scott larkins
-
Posts
489 -
Joined
-
Last visited
Content Type
Profiles
Forums
Gallery
Events
Everything posted by scott larkins
-
 WOW. words escape me.
 -
WOW, words escape me.
-
Maybe I missed it, but what are you doing to keep those sails so stiff?
-
Jon, Your build is coming along great, really. Keep it up.
-
Good luck with the soldering, if your skills continue there as they have for the wood, you'll kill it. I look forward to seeing your choice of construction.
-
Wow, moving right along there. Looks good
-
Thanks guys. JSG, I wish something in the instructions gave me a clue on those. My plans only show a ring shape. Since I have to put some bullseyes in the shrouds near each section top to run the running rigging, I just ordered more and used them. But then, aren't these kind of things that make each of our builds unique. LOL And if I was actually going to follow the plans, where I have bent brass, those should be ropes. However, I could see no way that those bullseyes would ever stay in the shape they are supposed to. Thus my continued use of my brass wire. Maybe a little less realistic but for me, practical.
-
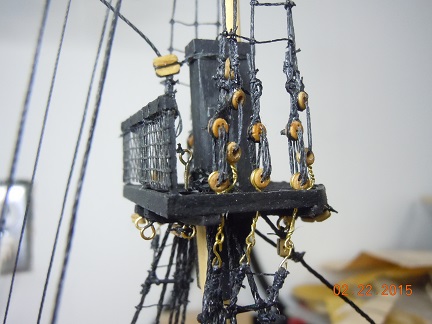
Found my pic up the upper deck, deadeyes and bullseyes. Try not to laugh at the mess. Small area to work in. I'm sure the rest of you will knock my socks off. See previous explanation.
- 264 replies
-
- 3
-

-
- rattlesnake
- model shipways
- (and 1 more)
-
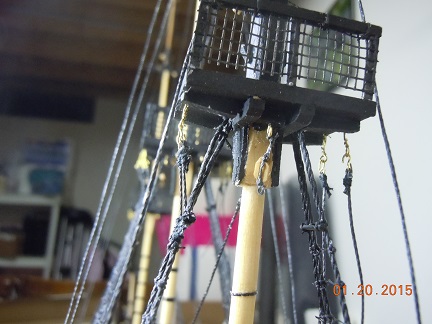
Next a view from the top. For the most part the upper rat lines tie the same as the lower. Of course each knot received a small dab of IC glue. The one added difficulty in tying the upper shrouds was the backstays getting in the way of my tweezers. Perhaps that was just my issue. Being right handed it was really only an issue when the backstays were on the right as I was tying.

- 264 replies
-
- 2
-
-
- rattlesnake
- model shipways
- (and 1 more)
-
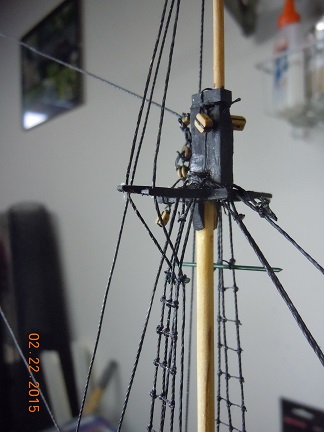
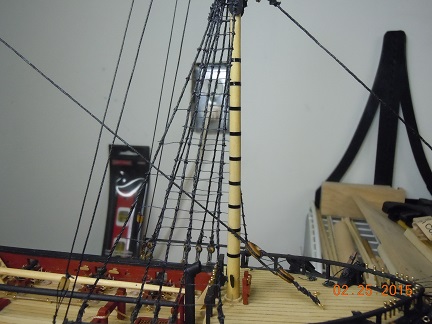
Here is the next level up shrouds. This is the top of the upper shrouds and the top most level of the mast. Here the shrouds start down at the platform where I used bullseyes. The plans don't actually call for the use of bulleyes but I didn't know what else to use and these seemed to fit the bill. Like the lower bulleyes, I used brass wire to "tie" the bulleyes to the deadeyes, tied the bulleyes together. But before tying the eyes together I first tied the upper one to a shroud line and singed the line. I kind of used the deadeye tying method here where I tied the line above the eye, wrapped it twice through the set of eyes and then back up above the top bullseye. Then I thread the line up behind the upper shroud, through the cross tree, up to the top of the mast and around it. Then back down through the tree, behind the shroud and to another bullseye. Then once the rope was tight I used another thin thread to singe the top of the mast together. You kind of have to put this knot up top as your wrap the shroud around the top and play back and forth between the top and the proper length so the bullseyes are the same height. I hope that makes sense.

- 264 replies
-
- 1
-
-
- rattlesnake
- model shipways
- (and 1 more)
-
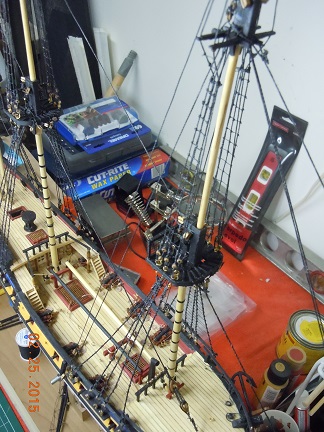
Well, after 10 weeks of blood, sweat and tears....... okay, maybe just tears, the shrouds and rat lines are finished on my Rattlesnake. Pics and explanations to follow. With just over 800+ knots tied they are all done. Here is a pic of the lower shrouds. If you go back to the previous page you'll get some explanation on how I got to this point.
- 264 replies
-
- 2
-
-
- rattlesnake
- model shipways
- (and 1 more)
-
Came out nice. I made that piece out of one piece of wood
-
How did the bending of that thick piece of work, work out for you when you had to bend it at such and angle? It got a little dicey for me.
-
Stunning sail work. Can't wait to see the whole thing rigged up.
-
Ha, I thought I was the only person with the misfortune of losing something down the stairwell. As for the twisting of the dead eyes, I've hung the waxed strings from my cross beams in the basement and hung weights on them. The strings untwist and stretch out the folds after a day or two. I've hung all of my strings now. I'll do the same thing with the running rigging when I get there.
- 974 replies
-
- 1
-
-
- rattlesnake
- mamoli
- (and 1 more)
-
Looing good. Yeah, I had issues with the windows and that back filler as well. Actually, I think my block actually would have covered part of the window, but since you end up painting the windows anyways I didn't lose sleep over it. Some times you need to pick your battles divarty.
-
Looking good. Make sure you review the plans frequently. I actually photo copied the plans various drawings from the sides, back and top and actually glued the paper onto the wood and then sanded down to the paper. Remember to check the angles of that back piece with some planking. The wood back there is a difficult step and getting the angle wrong now will hose you over later.
-
That was a lot of fun trying to tie that series of knots together I bet. I had to use two sets of tweezers and a magnifying glass to get it right. Your knots came out really nice.
-
Capstan came out really well.
-
Man that's a plot of grill work there. Looks nice.
-
Looking nice on the bulkhead.
-
Was there excitement in tying the rat lines. Funny, no one told me about that. LOL The one thing I did to help take out the twits was to wax and hang the lines with a weight for several days. The lines first spun as they hung but they eventually stopped. At least I found that helped for me.
-
And finally with the rat lines in place. Sorry for the photo. With all of the black up there it is hard to see the finished product. In my opinion, this area came out okay but not great. It is very difficult to work up there in such tight quarters. The plans called for three rat lines but there was no way I was going to be able to do that. Either I messed up on the futock bar placement of the scale in which I am working just didn't make that possible. But I was able to squeeze in two lines. Oh well, food for thought for those following.

- 264 replies
-
- 4
-
-
- rattlesnake
- model shipways
- (and 1 more)