scott larkins
-
Posts
489 -
Joined
-
Last visited
Content Type
Profiles
Forums
Gallery
Events
Everything posted by scott larkins
-
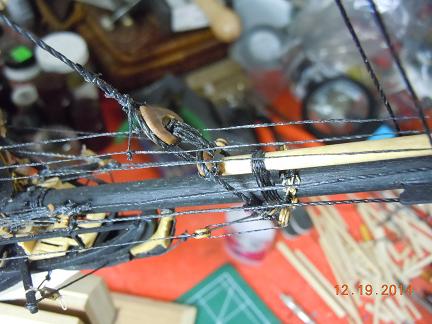
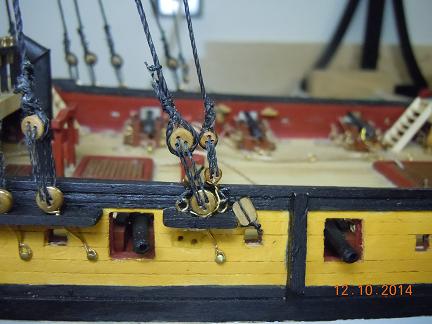
 And then tied to the shrouds. Yeah, wrapping those futocks around the futock bar was not easy. I first did a loose standard shoe knot around the shroud line in which I would feed the futock line through. I really needed both pair of tweezers and my magnifying glass for this. It's a balance between pulling the futock line too tight, finding a way to keep it in place tightening that shoe knot so the futock line stays in place. Then I snaked the futock line through the rat lines to hold it in place as I wrapped the line around the shroud and futock to shinge it in place. I had to do this twice for each line. At least that is what the plans called for. I used regular sewing thread for shinging this time. I felt that little area was just too tight/small for anything else.
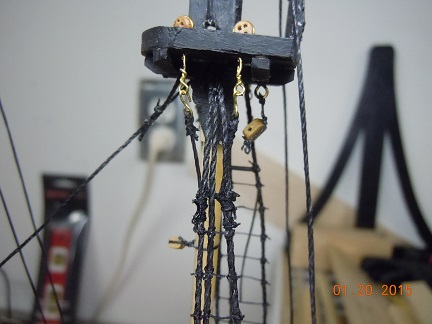
- 264 replies
-
- 3
-

-
- rattlesnake
- model shipways
- (and 1 more)
-
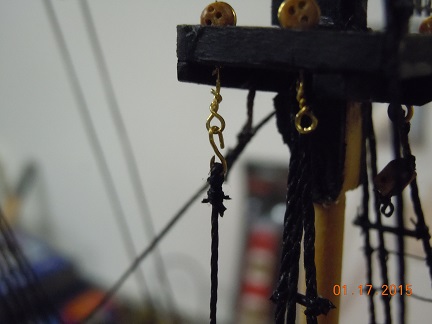
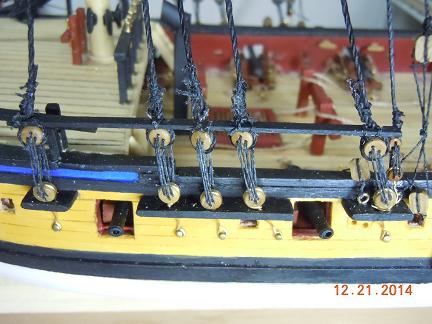
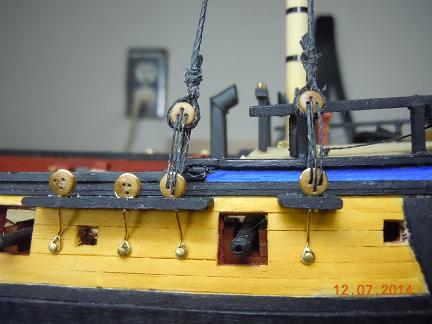
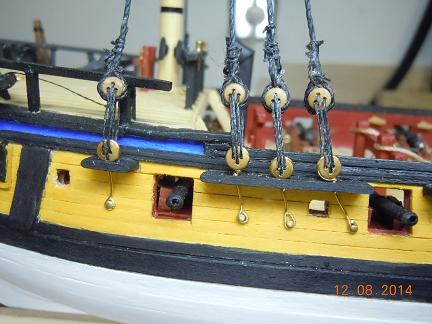
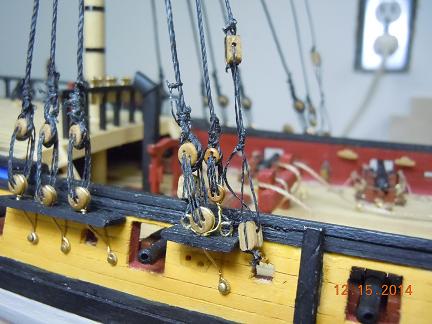
And this is how they looked once I hung them all in place.
- 264 replies
-
- 1
-
-
- rattlesnake
- model shipways
- (and 1 more)
-
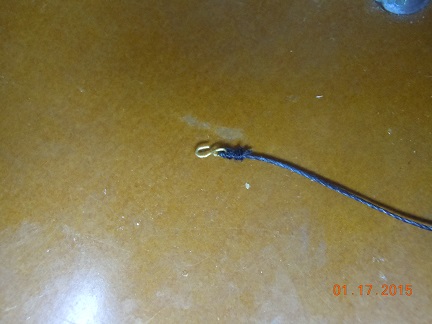
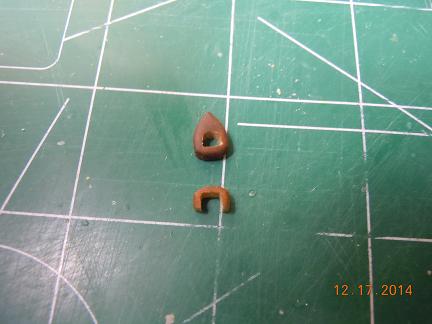
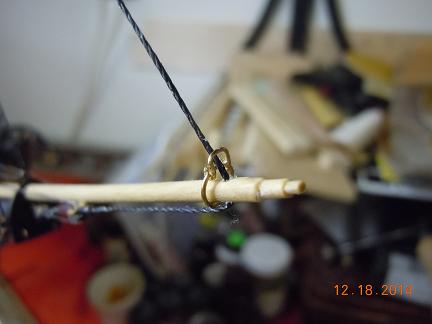
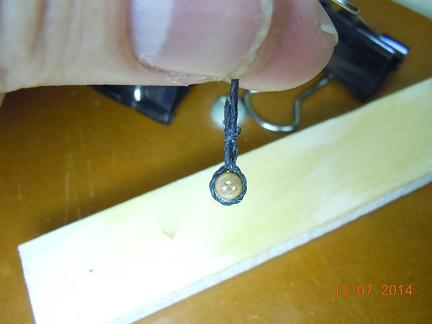
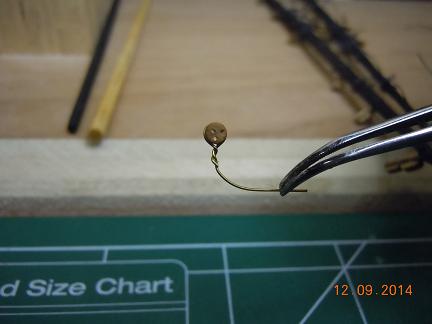
Looks like my computer is going to act weird so I'm going to have to make a single post for each pic. Sorry. Here are those little hooks once they are attached to the footock lines. I used a single shinge on this. It was a little tricky getting those lines tied. I had to first tie a simple shoe knot around the line, feed it through the hooks eye, then through the shoe knot and tighten the knot. I left extra string on both ends. I then used a cloths pin to hold the footock line and one end of the shinge string. I the wrapped the singe string around the bottom of the hooded footock line and pulled that extra string down into the cloths pin. I then held all of the lines with one hand and moved the cloths pin to the cover the hook. Then tied the two ends of the singe line together. I think it worked pretty well.
- 264 replies
-
- 1
-
-
- rattlesnake
- model shipways
- (and 1 more)
-
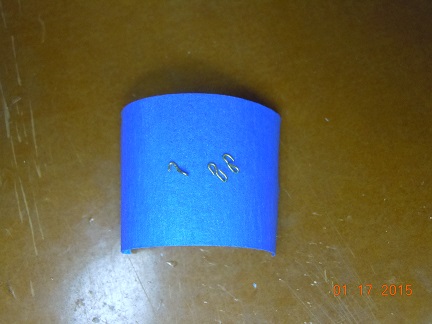
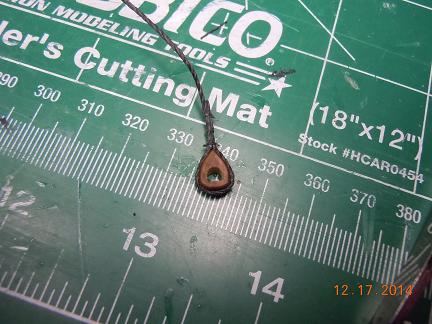
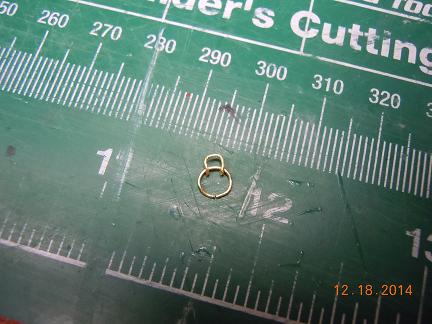
Okay, the lower shrouds and rat lines are finally done. Only 500 knots later. Here are the little hooks that the plans show where the footock lines hook into the platform deadeyes.
-
Hey Divarty, Take your time on the back fill block. Shaping it to its proper 3D shape is a challenge. Remember to that can always sand off more wood but if you go too far it's not that easy to add it back.
-
All looking good man.
-
Nice way to put that piece together.
-
Yeah, that bulk head is tricky. When building, keep in mind the false deck that you will have to put in. Perhaps I got lucky but the little section of deck that goes from the stairs up the side of the ship to the poop deck, it fit right over the top of the doors that are there on the sides. Or perhaps I didn't get so lucky but it was hard to see the results. I'm not so sure I got lucky myself. So just be aware of the tight fitting area there.
-
Looking nice.
-
Hey JS, The build is looking great. Still making my build look like a kids toy. My biggest advise on the shrouds, do not singe them together until after you have them tied to the dead eyes. My plans show them being tied / singed together right up there under the platform. I first tied one shroud, went up, singed it and back down and the lines tended to lay up on top of each other. If you are going to tie them up there, again, wait until they are tied to the dead eyes. This will help keep the shrouds side by side. Good luck.
-
Divarty, Watch those bulk heads. Many of us have realized that a few of them are not cut on center. I had a quick write up on my solution to the problem early in my build log. I think you will find that here even after you attached the bulk heads a few will be off center. Beveling the bulkheads is a must if you want this build to work. I strongly suggest you visit a few of our snake building logs before you get to far forward. Learn from out mistakes or sage advise. I know it saved me a lot of headaches.
-
Welcome aboard.
-
Thanks guys and happy New Year to you as well.
-
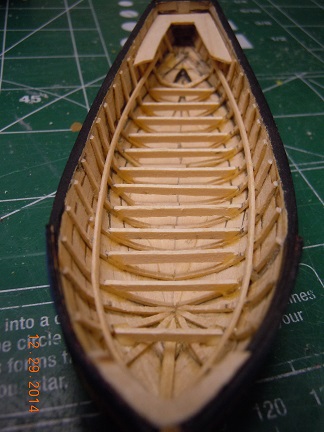
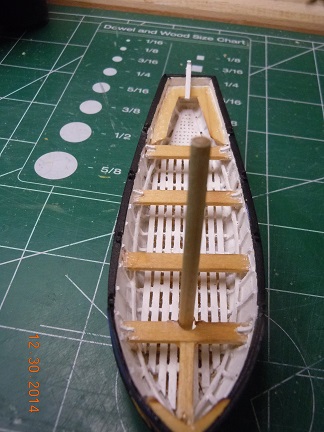
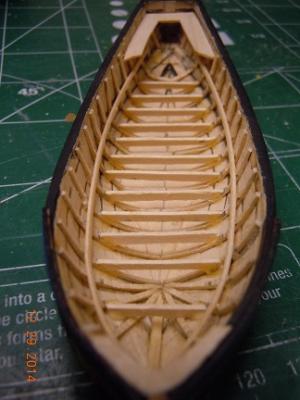
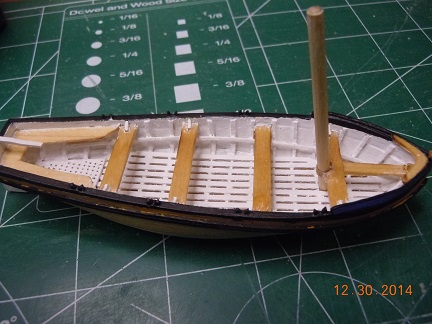
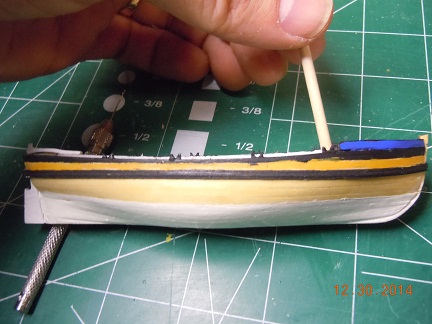
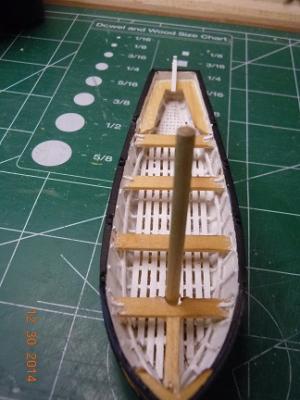
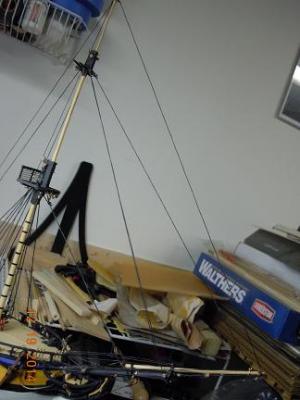
Had to take a break from all of the tying of little knots, Like my eyes were starting to cross LOL. So I took some time to finish my life boat. I decided to go with the whole shebang and tweak out the life boat. One of the things you have to think of when putting in the floor boards is a sub floor. Basically you have to put planking across you boat at the ribbing. The tough part, making sure the subfloor is all level. Not an easy task considering you can't line up those pieces from a level view. A lot of sanding will need to be done as seen in the last pic. Once that is done you simply lay down the wood, watching for the curving of the inside of the boat. As for spacing of the floor planks, I used the width of my smaller tweezers. As for the seats, just follow the plans. I actually photocopied the back seat, laid it over some wood, traced it and then cut and sanded to size. The other issue to be aware of is making sure all of those seats are at the same level. For that, just use a ruler from the top of the sides. I also put in a hole for a small sail. The plans seemed to show it but nothing in the instruction book calls for it so I figured, yeah, it's possible. So I used a small strip of metal, bent it around the post and glued it to the seat where I filed in the notch for the small mast; which you can see in some of the pics. And for anyone wondering, yes, my little boat does float and in an upright manner. LOL Not sure why my pics came in this way. I just got a new computer, so it was either my computer acting weird tonight of this site. Oh well, you get the idea.
- 264 replies
-
- 3
-
-
- rattlesnake
- model shipways
- (and 1 more)
-
Welcome aboard. Looking forward to your version of the Rattlesnake.
-
Started my first rat line work. Started with the mizzen mast since it was the smallest amount. I suggest the two knots that are displayed in the instructional book right before the section on all of this line work. The constrictor knot works really well but is a tad tricky. Make sure you use lots of line when making these rat lines. Do not cut off just enough. You will need the extra thread in order to pull out the thread away from the shroud line in order to weave the rat line behind certain lines in the constrictor knot. The extra thread helps. You can always tighten up the extra as you tighten up the knot. Once done, a little CA glue over the knot and you are set. These lines are about 6mm apart.
- 264 replies
-
- 3
-
-
- rattlesnake
- model shipways
- (and 1 more)
-
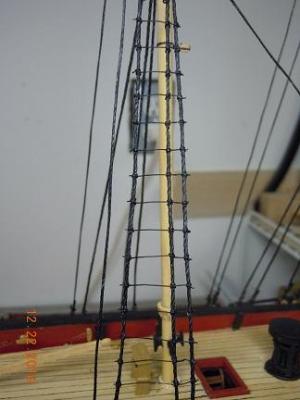
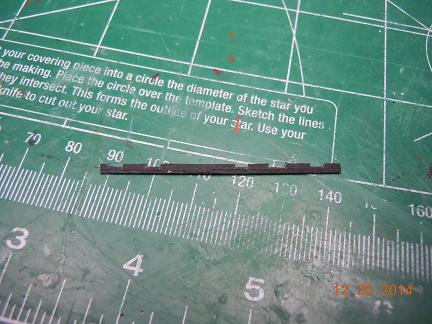
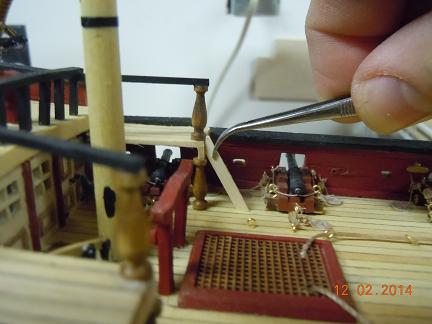
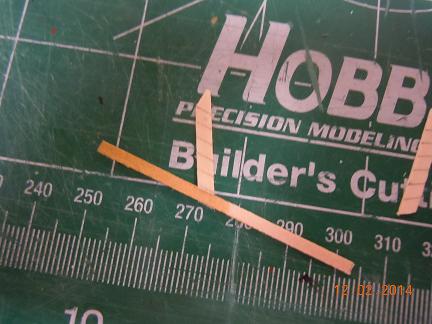
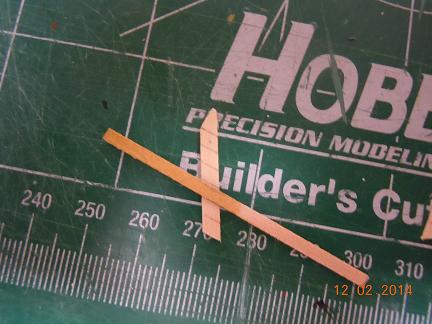
Even though this is not in the actual build manual but when you look at the plans, there seems to be a pole right above the dead eyes. The plans call for a pole but I put on a thin plank with cut out notches to fit around the shrouds. I hope you like my solution. Perhaps you'll use a pole but if anything, be aware that the plans call for this as you are startig the rat lines. Pics follow. Here is the pole/plank with the notches in it. I simply fed a thread through the small space between the shroud and the top of the dead eye. I made a figure 8 with the thread to wrap the pole and tie it off. Simple but effective. Next will be the actual rat lines. The thread has been hanging for over a week so I hope it is good and straight by now.
- 264 replies
-
- 5
-
-
- rattlesnake
- model shipways
- (and 1 more)
-
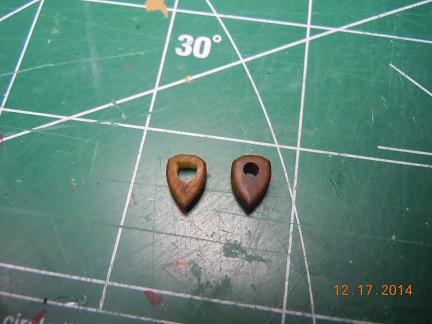
The rope marathon continues. Here is the start of the bow lines. I purchased hearts from MS but had to modify these a little with a jewels file. No big deal. Here's the final product. Here's the upper heart on the ropes. This will be threaded through the foremast according to the plans. And here is the heart and half heart tied together according to the plans. No real words of wisdom so far. Just follow the plans and work from the back of the jib boom forward. Next came the traveller. Since we are not provided one in the kit I gave my best shot at making one. I guess my traveller came out okay. Seems to fit the bill at least. Yeah, I supposed I may have gone without it but the plans call for the inner guys to be tied to it so I figured I have better not go without. And the final bow ropes done. As anyone would tell you, and the instructions do, be careful not to pull the masts out of line. Either to the sides when putting in the shrouds or along the keel as you pull the ropes foward and back. It's a delicate balancing act to keep the ropes looking tight but not pull the wood out of place. I still have the other stays to put in place so we'll see how well I continue. I can tell you one thing; that top gallant stay to the job boom gave me the most difficulty. The three hearts up front took three attempts, and the dead eyes back by the bow took three tries to get them right. That is such a tiny space to work in. When you get to this, I suggest lots of extra string between the dead eyes. You'll understand when you get there. Yikes the rope caused me heart ache.
- 264 replies
-
- 5
-
-
- rattlesnake
- model shipways
- (and 1 more)
-
Okay, the shrouds are done. I'm on vacation now until the 5th. I have some things to do here and at my mother-in-laws house during the break but the rest of the time is marathon ship building. Following are the finished lower shrouds. Keeping them tight is definetly tough. My continued recommendation is move with purpose and ease on these. I did a lot of work with my lit maginfying glass in front of my face. If you move too fast without thinking you could hit something or snap it. No, I didn't snap anything...... yet. Funny thing I discoverd when threading the mizzen mast. My mast was too close the the inside hole of the platform and I actually had no room to thread the thread. Damn. Didn't see that coming when I was working on the platforms. So take my warning now, before you get to the platforms. Make sure there is day light between the masts and the inside hole of the platform. I had day light but not enough for the thickest thread that is used for the shrouds. I ended up using a little drill bit to put a hole in the slot I had and then used the bit like a file to cut back and forth. Then I used a small jewelers file to clean it up. I don't think I comprimised anything but I sure could have. Man was I upset with myself. So don't make my mistake!
- 264 replies
-
- 3
-
-
- rattlesnake
- model shipways
- (and 1 more)
-
Nice video. Those clips are great aren't they. Just remember. once you get to an area where the planks are too close, you will have to come up with another way to get those puppies to form and hold for you. I hear some people use super glue I didn't like that option though. Too permanent too quickly. My wood glue dried pretty quickly so I ended up using my fingers for some of it. You do what ever you have to when you get to this step. Perhaps another video on your solution would be nice. Keep up the good work.
-
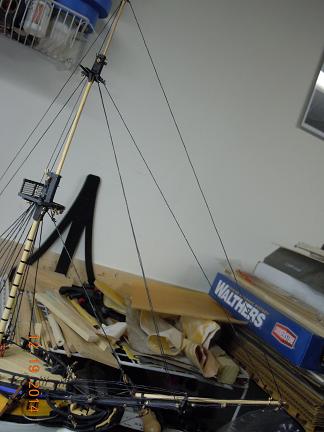
Okay, I continue to plug along with the shrowds now. I had purchased a loom for making these, but too late did I realize that it would become useless. I would only be able to use the loom to make the shrouds if I had made them several steps ago when I did the first level of the masts. Which at the time was not practicle as I was constently removing, refitting and replacing the masts. So, my opinion, don't purchase the loom for this model. It will not be useful here. So anyways, here I go. Before doing any of these steps I cut off long lengths of thread, waxed them and hung them in my furnace room to straighten the string with various weights. Can't have wrapped string bend marks in the thread. I hung them for a few days. I kind of felt like a horror picture show. LOL The first thing I did, according to the instructions and plans was two wrap a dead eye with the thickest rope available. There is a thread chart in the instructions as well if you are so inclined. I was. Anyways, I first made a simple knot, like when you start tieing your shoe. I put the thick string in the loop, then looped that thick string around the thin one and back into the thin loop. Kind of a loop within a loop. Then pulled the little string down until there was a smaller loop made in the thick string. Then I inserted the dead eye and then made another knot in the thin string and pulled it tight. You will have to leave some extra string up top so you can follow the plans. As you will see below. Yeah, it took me a little giving an pulling and a few swear words. But if you follow the plans you'll get it. Once you follow the thick rope tieing instructions as per the plans you'll be okay. I touched each not with a small dab of CA glue, Make sure to leave a bit of an extra hole above the lower tie I described above. You'll need that loop to feed the dead eye lines. Follow the plans. I really needed my big maginfying glass with the light for this stuff. Man my eye are getting old. Once you string up one dead eye, you wrap the shroud line up through the platform, between the lower and upper masts and then singe right up top there with a thin thread. I suggest you eventually put a dab of CN glue up there but not yet. I found I had to play around a little bit up there in order to make the shroud tight. Which by the way I never really got them as tight as I liked. I would have snapped the wood. It took me about 1.5 hours to do a set of shrouds. But that's me. Here you can see several dead eys and shrouds tied. I have these set at 8mm. Seems to be what the plans called for. I cut out about 5.5 inches of rope to tie the dead eyes together. Yeah, it was a little more than I needed but it's far easier to work with a little extra than come up short. I might have been able to get away with 5 inches. Now this step is the for the line that goes up to the next level of the mast. The upper mast. Now I believe the plans called for rope where I have brass wire but I could not possibley see how a rope, pulled taught, would ever wrap out to the side of the dead eye the way the plans called. So I used brass just like the lower dead eyes. You can see that I simply wrapped the wire around the smaller dead eye, gave it a couple of twists and cut off the extra. Here you can see how I put it in place. I basically wrapped the longer lower brass wire around the bottlom of the larger dead eye brass chain link. It took a little finagling but I got it. This was the only way I could figure out how to match the plans. My apologies to the purists. Then string it like the other dead eyes. A little more difficult given the smaller size, but as you can see, if I can do it, so can you. Then the last line to the top gallant mast. A simple block tied to a thicker rope, up and over to the other side and tie. If I read the plans right, yep, the middle rope seems to tie around the middle like that. If any one can tell me where the rope actually ties off I can easily make the correction. I could not figure it out. And there you have it so far. I have to finish the other masts, then move up to the next level and then the rat lines. I'll add pics and instructions as I go. TTFN

- 264 replies
-
- 5
-
-
- rattlesnake
- model shipways
- (and 1 more)
-
Ken, Yes, I too had real concerns and intrepidation on the various planking instructions. I found three and eventually settled on one. Of course my planking did not come out 100% like the instructions said they would but I was able to wing it enough, take my time, measure twice, three times, more, cut once and then sand down to shape. Was it easy?...... no. Did I have to pull a plank or two off once the glue had dried when I had the Oh S*&t moment, You betcha. All I can say, is what I just did above. Fortunetely MS gives you extra pieces of wood to accomidate those note so perfect moments. No rush. Remember, you can always sand a piece down but you can't build it up.
-
Let me ask a stupid question. Perhaps I missed the explanation from earlier. What are the pendents for?
-
JSGerson, Yes, getting the ends of the steps was a b%^&h but that is why I stacked them all up on top of each other and sanded them all at once with fine paper. That's why I also said, sometimes it's better to be lucky than good. LOL And Martin, yes, all of those blocks were nasty and never seemed to end. Too bad I still have the ones on the end of the sails to put on. I'm going to furl the sails so I'm not done yet. I'll probably have to send the MS for some more size 6 blocks. MS really cut us short on the two smaller blocks. Next comes the shrouds and rat lines.
-
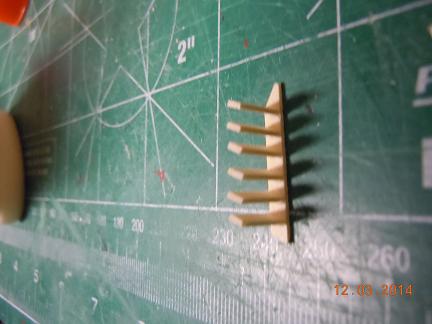
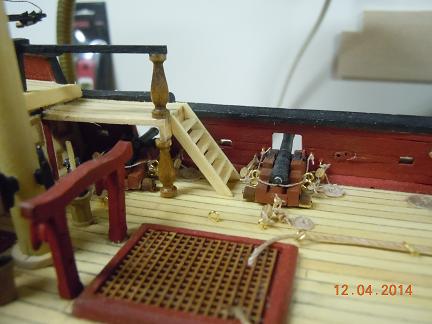
Okay, time for the four staircases. I show the process I used here. All four staircases were the same. The plans wanted you to make a jig to set the stairs all the same, but I didn't have the patients for it so I eye balled the design process. Perhaps others would have made the jig, and my hat's off to you for doing so. My patients weren't there for it this time. Here I set up the angle for the stair case, note the bottom footing and the front that would sit up against the decking. I also rounded off the top to make it look a little better designed. Once I figured out the angle I cut out 8 identicle pieces of wood and sanded them all to be the same way. By this I mean I lumped them all together and took to sanding them as one piece. Then I used a small piece of scrap wood and simply moved it up the side of the ladder and marked each stopping point. I think I got lucky because the plans called for 6 steps and when taking in the angle, the piece of scrap wood it all measured out to be exactly 6 steps. I guess sometimes it's better to be lucky than good. LOL I measued the width of the deck where the ladder would be placed so as to make the ladder the appropriate width. Word of caution here. When making the measurement and then cutting out the step, make sure to take off the width of the side of the ladder or it may end up being too wide. And no, I didn't make that mistake, but I almost did. Again, I cut out all of the steps the same width, stacked them together for each ladder and then did a finished sanding so all of the steps where the same. Then I glued each step on the lines I previously marked and let them dry. Once dried I glued the other side of the ladder to the steps. Make sure to look at the steps when you glue that second side on. Some of the steps may not have dried to the first side straight. Fortunetly it's easy enough to straighten those out. And here is the finished product. Even without the jig, I think they came out pretty good.
- 264 replies
-
- 8
-
-
- rattlesnake
- model shipways
- (and 1 more)