KenW
-
Posts
1,232 -
Joined
-
Last visited
Content Type
Profiles
Forums
Gallery
Events
Everything posted by KenW
-
 Gary - I don't know what color would be period correct. I thought white looked better, but went with the color of the Rodger's model. No other reason. I’m still working on planking the lower hull. But my method requires a lot of time for planks to soak and dry in place, and then for the glue to dry. So I have to find something else to do while I’m waiting. Recently, one of the entries to CaryKap’s blog, (wq3296, I think), pointed out that the door to the captain’s quarters was only 3 feet high according to the scale of the model. I can’t imagine a captain stooping that low. Since I’m still in the process of building the ship, I didn’t want to engage in an extensive renovation. I thought the best/easiest solution was to use a sliding top over the cabin door. While doing research I found a drawing of an 1818 American revenue cutter with a sliding entrance to the rear cabin. That was enough for me to decide that my solution was “period correct”. I still need to add the tree nails, but the sliding top looks good to me.
- 455 replies
-
- 5
-

-
- fair american
- model shipways
- (and 1 more)
-
Your ship looks great! Almost done. Where did you get your flags; and what source did you use to determine which flags to use. Thanks.
-
Hey Gary - The problem is that we are building a model based on a model. That is probably a unique situation. I think you could go with either red or green and still probably be correct. Also, I intended to go with more white on the stern, but decided I would go with the gold of the Rodger's model. I still like the white better. But ...
-
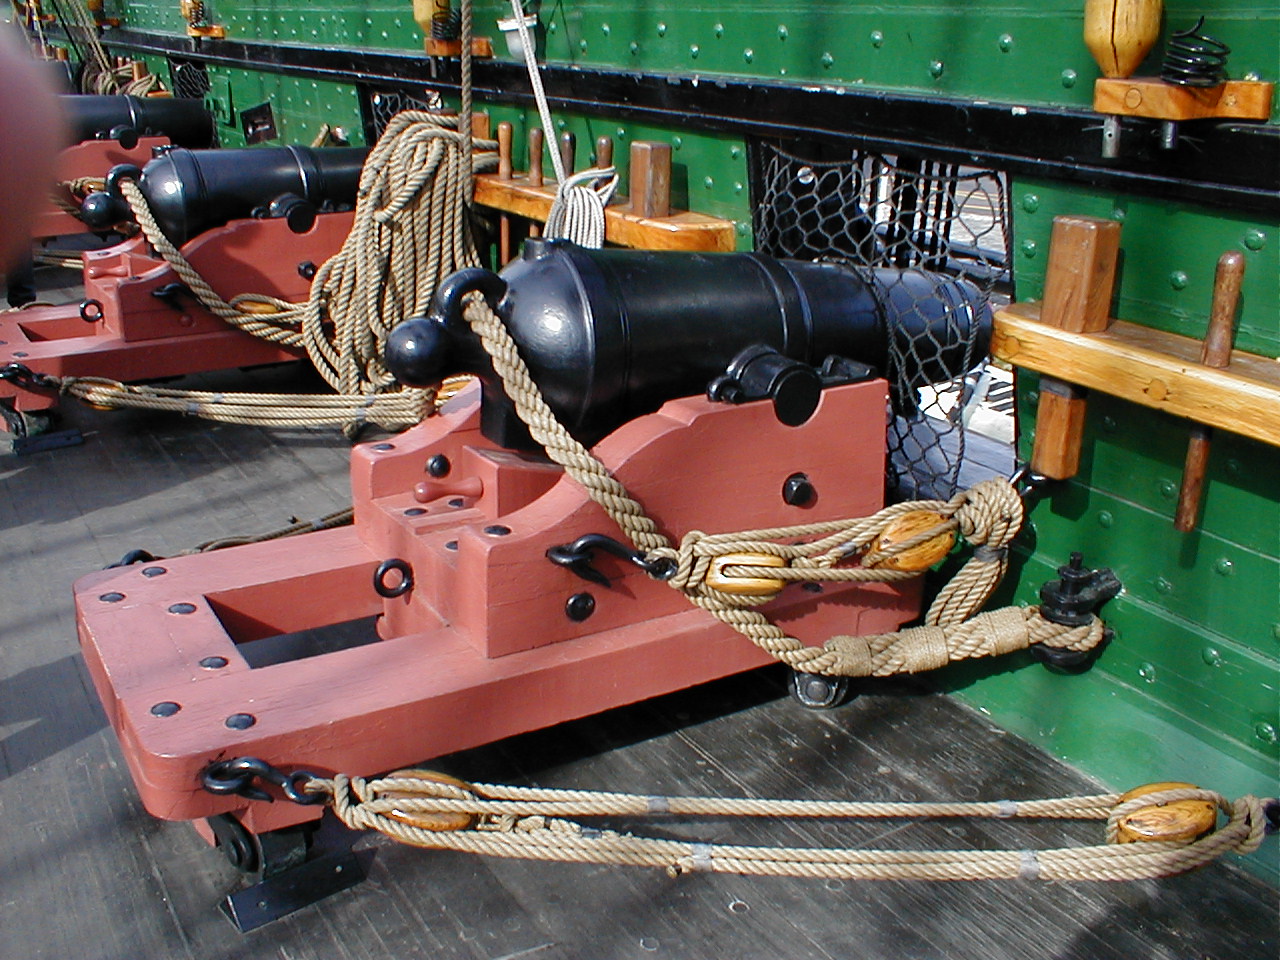
I visited the USS Constitution a few years ago. As you can see, the bulwarks were painted green and the gun carriages were red. Hope this helps.

- 206 replies
-
- 1
-
-
- fair american
- model shipways
- (and 1 more)
-
Thanks Kenny; and Alistair as well for the kind words. Cheers.
-
I definitely need to make my plank joints tighter. The problem with the pencil doesn't show up that well in the photos. Thanks for the encouragement, though. I will keep sanding and hope for the best. That paint can is always there. Cheers.
-
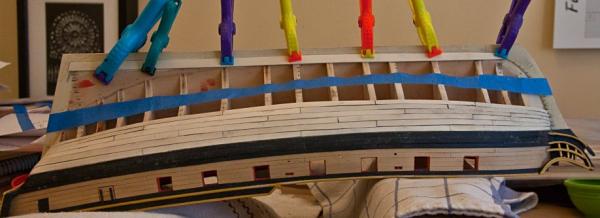
I’ve added 8 strakes to the lower hull, which I thought was half way. It turns out there will be 10 strakes needed to complete the job. I did some sanding and I’m not totally pleased with the results. I don’t like what the pencil lines do to the holly strips. Sometimes they get a shade darker and the glue, if I apply a little too much, runs. Sanding does not seem to completely restore that nice white color. I am careful so that no water touches the planks once they have been shaped and dried. I re-measured each bulkhead and applied a new tape at the top of the un-planked section. I think the ‘line of the planks’ looks good. That is encouraging. But, I will probably use at least one coat of paint to cover up my mistakes at the bow and stern; some plastic wood is going to be needed. The kit supplied white paint is almost the exact color of the holly. My craftsmanship is better than on my first model, but still needs to improve.

- 455 replies
-
- 3
-
-
- fair american
- model shipways
- (and 1 more)
-
Great job planking. The hull looks great.
-
I think your planking looks excellent. Much better than mine. I haven't ruled out painting yet. I don't like using the pencil to simulate caulking. I am still not able to control it and it gets into the glue and makes a mess. Most of the mess will sand itself out, but not all of it. My plan is the stop working from the wales up (the boat is upside-down) when I get to the half-way point. Then re-measure and work from the keel down. (The garboard strake is glued on.) Advise is always welcome. Cheers.
-
Your planking looks great! I want to compare mine when I am up to 9 strakes. I can only hope it looks as well. Great work.
-
Thanks Russ and Alistair. I don't have the wood on hand to make a new keel, stem and stern. I will just have to see what the contrast in colors looks like. There is always paint or stain (used sparingly). I think the problem at the bow won't be too bad once sanding has been done. Cheers.
-
Thanks Russ. I see the dip at bulkhead #14 and there does seem to be a problem at the bow. I also see that where the planks end at the stern there is a problem. I might put a thin molding there. Another problem will be that the keel, stem and stern posts are basswood while the planking is holly. The color isn't the same and I'm open to suggestions on that. Anyway, back to the shipyard. There is so much snow outside that I can't think of any reason to venture out.
-
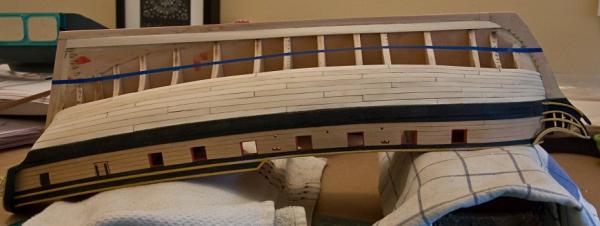
Here are photos showing the status of my planking of the lower hull. I think it is going well; but I am still not sure that I can ‘see’ the line of the planks. The planking seems to rise a little at bulkhead #8. So far I haven’t had to spile any planks. I find I can soak the holly for a couple of hours and then clamp the plank in place to let it dry. Once dried, I hardly need to use the clamps when gluing. And some of the planks look spiled. The disadvantage is there is a lot of wait time. I hope I can get some feedback about that ’line of planks’. Would a photo from a better angle be helpful?

- 455 replies
-
- 4
-
-
- fair american
- model shipways
- (and 1 more)
-
This will indeed be interesting. We both are planking the lower hull at the same time so I hope progress reports will be made often. I have 3 strakes completed on the starboard side and two on the port. It looks good so far, but I feel that it will get more interesting as I get closer to the half way point. Keep the posts coming.
-
Thanks russ and rafine. I had a problem when measuring the distance along each frame and dividing that distance by the same number of planks. When I stretched a thin tape along the middle plank line, the tape looked like a 'V'. So now I have a tape placed on the frames starting at the middle of bulkhead 15 and ending at the middle of bulkhead 2. That looks right to me. Then as I add a row of planks (I have only added two so far), I look again to see how the new row looks. I can only hope it turns out all right. The problem I see coming soon, is that there are 8 rows to the middle of bulkheads 15 and 2, but at bulkhead 8 there will need to be 9 to arrive at the middle according to the tape. I know this sounds confusing when trying to explain. But, if I mess it up there is always paint.
- 455 replies
-
- 1
-
-
- fair american
- model shipways
- (and 1 more)
-
I like that method of holding the hull while planking. I'm always afraid of breaking off that top of the stem post that holds the figurehead. Even with the head rails I worry. Keep us all posted on your progress.
-
Your cabin looks great. Will the inside of the cabin be visible? Through the windows, or will portions of the deck be removed? Your work is the best.
-
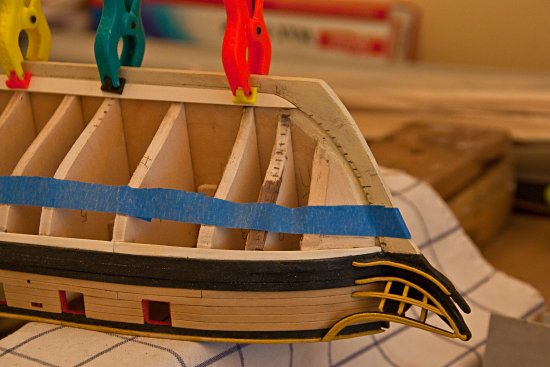
Thanks Gary and I hope I can be of help. I am still not comfortable with the tactics for planking the lower hull. As you see in a previous posting, measuring the distance at each bulkhead, for me, didn’t provide a real plan of action. For now, I think the key is in the bands placed along the hull. They must “look right”; although that is a very subjective criteria. I only have one row of planks applied and the garboard strake is still not glued. But a photo of the bow portion is attached. I will continue to watch your blog to see if you come up with a better plan of action.
- 455 replies
-
- 2
-
-
- fair american
- model shipways
- (and 1 more)
-
I am using 1/16 inch planking for the hull below the wales (holly planks). That is the thickness according to the plans. I'm still not comfortable with the process of determining the width of those planks. But I have a plan and will see how it goes. Good luck with your work. Cheers.
-
Looking at the plans: I note on Sheet #5, that the outboard bulwark planking above the black strake is 1/32 inches thick. (The inboard bulwark planking is also 1/32.) However, the hull planking below the wales is 1/16 inches thick. My impression was that the walnut planks were to be used only if you decided to double plank the hull. Like rafine, I ordered holly planks. I want to leave the wood unpainted but still have a color scheme that matches the Rodger's model.
-
Thanks to Russ for his helpful reply. My plan for the lower hull planking is as follows: I will leave the garboard strake clamped into place and take measurements of each bulkhead from the garboard strake to the wale. My measurements of the aft, a midships and forward bulkheads show that bulkhead 15 has the largest distance. Using the plank width of 3/16 inches, there will be 18 planks. At bulkhead 8 (a midships), the planks will have to be trimmed to 5/32 inches in order to fit 18 planks. And at Bulkhead 2, the planks will be 1/8 inches. I will use the artists tape to divide the hull into 4 sections of 4 to 5 planks each. Based on the ‘look’ of the tapes, I will make adjustments. Each strake will consist of 3 or 4 planks about 5 or 6 inches long. Hopefully, I will only have to spile the planks at the bow since I didn’t order any extra wide planks. I hope I am on the right track with this plan of action.
- 455 replies
-
- 1
-
-
- fair american
- model shipways
- (and 1 more)
-
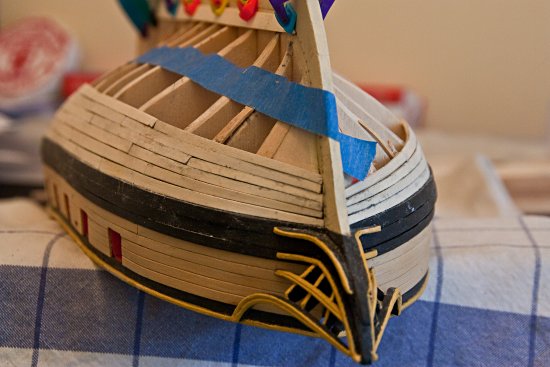
The order of holly planking has arrived and I have started to plank the lower hull. On my last model I was not concerned with planking technique since I just gave it many coats of paint. This time I want to do it right by using the holly, which is about the correct color, and leaving the planking unpainted and clearly visible. However, I can’t seem to get the hang of “lining out the hull.” I have several tutorials; and am using David Antscherl’s as my base with reference to Keith Harris’. The garboard strake has been fitted and clamped (but not glued at this point). I divided bulkheads 2, 8 and 15 in half and ran thin artist tape along this mid line of the hull. The problem is that the tape is shaped like a ‘V’. I can’t see how this will work. I estimate that even if I straighten the tape out, I will require at least 3 drop strakes and 2 stealers. I am hoping for a ‘eureka moment’. But lacking that some advice or comments would be welcome. (Actually the photo doesn’t look so bad, but it looks weird in real life.)

- 455 replies
-
- 3
-
-
- fair american
- model shipways
- (and 1 more)
-
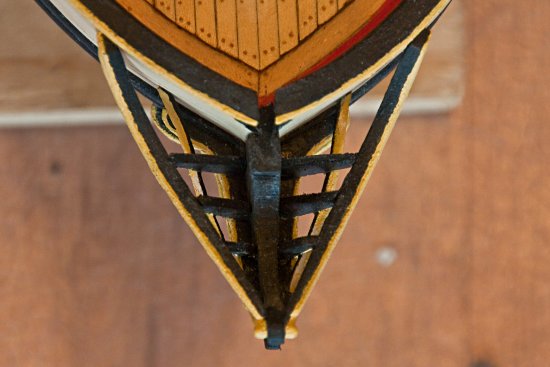
The bow has been completed. I think this was the hardest element of the build so far. But it looks acceptable. The head rails were cut from spare 1/8 inch thick material since I couldn’t get that steep bend from a plank. I scored the edge with an x-acto knife and awl. The middle rail was created from two 1/16 inch thick planks and laminated together. They were cut from planks ¼ inch in width to prevent the need for an edge bend. While following GaryKap’s blog, I read an entry from wq3296 which pointed out that the door to the cabin is only 3 feet tall according to the model’s scale. I can’t see the Captain being forced to stoop that low to enter his quarters. I’m considering modifying the entry to a companion way with a sliding top. That way I don’t have to make extensive renovations. I am wondering if that type of entry is accurate for the period. I could also have a companion way top that opens upward on hinges. I’m not sure which is better. I welcome comments/opinions.


- 455 replies
-
- 6
-
-
- fair american
- model shipways
- (and 1 more)
-
I see you have been making great progress. I never seem to be able to spend as much time in the shipyard as I want each day. Anyway - I also found the waterway bend was not easy. I used my wife's steam iron and it worked pretty well, but I had to sand out the "folds" in the wood. So I didn't use any scarf joints. I think I soaked the wood for a couple of days. Your decal name plate looks good. You can use the same technique for the scroll work - just make a scan from the plans and adjust the size. As for the companion way, I was thinking of using a sliding top over the door. (Not sure that is the best wording.) That is what my father's boat had, but I don't know if it is period correct. Be happy to get some input there. Keep up the good work.
-
Wow; I never tested the scale of those doors! And even though I only installed one, it seems it is way too small. I like the companion way idea. I don't think I want to tear out my upper deck to create a new door, however. Maybe I can just add a companion way cover without actually changing anything. I will have to think about it. I will be interested in seeing how you handle this. Cheers