HOLIDAY DONATION DRIVE - SUPPORT MSW - DO YOUR PART TO KEEP THIS GREAT FORUM GOING! (Only 24 donations so far out of 49,000 members - C'mon guys!)
×


KenW
-
Posts
1,231 -
Joined
-
Last visited
Content Type
Profiles
Forums
Gallery
Events
Everything posted by KenW
-
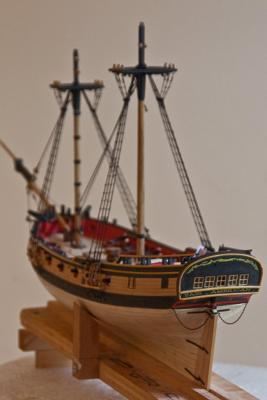
 I think it looks great; specially the deck and deck furniture. The stern lantern looks outstanding. I like the gold color. Keep up with your great work.
 -
I'm not at home this week so I will have to wait until Sunday/Monday to check the plans. I thought that lines would pass through the eyebolts at the base of the masts and then tie off on the mast cleat above each eyebolt. But I will check this out when I get home. BTW. Block Island is BEAUTIFUL!
-
Thanks Dave. And.I keep forgetting to say thanks to all the 'likes'. Thanks
-
Thanks Gary I also find myself making decisions about rigging based on multiple sources. My biggest fear is to get to a point where I need an extra block or something and it isn't possible to install it. So comments on this website are a big help. Cheers
-
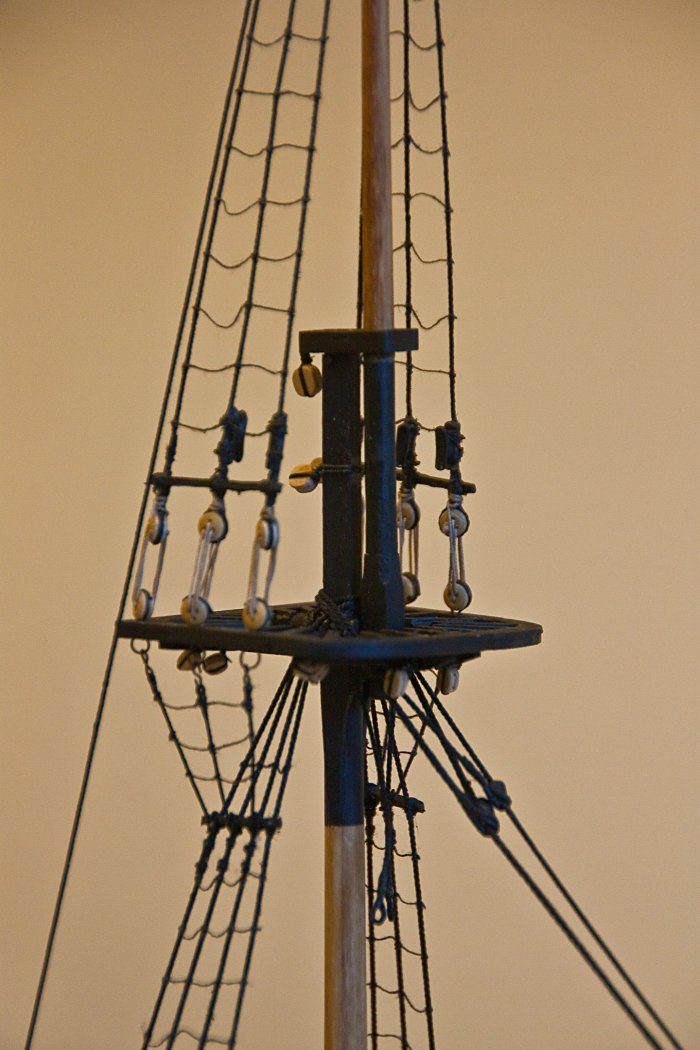
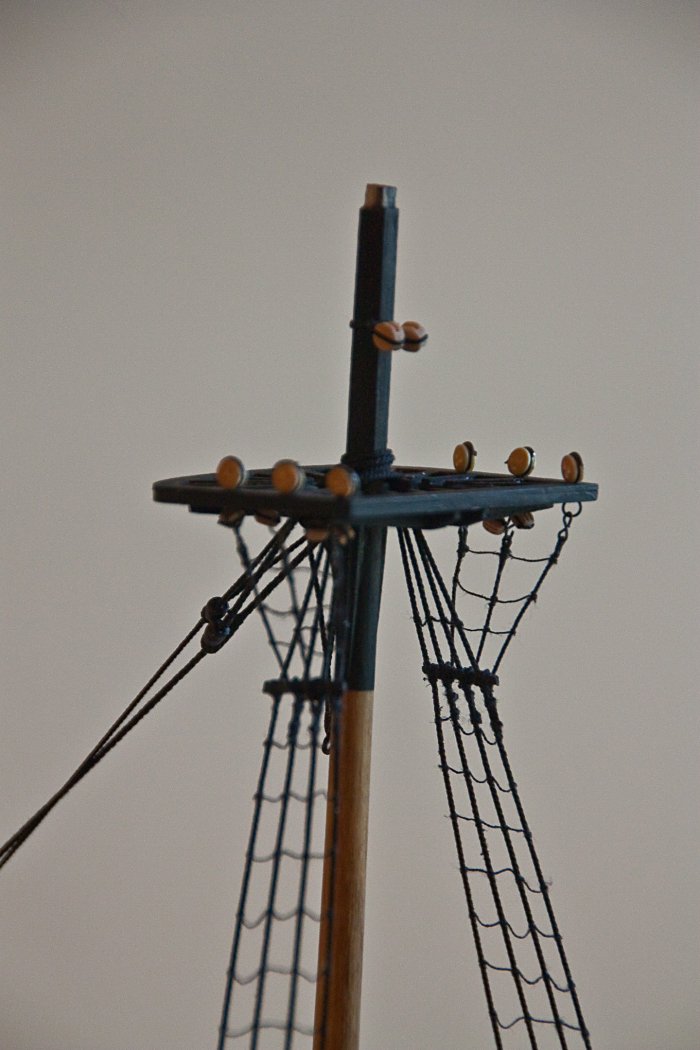
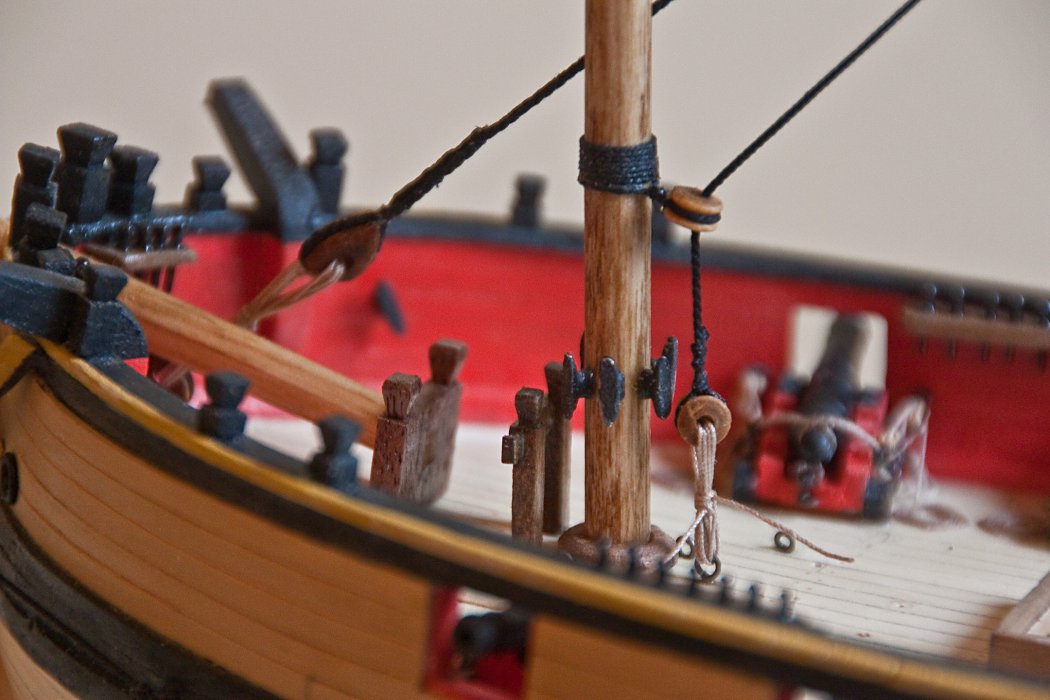
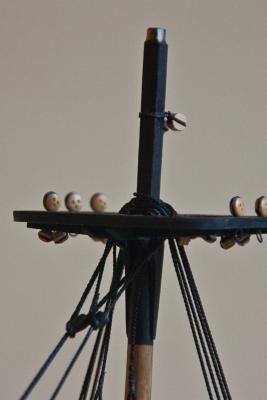
The main topmast is installed with its standing rigging. I wasn’t pleased with the location of the topmast backstay. It is too close to the topmast shrouds and the top itself. I think this is due to my moving the gun ports closer together, which forced the channel location to be modified, which moved the deadeyes for the backstay. But I’m not going to change all that now. Another issue was the rigging of the top yard lifts. The plans have them attached to a ‘thimble’ lashed between the first and second top shrouds. This makes the yard lifts part of the standing rigging rather than the running rigging. So if the yard is ever raised, the yard lifts won’t offer any assistance and, in fact, would be left dangling in the wind. So I changed the thimble to a block and added shroud cleats for both the top yard lifts and the topgallant yard lifts. This seems more correct to me. I rigged the topmast stay as per the plans, lashing some extra line above the block in case the stay ever needed to be loosened. Also, I’m glad I didn’t glue all of the deck furniture in place until they are necessary. I have a lot more space to work in.

- 455 replies
-
- 9
-

-
- fair american
- model shipways
- (and 1 more)
-
Thanks Bob and Tim. Tim - you should try it; although the kit has problems that my log documents. Cheers.
-
Thanks Russ and Ed. Always obey the Admiral.
-
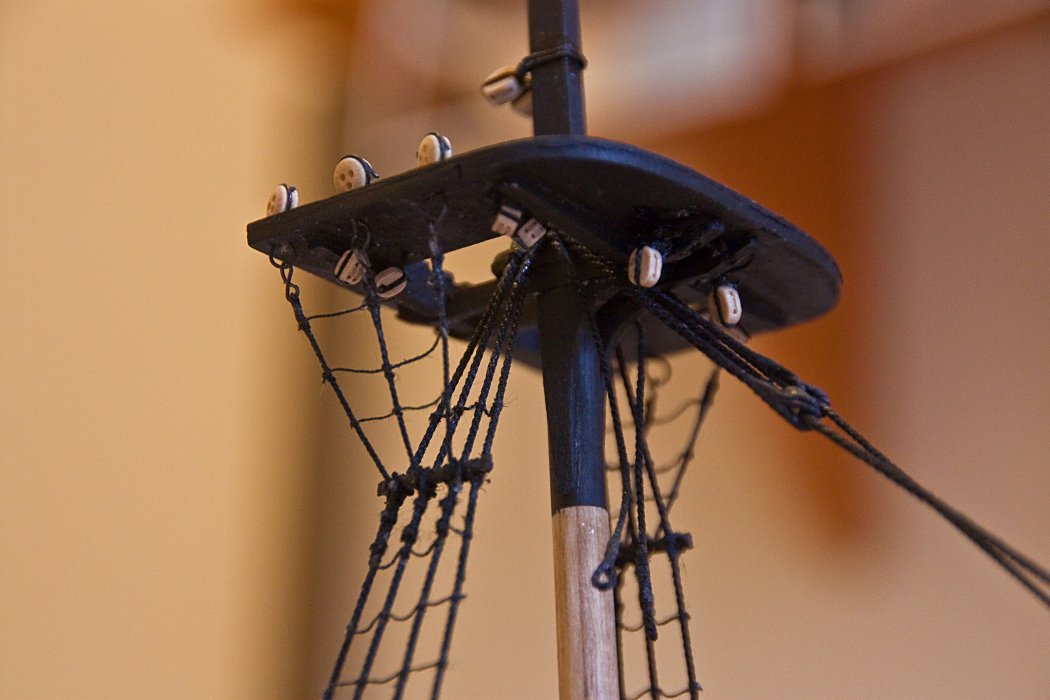
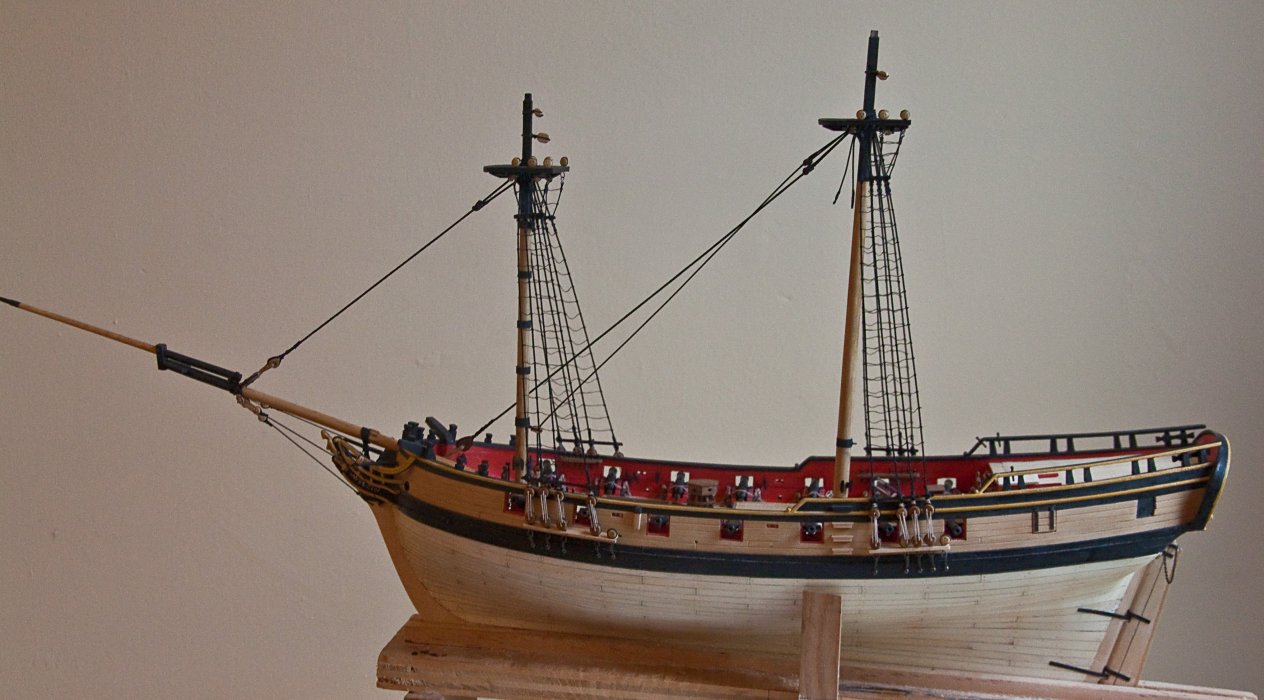
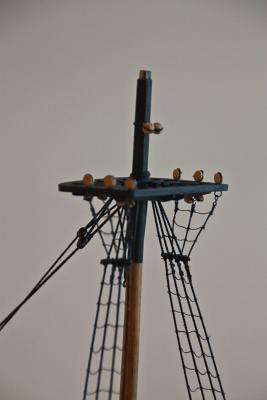
I’ve been away on a week’s vacation out in the American West and am now anxious to get back to modeling. My first task is to correct a problem with the work that’s already done. Two more blocks need to be added underneath the main top for braces. Adding blocks when the top is already glued in place is not as easy as when the top is free, but the task was done. Next I added the shroud cleats to the port side of the model. The kit didn’t include any shroud cleats so I ordered a pack of them from ME not thinking that their package comes with 10 cleats and I need at least 16. So I ordered some more and will work on the starboard side when they come. The cleats are 10mm, and they need to be filed down to about 8mm. The metal is soft and the filing was easy. I added the bunt line and brace blocks to the cross trees of the top masts. I initially used 5/32 blocks, but they were obviously too big, so I took them off and used 1/8 blocks. They seem much better. I also installed the pendants to both top masts. Lots more rigging to do.
- 455 replies
-
- 8
-
-
- fair american
- model shipways
- (and 1 more)
-
What a beautiful model!! Other than that, I am speechless.
-
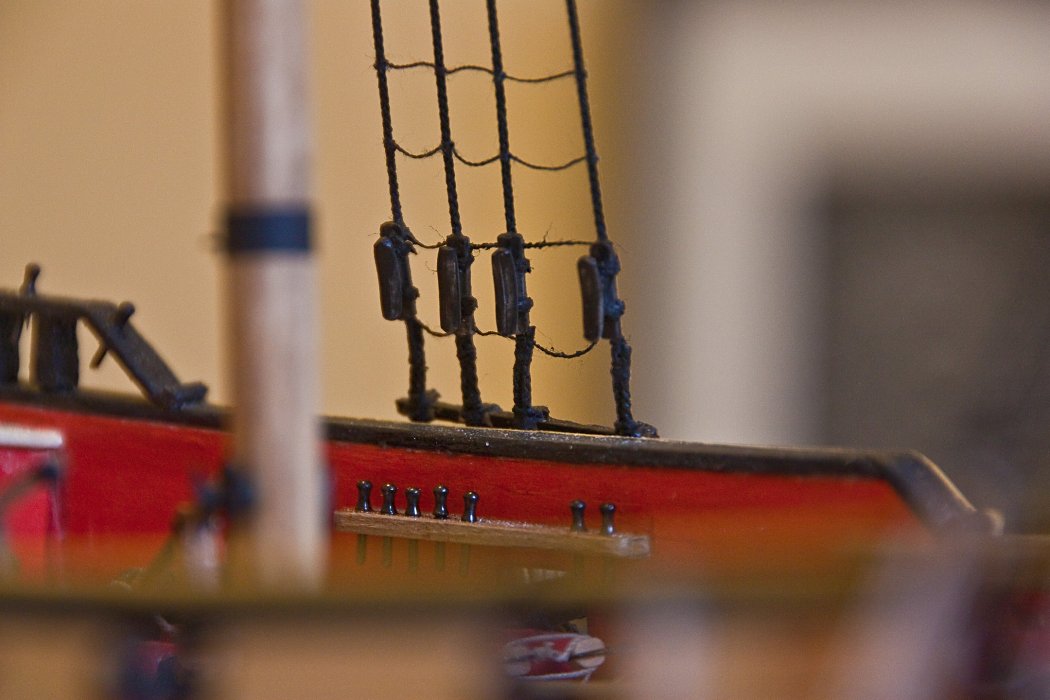
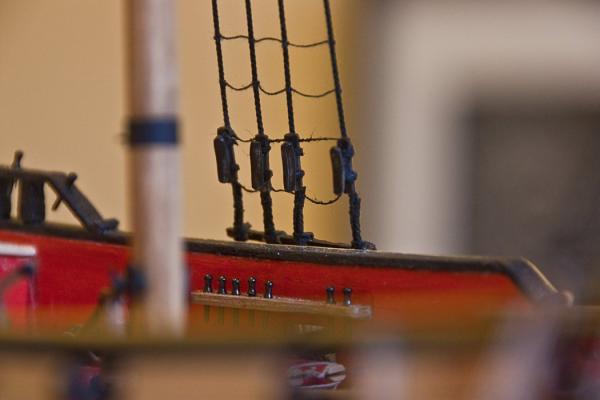
I’ve just about finished with the lower standing rigging. The only thing left to do is the shroud cleats. The problem is the kit didn’t come with any. So I’ve asked Model Expo for shroud cleats from the Armed Virginia Sloop; they are the perfect shape and size. Don’t know if they will comply. The lower ratlines were done with thin sewing thread and fastened with clove hitches as the FA instructions recommend. I found clove hitches were not hard to make – I was worried about using them. I also added an extra ratline above the futtock staff since I know the only way I will ever get to the top is through the lubber’s hole, and an extra ratline would be most welcome. We land lubbers have to stick together.
- 455 replies
-
- 7
-
-
- fair american
- model shipways
- (and 1 more)
-
Great workmanship. Can't wait for the head to be done.
-
Thanks for your insight.
-
Thanks Bob. That makes sense, given the instructions. It's just that I've never seen that kind of 'tying off' before. So unless someone else comes up with a better idea, I will go with that. Cheers.
-
I have a question - While I'm still working on the lower mast's standing rigging, I am researching the rigging for the topmasts. The main topmast stay attaches to the main topmast with a mouse and the stay passes through a 1/4 inch block on the foremast. It then is seized to a 'fiddle' block (which I call a sister block) halfway down the aft side of the lower foremast. "A purchase is rove between a single-becket block on deck and the fiddle block, the hauling end being hitched to the deck block at its strap." Do you know, or have a picture of, how that hitch is done exactly?
-
Thanks Alistair, Bob and Scott. As to the type of wood used for the masts: I used the dowel supplied by the kit which I assume is basswood. The main mast is a 5/16 inch dowel purchased at the local hardware store and thinned down to 9/32. It is probably pine. I stained both masts with Minwax 'Golden Oak' stain. I do have a question - While I'm still working on the lower mast's standing rigging, I am researching the rigging for the topmasts. The main topmast stay attaches to the main topmast with a mouse and the stay passes through a 1/4 inch block on the foremast. It then is seized to a 'fiddle' block (which I call a sister block) halfway down the aft side of the lower foremast. "A purchase is rove between a single-becket block on deck and the fiddle block, the hauling end being hitched to the deck block at its strap." Does anyone know, or have a picture of, how that hitch is done exactly? Thanks.
-
Thanks Russ and Dave. I'm using the documentation for the Syren to help me with the rigging. The only thing is that when there is a difference between the Syren doc and the FA plans, I defer to the plans.
-
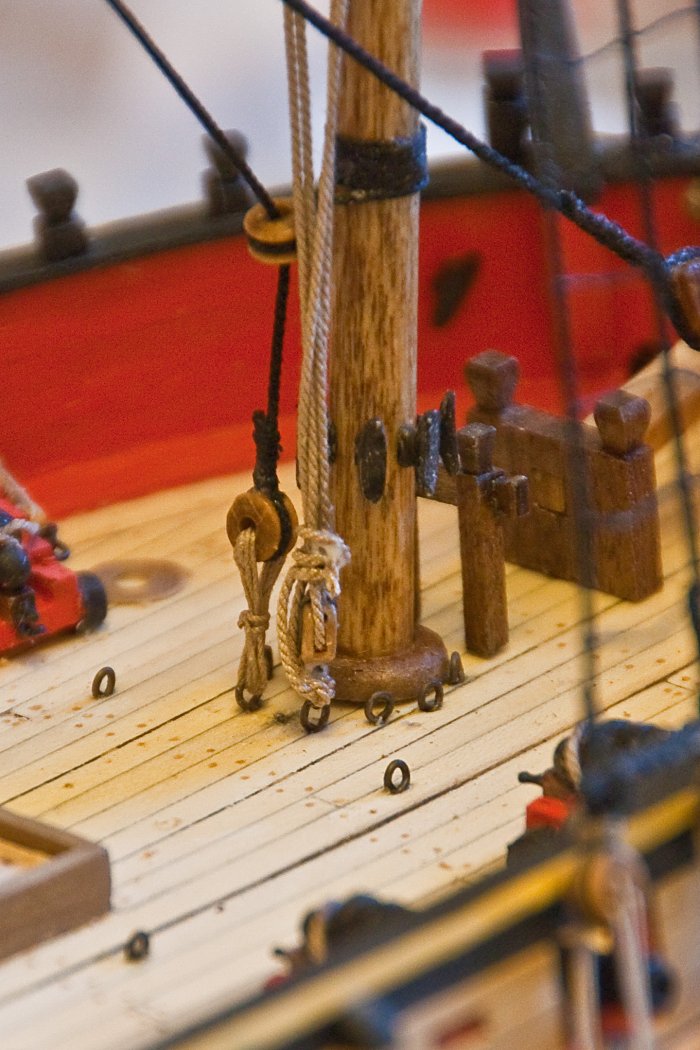
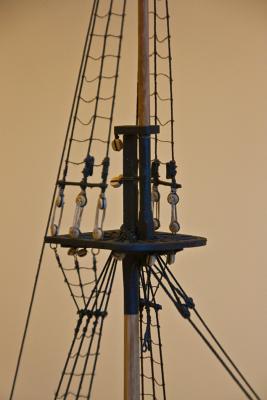
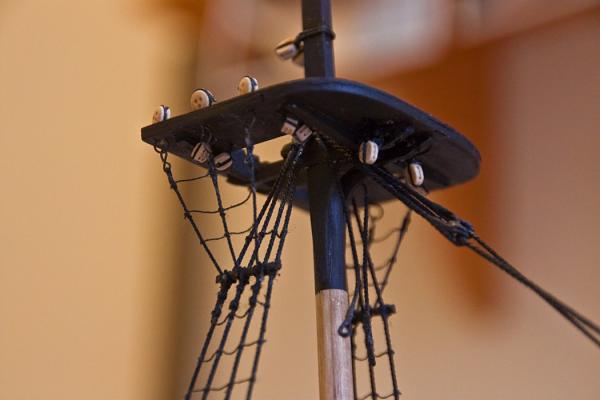
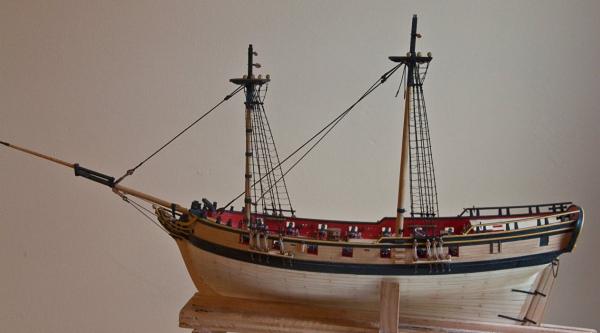
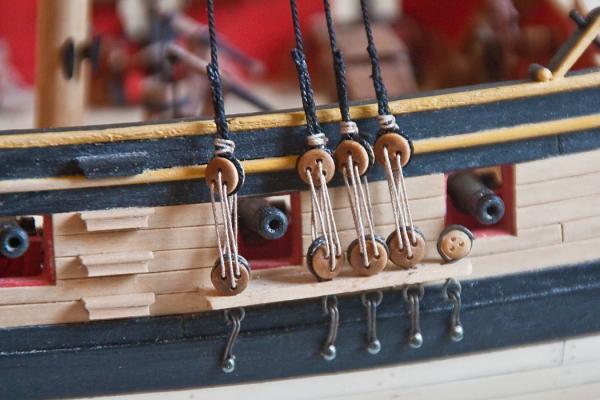
Attached are photos of the lower main mast’s shrouds and stays. I was pleased that the ‘line of sight’ of the aft guns were unaffected by the lanyards of the shrouds. Hope the fore mast shrouds come out as well. I made the mouses from 1/8 inch dowel: first drilling the hole, then shaping the end and finally cutting off the finished mouse. I never realized that my fingers were so fat, and there are thinner lines and tighter spaces yet to come. I also see from one of the photos that I forgot to trim the lanyard of the main preventer stay.

- 455 replies
-
- 11
-
-
- fair american
- model shipways
- (and 1 more)
-
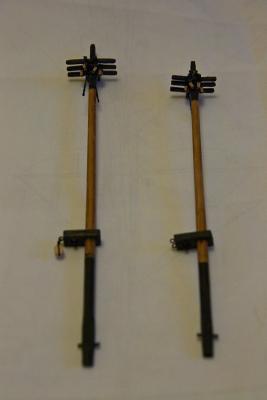
Thanks for the likes and comments. Gary: I was also surprised at the height of the masts. I guess that made her fast. The fids are to position the upper masts into the tops. They determine how far the top mast or top gallant mast 'drops down' into the slot in its top. As for the channels, I tried to make them as long as I could given the situation. I just finished installing the lower main shrouds and there is enough room for the two aft guns. Unlike the plans however, I have one shroud fore of its gun and the others aft of the gun. Hopefully I will have a photo tomorrow.
-
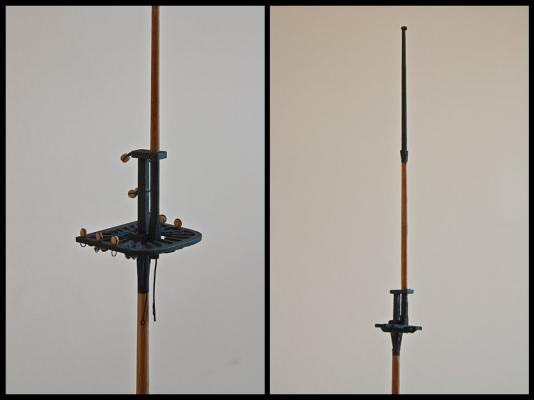
Glad to see your build is coming along. I take it you are not painting the masts except for the mast caps. They look good - and I like the wooldings. Cheers.
-
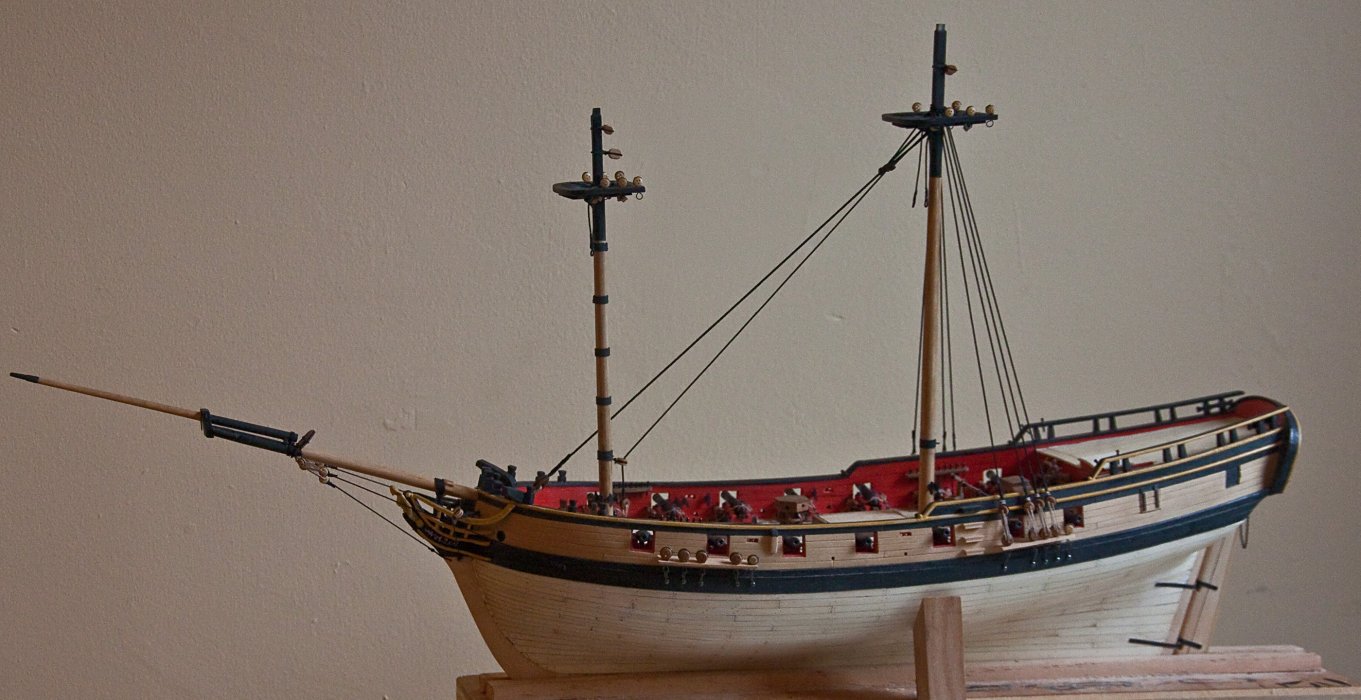
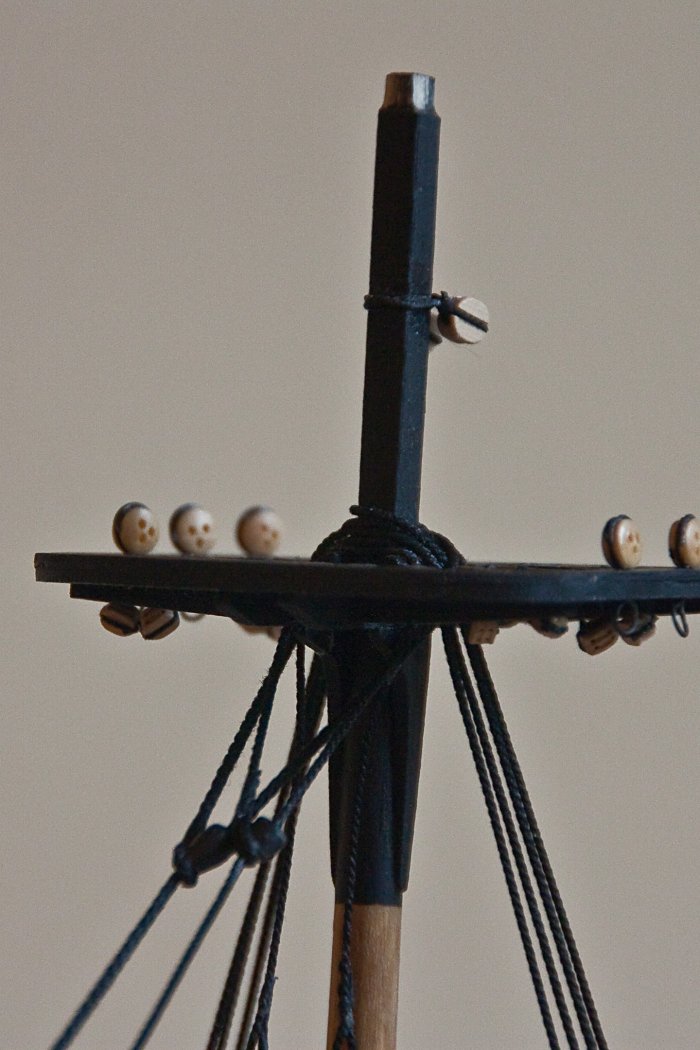
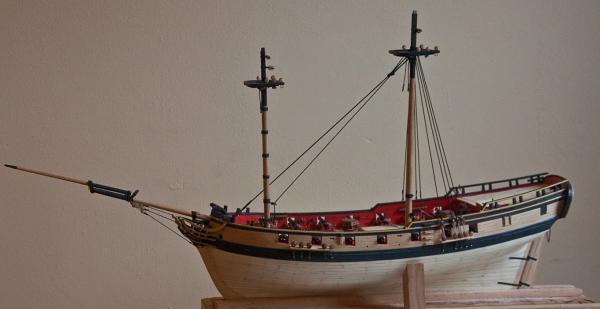
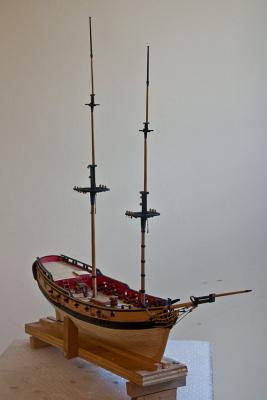
The masts are constructed. The top masts and top gallant masts are not glued yet, so they may not be perfectly straight. The hounds were a challenge but turned out all right. I followed the same painting scheme as Bob ‘rafine’. My main worry as I go forward is that I moved the guns slightly closer to each other to allow for the two aft guns to be further away from the housing front. This means that the dead eyes on the channels are crowded together, especially on the aft channels. I’m waiting to see what they ultimately look like.
- 455 replies
-
- 6
-
-
- fair american
- model shipways
- (and 1 more)
-
Hey Bob: You work place looks the same as mine. Its great to see I'm not the only one. Obviously it doesn't affect the quality of your work. Cheers.
-
Just started reading this thread, and I see a lot of options on jib saw blades. Of course, before I get some blades, I need a saw. What are your recommendations? The Dremel Moto Saw? Thanks.
-
Just to set the record straight. The above ship, Confederacy, was not done by me. That honor belongs to SawdustDave. Dave: I know my wood carving skills are negative; but I'm afraid that my clay sculpting skills are about the same.
-
I see you are an excellent craftsmen yourself. I must say you look nothing like your avatar. Sculpey seems to be a type of clay. Do you find it easier to work with than sculpting in wood? Cheers.
-
Hey Dave. Never heard of "sculpy". But at some point I want to start trying my hand at sculpturing figureheads and stern designs. I will look into it.