lambsbk
-
Posts
910 -
Joined
-
Last visited
Content Type
Profiles
Forums
Gallery
Events
Everything posted by lambsbk
-
Yes. I did mean the eye bolts. I can alter how they are mounted to make them kind of look like a ring bolt (i.e. change the angle of attachment to look like a ring bolt following gravity). Thanks Russ.
-
Thanks Russ. I do have plenty of those ring bolts so it would be easier. Removing the flash from the inner diameter makes them look a lot better. At any rate I doubt if I get much further over the next few weeks. Too many other things competing for attention.
-
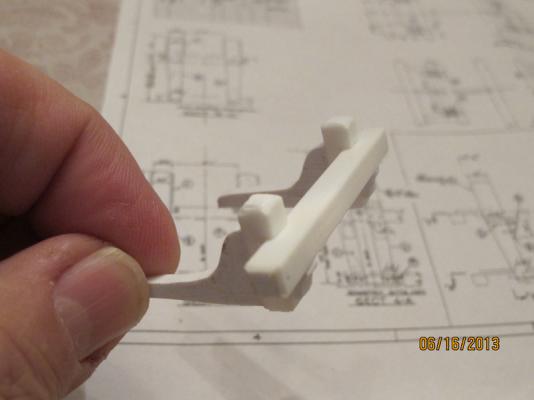
So instead I worked on the aft rider bitt today. It was my first solid build with styrene and I kinda' had fun with it. There was a bit of variability in the length of the bitt depending on the reference and I went toward the longer size. I still need to do some mild filing and painting.

- 601 replies
-
- 3
-

-
- constitution
- revell
- (and 1 more)
-
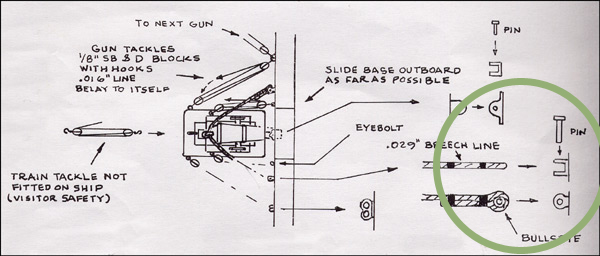
I still have not worked out the bulwark breeching attachment yet but I am leaning toward a cleat and pin method with a bullseye. It seems to predominate in the referenced material online and I think I can fabricate these with some labor. I will be on board the ship next week and between that and the museum I may get it finalized in my head.
- 601 replies
-
- 1
-
-
- constitution
- revell
- (and 1 more)
-
Not bad Dan. I too have been thinking of how to attach the galley funnel to the stove. I'm not there yet. After I attach the guns then riding bitts will be made. It is nice to see your progress.
-
Thanks for the tips Evan. I am looking forward to the trip.
-
Dan: I too found that it is easier when modifying all those canons to work them in groups of steps. It is good to see your progress.
-
My anniversary is coming up in a couple weeks and I just found out my wife has booked us at Boston. I had suggested Lake Tahoe but she knew I wanted to visit Boston (and she knew WHY) (she also wants to see the TOWN of Boston) so we are spending the week there. How cool is that!
-
Not much done yesterday. The muzzle of the cannons had some internal flash and in the right light this was annoyingly visible. The muzzle diameter of 5.6" worked out to 7/128" at 1/96 scale...well I was just fresh out of that size drill bit so 1/16" did the trick and now the cannons are smooth bore again.
-
Mine too Brian but my first one got destroyed years ago. I am hoping to try wooden ship models after this build. It will take a while but I believe I will get there.
-
LR: Comradery is a great thing. I look forward to seeing your ideas on this old classic.
- 601 replies
-
- 1
-
-
- constitution
- revell
- (and 1 more)
-
Thanks for the complement Runner63. You built (and finished) 2 of these! Congratulations. I hope your friend appreciated what a gift that was. My build did not start out to be so detail oriented (and I still do not come close to others building this model in all of it's incarnations) but seeing the lack of some detail in the kit and seeing some of the fine work of others (andymech, force 9, modeler12, texxn5 -and others too many to name) has inspired me to do what I can to improve this build. Again, thanks for watching.
-
Thanks Evan. I am afraid I will lose a little sleep over those knobs tonight and how to deal with them. I think I'll start scouring the connie reference drawings and photos again. BTW: your build is an inspiration - I am really enjoying all you are working into it. Dave
-
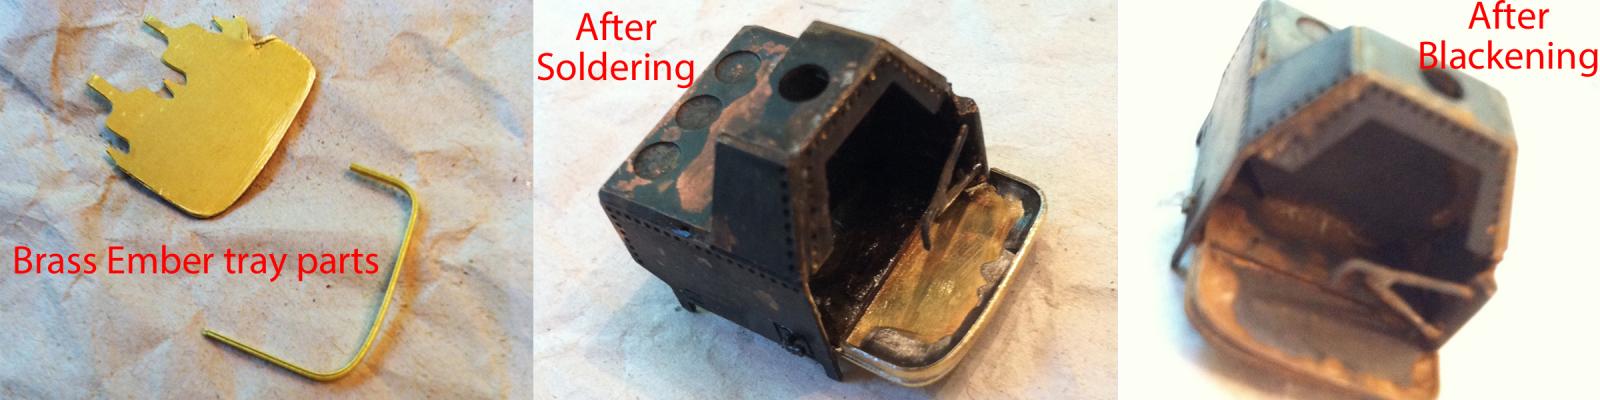
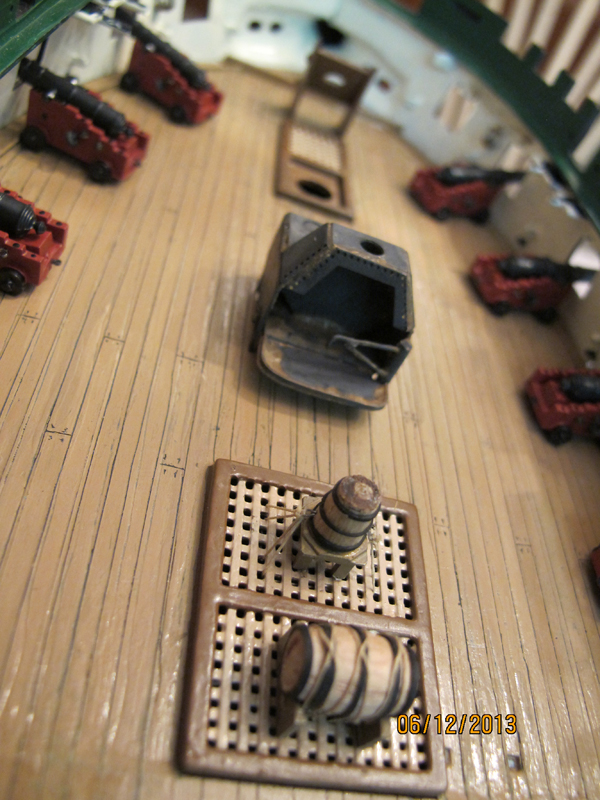
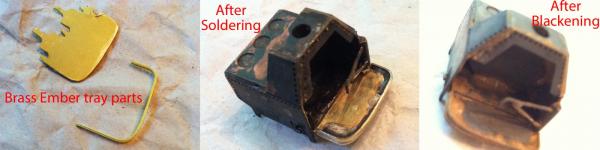
The camboose has been soldered but not painted yet. The ember tray was made from scrap PE brass. I may leave the ember tray and hearth un-painted as the blackening of the solder looks a lot like ash.
- 601 replies
-
- 2
-
-
- constitution
- revell
- (and 1 more)
-
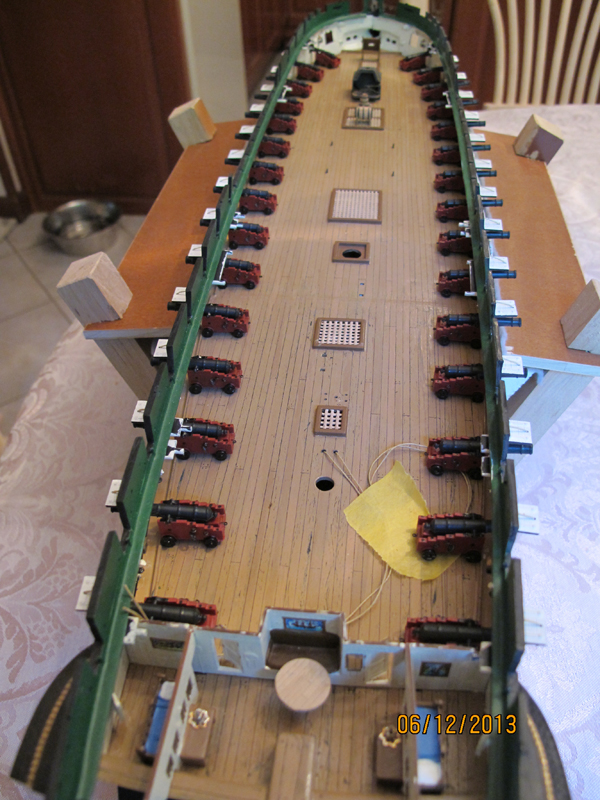
Today I completed the Gun deck gun carriage re-work and I also finished the camboose soldering. As expected the carriages got easier as I made more of them. They were tedious though (I am feeling all new back of neck muscles tonight). I could not help but dry place the guns just to check them out so that is the pic below. I will work the breeching next. I am not very happy with the Revell attachments for the breeching to the bulwak but have not figured out a way to modify it safely yet. Would a simple clove hitch be appropriate for the breeching at the knob?


- 601 replies
-
- 3
-
-
- constitution
- revell
- (and 1 more)
-
I had to change the reference above. It was the 'A' blocks that are 7/64" in the Kit and work out as a 7" Block. See pg. 4 of this build log for the math in working it out. 12 down today Dcooper and 18 to go.
-
Yes. They do get easier as I do them. I will probably have it just right by no. 30. I was hoping to pre-rig the breeching lines BEFORE installing the canons on the deck. The blocks worked out to Revell 'A' size in the kit...and since I have a second kit I have plenty of them. The gun tackle has already been tested but I have not posted pics of it yet. I'm getting closer though.
-
I agree John. Although I know little about wood ship models (yet) you seem to have a good start.
-
Russ: I am just now catching up on your log and am looking forward to following along.
-
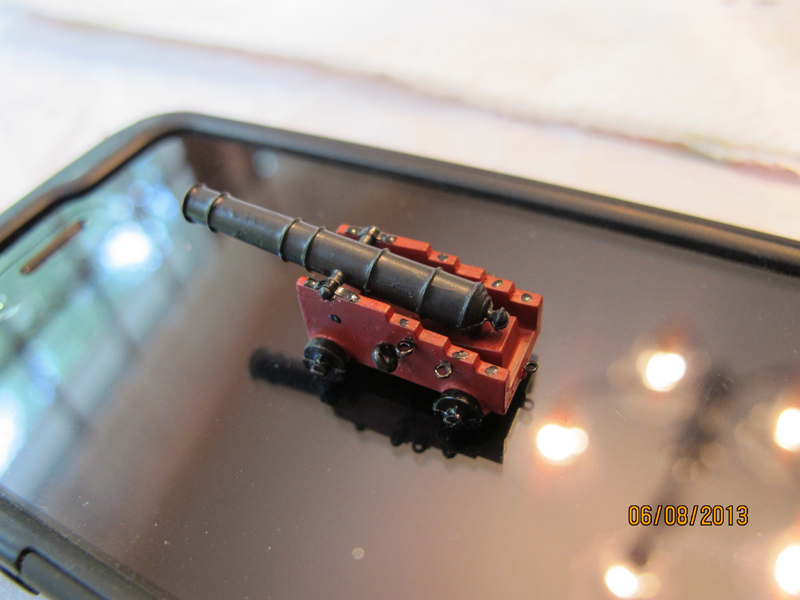
I decided to continue work on the 24 pounder guns today. After looking at the photos again on the Constitution web site I thought I could make mine better so I re-worked the carriages to better reflect what was in the pics. The large ringbolts for the breeching are not perfected (I need to clear a bit more flash from the inner diameter) but I am happier with them overall. A pic of the prototype is below.

- 601 replies
-
- 3
-
-
- constitution
- revell
- (and 1 more)
-
That second kit will come in very useful. The first time I needed it was early in my build when I LOST a bulkhead in the gallery! I know it is cliché but I am convinced the dog ate it. It is also nice to experiment on one and work the build with the other (not to mention the extra rigging line which I understand can run a little short sometimes.) Good luck. BTW: the canon detail is very nice.
-
I got the same info from Force9 so I have nothing new to add. The brass came with a transom as well as various coamings, cable stays, backing plates for cable stays, & hammock sling braces. I don't remember if anything else was included. I will not be using it all (at least not foreseeably). I am thinking of using the brass transom on my ship mount base (plaque like) and wiring it as a touch circuit for the lamp box of the fiber optics in my build. That is still a long ways off however.
-
Sorry. I thought you were asking about the actual scale of the BJ items. I only have the Constitution brass set for the camboose and it is in 1/96 inch scale. Good luck with your build. I look forward to your progress and posts.
-
I agree with John. The color changes are nice. Keep up the good work on detail. It will be worth it.
-
I believe they are 1/96 inch scale for the Connie brass. Simple metric conversion should not be a problem if you are used to the decimal system.
- 46 replies
-
- 1
-
-
- constitution
- revell
- (and 1 more)