


Maury S
-
Posts
1,490 -
Joined
-
Last visited
Content Type
Profiles
Forums
Gallery
Events
Posts posted by Maury S
-
-
Attached is a photo of my earlier ECB (2010) superimposed over a photo of the ECB in Mystic.
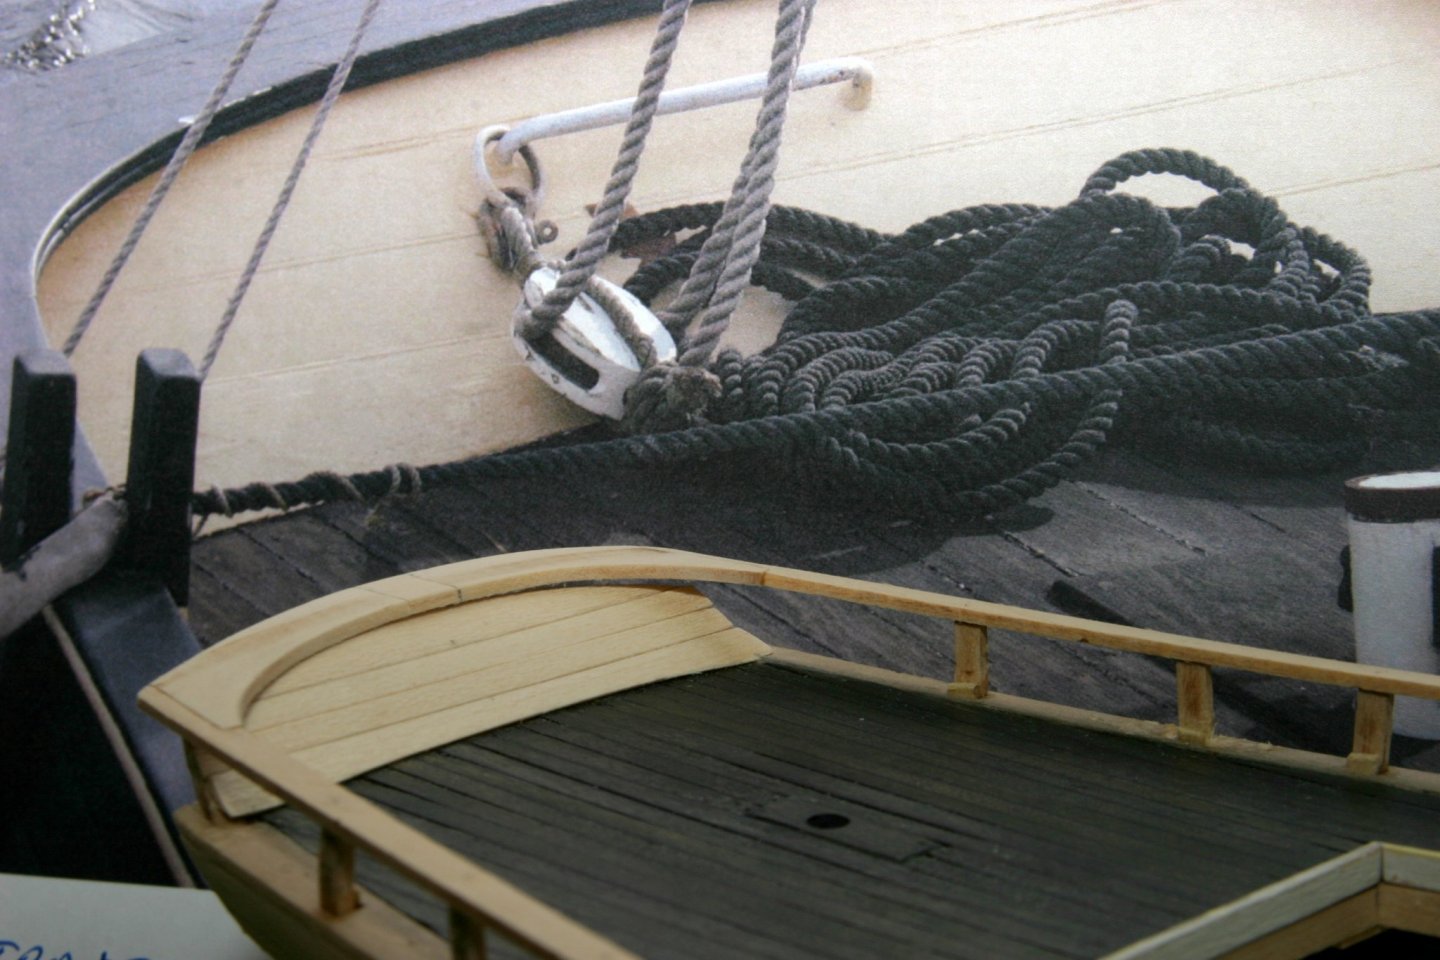
The model deck is almost identical in color to the real boat.
Maury
- thibaultron, KeithAug, druxey and 6 others
-
 9
9
-
Back in the shipyard. The covering board top and edges are painted "Cream". Four coats of thinned paint. I painted them before any more deck planking went on.

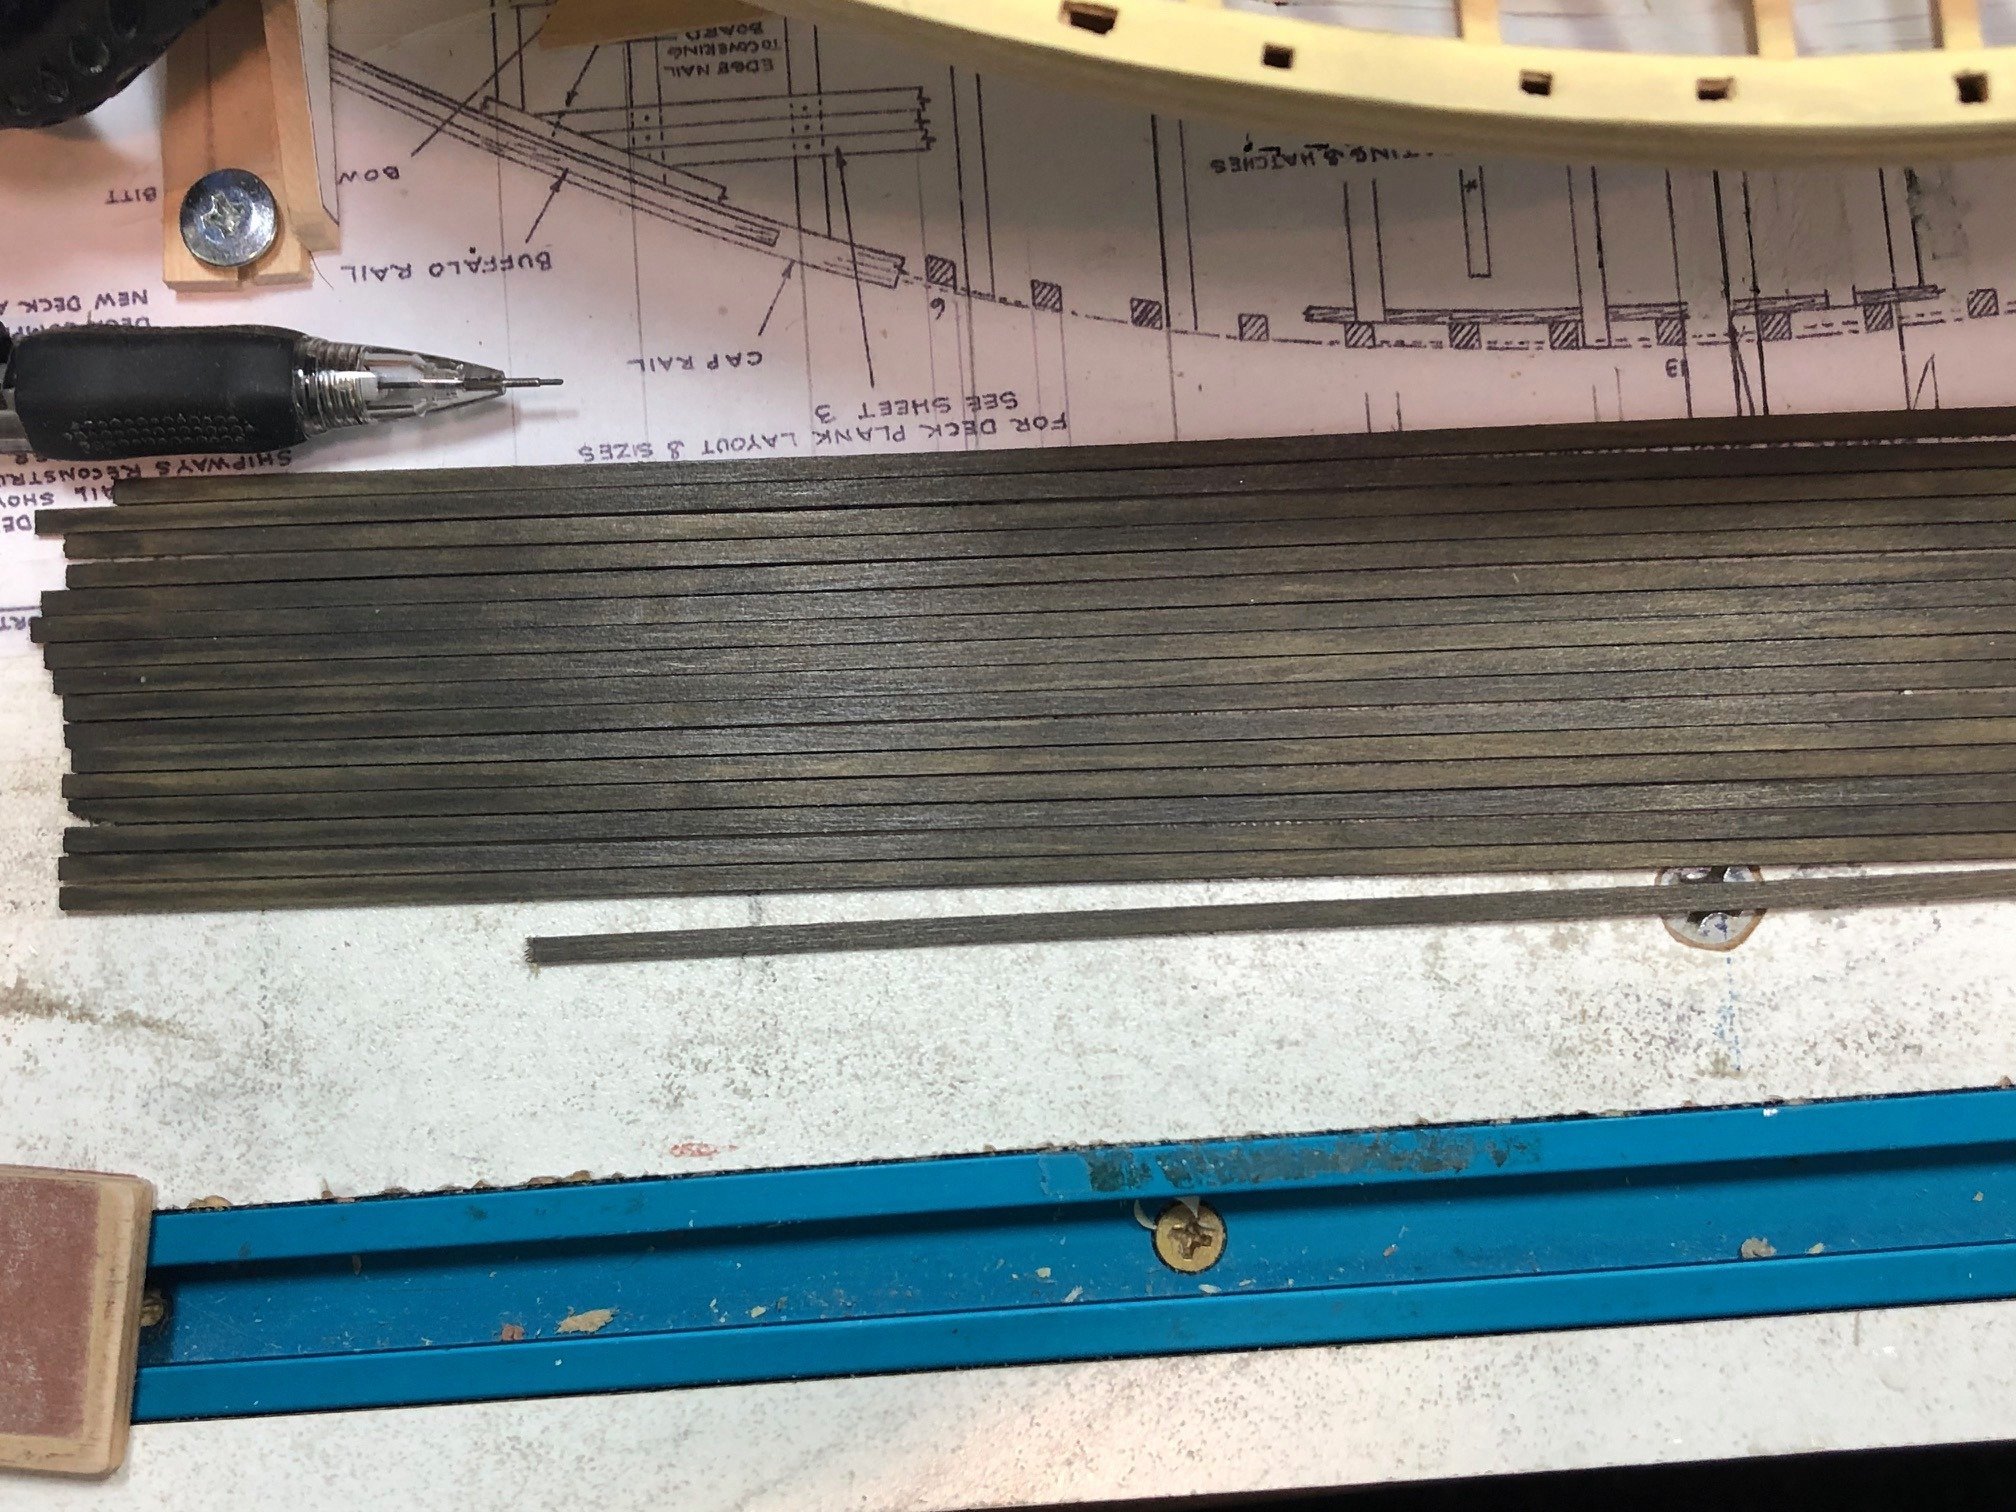
Deck planking is 2" x 4" and oiled. I cut the planks on the Byrnes table saw and stained with an alcohol stain from Micro-Mark. Four or five coats and a wipe with some graphite brought them to the right color. BTW, this pretty much matches the color of the deck on the boat in Mystic.

Hopefully this will be enough.
Maury
- thibaultron, mtaylor, yvesvidal and 5 others
-
8
-
So the plan may show one wider and two narrower planks (The centerline shown, not the center of four planks.)
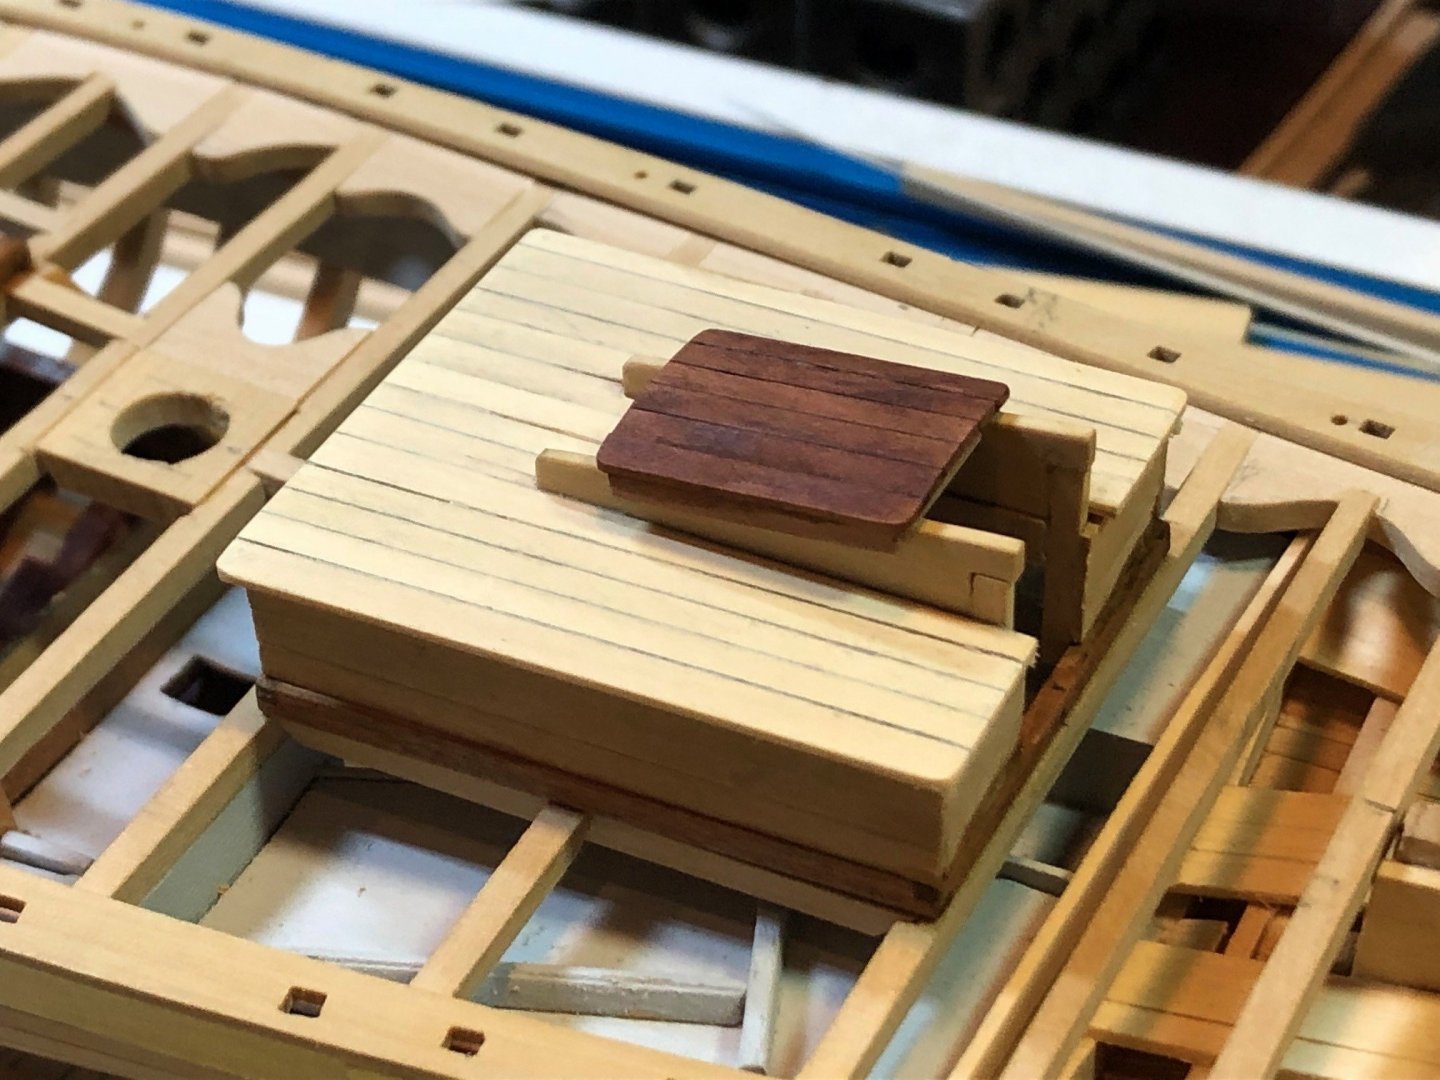
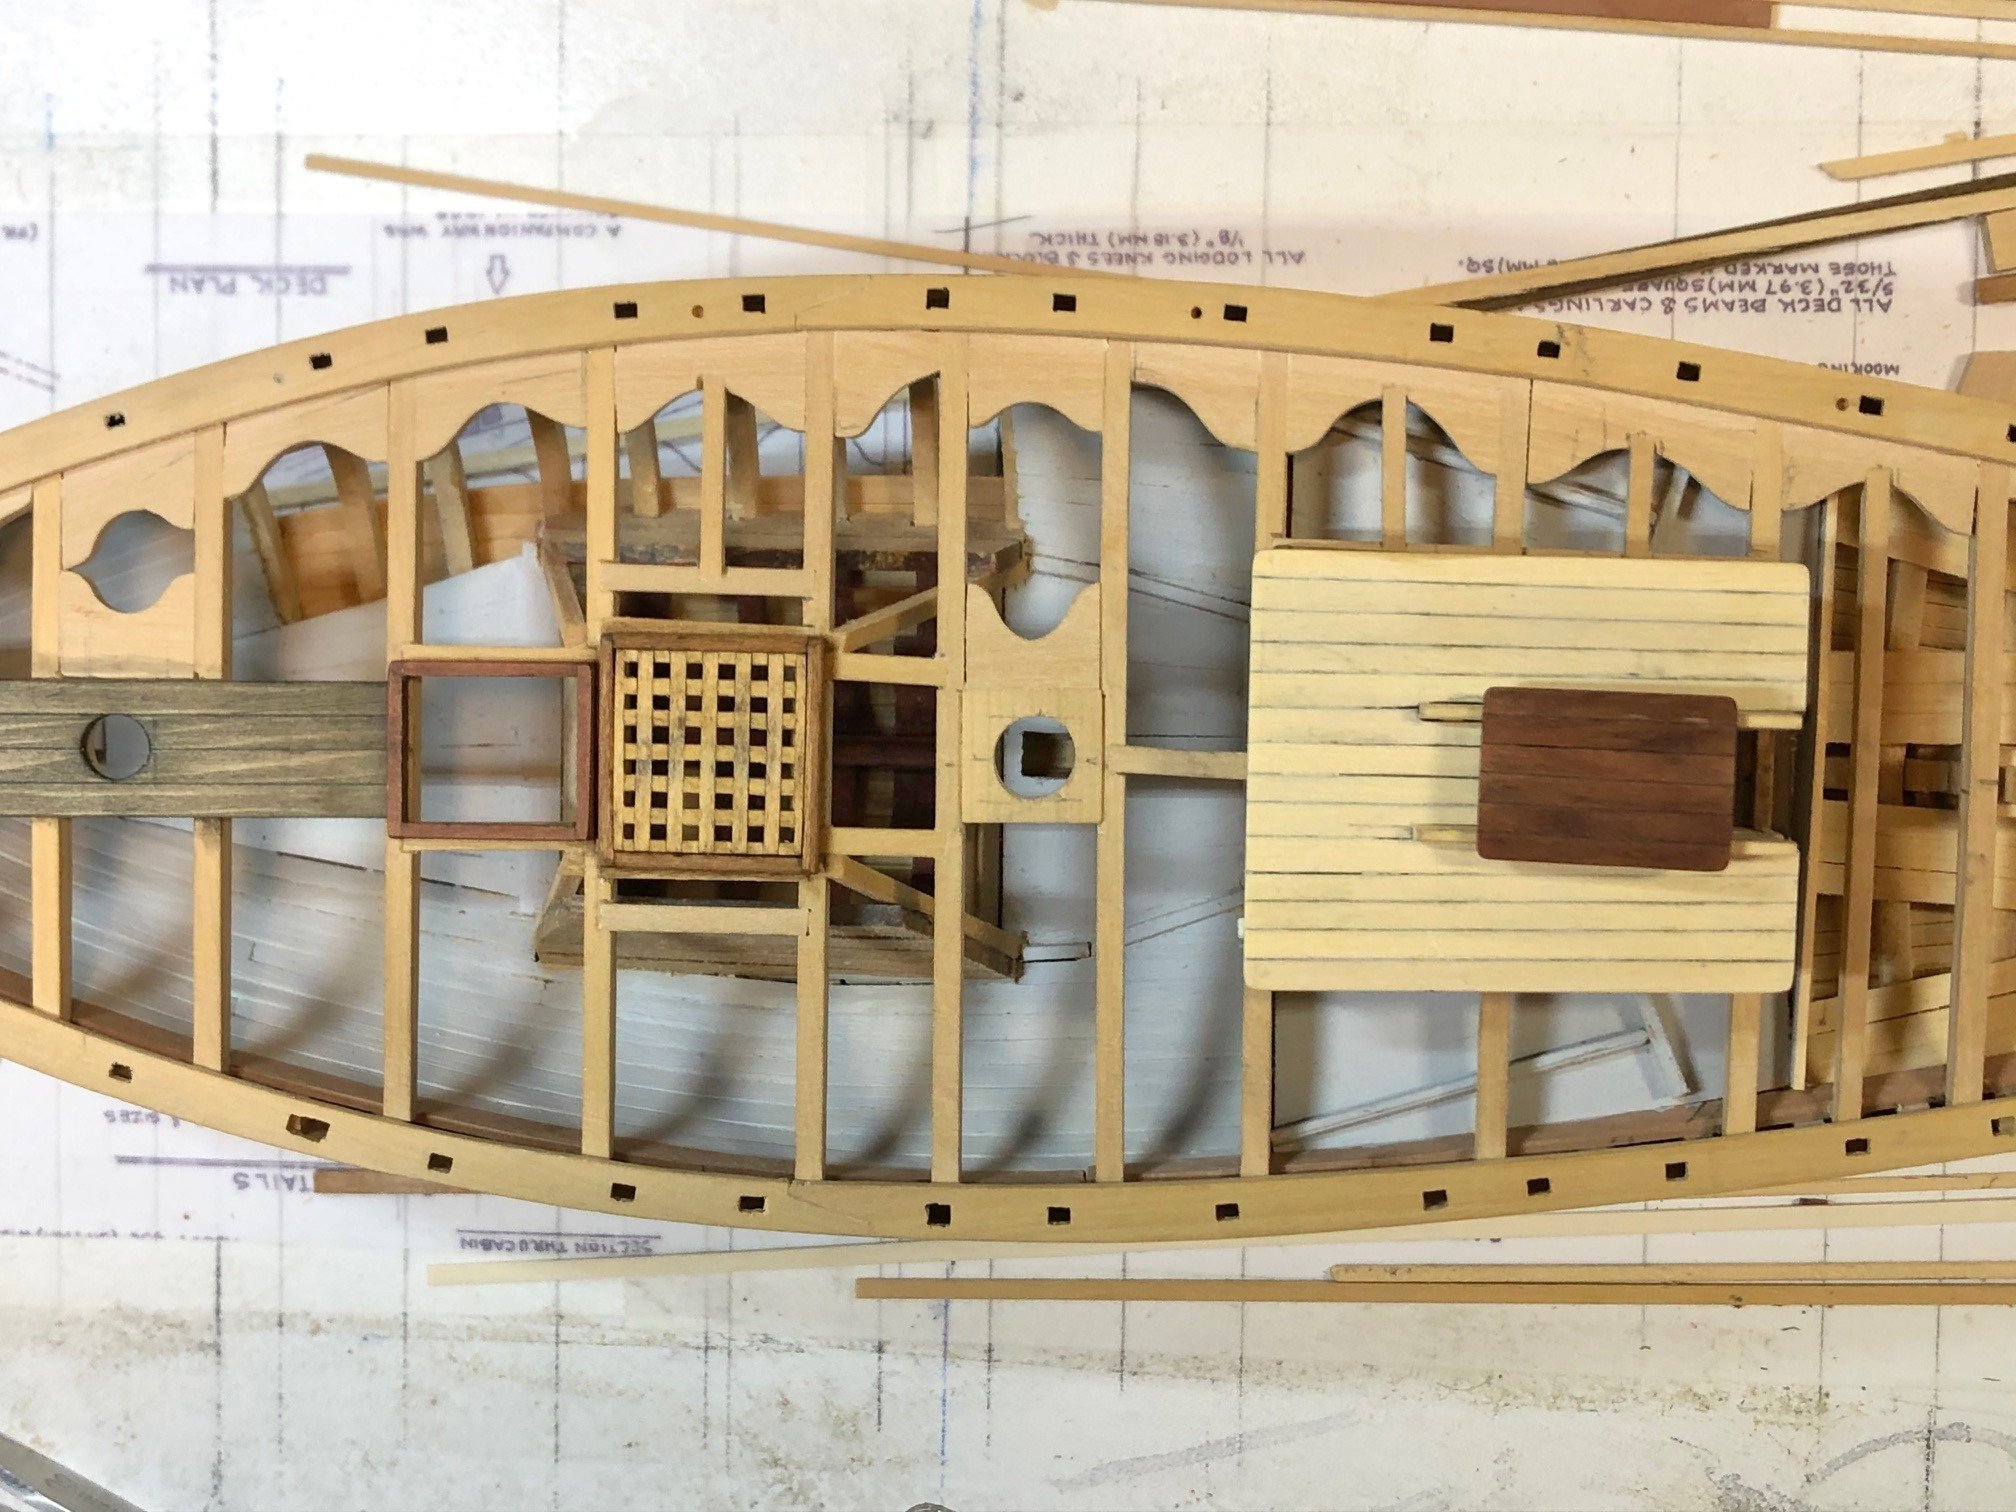
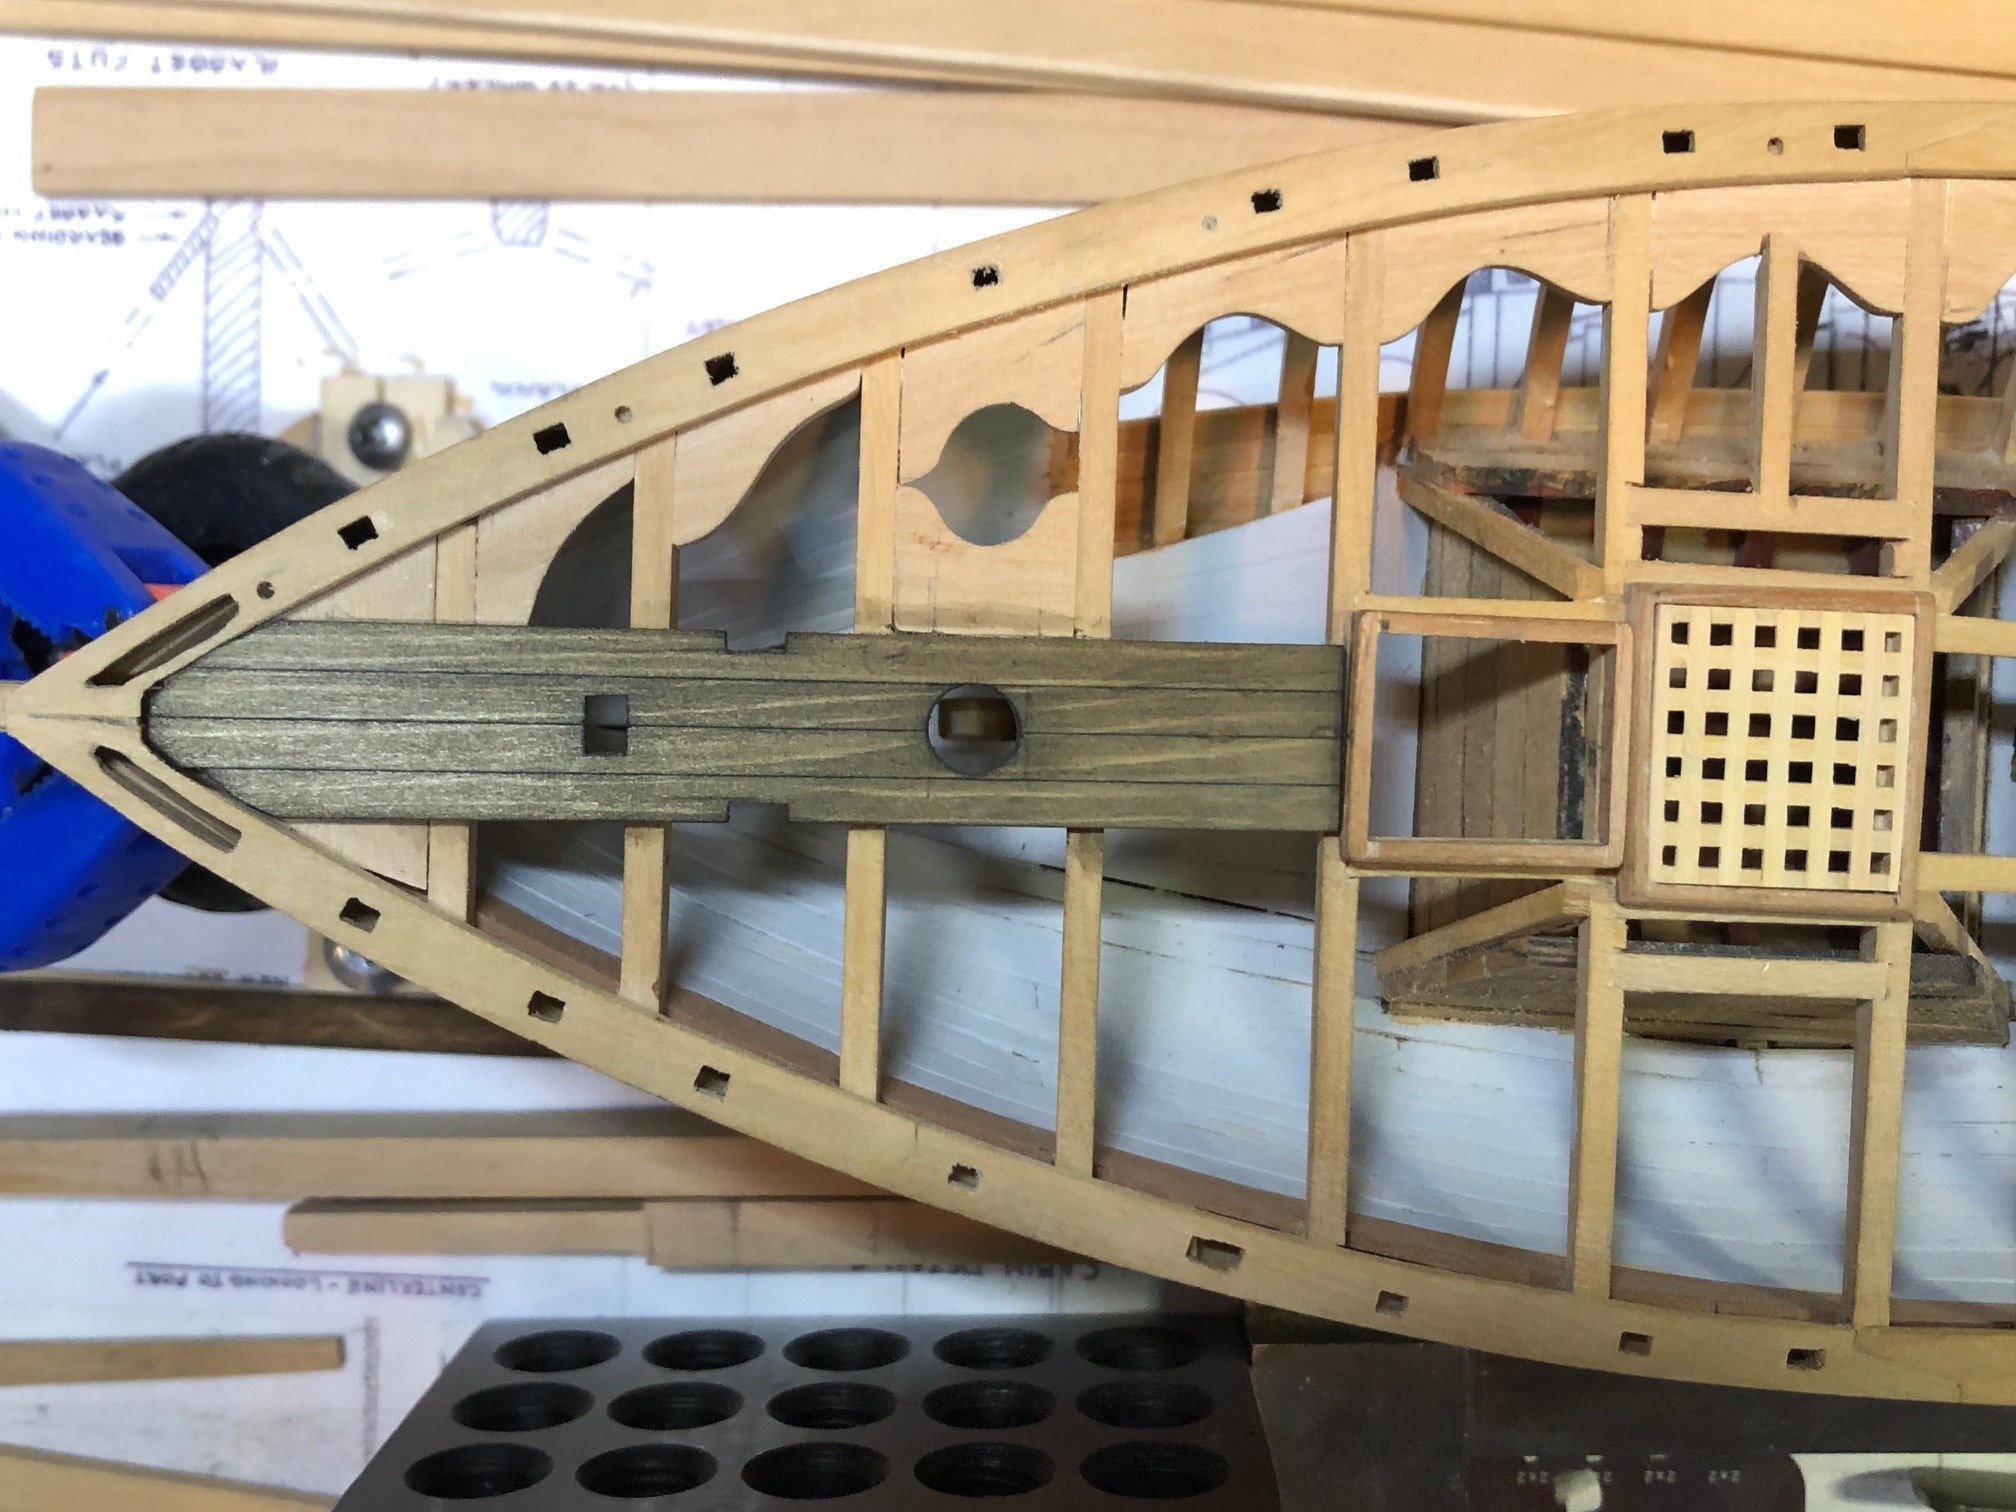
Hatches re-done. They are within 2 /1000s of square. They are just set in place...and one of the carlings is ever so slightly out of alignment. It will be planked over.Cabin finished, but top not yet painted and doors not yet made.

Maury
- yvesvidal, mtaylor, GrandpaPhil and 4 others
-
7
-
Randy Biddle pointed out a hatch out-of-square. Back to the ISO bottle.
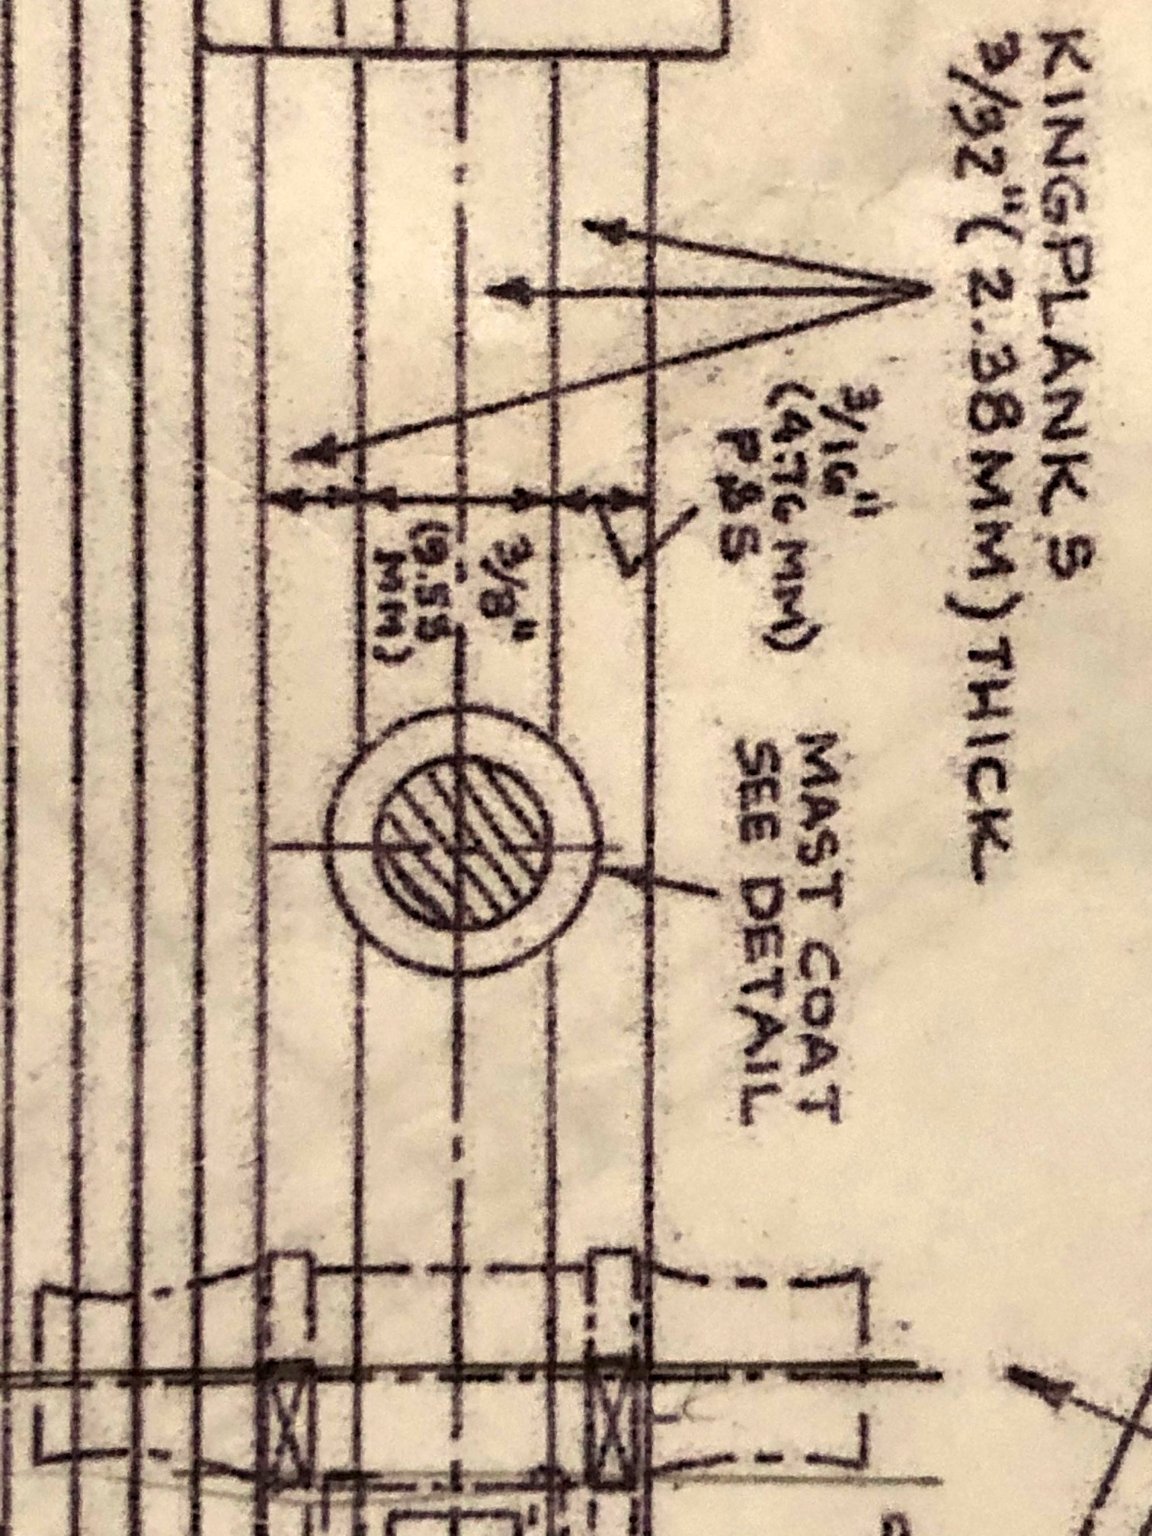
Plan showing "king plank".
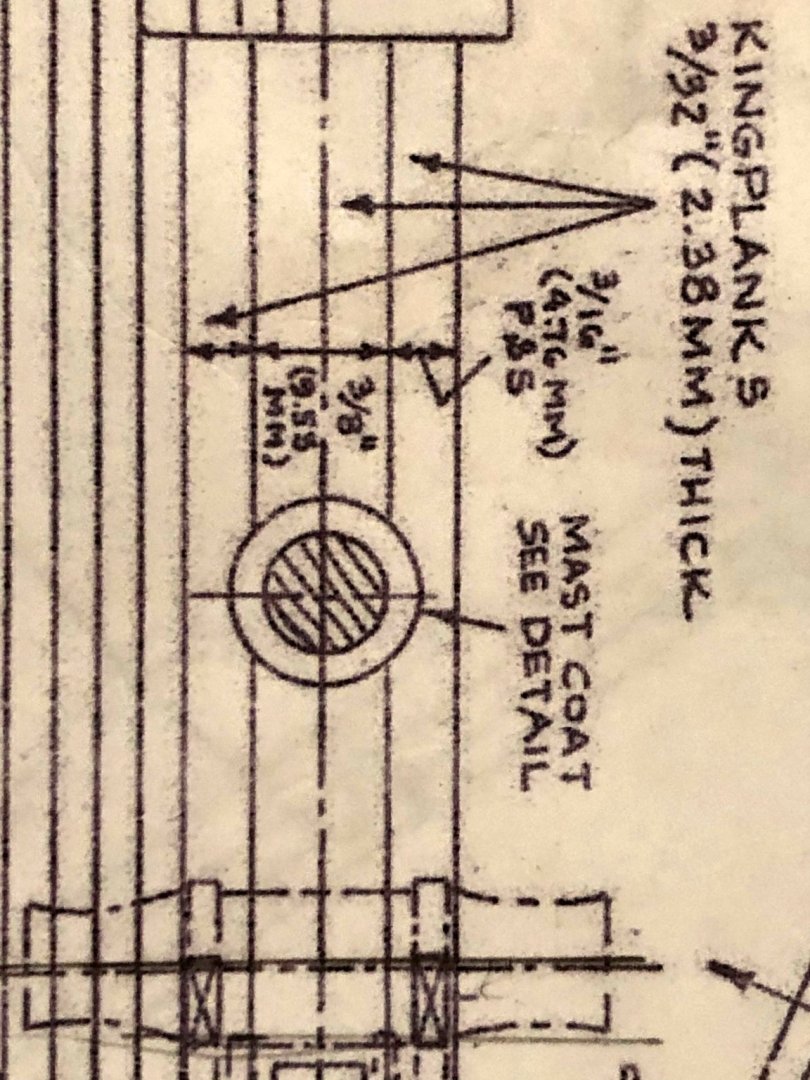
The measurements shown are in 1:32 scale. Multiply by .667 to get to 1:48.
Maury
- GrandpaPhil, thibaultron, druxey and 1 other
-
4
-
Druxey, the plan shows four strakes in the "king plank". It is 50% thicker than the surrounding planking.
Maury
- thibaultron, Tony Hunt and mtaylor
-
3
-
King plank made and installed.

Maury
- oneslim, druxey, thibaultron and 5 others
-
8
-
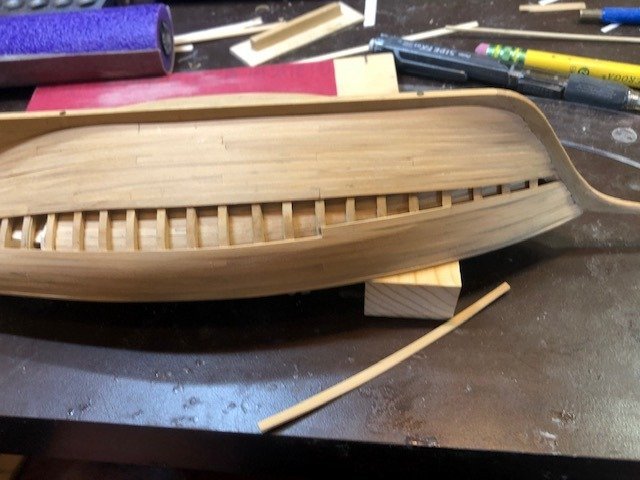
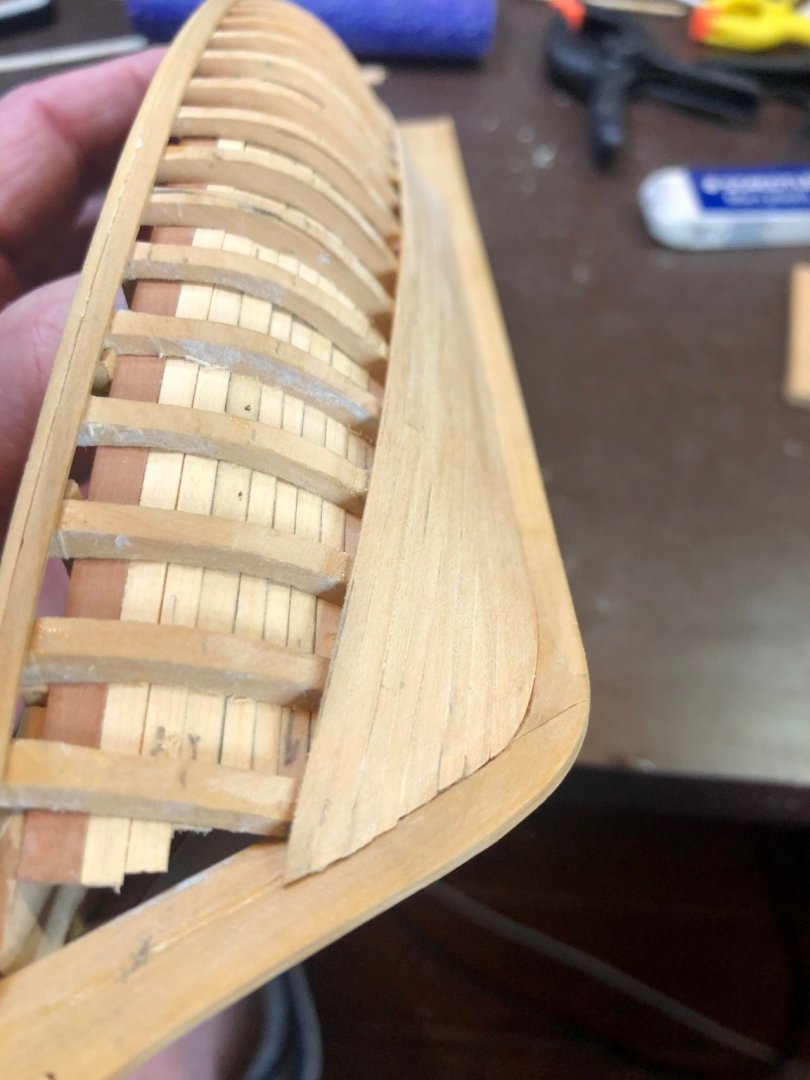
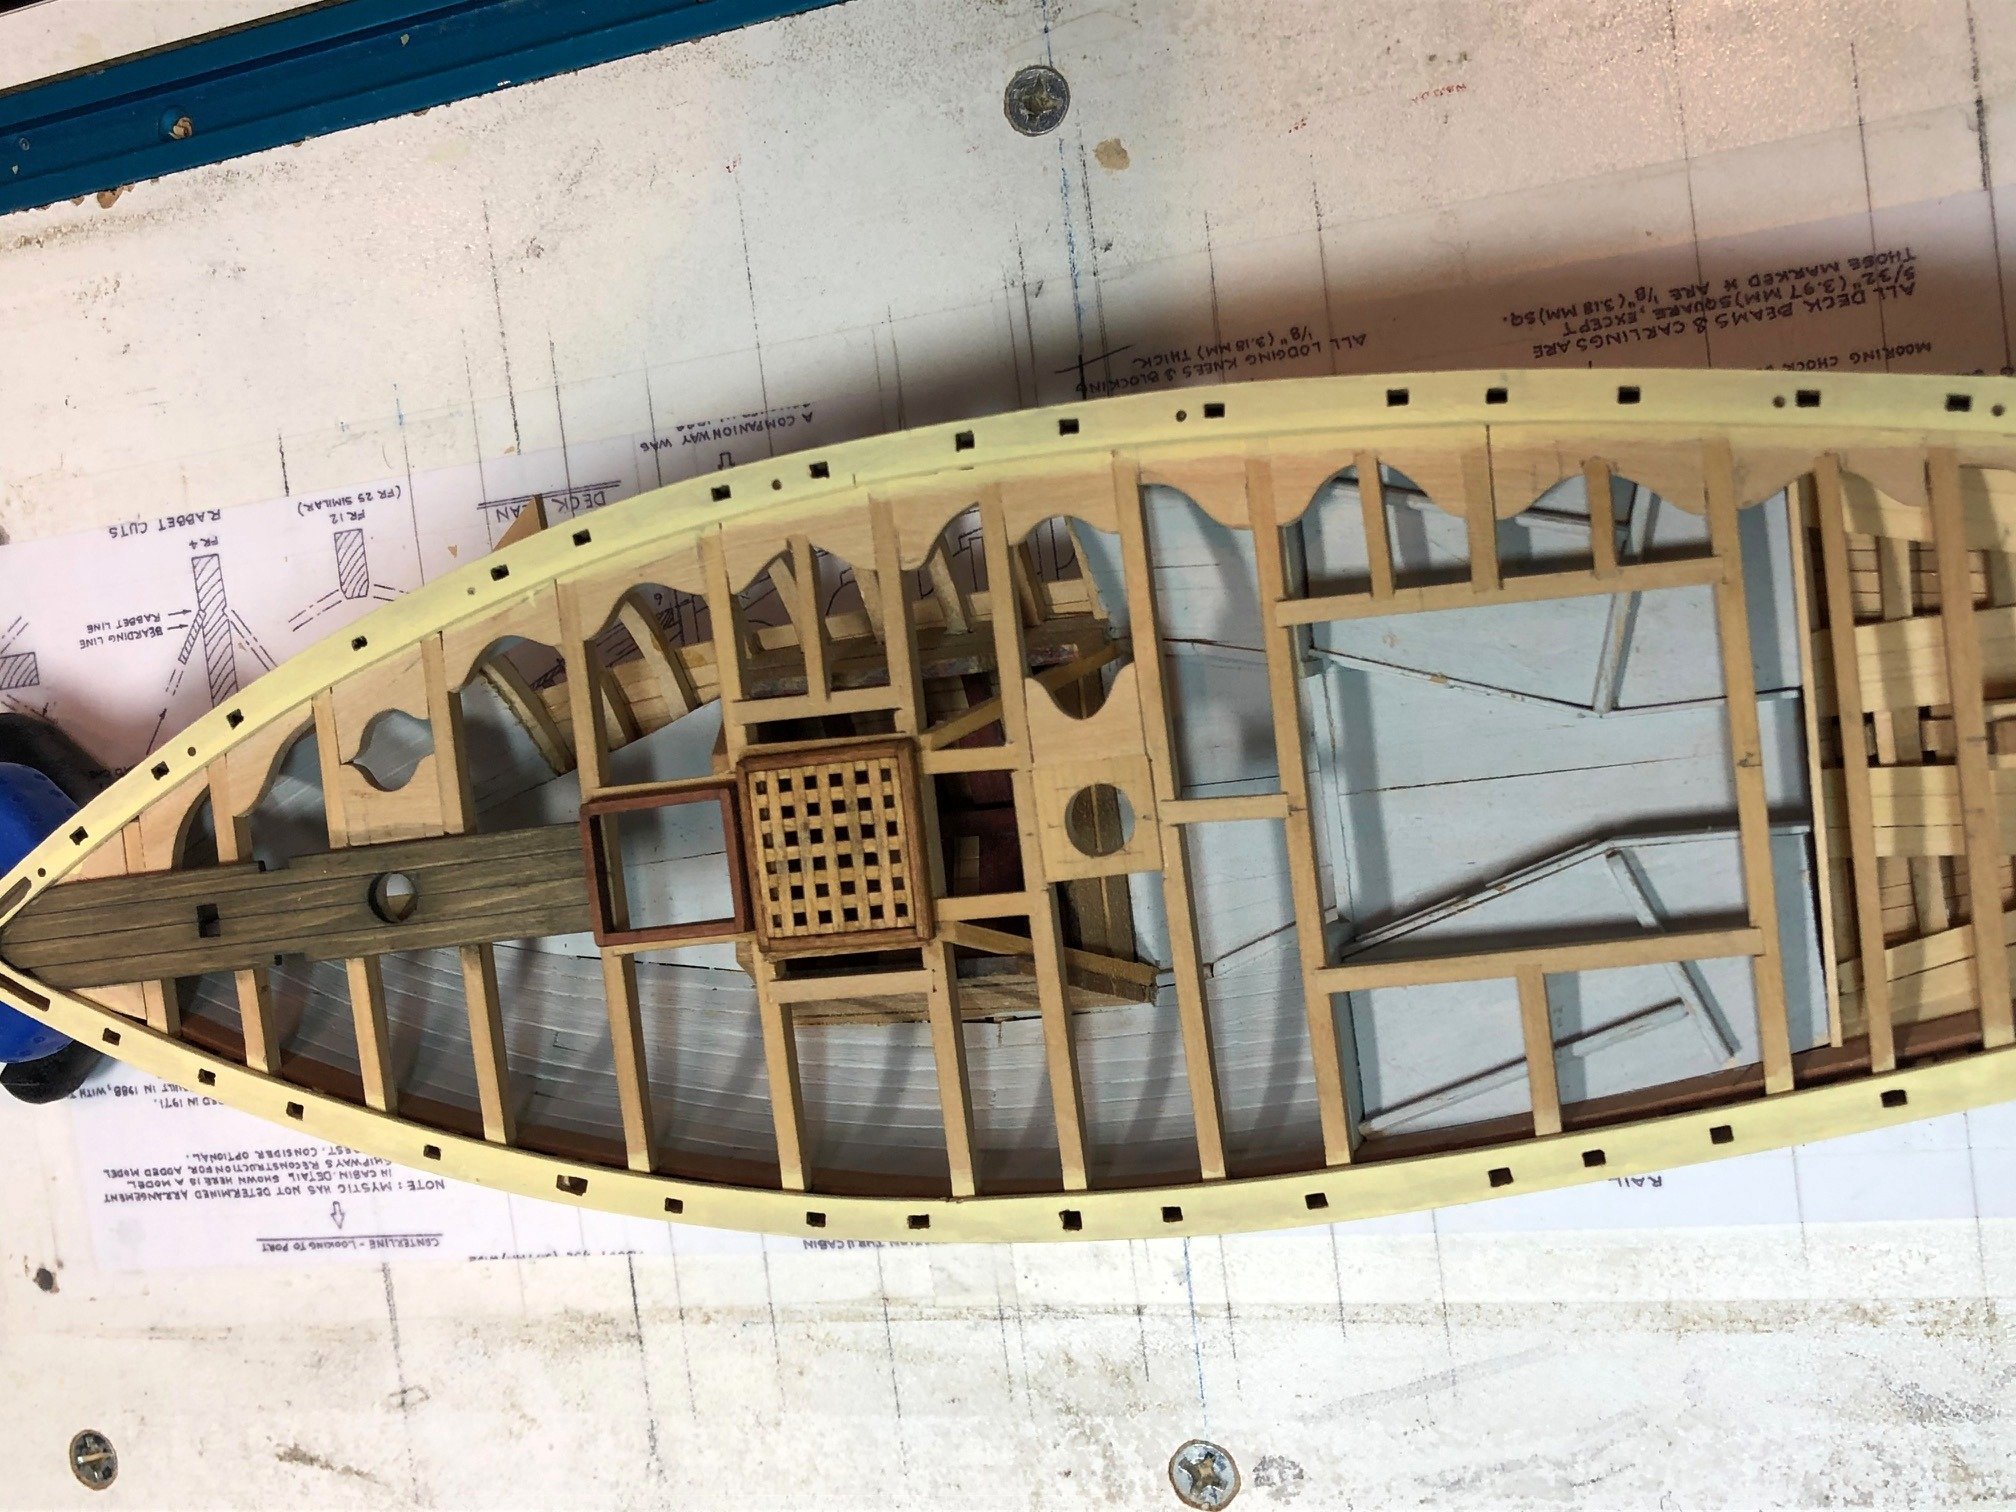
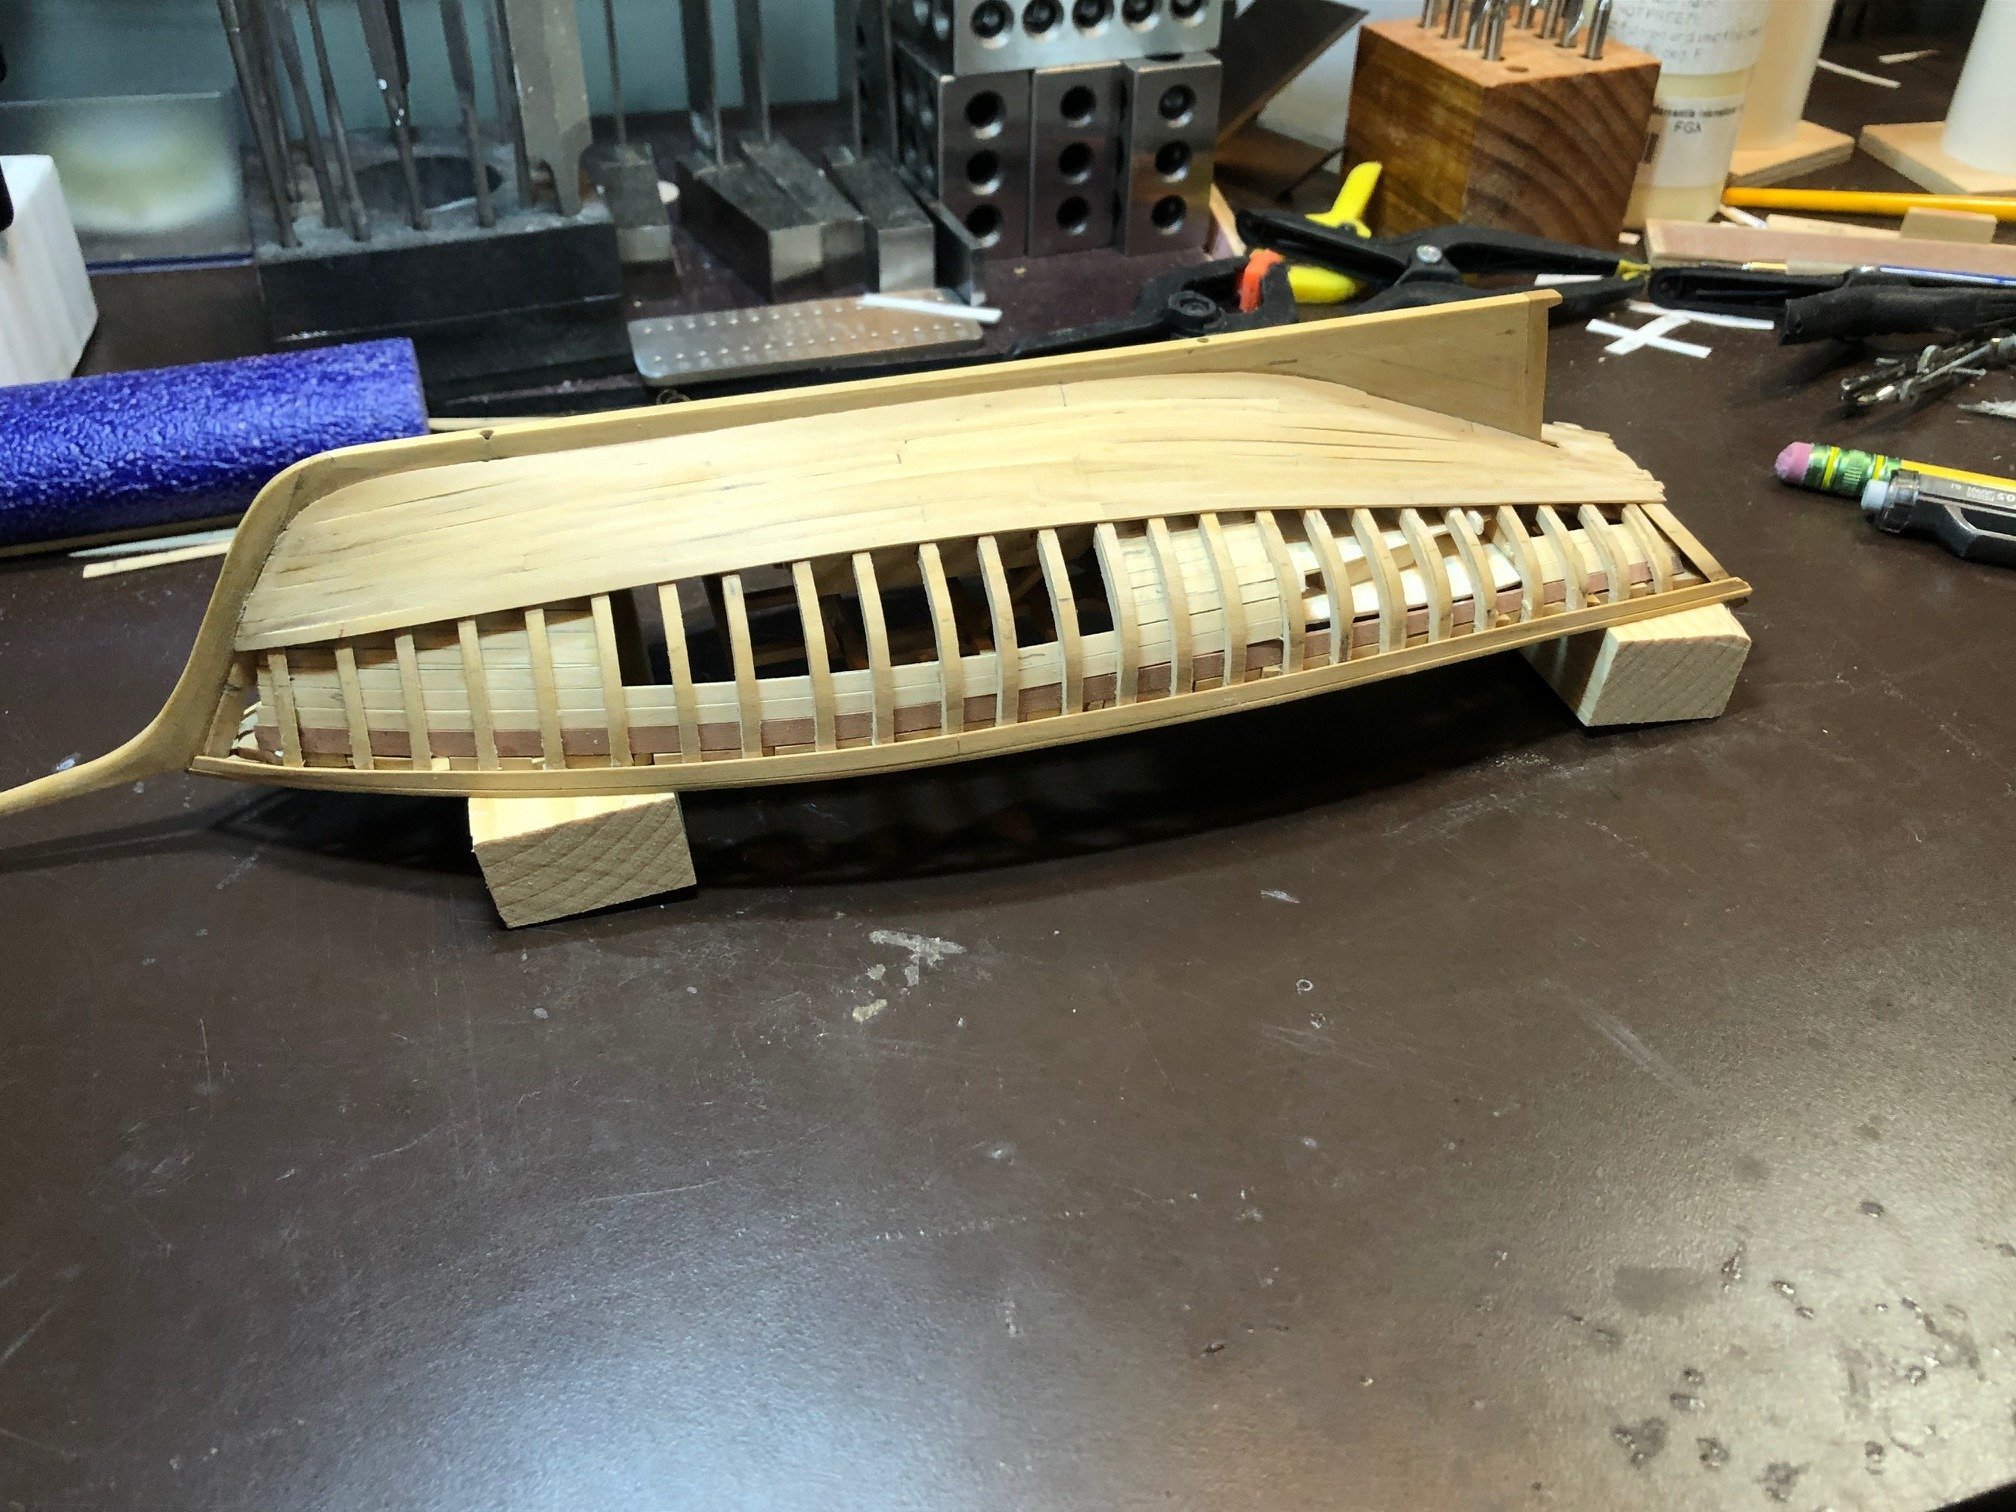
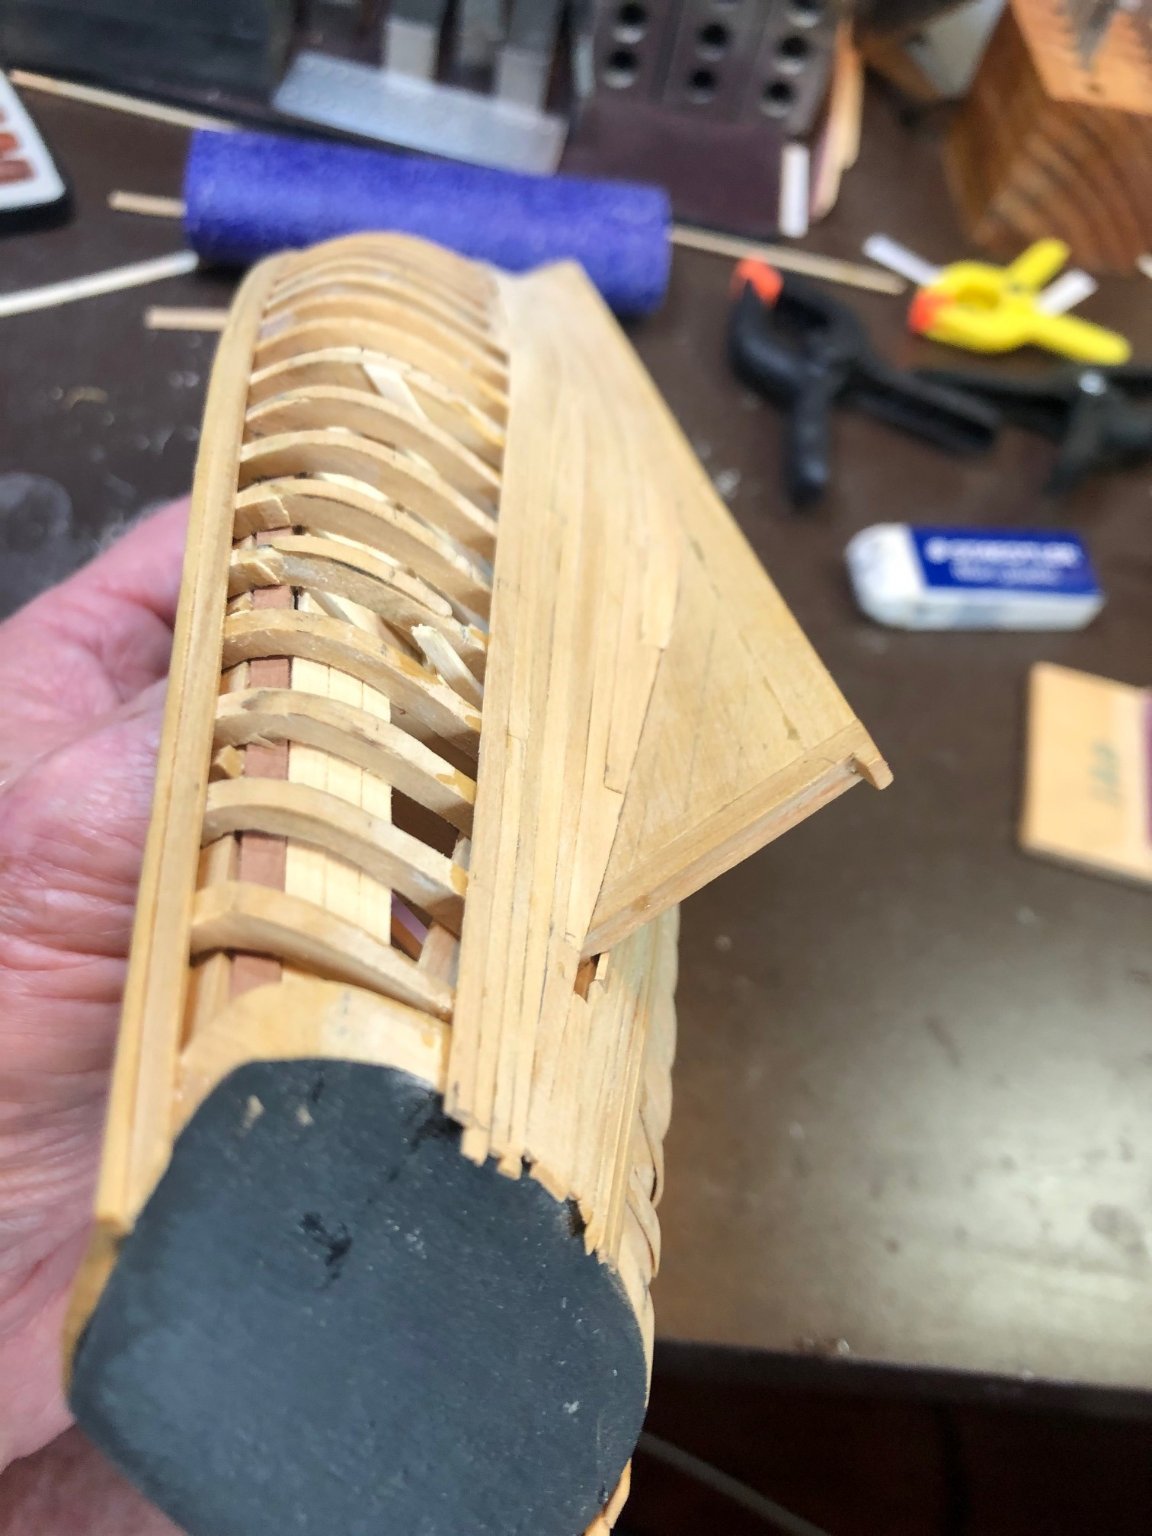
Edges of grating finished.
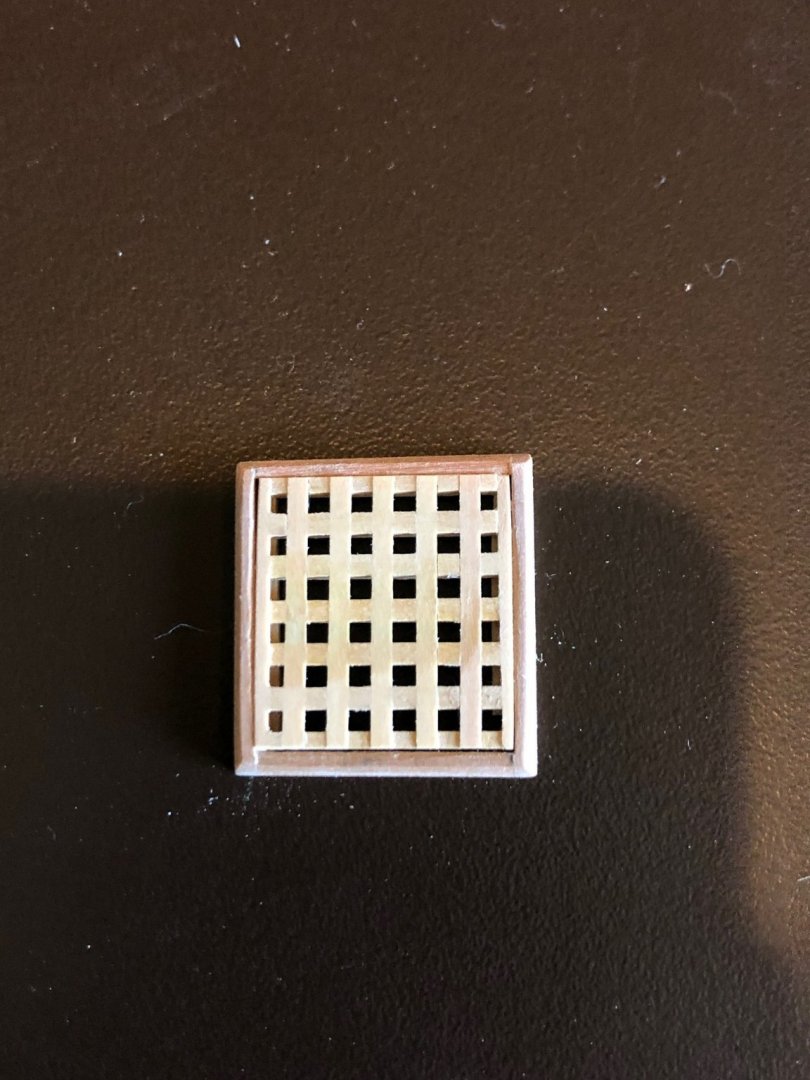
Both the coamings and the grate are to be oiled.
Maury
- GrandpaPhil, Tony Hunt, niwotwill and 2 others
-
5
-
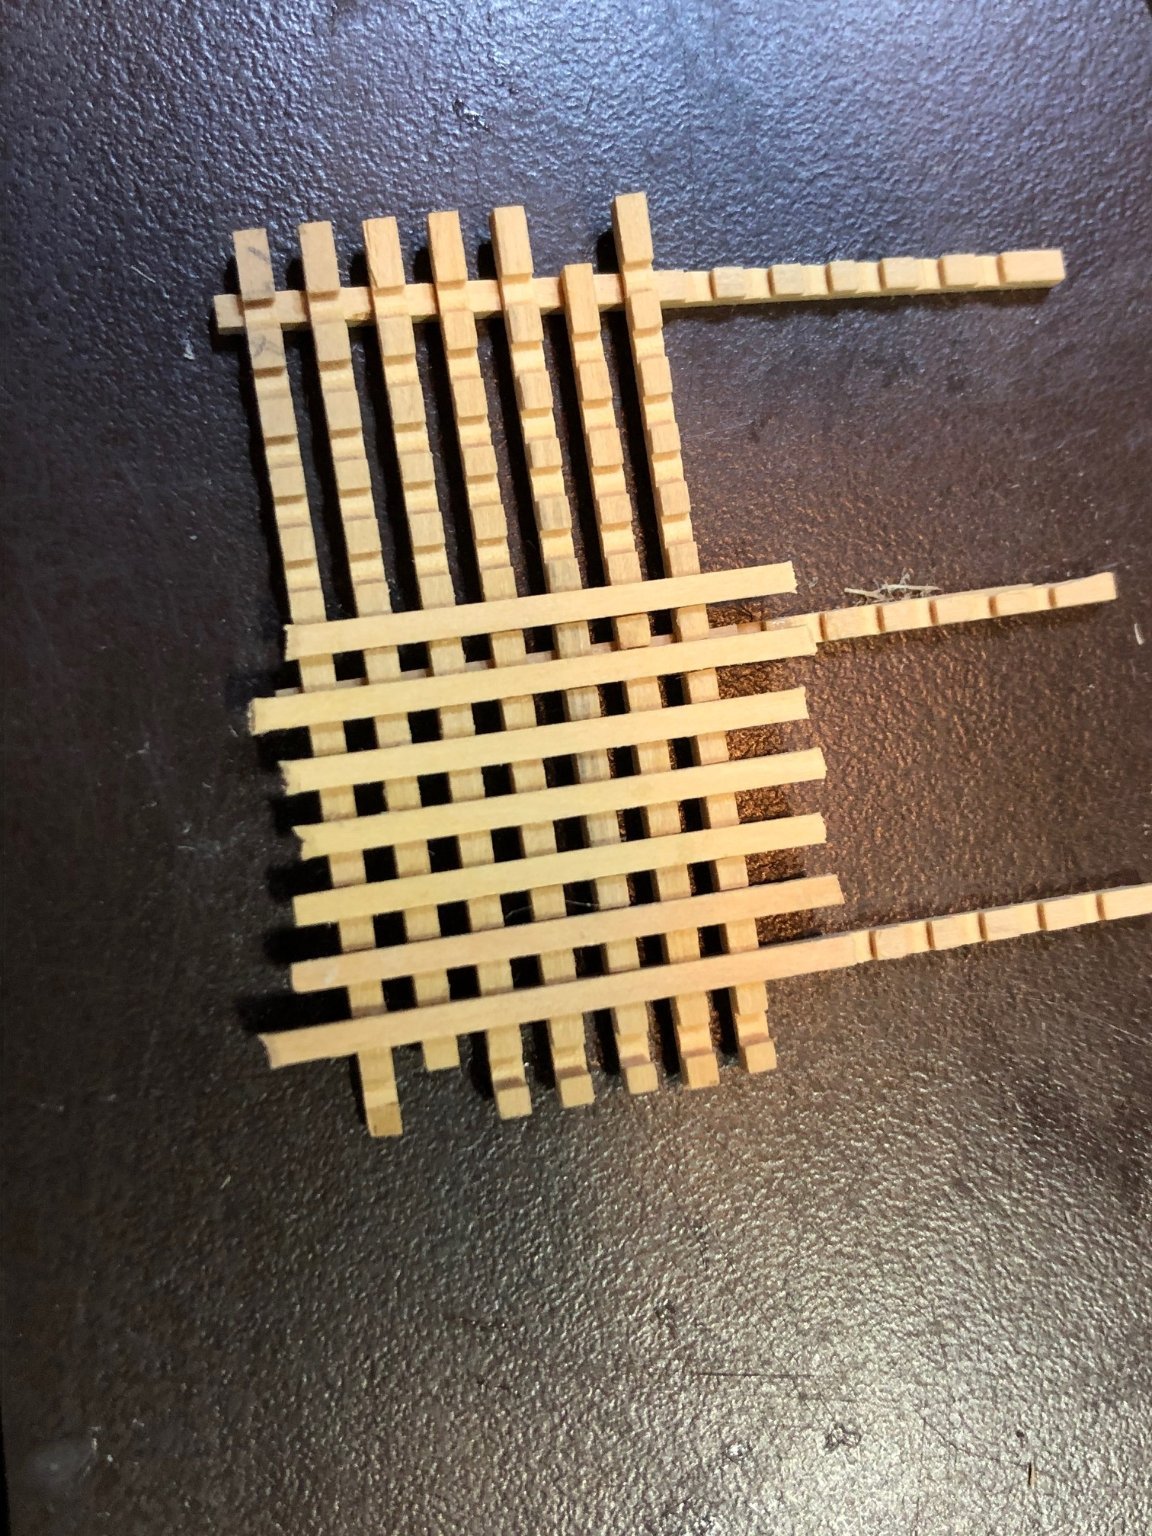
The only opening that has grating is the wet well. Everything was done on the Byrnes table saw. Started out with a 1/16" piece about 1.75" sq. The blade thickness is .057" with is about 2 3/4" at scale. I cut a shim 2x the blade width. First cross-cut dado is near the edge and about 1/32" deep. I left it sitting on the blade and moved the fence out the thickness of the shim and tightened down the fence. Second cross-cut made and the re-set of the fence repeated about 12 times. I then ripped the dadoed piece into strips the width of the blade.
Battens were cut the width of the dados and sanded to about .04" thick which leaves them about .02" proud. To set the spacing I put 7 dadoed strips onto two inverted strips that held them at the correct spacing. Then the battens were glued in the slots and clamped while the glue set.
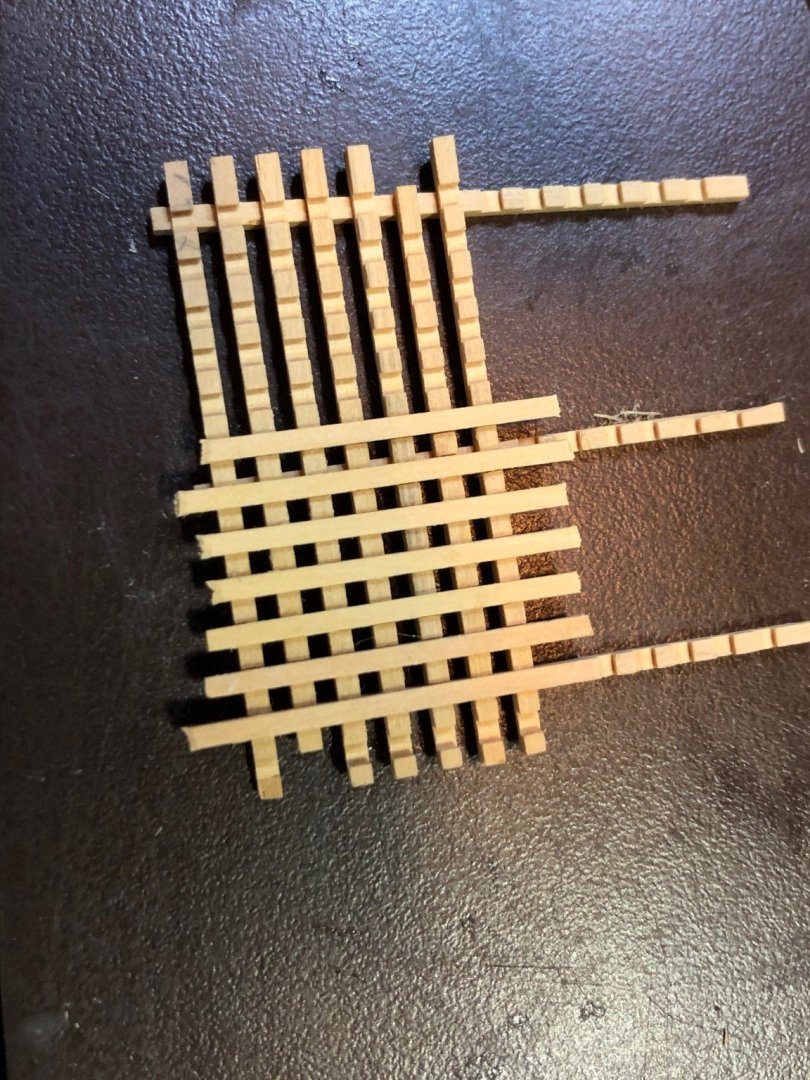
The battens will be sanded flush with the tops of the dadoed pieces and the edges finished. The explanation is a bit simpler than the execution. I chose a saw blade after a bunch of calculations of spacing and working with little pieces while holding everything square can be challenging.
Maury
- druxey, mtaylor, GrandpaPhil and 3 others
-
6
-
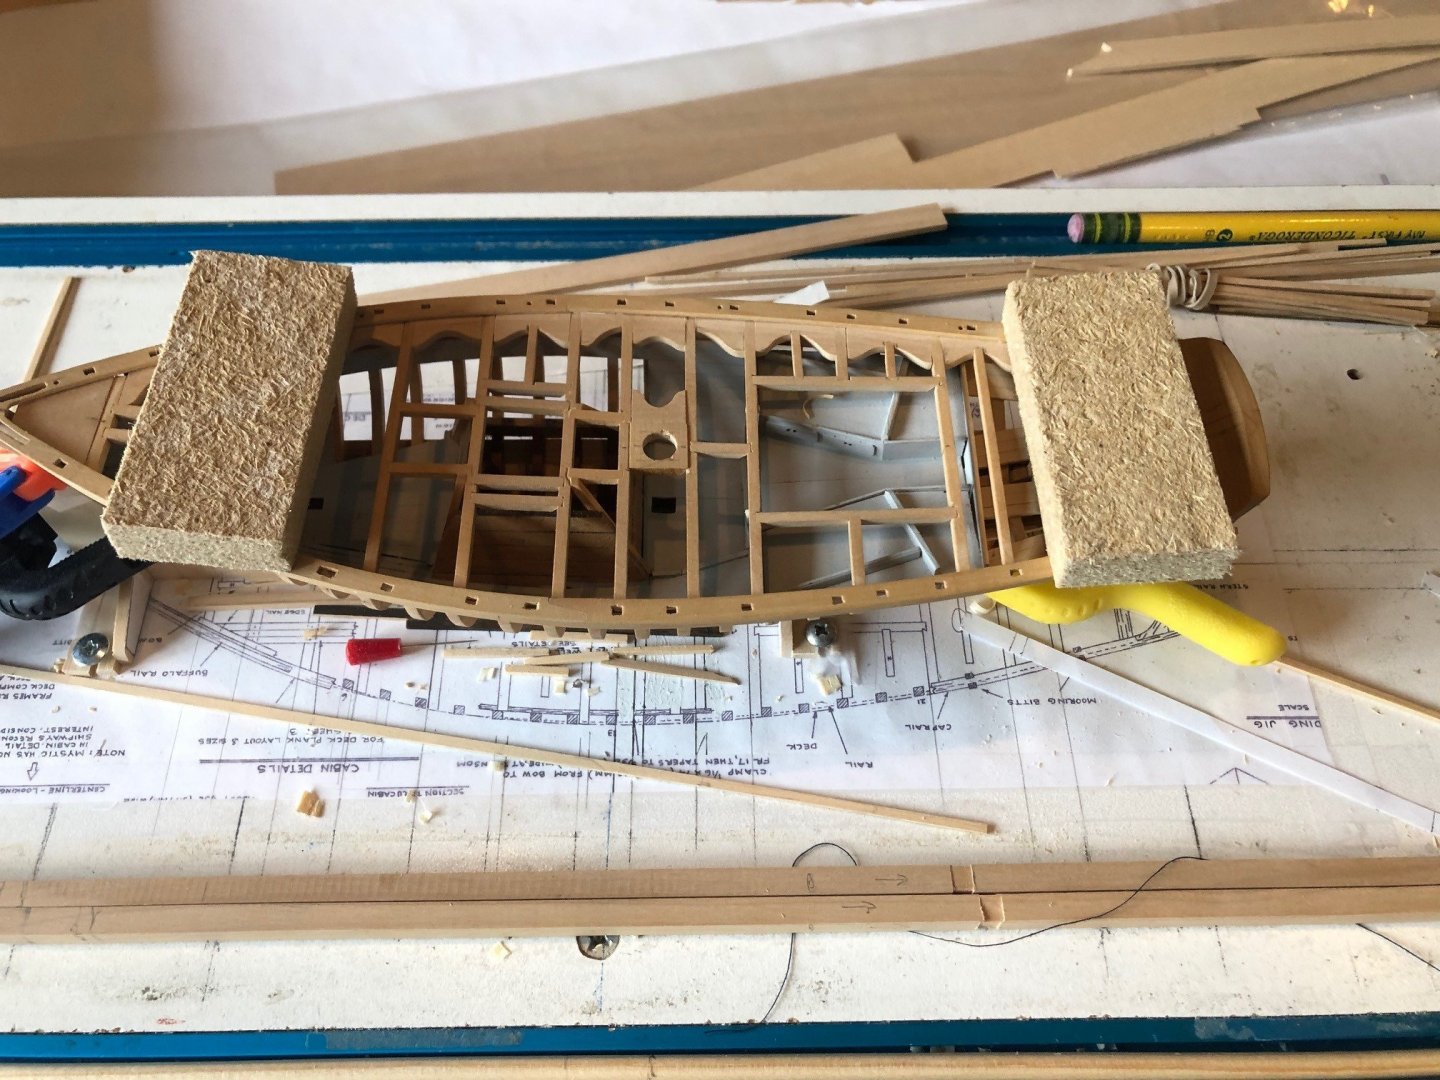
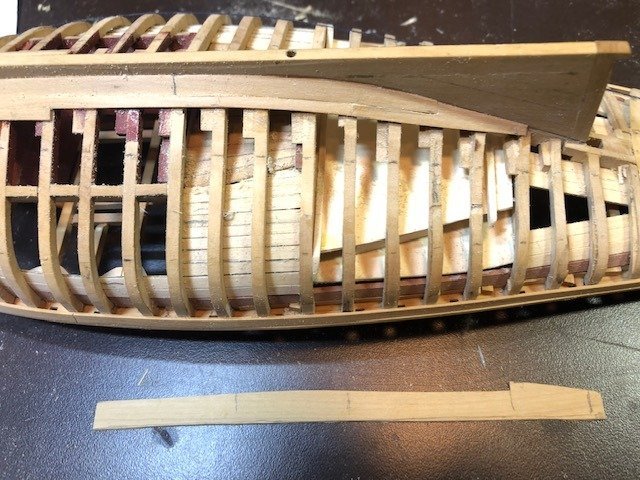
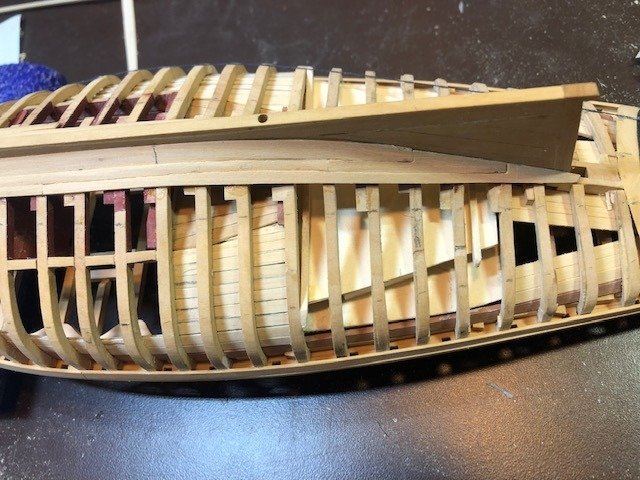
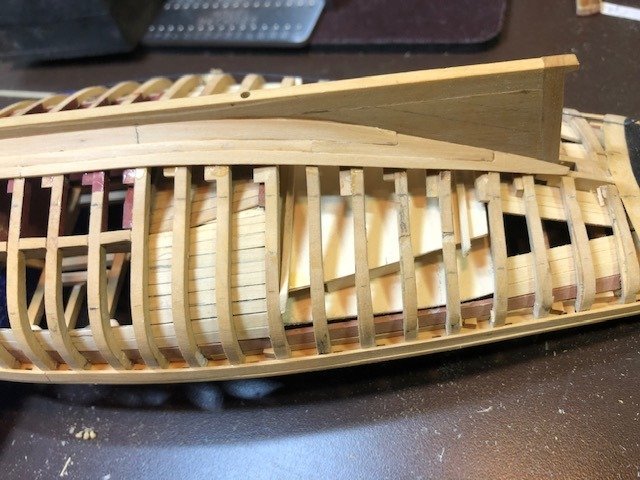
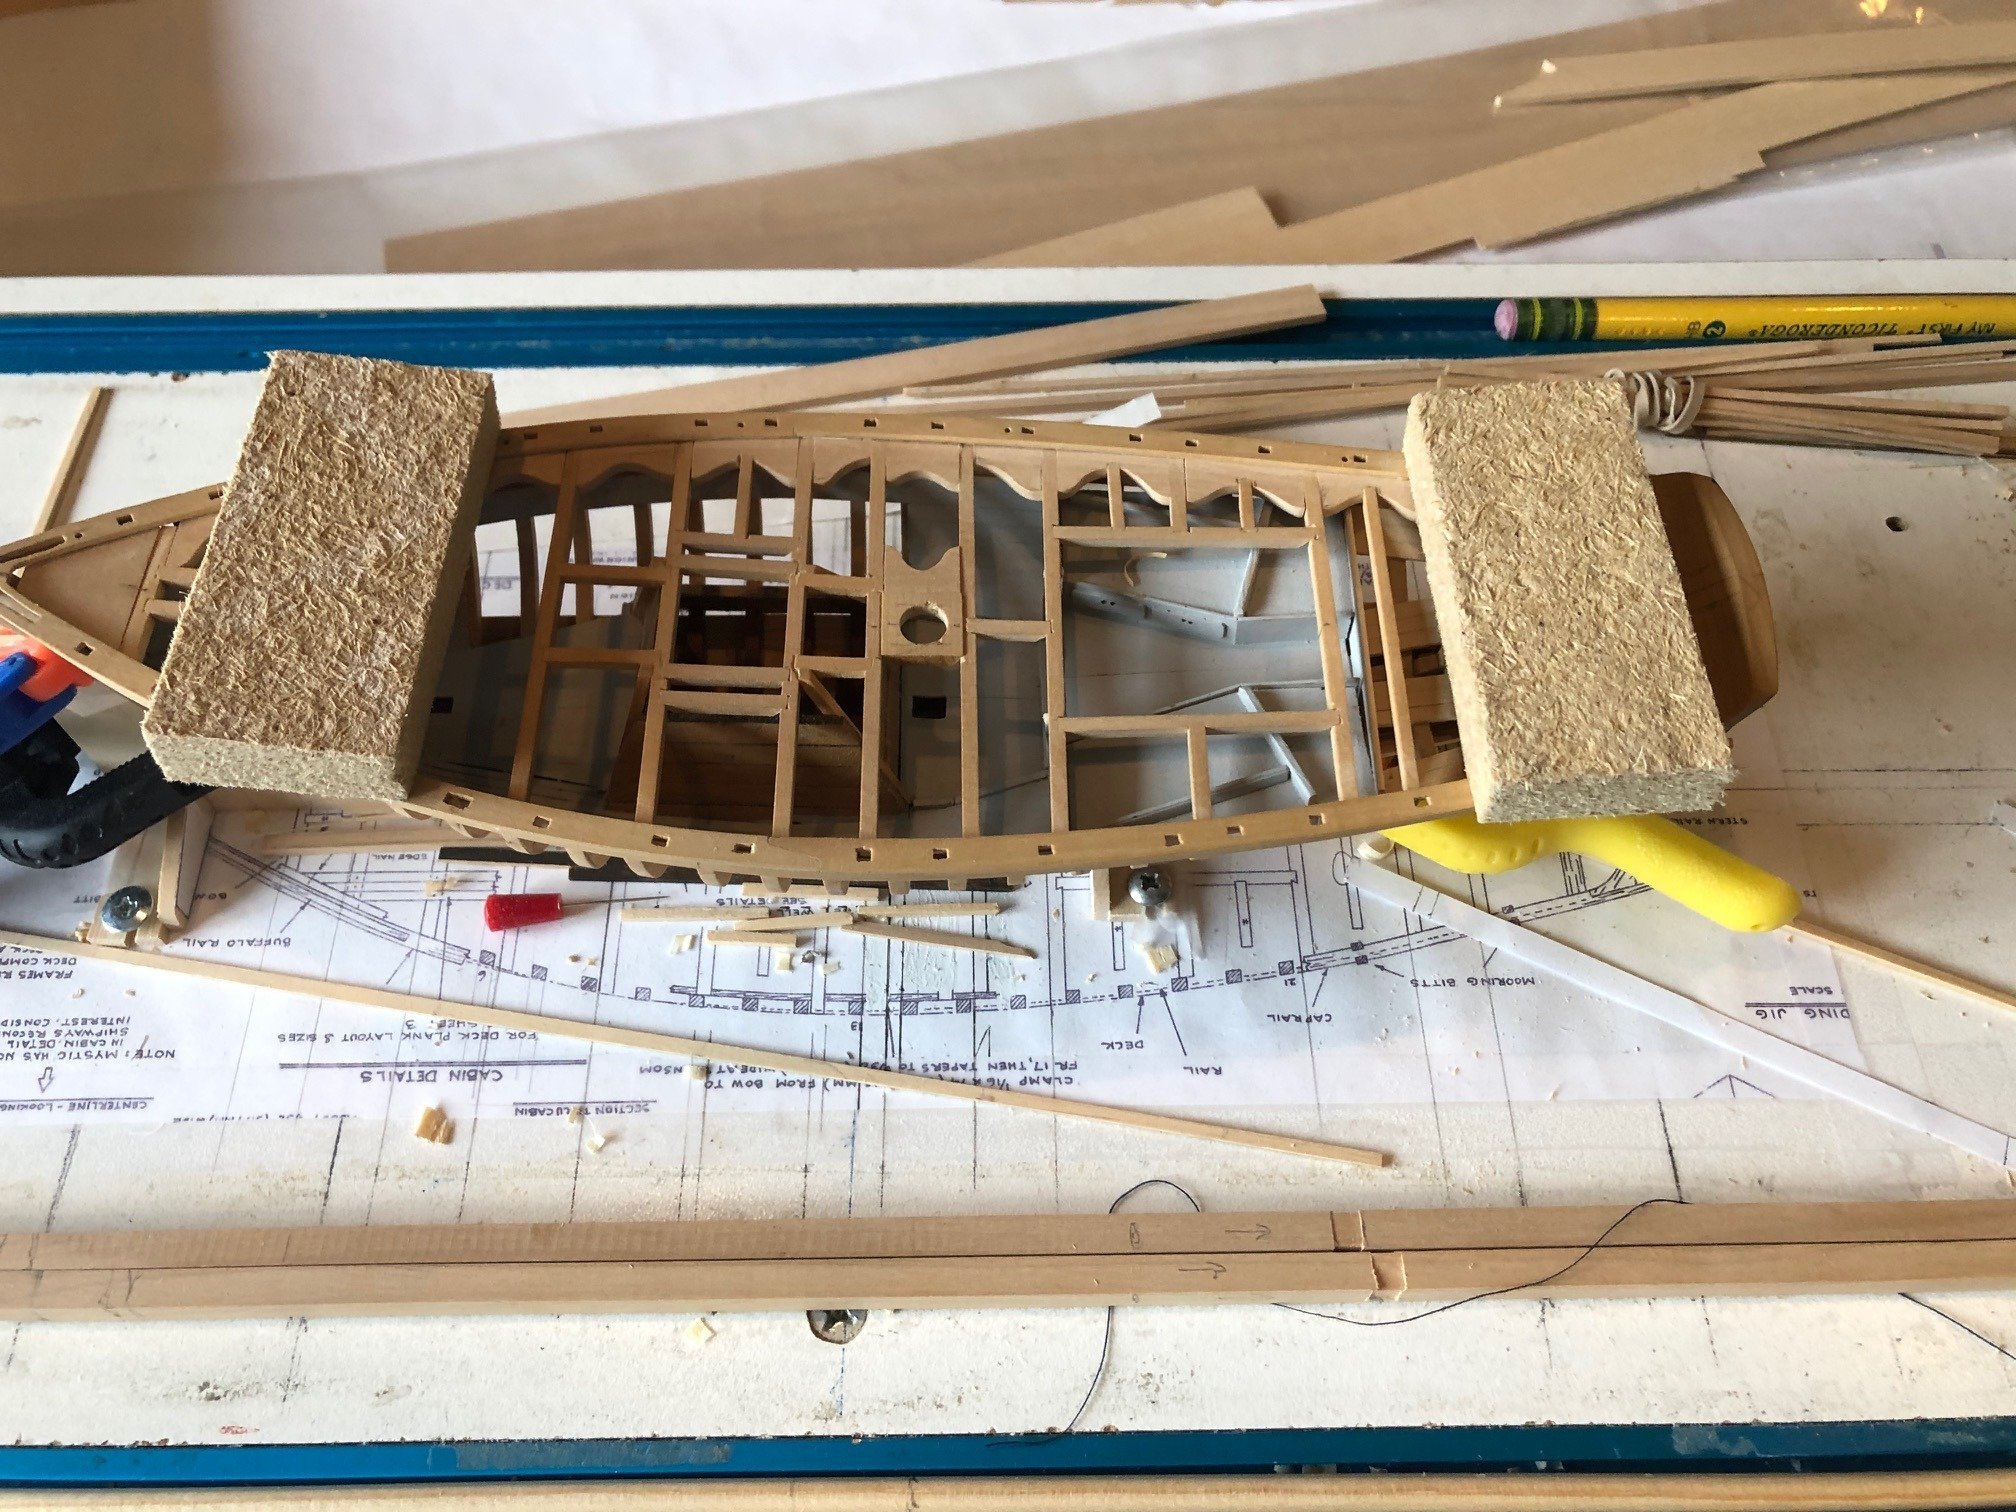
Before deck planking goes in, I need to do the coamings for the cabin, the wet well and the hatch. I cut blocks from scrap that fit the openings and used them a a form for holding the coamings pieces. They are 5" tall, 3" wide and the joints are lapped.
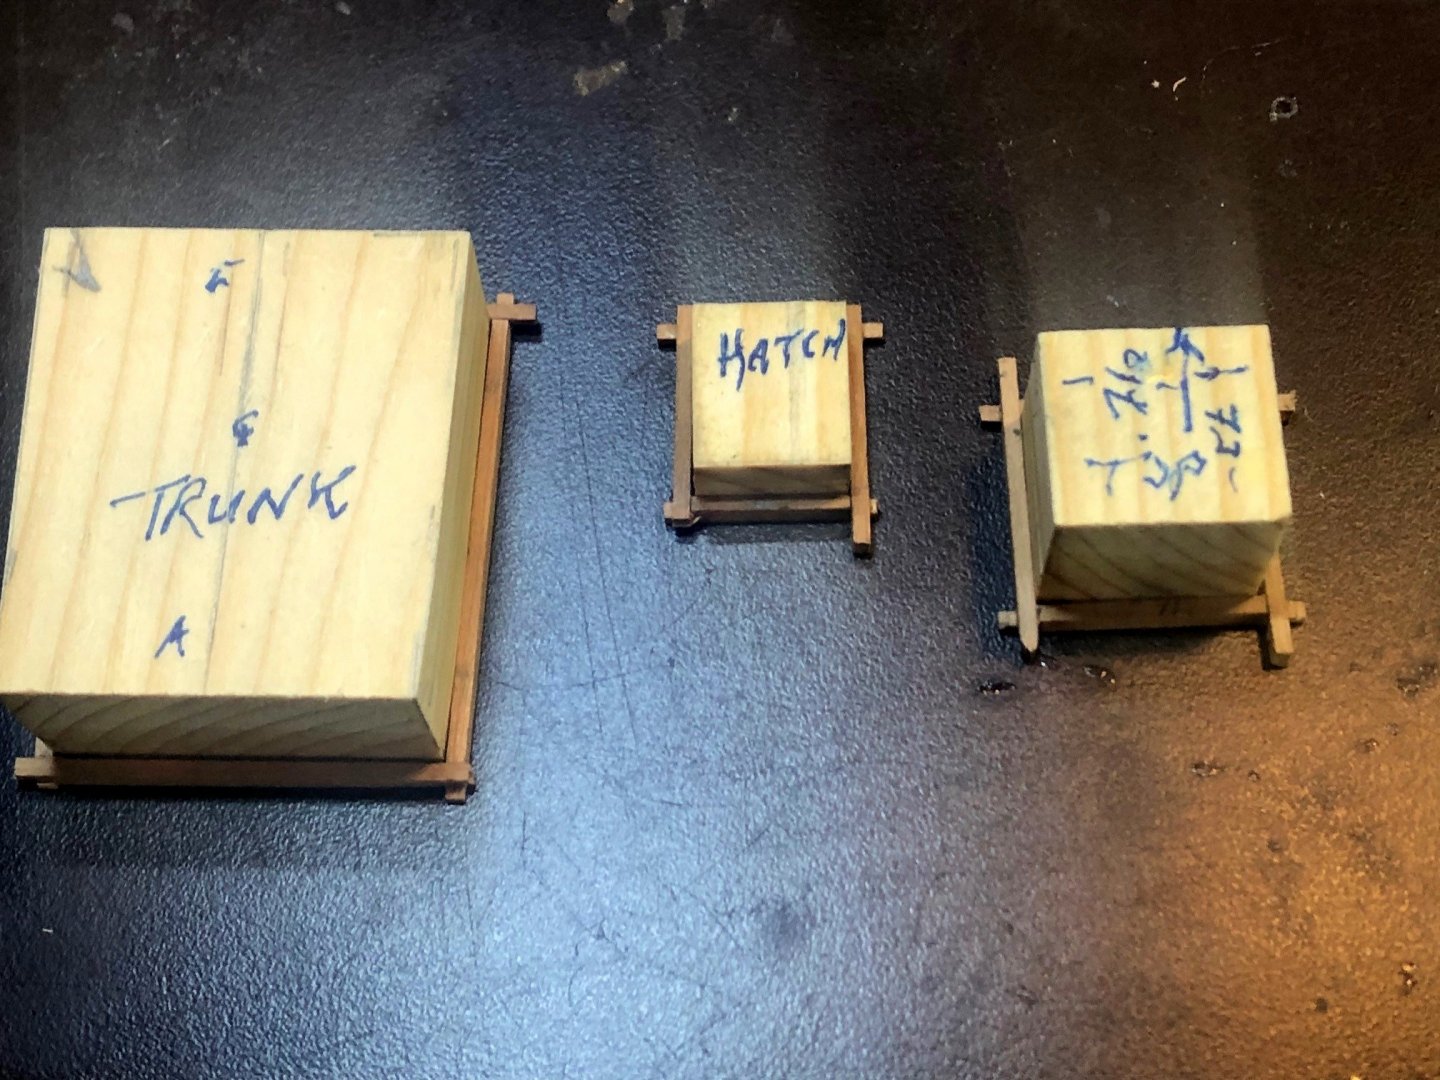
Once the glue has set, I used the same forms to hold the coamings while I sanded off the stub ends.

Maury
-
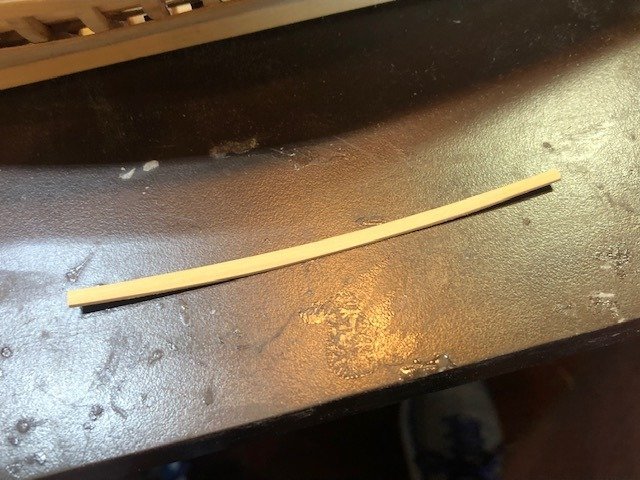
Planking is nearing completion. Regardless of the best laid plans, some stealers were necessary amidships. Below is the plank that is part that goes from 2 planks to three. This piece goes from about .085" to .125" at the joint where 2 becomes 3.
With its mated pair, the third plank will go between the two shown.
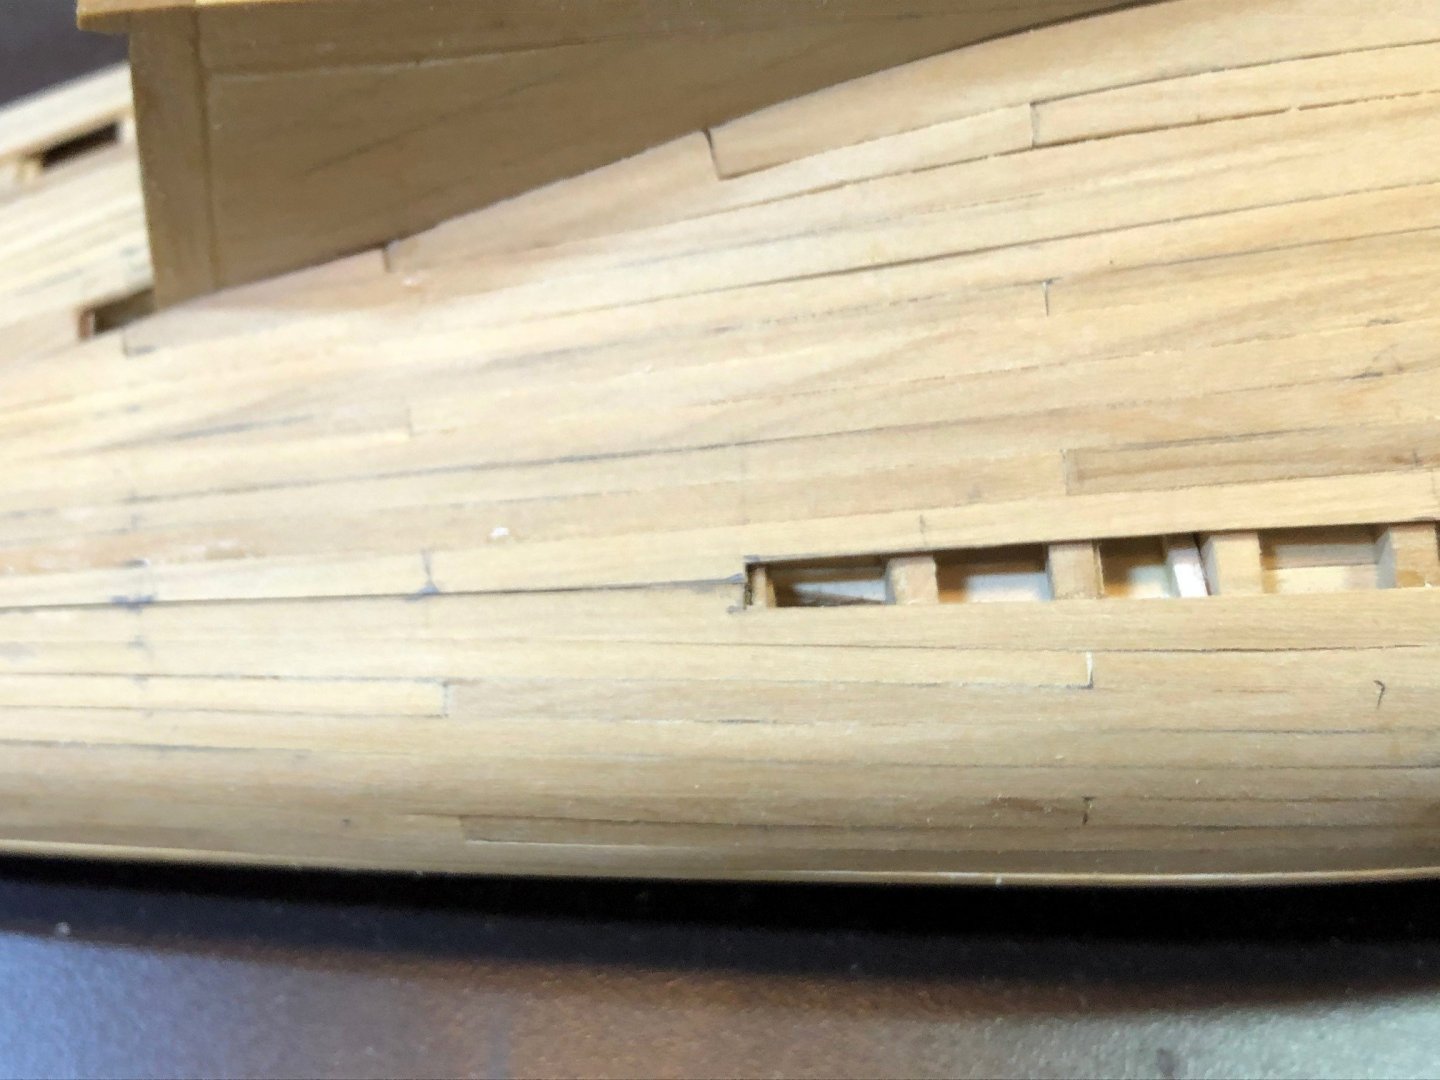
Below is the port side (inverted) fully planked with the stealer in place.
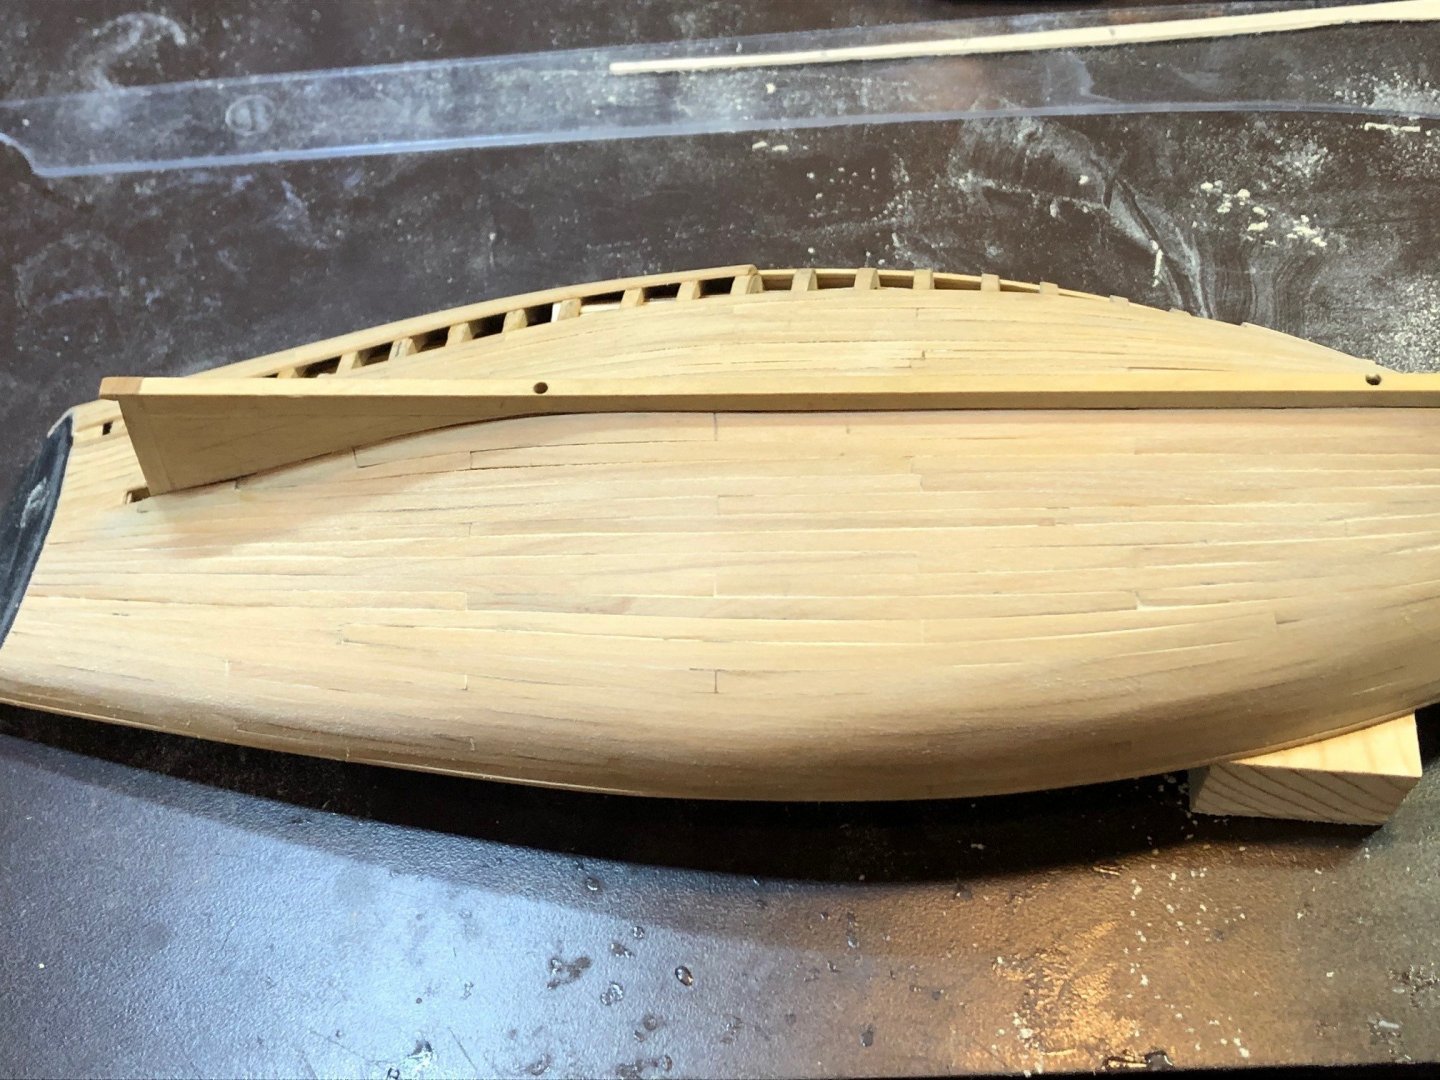
The final strakes will be done on the starboard side and sanding will commence. Can't take too much off since I started with 1/32" stock.
Maury
- druxey, thibaultron, jlefever and 3 others
-
6
-
Planking continues...I am finishing the A band (upper) before completing the B band (middle). This way, if there are any flaws in the final plank spiling they will not be visible when displayed.
Maury
- Tony Hunt, yvesvidal, thibaultron and 4 others
-
7
-
-
-
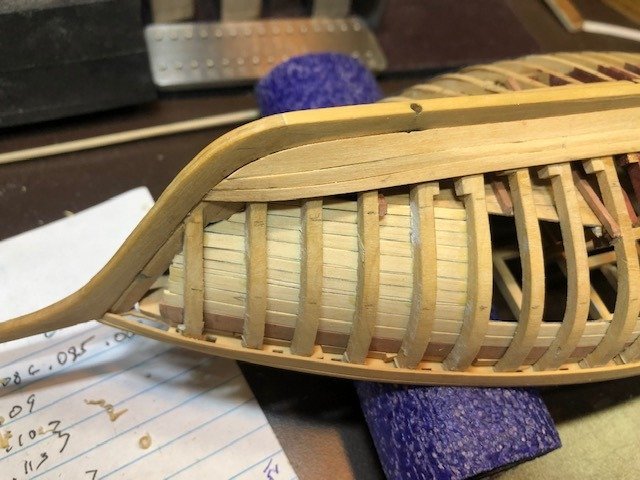
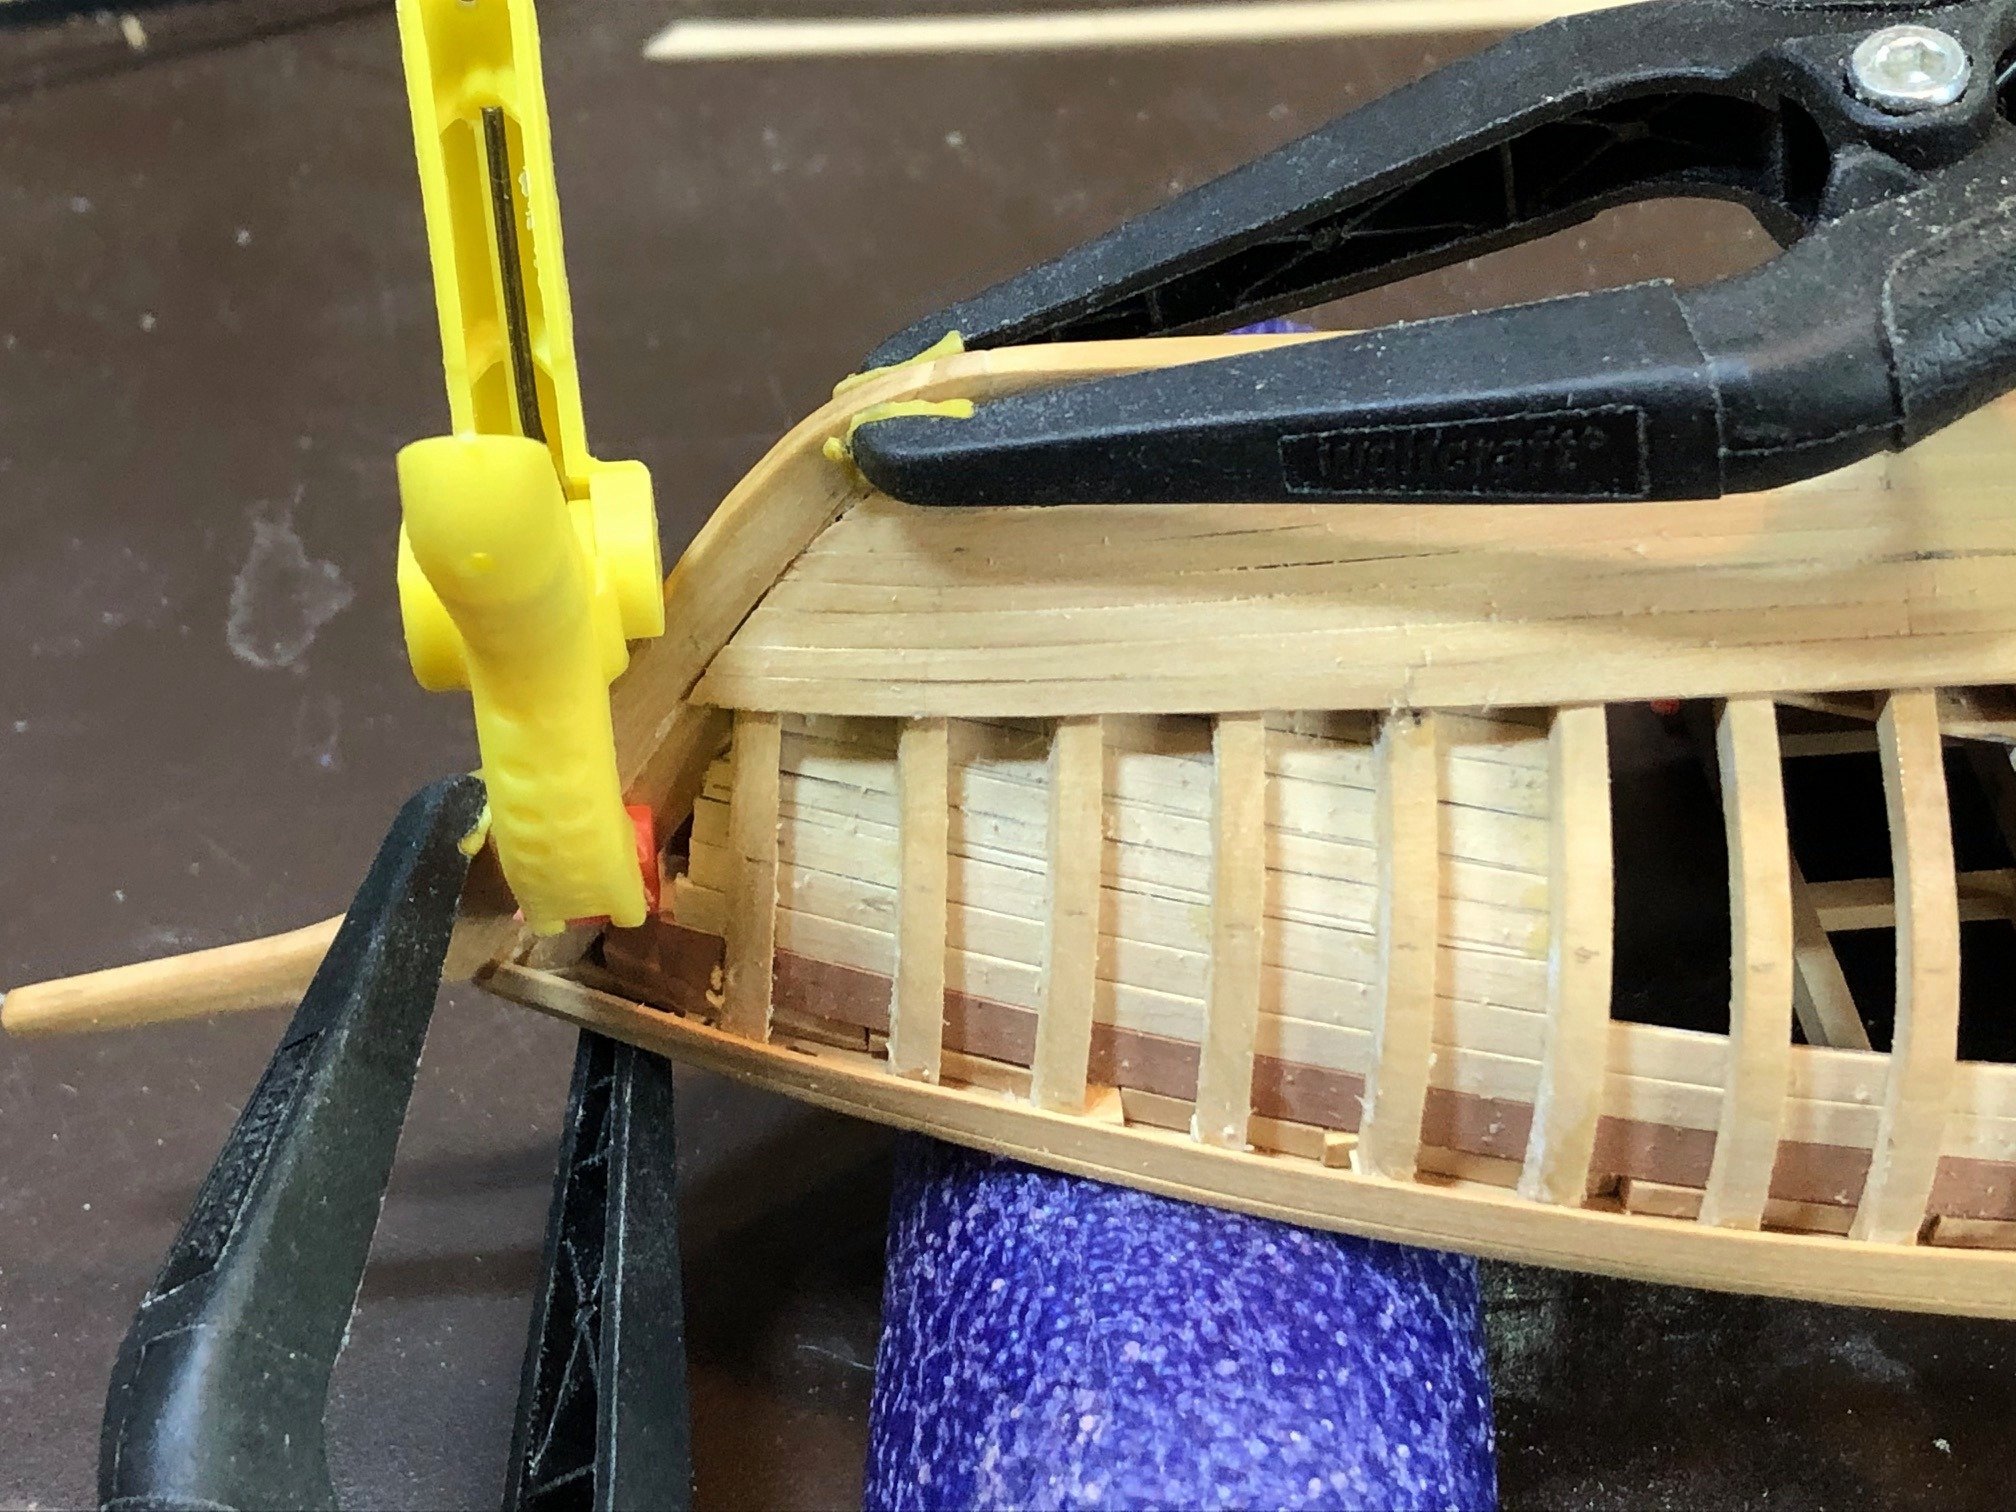
Druxey, Thanks for the tip re. the protective block(s). I glued a couple of MDF blocks to the covering board to protect the stem head.
Maury
- mtaylor, thibaultron, yvesvidal and 2 others
-
5
-
Checking on the fairness of the planking runs...

Fuzzy pics. but the lines are fair from many angles. After two of seven strakes in the middle band, I've re-measured for width and have made adjustments (a few thousands of an inch) here and there. The stem repair is holding for now.
Maury
-
It's been over 24 hours since the glue repair and I've put in another strake at the bow. So far, so good. I just have to remember to never put the boat upside down with the stem touching the table. That's always going to be a potential for trouble.
Maury
- thibaultron, gjdale, niwotwill and 1 other
-
4
-
-
The "C" band of planking is complete.
The line of the top strake appears fair from all viewpoints.
Maury
- Tony Hunt, thibaultron, druxey and 3 others
-
6
-
So clean!
Maury
- Keith Black, billocrates and mtaylor
-
3
-
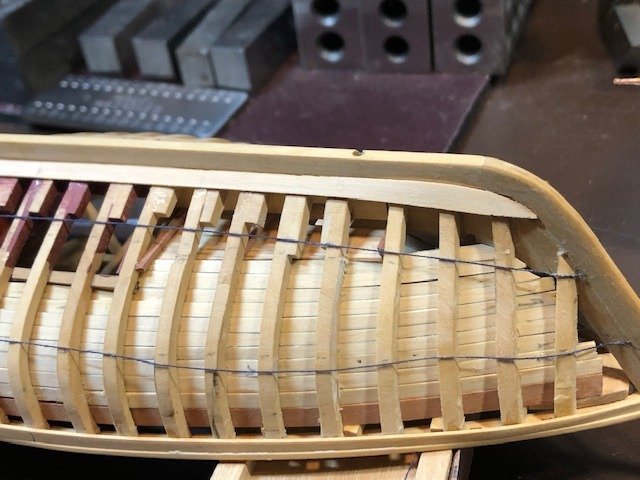
Planking continues...Each plank is spiled. A piece of sacrificial bass is laid along the prior plank and marked with a compass to determine the shape. The edge is cut and sanded so that it butts perfectly. That piece is used as a pattern to cut the box wood. Once the box wood fits properly, the frames are marked and the (tick strip) measured width is transferred to the wood. It is cut and sanded until everything lines up. Then heat-bent to shape and glued in.
Rough cut box wood is shown prior to final fitting.
Finished shape laid on frames.
Glued in place. The planks are tapered between 0.11" and .078". Even with all that prep, hairline gaps occasionally appear. What may appear as larger gaps are in fact shadows between planks that will disappear after sanding. Seventeen more strakes (on each side) to go.
Maury
-
-
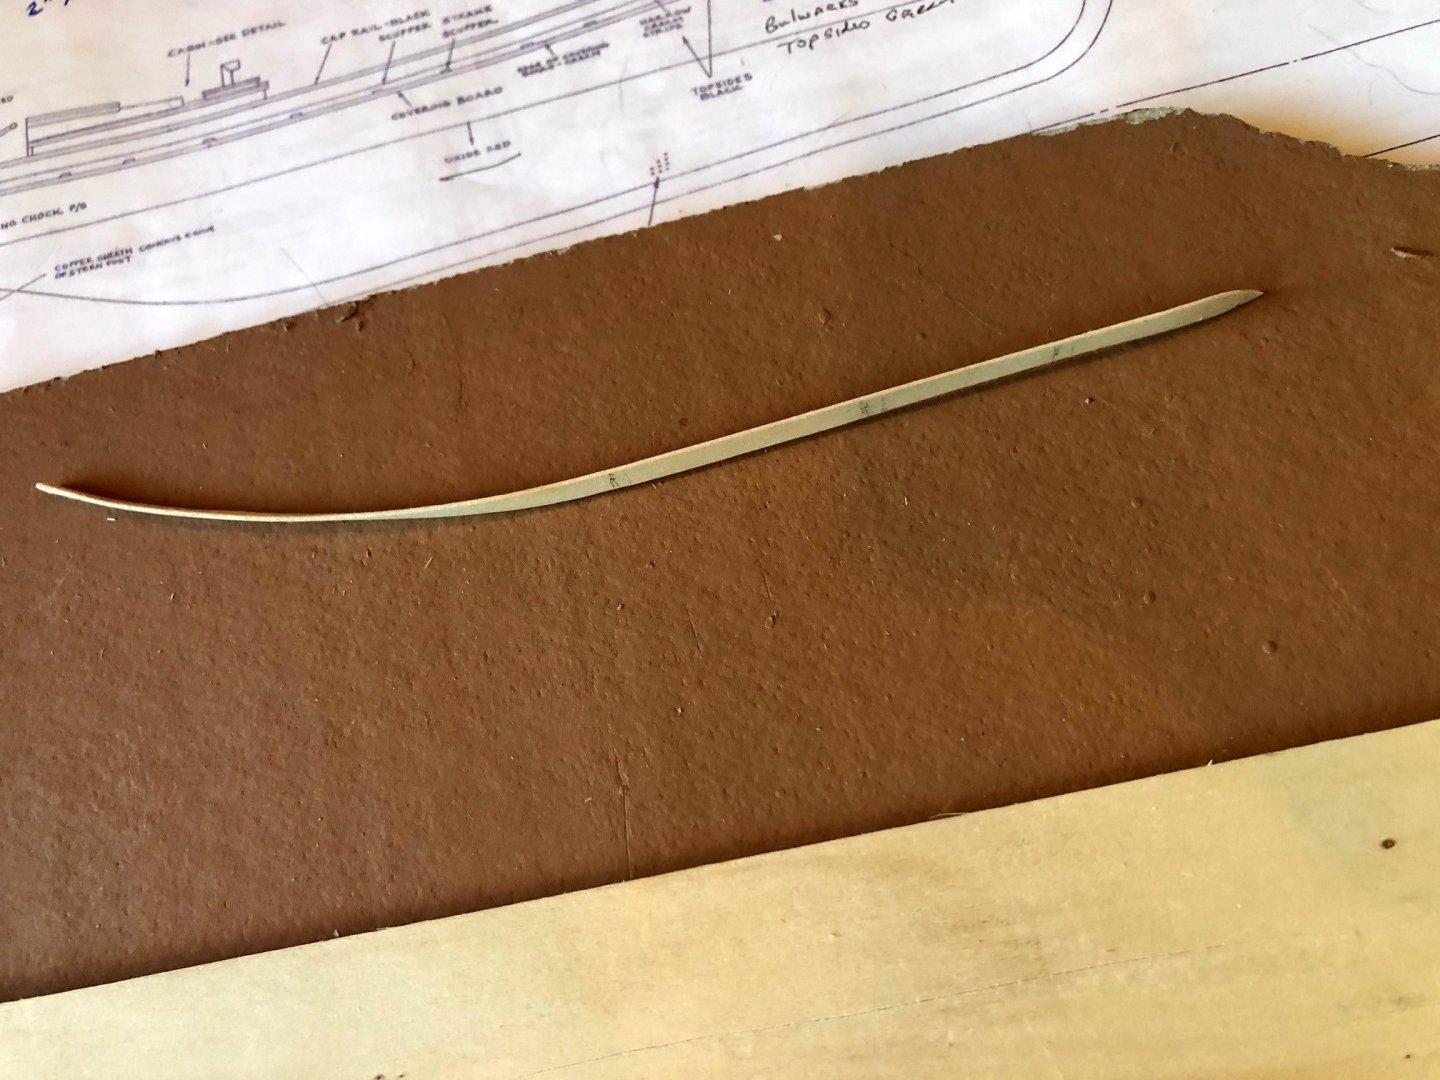
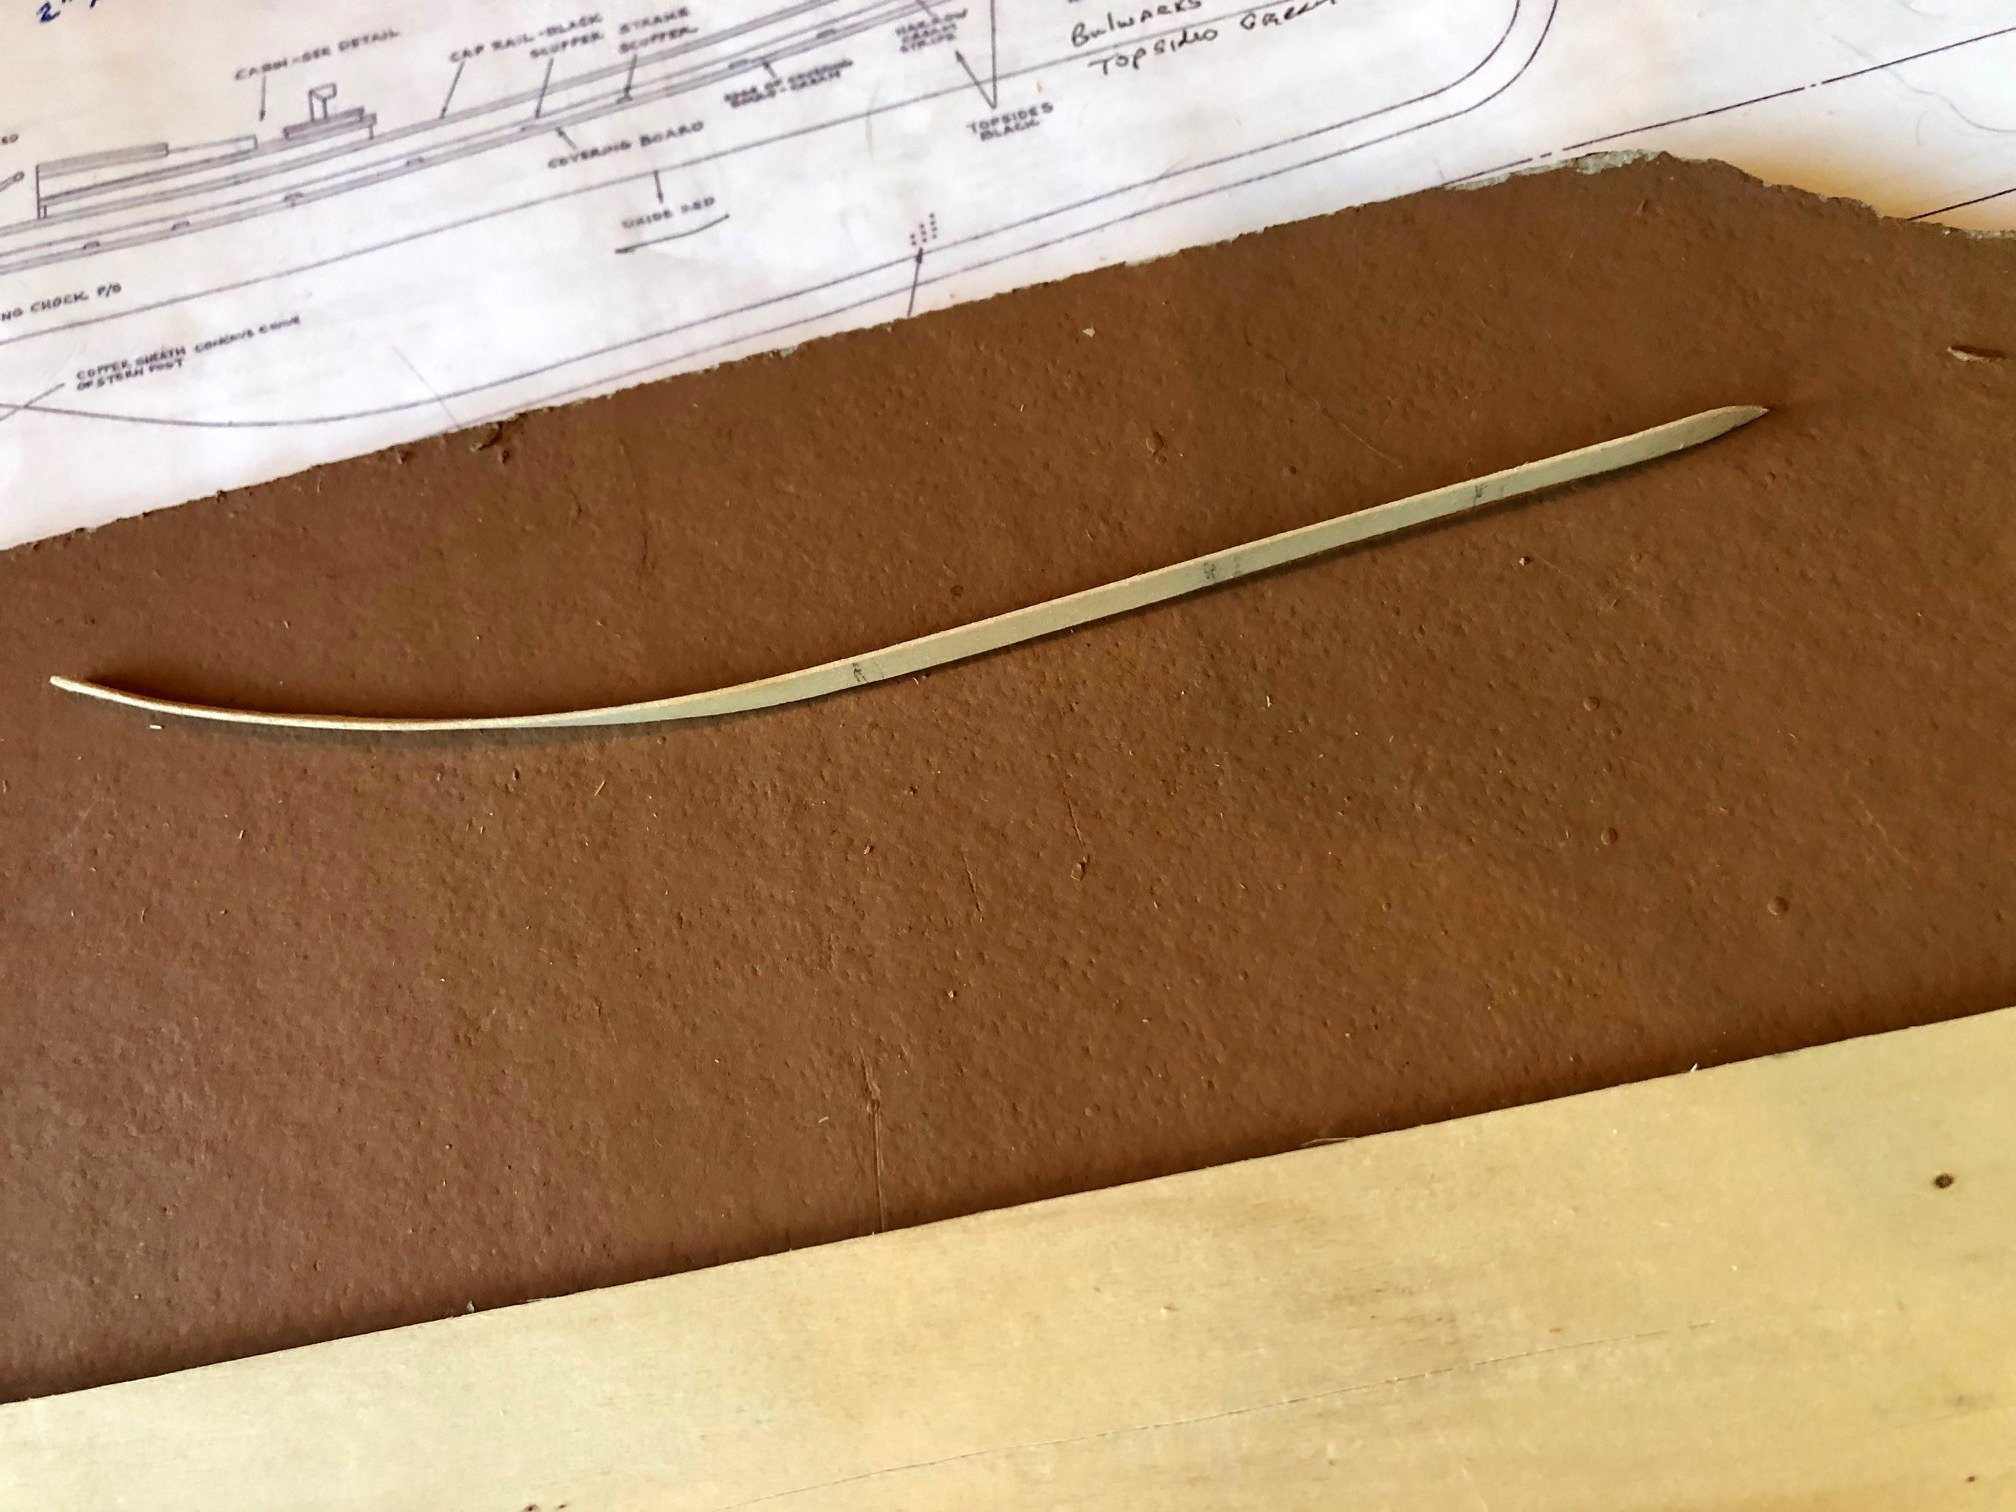
The garboard plank took some spiling to get it to lay properly and it now lines up with the planking plan. The good thing about the plan is that it puts the forward end of the plank at the correct place so you don't get plank creep up the stem. The plank is about 50% wider than an even spacing in the band.
The strings are no longer in place.
Maury
- GrandpaPhil, yvesvidal, thibaultron and 1 other
-
4
-
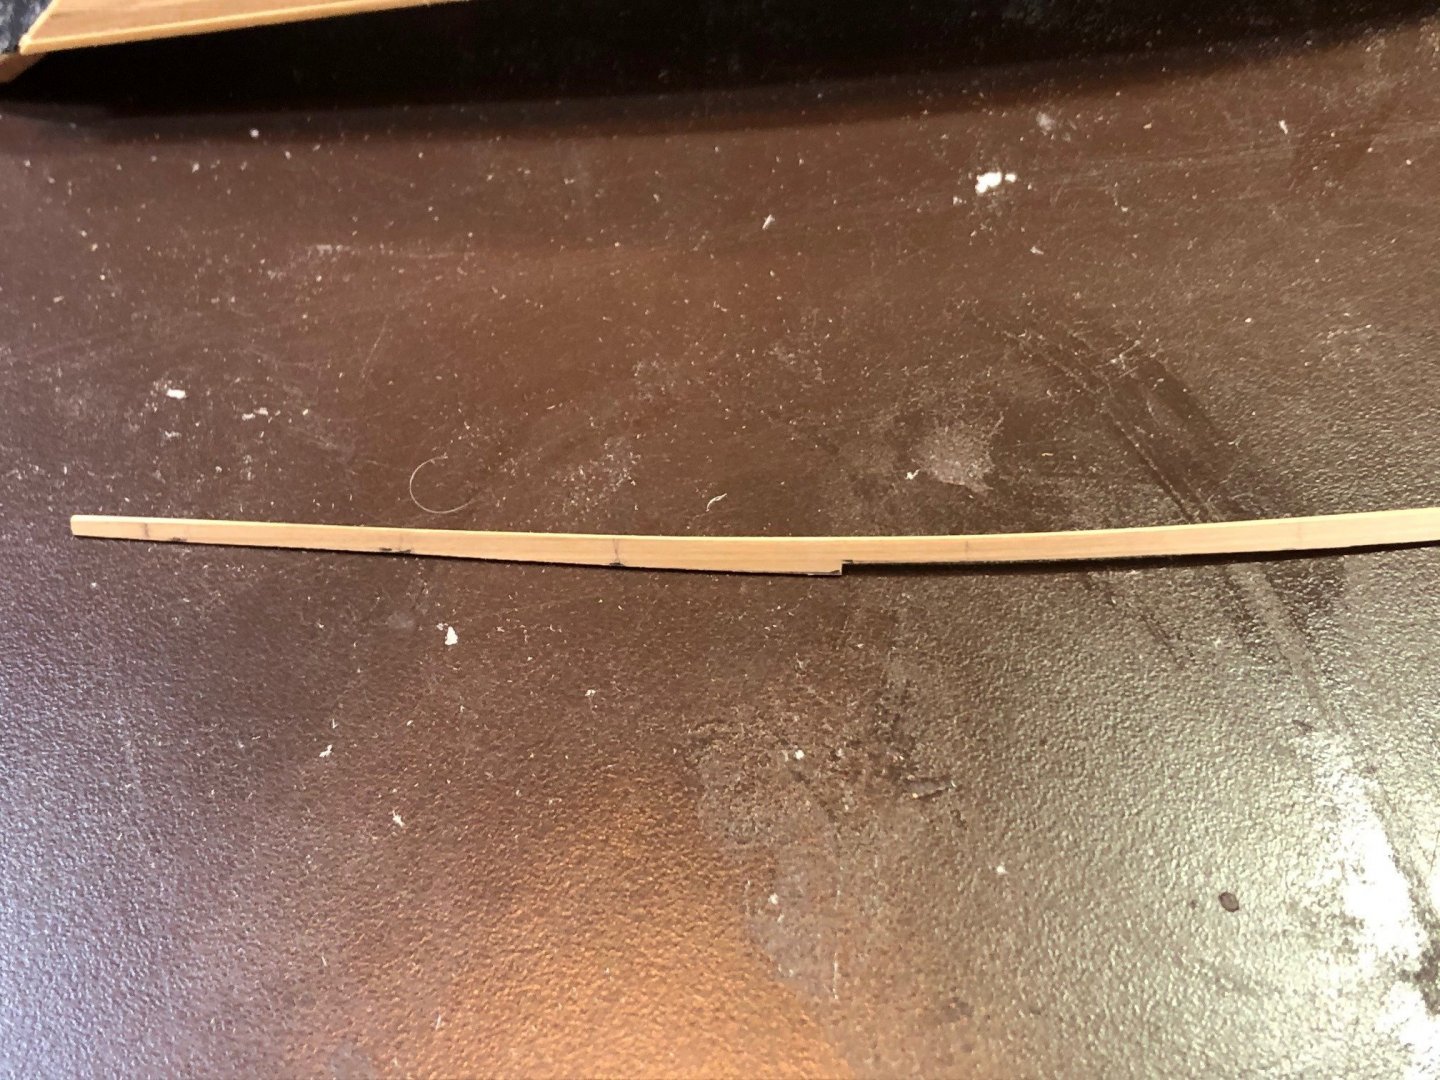
Pattern for garboard plank. I have much better luck using bass wood for patterns rather than card stock (I can fine tune by sanding). 2nd attempt came out well enough to transfer to Box wood. Some tapering first. No edge bending on this one, but plenty of twisting.

Maury
- niwotwill, GrandpaPhil, thibaultron and 2 others
-
5
-
I'm waiting on delivery of some 1/32 bass wood I can use for patterns for the garboard. In the mean time, I'm working on the spar dimensions. I have dozens of photographs of the her as a schooner between 1930 and 1940. None before that. With a number of shots of her side-on I can get the height of the main and fore masts and compare them with the over-all length (which is a known number). The Lankford plans have the sloop-rigged mast at about 48.5 feet, or 105% of the LOA. The photos as a schooner put the main mast at 38.25' or about 83% of the LOA, the Fore mast at 35.25', the top mast at 18.25' and the bowsprit shortened to 14.15' outboard, down from 17.5'. Some later photos show her with a jib boom, which I will not install.
Maury
- mtaylor, druxey and thibaultron
-
3


Emma C Berry by Maury S - 1:48 scale - POF - rigged as schooner
in - Build logs for subjects built 1851 - 1900
Posted
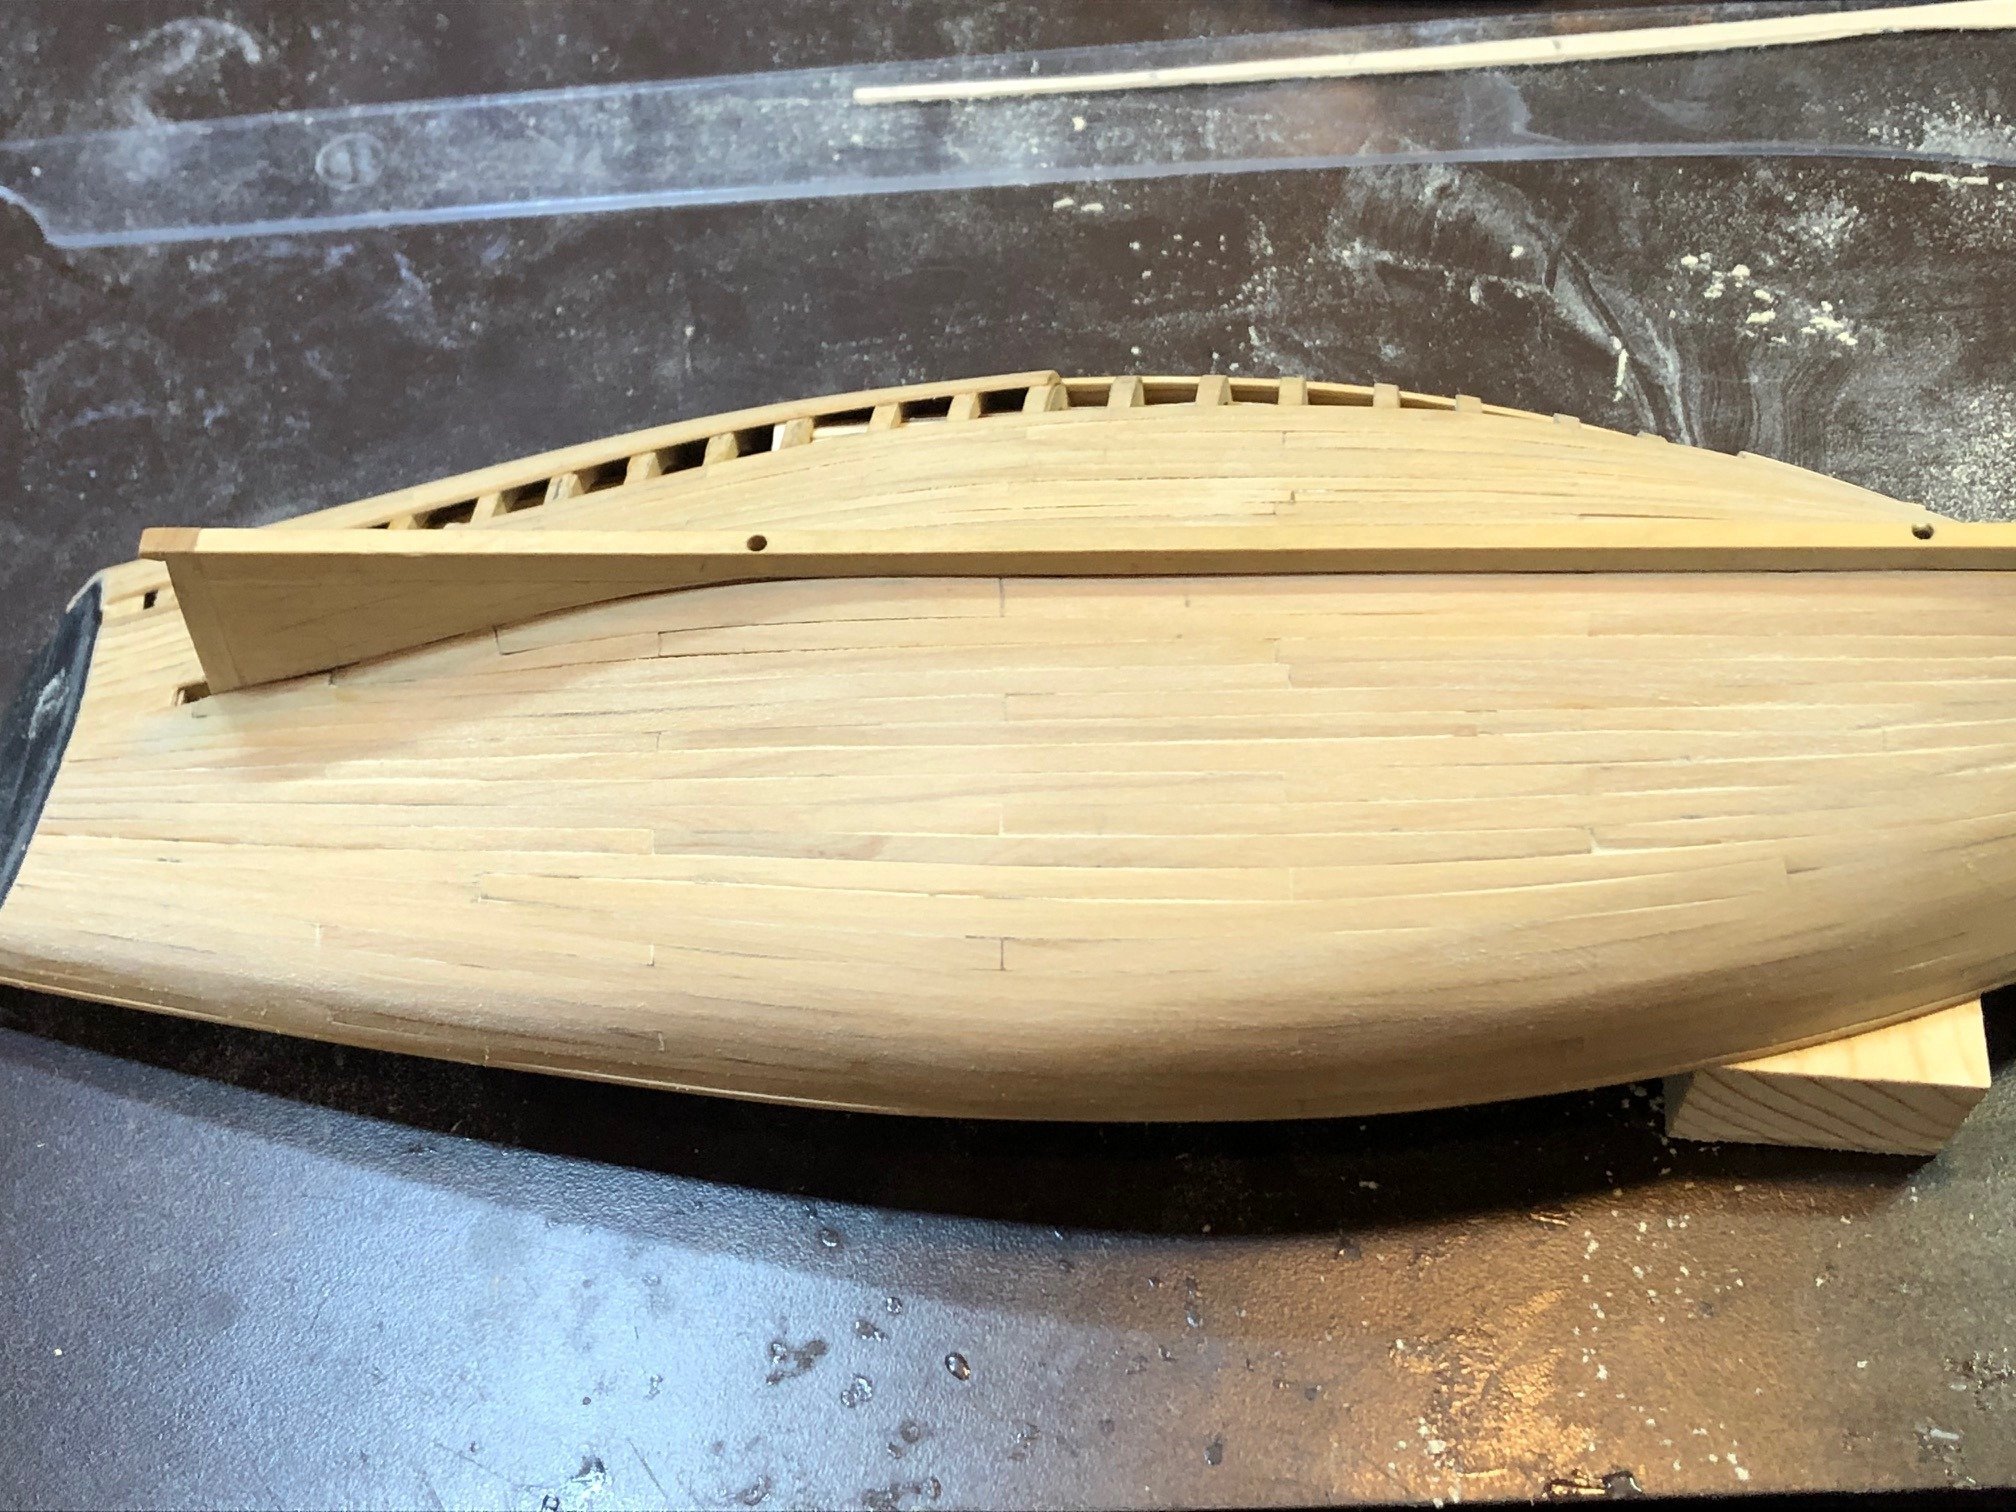
The deck planking is done. I started with the king plank(s) and laid each plank, expanding outboard. That assured that the planks were parallel stem to stern. The planking between the hatch and trunk and trunk and transom were then filled in.
A portion of the starboard side is left un-planked. The color pretty much matches the boat at Mystic. Next on to the bulwark stanchions.
Maury