Gahm
-
Posts
1,217 -
Joined
-
Last visited
Content Type
Profiles
Forums
Gallery
Events
Everything posted by Gahm
-

Cutter Cheerful 1806 by rafine - FINISHED
Gahm replied to rafine's topic in - Build logs for subjects built 1801 - 1850
Your rigging looks great! As you say after Essex the ratlines must have been just a little "warm up" exercise for you Thomas- 525 replies
-
- 3
-

-
- cheerful
- Syren Ship Model Company
- (and 1 more)
-
Your Syren looks beautiful! And your progress is amazing!! Thomas
- 659 replies
-
- 4
-
-
- syren
- model shipways
- (and 1 more)
-
Cutter Cheerful 1806 by rafine - FINISHED
Gahm replied to rafine's topic in - Build logs for subjects built 1801 - 1850
Beautiful rigging, Bob! Very well done! Thomas- 525 replies
-
- 3
-
-
- cheerful
- Syren Ship Model Company
- (and 1 more)
-
Hope you are feeling better soon! I love your little "helper cat" Thomas
- 1,306 replies
-
- 7
-
-
- syren
- model shipways
- (and 1 more)
-
That looks very good, Sal! I like your way of making the mouse. Thomas
- 659 replies
-
- 4
-
-
- syren
- model shipways
- (and 1 more)
-
You have done a very nice job on those head rails! They are not the easiest part of the Syren build Where do you get your boxwood from? Thomas
-
Your head rail looks very good! Excellent job! Thomas
- 1,306 replies
-
- 6
-
-
- syren
- model shipways
- (and 1 more)
-
Cutter Cheerful 1806 by rafine - FINISHED
Gahm replied to rafine's topic in - Build logs for subjects built 1801 - 1850
Wow! Super work, Bob! Thomas- 525 replies
-
- 3
-
-
- cheerful
- Syren Ship Model Company
- (and 1 more)
-
I agree with Dirk, that really looks very nice! Thomas
- 659 replies
-
- 3
-
-
- syren
- model shipways
- (and 1 more)
-
You are on a very good track with that head rail! This is one of the most difficult parts of the whole Syren build! Thomas
- 1,306 replies
-
- 6
-
-
- syren
- model shipways
- (and 1 more)
-
US Brig Syren by Gahm - Model Shipways
Gahm replied to Gahm's topic in - Kit build logs for subjects built from 1801 - 1850
Thank you, Dirk! Thomas -
US Brig Syren by Gahm - Model Shipways
Gahm replied to Gahm's topic in - Kit build logs for subjects built from 1801 - 1850
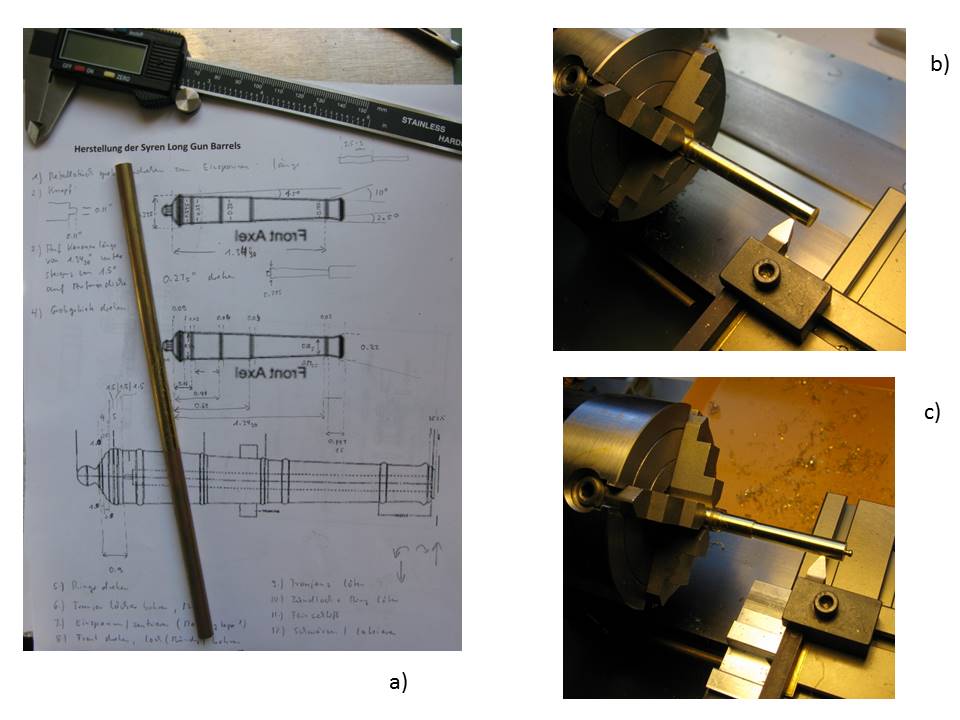
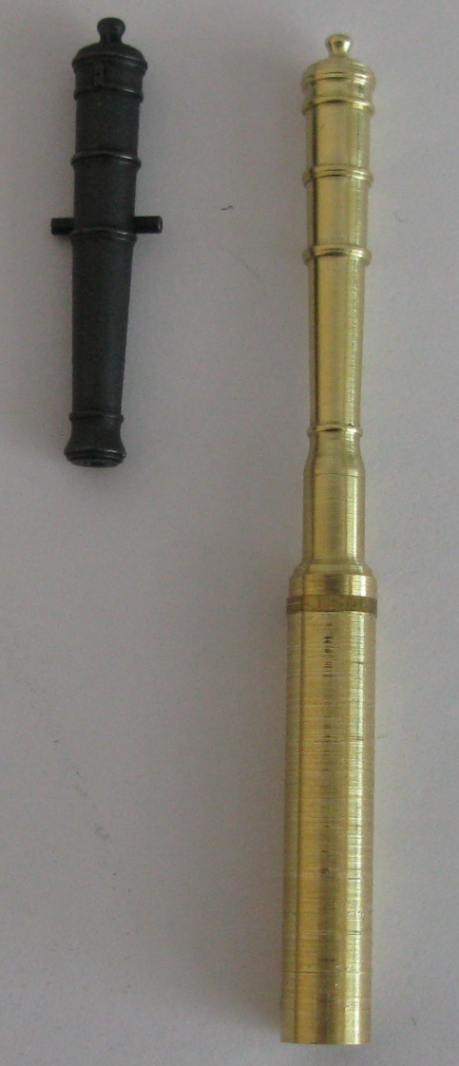
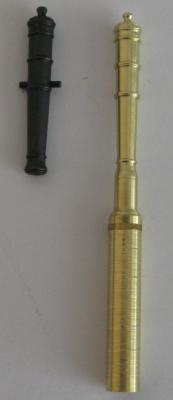
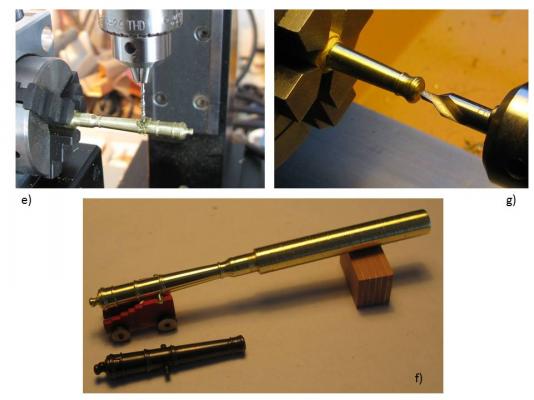
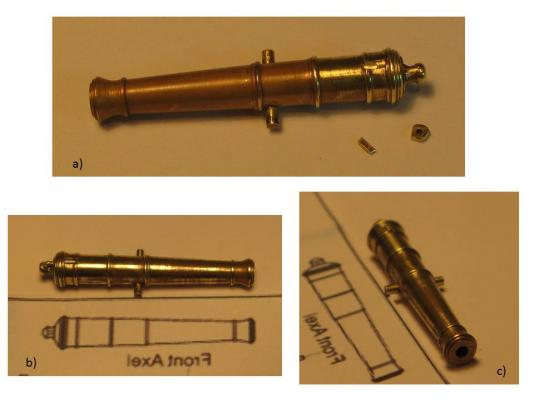
Hello Richard, Image 1a in the last sequence of images shows just one brass piece. I hope the images below make things a bit clearer. I selected a round brass dowel with diameter slightly larger than the largest diameter of the cannon barrel (image 1a). This dowel was then mounted on the lathe in a 4-jaw-chuck with individual jaw alignment (it allows for more precise centering than self-centering chucks) with a piece of the dowel about 1.3 times the cannon barrel length protruding out of the chuck. This piece was first turned to the largest cannon diameter (image 1b). By means of a cross sled I then tapered the piece by about 1.5˚ to give it its rough "cannon" shape (image 1c). This corresponds to what you have seen in my last image sequence as image 1a). After a lot of additional processing steps the major part of the barrel was finished but still part of the original brass dowel (image 2). As a final step it was cut off the dowel, turned around and mounted again in the lathe in order to finish the work on the front end of the cannon. Please don't hesitate to ask questions if the process is not clear. In any case it is a lot of fun to make your own cannon barrels Thomas Image 1 Image 2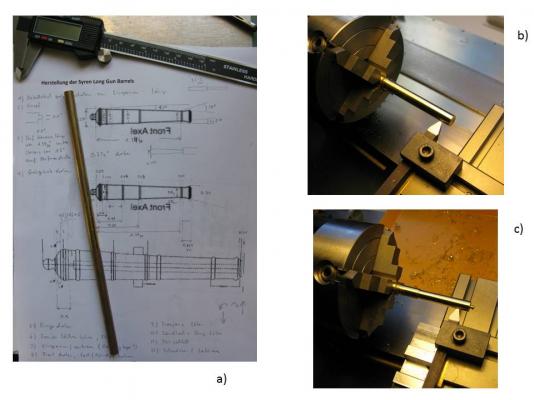
-
US Brig Syren by Gahm - Model Shipways
Gahm replied to Gahm's topic in - Kit build logs for subjects built from 1801 - 1850
Thank you so much for all your compliments and the likes! I would love to accept your cannon orders, but unfortunately without a CNC lathe I guess I must decline Thomas -
US Brig Syren by Gahm - Model Shipways
Gahm replied to Gahm's topic in - Kit build logs for subjects built from 1801 - 1850
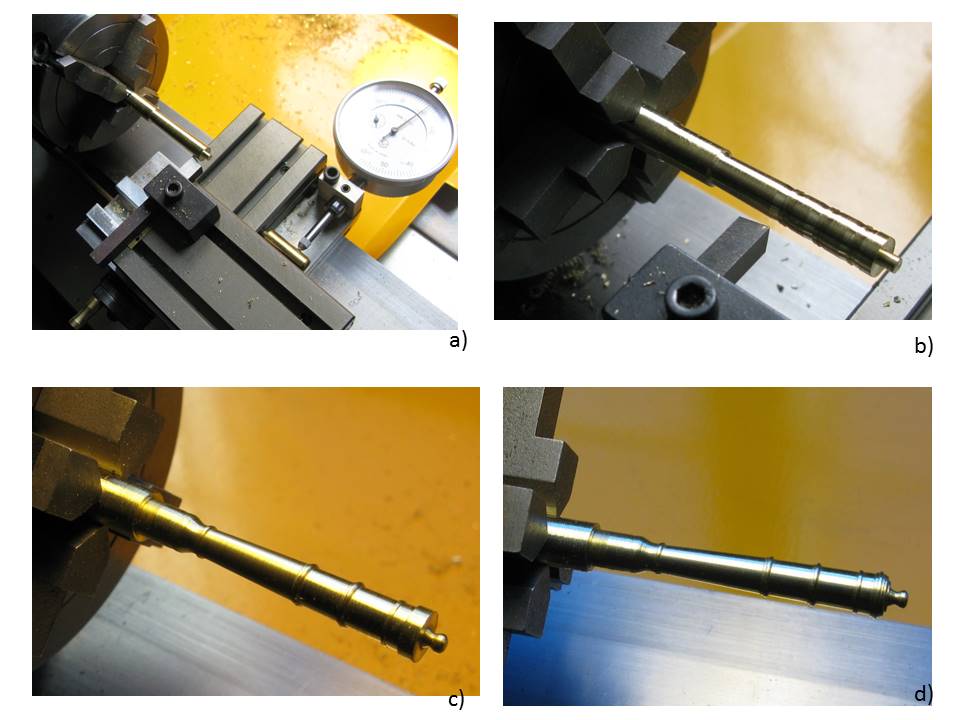
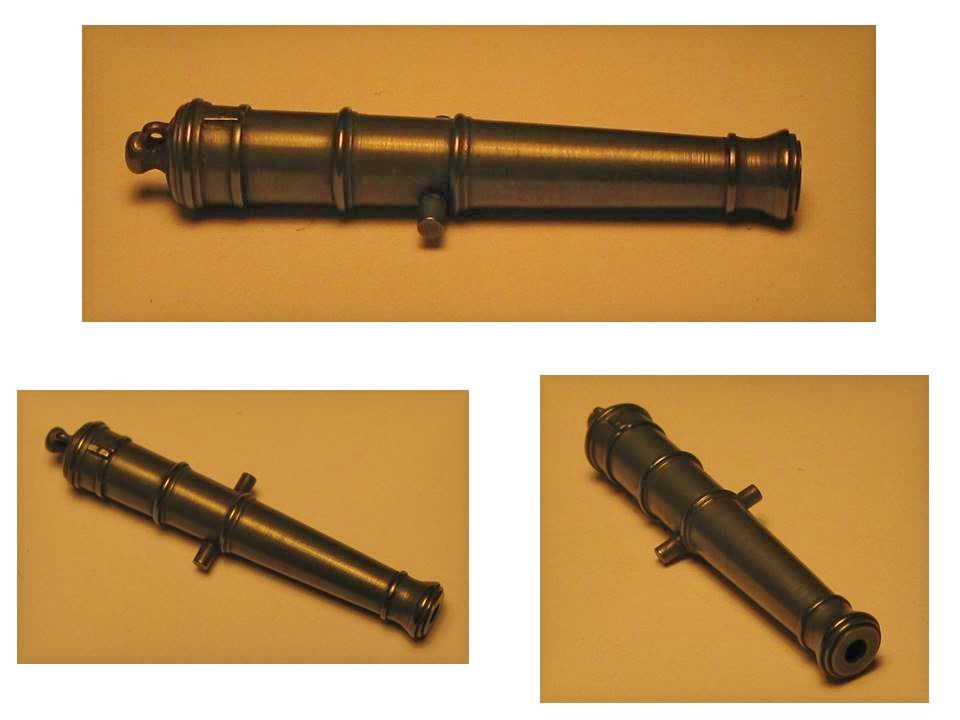
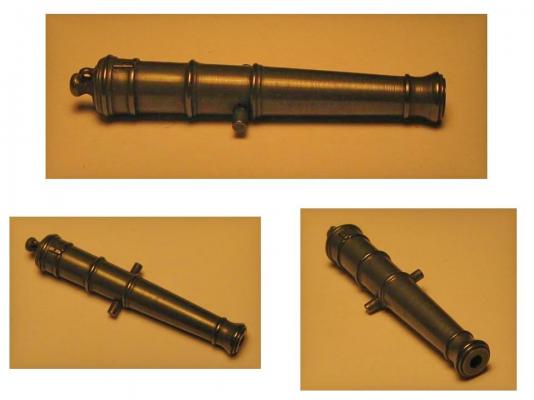
After getting distracted by a lot of other (mostly business related) projects I finally found some time to resume work on my Syren. Now the long gun prototypes, which I have shown on my model during the last 2 years, need to be replaced with the final versions. As there are only 2 guns I decided to make the gun barrels myself based on Chuck’s Syren plans. Images 1a – 1d show the different steps of turning one of the gun barrels. In image 2e the trunnion holes are drilled. After a “sanity check” with one of the gun carriages from the Syren kit the barrel is separated from the raw metal piece and the gun muzzle finished (img 2g). Img 3a shows the barrel with trunnions in place, the locations for the breech ring and touch-hole parts milled out, and the parts lying beside the barrel. The assembled gun barrel and Chuck’s plans are depicted in images 3b and 3c. The final result after blackening can be seen in image 4. Thomas Image 1 Image 2 Image 3 Image 4
-
Cutter Cheerful 1806 by rafine - FINISHED
Gahm replied to rafine's topic in - Build logs for subjects built 1801 - 1850
These are great looking guns, Bob! What wood are the gun carriages made of? I am just fiddling with the Syren long guns myself, so your current pictures are a nice help for me Thomas- 525 replies
-
- 3
-
-
- cheerful
- Syren Ship Model Company
- (and 1 more)
-
Cutter Cheerful 1806 by rafine - FINISHED
Gahm replied to rafine's topic in - Build logs for subjects built 1801 - 1850
Super work, Bob! It is an absolute pleasure to follow your progress! Thomas- 525 replies
-
- 5
-
-
- cheerful
- Syren Ship Model Company
- (and 1 more)
-
Cutter Cheerful 1806 by rafine - FINISHED
Gahm replied to rafine's topic in - Build logs for subjects built 1801 - 1850
Wonderful work, Bob! Thomas- 525 replies
-
- 3
-
-
- cheerful
- Syren Ship Model Company
- (and 1 more)
-
Looking really good, Sal! Merry Christmas and a Happy New Year! Thomas
- 659 replies
-
- 4
-
-
- syren
- model shipways
- (and 1 more)
-
Beautifully done, Sal! It really is a pleasure to watch your Syren build! Thomas
- 659 replies
-
- 5
-
-
- syren
- model shipways
- (and 1 more)
-
That looks really good! Did you also make the three iron bands at the (thick) end of the bowsprit from a brass strip or did you use the pinstripe tape for it? Thomas
- 659 replies
-
- 4
-
-
- syren
- model shipways
- (and 1 more)
-
Robbyn, I hope the 2 added images may answer your question. Thomas