HOLIDAY DONATION DRIVE - SUPPORT MSW - DO YOUR PART TO KEEP THIS GREAT FORUM GOING! (Only 13 donations so far - C'mon guys!)
×


Gahm
-
Posts
1,217 -
Joined
-
Last visited
Content Type
Profiles
Forums
Gallery
Events
Everything posted by Gahm
-
 Beautifully done, Sal! Your long guns look the part, and the new wheel cleaned up very nicely! I have looked at the commercially available wooden wheels myself and found them all out of scale. This is clearly a part where Chuck's Syren company could come up with a nice little steering wheel kit. Btw, if you continue at that speed your Syren will be finished at Christmas Thomas
- 659 replies
-
- 6
-

-
- syren
- model shipways
- (and 1 more)
-
When you copper a ship's hull nobody will focus on an individual copper plate - it is the overall impression of the hull that counts. And yours looks very good! Thomas
- 1,306 replies
-
- 7
-
-
- syren
- model shipways
- (and 1 more)
-
Beautiful work, Sal! You are filling up this deck quickly! Thomas
- 659 replies
-
- 3
-
-
- syren
- model shipways
- (and 1 more)
-
Cutter Cheerful 1806 by rafine - FINISHED
Gahm replied to rafine's topic in - Build logs for subjects built 1801 - 1850
You can be proud of your Cheerful! Fantastic work! Thomas- 525 replies
-
- 3
-
-
- cheerful
- Syren Ship Model Company
- (and 1 more)
-
Your figurehead is shaping up very nicely! I found building the figurehead at that scale is a bit of a challenge - but also a lot of fun! And you have some "artistic freedom". When you search the Internet you will find all kinds of examples of mermaid figureheads in different positions, with different fins, etc. I chose one with the arms at the side because it is relatively easy to carve . Thomas
-
Cutter Cheerful 1806 by rafine - FINISHED
Gahm replied to rafine's topic in - Build logs for subjects built 1801 - 1850
Beautiful work, Bob! Absolute pleasure to watch! Thomas- 525 replies
-
- 4
-
-
- cheerful
- Syren Ship Model Company
- (and 1 more)
-
Very nice job on your gratings! They look splendid! Thomas
- 659 replies
-
- 3
-
-
- syren
- model shipways
- (and 1 more)
-
Simply awesome! Thomas
-
Richard, you can find a nice example of that piece with several pictures in Dirk's build log. But you are right, it does not come as a laser cut part in the kit. Thomas
-
Your deck looks very nice. Well done! I also really like the ochre color of your Syren! Thomas
-
This is a superb planking job! Beautiful work! Thomas
- 452 replies
-
- 3
-
-
- cheerful
- Syren Ship Model Company
- (and 1 more)
-
US Brig Syren by Gahm - Model Shipways
Gahm replied to Gahm's topic in - Kit build logs for subjects built from 1801 - 1850
Thank you,Mike! I still have a lot of 'repetition' ahead of me Thomas -
US Brig Syren by Gahm - Model Shipways
Gahm replied to Gahm's topic in - Kit build logs for subjects built from 1801 - 1850
Thank you Glakie and CaptainSteve, and thank you for all the likes! I found specifically Tamiya masking tape a very useful tool, and not only for covering up areas when painting a part of the model. It sticks well to pretty much any surface, you can nicely write on it with a pen, it is pretty transparent, and it peels off easily. So it is perfect for marking things on the model without leaving any permanent traces. Thomas -
US Brig Syren by Gahm - Model Shipways
Gahm replied to Gahm's topic in - Kit build logs for subjects built from 1801 - 1850
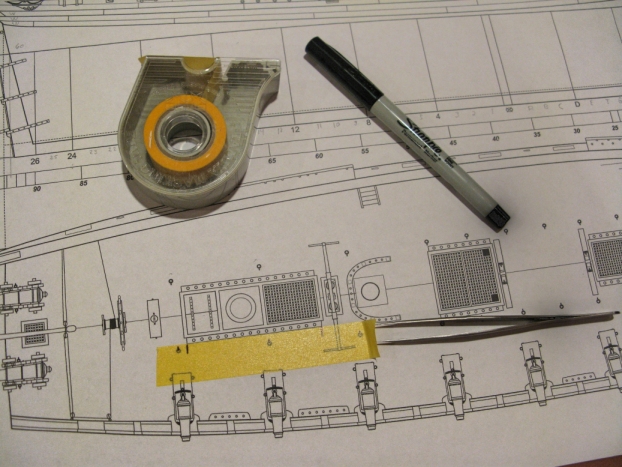
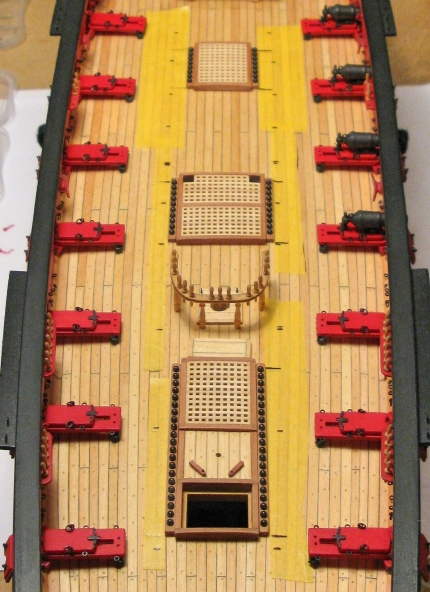
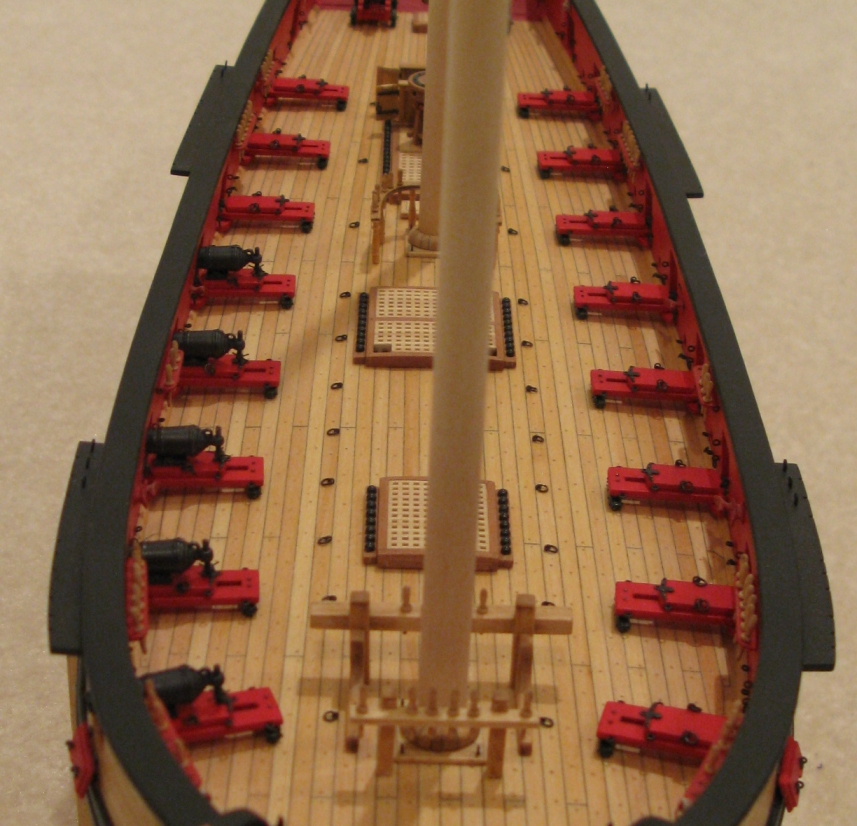
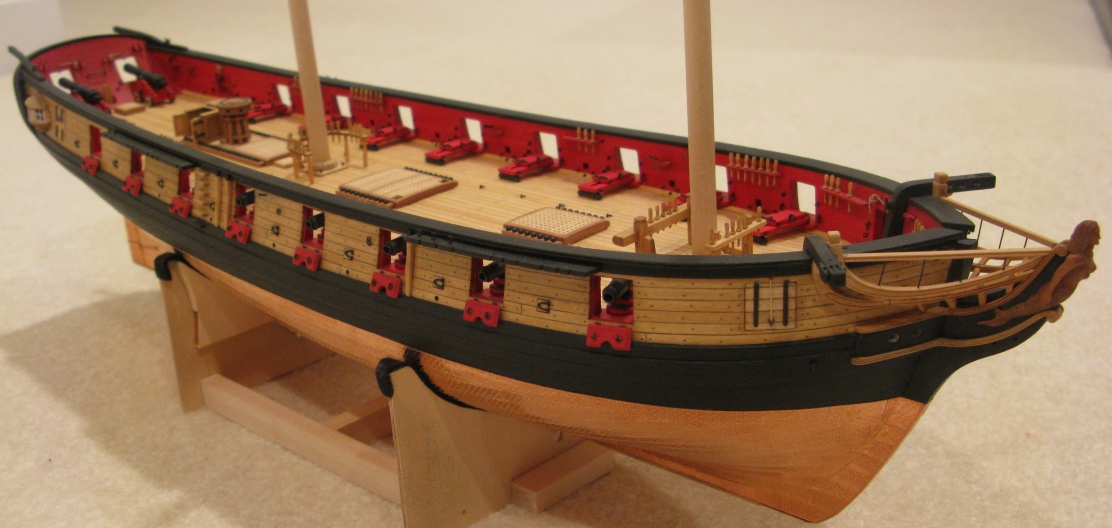
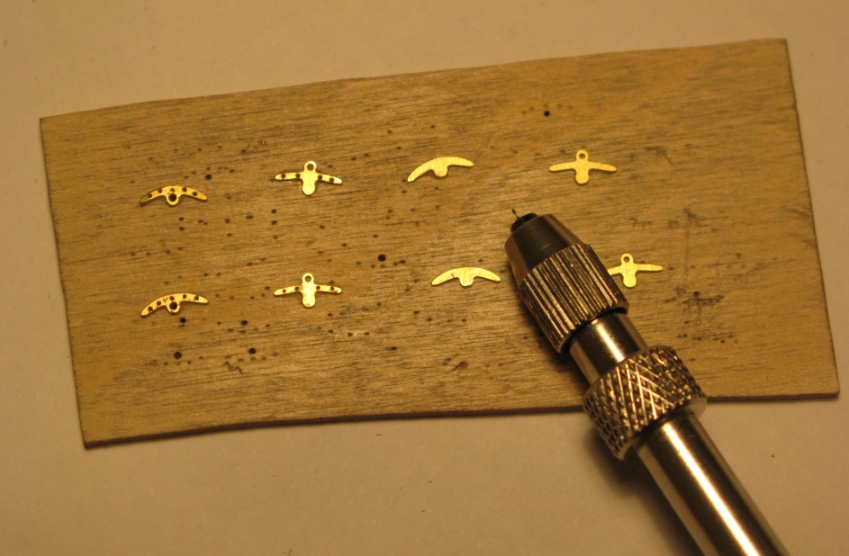
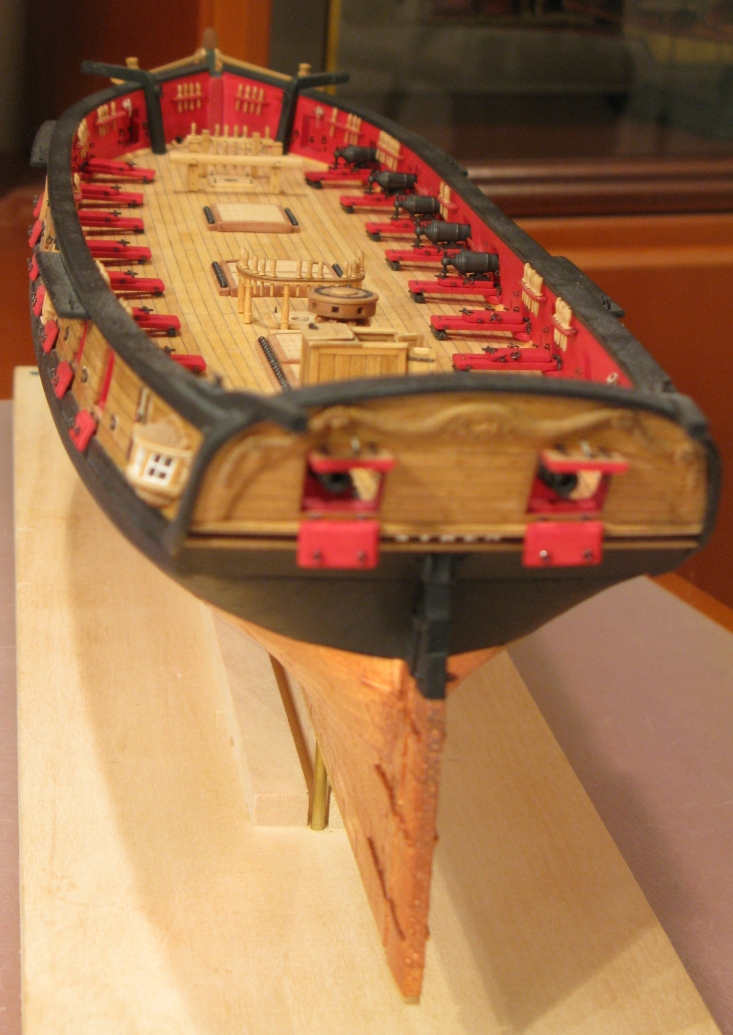
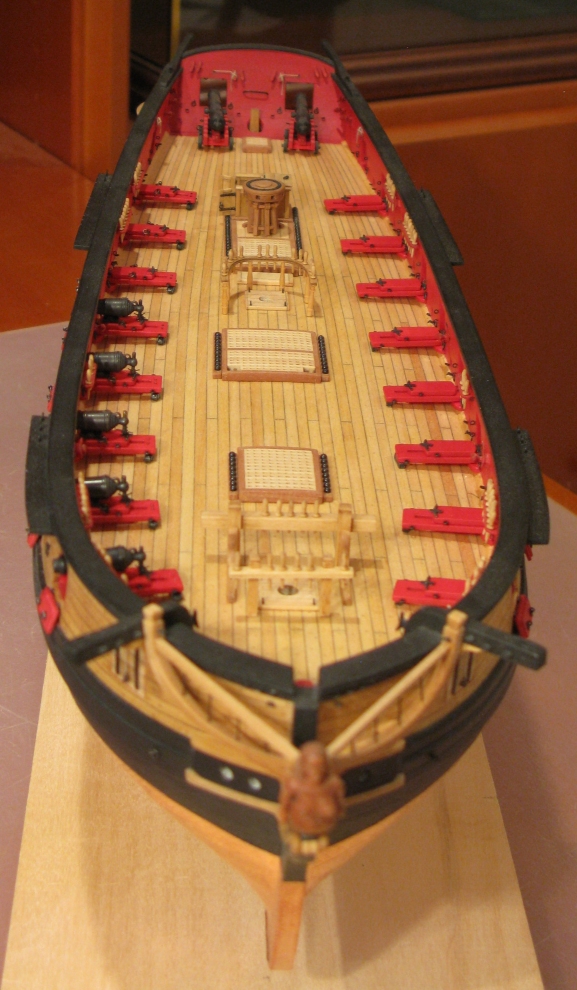
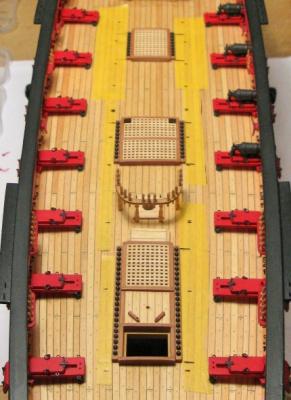
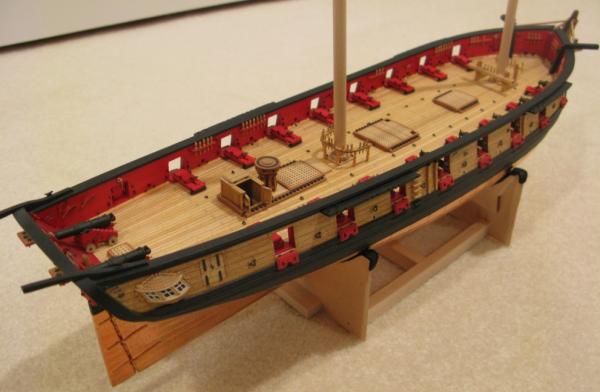
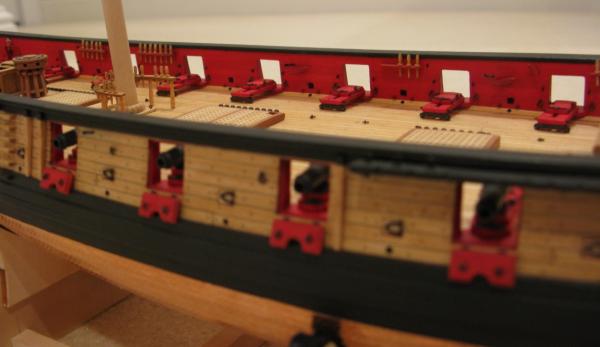
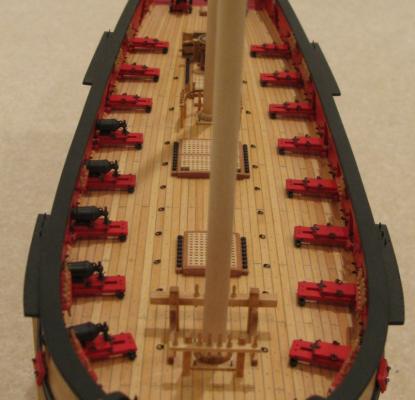
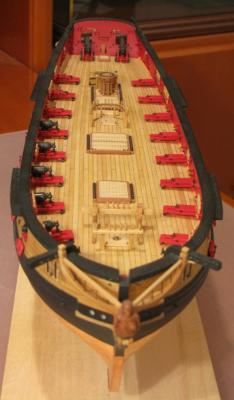
A little update: I have finished all carronade sleds, which means they are now all equipped with wheels and breech rings. I also added the 22 eyebolts with split rings to the Syren deck. To transfer the correct positions from the plan to the model I used masking tape. The tape first was aligned on the plan parallel to the gratings and the positions were noted on the tape (the black contours on the plan nicely shine through the masking tape, see image 1). In a second step the tape with the marks was aligned parallel to the gratings on the Syren deck, the position marks fine adjusted, the holes drilled through the tape, and finally the tape removed (image 2). Images 3 – 6 show the current status of the model. Thomas Image 1 Image 2 Image 3 Image 4 Image 5 Image 6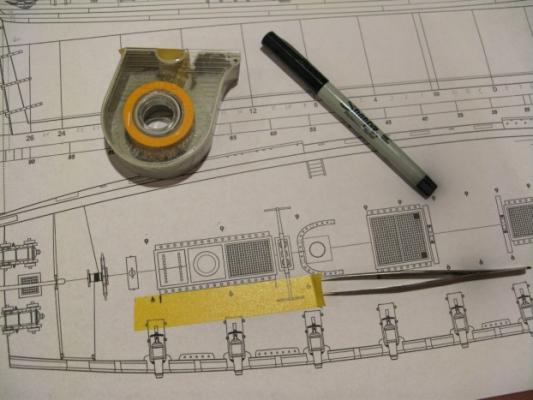

-
Well done, Sal! Excellent progress! You left me in your wake . . . Now I can look at your log to see how it's done Thomas
- 659 replies
-
- 2
-
-
- syren
- model shipways
- (and 1 more)
-
Your improvements look great! I really like your Holly deck! Very nice color and execution. And don't feel bad about your time problem - I guess a lot of our fellow model builders in this forum have a similar problem. At least I know for sure that I do Thomas
-
Excellent work, Augie! This really is a beauty! Thomas
- 2,191 replies
-
- 4
-
-
- confederacy
- Model Shipways
- (and 1 more)
-
Cutter Cheerful 1806 by rafine - FINISHED
Gahm replied to rafine's topic in - Build logs for subjects built 1801 - 1850
Bob, that is a very clean, precise planking job! Well done! Thomas- 525 replies
-
- 3
-
-
- cheerful
- Syren Ship Model Company
- (and 1 more)
-
Excellent progress, Sal! Those breech ropes look very good! First time I see this zip-seizing method.That's an interesting way of doing it. Thomas
- 659 replies
-
- 2
-
-
- syren
- model shipways
- (and 1 more)
-
Absolutely beautiful work, Augie! It is a pleasure to watch your progress! Thomas
- 2,191 replies
-
- 4
-
-
- confederacy
- Model Shipways
- (and 1 more)
-
US Brig Syren by Gahm - Model Shipways
Gahm replied to Gahm's topic in - Kit build logs for subjects built from 1801 - 1850
After several weeks of traveling and lots of other projects I finally resumed work on my Syren again. Nothing exciting - I just continued building the carronade sleds. So far I finished drilling the holes for all photo-edged sled parts and mounted them with the 0.4mm rivets from Scale Hardware on the sleds. Images 1 – 4 show the current status. Thomas Image 1 Image 2 Image 3 Image 4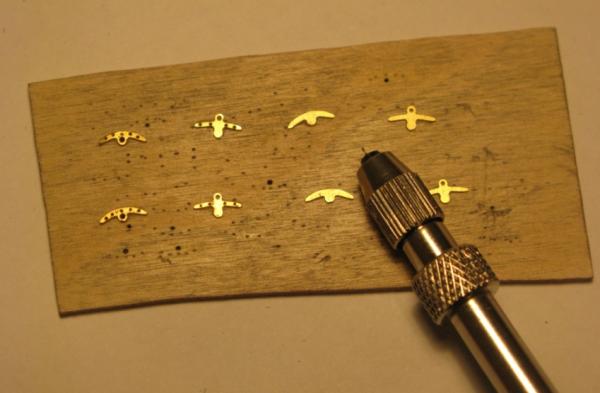


-
These are some fine looking carronades! I love your bead idea! Thomas
- 659 replies
-
- 4
-
-
- syren
- model shipways
- (and 1 more)
-
This looks fantastic! Beautiful detail combined with flawless execution! Thomas
- 2,191 replies
-
- 4
-
-
- confederacy
- Model Shipways
- (and 1 more)
-
Your carronade sleds look very good! Can't wait to see the finished carronades! Thomas
- 659 replies
-
- 3
-
-
- syren
- model shipways
- (and 1 more)