Gahm
-
Posts
1,217 -
Joined
-
Last visited
Content Type
Profiles
Forums
Gallery
Events
Everything posted by Gahm
-
 Hi Jesse, first of all I also want to emphasize that you did and excellent job on those carronades. Handcrafting these little guys is not easy at all, and yours look very nice! Where the painting is concerned I can only agree with what was already said here by our fellow modelers - the trick is to have several coats with VERY THIN paint. And yes, it can get frustrating at times as building these carronades takes quite a while. I think it took me close to a year from start to finish until I had my carronades done - and I have not even rigged them yet. However, on the good side - on the Syren you only have to do 16 + 2 guns . . . now just think of a ship of the line Thomas
- 1,306 replies
-
- 11
-

-
- syren
- model shipways
- (and 1 more)
-
Super job, Sal! You can be proud of your Syren! Congratulations! Thomas
- 659 replies
-
- 4
-
-
- syren
- model shipways
- (and 1 more)
-
Excellent job, Sal! Your Syren is a real beauty! Thomas
- 659 replies
-
- 5
-
-
- syren
- model shipways
- (and 1 more)
-
What a fantastic sight, Sal! Can't wait to get there myself . . . Thomas
- 659 replies
-
- 5
-
-
- syren
- model shipways
- (and 1 more)
-
That looks very good! I always wondered how much trouble that part would be. You make it look easy! Thomas
-
Hello Richard, a traditional wood lathe typically is operated manually with wood chisels like you use your Proxxon lathe. I fully agree, having any measurement instruments built into the lathe is difficult to imagine. I was talking about the more sophisticated type of lathe like the Sherline you are thinking about. Here it is easy to either use digital read outs or analog ones. The difference is more in the cost and your preference of how to read the measurements. You can find a lot examples on any webpage selling lathe equipment, for example: http://littlemachineshop.com/products/product_view.php?ProductID=1593&category=1319044103 Thomas
-
Richard, in my opinion the Sherline lathe is certainly one of the best-suited lathes for the type of work needed for ship modeling. It is also very complete and versatile in terms of having all the parts available needed for special tasks. And a digital read out will be a big help to achieve consistency. However, you can achieve the same thing with cheap analog measurement devices mounted on the lathe at the right places. I am using a very cost efficient Taig lathe which I pieced together over the years and actually built me a lot of parts myself. A lathe is one of the devices which actually can "reproduce itself", which means once you have the basic parts you can make all parts needed for the lathe yourself. So in short: the Sherline lathe (and also their mill) is an excellent choice. Thomas
-
Cutter Cheerful 1806 by rafine - FINISHED
Gahm replied to rafine's topic in - Build logs for subjects built 1801 - 1850
Congratulations Bob! Your Cheerful is a real beauty!! And it was an absolute pleasure following your build log! Thank you for sharing all those images and process descriptions with us. Btw, I already secured a seat on your next project Thomas- 525 replies
-
- 3
-
-
- cheerful
- Syren Ship Model Company
- (and 1 more)
-
Excellent choice, Bob! The Granado was always one of my favorites, so I will be watching your build log with keen interest! Thomas
-
It looks like you are not far from the finishing line! Great job! Thomas
- 659 replies
-
- 5
-
-
- syren
- model shipways
- (and 1 more)
-
US Brig Syren by Gahm - Model Shipways
Gahm replied to Gahm's topic in - Kit build logs for subjects built from 1801 - 1850
Thank you, Jesse! Thomas -
US Brig Syren by Gahm - Model Shipways
Gahm replied to Gahm's topic in - Kit build logs for subjects built from 1801 - 1850
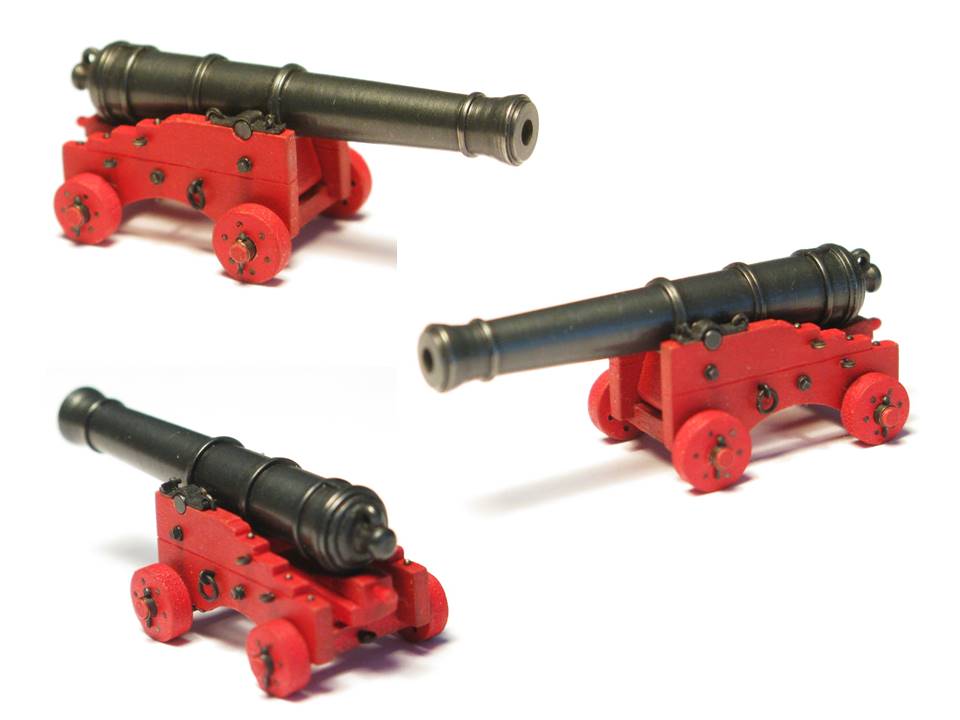
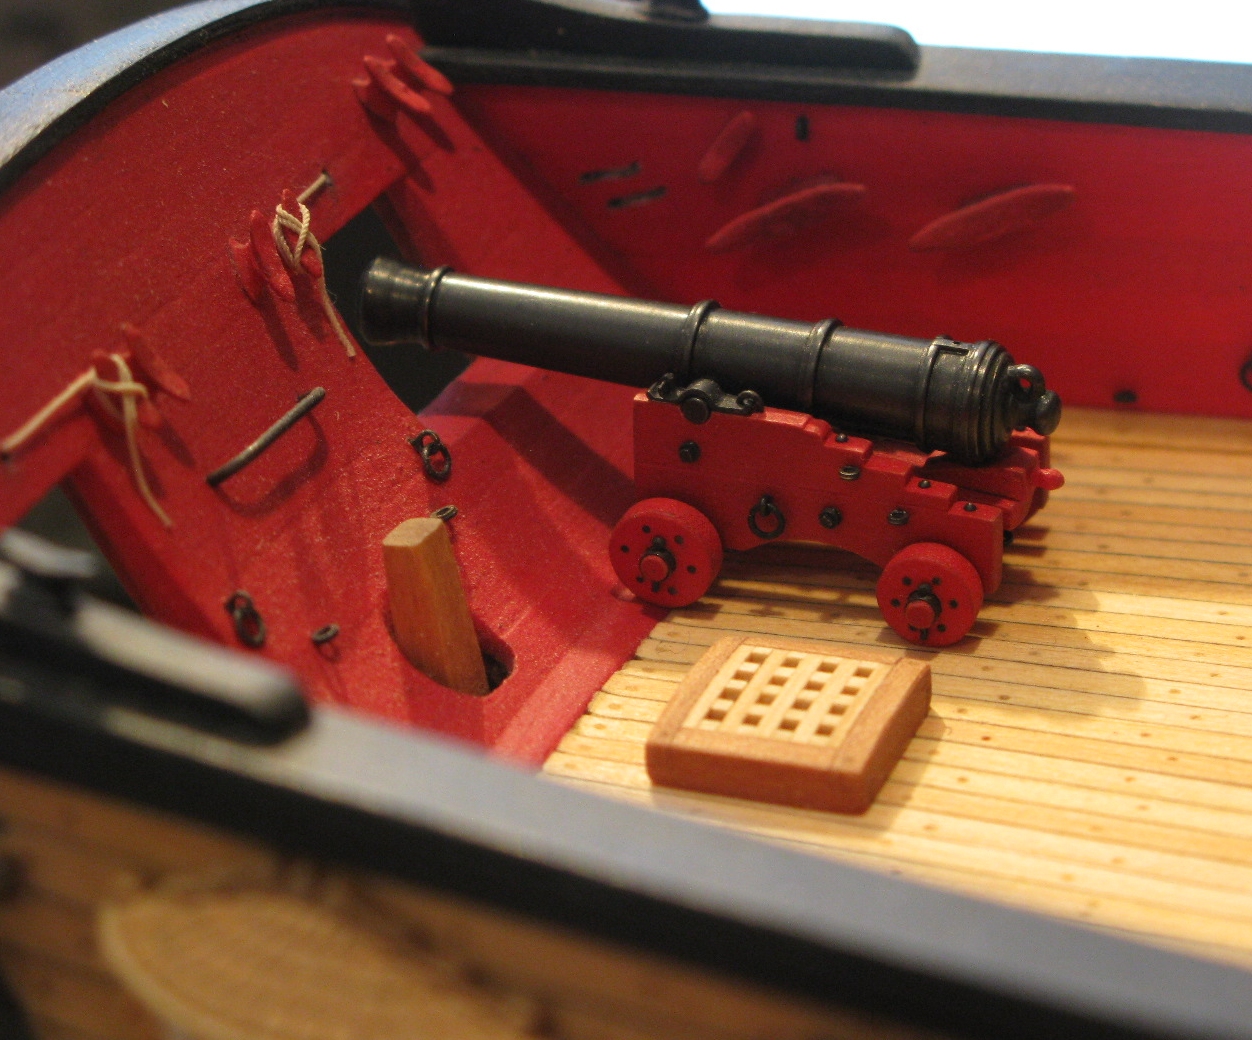
I finished the 2nd long gun as well (see images below). I am quite happy now to move on to something else . Thomas Image 1 Image 2 Image 3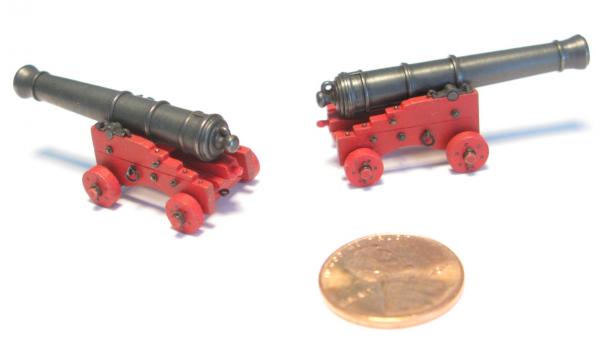

-
Wow, these boats are master pieces!! Thomas
-
Cutter Cheerful 1806 by rafine - FINISHED
Gahm replied to rafine's topic in - Build logs for subjects built 1801 - 1850
Bob, I don't know what the most historically accurate representation is, but I love the way you did the rigging! It looks absolutely fantastic! Thomas- 525 replies
-
- 4
-
-
- cheerful
- Syren Ship Model Company
- (and 1 more)
-
US Brig Syren by Gahm - Model Shipways
Gahm replied to Gahm's topic in - Kit build logs for subjects built from 1801 - 1850
Thank you, B.E., for this kind comment! Thomas -
US Brig Syren by Gahm - Model Shipways
Gahm replied to Gahm's topic in - Kit build logs for subjects built from 1801 - 1850
No chance, Dirk - unless you build the Confederacy in between Thomas -
US Brig Syren by Gahm - Model Shipways
Gahm replied to Gahm's topic in - Kit build logs for subjects built from 1801 - 1850
George, Gary, Bob, Alde, Sal, thank you so much for your kind words and comments! They are highly appreciated! And thank you for all the "likes"! Thomas -
US Brig Syren by Gahm - Model Shipways
Gahm replied to Gahm's topic in - Kit build logs for subjects built from 1801 - 1850
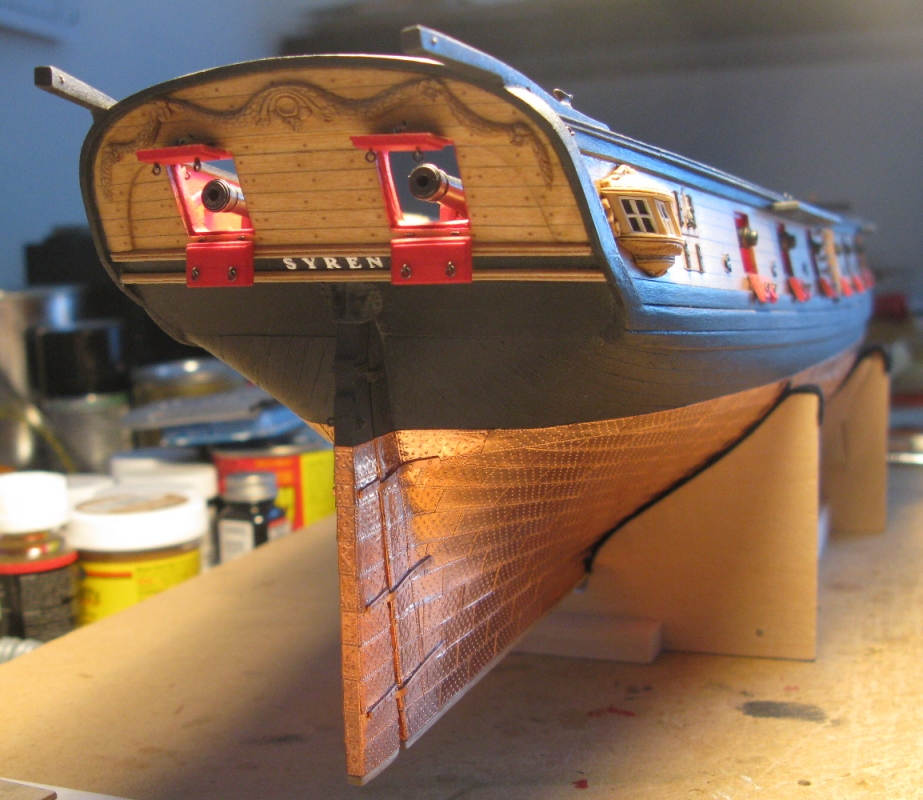
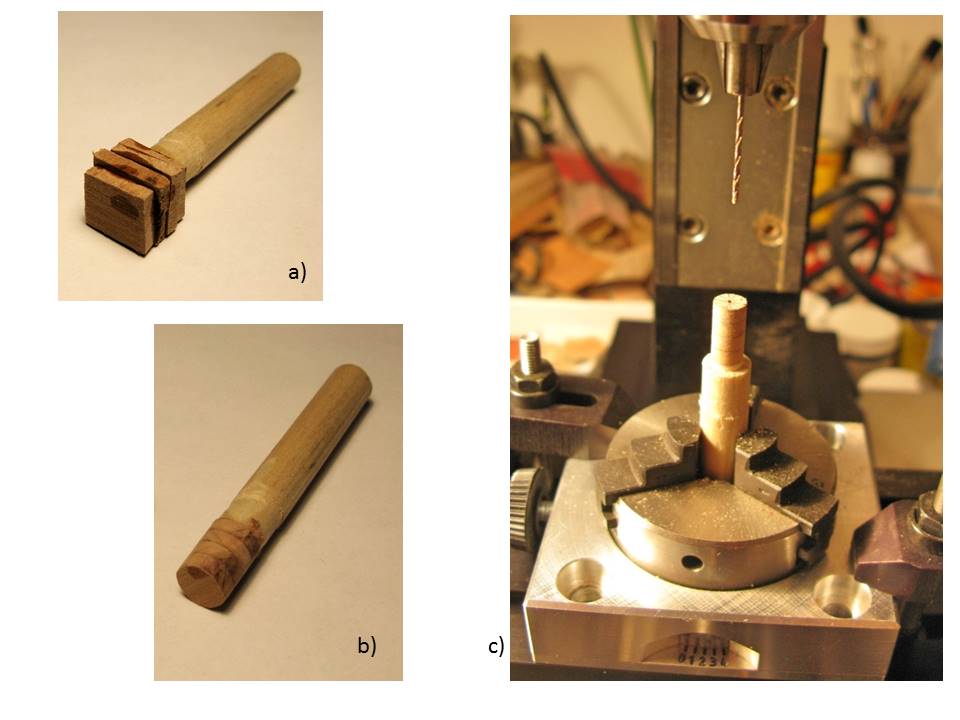
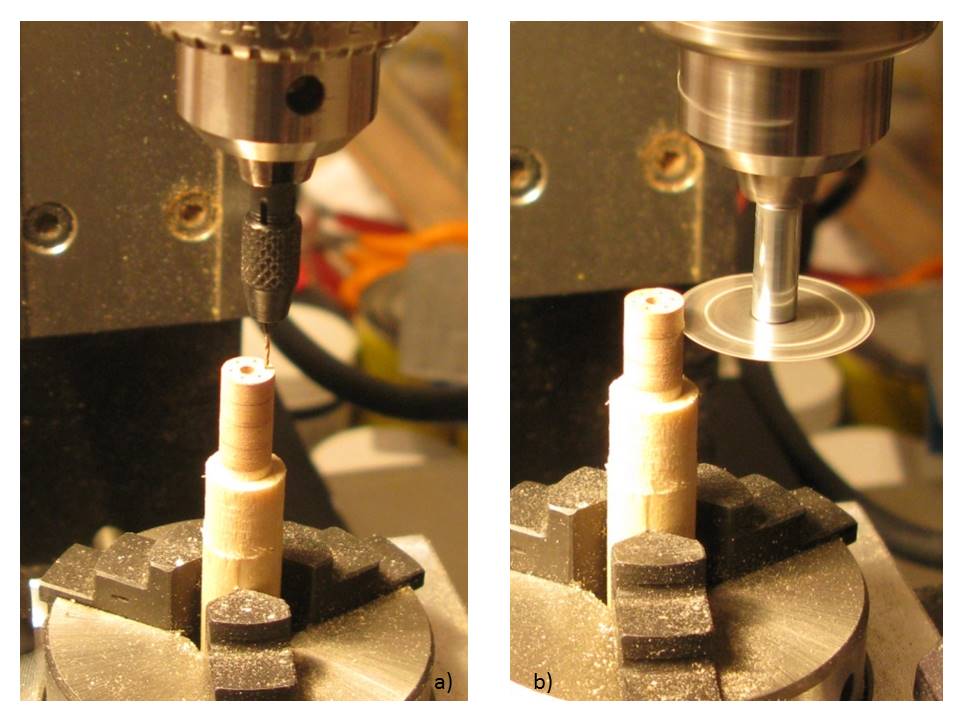
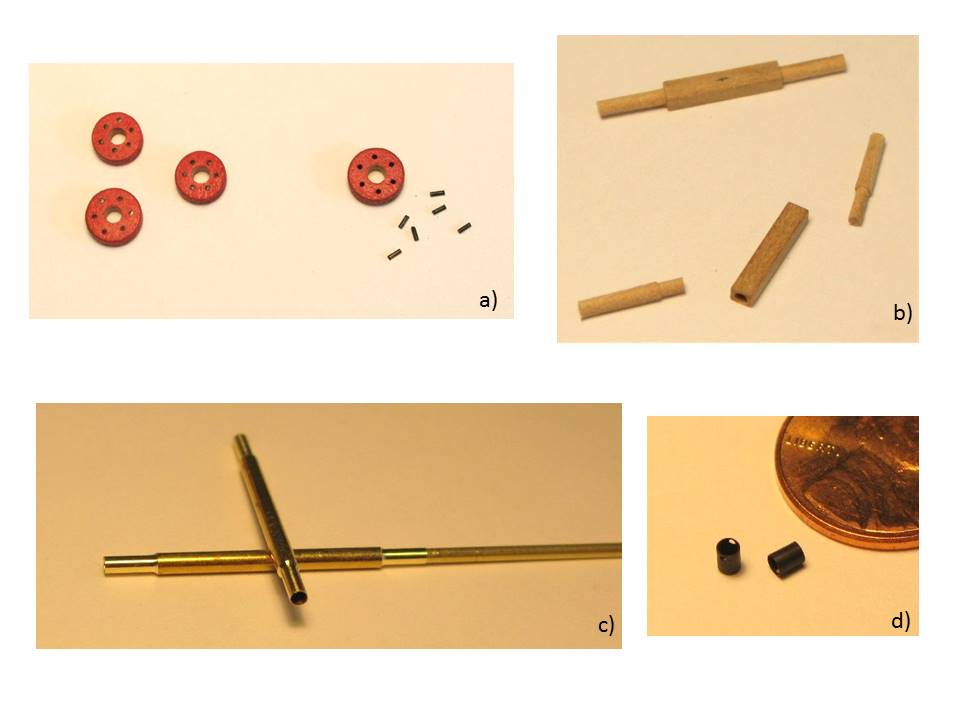
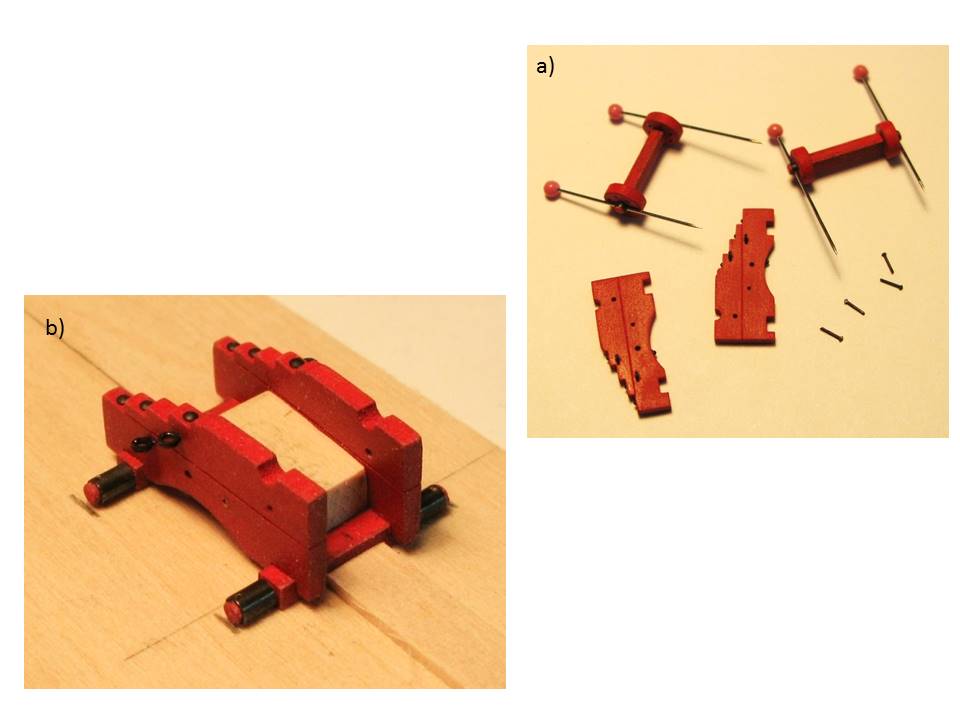
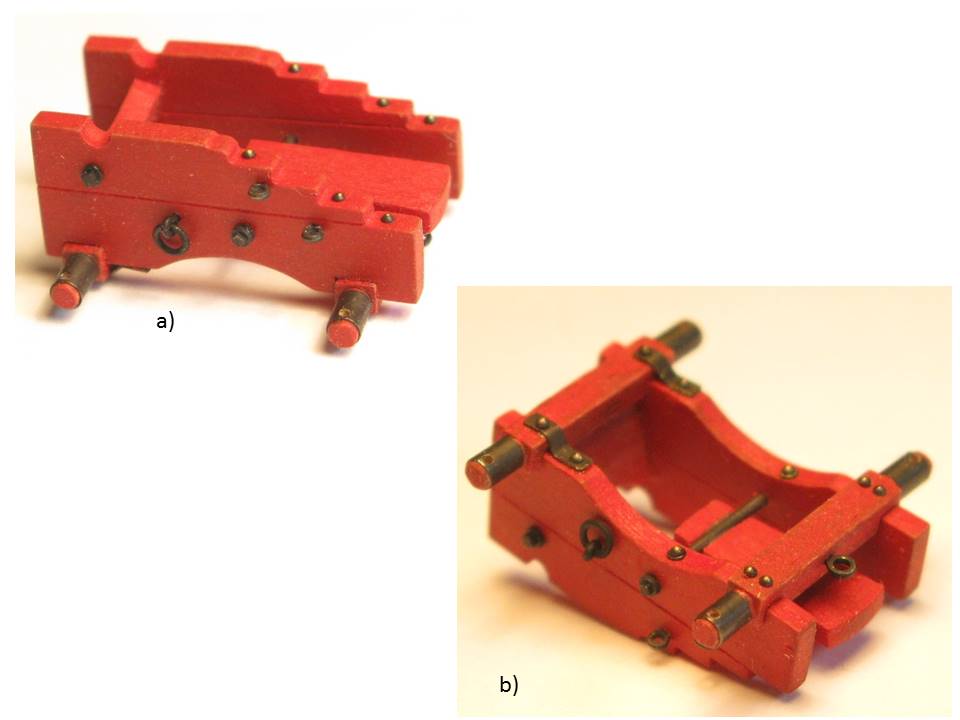
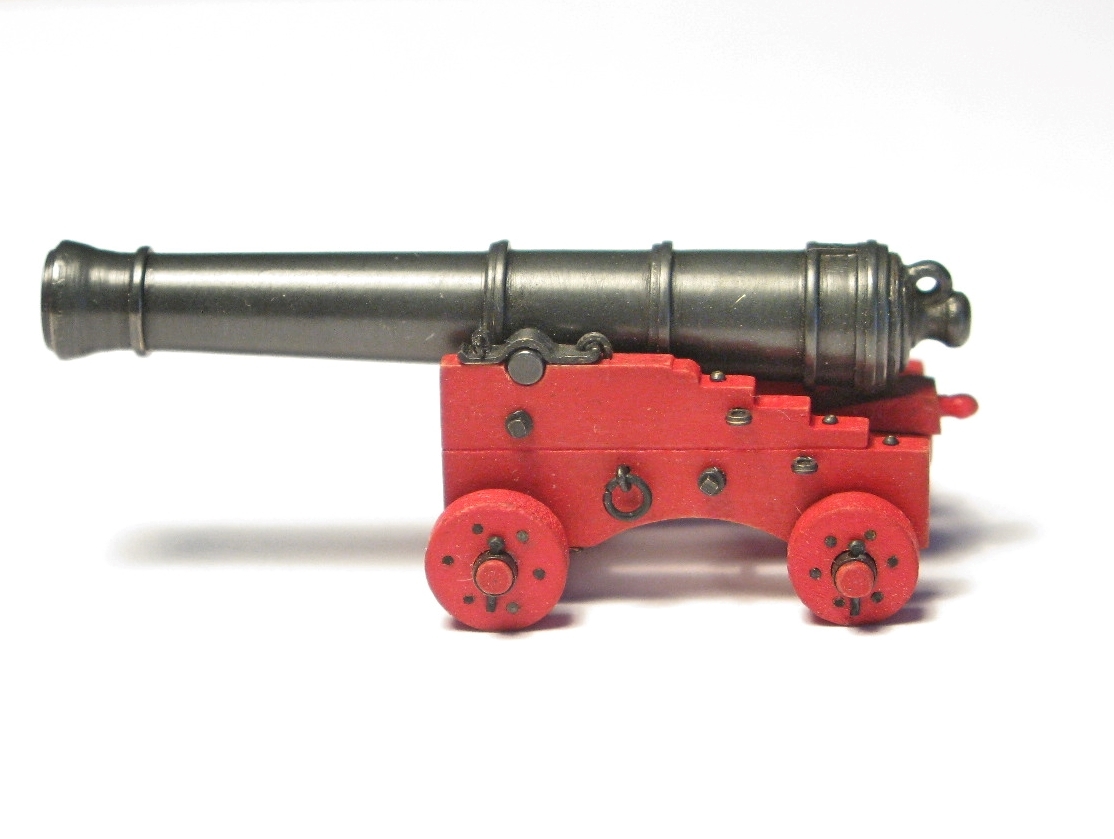
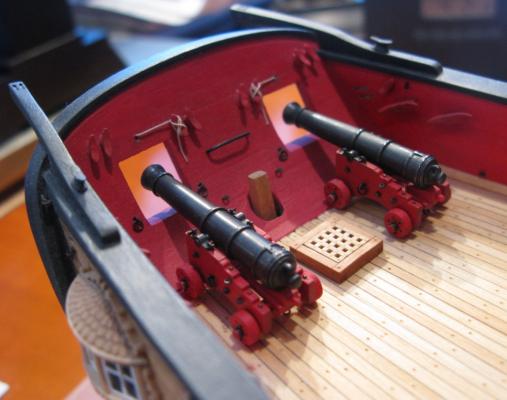
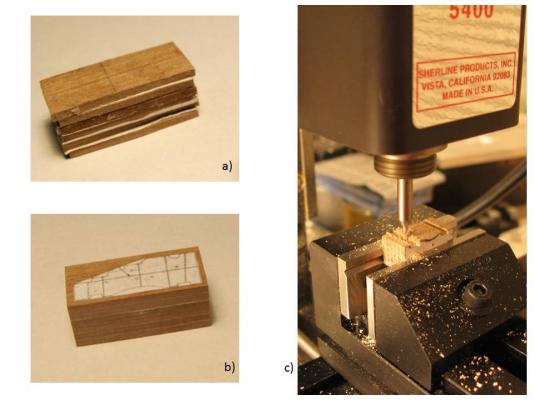
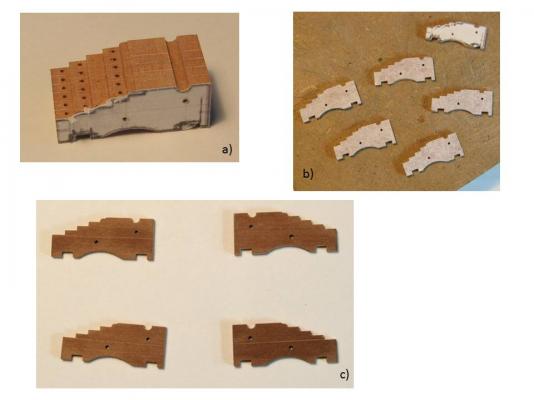
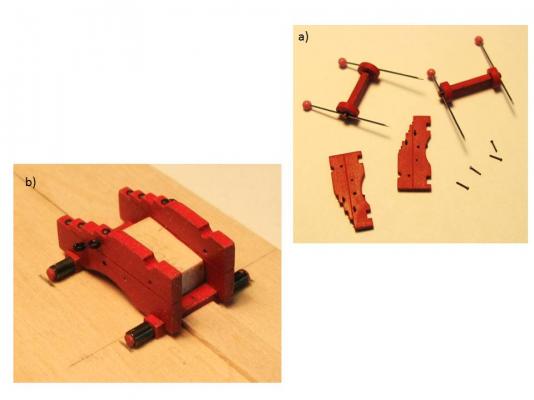
I finished the first long gun – the second one is about one week behind . I followed the long gun design in Chuck’s Syren plans (with a few small changes) as basis for the build. Images 1, 2 and 3 show how the wheels and the axles were made. I glued 4 roughly square pieces of pear wood on a beech dowel (img 1a and 1b), turned them on the lathe to the required diameter, drilled the holes for axels and bolts (img 1c and 2a), and cut them apart with a little saw (img 2b). The finished wheels are shown in img 3a. Images 3b, c and d present how the axels were made and how the axels’ bearings were built by turning a brass tube down to the correct size. For stabilization a second tube was inserted during the lathe work. Image 01 Image 02 Image 03 Images 4 and 5 show the making of the carriage parts. I glued 6 correctly sized pieces of pear wood together with a piece of paper between each pear wood layer (img 4a). The paper insures that the pear wood pieces can be separated from each other later on (img 5). The resulting block of layered pear wood was processed with mill, drill, and sanding wheel to arrive at the desired shape (image 5a). After painting the finished pieces the gun carriage was assembled on a jig (img 6b). The result is presented in image 7. The finished gun can be seen in images 8 and 9. Image 10 shows the long gun in its place on the Syren. Thomas Image 04 Image 05 Image 06 Image 07 Image 08 Image 09 Image 10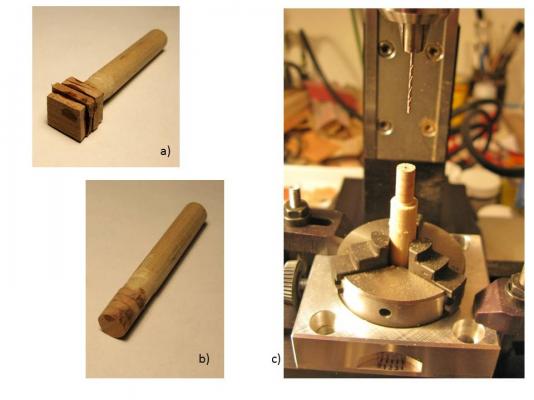


-
Well done, Richard! Your belaying pins look very good! I already did the "stress test" with mine and I am convinced they will hold up fine once they have to support the lines Thomas
-
Cutter Cheerful 1806 by rafine - FINISHED
Gahm replied to rafine's topic in - Build logs for subjects built 1801 - 1850
Beautiful work, Bob! A pleasure to follow your progress! Thomas- 525 replies
-
- 3
-
-
- cheerful
- Syren Ship Model Company
- (and 1 more)
-
Cutter Cheerful 1806 by rafine - FINISHED
Gahm replied to rafine's topic in - Build logs for subjects built 1801 - 1850
Fantastic work, Bob! You really know how to do rigging! Thomas- 525 replies
-
- 4
-
-
- cheerful
- Syren Ship Model Company
- (and 1 more)
-
I agree with Gary. Lots of useful tips in your build log which will make my life easier once I get to the rigging! Great work, Sal! Thomas
- 659 replies
-
- 4
-
-
- syren
- model shipways
- (and 1 more)