barkeater
-
Posts
416 -
Joined
-
Last visited
Content Type
Profiles
Forums
Gallery
Events
Everything posted by barkeater
-
You do want to assemble your mast components before instillation. They need not be glued together if the fit of pieces is tight, but they do need to be assembled. Assembling allows you to make sure that they are perfectly centered and not canted to port or starboard. If you just insert the main mast, you may be a bit off center and not realize it until you install the topgallants. Rich
-
I don't know if this has been mentioned before. It is on YouTube by Epic History. There are 5 videos and are worth your time. Rich
-
I agree with Johnny. There are multiple ways to finish, and it depends on the look you desire. For example, I use Testors Dulcote for my finish which gives a dull finish since I do 1700's ships, and I want them to look dull and weathered. If you were doing say a Chris Craft speed boat, you would want a shiny surface. As to milling, if you rip your own planks from purchased wood, I recommend you get a thickness planer/sander. I've purchased wood in the past and after having ripped planks, discovered that the boards varied a couple mm in thickness at different places. This made planking more of a challenge since the resultant planks varied in width. I do hand sand with fine grit once the planks are installed. I also use shape scrapers for detail. Finally, I use walnut for the hull which other people don't like. It varies considerably in color and shade unlike some other choices. This gives a patchwork appearance to the hull which brings out the planking detail including the use of trenails. I should mention that I only paint decorative components such as the figurehead and any carvings. Another "to each his own". Rich
-
To strop your block, take your line and lay it around the block. Pull tight and place the block in a spring clamp to hold tight and maintain tension. Place the two line ends in another clamp to maintain tension One end of the line cut to about 1/2 to 3/4 the desired length to your bolt. The other end keep long for the moment. Using thread tie a series of square knots, 3 or 4, to fasten/splice the two ends tightly together to fix the block in place. Hit with pva diluted 1 to 1 with water. Let dry. Then take your long end through the bolt and turn back towards block. Fasten with 3 to 4 square knots. Hit with the pva water mix and let dry. Trim as desired Your done. Rich
-
splice hull plank.
barkeater replied to Janne's topic in Building, Framing, Planking and plating a ships hull and deck
Janne, What scale is your project, and do you mean taper when you say splicing. Rich -
Sorry to hear. It was a pleasure doing business with you. Richard
-
Have fun. Rich
-
Carcass 1758 by barkeater - scale 1:48
barkeater replied to barkeater's topic in - Build logs for subjects built 1751 - 1800
The second planking is coming along. For scale 1/48, maximal length of planks is 5 inches. This would be 20 feet. My trenails ae .6 mm or #72 drill bit which would give me to scale just over an inch. Rich
-
question about waxing thread
barkeater replied to ford34tom@comcast.net's topic in Masting, rigging and sails
Wax before using and use white glue to secure knots or stiffen after. Depending on your thread you may or may not need to wax, Cheaper thread tends to be fuzzy in my experience while well-made thread does not. Rich -
Carcass 1758 by barkeater - scale 1:48
barkeater replied to barkeater's topic in - Build logs for subjects built 1751 - 1800
The model is now ready for the second planking. Any rough or low spots have been filled and everything sanded smooth. I have penciled lines where the bulkheads are. These will be where the butts of planks are placed. I use trenails throughout. I also measure along each line to figure out my overall taper. I'll do 5 to 10 planks and then remeasure and adjust rather than breaking the hull surface into smaller divisions. This allows me to deal with any problem in tapering before it is apparent and so do a milder taper over a longer stretch. Rich
-
You can fix it in either of two ways. First option, take an EXTRA piece of wood strip for planking and either run it up the bulkhead and glue with pva or cut several small pieces and place these across the bulkhead so your planking will have contact wood continuously to glue to. You probably will have to sand down or file it down at least the end to taper depending on your situation. If you run it up long ways, then you probably are going to have to clamp or heat bend in your case. Be careful you don't snap off the bulkhead as they can be somewhat fragile. If you ever do break a bulkhead, you can just sister brace them with a piece of wood. Finally, it looks like you are going to have to add some wood to the bulkhead below the deck as well from your picture. Second option, you could shave the extra wood from your false deck, so it doesn't stick out. Just lay a plank across the bulkheads from for to aft and slowly and carefully trim away the excess wood so that the plank you are using as a reference can slide up and down over the deck. Rich
-
Carcass 1758 by barkeater - scale 1:48
barkeater replied to barkeater's topic in - Build logs for subjects built 1751 - 1800
I realized that I had not put up a good picture of the stern plans. On the pictures of the model, I have to curve in the upper bulwarks which I forgot to mention. Also, the reason I did not steam bend is that the stern has two windows which along their bottom just have a sill. I felt that my chance of getting a smooth curve throughout the plywood would be significantly decreased with the window cutouts. Rich
-
Carcass 1758 by barkeater - scale 1:48
barkeater replied to barkeater's topic in - Build logs for subjects built 1751 - 1800
Here are a couple pictures of the stern. The stern in this ship is unusual as I'm sure you noticed. Before I start, please excuse the appearance. I have a lot more work to do sanding and smoothing. I had two options in forming the stere. Either I steam bent a piece of plywood which I've done before or file the plywood down to give the proper angle, so I cut curve the stern forward. I decided to go with the latter. This meant that instead of running the first plank to the outer edge of the plywood I needed to tuck it in behind which is what I did. I've indicated on the side view how I will run the trim forward to give the appearance of a curved stern. The trim will be applied over the first planking, so I have a little leeway in fitting it flush and then I'll bring the second hull planking up to it covering any small gap. For the stern itself I'm thinking vertical planks in purple heart and yellow heart which should give a nice decorative appearance. For the upper stern counter, I have not figured out my plank pattern or color scheme yet. Rich

-
Carcass 1758 by barkeater - scale 1:48
barkeater replied to barkeater's topic in - Build logs for subjects built 1751 - 1800
The gun ports have now been framed and the first planking completed. I have penciled in the gun ports on the aft portion of the ship. These will be depicted as closed on the finished model, so I did not need to frame them. I have left holes (1 each side) where the cabin windows will go. The window frames will be applied after the second planking. Also, the gun ports are slightly larger than will be present on the finished model as these will be lined in this case with red heart. Next up, a lot of sanding and a bit of filler. Rich
-
deck planking options
barkeater replied to manning16's topic in Building, Framing, Planking and plating a ships hull and deck
Here's beech for comparison
-
There was some variation in length for a given ball weight. Larger canons were longer and would be placed on lower decks for stability. I have never heard of shorter gun barrels for small vessels in the same shot weight. Rather the shot weight determined the length with some manufacturing variation. Smaller vessels naturally had smaller weight canons and larger vessels would have multiple canon sizes with larger on the lower decks Rich ty.
-
Carcass 1758 by barkeater - scale 1:48
barkeater replied to barkeater's topic in - Build logs for subjects built 1751 - 1800
First planking is done up to the deck which I marked with a black dyed plank for visual reference when I do the second planking. Next job is to frame out the gun ports and windows before I finish up planking to the top of the gunwales. Rich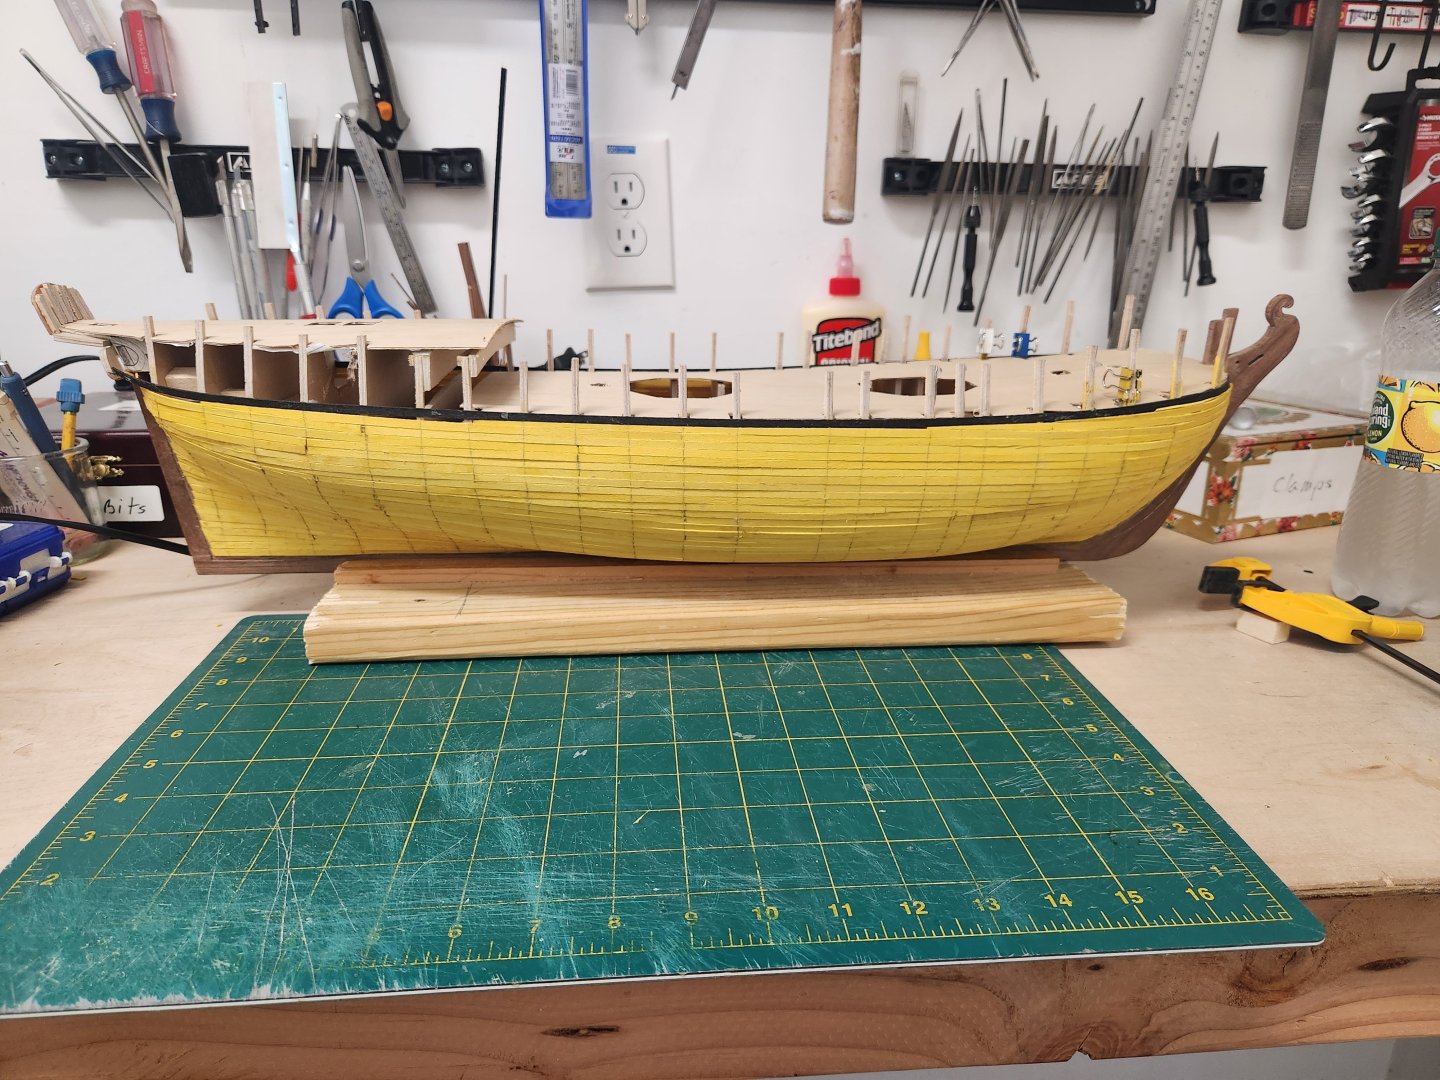
-
Planking disaster
barkeater replied to sgrez's topic in Building, Framing, Planking and plating a ships hull and deck
ok, my two cents. I use wood glue (pva) when joining wood or wood products (paper). If I need to glue wood to metal or plastic, I use cyanoacrylate (ca). My planking I do with pva. I heat bend my planks before gluing and even if I have to clamp with my fingers, a slow count to 100 usually gives enough time to set the glue. Ca is messy and if you get it on a surface it will stain. Even if you paint you can see the stain as it is plastic and fills in the wood grain. You also can't easily sand it out either. Yes, you can remove with acetone but with excess pva I just wipe with a wet paper towel. It also sands nice with no staining. My main use for ca is pinning deck furniture where I place a pin internally and glue it to a hole drilled in the deck. -
Beautiful work. Rich
-
Planking disaster
barkeater replied to sgrez's topic in Building, Framing, Planking and plating a ships hull and deck
You're ok, just taper the remaining planks. The first planking in a double planking is really just a base to apply the second planking to. I would get rid of the nails as has previously been noted. You can't sand them. Use some wood filler and sand nice and smooth to receive the second planking. Have fun. Rich -
Here's a tip I don't think anybody has mentioned. The tapered surface of the plank should always go against an already installed plank. The planks free edge is therefore straight and any gap that needs to be corrected is against an installed plank and readily apparent before glueing. Also, if you use steam bending, let the finished plank sit overnight in place before gluing. Wet wood swells. Degree is minimal but you want to get the tightest fit you can. Rich here's a tip I don't
-
Carcass 1758 by barkeater - scale 1:48
barkeater replied to barkeater's topic in - Build logs for subjects built 1751 - 1800
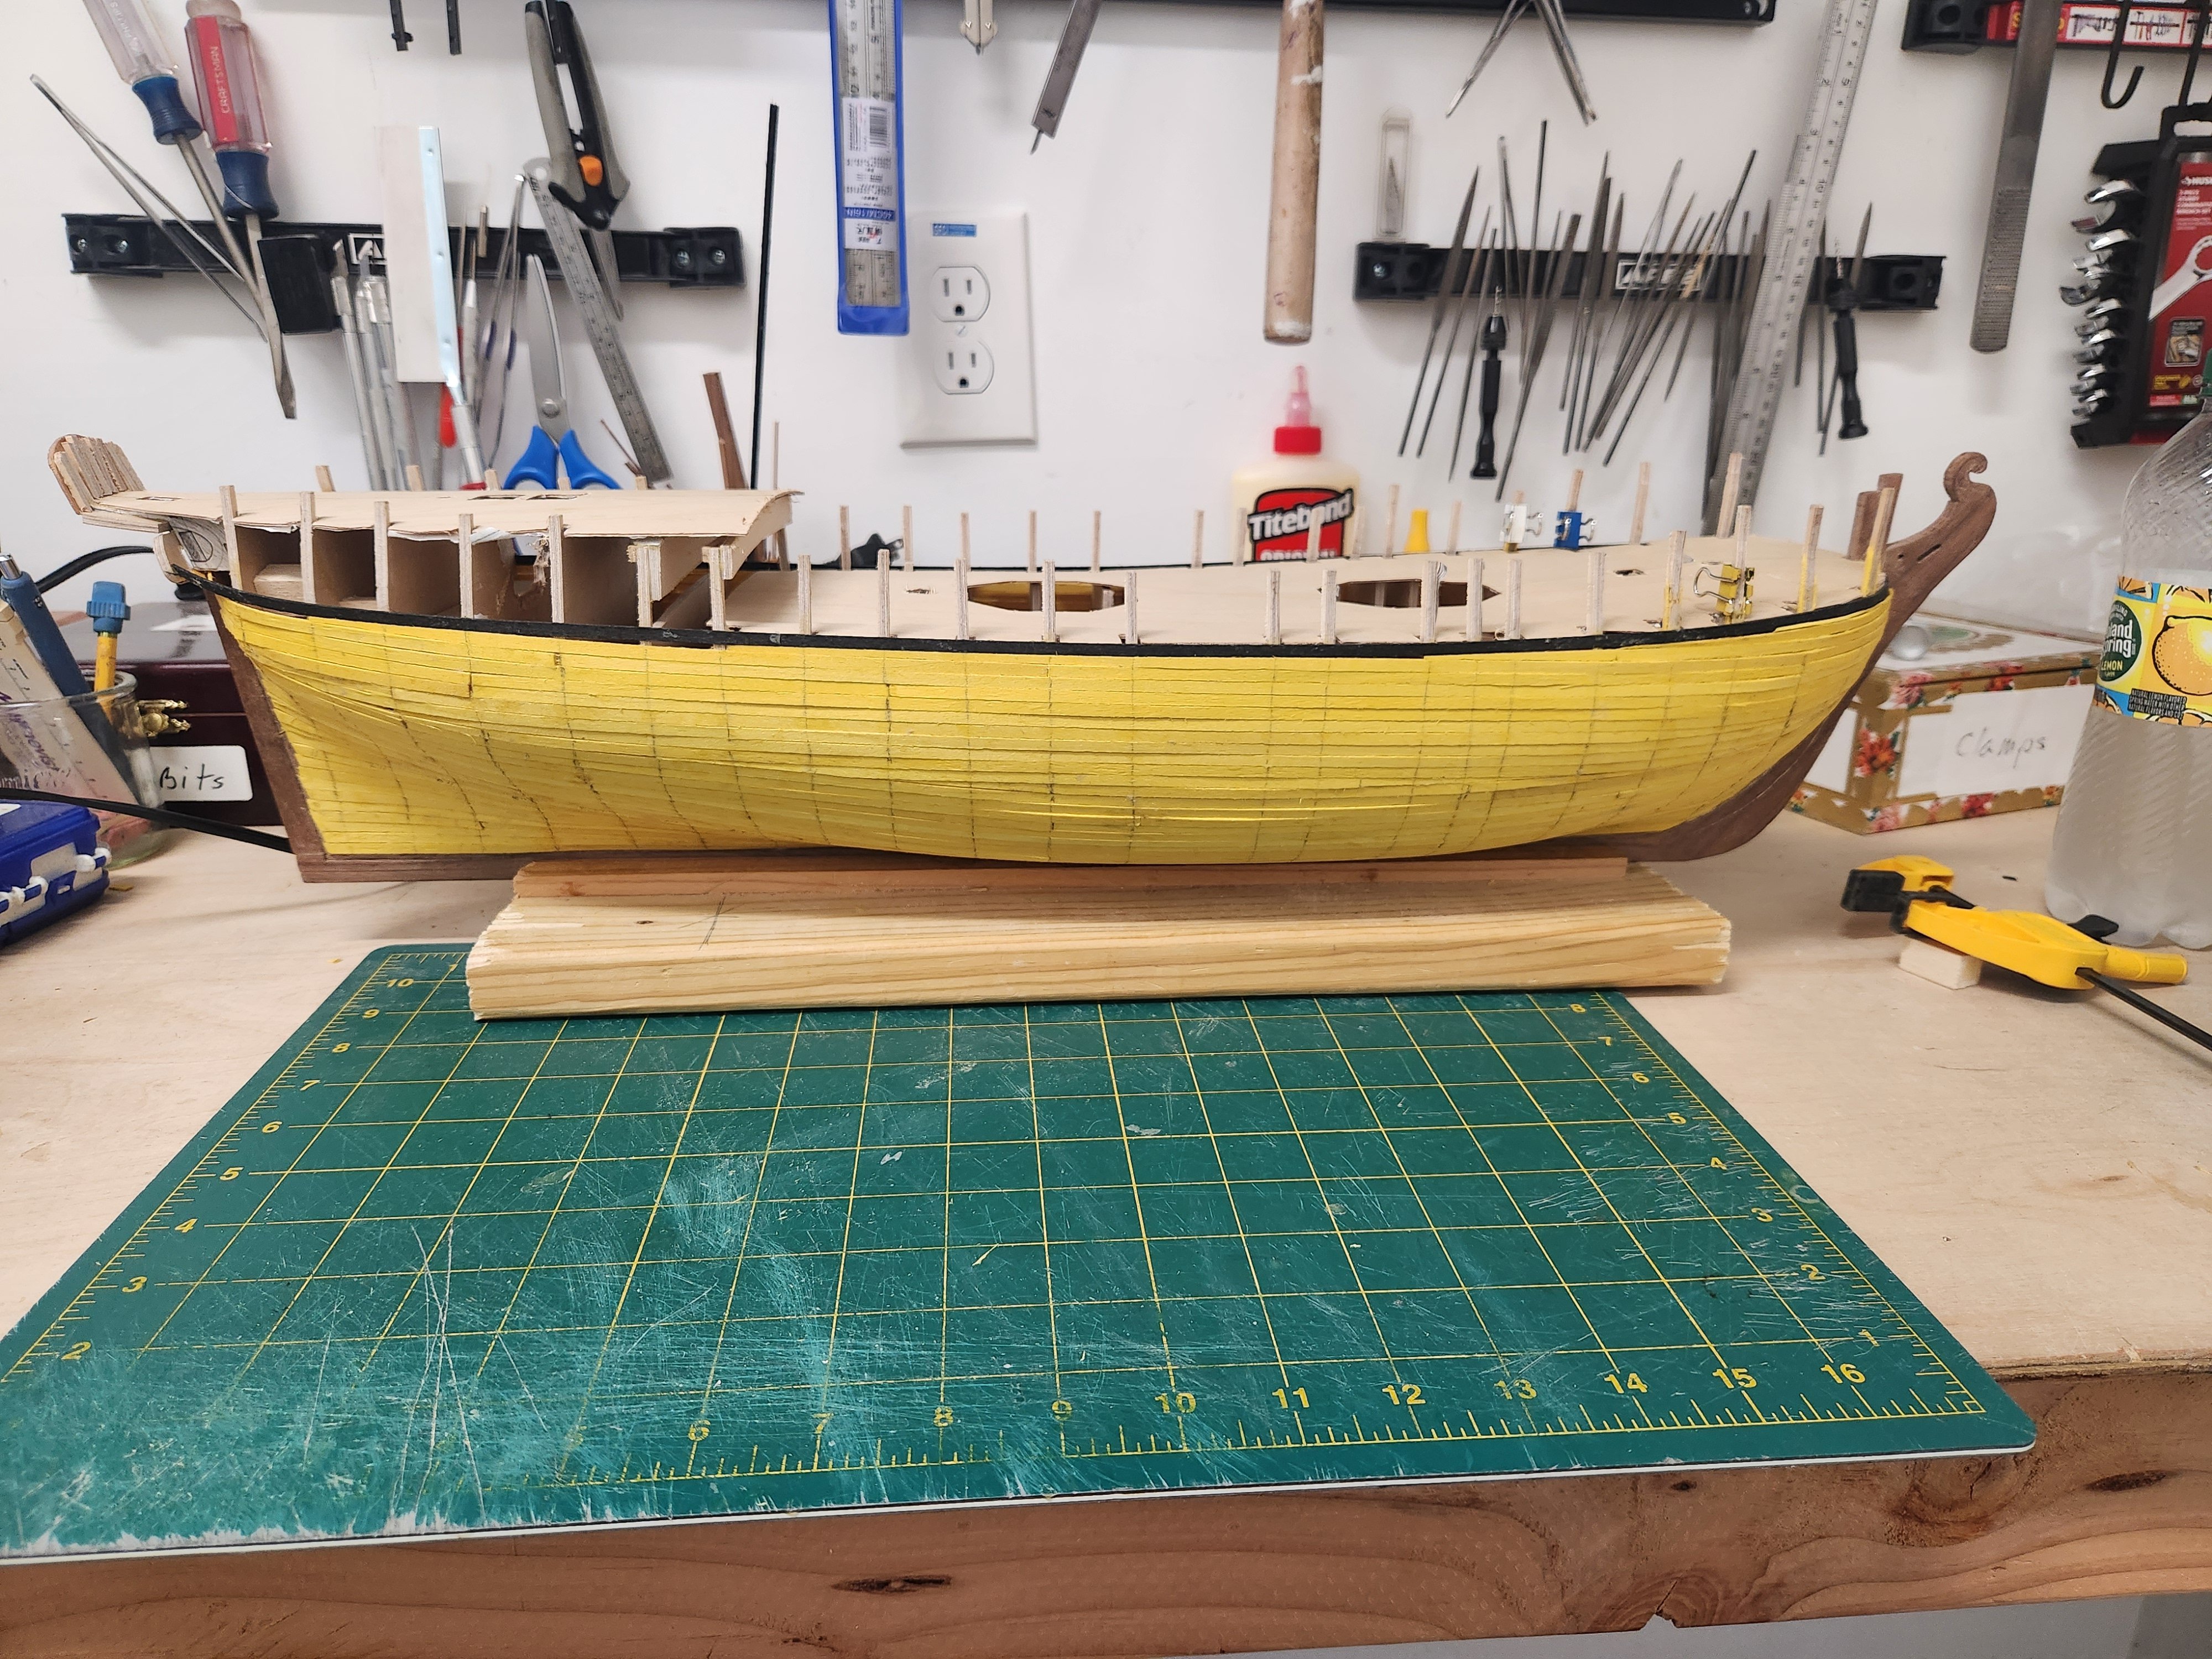
I've been working on the first planking. I thought I ordered natural strips but I either hit the wrong button or they sent me the wrong color. Doesn't matter as this will all be covered up. It does look though like it would glow in the dark at this point, however. Not quite sure yet how the planking is going to wind up at the stern. I may be able to continue or put in an additional piece. oh well, that's part of the fun figuring it out. Rich
-
Welcome aboard. Have fun. Rich
-
Carcass 1758 by barkeater - scale 1:48
barkeater replied to barkeater's topic in - Build logs for subjects built 1751 - 1800
The bulkheads have been installed as well as the sub decks for both the main deck and quarterdecks. There is a foredeck, but this is open to the main deck along its aft portion. I will not do a subdeck but rather a single plank on beams. I found two slightly different sets of plans from the NMR. One has two masts while the other has three and the quarterdecks are different lengths. I went with the 3 masts as this is how she is depicted by John Cleverly the Younger on her Nordic expedition with the Racehorse. Next job is fairing.
-
Ronald, Think of the hull as one big batten instead of dividing it up into multiple smaller battens. I plank from the keel up. Now, I know at the top planking at the bulwarks, if I've cut out my bulkheads correctly, I will have a true or correct run of the planks. The needed taper of planks in between the keel and the top plank can therefore be calculated. Using the entire hull gives me the advantage that I can correct any tapers that need to be made gradually rather than having to make larger or greater corrections in a briefer run. This is especially useful along the stern where you can have an area where you need to increase your widths and have another area where you need to taper. I don't mean to disparage other methods, but this method works best for me. Rich