HOLIDAY DONATION DRIVE - SUPPORT MSW - DO YOUR PART TO KEEP THIS GREAT FORUM GOING! (Only 27 donations so far out of 49,000 members - C'mon guys!)
×


Javlin
-
Posts
1,681 -
Joined
-
Last visited
Content Type
Profiles
Forums
Gallery
Events
Everything posted by Javlin
-
Craig if I am reading you right are you talking about the three color scheme derived from one color for decks?I have done two back in day like that that is some work it works but alot of taping and patience.I in fact started the Eugen like that and bought the wood deck to go over it it's a long process.
-
I think I will watch and see the progression while I work with wood some I have yet to complete a a wood ship.
- 24 replies
-
- 2
-

-
- De 13 Søskende
- sail
- (and 5 more)
-
I like it and it's definitely different with a nice way to learn/preserve the history.The purple wood could be purpleheart starts off red and goes purple later if I am not mistaken.We get some of it comes in through Gulfport Harbor a couple times a year along with others from S.America.I think that you have given insight for a project much the same just not a game for the local Museum dealing with the history of the Gulf Coast in MS.A buddy of mine which I am doing a base for now a different commission job is doing the the "Trojan" for the City of Gulfport. I see your strip and it's purpleheart. http://www.historicalsocietyofgulfport.org/trojan.html
-
Mike that's Tamy's stuff right I think I have a can 1200 rattle type also was thinking of getting some etching primer from work and maybe decant.
-
It was not to bad Mike but did require some patience ,recheck and recheck and still a couple of touchups.I was not aware that Tamiya has a metal primer out there acrylic does not stick worth a hoot to metal.This build finds me using the most acrylic ever,I will have to clean and redo the railings always like to pre-paint .
-
I have seen some builds of it Craig a partial I think at LSP yes Craig if this hits your bench lots of very useful info in the build on painting and things GWH got wrong minor but need to be addressed. https://forum.largescaleplanes.com/index.php?/topic/92782-finished-132-great-wall-hobby-p-40-curtiss-hawk-flying-tigers/#comment-1337129
-
Thank You Alan glad it hit a cord with some definitely different
-
Thks Dan these little guys probably got pretty dirty seeing the environment they were used in but just not that many pics out there and the Chikuma and all those other unfinished builds have my attention.
-
I am using some not all of the Eduard Set I had to order another ladder set from Trumpter see if they fold easier than the Eduard does.
-
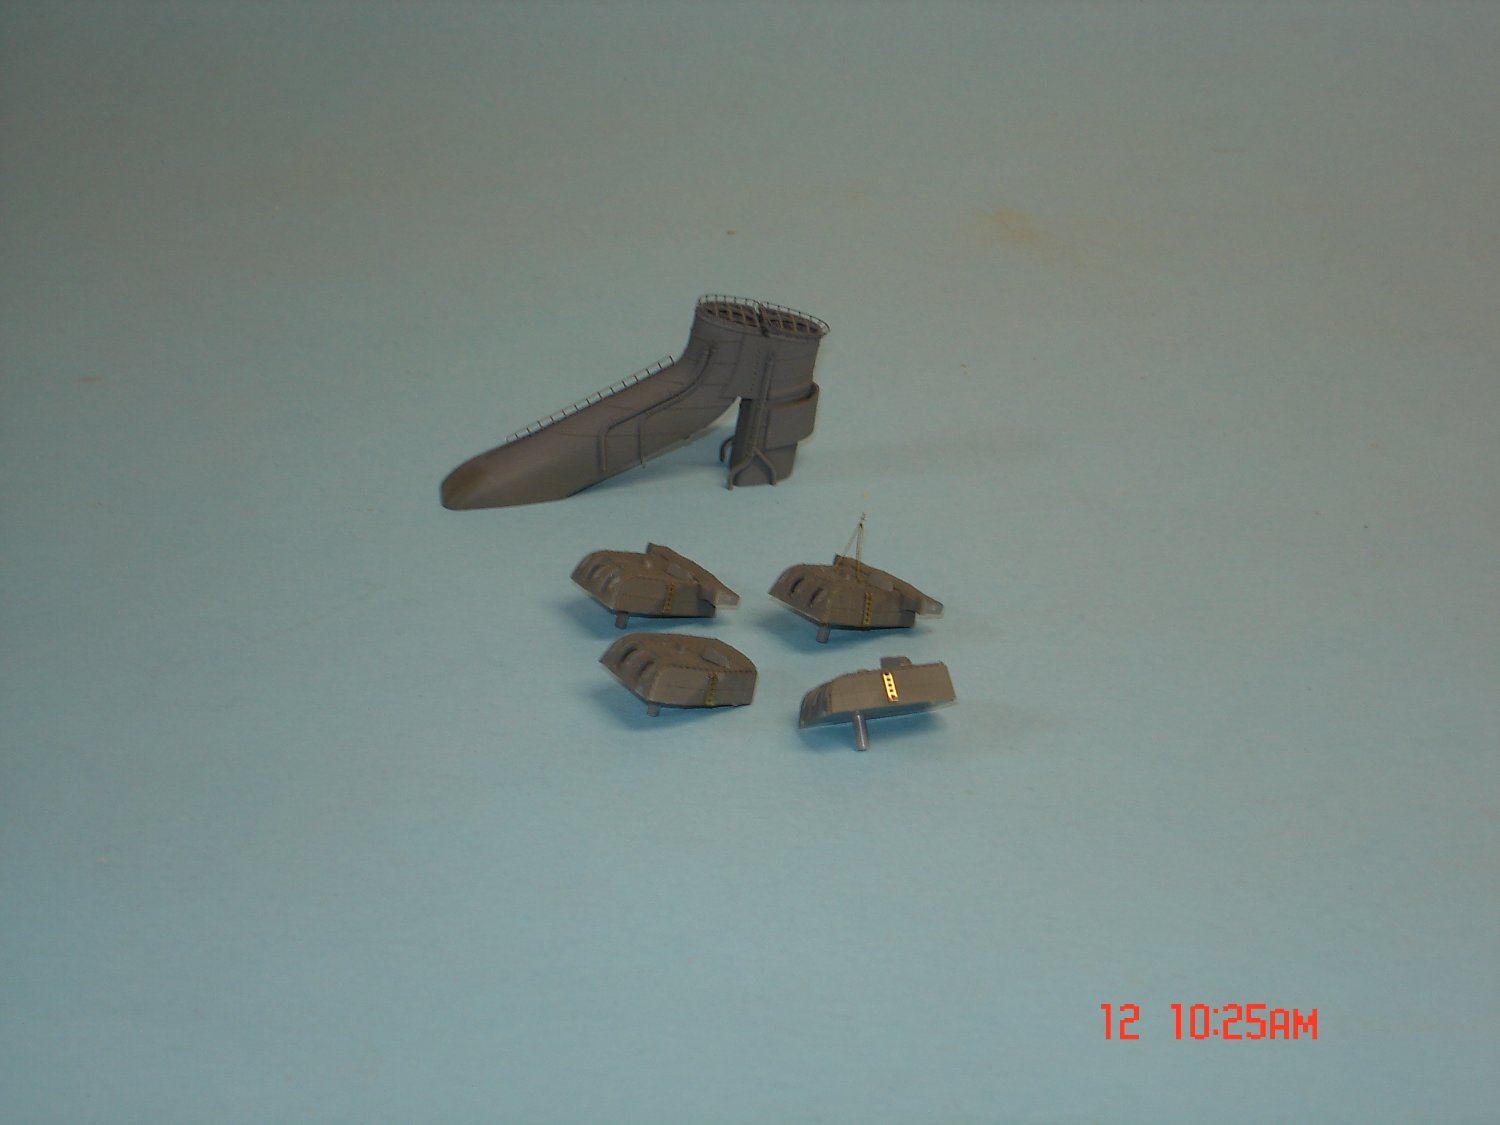
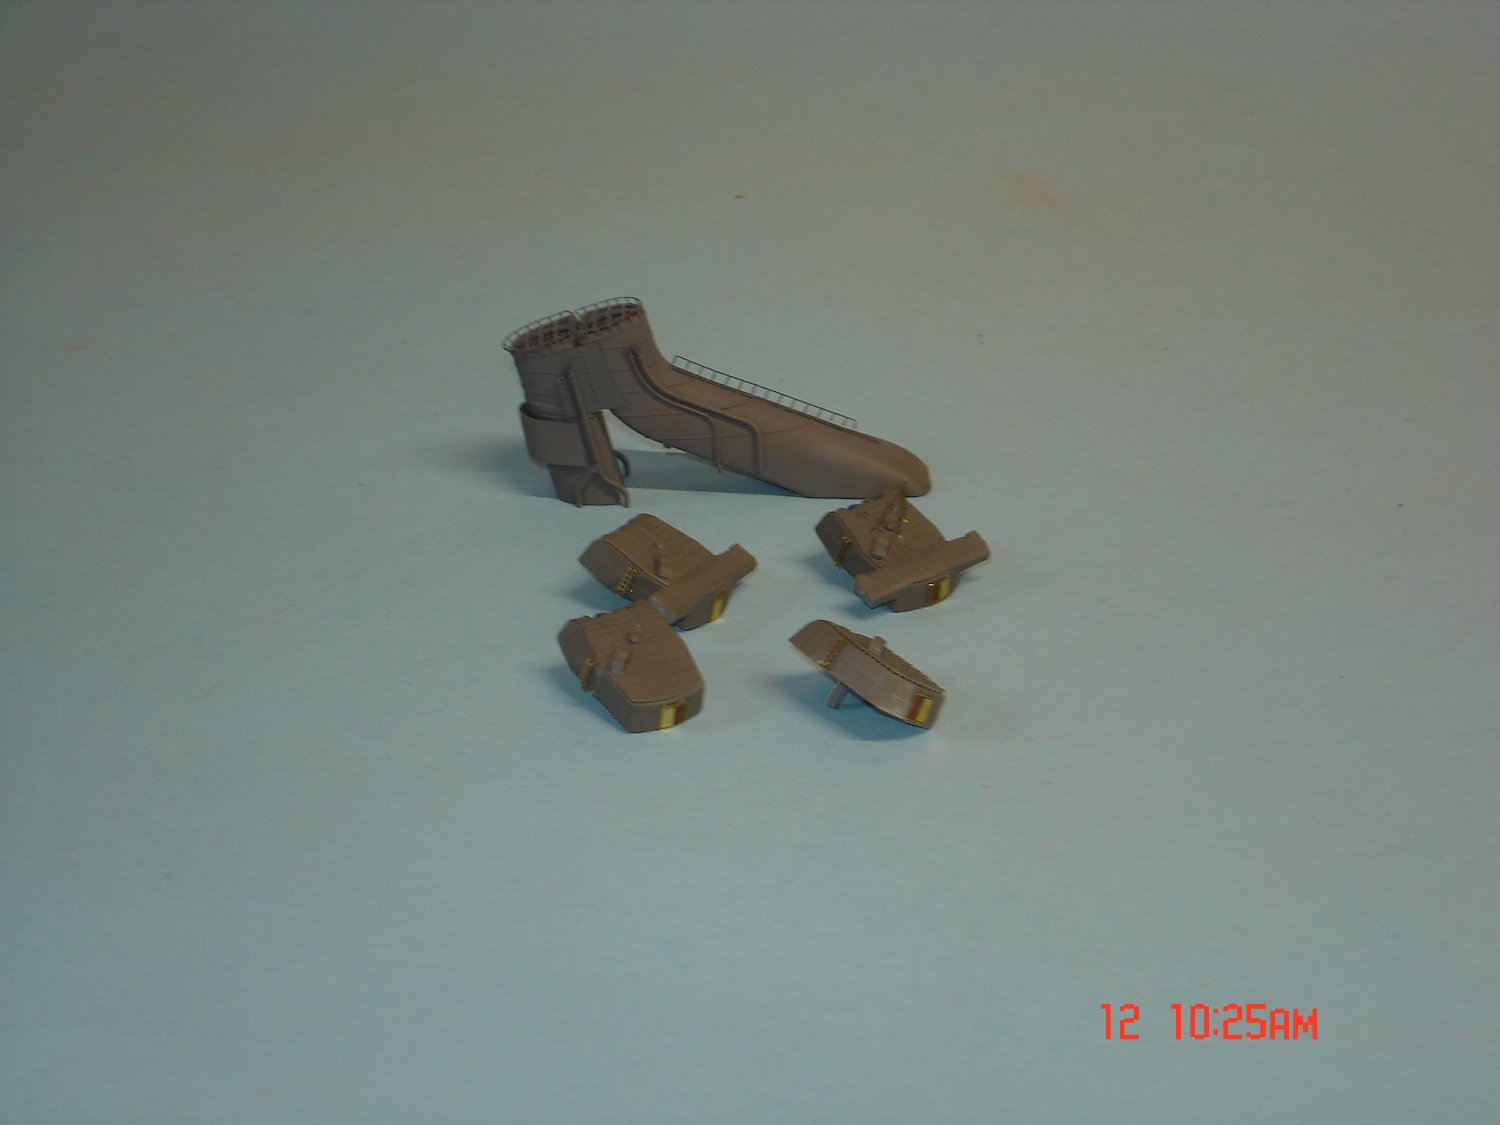
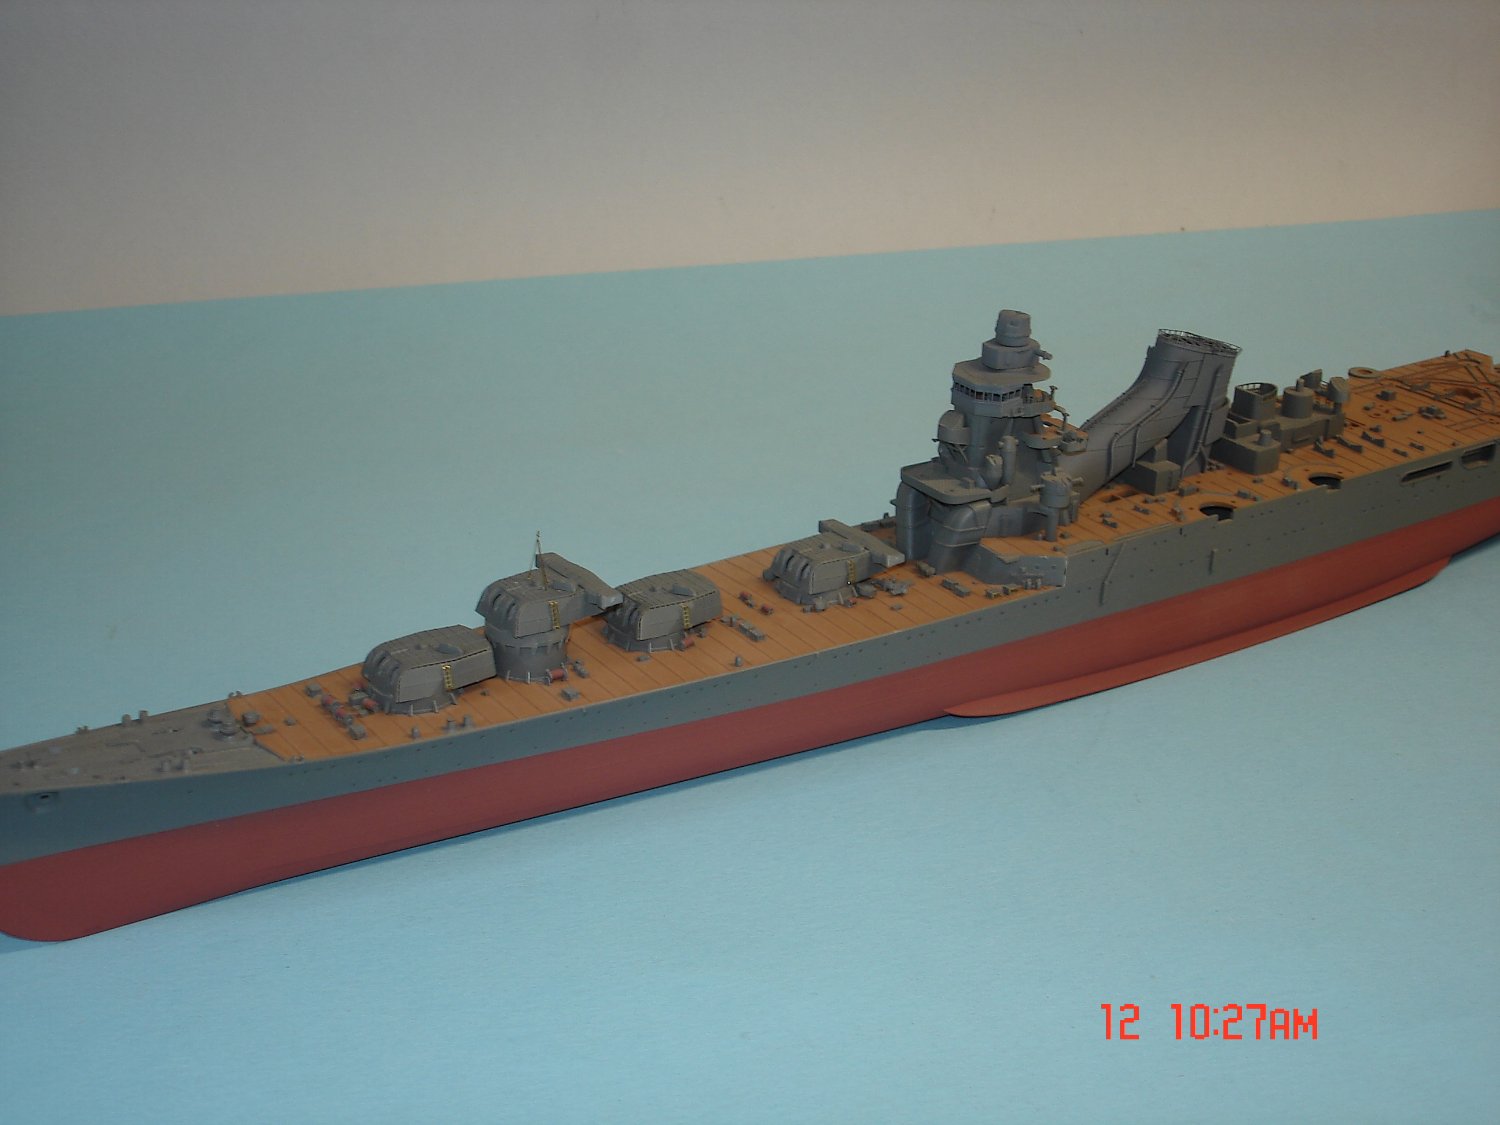
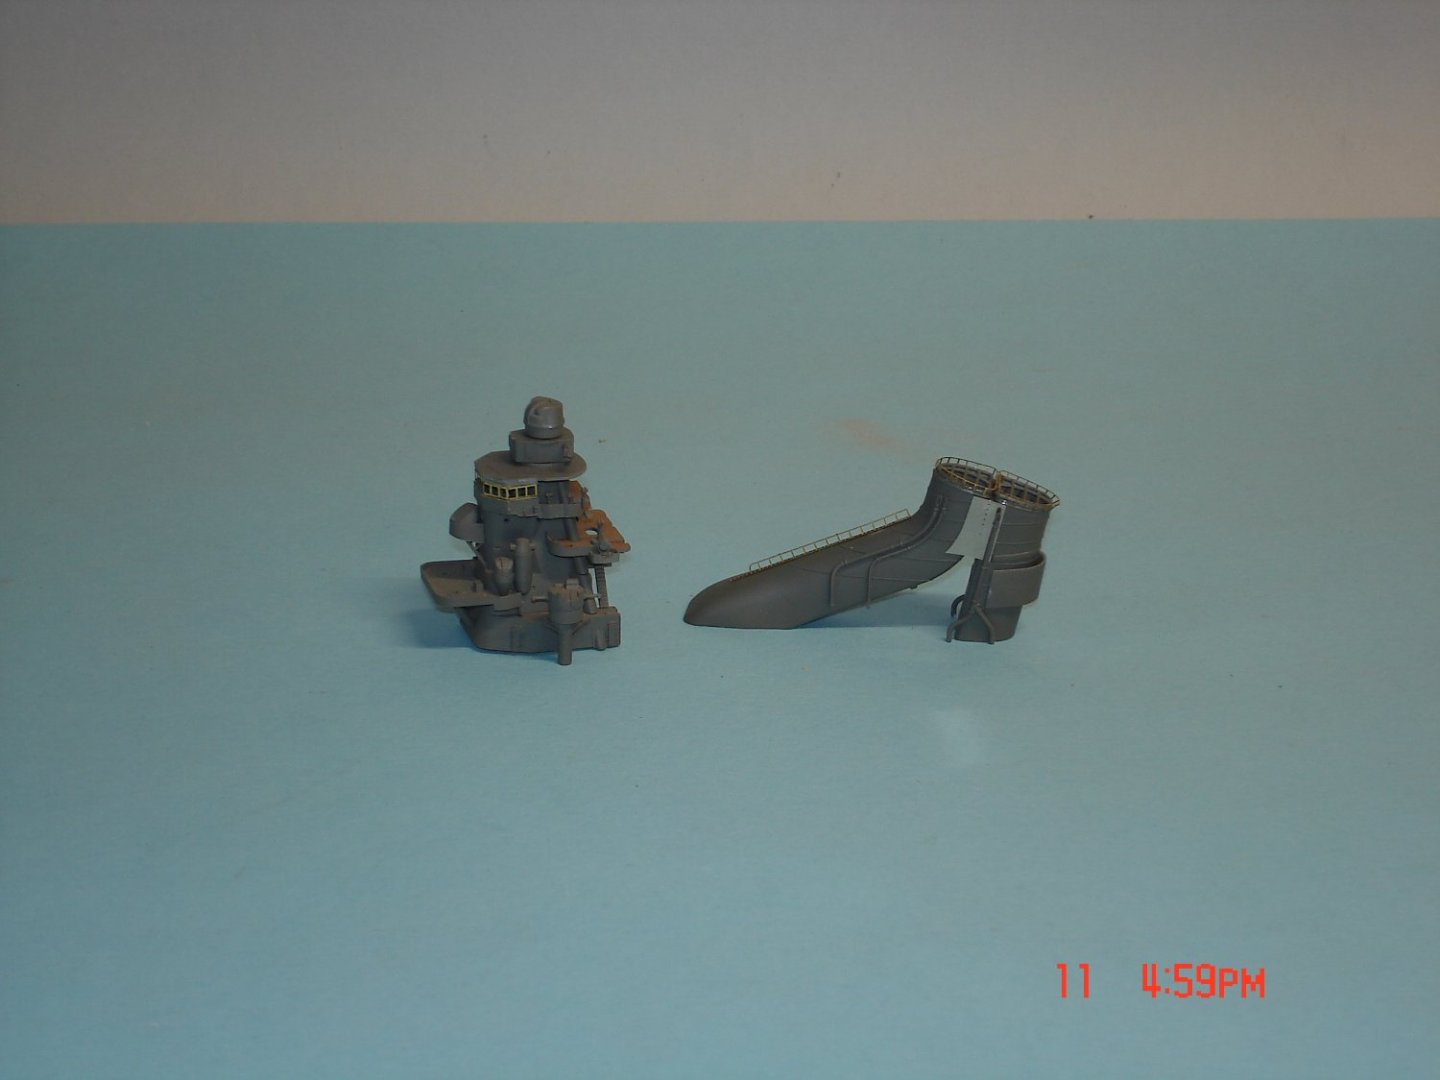
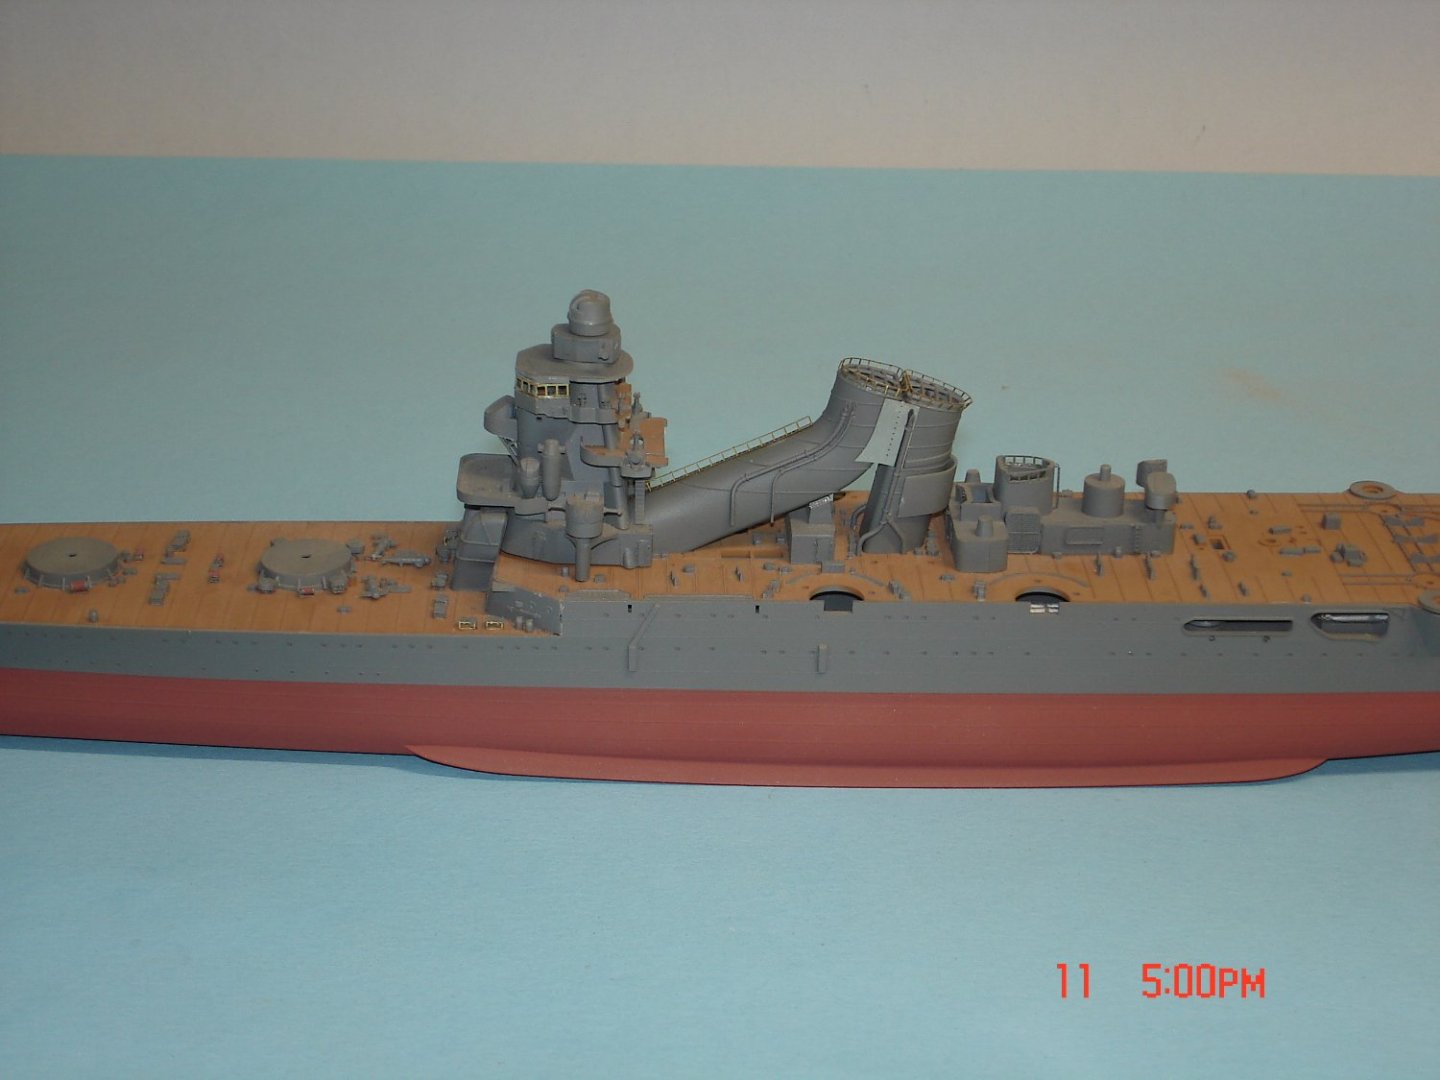
That they do Craig I also like the Kreigsmarine when they introduce the Atlantic bow it became slashing in my opinion. Roger I have read only a few book on the PTO "The Rising Sun","Midway" (not sure of author) and one on Pearl Harbor "Day of Infamy" as time goes on my interest in the N.Africa and the PTO is peaking quite a bit. The four main batteries have been assembled only the PE needs to be attached and a repaint.The Yamyia IJN Grey was a perfect match to the Humbrol.
-
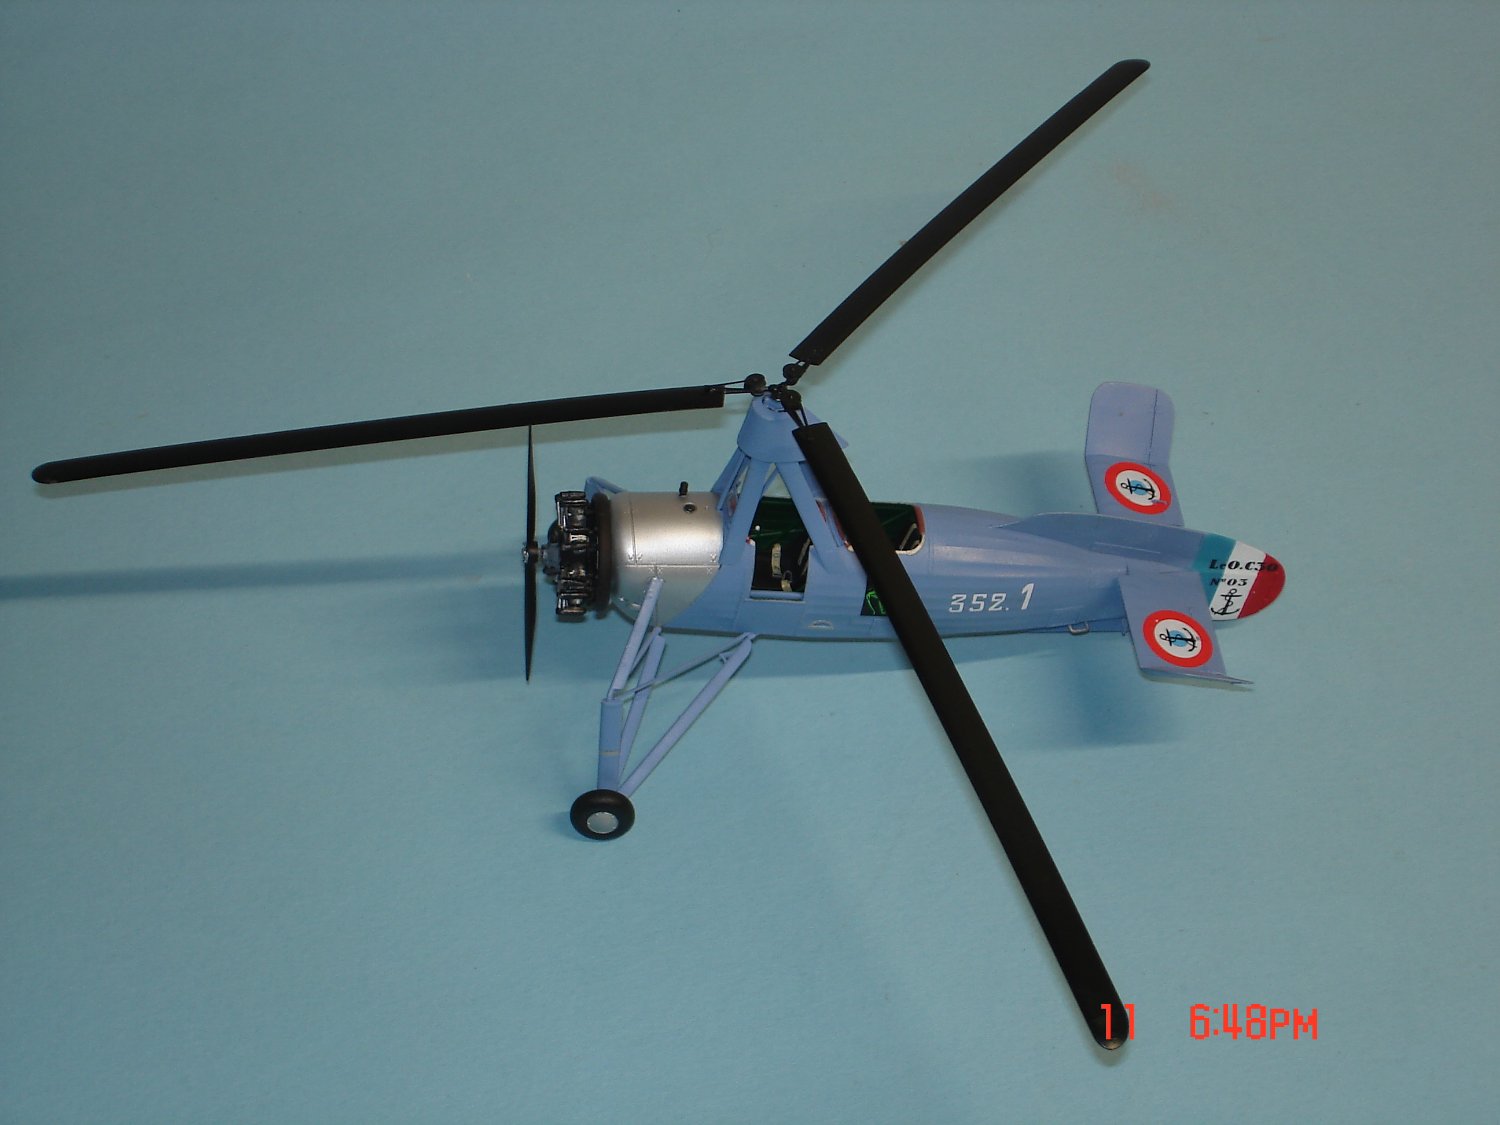
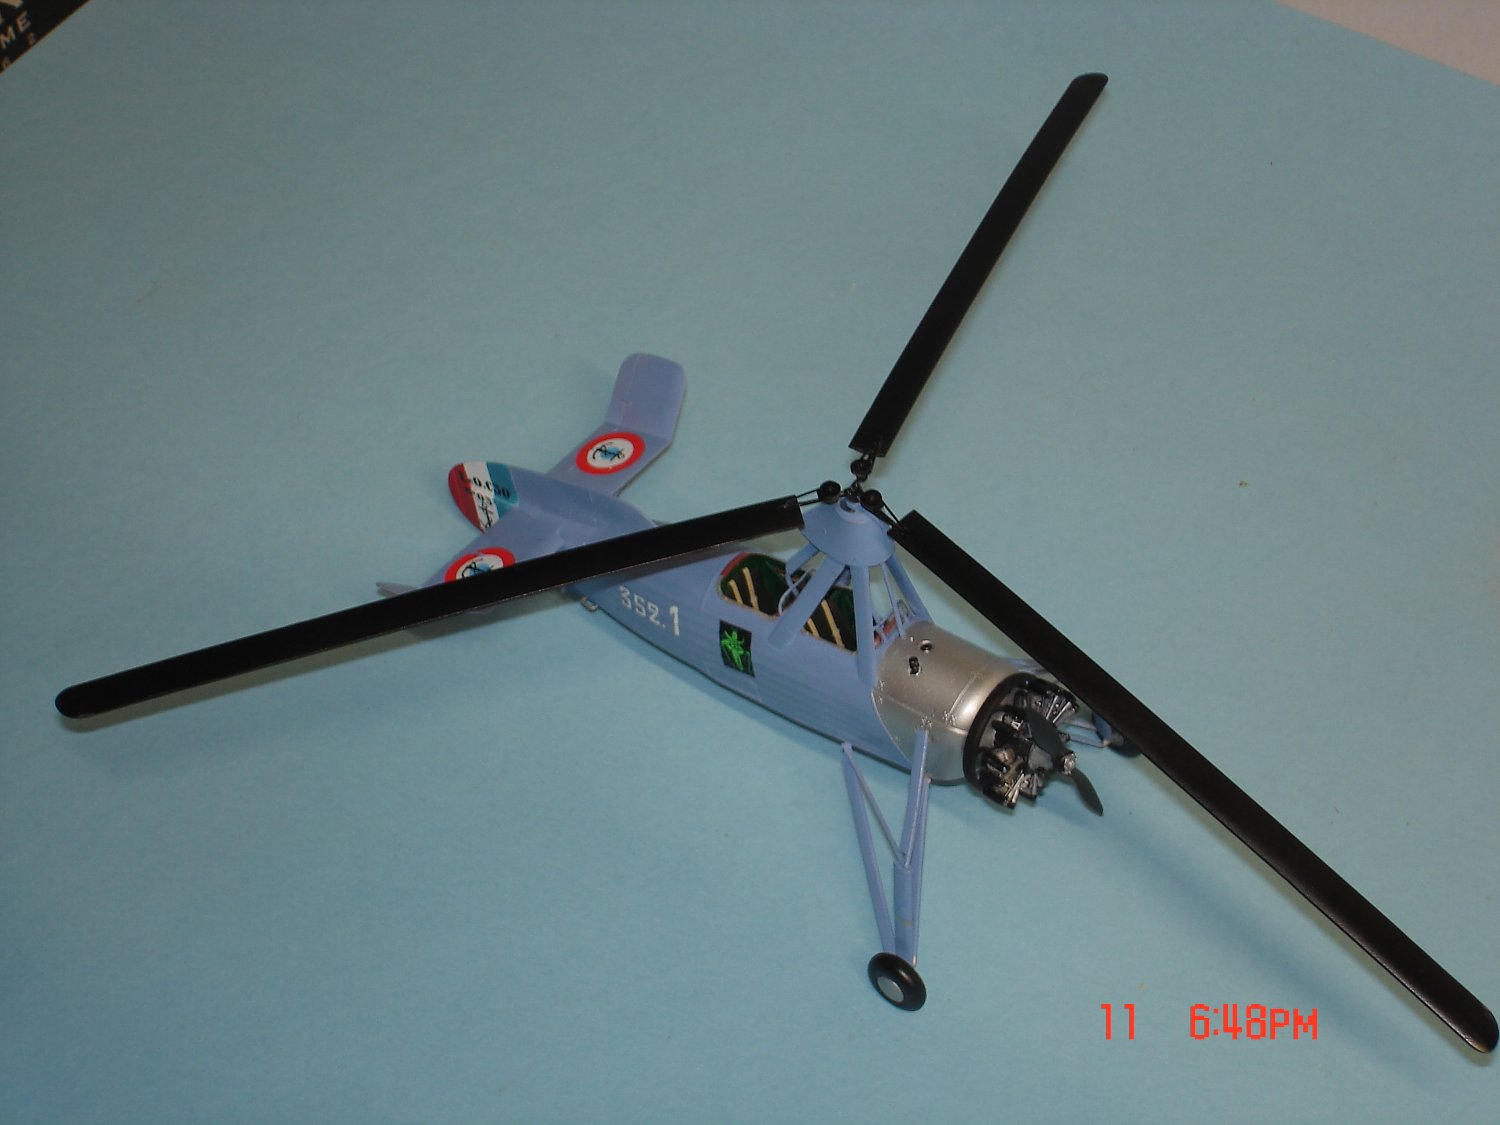
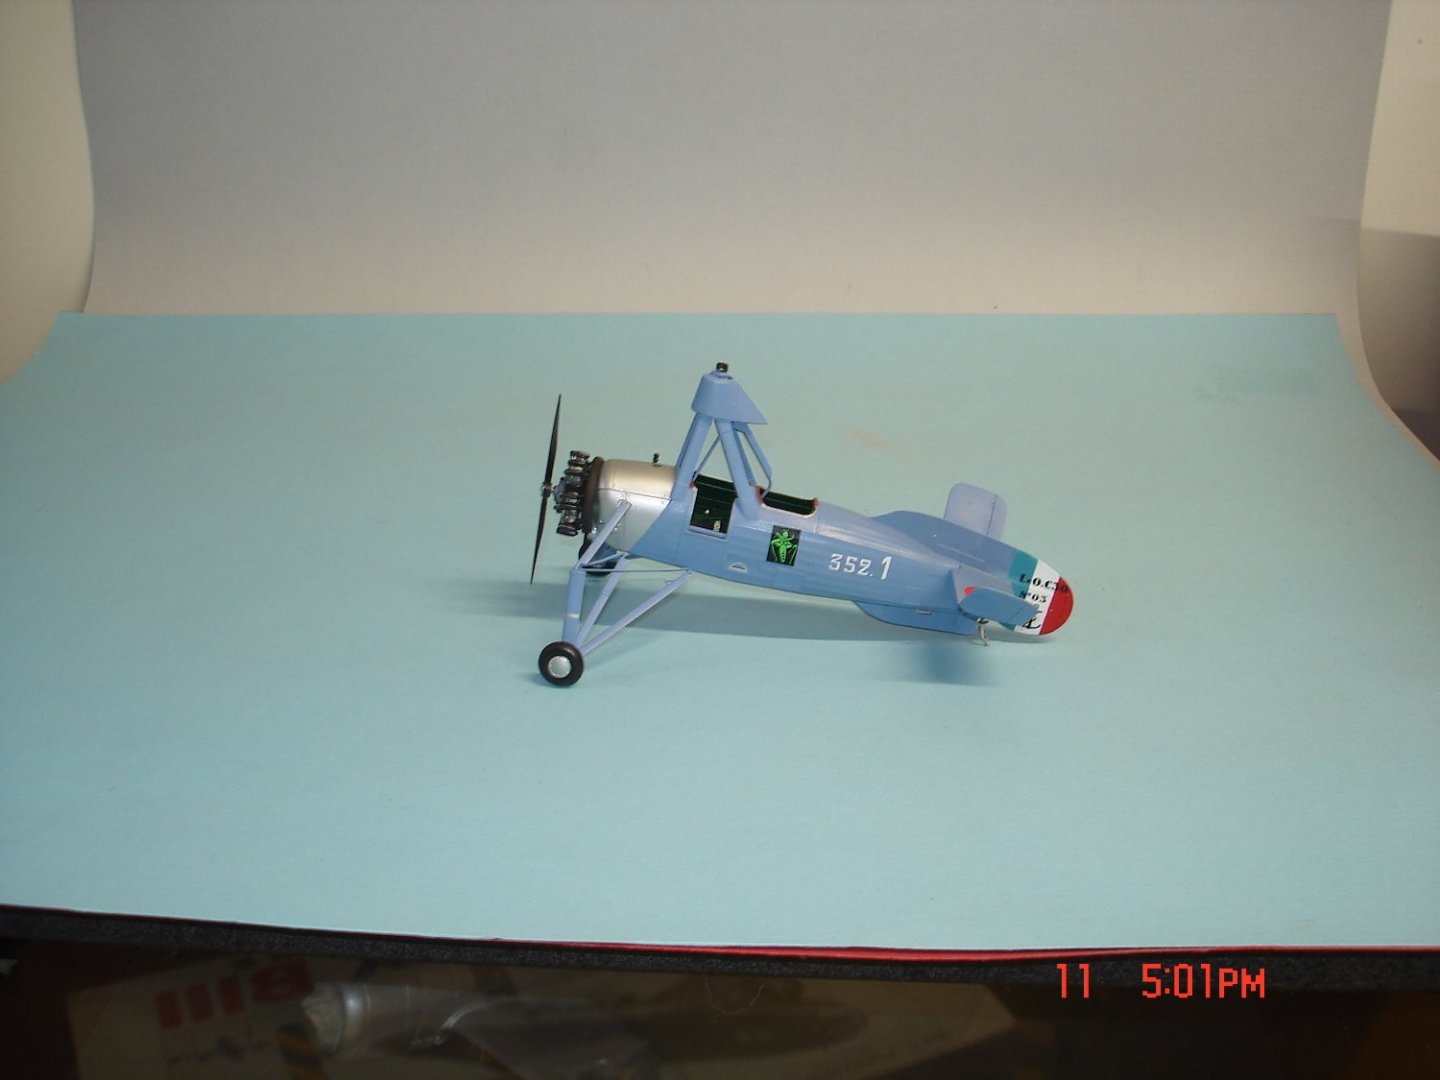
Just about done with this one put the glass and the blades and WhaLa
-
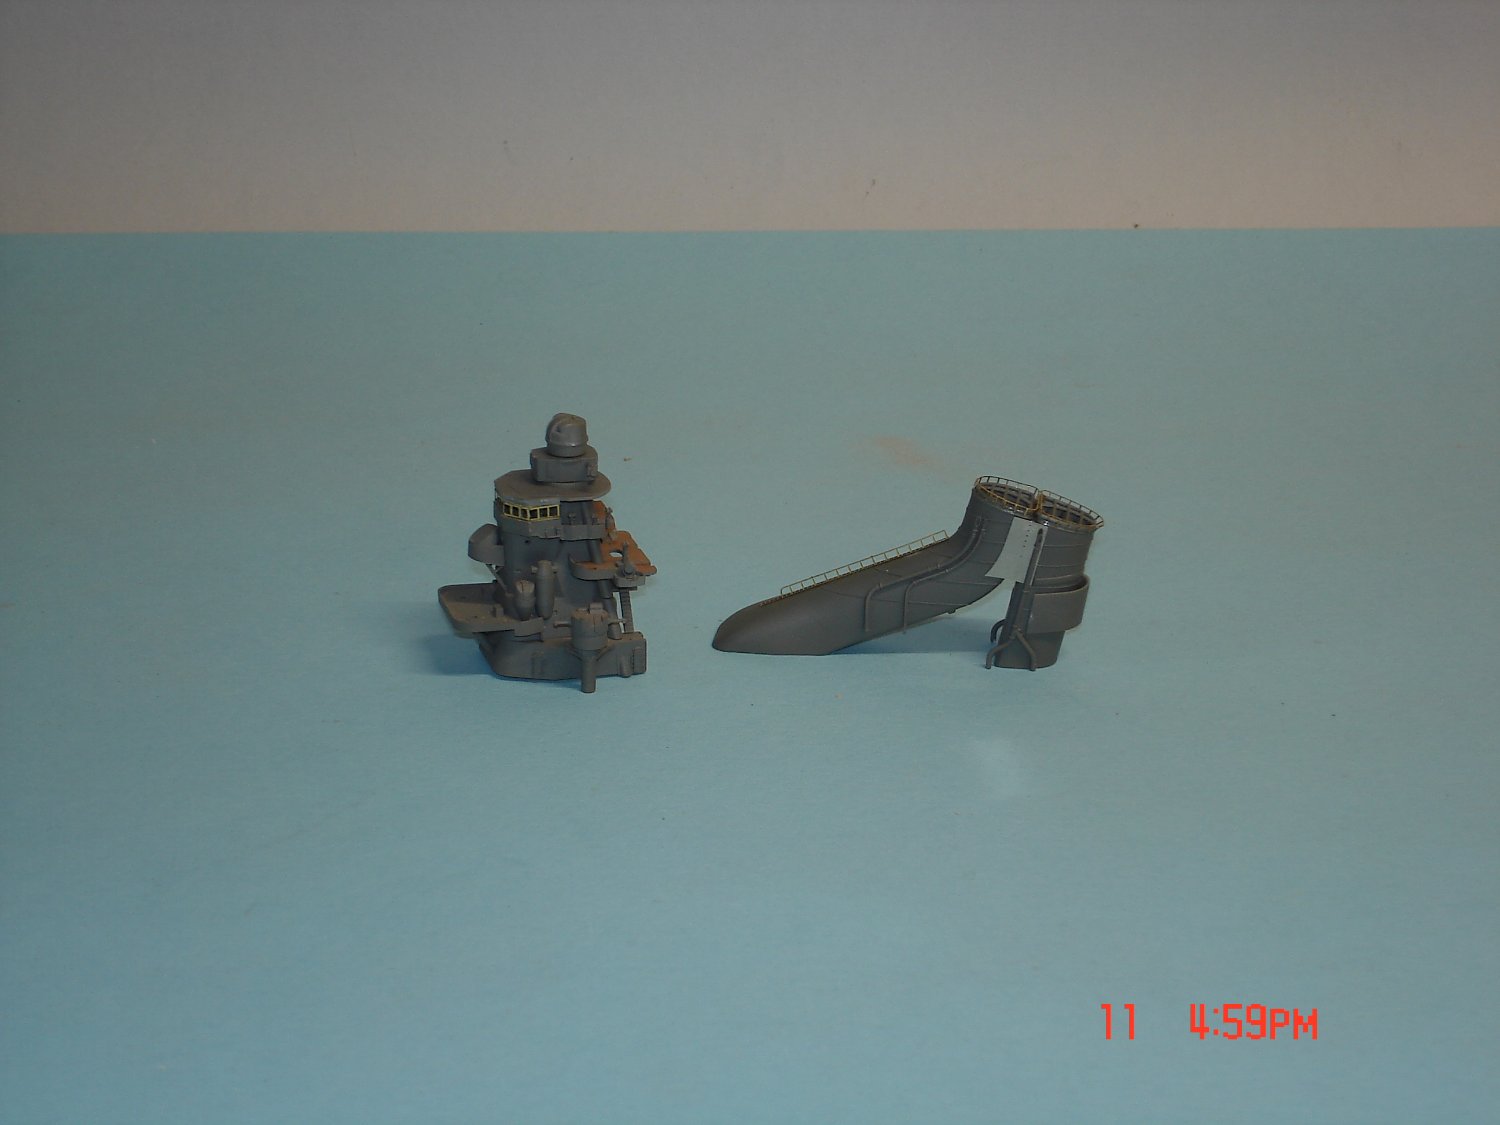
I have just about finished the bridge I screwed up two ladders trying to get the steps to fold out more inbound.The funnels are just about complete I have lost misplaced the colors I used I have Tamy's IJN grey on hand it is very very close to what I used from Humbrol.This is feeling at home I have to say some work left but really I am 50% methinks ATTM.
- 115 replies
-
- 10
-
-
Ouch!!
-
F-86F-30 Sabre by Egilman - Kinetic - 1/32nd scale
Javlin replied to Egilman's topic in Non-ship/categorised builds
EG a thought...maybe take the yellow out to the black outside borders then mask off the yellow to inside and paint the black or is that the plan?That way only two more tape lines inside for the black.Seems I did mine that way. -
Not my cup of tea Craig but I'm liking the results
-
F-86F-30 Sabre by Egilman - Kinetic - 1/32nd scale
Javlin replied to Egilman's topic in Non-ship/categorised builds
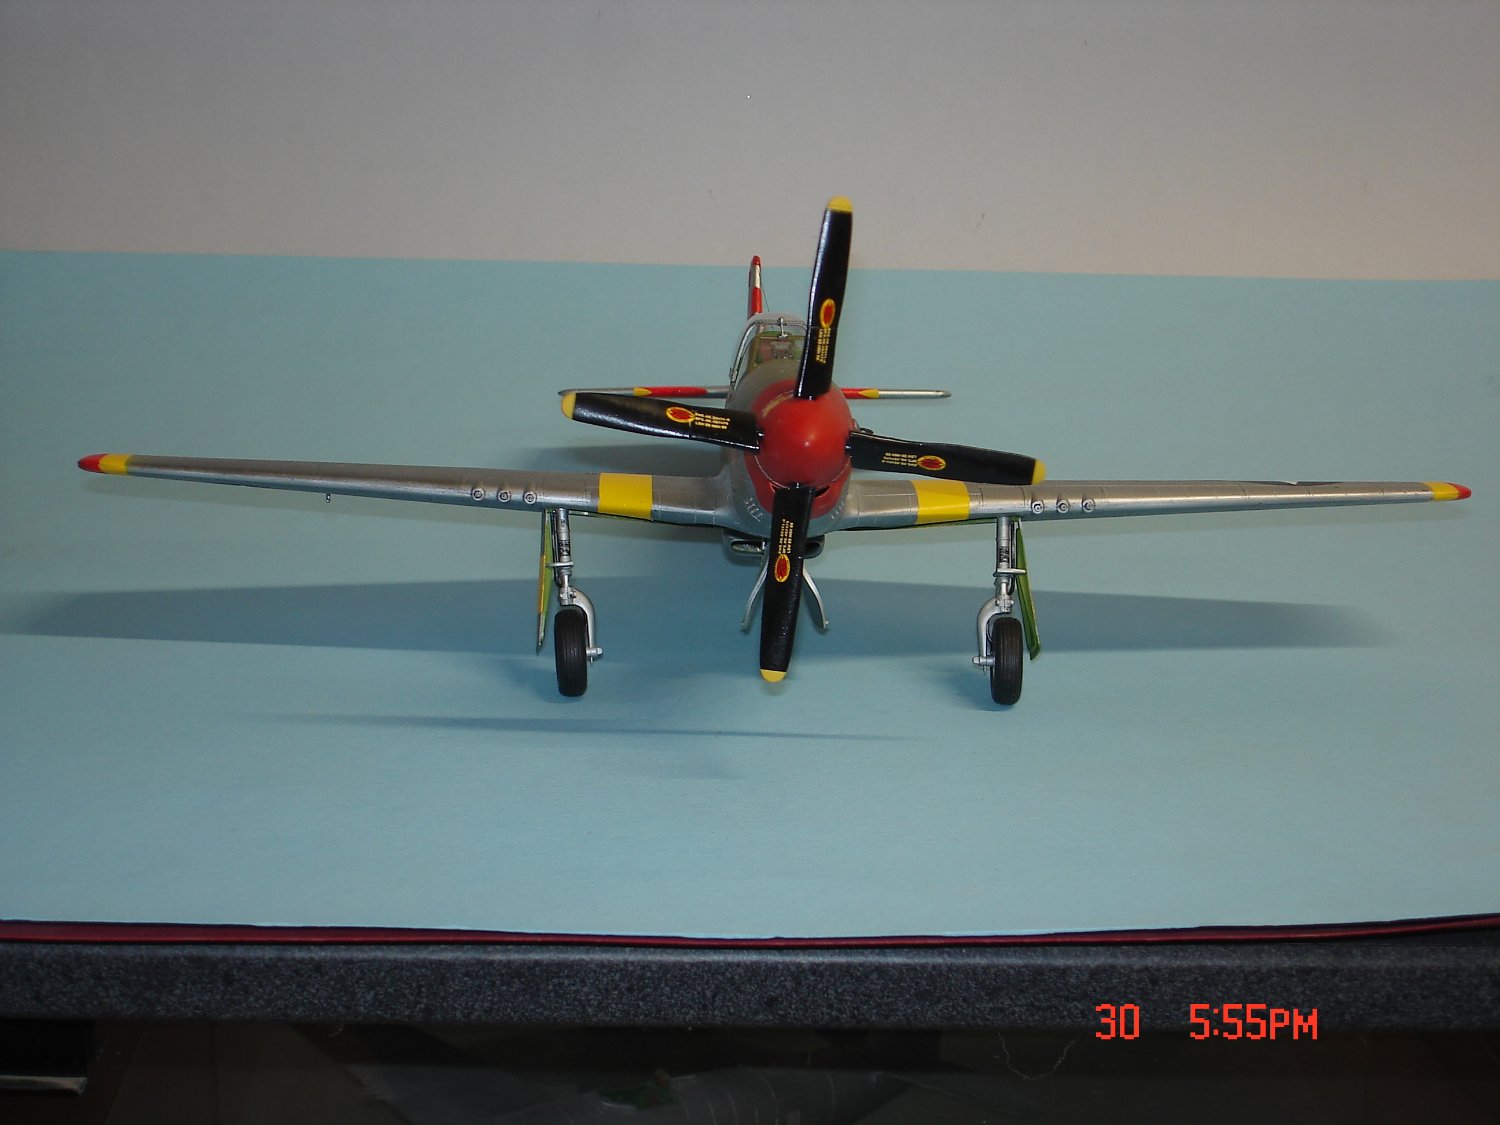
looking good EG and yep the fuse band is a beotch I was surprised the yellow on the 51 worked as good as they did. -
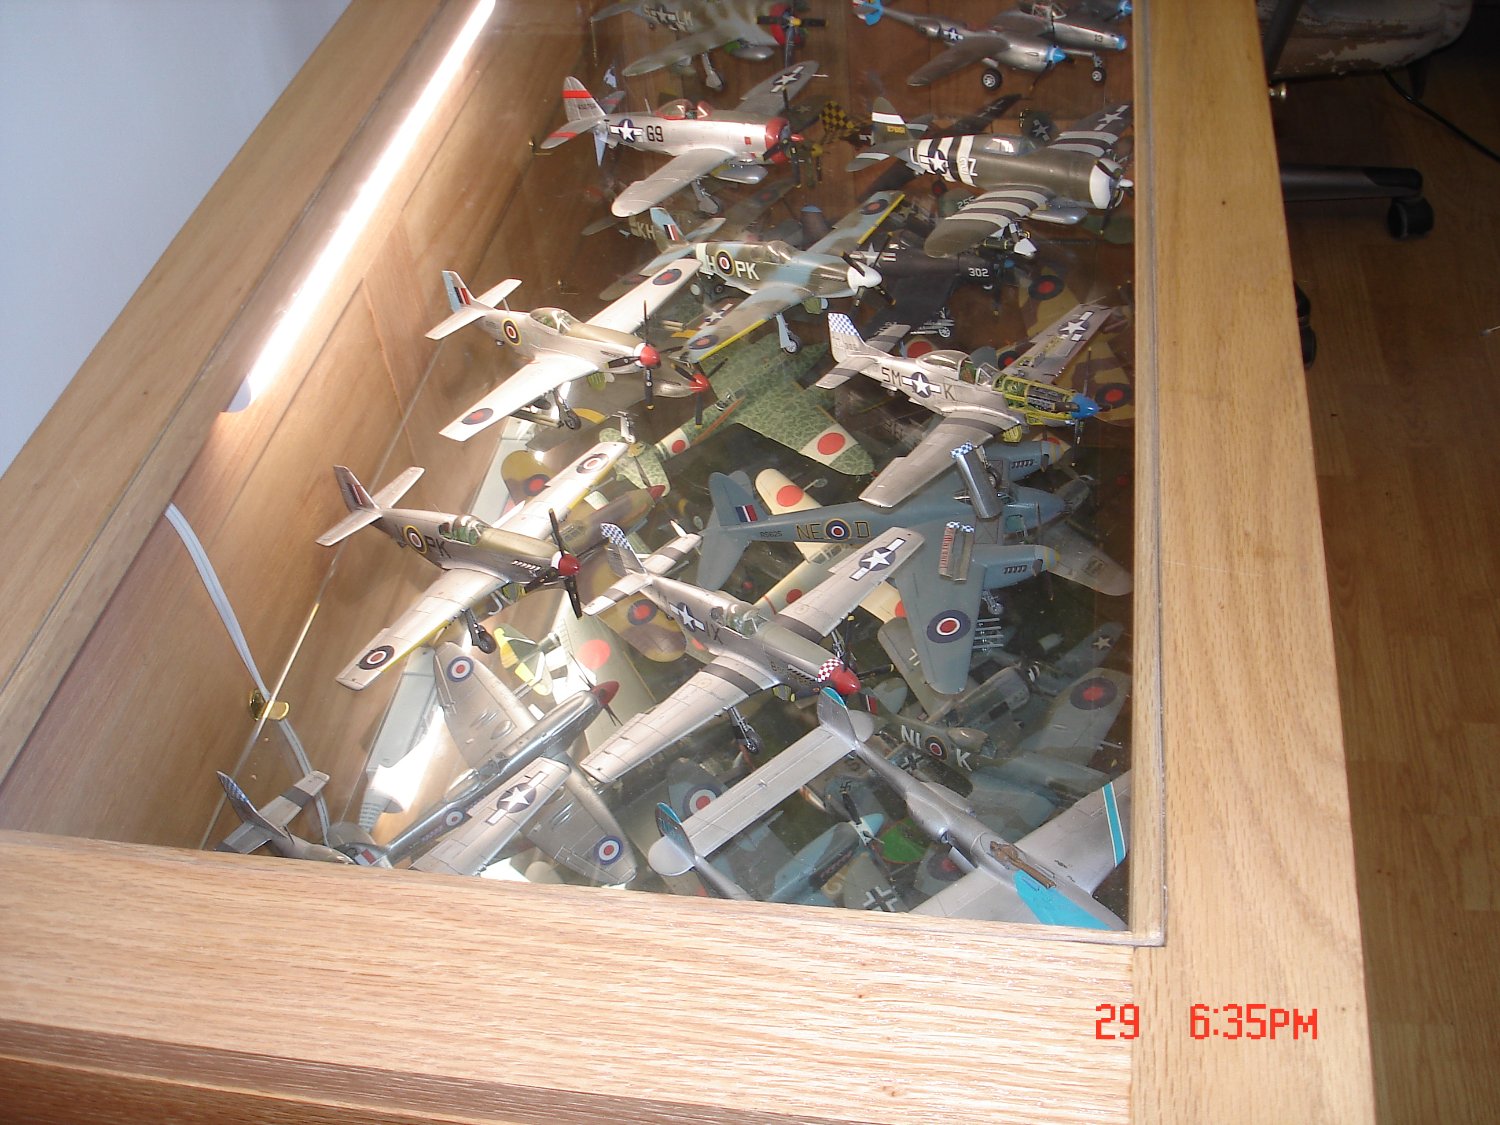
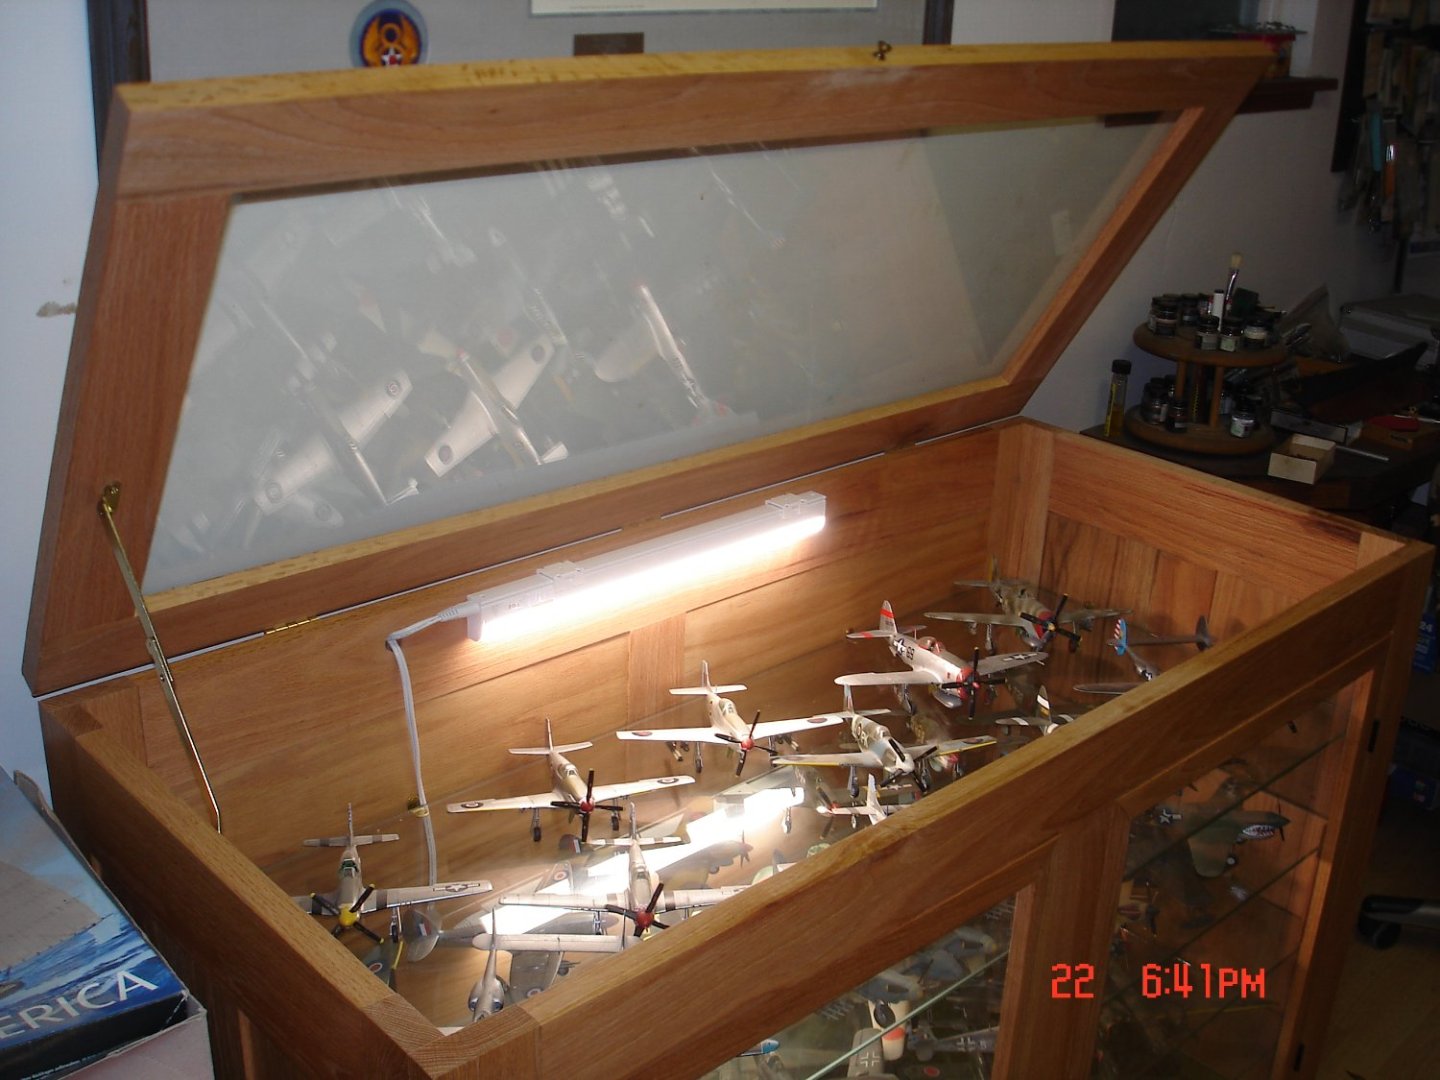
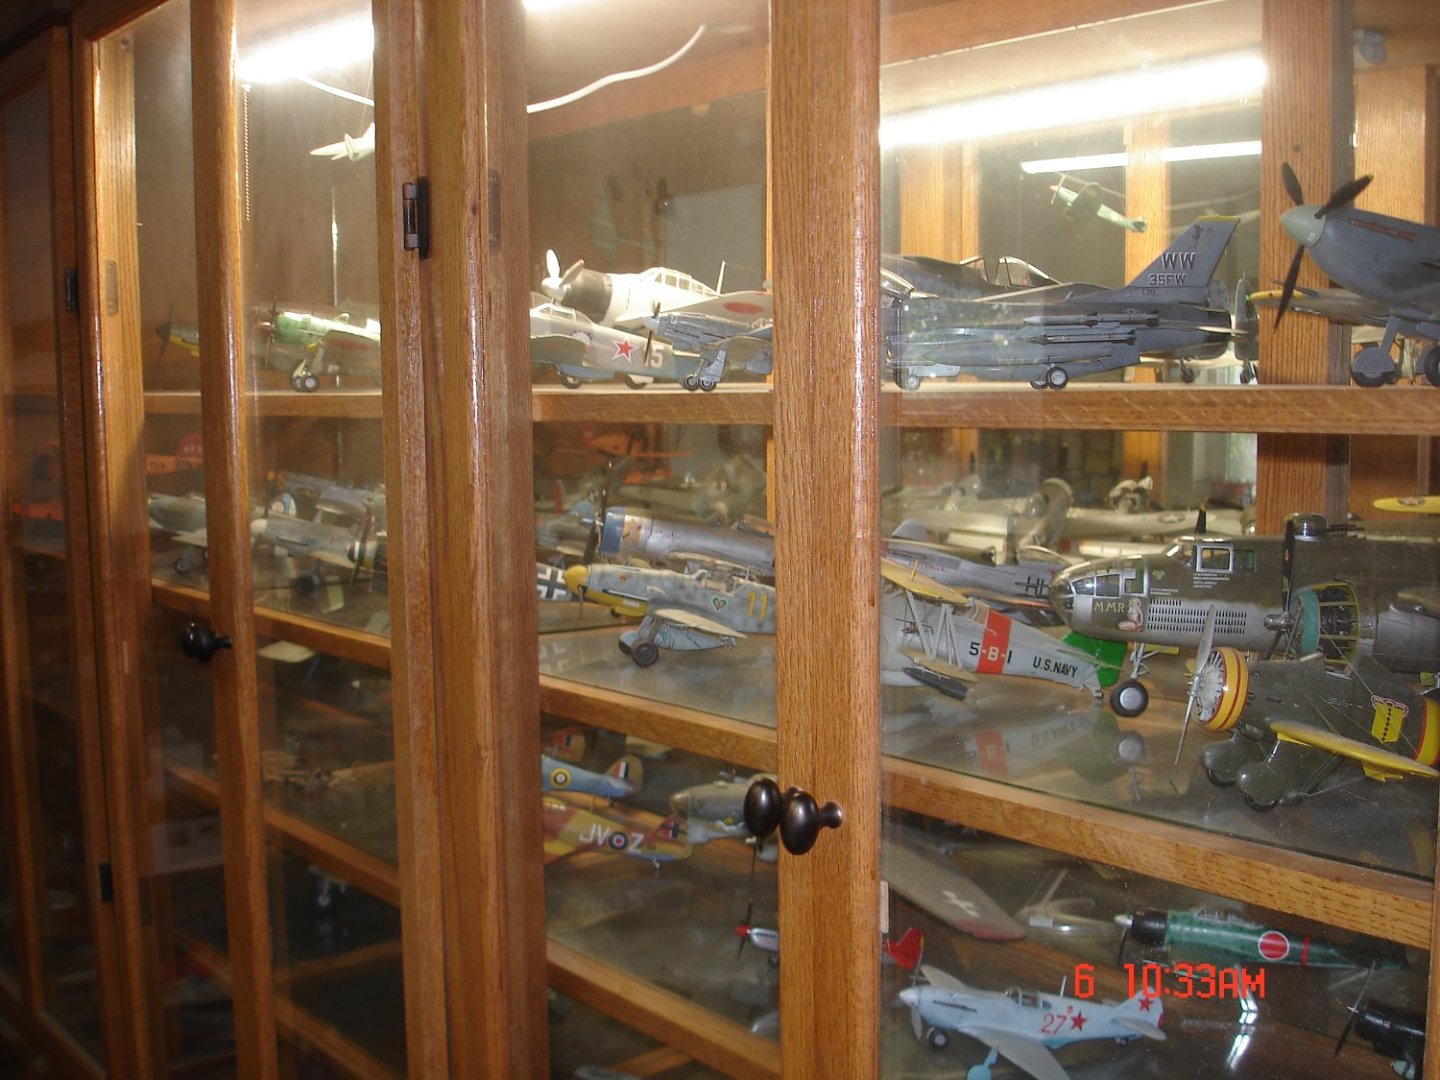
Dan for me it's the end part my mind is usually already working on the next project just not this time.I do go back and look at times it's all right there in the same room as I build.I was thinking last night this room represents 40yrs of work I wish I had a LHS to donate too the Library up the road use to display some at one point 20 years ago not anymore.The auto-gyro will be completed in the next week or two I fixed the F-up i had moving forward. Some pics of the office/hobby room shop Dan.

- 55 replies
-
- 15
-
-

-
F-86F-30 Sabre by Egilman - Kinetic - 1/32nd scale
Javlin replied to Egilman's topic in Non-ship/categorised builds
EG I p/u at Hobby Lobby one of those small hand held magnifier with a light you use for coins it aided me on the the last build knowing up and down.She's coming together well never notice or did I "forest for the trees" effect the canning to the surface? -
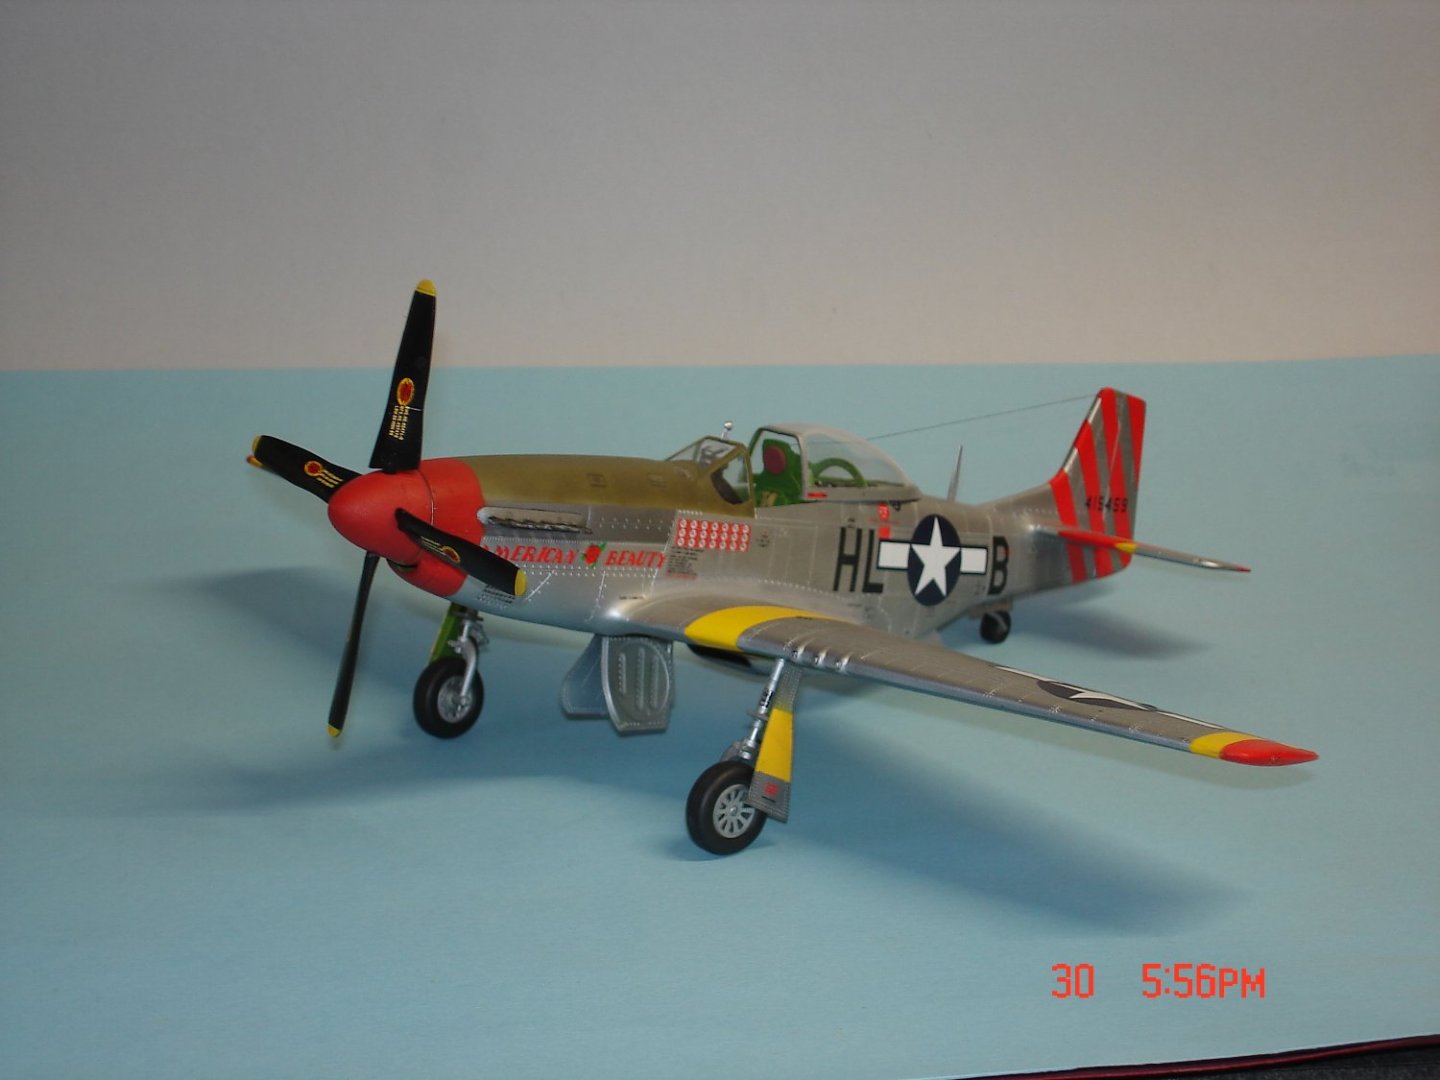
Dan this felt slow and time consuming once I hit the decal stage I start to lose interest.I have to many kits that are unbuilt that need my attention hence the reason sometimes I pass up the engine and gunbays in this one,once in the cabinet no one but those that walk into the shop will ever see it.
-
I thank all of You for the kind comments and those that sent out likes.I am starting to run flat on Mojo though ATTM.I looked and looked at kits last night 250/300 unbuilts but it just was not happening for me.I worked on the wife's truck yesterday 6 hrs non-stop my body and neck were caving.I have an appointment this week to setup another nerve burn for T1/T2 and C4 probably come September/October.I may move to the other side of the shop start some wood work she does need some filing boxes for kiddies work at school bought the wood today easy-peasy.I think some of ya'll (i'm deep south) remember back when I cleared out a cache of SOD kits I will post those in the future.
-
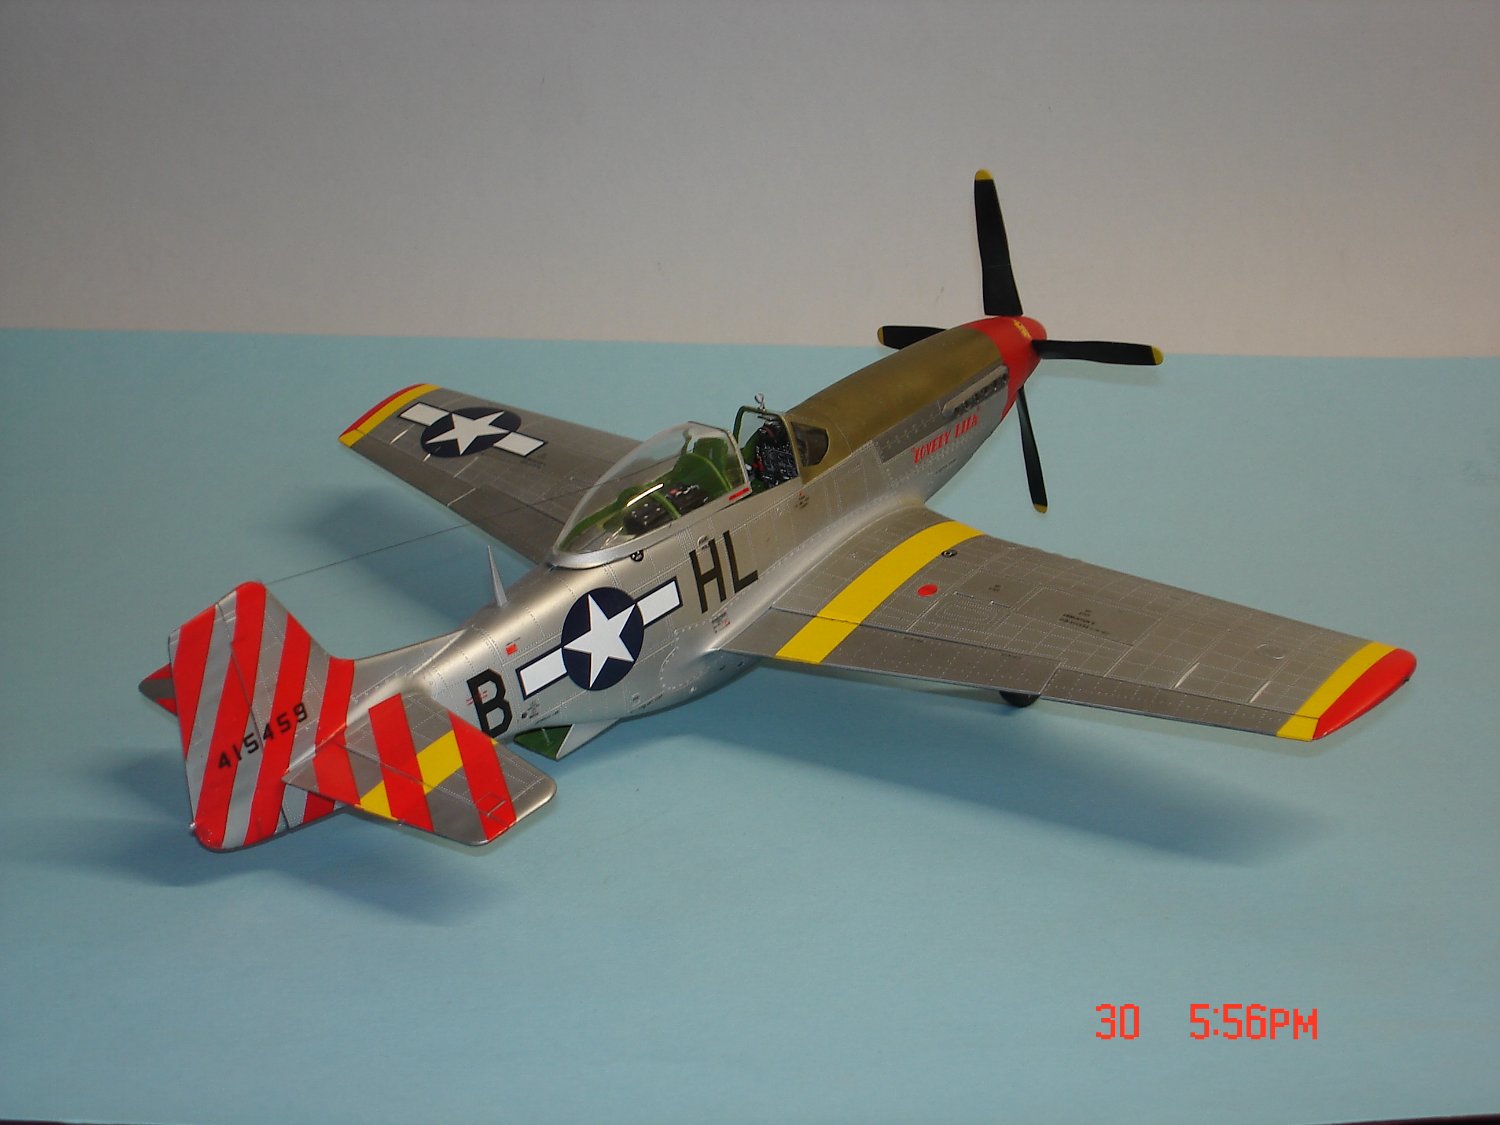
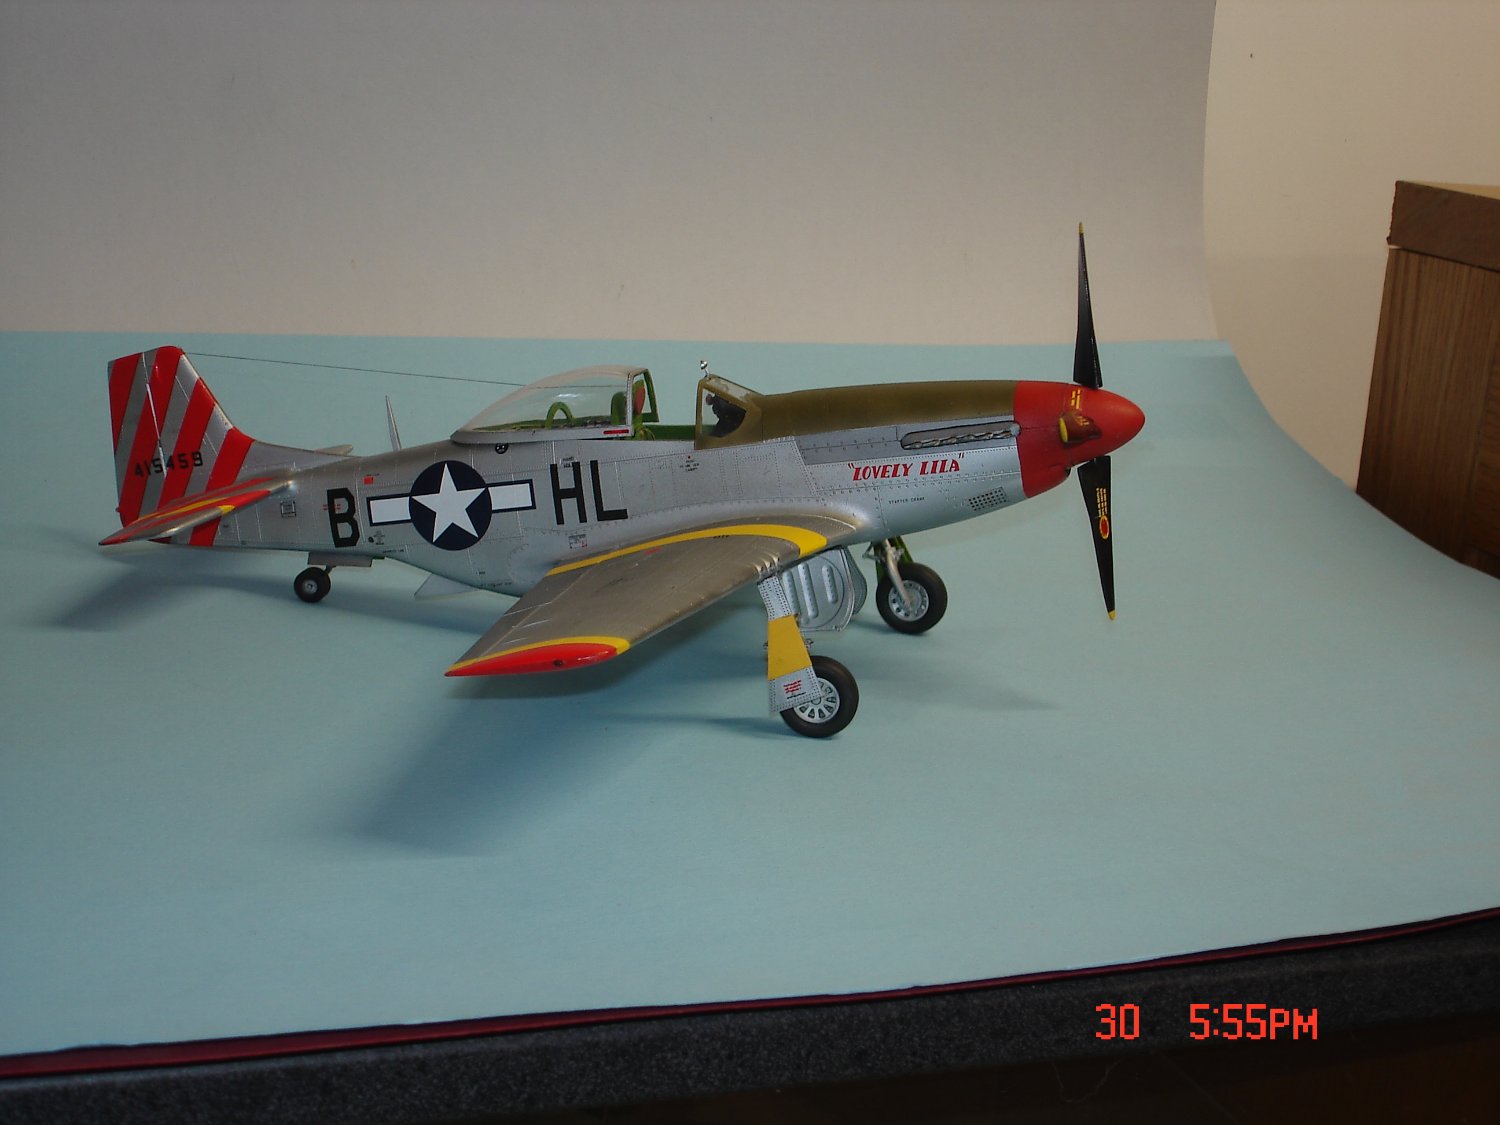
I am calling this one done Guys even for a Trumpter Kit and all the decal issues she came out pretty good.

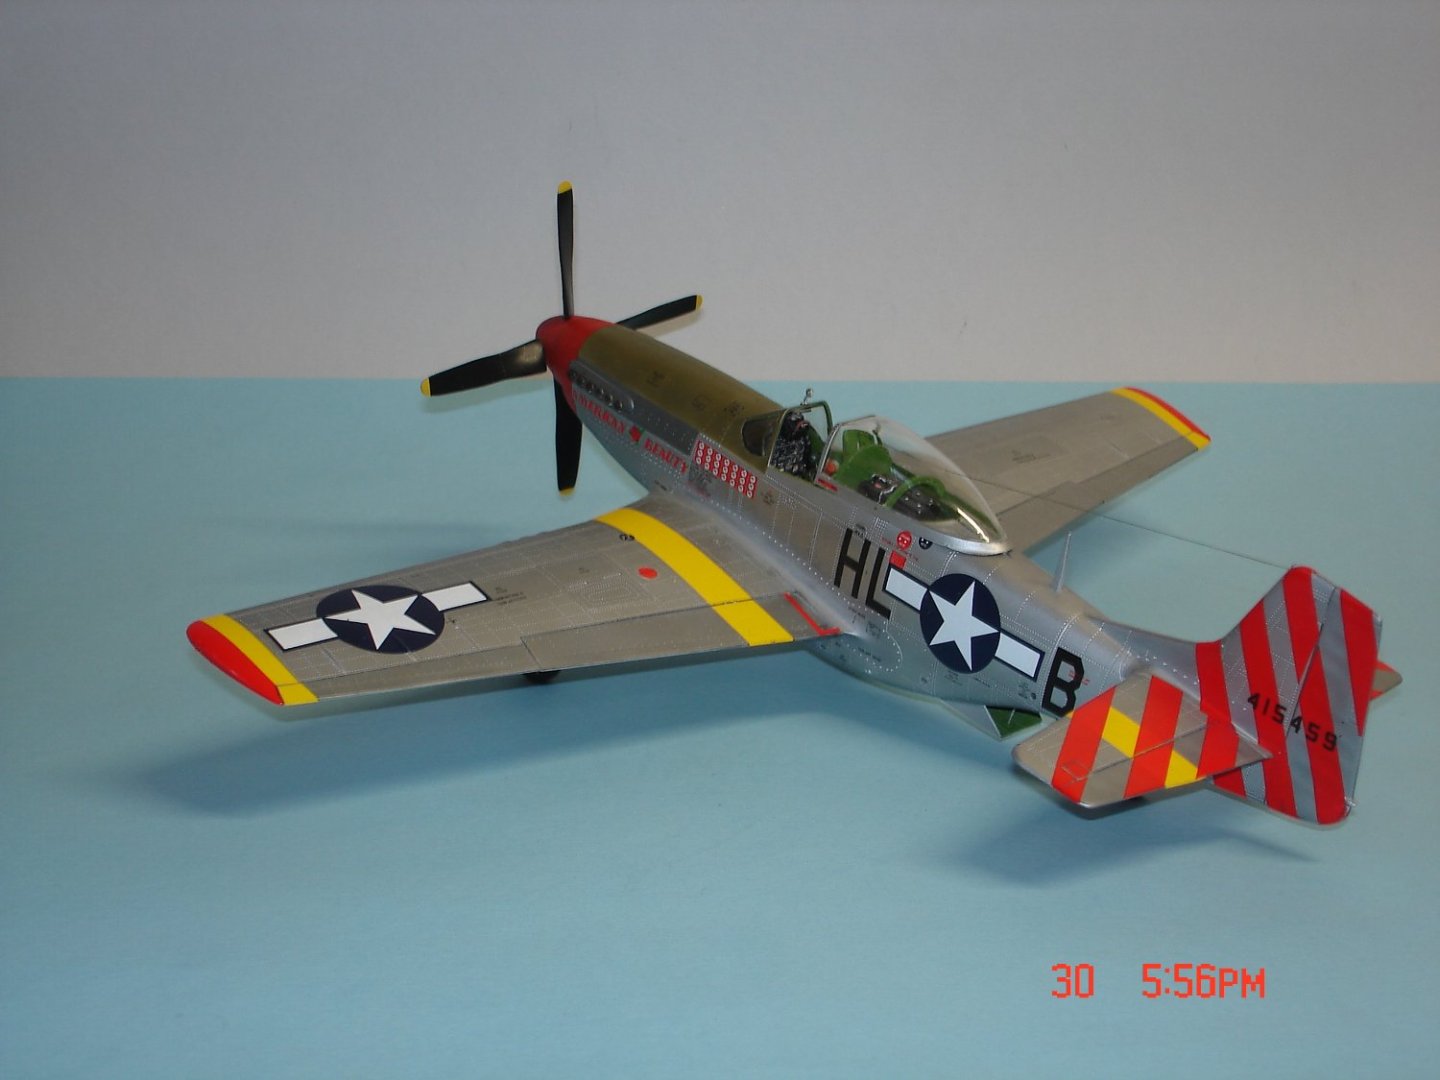
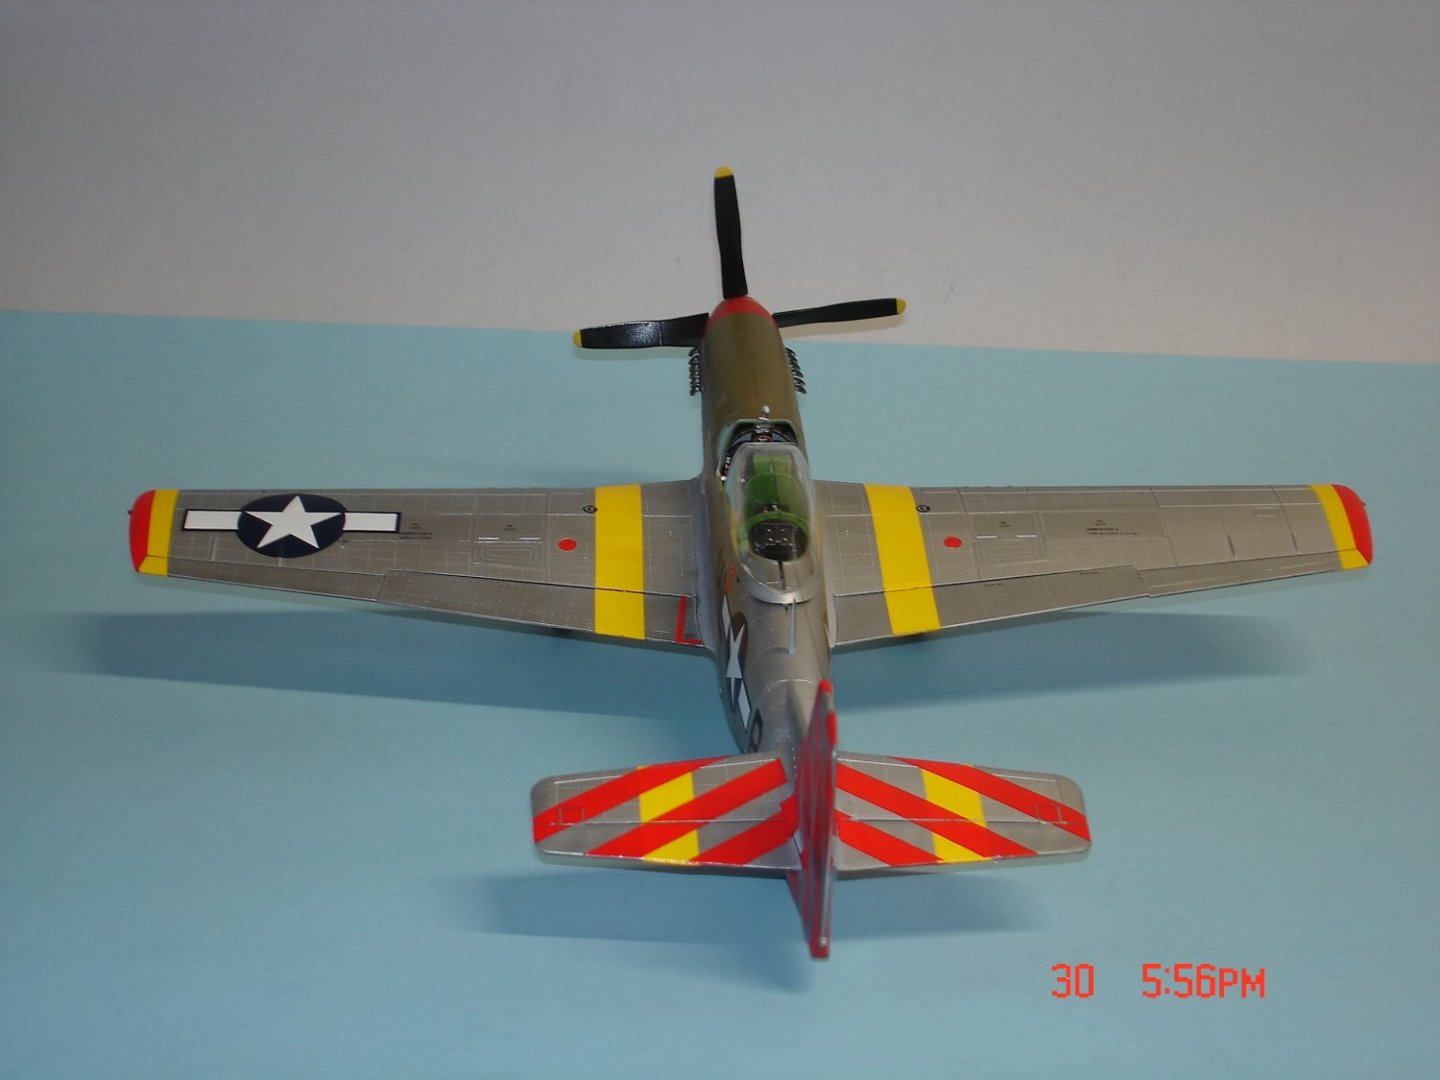


- 55 replies
-
- 19
-
-