HOLIDAY DONATION DRIVE - SUPPORT MSW - DO YOUR PART TO KEEP THIS GREAT FORUM GOING! (89 donations so far out of 49,000 members - C'mon guys!)
×


Shipyard sid
-
Posts
1,106 -
Joined
-
Last visited
Content Type
Profiles
Forums
Gallery
Events
Everything posted by Shipyard sid
-
 Neil We're are you?? Been waiting a while for an update on your little prob, look forward to your progress. DAVID
 -
Hello yon Well that looks ok to me. Only the edge of the facia needs tidied and you've cracked it, well done yon. Post some more photos as you Complete it. DAVID
-
Hello yon I don't know if this will help as I cannot tell what is actually going on, but to tidy things up, maybe you could use some marquetry Sheeting in places as skins, which is easy to work with. I used it on both the upper and lower counters to tidy them up and it's easier and quicker than planking . As Kevin said give jotika a ring and tell them which sheet you need. They will definitely send you one no prob. Ring them now. DAVID
-
Greetings Jerry Good to see you have got your photos sorted, so now you can get on with your build. Everything is looking good, keep up the good work and keep the photos coming. Regards DAVID
-
Greetings Patrick Well things are still looking good. And your timber has arrived at last. Are you going to use the staunchings supplied for the handrail around the stairway, or use the alternative which I used. You say you have slowed up a bit??? Patrick those copper plates will still be waiting!!! DAVID
-
I don't understand this, are you going to start your log after the posts you have received from others, who have posted to you commenting on your build???? if you can understand that. Well that's what you must be doing, I think.
-
Greetings ,and another caldercraft victory to follow. You just enjoy your build . It is looking very good , and I will follow your log with interest. Don't worry about your English, it no problem at all . Enjoy you build DAVID
-
Hello again So it's a max of 10 photos per post. Looks like you will have to edit it . I don't think that will be a prob for you. Post the 10, then start again. DAVID
- 900 replies
-
- 1
-

-
- victory
- caldercraft
- (and 1 more)
-
Jerry I think it may have some thing to do with the file size. It says you can upload an unlimited number of files, but each file can be no more than 2MG that may be it. If I am wrong others will definitely tell you.DAVID
-
Hello Jerry , Well there you go !!!! Your log is less than a day old and you have lots of new friends and followers. Things are looking really good, and you have certainly got the picture prob sorted in no time. Just keep enjoying it. Well done . If you go to the jotika website there is a twenty page view of the construction of the model. Click on the photos to enlarge them. I do know if you have seen it. DAVID
- 900 replies
-
- 1
-
-
- victory
- caldercraft
- (and 1 more)
-
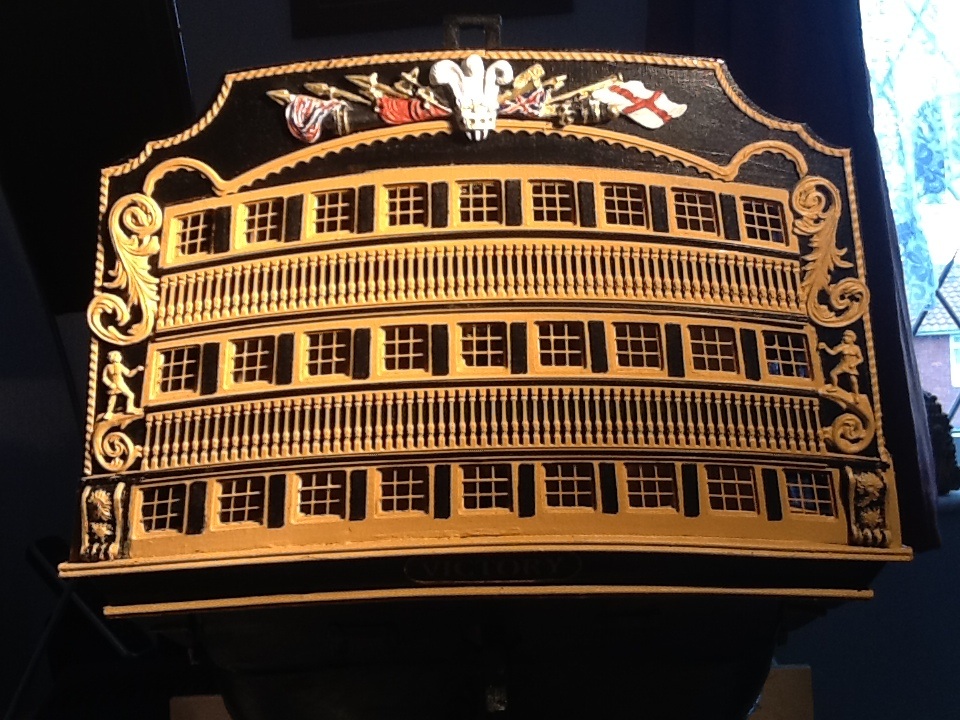
Hello yon Well the stern looks good to me. I had a prob with keeping the galleries in place, and also pinned them. I don't know how you have fixed the gallery glazing, I was worried about it coming off. Someone a while back ( I think it was Simon s ) mentioned fitting each individual window ready glazed, I wonder if that may a good idea, it would eliminate the curving if you understand, and no springing off. The thing I was looking to see on the stern facia was were the two flower pattern things ( whatever they call them ) on the lower edge of the stern facia finished. I had nothing to fit the brass profile onto, and had to improvise ( cheat ) by putting a small trim under the bottom of the facia if you know what I mean, and that gave me problems matching the brass profile around the bottom of the galleries. it may be worth looking at. I am sure all will turn out fine with your galleries, thanks for posting. Catch you later David
-
Greetings Jerry!! , Welcome to MSW. And another CC Victory build log to follow. Just enjoy your build and we will all enjoy watching you build it. Create something special for yourself . Best wishes DAVID.......gunport linings finished yet????
-
Jerry Have you started your build log yet. If you start it now explaining your build, you can then post the photos on it and we can watch you progress, other wise you will not be creating a log for yourself. Anything you post on it will build up your log. See how it goes, Hope things are coming on well DAVID
-
Hello Erik And another caldercraft victory, the more the merrier. I look forward to following your build throughout its progress. For those who have asked about the size of the ship, well there's the box it came in!!! ..... Regards DAVID. Enjoy your build
-
Hello yon How's the facia coming on ? I am looking forward to seeing it fitted in relation to the upper counter and gallery sides. DAVID
-
Derek Well done getting it sorted. This can also be a bit tricky, with the brass profiles matching at the corners. Coming on fine DAVID
-
Jerry Wow!!! You are really moving on. Got to agree with on the yellow, it's awfull. It woul be nice to see a photo or two of your ship as it is now. It would help. Ok away you go on your linings. Well done.. DAVID .......... don't forget set the linings 1mm back as per instructions.
-
Hello yon Well done, it's looking very good. I look forward to seeing the whole section completed, it makes a big difference when you see it. When you fit the scroll work you may find you have an overlap on the edges, I don't know why. I think I trimmed a little off the two little chaps ( what ever they are ) below the scroll, I am not sure about this. Cracking stuff Yon. Here is a photo of mine, you can see what I mean about the scroll DAVID

-
Hello grant THanks for for posting. Cracking build I have to help me. I love the jig, simplicity in its self. I will need one In a years time. I have slowed my build down a bit, its the less haste thing, I am starting to rush things, it's easy to see. Anyway keep up the good work and keep enjoying it. DAVID
-
Well done Jerry You are off and running, make sure you keep the superglue well away from the prongs!!!!!!. you cannot afford to get glue on them. I have found a few photos to explain marking off the waterline, I will post them later. Good luck DAVID
-
Jerry Here's the tool you mentioned to derek which helps you fit the linings easier. The wood is 3mm x 3mm balsa , glue the balsa inside the port, and use it for seating your linings , it makes the fitting of them easy with a pair of tweezers. If you do not get the balsa in the correct position you just trim it with a craft knife. Will get back to you later. Tell me if you don't understand DAVID
-
Ok Jerry If you go to page one of my log look at the ninth photo down and you will see I painted the hull yellow then fitted the linings. I will come back to you later about the fitting of the linings and about the water line. Just ask any question when ever you want. I will be back to you later. It may be a few hours DAVID
-
Hello again Jerry Like Kevin said start a build log it will be better if you do, you can ask all the questions you need to and it will be the best idea. Use 0.5mm x I mm styrene strip for you water line and start fitting your copper tiles under the strip. It will be better if you reply to myself......shipyard Sid, On my log, ( you have posted there before) Or to derek on he's log, as we are communicating via Derek's log at the moment. We can all advice you better if you start a log, and you will receive the answer to your questions a lot easier as Kevin says. Post to me now and we can talk about your gun linings on my log, or post to Kevin on he's log, do it now to sort out you linings problem even before you start a log. Just do it Jerry . DAVID
-
Hello Jerry I think we are all waiting for you Jerry , come on start a build log we are all waiting for you to start it !!!! There can never be to many jotika Victory build logs on the go, so let us all enjoy your build log while you enjoy building your Vic . Regards DAVID