

jhearl
-
Posts
355 -
Joined
-
Last visited
Reputation Activity
-

 jhearl got a reaction from Nirvana in Bluenose II by Bulwark - Artesania Latina - Scale 1:75
Once the glue is dry and the pins are removed, you can dip a small paintbrush into water and put just a small dot of water on the pin hole. Often that's enough to cause the wood to swell so the hole disappears. If not, put a tiny amount of yellow glue on the hole, sprinkle on a bit of sanding dust and then sand the plank lightly over the hole.
Personally, I never use ammonia because I can't stand the smell and I don't think it's necessary to pre-bend the planks with this hull. Try gluing just a few bulkheads at a time - no more than you can easily reach with your fingers to hold the plank to the bulkhead. Once the glue sets up (30 secs to a minute or so with medium CA) then the plank should hold just fine. Then you can do a few more bulkheads. Rubber bands can help too. With CA, the glue can soak into the plywood bulkheads rather quickly, so don't wait too long after applying the glue before you put the plank in place and be sure you're using medium CA, not the thin stuff (it will soak in almost instantly). The soaking-in factor is one reason to only do a few bulkheads at a time.
Cheers -
John
-
jhearl got a reaction from Nirvana in Bluenose II by Bulwark - Artesania Latina - Scale 1:75
If you have a thick, stiff, steel or aluminum ruler, you put some fine sandpaper on one side using double-sided tape or rubber cement. The sandpaper helps to hold the plank in place while you cut it with an Xacto knife and the ruler provides a nice, straight edge. I have a Permagrit tool that I use in this way. You'll still need to do some final sanding on the edge of the plank.
-
jhearl got a reaction from Nirvana in Bluenose II by Bulwark - Artesania Latina - Scale 1:75
It's a bit funny to see my name used so often, but I wanted to let you know that I'm still alive and kicking and happy to clear up anything you may not understand about my tutorial. You're welcome to PM me any time or send me an email directly. Looks like you're doing well so far. My one piece of advice at this point is to take your time, read and think ahead, and work out what you're doing and why you're doing it in your head before you do it on the boat. I look forward to watching your progress and I hope you enjoy the build.
Cheers -
John
-
.thumb.jpeg.fc5d633a7b34428fcf19419a73d56d55.jpeg) jhearl got a reaction from EricWilliamMarshall in Bluenose II by Heronguy - Artesania Latina #20500 - Scale 1:75 - 2nd build
jhearl got a reaction from EricWilliamMarshall in Bluenose II by Heronguy - Artesania Latina #20500 - Scale 1:75 - 2nd build
As Mark Twain said, more or less, the rumors or my demise have been greatly exaggerated! Still alive and kicking although a bit more slowly every year. I retired in September of last year and have been enjoying lots more time to work on models. I still maintain the website and am currently working on a scratch build of a Chesapeake Bay buyboat.
Doug - looks like your BN2 is coming along well.
Cheers -
John
-
 jhearl got a reaction from Bulwark in Bluenose II by Bulwark - Artesania Latina - Scale 1:75
If you have a thick, stiff, steel or aluminum ruler, you put some fine sandpaper on one side using double-sided tape or rubber cement. The sandpaper helps to hold the plank in place while you cut it with an Xacto knife and the ruler provides a nice, straight edge. I have a Permagrit tool that I use in this way. You'll still need to do some final sanding on the edge of the plank.
-
 jhearl got a reaction from Heronguy in Bluenose II by Bulwark - Artesania Latina - Scale 1:75
It's a bit funny to see my name used so often, but I wanted to let you know that I'm still alive and kicking and happy to clear up anything you may not understand about my tutorial. You're welcome to PM me any time or send me an email directly. Looks like you're doing well so far. My one piece of advice at this point is to take your time, read and think ahead, and work out what you're doing and why you're doing it in your head before you do it on the boat. I look forward to watching your progress and I hope you enjoy the build.
Cheers -
John
-
 jhearl got a reaction from thibaultron in Question for Jim Bryne's Saw Owners and Preac Saw Owners
I'll offer a somewhat contrarian view. I bought my Preac in 2001 and it has served me well all these years. I have only had my Byrnes saw for a few weeks now. I don't have a lot of room on my tool bench, so I can't have both saws on there at the same time without removing another tool. But since having the Byrnes saw, I have yet to have any need to pull out the Preac.
One of the first things I did was make a sliding crosscut table and for the base, I used 3/16" hardboard. (It's sold as marker board and is smooth brown on one side and smooth white on the other). The reason for using 3/16" was so that any long stock placed on the crosscut table would go over the rip fence so that I would not have to be constantly removing/replacing it. I find myself changing between the two modes very frequently and I knew going in that dealing with the rip fence would be a big issue for me. Using such thick material for the base meant using 4" slitting saw blades, but they are working just fine for me. In fact, just the other day I ripped some 3/4" poplar with the 100-tooth blade that Jim sells and it cut through it with no problems at all. Only once have I used the carbide blade so far, and that was to cut some 3/4" boxwood. The slitting saw blade just wouldn't cut it. This was some true, European Box that I had harvested from some old-growth bushes and is hard as a rock.
One great advantage of the Byrnes saw over the Preac is the ability to cut thicker material. My Preac would barely cut 3/16" and to cut 1/2" stock meant cutting one side, turning the stock over and cutting the other. And because of the small motor, it would often bind up on something like that. That problem has been entirely solved with the Byrnes saw. The other real nuisance with the Preac was setting the blade to a particular height. The adjustment mechanism on that saw is quite primitive and I found that when I tightened the blade down, the height would change, so there was often a lot of trial and error to get it right. Not so with the Byrnes saw. The height adjustment is quick and precise and stays where you put it when you lock it down. If you need to cut lap joints or notches at a precise depth, this is something you will appreciate immediately. Unless I'm doing something precise like lap joints, I don't even lock down the blade height on the Byrnes saw. On the Preac, you had to lock down the height and it was always awkward (not to mention the hole in the cap screw always being full of sawdust).
On my current model, I've lately been making some planks that are about 1/2mm thick and 3mm wide. Pretty tiny stuff. I've had no problems cutting it using my crosscut table (I'm using a 220-tooth 4" blade for this). One issue I've had, however, is that when ripping wider material to get these planks, it is so thin, it slides under the rip fence. So I have to clamp a piece of wood to the fence so that the wood sits right down on the table. The rip fence on the Preac is designed differently and sits tight to the table, so it would be better for that kind of work, but then, I'd have to take one of my other tools off the bench, pull out the Preac, set it up to make the cut, then put everything back in place. If I had room for both saws, I'd probably use both, but as it is, I have not really missed the Preac at all so far.
Cheers -
John
-
 jhearl got a reaction from Ryland Craze in Question for Jim Bryne's Saw Owners and Preac Saw Owners
I'll offer a somewhat contrarian view. I bought my Preac in 2001 and it has served me well all these years. I have only had my Byrnes saw for a few weeks now. I don't have a lot of room on my tool bench, so I can't have both saws on there at the same time without removing another tool. But since having the Byrnes saw, I have yet to have any need to pull out the Preac.
One of the first things I did was make a sliding crosscut table and for the base, I used 3/16" hardboard. (It's sold as marker board and is smooth brown on one side and smooth white on the other). The reason for using 3/16" was so that any long stock placed on the crosscut table would go over the rip fence so that I would not have to be constantly removing/replacing it. I find myself changing between the two modes very frequently and I knew going in that dealing with the rip fence would be a big issue for me. Using such thick material for the base meant using 4" slitting saw blades, but they are working just fine for me. In fact, just the other day I ripped some 3/4" poplar with the 100-tooth blade that Jim sells and it cut through it with no problems at all. Only once have I used the carbide blade so far, and that was to cut some 3/4" boxwood. The slitting saw blade just wouldn't cut it. This was some true, European Box that I had harvested from some old-growth bushes and is hard as a rock.
One great advantage of the Byrnes saw over the Preac is the ability to cut thicker material. My Preac would barely cut 3/16" and to cut 1/2" stock meant cutting one side, turning the stock over and cutting the other. And because of the small motor, it would often bind up on something like that. That problem has been entirely solved with the Byrnes saw. The other real nuisance with the Preac was setting the blade to a particular height. The adjustment mechanism on that saw is quite primitive and I found that when I tightened the blade down, the height would change, so there was often a lot of trial and error to get it right. Not so with the Byrnes saw. The height adjustment is quick and precise and stays where you put it when you lock it down. If you need to cut lap joints or notches at a precise depth, this is something you will appreciate immediately. Unless I'm doing something precise like lap joints, I don't even lock down the blade height on the Byrnes saw. On the Preac, you had to lock down the height and it was always awkward (not to mention the hole in the cap screw always being full of sawdust).
On my current model, I've lately been making some planks that are about 1/2mm thick and 3mm wide. Pretty tiny stuff. I've had no problems cutting it using my crosscut table (I'm using a 220-tooth 4" blade for this). One issue I've had, however, is that when ripping wider material to get these planks, it is so thin, it slides under the rip fence. So I have to clamp a piece of wood to the fence so that the wood sits right down on the table. The rip fence on the Preac is designed differently and sits tight to the table, so it would be better for that kind of work, but then, I'd have to take one of my other tools off the bench, pull out the Preac, set it up to make the cut, then put everything back in place. If I had room for both saws, I'd probably use both, but as it is, I have not really missed the Preac at all so far.
Cheers -
John
-
 jhearl got a reaction from WackoWolf in Question for Jim Bryne's Saw Owners and Preac Saw Owners
I'll offer a somewhat contrarian view. I bought my Preac in 2001 and it has served me well all these years. I have only had my Byrnes saw for a few weeks now. I don't have a lot of room on my tool bench, so I can't have both saws on there at the same time without removing another tool. But since having the Byrnes saw, I have yet to have any need to pull out the Preac.
One of the first things I did was make a sliding crosscut table and for the base, I used 3/16" hardboard. (It's sold as marker board and is smooth brown on one side and smooth white on the other). The reason for using 3/16" was so that any long stock placed on the crosscut table would go over the rip fence so that I would not have to be constantly removing/replacing it. I find myself changing between the two modes very frequently and I knew going in that dealing with the rip fence would be a big issue for me. Using such thick material for the base meant using 4" slitting saw blades, but they are working just fine for me. In fact, just the other day I ripped some 3/4" poplar with the 100-tooth blade that Jim sells and it cut through it with no problems at all. Only once have I used the carbide blade so far, and that was to cut some 3/4" boxwood. The slitting saw blade just wouldn't cut it. This was some true, European Box that I had harvested from some old-growth bushes and is hard as a rock.
One great advantage of the Byrnes saw over the Preac is the ability to cut thicker material. My Preac would barely cut 3/16" and to cut 1/2" stock meant cutting one side, turning the stock over and cutting the other. And because of the small motor, it would often bind up on something like that. That problem has been entirely solved with the Byrnes saw. The other real nuisance with the Preac was setting the blade to a particular height. The adjustment mechanism on that saw is quite primitive and I found that when I tightened the blade down, the height would change, so there was often a lot of trial and error to get it right. Not so with the Byrnes saw. The height adjustment is quick and precise and stays where you put it when you lock it down. If you need to cut lap joints or notches at a precise depth, this is something you will appreciate immediately. Unless I'm doing something precise like lap joints, I don't even lock down the blade height on the Byrnes saw. On the Preac, you had to lock down the height and it was always awkward (not to mention the hole in the cap screw always being full of sawdust).
On my current model, I've lately been making some planks that are about 1/2mm thick and 3mm wide. Pretty tiny stuff. I've had no problems cutting it using my crosscut table (I'm using a 220-tooth 4" blade for this). One issue I've had, however, is that when ripping wider material to get these planks, it is so thin, it slides under the rip fence. So I have to clamp a piece of wood to the fence so that the wood sits right down on the table. The rip fence on the Preac is designed differently and sits tight to the table, so it would be better for that kind of work, but then, I'd have to take one of my other tools off the bench, pull out the Preac, set it up to make the cut, then put everything back in place. If I had room for both saws, I'd probably use both, but as it is, I have not really missed the Preac at all so far.
Cheers -
John
-
jhearl got a reaction from Heronguy in Question for Jim Bryne's Saw Owners and Preac Saw Owners
I'll offer a somewhat contrarian view. I bought my Preac in 2001 and it has served me well all these years. I have only had my Byrnes saw for a few weeks now. I don't have a lot of room on my tool bench, so I can't have both saws on there at the same time without removing another tool. But since having the Byrnes saw, I have yet to have any need to pull out the Preac.
One of the first things I did was make a sliding crosscut table and for the base, I used 3/16" hardboard. (It's sold as marker board and is smooth brown on one side and smooth white on the other). The reason for using 3/16" was so that any long stock placed on the crosscut table would go over the rip fence so that I would not have to be constantly removing/replacing it. I find myself changing between the two modes very frequently and I knew going in that dealing with the rip fence would be a big issue for me. Using such thick material for the base meant using 4" slitting saw blades, but they are working just fine for me. In fact, just the other day I ripped some 3/4" poplar with the 100-tooth blade that Jim sells and it cut through it with no problems at all. Only once have I used the carbide blade so far, and that was to cut some 3/4" boxwood. The slitting saw blade just wouldn't cut it. This was some true, European Box that I had harvested from some old-growth bushes and is hard as a rock.
One great advantage of the Byrnes saw over the Preac is the ability to cut thicker material. My Preac would barely cut 3/16" and to cut 1/2" stock meant cutting one side, turning the stock over and cutting the other. And because of the small motor, it would often bind up on something like that. That problem has been entirely solved with the Byrnes saw. The other real nuisance with the Preac was setting the blade to a particular height. The adjustment mechanism on that saw is quite primitive and I found that when I tightened the blade down, the height would change, so there was often a lot of trial and error to get it right. Not so with the Byrnes saw. The height adjustment is quick and precise and stays where you put it when you lock it down. If you need to cut lap joints or notches at a precise depth, this is something you will appreciate immediately. Unless I'm doing something precise like lap joints, I don't even lock down the blade height on the Byrnes saw. On the Preac, you had to lock down the height and it was always awkward (not to mention the hole in the cap screw always being full of sawdust).
On my current model, I've lately been making some planks that are about 1/2mm thick and 3mm wide. Pretty tiny stuff. I've had no problems cutting it using my crosscut table (I'm using a 220-tooth 4" blade for this). One issue I've had, however, is that when ripping wider material to get these planks, it is so thin, it slides under the rip fence. So I have to clamp a piece of wood to the fence so that the wood sits right down on the table. The rip fence on the Preac is designed differently and sits tight to the table, so it would be better for that kind of work, but then, I'd have to take one of my other tools off the bench, pull out the Preac, set it up to make the cut, then put everything back in place. If I had room for both saws, I'd probably use both, but as it is, I have not really missed the Preac at all so far.
Cheers -
John
-
 jhearl got a reaction from Canute in Question for Jim Bryne's Saw Owners and Preac Saw Owners
I'll offer a somewhat contrarian view. I bought my Preac in 2001 and it has served me well all these years. I have only had my Byrnes saw for a few weeks now. I don't have a lot of room on my tool bench, so I can't have both saws on there at the same time without removing another tool. But since having the Byrnes saw, I have yet to have any need to pull out the Preac.
One of the first things I did was make a sliding crosscut table and for the base, I used 3/16" hardboard. (It's sold as marker board and is smooth brown on one side and smooth white on the other). The reason for using 3/16" was so that any long stock placed on the crosscut table would go over the rip fence so that I would not have to be constantly removing/replacing it. I find myself changing between the two modes very frequently and I knew going in that dealing with the rip fence would be a big issue for me. Using such thick material for the base meant using 4" slitting saw blades, but they are working just fine for me. In fact, just the other day I ripped some 3/4" poplar with the 100-tooth blade that Jim sells and it cut through it with no problems at all. Only once have I used the carbide blade so far, and that was to cut some 3/4" boxwood. The slitting saw blade just wouldn't cut it. This was some true, European Box that I had harvested from some old-growth bushes and is hard as a rock.
One great advantage of the Byrnes saw over the Preac is the ability to cut thicker material. My Preac would barely cut 3/16" and to cut 1/2" stock meant cutting one side, turning the stock over and cutting the other. And because of the small motor, it would often bind up on something like that. That problem has been entirely solved with the Byrnes saw. The other real nuisance with the Preac was setting the blade to a particular height. The adjustment mechanism on that saw is quite primitive and I found that when I tightened the blade down, the height would change, so there was often a lot of trial and error to get it right. Not so with the Byrnes saw. The height adjustment is quick and precise and stays where you put it when you lock it down. If you need to cut lap joints or notches at a precise depth, this is something you will appreciate immediately. Unless I'm doing something precise like lap joints, I don't even lock down the blade height on the Byrnes saw. On the Preac, you had to lock down the height and it was always awkward (not to mention the hole in the cap screw always being full of sawdust).
On my current model, I've lately been making some planks that are about 1/2mm thick and 3mm wide. Pretty tiny stuff. I've had no problems cutting it using my crosscut table (I'm using a 220-tooth 4" blade for this). One issue I've had, however, is that when ripping wider material to get these planks, it is so thin, it slides under the rip fence. So I have to clamp a piece of wood to the fence so that the wood sits right down on the table. The rip fence on the Preac is designed differently and sits tight to the table, so it would be better for that kind of work, but then, I'd have to take one of my other tools off the bench, pull out the Preac, set it up to make the cut, then put everything back in place. If I had room for both saws, I'd probably use both, but as it is, I have not really missed the Preac at all so far.
Cheers -
John
-
 jhearl got a reaction from mtaylor in Question for Jim Bryne's Saw Owners and Preac Saw Owners
I'll offer a somewhat contrarian view. I bought my Preac in 2001 and it has served me well all these years. I have only had my Byrnes saw for a few weeks now. I don't have a lot of room on my tool bench, so I can't have both saws on there at the same time without removing another tool. But since having the Byrnes saw, I have yet to have any need to pull out the Preac.
One of the first things I did was make a sliding crosscut table and for the base, I used 3/16" hardboard. (It's sold as marker board and is smooth brown on one side and smooth white on the other). The reason for using 3/16" was so that any long stock placed on the crosscut table would go over the rip fence so that I would not have to be constantly removing/replacing it. I find myself changing between the two modes very frequently and I knew going in that dealing with the rip fence would be a big issue for me. Using such thick material for the base meant using 4" slitting saw blades, but they are working just fine for me. In fact, just the other day I ripped some 3/4" poplar with the 100-tooth blade that Jim sells and it cut through it with no problems at all. Only once have I used the carbide blade so far, and that was to cut some 3/4" boxwood. The slitting saw blade just wouldn't cut it. This was some true, European Box that I had harvested from some old-growth bushes and is hard as a rock.
One great advantage of the Byrnes saw over the Preac is the ability to cut thicker material. My Preac would barely cut 3/16" and to cut 1/2" stock meant cutting one side, turning the stock over and cutting the other. And because of the small motor, it would often bind up on something like that. That problem has been entirely solved with the Byrnes saw. The other real nuisance with the Preac was setting the blade to a particular height. The adjustment mechanism on that saw is quite primitive and I found that when I tightened the blade down, the height would change, so there was often a lot of trial and error to get it right. Not so with the Byrnes saw. The height adjustment is quick and precise and stays where you put it when you lock it down. If you need to cut lap joints or notches at a precise depth, this is something you will appreciate immediately. Unless I'm doing something precise like lap joints, I don't even lock down the blade height on the Byrnes saw. On the Preac, you had to lock down the height and it was always awkward (not to mention the hole in the cap screw always being full of sawdust).
On my current model, I've lately been making some planks that are about 1/2mm thick and 3mm wide. Pretty tiny stuff. I've had no problems cutting it using my crosscut table (I'm using a 220-tooth 4" blade for this). One issue I've had, however, is that when ripping wider material to get these planks, it is so thin, it slides under the rip fence. So I have to clamp a piece of wood to the fence so that the wood sits right down on the table. The rip fence on the Preac is designed differently and sits tight to the table, so it would be better for that kind of work, but then, I'd have to take one of my other tools off the bench, pull out the Preac, set it up to make the cut, then put everything back in place. If I had room for both saws, I'd probably use both, but as it is, I have not really missed the Preac at all so far.
Cheers -
John
-
 jhearl got a reaction from PeteB in Simple casting of decorations with a one part mold - demo
Chuck -
I decided to send the question to you as a PM rather than turn your tutorial into a discussion. But since it seems OK with you, here's what I said in the original post:
I recently watched a YouTube video about a product called Blue Stuff which allows you to press a mold material around a part. The material softens when heated and hardens when cooled. It is re-usable. It seems hard to find in the US, but there is a similar product called Instant Mold available from Amazon. A quick YouTube search will reveal many videos on both products.
I certainly understand that it would not be appropriate for delicate parts like the one in your demo. However, I need to make 8 hawse hole covers for the 1:24 scale model I'm working on and the master will be anything but delicate! So it seems like the Instant Mold might be useful for more robust parts. As I mentioned, I have not tried it, so I can't say for sure.
Cheers -
John
-
 jhearl reacted to Cathead in A method for making panelled sails using paper
Part III: Adding reef points
Reef points add a lot of visual interest to sails, and they're easy to add in the paper-sail method.
The reef bands were glued on in Part I. Where to place the reef points is something of an uncertain topic; I found references for a variety of options, including one point on each seam, one point within each panel, and two points within each panel. I chose to use the first approach. Because the paper layers were extra thick here, due to the seam and reef bands, I used a small drill bit to open up a hole rather than trying to drive a needle through.
For the reef points, I cut a series of rigging rope a bit longer than I needed. I wanted my reef points 2 scale feet long, so I cut the rope 5' long to allow for trimming, then used a deadeye/block threader to run each line through the sail. The threader creates a strong crimp in the line, so I tried to center each line in the threader before pulling it back through; the crimp then becomes a natural reference point holding the line in place where it passes through the sail.
When all the lines for a given band were threaded, I clamped a piece of wood across the sail 2 scale feet below the reef band as a reference marker. You can get the length right here in two ways: either trim each line to the right length relative to the crimp, or don't worry about the crimp and pull each one back through the sail until only 2' are left on the side you're working on. I then used a fine brush to gently apply a bit of glue to a line, then pressed it into place on the sail with its tip against the wood. You only have to hold the line in place for maybe 10-15 seconds for the glue to take hold, before moving on to the next one. I like to get glue from the tip to about 2/3 to the sail, not all the way to the sail. This means the line naturally bows out a bit where it comes out of the sail, giving it some 3D texture. Don't overdo the glue or you'll get weird stains on the paper. Also, don't worry about trying to get each line perfectly straight; they're going to want to curve this way and that, and buckle a bit, and that's exactly what you want because that really makes them look like loose lines dangling down. You want just enough glue to hold them relatively flat so they look like gravity is working. If you glue them too flat or perfect, they'll look glued on and artificial.
Once one side is done, it looks something like the image above. Then you just turn the sail over, clamp the wood at 2' again, trim the remaining lines to length, and glue them in the same way.
If there is more than one reef band, do the upper one first, since you're overall working on the lower side. Above, you see the same process being repeated for a lower line of reef points.
And here are the two completed lines of reef points. They have a nice randomness that looks like loosely dangling lines. Note that, once again, I slightly messed up this demonstration by not cutting the upper line of reef points quite evenly (they're too short on the left). It figures that my demonstration sail would be the sloppiest of any I've made so far, but I hope the idea comes across. And, as above, this sort of things fades away when the sail is placed in the full context of a rigged model.
I'm quite happy with this method. I've now made all six of the sails for my topsail schooner this way and feel that they have a strong visual interest and a realistic (if not perfectly accurate) appearance. Moreover, the method uses cheap material that's easy to work with, and requires no special skills other than some patience and care when handling glued paper. It's easy to test on random scraps first before trying a full sail, and it's easy to customize. For example, you could skip the panels and just use a full sheet of paper, or skip the boltropes, and still use the rest of the approach to have a nice sail that holds it shape and can even be shaped to hold a curve. I hope others find some or all of this interesting and useful as a different way to produce interesting sails for nautical models. Thanks for reading.
-
 jhearl got a reaction from Tigerdvr in Scale Hardware back in business
Those of you who have purchased tiny nuts and bolts from Scale Hardware in the past will recall that they went out of business a while back. I just got an email this morning from Model Motorcars, Ltd. to inform that they have bought the Scale Hardware name and stock and will continue to produce their products. Here's a link to the new site:
https://model-motorcars.myshopify.com/collections/small-parts-hardware/bolts
Cheers -
John
-
jhearl got a reaction from Canute in USF Essex Model Shipways Kit
The first sentence in Chapter 5 of the manual reads as follows:
The ESSEX’s hull will be planked in a single layer of1/16” thick basswood strips.
-
jhearl got a reaction from mtaylor in USF Essex Model Shipways Kit
The first sentence in Chapter 5 of the manual reads as follows:
The ESSEX’s hull will be planked in a single layer of1/16” thick basswood strips.
-
 jhearl got a reaction from zoly99sask in Scale Hardware back in business
Those of you who have purchased tiny nuts and bolts from Scale Hardware in the past will recall that they went out of business a while back. I just got an email this morning from Model Motorcars, Ltd. to inform that they have bought the Scale Hardware name and stock and will continue to produce their products. Here's a link to the new site:
https://model-motorcars.myshopify.com/collections/small-parts-hardware/bolts
Cheers -
John
-
 jhearl got a reaction from Richvee in Whaleboat equipment question
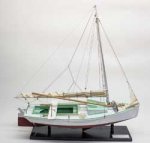
In the same museum where Lagoda is to be found is a model of Kate Cory by Erik A. R. Ronnberg, Jr. I've attached a crappy picture of one of the whaleboats on that model. As you can see, more or less, everything is in there and the boat is ready to go although it's still lashed to the ship.
Cheers -
John
-
 jhearl got a reaction from Landlocked123 in Whaleboat equipment question
In the same museum where Lagoda is to be found is a model of Kate Cory by Erik A. R. Ronnberg, Jr. I've attached a crappy picture of one of the whaleboats on that model. As you can see, more or less, everything is in there and the boat is ready to go although it's still lashed to the ship.
Cheers -
John
-
jhearl got a reaction from mtaylor in Whaleboat equipment question
In the same museum where Lagoda is to be found is a model of Kate Cory by Erik A. R. Ronnberg, Jr. I've attached a crappy picture of one of the whaleboats on that model. As you can see, more or less, everything is in there and the boat is ready to go although it's still lashed to the ship.
Cheers -
John
-
 jhearl got a reaction from Jack12477 in Whaleboat equipment question
In the same museum where Lagoda is to be found is a model of Kate Cory by Erik A. R. Ronnberg, Jr. I've attached a crappy picture of one of the whaleboats on that model. As you can see, more or less, everything is in there and the boat is ready to go although it's still lashed to the ship.
Cheers -
John
-
 jhearl got a reaction from CaptainSteve in Whaleboat equipment question
In the same museum where Lagoda is to be found is a model of Kate Cory by Erik A. R. Ronnberg, Jr. I've attached a crappy picture of one of the whaleboats on that model. As you can see, more or less, everything is in there and the boat is ready to go although it's still lashed to the ship.
Cheers -
John
-
 jhearl got a reaction from Dubz in Scale Hardware back in business
Those of you who have purchased tiny nuts and bolts from Scale Hardware in the past will recall that they went out of business a while back. I just got an email this morning from Model Motorcars, Ltd. to inform that they have bought the Scale Hardware name and stock and will continue to produce their products. Here's a link to the new site:
https://model-motorcars.myshopify.com/collections/small-parts-hardware/bolts
Cheers -
John
-
jhearl got a reaction from Ryland Craze in Scale Hardware back in business
Those of you who have purchased tiny nuts and bolts from Scale Hardware in the past will recall that they went out of business a while back. I just got an email this morning from Model Motorcars, Ltd. to inform that they have bought the Scale Hardware name and stock and will continue to produce their products. Here's a link to the new site:
https://model-motorcars.myshopify.com/collections/small-parts-hardware/bolts
Cheers -
John