
HOLIDAY DONATION DRIVE - SUPPORT MSW - DO YOUR PART TO KEEP THIS GREAT FORUM GOING! (Only 66 donations so far out of 49,000 members - Can we at least get100? C'mon guys!)
×

alde
-
Posts
1,028 -
Joined
-
Last visited
Content Type
Profiles
Forums
Gallery
Events
Everything posted by alde
-
 Looking really good Tim. The Bounty Launch comes with pre-spiled planks and the plans have them drawn out like the Pinky. It only required final fitting of the planks which made it much easier for a first time planking job. Does the Pinky give you wide enough material to spile the planks like the plans show? I haven't even opened the box on mine yet.
 -
It looks like a nice clean job so far. Taking your time at this stage will really pay off when you start planking.
-
Hey, congratulations on your promotion Captain.
- 625 replies
-
- 1
-

-
- bounty launch
- model shipways
- (and 1 more)
-
I was scratching my head over a plank that just didn't seem to fit just right until I realized it was the wrong plank for that position. Some of them do look very muck alike and come close to fitting. You could always make a new plank to avoid the stealer too.
- 625 replies
-
- 1
-
-
- bounty launch
- model shipways
- (and 1 more)
-
Bligh would be right proud of your replication of his launch. The lighter color stain is very nice. I do think painting the bottom white would spoil the effect. I would leave it just stained and distressed.
- 625 replies
-
- 1
-
-
- bounty launch
- model shipways
- (and 1 more)
-
Looking good so far. I agree she does have great lines and will make a fine model. I hope to start mine in a couple of months. Still a lot to do on the launch.
-
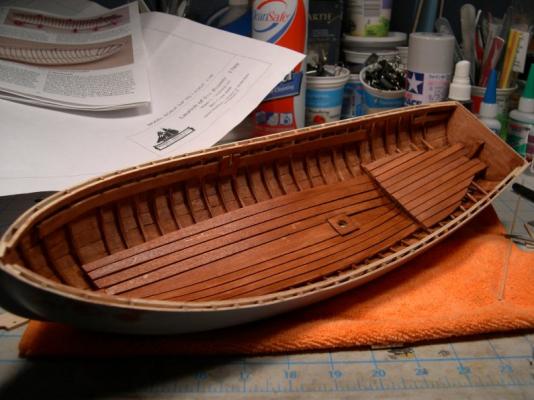
Disaster has been thwarted. It was sure nice cutting these longer pieces on the new mini table saw. Here the new thwarts are just dry fitted and ready for final details and shaping.
-
Bob, Thanks for the informative reply. This is probably the most educational thread I have had the pleasure to read. I am looking forward to trying the techniques. Al D.
-
You should be very proud of your ship. She is fantastic looking.
-
Bob, Thank you for the outstanding tutorial. You have made some things clear with your photos and text that I did not quite understand before as a beginer. I now have a pretty firm grasp of using tick strips and the grid. Am I correct in thinking that the grid takes the place of proportional dividers? I will use these techniques on my next model. It will be my first time spileing planks as the Bounty Launch kit does it for you. I will bookmark this thread for future use. I have this longboat kit on the shelf for when I'm ready for it. Al D.
-
Don't stress over your distress. At least you had planned on painting the interior. The floor boards and thwart risers will also cover any little goofs. Once the internal details start to go in it sure looks a lot like a boat. I am really impressed with this kit.
- 625 replies
-
- 1
-
-
- bounty launch
- model shipways
- (and 1 more)
-
Your decks look great. I like the color.
-
Mundie, Good save but you may want to re-think your use of epoxie. Regular wood glue is much more forgiving, holds great and can be taken apart pretty easy. We have all had to take stuff apart but like CaptainSteve said, the wood glue comes apart really well with isopropyl. The 99% pure works great and won't cause the grain to lift. The 70% pure has 30% water and will raise the wood grain.
-
Tom, I am very sorry for the loss of your brother. You and he are in my thoughts.
- 1,350 replies
-
- 1
-
-
- constitution
- model shipways
- (and 1 more)
-
CaptainSteve, That's a book I will have to look for. Bligh doesn't mention the condition of his boat at all in his log of the voyage, at least not as far as I have read. I am only half way through the book but it's quite a good read. You would have thought maintaining the only way of getting off the ship in the event of a sinking would be well maintained. I guess a warship is different in that respect. They had many more men to keep occupied on long voyages. Bligh only had something like 45 men in his crew compaired to 300 or so on a frigate size ship.
- 625 replies
-
- 2
-
-
- bounty launch
- model shipways
- (and 1 more)
-
It's not too painful Bindy. Recovery should be pretty quick. Besides, it gives me a reason to use my new mini table saw on a real project. Thanks for the kind words. You sure did. It seems like a common problem. MS should make them too long to be fitted. I really don't think my hull sprung to a wider dimension. With the belaying pin holes and such I could possibly get 2 by re-using the kit parts. I will do that if possible though.
-
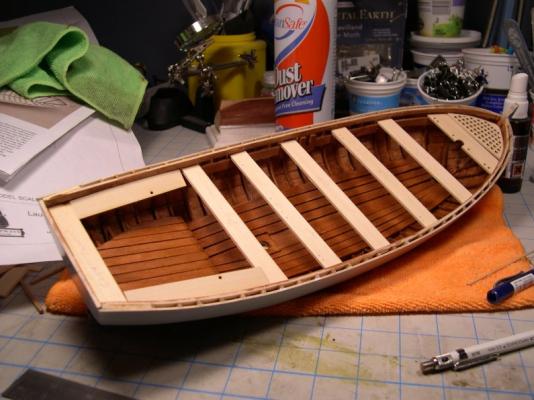
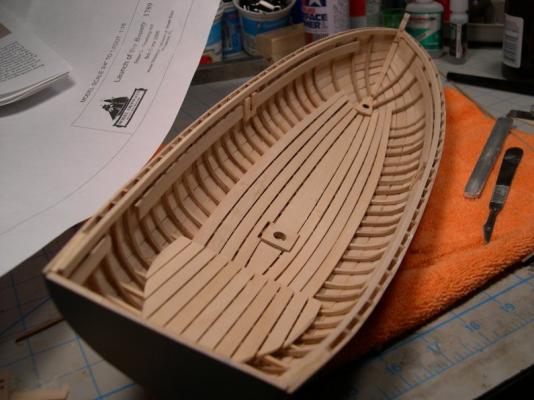
It looks like I'm suffering "Short Thwart Syndrome". There is no squeezing the hull to fit the thwarts so we will have to make some new ones.Should be simple enough but I will have to pick up a sheet of basswood. It doesn't look like there is enough on the leftover part sheets. It looks like I will have to make all but the forward most and stern thwart. I did stain the interior of the hull using Minwax Vermont Maple (water base) stain. I like the color for the interior of the boat and am pretty happy with the way it came out. Al D.
-
Making some good headway there. I know what you mean about getting back to the Rat Race. There's never enough time for the fun stuff.
- 625 replies
-
- 1
-
-
- bounty launch
- model shipways
- (and 1 more)
-
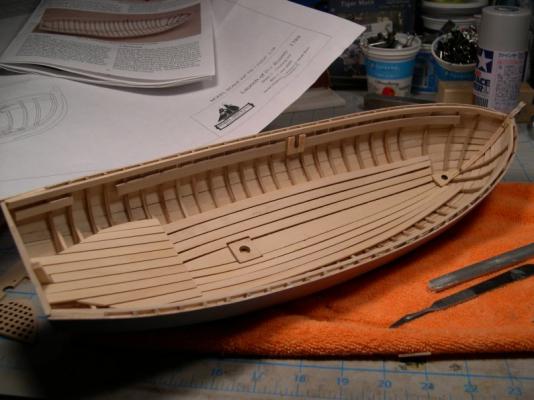
Looking good. Once you got started you started zipping along. It looks like you did a nice clean job on the rabbit.
-
Here are the latest pictures of my Bounty Launch project. I have installed the floors and they were a bit more of a challenge than I expected. They were not difficult by any means but I could not thing of a good way to clamp them so I went with the Super Glue method. I'm pretty happy with the results. Stain is next after a good going over to get rid of any glue spots and do a bit of sanding. Thanks for looking, Al D.
-
My heart goes out to you in the loss of your friend. Al D.
- 78 replies
-
- 2
-
-
- model shipways
- bounty launch
- (and 1 more)
-
Outstanding job. You should be very proud of your model.
-
Steve, I picked up some water based stain yesterday and stained a couple of pieces of wood. After they dried for about 4 hours I glued them together using Elmers Wood Glue and clamped them for 3 hours. I gave the pieces a good pull and the wood splintered leaving slivers of one piece still glued to the other. It looks like they glue up just fine. I hope you find the same thing as you are pre-staining your planks. Al D.
-
Patrick, Thank you for posting the link to the 1803 painting. It's full of information. Too bad we can't know for sure how accurate it is but it sure is a big piece of the puzzle. It's really interesting that it has no gunport lids at all. I can't imagine that a frigate of that period designed to operate in the open Atlantic not having them. I have a book on the way that is an illistrated guid to the ship model collection of the Boston Museum of Fine Arts. The description specifically talked about Constitution models. I will let you know what it shows. Here is a link to the Boston Museum of Fine Arts Constitution model. Some decent photos. It shows the figurehead and split Gunport Lids among other interesting details. http://www.mfa.org/collections/object/u-s-frigate-constitution-38428
-
I like the color in you last photo. Maybe a touch more of the Golden Teak to lighten it up just a bit though. Of course that's only an opinion. A question though. Is there any problem glueing stained parts? I know the stain penetrates the wood and is oil based. Can you just use regular wood glue?
- 625 replies
-
- 1
-
-
- bounty launch
- model shipways
- (and 1 more)


