kiwiron Posted January 22, 2025 Author #181 Posted January 22, 2025 (edited) Masts done, now for the yards and booms. Just one mistake I managed to get around. Make sure you match the mast tops to the correct masts and lower or upper position. Edited January 22, 2025 by kiwiron Charter33, mort stoll, Yabuhebi and 6 others 9 Current builds: HMS Victory - Caldercraft 1:72 Completed builds: HMB Endeavour - OcCre 1:54 HMS Supply - Caldercraft 1:64. Fishing boats, Bremen, Palamos.
Charter33 Posted January 22, 2025 #182 Posted January 22, 2025 Very impressive Ron👏 mort stoll and kiwiron 2
Yabuhebi Posted January 22, 2025 #183 Posted January 22, 2025 38 minutes ago, kiwiron said: Masts done, now for the yards and booms. Just one mistake I managed to get around. Make sure you match the mast tops to the correct masts and lower or upper position. A great step to get past! First planking...second planking...copper plating....cannons....it just gets better at every step. The banding on the previous page looked great by the way!!!! "In every revolution, there is one man with a vision" - Captain James T. Kirk Chris Current build : Caldercraft HMS Victory 1/72 Completed: Trumpeter RMS Titanic 1/200
kiwiron Posted January 22, 2025 Author #184 Posted January 22, 2025 Thanks a lot Chris, also thanks for all your photos and advice. Current builds: HMS Victory - Caldercraft 1:72 Completed builds: HMB Endeavour - OcCre 1:54 HMS Supply - Caldercraft 1:64. Fishing boats, Bremen, Palamos.
kiwiron Posted January 3 Author #185 Posted January 3 Happy New Year everyone, I hope it's a great year with good health. Time to do a bit more after a 12 month break. Yards, booms etc sanded . I found it was easier with the bigger yards with a lot of material to remove to use a hobby knife to whittle away until close to the required size then sand to size. When fitting the rings I will do the final sanding to get the correct size to get them to fit properly. RossR, CODY, The Gimps Chimp and 2 others 5 Current builds: HMS Victory - Caldercraft 1:72 Completed builds: HMB Endeavour - OcCre 1:54 HMS Supply - Caldercraft 1:64. Fishing boats, Bremen, Palamos.
kiwiron Posted January 8 Author #186 Posted January 8 On main topmast yard rings the plan should label the ring 689 not 686. Stevenleehills, Charter33 and ERS Rich 3 Current builds: HMS Victory - Caldercraft 1:72 Completed builds: HMB Endeavour - OcCre 1:54 HMS Supply - Caldercraft 1:64. Fishing boats, Bremen, Palamos.
kiwiron Posted January 9 Author #187 Posted January 9 Another one. After making a driver boom comb cleat I found there is actually a part for this # 386. It would be nice if they checked the plans properly. Stevenleehills and Charter33 2 Current builds: HMS Victory - Caldercraft 1:72 Completed builds: HMB Endeavour - OcCre 1:54 HMS Supply - Caldercraft 1:64. Fishing boats, Bremen, Palamos.
kiwiron Posted January 10 Author #188 Posted January 10 Time for paint, I'll have to copy where others have done this. RossR, Charter33, bruce d and 3 others 6 Current builds: HMS Victory - Caldercraft 1:72 Completed builds: HMB Endeavour - OcCre 1:54 HMS Supply - Caldercraft 1:64. Fishing boats, Bremen, Palamos.
kiwiron Posted January 11 Author #189 Posted January 11 Driver boom ccoyle, The Gimps Chimp, mort stoll and 2 others 5 Current builds: HMS Victory - Caldercraft 1:72 Completed builds: HMB Endeavour - OcCre 1:54 HMS Supply - Caldercraft 1:64. Fishing boats, Bremen, Palamos.
Yabuhebi Posted January 16 #190 Posted January 16 Very nice! Isn't it nice when you check off a task? Especially in the manuals, makes it easy to go back and make sure you've done everything! kiwiron 1 "In every revolution, there is one man with a vision" - Captain James T. Kirk Chris Current build : Caldercraft HMS Victory 1/72 Completed: Trumpeter RMS Titanic 1/200
kiwiron Posted January 21 Author #191 Posted January 21 Thats for sure Chris, it would be nice if they proof read the instructions, without everyone's photo's I would'nt have got far. Current builds: HMS Victory - Caldercraft 1:72 Completed builds: HMB Endeavour - OcCre 1:54 HMS Supply - Caldercraft 1:64. Fishing boats, Bremen, Palamos.
Yabuhebi Posted January 21 #192 Posted January 21 11 hours ago, kiwiron said: Thats for sure Chris, it would be nice if they proof read the instructions, without everyone's photo's I would'nt have got far. Get Thomas Gropp's book! It is a game changer!!!! Especially for you since you will be getting ready to start adding the yards to the masts soon! You will thank me! "In every revolution, there is one man with a vision" - Captain James T. Kirk Chris Current build : Caldercraft HMS Victory 1/72 Completed: Trumpeter RMS Titanic 1/200
kiwiron Posted Sunday at 07:46 AM Author #193 Posted Sunday at 07:46 AM Hi Chris, it would be a good idea. I'm still finding mistakes on the plans. Please correct me if I'm wrong but I think these blocks on the plans are upside down. Current builds: HMS Victory - Caldercraft 1:72 Completed builds: HMB Endeavour - OcCre 1:54 HMS Supply - Caldercraft 1:64. Fishing boats, Bremen, Palamos.
kiwiron Posted Sunday at 08:37 AM Author #194 Posted Sunday at 08:37 AM (edited) Just found I have lost about 8 boarding Pikes off my main mast. I would leave them until you ship the masts, easily damaged as well. Edited Monday at 08:01 AM by kiwiron Current builds: HMS Victory - Caldercraft 1:72 Completed builds: HMB Endeavour - OcCre 1:54 HMS Supply - Caldercraft 1:64. Fishing boats, Bremen, Palamos.
Yabuhebi Posted Monday at 01:29 AM #195 Posted Monday at 01:29 AM 17 hours ago, kiwiron said: Hi Chris, it would be a good idea. I'm still finding mistakes on the plans. Please correct me if I'm wrong but I think these blocks on the plans are upside down. You are right, using the kit's blocks, they should be installed so that the holes are close to where the block is secured to whatever it needs to be attached to. Then the line goes down to the block, through the block and then back up to wherever. Creating the illusion of an actual sheave. I suppose the other option would be to drill the other hole so that it looks right. That is easier said than done on the smaller 3 and 5mm blocks. I don't have bits small enough that would withstand the stress of drilling!!!! kiwiron 1 "In every revolution, there is one man with a vision" - Captain James T. Kirk Chris Current build : Caldercraft HMS Victory 1/72 Completed: Trumpeter RMS Titanic 1/200
Yabuhebi Posted Monday at 01:32 AM #196 Posted Monday at 01:32 AM For new builders, perhaps unfamiliar with why there would be so many lines attached to each yard, I thought a quick synopsis of what each of the lines you are going to add actually do. For me when sailing, I think of the leeches of a sail where the wind kind of 'leeches' away or spills off the back of the sail. On modern sloops, the wind moves across the sail and actually creates a type of airfoil so that the boat is 'pulled' forward due to the creation of lift. That is what they mean by reaching as the wind is usually just in front or to the side of the boat. From above, the winds are coming into the boat from about 11 o'clock to about 3 o'clock (opposite for the other side). When they say running, the wind is behind you and then you are being pushed forward...no or not much lift. A square sail is a four-sided rectangular sail hung horizontally from a yard (spar) perpendicular to the mast, characterized by its ability to capture wind directly from behind (running) or from the side (reaching). Key components include the head attached to the yard, the bottom corners known as clews, and control lines called braces, sheets, and halyards, commonly used in traditional sailing rigs. Key Components of a Square Sail Diagram Based on traditional rigging: Yard (or Spar): The horizontal beam at the top to which the head of the sail is bent. Head: The top edge of the sail attached to the yard. Leech: The vertical side edges of the sail. Foot: The bottom edge of the sail. Clews: The lower corners of the sail, where sheets (to pull down) and braces (to turn) are attached. Braces: Lines attached to the yardarms to pivot the yard to angle the sail to the wind. Sheets: Lines attached to the clews to pull the bottom corners down and towards the stern or side. Halyard: The tackle used to hoist the yard up the mast. Buntlines: Lines that run up the forward side of the sail to the yard, used to pull the body of the sail up for reefing or furling. Clewlines: Lines used to pull the clews up to the yard when shortening sail. General Structure The sail forms a large rectangle, often slightly wider than it is tall, providing maximum surface area to catch the wind. Unlike fore-and-aft sails, square sails are not attached to the mast along their side, but rather hang freely from the yard, allowing them to swing. Not all of the above lines may be in the instructions, especially since my model doesn't include sails, but can be easily included. "In every revolution, there is one man with a vision" - Captain James T. Kirk Chris Current build : Caldercraft HMS Victory 1/72 Completed: Trumpeter RMS Titanic 1/200
Yabuhebi Posted Monday at 01:35 AM #197 Posted Monday at 01:35 AM I wanted to complete the fire pails and get closer to done with lanterns before too much rigging was in the way. I had bought the aftermarket pails from Woody's a while ago and they really looked good. The photo etch of the logos were very delicate and perfect. They kit also included PE ropes for the ladders. I tried to add them and maybe I had them too low on the sides of the pails, but they were going to end up being way too short. You can see below that the pail on the right is a PE rope and the one on the left is just .25mm black thread. That seemed to work better. I did find the fire bucket brackets, I had painted them last year and had them in a 'holding bin' I have for parts so they don't get lost.....lol. It was a mistake to wait so long to do these. They should have been installed before the masts went up, right after I had completed the hammock netting. Now I had to twist and turn to try and get the brackets in place around all of the rigging. Even after that, trying to get the finished buckets to hang was terrible Many kept falling onto the deck. They look more like a string of musical notes than what a ship's captain would tolerate on a ship of war!!! I am going to say that they are messed up because the ship just got done heeling! Finally, I worked on getting the lanterns ready. I put metal etch on the PE lantern parts and then carefully bent them using a PE bender I have. I took some transparency and sanded both sides to create a white opacity to create the glass without actually seeing inside. I was trying to figure out how I could create the semblance of fire and thought perhaps painting little pieces of cotton with red, yellow and orange might work. Well, painting cotton just makes it a cotton blob. But it is red! So in it went. I still have to touch up the base with black and then re-add the yellow highlights. Once done, I will create and bend the piping and install them...hoping I don't snag on them!!!! kiwiron 1 "In every revolution, there is one man with a vision" - Captain James T. Kirk Chris Current build : Caldercraft HMS Victory 1/72 Completed: Trumpeter RMS Titanic 1/200
Yabuhebi Posted Monday at 01:42 AM #198 Posted Monday at 01:42 AM Next I finished the fore yard's lifts, bunt and leech lines for both sides. After than I moved to the topmast yard's lifts, this required the addition of 3mm single blocks that have to be tied to the upper shrouds. The ends are secured to cleats on the lower shrouds. This is the foremast course yard showing the completed lift line that goes to the cap with a single/double block system. The other natural thread lashings are the buntlines and leech lines that terminate in knots on the blocks on the yards and are then run up under the platform and then back down on deck to the belfry rail. This is the fore topmast yard and the lift lines. They begin as tied off line at the cap, down to the large block on the end of the yard back up to an installed 3mm single block, down to a cleat on the shrouds. A closer pic of the above work. Both lift lines in view, the lines are a bit loose as I've haven't tightened them down yet. You can kind of see the ends lashed to the cleat, but they tend to melt in with the ratlines. Some front views of the first two yards I have worked on. CODY, kiwiron and Charter33 3 "In every revolution, there is one man with a vision" - Captain James T. Kirk Chris Current build : Caldercraft HMS Victory 1/72 Completed: Trumpeter RMS Titanic 1/200
kiwiron Posted Monday at 08:07 AM Author #199 Posted Monday at 08:07 AM Good info thanks Chris, You're going great, your photos are a great help. Current builds: HMS Victory - Caldercraft 1:72 Completed builds: HMB Endeavour - OcCre 1:54 HMS Supply - Caldercraft 1:64. Fishing boats, Bremen, Palamos.
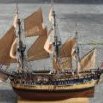
kiwiron Posted 8 hours ago Author #200 Posted 8 hours ago Blocks and dead eyes finnished for the masts and bowsprit. Next back to finishing the yards. Current builds: HMS Victory - Caldercraft 1:72 Completed builds: HMB Endeavour - OcCre 1:54 HMS Supply - Caldercraft 1:64. Fishing boats, Bremen, Palamos.

Recommended Posts
Create an account or sign in to comment
You need to be a member in order to leave a comment
Create an account
Sign up for a new account in our community. It's easy!
Register a new accountSign in
Already have an account? Sign in here.
Sign In Now