Jerry Posted August 10, 2015 #61 Posted August 10, 2015 Your stern work is awesome, Heinz. This Victory will certainly shine. Best, Jerry mort stoll and Shipyard sid 2 Cutty Sark - Billings- Scale:1:64 HMS Victory - Caldercraft - Scale 1:72 https://modelshipworld.com/index.php?/topic/1951-hms-victory-by-jerry-finished-caldercraft-scale-172-1805-version-wood/ HMS Bounty - Amati - Scale 1:60 https://modelshipworld.com/index.php?/topic/10200-hms-bounty-by-jerrys-admiral-finished-amati-scale-160/&hl= hms bounty jerry#39;s admiral Viking Ship - Amati- Scale - 1:60 https://modelshipworld.com/index.php?/topic/10415-viking-ship-drakkar-by-jerry-finished-amati-scale-150/ Half Moon - Corel - Scale 1:50 https://modelshipworld.com/index.php?/topic/9065-half-moon-by-jerry-finished-corel-scale-150/&hl=%2Bhalf%2B%2Bmoon%2B%2Bcorel%2B%2Bjerry Bluenose- Model Shipways - Scale: 1:64 https://modelshipworld.com/index.php?/topic/13649-bluenose-by-jerry-model-shipways-scale-164/&hl=bluenose La Nina - Artesania Latina - Scale 1:65 COMPLETED...7-8-2017
Heinz6672 Posted August 10, 2015 Author #62 Posted August 10, 2015 Hello Jparsley! Hello Jerry! thank you so much for your compliments. This means a lot to me :-))) - Heinz - Shipyard sid 1 HMS Victory by Heinz746
Shipyard sid Posted August 10, 2015 #63 Posted August 10, 2015 Greetings Heinz Got to agree with Jerry and Jparsley, Your work continues to be outstanding, and is reflected in the quality of the work on the gallerys. Is there a decision to be made on whether or not to copper plate the hull ?. Yes is going like a dream. Keep enjoying it Heinz....DAVID
Heinz6672 Posted August 10, 2015 Author #64 Posted August 10, 2015 Hello David, thank you very much for your nice words! Definitively I will not copper the hull. I never wanted to do it. It was just an opportunity if I would not get the hull planking right. But I am more than just happy with the result. No need to hide it with copper :-) If somebody is interested in the copper plates, please tell me. I don´t need them anymore! - Heinz - Shipyard sid, Seventynet and shihawk 3 HMS Victory by Heinz746
Jerry Posted August 10, 2015 #65 Posted August 10, 2015 Hello Heinz.. How much will you take for the copper plates? Best, Jerry Cutty Sark - Billings- Scale:1:64 HMS Victory - Caldercraft - Scale 1:72 https://modelshipworld.com/index.php?/topic/1951-hms-victory-by-jerry-finished-caldercraft-scale-172-1805-version-wood/ HMS Bounty - Amati - Scale 1:60 https://modelshipworld.com/index.php?/topic/10200-hms-bounty-by-jerrys-admiral-finished-amati-scale-160/&hl= hms bounty jerry#39;s admiral Viking Ship - Amati- Scale - 1:60 https://modelshipworld.com/index.php?/topic/10415-viking-ship-drakkar-by-jerry-finished-amati-scale-150/ Half Moon - Corel - Scale 1:50 https://modelshipworld.com/index.php?/topic/9065-half-moon-by-jerry-finished-corel-scale-150/&hl=%2Bhalf%2B%2Bmoon%2B%2Bcorel%2B%2Bjerry Bluenose- Model Shipways - Scale: 1:64 https://modelshipworld.com/index.php?/topic/13649-bluenose-by-jerry-model-shipways-scale-164/&hl=bluenose La Nina - Artesania Latina - Scale 1:65 COMPLETED...7-8-2017
Heinz6672 Posted August 10, 2015 Author #66 Posted August 10, 2015 Hello Heinz.. How much will you take for the copper plates? Best, Jerry How much does the postage? If someone pay me 10 Euro I will send it. I don´t want to make money with it... (if you want to give more... don´t hesitate); ideally you send me a personal mail... HMS Victory by Heinz746
seamymcnally Posted September 3, 2015 #67 Posted September 3, 2015 Wunderbare arbeit heinz Heinz6672 1
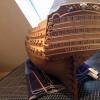
Heinz6672 Posted September 5, 2015 Author #68 Posted September 5, 2015 Hello friends, thank you again for all the nice words :-))) I can show you some progress. The stern is growing slowly. After finishing the back of the stern I decided to renew the lower line. I changed the distance of the pillars (I built them closer to each other) and took more care of the overall impression - sorry, I couldn´t even explain that in german - impossible for me to write that in english. Anyway, it took 1 week of my holidays and I think it was worth every minute. I keep on going this way. And it´s a long, long way... Sometimes I talk with my workmates about my hobby and i show them pictures of my Victory. No one can imagine how much time it took to build all the details. Everyone tells me that they would not have the patience to do this. The most common question is: "can your model swim?" That is the moment when I lose my patience too. I am close to jump out of the window... Best wishes for the weekend :-) - Heinz - GuntherMT, de_kryger, oscarmate and 6 others 9 HMS Victory by Heinz746
yamsterman Posted September 5, 2015 #69 Posted September 5, 2015 Hi heinz Absolutely beautiful workmanship.......lovely and clean and crisp. Your elderberry wood certainly seems to hold small details very well. Cheers....mick Heinz6672 and mort stoll 2
Jparsley Posted September 5, 2015 #70 Posted September 5, 2015 Hello Heinz I also am asked those questions and told by people that they don't have patience enough it must be an international theme I too do not know what to say about your ship in English or any language as to how wonderful she is looking Best regards Heinz6672 1 USF Constellation 1/85 AL Jparsley
shihawk Posted September 5, 2015 #71 Posted September 5, 2015 Fantastic work ,makes me want to do mine over again ,but i won,t . similiar experience from showing friends pics of the model ,they just don,t understand the work involved !!!!!! Heinz6672 1 HMS Victory by Shihawk. Billing 1-75 wood finish
Seventynet Posted September 22, 2015 #72 Posted September 22, 2015 Hello Heinz, beautiful workthroughout! I wonder if I may ask you some questions. I am just about to install whales and start my second planking on my Victory. I so admire your second planking and want to [try] to do something similar. My questions are would you see any benefit in applying any kind of dark coating to your first planking so that cracks between the walnut planking would not be so visible? From your pictures it doesn't look like you did and I could see how that might interfere with any lines to guide the second planking - but I thought this idea might have some merit? Second, I am anticipating that I will need to spile planks at the bow from thicker stock. Did you spile your planks at the bow - your planking line at the bow is exactly what I aspire to! If you did spile from thicker stock, did you use the 1*16 mm walnut supplied in the kit? In other words is there enough to line the gunports and do spiling? And finally, did you settle on a preferred method for tapering and cutting the planks? I know how easy the limewood was to work with and see right away how brittle and crack prone the walnut is. I apologize for the long post and know that English is not your first language. Thank you in anticipation. Ian Builds in progress - Speedwell - by Syren Ship Model Company Builds completed - Hayling Hoy - by David Antscherl - Naval Cutter Cheerful - by Syren Ship Model Company - Cape Cod Catboat - by Bluejacket - Gokstad - by Dusek - Ship's Boat - by Dusek - Brazzera - by MarisStella
Heinz6672 Posted September 22, 2015 Author #73 Posted September 22, 2015 Hello Ian, thank you for your questions. I am very proud that you want to build your victory in the same way I do. You are right, english is not my first language. So I am not sure if I understand everything correct, but I do my best to explain the way I builded the whales. Your first question: you are right. I did not apply any kind of dark coating on my first planking. To say the truth: I simply did not have such an idea. After my first experiences with the planking on the upper deck I decided to fill the spaces with black wood filler. I realized that this method has two benefits. First benefit: all spaces disappear. The second benefit is: the walnut wood gets an old and used look because the wood filler gets into the pores of the wood. It looks kind of dirty. And maybe a third benefit: it looks like the caulking of the hull :-) But you need really good nerves if you try to work with black wood filler. Look at picture No.35: I was shocked and afraid that I have destroyed my model. I scraped off the filler with a razor blade and rubbed it down with a wet sponge. It works well and the result surprised me. With a growing experience I intentionally builded the planks with spaces, cause it´s easier to fill them out (second picture). There is no place for the filler when the planks are build too close to each other. So in case I worked to exact I cut a slit between the planks to make space for the wood filler. To answer your first question: I am not so exited about your suggestion. In my opinion there are two possibilities: 1) you want to hide the cracks between the planks. But that means that you don´t work clean. Maybe it even seduce you to not take care enough. I think if you can see the first planking between your planks you have to rebuild it. Sorry! 2) if you want to make the spaces look like a caulking you have to work extremely exactly. I think it only looks well if all the spaces are equal to each other. I don´t believe that this is possible to do for my skills. So if you like the result of my Victory... do it in my way :-) . Your second and third question (I am not quite sure if I understood the second question - sorry): I did not use the wood supplied in the kid. I found a carpenter able to cut wood in exactly the thickness I need for my model. I used the same wood for the inner surface of the gun ports and the whales of the hull: 2 x 15 mm walnut. If the walnut strip isn´t so thin (1mm or less) it´s much better to work with (no brittle and crack prone). But you need patience to curve it. The biggest problem for me was the fact that the way of the planks does´t follow a "natural" way. I mean not only you have to curve them lengthways, you have to curve them upwards. It´s not such a problem when you work towards the stern. But I did not get it in the bow. The solution was to draw every single plank on my 15mm wide wood strip in the way I needed it and cut it out with a knife. I hope you understand what I mean. Every plank was exactly build for the place it deserves to be. I found out that it´s much easier to first draw the future planks on the hull and than transfer this sketch on my walnut strips using my sketch as a stencil. After building the planks in that way I only had to curve them lengthways and glued and fixed them without any problems. Ian, I hope I could answer all your questions and helped you with my advice. Feel free to ask me if you did not understand a word of it ... - Heinz - oscarmate and mort stoll 2 HMS Victory by Heinz746
Seventynet Posted September 22, 2015 #74 Posted September 22, 2015 (edited) Thank you so much for taking the time to respond so comprehensively. I will definitely take your advice with the black filler. Your explanation makes perfect sense. I think what you describe for shaping the planks at the bow is what I called spiling and there is likely no google translation for that technical term. But you have verified to me that this is what you did. What thickness did you have the walnut planking milled to? The kit supplies 1 mm thickness but I may go a little thicker say 1.5 mm if that makes it easier. I've had some success in milling my own planks and I have a nice piece of walnut that I could use. I am not sure I am brave enough to attempt the anchor stock planking you did for the whales but it sure looks good. I do have a good saw and taper jig if I do decide to go that way. I would be honored if you would comment critically on my build as I progress to this next stage. Thanks, Ian Edit: oh and by the way your English is excellent! As Jerry has pointed out. Edited September 22, 2015 by Seventynet Builds in progress - Speedwell - by Syren Ship Model Company Builds completed - Hayling Hoy - by David Antscherl - Naval Cutter Cheerful - by Syren Ship Model Company - Cape Cod Catboat - by Bluejacket - Gokstad - by Dusek - Ship's Boat - by Dusek - Brazzera - by MarisStella
Jerry Posted September 22, 2015 #75 Posted September 22, 2015 Hello Heinz.. The purpose of this post is threefold. I wanted to say hello, to give you an update on my admiral's HMS Bounty and to tell you that your English is excellent. Charlene has finished planking the first layer of the hull and has done all the wood filling and sanding. She is getting ready for the walnut planking but first has decided to run a styrene strip around the hull to locate the waterline. She'll use the copper plates, you were so kind to send us, from the waterline down and use walnut strips from the waterline up. Keep up your wonderful work. Best, Jerry Cutty Sark - Billings- Scale:1:64 HMS Victory - Caldercraft - Scale 1:72 https://modelshipworld.com/index.php?/topic/1951-hms-victory-by-jerry-finished-caldercraft-scale-172-1805-version-wood/ HMS Bounty - Amati - Scale 1:60 https://modelshipworld.com/index.php?/topic/10200-hms-bounty-by-jerrys-admiral-finished-amati-scale-160/&hl= hms bounty jerry#39;s admiral Viking Ship - Amati- Scale - 1:60 https://modelshipworld.com/index.php?/topic/10415-viking-ship-drakkar-by-jerry-finished-amati-scale-150/ Half Moon - Corel - Scale 1:50 https://modelshipworld.com/index.php?/topic/9065-half-moon-by-jerry-finished-corel-scale-150/&hl=%2Bhalf%2B%2Bmoon%2B%2Bcorel%2B%2Bjerry Bluenose- Model Shipways - Scale: 1:64 https://modelshipworld.com/index.php?/topic/13649-bluenose-by-jerry-model-shipways-scale-164/&hl=bluenose La Nina - Artesania Latina - Scale 1:65 COMPLETED...7-8-2017
Heinz6672 Posted September 23, 2015 Author #76 Posted September 23, 2015 What thickness did you have the walnut planking milled to? The kit supplies 1 mm thickness but I may go a little thicker say 1.5 mm if that makes it easier. I've had some success in milling my own planks and I have a nice piece of walnut that I could use. I would be honored if you would comment critically on my build as I progress to this next stage. Hi again :-) I did not use the wood supplied in the kit. I have my own wood. And all the whales are made from 2x15mm walnut. Please don´t forget that I builded it in a different way. The kit "tells" you to make a second planking with the 1mm walnut and than build the whales as a third planking on top, using the 1mm walnut again. I have decided to fix the 2mm whale directly on my first planking, so I did not have to milled it. The thickness is the same -> 2mm. The major reason to do this was the fact that I don´t wanted to paint the hull. I mean without any "covering" color you can see if the whales are not build as it was in reality, namely as extra thick planks. You can see that they are only glued as a third layer on the hull. My way of building them is the more correct and better looking way (in my opinion). Ian, it would be a pleasure for me to comment your build. But I am not an expert. I call myself a beginner. I have a vision of how I want to build my victory and get many inspiration of Alexandru´s victory (look at his build and you will never talk to me again...) and I try to realize my visions. But I would never say that my way is the own and best way to do this. To say the truth: I am surprised about the result for myself and very proud about all the nice comments here. So I would really love to discuss with you and all member of this community. But if you decide to build it in another way, it´s absolutely o.k. (and maybe better :-) ). Hello Heinz.. The purpose of this post is threefold. I wanted to say hello, to give you an update on my admiral's HMS Bounty and to tell you that your English is excellent. Charlene has finished planking the first layer of the hull and has done all the wood filling and sanding. She is getting ready for the walnut planking but first has decided to run a styrene strip around the hull to locate the waterline. She'll use the copper plates, you were so kind to send us, from the waterline down and use walnut strips from the waterline up. Keep up your wonderful work. Best, Jerry Hello Jerry! Thank you for your greetings and update of Charlene´s HMS Bounty. I am a faithful follower of her build log and can not wait to see "my" copper plates . The HMS Bounty is a beautiful ship and I am sure with your advice, Charlene is building something special. I will do my best to keep up my "wonderful" work. I am near to fulfill the galleries of the stern and can not wait for the next step. But my victory is growing. Very, very slowly.... Best to you and Charlene!!! - Heinz - Seventynet 1 HMS Victory by Heinz746
Seventynet Posted September 23, 2015 #77 Posted September 23, 2015 Hi Heinz, Thank you again for your detailed explanation. I spent the morning milling some 2 by 20mm and 1 by 20 mm walnut strips so that I can skip double planking for the wales and so that I have some stock (1 by 20) to use for spiling the hull planking at the bow. I am not sure I'll use the anchor stock planking approach for the wales that you have (it looks beautiful by the way) but now I have wide enough strips to use if I do decide to go that way. I'm not sure I have the skill to do that. I have to say that if you consider yourself a beginner that would make me at the level of pond scum . And I have followed Alexandru's Victory build for many months now. From my view he is the Michelangelo of shipbuilding. Amazing work. Ian Heinz6672 1 Builds in progress - Speedwell - by Syren Ship Model Company Builds completed - Hayling Hoy - by David Antscherl - Naval Cutter Cheerful - by Syren Ship Model Company - Cape Cod Catboat - by Bluejacket - Gokstad - by Dusek - Ship's Boat - by Dusek - Brazzera - by MarisStella
Heinz6672 Posted October 11, 2015 Author #78 Posted October 11, 2015 Hello friends! Another update from me on a wonderful sunday afternoon :-) I am happy to say that I finished the balustrades on both sides of the stern. Time to take a closer look to all the ornaments. What should I say... they don´t fit. I know that this is my own fault. I builded the stern in a different way than it´s written in the instructions. So I could not blame anyone instead of myself. I started to finish the stern with the logo "VICTORY". I did not think about using the sheet-letters from the kit, so I had to build my own ones. My elderberry strips are not wide enough to build them in one piece. I had to split them and build every letter from several peaces. Unfortunately you can see this very well when you look close to it. But is this really so bad??? I try to take care of copying the typeface of the letters and let them fall to the sides to give the logo a swung look (I hope someone understand what I want to say...) The last picture shows how I started to build the lower peak on the left side of the stern. I have an idea how to build it. But I am not sure if it works. But I will know it soon.... Have a nice weekend!!!! - Heinz - jablackwell, GuntherMT, Landlubber Mike and 6 others 9 HMS Victory by Heinz746
Seventynet Posted October 11, 2015 #79 Posted October 11, 2015 Hello Heinz, I think the transom and your lettering looks magnificent and adds to the uniqueness of your build. Keep it up! Ian Heinz6672 and mort stoll 2 Builds in progress - Speedwell - by Syren Ship Model Company Builds completed - Hayling Hoy - by David Antscherl - Naval Cutter Cheerful - by Syren Ship Model Company - Cape Cod Catboat - by Bluejacket - Gokstad - by Dusek - Ship's Boat - by Dusek - Brazzera - by MarisStella
Heinz6672 Posted October 11, 2015 Author #80 Posted October 11, 2015 Hi Ian, thank you, thank you, thank you, thank you thank you soooo much!!! :-) Heinz HMS Victory by Heinz746
Seventynet Posted October 11, 2015 #81 Posted October 11, 2015 My pleasure. I am only at my second planking around the middle and lower wales. I find great inspiration in your and other Victory builds as I labour, endlessly, on this massive project. Ian Shipyard sid 1 Builds in progress - Speedwell - by Syren Ship Model Company Builds completed - Hayling Hoy - by David Antscherl - Naval Cutter Cheerful - by Syren Ship Model Company - Cape Cod Catboat - by Bluejacket - Gokstad - by Dusek - Ship's Boat - by Dusek - Brazzera - by MarisStella
shihawk Posted October 11, 2015 #82 Posted October 11, 2015 Your logo looks great ,. Patience and skill must be a good combination ! Heinz6672 1 HMS Victory by Shihawk. Billing 1-75 wood finish
Heinz6672 Posted October 24, 2015 Author #83 Posted October 24, 2015 I tried a few things with the ornaments. I know they don´t look like exact copies from the original Victory. But let me tell it like this: I was inspired by it :-) Have a nice weekend!!! - Heinz - mort stoll, shihawk, oscarmate and 7 others 10 HMS Victory by Heinz746
rafterrat_2005 Posted October 24, 2015 #84 Posted October 24, 2015 Oh my gosh, sweet work! What detail!!!!! I will be following this build very close. The middle deck I planked with the accompanying Tanganyika wood. I have always left a small gap, and this sealed with a black putty. This is supposed to represent the caulking. Although the timber has been coated previously, some residue remained on the surface are. That was not planned, but gives the whole a very nice old look. Heinz6672 and Shipyard sid 2
Shipyard sid Posted October 24, 2015 #85 Posted October 24, 2015 Greetings Heinz Wonderful build, We often hear it, but we have something special going on here. Your work on the stern and galleries is exemplary. Well done Heinz, just keep enjoying it DAVID mort stoll and Heinz6672 2
Seventynet Posted October 24, 2015 #86 Posted October 24, 2015 Keep it up Heinz! Very inspirational. Ian shihawk and Heinz6672 2 Builds in progress - Speedwell - by Syren Ship Model Company Builds completed - Hayling Hoy - by David Antscherl - Naval Cutter Cheerful - by Syren Ship Model Company - Cape Cod Catboat - by Bluejacket - Gokstad - by Dusek - Ship's Boat - by Dusek - Brazzera - by MarisStella
SimonV Posted October 25, 2015 #87 Posted October 25, 2015 Hello Heinz, just found your build log and I am very very impressed with your work. I really like your approach with natural wood finish and will follow your progress with great interest. Heinz6672 and shihawk 2 Simon Current build: Royal Yacht, Duchess of Kingston by Vanguard Models Mercury by Victory Models - scale 1:64 - (99% scratchbuild) - on hold Finished: Bluenose by Amati - scale 1:100
Heinz6672 Posted October 26, 2015 Author #88 Posted October 26, 2015 A big THANK YOU to all modelers for your kind compliments. Without you it would be half the fun to build a model!!! - Heinz - SimonV and shihawk 2 HMS Victory by Heinz746
NMBROOK Posted October 26, 2015 #89 Posted October 26, 2015 Quite simply outstanding work Heinz Personally I am not a big fan of too much paint on my models,if I were to build Victory,it would be a similar approach to yours. Your caulking technique is not dissimilar to Russian masster Dimitry Shevelev's technique.He leaves a small gap,but after sealing he uses a bitumous wax to provide the caulking and ageing. Kind Regards Nigel Seventynet 1 Currently working on Royal Caroline
Heinz6672 Posted October 26, 2015 Author #90 Posted October 26, 2015 Hello Nigel, Shame about me. I did not know Dimitry Shevelev so far. I found some pictures of his work at shipsofscale and have to say that I am more than just impressed about it. Also I took a fast view to your build of the Sovereign of the seas. I don´t think that I can compare myself with you and Mr. Shevelev. These work is amazing! It´s an incentive to me and shows me what is possible to do. Thank you very much! - Heinz - NMBROOK 1 HMS Victory by Heinz746

Recommended Posts
Create an account or sign in to comment
You need to be a member in order to leave a comment
Create an account
Sign up for a new account in our community. It's easy!
Register a new accountSign in
Already have an account? Sign in here.
Sign In Now