Erik W
-
Posts
416 -
Joined
-
Last visited
Content Type
Profiles
Forums
Gallery
Events
Everything posted by Erik W
-
 Thanks for the kind words! I make such a mess when I do the planking, with the glue smearing the pencil all over the place, glue finger prints, etc., that I can't tell how the joints between strakes will look until I sand all the mess off. As I sanded, I was pleasantly surprised that the last strake turned out so well. To get it to the right width I cut it down to get it to the basic shape, but slightly oversized, and then started at the bow with removing material and worked my way along the length of the plank. Meaning, once I got the first 1/2" so it would fit in between the adjacent strakes, I moved onto the next short segment, carefully sanding the plank edge and test fitting until it fit correctly with a little pressure. I erred on the side of not removing enough material as I did my sanding, before test fitting. As we all have learned the hard way, you can't put material back! Erik
 -
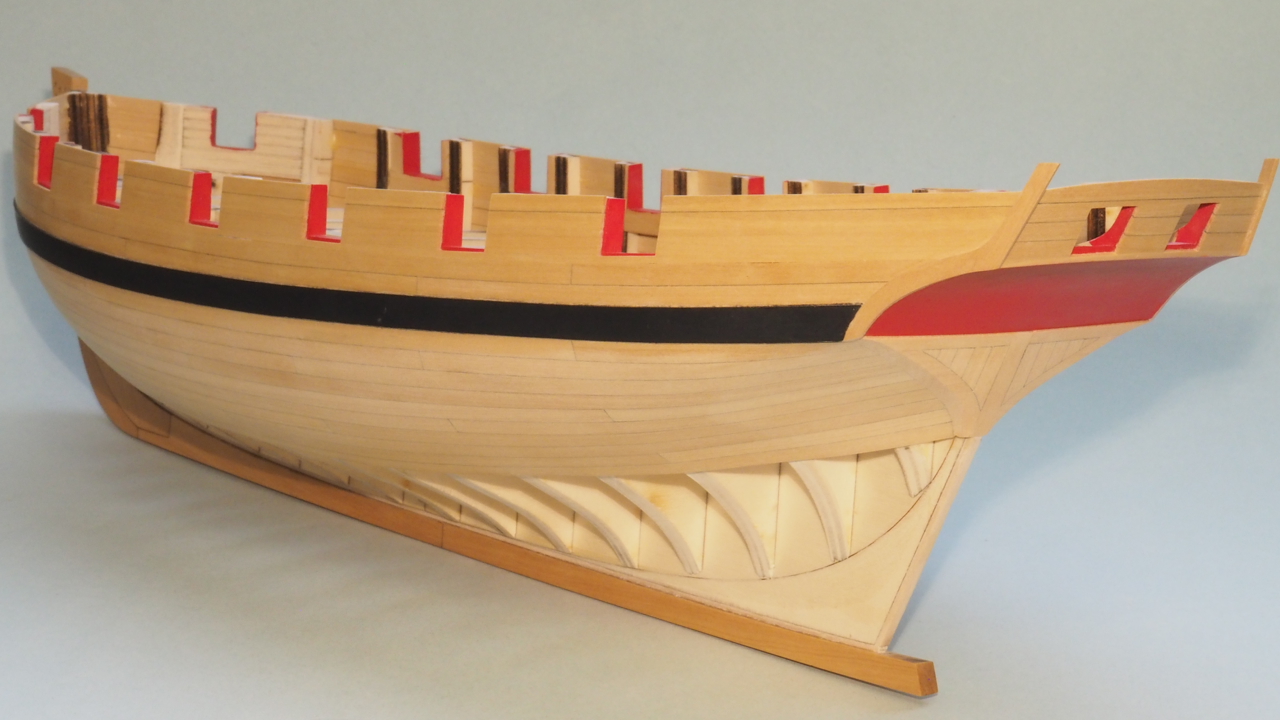
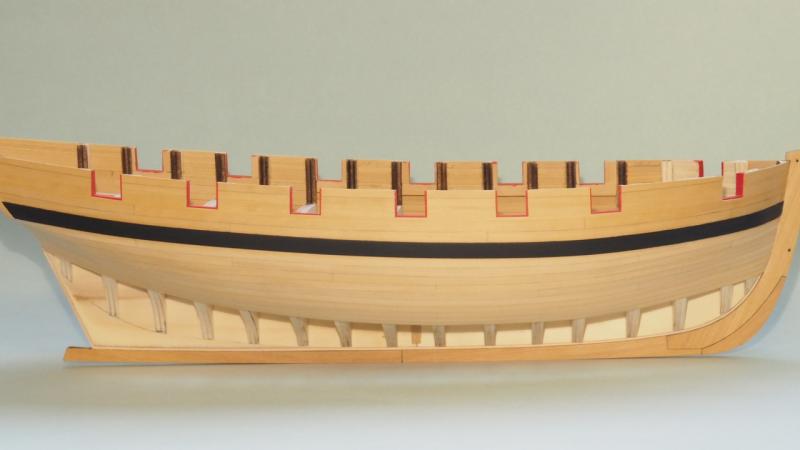
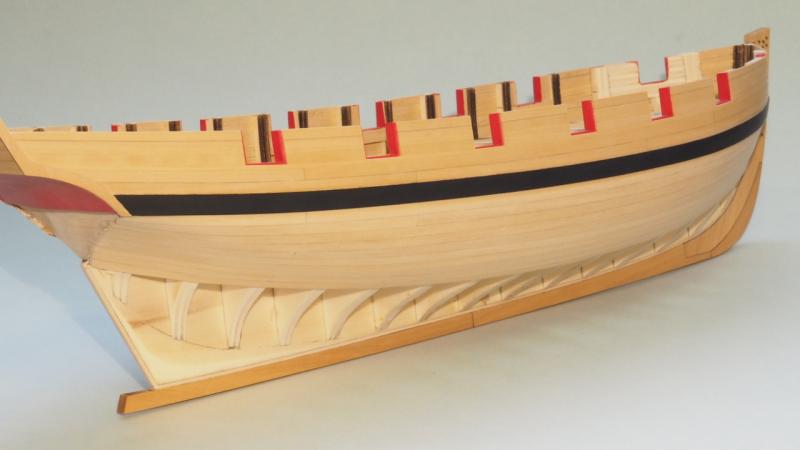
I reached a bit of a milestone today. I finished the planking on the starboard side. That last row of planks was a bit tricky, but I managed to avoid any gaps. I gave this side of the hull a once over with 120 grit emery boards. This is what I've done all my sanding with so far, and what I shape the planks with: https://www.amazon.com/gp/product/B00CX9R0E0/ref=oh_aui_detailpage_o05_s00?ie=UTF8&th=1 They're flexible, so easily contour to the shape of the hull as I sand. I cut them into smaller shapes for detail work. Cheap and effective. This is a bit of a rough look since I'm waiting to get the hull fully planked, and the stern post attached, before I do any sanding near the stem and keel. I'm happy with the results so far. Lets hope the port "display" side of the hull turns out as well or better. I included a closeup shot of the planking to show the variety of pattern and color of the boxwood I'm using. I like the variation. Erik
.JPG.0c9383f4b0676bab5af0bc35a0870207.JPG)
.JPG.01168d9e019201de08e4474895ed859c.JPG)
.JPG.92ec95c8b32a1ca04bb8da47ad0bbd0a.JPG)
.JPG.60514fa0740f5ef217534f2476d652c9.JPG)
.JPG.ba4d03d065ca5504a7ea3383da1e6f65.JPG)
.JPG.1a5c39ad0eb6901143efd7dee7eceae8.JPG)
.JPG.373c30cd54c508798fad38277f39bc07.JPG)
.JPG.bd454b5b8f5d62b07b6b0b0dabf4a2f9.JPG)
.JPG.74bceab021d6e92d723b796ece3b3713.JPG)
.JPG.ff56e1673ed8332381f1828d174c4a88.JPG)
.JPG.26e754e52858d949de92415b6b475ea9.JPG)
-
Oh it's bad. Trust me. It's so bad I can't even say it on the internet. Erik
- 335 replies
-
- 5
-

-
- 18th century longboat
- Finished
- (and 1 more)
-
Nice job Per! But . . . we demand more photos than the few you posted in the gallery. Your build looks great, so needs to be shown in lots of large photos! It's the law according to the rules of the MSW statutes Section 4 subsection 4b paragraph 27 item 16 exhibit GE25J after all. It's a pretty serious infraction if you don't post more photos, just ask the moderators. Seriously though, good job! Erik
- 335 replies
-
- 7
-
-
- 18th century longboat
- Finished
- (and 1 more)
-
Joe, I hadn't thought of that. I used the tape method to determine the edge bend of each plank. I finished the second-to-last row of planks last night, so forge ahead with the last row tonight. I'll probably do what I've been doing with the other rows. Using digital calipers I transfer, from my tick marks, the plank width to each plank where it sits on the bulkheads. Using first an Xacto blade, then a 180 grit emery board, I remove material on the plank down to my marks. I'm sure I'll test fit it around a million times to try to get it perfect. Erik
-
I guess I just need to make sure I take extra time to get the plank shaped correctly. I looked at my longboat photos, where I planked it in the same fashion, and can't tell from the results which was the last plank . . . so I must've done something right. I'm probably worrying for nothing. Since it looks good so far, I don't want to screw the planking job up on the last row! Erik
-
I need some advice. I'm about to start planking the last row of strakes on one side of the lower hull. I've planked the top 10 rows of strakes under the wales, and 9 rows up from the keel. So, the last row are the strakes is a row in the middle. So far I've had success with clamping the strakes to get them nice and snug, see my last post above. Do you guys, particularly those of you who do planking well (Chuck, Druxey, Stuntflyer, etc.) have any tips on how I should go about this last row of planks. I'm a bit concerned I'll wind up with gaps. I plan on beveling both edges. My thought was that if the plank is ever so slightly oversized, with beveled edges, it will force any slight gaps closed as I press the plank snug on the bulkheads. Does this sound like reasonable thinking? Thanks, Erik
-
Mike, I had figured ratlines were something that took weeks, rather than days. So, three days sounds quick to me! Erik
- 450 replies
-
- 2
-
-
- cheerful
- syren ship model
- (and 1 more)
-
Mike, The ratlines look great. How long did it take you to do the them? Erik
- 450 replies
-
- 3
-
-
- cheerful
- syren ship model
- (and 1 more)
-
Since I've been getting compliments on my planking, I thought I'd show you all how I go about gluing and holding the strakes onto the ship while the glue sets. I'm using PVA, since CA sets too fast for my liking. The first set of photos show the typical clamping positions on the top belt of strakes. All the clamps are test fit on the formed strake before I apply glue. You can figure out the best angle beforehand that way. The ideal clamp location is one that holds the strake firmly against the bulkhead as well as holding it to the edge of the strake you're gluing it to without bending or warping the plank, if at all possible. The clamping I'm doing is to hold the strakes tight while the glue sets, not to force the plank into place. I have edge bent them with heat (no water) and face bent them around a jar without heat to get them as close to the correct shape as possible. This next photo shows the clamping at the bow of the lower belt of strakes. The clamps are positioned for even pressure across the edge of the plank. On this one I couldn't get the clamp positioned to my liking at the very bow, so I did it the old fashioned way . . . held it tight with my fingers and sat there for 15 minutes. Now a short tutorial. I just glued this strake today and took photos of the process. The strake was shaped, had the edge beveled, and was pre-bent, before it was glued on. These next two photos show the first gluing session. I only glued the 3 left-most bulkheads and the edge of the plank between two and a half of those. The clamp on the right is up against the bulkhead where that side of the plank's edge is glued. I've found that when gluing a strake in sections, it works best to split the sections to be glued midway between bulkheads. I let this set for about 20 minutes. These next two photos show the tool I use to apply glue, and how I do it. I've been able to bend the boxwood and get in there with the curved sharp blade in order to get the glue as close to the previously glued plank center. I think it gets to within 1/8" or so on the plank edge. This shows more of the same in the center section of the strake. Again, notice that at the edges of the clamps on either side, the clamps are up against the interior bulkheads. I really try to make sure that the plank edge only half glued is snugged down tight. I also let this sit for about 20 minutes. And finally the last part of the plank. Testing the clamp position was essential on the very end of the plank because the shape is changing, so the clamp angle has to be adjusted. One thing I'd like to point out. Though this is only my second build, I don't feel like I necessarily have an aptitude that's greater than anyone else. I have noticed over the years that being patient and going slowly yields better results, always, than when rushing through things. Part of my ability to get the planking looking the way I want it is because of the time I've spent thinking how I'm going to do certain processes before I begin cutting wood. My goal is to build a ship, rather than to have a finished ship . . . so if the process takes me a while, that's fine. Lastly, some advice, don't ever look at the builds you admire on this board and think, "I can't do that." I'm convinced that taking your time, and spending the effort to think your processes through . . . and practice, practice, practice, will yield great results. Erik
.thumb.JPG.9e9435d66de464c8e65393c2efddecae.JPG)
.thumb.JPG.391a604726b1eb74d14b9aa9f2b4f13a.JPG)
.thumb.JPG.2fcf4376daa18787db8659d4154d46d8.JPG)
.thumb.JPG.4bb63a28c17c607a75e82b5d42a40b32.JPG)
.thumb.JPG.a2ea5ba21de3c4fb188fcda919d81fa3.JPG)
.thumb.JPG.df96ad074f9a4de9710a2136cfc46822.JPG)
.thumb.JPG.19c72b530eda5a26d8bb26e4c5cf6389.JPG)
.thumb.JPG.3a69e3e3e97c1d1629507b8e882b37c7.JPG)
.thumb.JPG.fed05d4d0b6074f992361a3822094b8b.JPG)
.thumb.JPG.4d507a848fc6e0b4e6fedda90be157b0.JPG)
-
Thanks guys! I definitely feel like I'm in the groove with the intricacies of how to get good results planking. This section of 5 strakes above the keel came out the best yet. I still have finish work (sanding) to do where the strakes meet the keel and stem, but will save that for when the hull is fully planked. I glue the edge of the strakes a few bulkheads at a time, and use these clamps to hold the strakes tight against one another while the PVA sets: I wait 20 minutes or so, and then move on to where the strake sits on the next several bulkheads. I was thinking of taking some in-progress photos of this procedure if you folks are interested. How I'm clamping the strakes has, out of necessity, gotten pretty creative! Erik
-
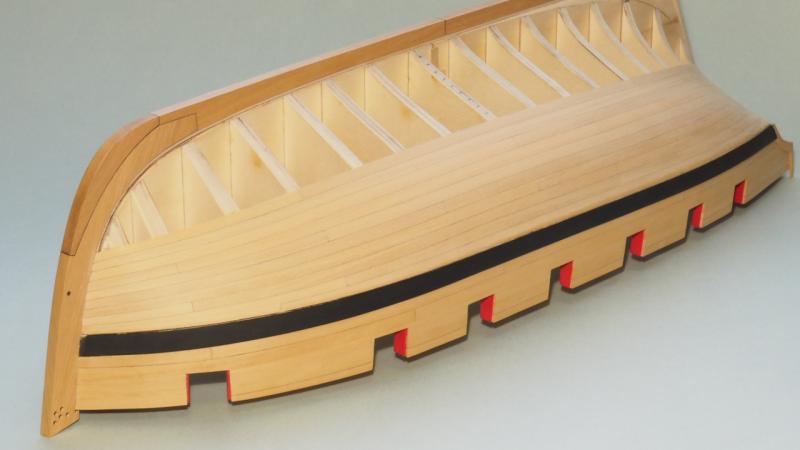
Planking, planking, and more planking. Here are some quick photos, warts and all, after a quick rough sanding. Planking from the keel up is a different beast than the other belt of strakes. The shapes take a bit of getting used to. It's coming along well so far. I've double and triple checked my tick marks. I shouldn't have any surprises when I get to the meeting of the two belts. Erik
.thumb.JPG.6c01d9cbd25efd227850644e86f7fdcc.JPG)
.thumb.JPG.c3f69d2182cc881428bed99fbede40a4.JPG)
.thumb.JPG.4cc3d573eb69b66a8293e1eb894bb45c.JPG)
.thumb.JPG.fc072d054f600be29d071818374239bc.JPG)
-
I like how you do some of this off of the boat. Once of the challenges for me on the longboat, being new to rigging, was getting everything tied while the mast was installed. Erik
- 335 replies
-
- 6
-
-
- 18th century longboat
- Finished
- (and 1 more)
-
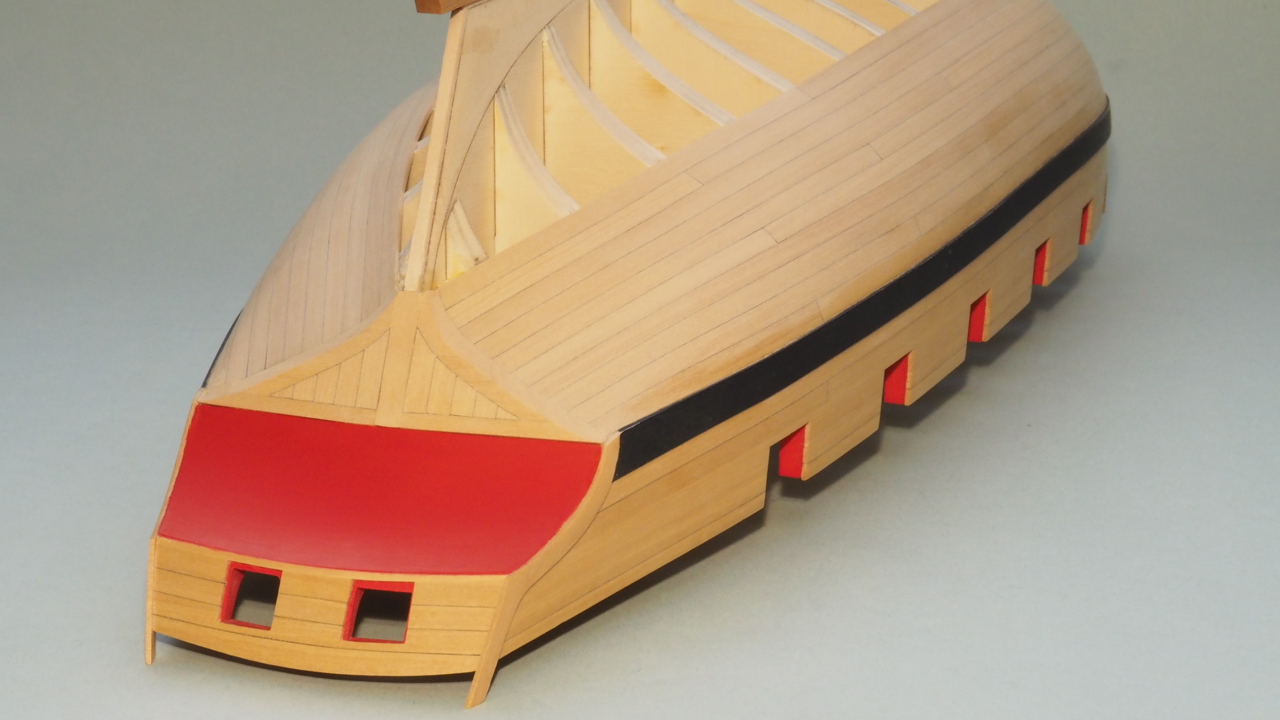
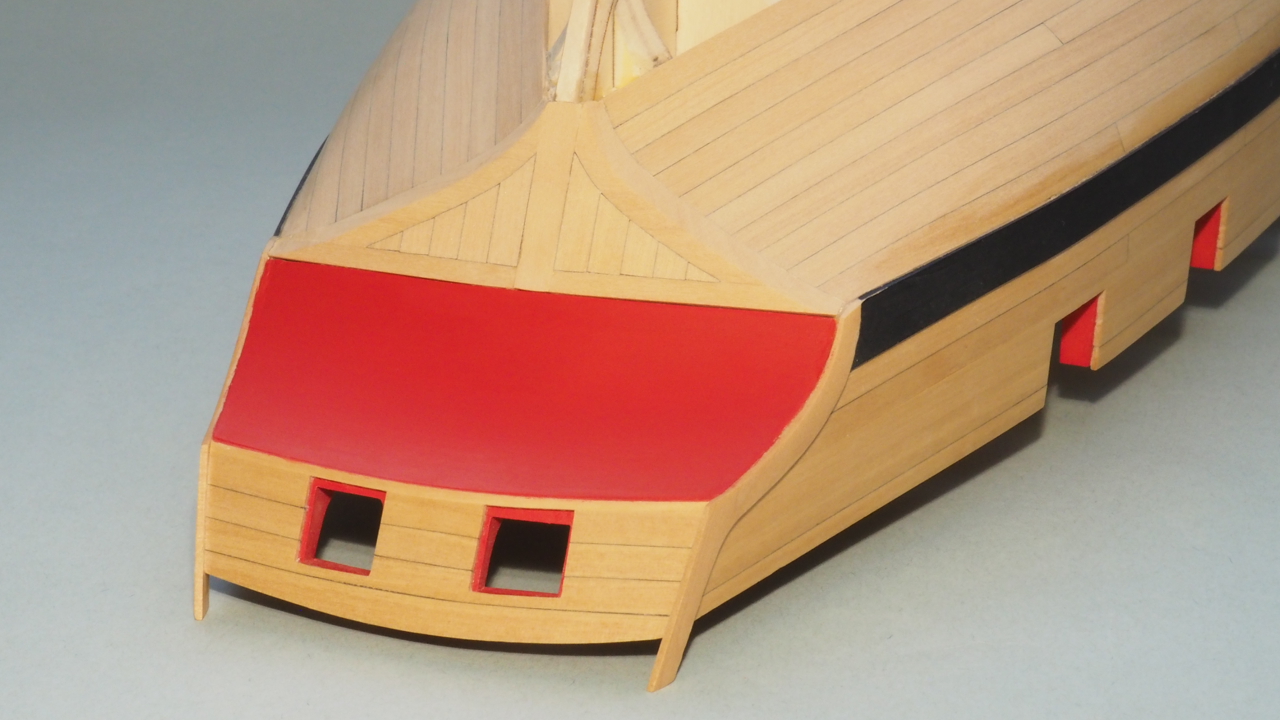
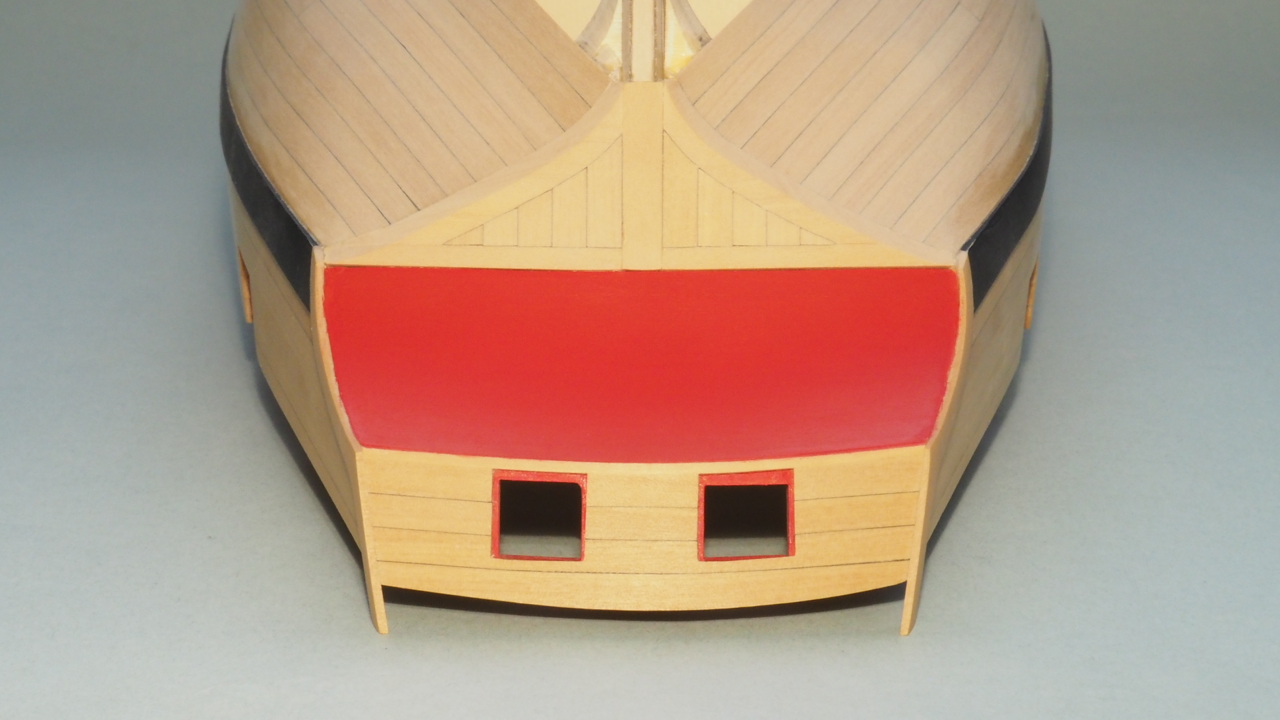
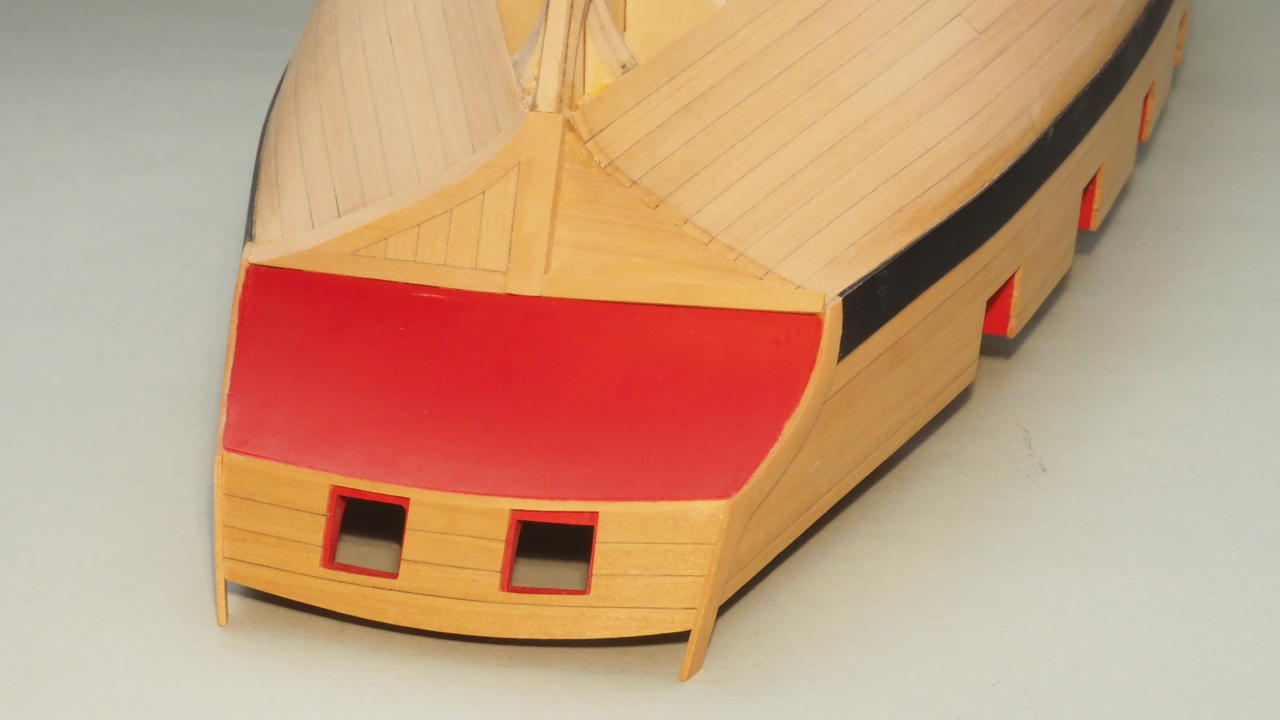
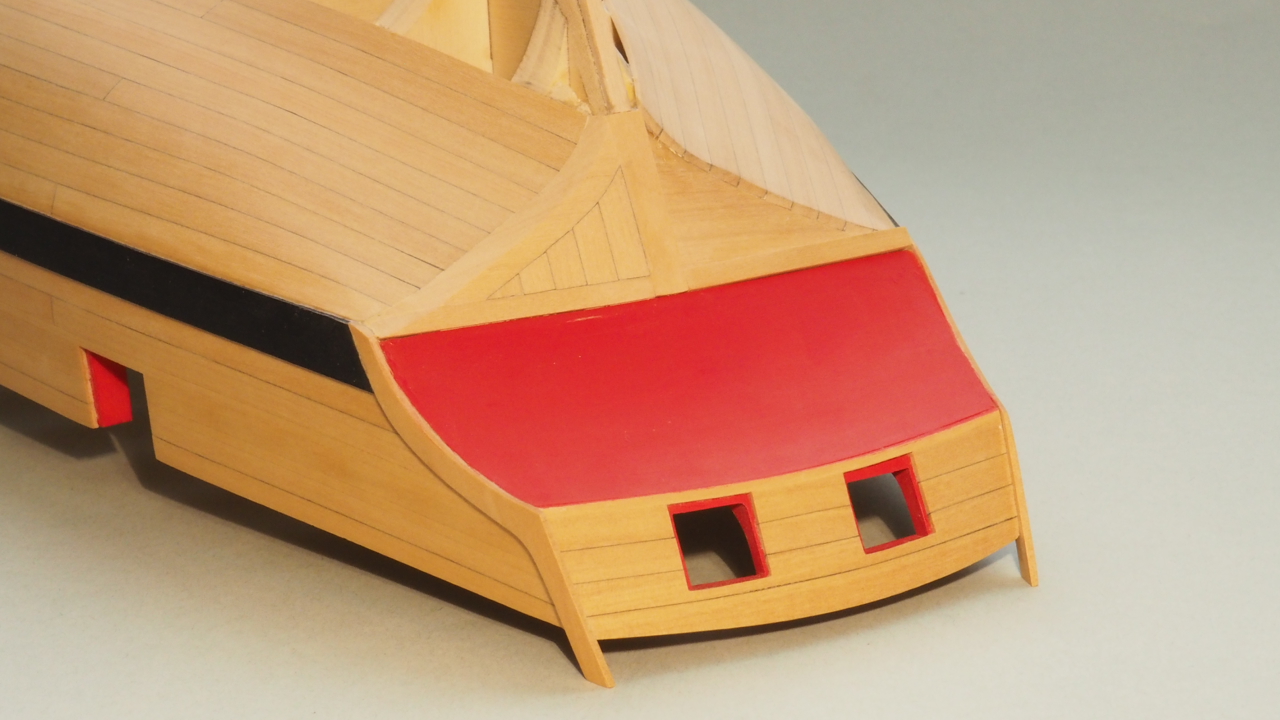
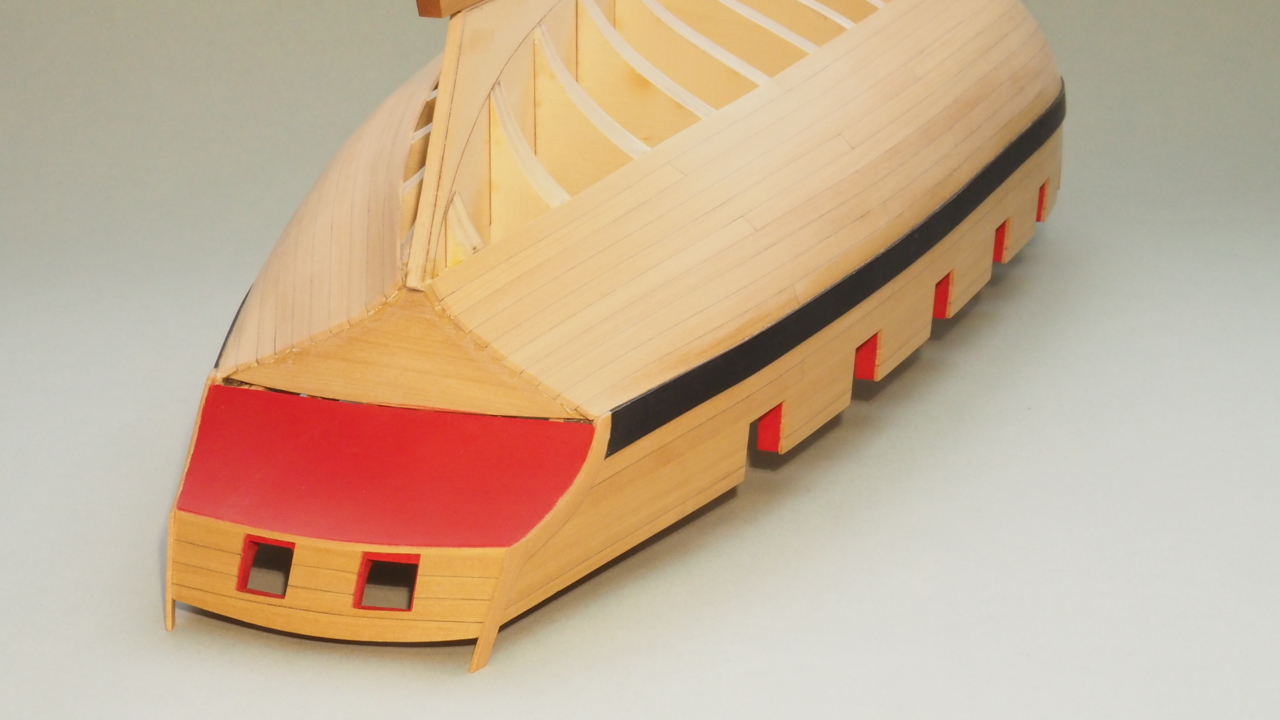
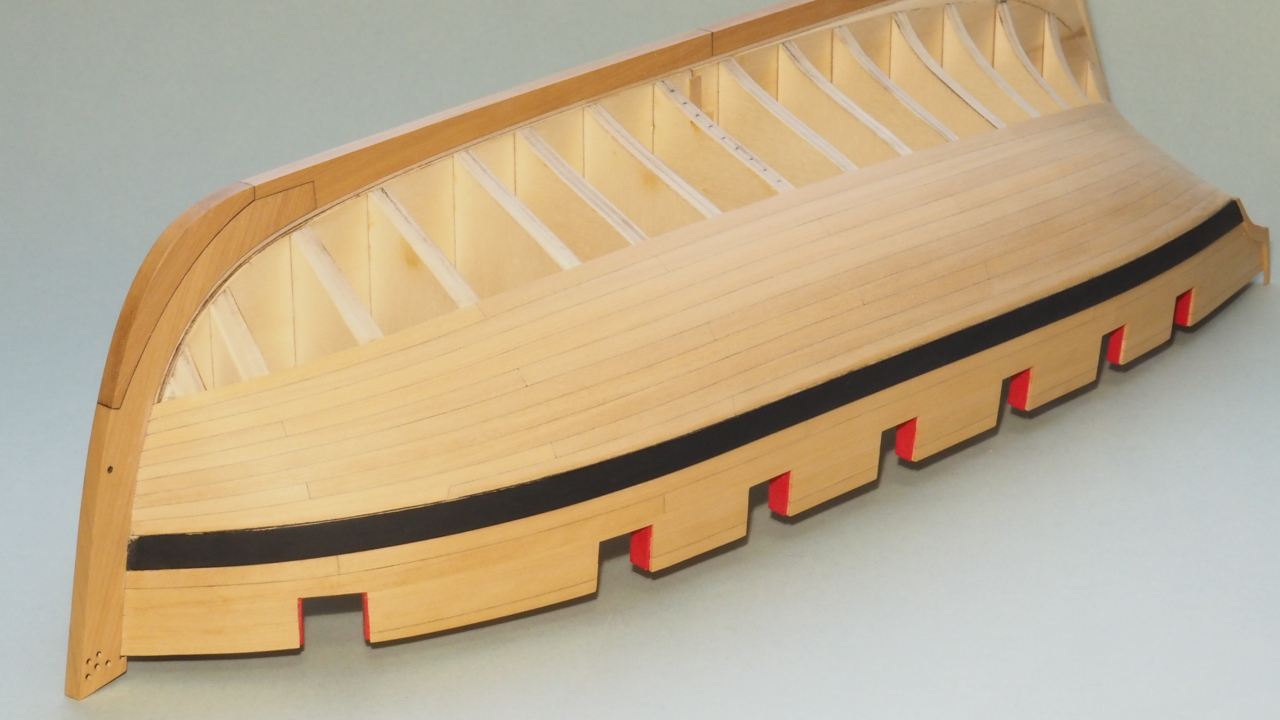
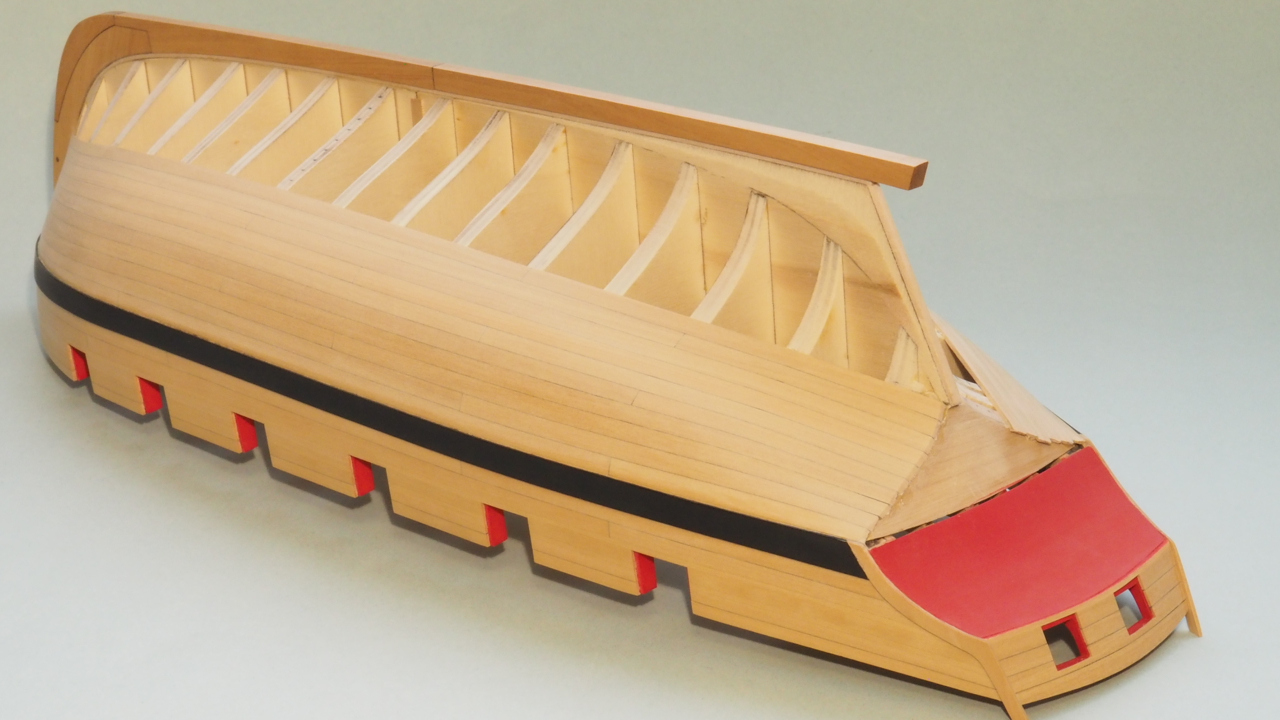
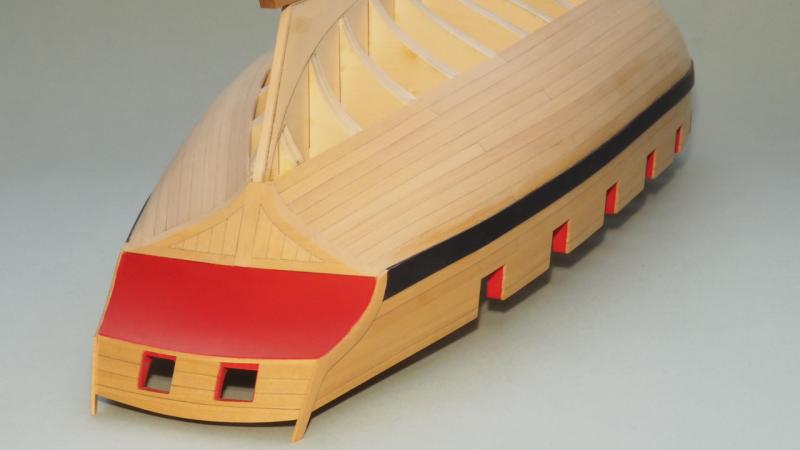
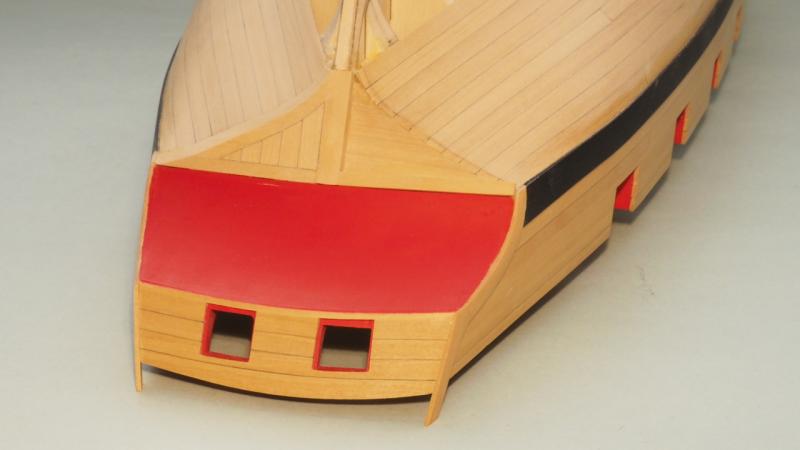
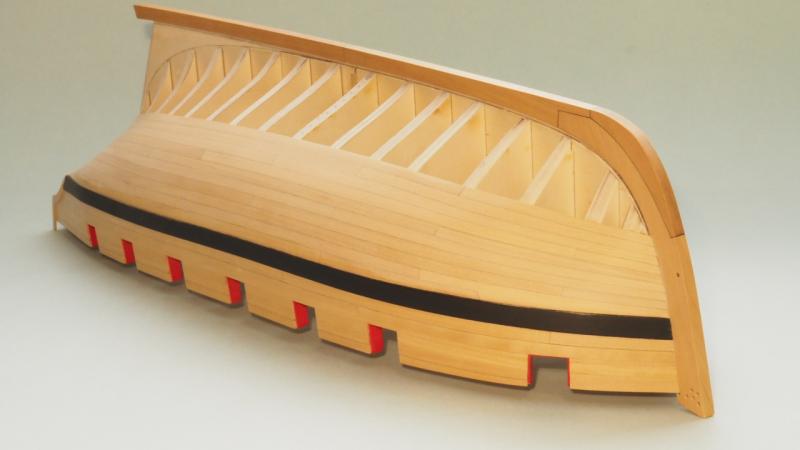
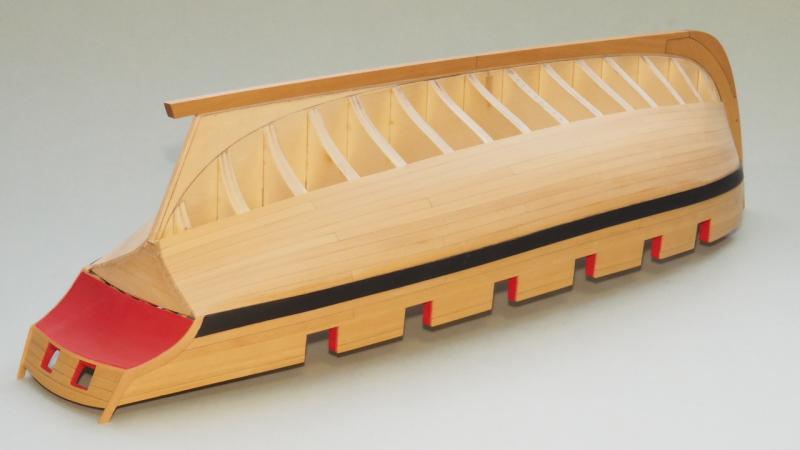
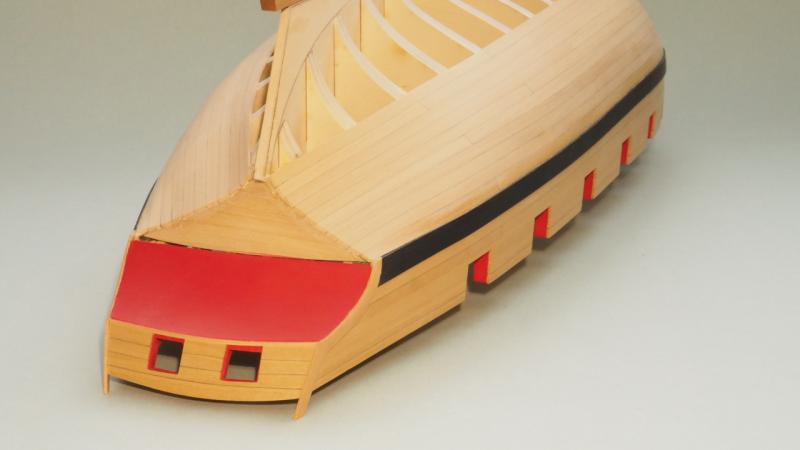
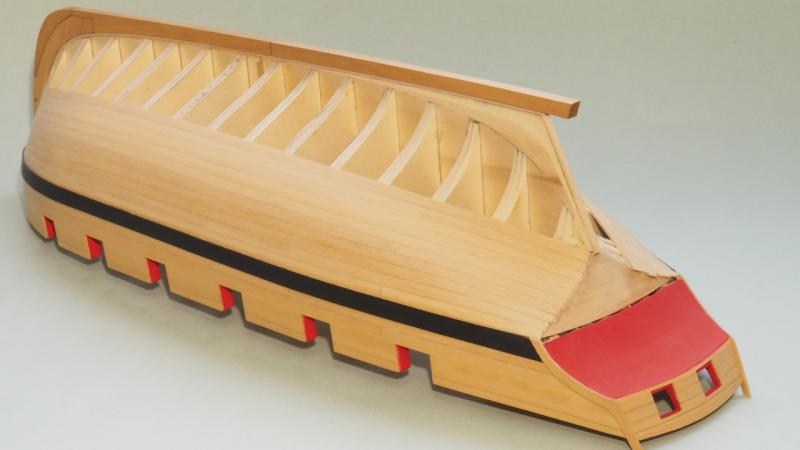
I finished the square tuck, gave it a rough sanding (I've only done a preliminary sanding below the wales with 120 grit sandpaper so far), and applied another 4 thin coats of red paint to the counter. The counter had gotten scuffed over the last couple of weeks. Things turned out pretty well. In the last photo, the uneven gun port frames jump out. When I planked the transom I erred on the side of having the transom planking symmetrical, knowing the gun ports would be modeled closed. The important thing to me was to have the gun port framing appear aligned correctly when viewed from the interior, since that will be visible. Every time I look at a photo of the exterior of the transom though, that just annoys me, as do the dozens of other little imperfections that only the builder usually notices. Erik


-
That looks great Mike! Your rigging is turning out as clean looking as your woodwork. Erik
- 450 replies
-
- 3
-
-
- cheerful
- syren ship model
- (and 1 more)
-
I've been wrestling with the square tuck this week. There's a lot going on as far as curves and angles in that area, making getting things correct a bit difficult. I realize my planking is flatter in the area adjacent to the wales, so that area of the square tuck looks a bit different than Chuck's. All in all I'm happy with the way it's turning out so far. I used 3/64" thick planks with a filler block behind them, rather than 1/8" thick planks, figuring it would be easier to get the planks shaped correctly in this complicated area. The idea seems to have proved successful. Erik

-
Greg, The problem is Chuck and the first few builders set the bar high, none of us who follow want to be the only ones to build a substandard Cheerful . . . so we're forced to up our game. The pressure is intense. Erik
-
I just ordered the La Belle Poule monograph from them in Wednesday evening 1/19 and only paid for the slow 5 Euro postage. The book was shipped Thursday 1/19. It arrived from France to Colorado a week later on Friday 1/27. I ordered another book from them a year or so ago and it was shipped the next day and arrived within 10 days or so. Erik
-
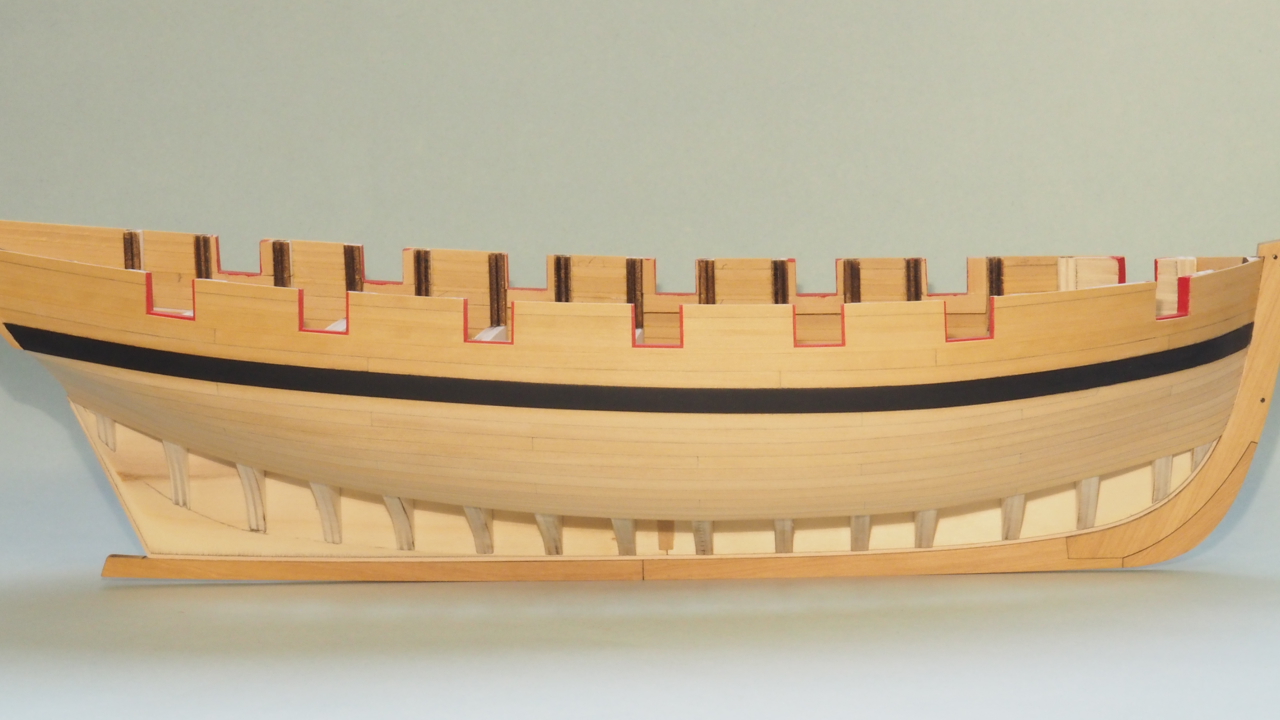
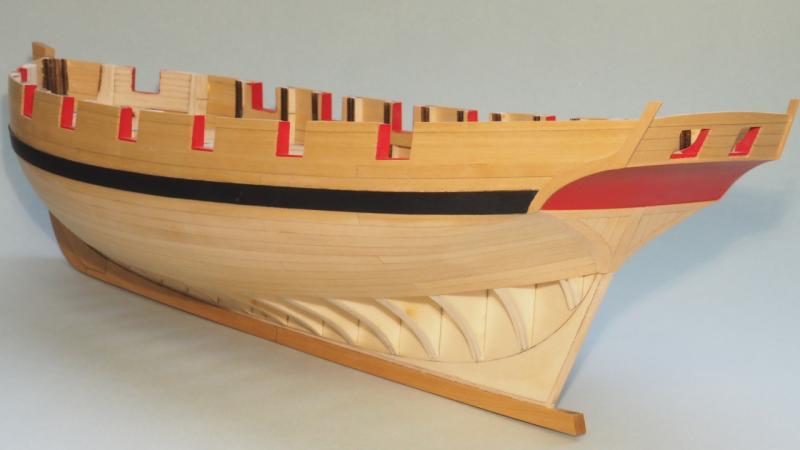
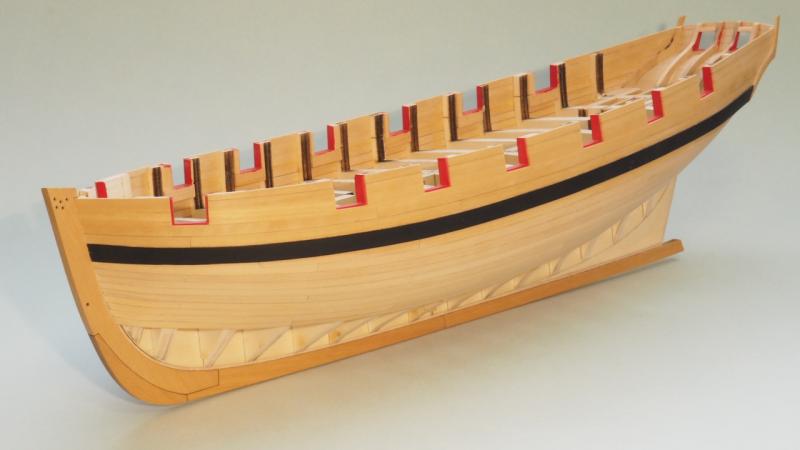
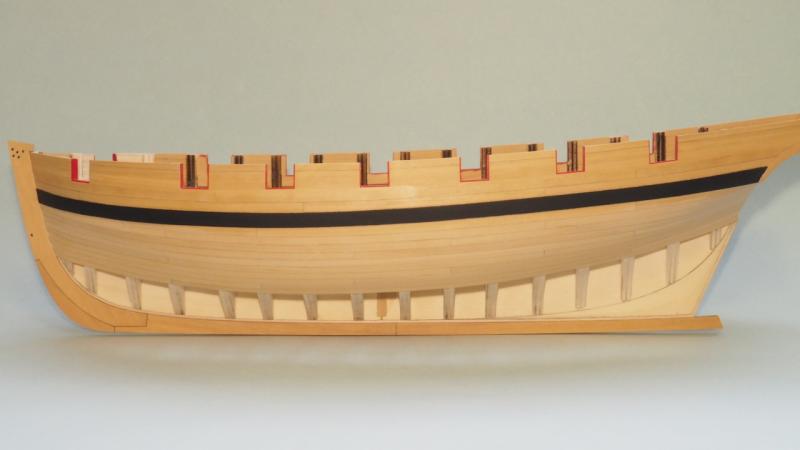
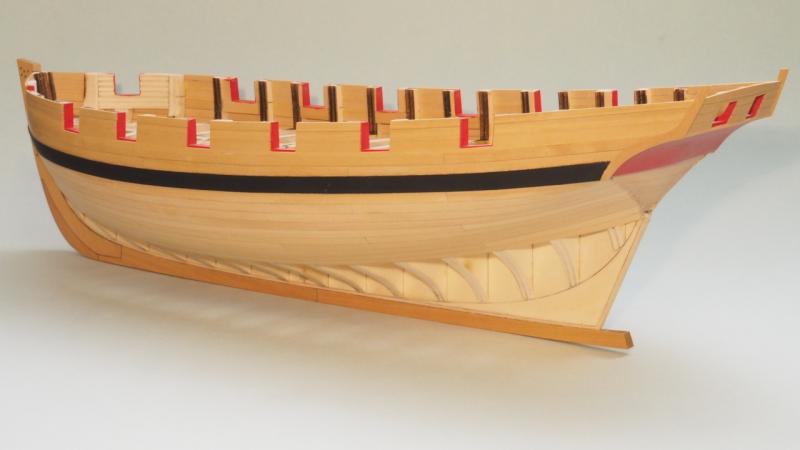
I finished planking the first belt of port side strakes. This had been partially done when I posted last weekend, so no, I didn't plank 10 rows of strakes in a week. These photos show the first rough sanding. There are still areas that are uneven or need a little more attention . . . which pop out to me when viewing these photos. That, and ignore the dinged paint, and glue marks. Definitely not a clean finished look yet! I'm looking forward to working on the square tuck next. I could use a little break from planking the hull sides! Erik
-
Thanks for the kind words! Many of you set the bar high. Gives the rest of us something to aim for! Planking is an interesting process. While repetitive, there is enough of it to actually see an improvement in technique and results as progress is made. I guess this is why no matter how much we understand the concepts of how certain processes are done beforehand, improving our results only comes from getting our hands dirty by actually doing. I'm soooo glad I built the longboat as a first project rather than jumping into something like this as a first build. I'm definitely refining what I had first learned on the longboat. Toni, I'm so slow, I only have time for one or two planks a day! Druxey, I can see how it will be possible to do this a little more quickly . . . down the road. Glad to hear that others have a "Show side" vs. "Wall side" too. Erik
-
I finished the planking of the upper belt of strakes on the starboard side. I'm not sure if any of you other folks do this, but I decide early on a build which side of the model will be displayed . . . and then, since I do every process twice, one on each side, do the process first on the side that will be facing the wall. That way I have practice before I do the process on the side facing the viewer when the finished model is displayed. The planking is turning out well for the most part, with a minimum of gaps. I can honestly say I've given it my 100%. There's definitely a learning curve though. I'm learning what works for me, and how to do it. I seem to have settled into a rhythm of getting 1 plank done a day on weekdays and 2 a day on weekends. Slow progress, but it'll get me there. These photos were taken after the first rough sanding. Erik

-
I had to do some of that mental math between my first build and my current build. My first build was the Model Shipways 18th Century Longboat at $40, with some new hand tools, and some of Chuck's rope, say around $100 total . . . for a 6 month project. My current build is Chuck's Cheerful built with boxwood. Most of the cost was up front, with follow-on purchases as I've needed more supplies, or hand tools. I think my total cost will be around $800. I was a bit put off by this price tag, by far the most I've ever spent on a single model, but I did the math for the cost per day over an estimated 3 years (knowing my slow speed) of working on it, and it comes to $.73 a day. Very reasonable in the long run. At times, I've gone months without spending money on the Cheerful project. Of course, a new parallel hobby seems to be collecting sailing ship books . . . I, er, won't talk about the cost of those 35 books. Also, I made the decision to choose a second build that wouldn't require power tools. If I get to the end of the Cheerful, and am confident I've found another life long hobby, I may dive into the expense of power tools. Erik
-
Questions about double wale
Erik W replied to Erik W's topic in Building, Framing, Planking and plating a ships hull and deck
Pete, The only other thing the book says about the wales on the Rogers Collection model of the Royal William is the sentences following what I had quoted above, "This produced a solid-looking main wale that became the norm for the remainder of the century. The Royal William's main wale is solid, except that here it is made of two, not three, broad strakes, both painted black and lacquered. The upper wales, too, are solid, though unpainted, but the channel wales are of the old, double wale construction." Erik -
I just received this exquisite book today. It's filled with great color photos, and is chocked full of tons of interesting information. I'd highly recommend it to anyone interested in the history of these ships and models. Erik
-
Questions about double wale
Erik W replied to Erik W's topic in Building, Framing, Planking and plating a ships hull and deck
Today I received Seawatch Books The Rogers Collection of Dockyard Models by Grant H. Walker. I stumbled upon this in the section about the 100 gun Royal William regarding double wales, " . . . a Navy Board order issued on 14 October 1715 directed that this traditional practice was to cease, and that henceforth the main wale would be made up of three strakes, all of the same thickness." Erik
.JPG.f4f23057cf27963d3b1cb3bac02e078a.JPG)
.JPG.c74d5471f5ae3025a11db3130917e1a1.JPG)
.JPG.82d60518a21b2a8866efd114d8a18795.JPG)
.JPG.d2d14c5a6ece781754c5df5750574856.JPG)
.JPG.1fc41591498b58da35f8412419f44138.JPG)
.JPG.a1366a9b12460e20478d06faacc818ef.JPG)
.JPG.2fe5aea6564452de2459603910c5f26e.JPG)
.JPG.7fa224fbfc58758bc8dba2df3ce34460.JPG)
.JPG.b88889c166d5df1cc0e4fcb7e1476d11.JPG)
.JPG.3e792a2fbe7eaa1aac32988dd63f6269.JPG)
.JPG.a832997cbdcf26ee20c04937a8dddb3b.JPG)
.JPG.f0ef887bb366e0bed1911245758fa9be.JPG)
.JPG.6fb71343a70916b10febdabf89a27135.JPG)
.JPG.6d26cf2b10c58abc2c932a9f99a6fca1.JPG)