-
Posts
491 -
Joined
-
Last visited
-
 cajunrandy214 reacted to a post in a topic:
Cutty Sark by Richard Dunn - 1/40 scale - scratch built semi-kit prototype
-
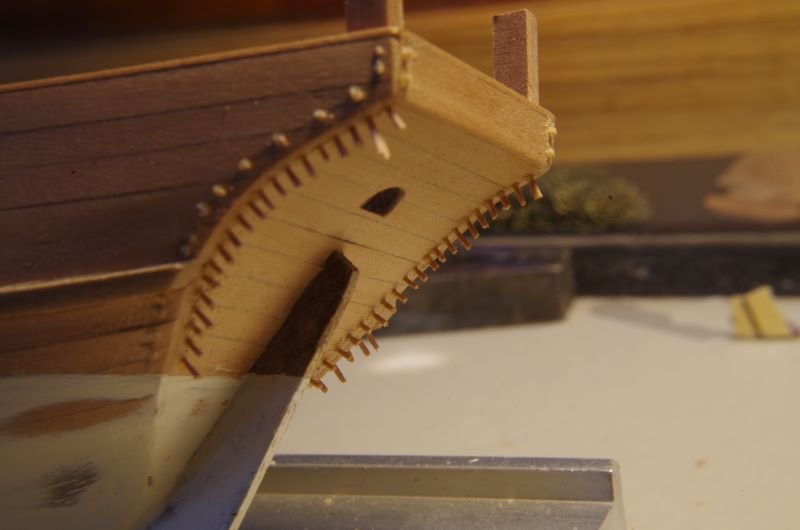
I find the below to be the most enjoyable part of building a ship. Yes, I'm pretty sure I'm on the spectrum. These are pear, and from old pear blocks I had on hand. Rough-cut dowels were pulled through a standard progressive drawplate, and the ends sanded down to points allowing me to gently glue them into the predrilled holes. And then clipped/sanded down Just a photo of the topside of one of the pintles before the holes were drilled into the sides. And finally, the rudder assemblies are about complete. I'm not going to hang the rudder until the topside is complete and the model has been installed onto its base. The ends of the bolts were cut via a rolling motion under my X-acto blade which provided a tiny lip on the ends. They were then inserted into the pintles/gudgeons with a bit of superglue; overall, they hold the pintles/gudgeons more securely than I thought they would. I'm trying to decide whether or not they should be blackened or left bare. Each one of them reflects light at a different angle, so while it's fun to show that I created such small bolts, it's also frustrating, in that they don't look uniformly placed. I think I'll eventually prime/paint over them as they should be black in color anyway.
-
 Scottish Guy reacted to a post in a topic:
Hawker Hurricane Mk. I by ccoyle - Halinski - 1/33 - CARD
-
 laarmada reacted to a post in a topic:
Philip Reed style Navy Board models: are there any on MSW?
-
 mtaylor reacted to a post in a topic:
Sloop Speedwell by Chuck - Ketch Rigged Sloop, 1752 - POF
-
 FrankWouts reacted to a post in a topic:
Sloop Speedwell by Chuck - Ketch Rigged Sloop, 1752 - POF
-
 Jack12477 reacted to a post in a topic:
Sloop Speedwell by Chuck - Ketch Rigged Sloop, 1752 - POF
-
Ok, that's just shocking. I'd nervous to steer that ship on a lake. lol Alan
- 796 replies
-
- speedwell
- syren speedwell
-
(and 1 more)
Tagged with:
-
 Ryland Craze reacted to a post in a topic:
Bregante by AmateurModelBuilder - Mini Mamoli
-
 bdgiantman2 reacted to a post in a topic:
Sloop Speedwell by Chuck - Ketch Rigged Sloop, 1752 - POF
-
 FrankWouts reacted to a post in a topic:
Sloop Speedwell by Chuck - Ketch Rigged Sloop, 1752 - POF
-
 king derelict reacted to a post in a topic:
Bregante by AmateurModelBuilder - Mini Mamoli
-
I see a recipe for kittens with a cat in both bow and stern; I see that one of them also knocked one of the checkers. down. I also like the tombstone cutaways. Everything looks fantastic. Alan
- 796 replies
-
- speedwell
- syren speedwell
-
(and 1 more)
Tagged with:
-
Hello, Gregory was exactly right. Below is a photo of my mini-Mamoli Nina. The keel parts are glued into the pre-drilled groove all the way along the keel. Since the keel will be painted below the waterline, it doesn't really matter what pattern of pieces you cobble together down there as long as they are all snug in the groove, and against each other. It also helps to install pieces which stick out too far as well, so the entire keel/stem can be sanded down as one unit after the glue dries. Alan
- 14 replies
-
- Solid hull
- Bregante
-
(and 1 more)
Tagged with:
-
Warship identified off Florida coast 3 centuries after it sank
knightyo replied to Gregory's topic in Nautical/Naval History
They were just experimenting with fiberglass cannons. Alan -

Hawker Hurricane Mk. I by ccoyle - Halinski - 1/33 - CARD
knightyo replied to ccoyle's topic in Non-ship/categorised builds
I'd wager that your shipbuilding experience creating stealers had an influence on this solution. Alan -
 knightyo reacted to a post in a topic:
Sloop Speedwell by Chuck - Ketch Rigged Sloop, 1752 - POF
-
Hello Kai, Since you enjoyed the Hornblower books, I would like to recommend the series by Patrick O'Brien which covers the same era, if you haven't already read them. That series of books is so enjoyable to read that many people read the entire series annually. Alan
-
From one Oregon introvert to another, welcome aboard! Alan
-
 knightyo reacted to a post in a topic:
Revenge 1577 by Loracs - Amati - 1:64
-
There are also mini LED's that flicker, simulating fire, that one could install in the fireplace if one wished to go overboard (I couldn't help myself) with the build. Alan
- 796 replies
-
- speedwell
- syren speedwell
-
(and 1 more)
Tagged with:
-
 knightyo reacted to a post in a topic:
The San Marco mosaic ship c. 1150 by Louie da fly - 1:75
-
 knightyo reacted to a post in a topic:
The San Marco mosaic ship c. 1150 by Louie da fly - 1:75
-
 knightyo reacted to a post in a topic:
SS Blagoev (ex Songa )1921 by Valery V - scale 1:100 - Soviet Union
-
 knightyo reacted to a post in a topic:
The San Marco mosaic ship c. 1150 by Louie da fly - 1:75
-
 knightyo reacted to a post in a topic:
The San Marco mosaic ship c. 1150 by Louie da fly - 1:75
-
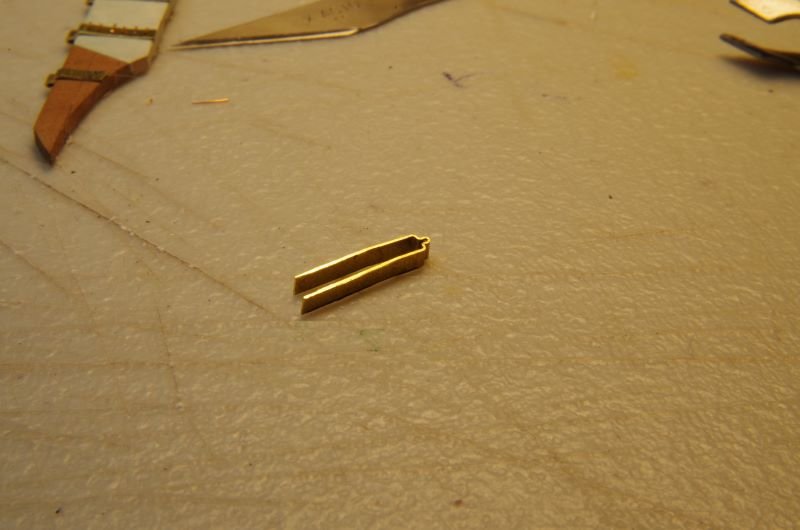
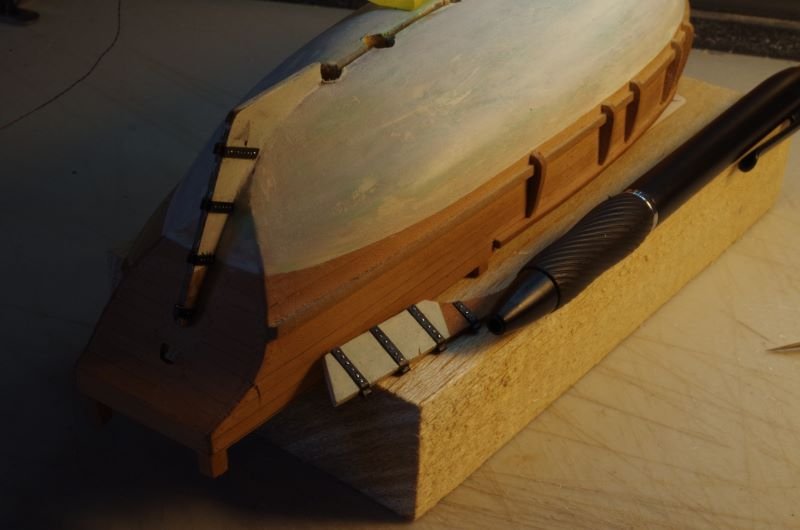
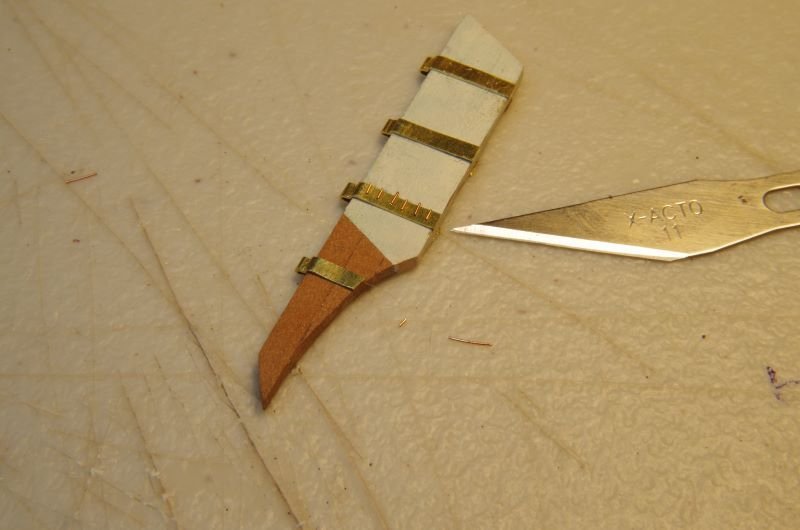
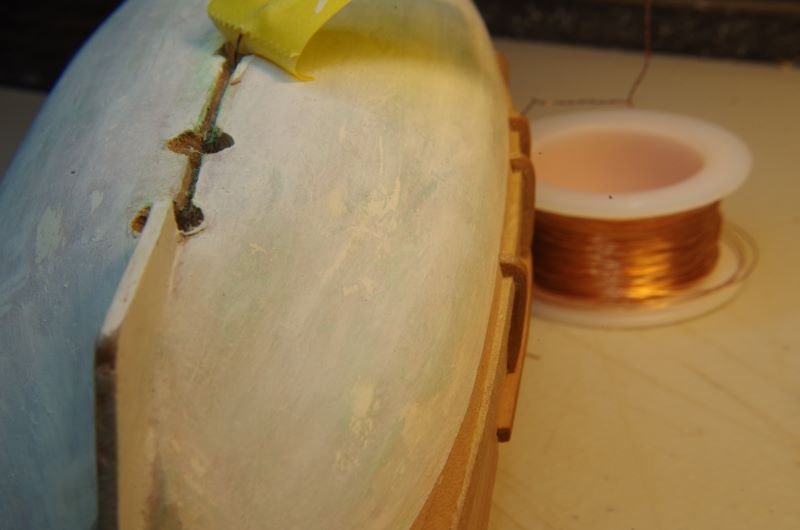
Metalwork around the rudder has been slowly taking place, and the straps are loosely placed on the rudder. They will be further shaped to the rudder and blackened before being permanently affixed (no idea how I'm going to permanently affix these. The wire bolts won't really have any strength long-term, so am really pondering this one). I had quite a learning curve in learning how to uniformly fashion the straps; many, many scrap pieces throughout. The photo also shows the bits of 30 ga wire that will be made into bolts. I'm just laying them down on the strip in the middle to see how the thickness of the wire will look from a scale perspective. I'm thinking of having 2 bolts per plank. The rudder is basically made up of 3 planks. I've also been experimenting with the finish on the hull. Goal is to try and make the finish appear to be as "real/aged" as possible, so there are a lot of green/brown washes on there now in addition to other white washes. The plan is to have shellac on the model, and I'm thinking of extending that down all around the acrylic on the hull as well to give it a bit of a wet/shiny appearance. Still debating that one, however. The gouges in the hull are for the brass tubing in which the lighting will run through from the ship down into the stand where the power source will be. When the tubing has been installed, the keel will be replaced and everything tidied up.
-
That's actually perfect. If you decide that you've sanded too much off, it's easy to reapply. I applied/removed acrylic to the hull of my Nina for a long, long time until I finally ended up with the look that I liked (applied different wash "layers" with slightly different colors as well. You might be able to get a pretty nice effect by applying washes of greys/greens/browns, showing not only the standard wear of the black, but also the effects of a boat that has been in the water with sea life). As Baker mentioned, it would probably be best to practice on scraps first. It's all your personal choice, however. The model is looking great! Alan
- 392 replies
-
 knightyo reacted to a post in a topic:
Bulkhead sanding advice
-
 knightyo reacted to a post in a topic:
Revenge 1577 by Loracs - Amati - 1:64
-
That must be the intro to the fight scene.
- 796 replies
-
- speedwell
- syren speedwell
-
(and 1 more)
Tagged with:
-
Yes! With a flashlight whilst also swearing. Now THAT would be an authentic scene.
- 796 replies
-
- speedwell
- syren speedwell
-
(and 1 more)
Tagged with:
About us
Modelshipworld - Advancing Ship Modeling through Research
SSL Secured
Your security is important for us so this Website is SSL-Secured
NRG Mailing Address
Nautical Research Guild
237 South Lincoln Street
Westmont IL, 60559-1917
Model Ship World ® and the MSW logo are Registered Trademarks, and belong to the Nautical Research Guild (United States Patent and Trademark Office: No. 6,929,264 & No. 6,929,274, registered Dec. 20, 2022)
Helpful Links
About the NRG
If you enjoy building ship models that are historically accurate as well as beautiful, then The Nautical Research Guild (NRG) is just right for you.
The Guild is a non-profit educational organization whose mission is to “Advance Ship Modeling Through Research”. We provide support to our members in their efforts to raise the quality of their model ships.
The Nautical Research Guild has published our world-renowned quarterly magazine, The Nautical Research Journal, since 1955. The pages of the Journal are full of articles by accomplished ship modelers who show you how they create those exquisite details on their models, and by maritime historians who show you the correct details to build. The Journal is available in both print and digital editions. Go to the NRG web site (www.thenrg.org) to download a complimentary digital copy of the Journal. The NRG also publishes plan sets, books and compilations of back issues of the Journal and the former Ships in Scale and Model Ship Builder magazines.


