Search the Community
Showing results for tags 'corel'.
-
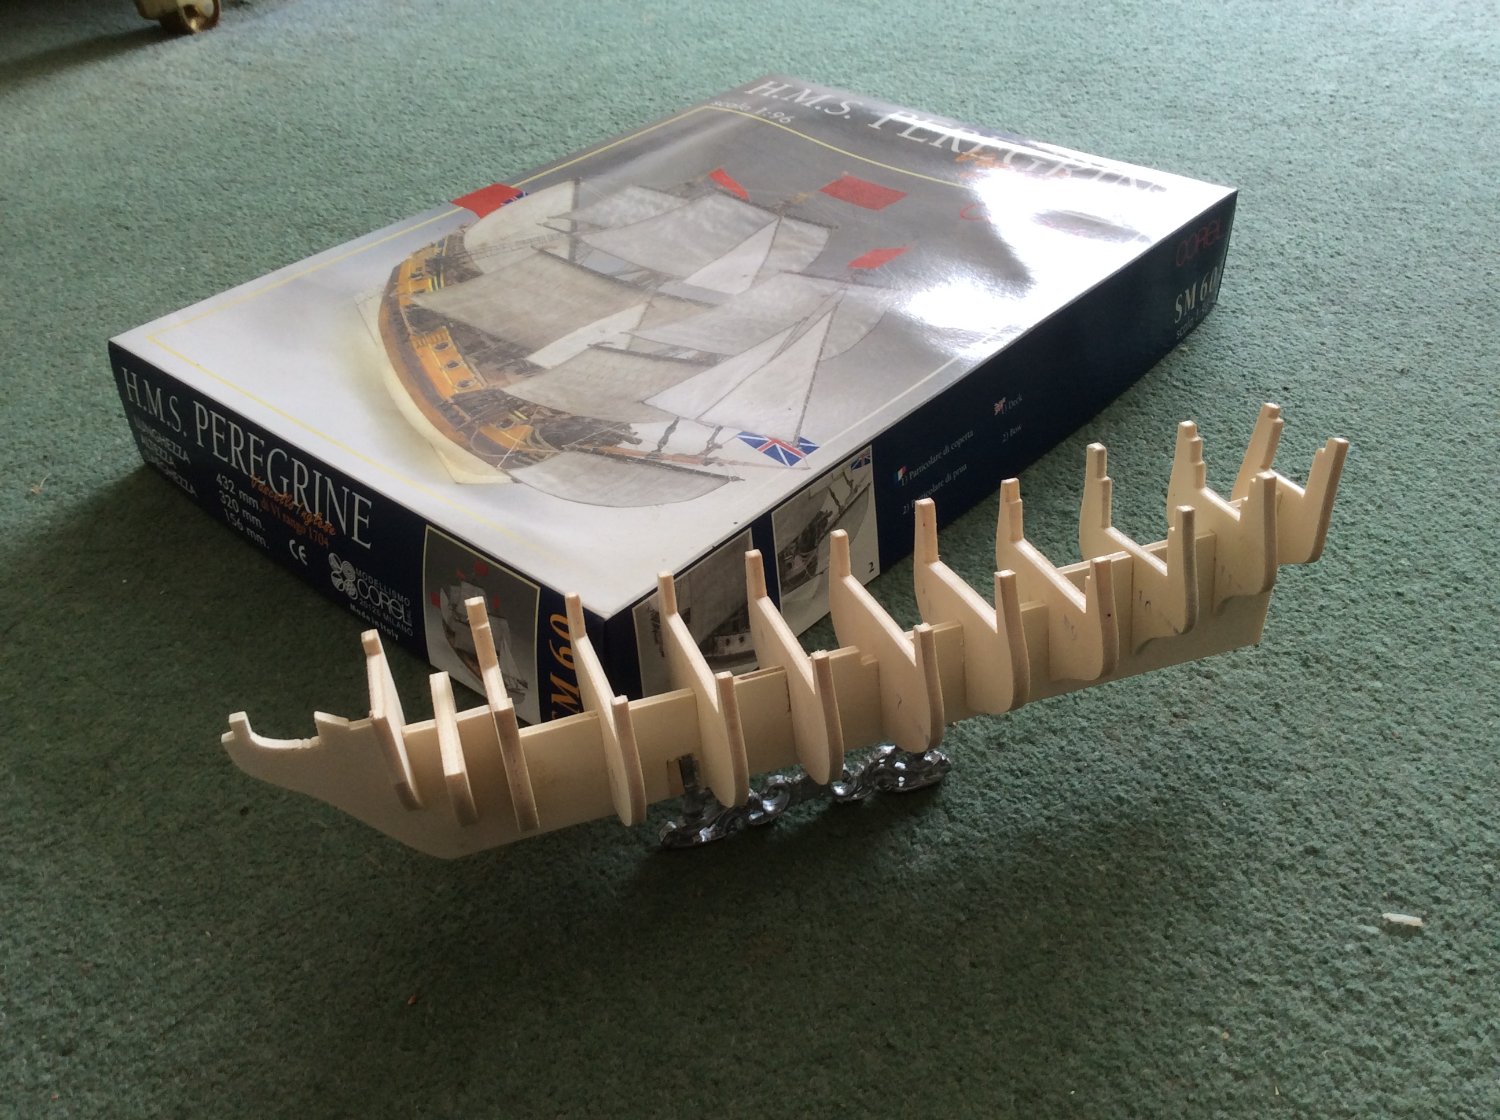
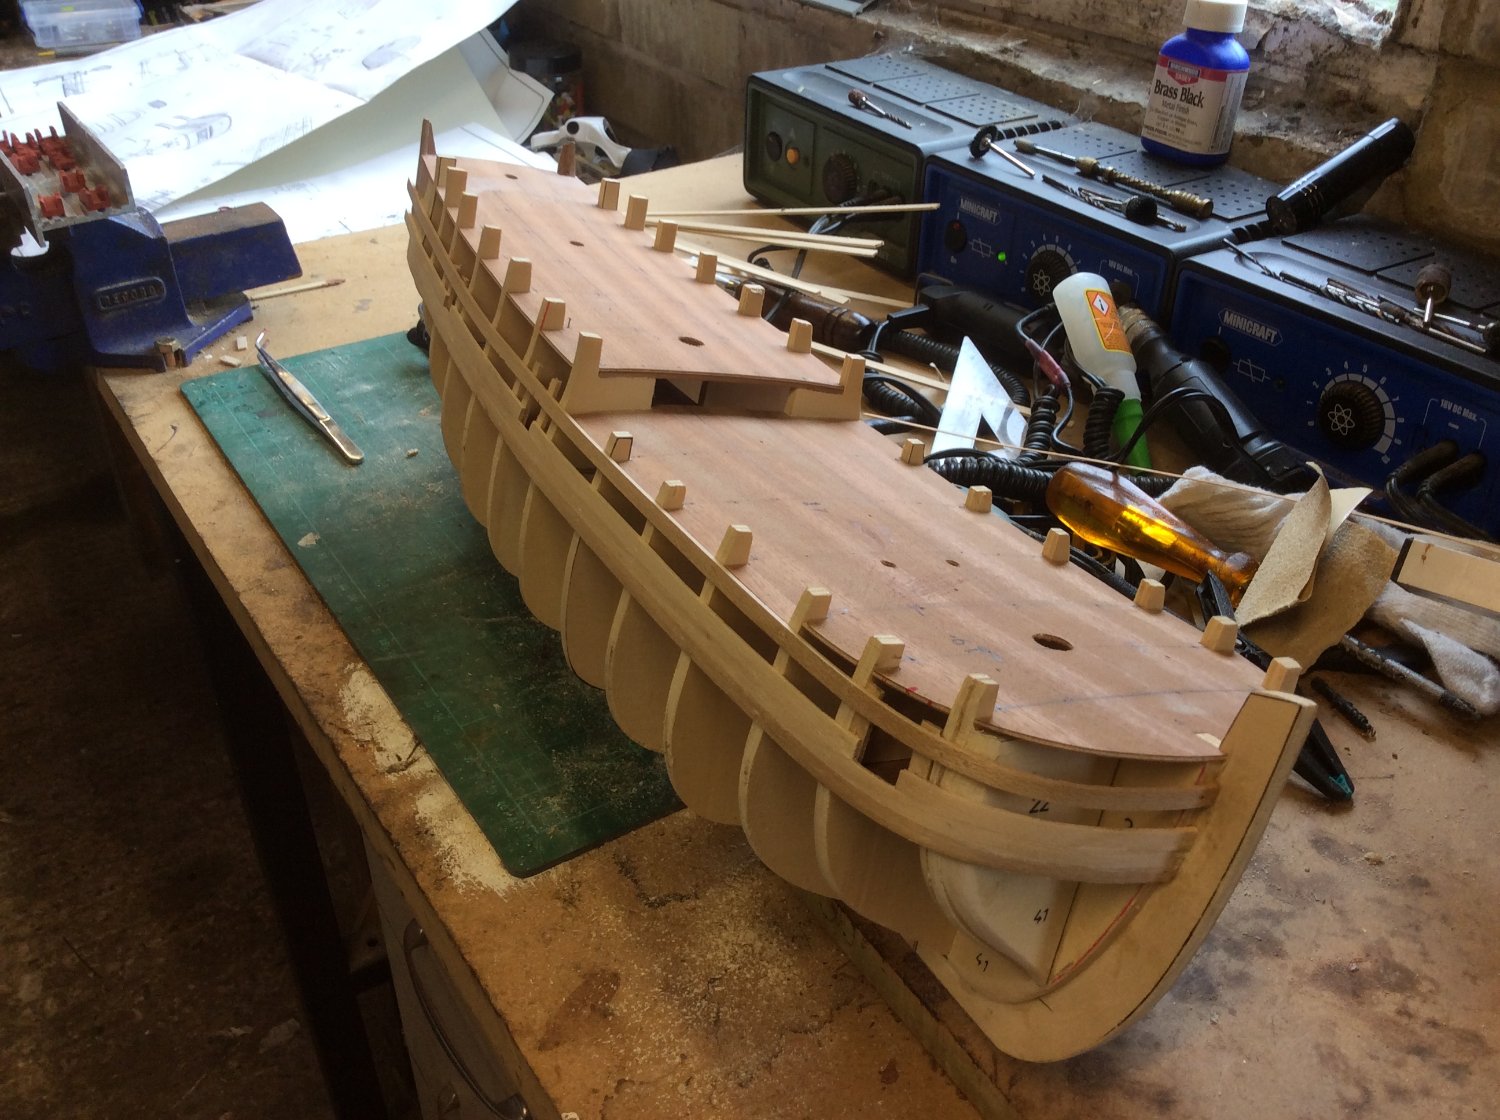
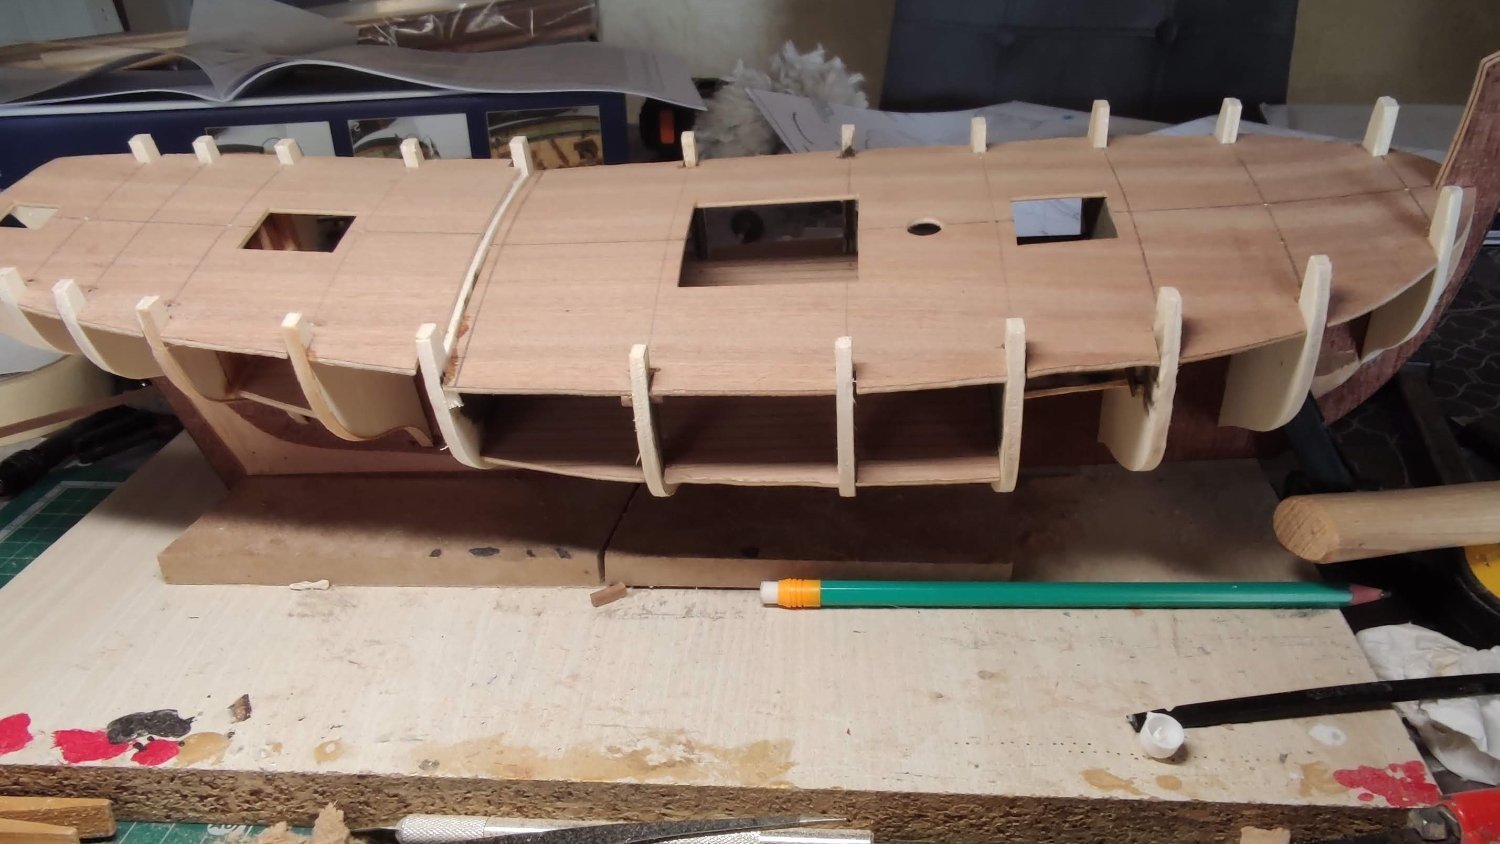
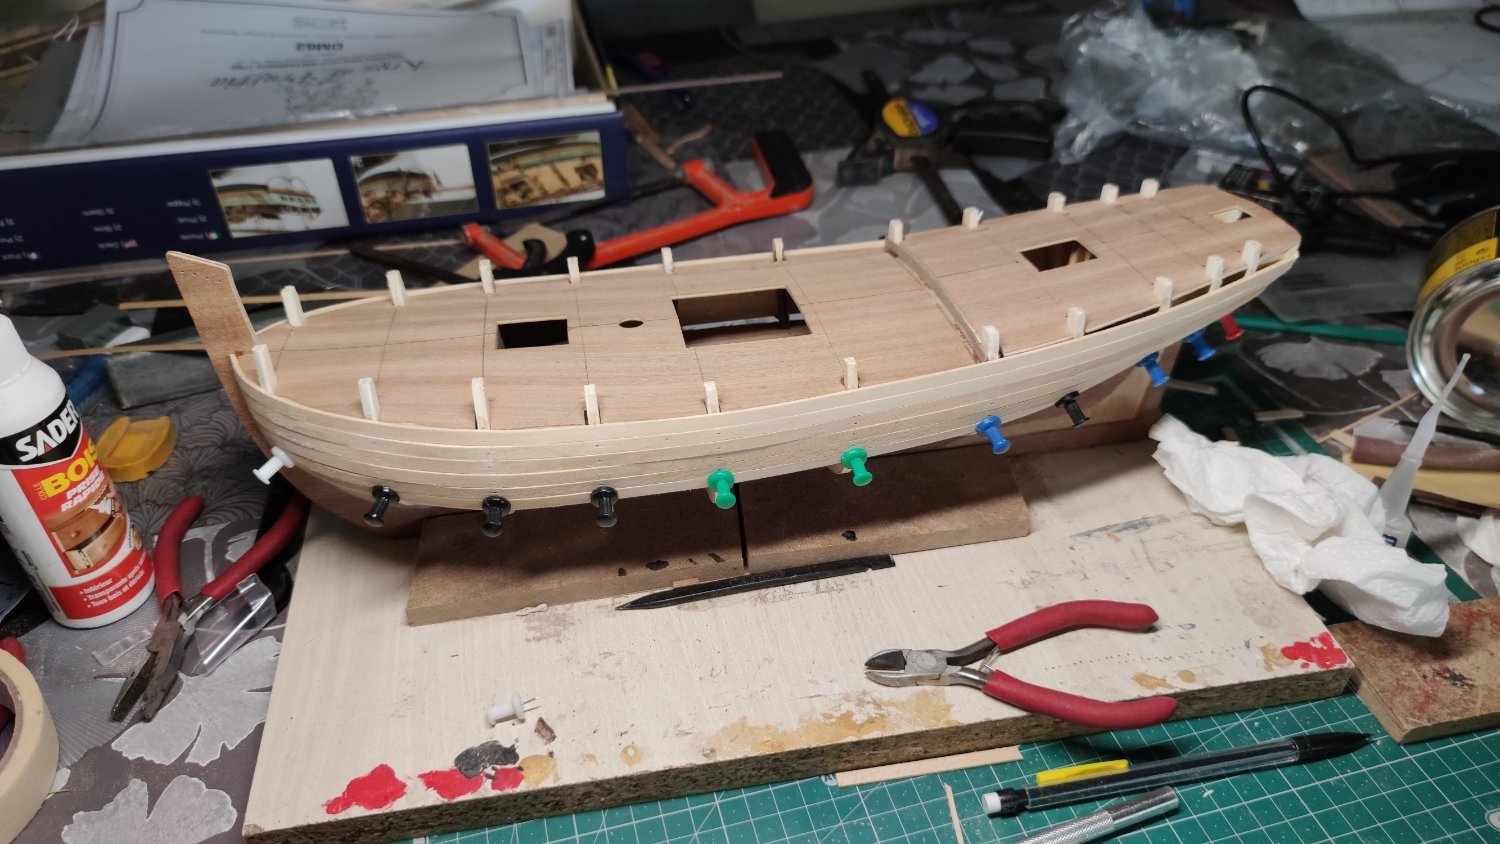
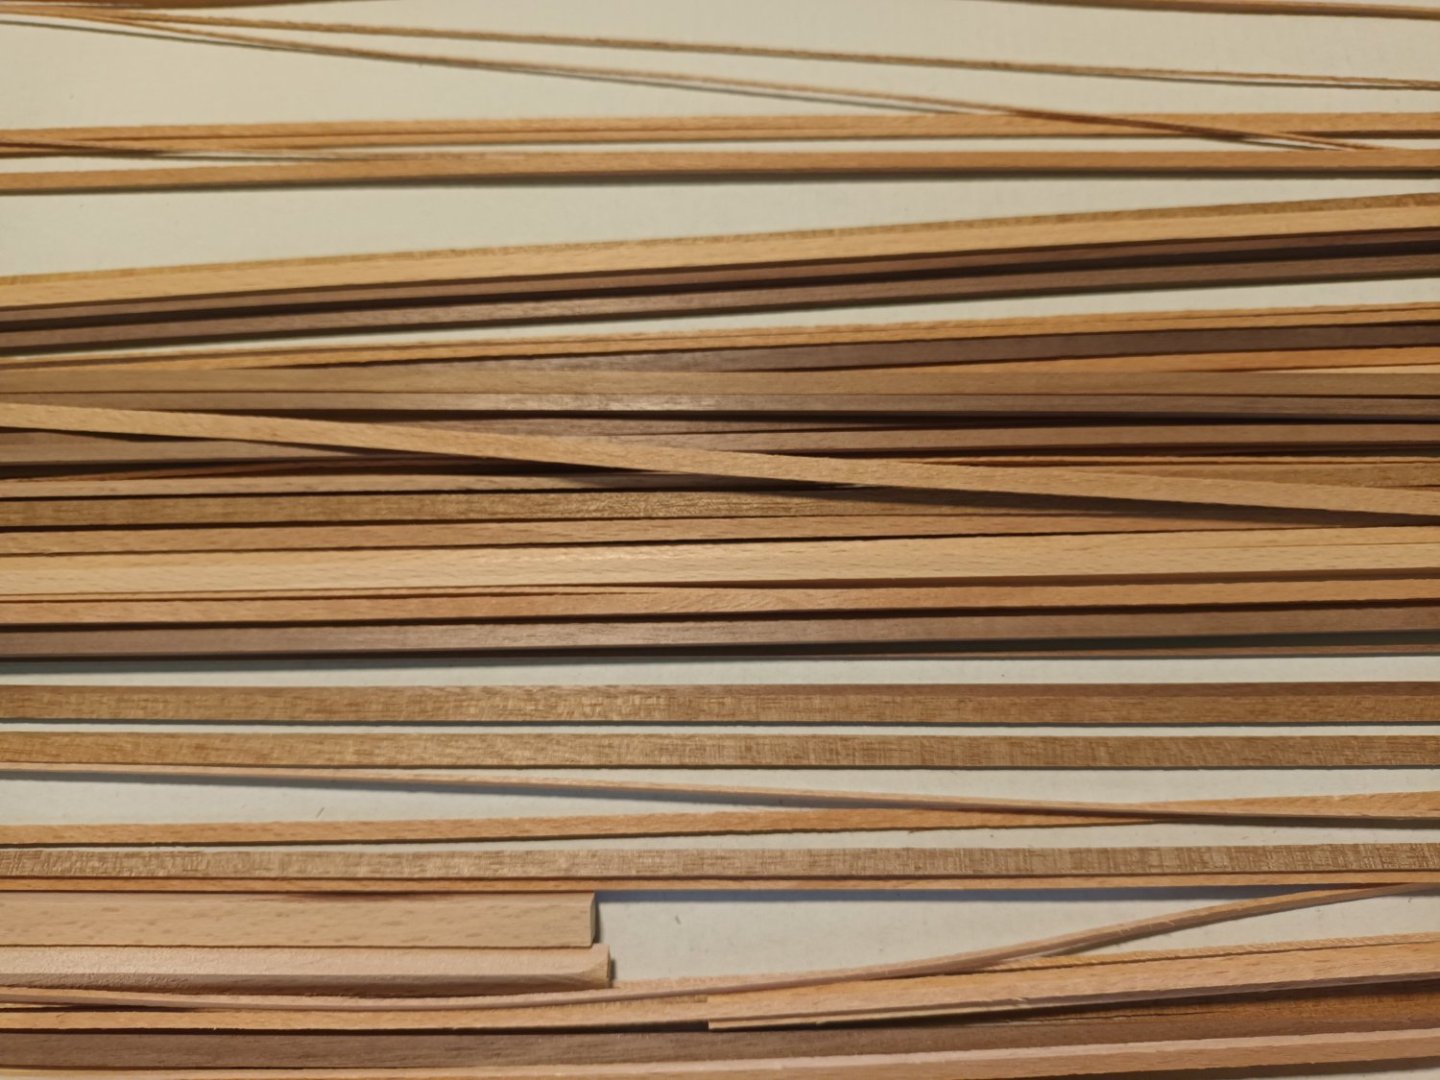
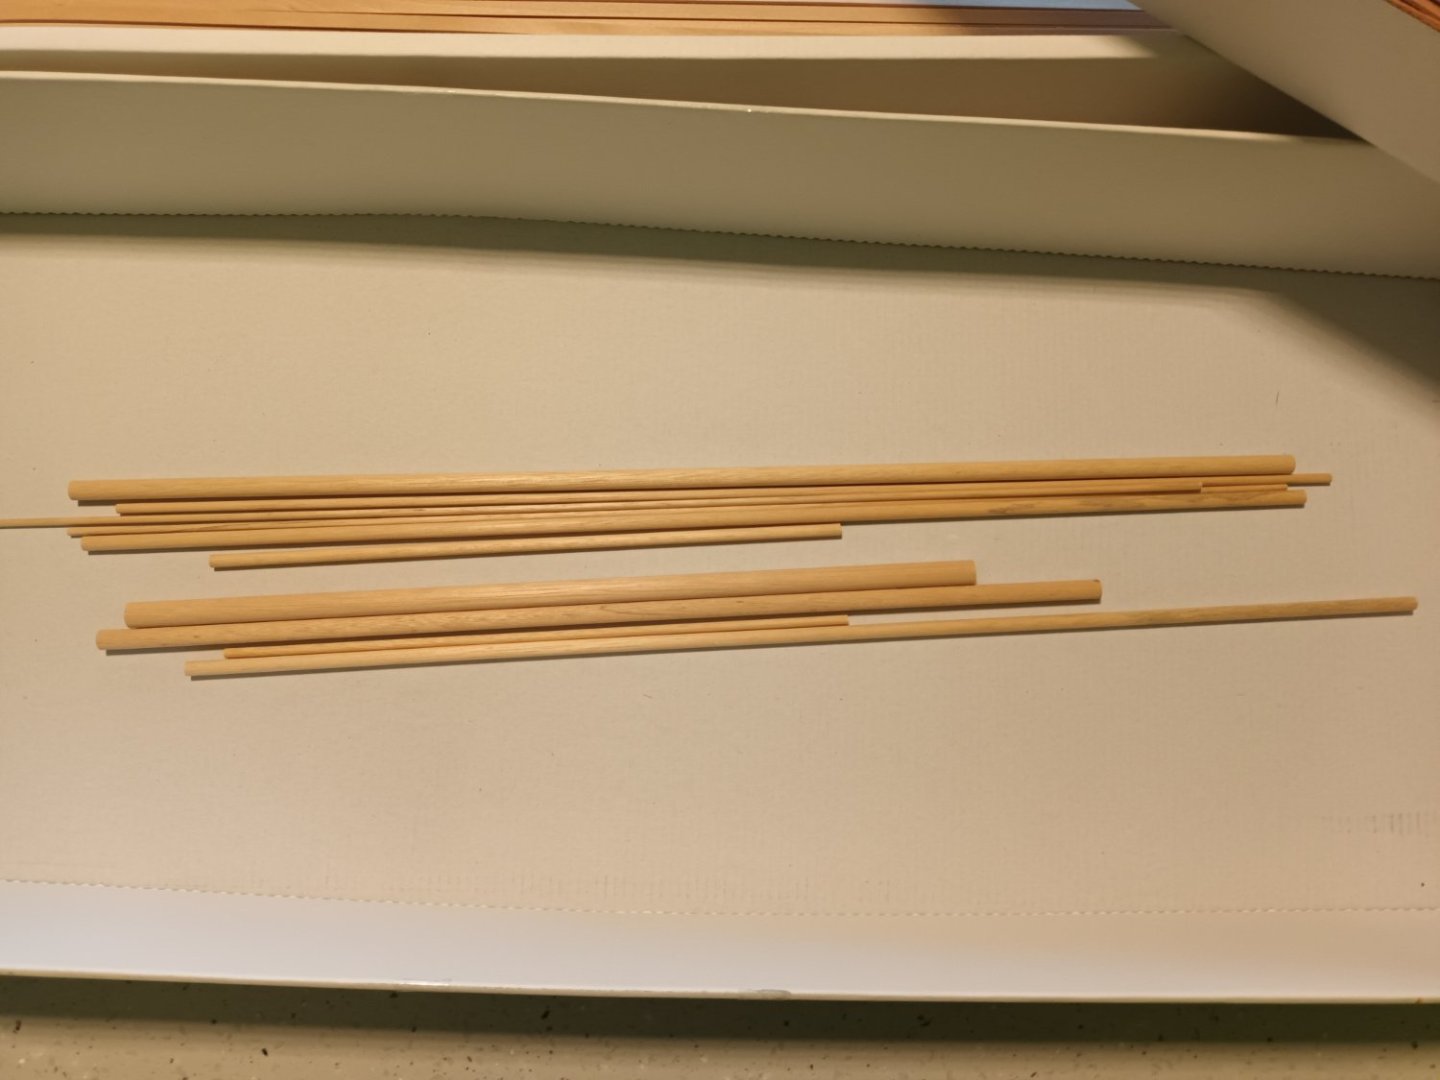
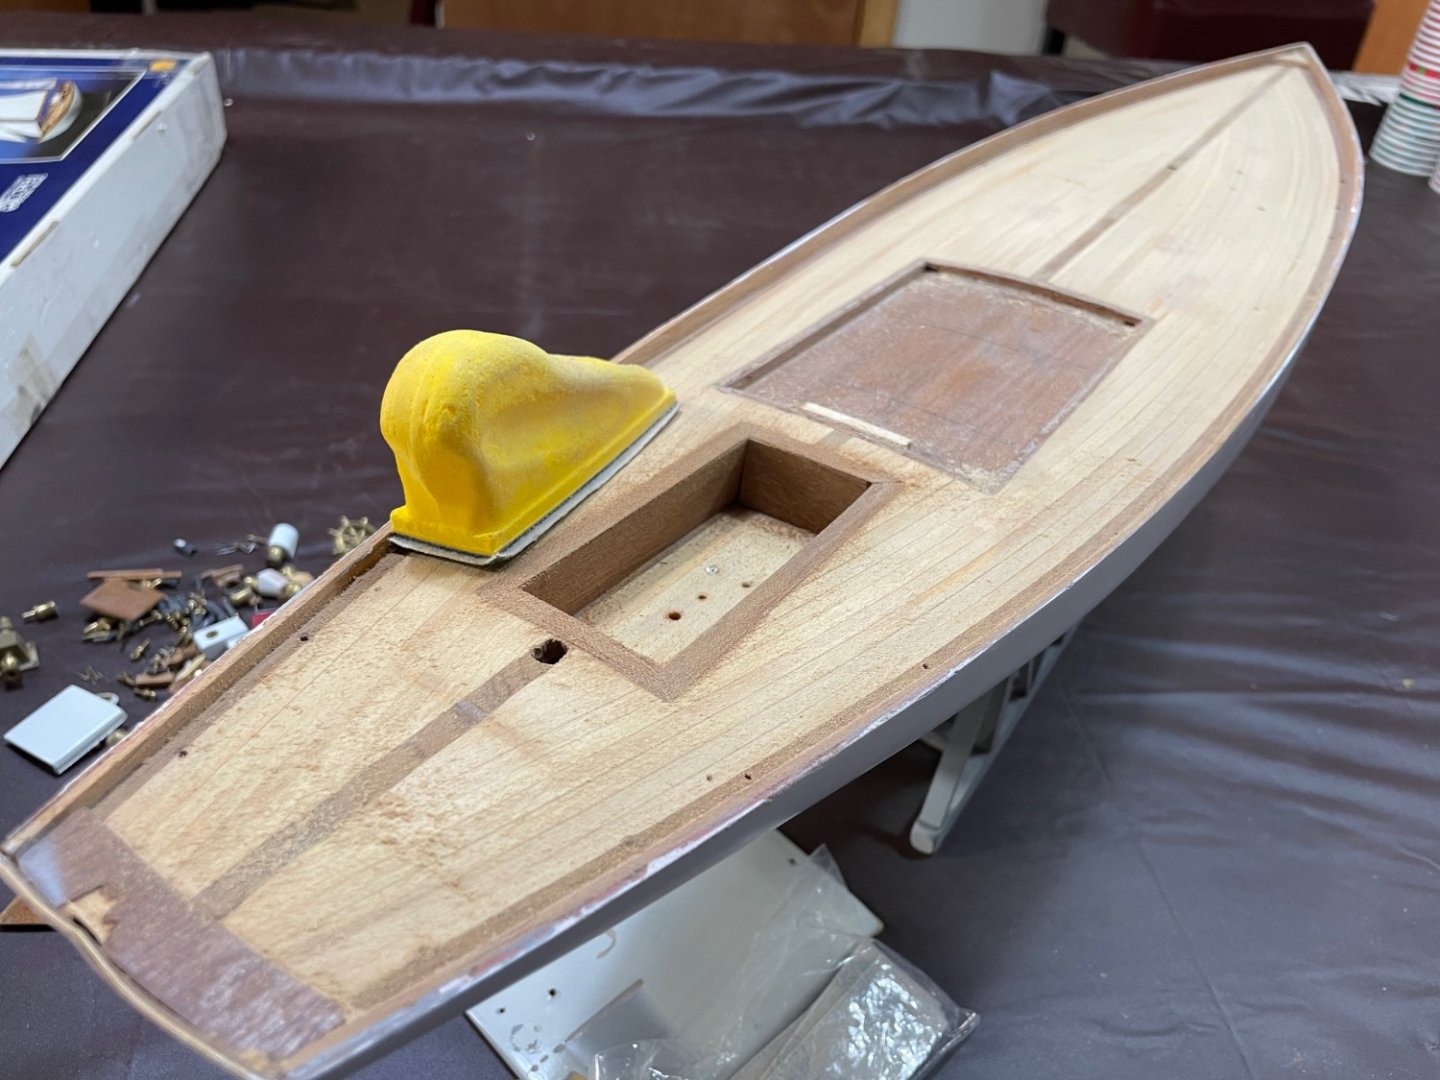
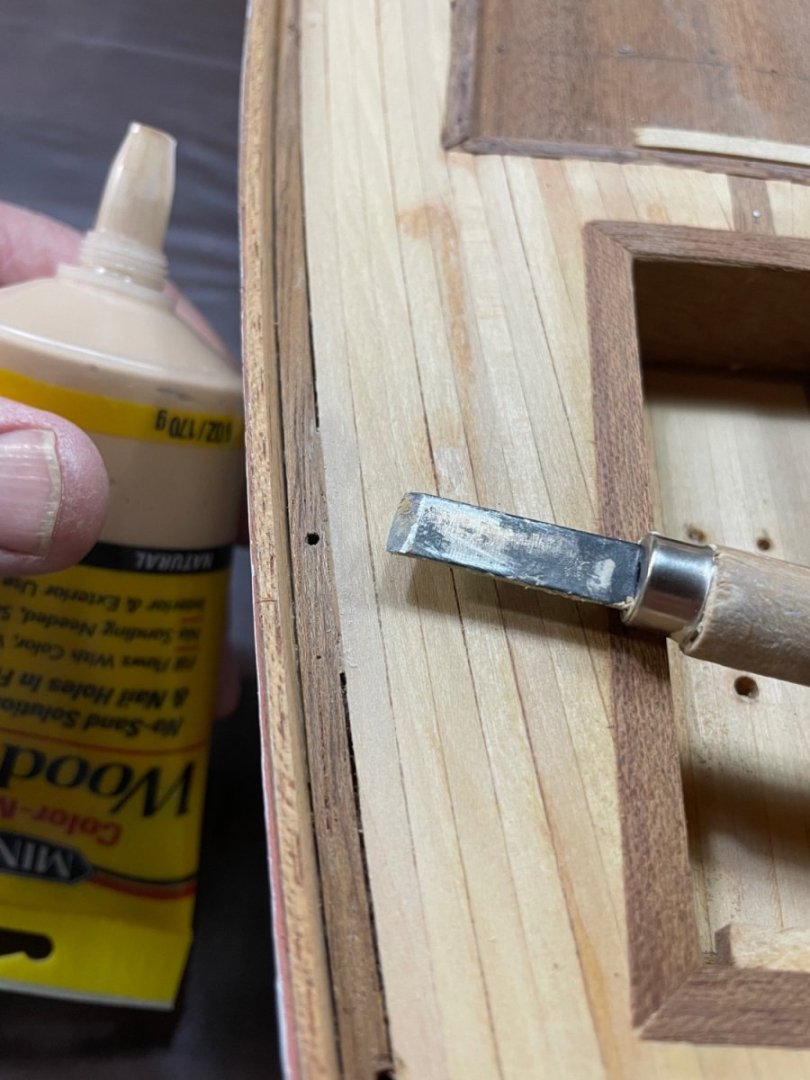
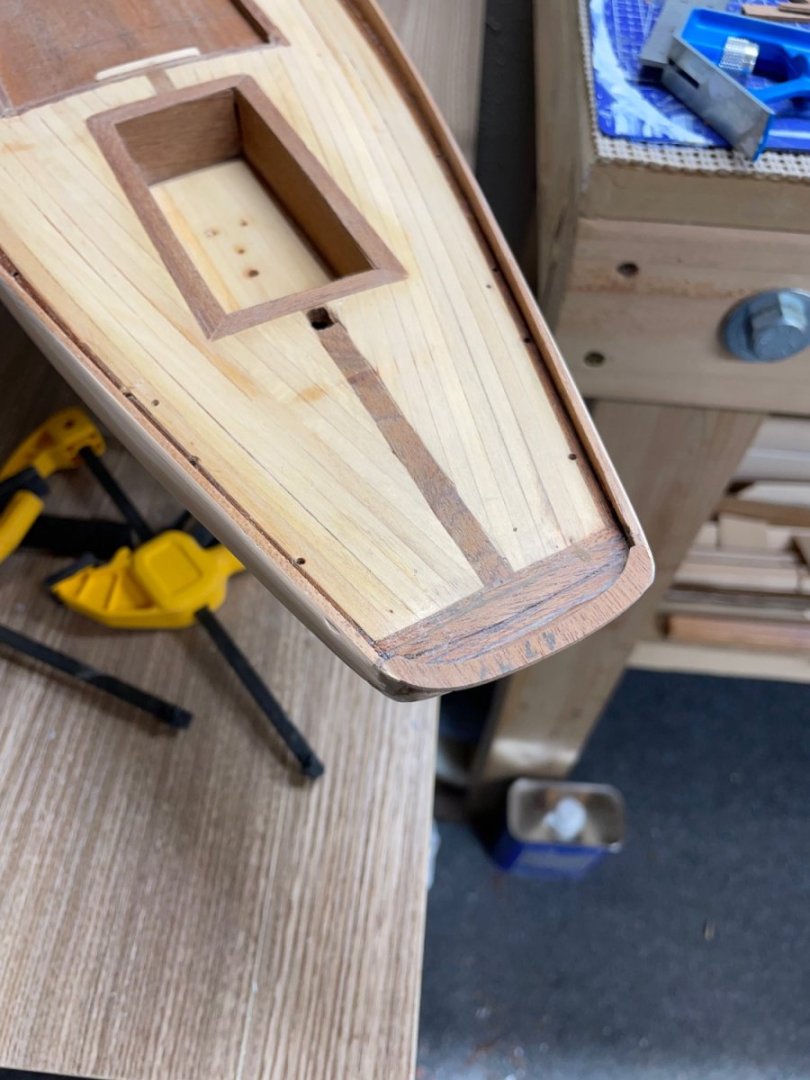
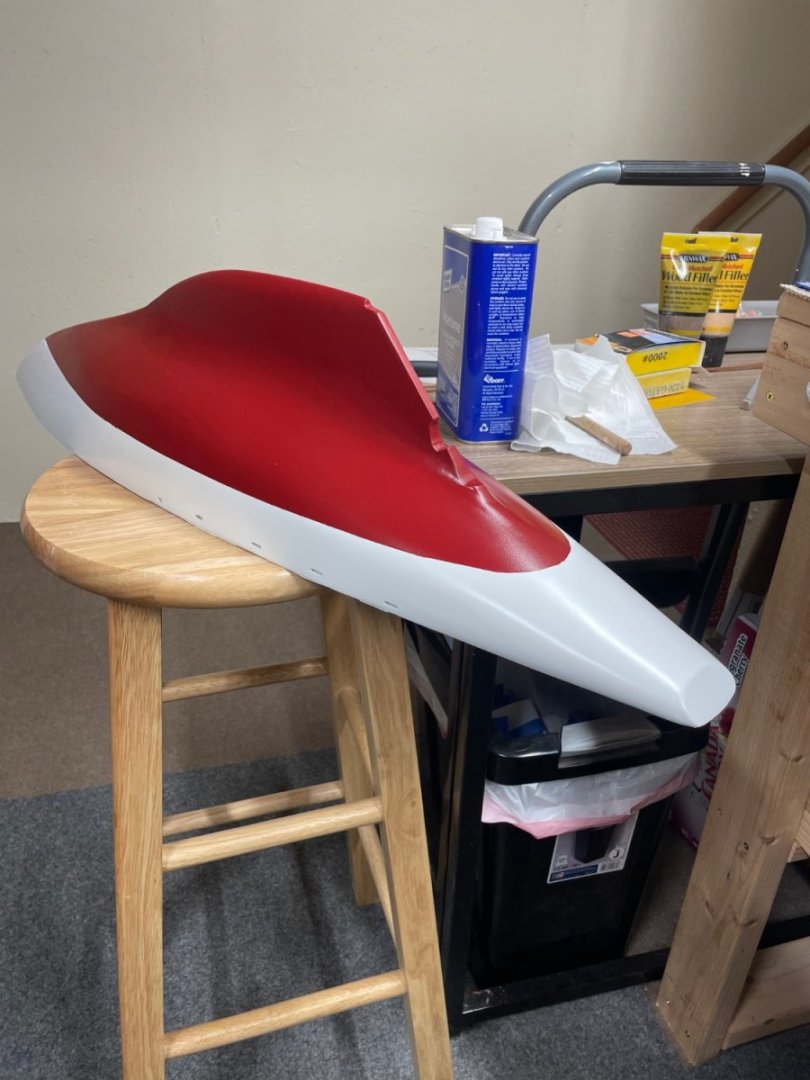
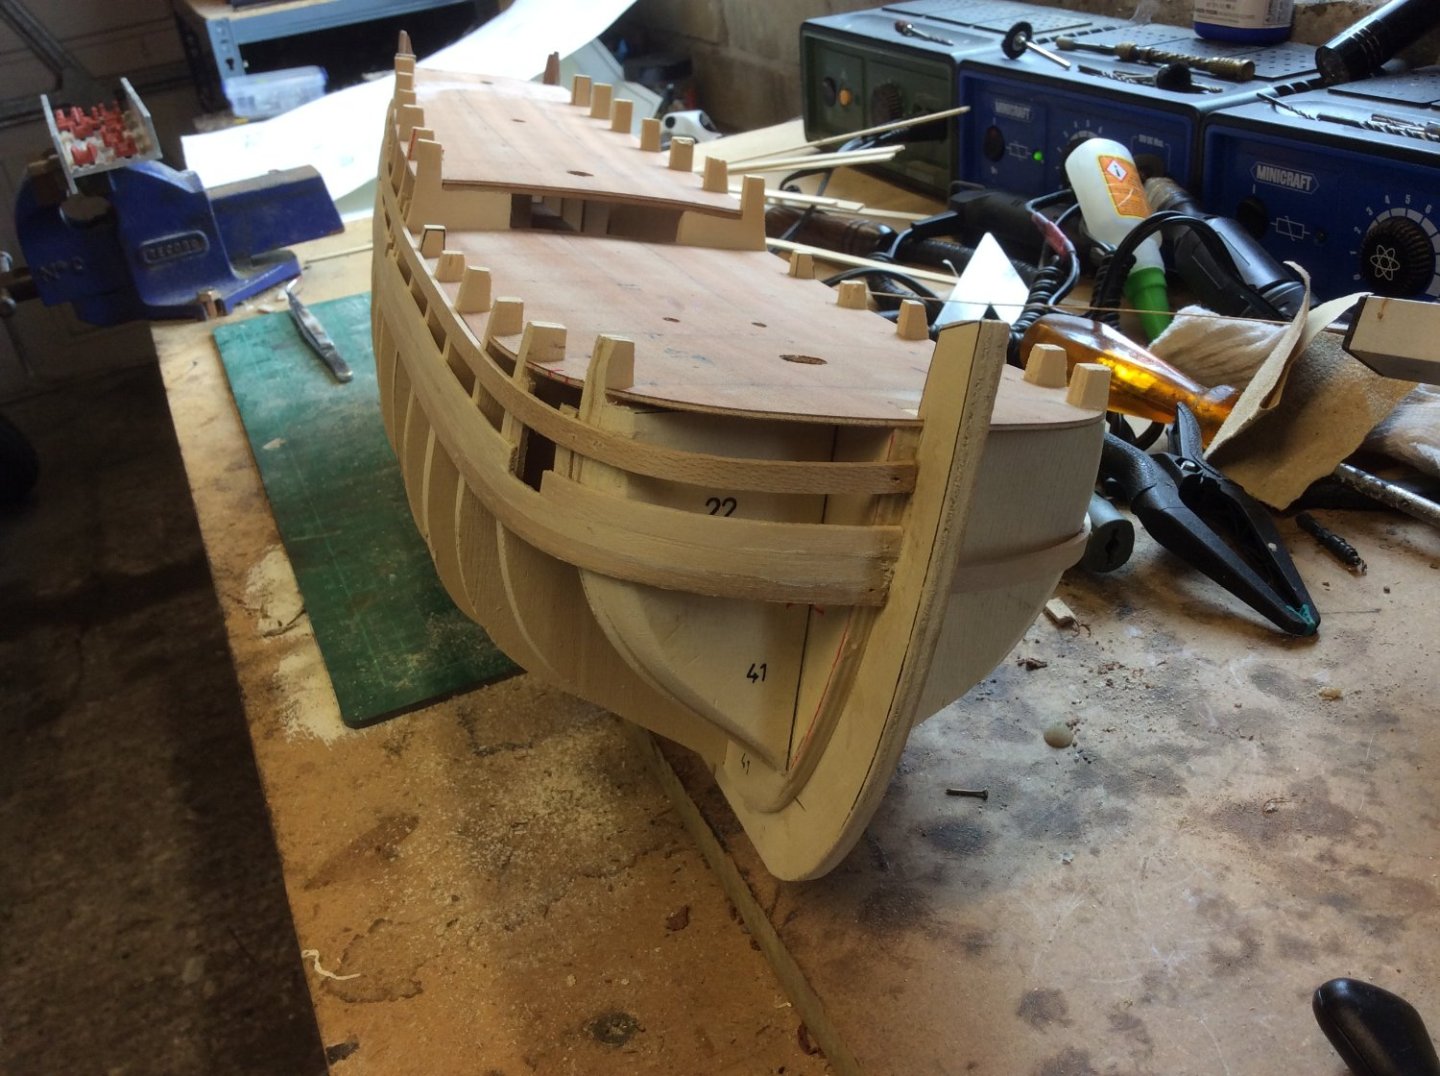
 Good evening all, This is my first log and first ship as i delve in to the world of model ship building. I have a fair bit of Sci-Fi model building and painting behind me and i am hoping that I can bring that patience across to ship building. The model I have is the lovely HMS Peregrine by Corel, it is slightly bigger than i would have liked for a first ship, however, as it was given to me by a friend of the family that had lost patience and given up was not going to look a gift horse... So where am i at now? Well the model came with the hull already built and it looks although they had an initial crack at planking and that is where they gave up. I have spent the initial few hours organising the pile of jumbled up wood, translating the instructions from Italian and researching wood colors to allow me to identify the correct planks. This to my deliberate and need for organised structure brain was fun in itself. I have then spent a bit of time measuring and checking symmetry where i found that the hatches were 2mm off centre, so they had to come off, next comes removing excess glue and sanding the bow. Now this is where my first disagreement comes with the instructions which is telling me to fix the gunwales and planking before the decking. however, it would appear if I did this then getting a nice smooth deck flush with the planking will be nigh on impossible. So it looks like i will be going off piste, i will update later and tell you all if I regret or approve of this. Due to working away for weeks at a time the updates may be infrequent or splurges of progressive. Please see the photos attached of the ship so far and prior to fixing errors (you can see how off centre the hatches are), also my organised drawer of wood that I spent far too long doing.
-
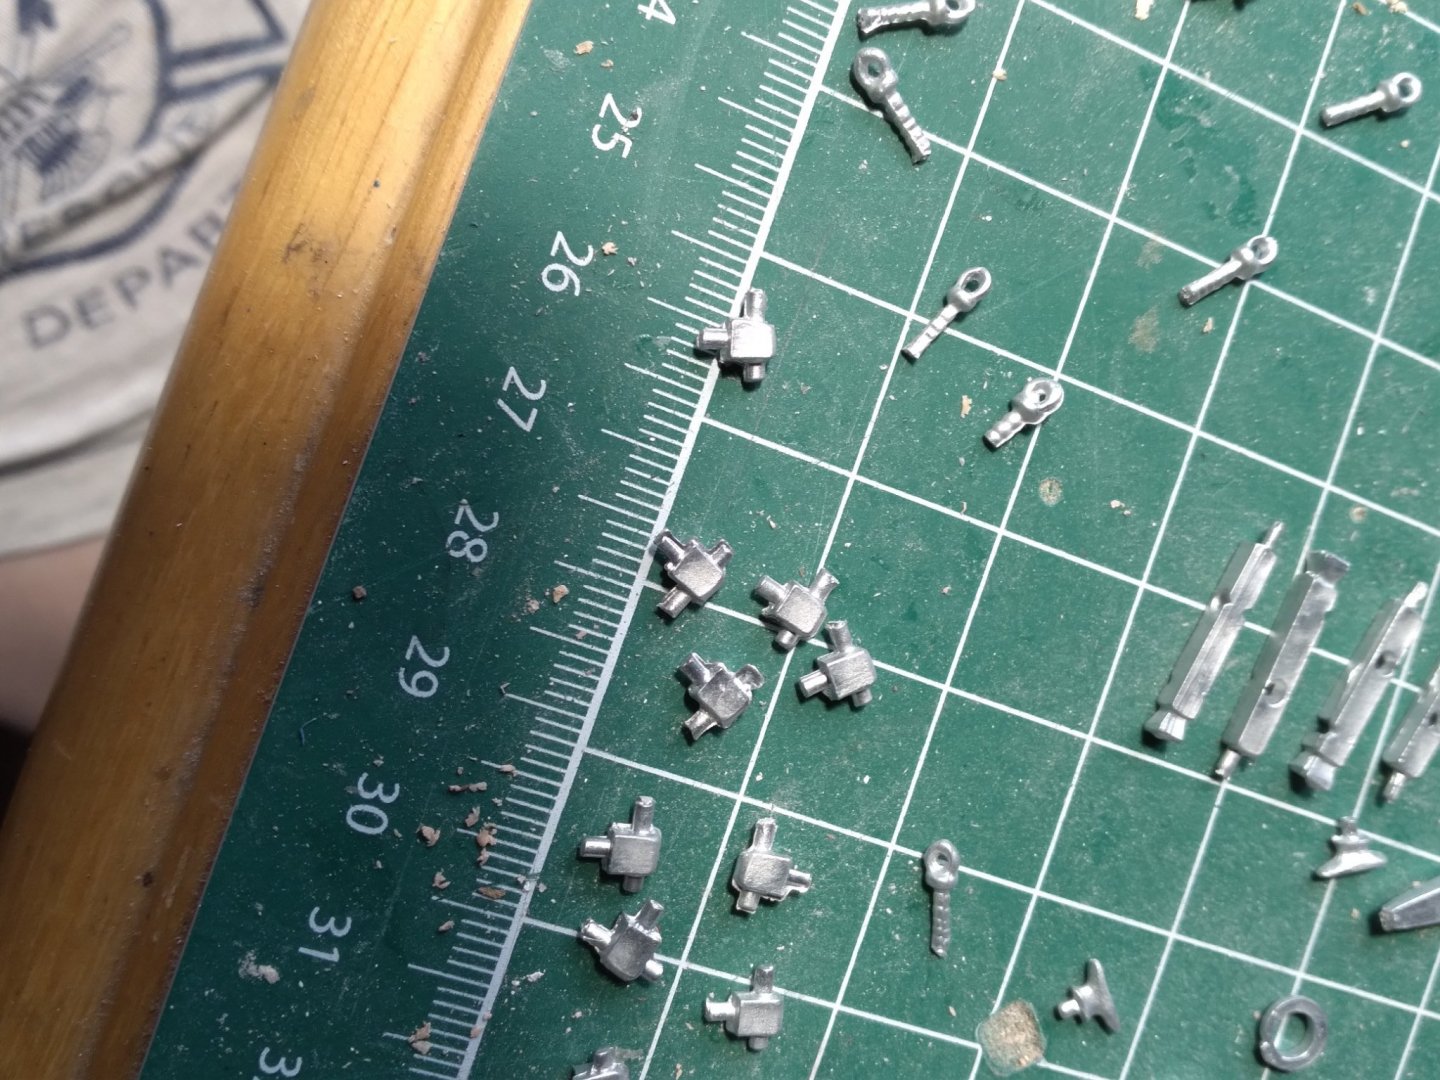
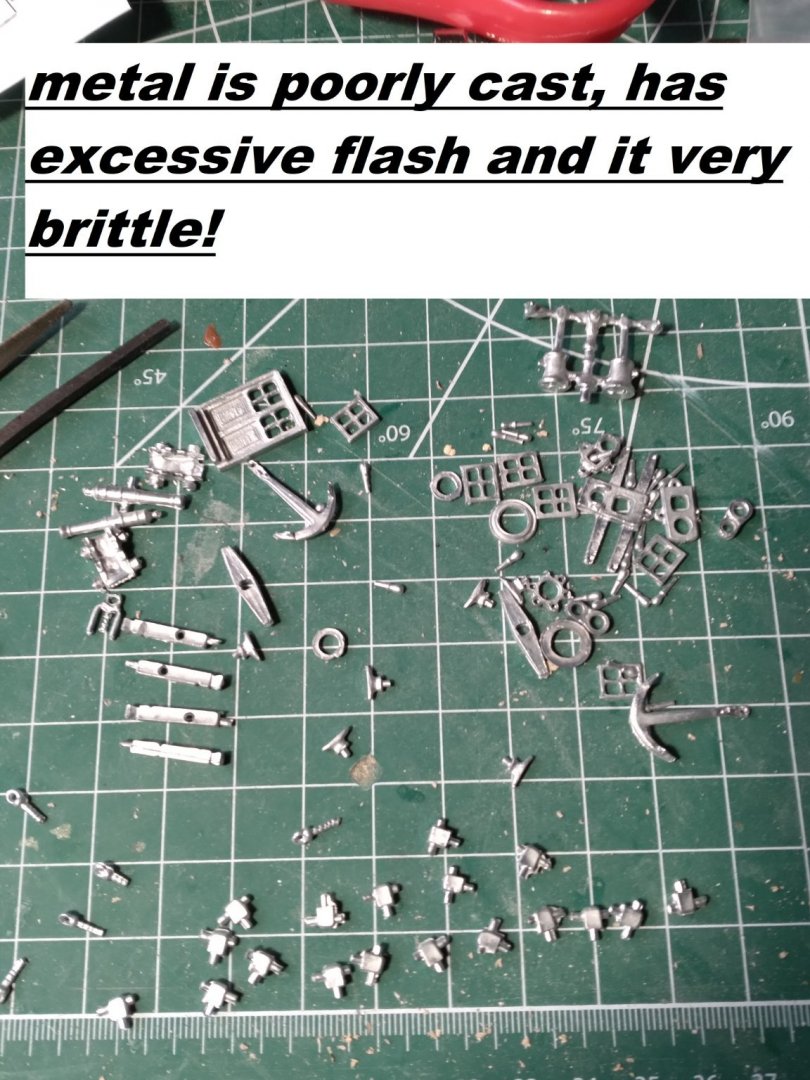
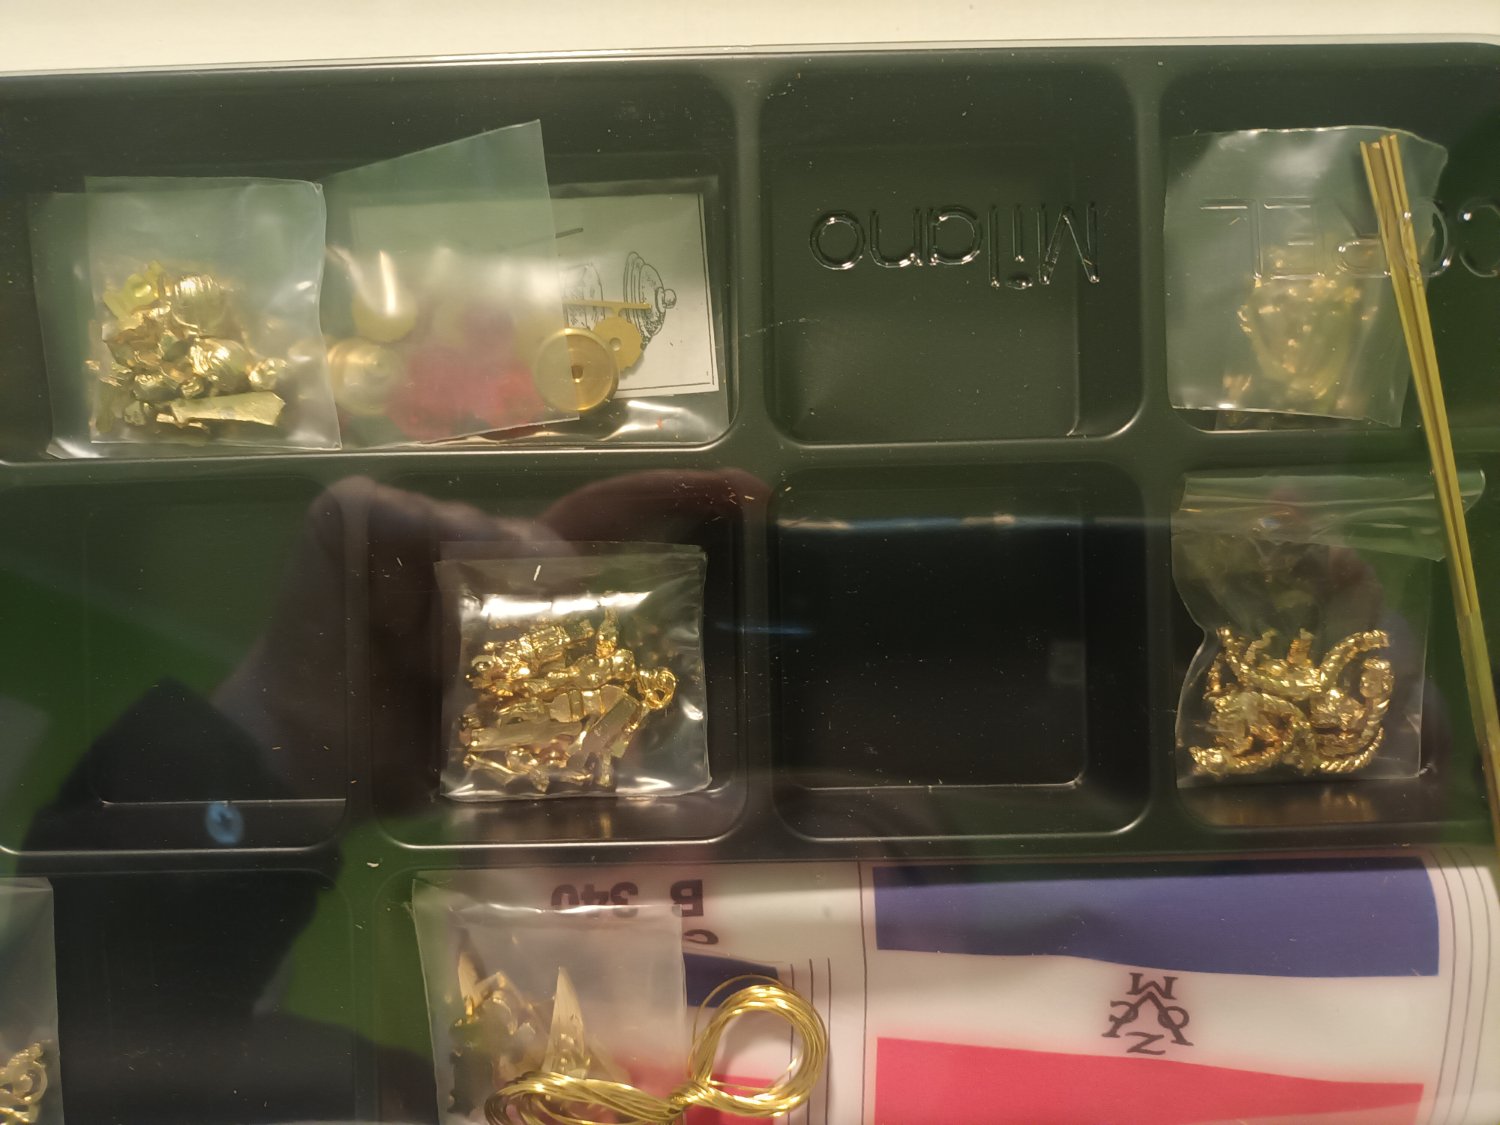
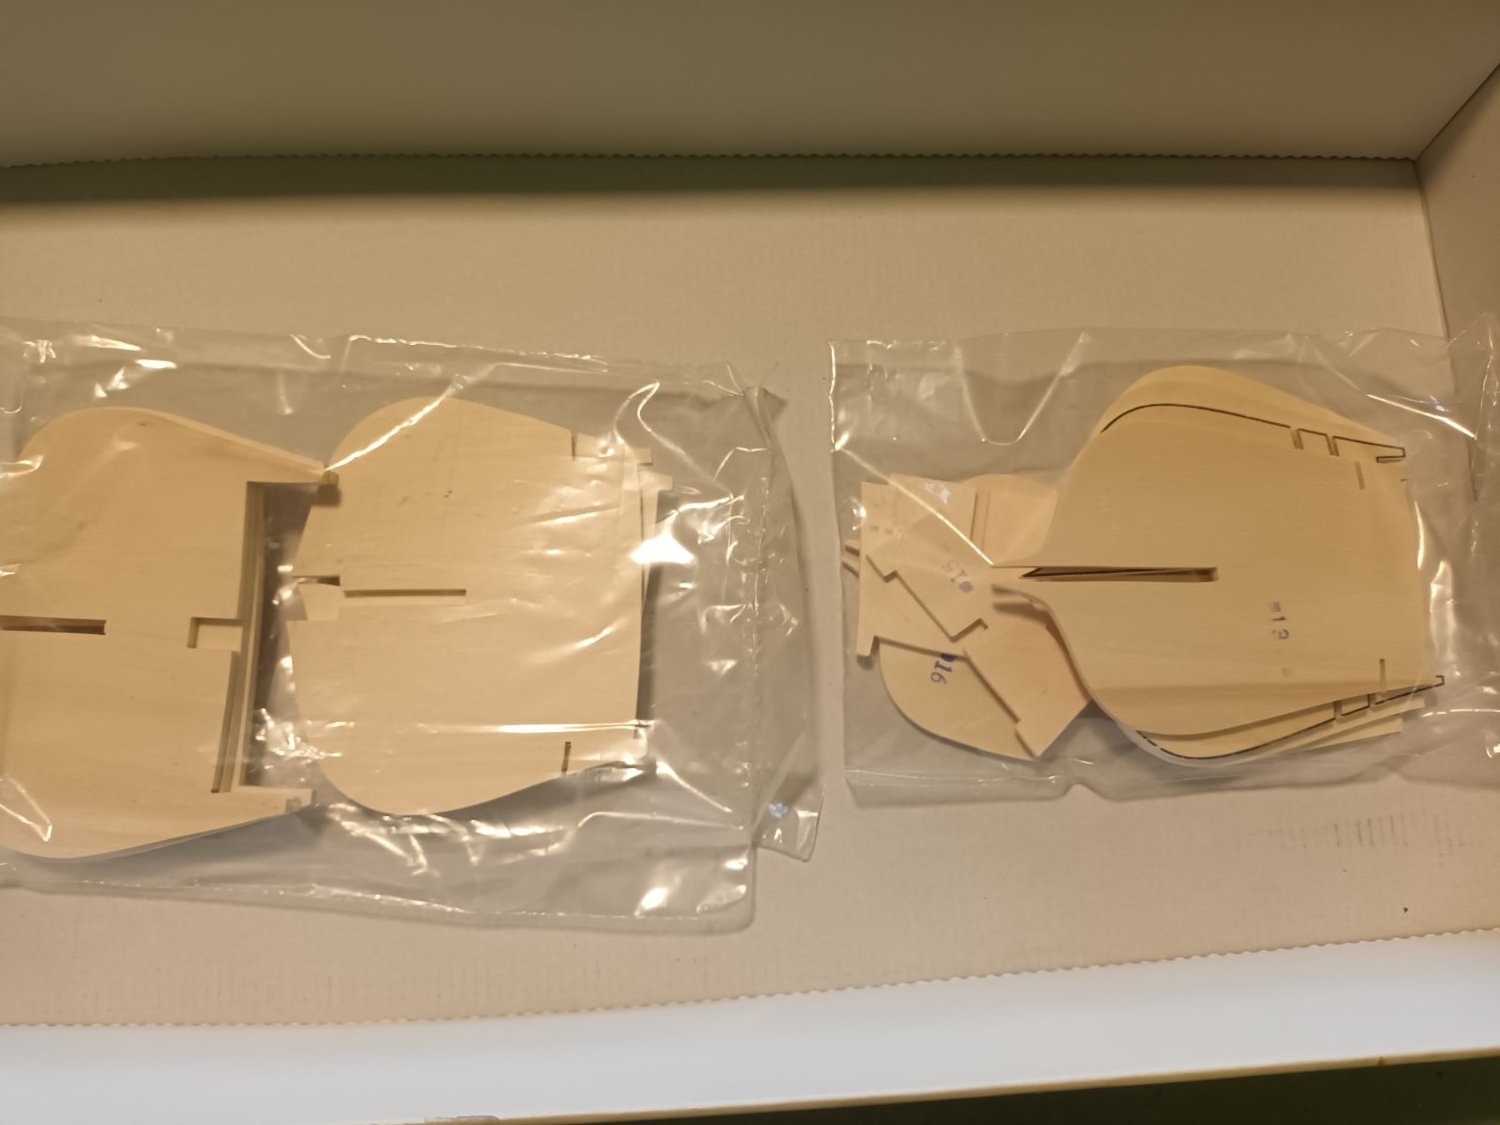
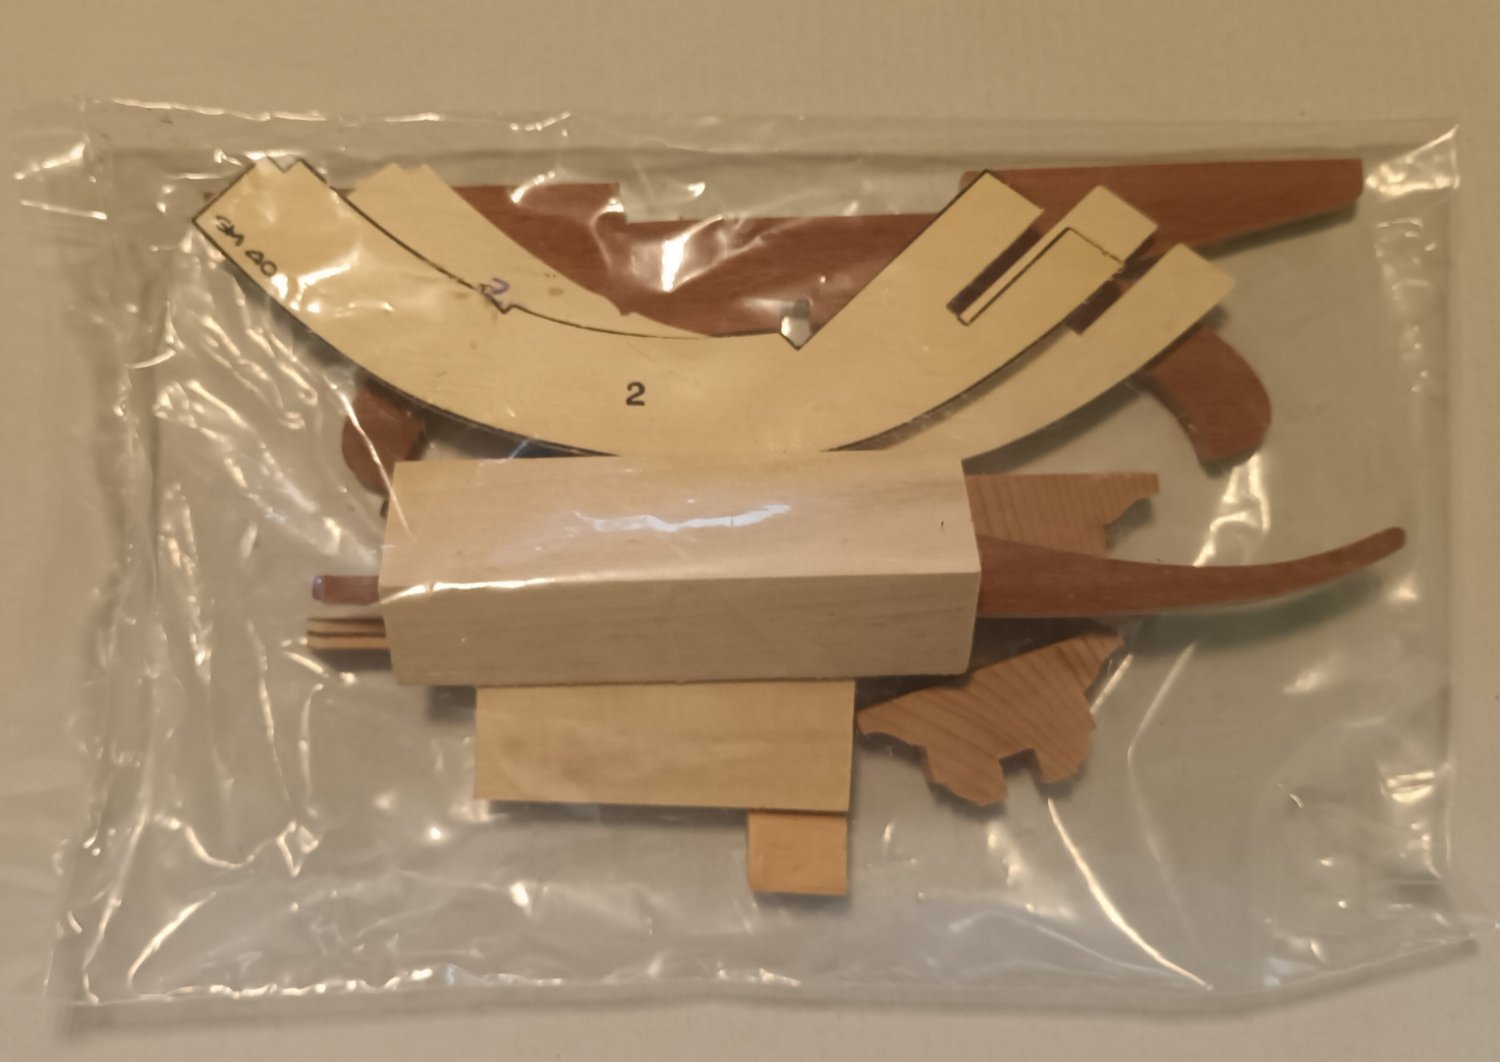
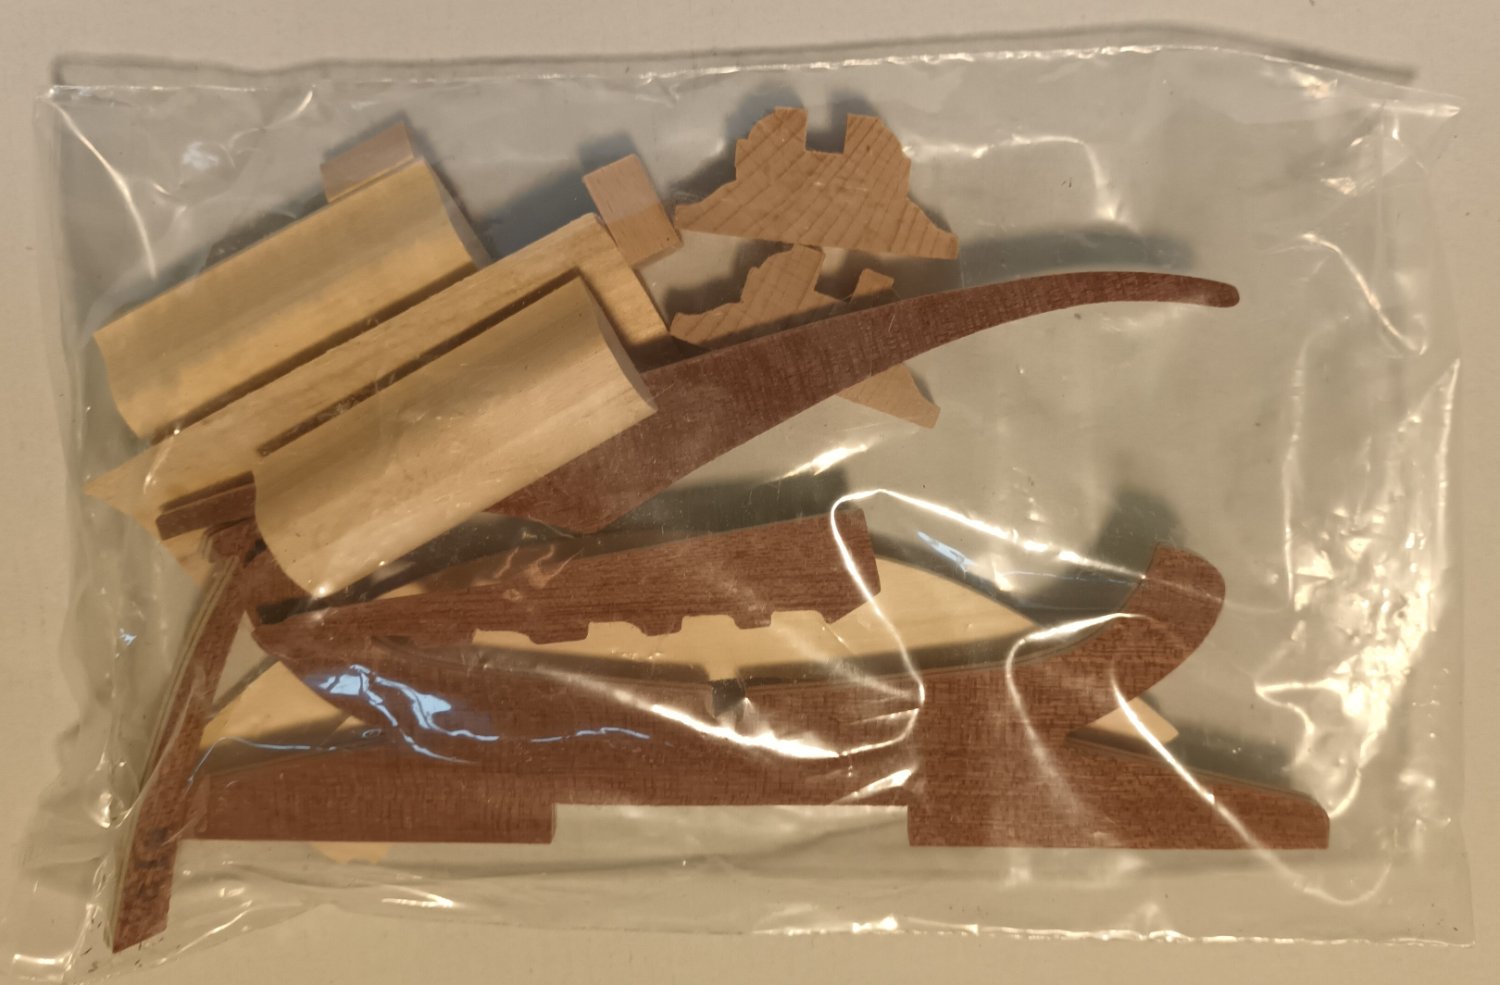
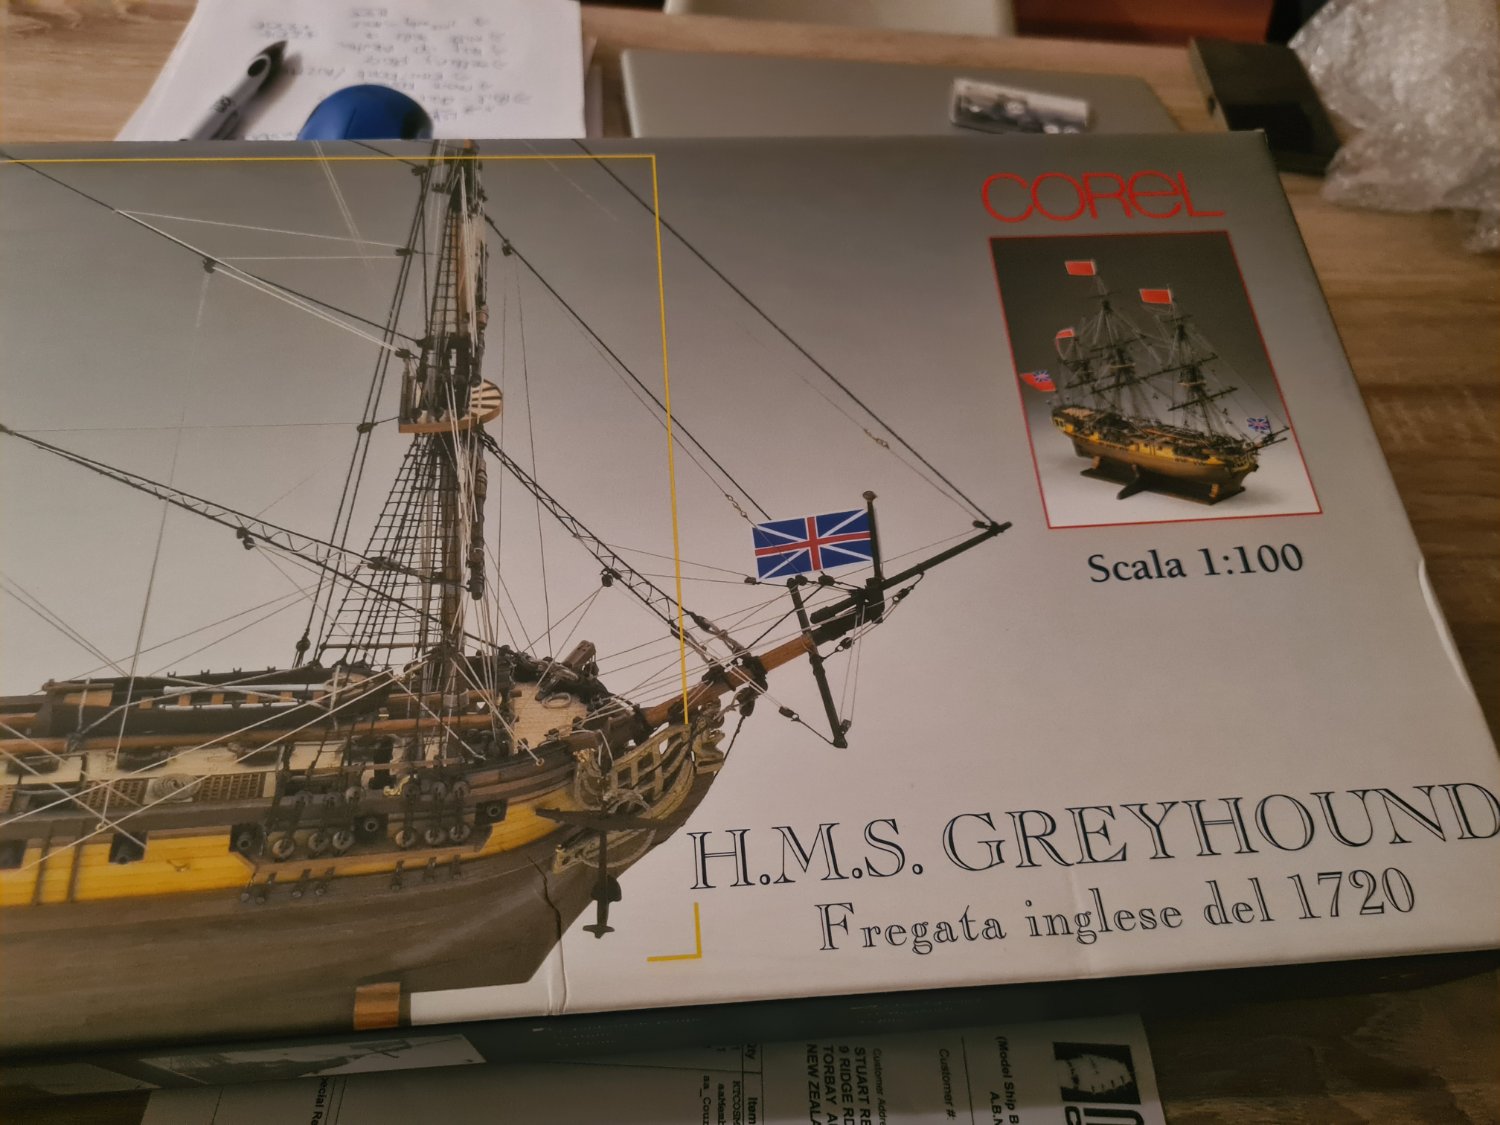
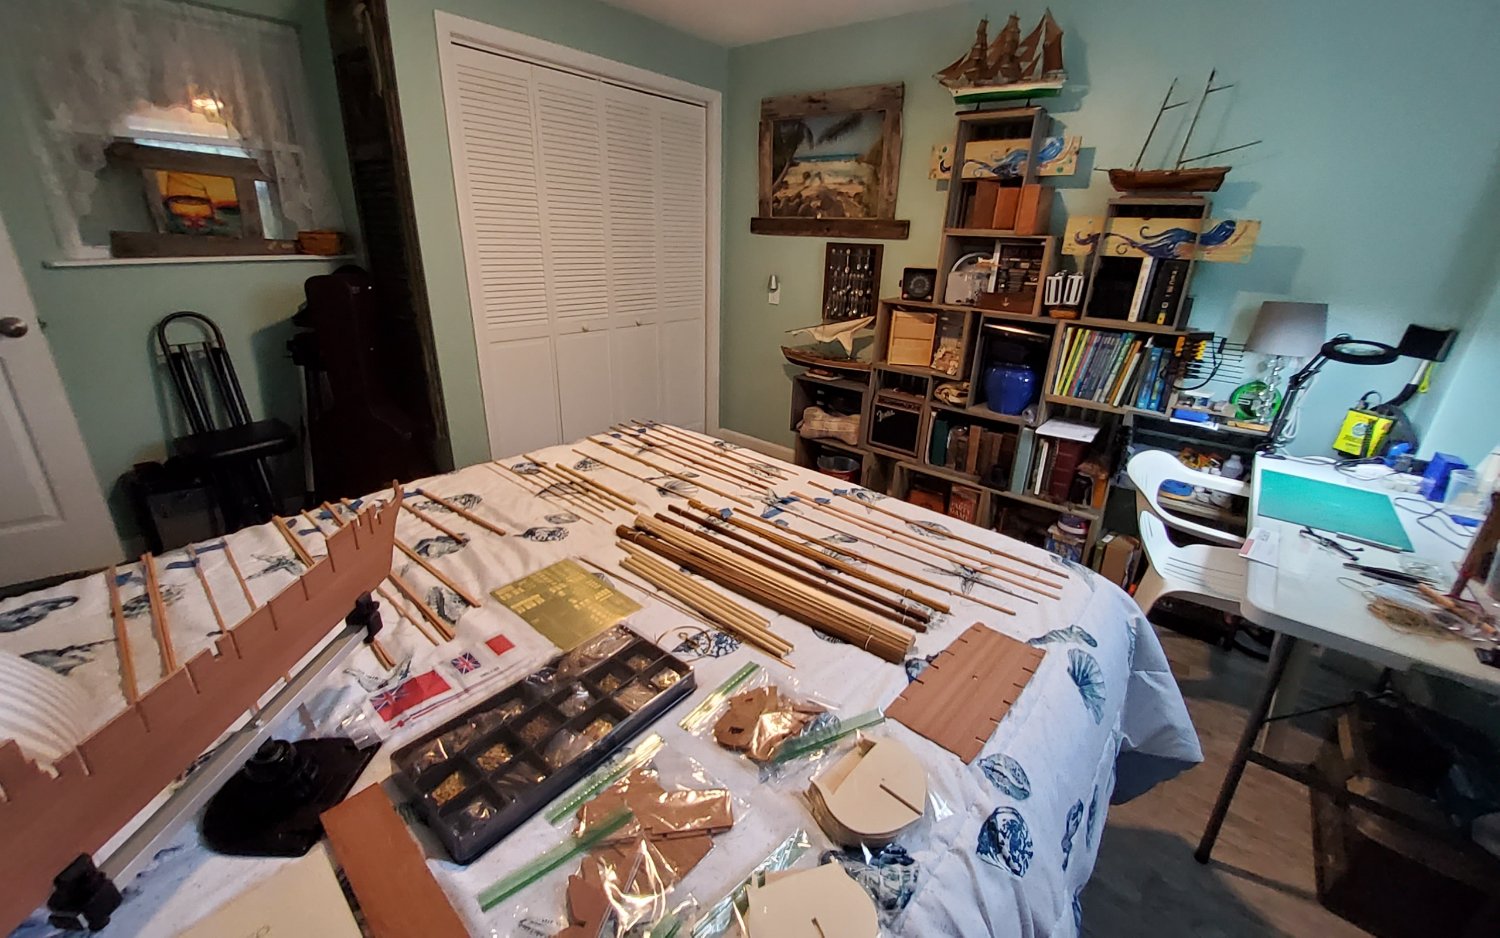
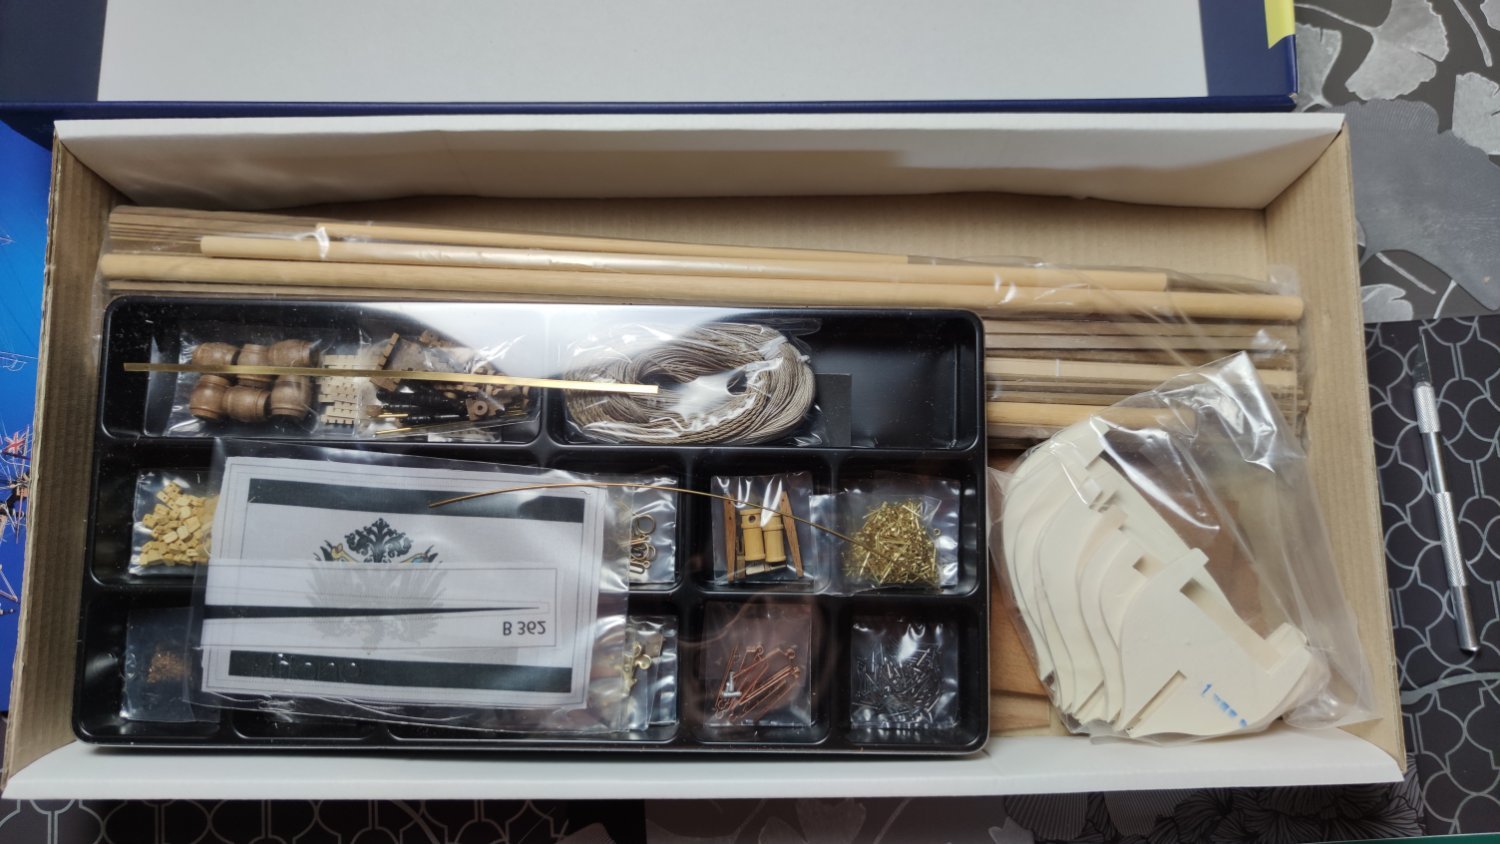
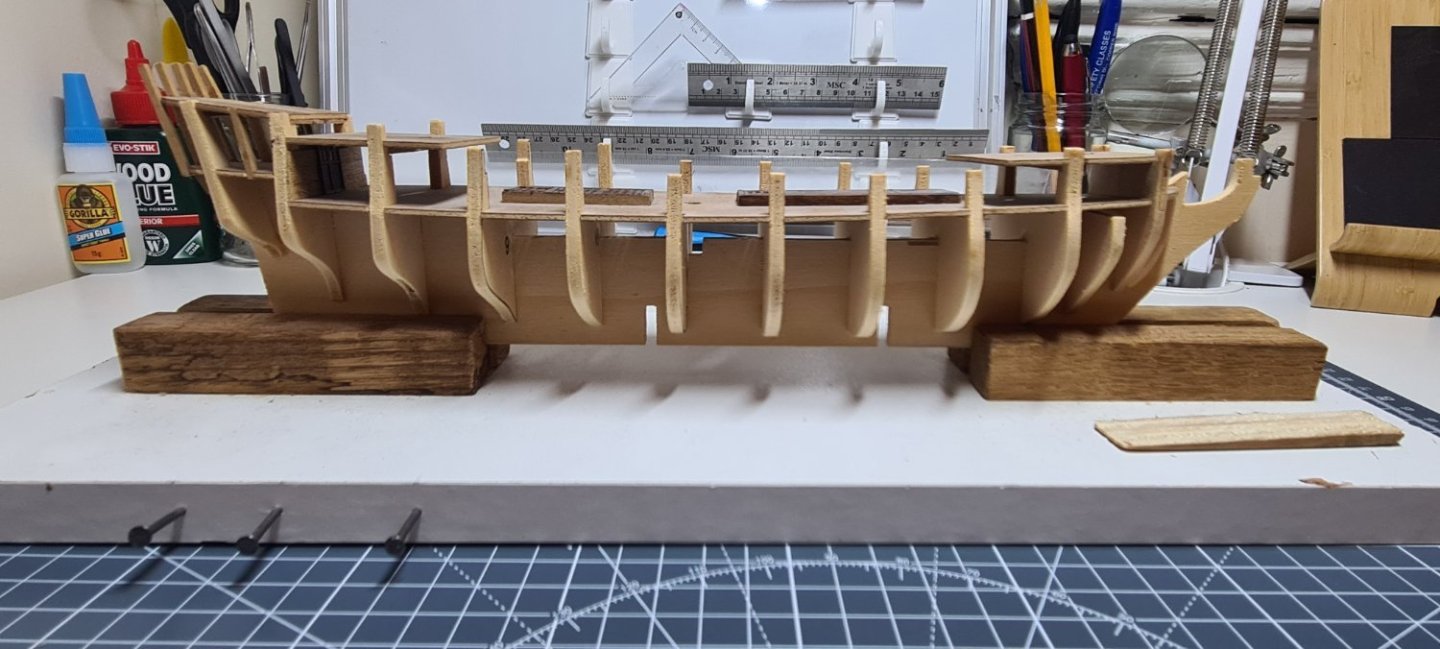
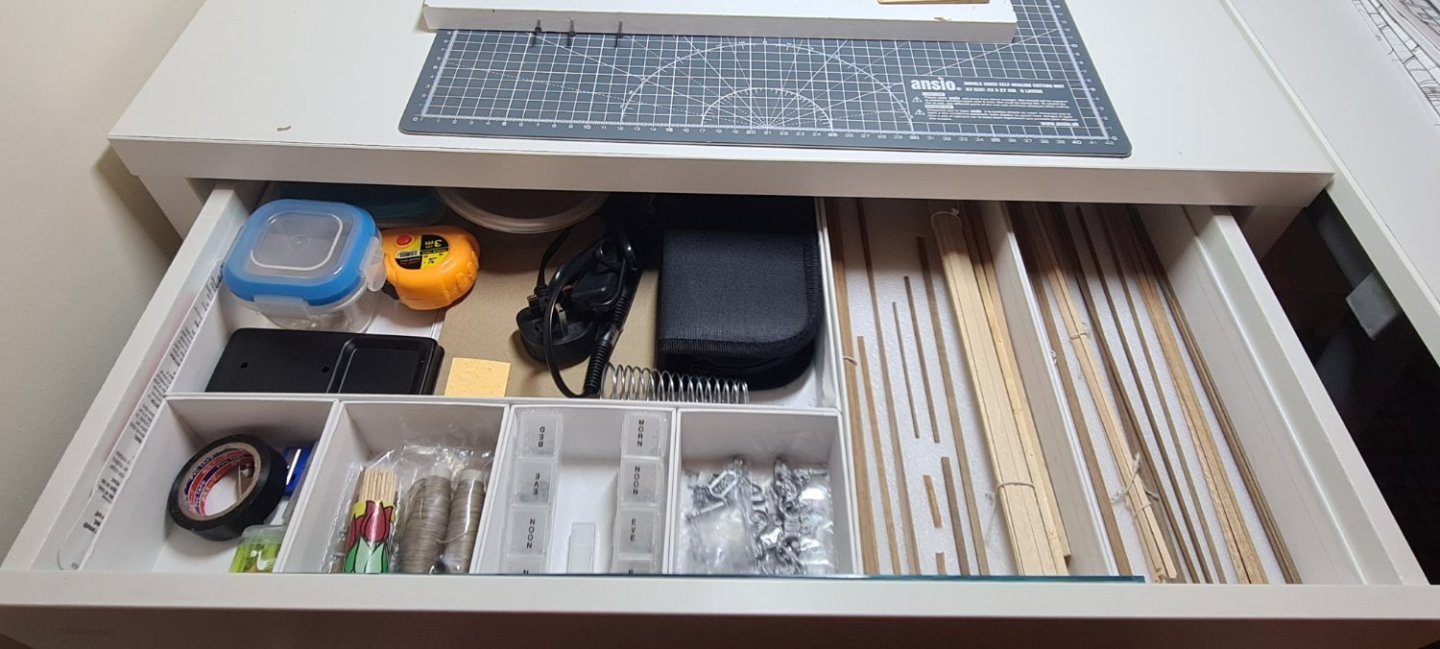
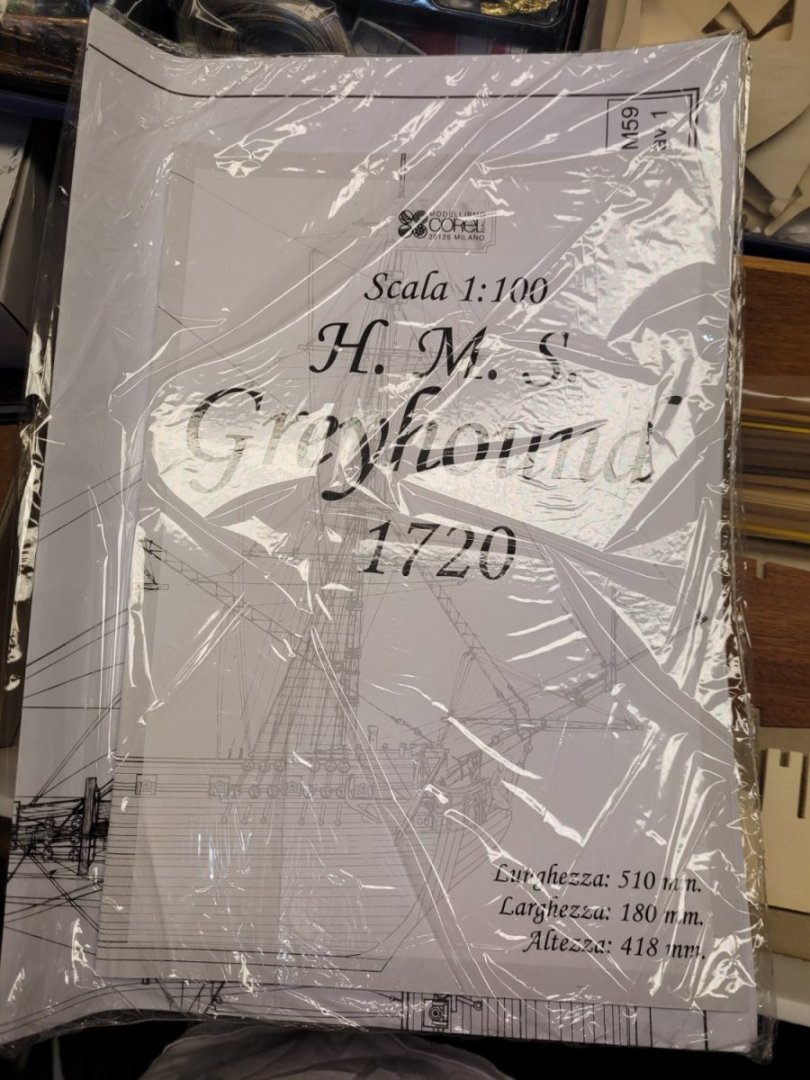
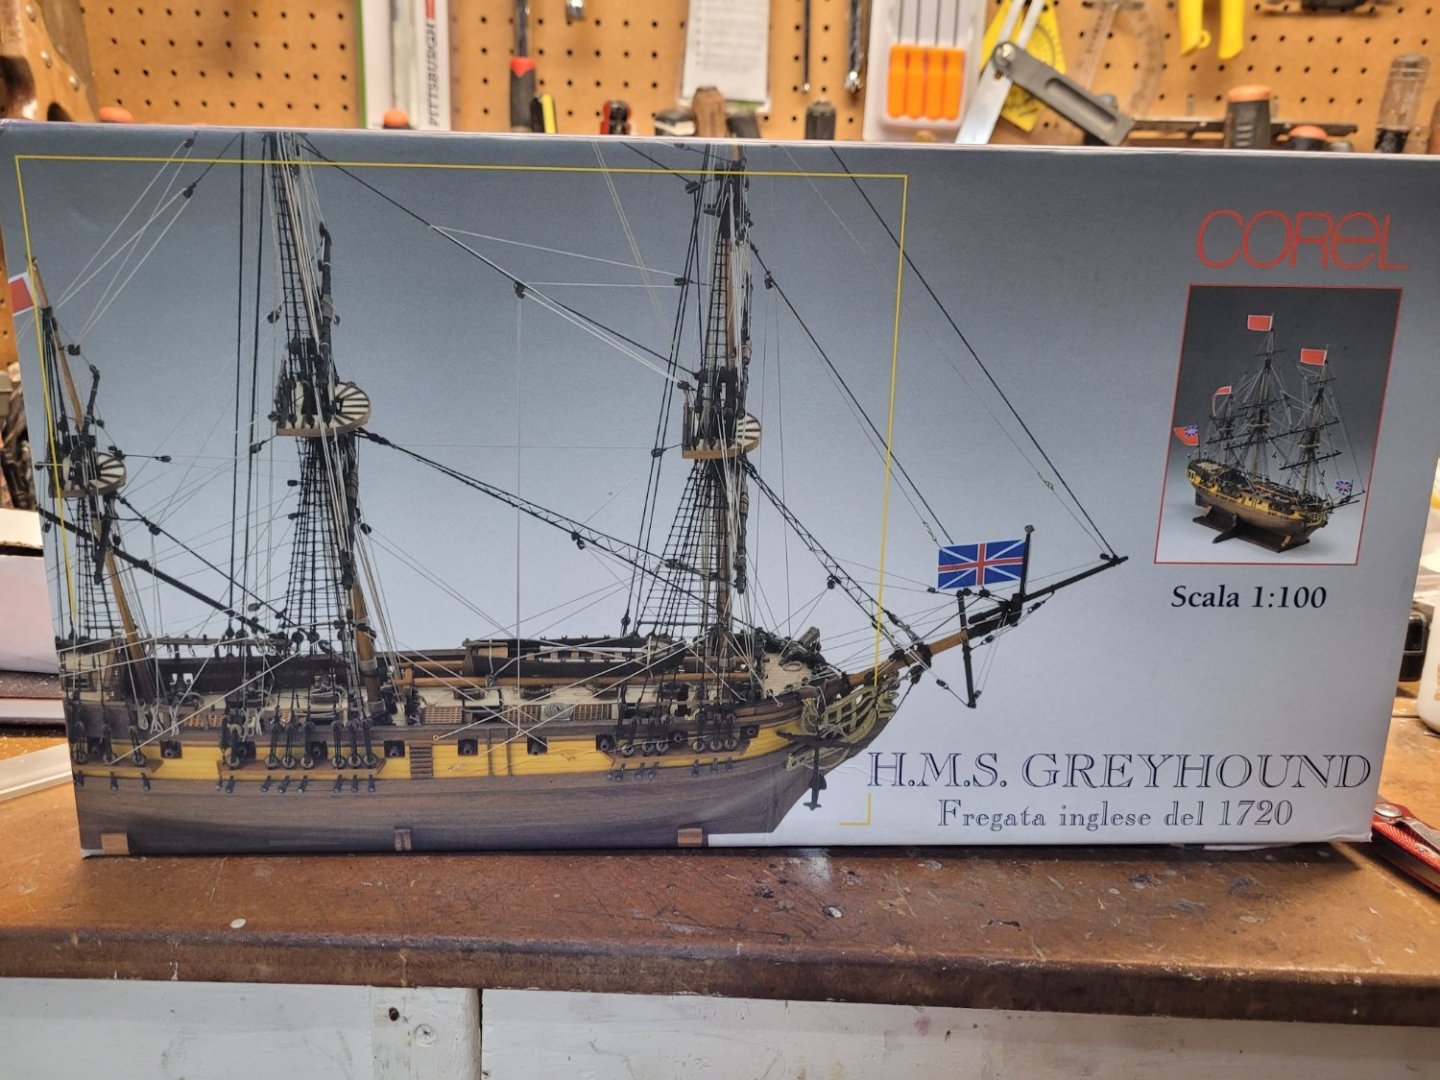
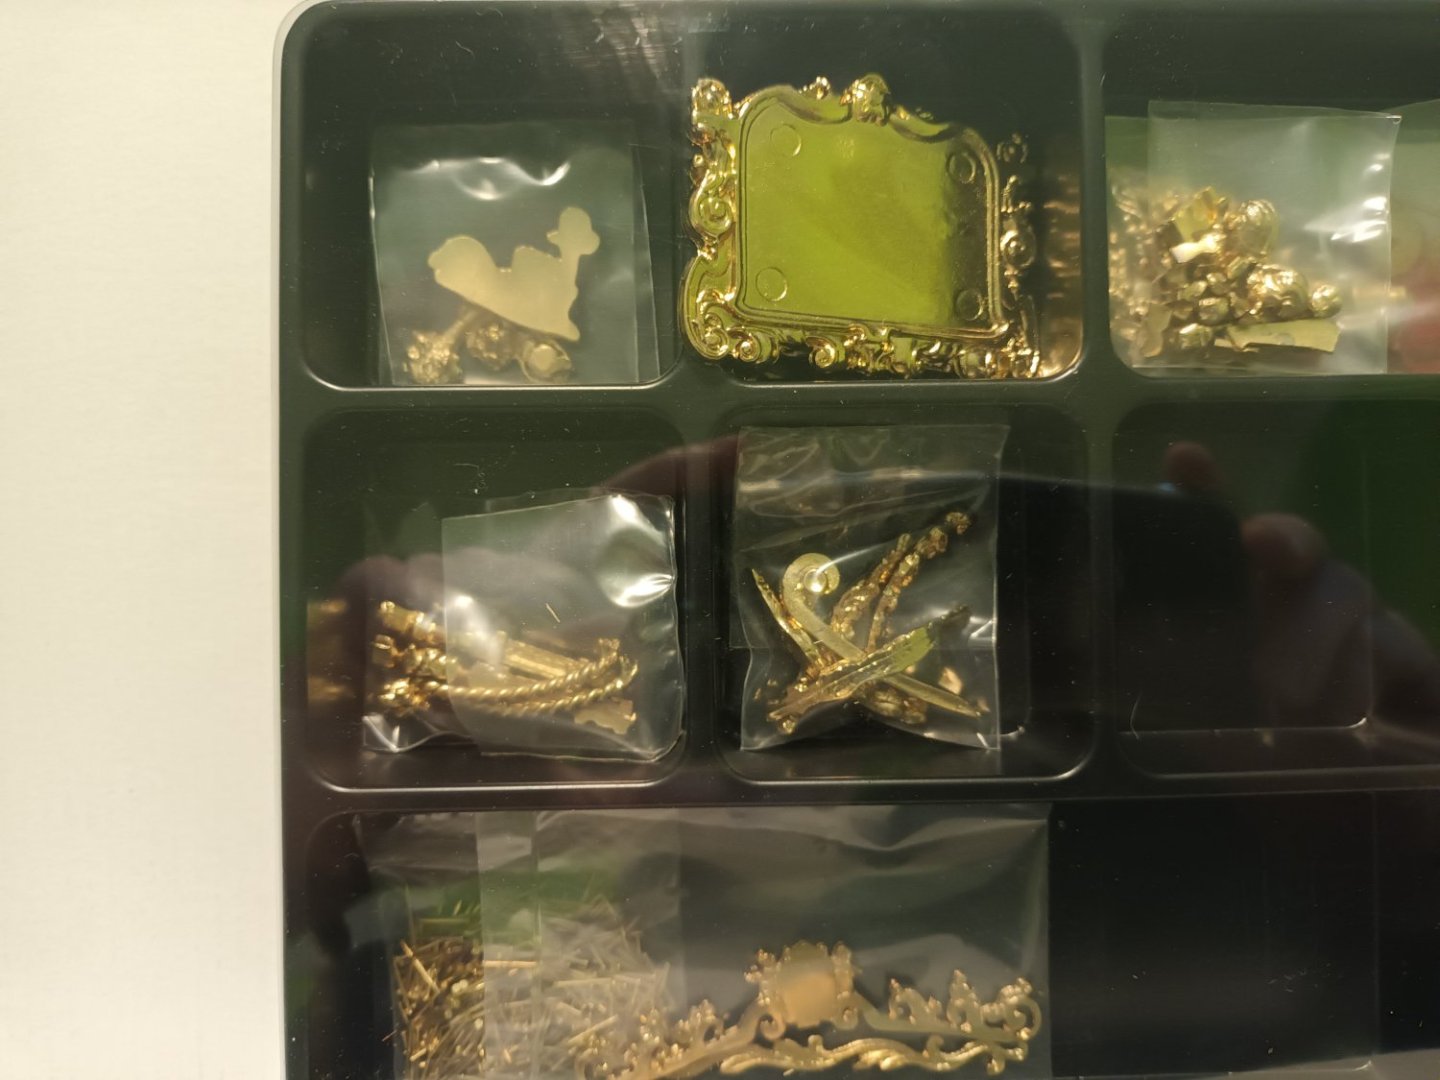
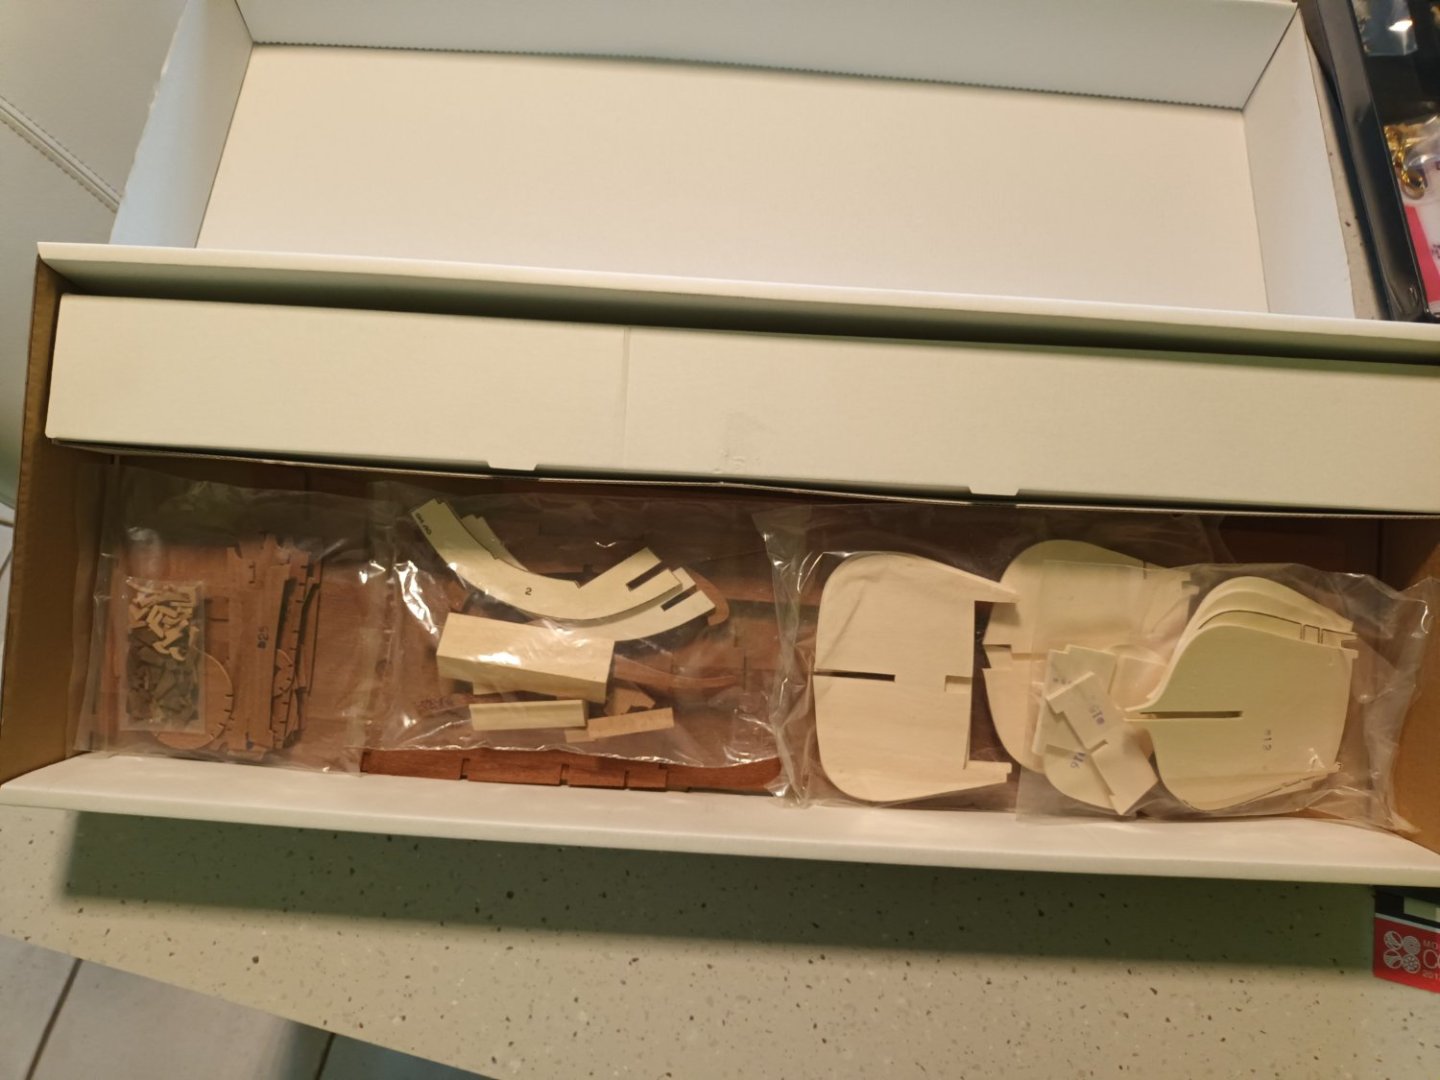
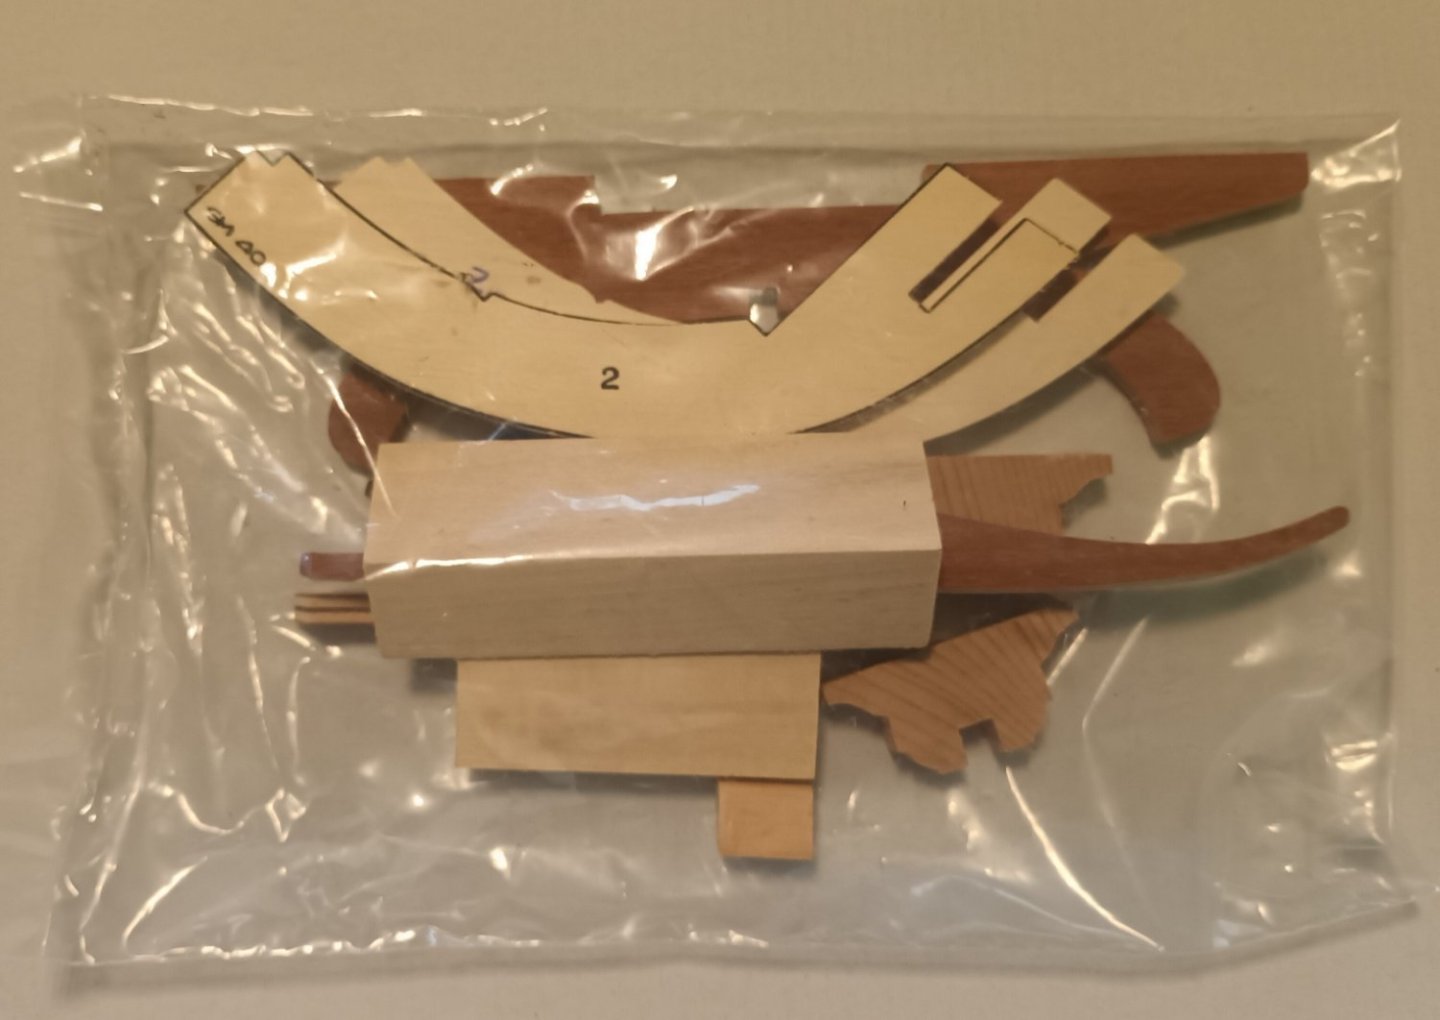
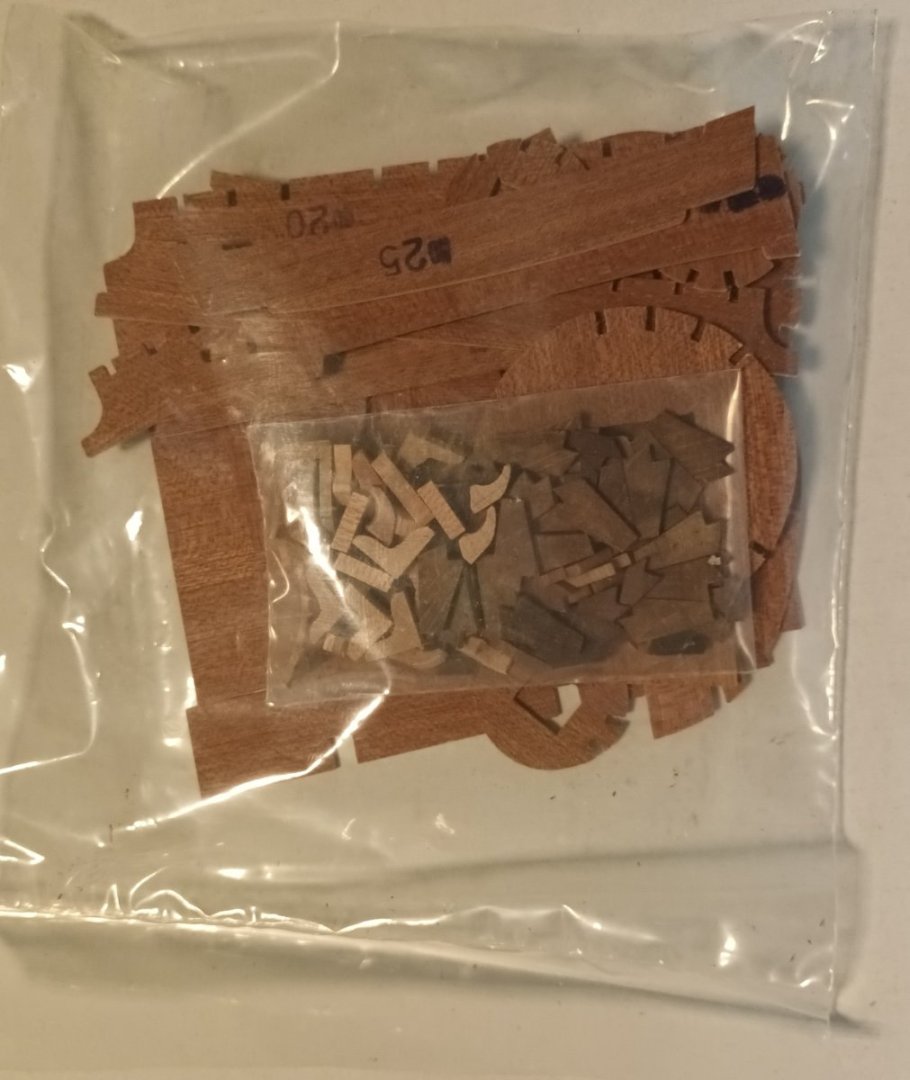
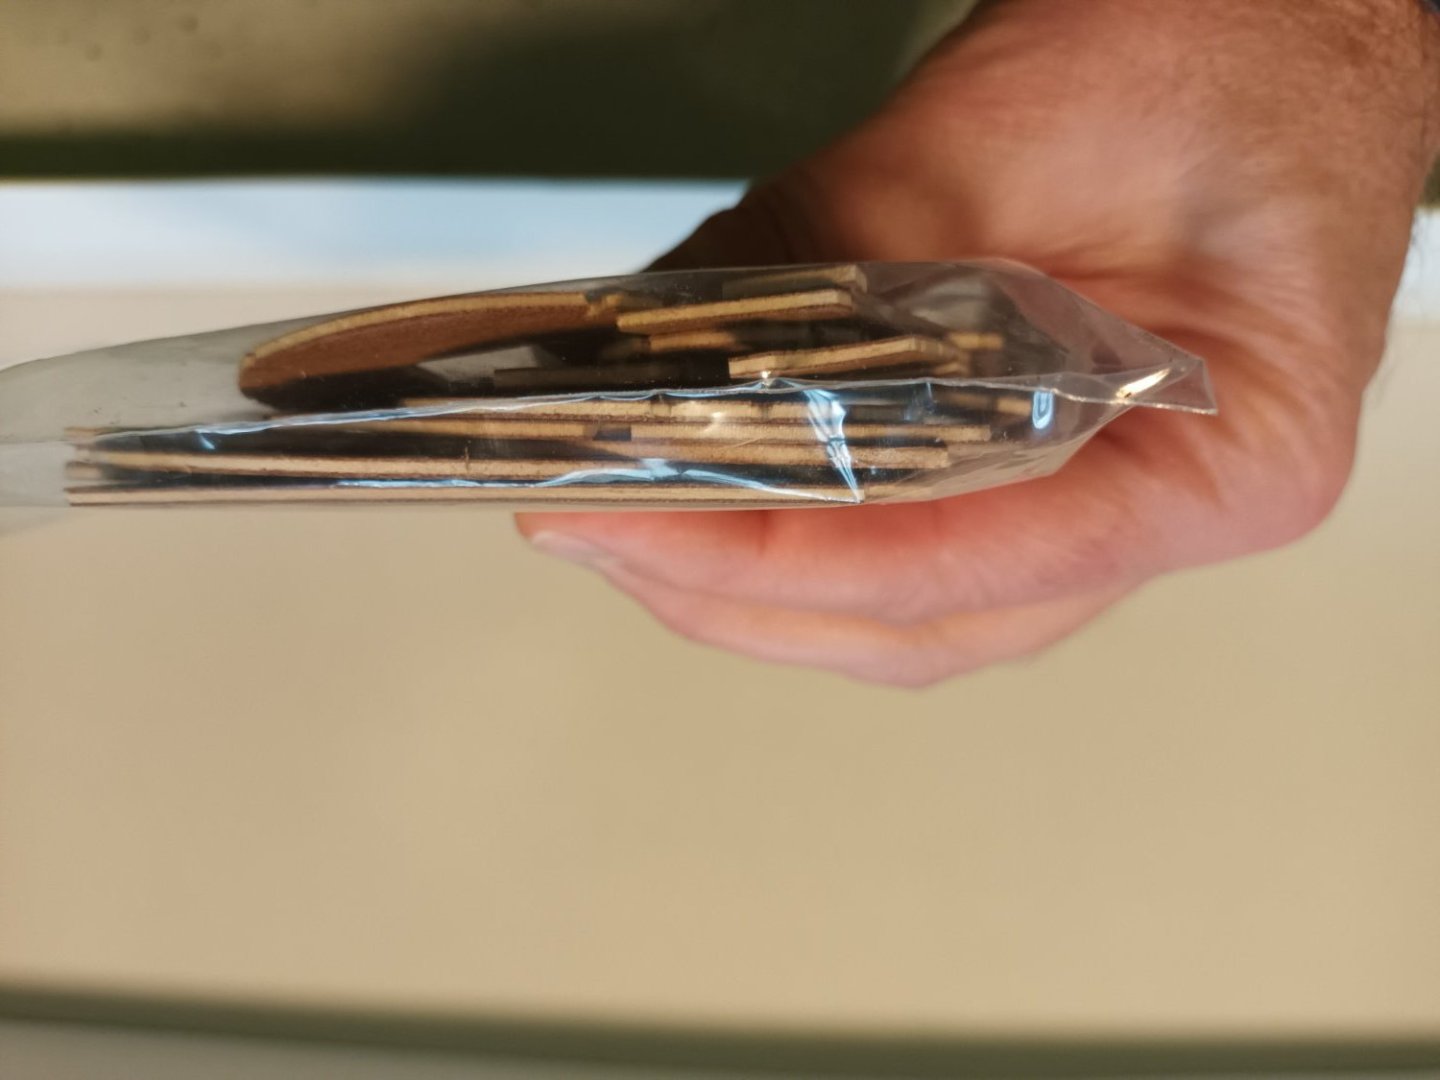
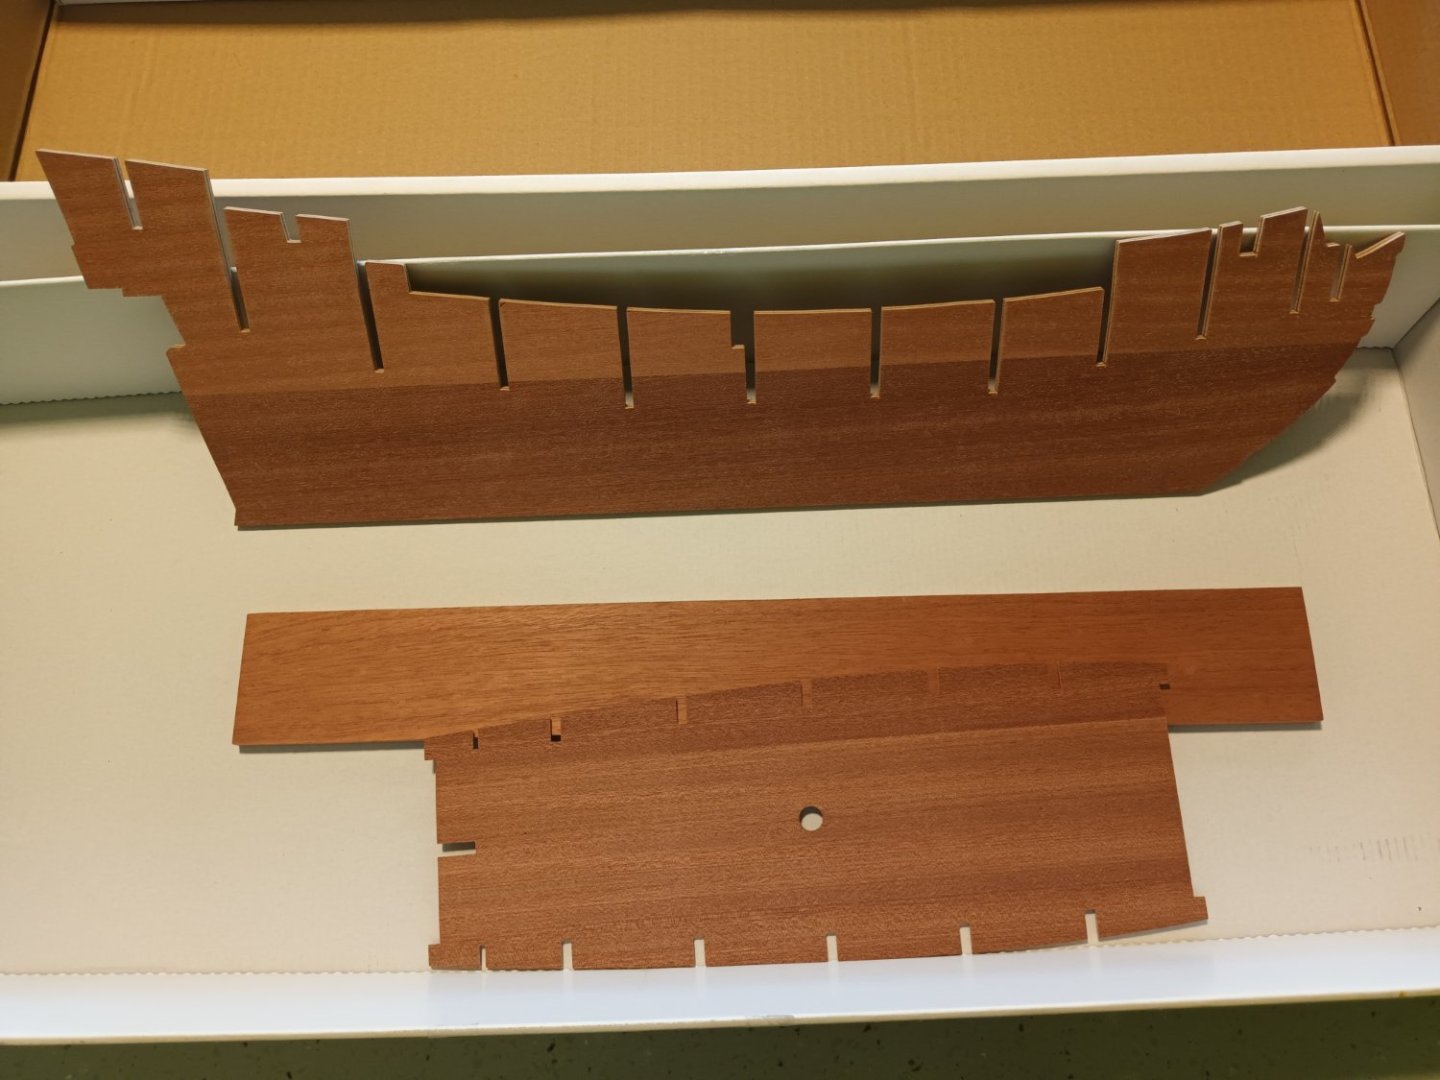
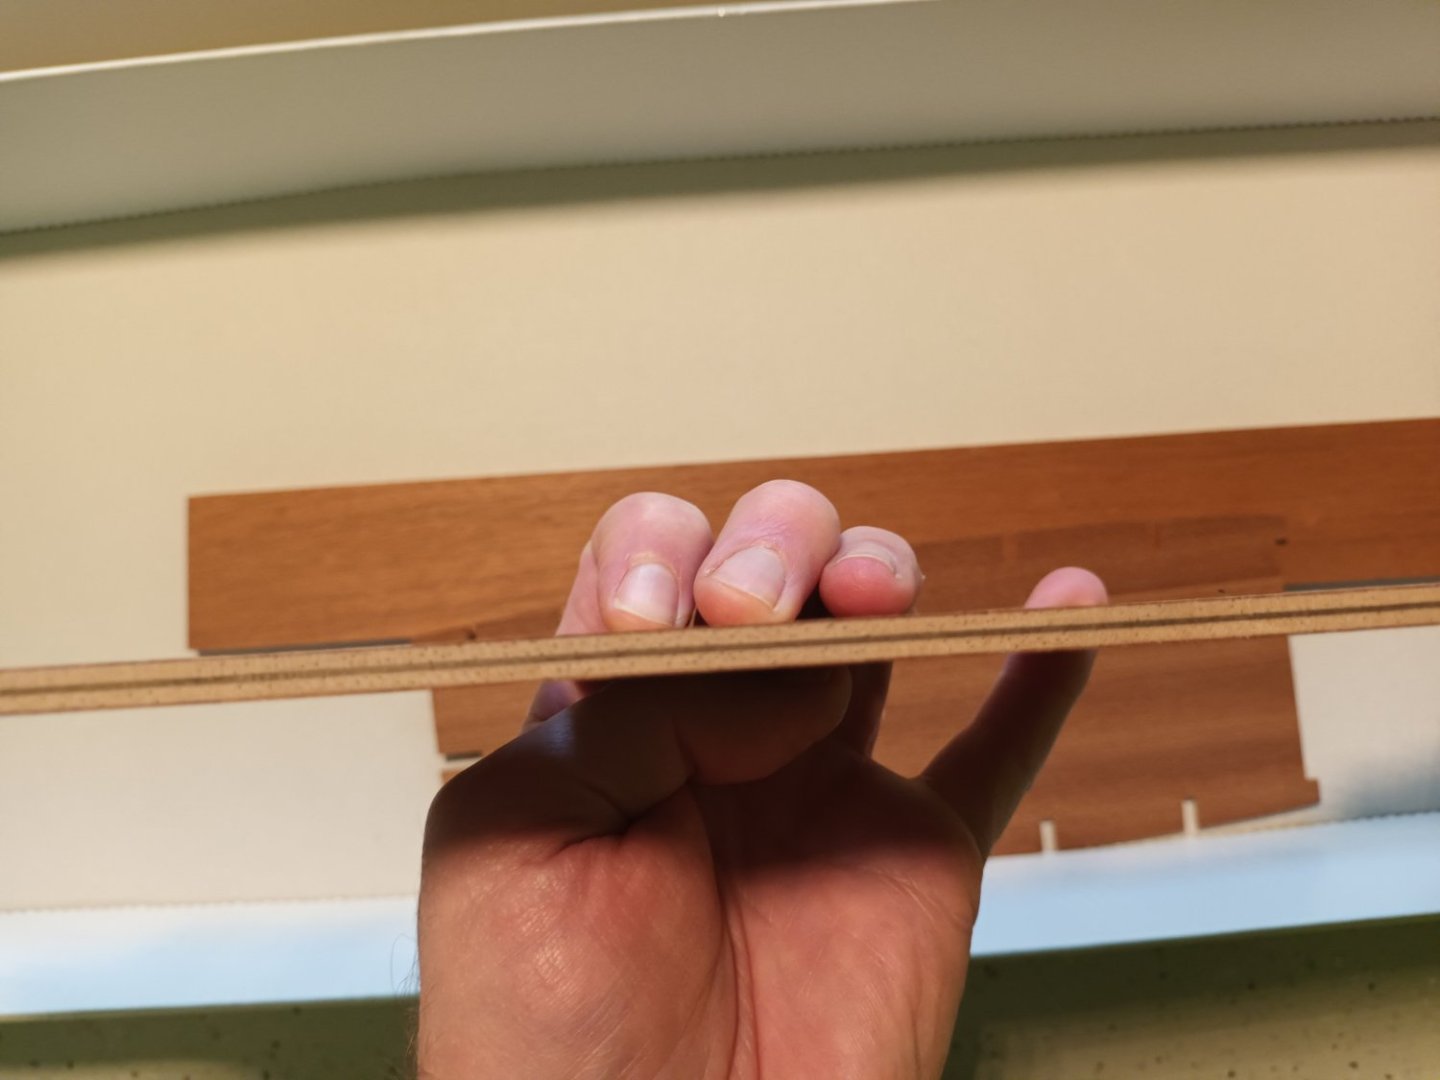
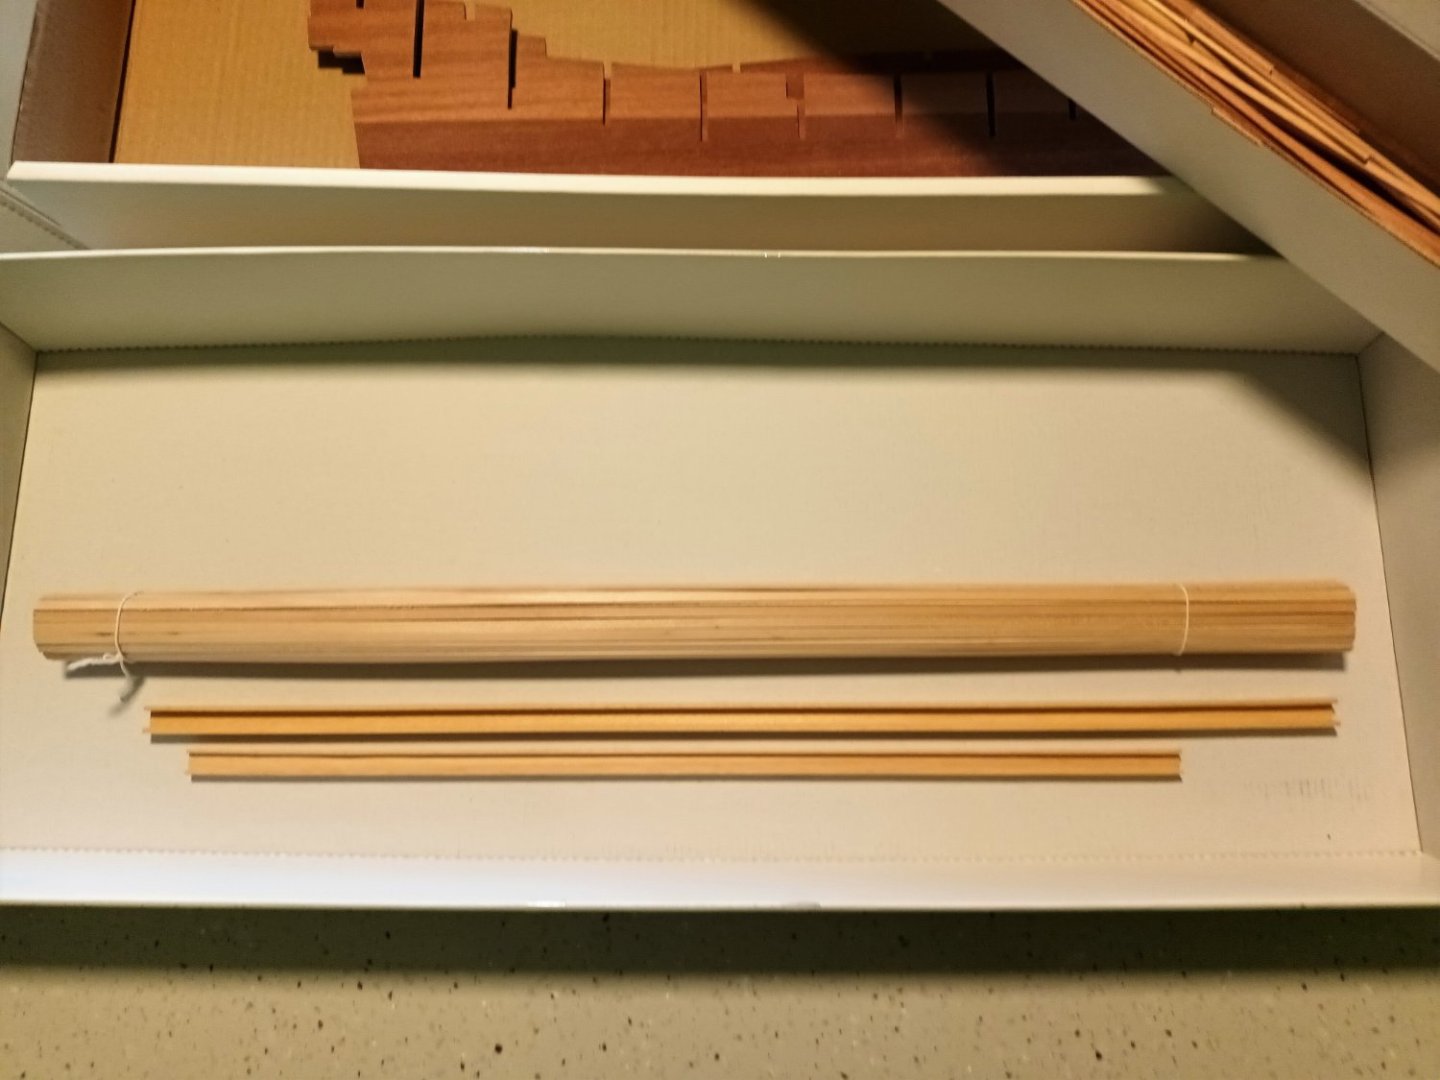
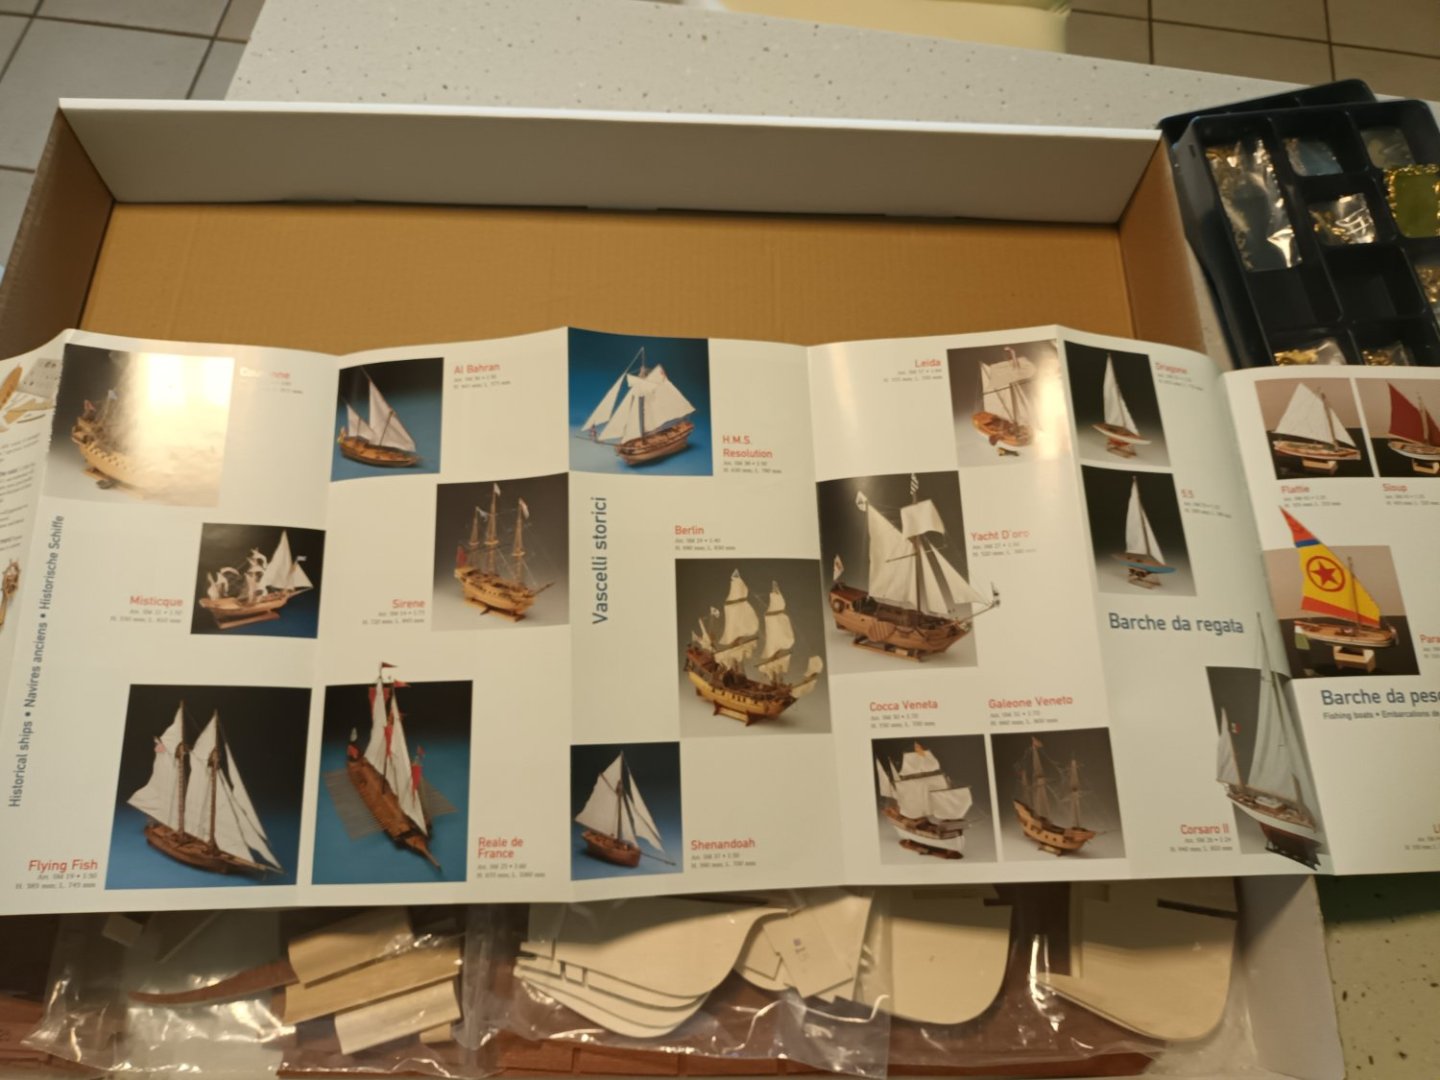
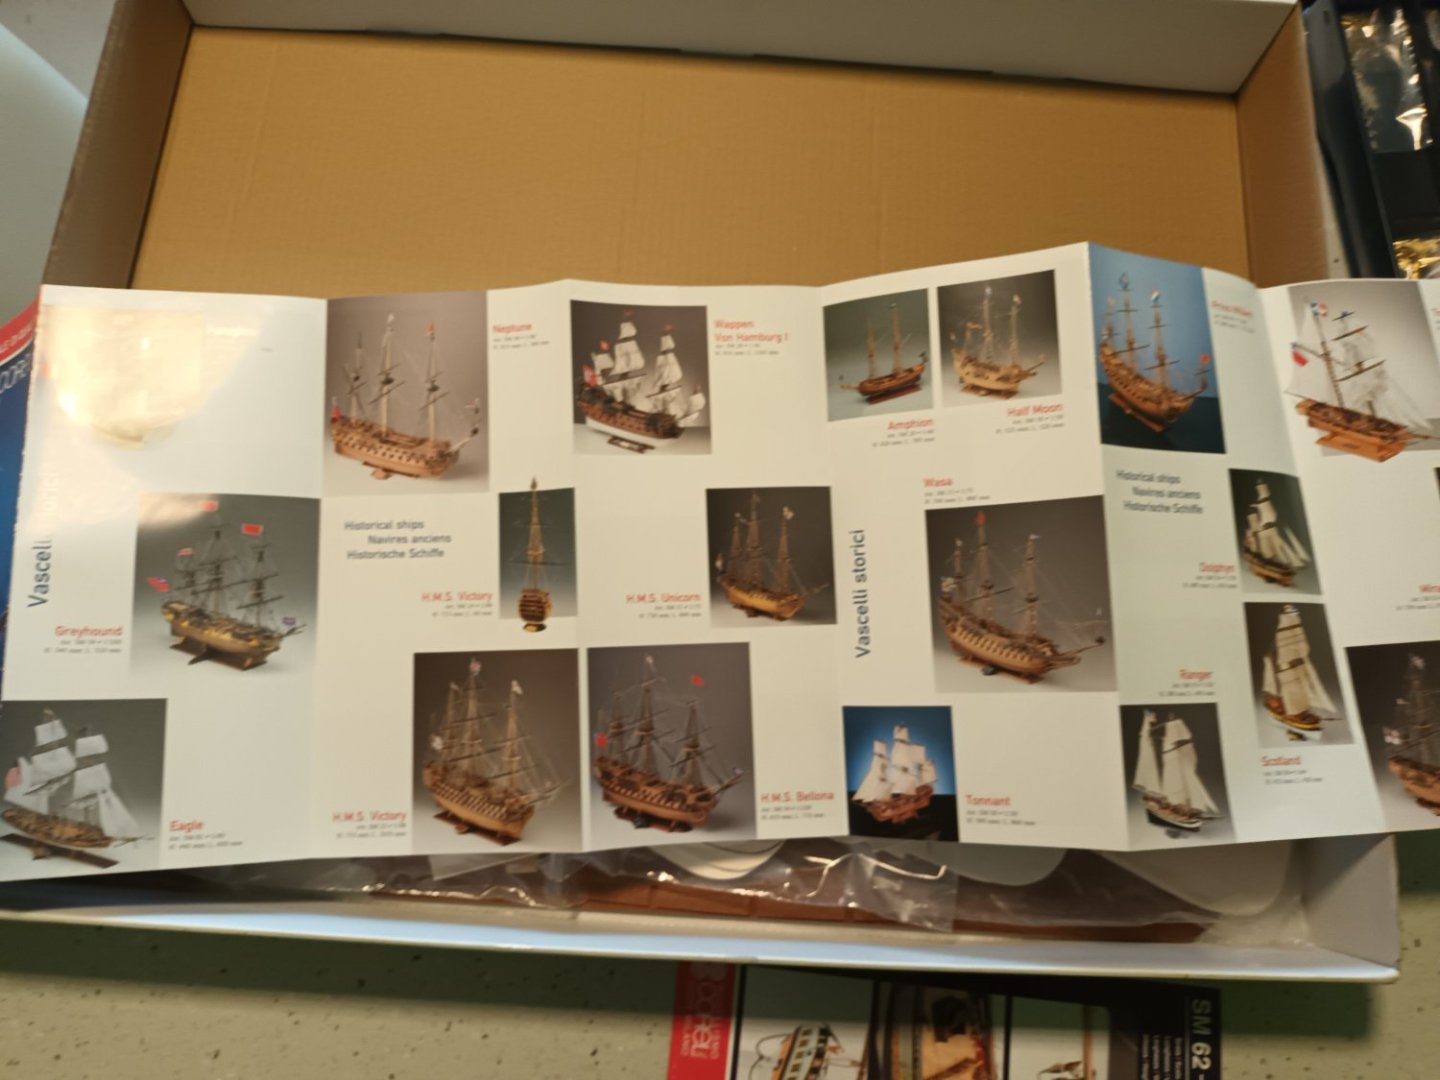
 Hello Everyone. I'm starting The HMS Greyhound. Although, I will be converting her to the 1779 USS Protector. I've already communicated with Hamilton about the challenges of this endeavor. I will most certainly be buying him a drink before, during and after the build. A little background and explanation before I start so I get my intentions across. I have an ancestor, one Ebenezer Fox. Said ancestor was alive and galivanting during the Revolutionary War. Great Great Grandpa Ebenezer wrote a book called the Revolutionary Adventures of Ebenezer Fox. I attached a pdf version. Young Ebenezer ran away from home and got aboard a US Navy Ship, The Protector. He was present during its notable win against The DUFF. He was also aboard during the battle with the Roebuck and Medea where it was captured by the British and renamed the HMS Hassar. My plan is to convert this ship into The Protector. My ancestor states that it was a 20 gun frigate, but other accounts has her listed as a 24-28 gunner. I'm choosing to go by Great Grandpas description. I plan to add sails, this kit has a sail plan, but no sails. First question is are the sail templates actual size? and is there enough wood for planking? the one package looks small. My last kit was the 1768 Bark Endeavor by Artensia Latina and It had TONS of material. I know I'm going to have to order more "parts". I would appreciate assistance with a shopping list for those who have done this kit and discovered the wrong size parts. Im still in the planning stages and making sure everything is accounted for. The pictures below are what I received. I will post again once I begin, after the honey do's are competed. Thank you all in advance. adventures of ebeneezer foxe.pdf
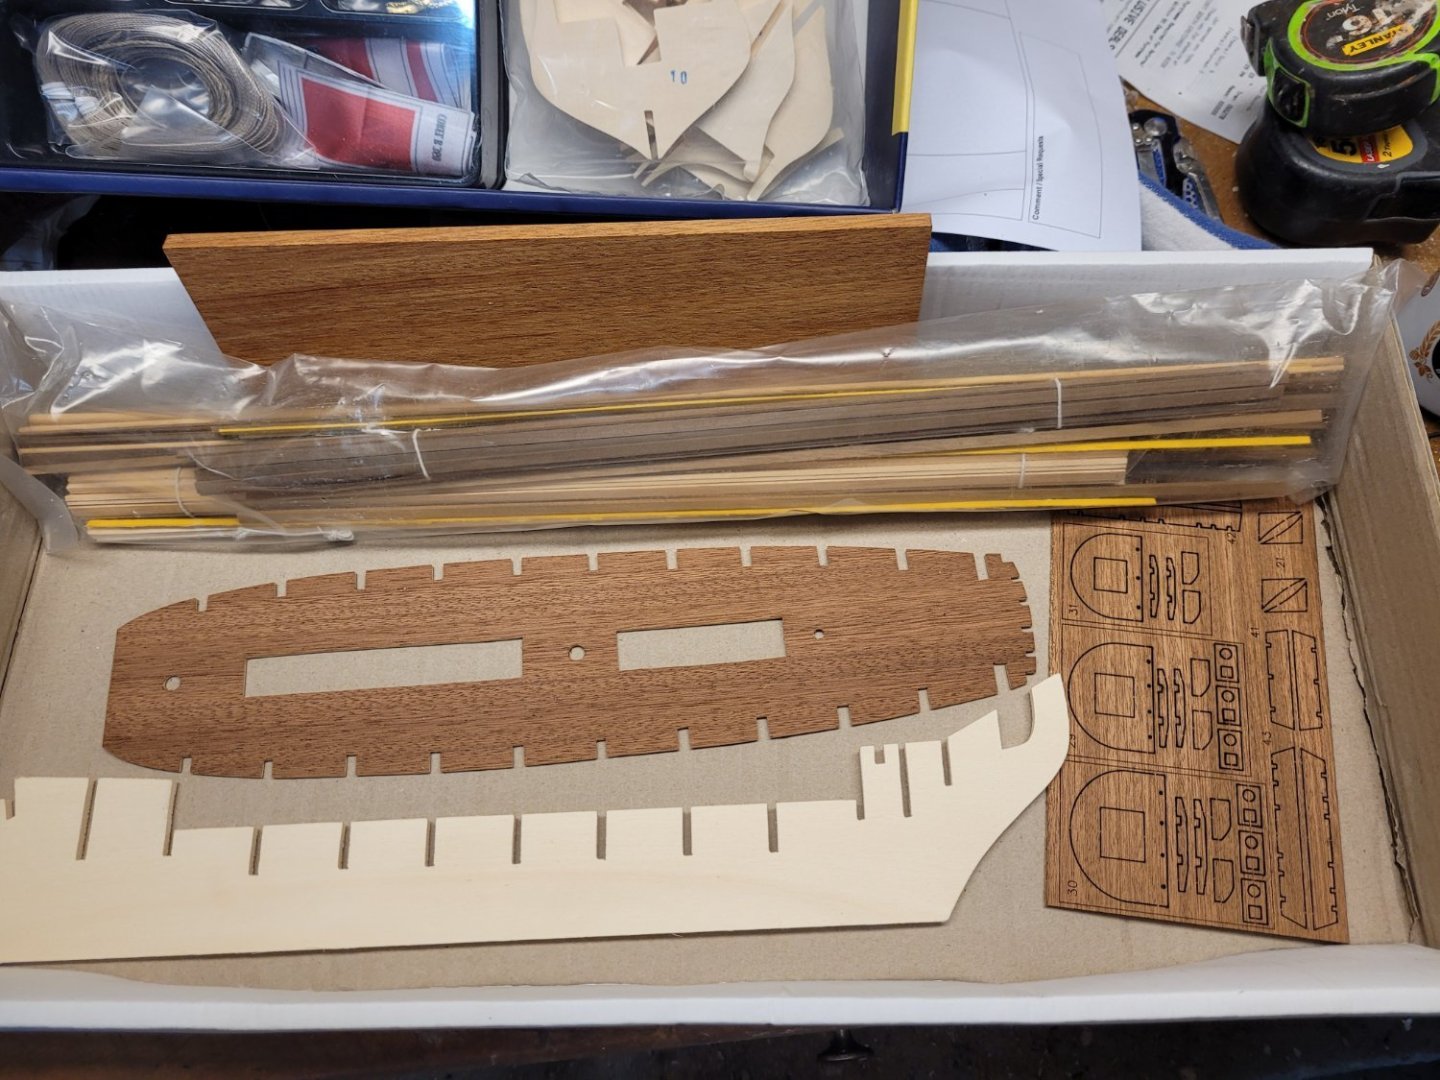

-
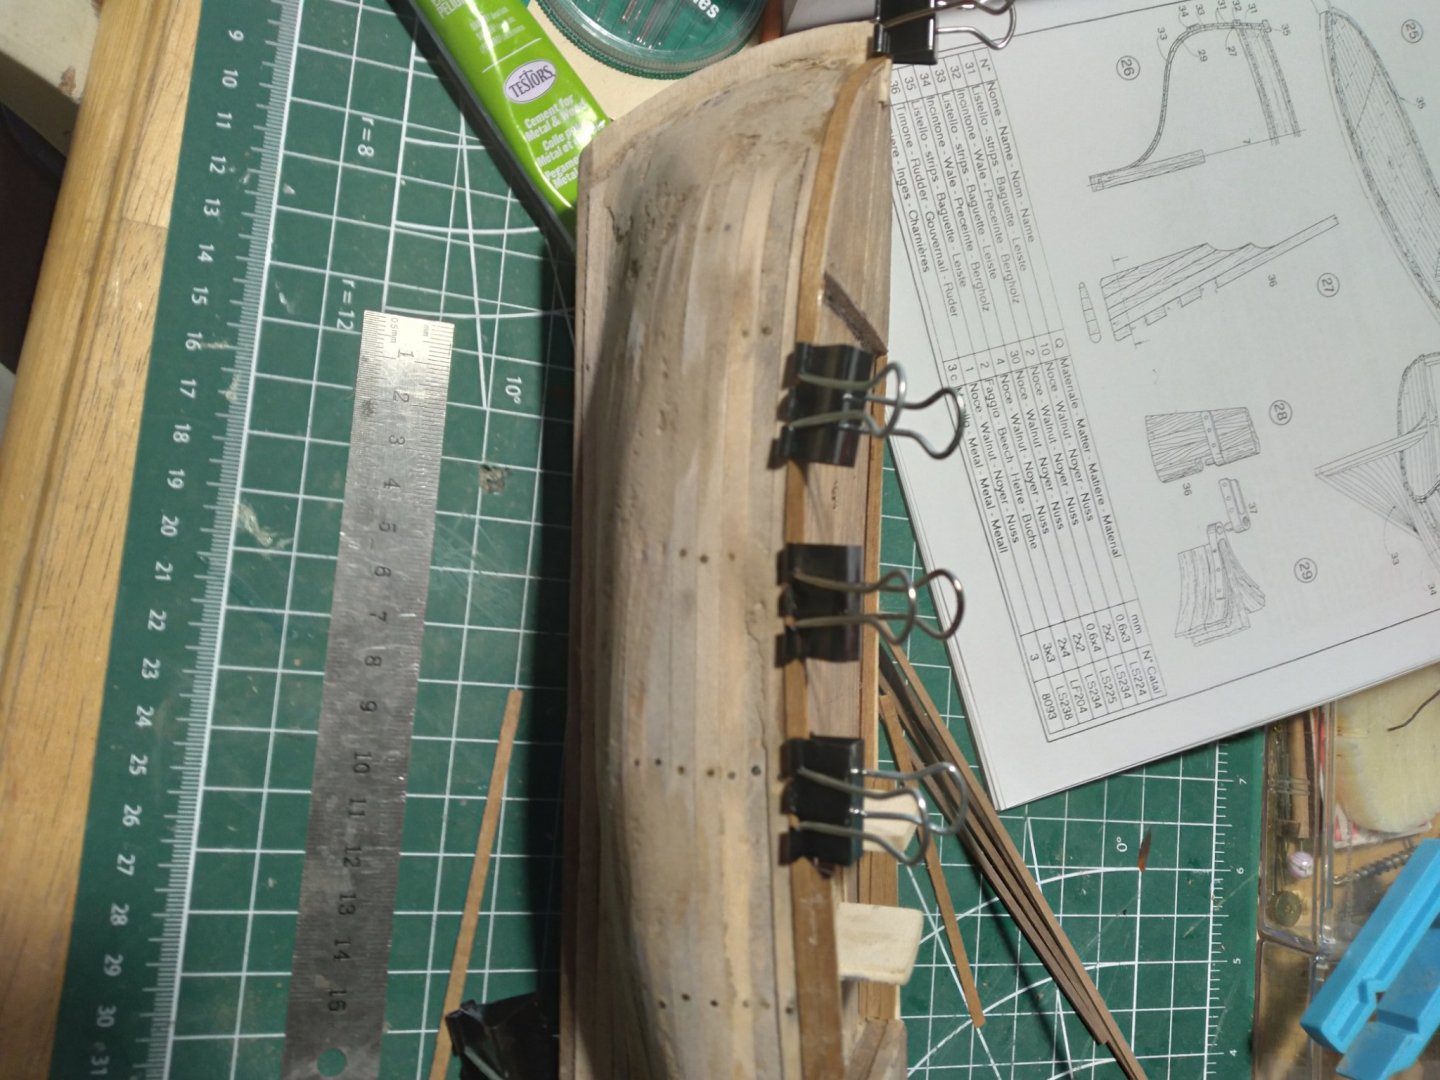
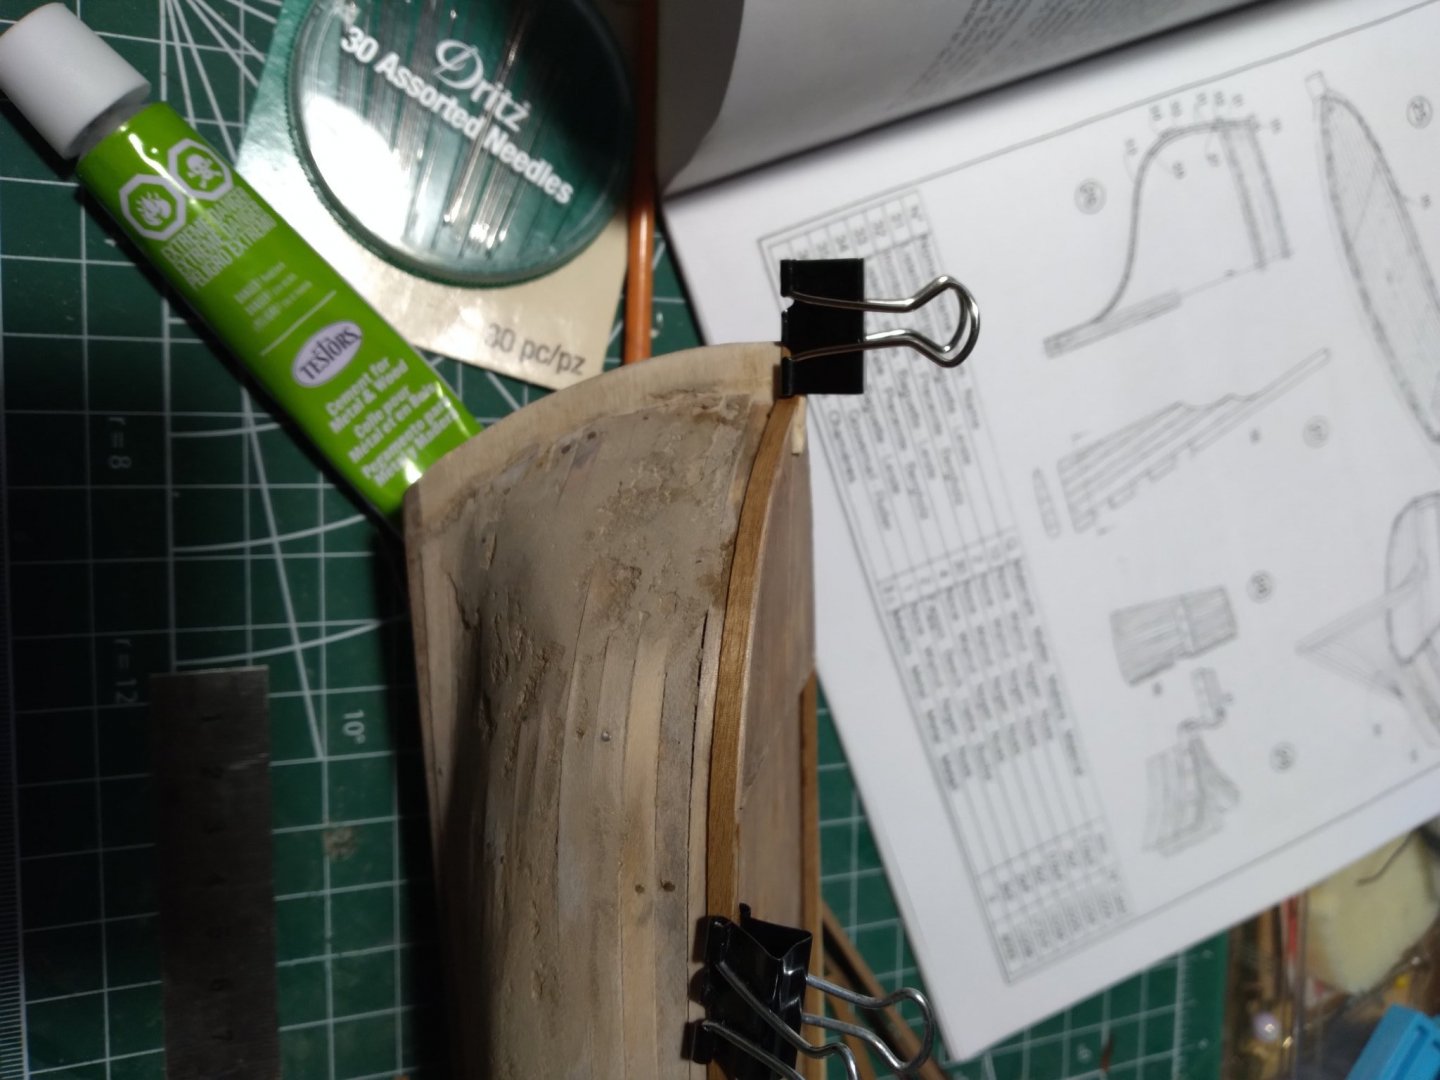
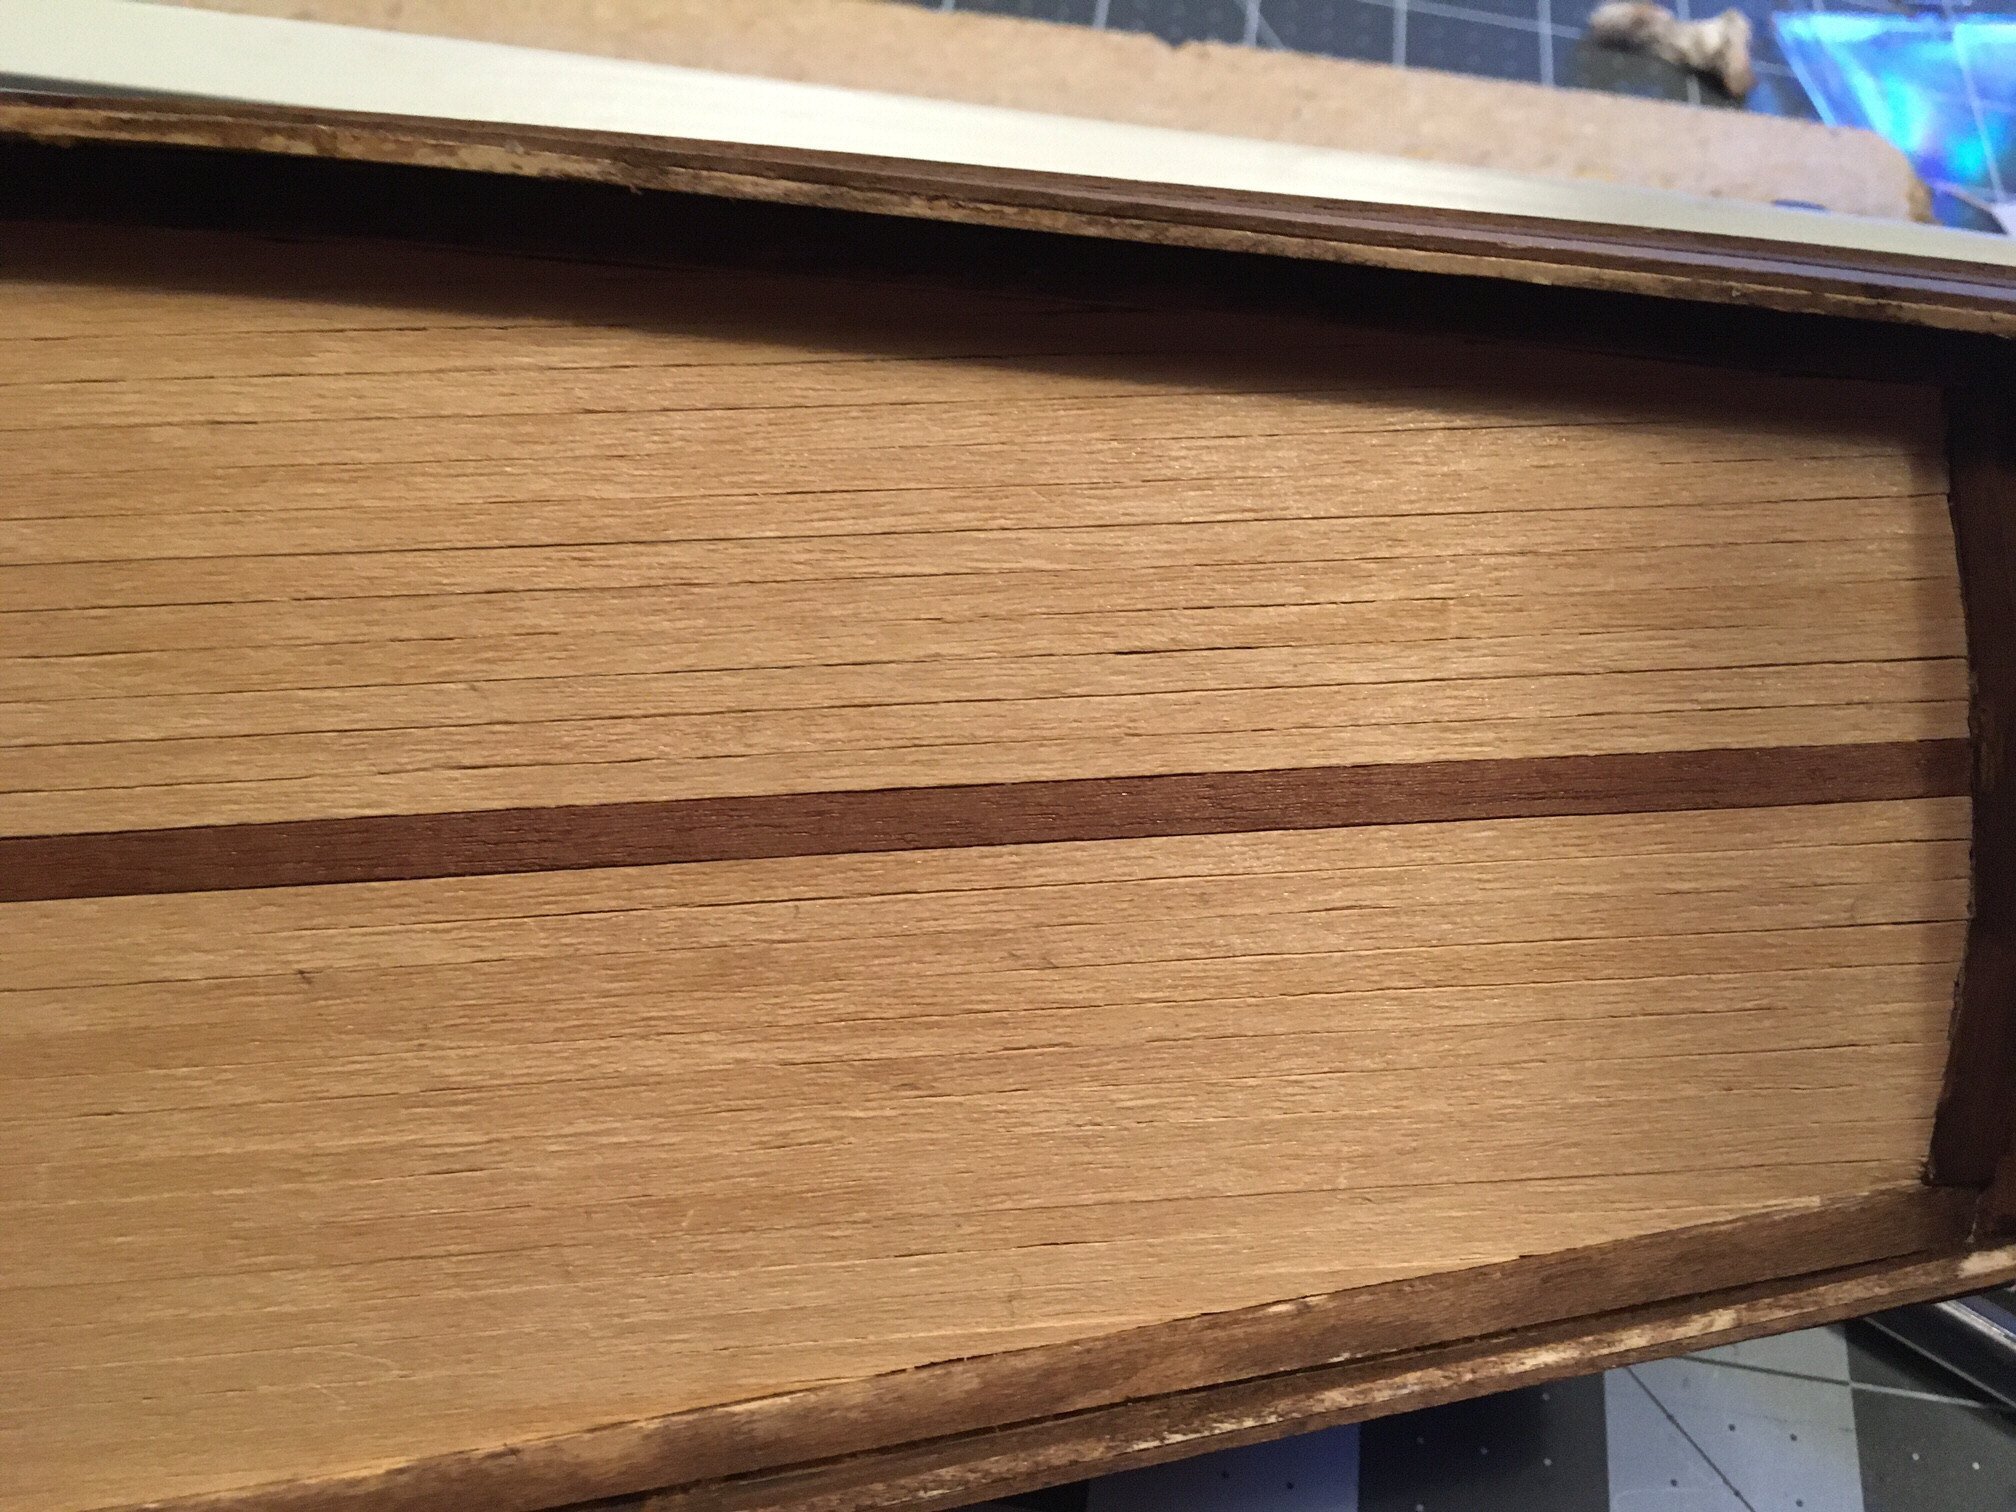
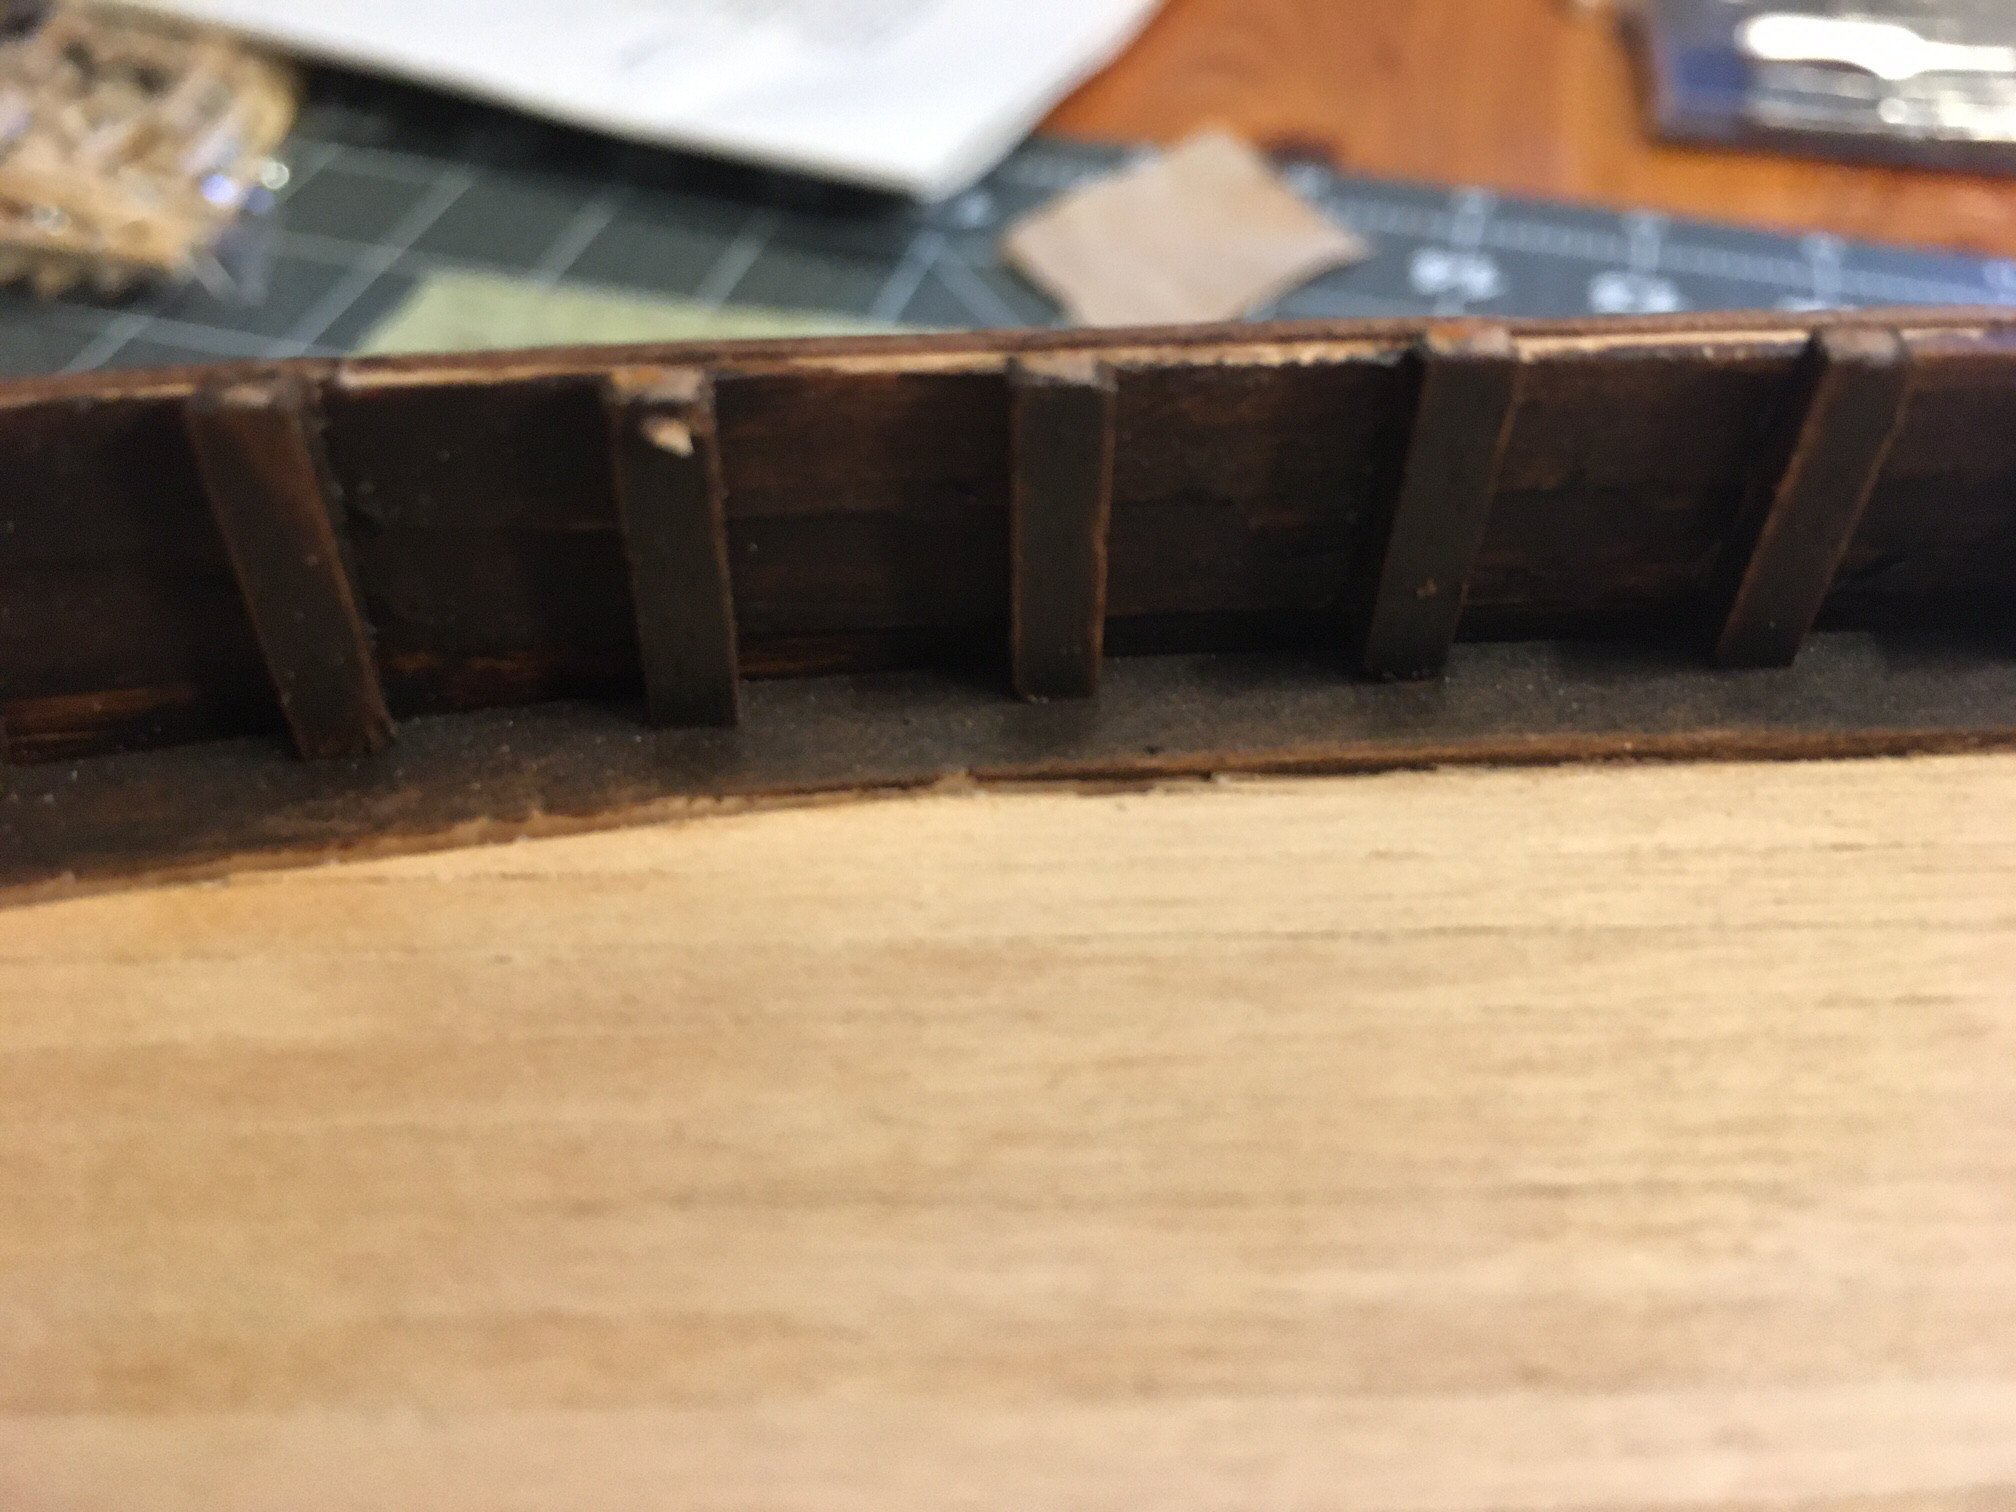
 The convoy ship Wappen von Hamburg 1669 - Corel SM28, scale 1:50 Hi everybody, I'll guess I'm going to attempt to build a Dutchmen, which is a first time. Some folks may read "Hamburg" in the title and think (Dutch?), Hamburg lies in Germany and not in The Netherlands. And you are absolutely 100% right, however this ship has been built by a Dutch master shipbuilder is by Dutch design. So welcome to my buildlog of this imposing Frigate and kit. The punk kid story... I remembered when I was a little kid, my parents took my sister and me out for shopping for clothes and stuff in the city of Rotterdam - The Netherlands. Living outside the city, my father always seem to parked his car just outside the shopping area, which means my sister and I had to walk a couple of blocks to reach the area where all the shops were. Passing certain streets and shops, one always grabbed my attention. It was a very small and old school wooden ship modeling shop. That means that the shop itself only sold wooden ship model kits and accessories for wooden ship modeling. When you entered the shop, the smell of woodworking was always around and the lights were dimmed a bit. On the shop's window the name of the shop was painted with a classical font and behind that the most beautiful historic ship models were displayed. Always 3 or more completely built models were displayed with one big model in the middle. The centerpiece so to say! My eyes rolled over the many decks and guns and couldn't get enough of it. The owner was a very pleasant and friendly "old" guy and was building the models himself in the back corner of the shop. It apparently made a "big" impression on me. My mother told me, that I was a bit young for building models like that, but perhaps when I'm older and still be interested, I could have a go with it. She was absolutely right! One day, passing the shop a new centerpiece ship was placed in the shop's window. It was the Wappen of Hamburg. An imposing vessel, big, lot's of guns, figures on the stern and with removable decks. Can you believe that, I mean, I'm talking about the mid / end '80's of the last century, that was unheard of in a kit! I was hooked and my parents had to drag me away from the window. I could stay there all day long imagining, dreaming building that model. I was 8 years old. The kit from Corel There is one wooden kit from the Wappen of Hamburg from 1667 - 1669 and that's Corel SM28 before Movo Milano. It's one of Corel's flagship kits and is a very luxurious edition. Corel stated that a lot of research went into designing this kit and that some of the unique selling points of this kit is it's historical accuracy, the high quality figures and ornaments, the choice of having removable decks, gratings and with a lot of shown interior features, all cannons are on carriages on all decks. That means full decks on all levels with real gun ports and lids. Size and measurements Length: 43 inches or 1100mm Width: 18 inches or 460mm Height: 36 inches or 910mm Scale: 1:50 On the box scale 1:40 is mentioned but all the drawings are in 1:50 scale which is the correct scale for this kit. The box and it's content When newly purchased and untouched, the box and it contents are displayed in the pictures below. As been said, it's a luxurious kit with a lot of high quality "walnut" wood and die-cast ornaments and figures. The die-cast metal ornaments are really beautiful and detailed. It's really impressive to see how good they are looking. The history of the ship and her destiny At the end of the Hanseatic trading period, which was a military trade group by origin, the Hanseatic city of Hamburg did not have its own warships. These ships were actually needed to protect the merchant fleet against the ongoing and growing threat of pirates and competitors. The idea of having own warships to protect the fleet, arose in 1663. These ships would be built by a Dutch master shipbuilder and according to Dutch designs. At that time, the Dutch were the most dominant trading nation in the world which prospers the shipbuilding activities. The plan was to start with two ships, so called sister ships called the Leopoldus Primus and the Wappen von Hamburg. However it appeared that there was a lot of disagreement over financing responsibilities and after a long period of debate the Hamburg Admiralty finally decided in 1667 to start construction of these two ships. Both ships were commissioned in 1669. The construction of both ships was carried out under the supervision of the Hamburg Admiralty under the direction of an unknown Dutch shipbuilder. The flagship of Lieutenant-Admiral Maarten Tromp which was a famous Dutch admiral, called Aemelia from 1632 https://nl.wikipedia.org/wiki/Aemilia_(flagship) is mentioned in professional literature as an example and model for both ships. The Wapen von Hamburg is the first of four convoy ships to bear this name. She was built at the Theerhof shipyard in Hamburg. The ship was not allowed to have excessive draft, otherwise it would have problems safely passing the shallow parts of the River Elbe, and especially the Altona sand. Because the shipbuilder knew, based on the knowledge available at the time, that a wide ship with low masts had more stiffness and strength to keep itself upright in a turbulent sea, and a narrow ship with high masts, on the other hand, sailed faster, the Wappen von Hamburg opted for a combination of both properties. This gave it a good compromise between stability and sailing speed and could pass the Elbe river. In the evening hours of the 10th of October 1683, a fire broke out for unknown reasons in the lower room of the ship's forecastle. This expanded rapidly and, despite all efforts, could no longer be adequately accommodated by the resources on board. The crew tried to get to safety in the lifeboats, but was ordered by Admiral Karpfanger to return to the fire and to try to extinguish it. At the same time, signal shots were fired to signal surrounding ships to send emergency firefighting teams. When the fire spread through the deck to the foremast and immediately set fire to the rigging and sails due to an unfavorable wind, the rowing helpers kept a safe distance for fear of an explosion of the gunpowder room. Karpfanger had his son, who was traveling with him, taken off board, who had earlier appealed to his father to leave the ship with him to keep both lives safe. However, Karpfanger did not want to consider the loss of the ship just yet. It was suggested that they shoot a puncture in the hull and allow the ship to fill with water and sink to the seabed - but Karpfanger refused. Finally, he agreed to try to beach the ship and had the ship's anchor ropes cut so that the ship could run aground near the shore. Abandoning ship was in any case out of the question for Karpfanger: he saw himself bound by the oath he had taken on the 14th of July 1674 before the Senate of Hamburg, which instructed him to "stand manfully in defense of the fleet entrusted to him and rather to to use good and blood, to sacrifice life and limb than to abandon her and his ship. As the convoy ship slowly drifted towards the coast, the fire below deck moved increasingly towards the stern, where the gunpowder room was also located. Towards midnight the fire reached some of the guns at the stern, which ignited themselves and fired volleys. At the same time, some grenades on board also ignited. An hour after midnight, after the ship had burned for five hours and Admiral Karpfanger, true to his oath, was still the last man on board, the fire reached the gunpowder room, which eventually exploded. The back of the ship, which was broken in the middle, flew into the air, the front lay on its side and began to sink. Debris rained down from a great height. The accident resulted in 65 deaths: 22 soldiers and 42 ships men, as well as Admiral Karpfanger were killed. His body was found floating in the water on an anchor line of an English ship in the harbor of Cadiz on October 11, 1683. On the picture below the Wappen von Hamburg (left) and the Leopoldus Primus (right) is displayed. Luxurious but notorious This kit is famous and notorious at the same time. The quality of all the components are superb and the features of this ship excellent. However when you look at the "building" aspect of this kit and the way the modeler is being "guided" by the help of the construction manual and the dozen drawings does has it's challenges. It's an old kit. developed in the late 70's and never updated as far as I can tell. Corel expects that the builder of this kit knows all the basic things to make a model ship and to craft all the items needed. Little or no step by step pictures are added with this kit. The drawings are of good quality but it shows only parts of the ship, not the complete process on how to actually build her. That means that a lot of questions will arise for the modeler. Perhaps that's why there are so few finished buildlogs on the internet. People strand a lot during the build of this giant, and it's developed a reputation of a hard to build ship. When a modeler decides to pick a new project and looks at the variety of ship kits and compare the prices of these kits, the Wappen von Hamburg is at the very top of the range. With the bad building reputation it has, a high purchase price and the abundant choice of other kits, it's lost her glance and popularity. I think this is a sad conclusion and hopefully with this buildlog I can inspire others to build this unique and magnificent ship. A picture below shows the inscription on one of the cast metal parts. This was cast in '78 by Movo! The drawings and instruction manual are shown below. Although the drawings are of high quality, only the end result of a product to craft is shown. Then the modeler should somewhat guess where the crafted item should go on the model because the drawings are not always clear on that part. The written text in the instruction manual isn't always helping either so I think that there is a lot to win by Corel if these instructions and drawings are updated and brought to standards of today. I'm sure this will benefit the sales and popularity of this kit. "Dutch Ebay" and plan A On the "Dutch Ebay" called marktplaats (translation is marketplace) a second hand kit of WvH was offered. I wasn't really looking for this particular kit, but it came up and somehow I was triggered. I guess my childhood memories and sentiment took over. I reached out to the seller and apparently the hull was already completely built. He showed me a few pictures and at the beginning I hesitated to go on with the purchase. I have this principle that I love to rescue kits from Ebay that otherwise been thrown away, however the kit should be in pristine condition, unbuilt and "untouched" so to say. It's just that I don't like to continue other men's work with respect to the previous builder, I just want to start from the beginning to have the full experience. Call me weird, I don't mind... So the hull was built and again with respect to the builder, it didn't fit my expectations....take a look. Below a few pictures of the way it was built with a lot of gaps and cracks. The kit was complete and everything was there. I was pretty honest to the seller, that it lost most of it's value due to the fact that the complete hull was already done. The owner almost gave it away due to the fact he inherited the kit and it was in his way. It took a lot of space in his house. So I decided to purchase the kit and had the idea to carefully demolish the hull, order new wood and simply start over! Hold that idea, it turned out a bit differently.... Arriving back home with the kit and the hull, (The Netherlands is a small country, so it was easy to drive to the seller and pick up the kit) I opened the box and inspected all the items inside. Beneath a few items I found some glue tubes which were almost empty. Epoxy glue, some UHU hard glue and the last one was CA glue.... Alarm bells went off inside my head! I could only think, "please don't let this hull being glued with this stuff"....boy was I in for a treat.....you probably are going to guess what's next? The first try to get one of the hull planks of the bulkheads resulted in a mess. The glue residue was glass hard and it was used all over in a very abundance of amount. I think the previous modeler must have thought that it should be glued together forever...I don't know but the carefully "take it apart" approach ended into a total demolish and destruction of the hull. I tried everything from using heat, chemicals like acetone, white spirit, hot water, glue remover etc. nothing worked! With pain in my heart I had no choice and had to throw away all the nice hardwood used for this ship. The bulkheads that appeared underneath the hull planks were poorly placed and faired wrong. Also the bulkheads were beyond repair due to all the glue residue and wrongly fairing. These need to be replaced as well... While closing the lid of the trashcan, I realized I also discarded plan A which lies with all the broken pieces of wood inside the trashcan. Woodglue! I would like to reach out to all my fellow modelers and advice to please use woodglue like the normal white woodglue. The stuff is made for this purpose and it's great. Sure, the people living in the USA also have an abundance variety of wood glue's and the easy access to yellow wood glue like Titebond. Both are great and more important easy to repair with afterwards. By applying heat, the white and yellow wood glue becomes soft and so you can easily make repairs or redo parts afterwards. Normal white wood glue dries fast, has great strength and dries up transparent and glue residue can easily removed with a damp cloth. The brand I use is a local brand called Bison. After it had dried it holds some of flexibility, so when humidity let the wood of your model shrink or expand a little bit, the glue can cope with this and doesn't crack or let the wood crack. CA glue can help, sure. I use it as a liquid nail on certain difficult spots, so to say but very sparingly. Sure, you can't glue metal parts with wood glue and perhaps an epoxy glue or CA gel would be best, not for wood on wood. Hell, I even use diluted wood glue with a syringe to apply it to knots on my rigging work. Works great! I'm just saying, I love my white wood glue. Out of frustration I forgot to take pictures of the before stage of the hull....I'm sorry! After the demolishment, I was just left with al lot of parts... Plan B: Because I left Plan A, it's time for plan B. I had this idea to remodel all the bulkheads from the plans and use new plywood for the bulkheads. Then I would replace the lost Walnut with swiss pear! Sounds like a plan to me and so I took a short trip to my nearest modeling shop and returned with all the needed plywood and some pear veneer. I redrew all the bulkheads on paper. Apparently I was out of white paper and "borrowed" some pink and green paper from my kids stash. They wouldn't mind I guess....and again they were in bed sleeping at the time. The cutting list I made a list of all the missing strips of walnut to replace them with pearwood. On my Proxxon tablesaw I cut all the needed strips. It took me a while to work trough the entire list. Let's say I made a lot of dust and the Admiral wisely said to do this outdoors instead in the living room. I guess I didn't need to push the limits here. Call me a wimp! While working out this plan I had more and more doubts. I did not completely agree with the shape of the bulkheads and the lines of the ship. Besides I saw all kind of points for improvement to make the ship look “more Dutch”. In addition, replicating all the gun ports as Corel had designed would be a hell of a job with my limited resources. I eventually decided to throw this plan in the proverbial trash bin as well, which was already starting to become quite full... Because I was momentarily without inspiration, I decided to put the project on ice and think things over. Eventually I decided to completely left the project and started focusing on something else.... The rise and development of plan C While working on my previous project (Xebec 1750) and I was already in the preparations (research) of a new project, the Wappen von Hamburg kept nagging at my head. Somehow I couldn't quite let go of the project and started searching the internet for some inspiration. During this research I came across a booklet by Wolfgang Quinger about the Wappen von Hamburg and ordered it out of curiosity. After a few days the doorbell rang and I received the booklet. It is an old book, pages completely yellowed and fragile, it even smells old and according to the publisher it was published in the former GDR, East Germany, in the early 1980s. It was of course written in German and to my knowledge has not been published in any other language. In addition to a wealth of information, the booklet contained a completely different treasure, namely two large drawings printed on both sides with, yes, a complete plan of all the frames on a scale of 1:75. Quinger himself describes in his book that he has consulted many sources, mentions and praises them all. Some well known sources are N. Witsen, C. van Ijck, R. Hoeckel, H. Winter, W. Mondfeld, F.H. Chapman, R.C. Anderson. He himself says that the reconstructions of some well-known ships liken the Friedrich W. Zu Pferde, Derfflinger and Roter Löwe, among others, designed by Hoeckel quickly gained name and fame, but that the very thorough research of Mr. Friedrich Jorbergs led to more than 80 adjustments to Hoeckel's earlier reconstructions. One of these adjustments was that Hoeckel used the Amsterdam dimensions (Amsterdam foot) and Jorbergs the Rotterdam dimensions (Rotterdam foot). Later in this report I will explain why this is important and is essential for the lines plan and proportions of the ship! Quinger made a new reconstruction of the lines plan based on all the information he gathered. With his plan he explains that he had made a compromise between Hoeckel's plan based on Amsterdam dimensions and Witsen's. It is a shape that could well have suited this ship and is therefore more truthful than the shape that Corel has chosen for the WvH. The more I immersed myself in the design, the more it started to appeal to me. Slowly a new plan formed in my head….Plan C! Plan C After extensively studying the frame plan and the rest of the drawings, I decided to use parts from the Corel kit on the hull shape of Quinger. The advantage for me is that Quinger's design fits more with all the points that I would have liked to adjust from the kit. It solves many questions and puzzles for me, but it also brings completely new challenges for me. Quinger's drawings and therefore also the plans are on a scale of 1:75 and the Corel kit is 1:50. This means that I have to convert the drawings to a different scale and then completely scratchbuild all the frames. All things I've never done before. My interest in seeking out the unknown and taking on the challenge grew more and more... I can't wait. In short, this means the following work: - Increase the frame plan from 1:75 to 1:50 - Reconstruct keel plate, keel, transom, decks, guns and bow according to Quinger's plan; - Use a different design for gun ports and bulwarks. - Change wood from Walnut to Pear wood - Cutting all hull planks, deck planks, deck beams, wall planks, knees, gunwales, arrangements, carriages, gun port lids, etc to size. - Underwater ship hull planking in a “Dutch” manner - Ornaments and decorations partly according to Corel with additions from myself; - Rigging and sails according to Quinger's plan - Flags according to Corel My overall conclusion so far is that a lot has ended up in the trashcan.... Chapter 1 - plan of scale 1:75 expand to 1:50 Due to the fragility of the books plans, I copied the plan of the lines of the hull by using plain A4 paper and a pencil. To enlarge the plan to the desired 1:50 scale, I need a bigger piece of paper. In this case, A3 format will suffice. Clamping is easy by securing the corners of the paper with tape. I made sure the sides of the paper are parallel to the lines on my cutting mat. This will help against the paper from sliding all over the place and I can use the grid of the mat to use for my horizontal and vertical lines. Having a professional drawing desk with the right equipment will make the job much easier. However I have to do it with a more primitive solution. I begin with drawing the grid on paper. Then place the dots on the paper where the lines of the plan crosses the grid. Eventually I connected the dots drawing the lines by hand. The more accurate I am in this stage, the less corrections I have to do on the actual bulkheads when fairing in a later stadium of the build. I start with the view on the bow, which is the right part from the middle. The left is the stern view. Both drawings next to each other. 1:75 on the left, the 1:50 on the right! Chapter 2 - the stern drawing Quinger made a nice drawing of the stern of the ship. I decided to copy that and to learn and experience the difference between Quinger's and Corel's design. On my computer I played around with some colors and this will give me an idea how the stern fully painted would look. It's a draft and I probably will change some things, but it just gives me an impression. Nothing more, nothing less. And that's it for the introduction and first few babysteps into a new project. I hope you will like this new endeavour of mine and hopefully you will follow me along. It's not that I aim for 100% historical accuracy, but I would like to build the ship the way I like it. I would really appreciate that due to the fact I'm in uncharted territory and can use all the help I can get to finish this project. Until the next update, see yah around, Peter
- 30 replies
-
- 18
-

-

-

-
- Corel
- wappen von hamburg
- (and 1 more)
-
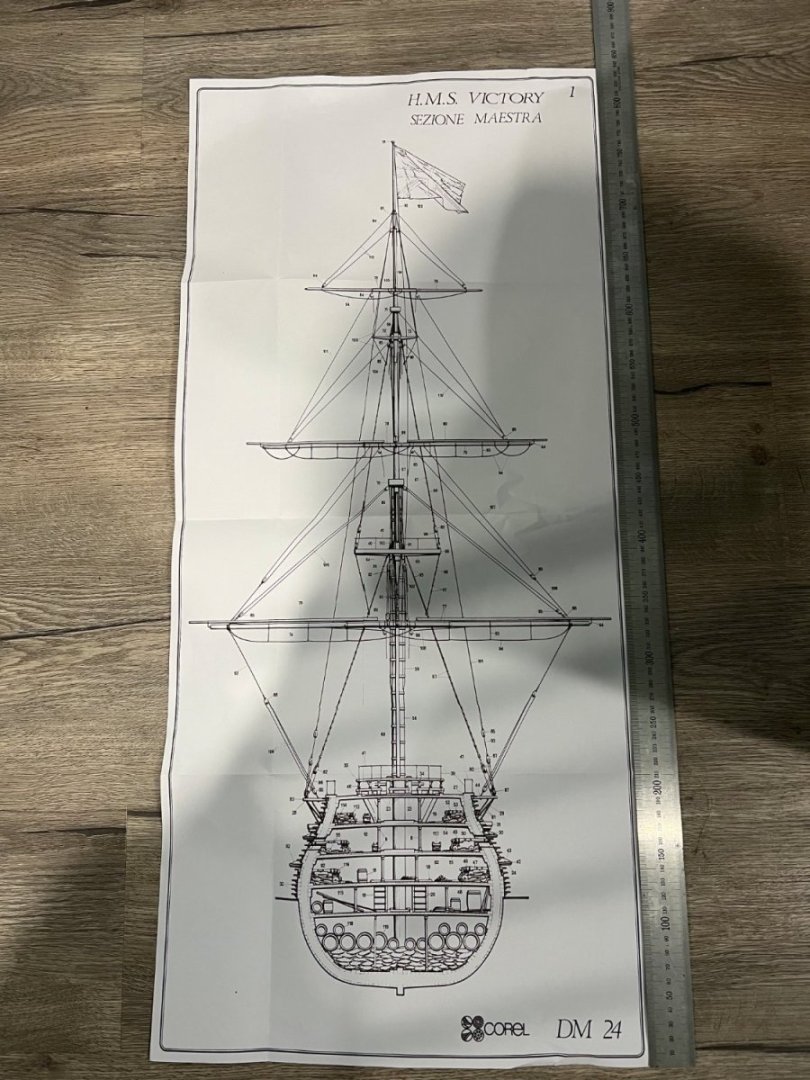
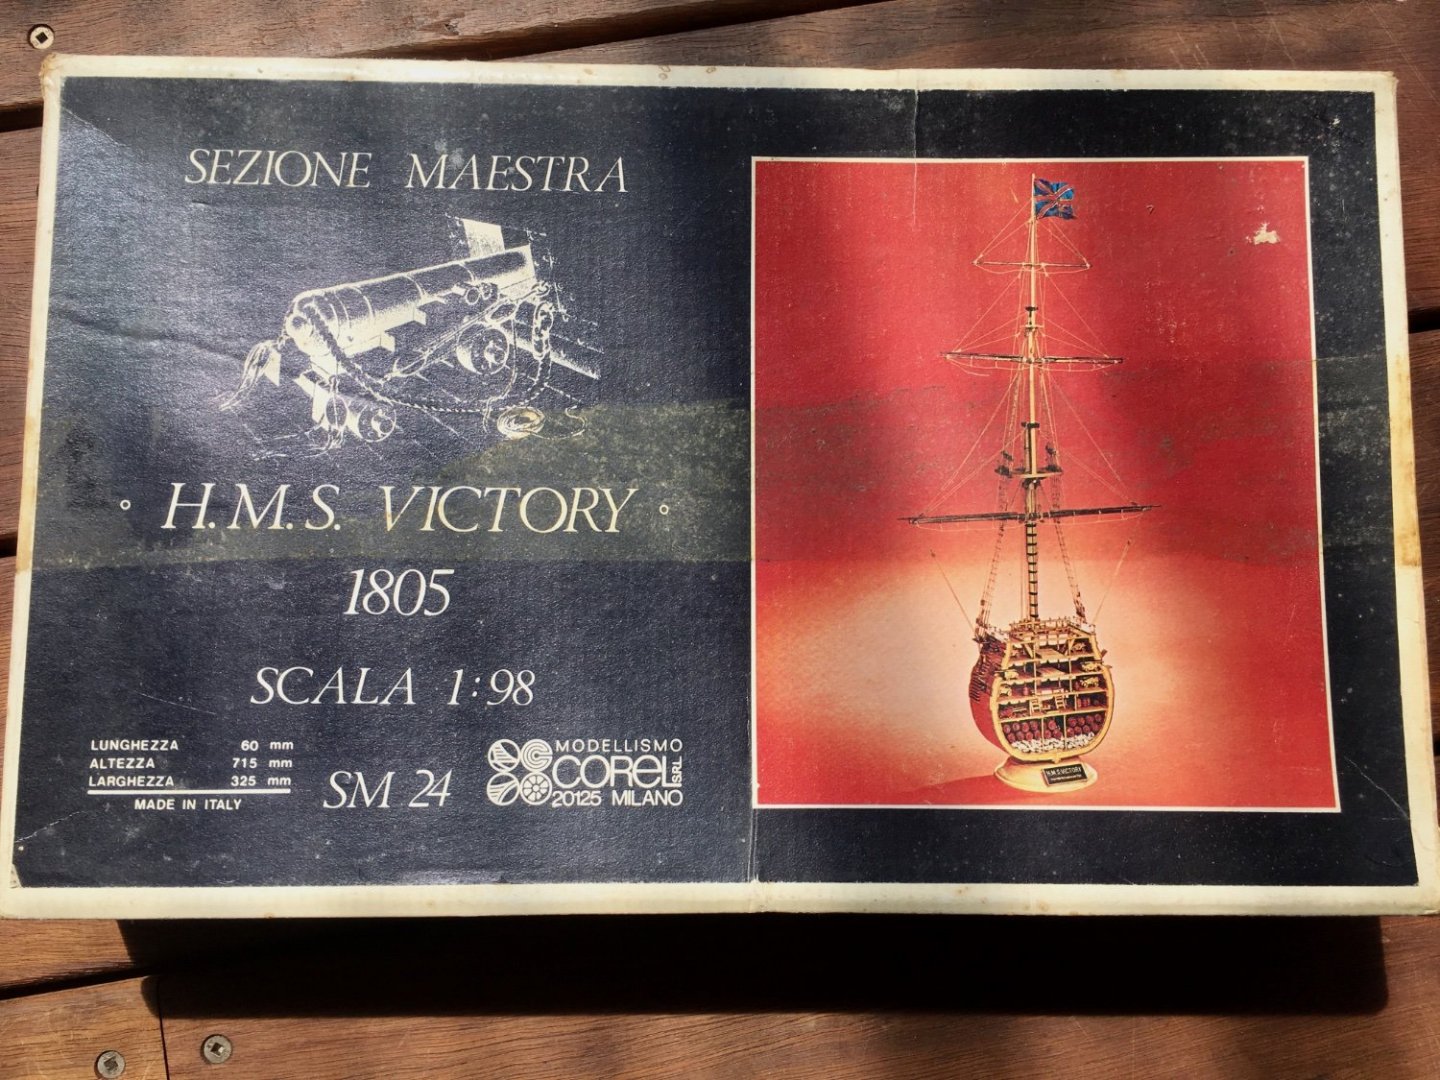
 After a longtime out of the hobby I thought I'd ease myself back in by doing something simple so I picked the Corel Victory cross section 😎🤣 So obligatory pictures of the box , full sized plan and references.
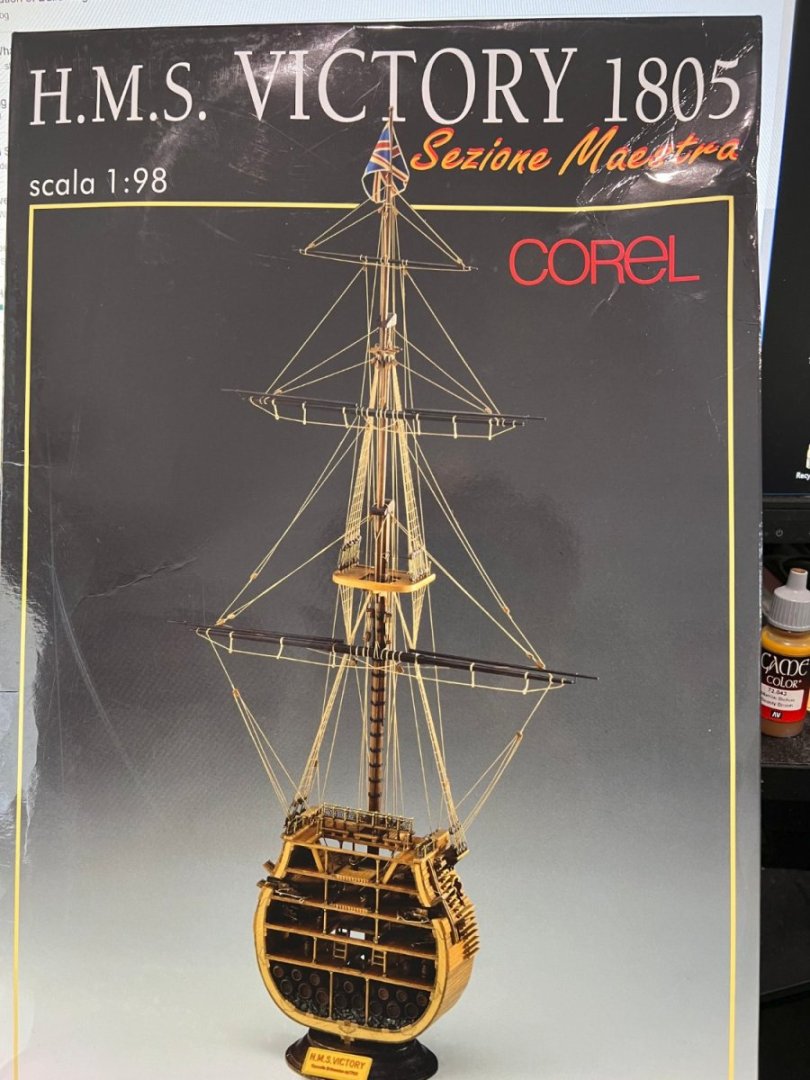

- 25 replies
-
- 4
-
-
- Victory
- Cross-Section
- (and 1 more)
-
 Greetings to all. This will be my 1st Build Log but have been a long time lurker. My history of ship building includes Constructo HMS Grimsby, Constructo Pandora, and last with my skills sharpened Panart San Felipe. I'm not in much of a hurry when building these but more importantly, always finish what I've started.
 -
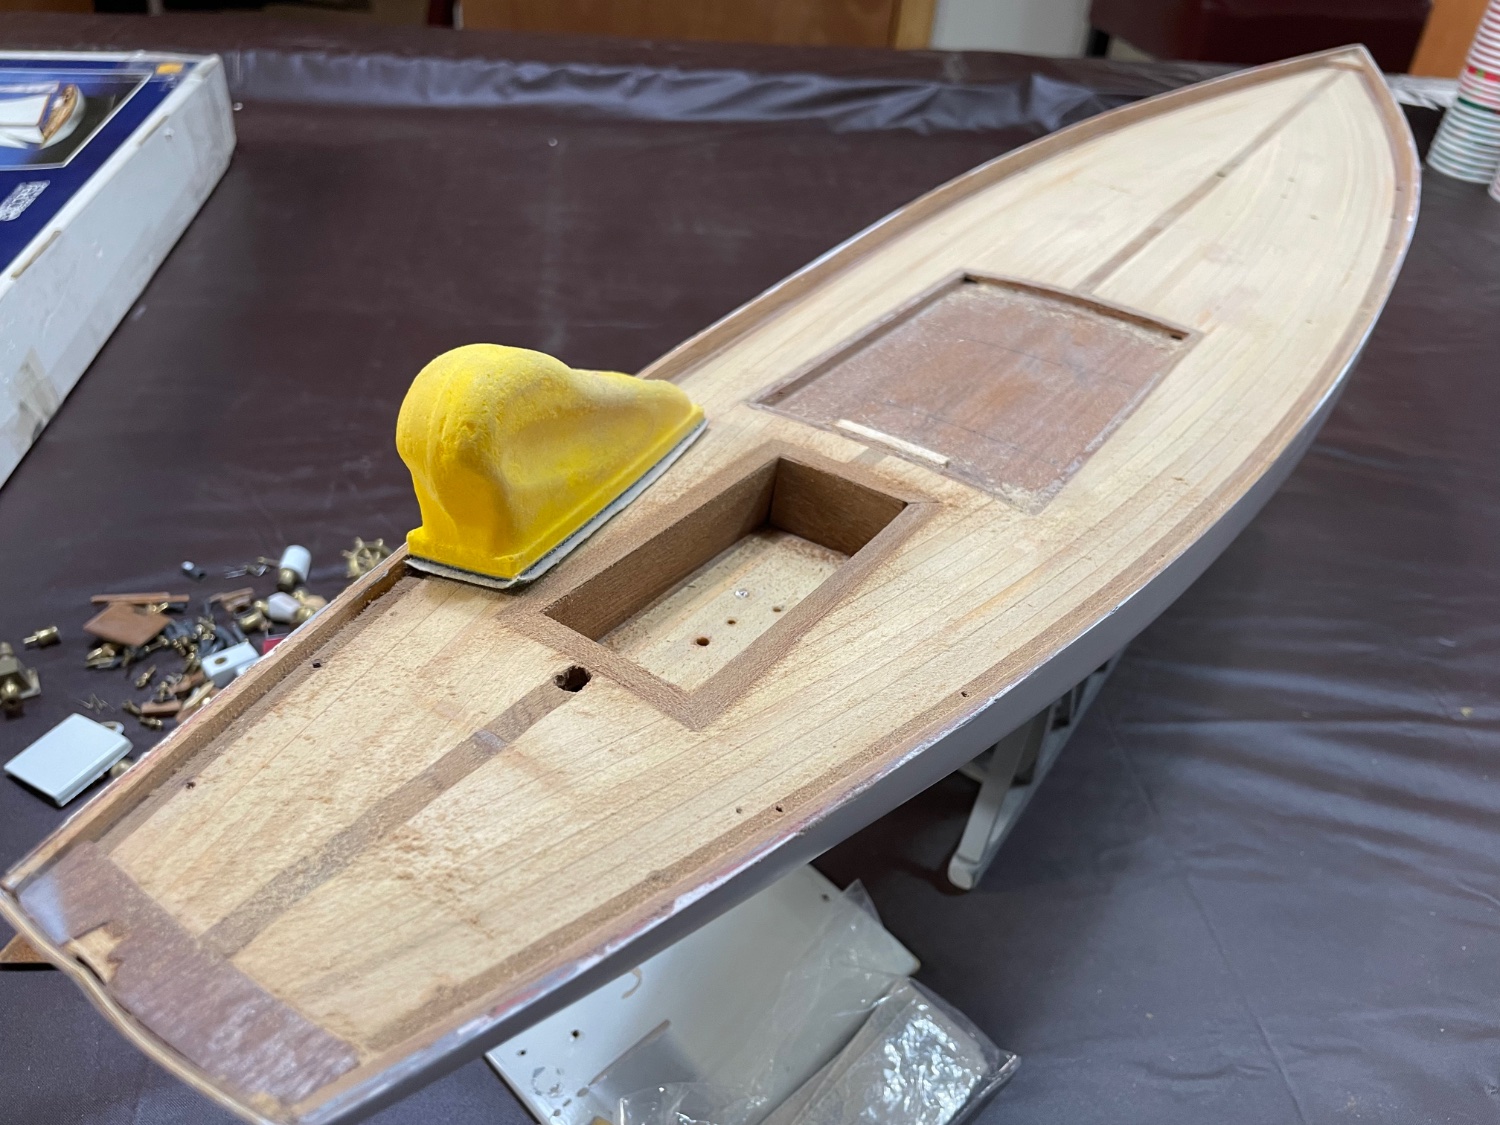
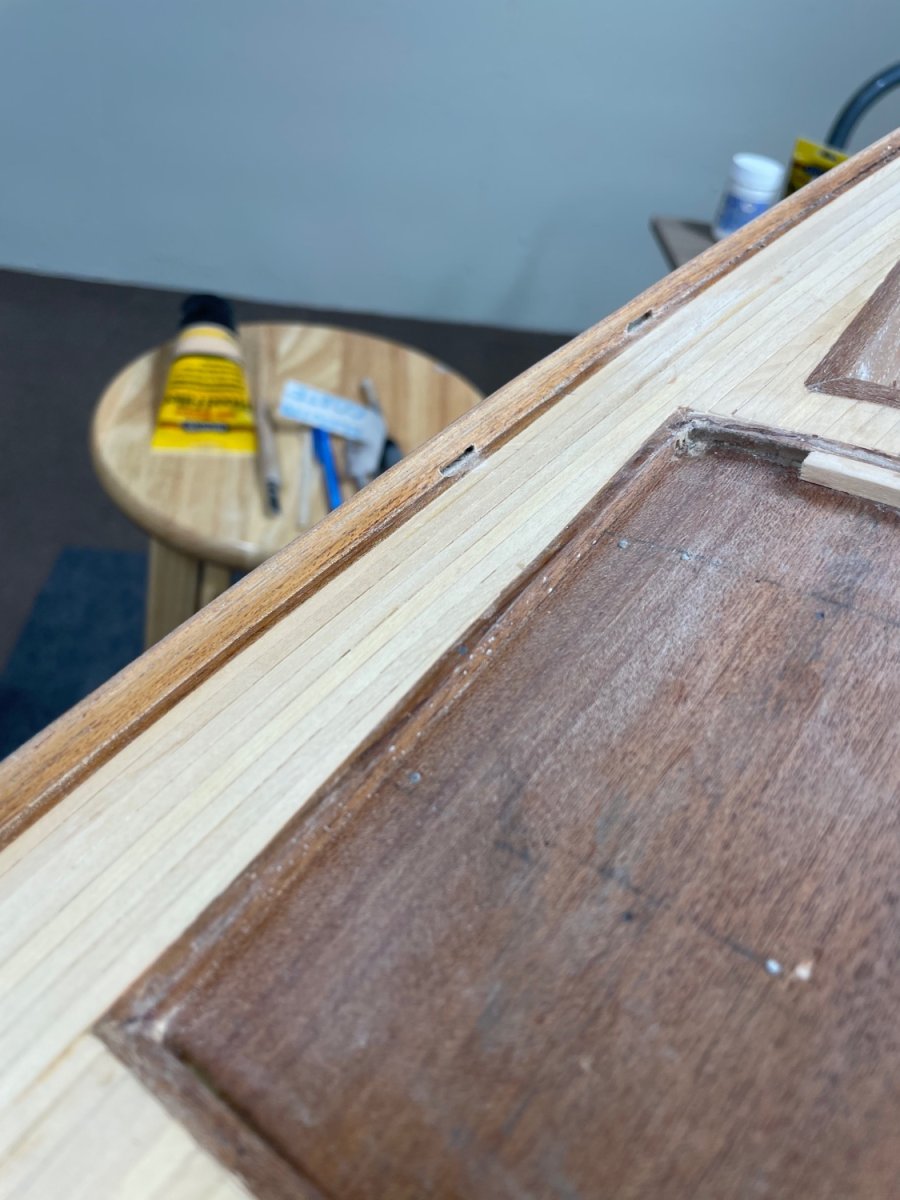
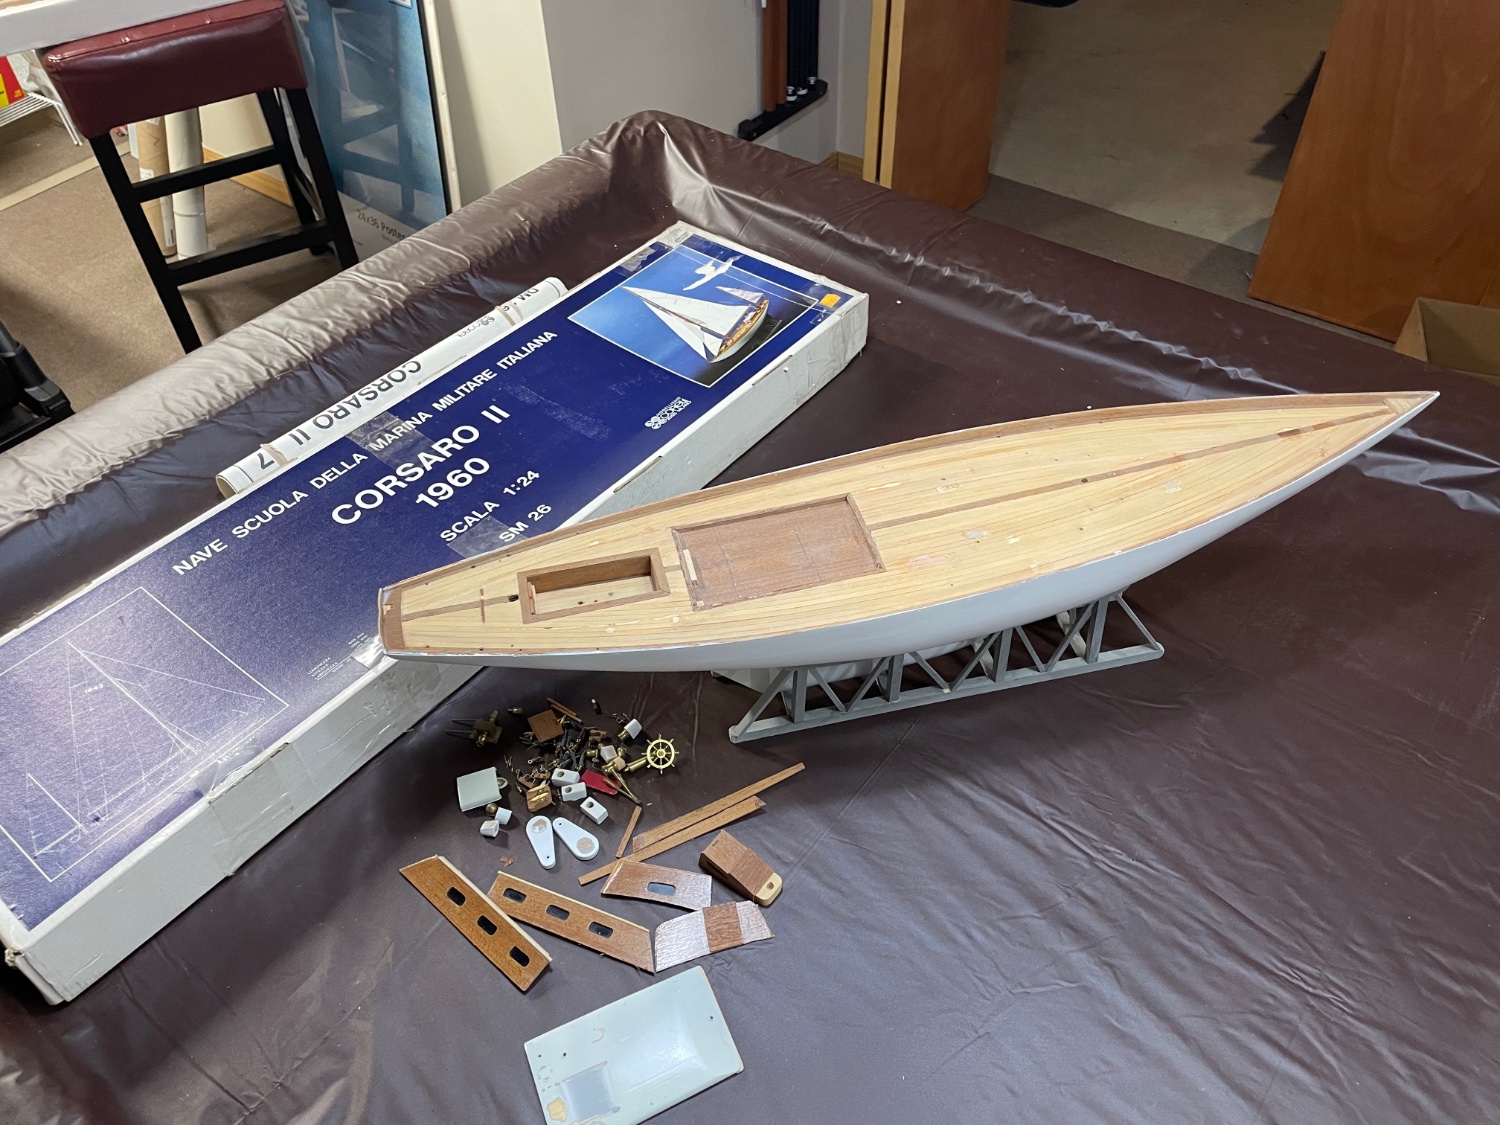
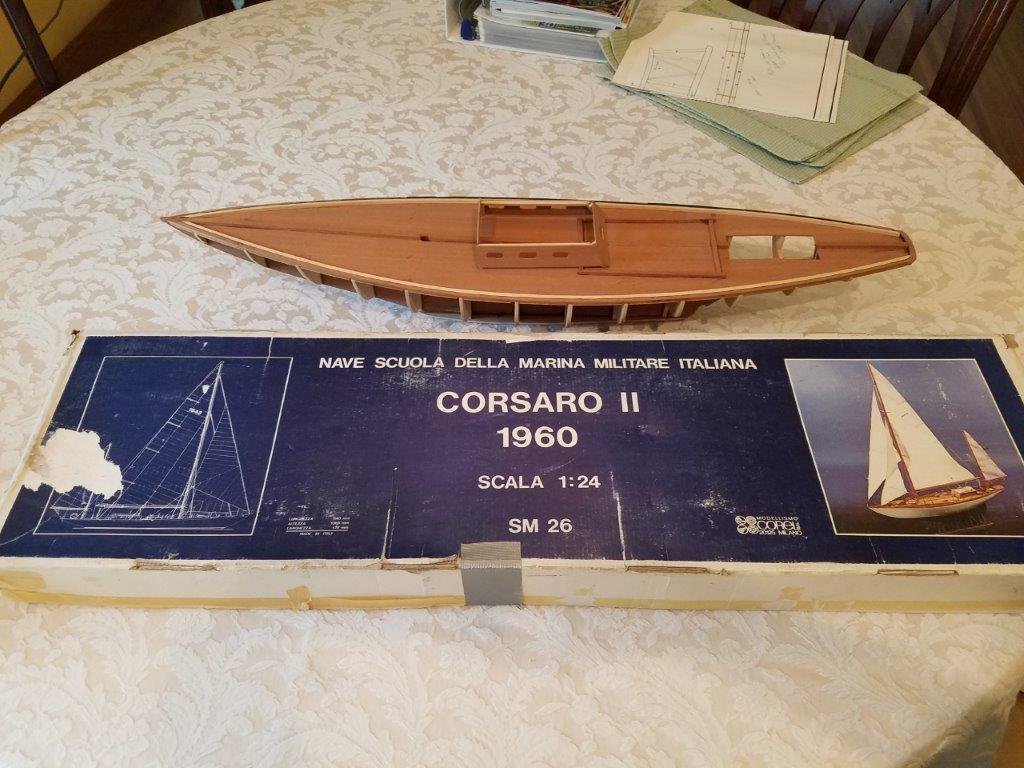
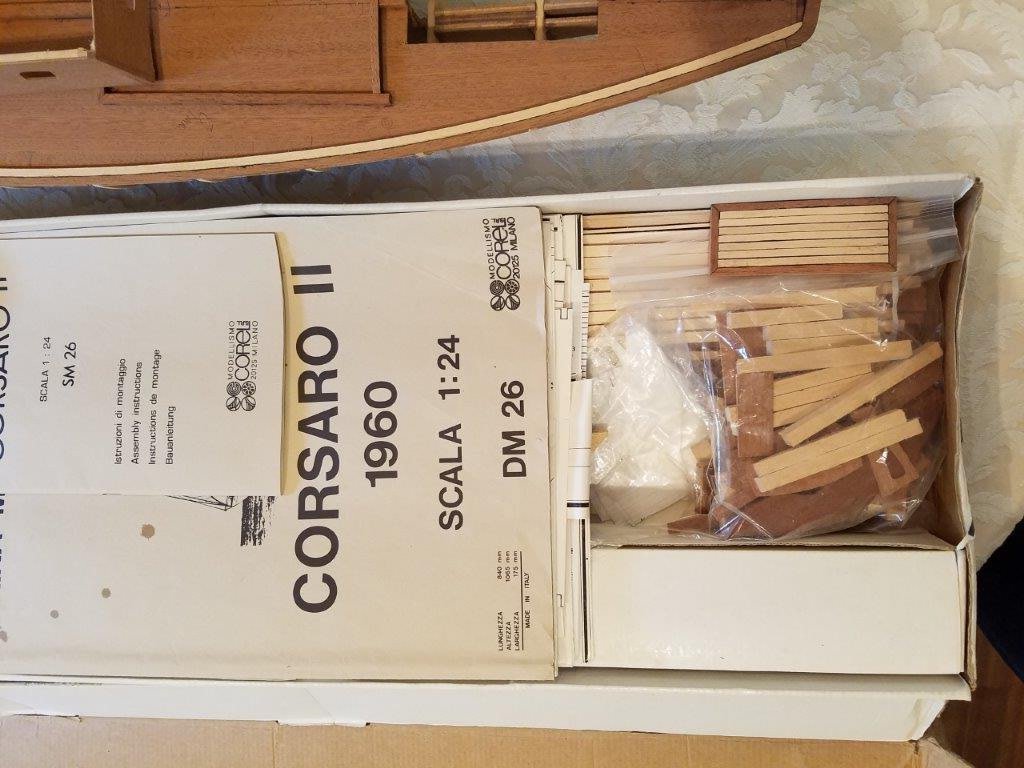
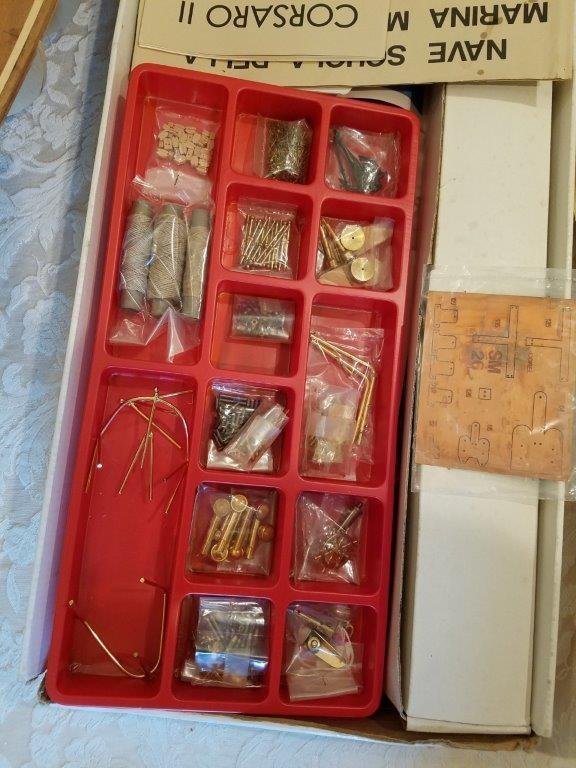
 The Corel Corsaro II is was an adoption from a fellow modeler, who decided to offer it for someone to finish it. So I adopted her with the anticipation of finishing her and hopefully turn her into a grand lady of the sea. Stay tuned for periodic updates. I'm finishing up on the USS Missouri adoption and will make the Corsaro my next project. I have a great starting point here to finish her up. Most orphans I adopt are not nearly of this quality, I usually have to rip it apart and start over, but this is from a master modeler, so I expected no less.

- 42 replies
-
- 9
-
-
- Corsaro II
- Corel
- (and 1 more)
-
 I'm not so sure on how to start the build log. If anyone has any instructions, please let me know. the build logs I've seen so far are for the beginning of the model. I have completed the beginning and would like to continue on.
 -
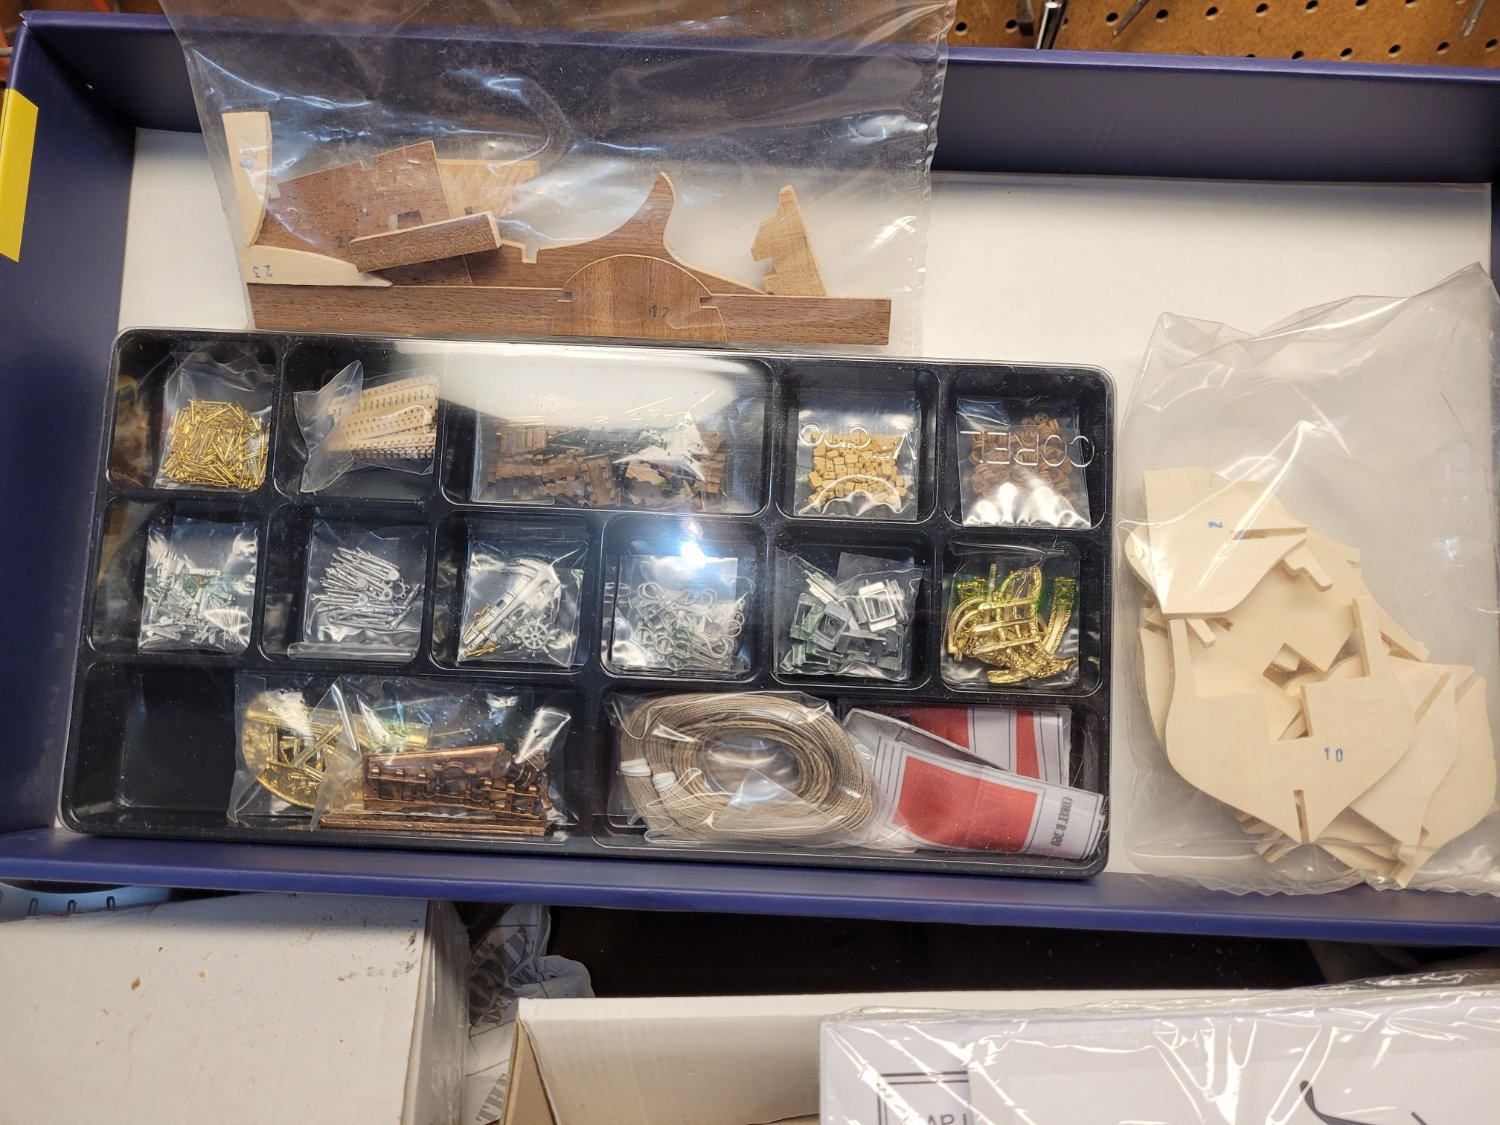
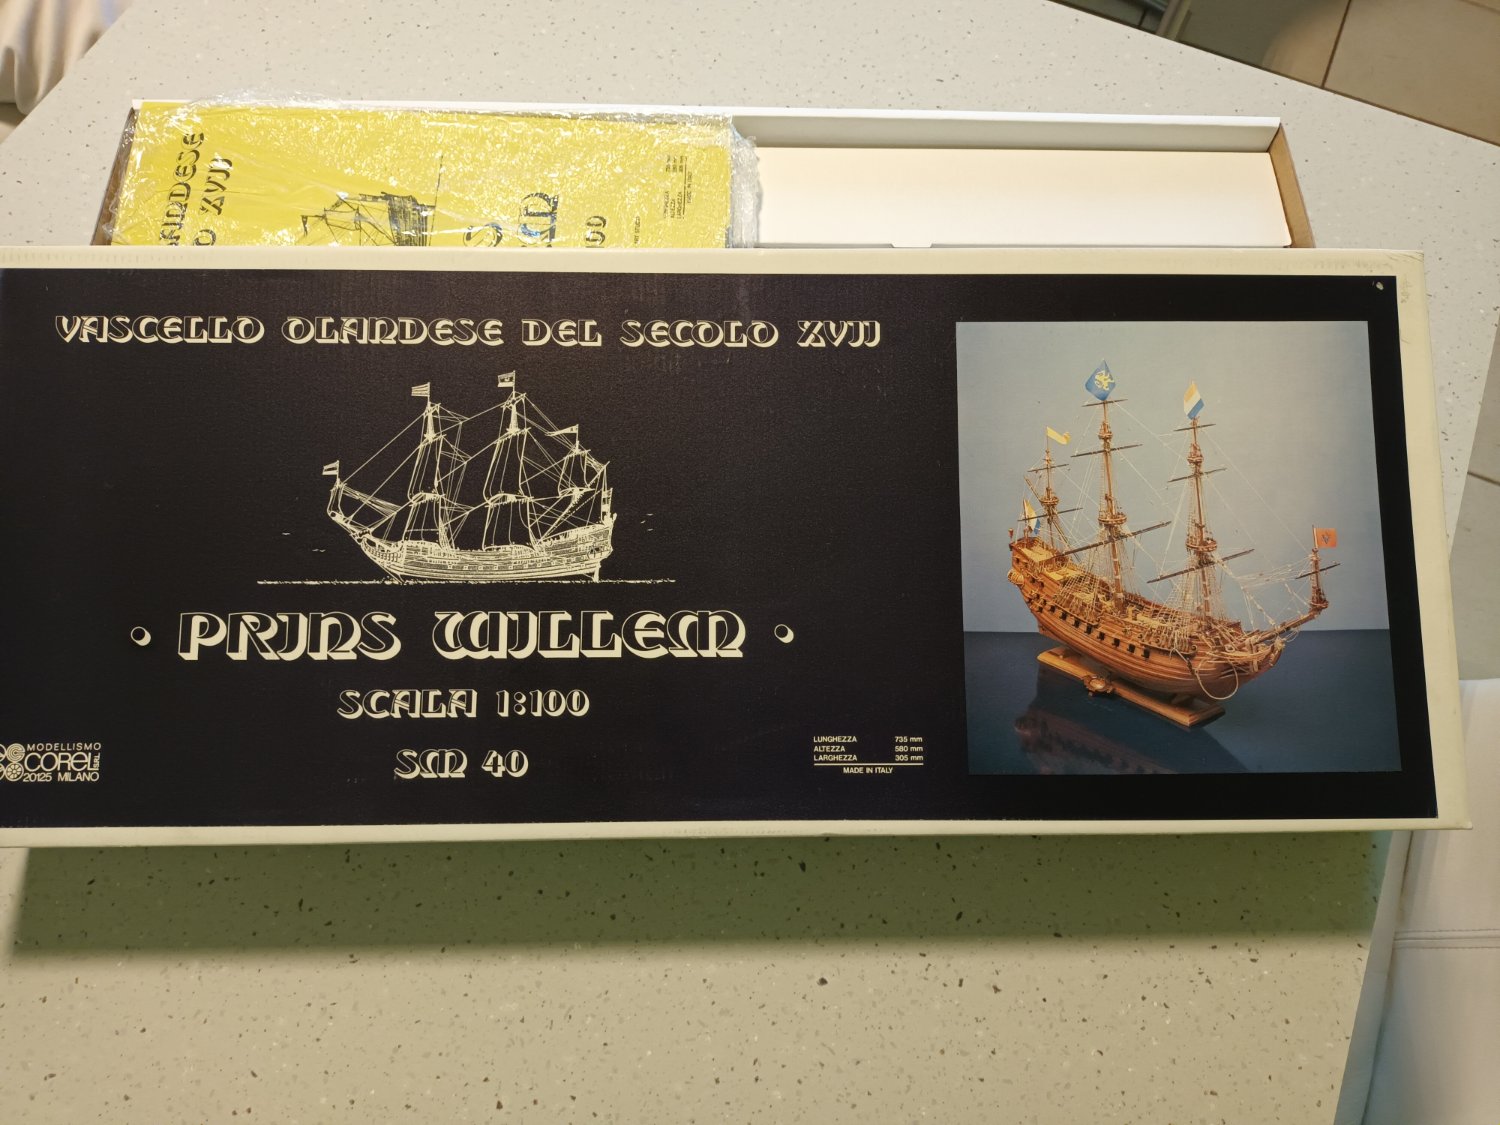
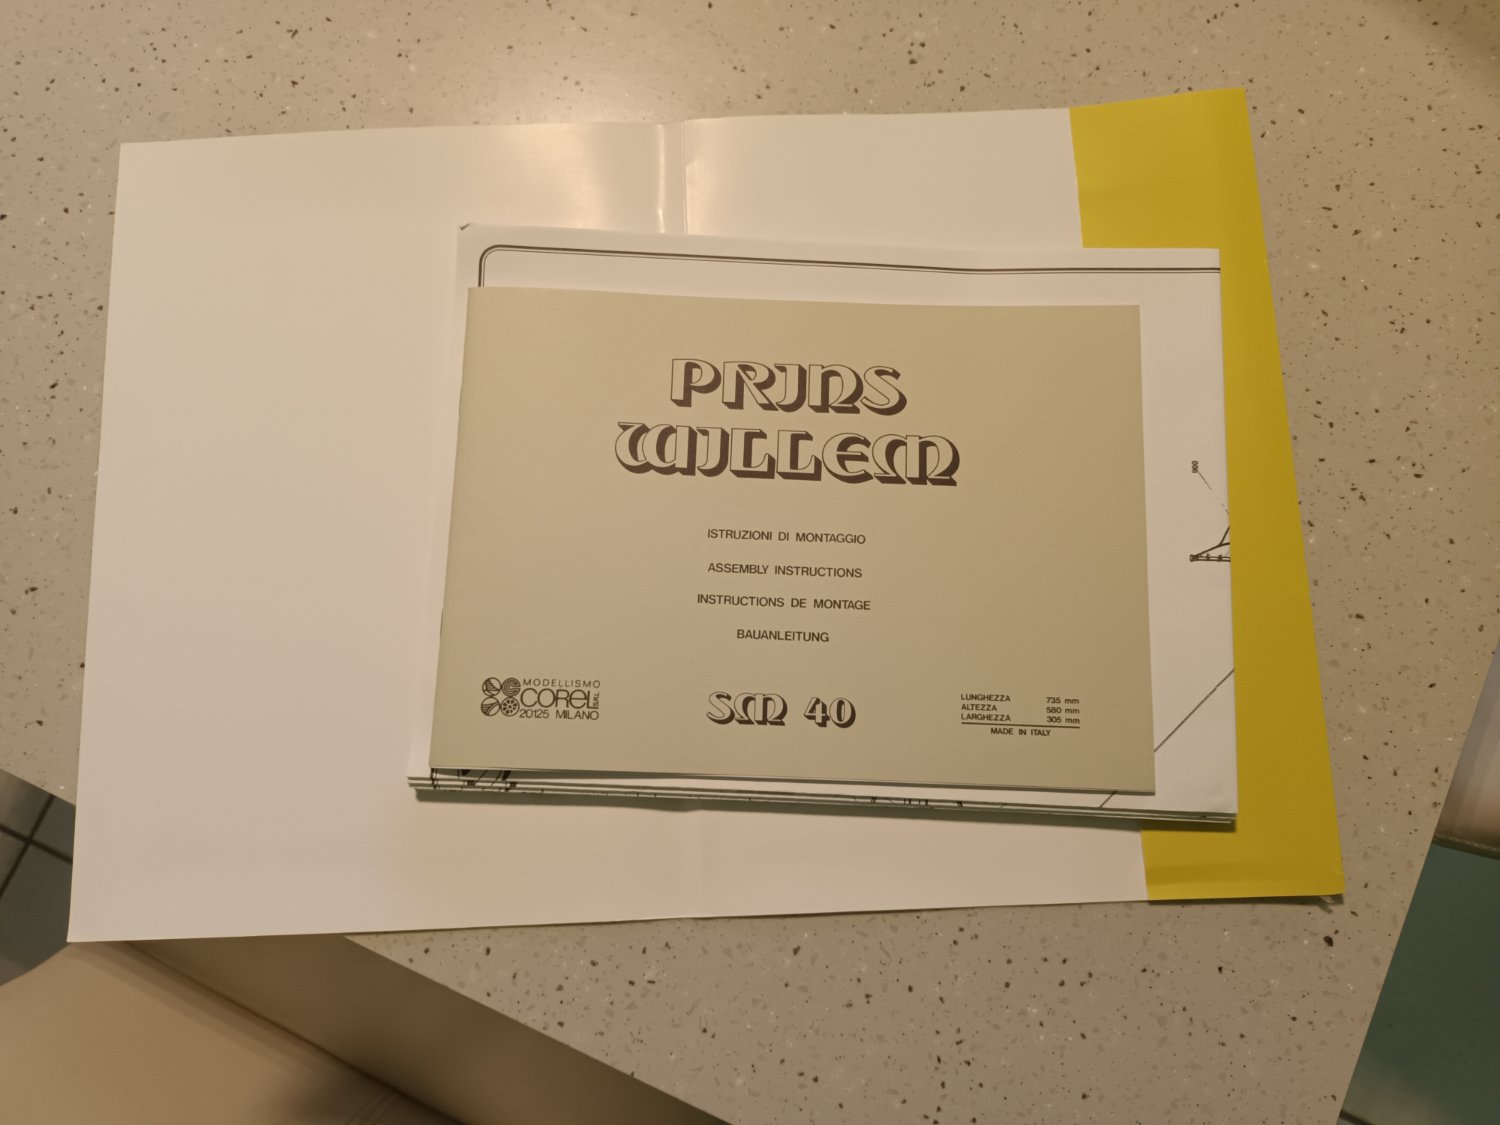
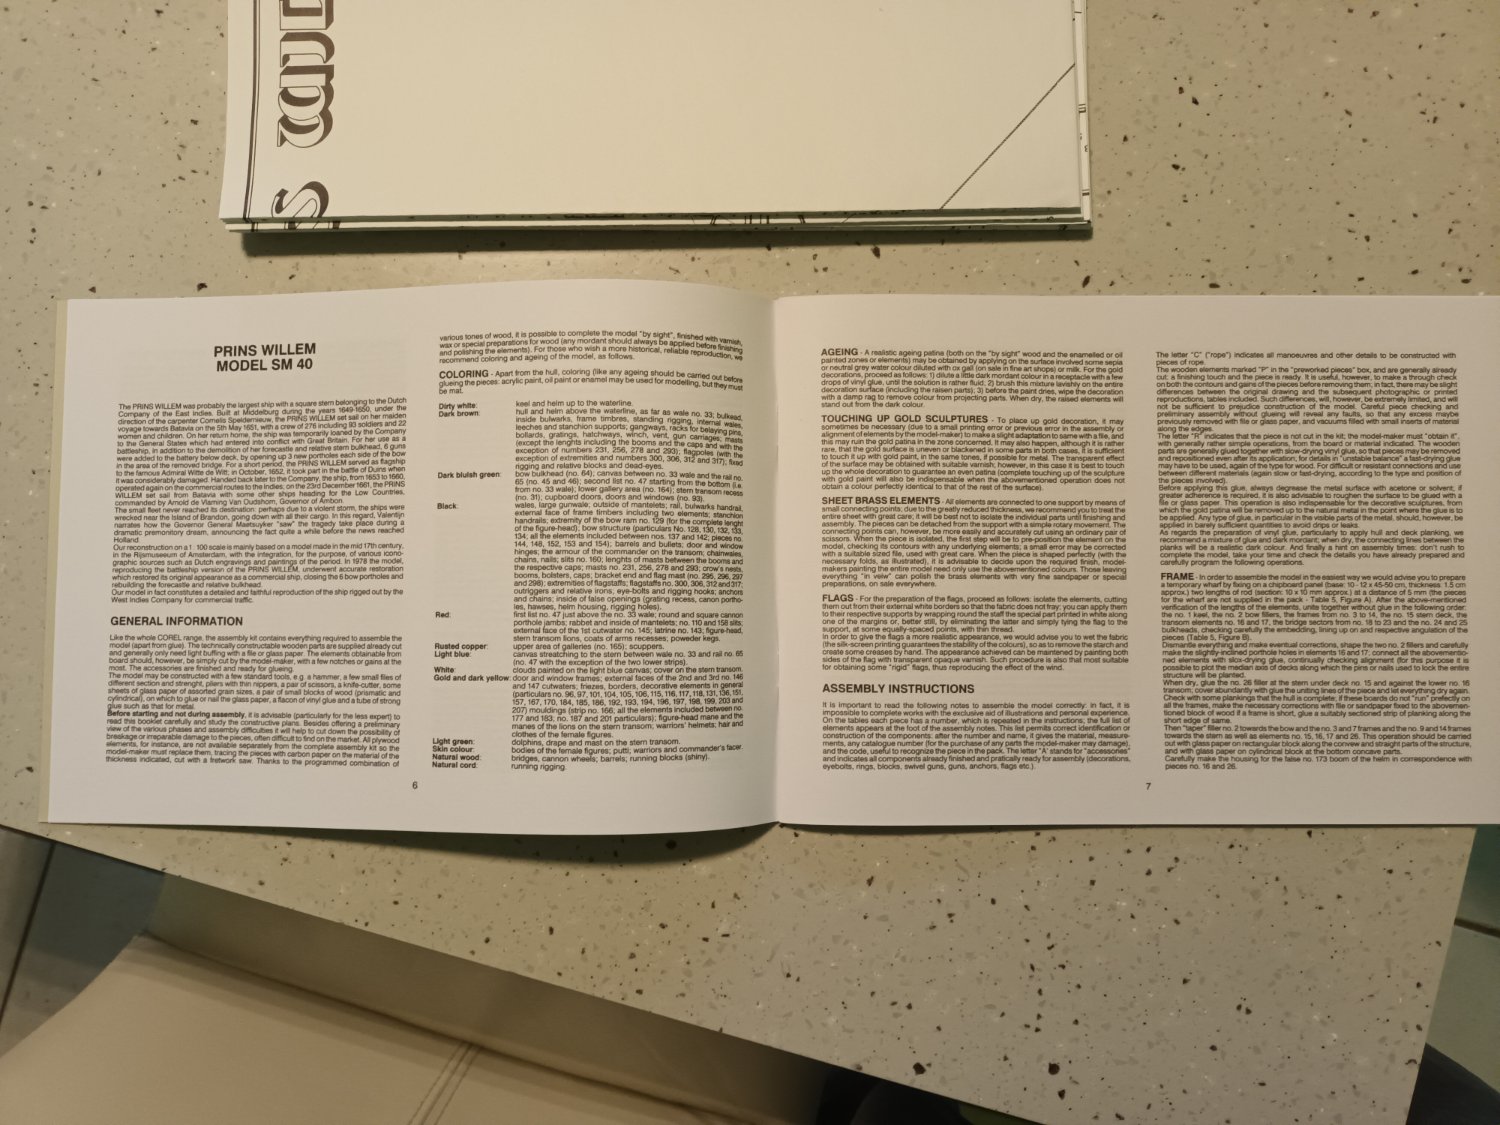
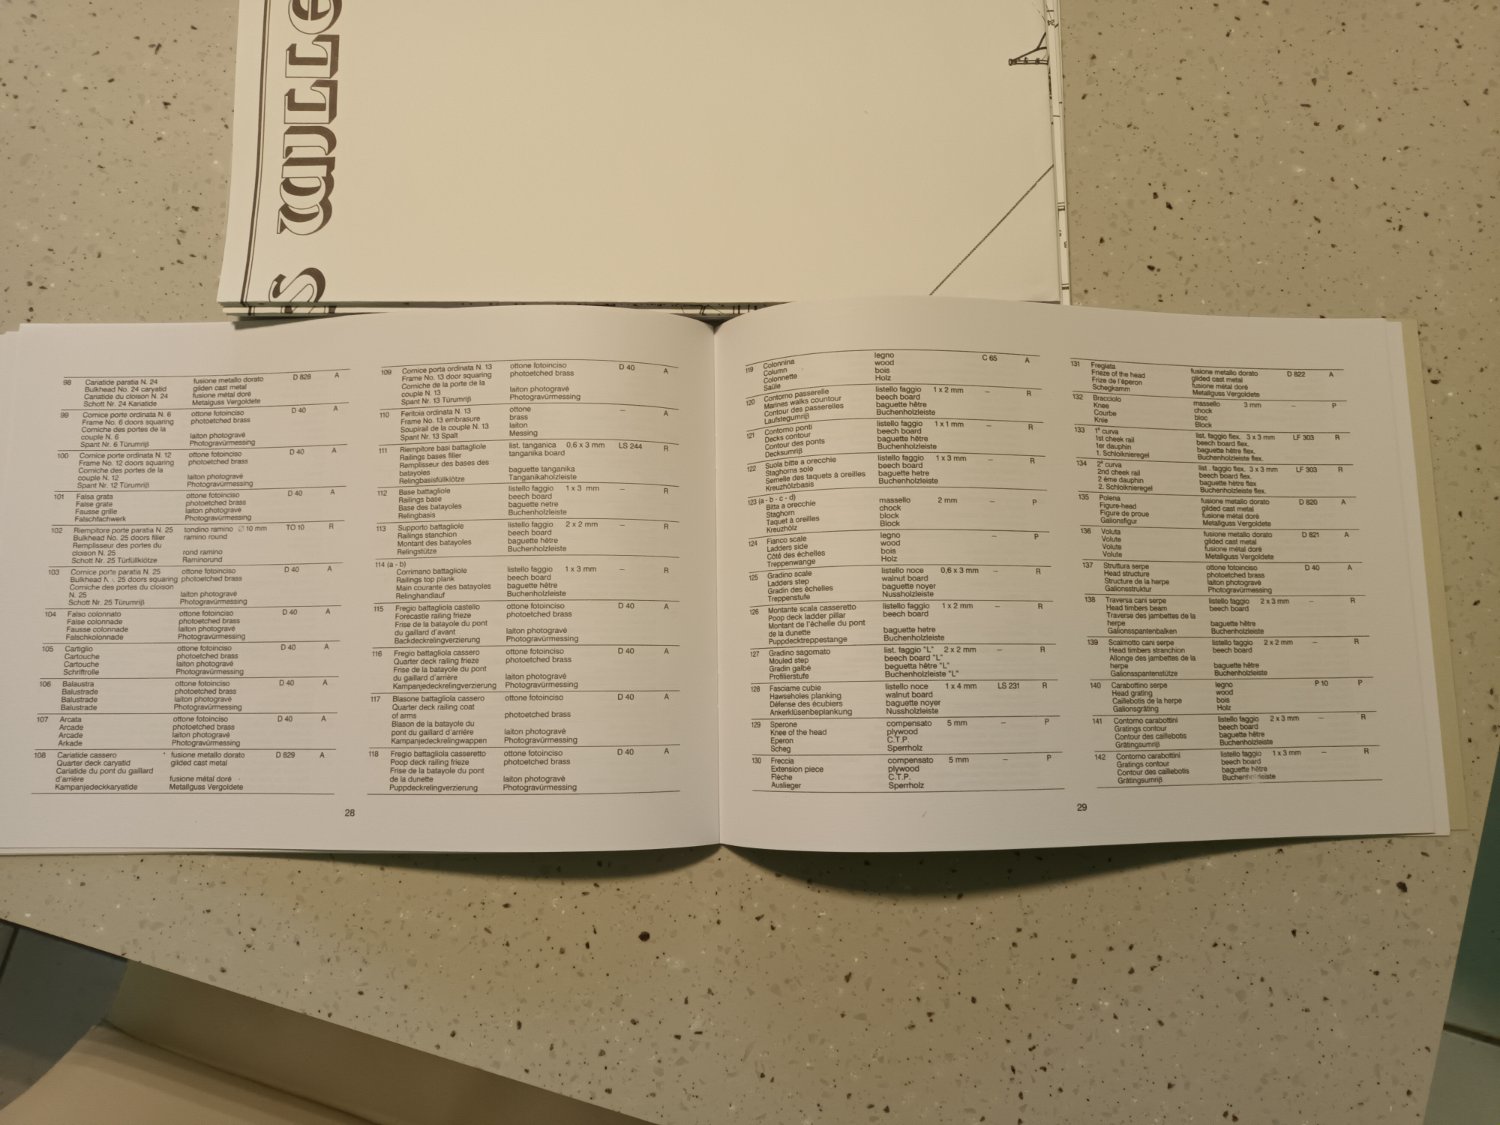
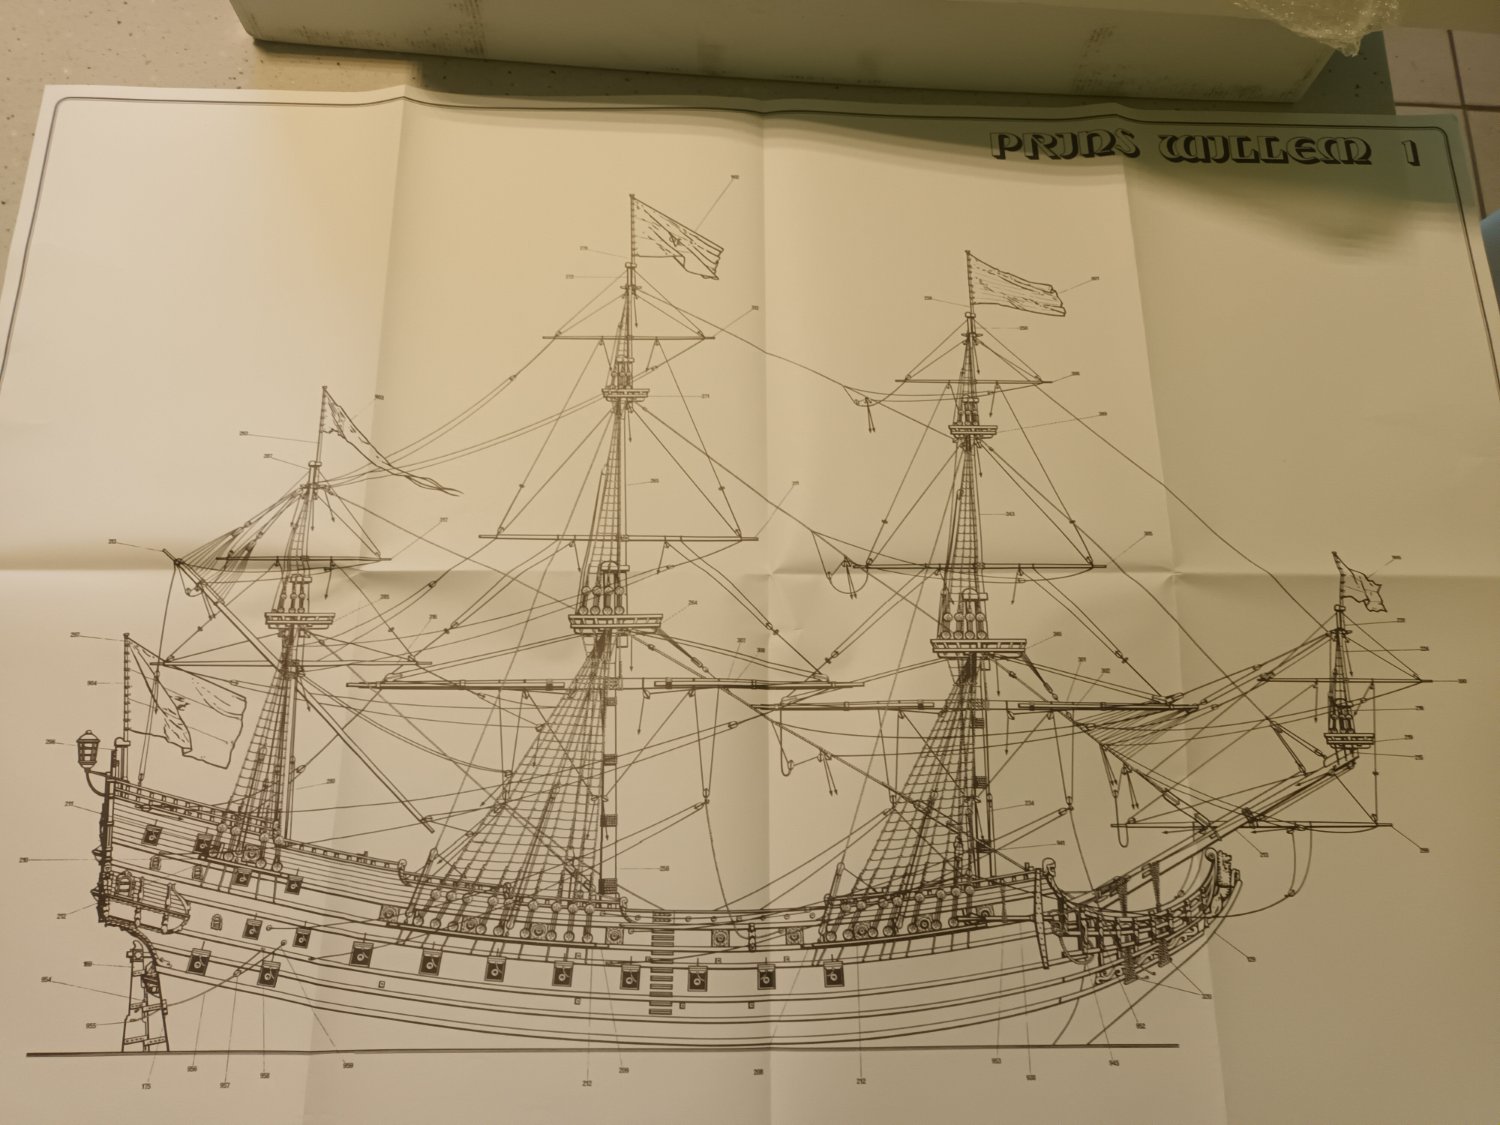
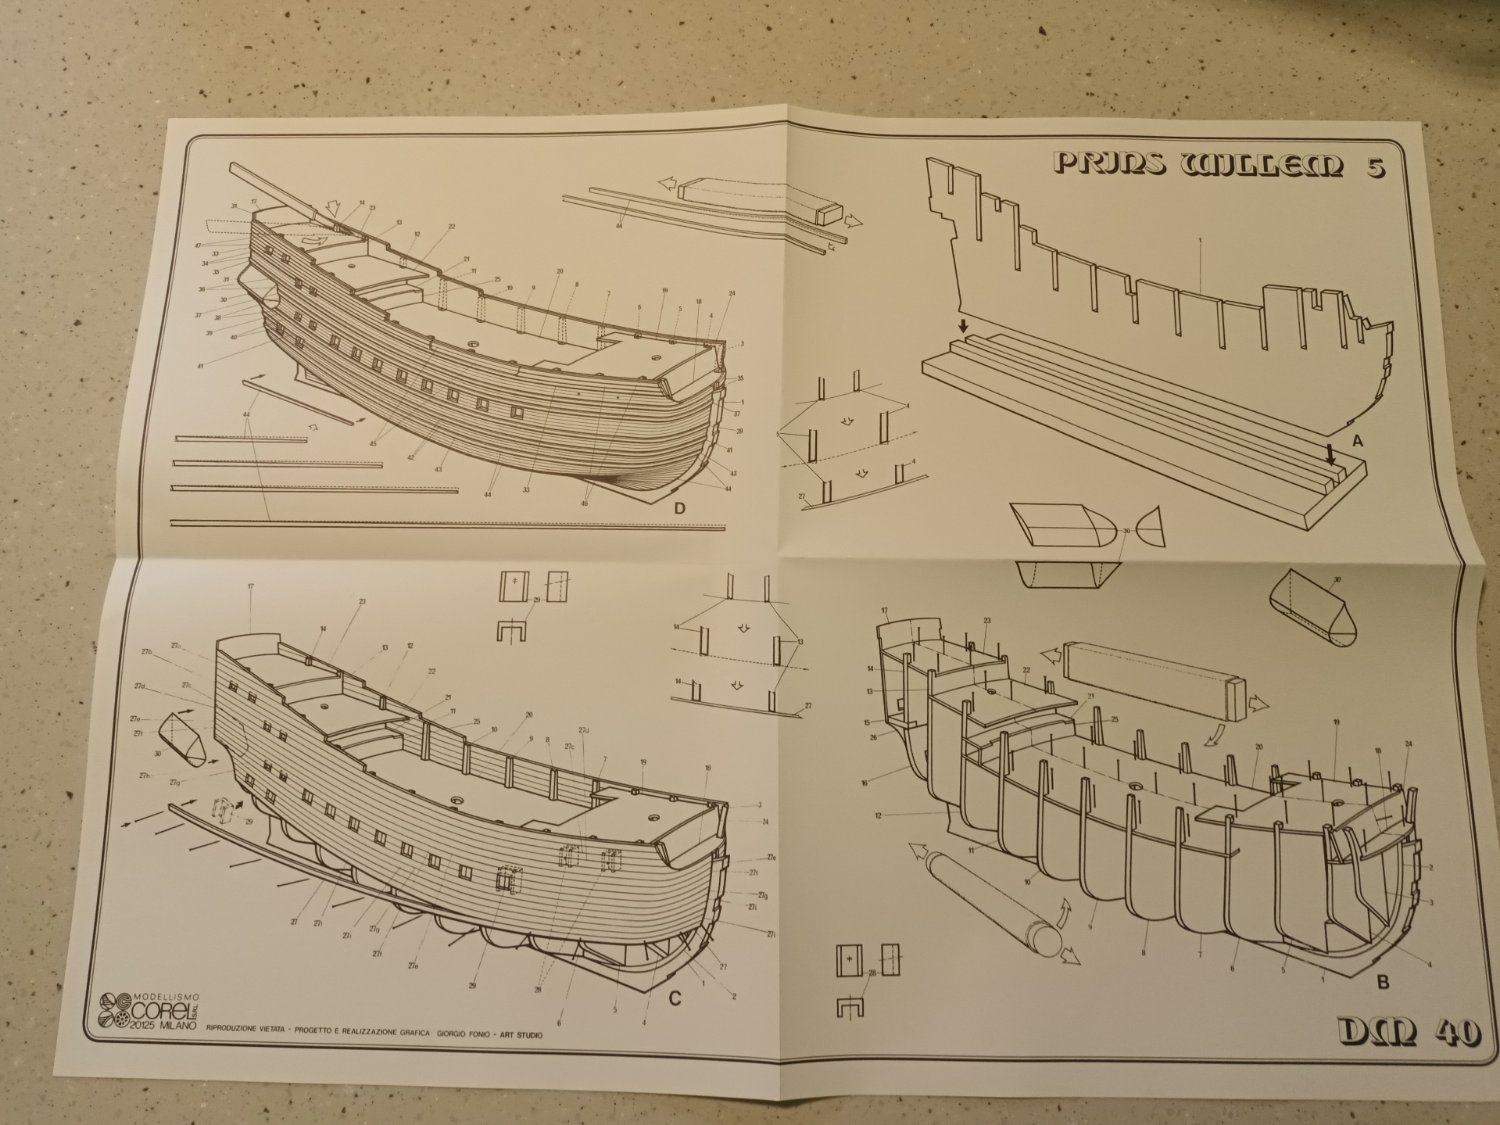
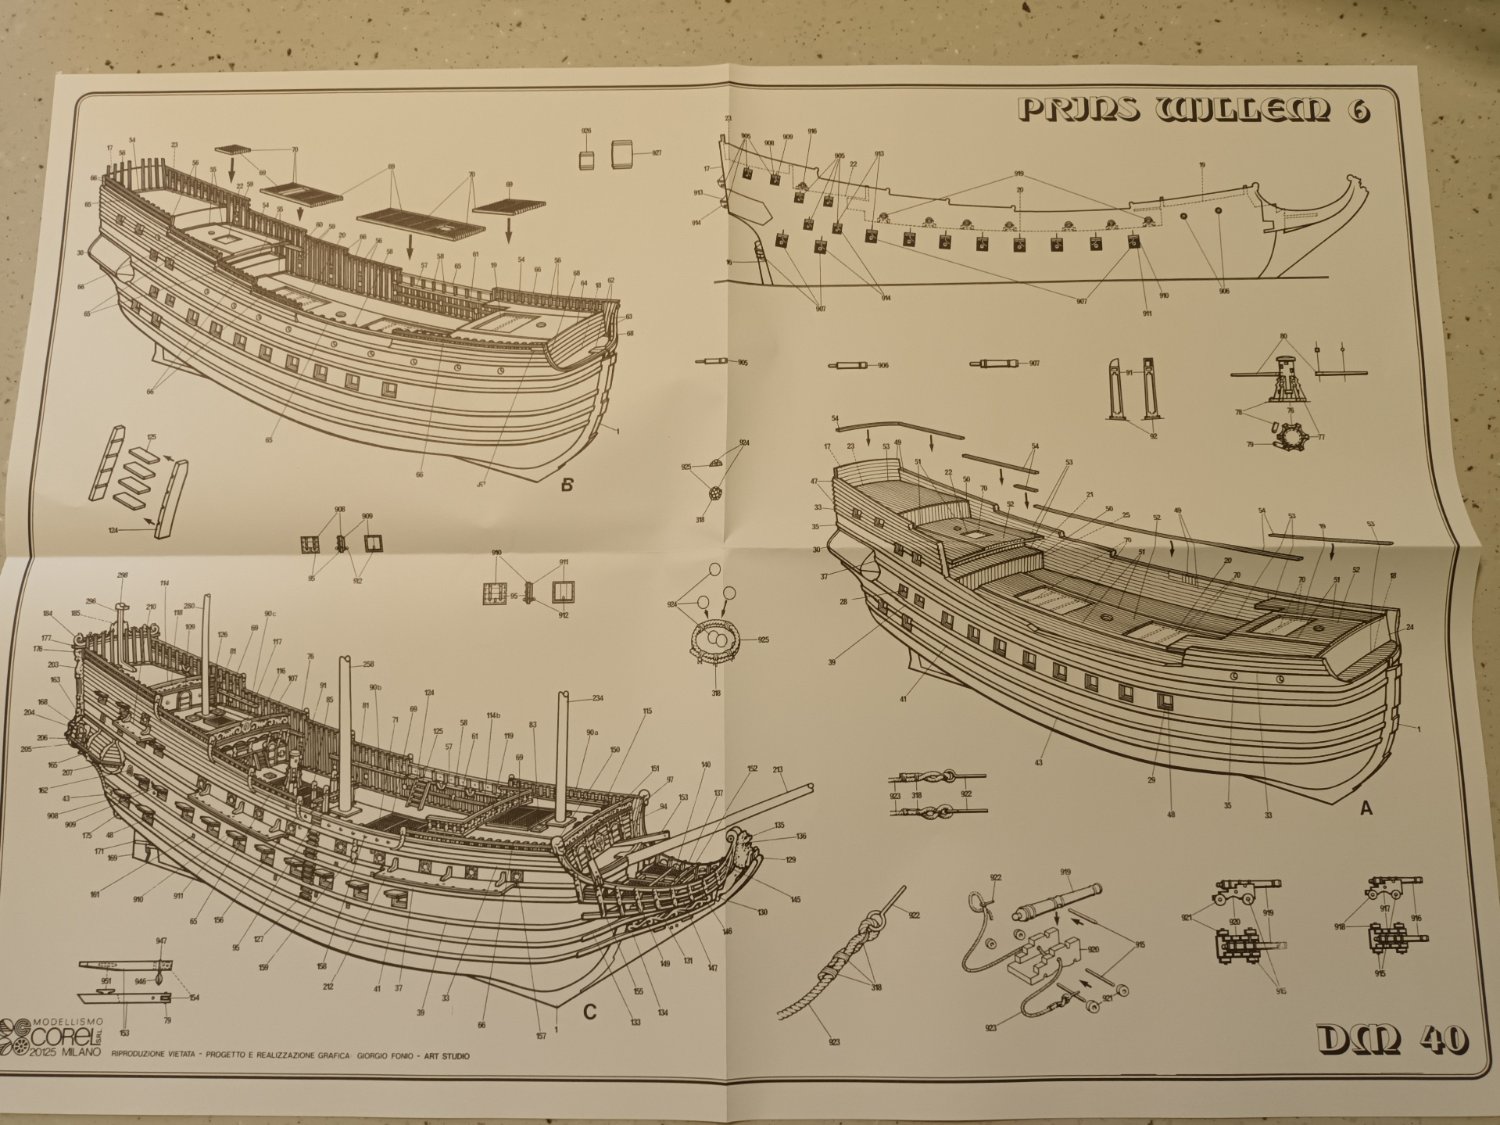
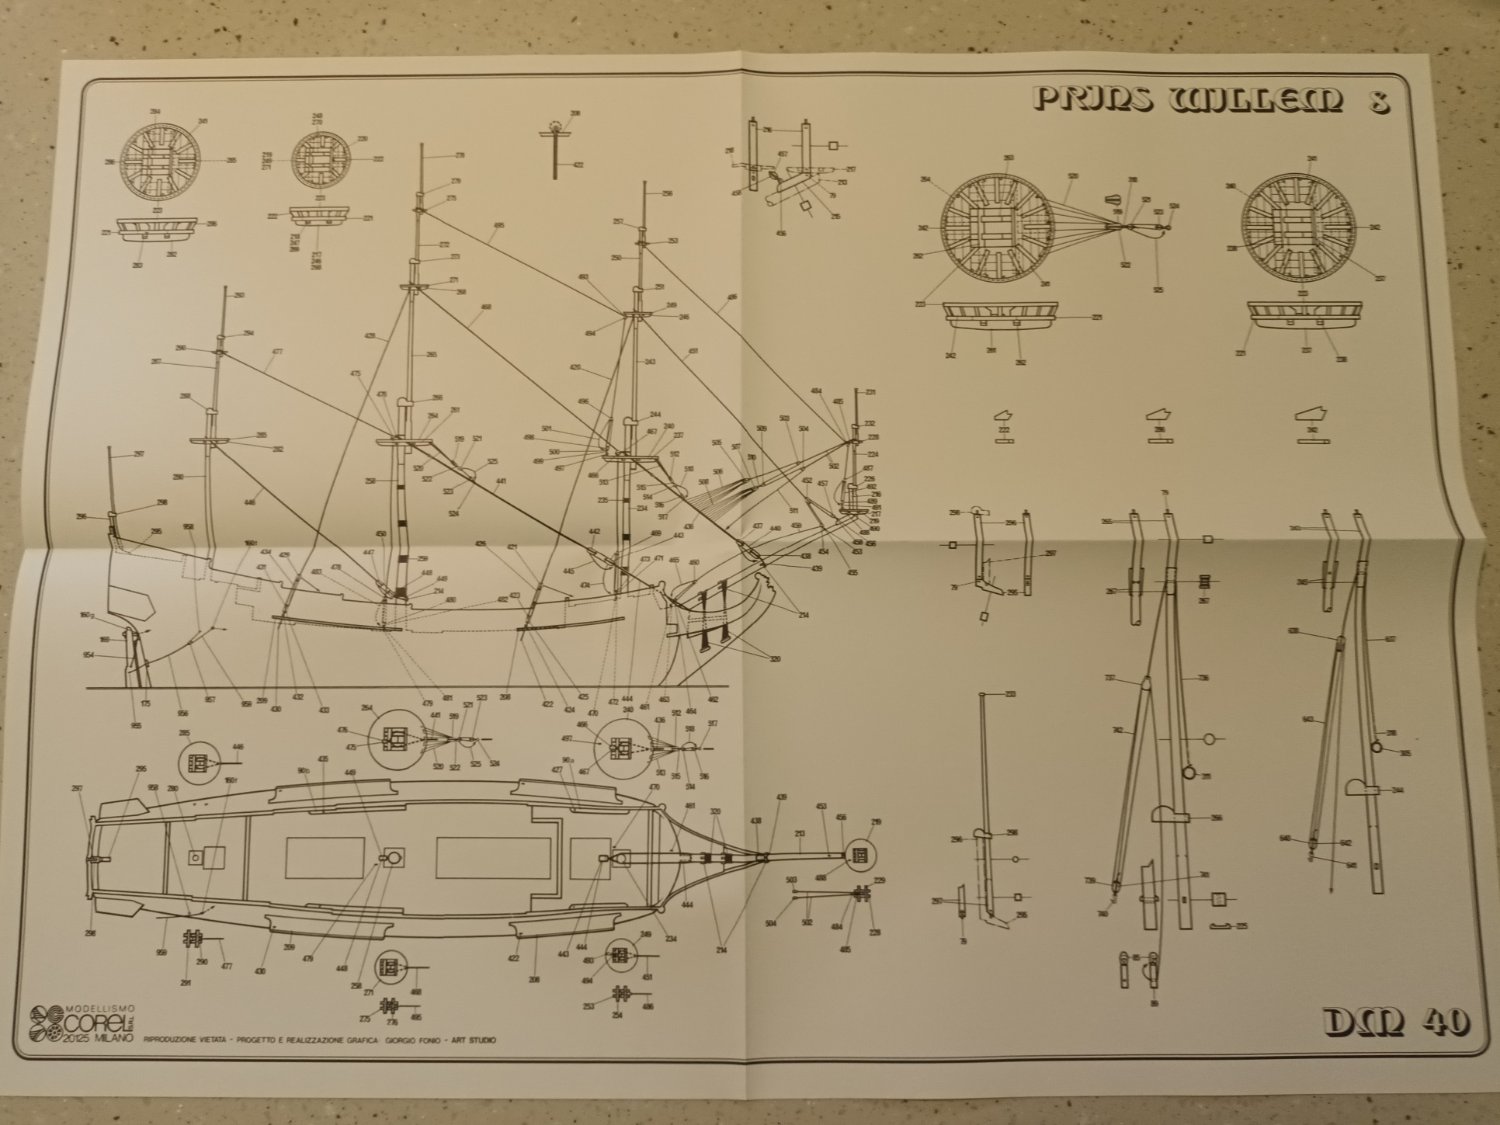
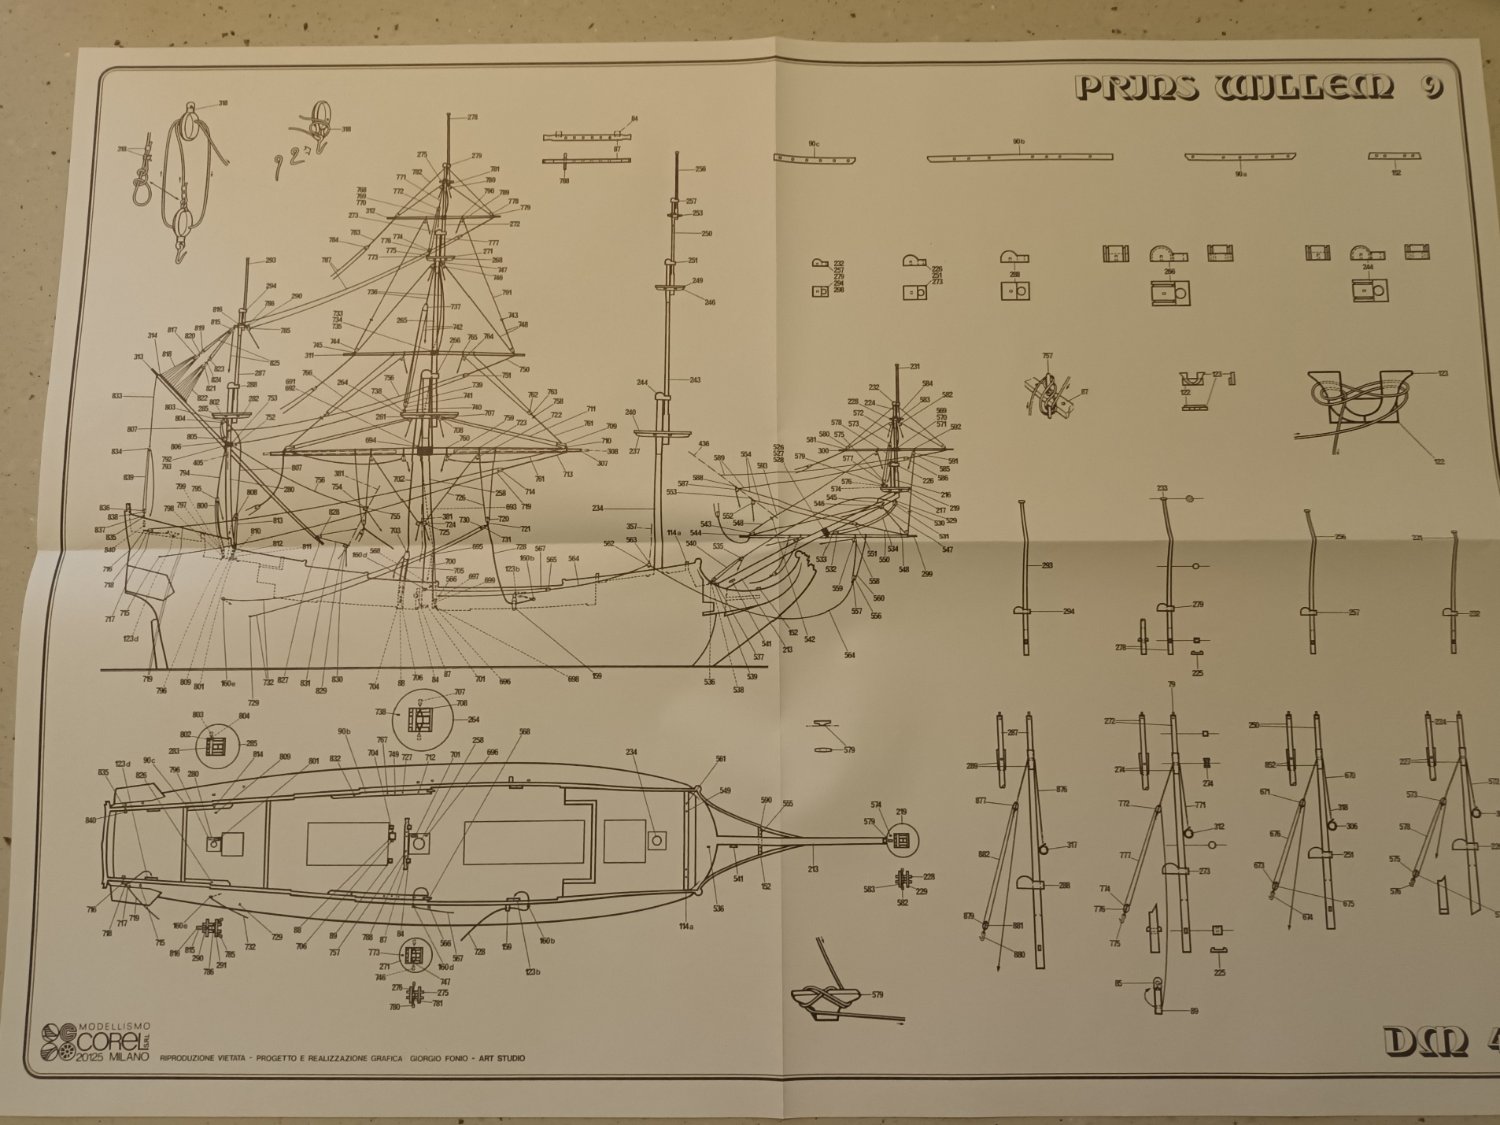
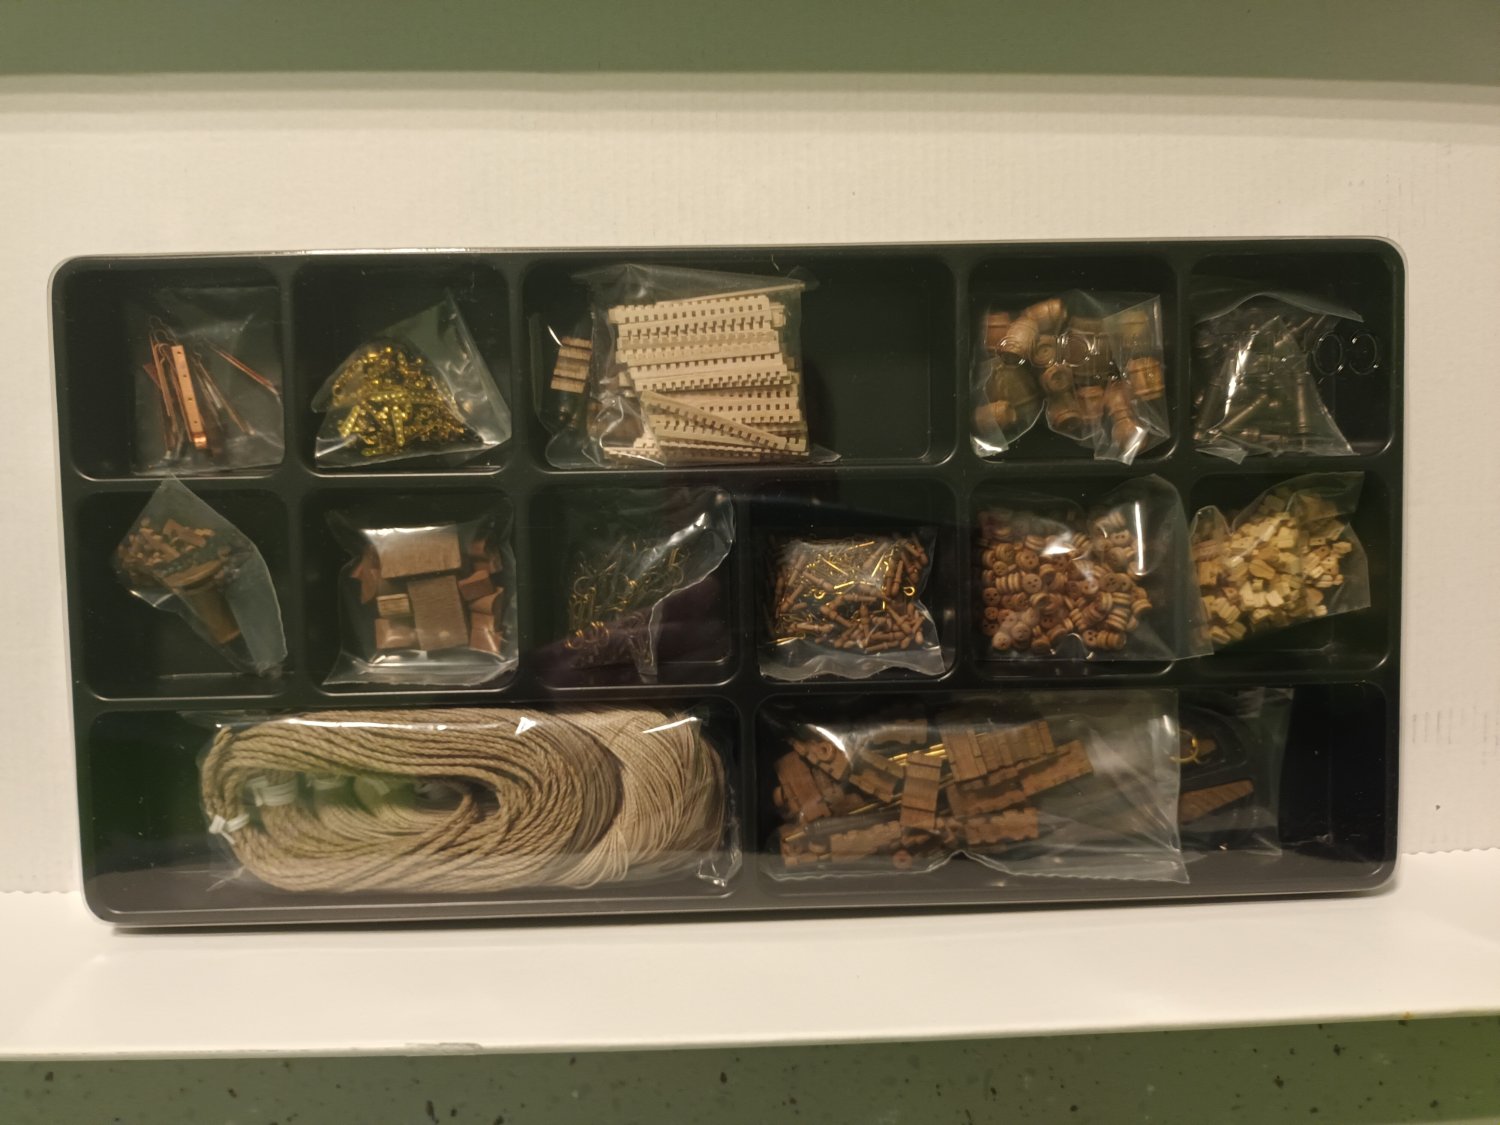
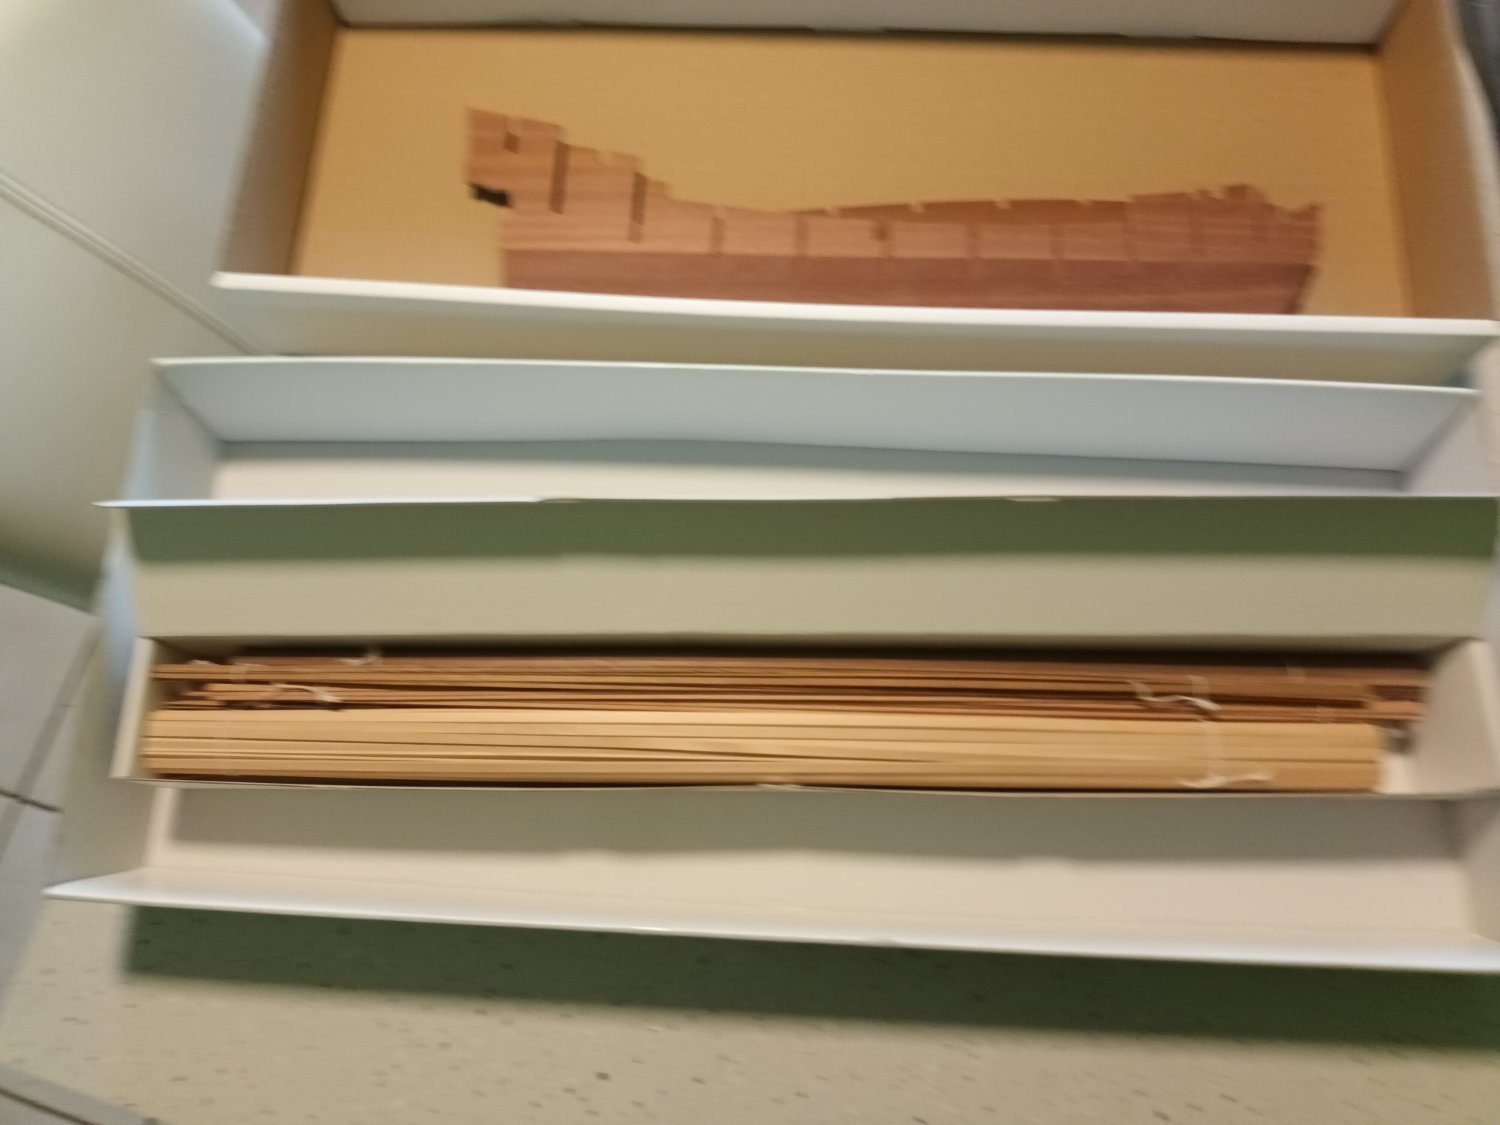
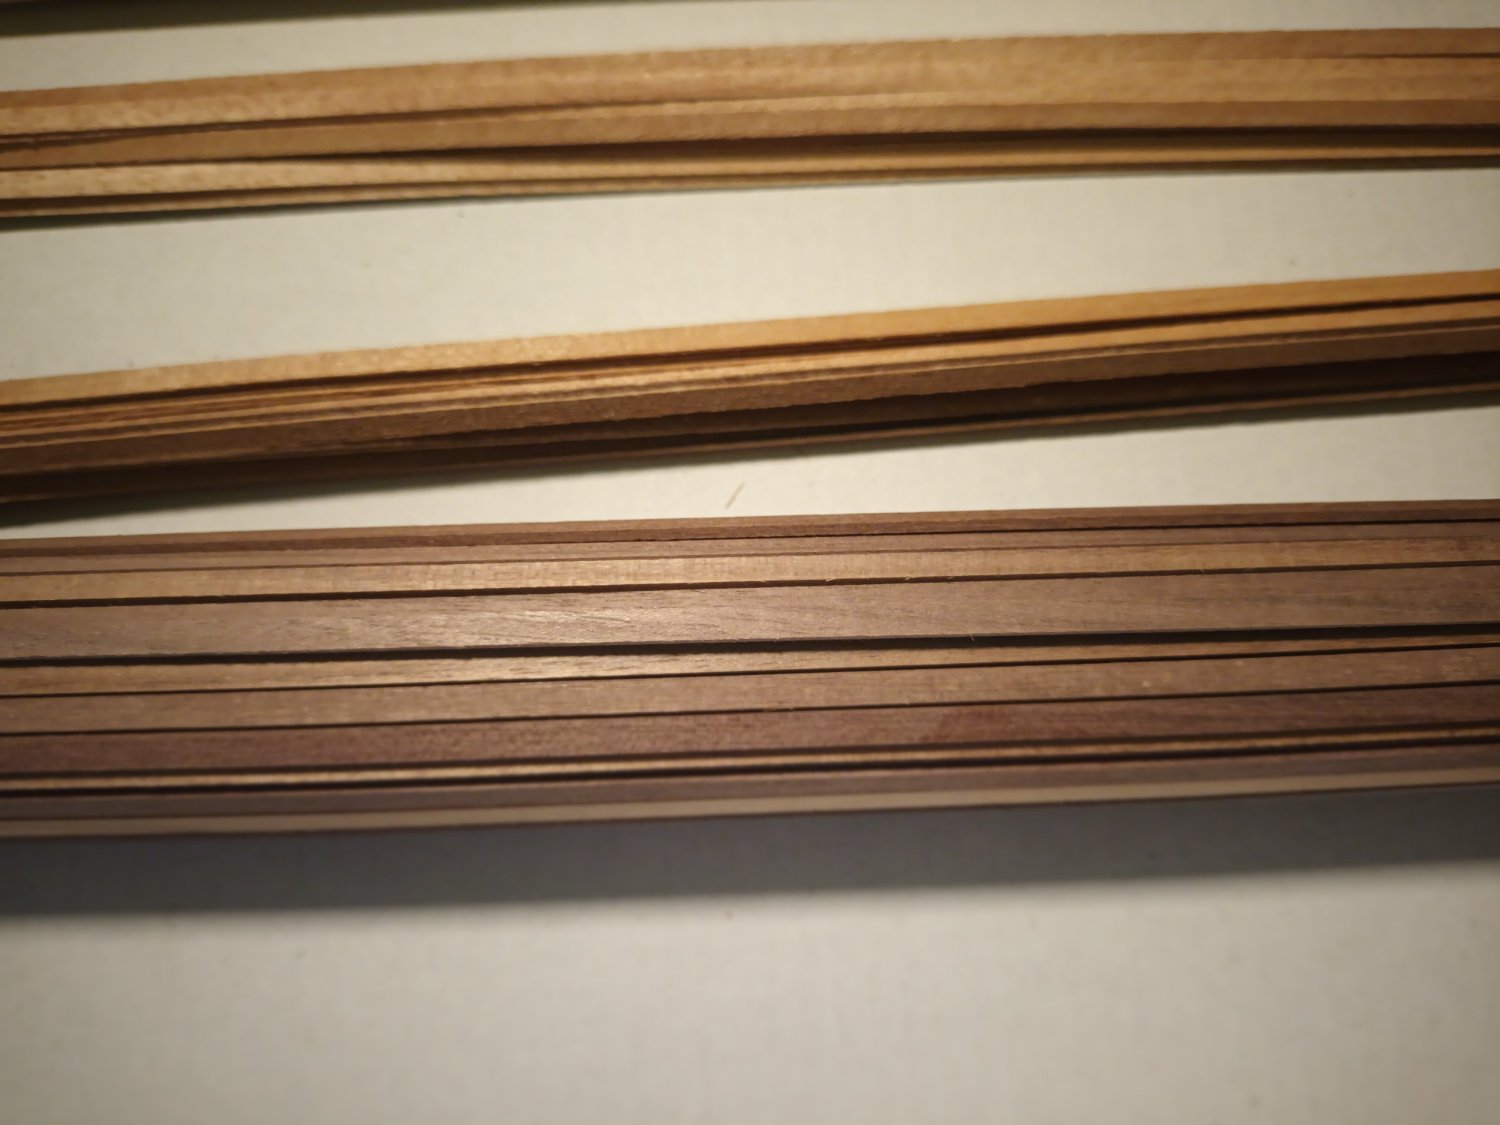
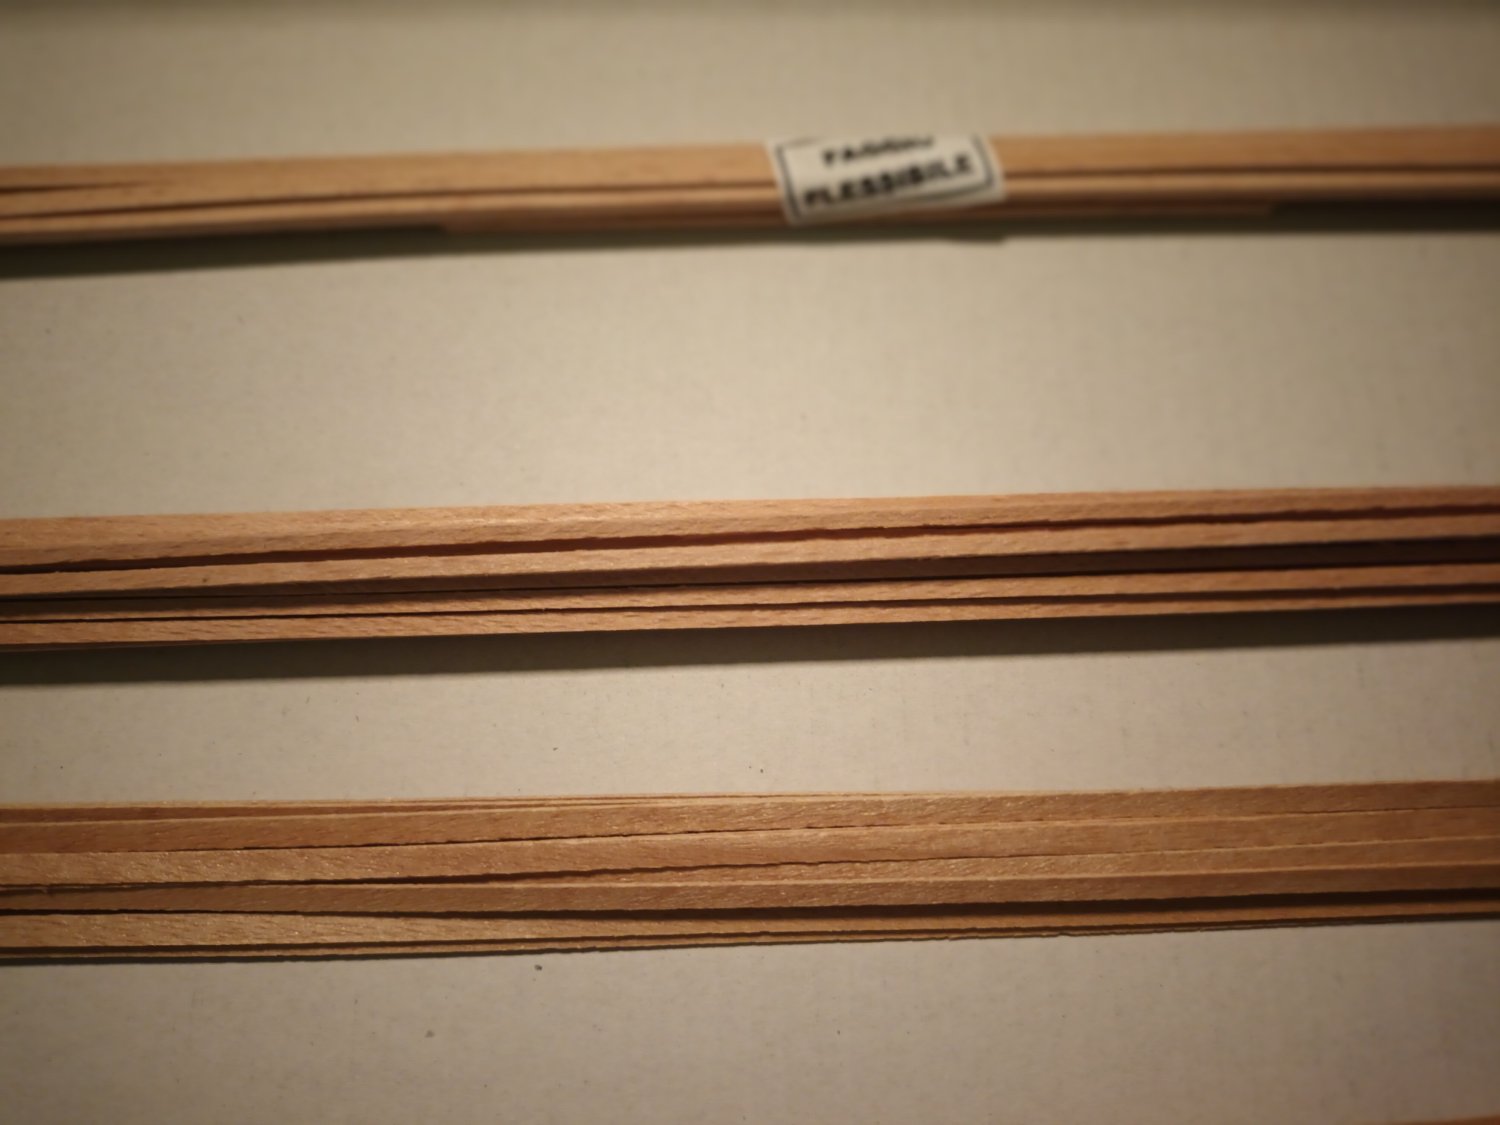
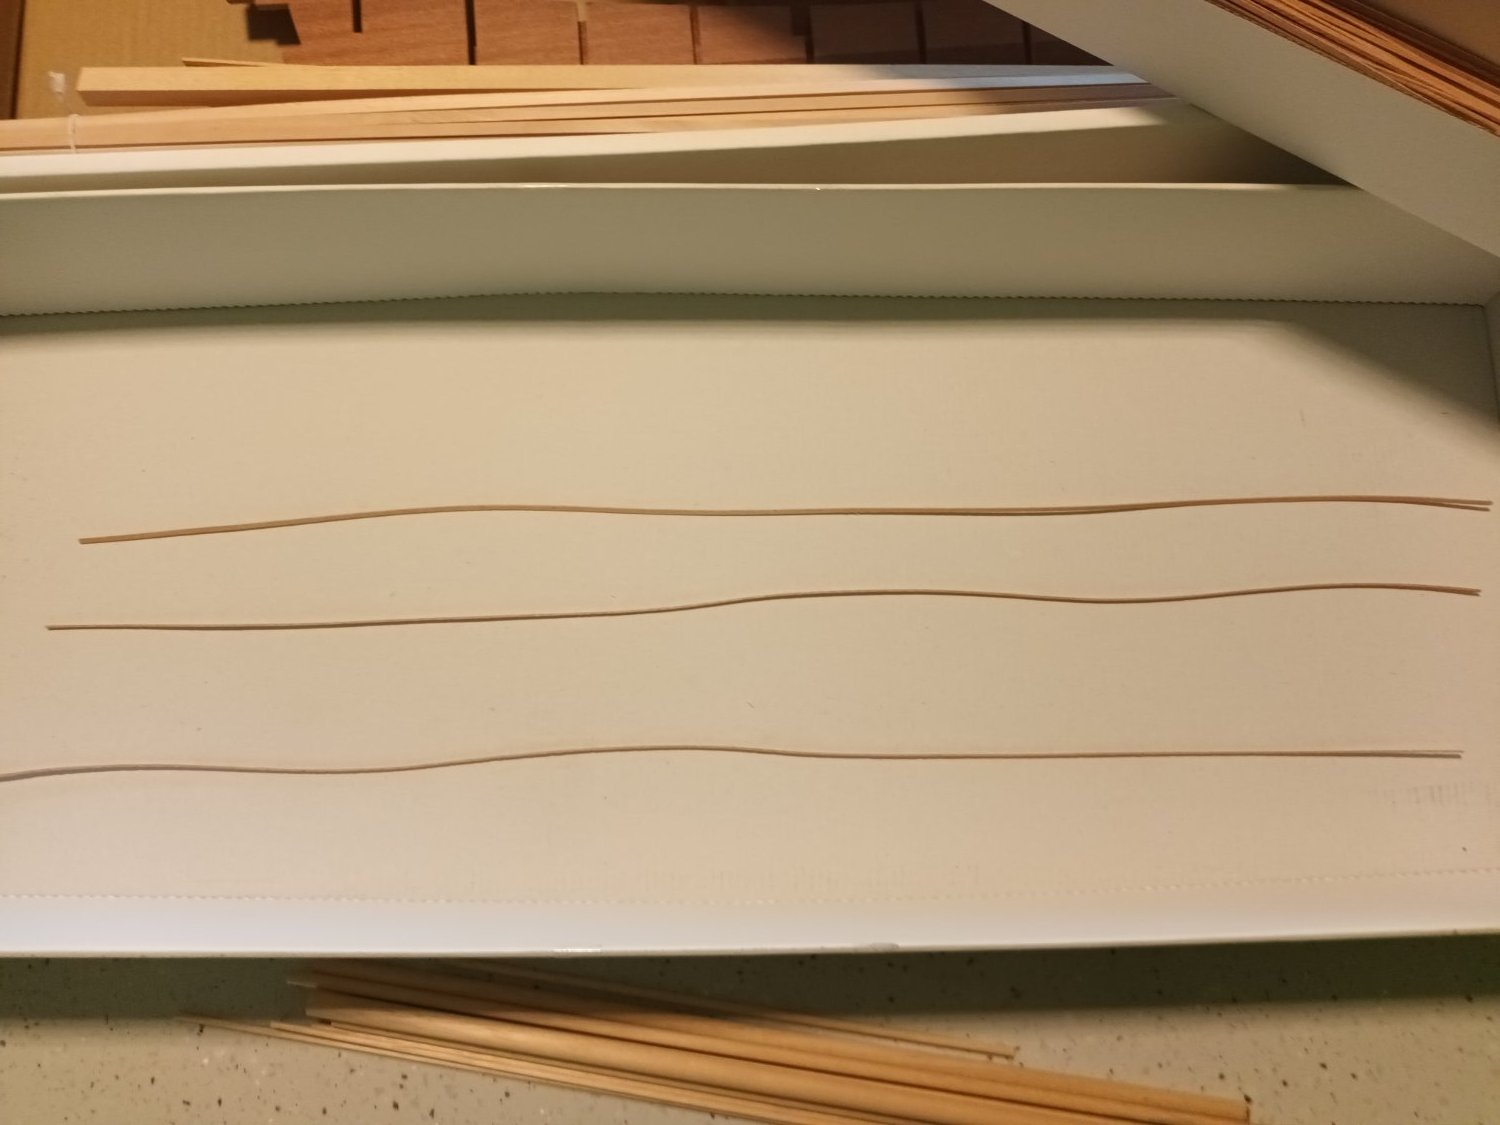
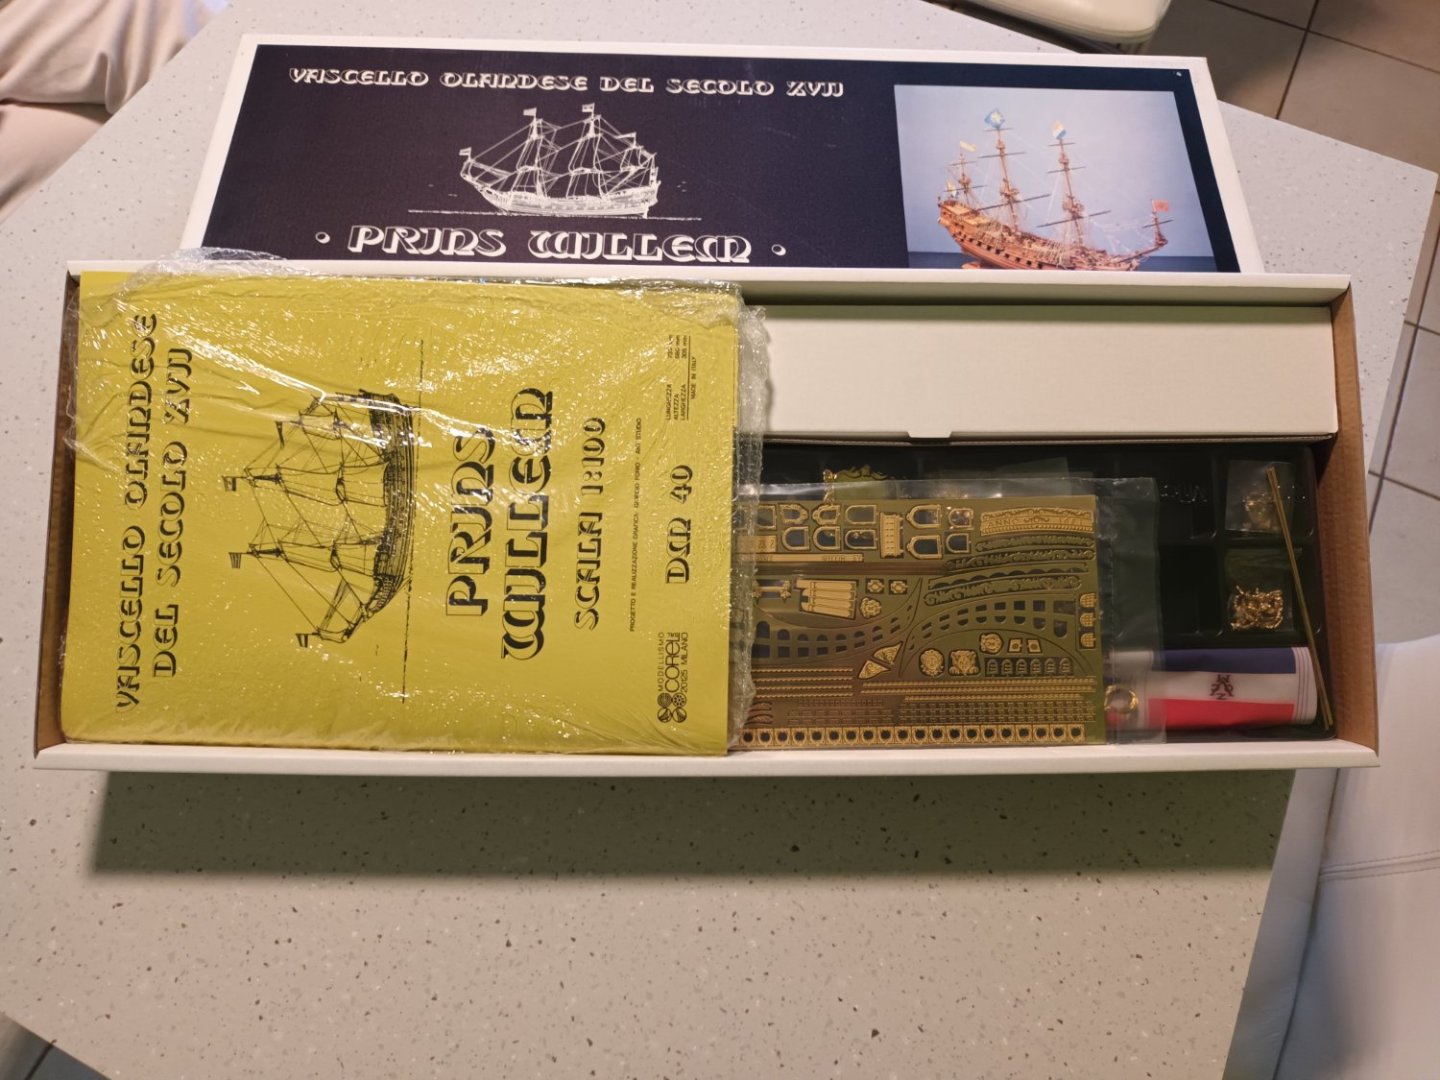
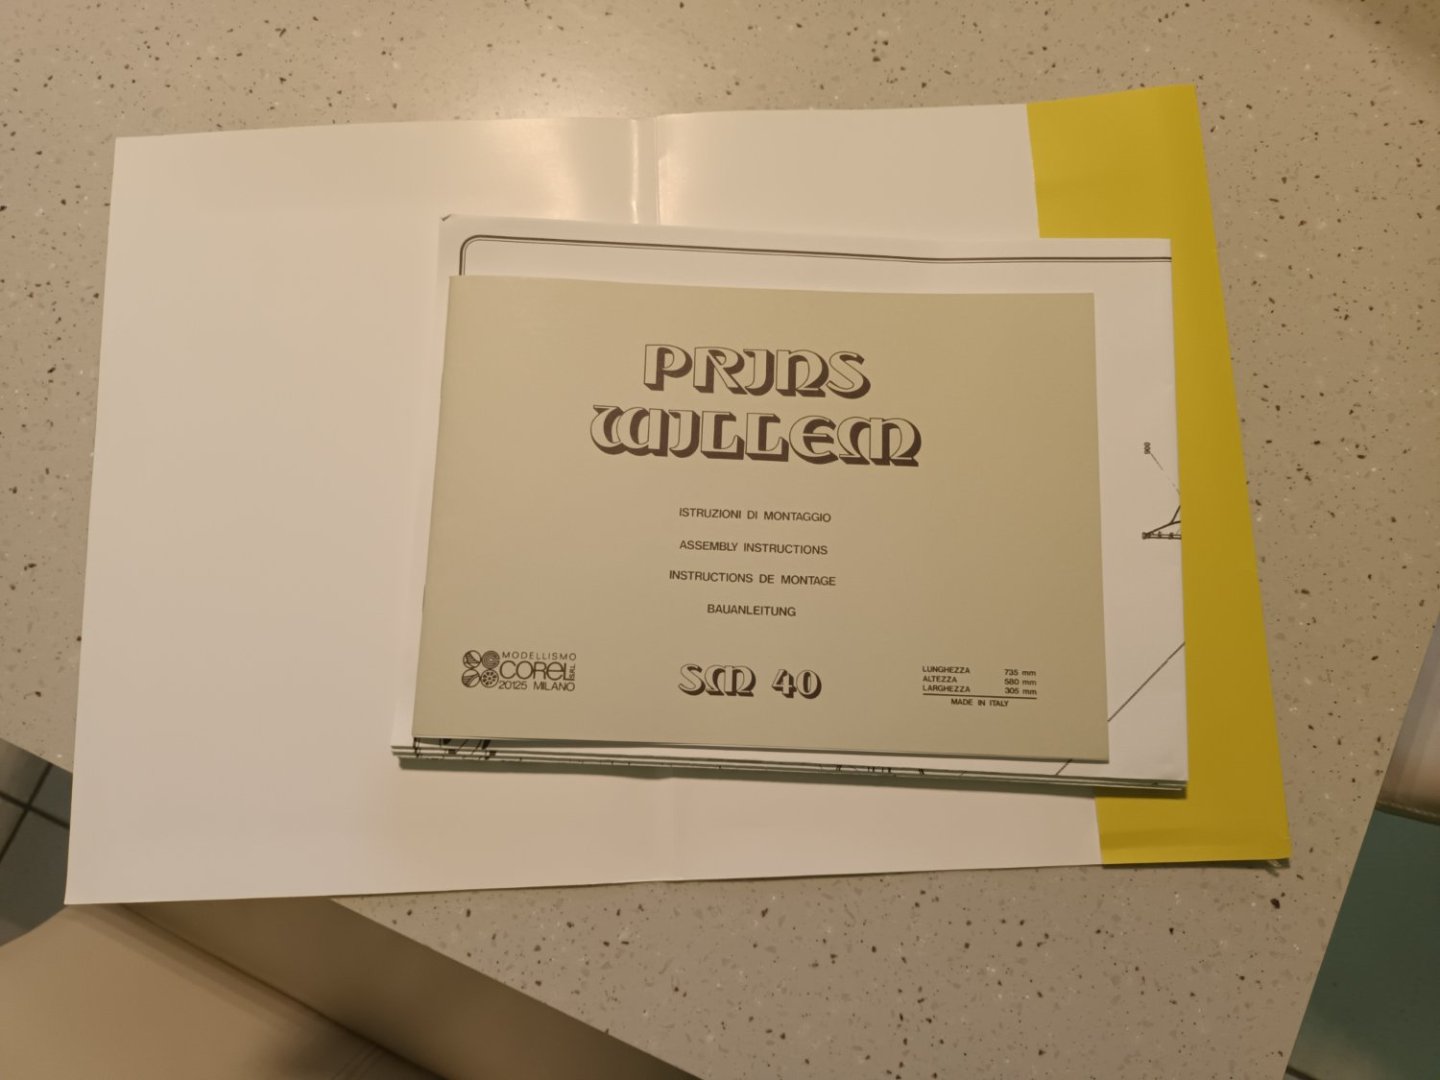
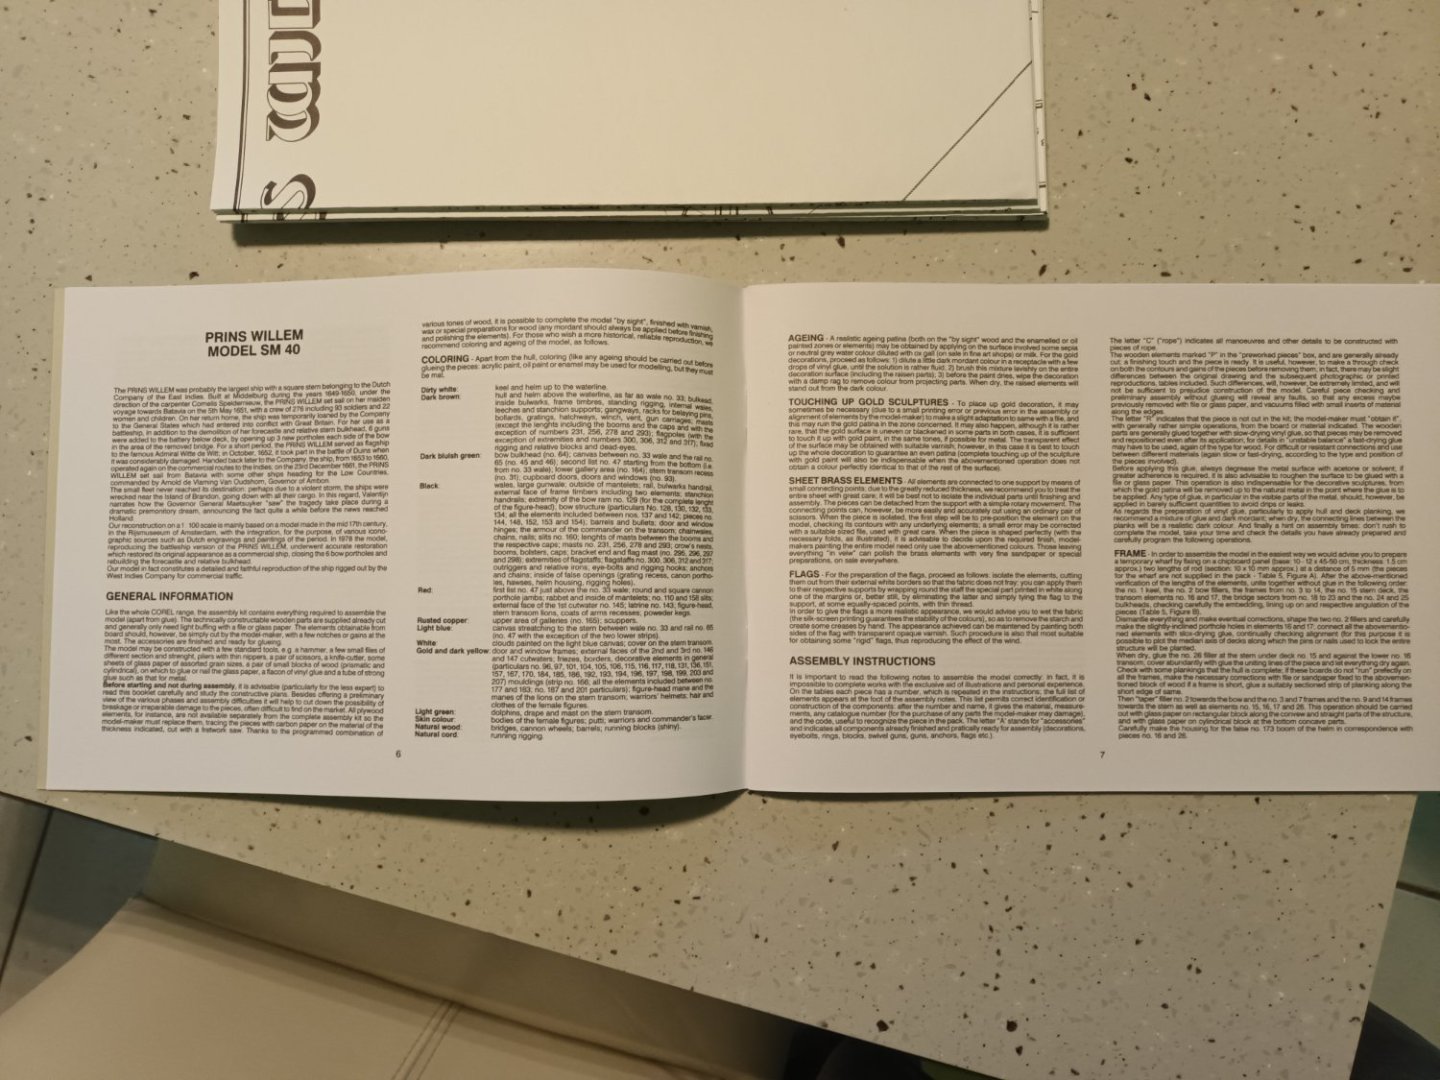
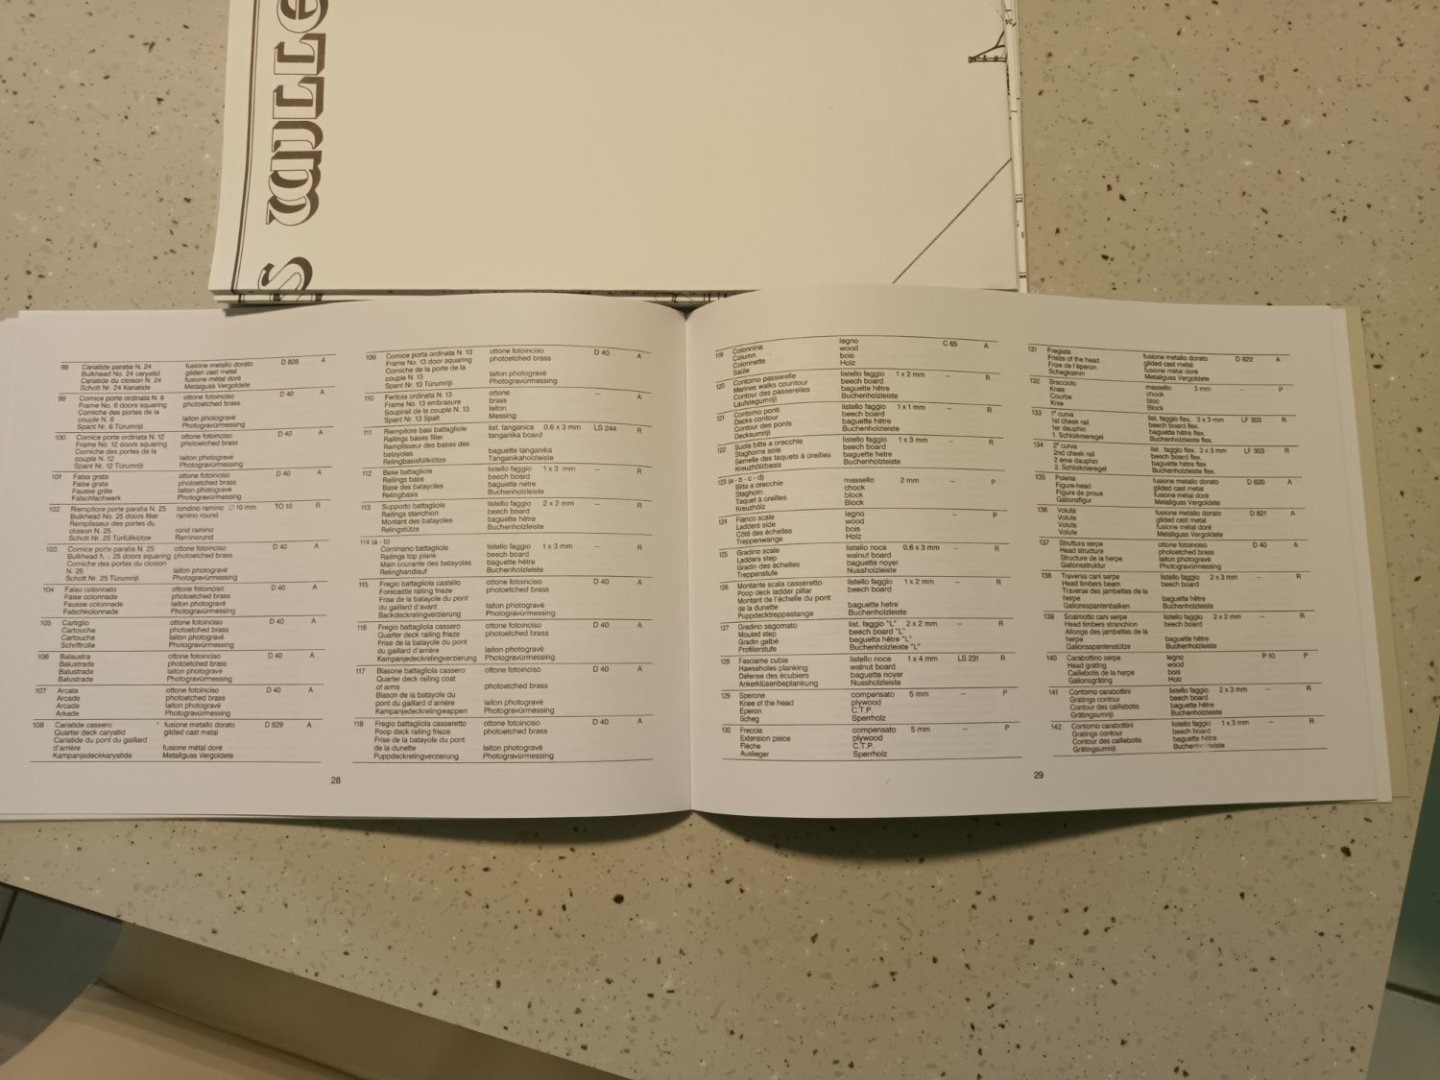
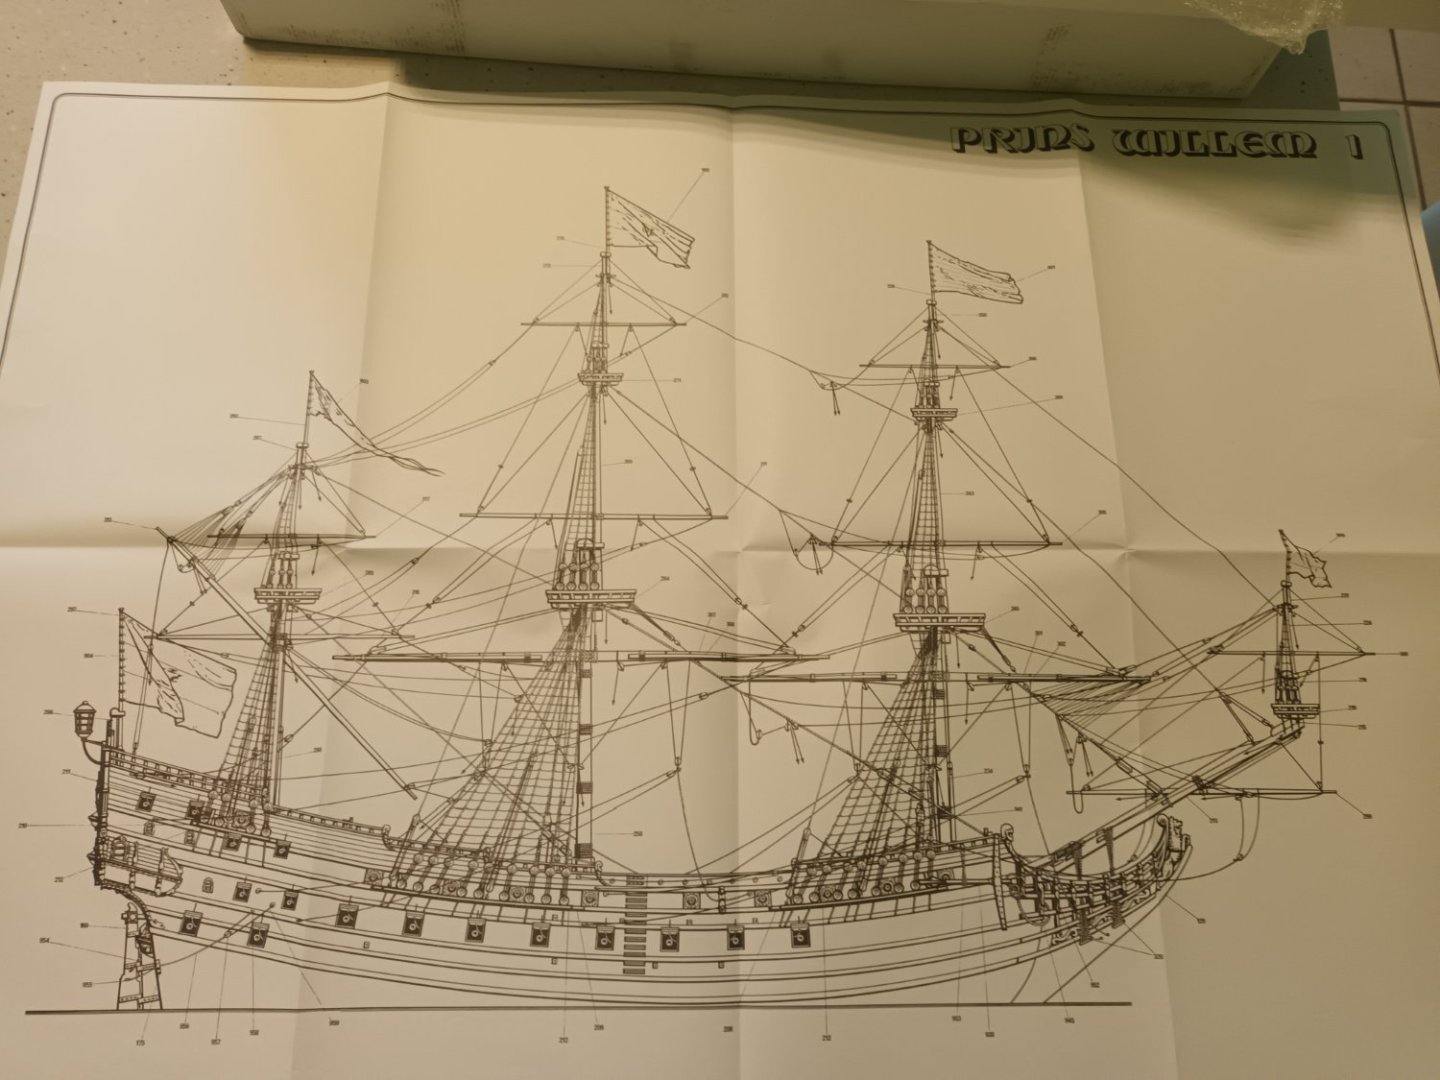
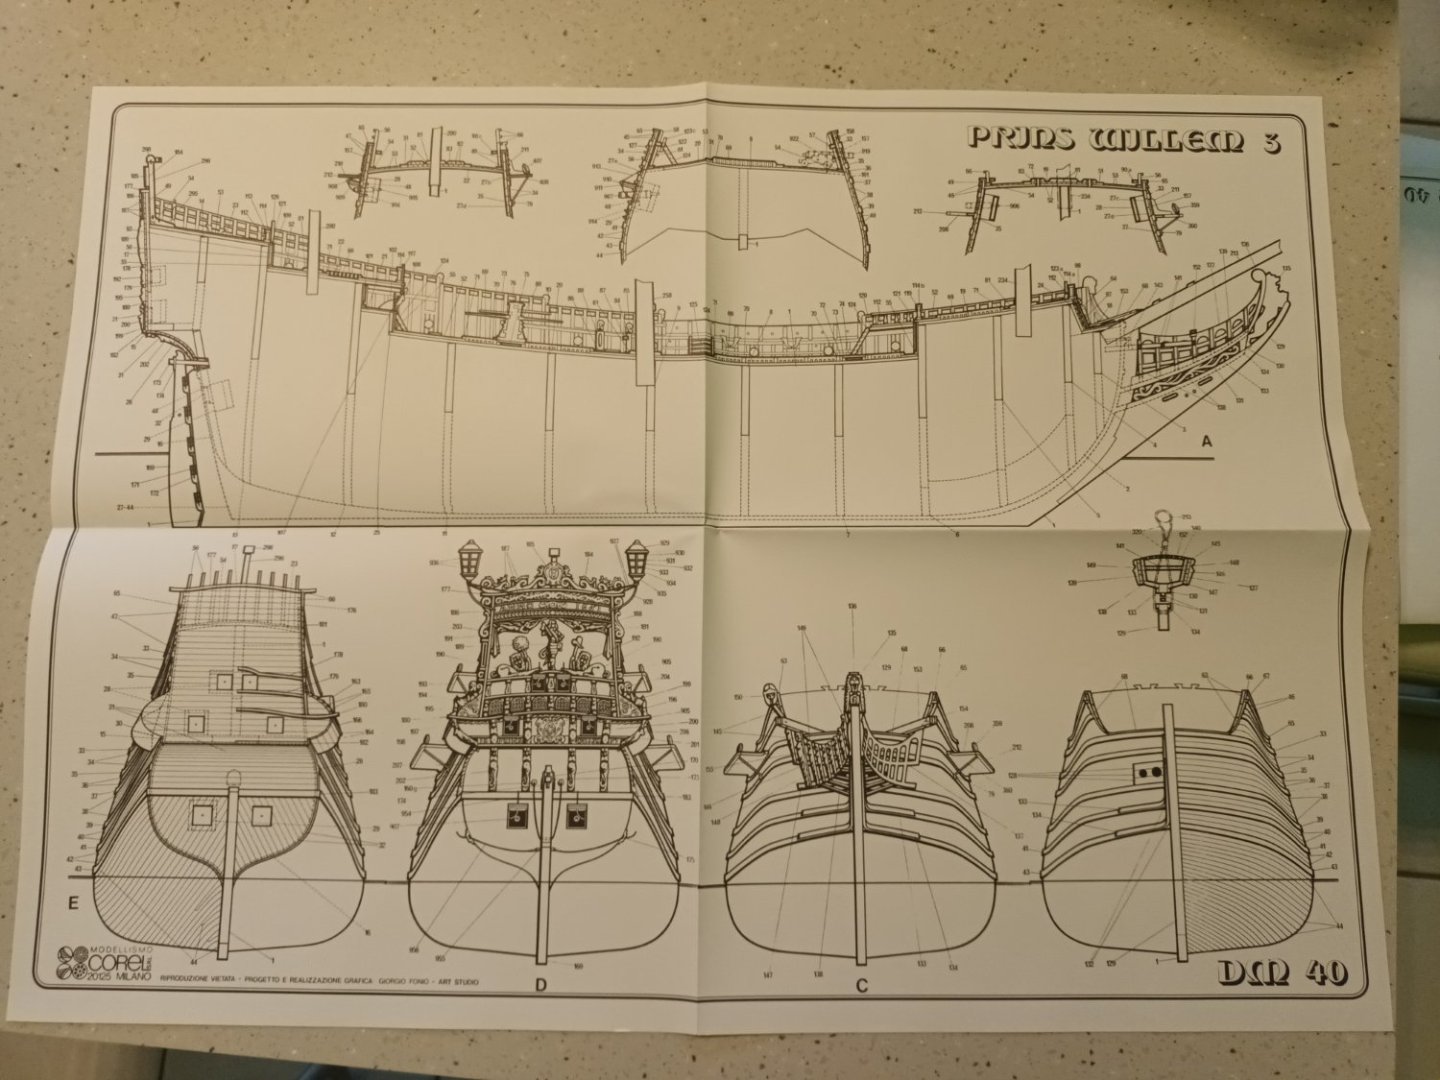
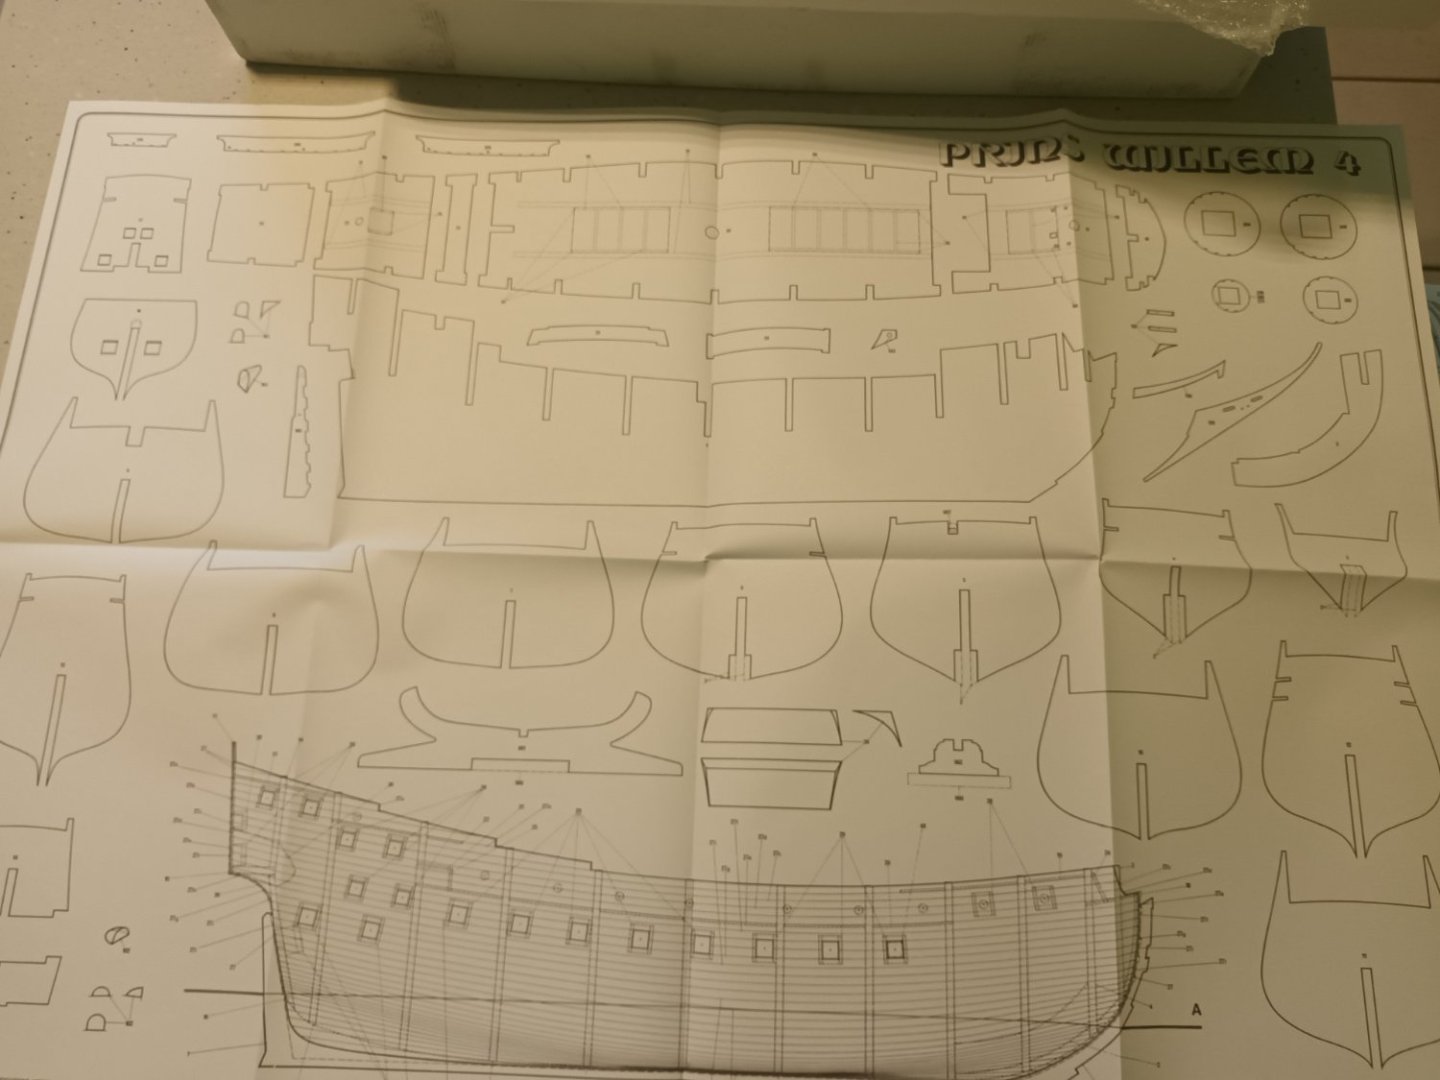
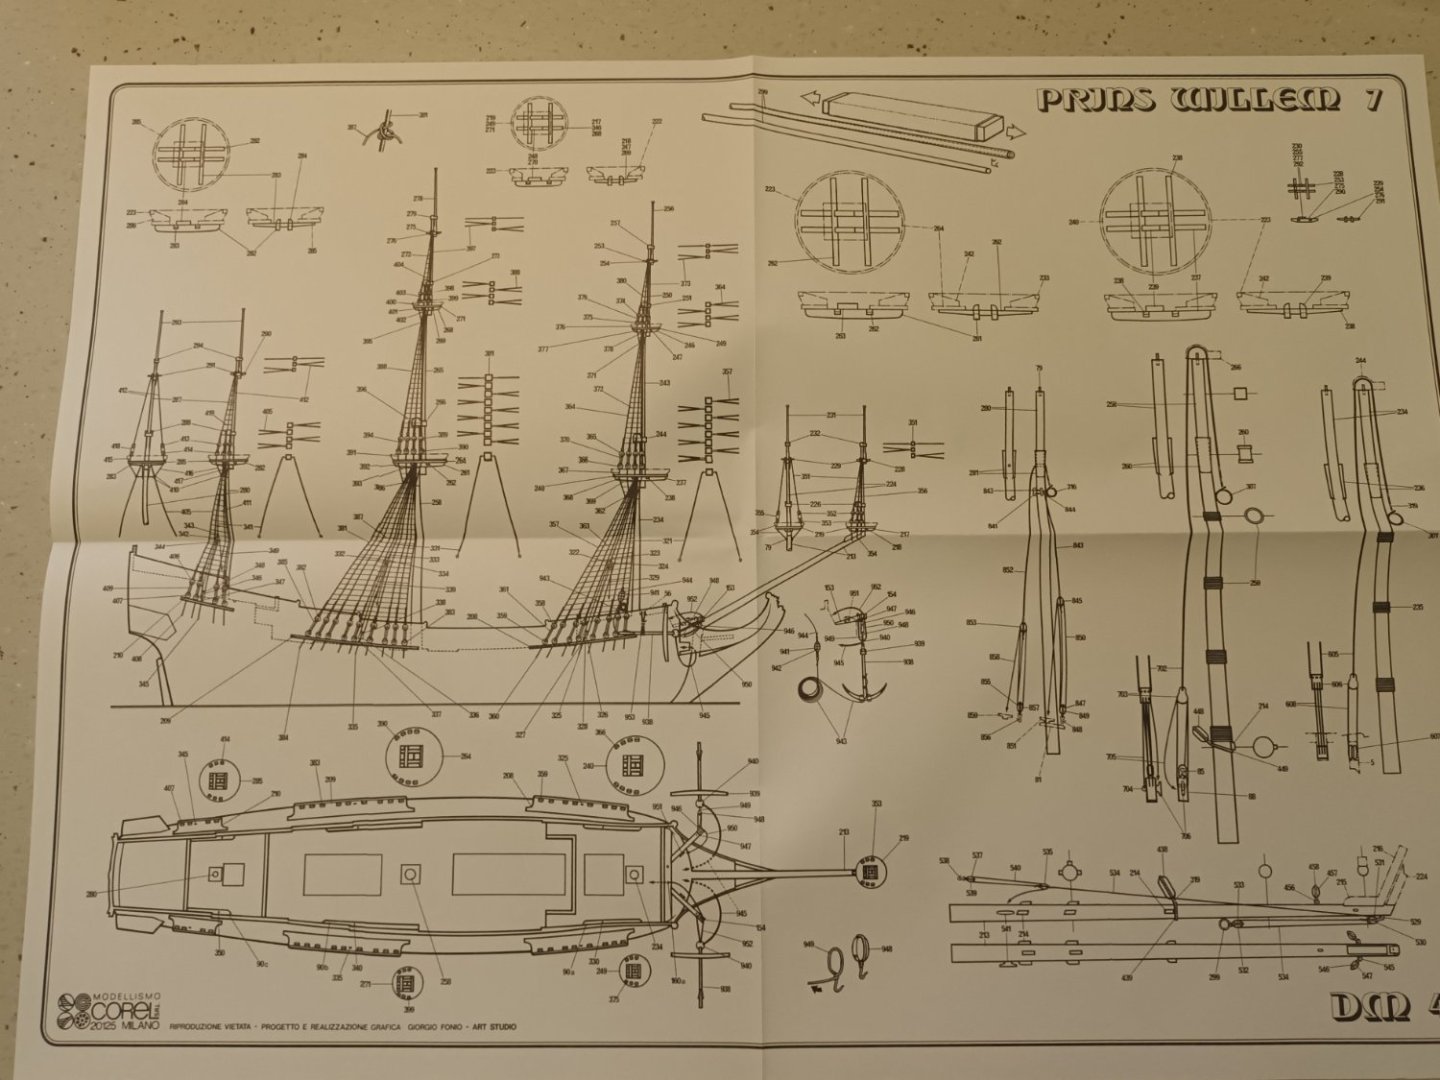
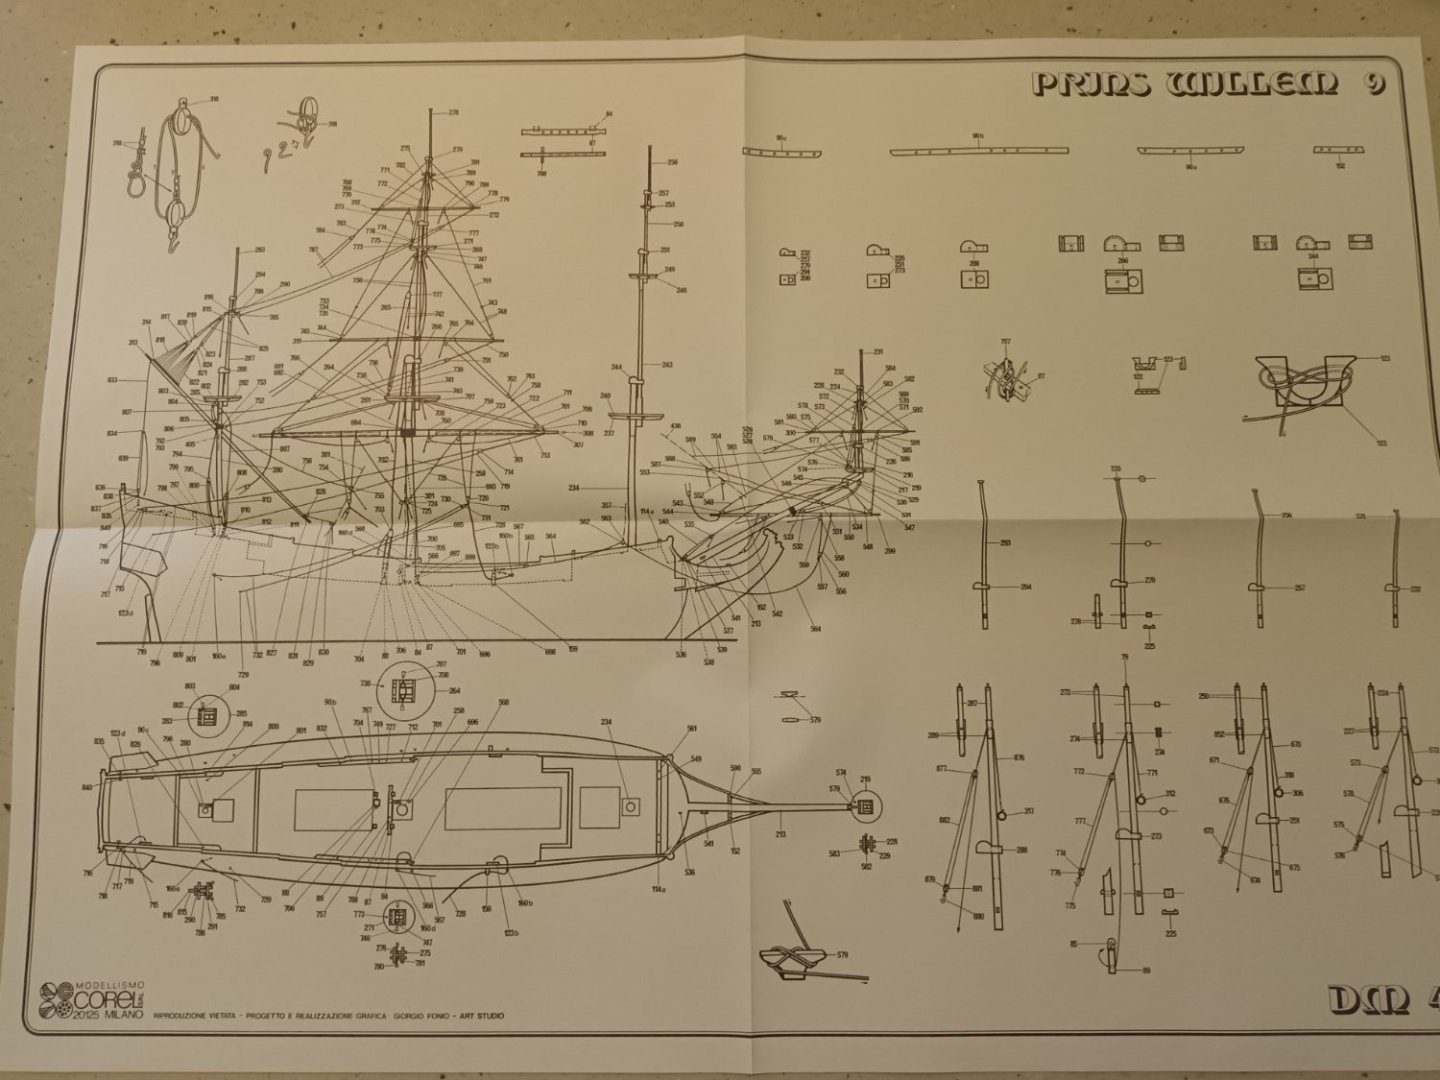
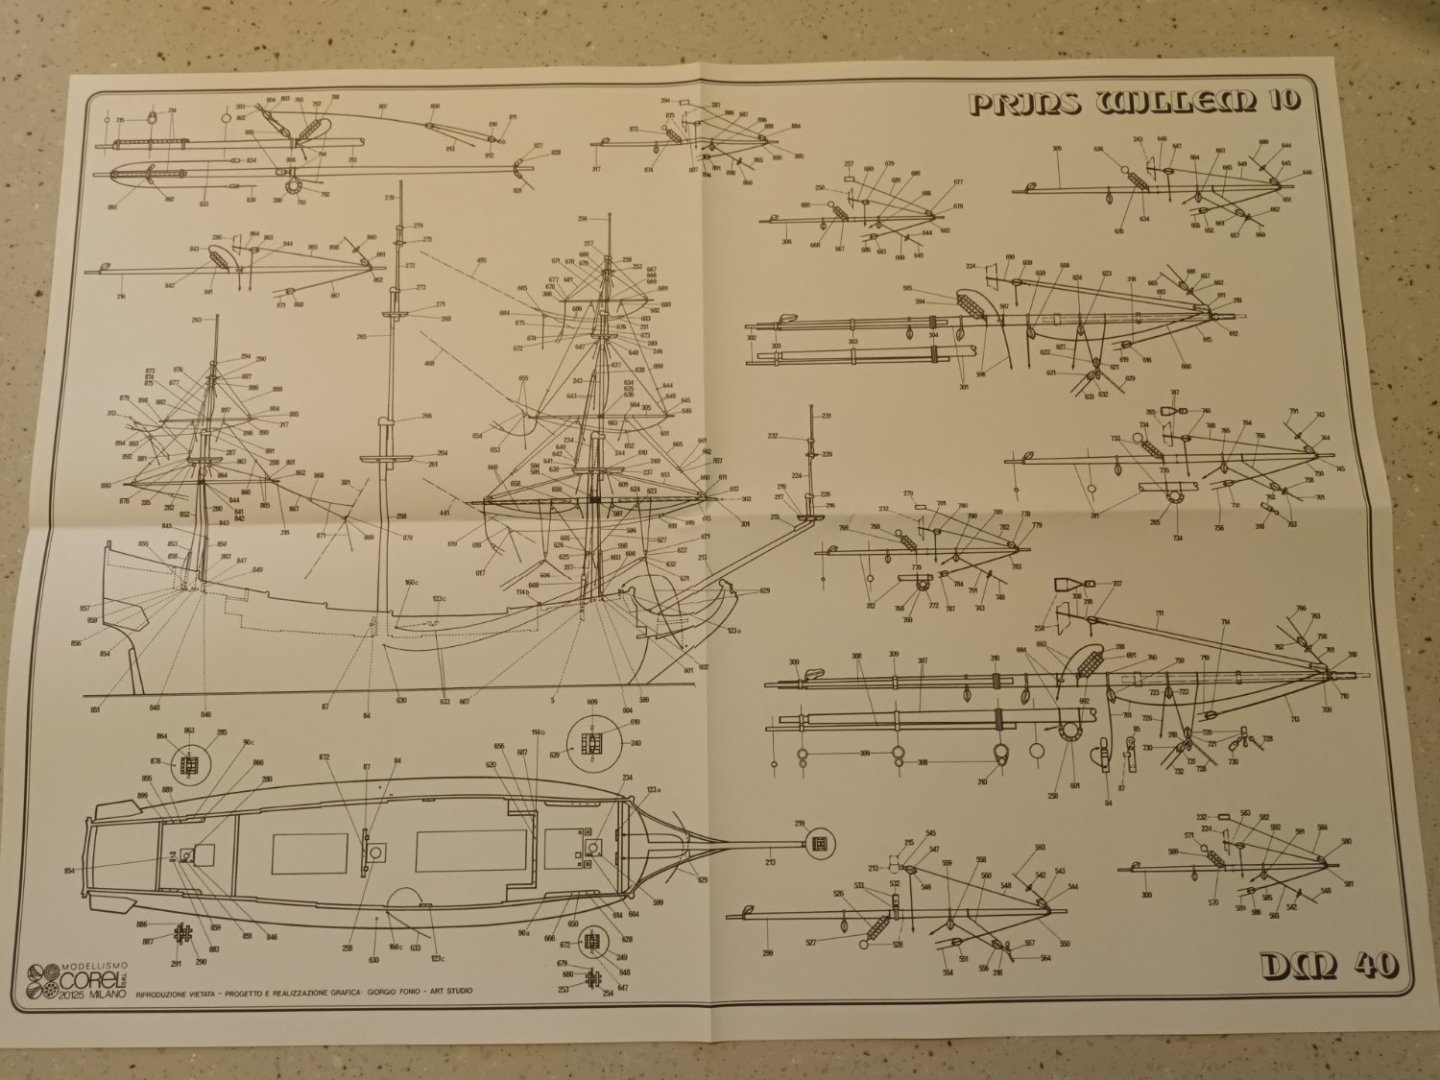
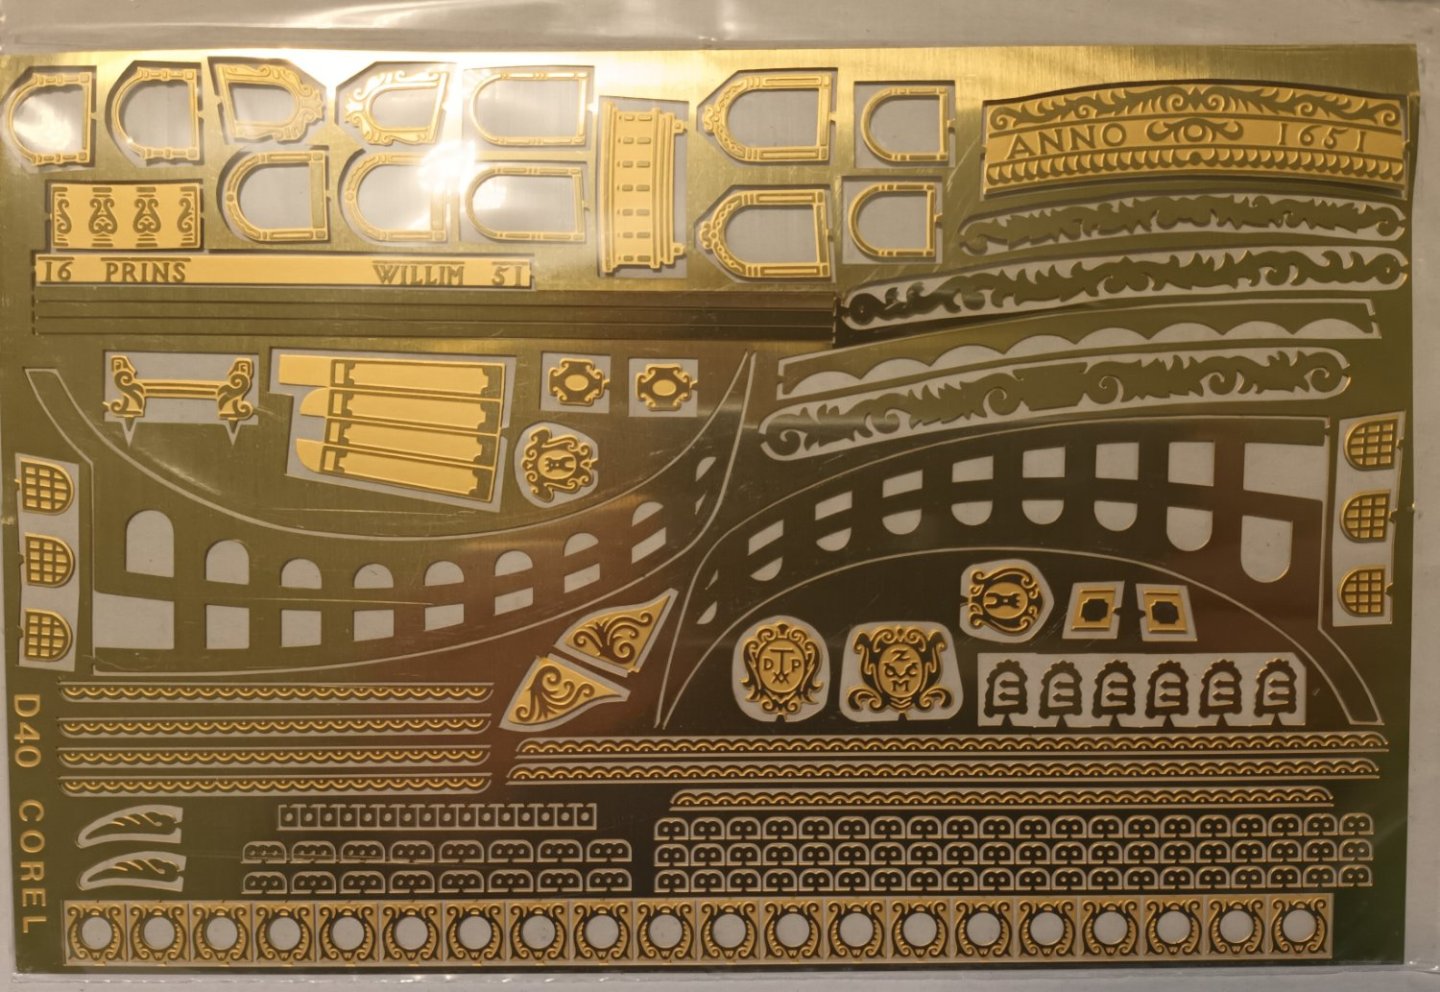
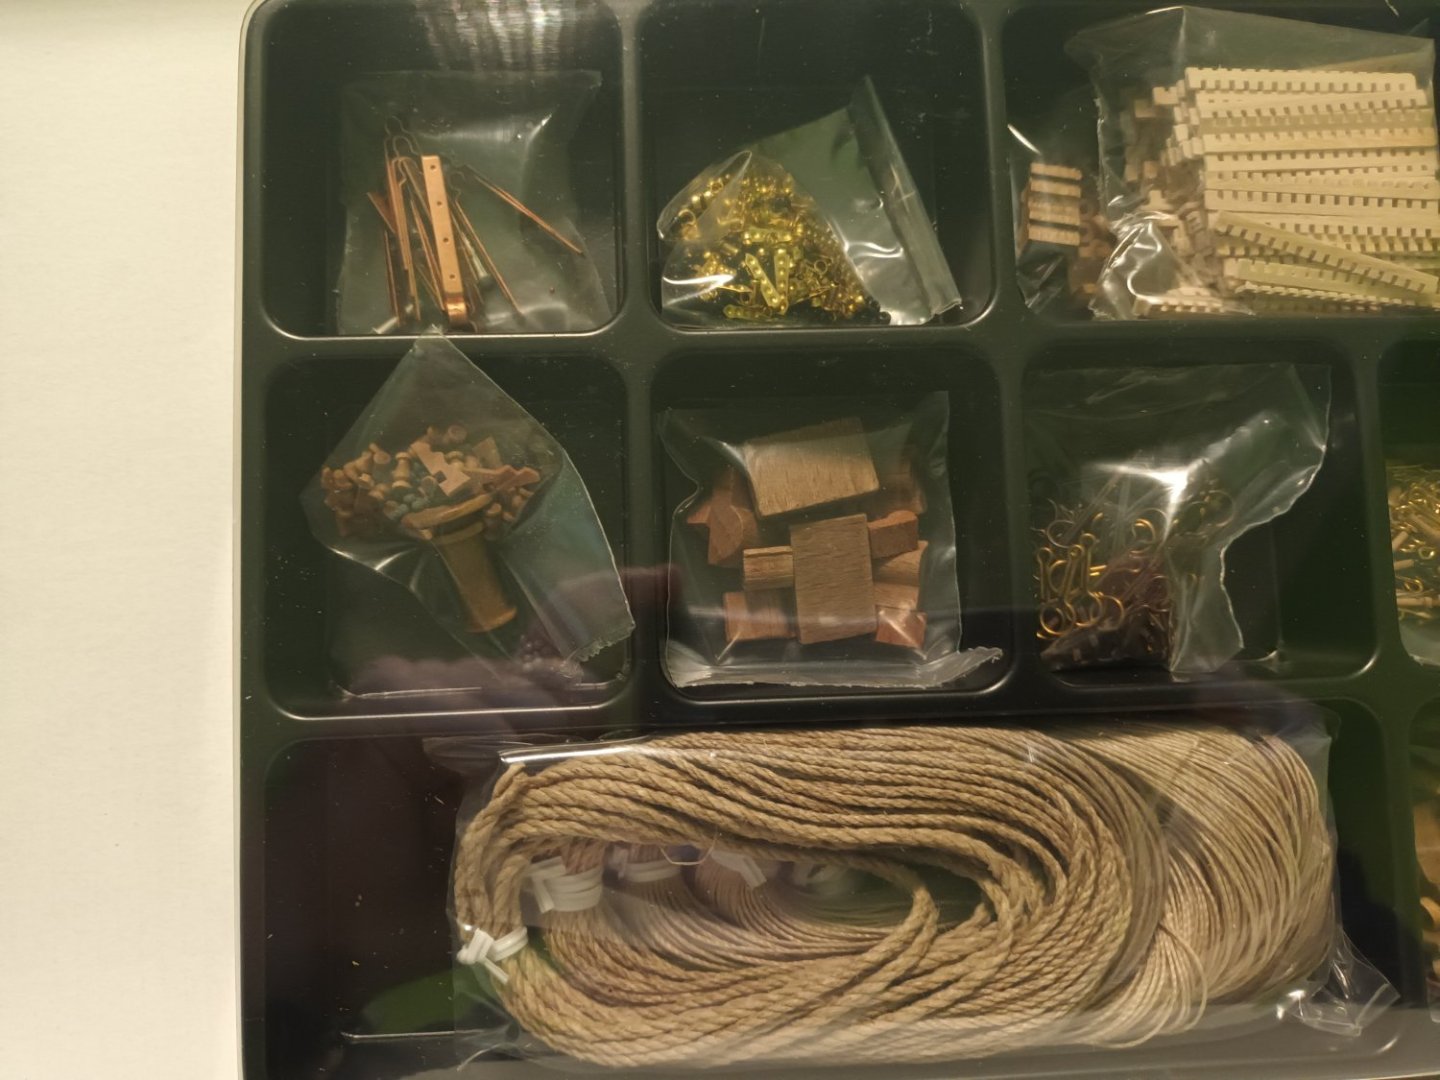
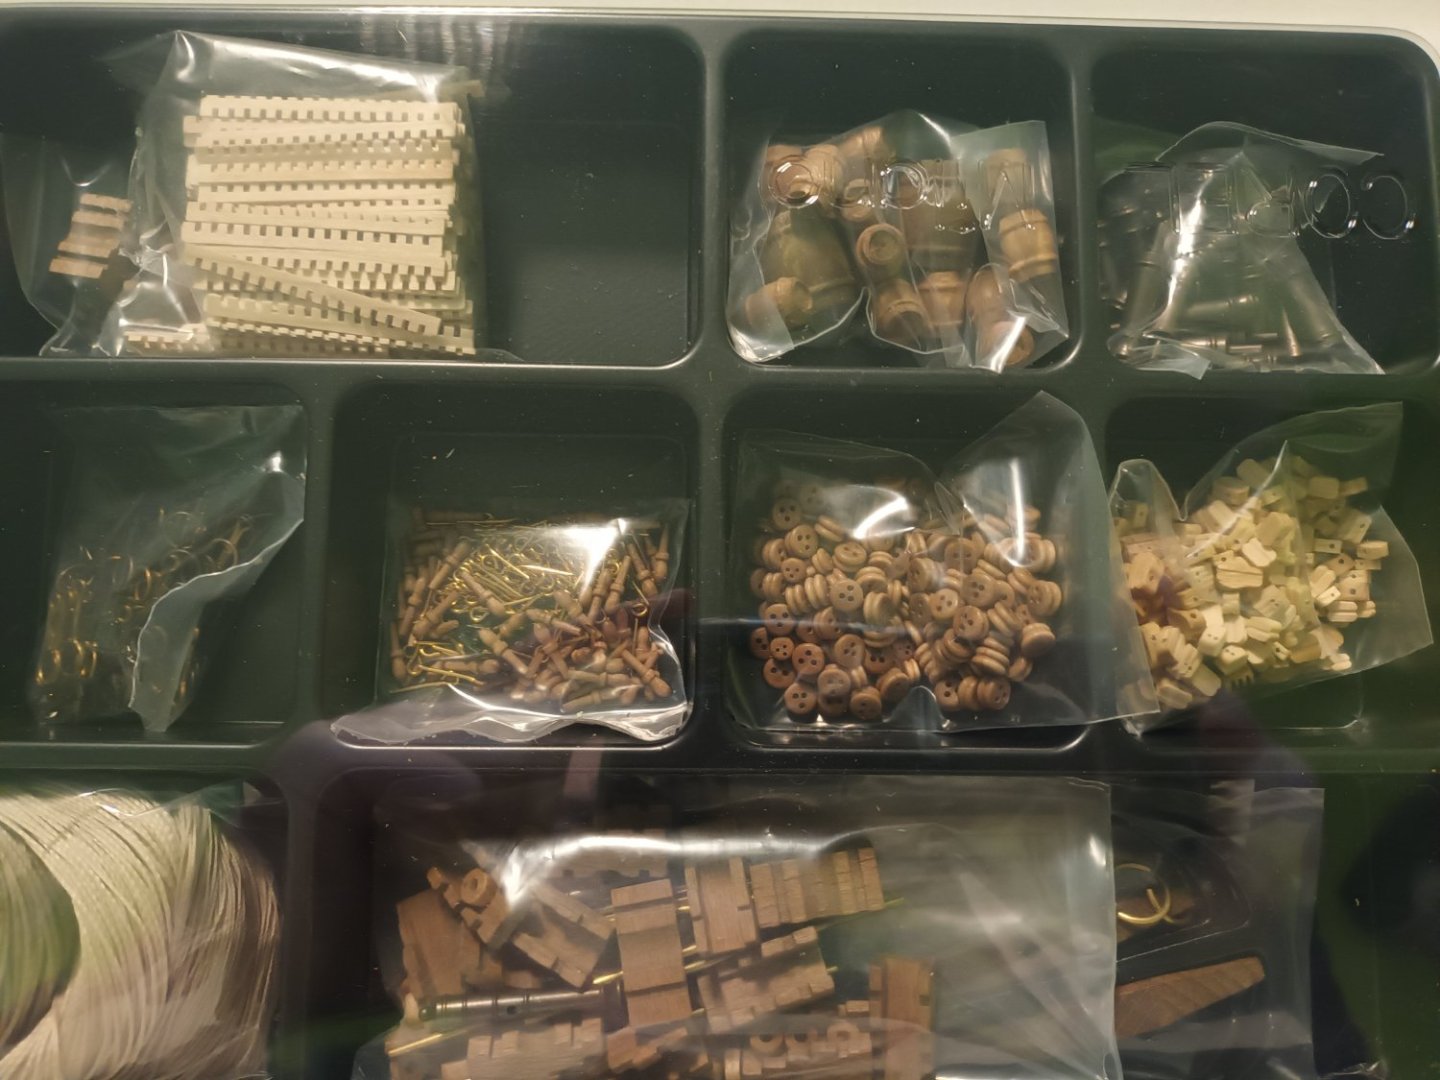
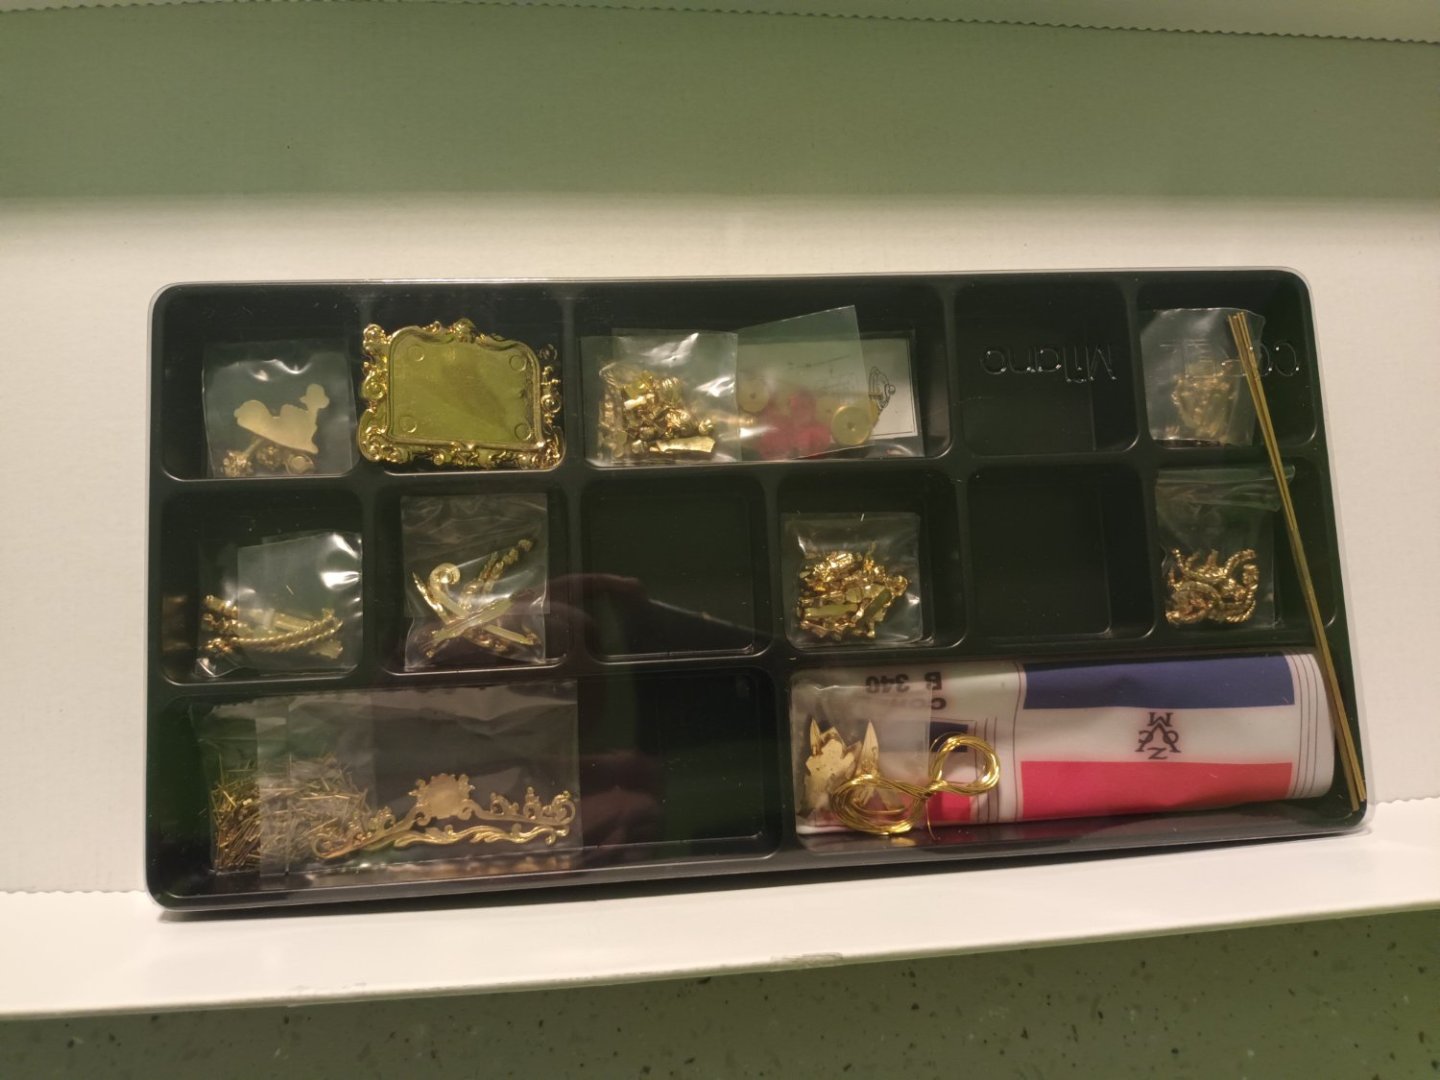
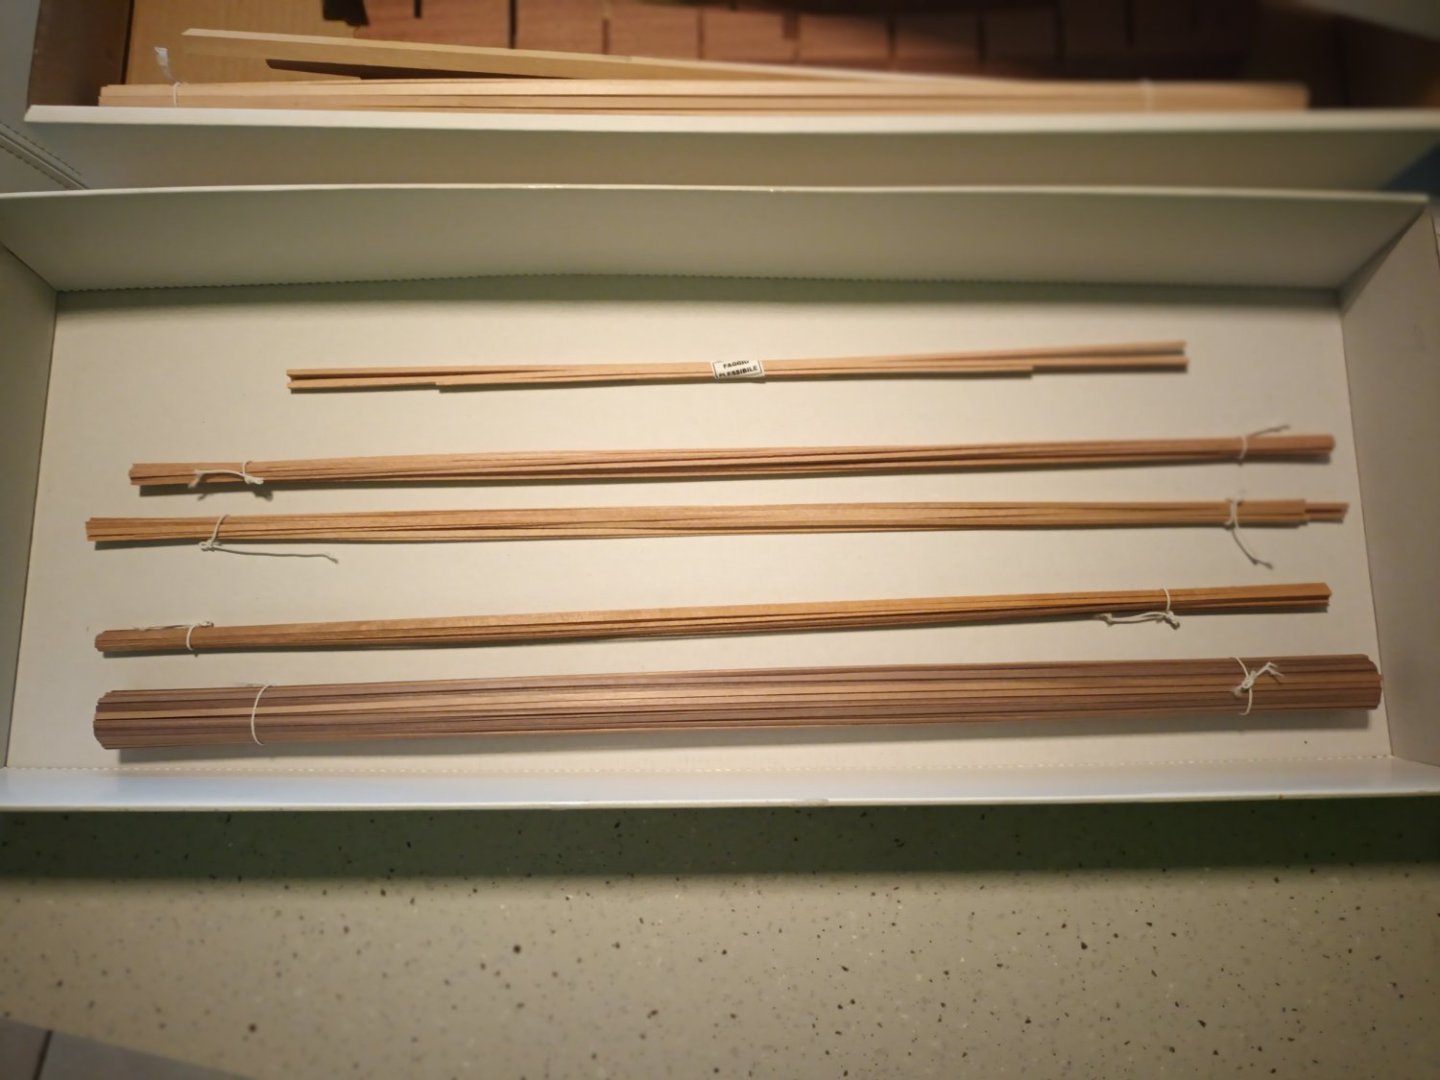
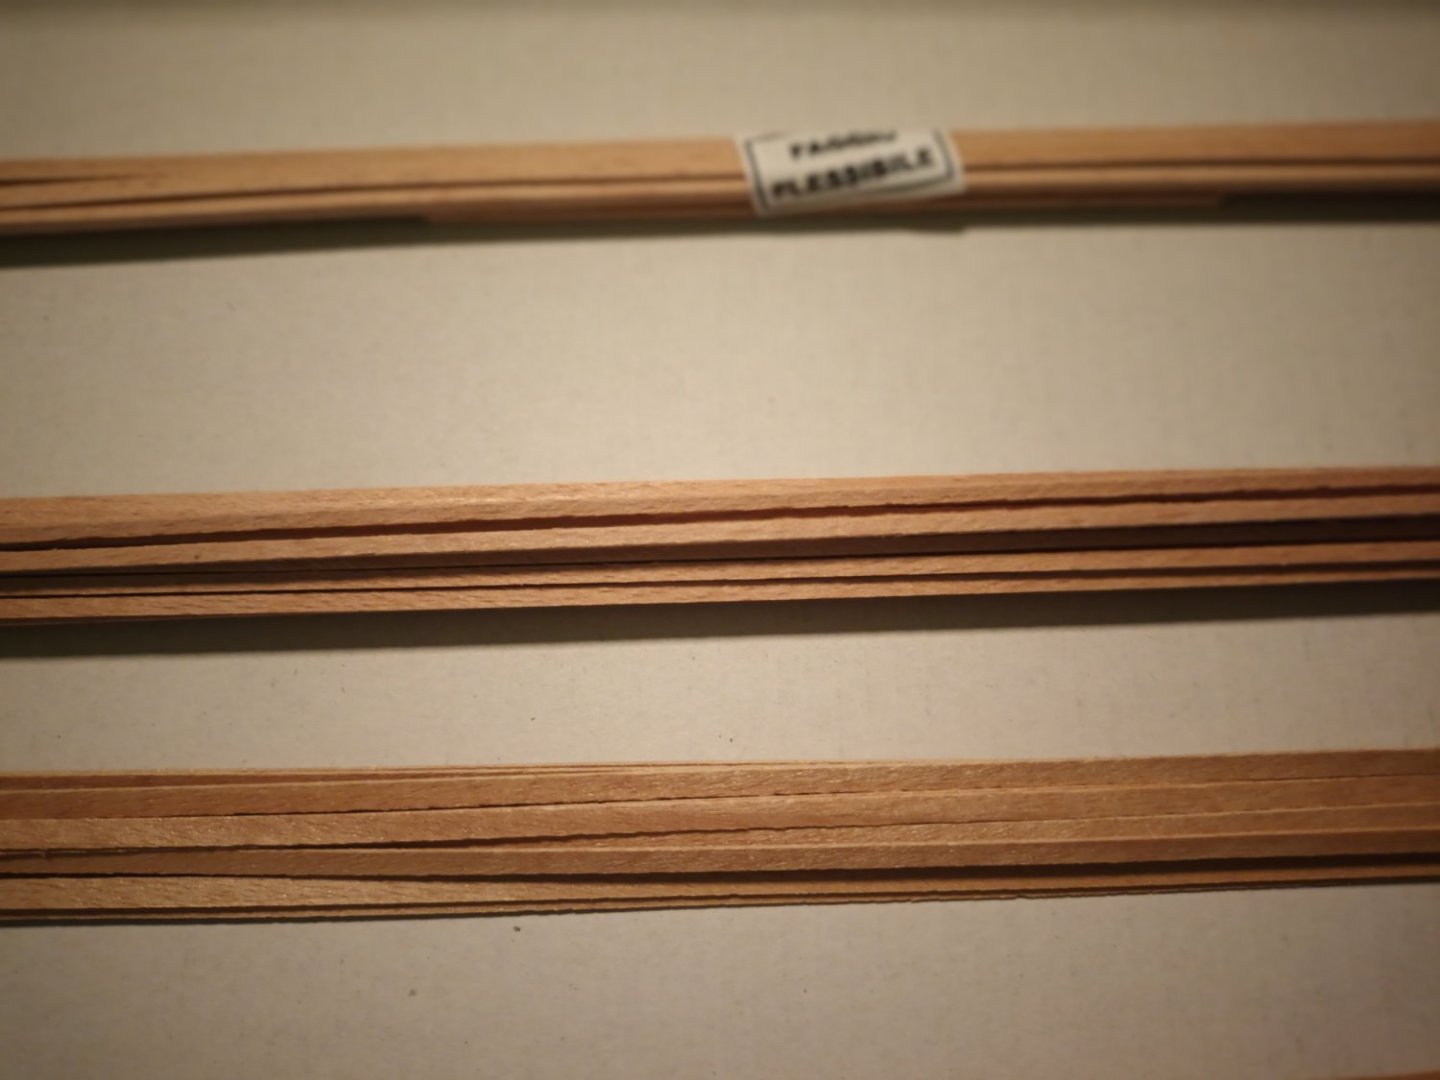
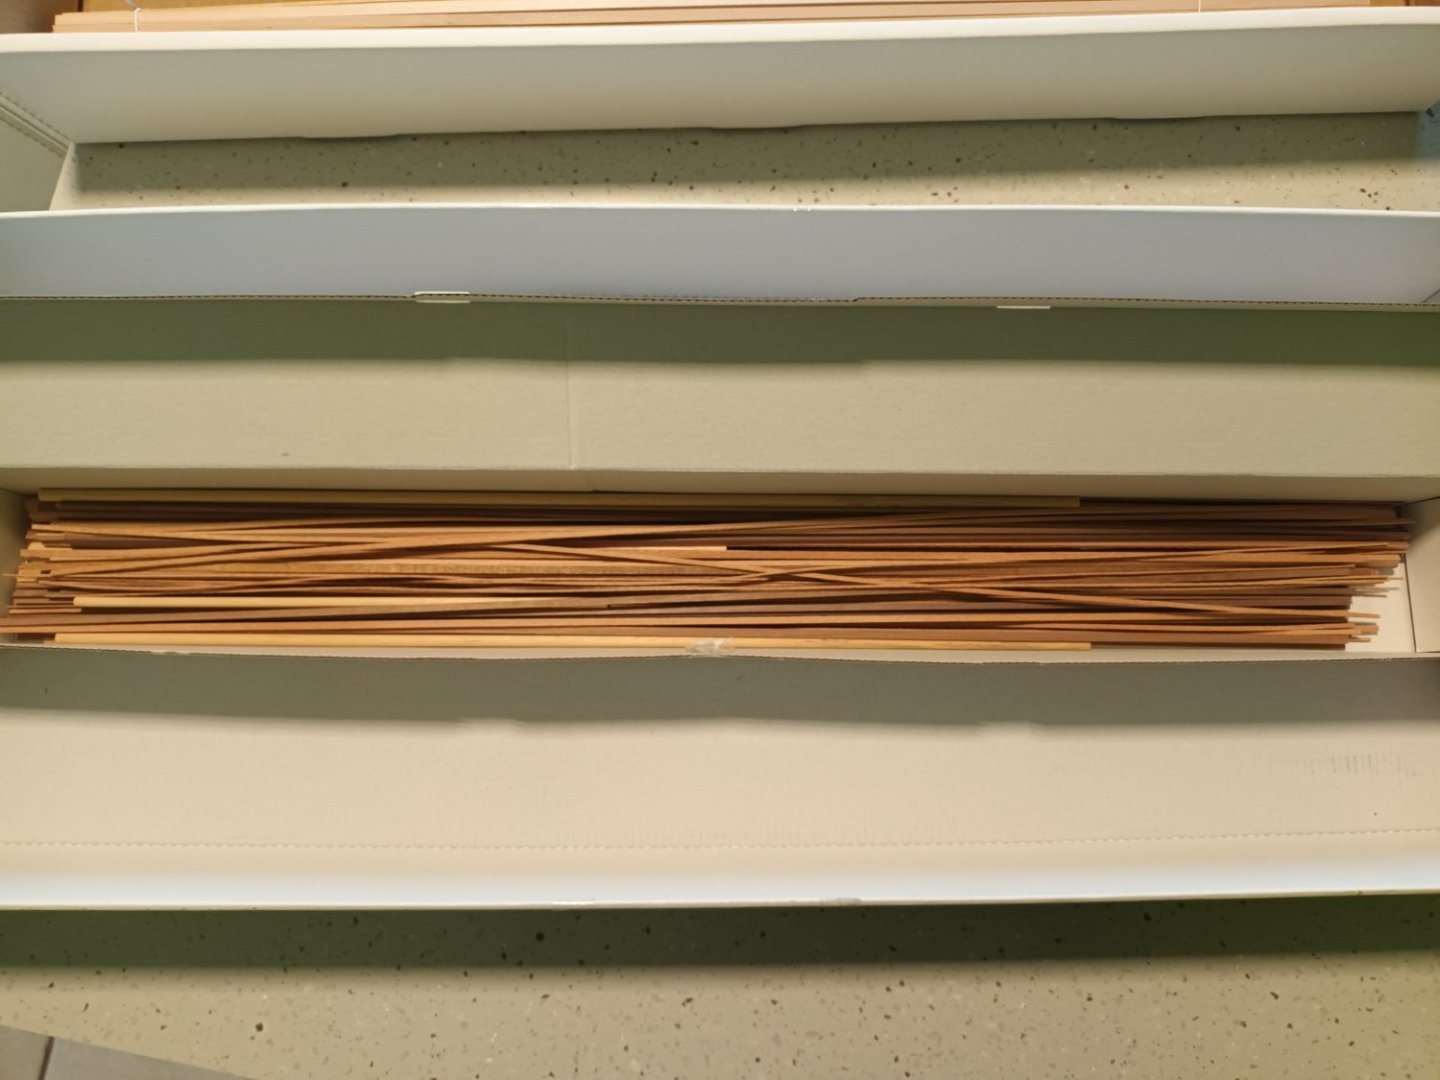
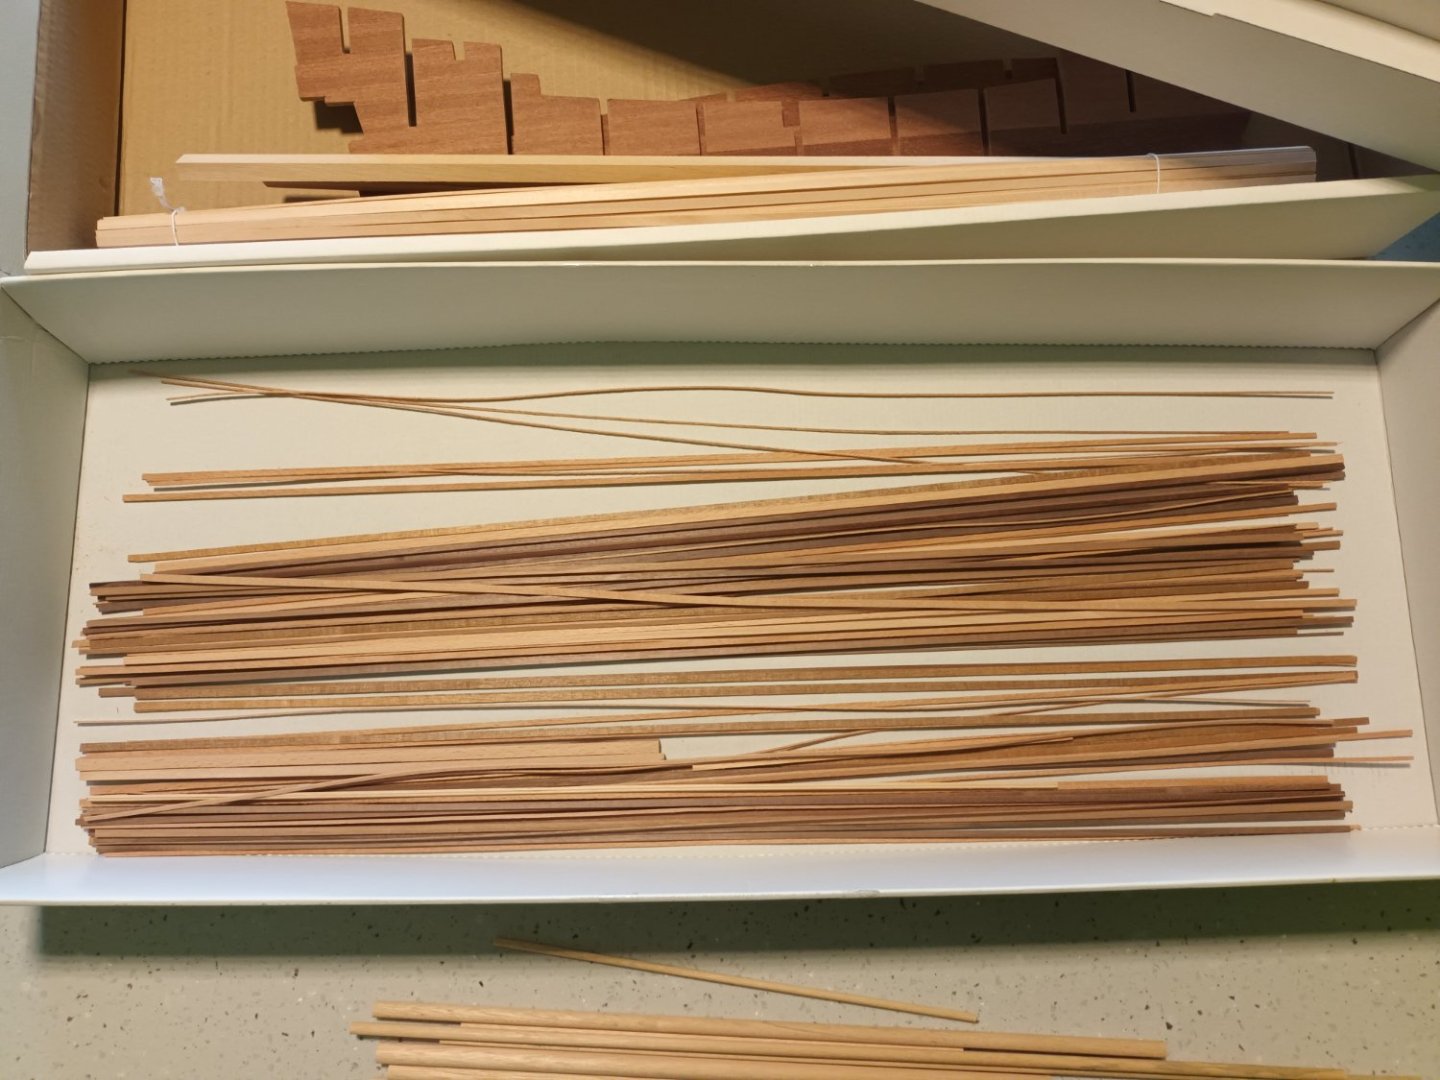
ships name : Prins Willim (a Dutch VOC ship 17th century) company : Corel scale 1:100 Kit number 20125 length 735mm height 580mm width 305mm Price : somewhere between 450 and 550 euros in this part of the world. I was able to buy my kit with a discount and paid 372 euros (so,couldn't resist buying) (This is my first kit review. After reading all the rules I don't think I've done much wrong ) general info https://en.wikipedia.org/wiki/Prins_Willem I think Prins Willim (with i ) is an old dutch spelling for Prins Willem. Manufacturers info (I don't think Corel has its own website) http://www.corel-srl.it/VASCELLISTORICI.html the box first impression : looks good A map with instructions and plans info about the ship detailed parts list The plans The parts The photo etched parts parts box 1 details parts box 1 parts box 2 detail parts box 2 The wooden parts plywood frames Plywood parts for the hull plywood parts for masts, channels. and solid wooden parts this plywood in detail Keel in thick plywood and deck in thin plywood the plywood of the keel in detail the "box" with planks planks for the first layer Second layer and others nice quality The other planks are of good quality but the organization is a bit "sloppy" only 3 planks are warped The wood for masts and yards For free : a cataloge to choose the next model


-
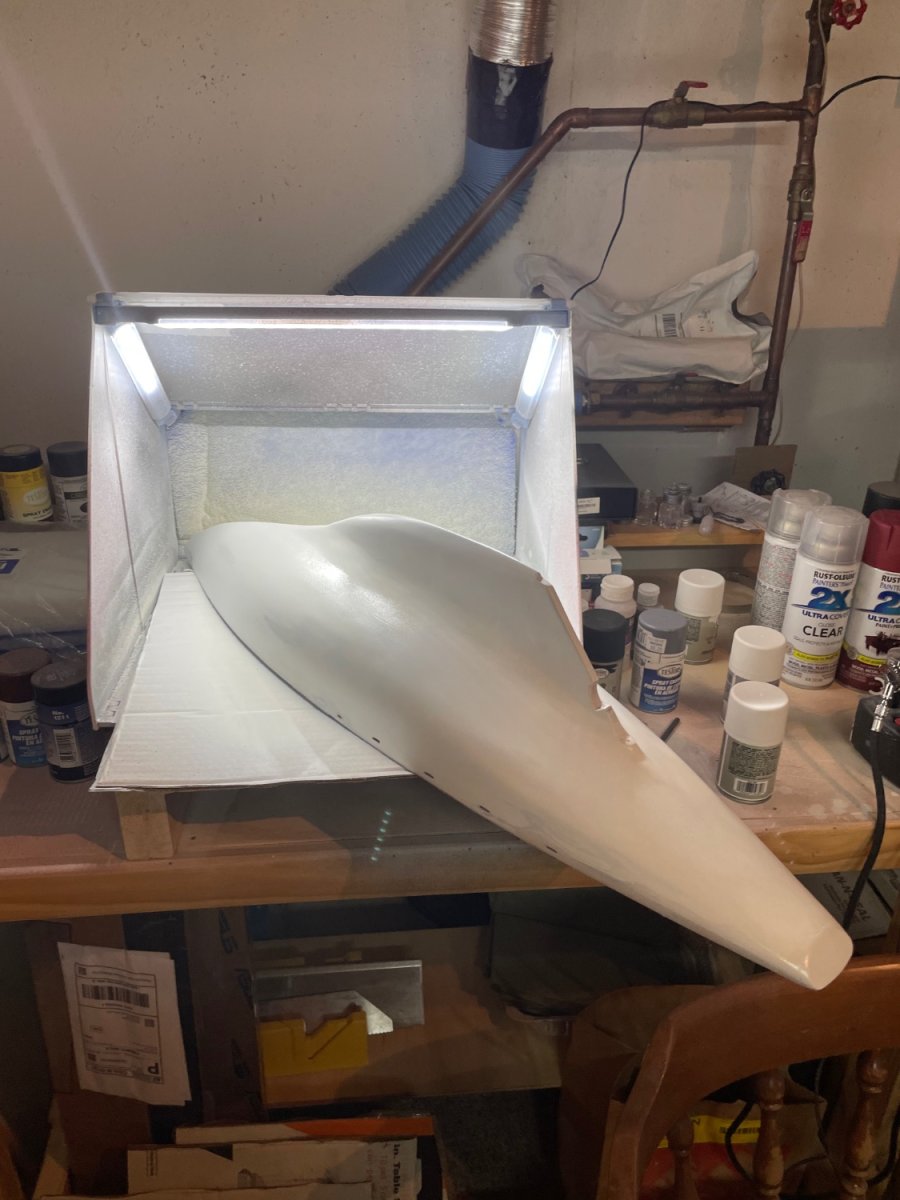
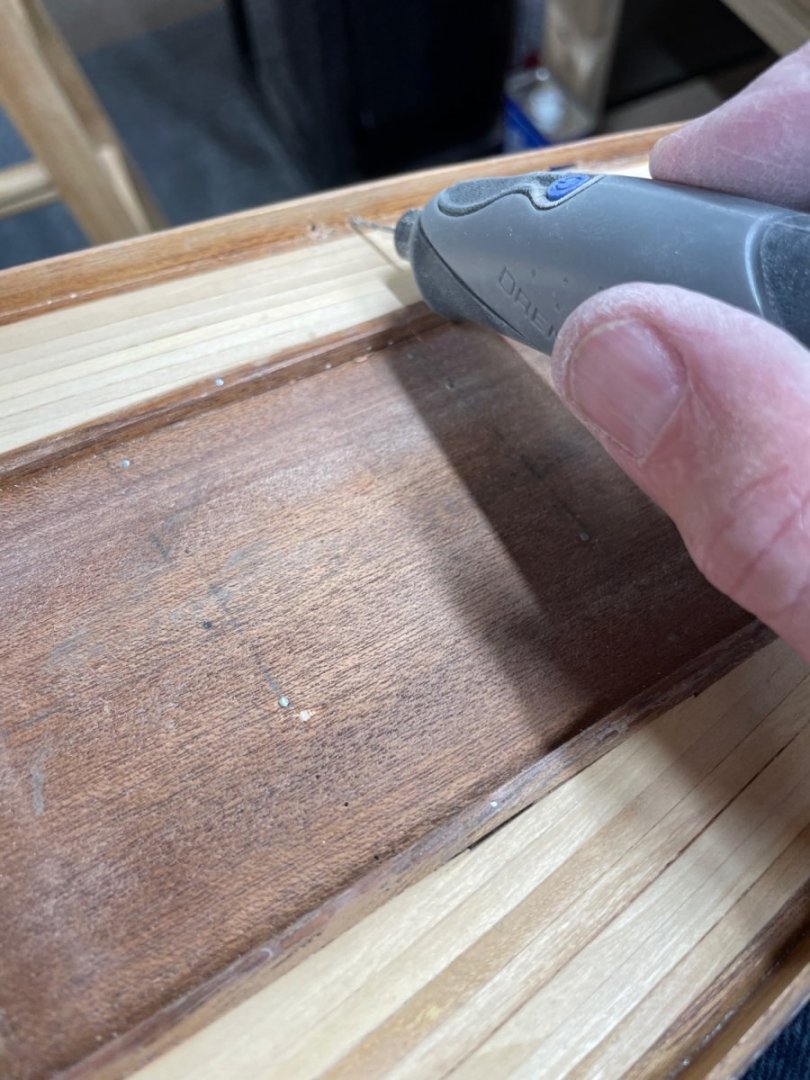
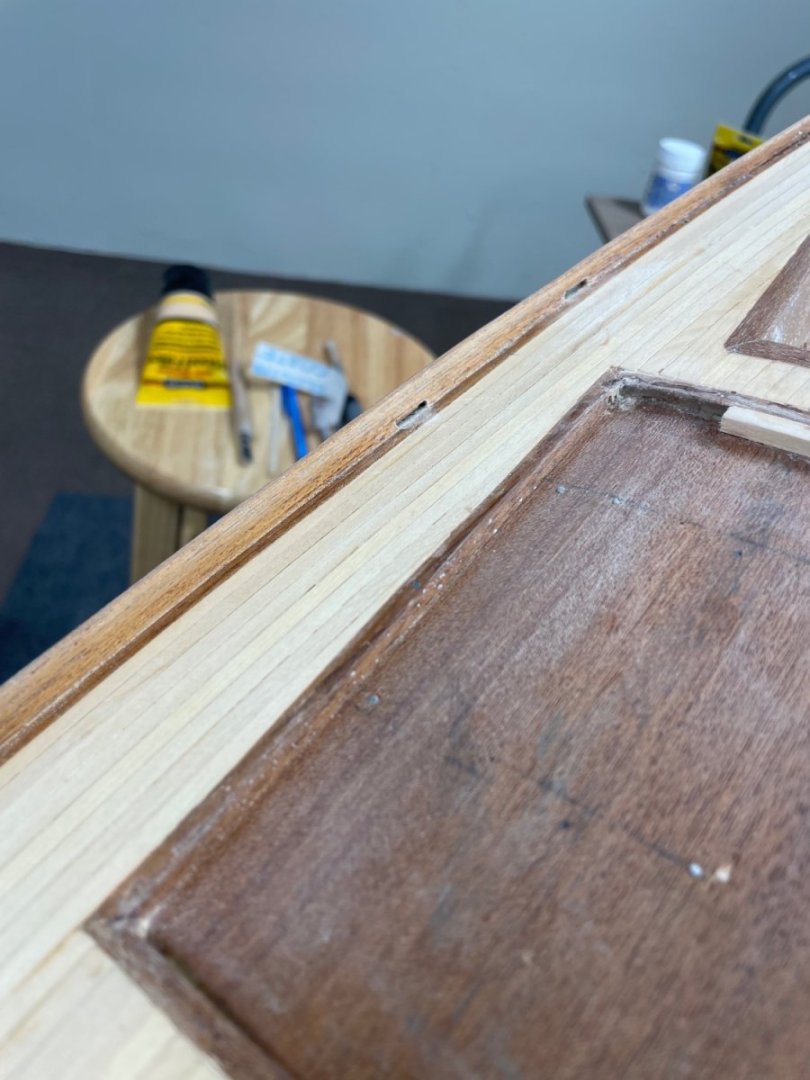
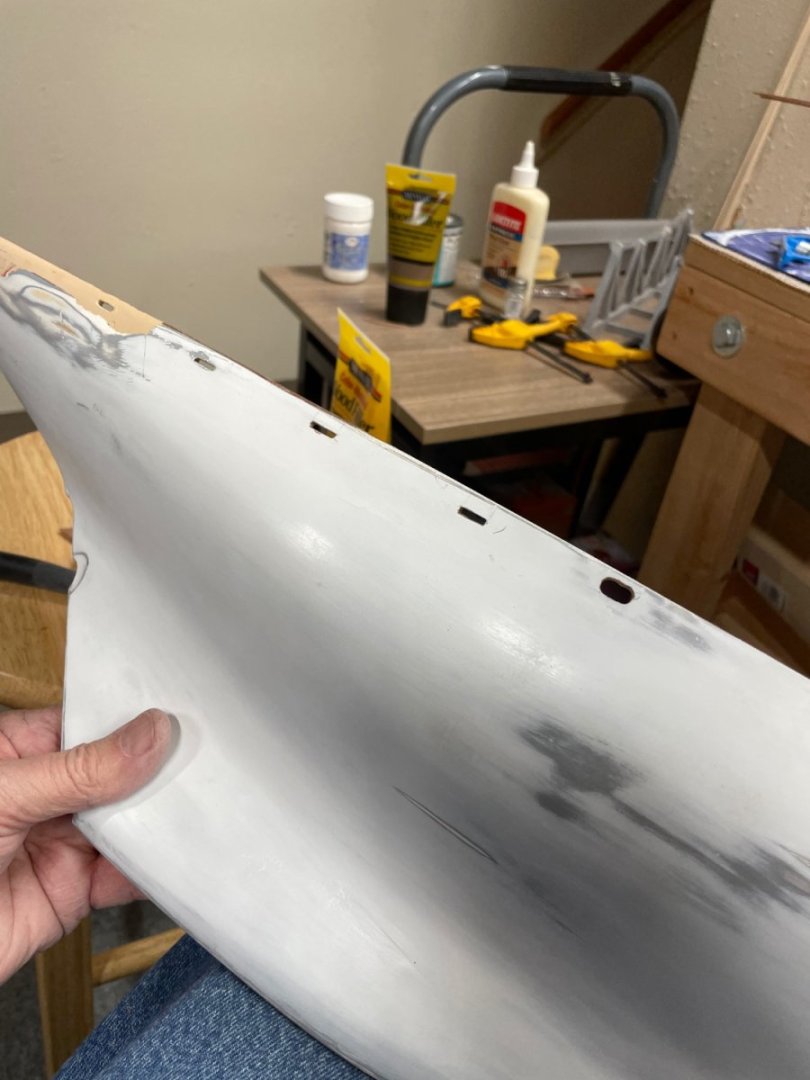
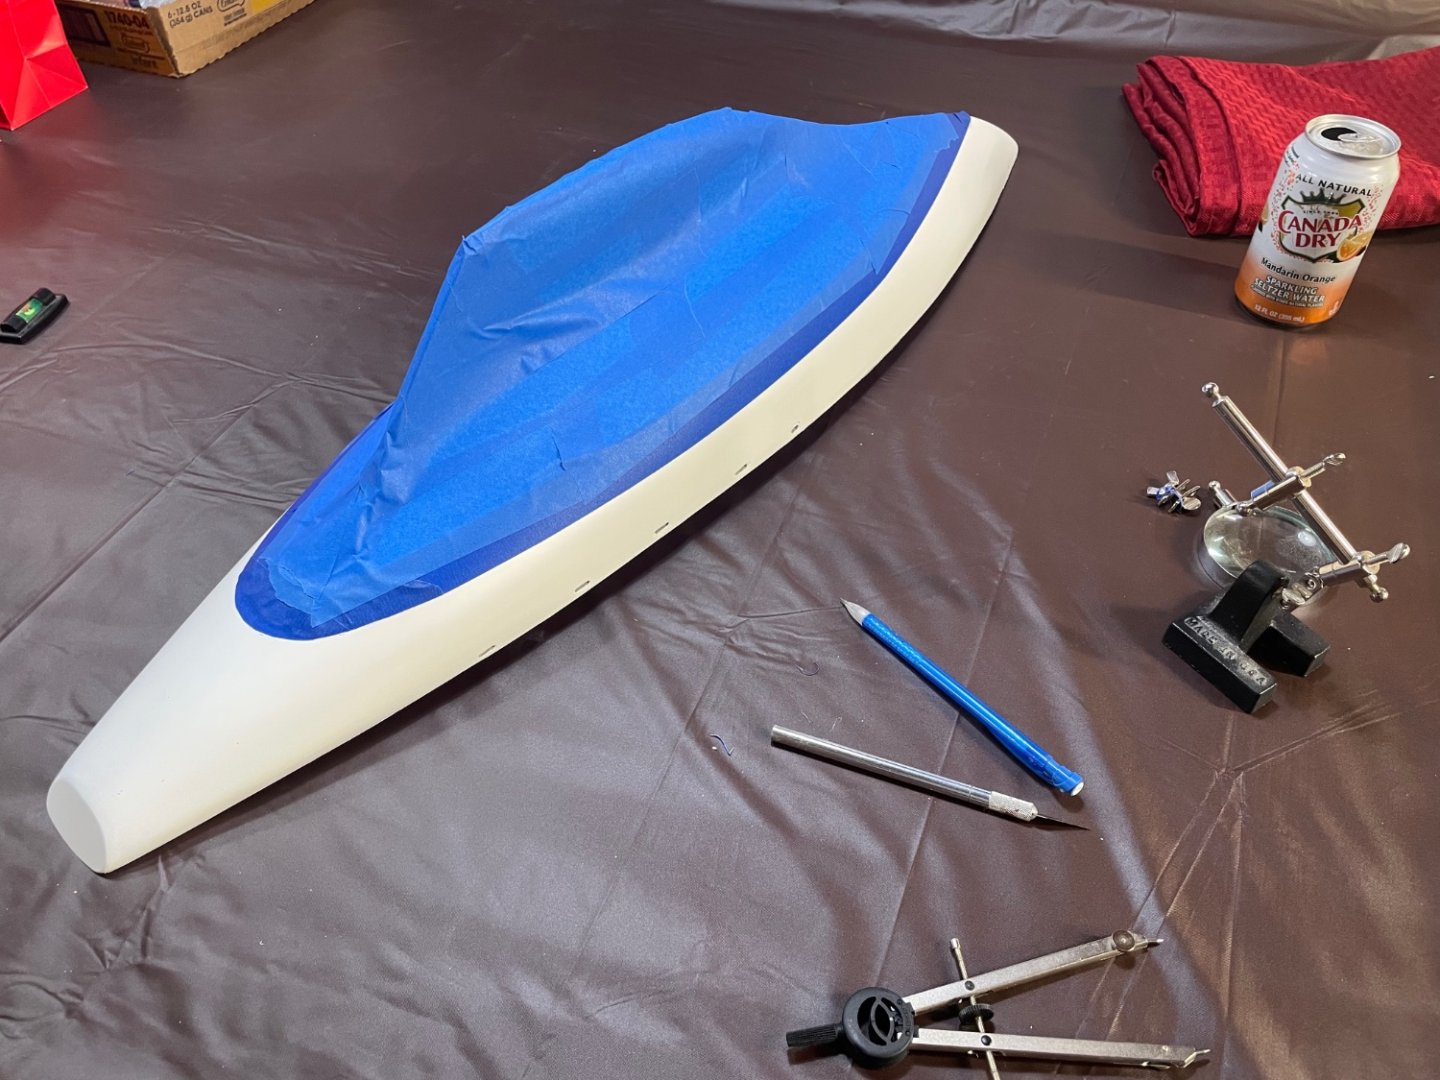
 Welcome to my latest build log. Picked up this beautiful kit from my new friend out of Montreal. @rshousha Rick has had this model on the shelf for the past 10 + years and wanted to find someone who would take her to completion. I have accepted that challenge and so, here begins the rest of the story. Here she is received into my home safe and undamaged via international shipment. After a close inspection 🧐 I found that time had not been kind to her deck. My first order of business was to remove Rick’s wonderfully installed deck furnishings and fittings to restore and finish the decking. I used Minwax color match filler to close the gaps and fine sand the finish. I then cut in the scuppers and hause holes. Prepared the hull for a few more coats of paint. Drew the waterline and masked to paint from the waterline up. And then waterline down… Ready for some more sanding and then a few coats of clear ploy to give her a nice shine. Rick, Beautifully done hull and decking. 👍 We are on our way to completion. 🍻
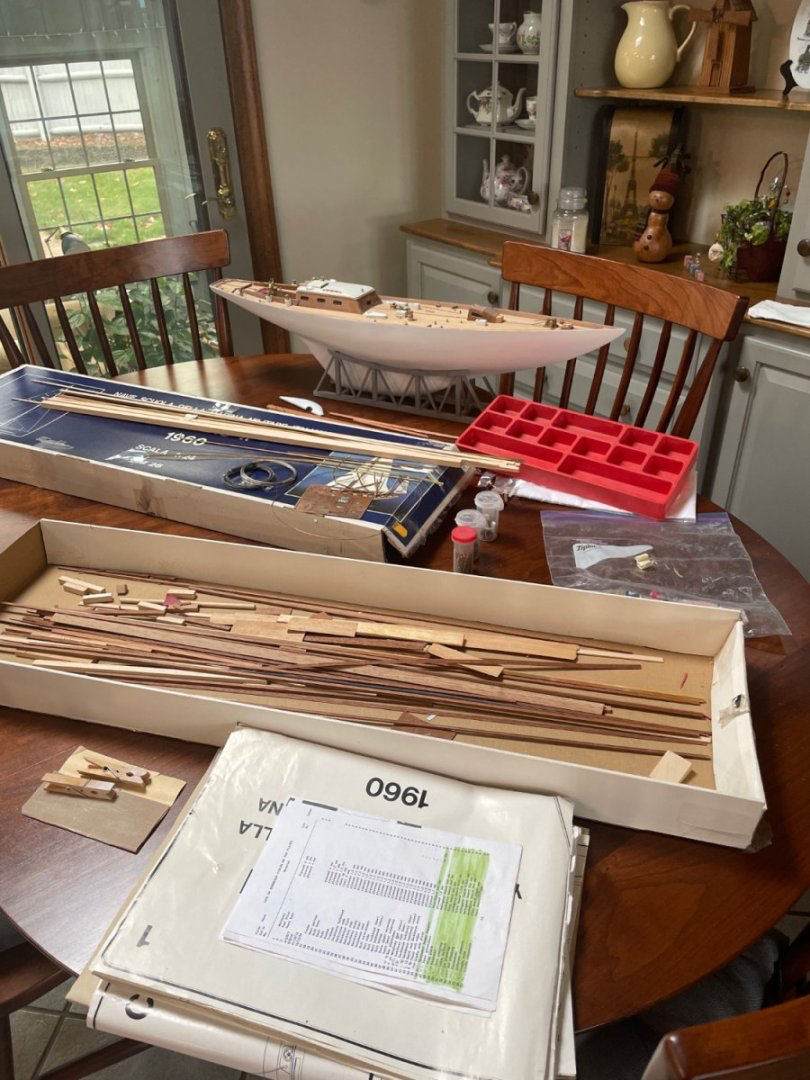


- 84 replies
-
- 14
-
-
-
- Corsaro II
- Corel
- (and 1 more)
-
 I know this kit is a bit rubbish but I'm dead keen on building a stable of HMS Royal Navy ships and starting with a sixth rate ship of the line and building upwards.. also it only has 20 cannons and doing all the details of the cannons x20 seems boring to me Goals for this kit are: Knowing that some of the bulkheads are wrong I am going to utilize navisworks and either do some 2d or 3d modelling and see if I can create my own bulkhead patterns that fix the problems and recut them... im thinking about laser cutting .. will have to see how the budget goes. Filler blocks under the first planking to provide that stability to the first planking and give a solid base. Small metal 90 degree angles to keep the bulkheads straight to the keel Less glue and more pre shaping with minimal glue to stop staining and minimal filler... famous last words.. Mark of a good craftsman?!?! Rigging the boat with sails furled to see the running rigging as well as the other rigging. It's a pretty little ship and I think I can do her justice.. will take 6-9 months I think. The 1:100 scale will make the rigging quite small though for my sausage fingers. Anyway looking forward to it.
-
 The smallest ship i am taking on......nothing for months then along come two...this and Endeavour.
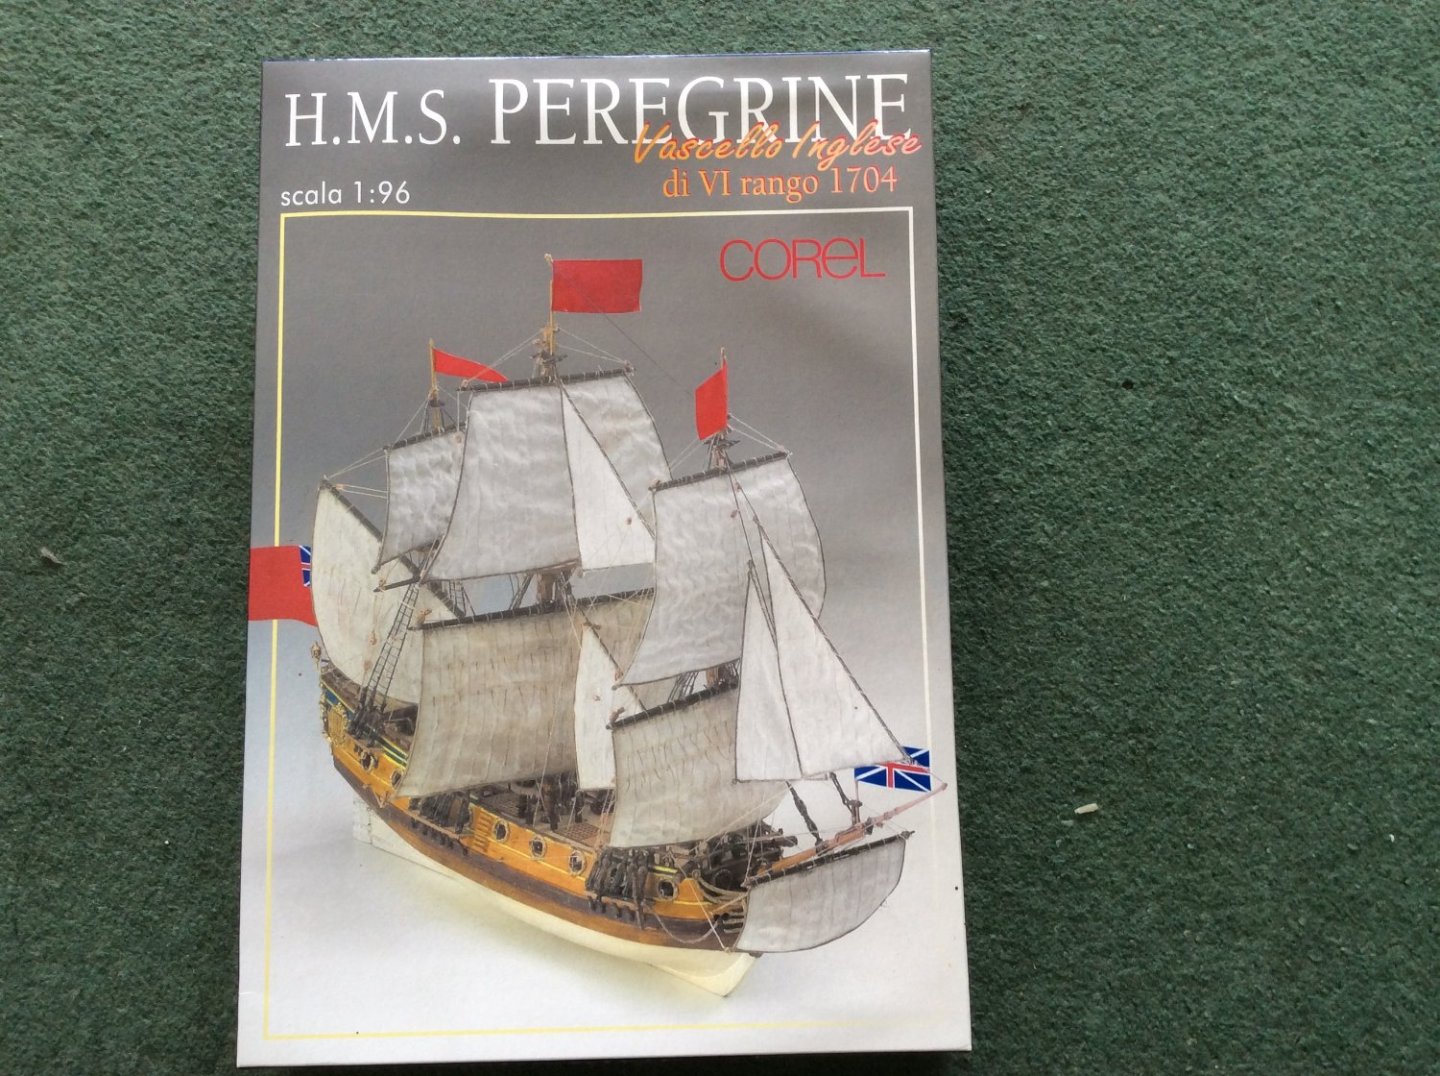

-
Whilst Endeavour is in the news recently I have decided to get it from the shelf and start to build whilst finishing the rigging on Unicorn. A couple of pics of the initial few ist planks.

-
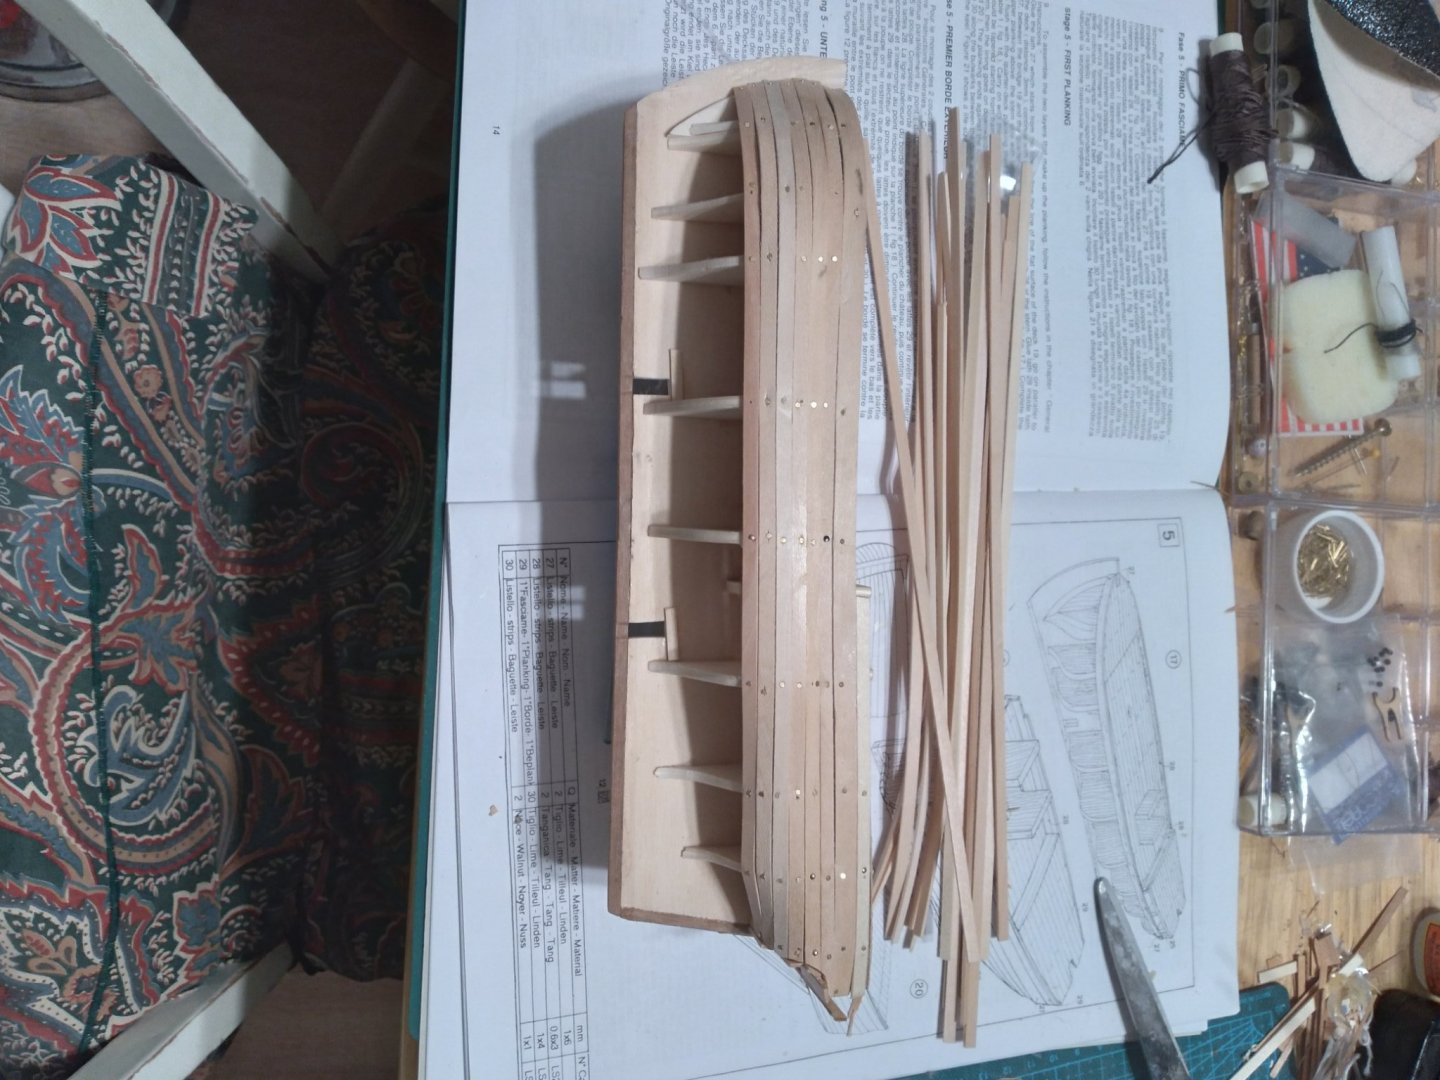
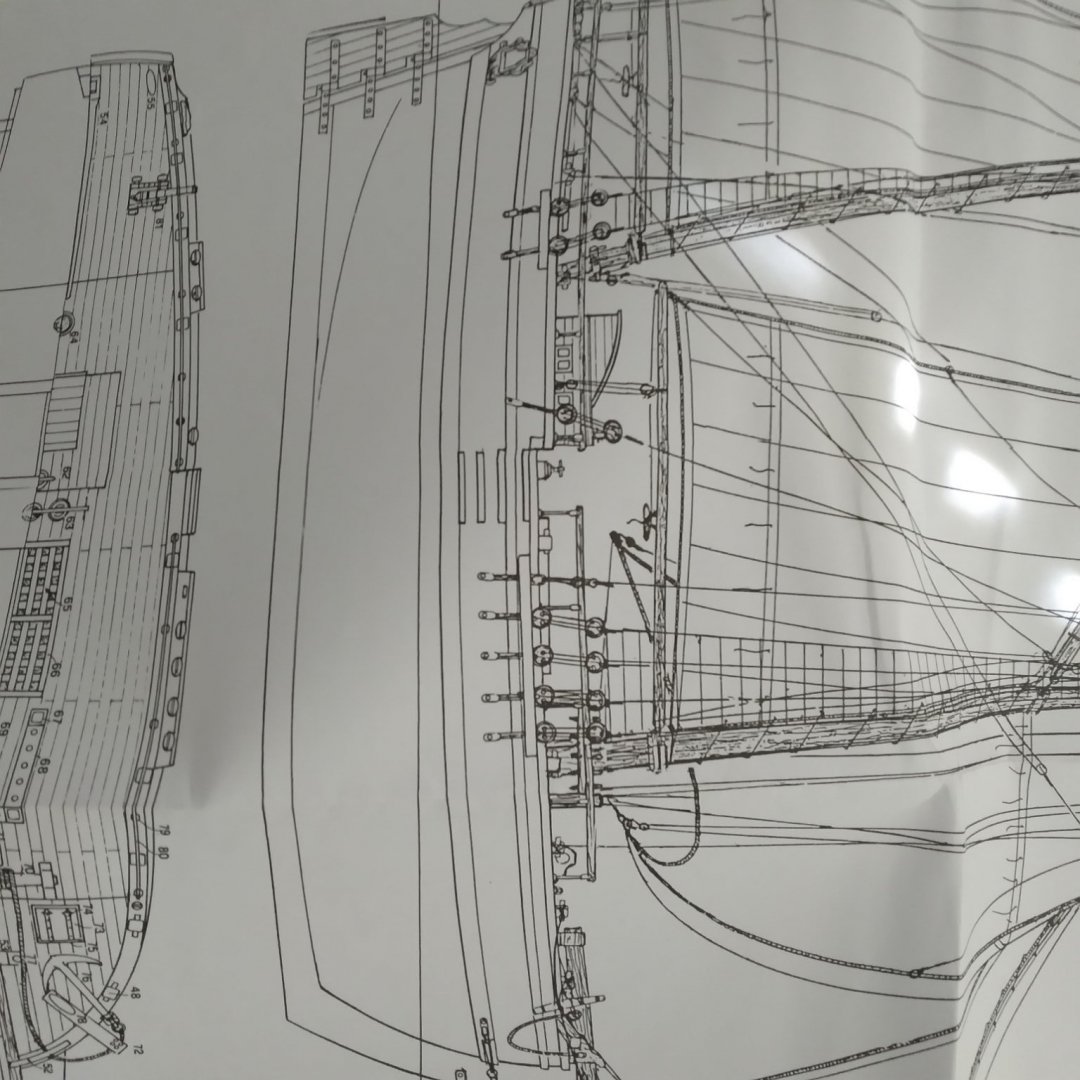
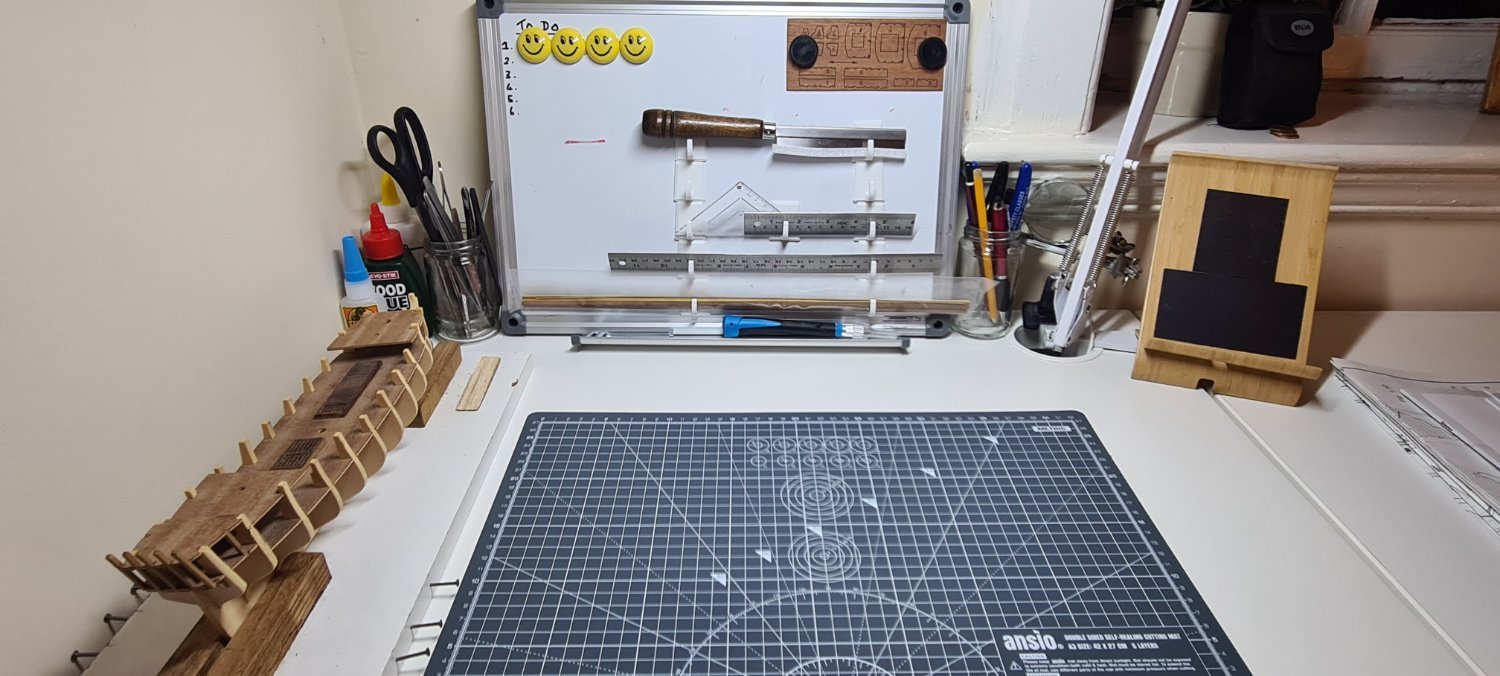
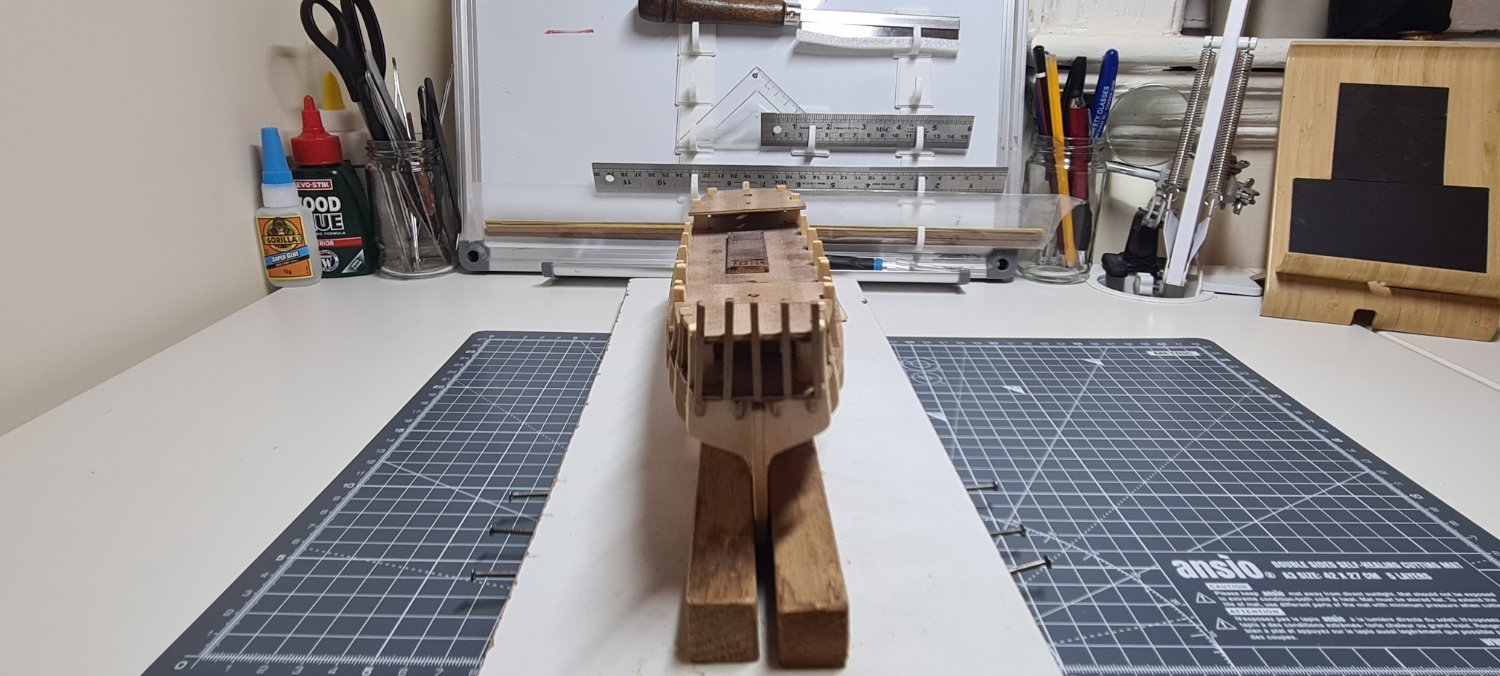
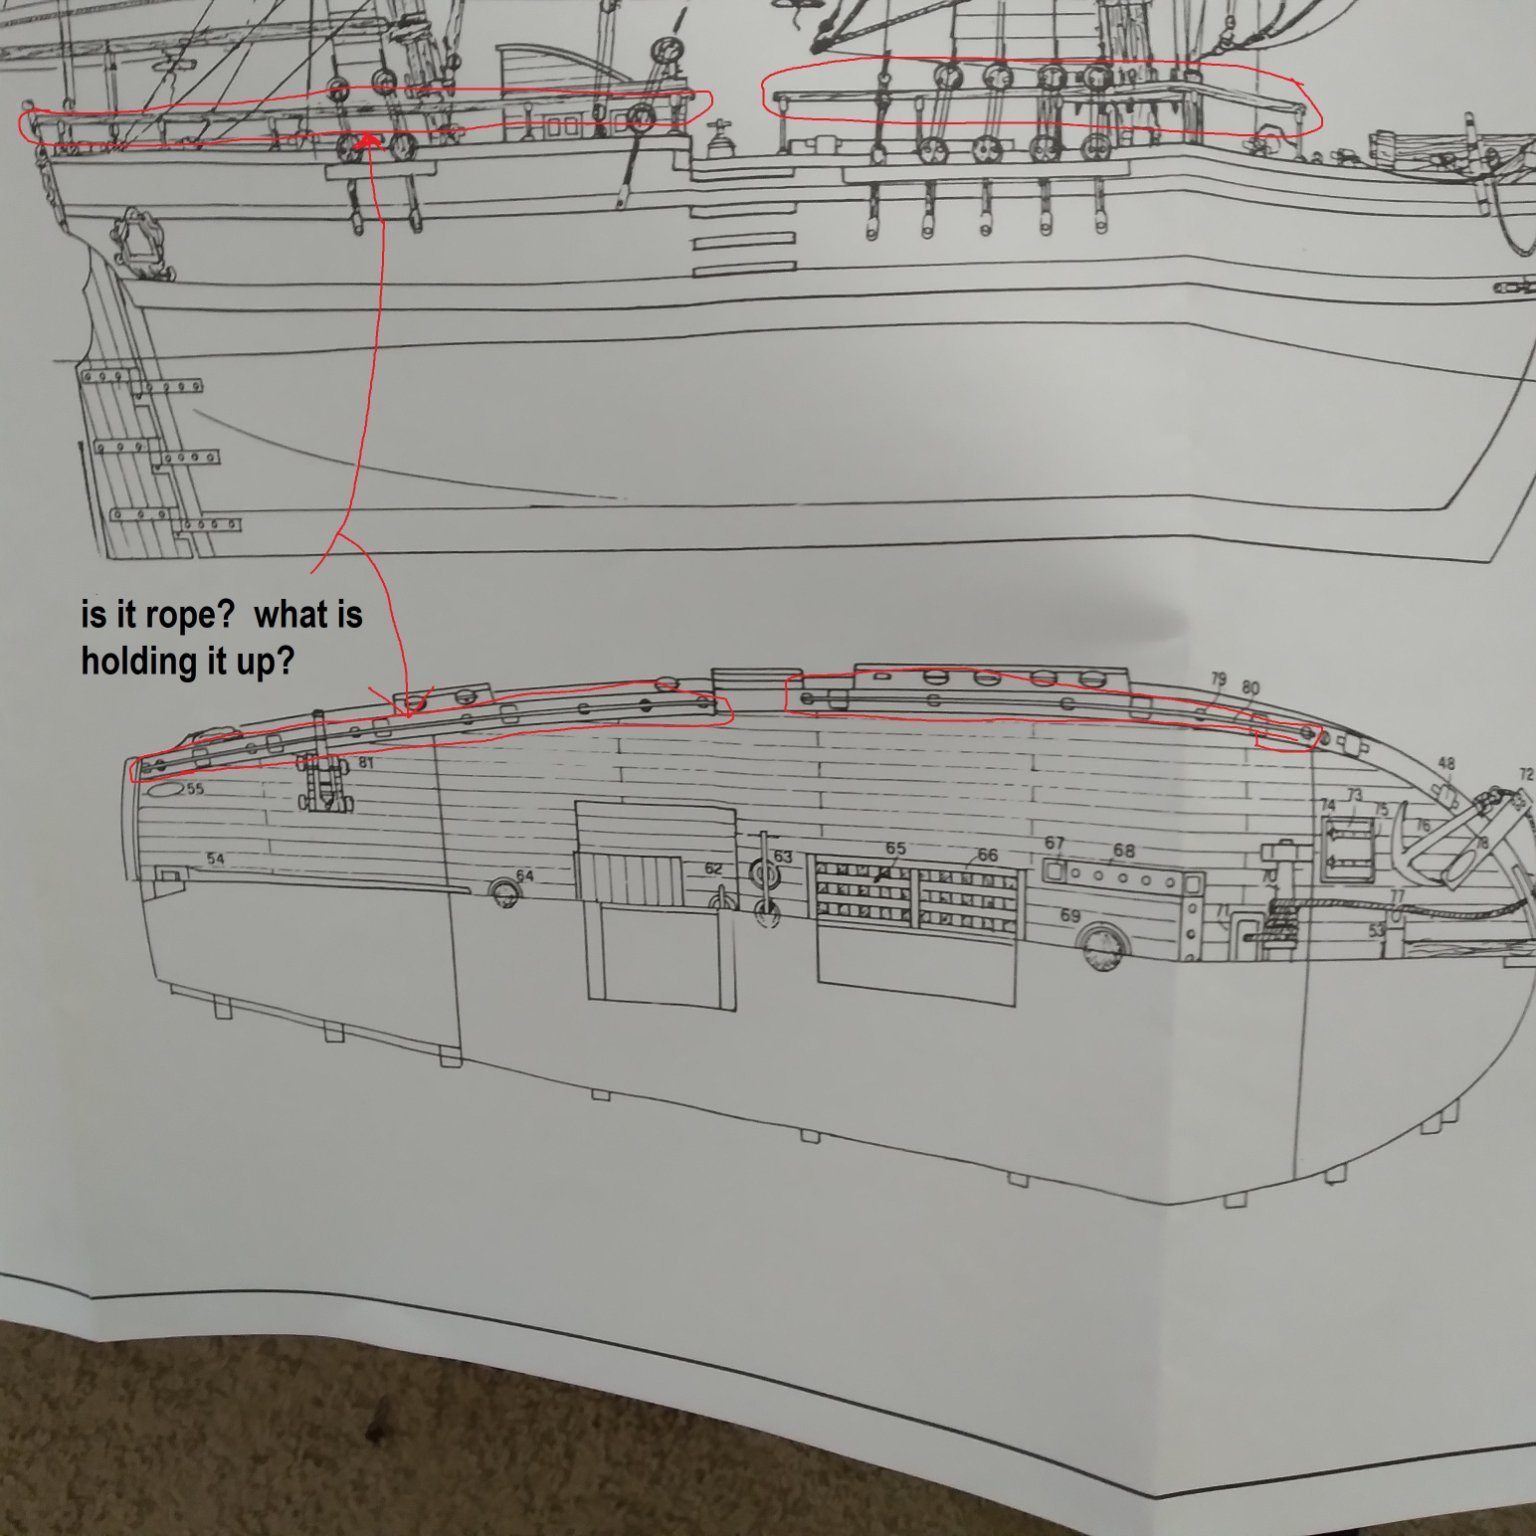
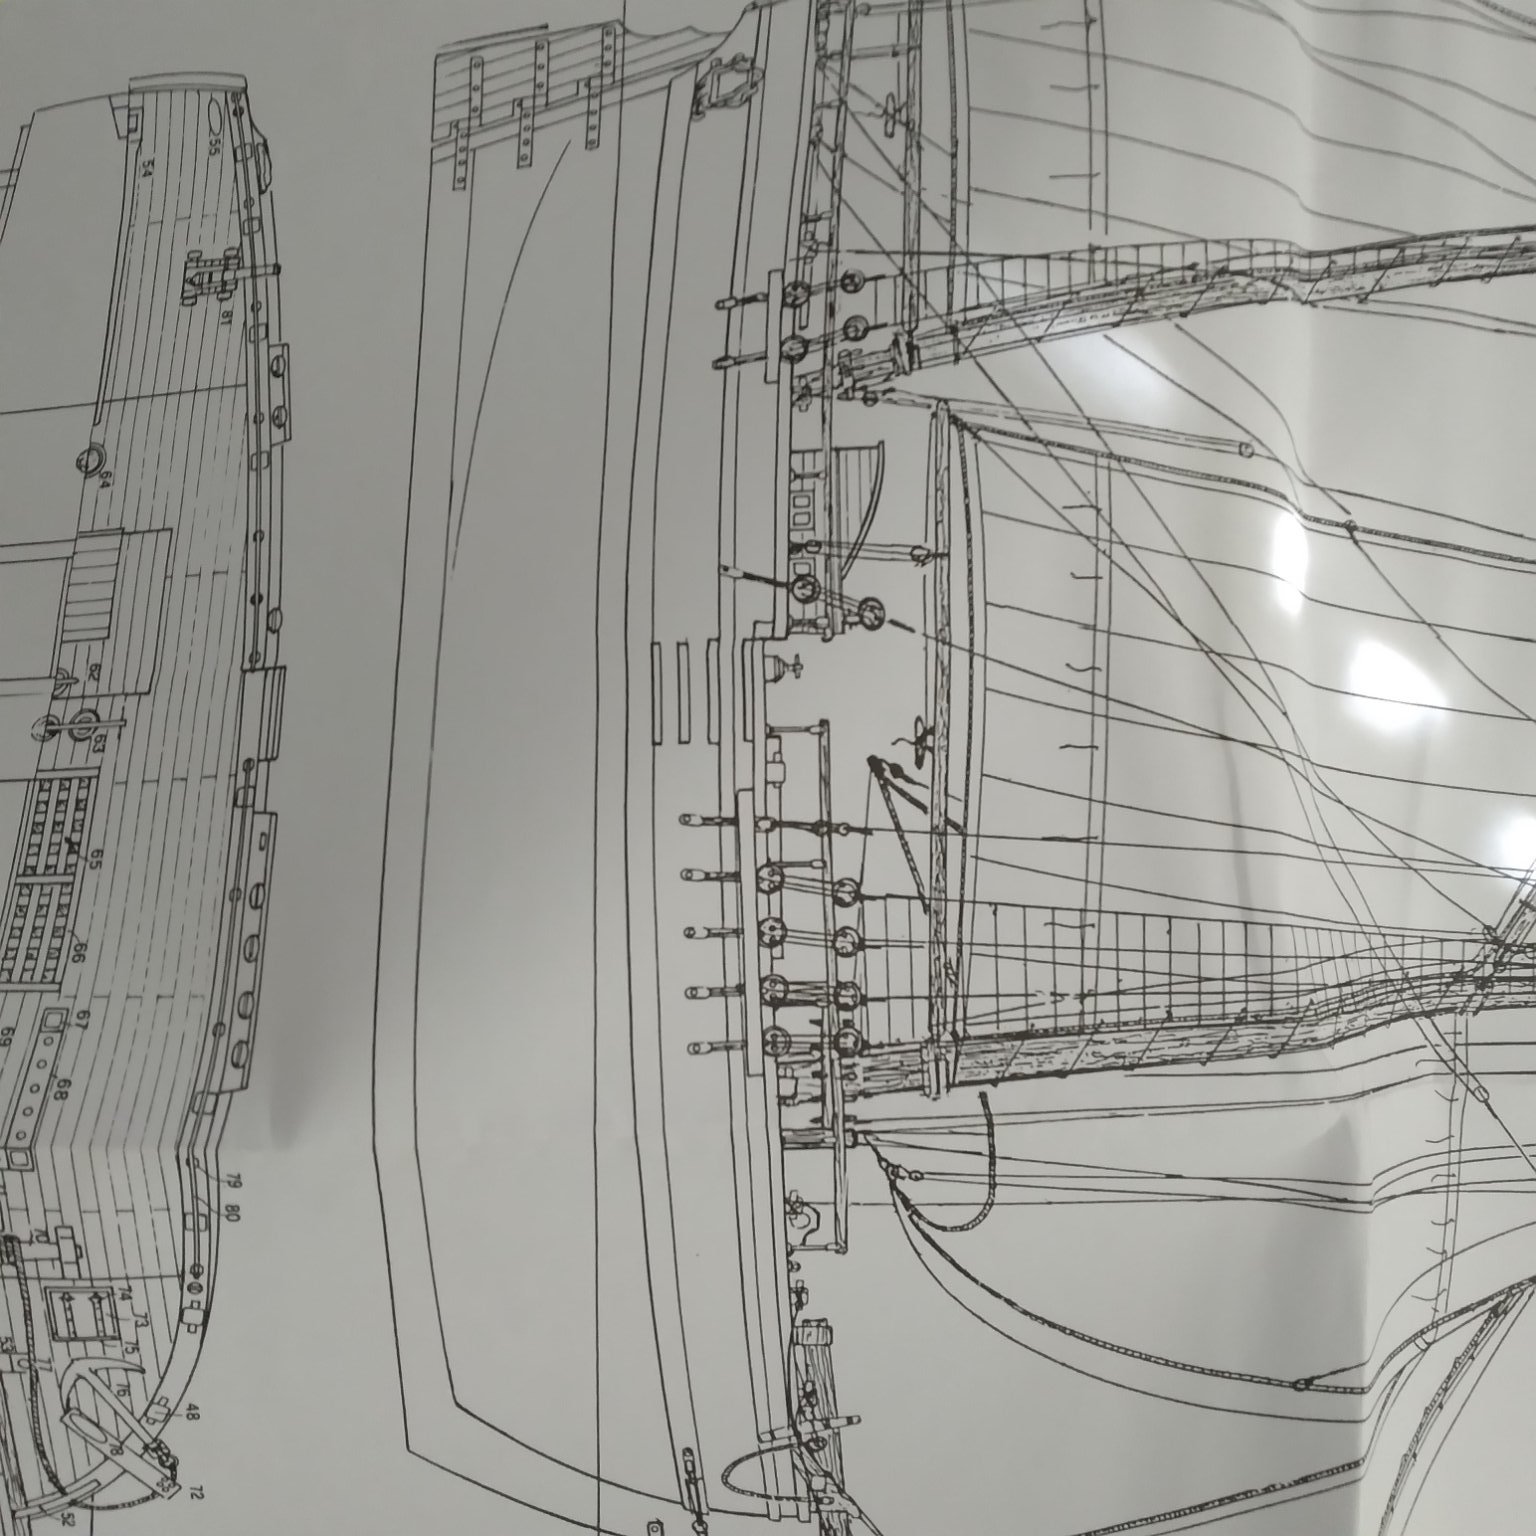
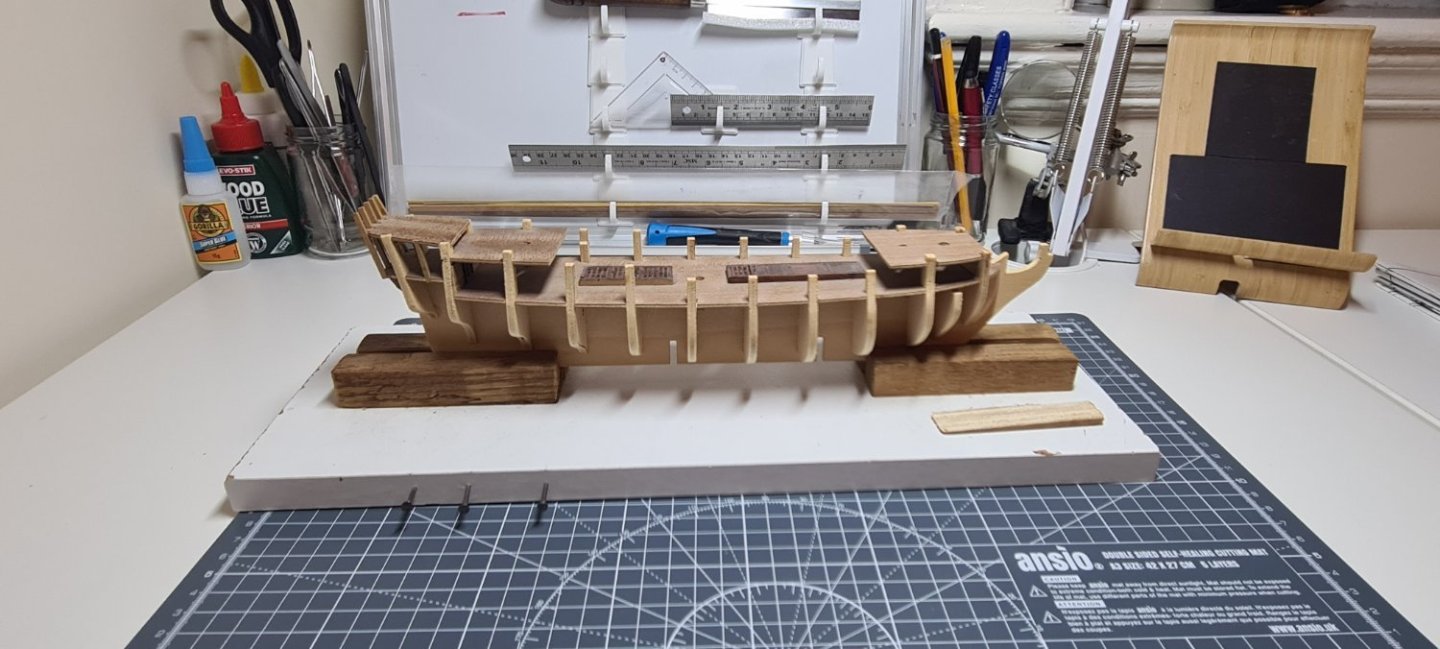
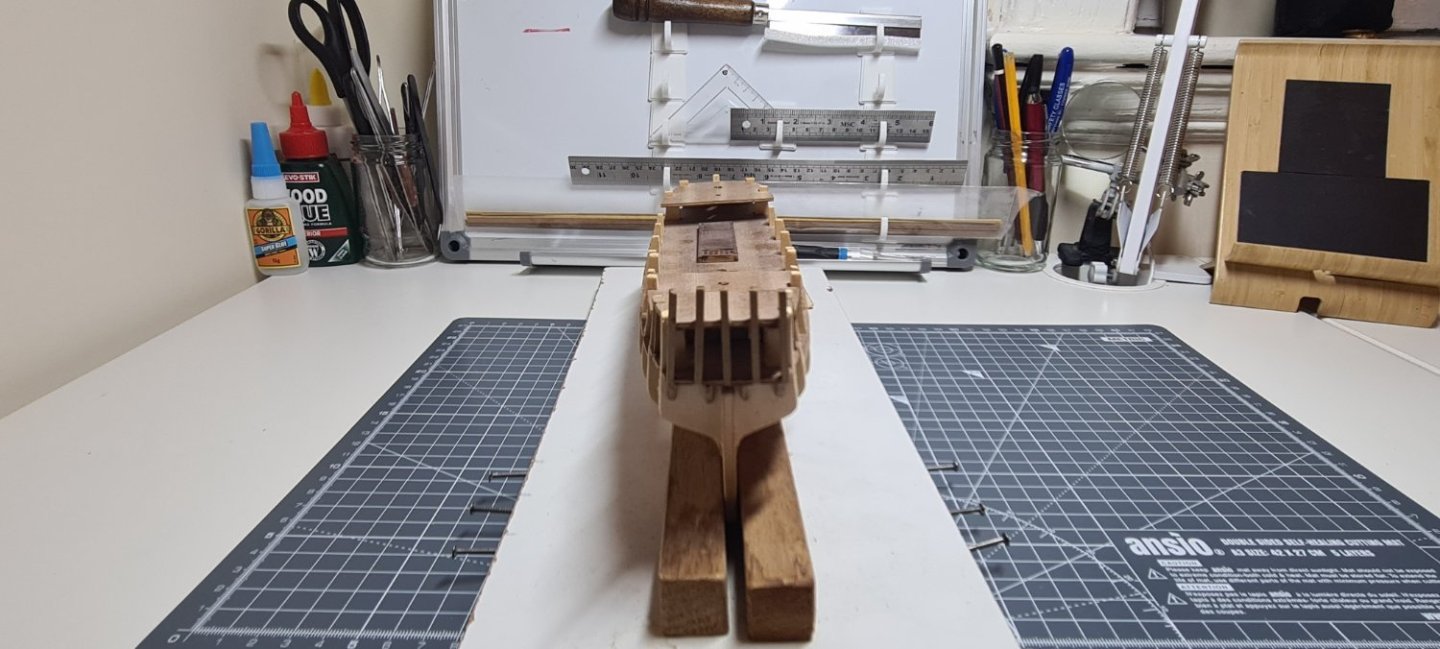
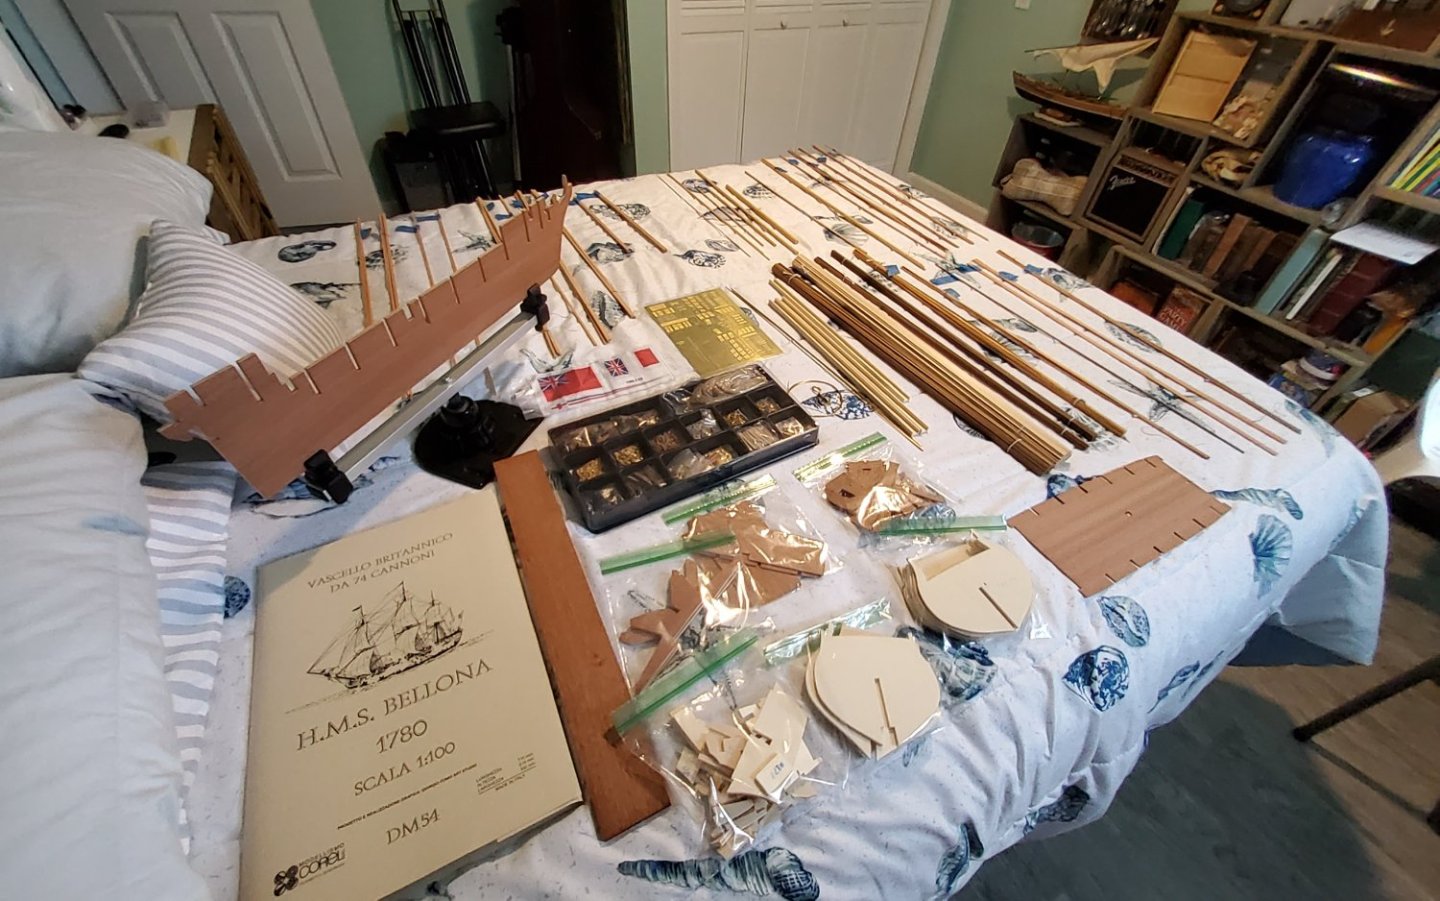
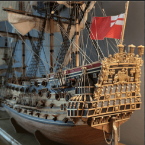
 Hello, I have seen a couple of build logs for the HMS Bellona on MSW and I am going to attempt to build this amazing ship. I hope that I can be half as good as the others that are building this ship. I ordered the kit back in May and received it at the end of June. I was surprised that it shipped from Australia as I got a notice that it was stuck in customs. Well, I was not going to start on this until I completed my 1850 Whaling Launch by Panart, which I did. I posted the finished build on the finished build area of MSW. Anyway, this is my humbled opinion on the kit so far. My first opinion when opening up the box and inspecting the contents was "Oh Boy!!! It's so small" The Whaling Launch was 1:16 scale so going to a 1:100 scale was a bit of a shock. I didn't want to build a large model because I am limited on space. Being in line with the other previews of this kit, I inspected the contents and reviewed the drawings and instructions. They weren't kidding when they say that Corel isn't much on their instructions. I think there is a whole 6 pages in English on how to construct this kit. There are about 10 sheets of drawings, most of them being to scale. There is no parts inventory with this kit, but I knew that going into it from previous reviews that I read. I sorted all the strips of wood and labeled them as to their size so I wouldn't have to hunt for them when needed. I'm not a very experienced modeler, so this will be a very challenging kit for me to build. I am glad that there are a couple of other build logs here that I can follow and help get through some of the difficult challenges that lay ahead.
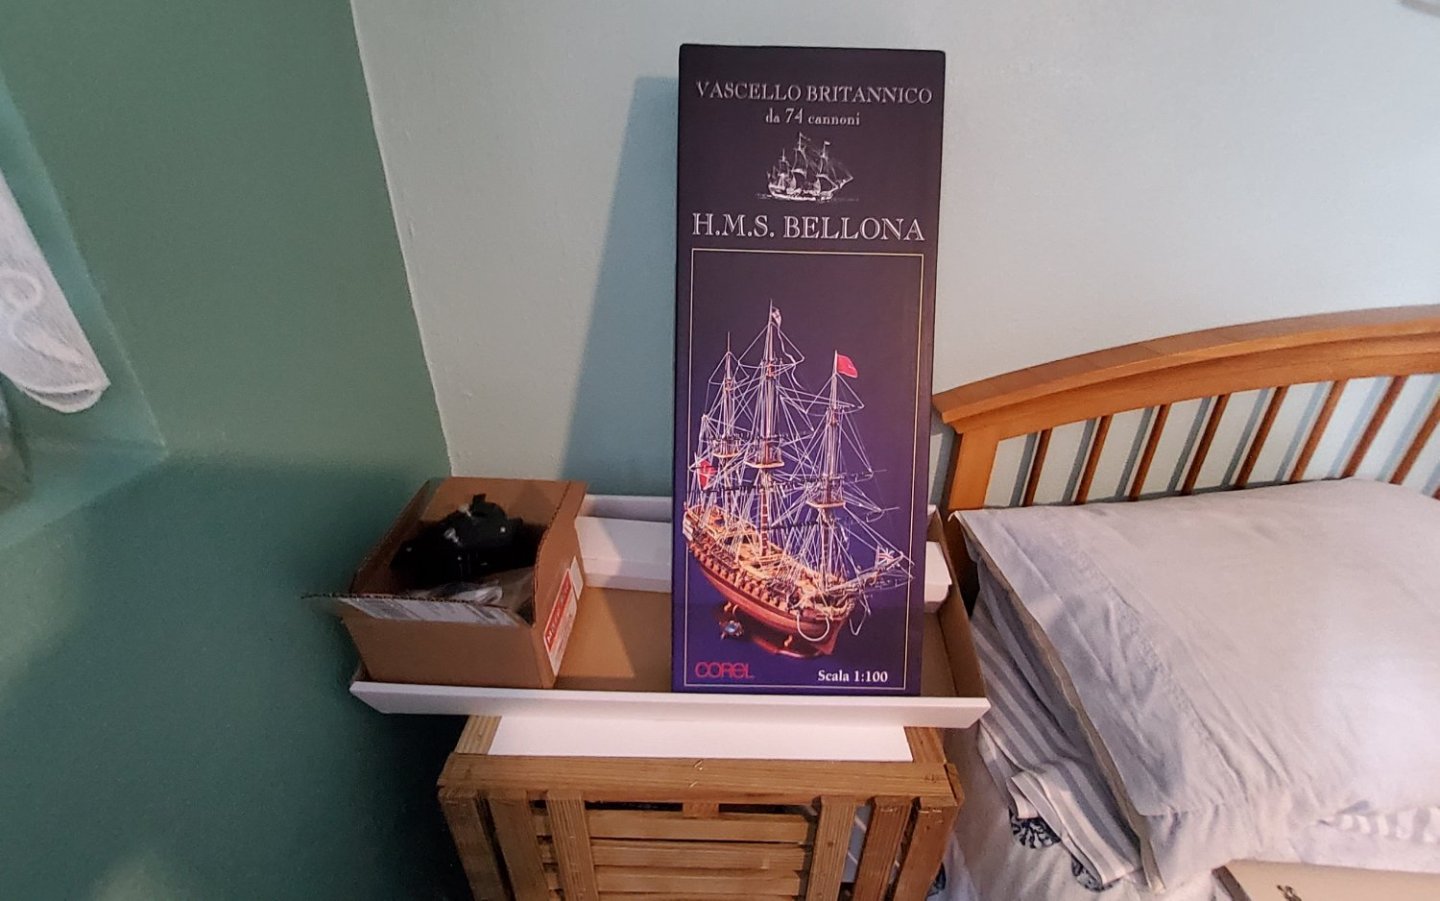


-
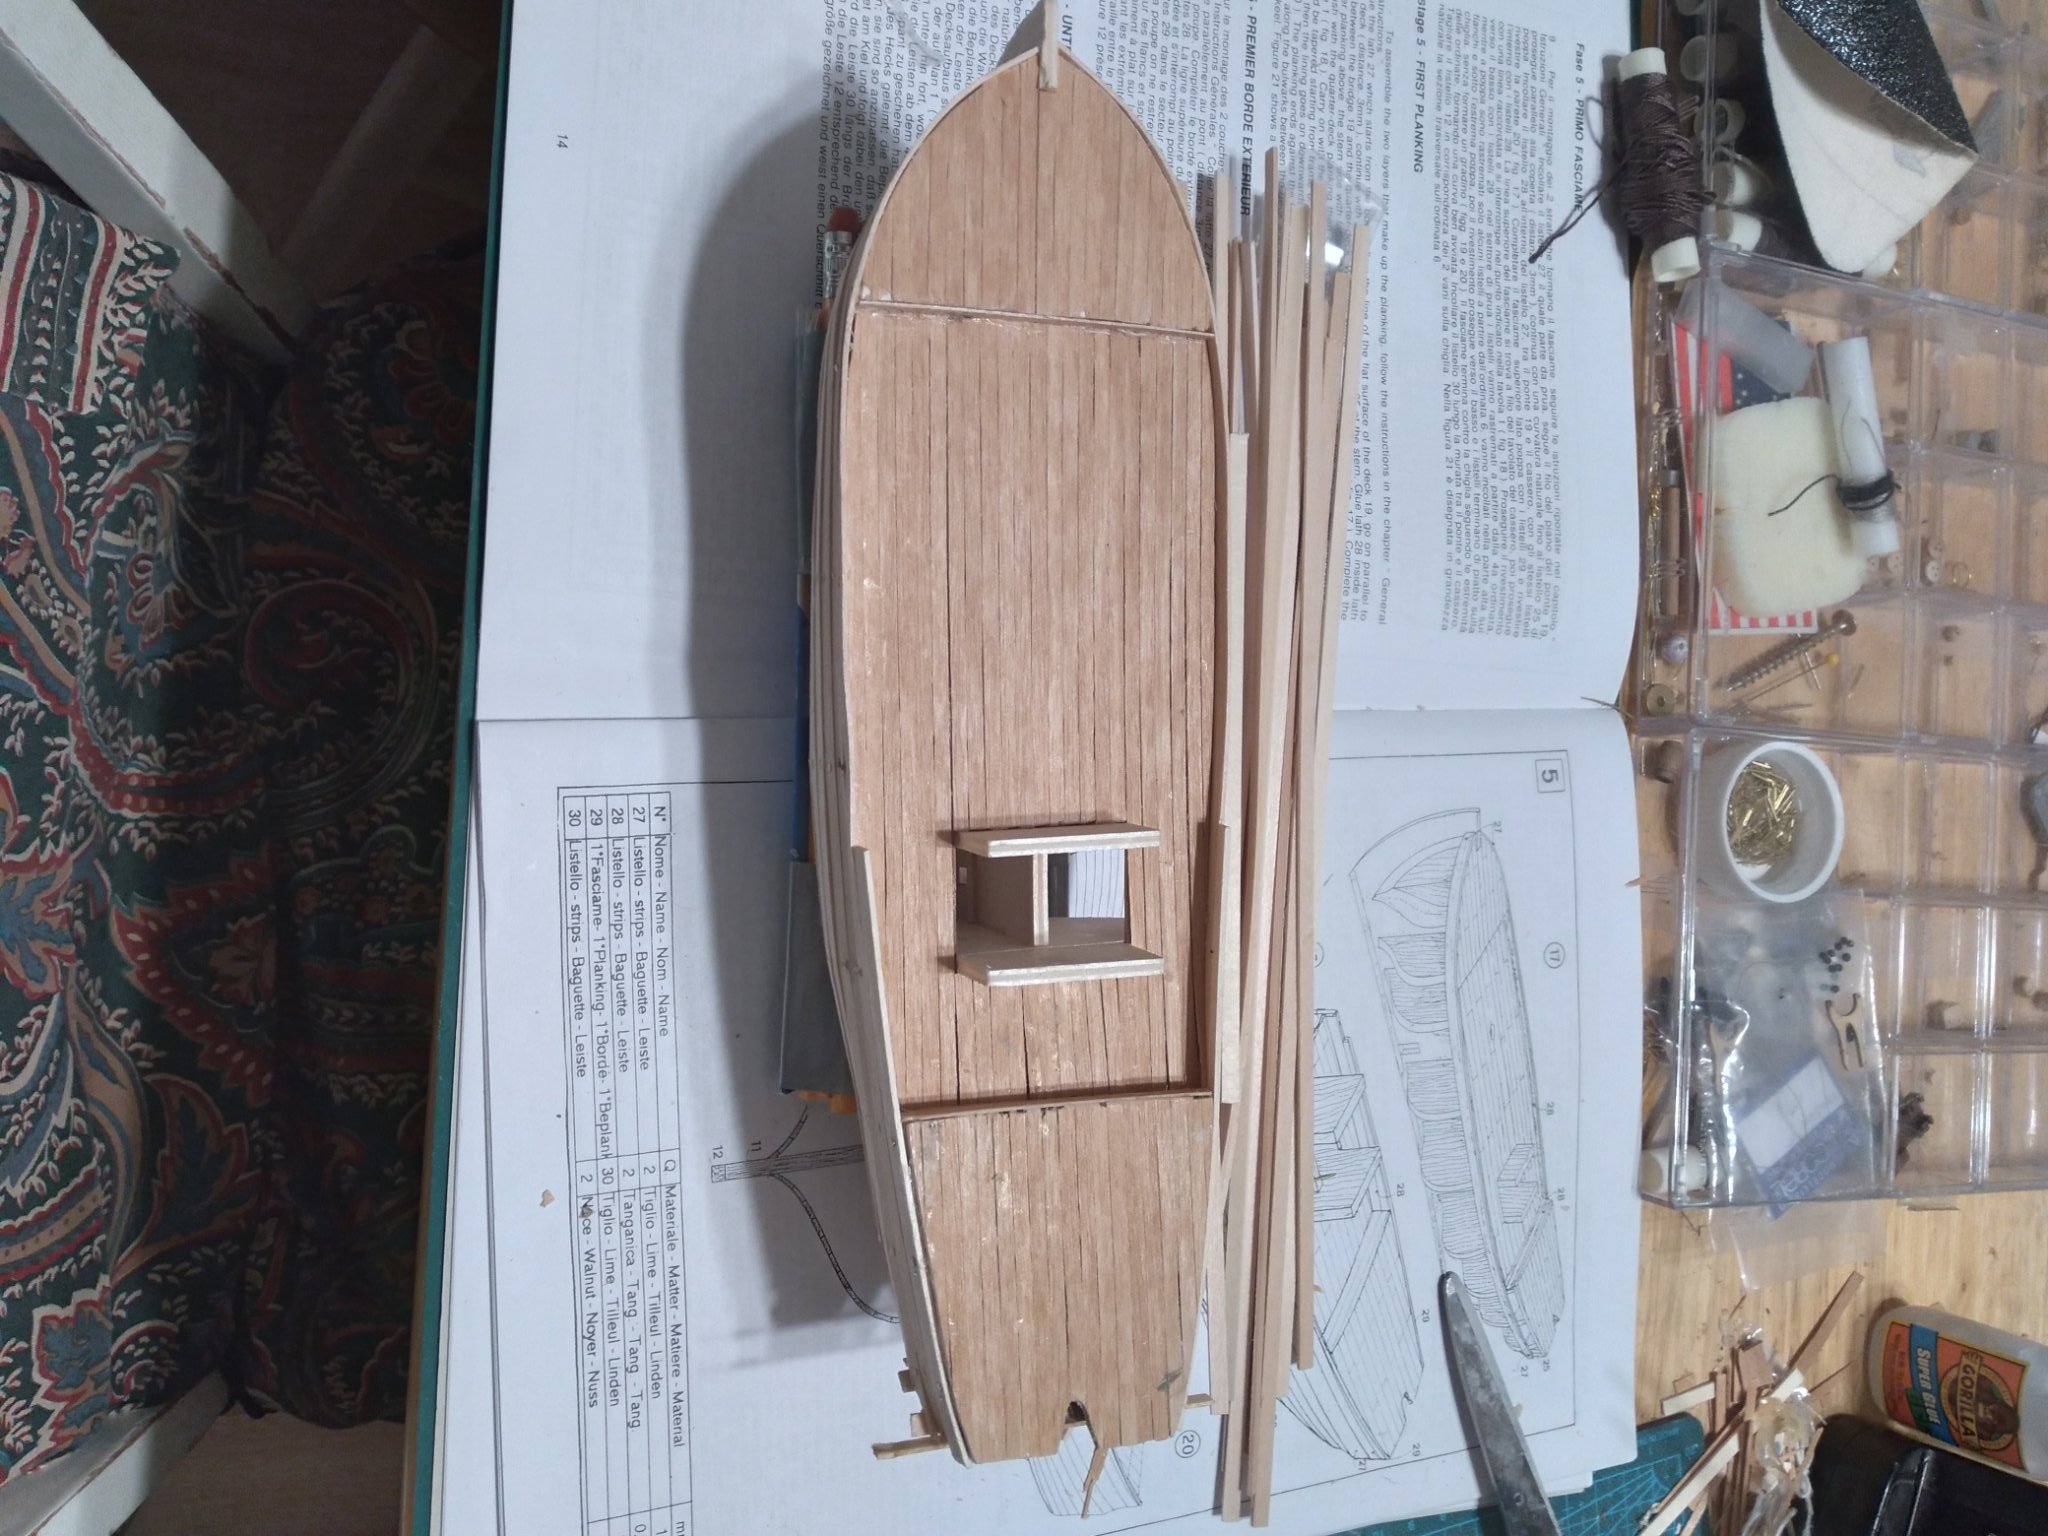
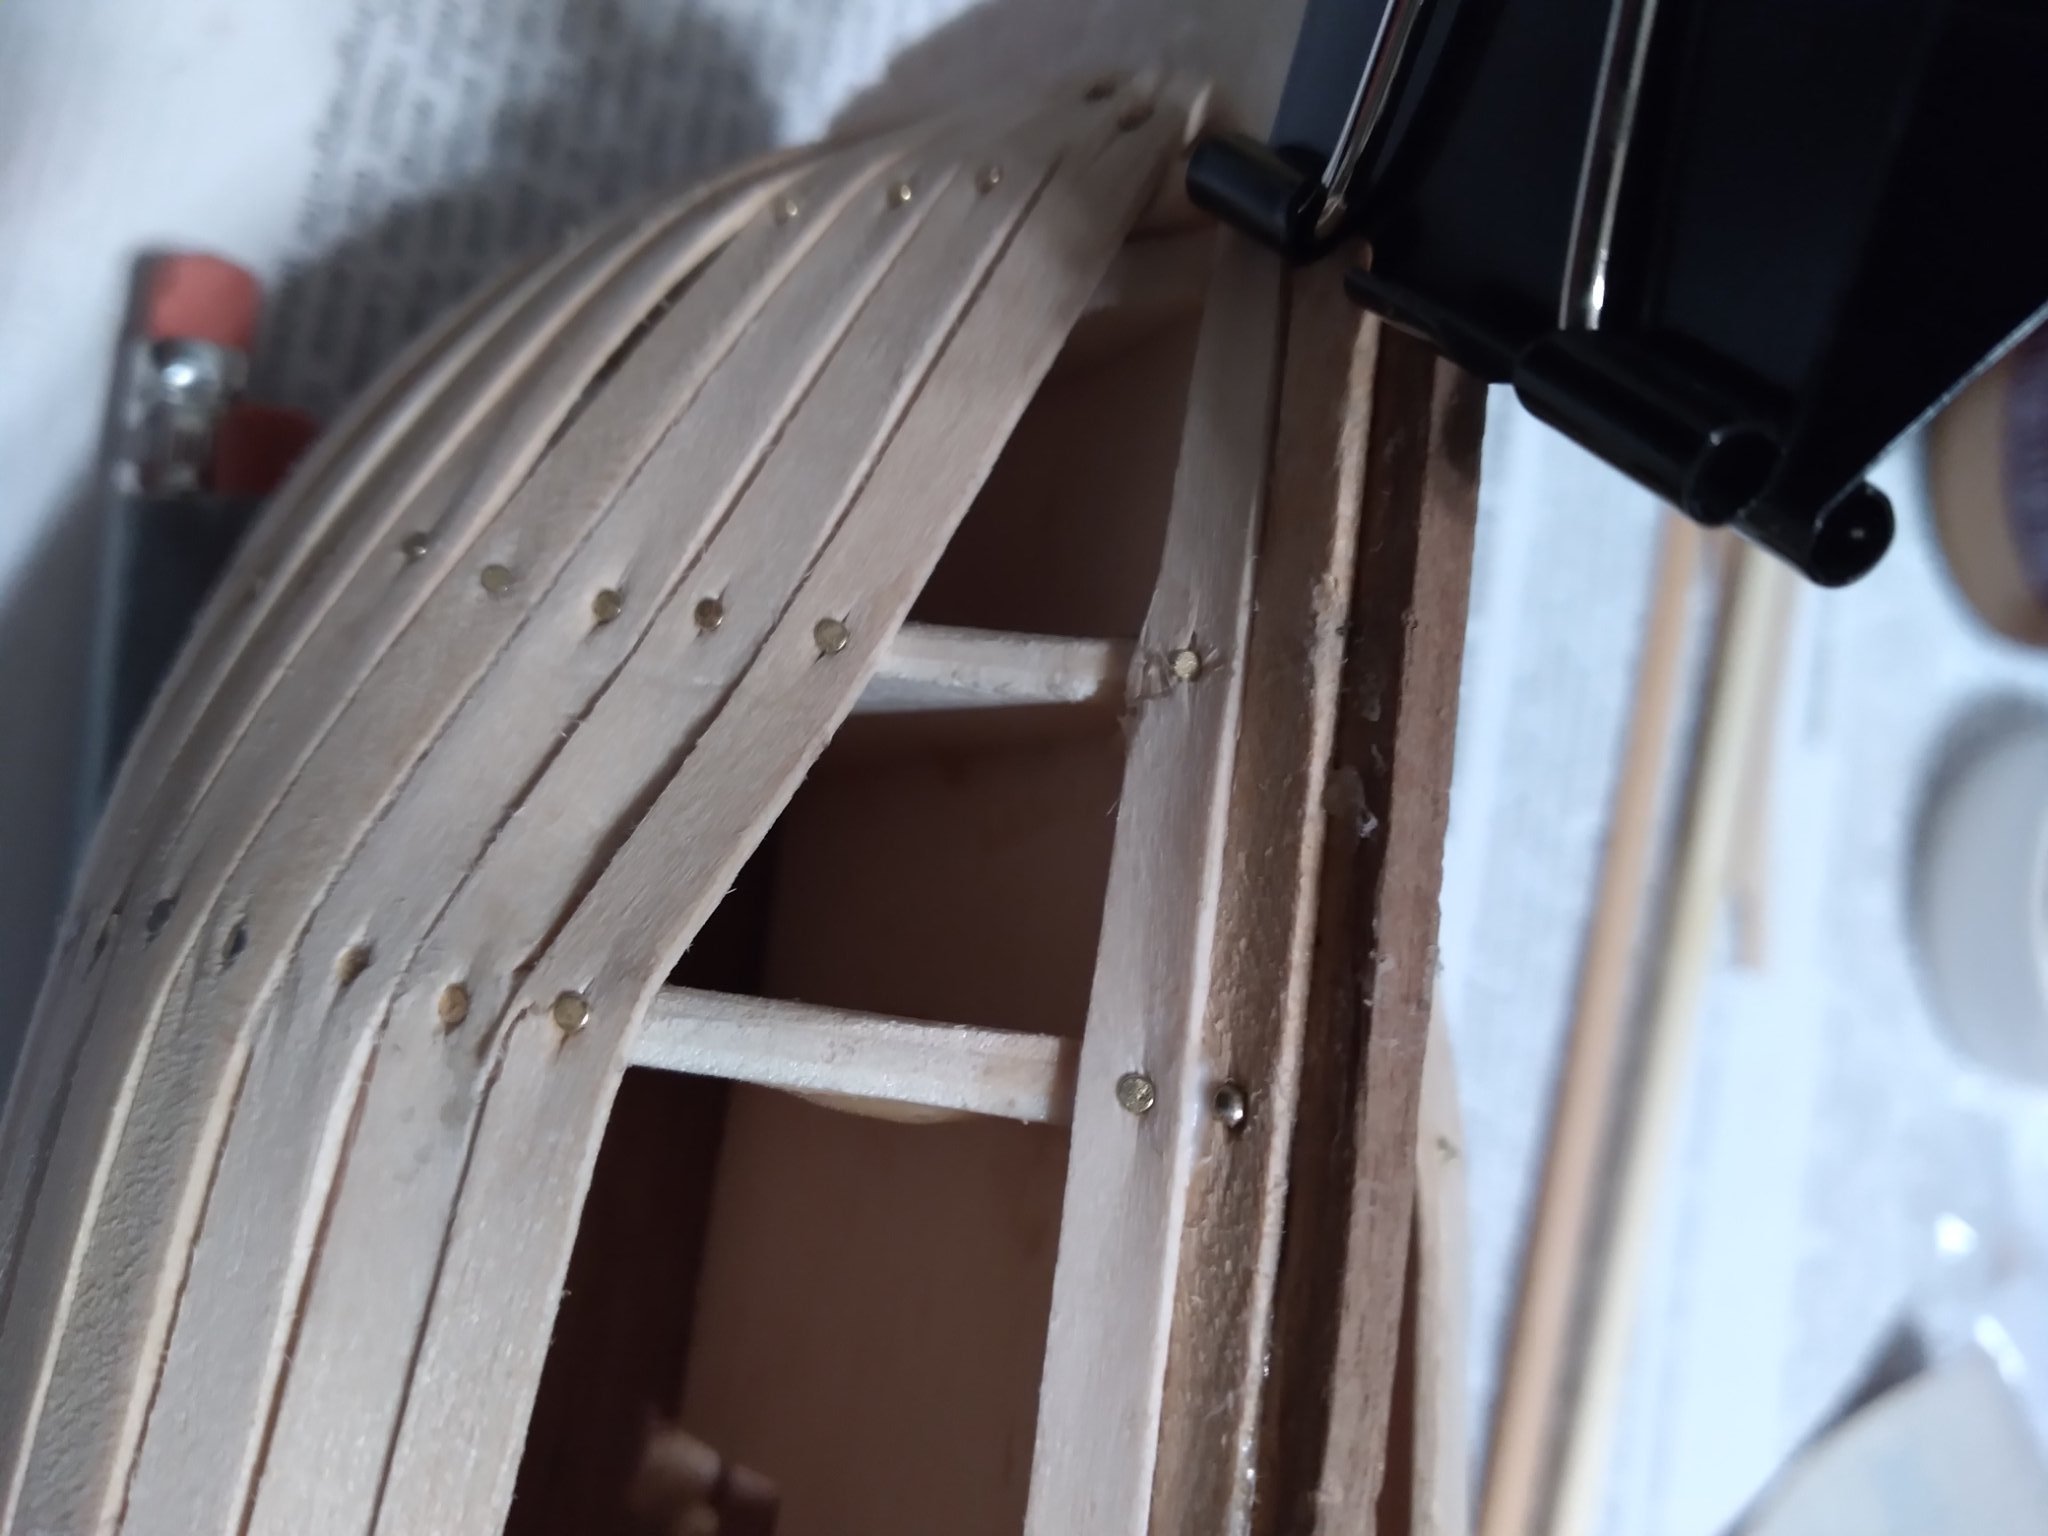
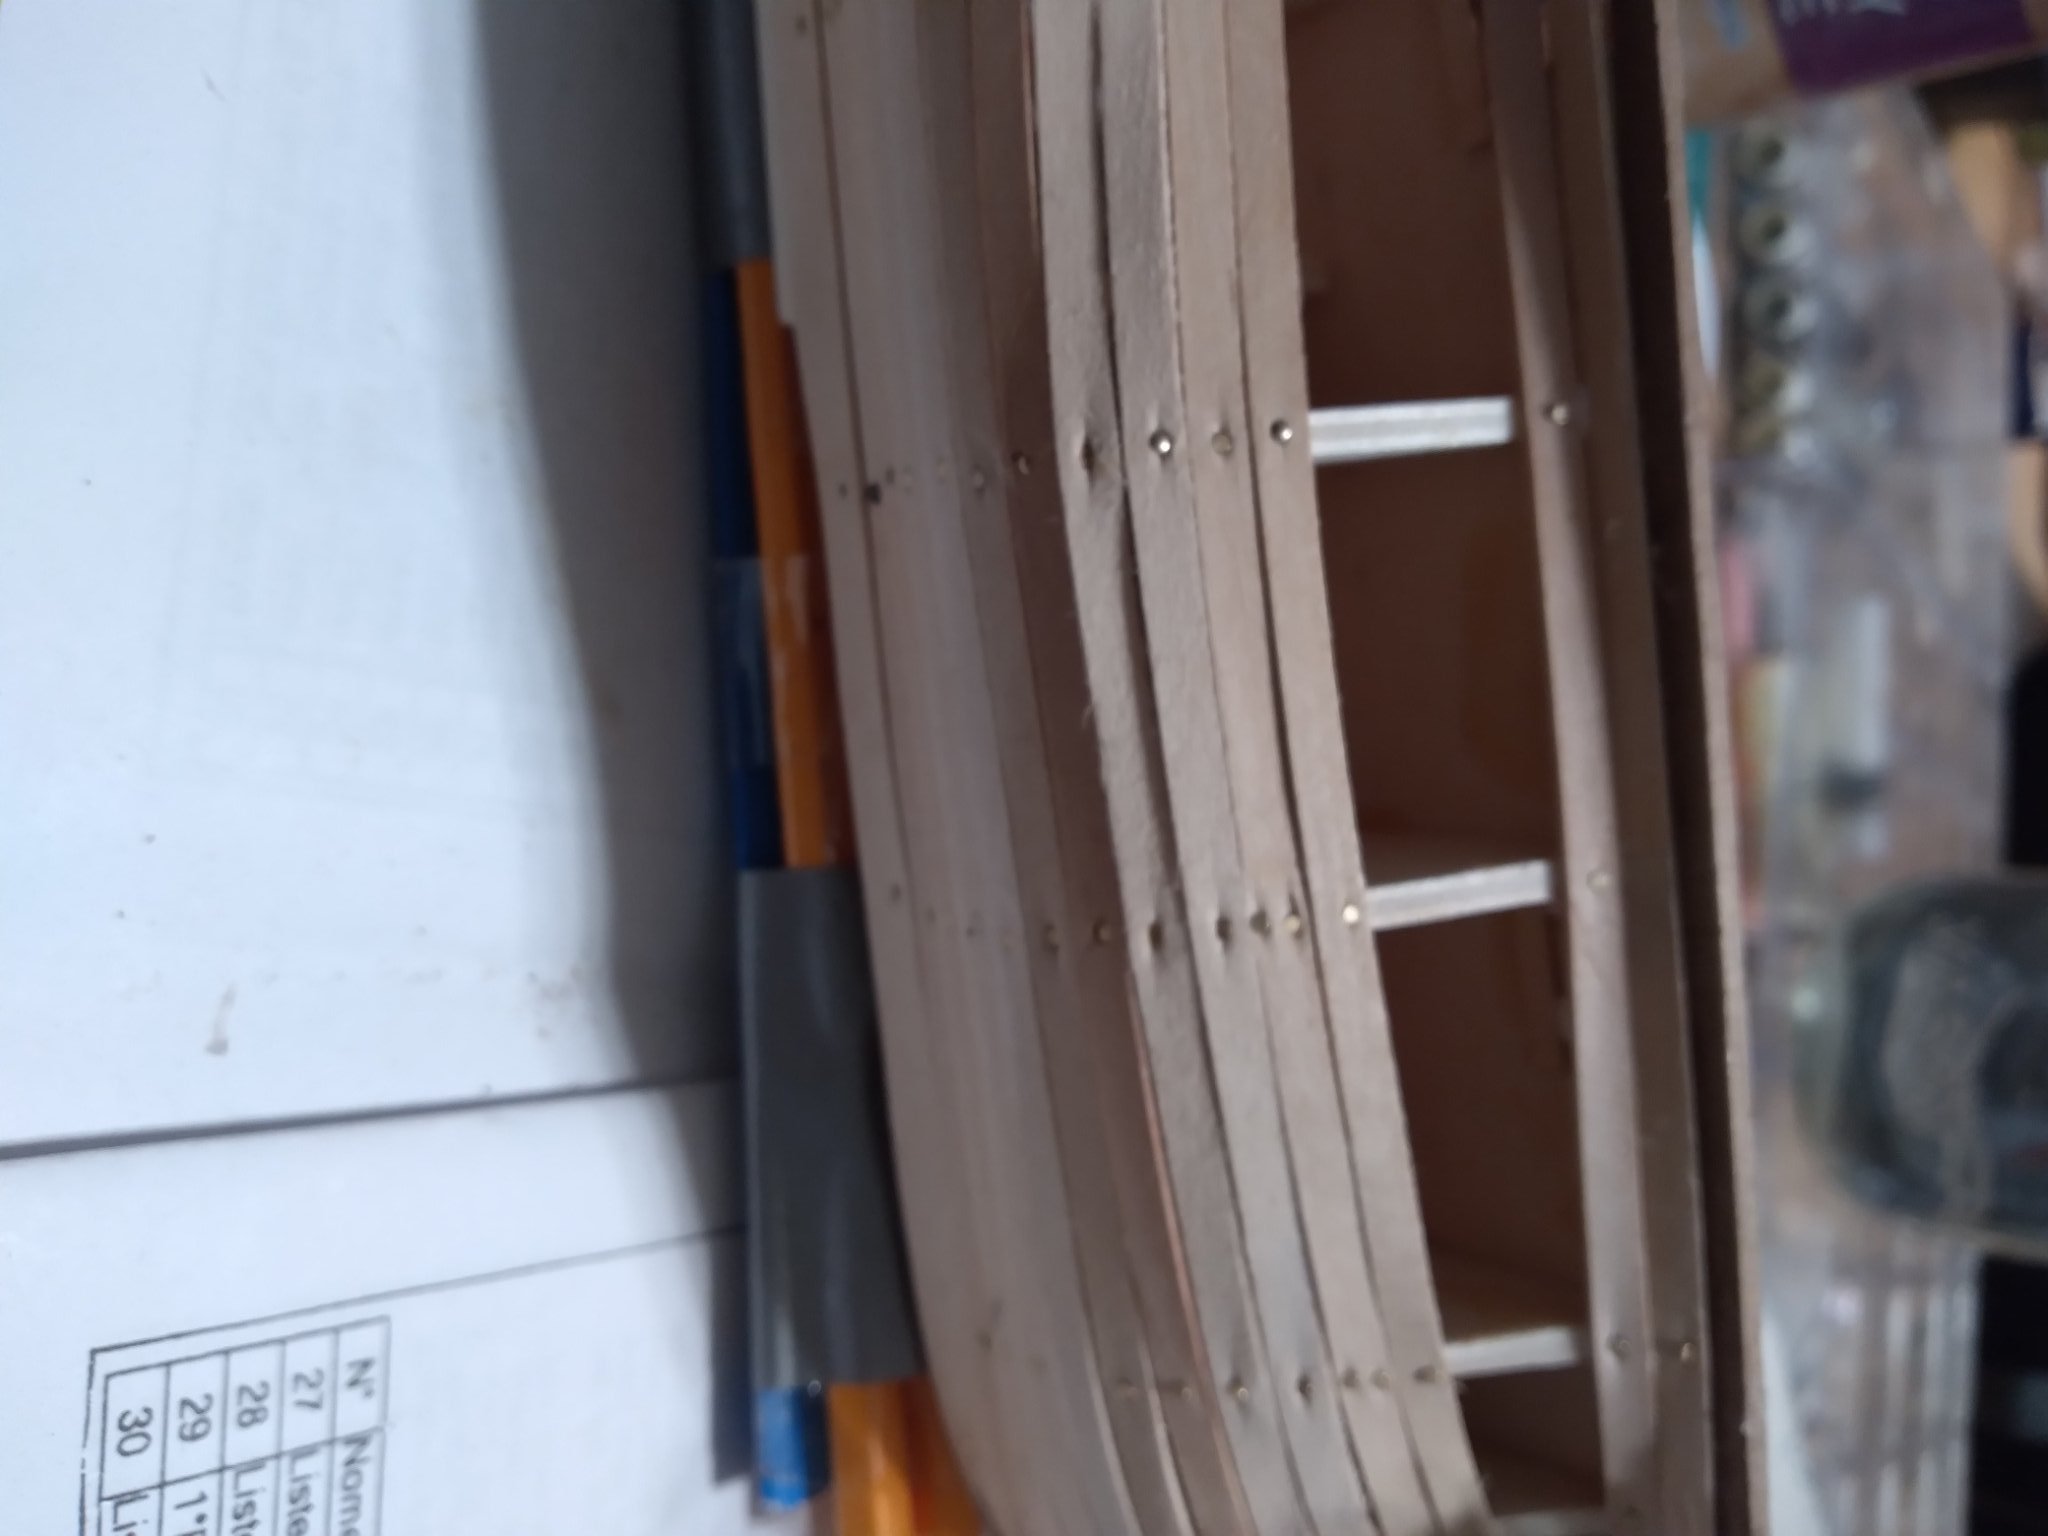
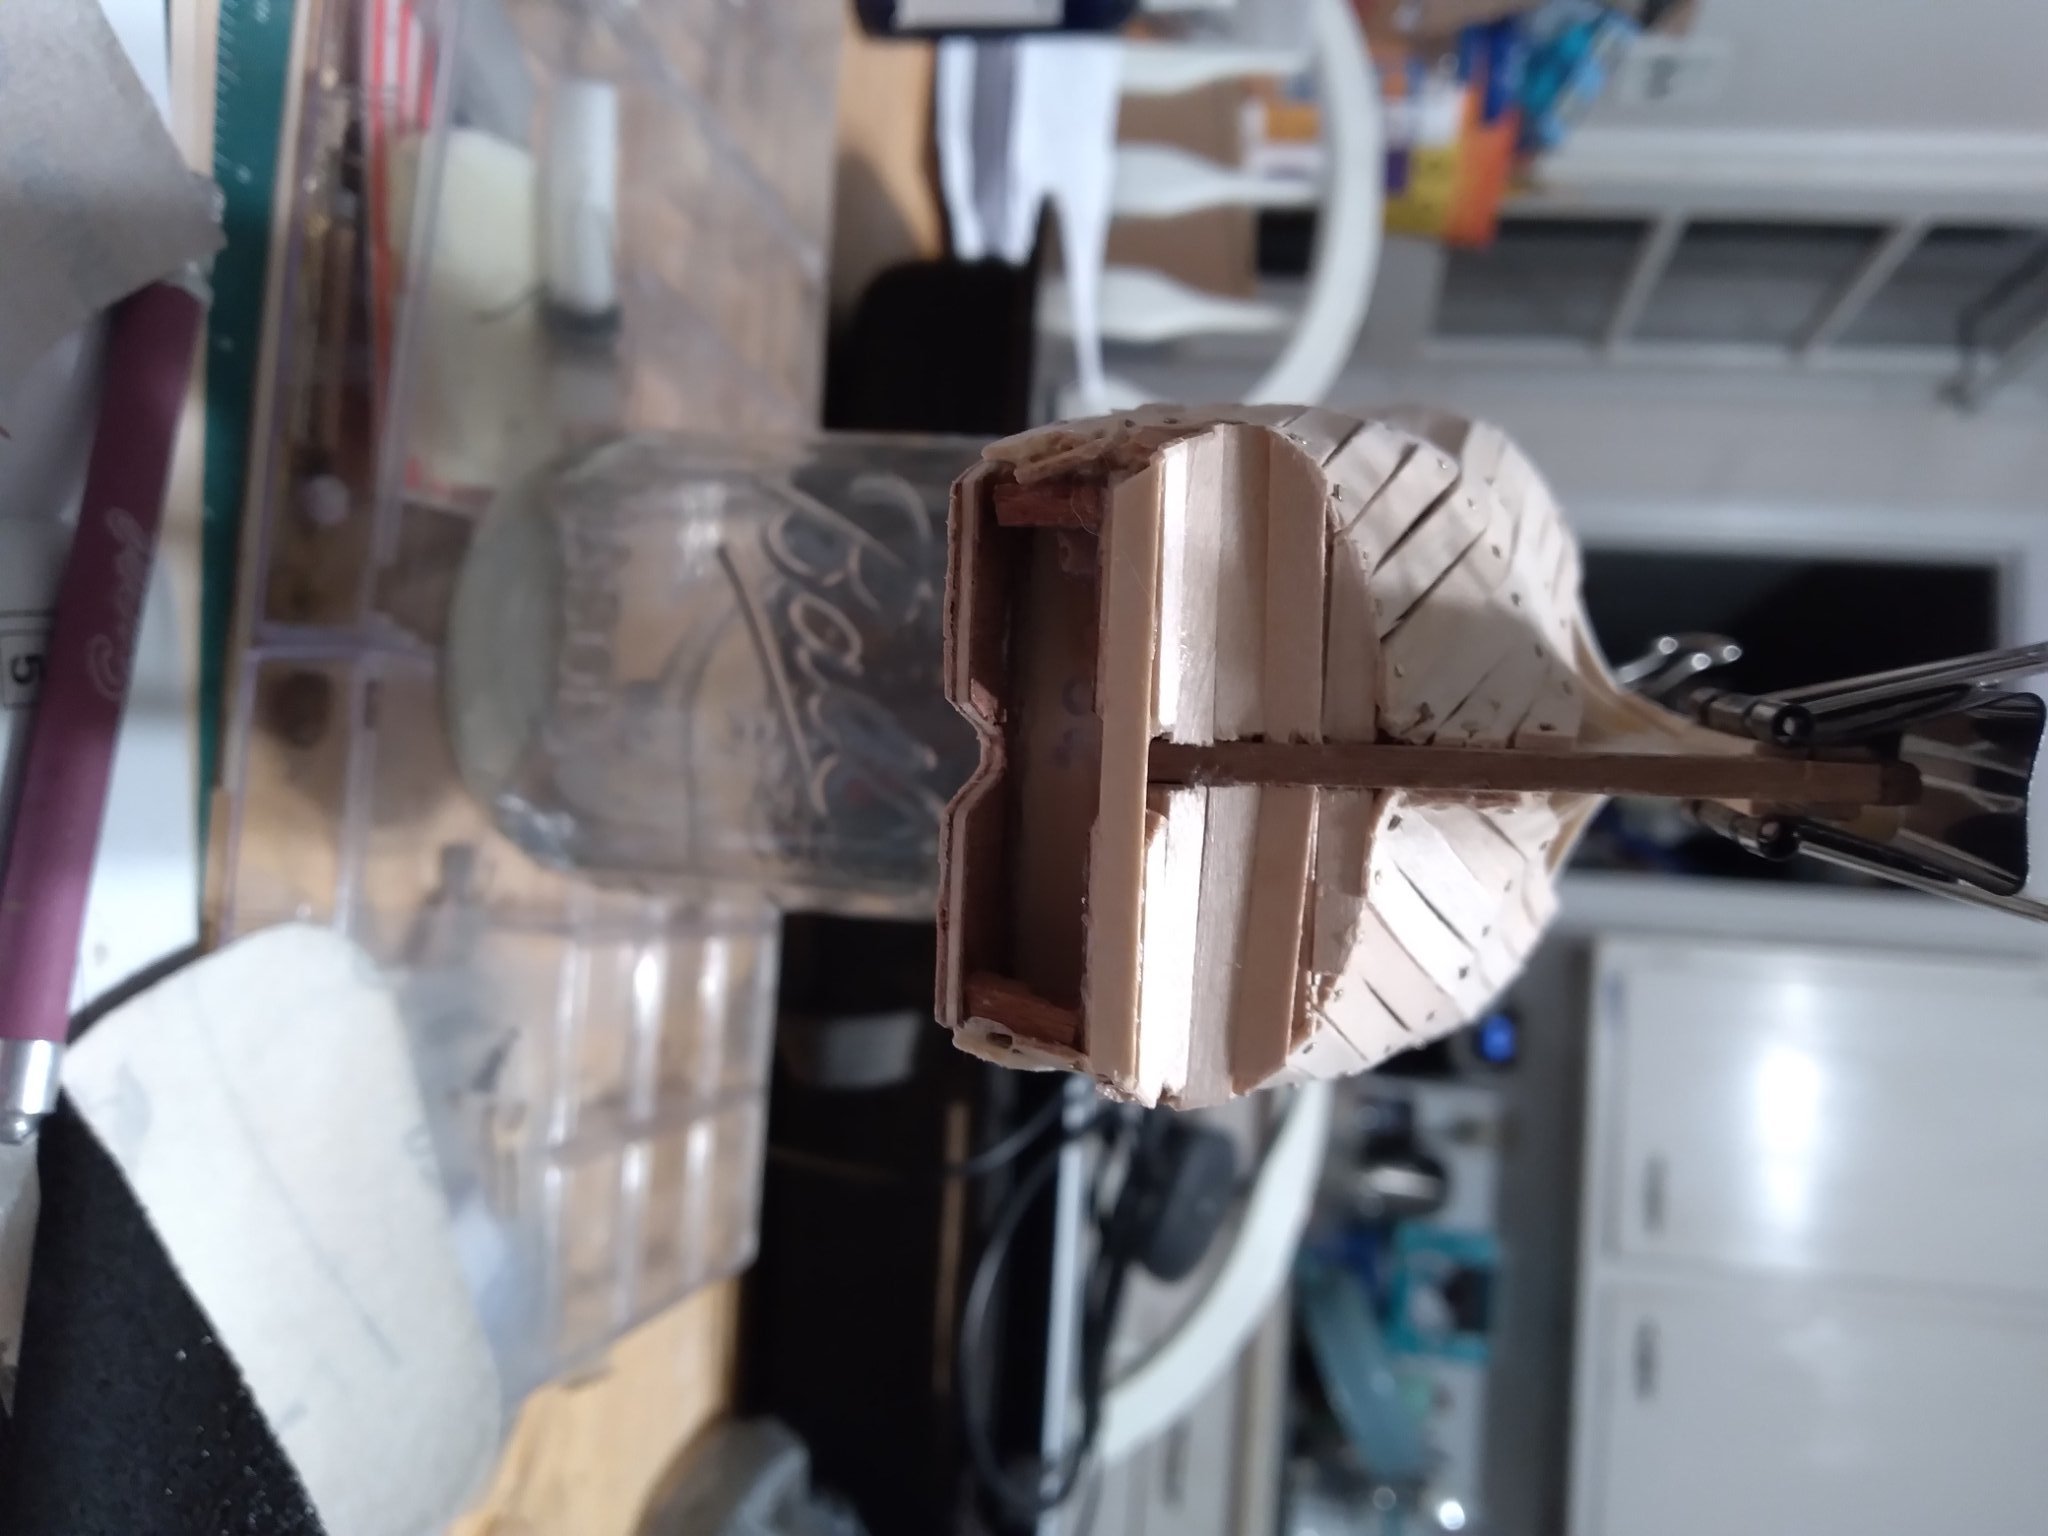
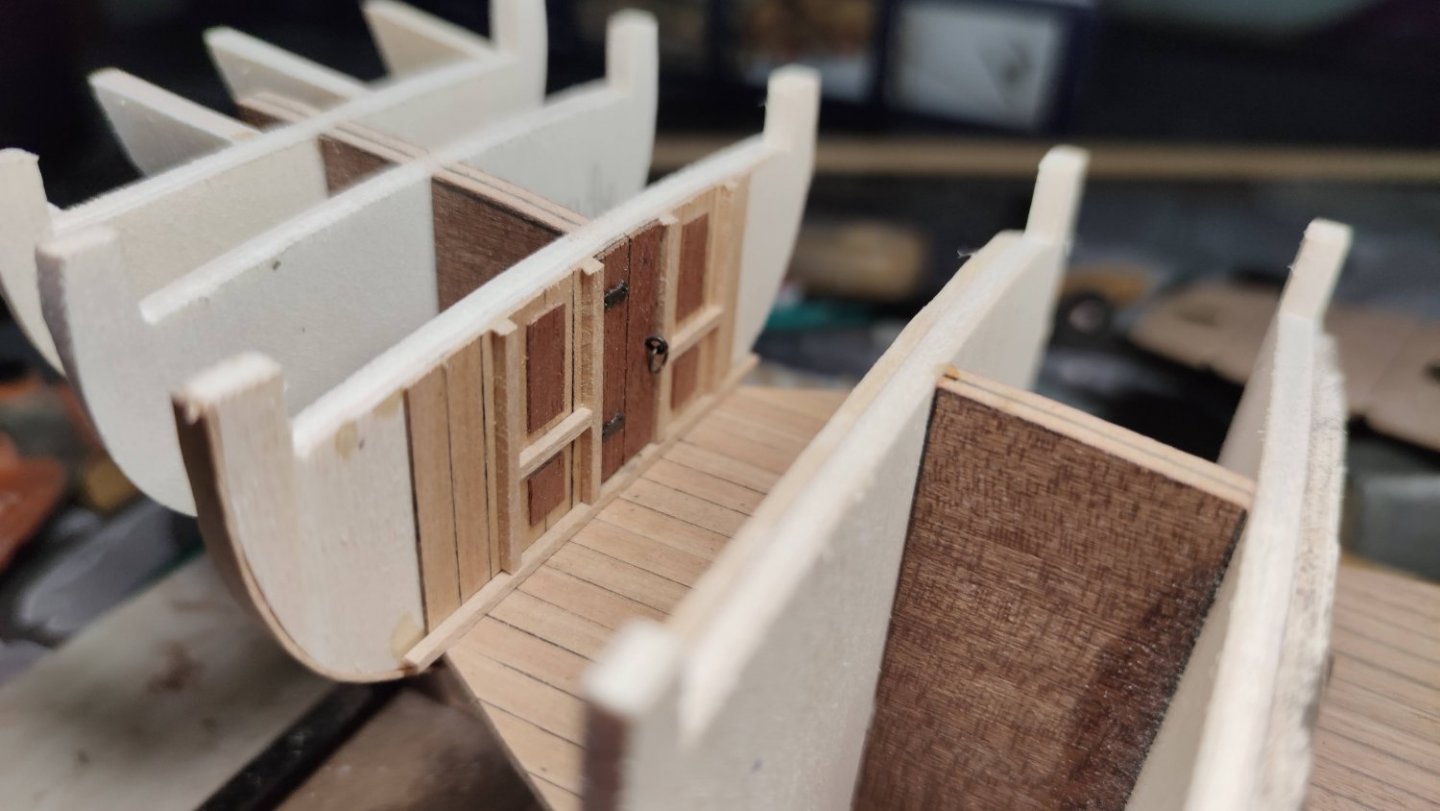
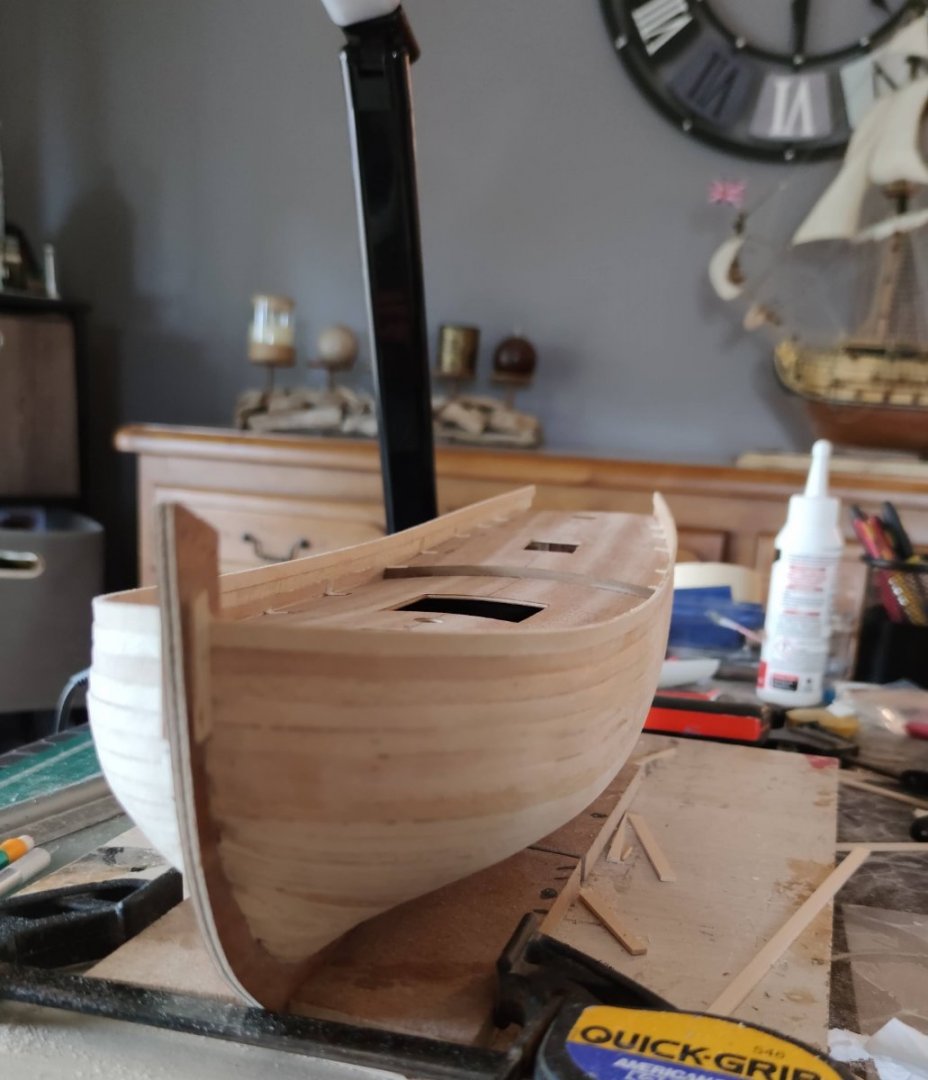
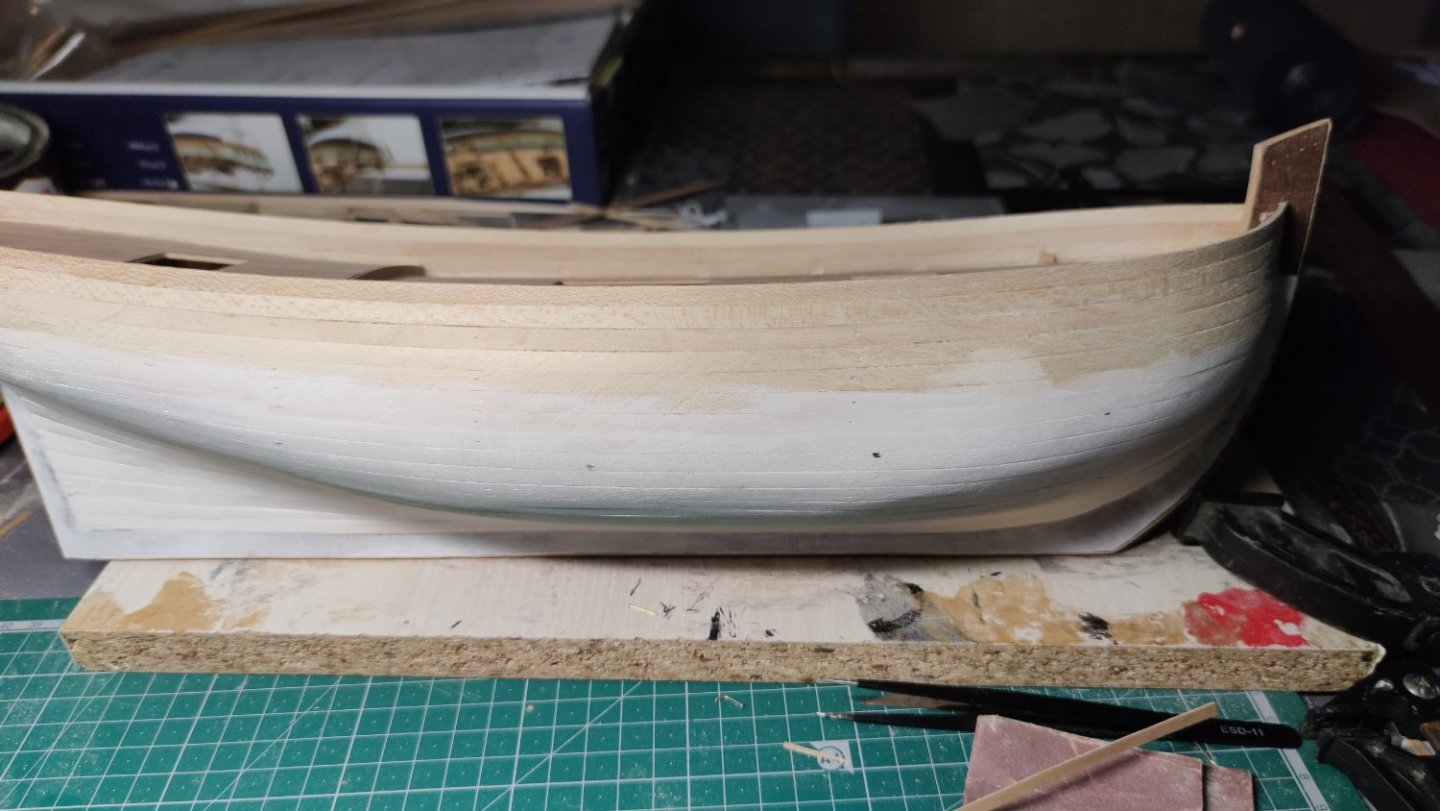
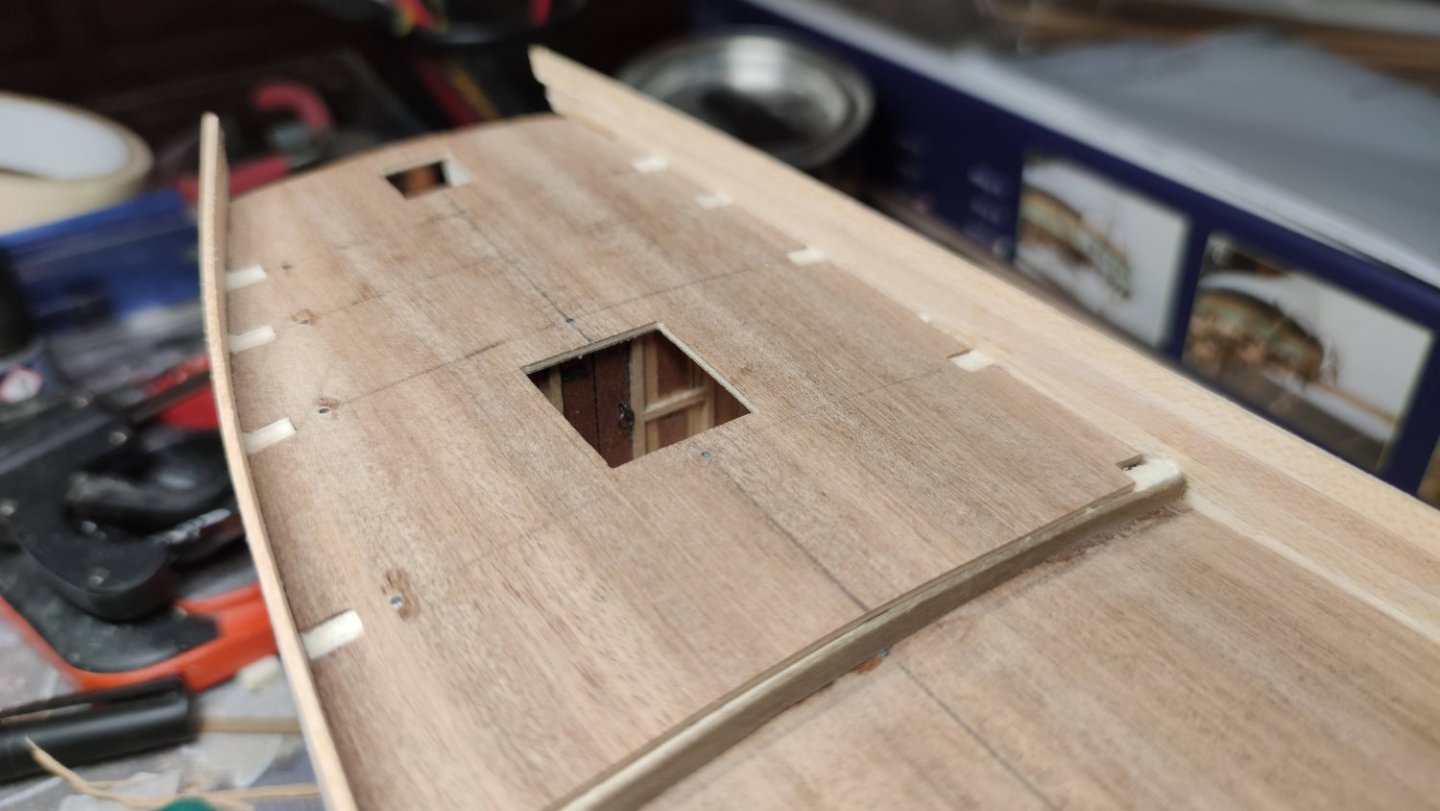
 Hello everyone! I'm going to start my first build log with the King of Prussia from Corel. This is my 4th wooden ship, following the big HMS Prince from Constructo which kept me busy for more than a year. It's a smaller but quite detailed ship that I chose, my first from Corel. Here are some pictures of the box: Start of the build: Scratch build interior (will be visible through a hatch): First planking: I decided to paint this part directly in white without a second planking, because I was satisfied with the initial result, which brings out the lines of the planks. Here is the first coat, which shows some areas that need further sanding: Then I will cover the deck and add the inner planking. Feel free to share your thoughts on this build !


-
 Hello all, I started this kit 21 years ago. Recently, I was inspired by my good friend Banyan and his excellent Endeavour. So, over the last couple of months, I have been getting stuck in and really enjoying it. I did have a build log up years ago but that's gone and I have been prompted to start another. I will appreciate any comments, criticisms, suggestions etc., especially as I am coming into the next phase when I think I'll be asking quite a few questions. It is a real pleasure to be a part of this online community. MartyB
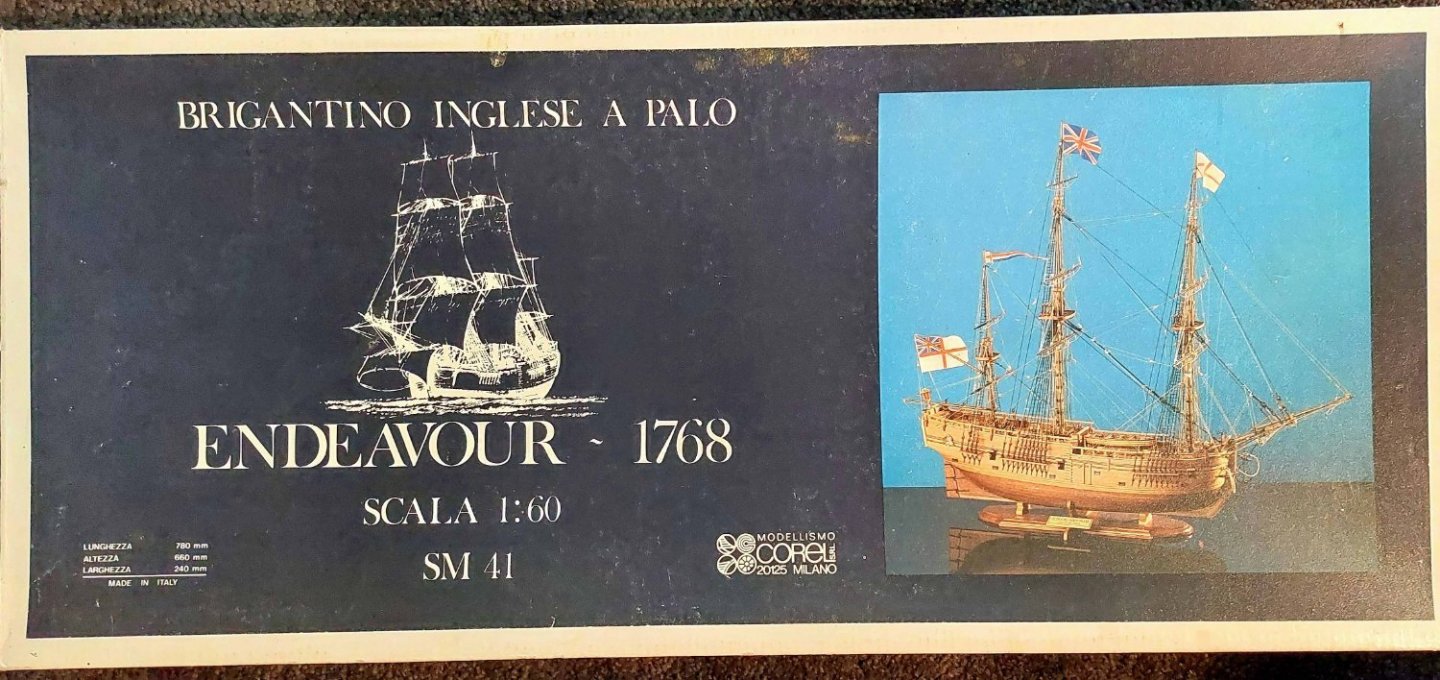
-
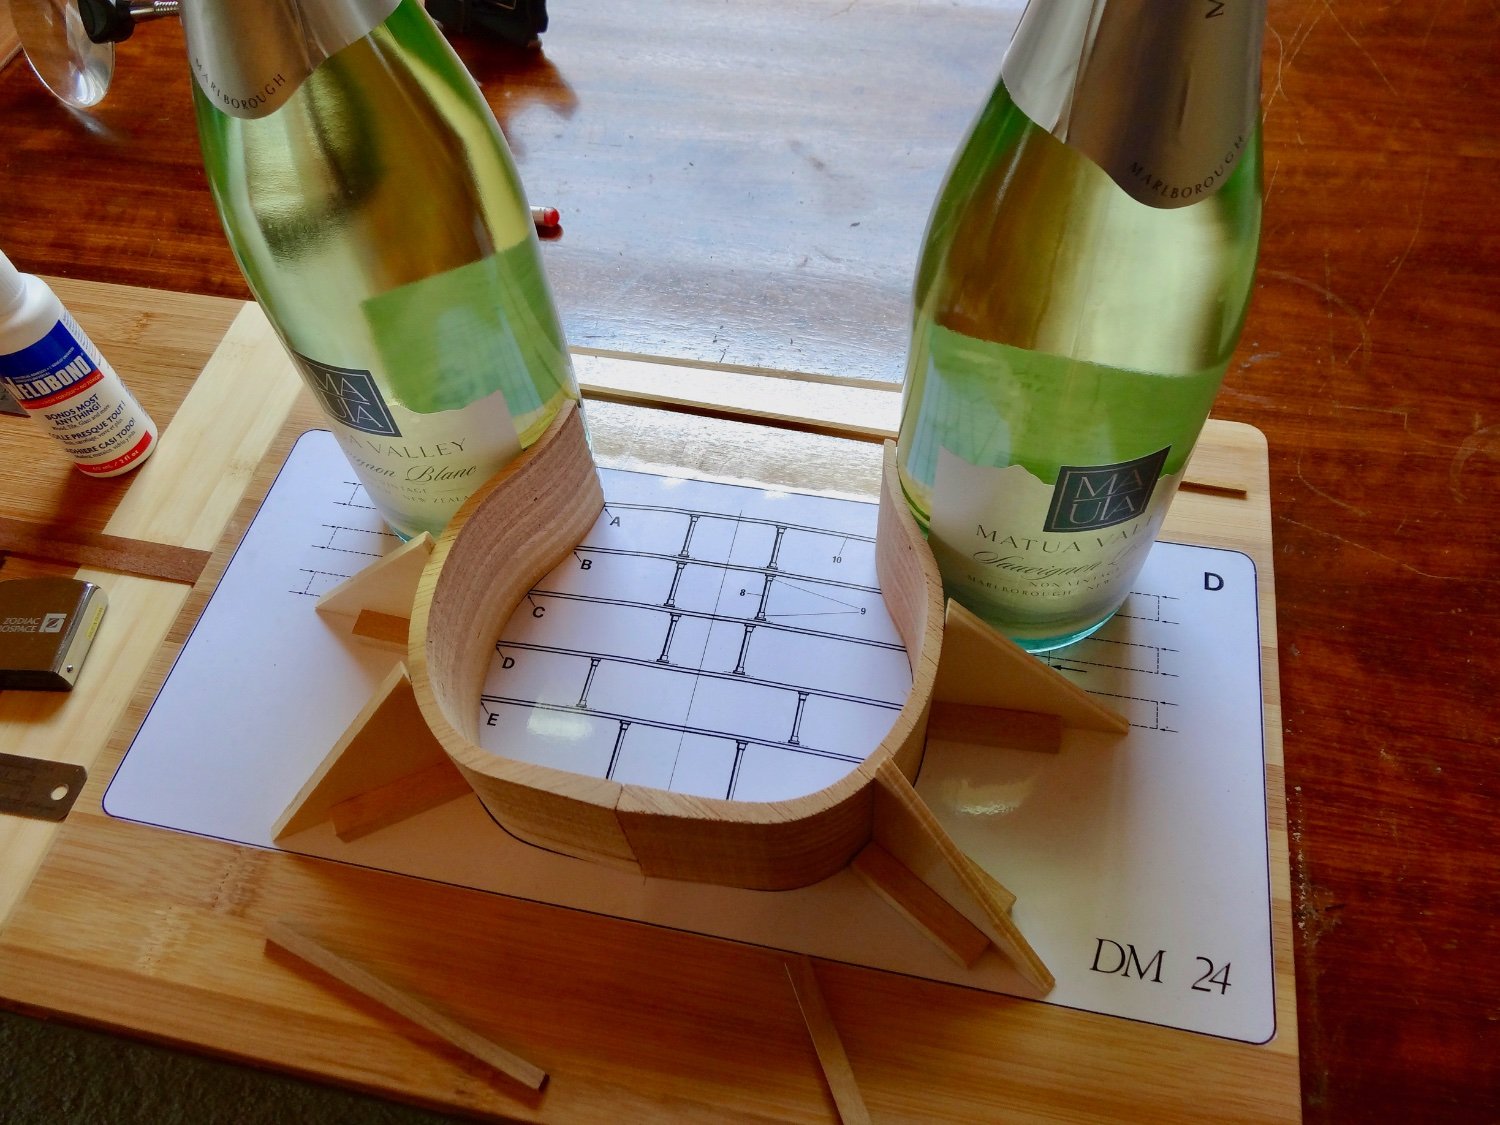
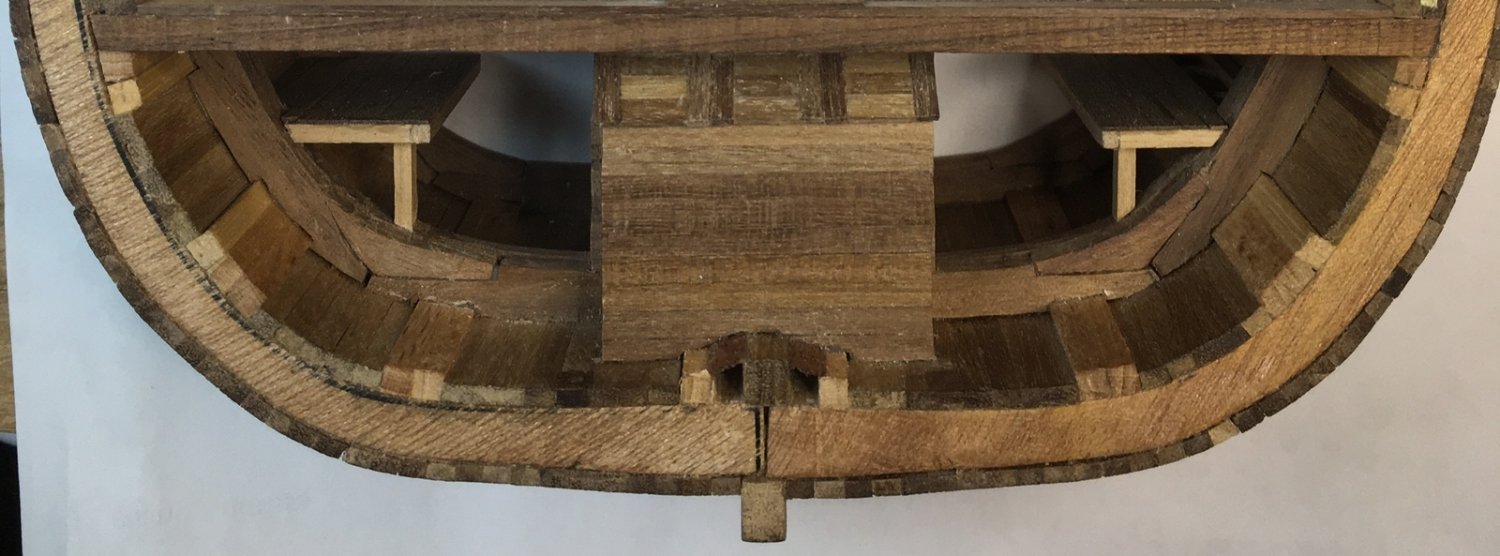
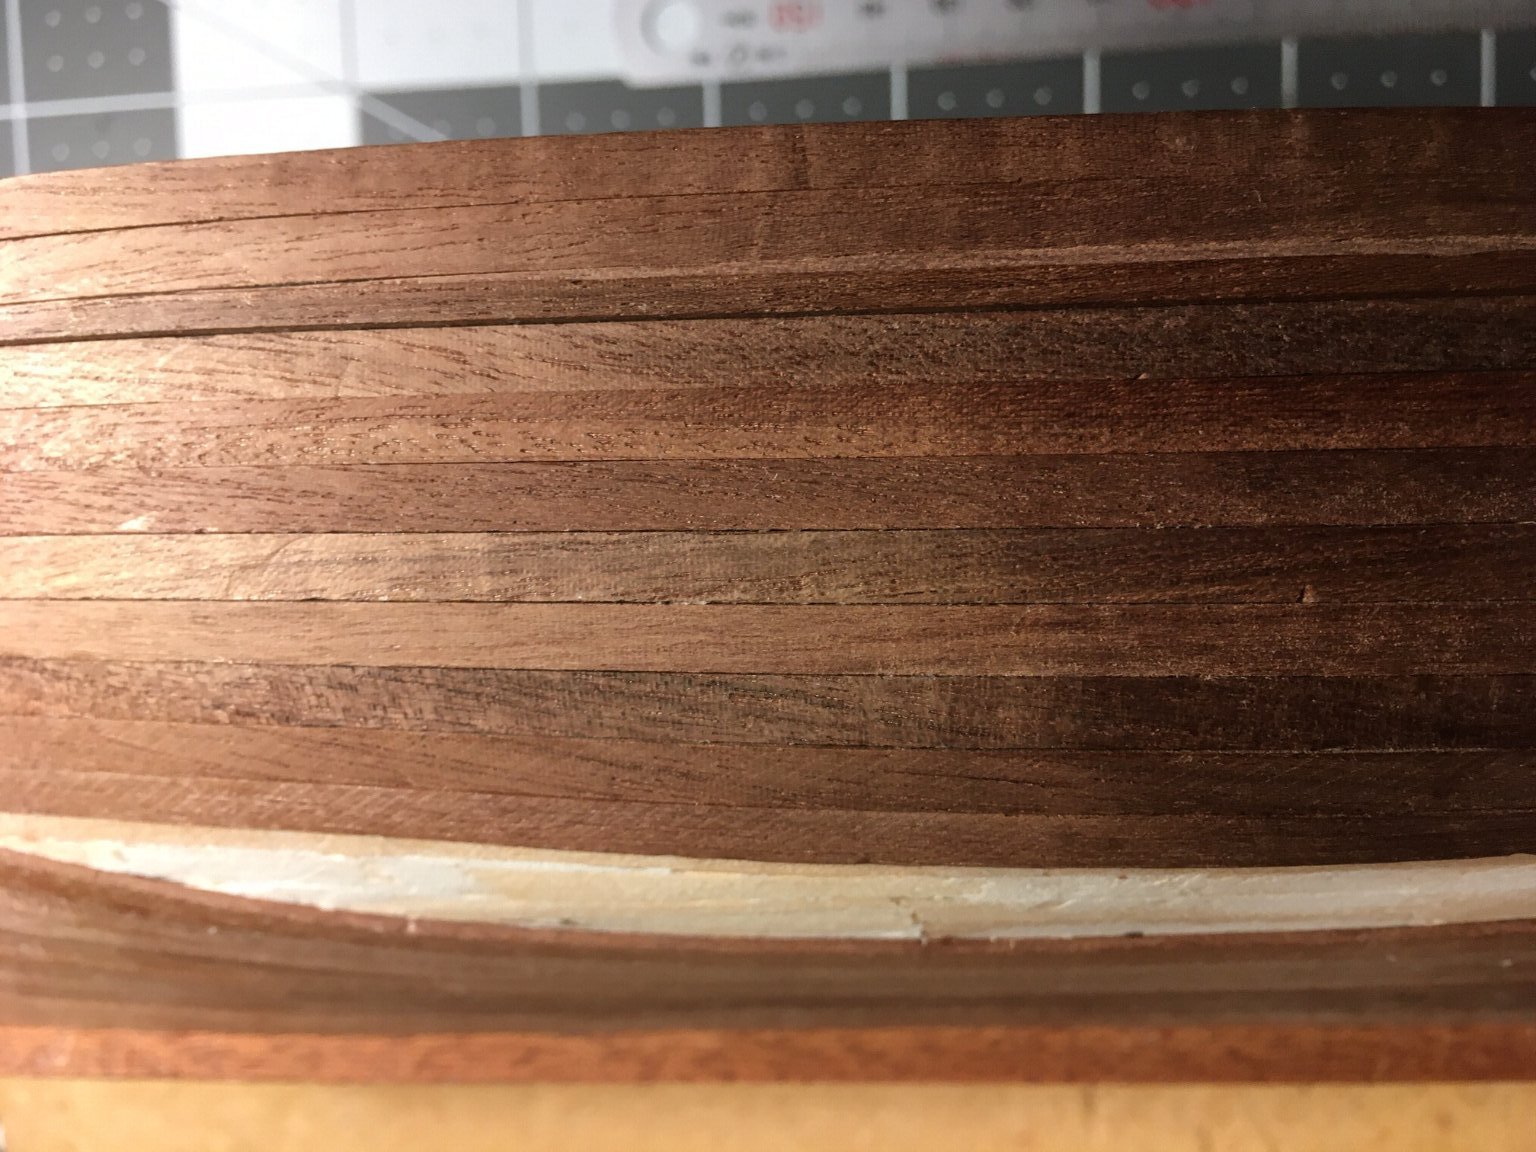
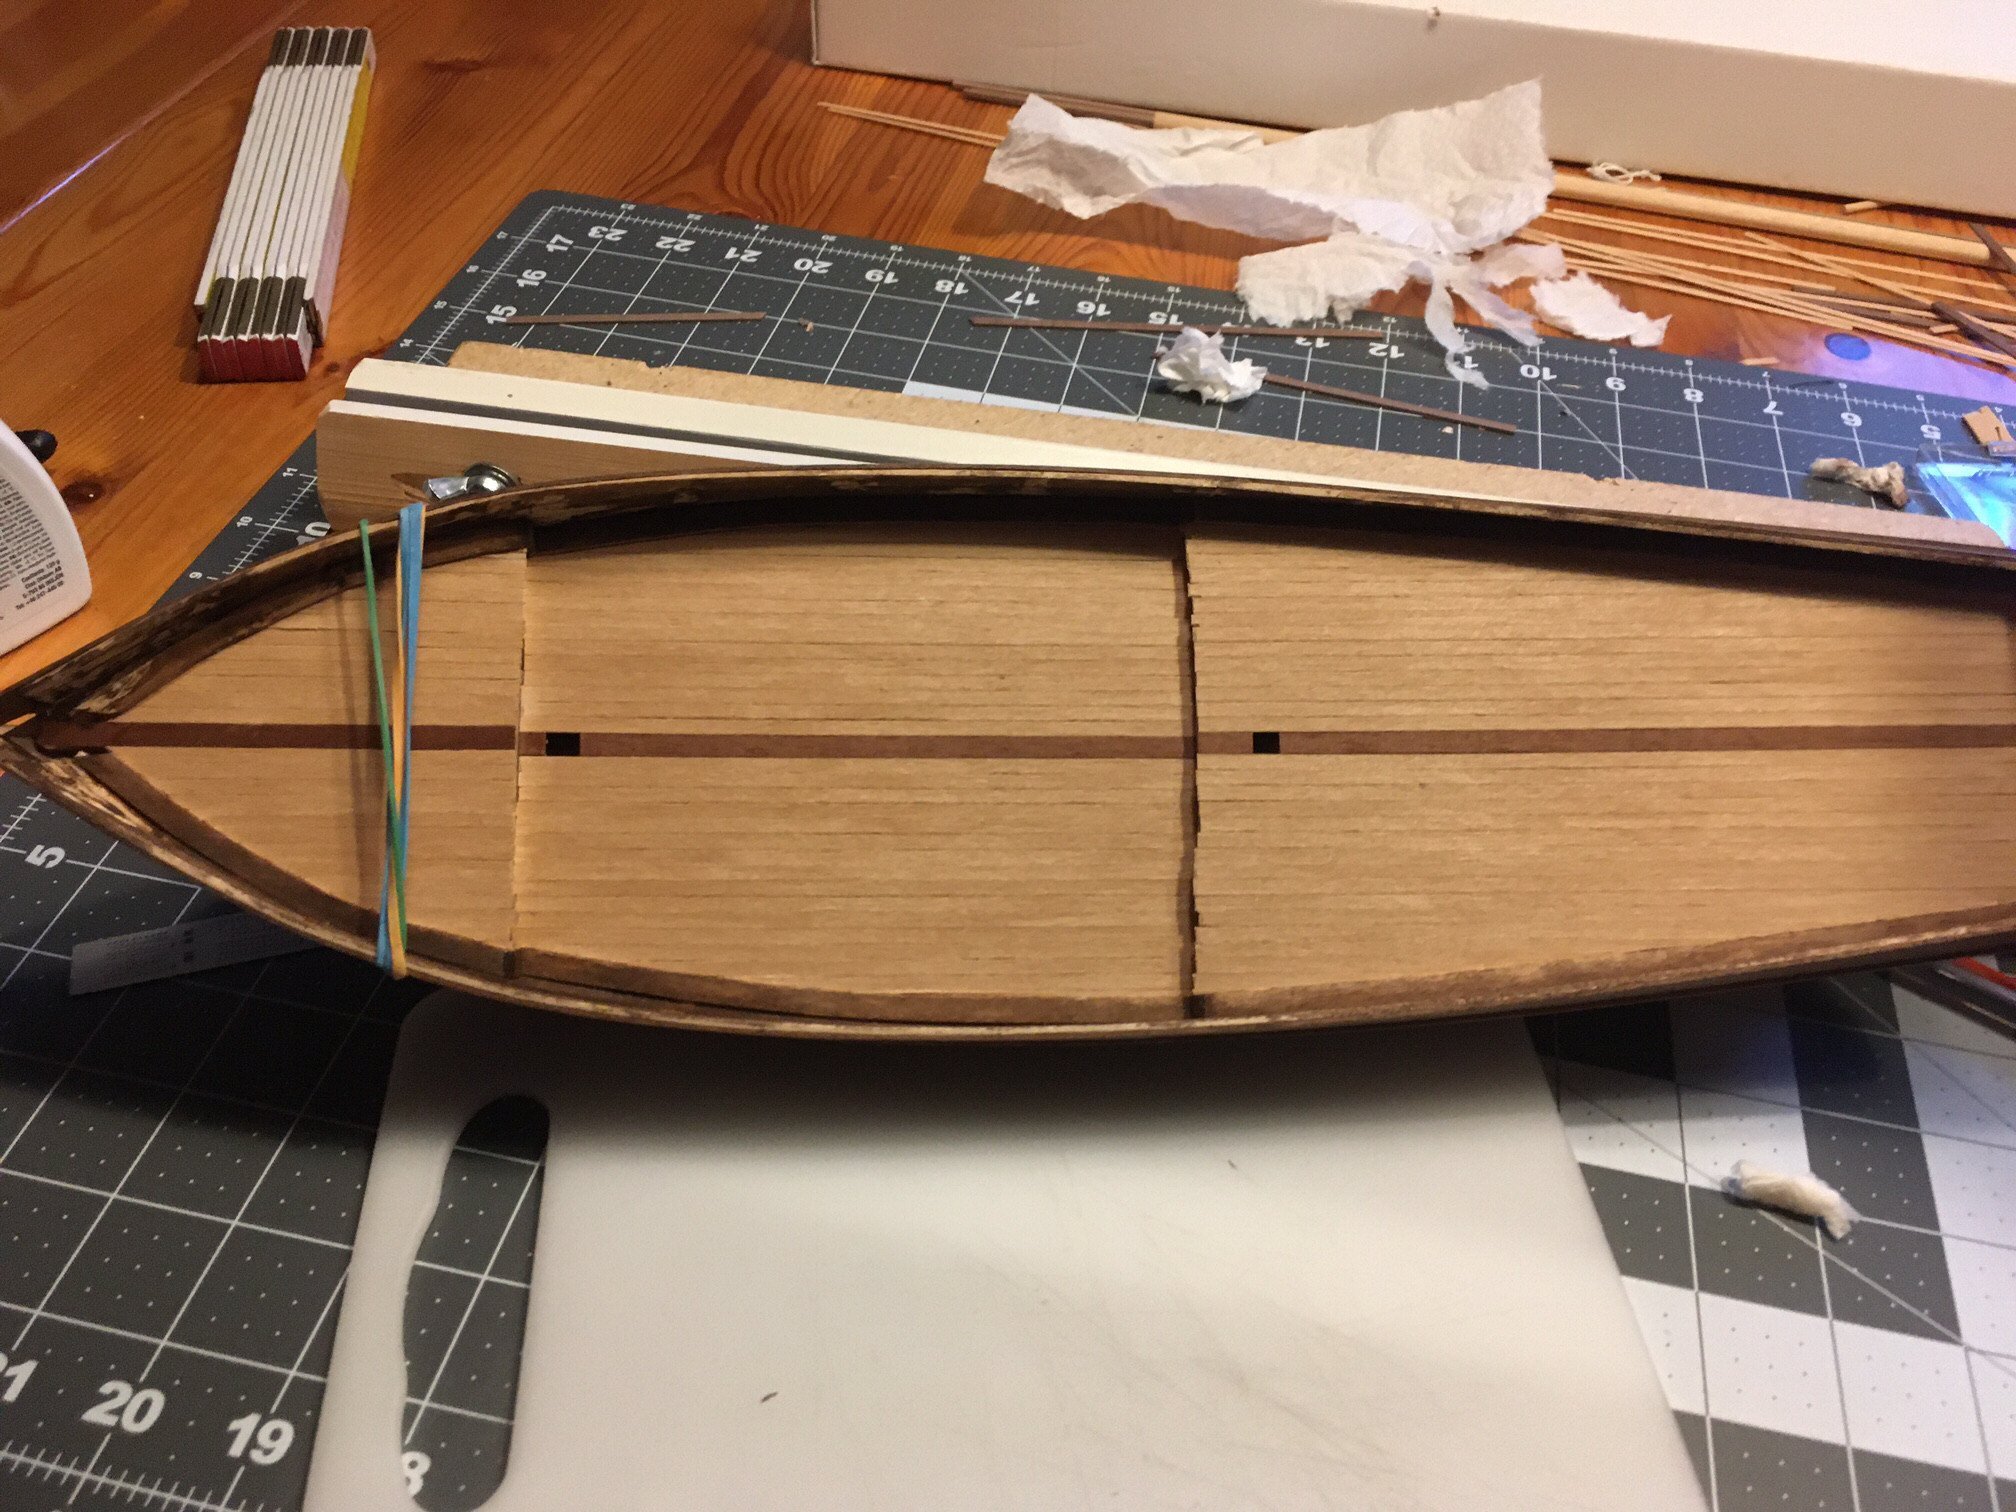
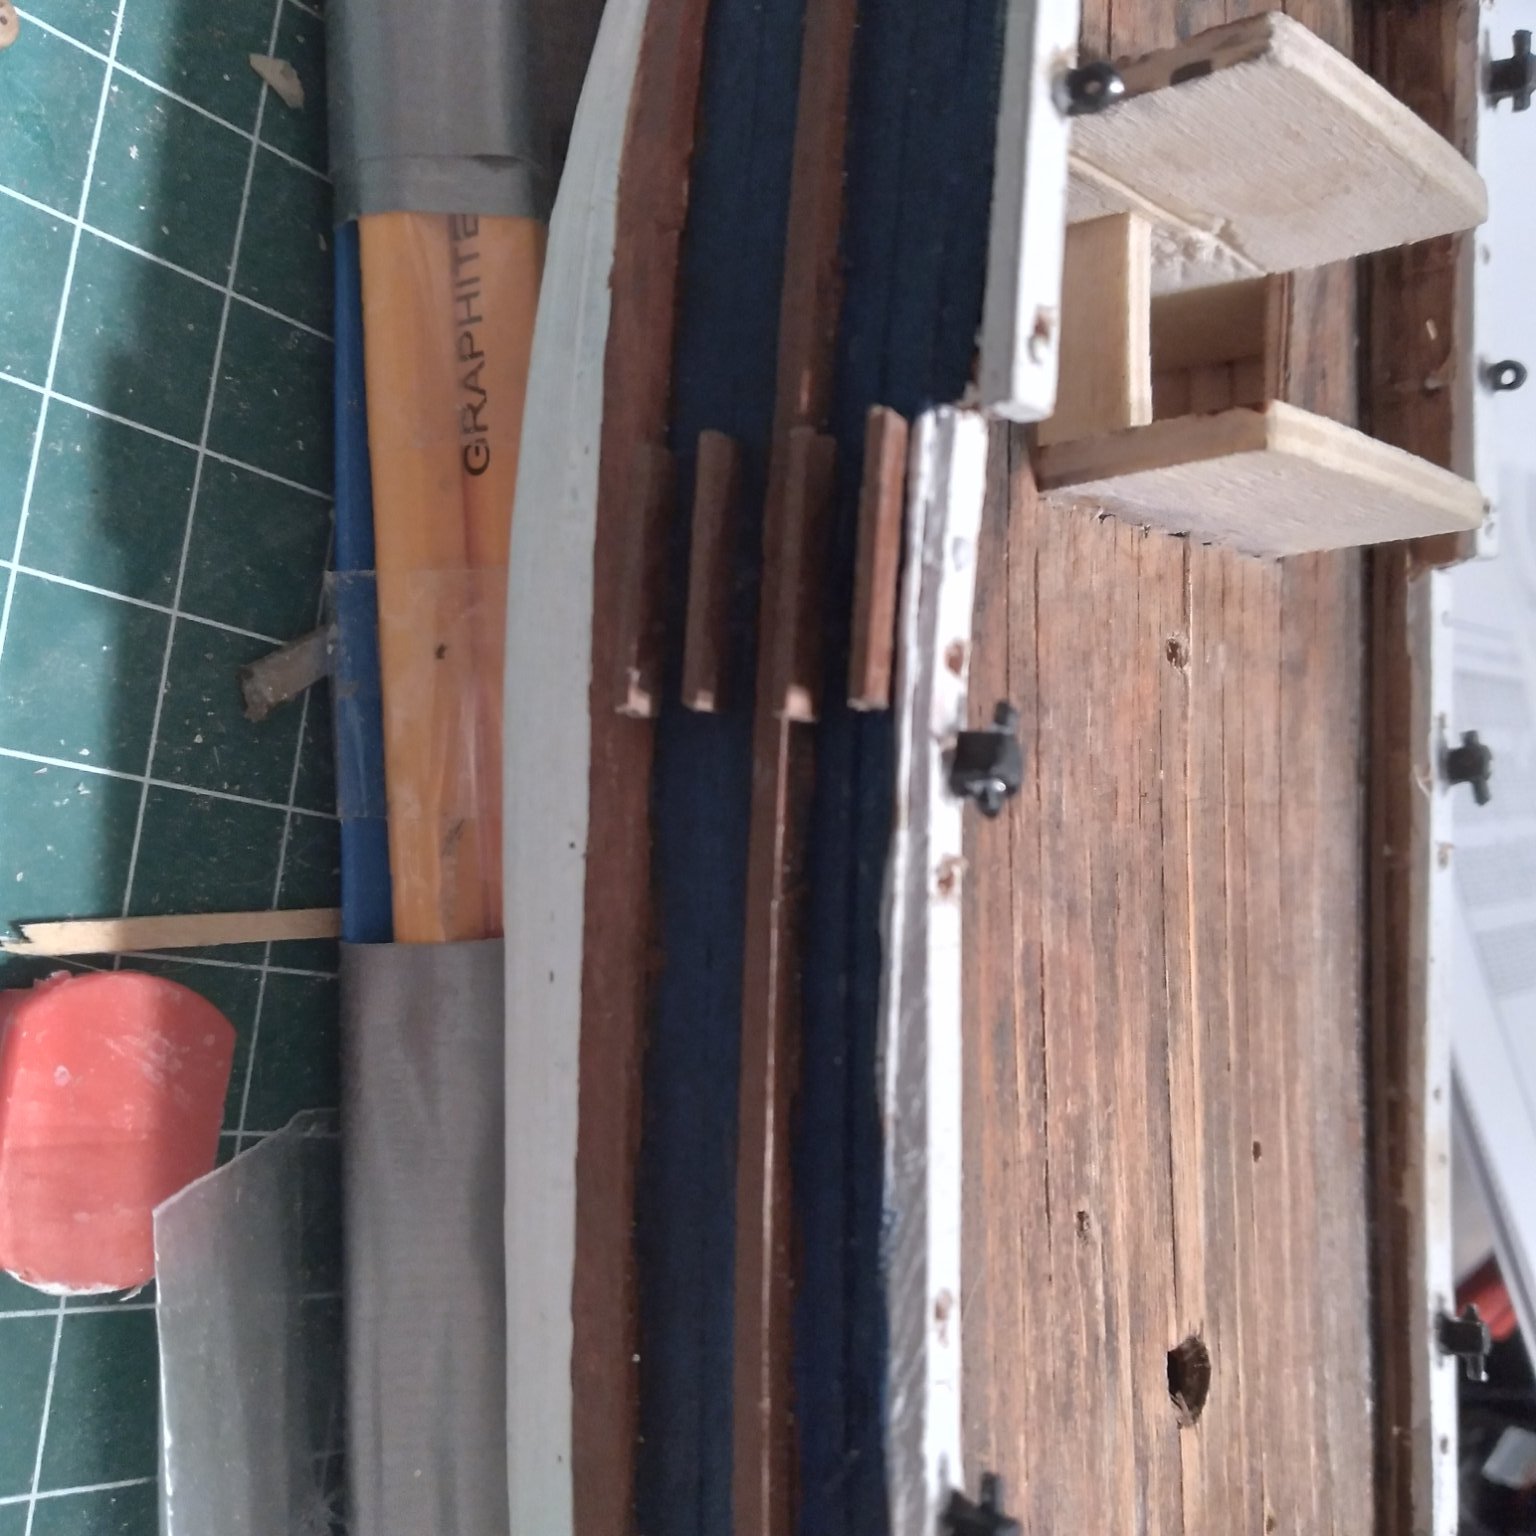
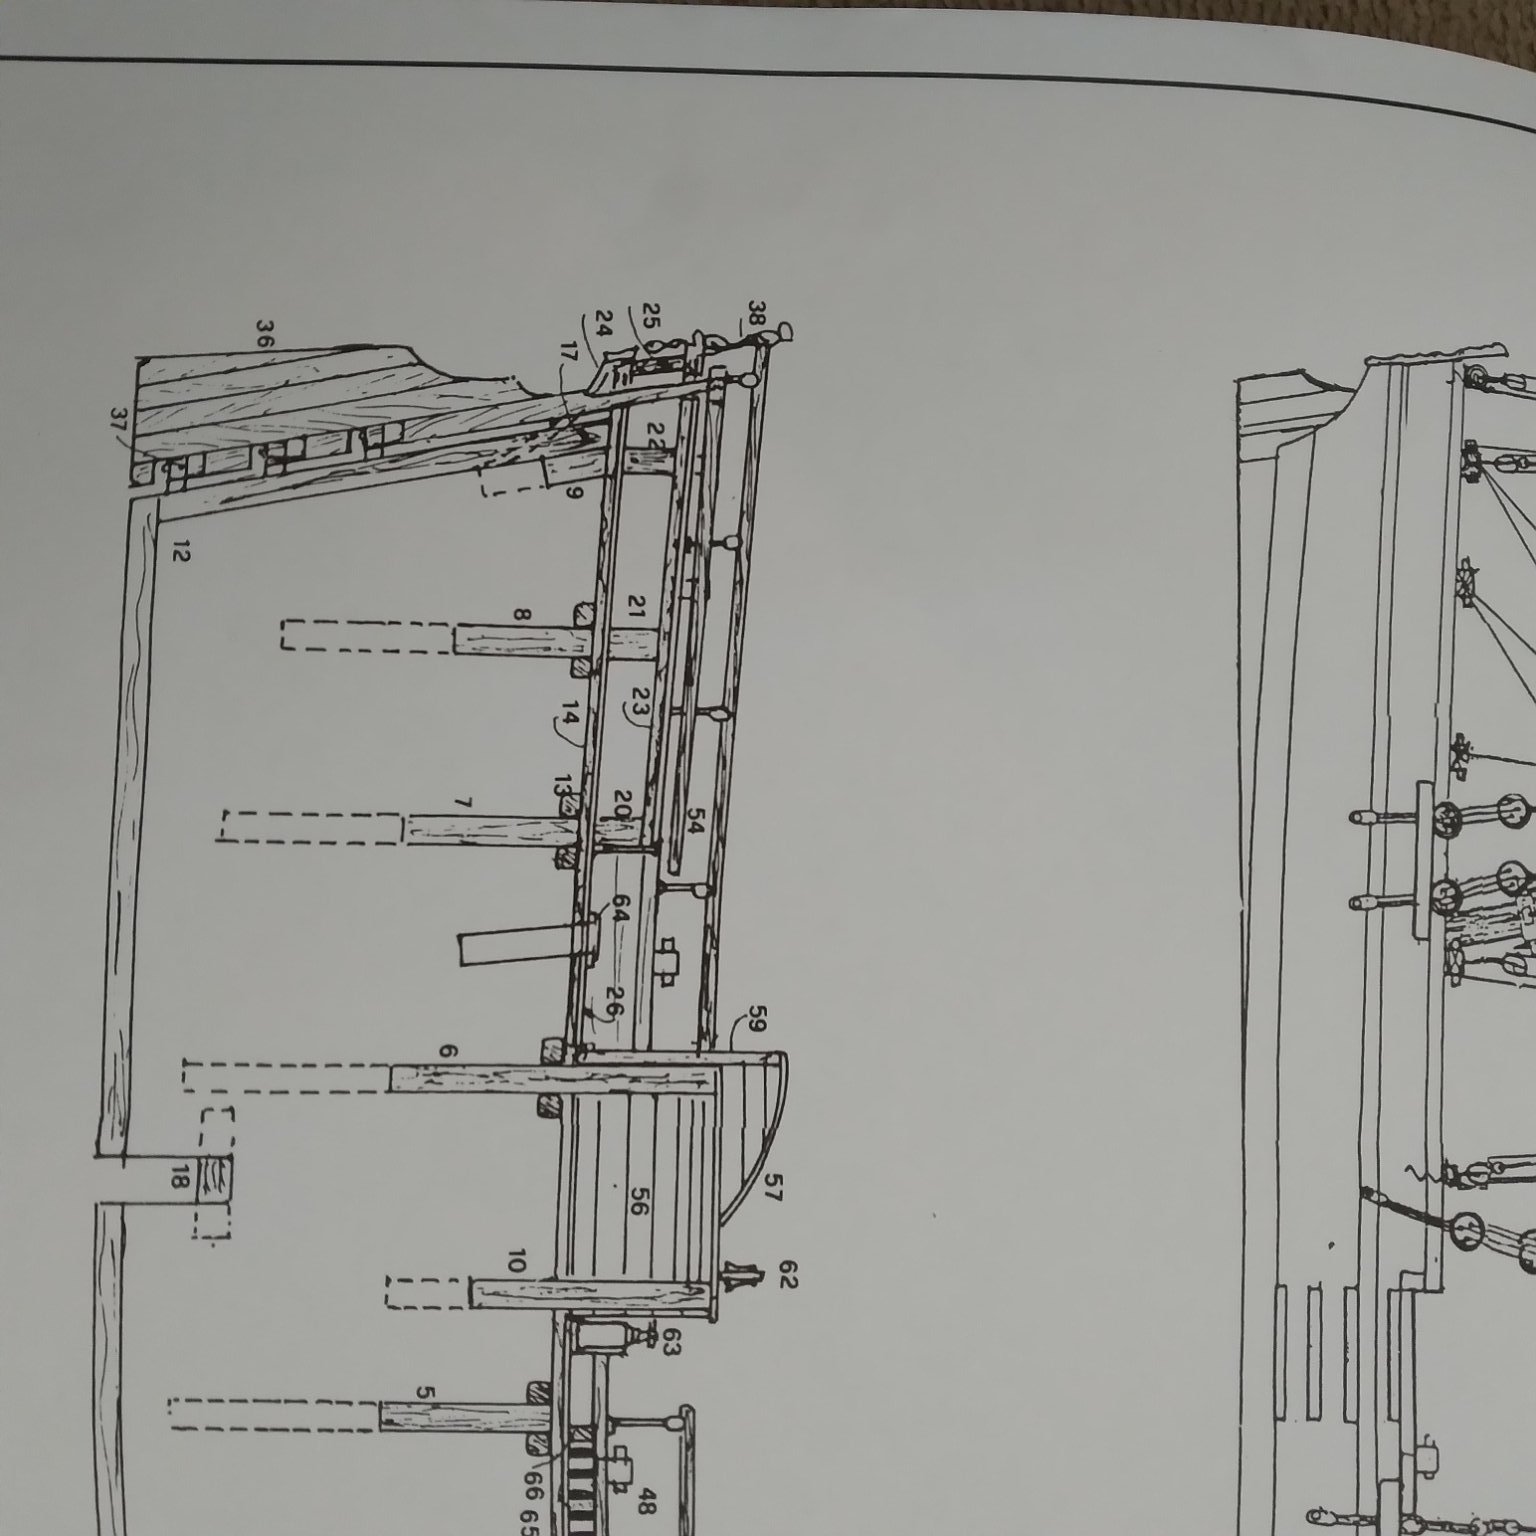
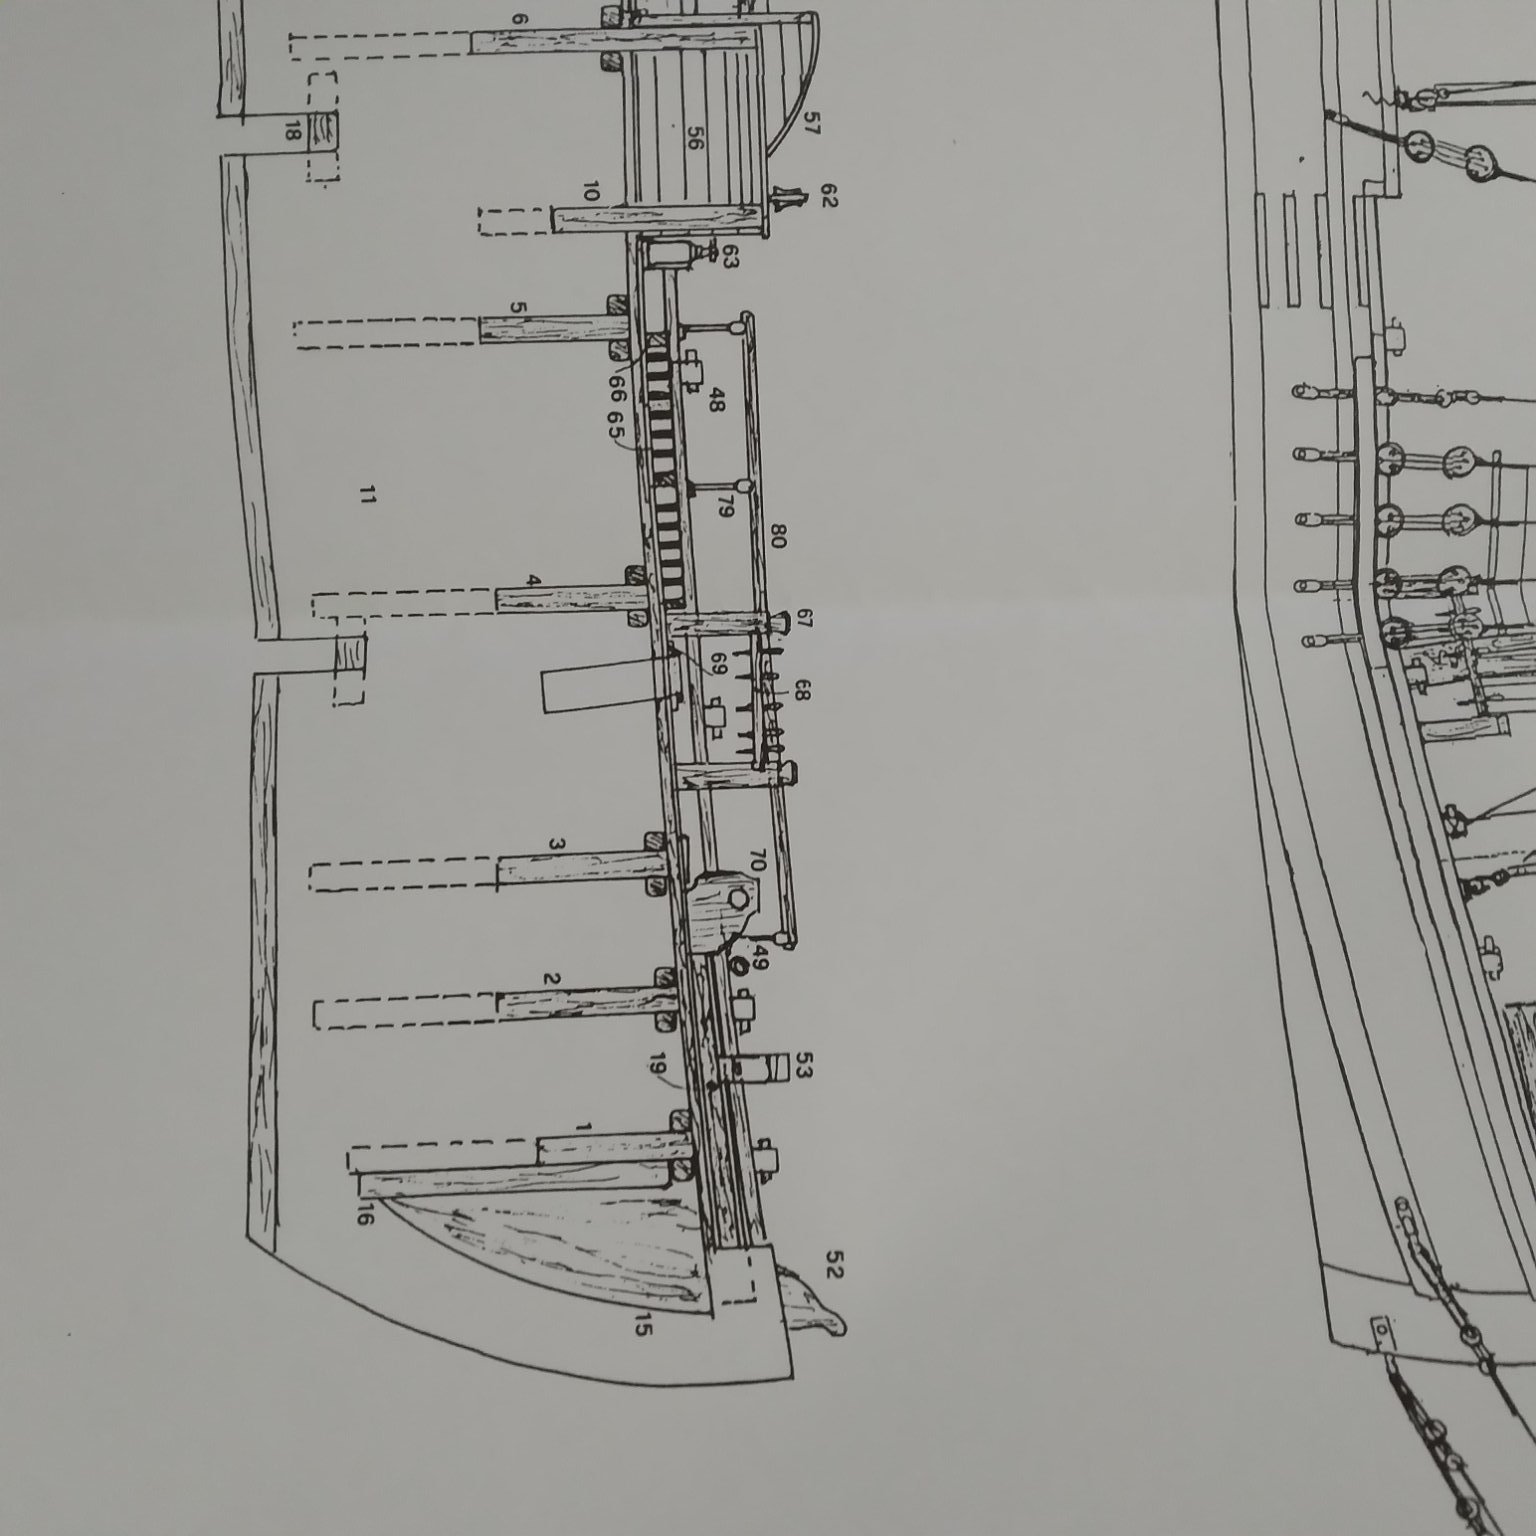
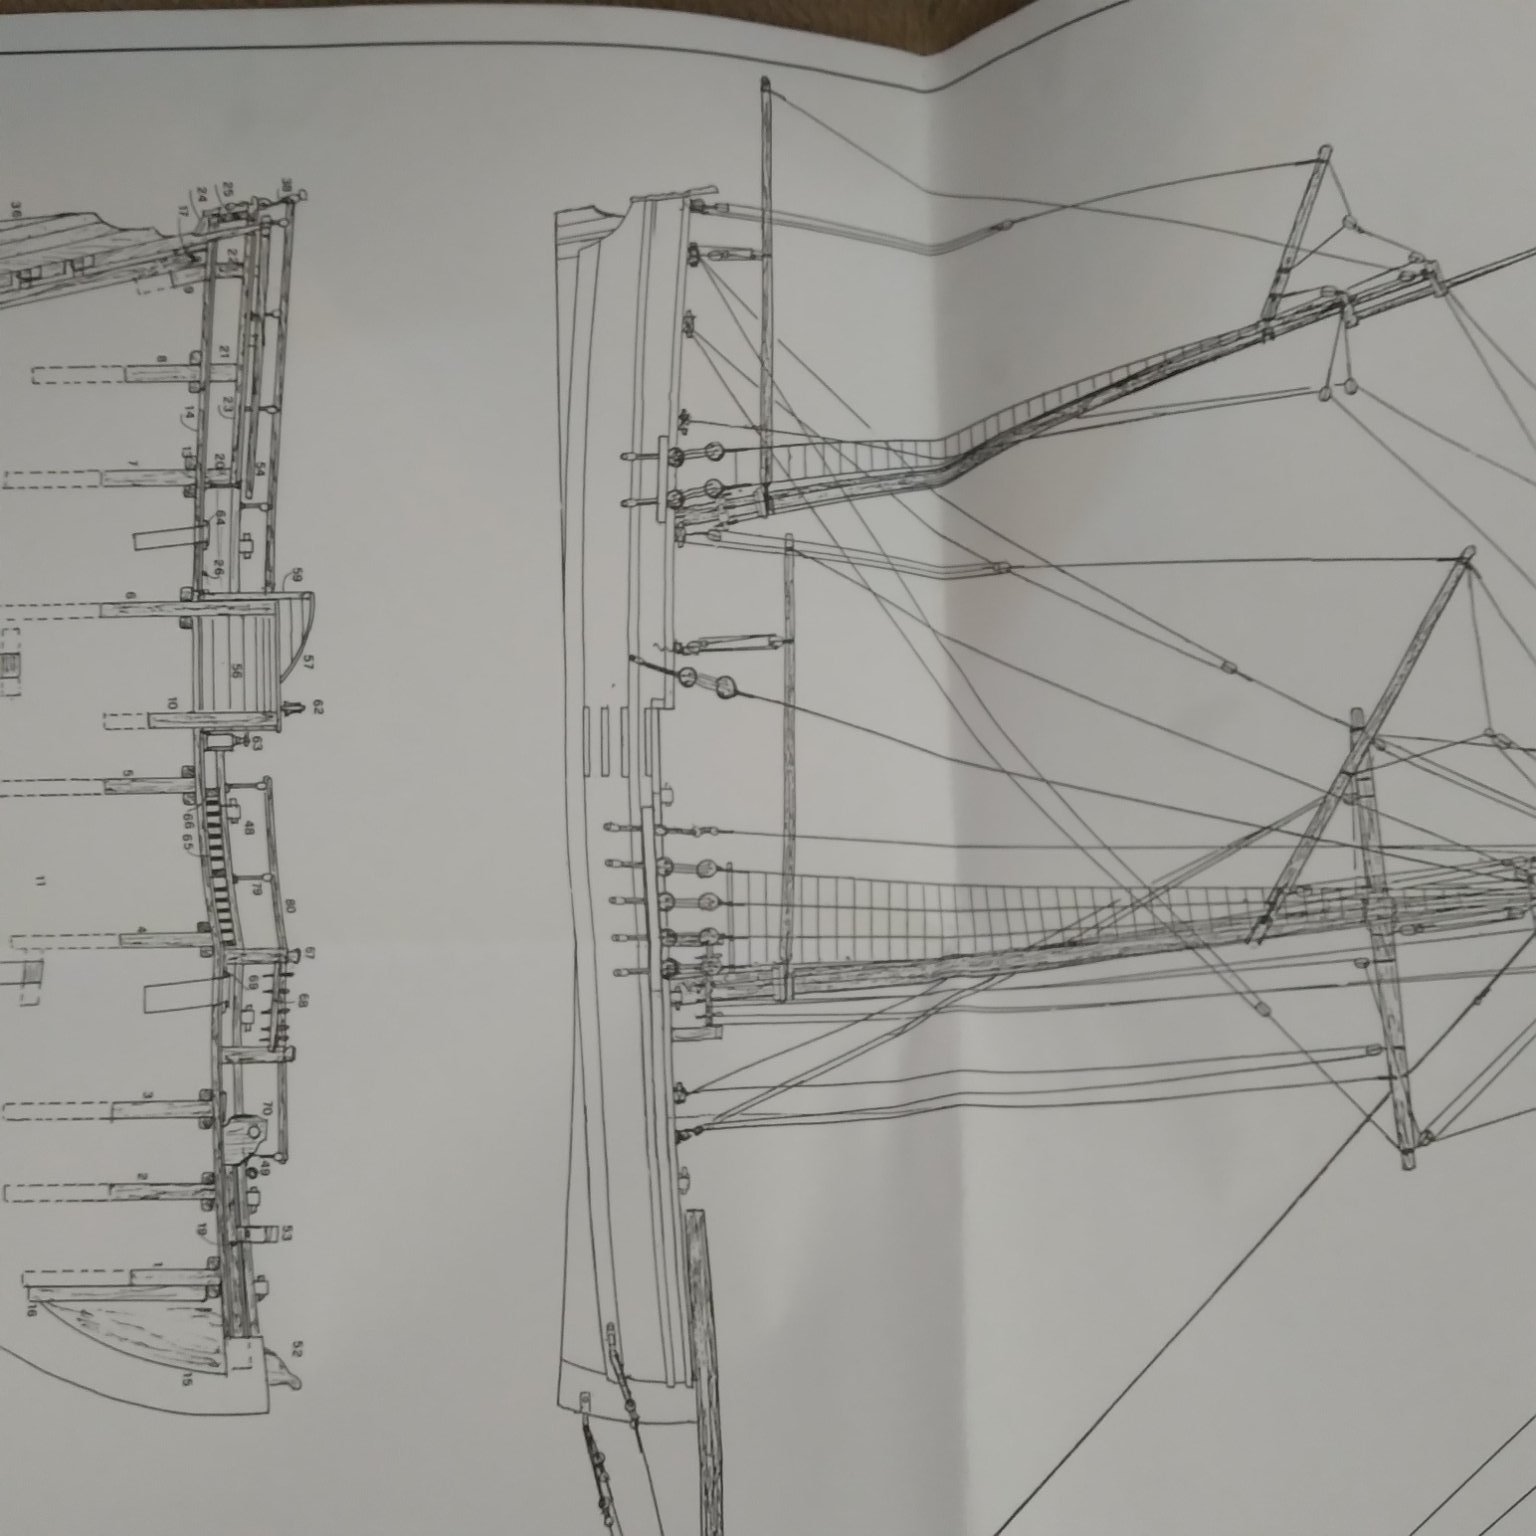
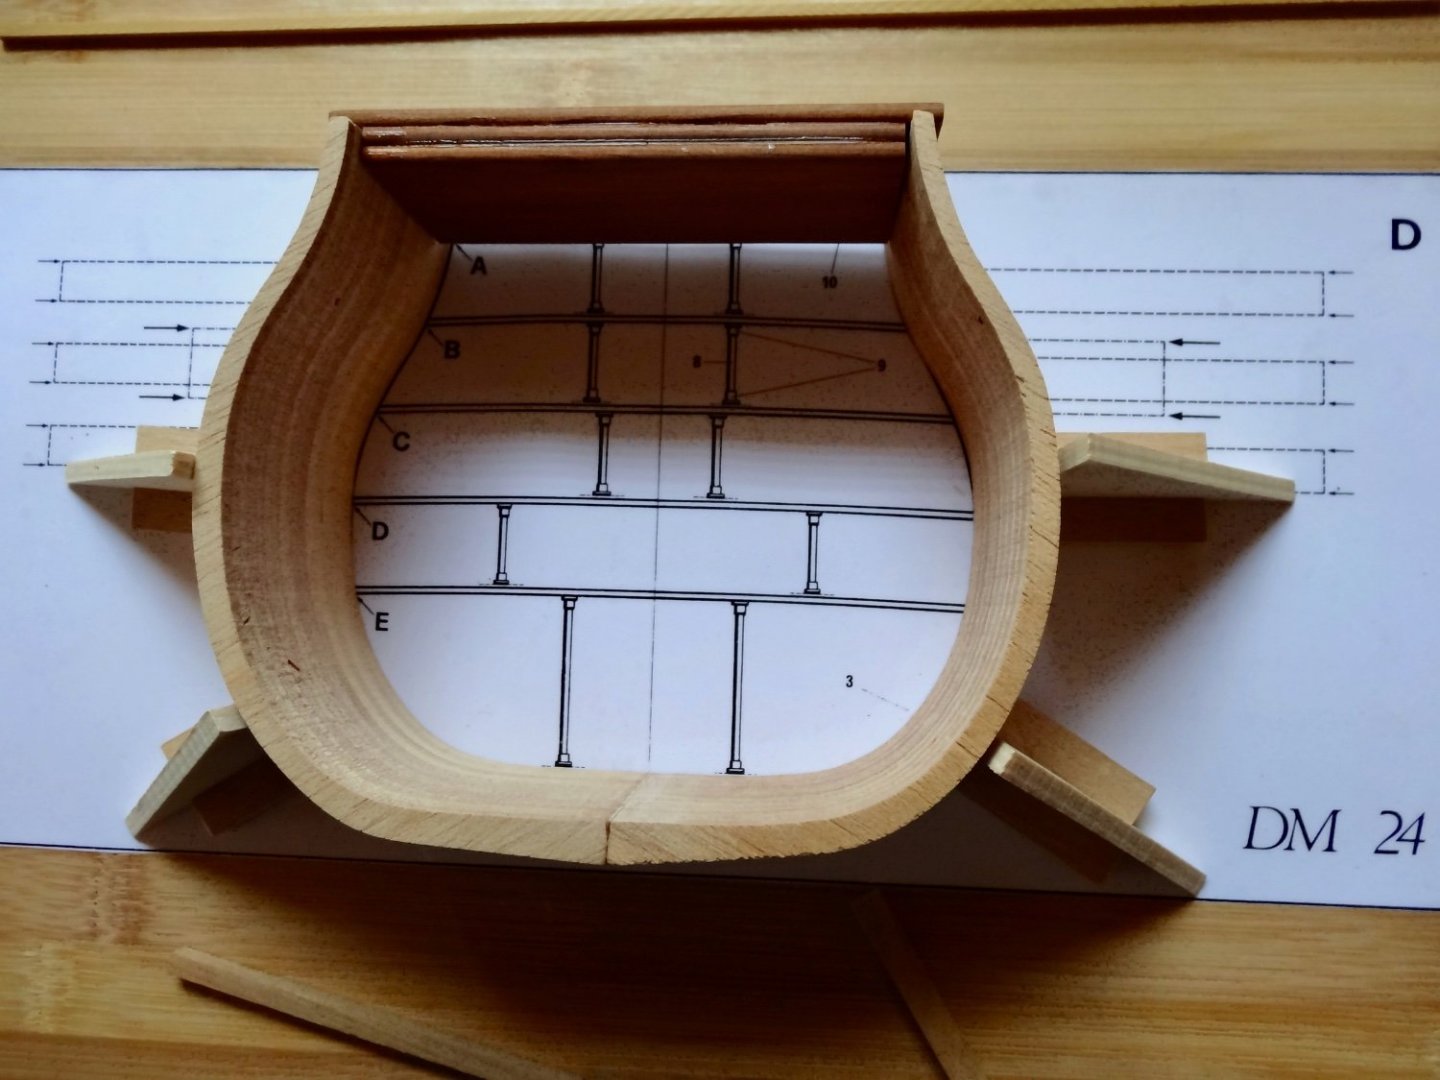
 Purchased this Corel kit around 40 years ago in Genoa Italy. At that time, in a previous life, I was a Marine Engineer on a container ship that continually circumnavigated the world, with lots of stops in Genoa and the UK etc....plenty of opportunities to buy kits, books and modelling tools. My intention was to ultimately build a full model of the Victory from a Corel kit. The Cross-Section was to be my apprenticeship in Period Ship modelling. Anyway, as it does, life took over and the kit found its way into the back of a cupboard gathering dust. Three children later and after a long career in the marine industry, I finally retired from the Merchant Navy and started a 5 year renovation of our house. During this period I also managed to acquire a Corel Kit of the complete Victory model, which true to form, also made its way into the back of the cupboard to share the dust collection. Lots of advice on here as to the difficulties involved building the full Corel Victory, mainly due to the poor instructions supplied etc. This along with recognising my own penchant for completely ignoring manuals anyway, I thought it finally time to start the Cross- Section. What could go wrong..?? I have no intention of trying to create a "museum quality build" (there are plenty of them on here to admire)...!! Having said that, I have only kept the parts list for reference. The model will be built from the plans supplied and I will build to the best of my ability. Hopefully I will learn from my mistakes. After all, I have I have been fortunate to have had the opportunity to build full size 1:1 scale ships, in yards in Hamburg, Singapore and Australia.....no building instructions, just a specification and lots of technical drawings. Time to jump right in...Firstly, I didn't like the building jig arrangement. It limits opportunities to physically handle the hull...Besides, the wine was far too good to be put into service for an extended period. To overcome this issue I made a "strong-back" from cedar. This, combined with some sturdy elastic bands will hold the hull in the correct shape when removing it from the jig.
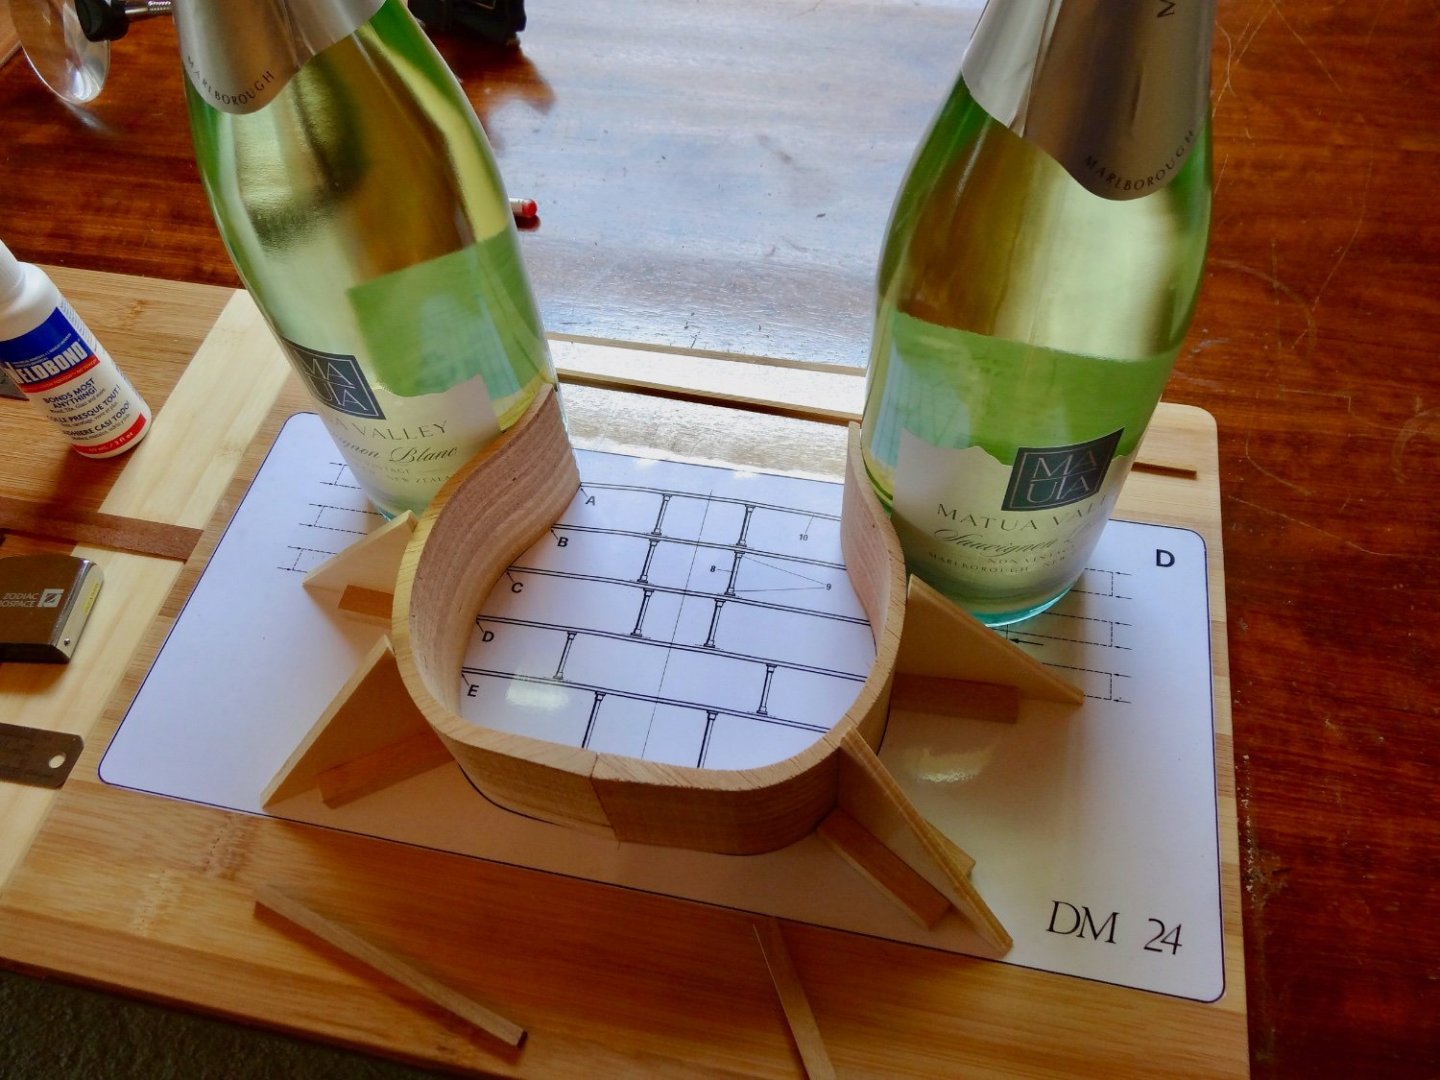

-
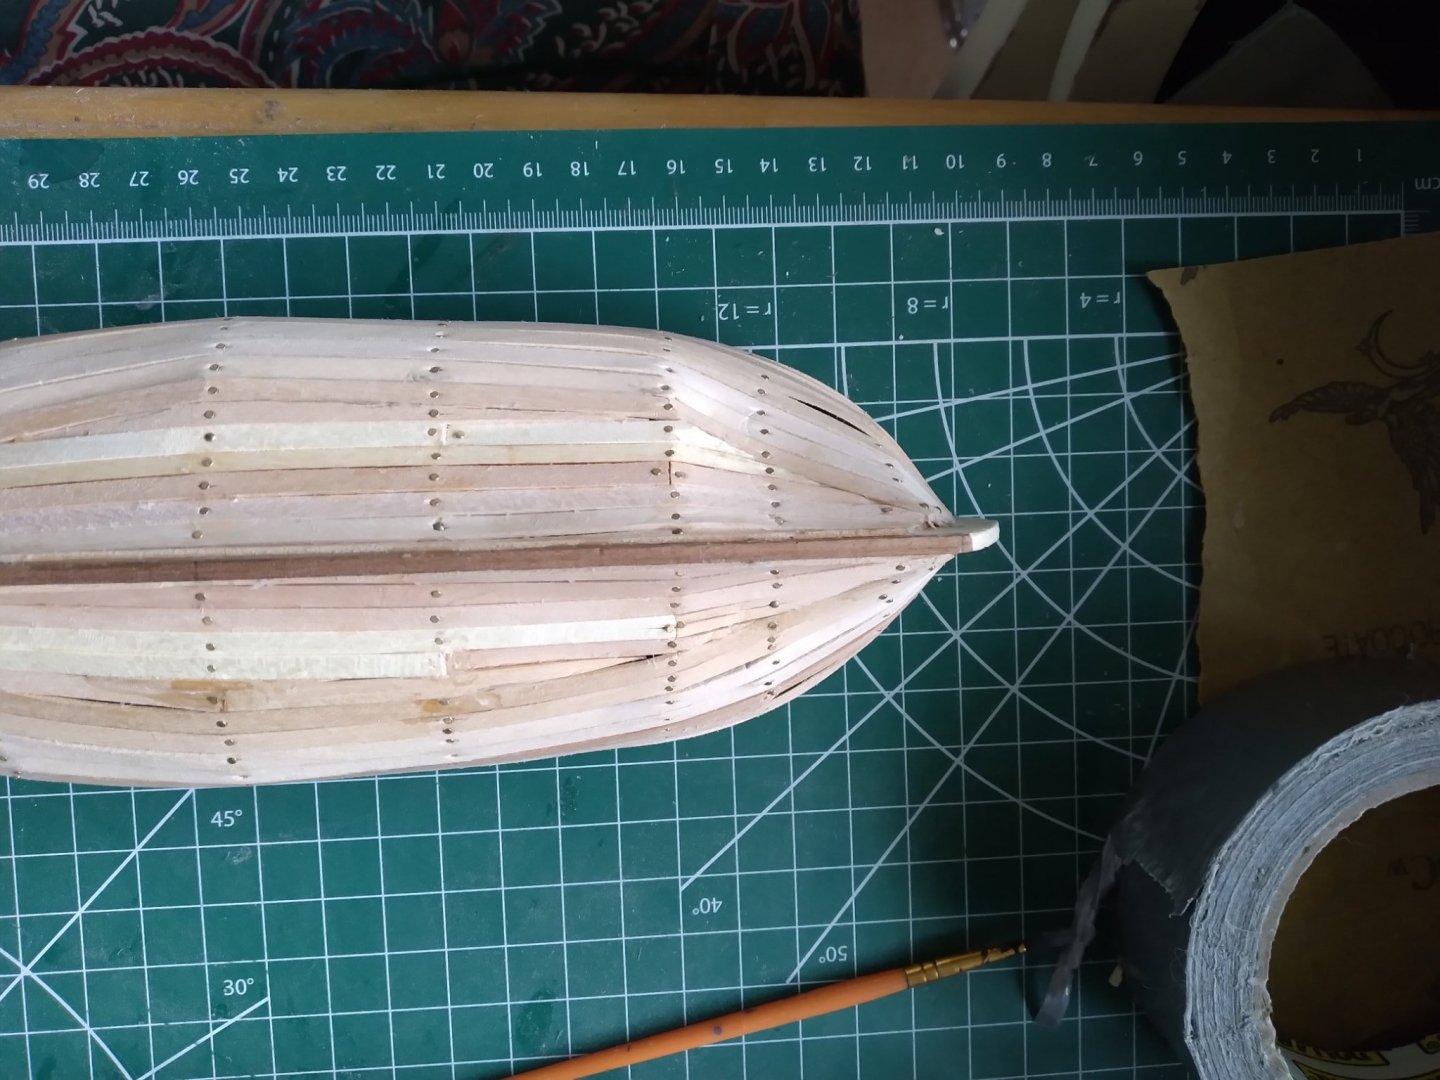
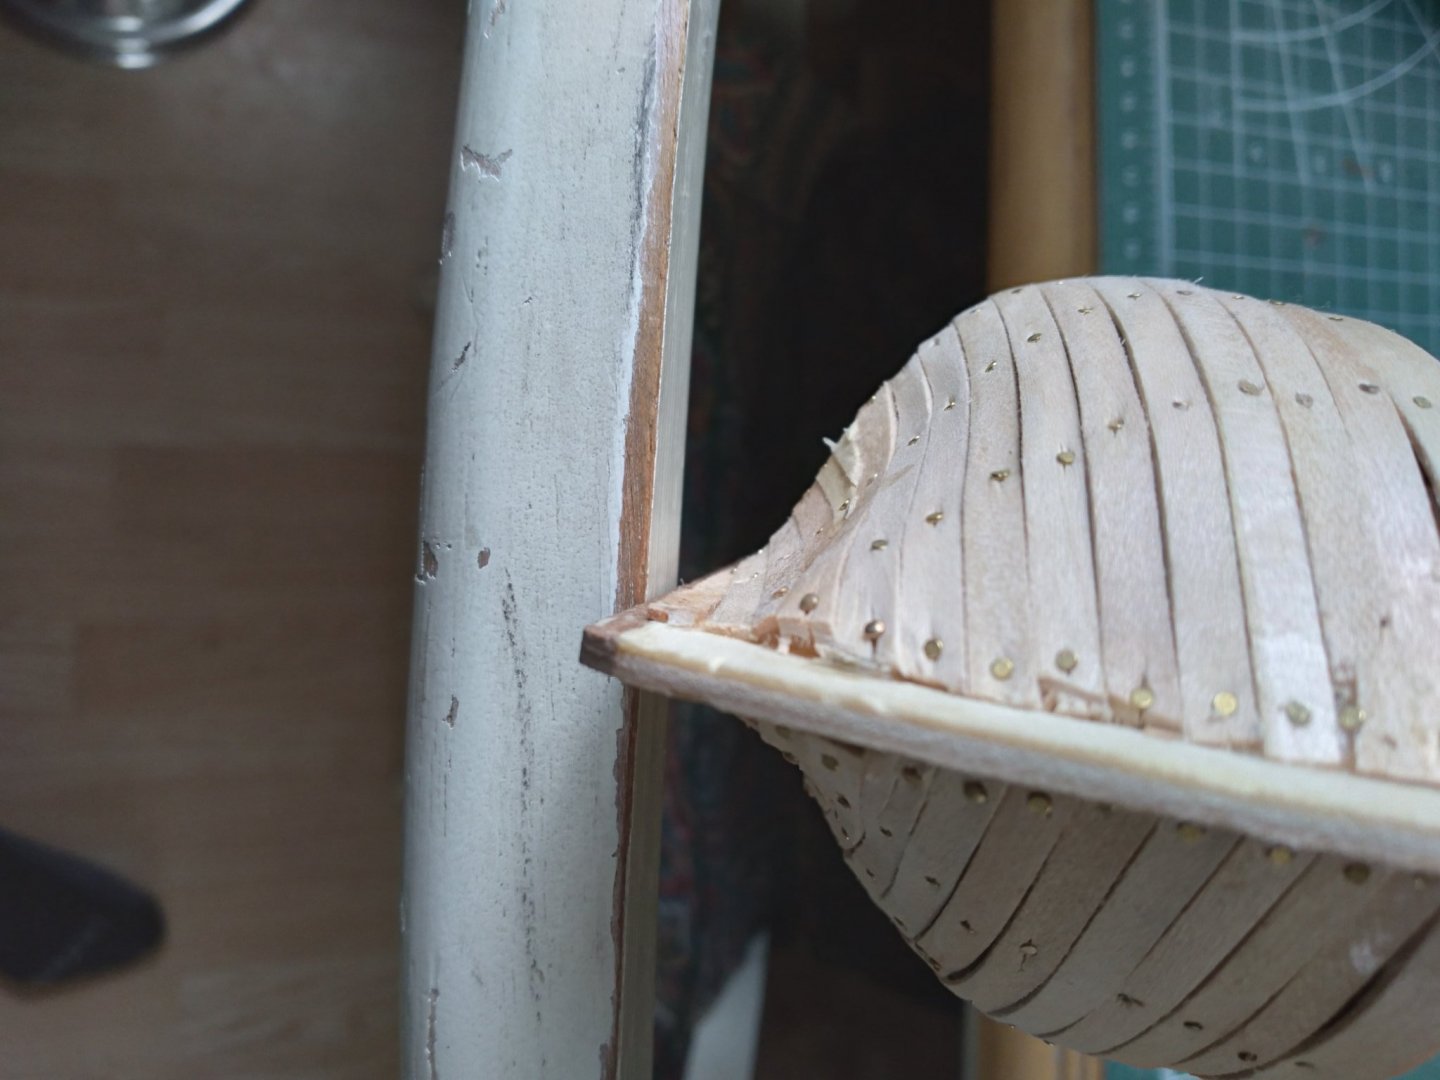
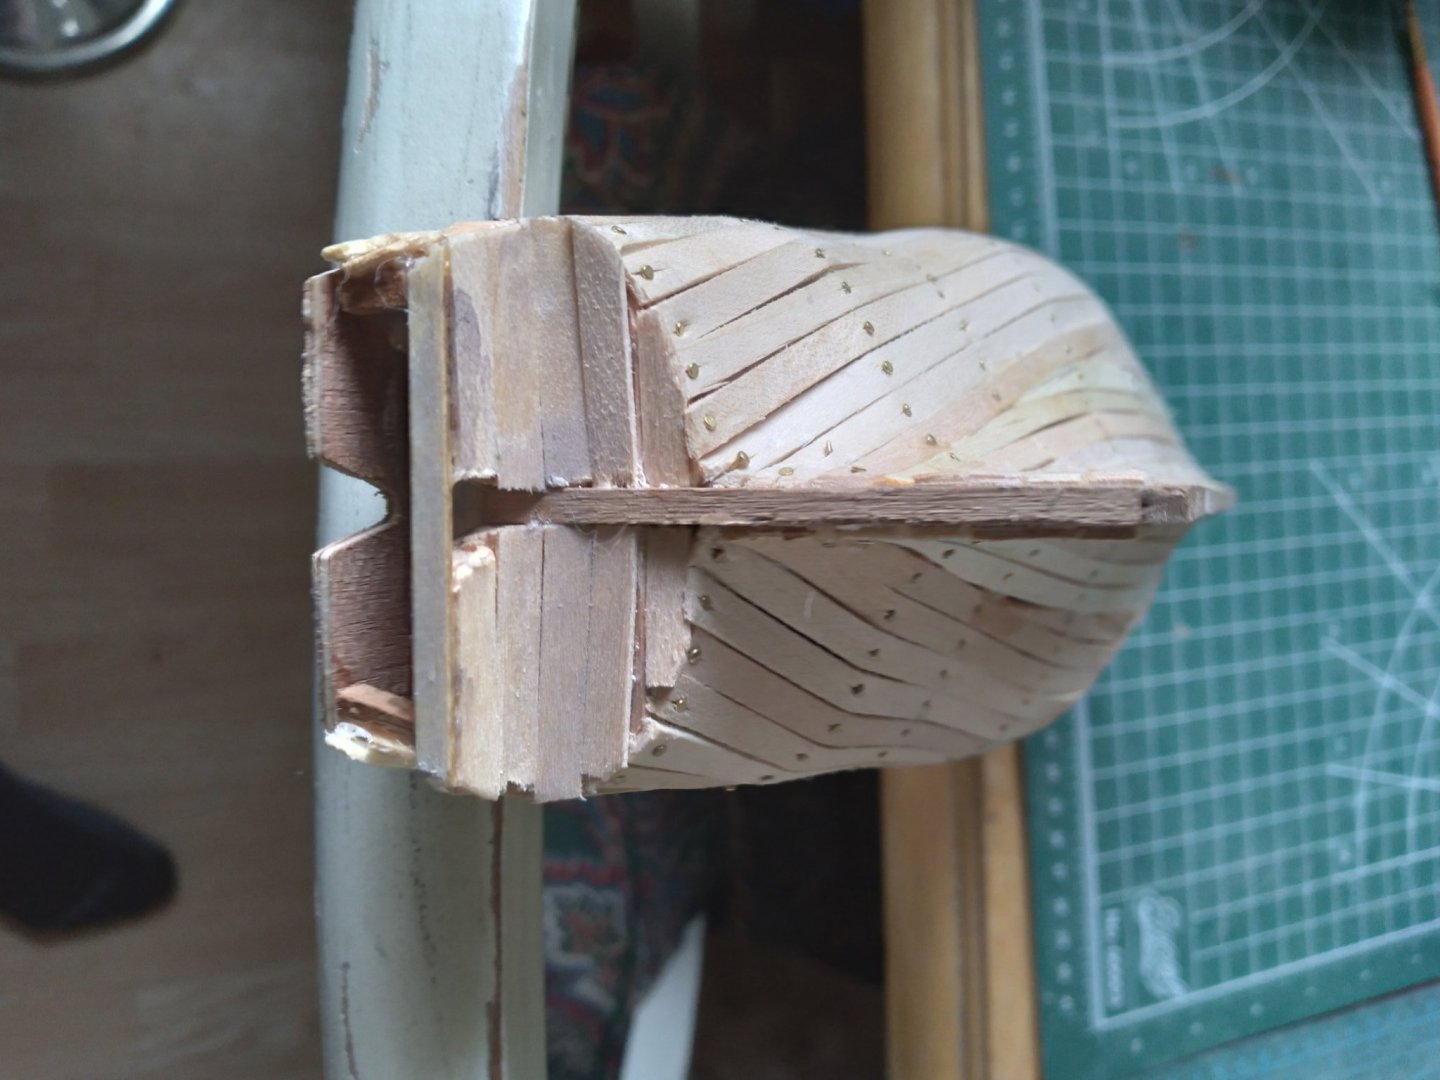
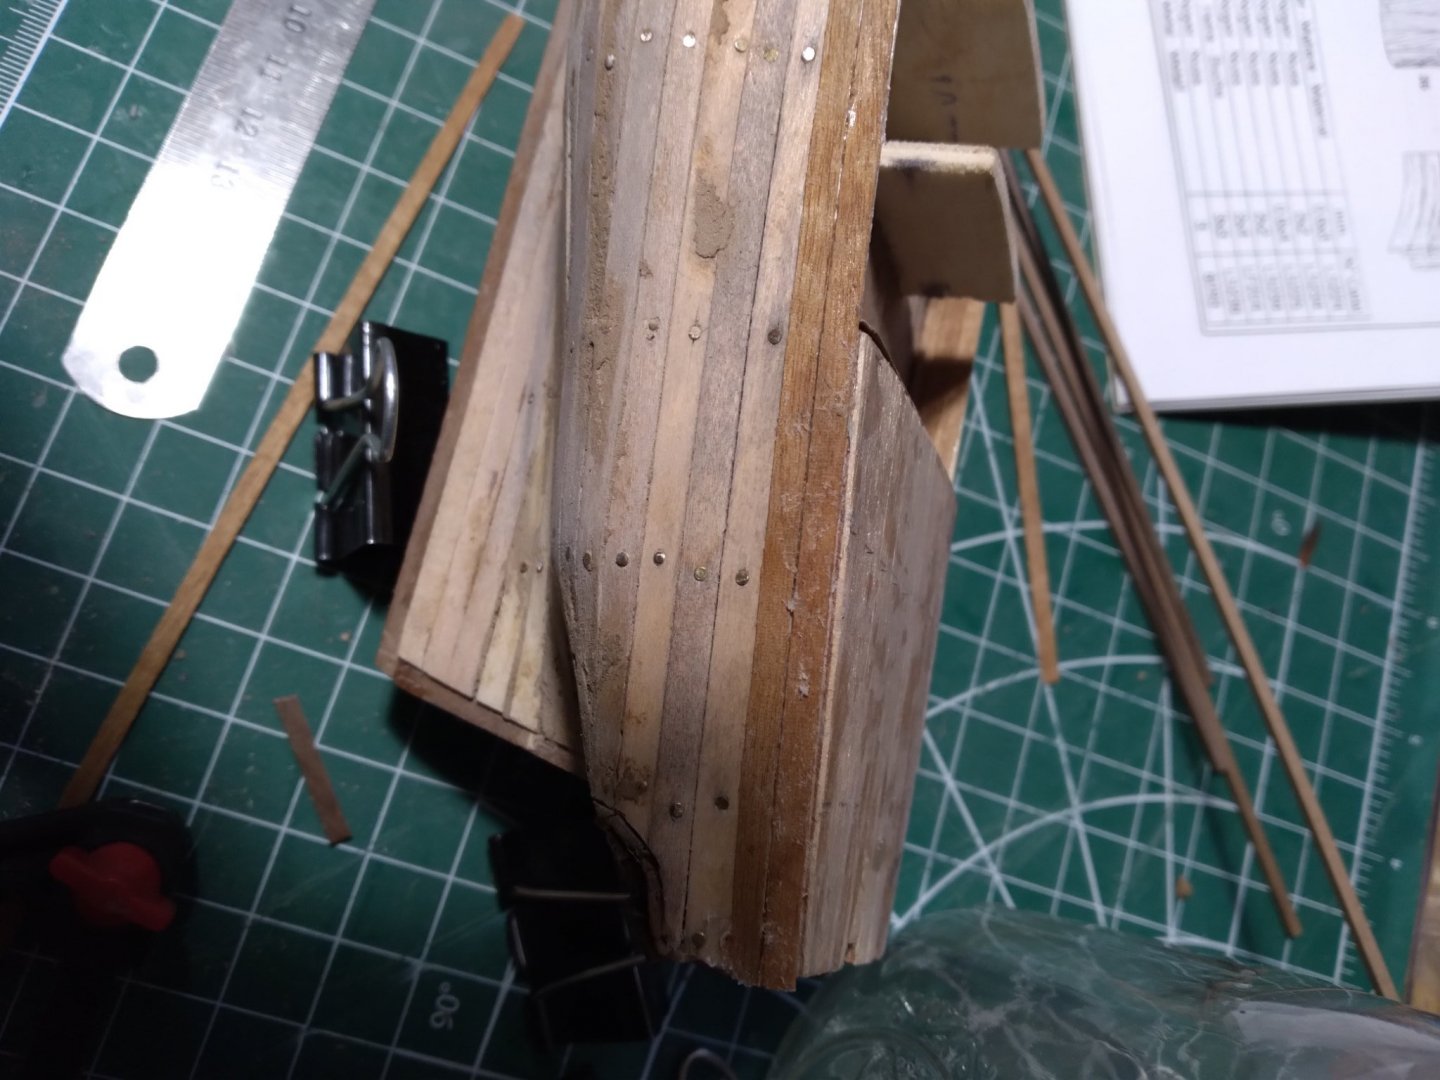
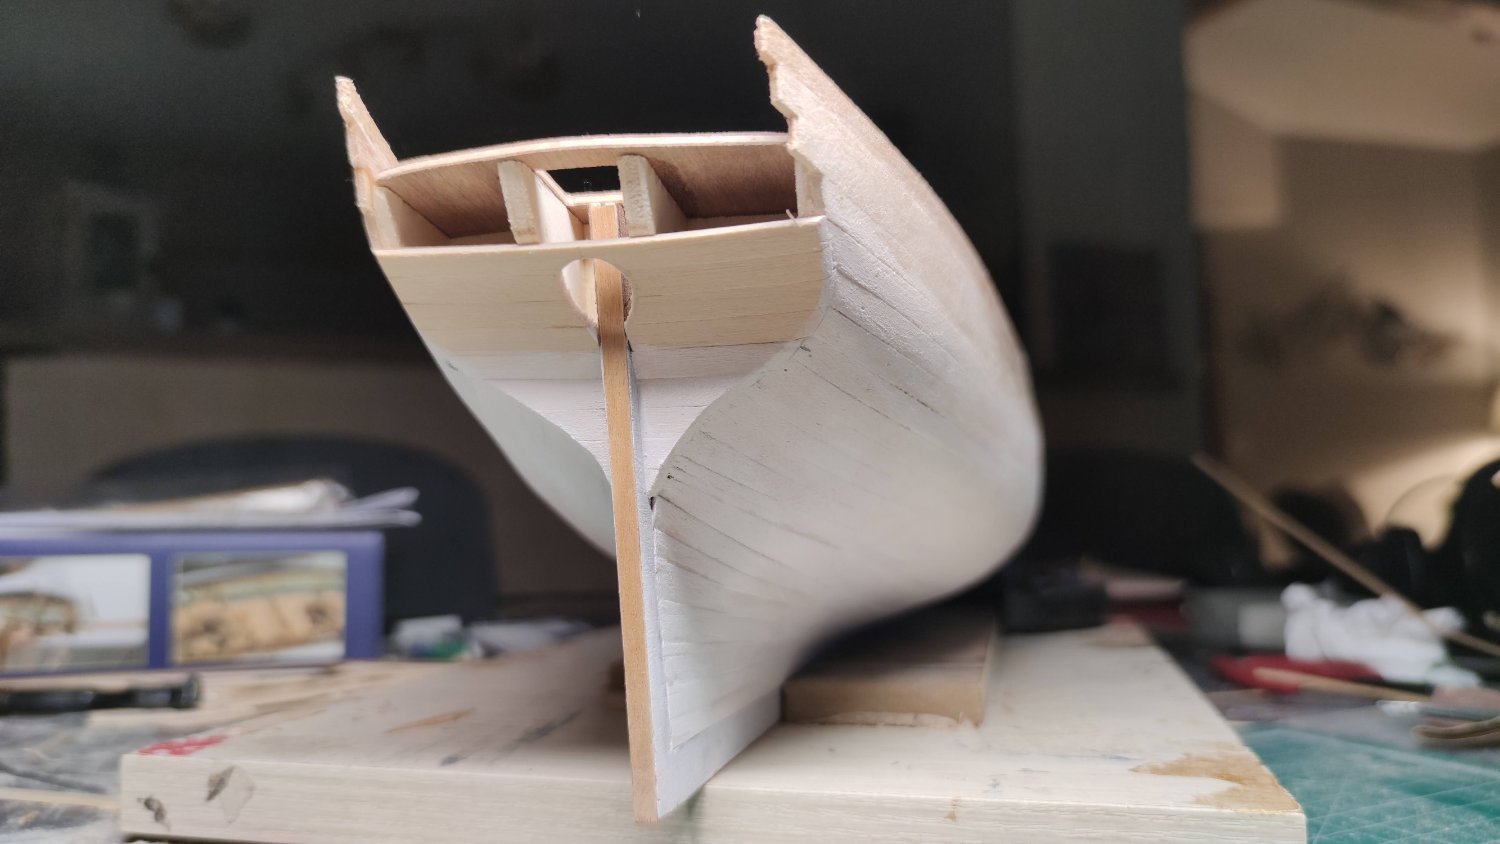
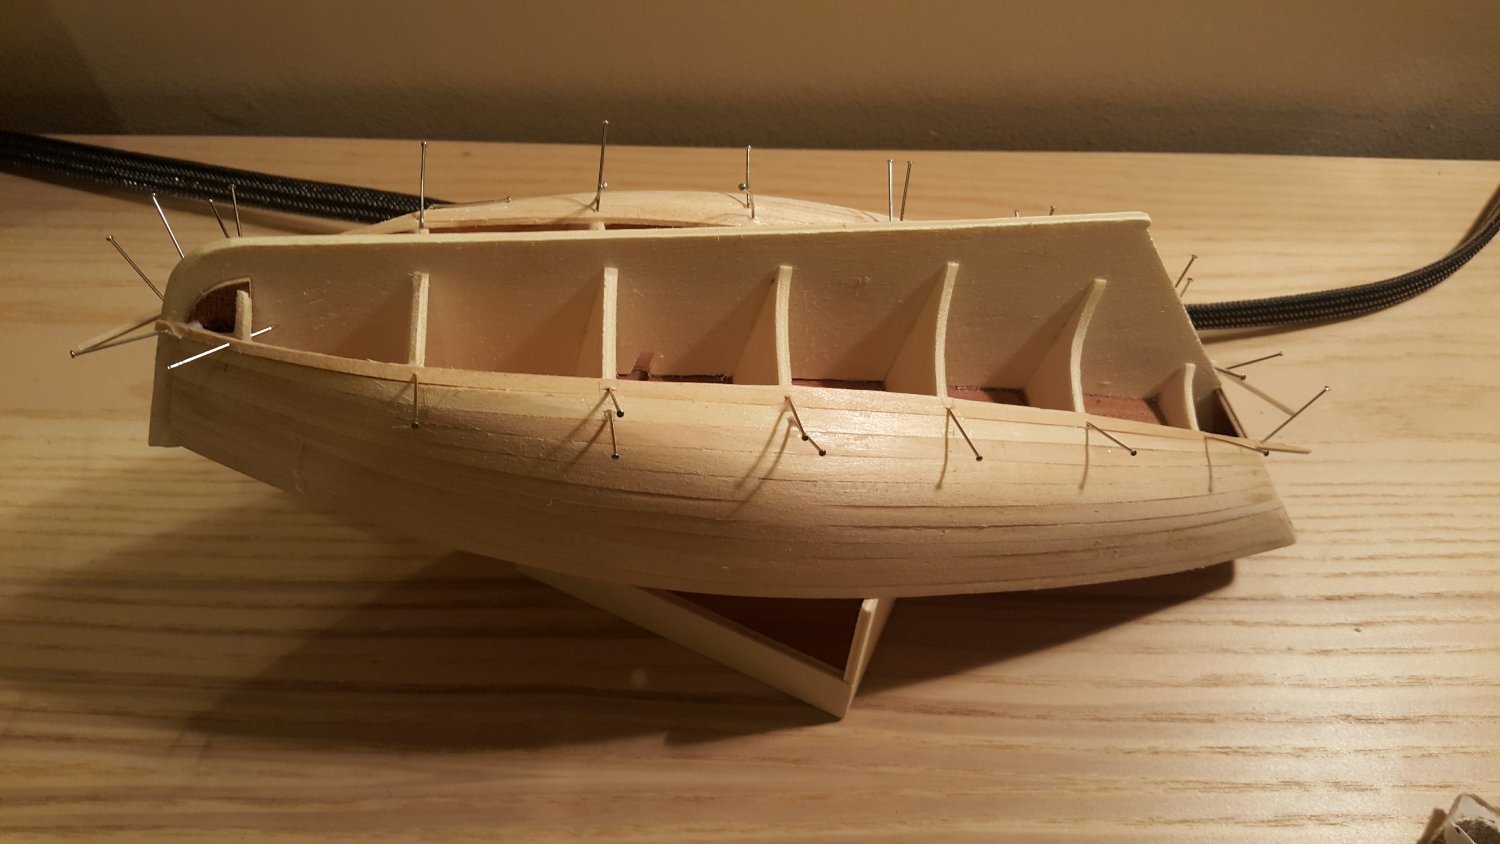
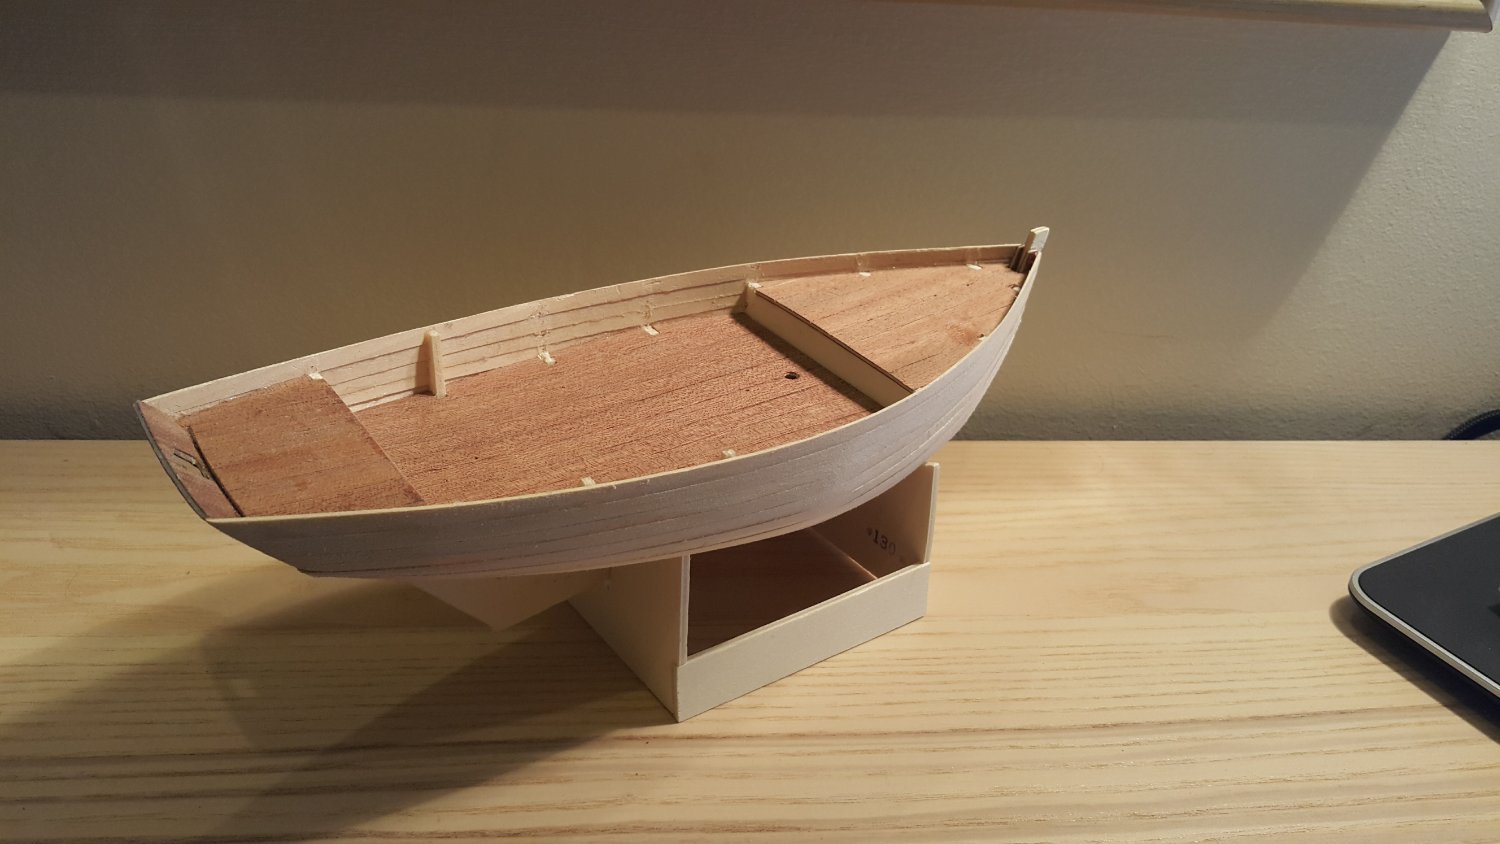
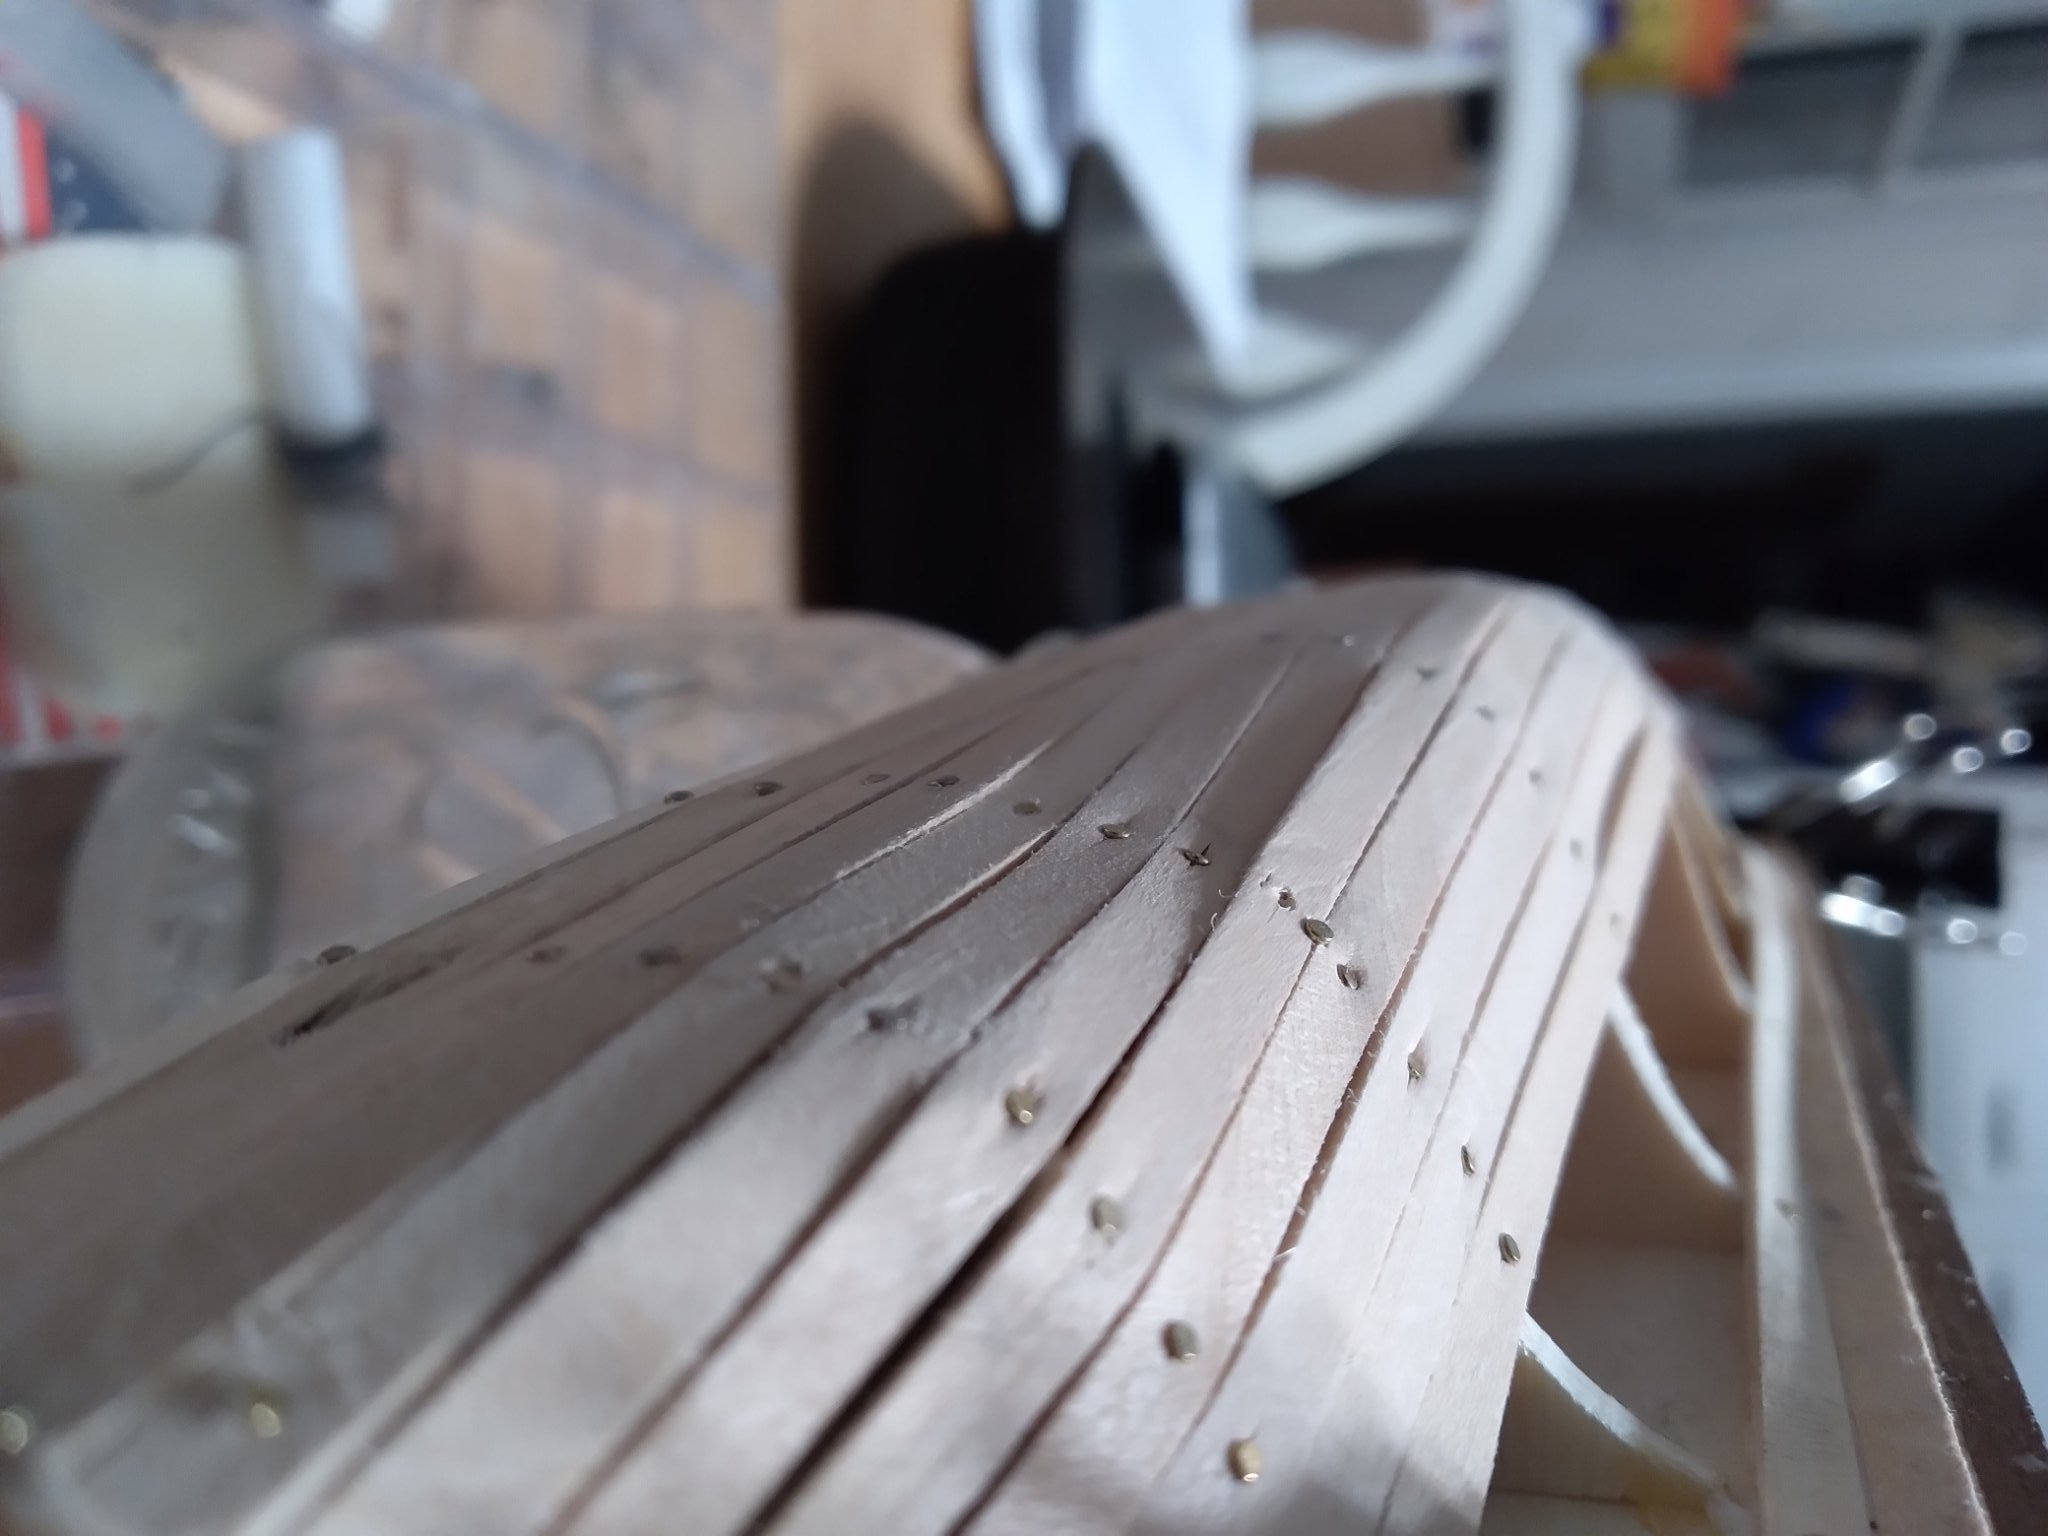
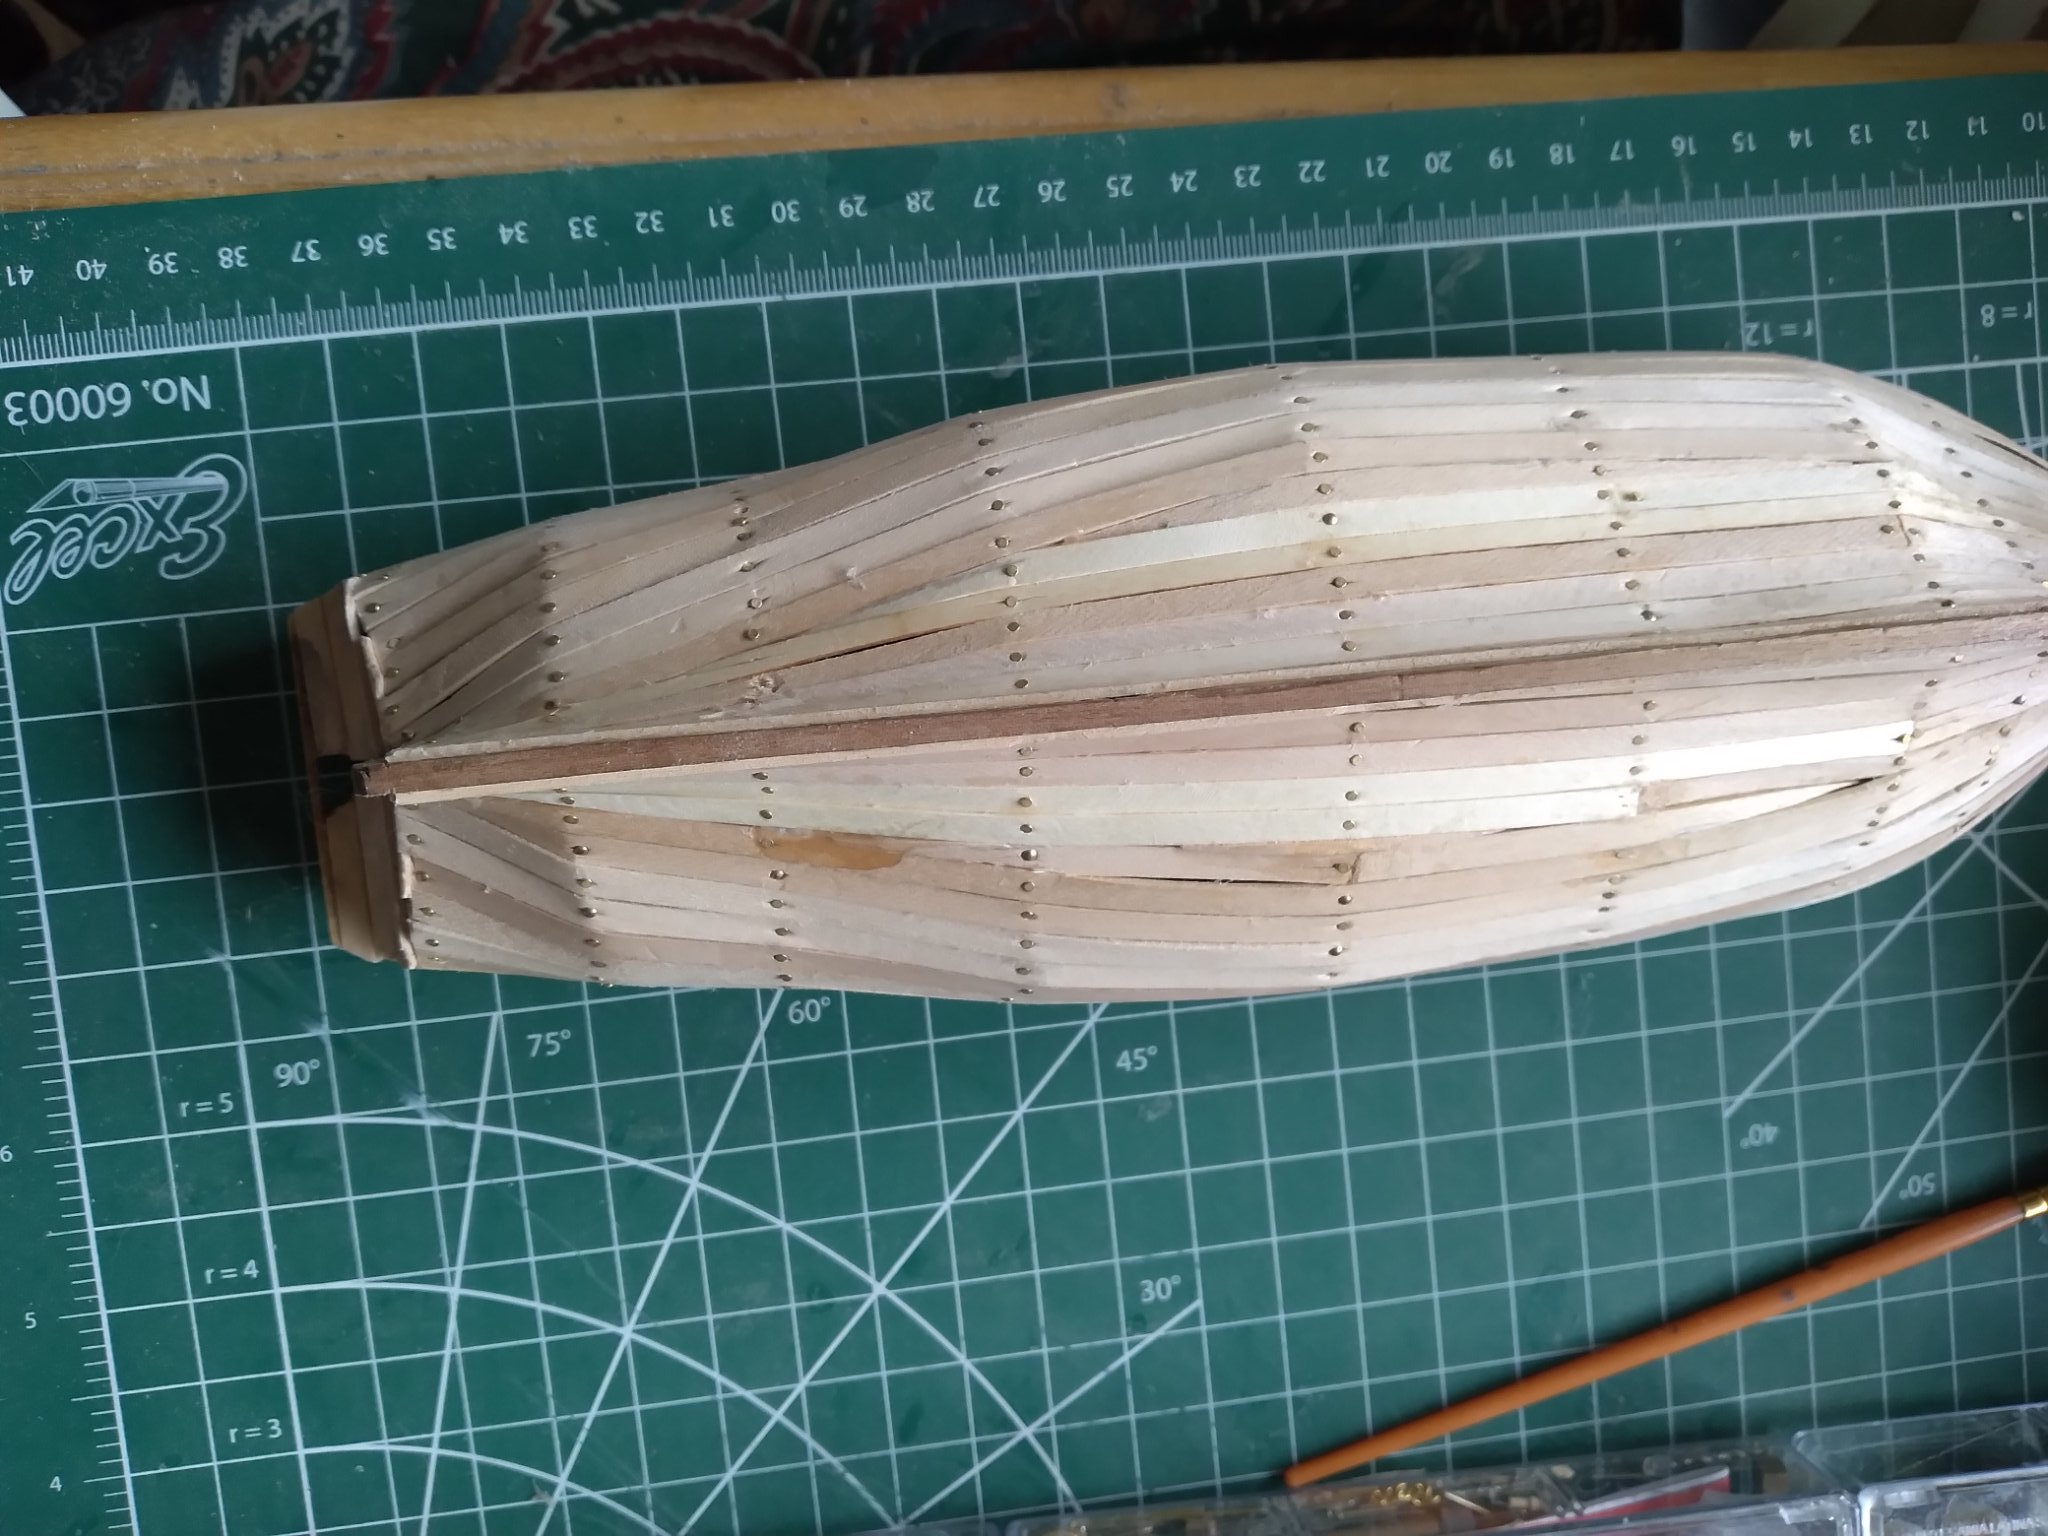
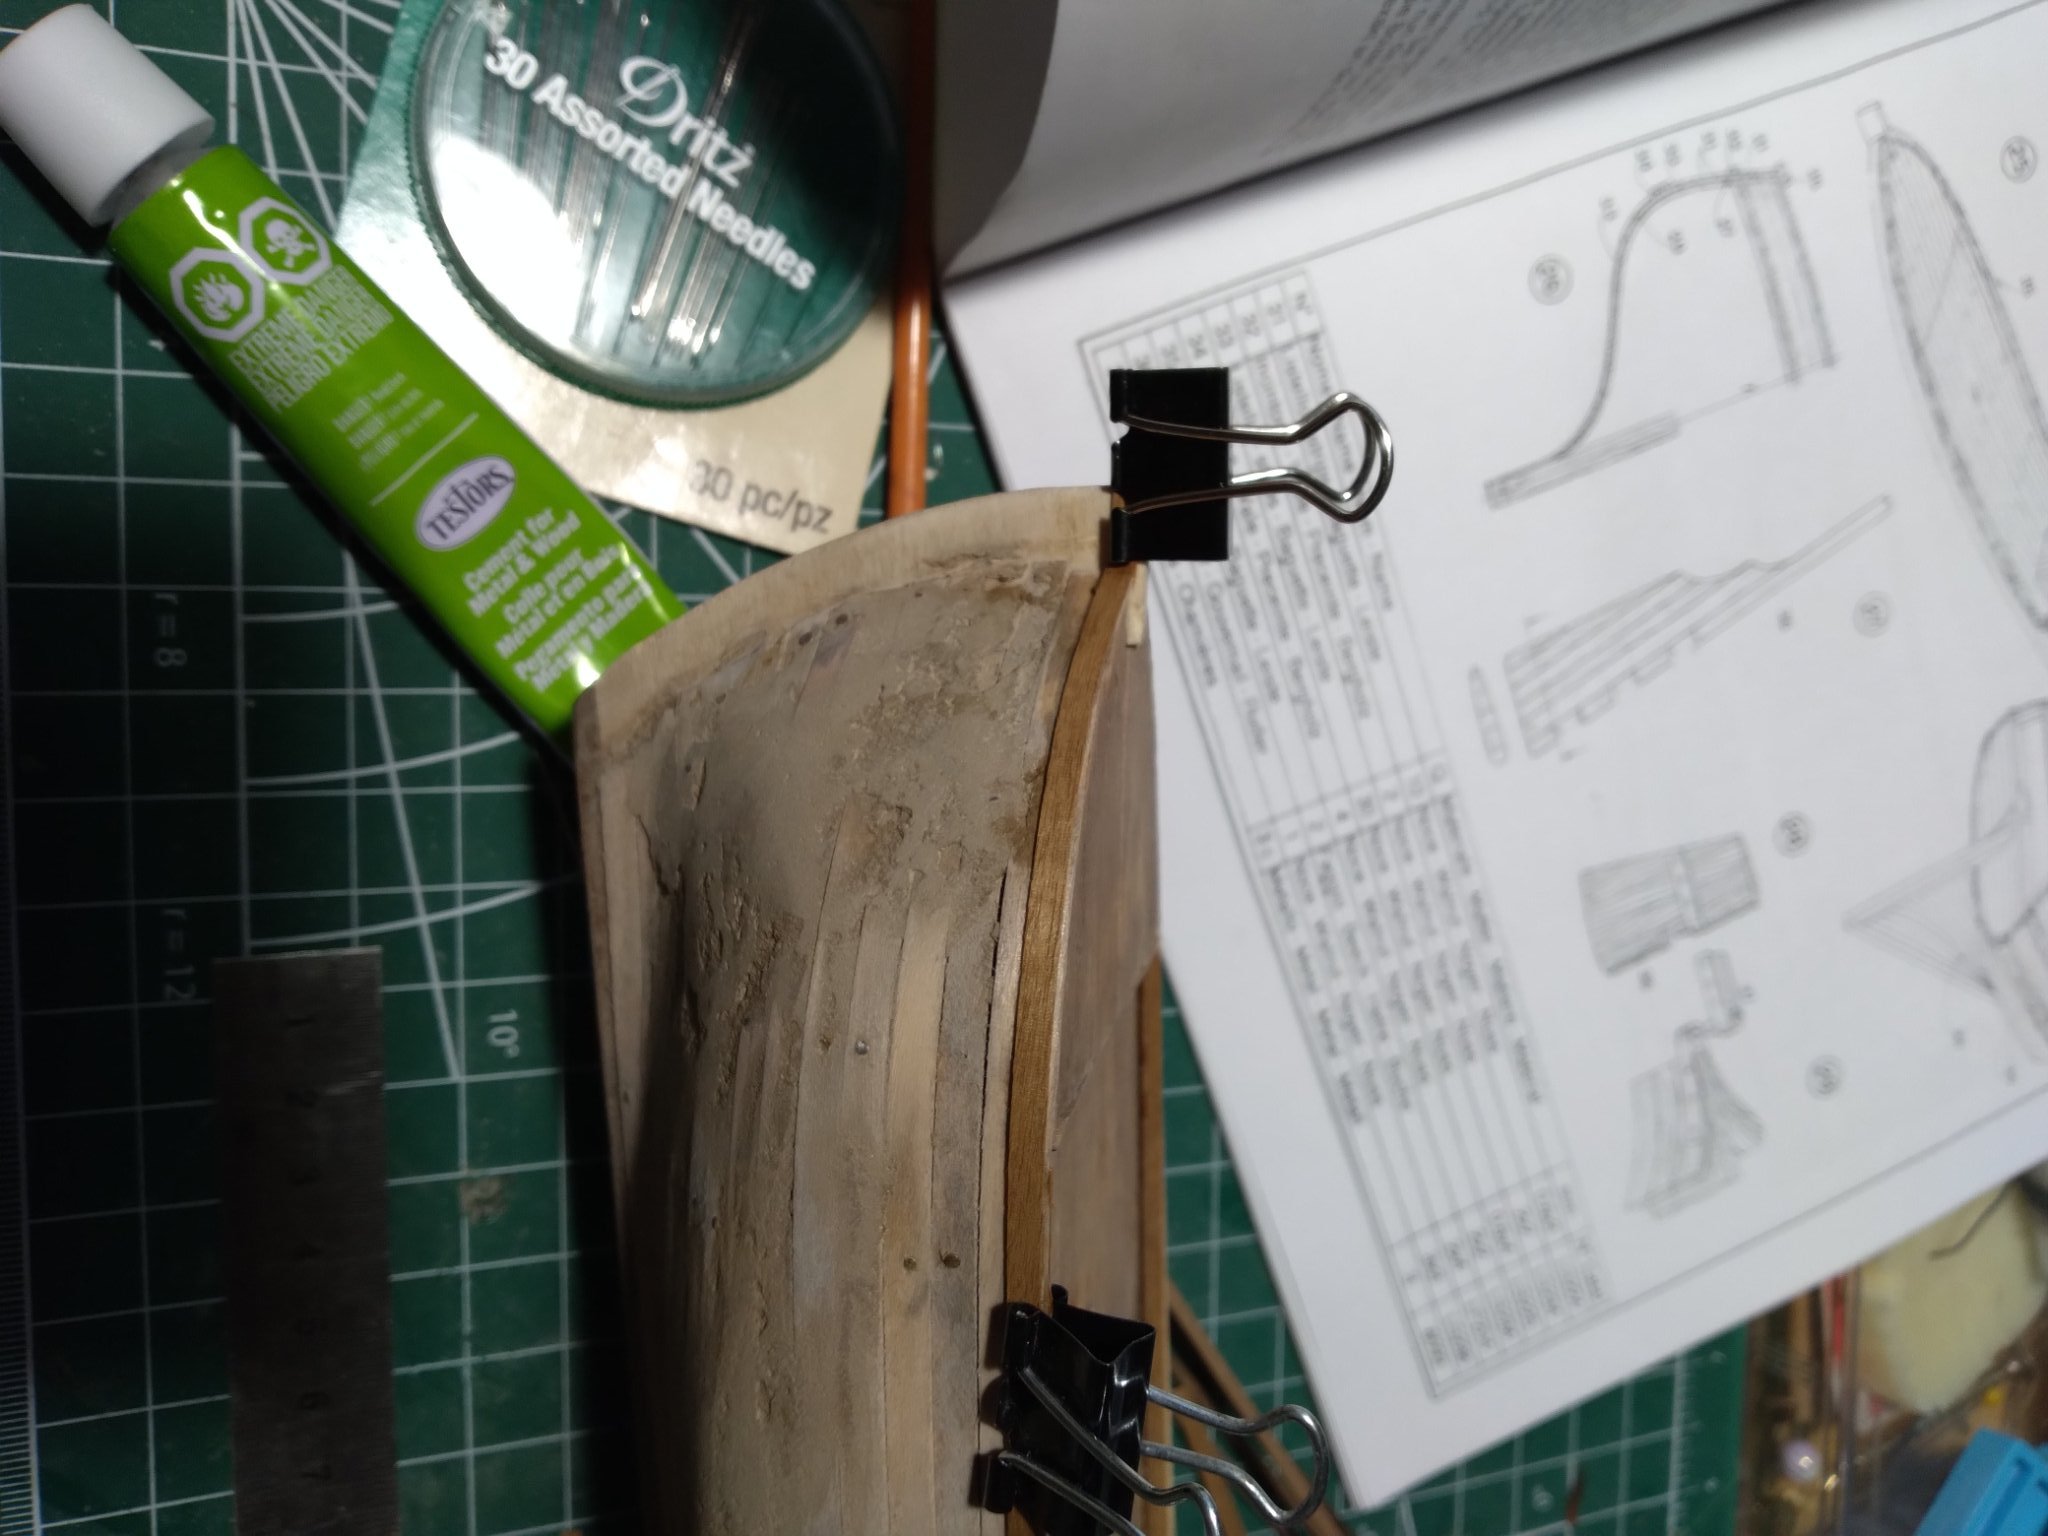
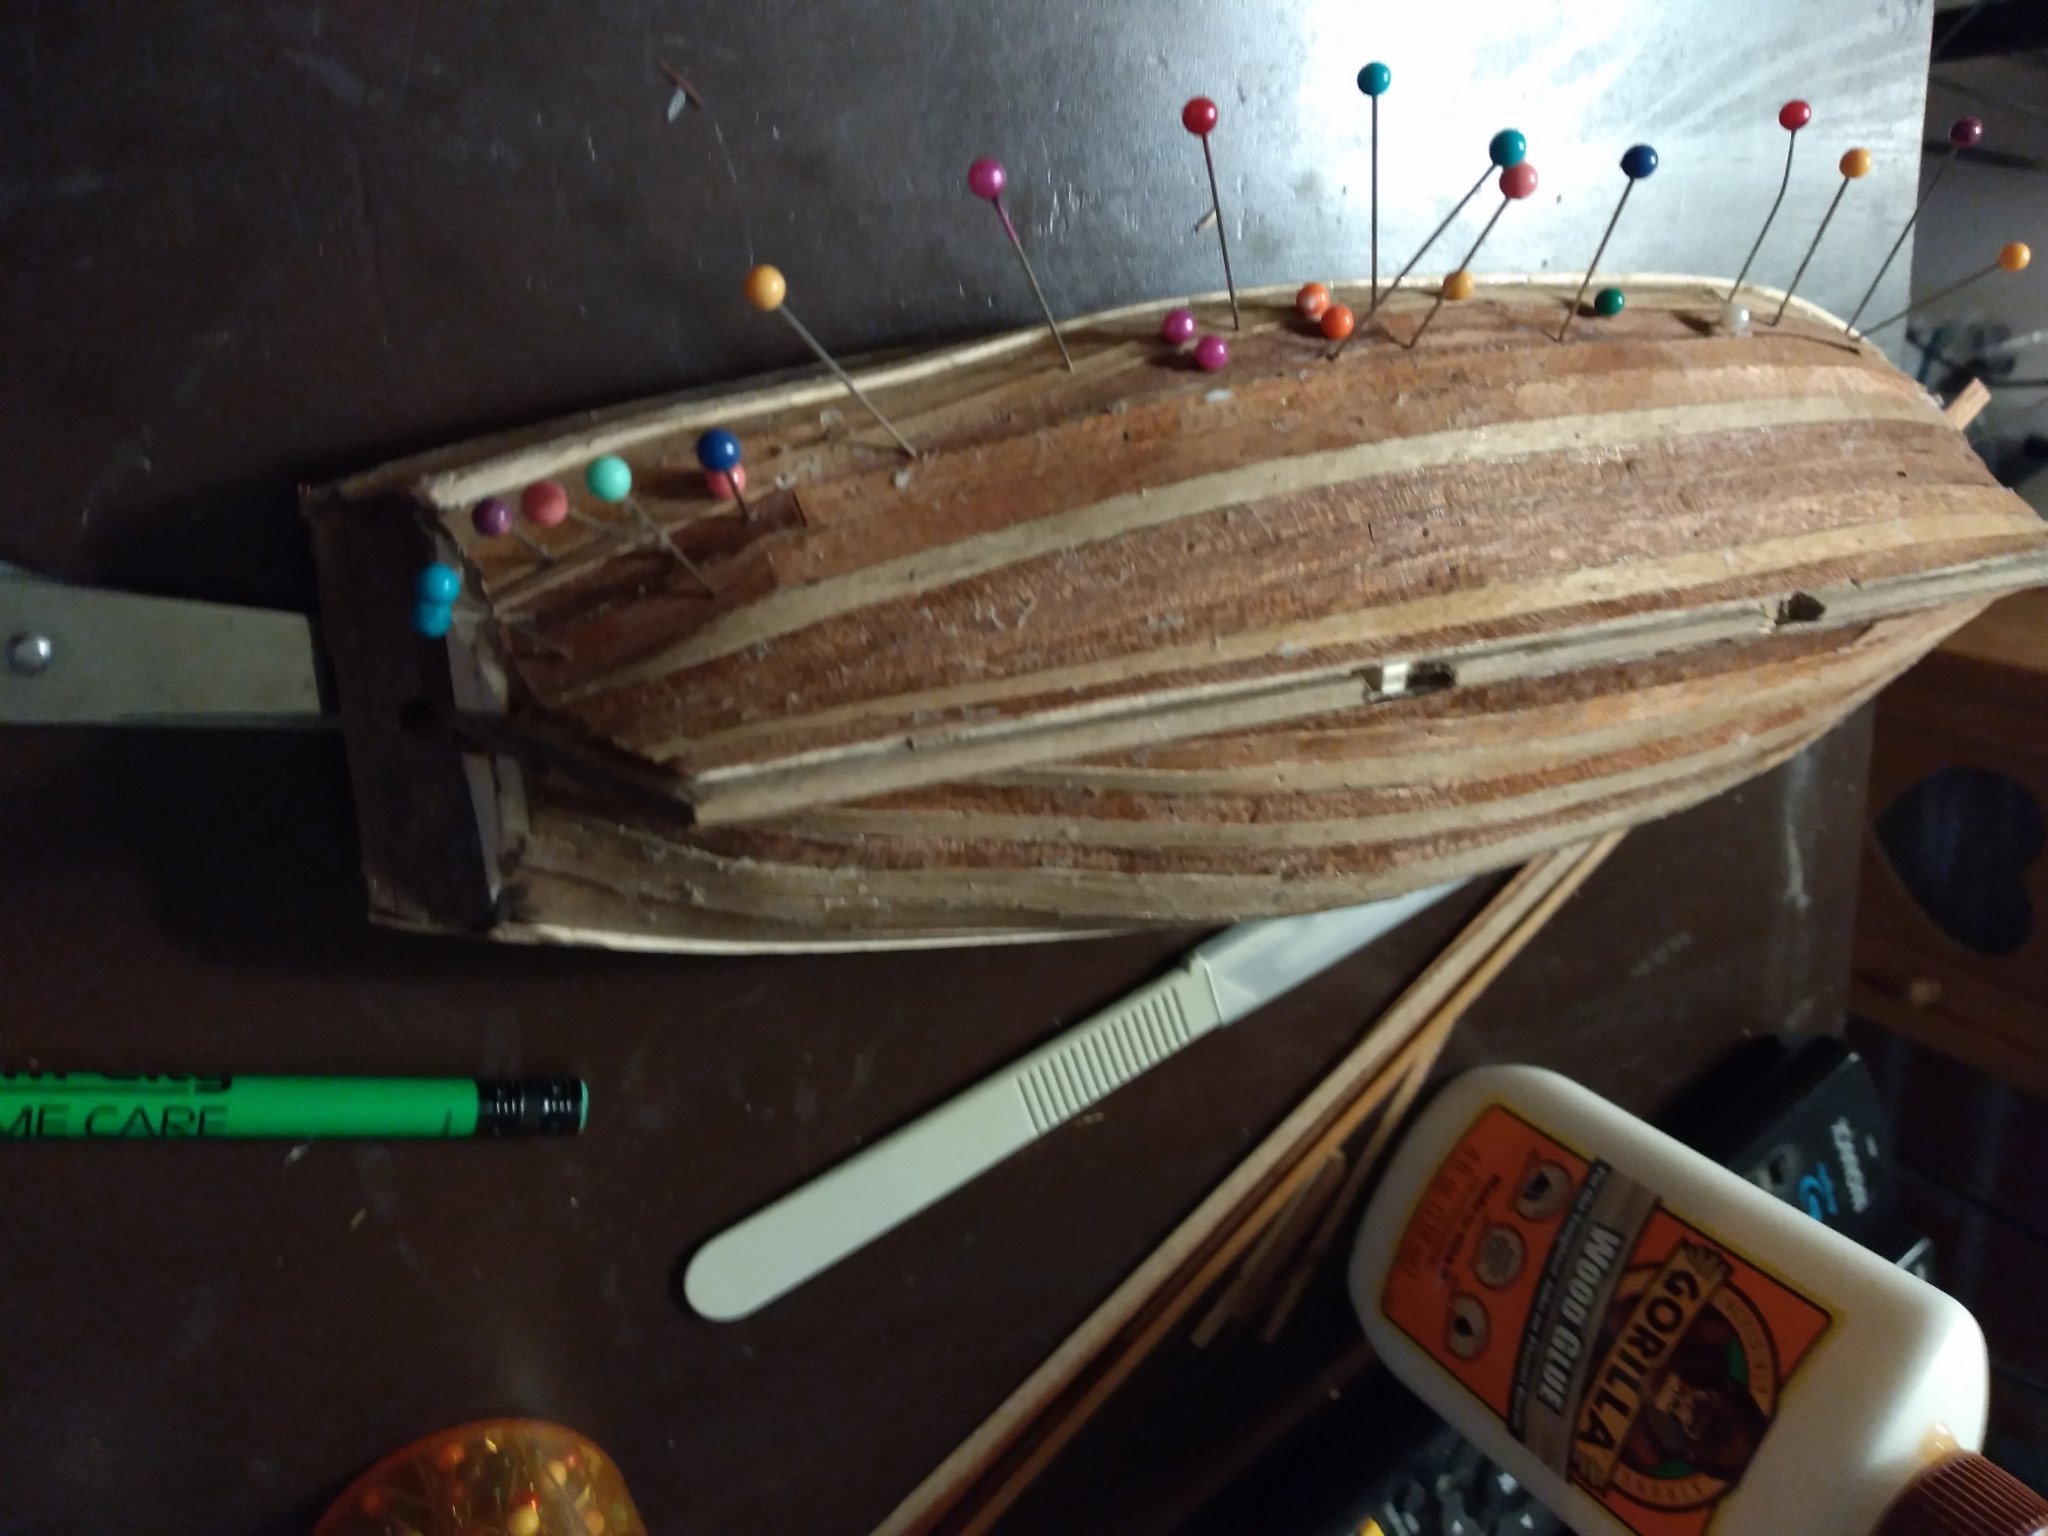
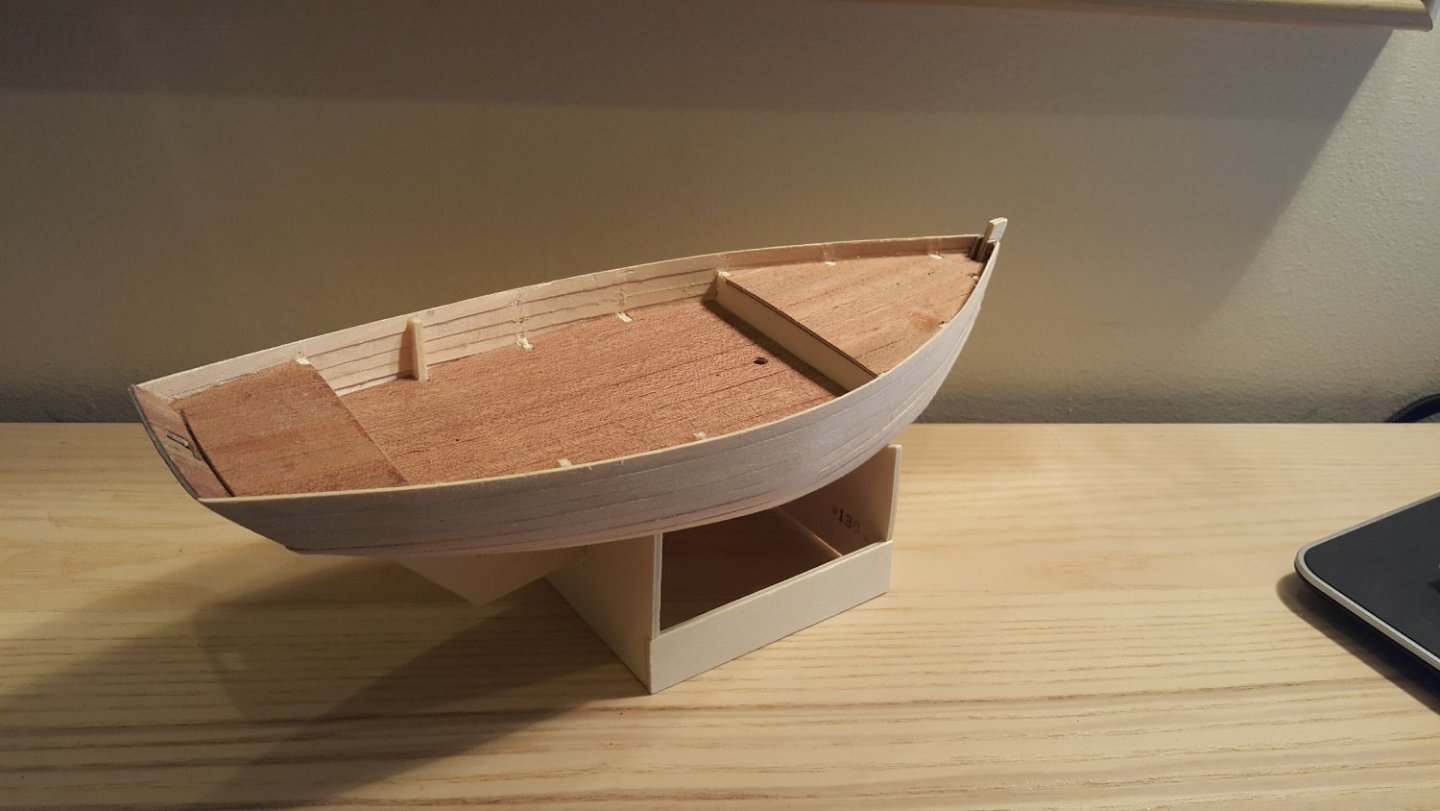
 I began this project in 2017 and it's been progressing very slowly! I found some of the pictures I took along the way. Here I was completing the hull. The "sloup coquiller" was a typical Oyster Boat of the area of Brest in the Department of Finisterre in Brittany, being used for catching shell-fish. The model is based on pictures from 1912 onward.
-
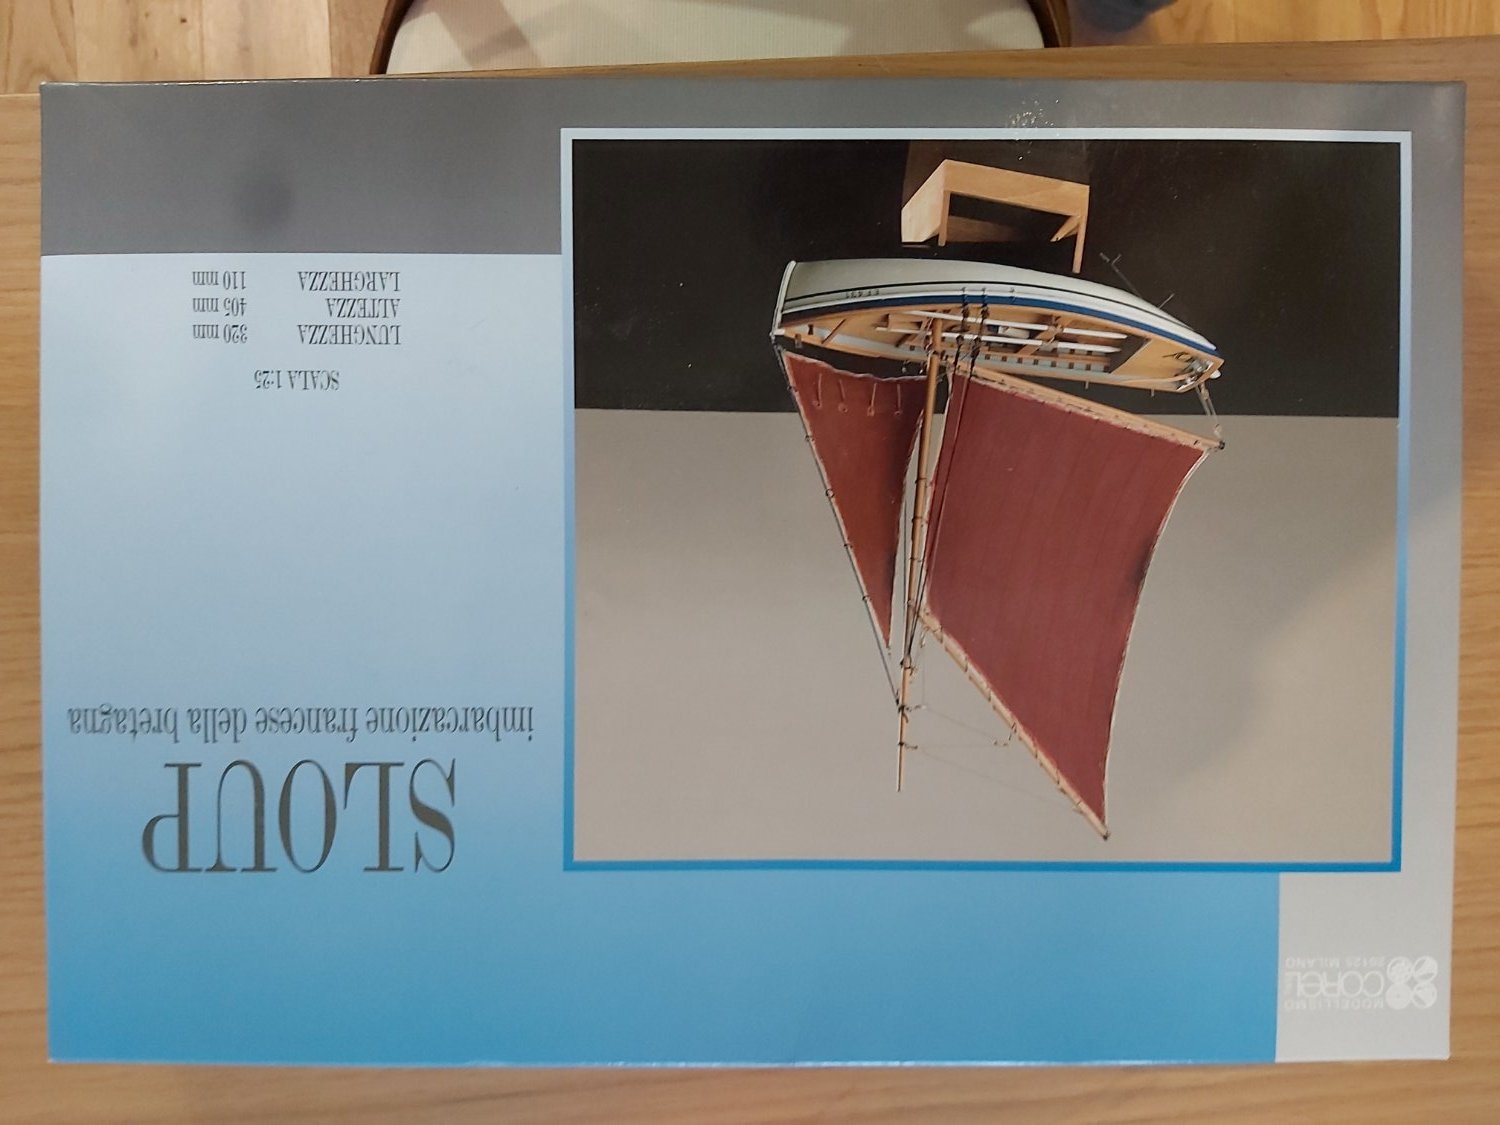
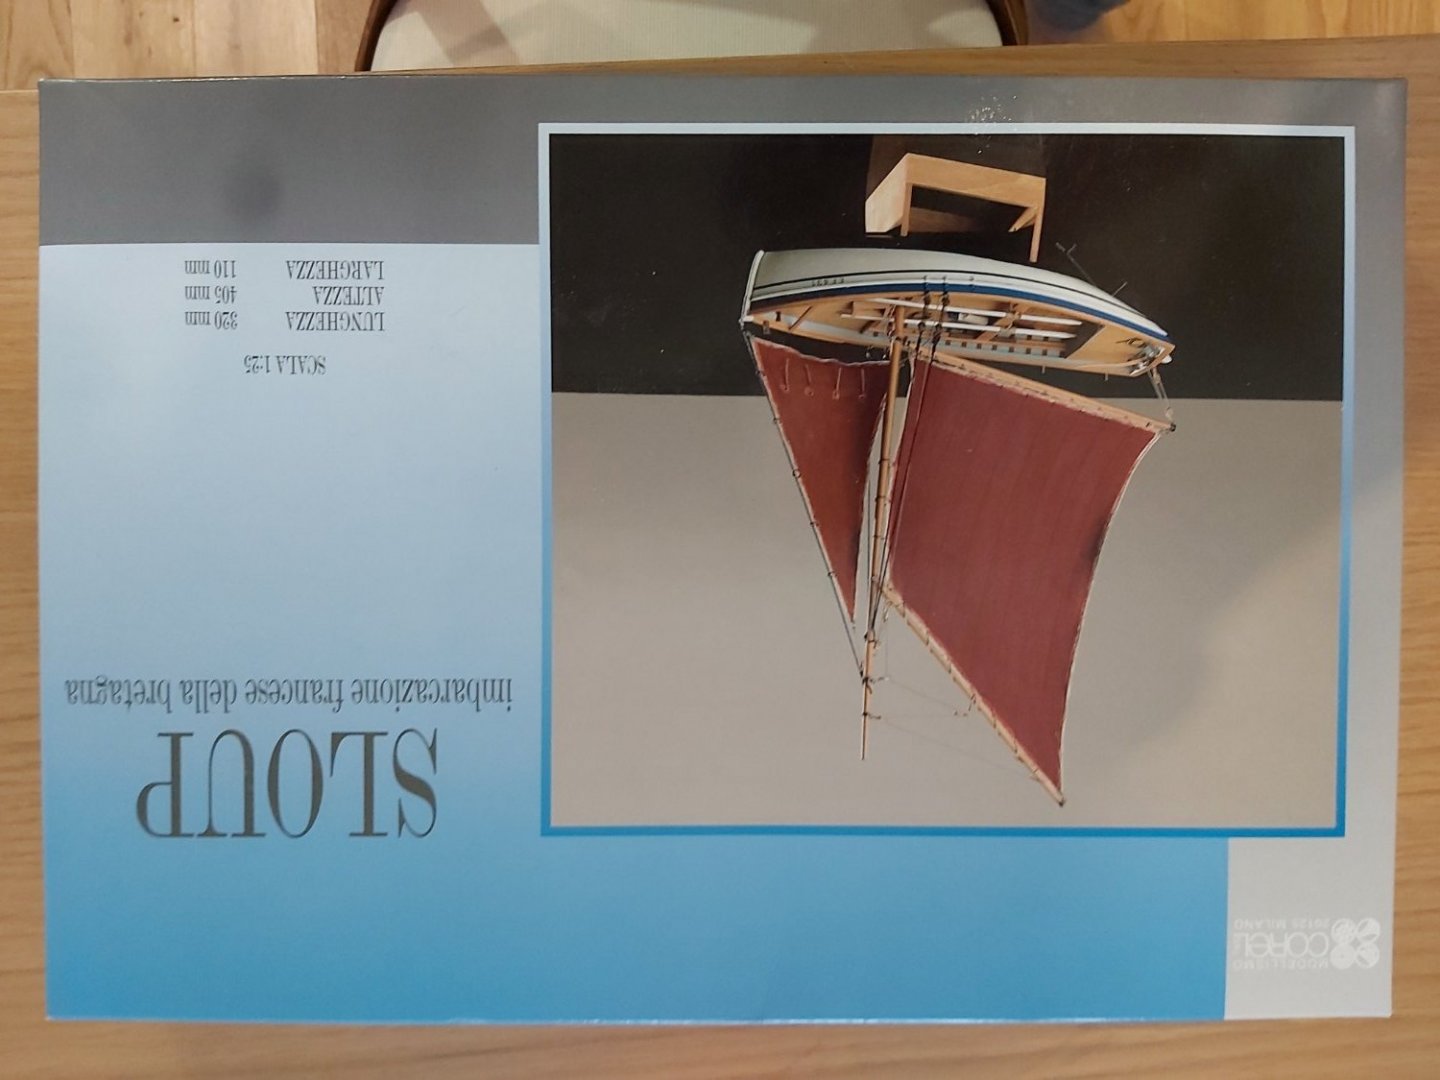
Hello, my name is Michele, I live in the rainy North West of the UK. I've always had an interest in models, mainly aircrafts. In 2017 I bought my first boat, the Sloup from Corel and I loved it! It's been a very slow project, with lots of breaks in between. Recently I've managed to progress a bit faster than usual and by searching suggestions and advice on how to build it it's how I came across modelshipworld! I'm looking forward to finally complete this model and to move to next one!
-
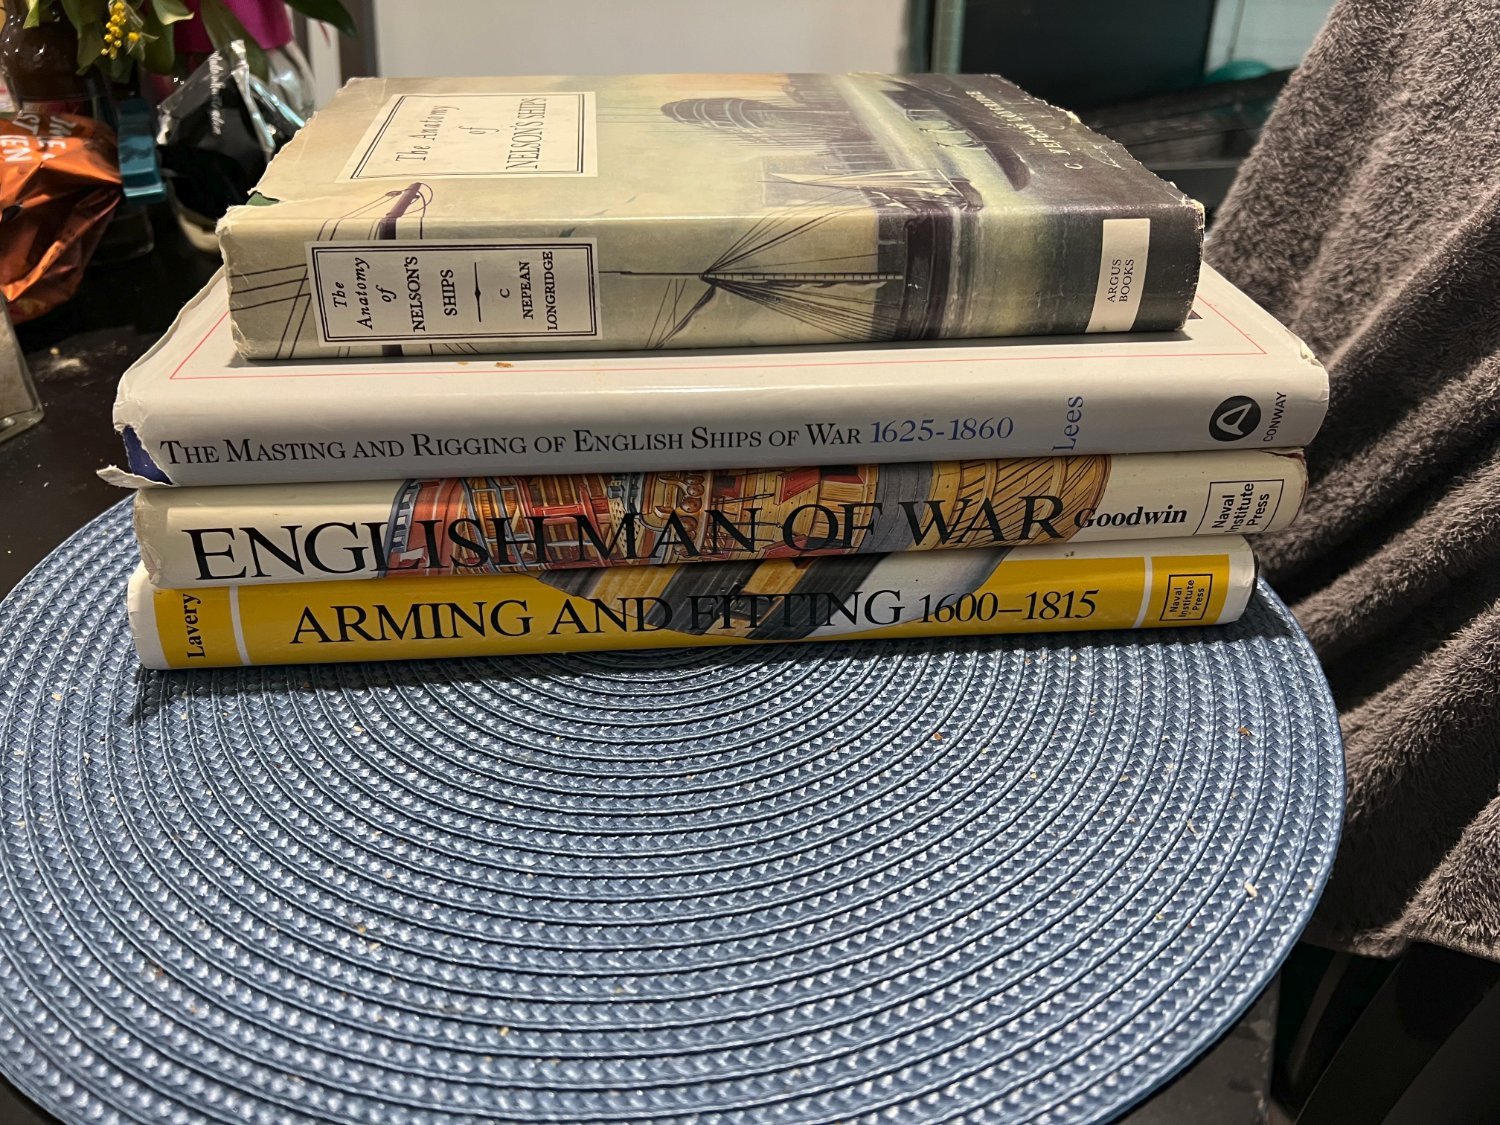
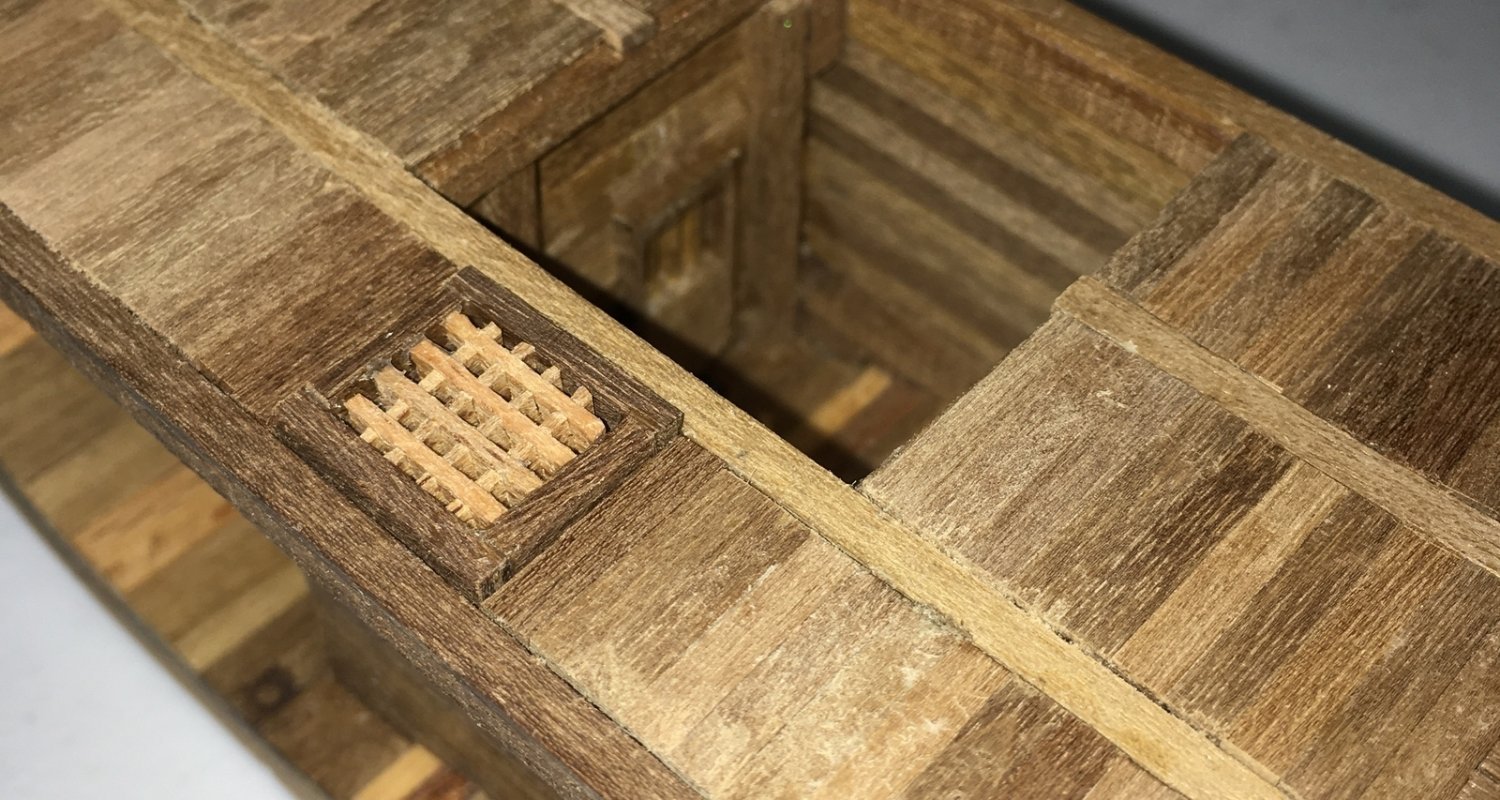
 Hi. David here. I thought I could start a build log in mid progress it that’s okay. I don’t have any photos of my previous work on this, but I’ll start now. I probably should say that this might be more of a “how to avoid mistakes that I made” rather than a “see how good a job I did.” This is going to be a skill building project for me. I know that Victory changed over time so I’m not trying to be perfect but to follow the sources and use my judgement when they disagree or are missing details. I want to make it… well if not completely accurate then at least plausible. And something nice to go on the wall! I also didn’t want to spend a fortune on upgrading it. I grabbed up this kit back in 2007 and set it aside for a while. Eventually I got around to working on it. I followed the instructions in the beginning. I joined the two half frame units, attached the keel and keelson, planked the hold, and added the orlop deck. I then decided it was not very accurate. I put it aside for a time. Around 2019, as I was heading towards retirement, I started getting serious about redoing it and I started my research. Main print sources used so far: · McGowan, Alan P. HMS Victory: Her Construction, Career, and Restoration. Naval Institute Press, 1999. · Bugler, Arthur R. H.M.S. Victory: Building, Restoration & Repair. Her Majesty's Stationary Office, 1966. · McKay, John. The 100-Gun Ship Victory (Anatomy of the Ship). Naval Institute Press, 2000. · Longridge, C. Nepean. The Anatomy of Nelson’s Ships. Percival Marshal & Co., Ltd, 1955. · Goodwin, Peter. The Construction and Fitting of the English Man of War: 1650 – 1850. Naval Institute Press, 1987. · Lavery, Brian. The Arming and Fitting of English Ships of War, 1600 – 1815. Naval Institute Press, 1987 · Peter G. Goodwin (2013) The Application and Scheme of Paintworks in British Men-of-War in the Late Eighteenth and Early Nineteenth Centuries, The Mariner's Mirror, 99:3, 287-300, DOI: 10.1080/00253359.2013.815993 I also did a lot of searching on the web for photographs and YouTube has several good video tours that helped with a few areas that don’t show well in the plans or in any photographs I had seen. I decided to have the forward edge of the model end with the forward wall of the pump room. I didn’t want to try to open the room to show the pumps. The other edge would end at the orlop deck beam aft of the shot locker. On the McKay plans this would be from about station 1? to about station 8? I will say that the McKay plans scale easily to 1:96 but this model is listed as 1:98. I felt the difference was small enough to work around. I bought some additional walnut wood strips and sheets to supplement what came with the kit since I needed different sizes. Sizes I mention in this are how they were listed by the seller in my order, but the actual materials vary a little bit. I don’t have any power tools other than a Dremel tool with a shaper/router table and a Rockwell Bladerunner for home repairs. They are okay for rough cutting and shaping but not for the fine stuff. The hold. The first thing that I did was remove my previous orlop deck entirely. Next, I removed one plank on either side of the keelson to create the limber passages and covered them with thin limber boards. I traced out templates and used the Bladerunner to rough cut some riders from a 1/8” walnut sheet and shaped them with the Dremel. They are not as tight a fit as I would like. If I had something thicker, I probably would have used it. I built the pump house from 1mm x 3mm strips. I put in a door on the port side even though I couldn't get a good view anywhere to see what it looked like. The platforms are 2mm x 2mm with 2mm wide strips. I’ll detail later with hinges for the shot locker lids along with iron and shingle ballast. I planked the exterior up to the level of the orlop using the kit supplied strips. Orlop Deck I used 4mm x 4mm walnut strips for the orlop deck beams, 2.5mm x 2.5mm for the fore and aft carlings and 1.5mm x 1mm for the athwartship carlings. I tried adding the carlings with the beams in place and leaving room for the deck boards to recess. I used 2mm x 5mm strips for the waterways. It ended up uneven in places. I should have built the deck as one unit before installing it. I didn’t paint the underside of the deck but I probably should have. Probably too late now. I cut knees from the 1/8” sheet. For the pump house on the orlop I used 2mm x 2mm uprights with 0.6mm x 3mm strips. I arranged the strips in a louvered pattern. I wasn’t able to leave a gap between each strip for ventilation so just pretend that they are there. I felt the kit grate was too bulky, so I purchased a grate with 0.6mm holes and cut a piece to size. If my math is right the openings scale to 2.35 inches at 1:98. I framed it with 1mm x2mm strips. Kit grate. Pearwood grate. I painted the sides of this deck and the pump house white.
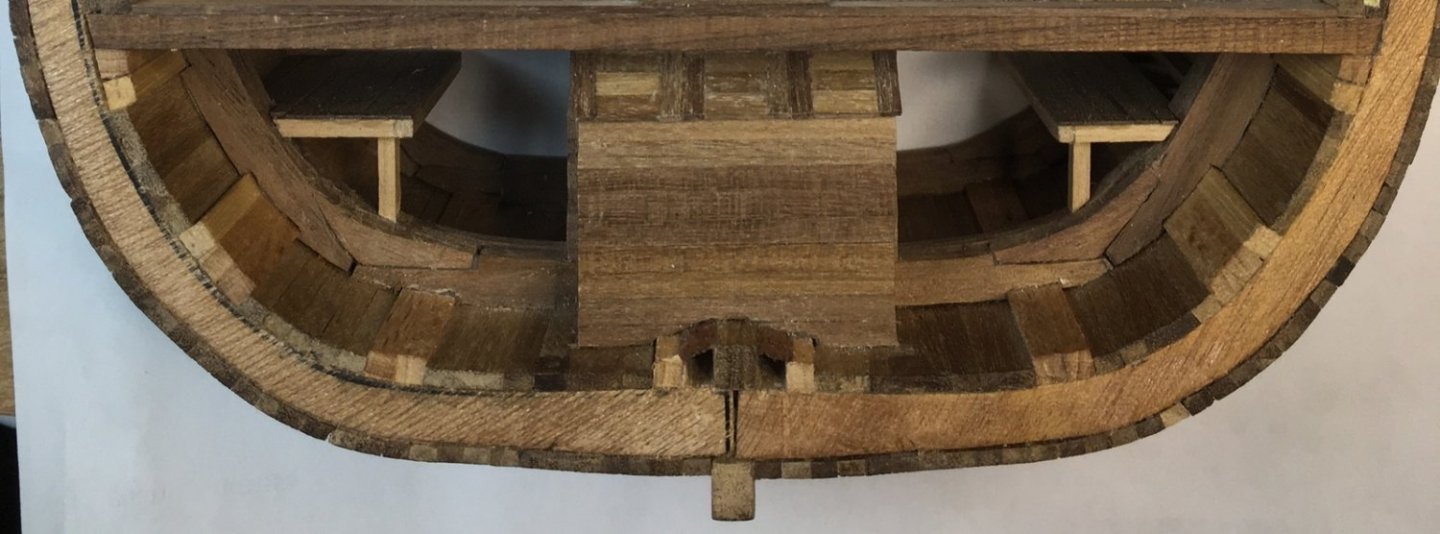

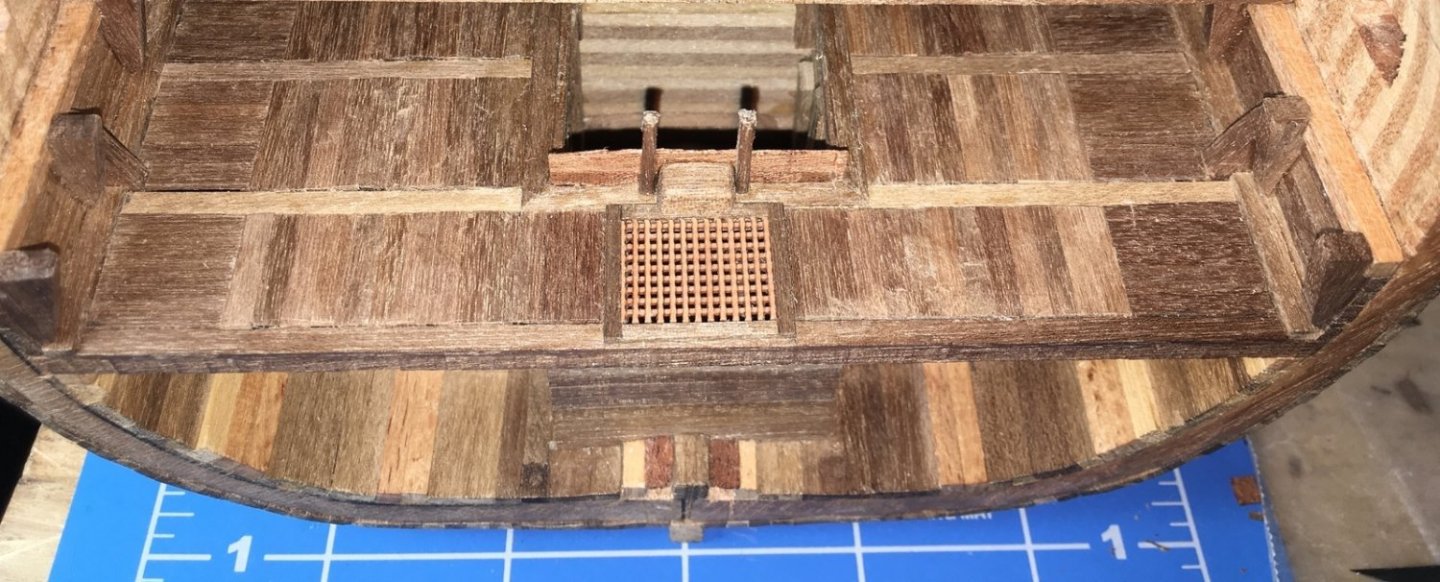

-
 Hello all This is becoming a terrible habit, but I've decided to take another break from Bluenose and venture onto another build - one that has been sitting on the shelf for a very long time and that I've been thinking about since I got this kit (I think back in 2012) - Corel's Bellona. I have to give fellow MSW members Chief Williams and Harlequin acknowledgement as inspirations and for providing impulse to begin this build - and this log! I've always thought it strange that there weren't more builds of this kit on MSW, and I hope that this log can serve some purpose for the community. The history of Bellona is well known, and I'm not going to rehash it here. But my plan for the build is to represent the model (as per the kit) at her 1780 refit. As reference I'm using Brian Lavery's Anatomy of the Ship HMS Bellona - though his drawings cover both the pre- and post-refit and are sometimes confusing in terms of what is being depicted. This is most obvious with the rigging, which I've used James Lees' Masting and Rigging of English Ships of War to determine. A few years ago I started plotting out the build by making a detailed (some might say insane) parts list and rigging and belaying tables to supplement the information supplied on the Corel plans and to plan out approaches to the various elements. This is my usual way of working through a complex build and allows me to think through the construction of each element and to engage in intensive study of the plans and source material. Hope it pays off! In any case, in terms of build progress at the moment, I've nearly finished putting the framework together. But because I have a young family and a demanding day job (at least one that's very demanding for ten months of the year), I am only able to work on the model for a few hours each week, which makes for slow progress. So I'll be posting weekly updates here to cover stages of the build up to where I am now. In the meantime - here's the box and the centre keel. Build updates will start next week. In the meantime - enjoy your modelling! hamilton
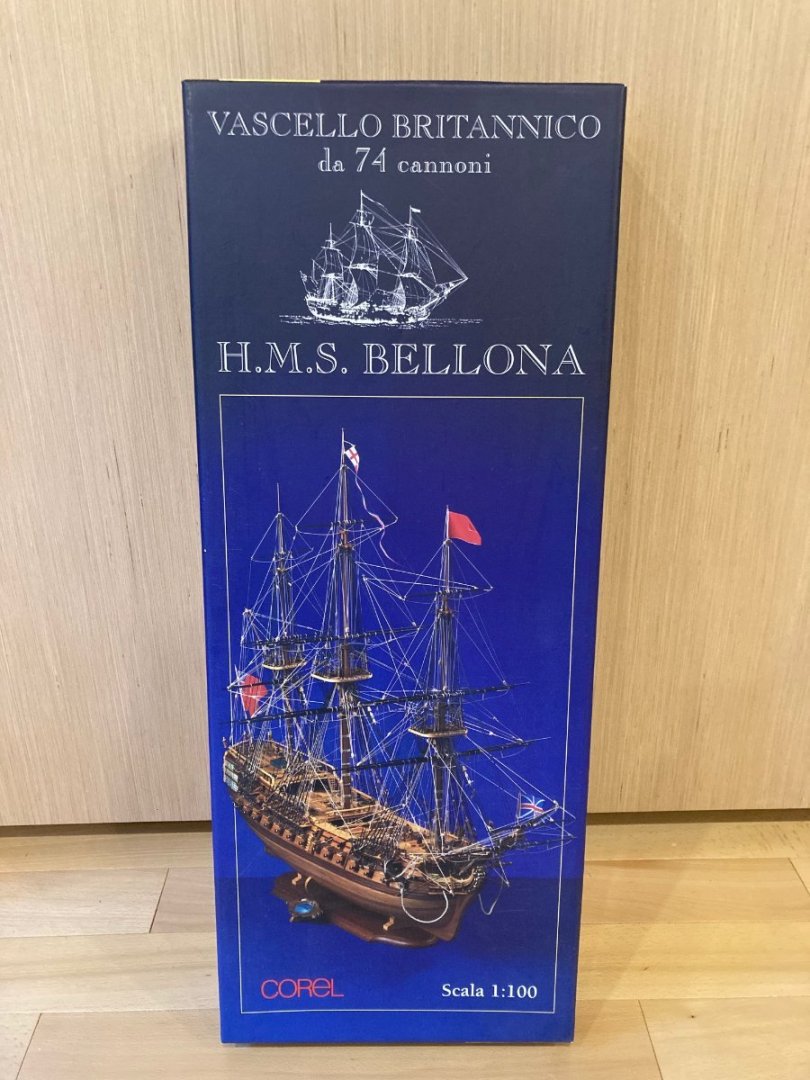
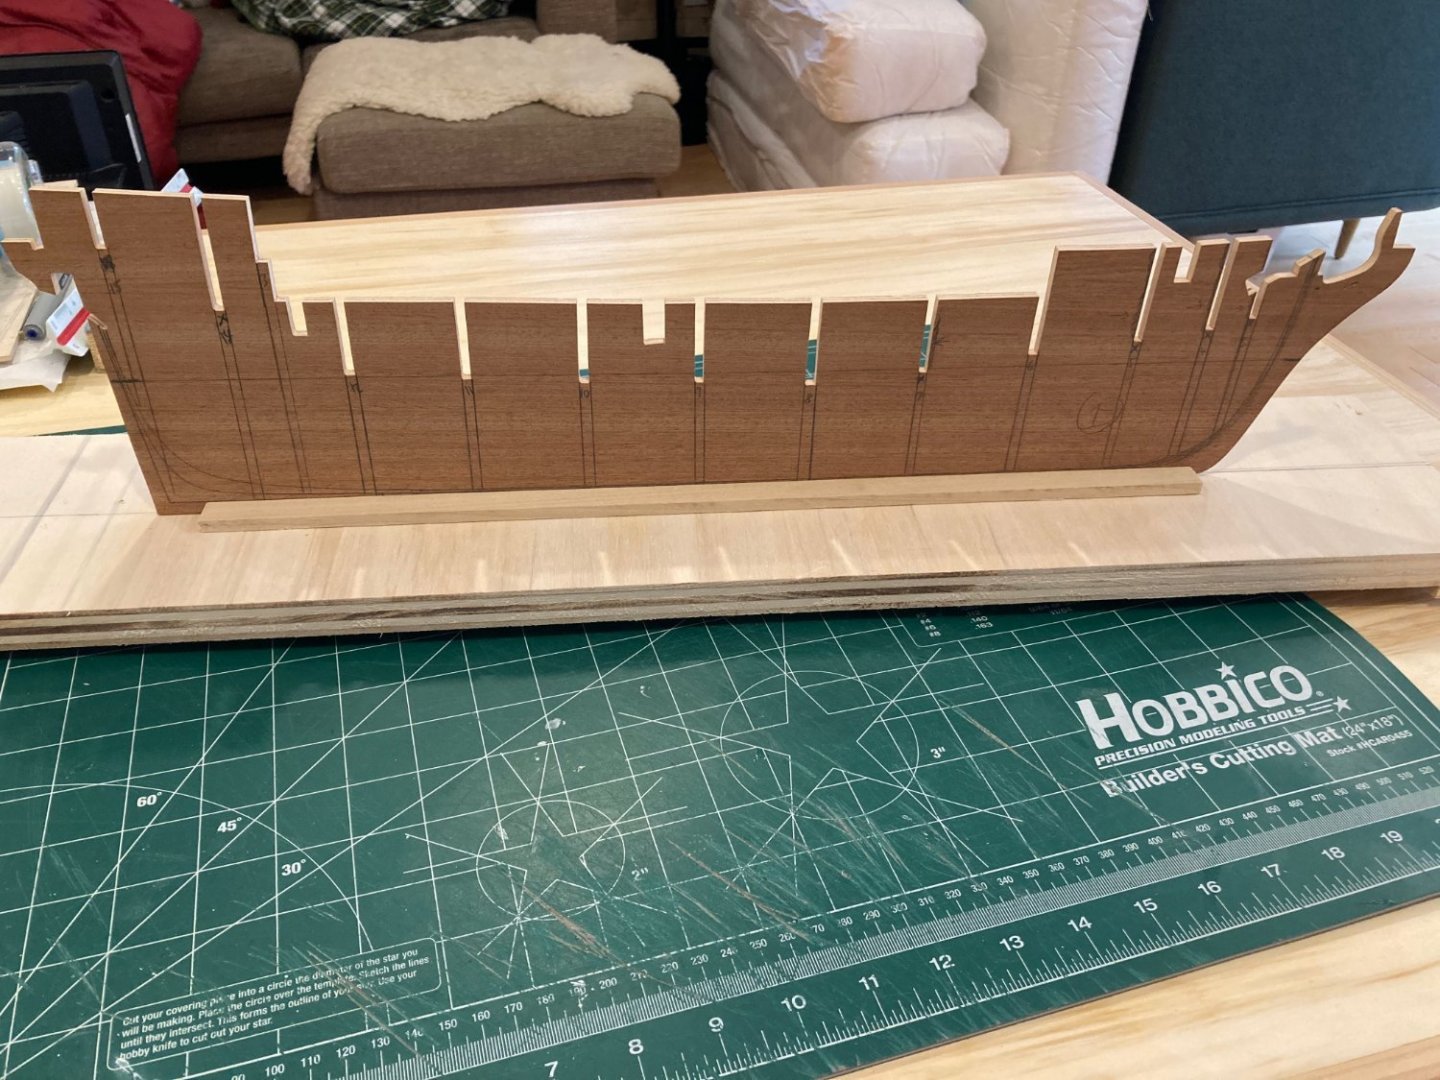
-
 Have been building on this for a couple of months now, this is my very first wooden model kit I am building and there are a lot of things to learn here and there. Thankfully youtube exist where lots of tips and tricks can be found. However as this kit do not provide any building instructions at all, only a parts list which does not describe all numbers, items can be out of scale, missing parts, items in the package is not for this model, lacking some wood and the drawings are not the best to follow and as it turns out in some cases should not be followed. All this gave me more problems then I needed and I proceeded as best as I could. I have in mind to finish it, hopefully it will be a nice looking ship after all. Second planking and deck planking on the way, a hole emerged in the hull but it could be fixed nicely with the second layer. Second planking was done with 1x4mm Walnut Deck planking Tanganika 0.6x3mm In center there are a Mahogany board 0,6x5mm Starting to place the Capstan and Jibbom This part was missing, I started making a new, found a brass screw and I thought "This will do just fine" after a while the grinding revealed that it was a fake brass screw, steel under the yellow skin. It was Ok as I was going to paint it anyway, just a little tougher to work with 😊 This part was also missing, made a new one from what I could find at home, oak. Placed the railing in the fore Placing the railing in the stern, yet another setback, according the part list and number on the drawing it was supposed to be made from flexible birch, I was missing around 4-500mm of that so I had to use hull planks from layer 1. Also this flexible birch was not wide enough 5mm. It should have been 6mm to ensure that it was a little bit wider then the hull, now it is just as wide. Here is another piece that was impossible to use, out of scale, made new ones. This pin rack should have seven drilled holes, did my math and started drilling, I really must have enjoyed the drilling itself as when I was finished I had eight holes. Did the math once more and now I got seven holes Building the fore deckhouse More deck items Note: The Items are not fixed yet Then I started to look closer on the two masts, I needed to have some kind of grinding station so I can make them conical. This is build now and soon I will start with this job, but when I was looking at one drawings I found that 2 brass ring to be placed on both the mast also in the part list (pos 111), they are both missing. I have ordered two brass pipes 9 and 10 mm so I can make both this rings. Then there is something attached on the mast-rings, (pos 110 Wire plate, browned brass), also is missing. I cant make out what they are, could a round brass piece work? If so, which diameter should it have approx. or how should it look?
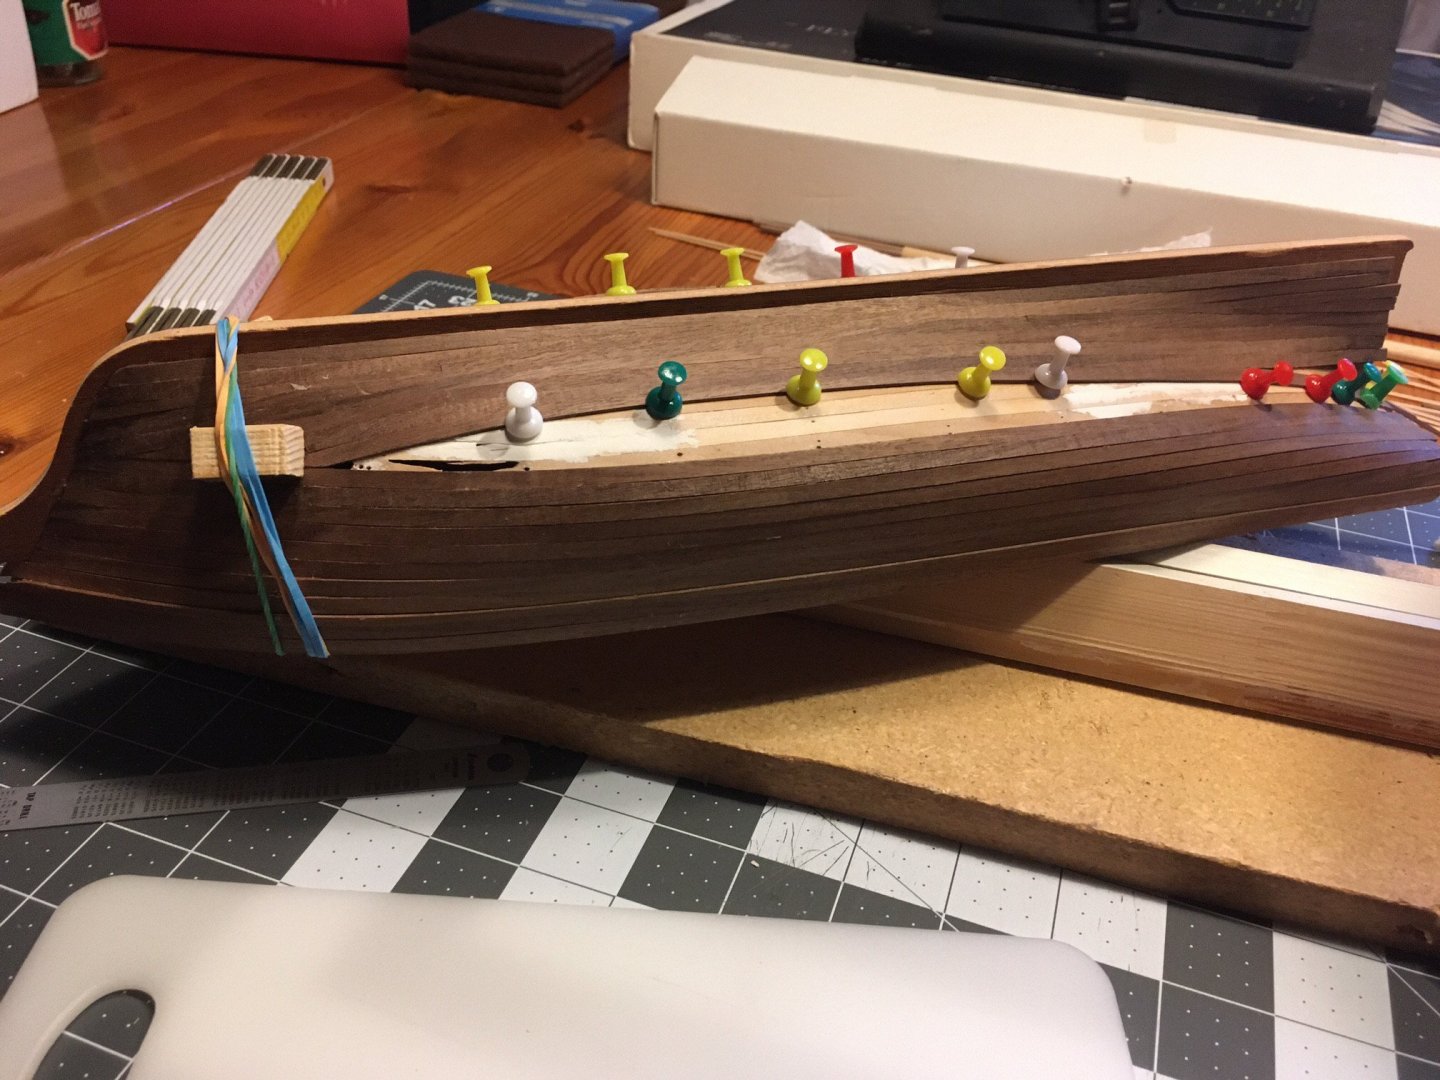
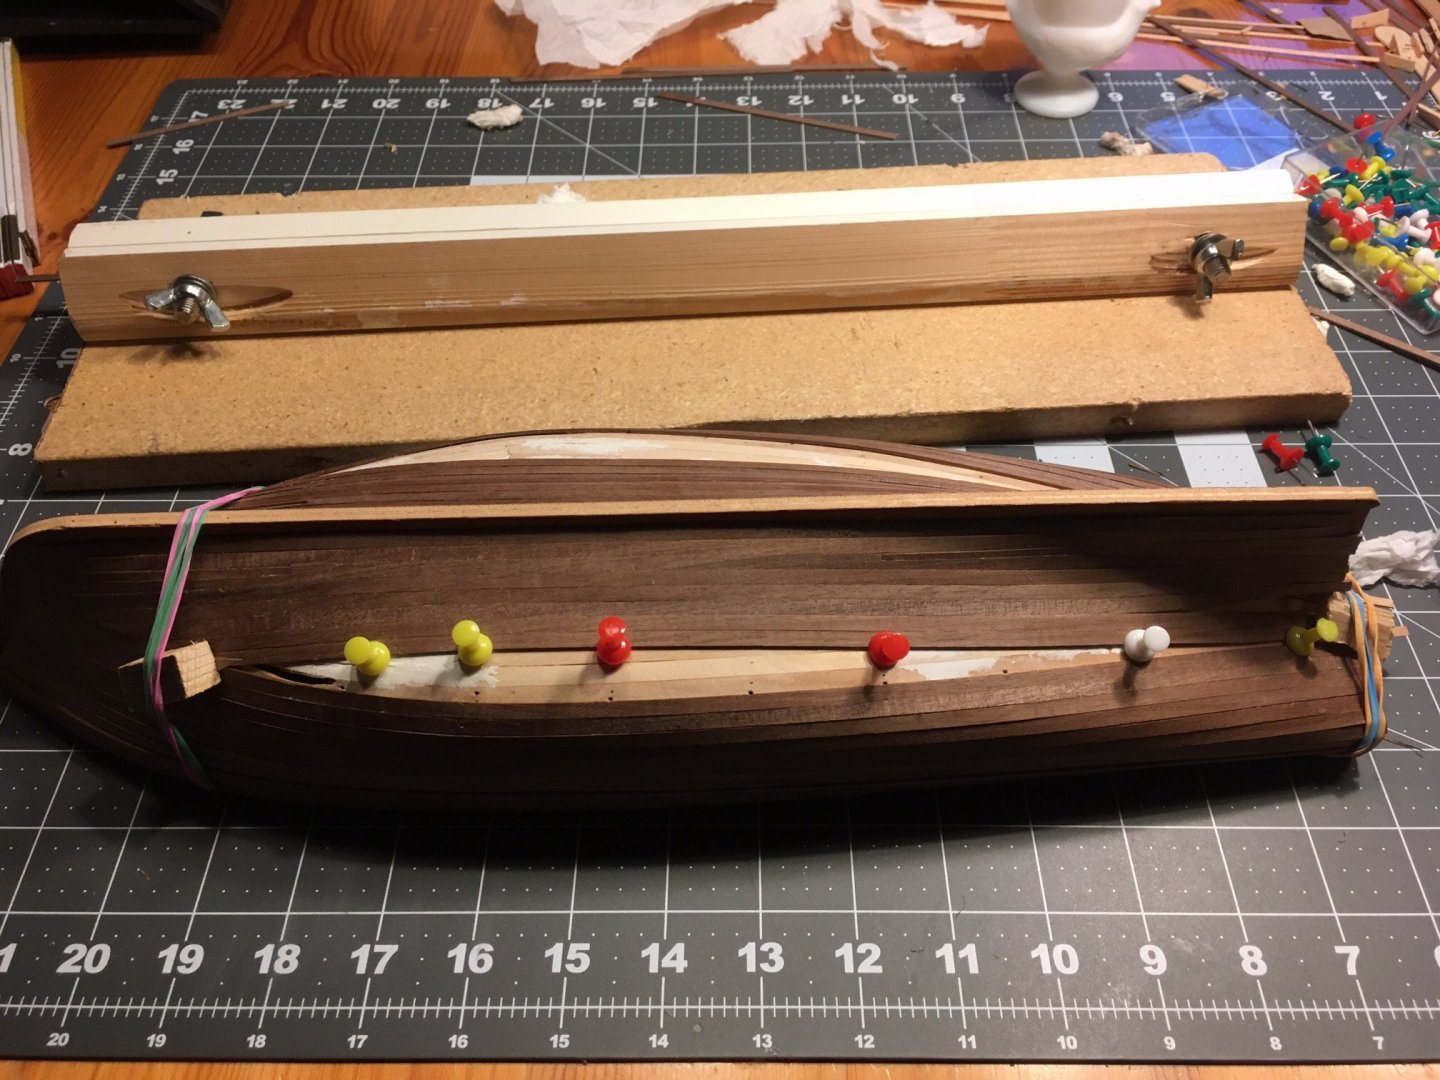


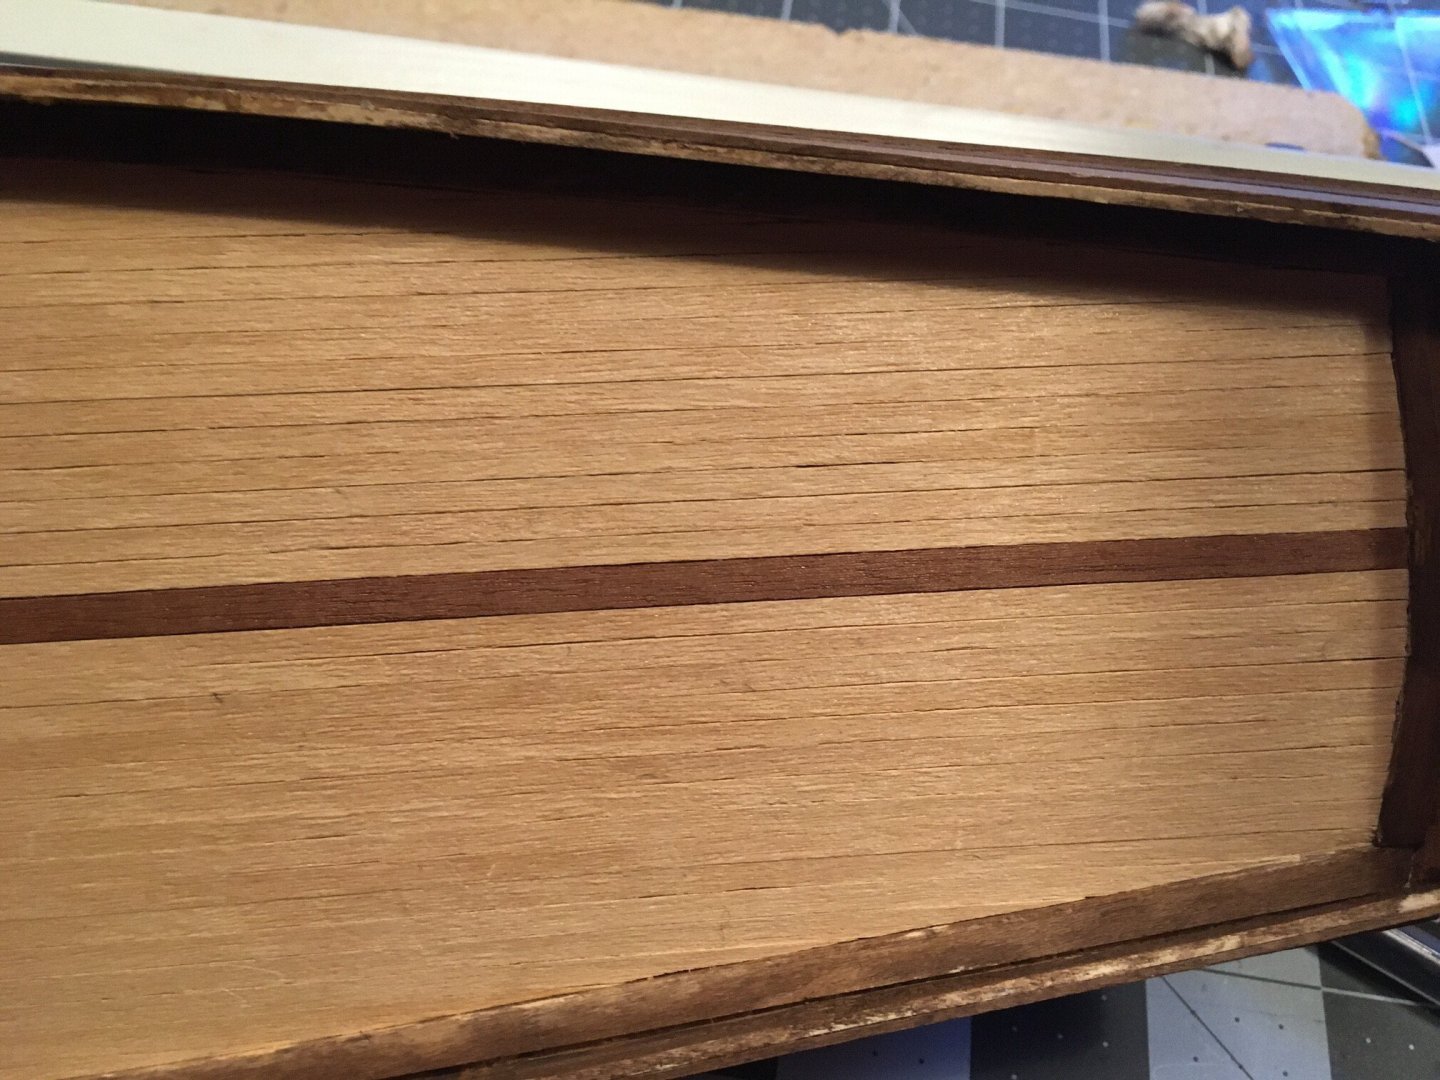
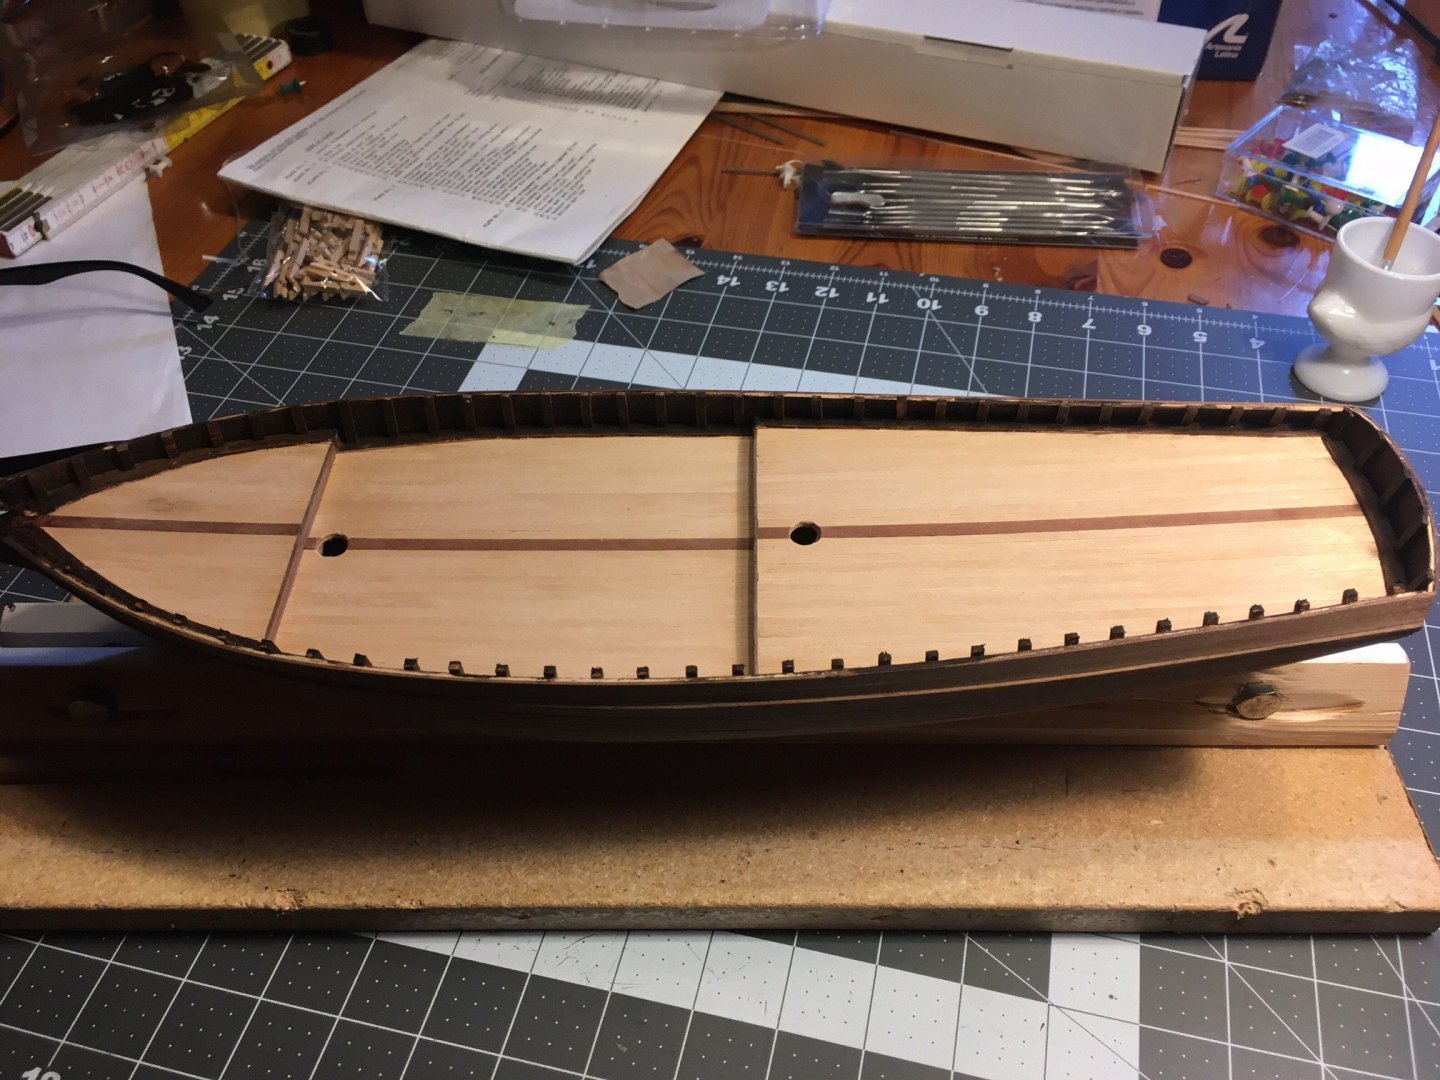


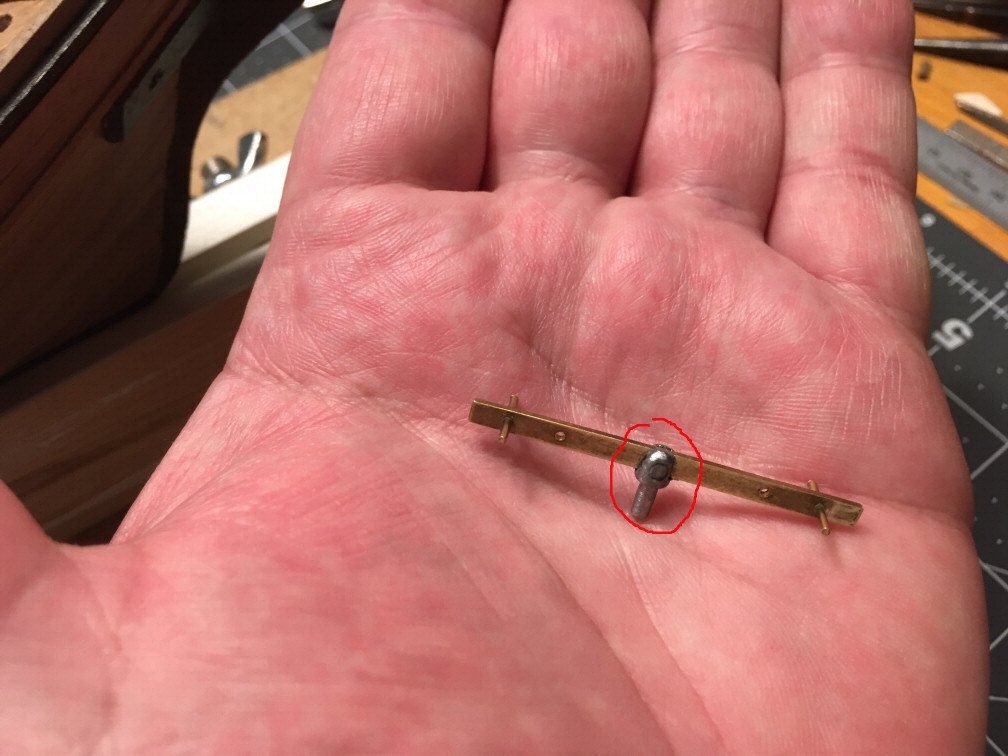
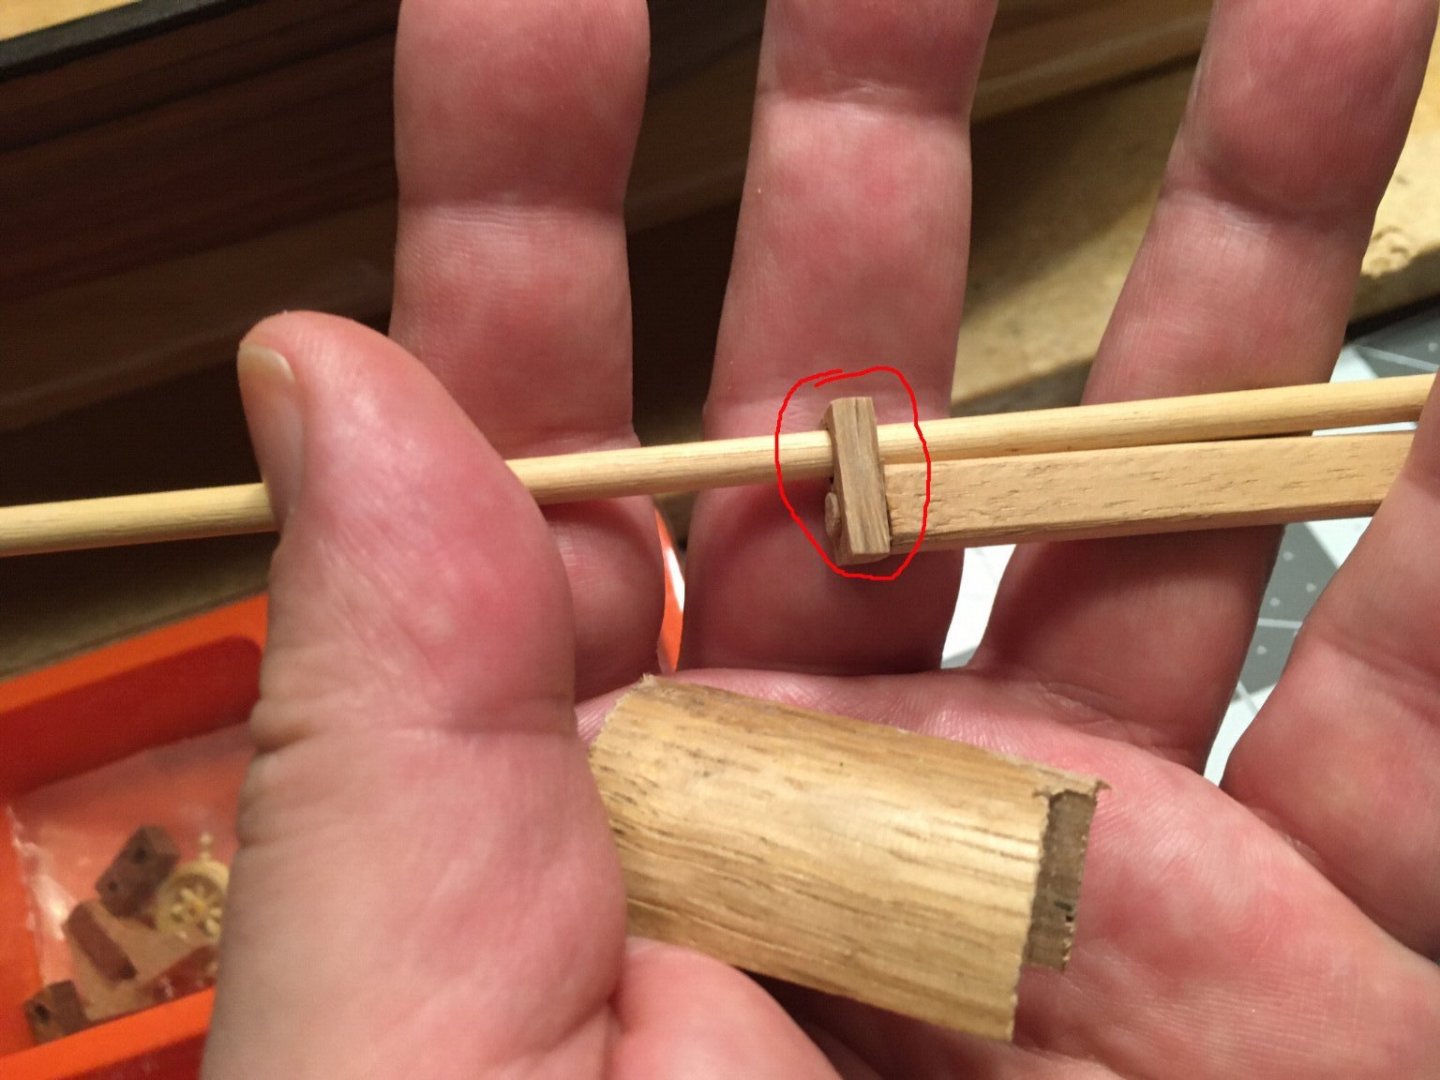

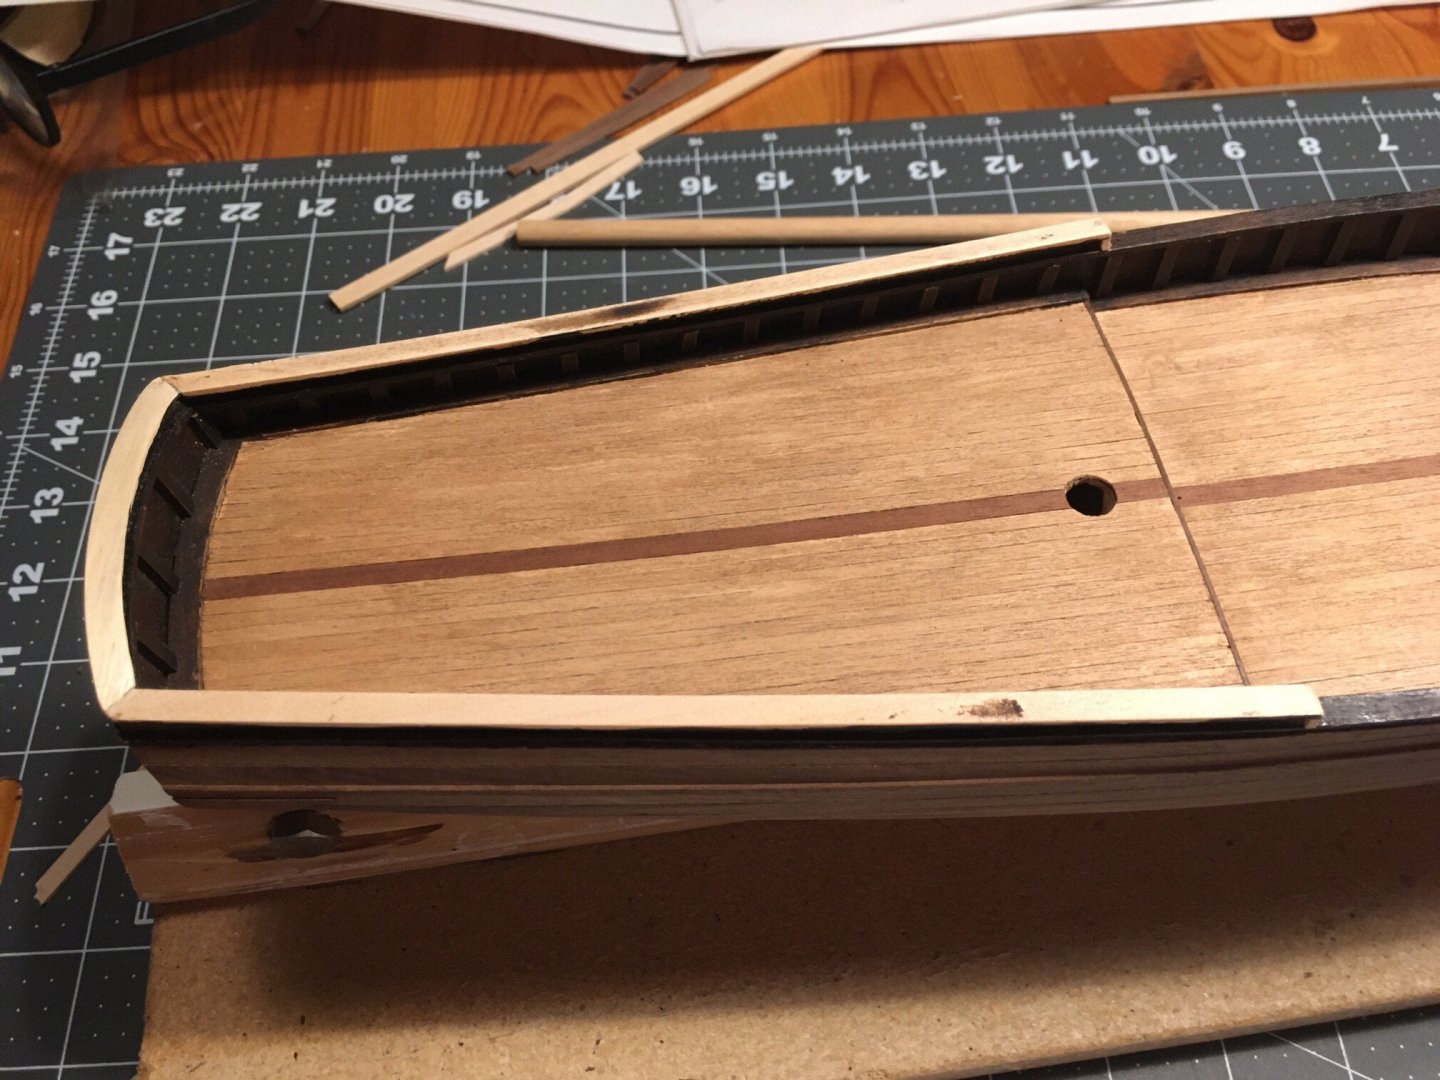
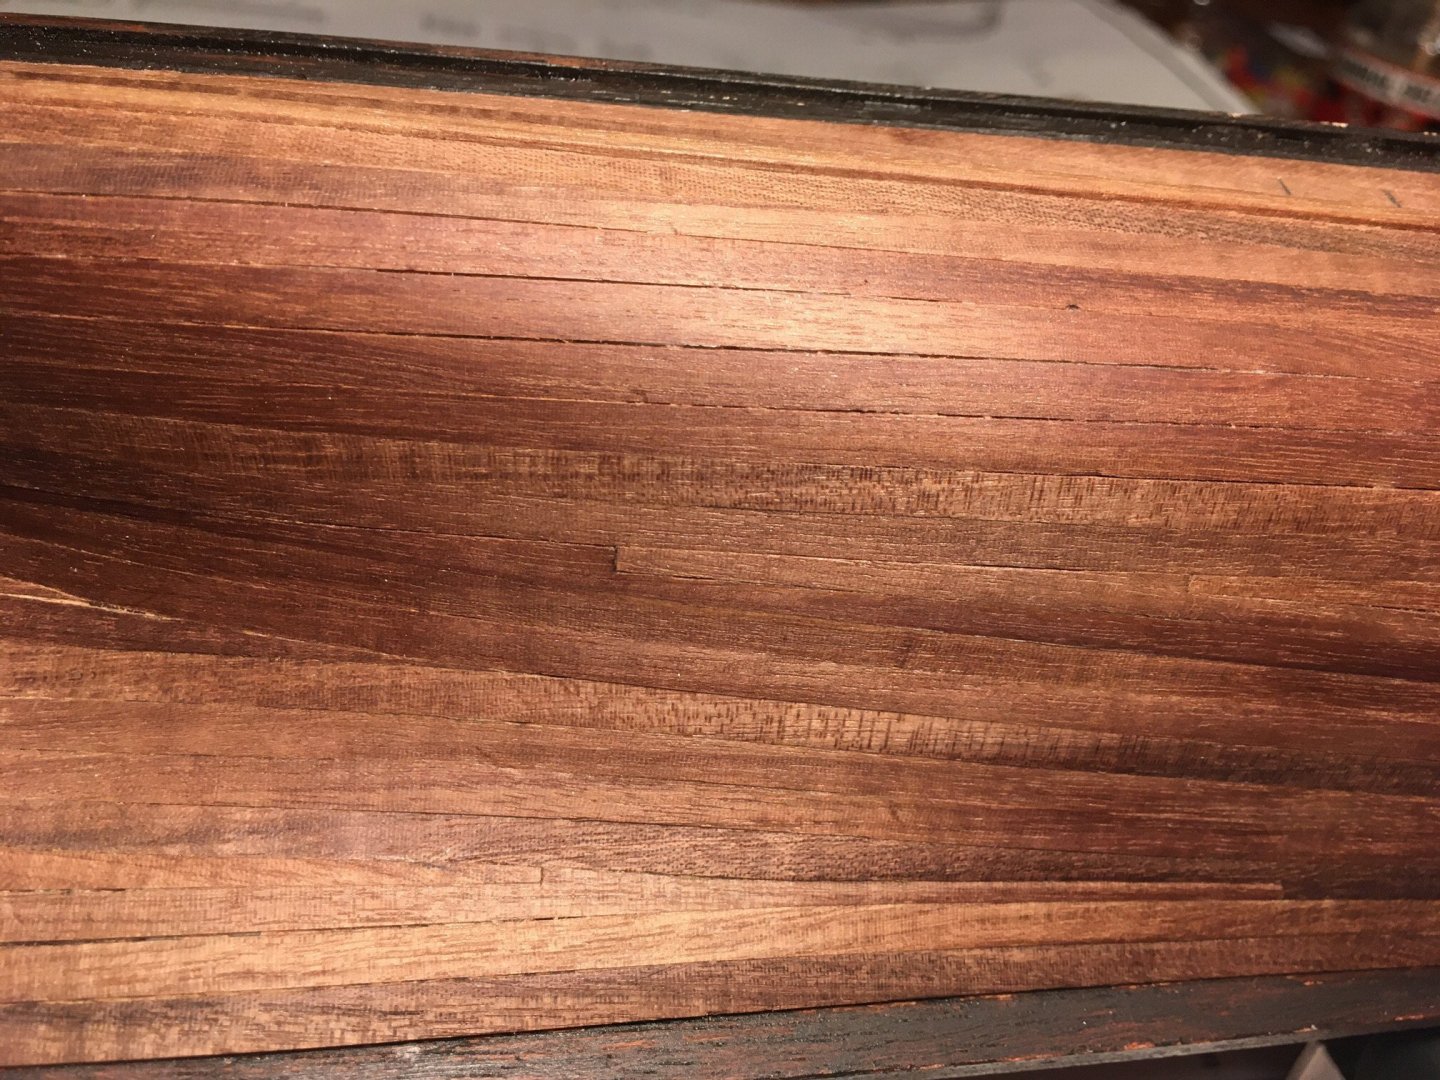
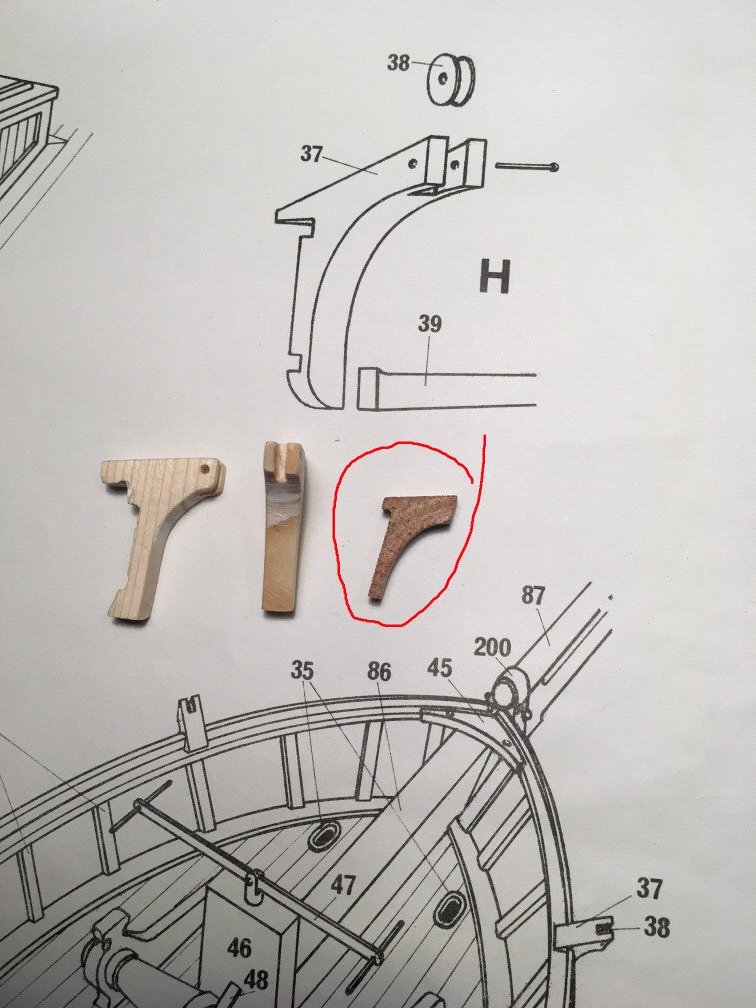
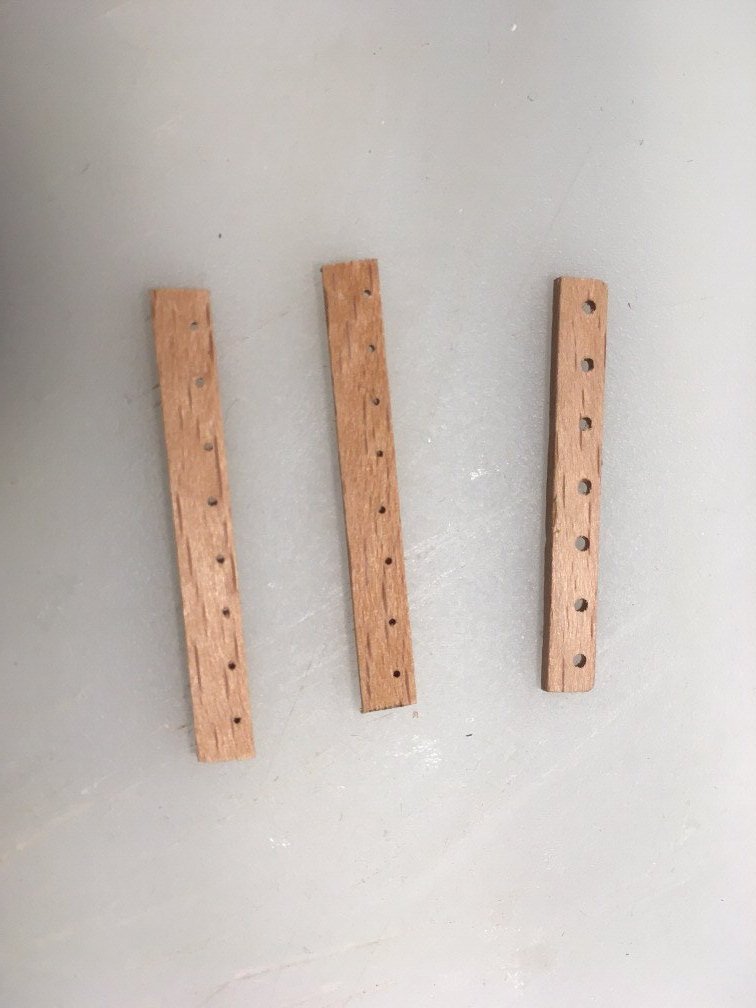

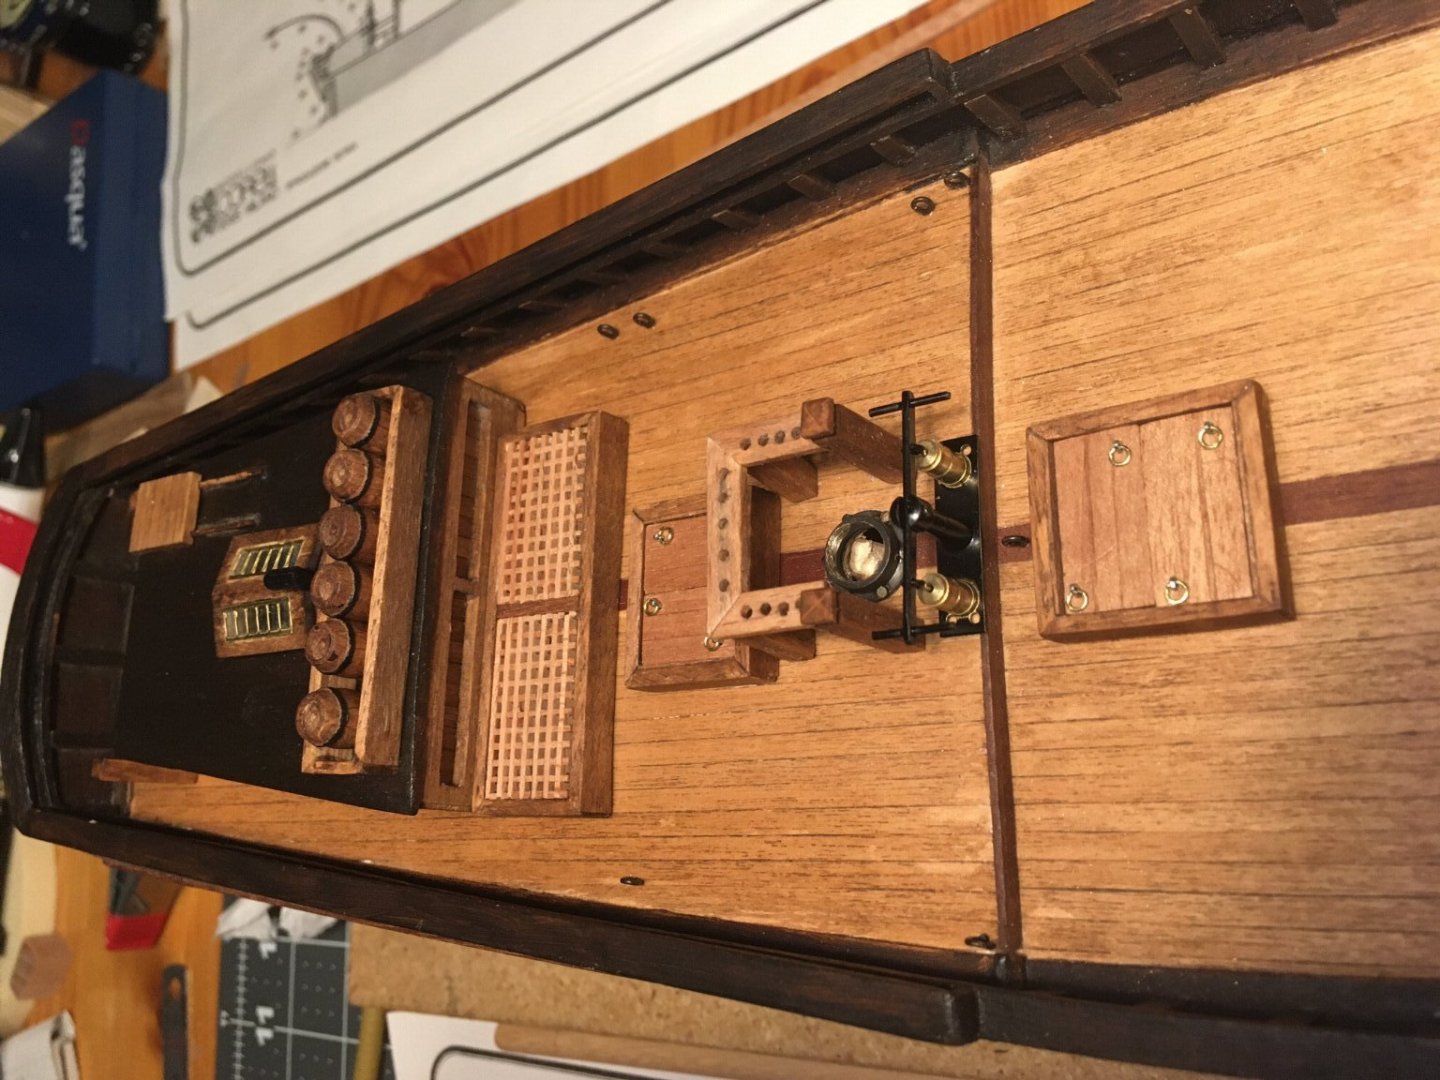

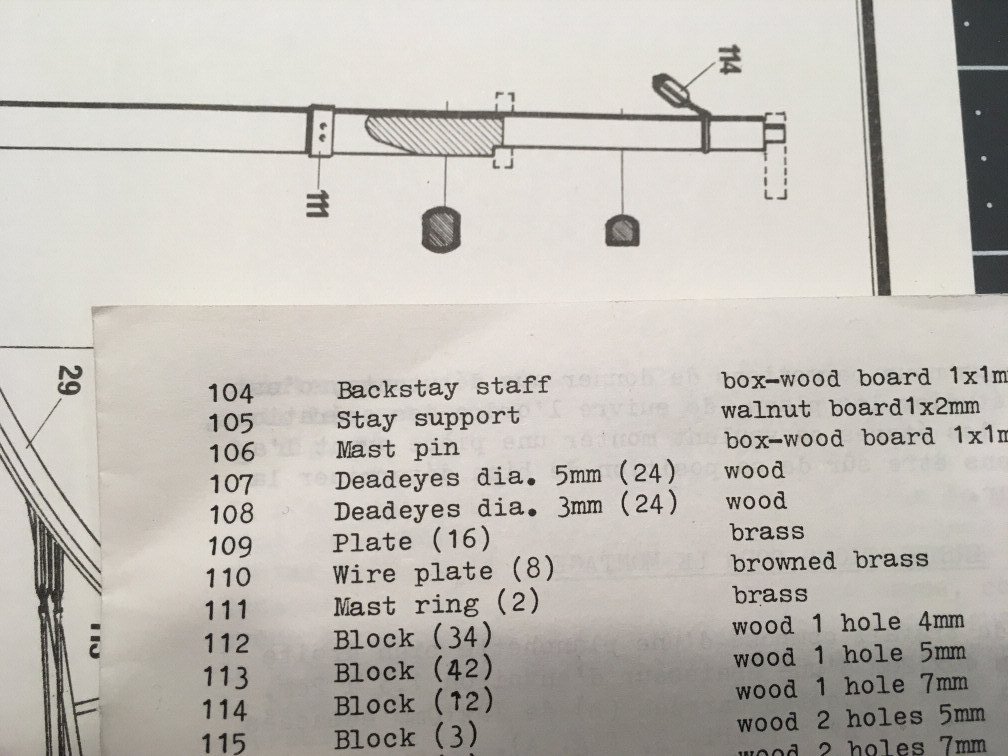
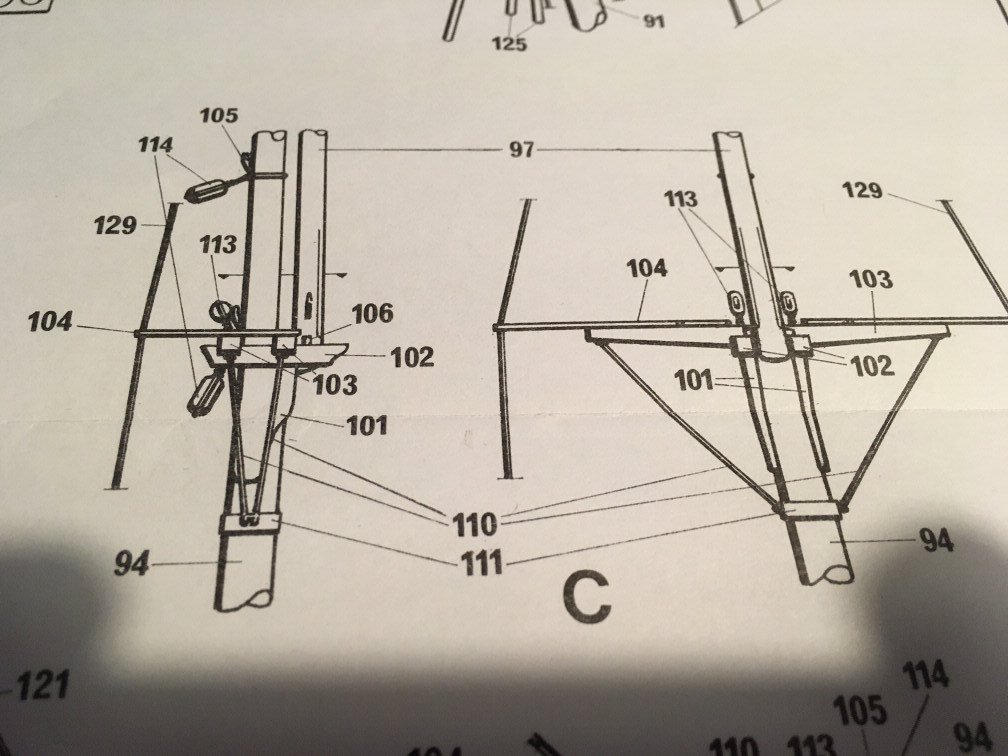
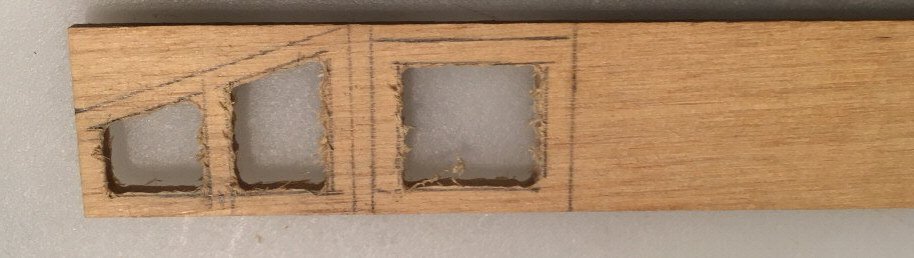
- 10 replies
-
- 3
-
-
- Corel
- Flying Fish
- (and 2 more)
-
 I already started this build when I found this site. I haven't built a ship in 10 years but I always dreamed of building this kit. The price tag has prevented me from building it sooner. I purchased this kit from someone who had started it and there where pieces missing. The keel I had to make from a piece of oak and I will most likely stain it to match. Like others, I have had to make a lot of modifications to the parts supplied. I built Model Shipways U.S.S. Constitution and I was thinking of putting lights inside it but the gun ports where to small to see inside the gun deck. But this kit has bigger gun ports so I was thinking this could be the ship to add lights and more detail for the gun deck. I know by doing this that the lights can never be replaced so I'm not sure about doing it. If anyone has any thoughts on this, I would love to here them. I'm terrible at planking. I have watched videos and read many different techniques but every time I try it never goes the same. So I will muddle through this planking as I have always done.
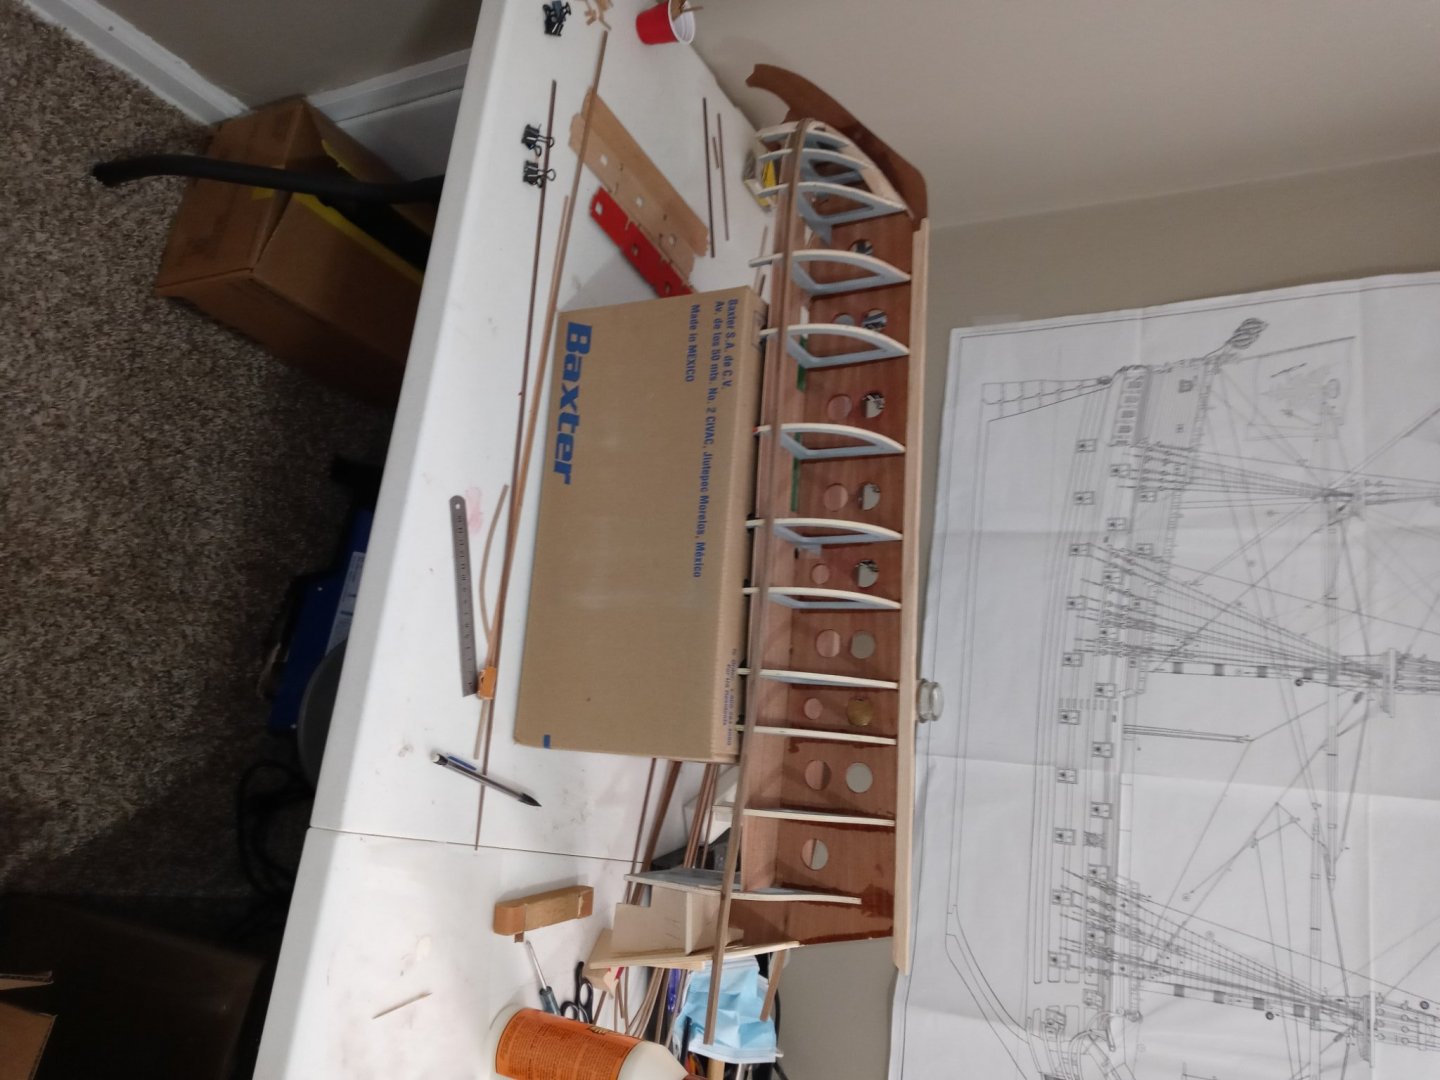
-
 I've just started this kit, I wasn't going to do a build log, as I'm not in the habit of doing it, but with Bellona I will need to scream for help from more experienced model shipwrights, and it would help if you knew what stage I'm at. I've spent a month going through the drawings, and instruction booklet, as well as checking all the parts in the box against the parts list in the booklet. I hit a problem as the parts list didn't call up the plate that the parts were shown in, and as there are a set of 14 very detailed drawings, I decided to transfer the lot to a spreadsheet that would allow me to reference each part to the material it’s made from, and also the plate(s) that it appeared on. From this, I could also build a Bill of Materials of what should be in the box, a thing that Corel flatly refused to supply. This allowed me to check everything that was in the box against the BOM, to reassure myself that I wasn’t going to be waiting for Corel to supply me with anything that was missing. Up to now, and I’ve only just started fitting the frames, it’s been a great help. If anyone is thinking of starting this kit, I’d be extremely happy to give them a copy of my spreadsheet with the attached BOM. I’m not sure how to do a private message in this forum, but if you do, get in touch and I’ll email it to you. End of the first day's work, all the frames fitted and assembled. No glue yet, I've got the decks and a few other odds and sods to do before I open my glue bottle.
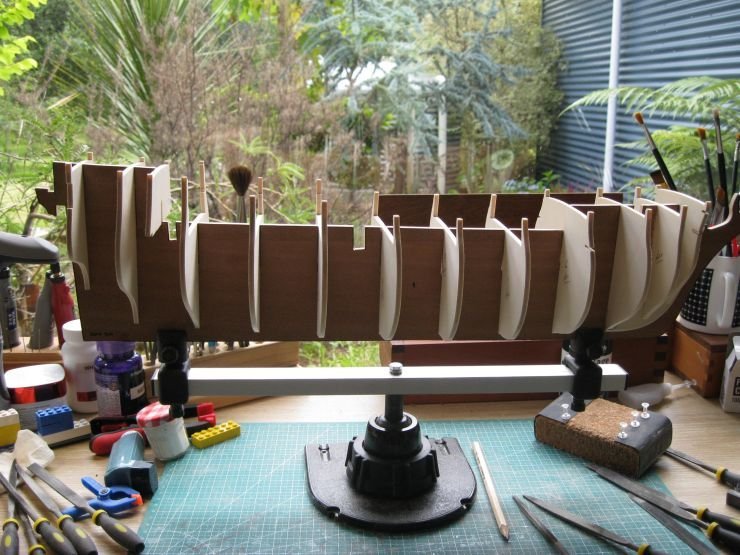
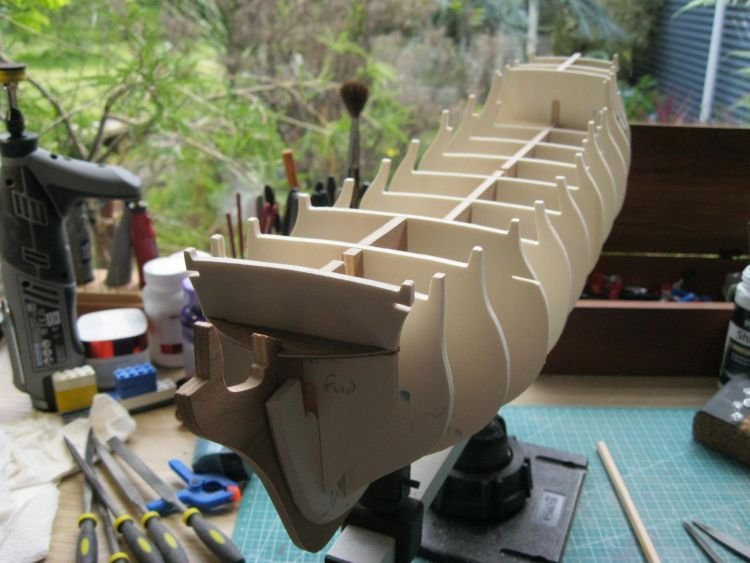
-
My wife bought me this model 12 years ago and I started building a while but I lacked many tools and there are no instructions so for a beginner like me it was frustrating and the interest droped after finishing the first planking. A couple of months ago the interest started again and my first issue was to get some of the required tools which I have done and I was on my way. I have seen on other forums that this kit is not the best and I can confirm this as well but I have nothing to compare with as this is my very first model, but I would not recommend it for a beginner like myself. Just the lack of instructions is hard and when you expect them, and following the drawings by drawing number has given me surprises from later drawings that shows some details as should have been done in a earlier stage. Maybe this depends on my own lack of experience, but as there are no instructions... It does not get any easier when parts included do not apply to the drawings, so far two of them was so wrong that I must build new ones to fit as they should be, on other places I will have to accept the fact that some parts are not like the drawings, this maybe this is something that you must accept? I fumble in the darkness with some things and think that "I will do it like this", not knowing if that is correct or not. The worse thing with this kit is the fact that some parts are actually missing, so far: around 100mm anchor chain, missing some wood, missing one metal part to the capstan All of this have made me do mistakes, not crucial (yet, guess it depends on whom is looking) so I came to the point where I decided to complete the ships as good as I can and accept the fact that there are mistakes and to do it as well as I can. I guess/hopes it will be a nice looking ship in the end after all. Now I needs help with some lines that I noticed today on one drawing. As I am working on completing the deck furniture and items I saw on the deck where both the masts are that there are three markings On another drawing they are marked as 158,159,171 and 173.174.182. Looking on the part list, as is all I have to follow, shows this for the no 158,159,171 and 173,174,182 = Nothing Could this also be part 144 – Ring with leg, 144 can be seen on pic1, I suspect it is as it looks like this but I don't know. As I have not yet placed the deck furniture it would be best to know this before I continue. I can't make out on the rigging drawings either what it is.
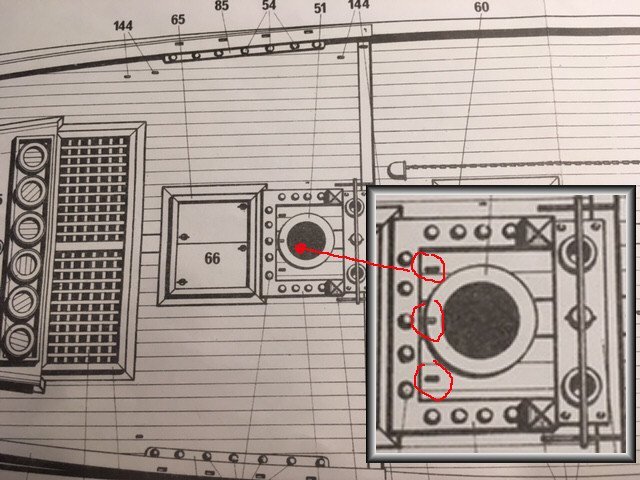
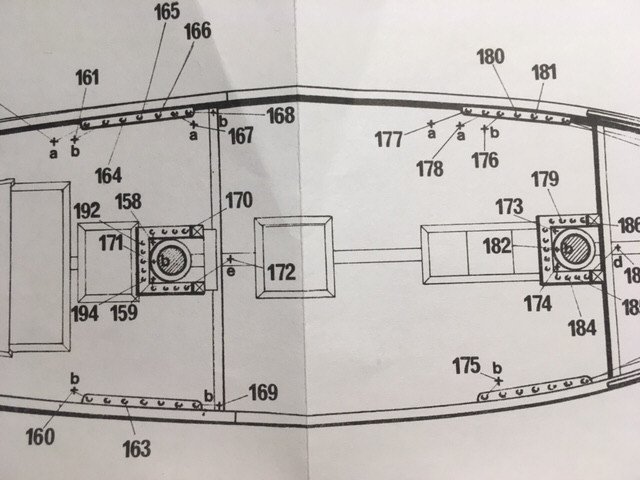
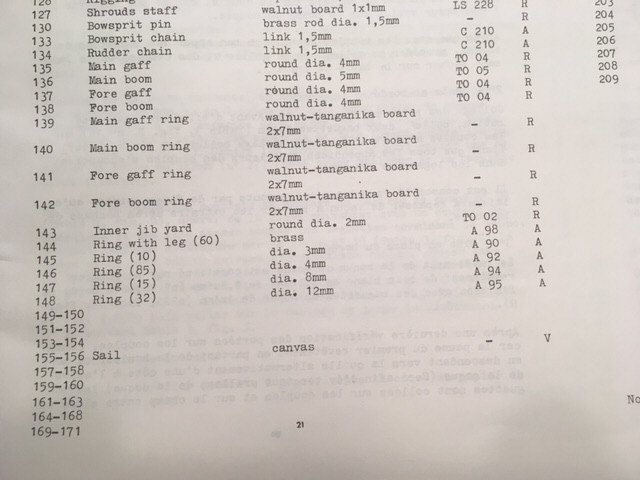
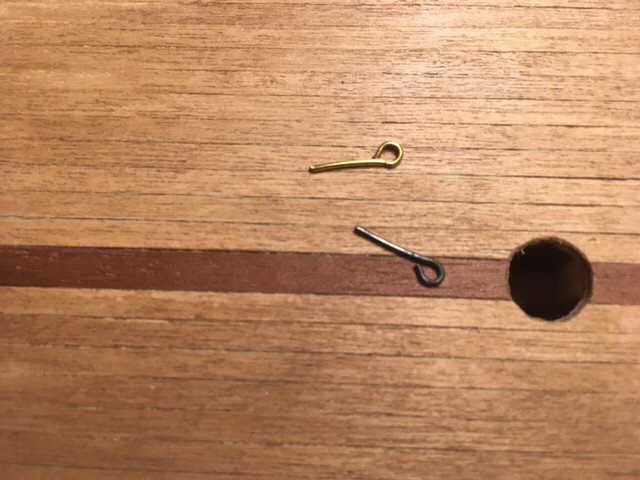
-
 I started "kit bashing" my Corel kit, the Baltic Ketch "Scotland" to something I like a little better, and could quite possibly happened. I have never worked in 1:64 scale and to be honest, it is driving me bonkers. Here is a photo progression thus far. I thought I had photos showing how warped the keel and the frame was, but I can't seem to find them. I have since unbashed and am building the kit according to the instructions.