Search the Community
Showing results for tags 'pickle'.
Found 19 results
-
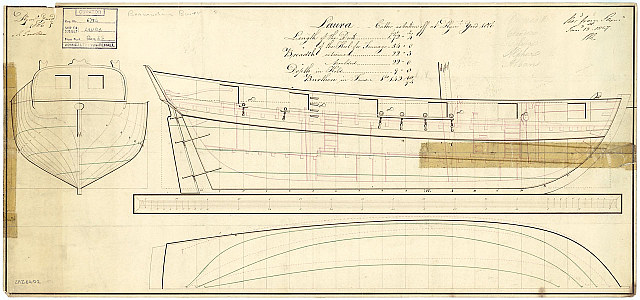
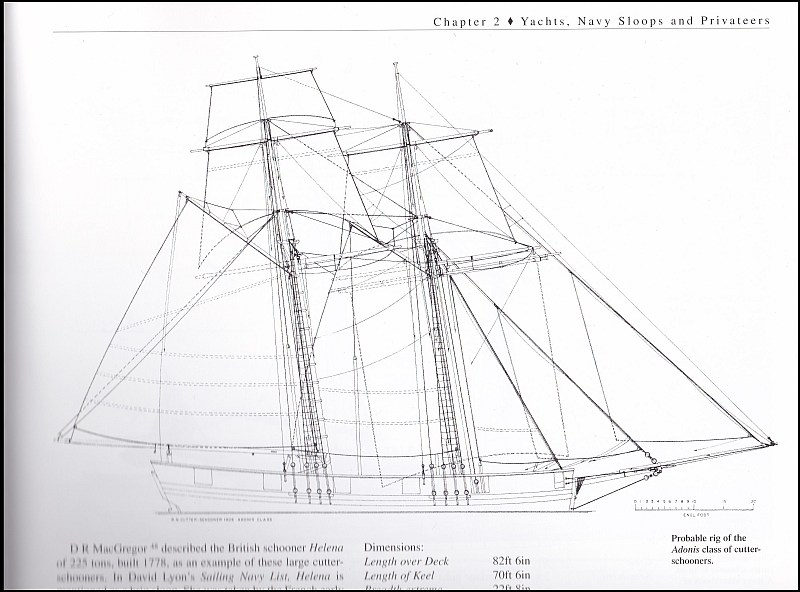
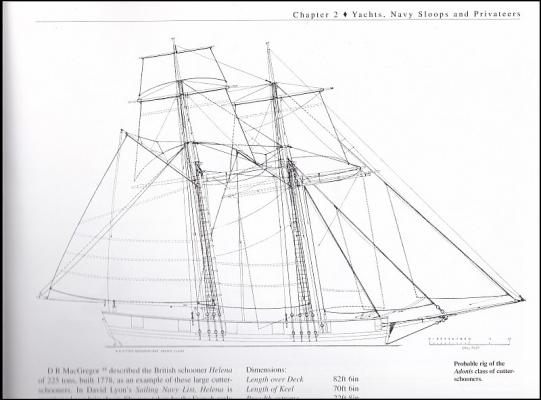
 Build Log HMS Pickle The Caldercraft kit has arrived and seems of the same good quality as I could expect from Granado. However, before I start, I made a bit of research and will add a few corrections. I like Pickle as an example of those elegant schooners and for her role after Trafalgar. But – I find that the kit’s Pickle looks somewhat strange in some respects: The bow seems too bluff for the period The overall proportions of hull length, mast distance and mast height seems wrong The stern looks ugly and the taffrail is completely different from other schooners of the period. According to some correspondence with CC (I lost the copies, sloppy me) the kit is built according to plans found in the Bermudas which show an unnamed vessel of about the same size and specifications as Pickle built around 1800. It is however not confirmed to be Pickle. The plans are held back as somebody seemingly wants to write eventually a book about Pickle. They also referred to a contemporary sketch showing Pickle with seven gun ports per side and a rig according to the kit but with a vertical foremast which configuration was not adopted. To me the kit Pickles hull looks much more old fashioned and ungraceful than other contemporary schooners. As I have no access to the original plans used for the kit I will make some corrections based on different sources: Plan of the Royal Maritime Museum in Greenwich (RMG) of the Adonis – class cutter Laura Although the 12 Adonis – class vessels were ordered as cutters they were built as (or converted to) schooners. Their hull size is very similar to Pickle and the armament was with 10 instead of 8 12-pounder carronades although there were only 6 gun ports per side. They were built in the Bermudas in 1806 I bought a copy of that plan from RMG. It’s not only a plan full of information but a fascinating object of art. Sketches of the Adonis – class schooners in ‘The Global Schooner’ (TGS) Karl Heinz Marquarts book is a treasure of information about schooners and contains some small plans of the Adonis – class. Pictures of different plans from the collections of RMG J2147 sail J8265 unnamed 18-gun two-masted brig
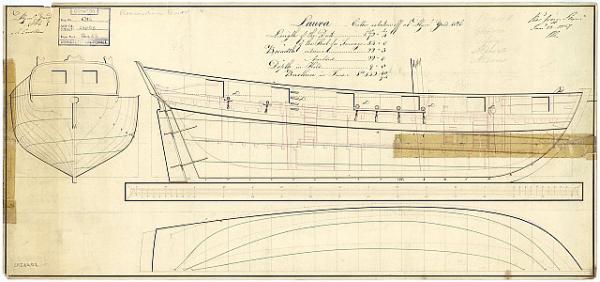
- 293 replies
-
- 4
-

-
- pickle
- caldercraft
- (and 1 more)
-
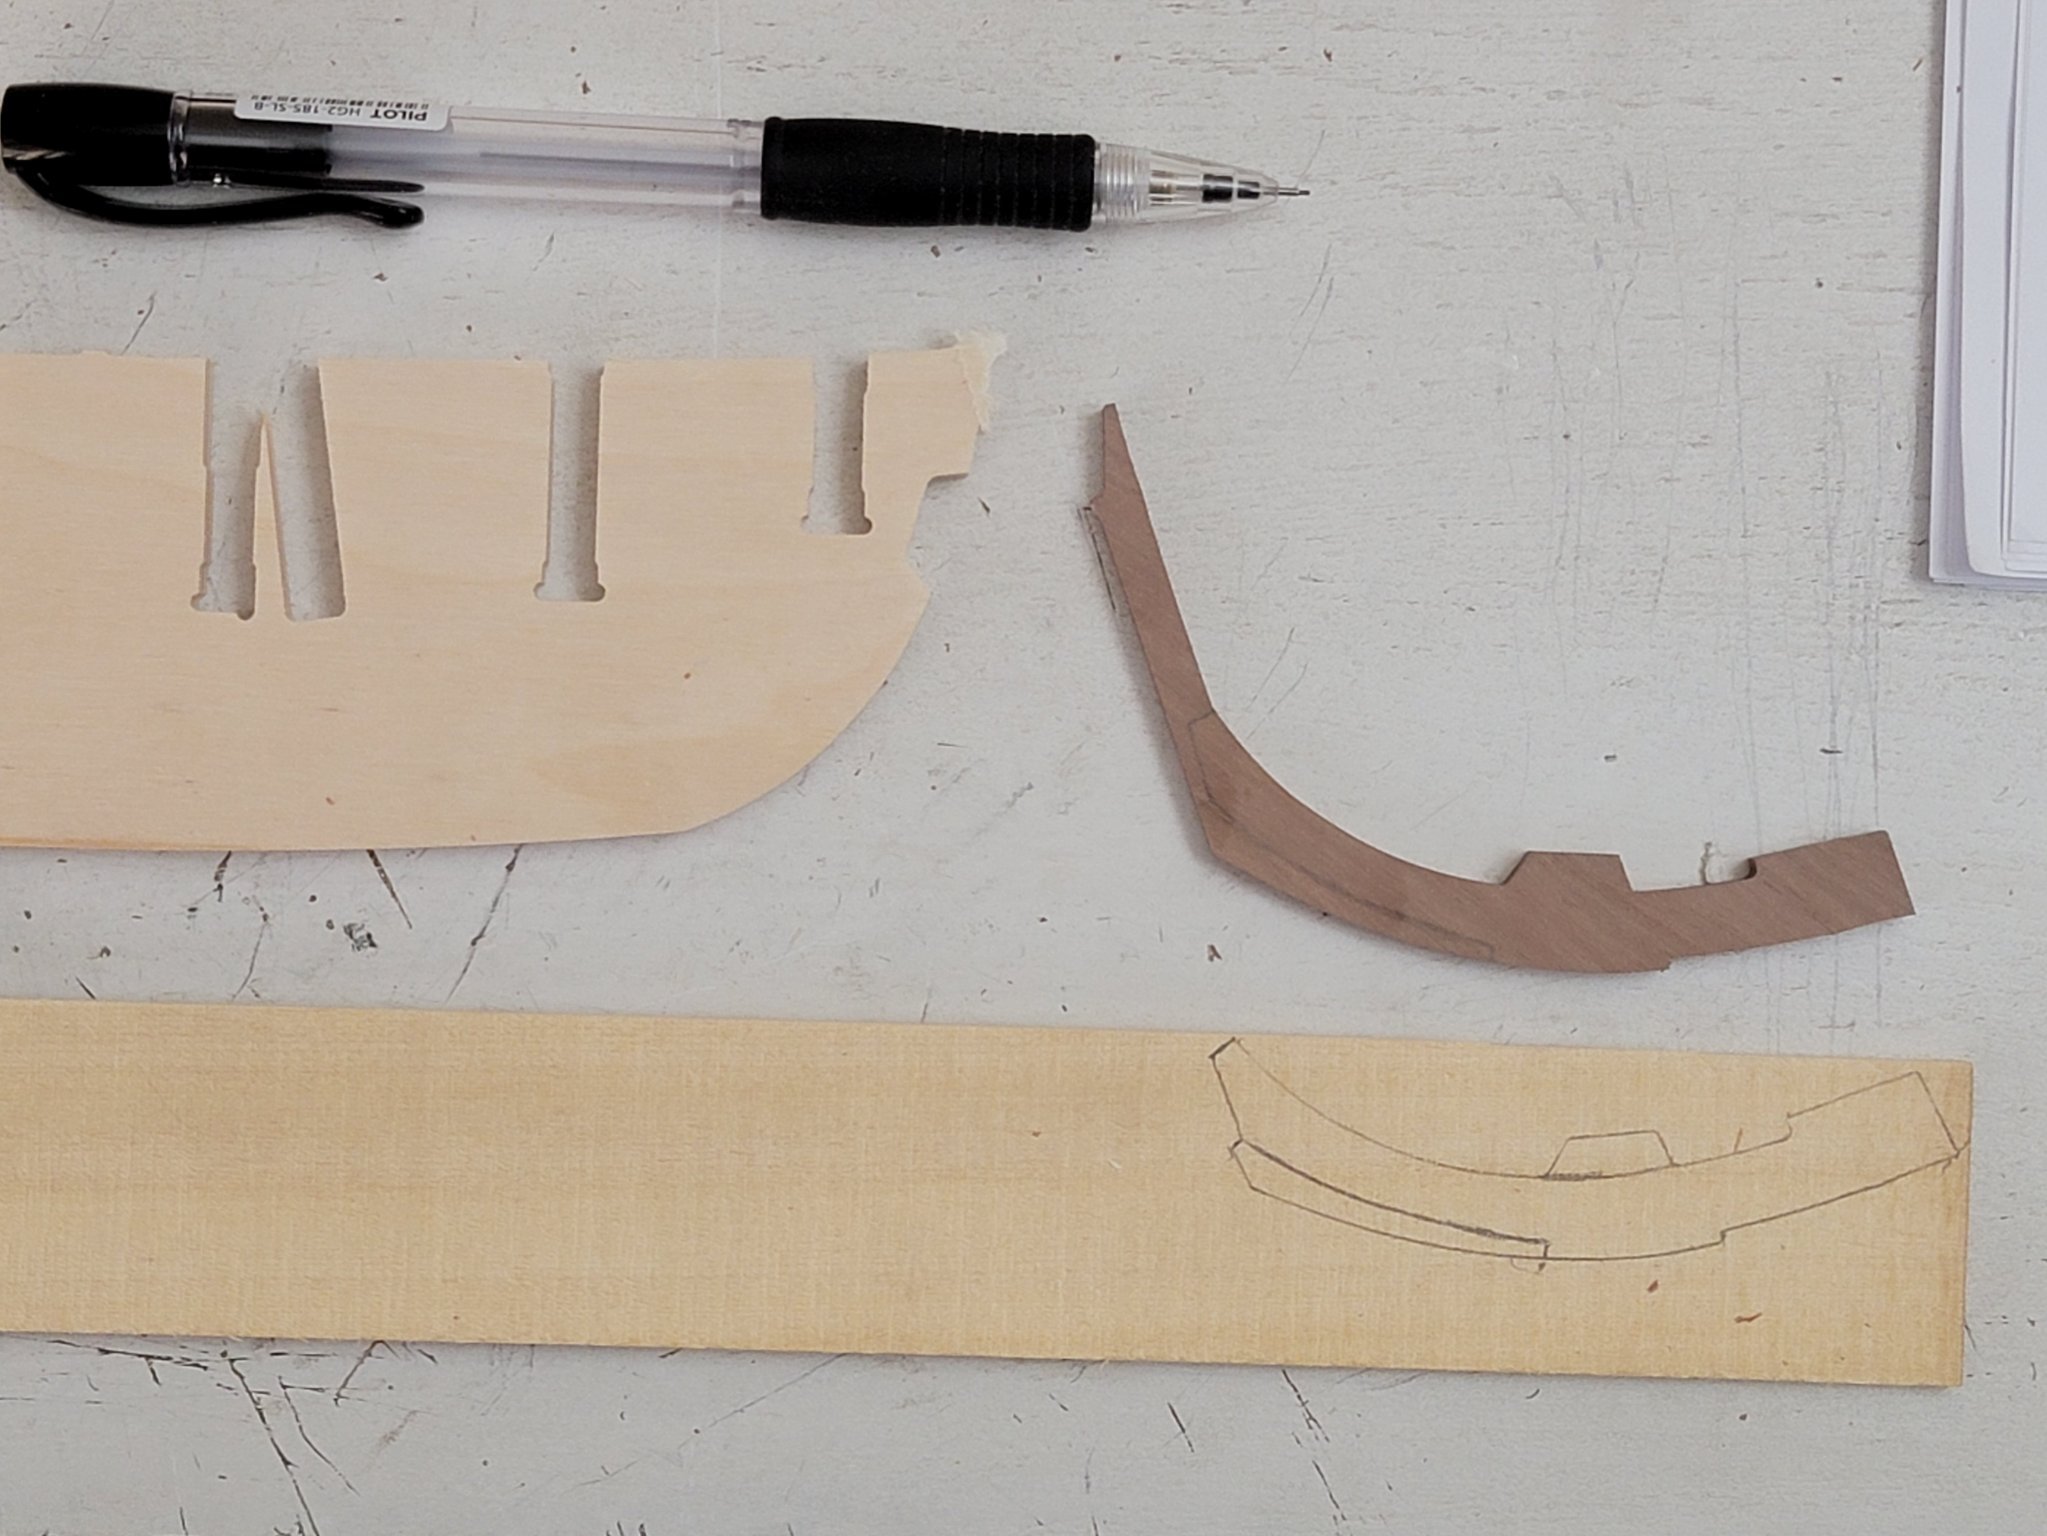
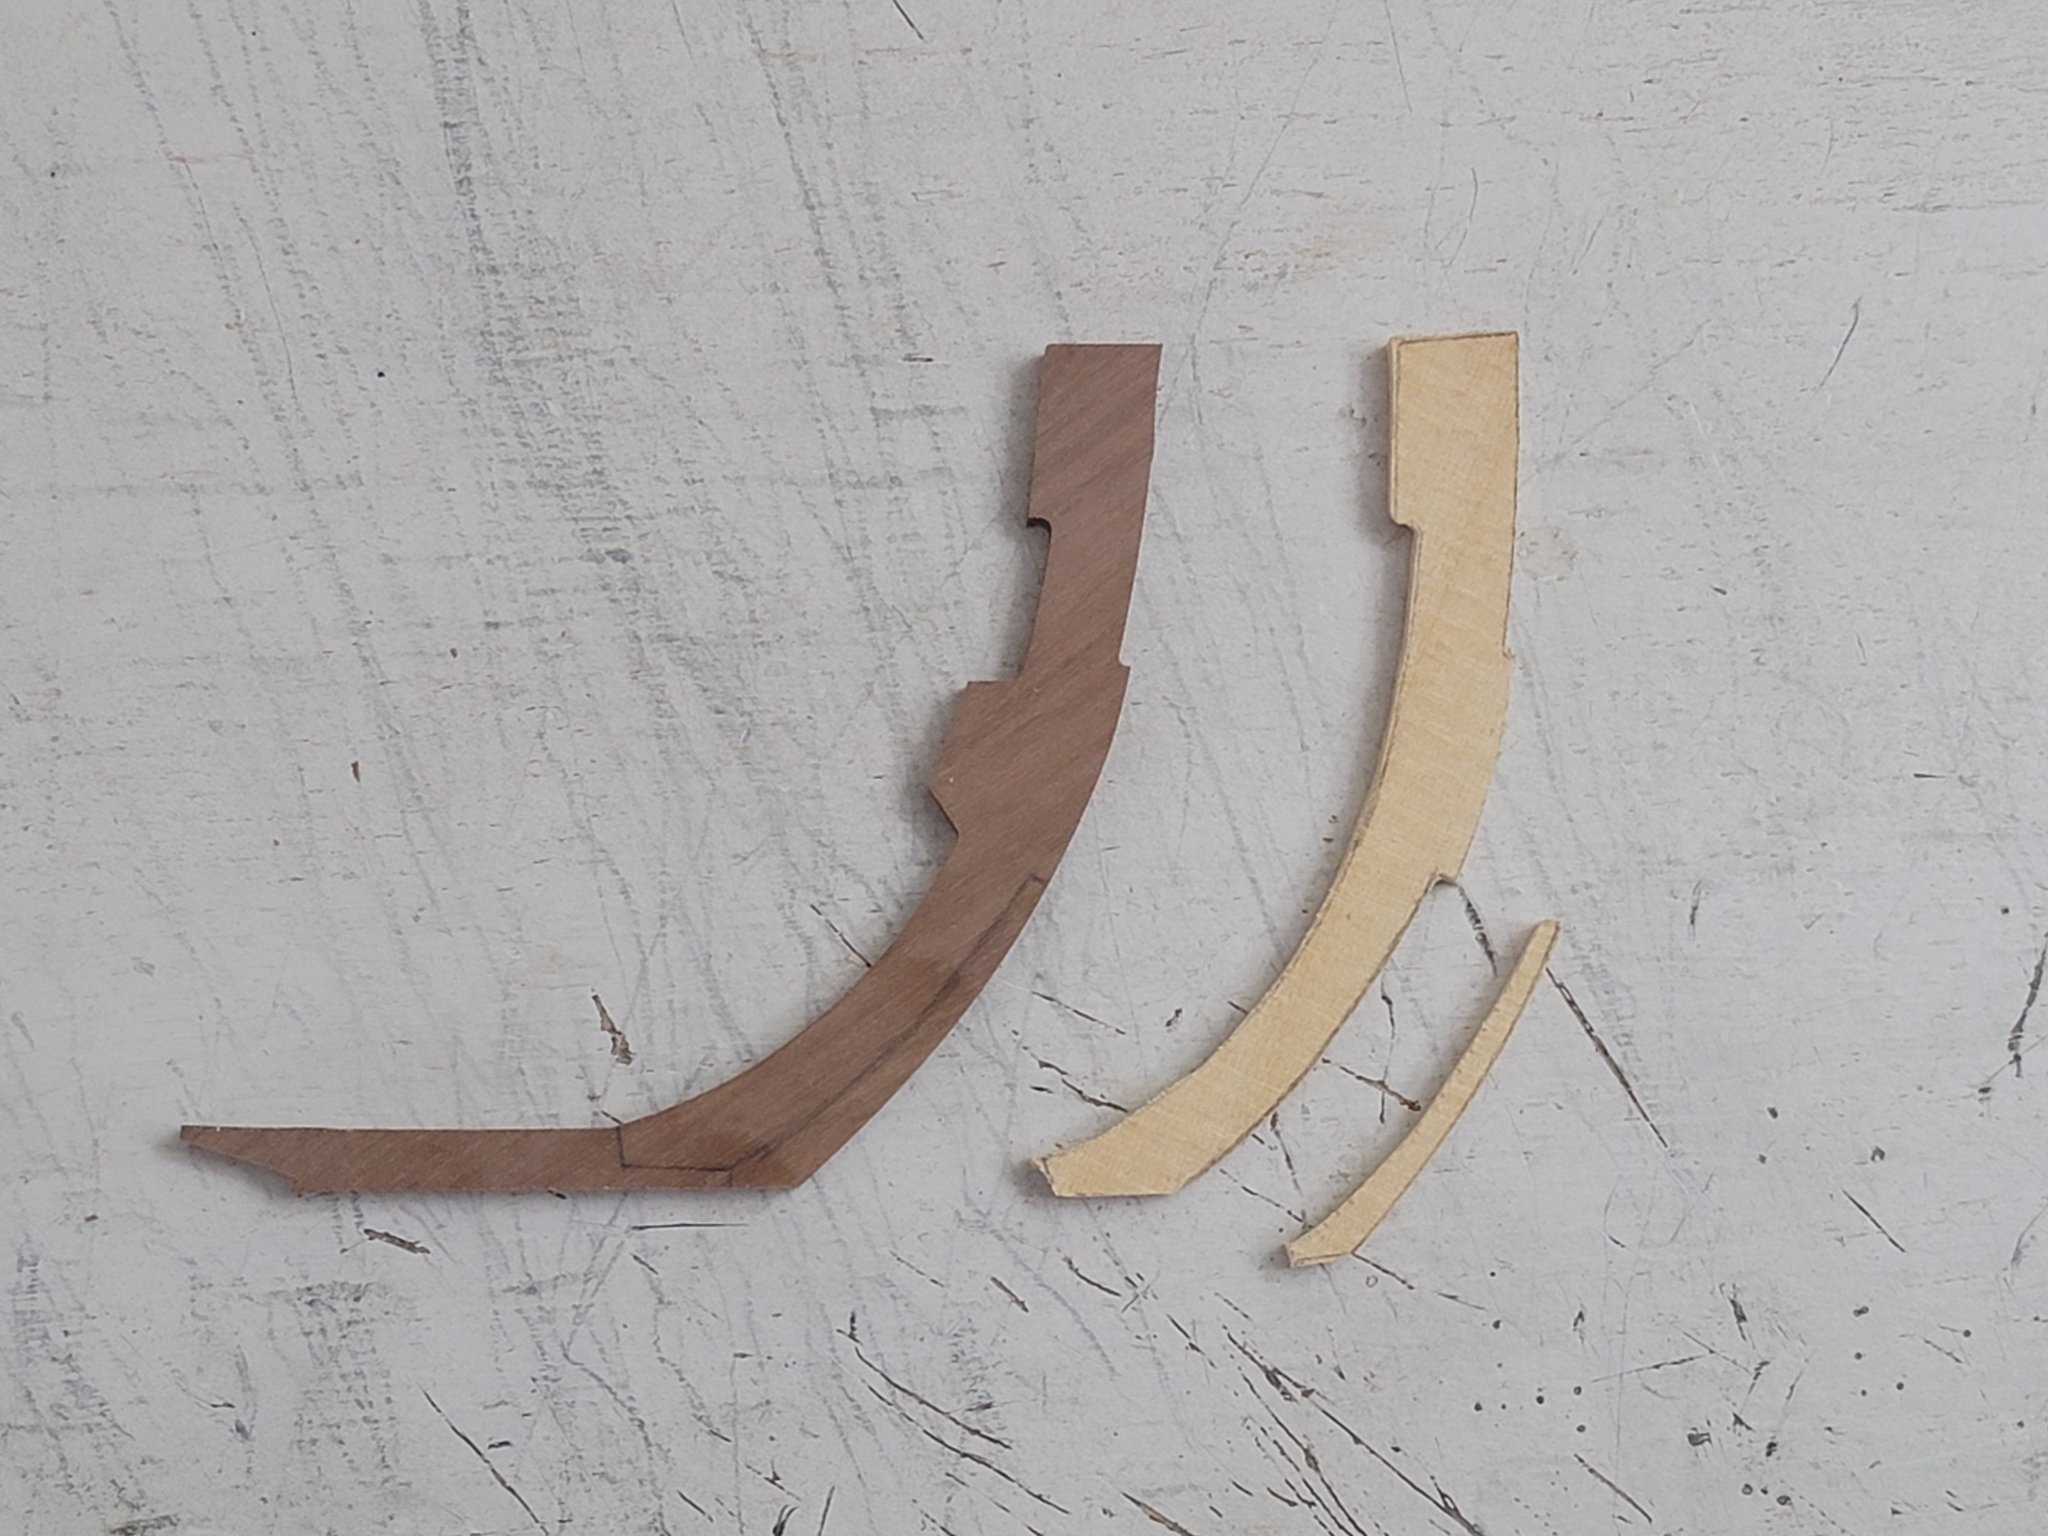
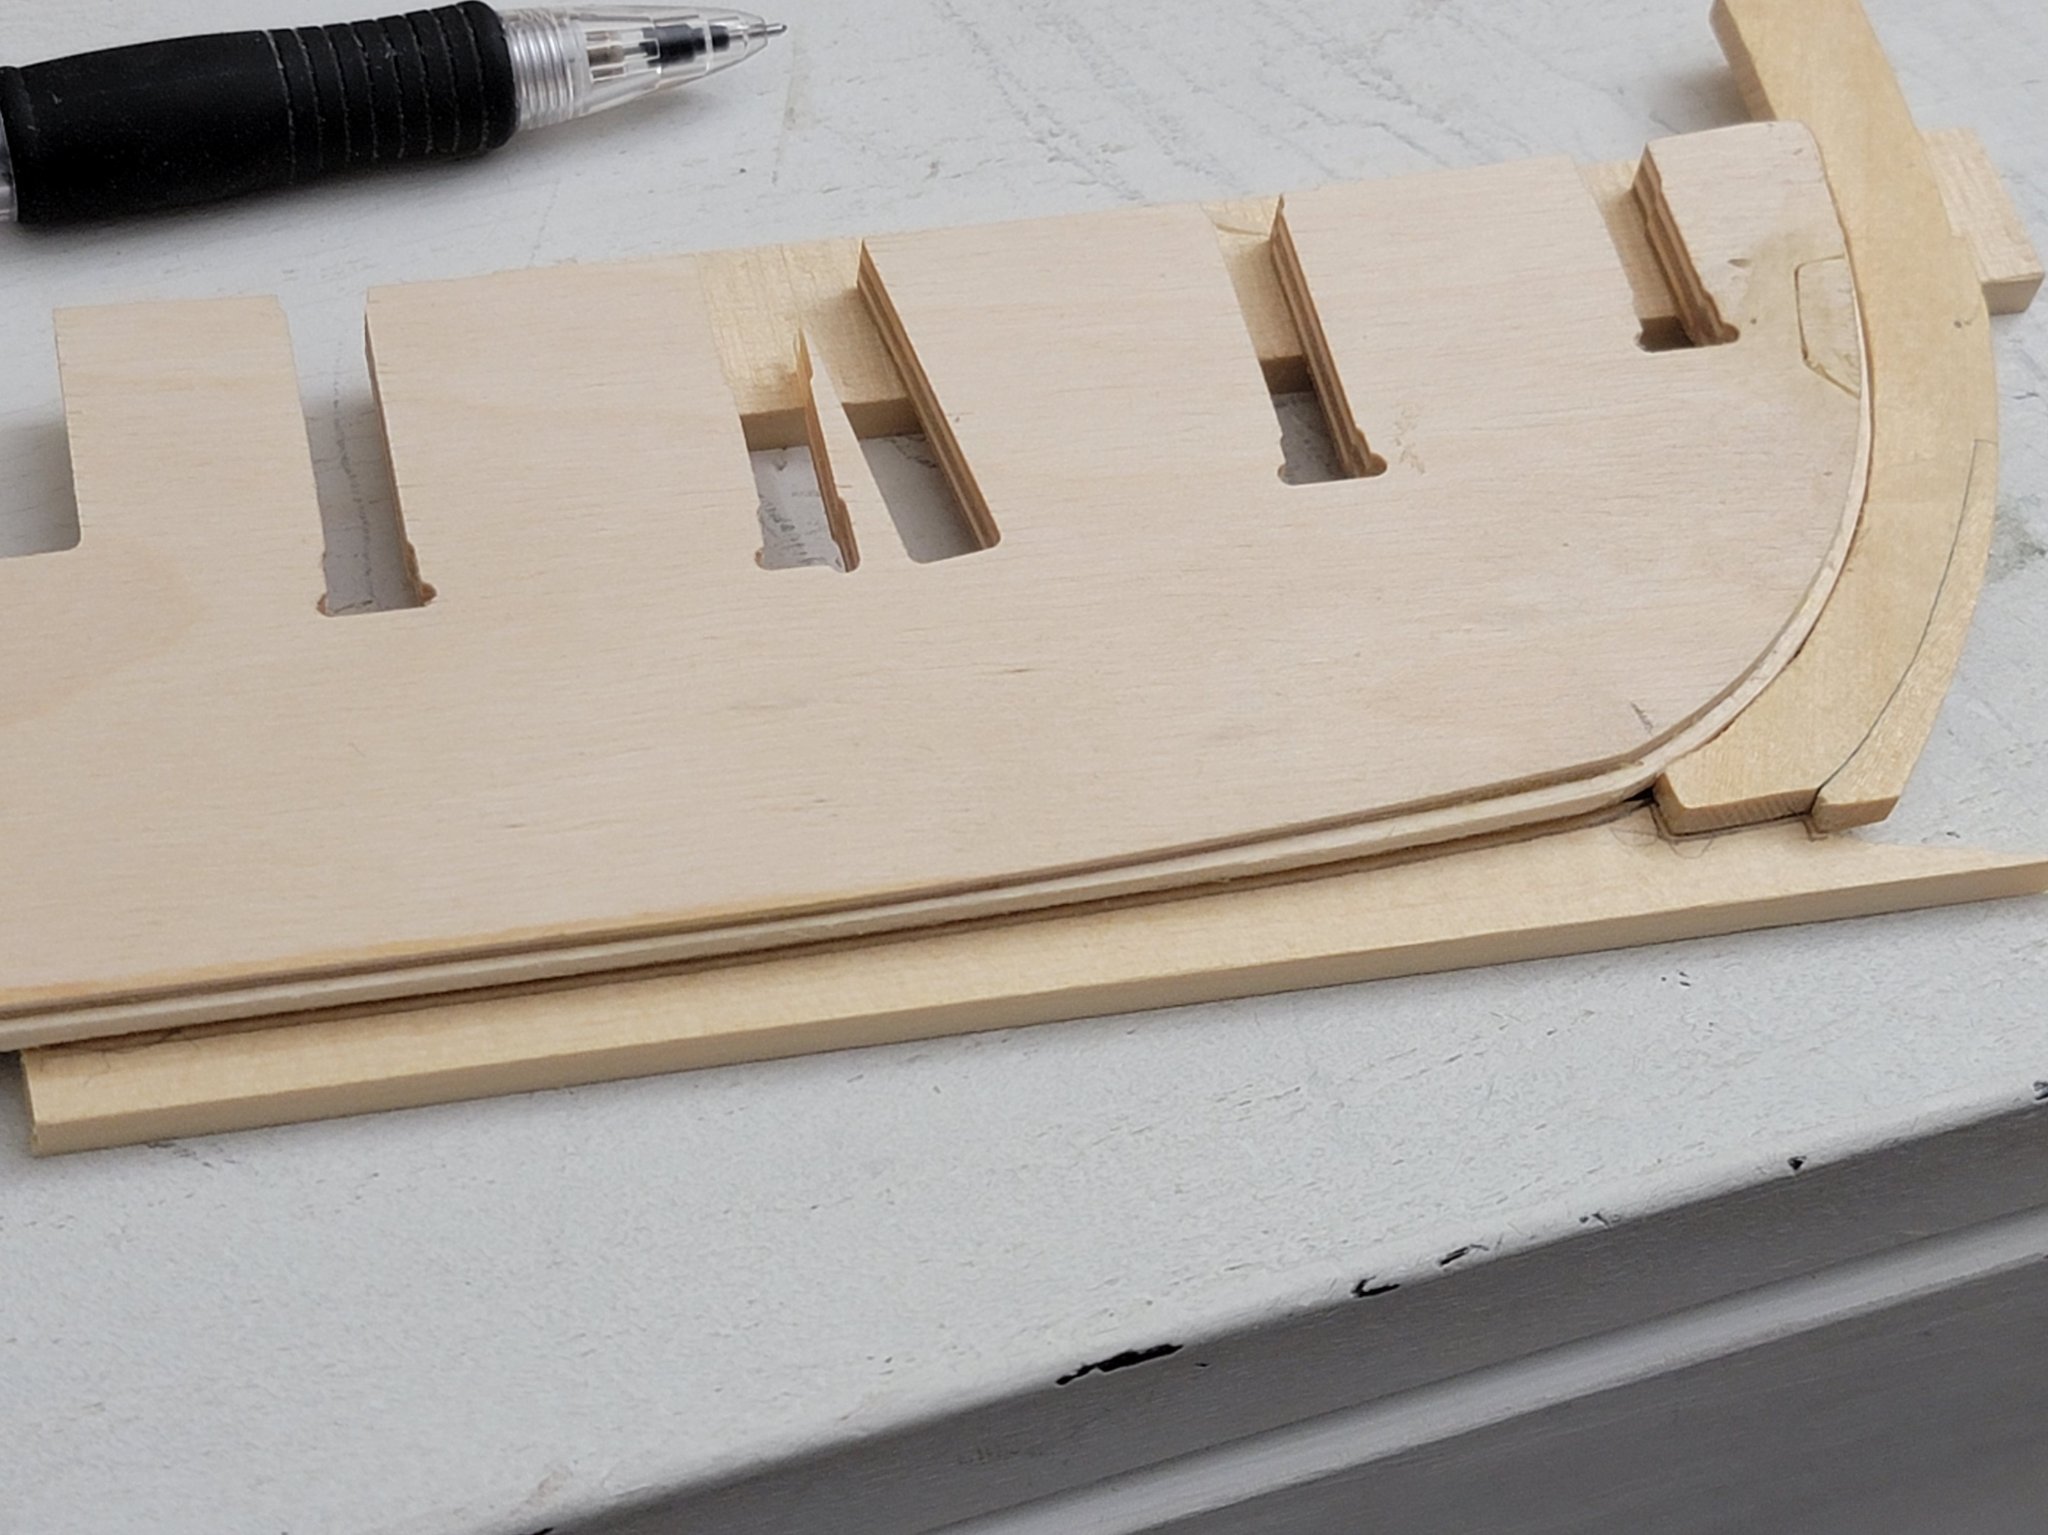
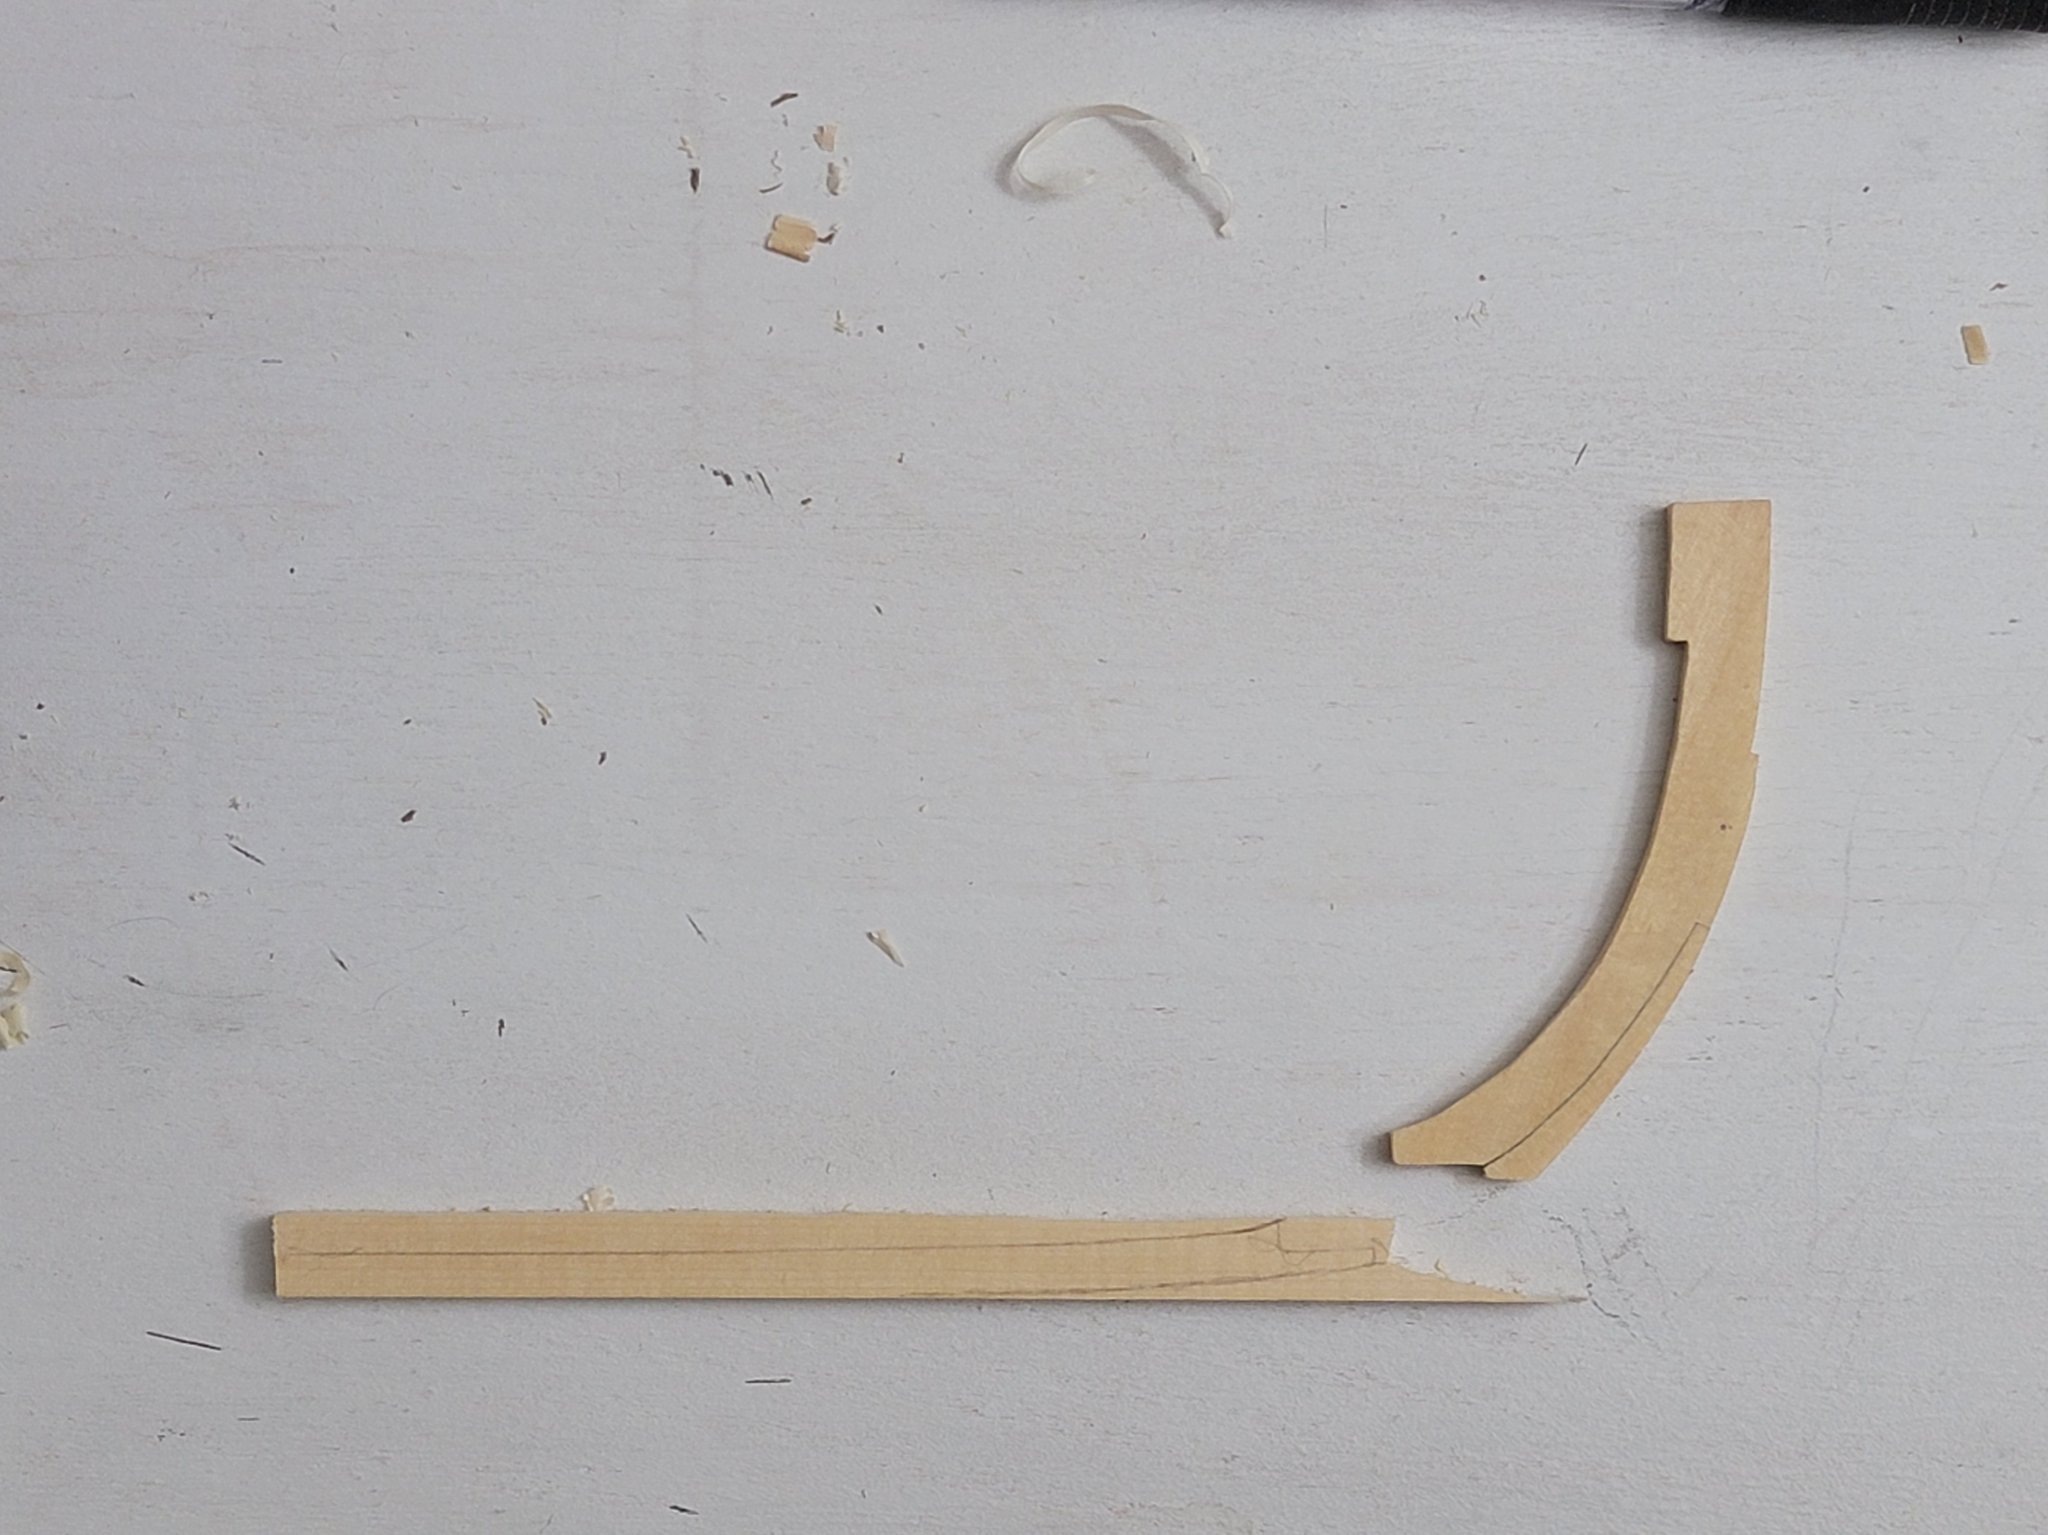
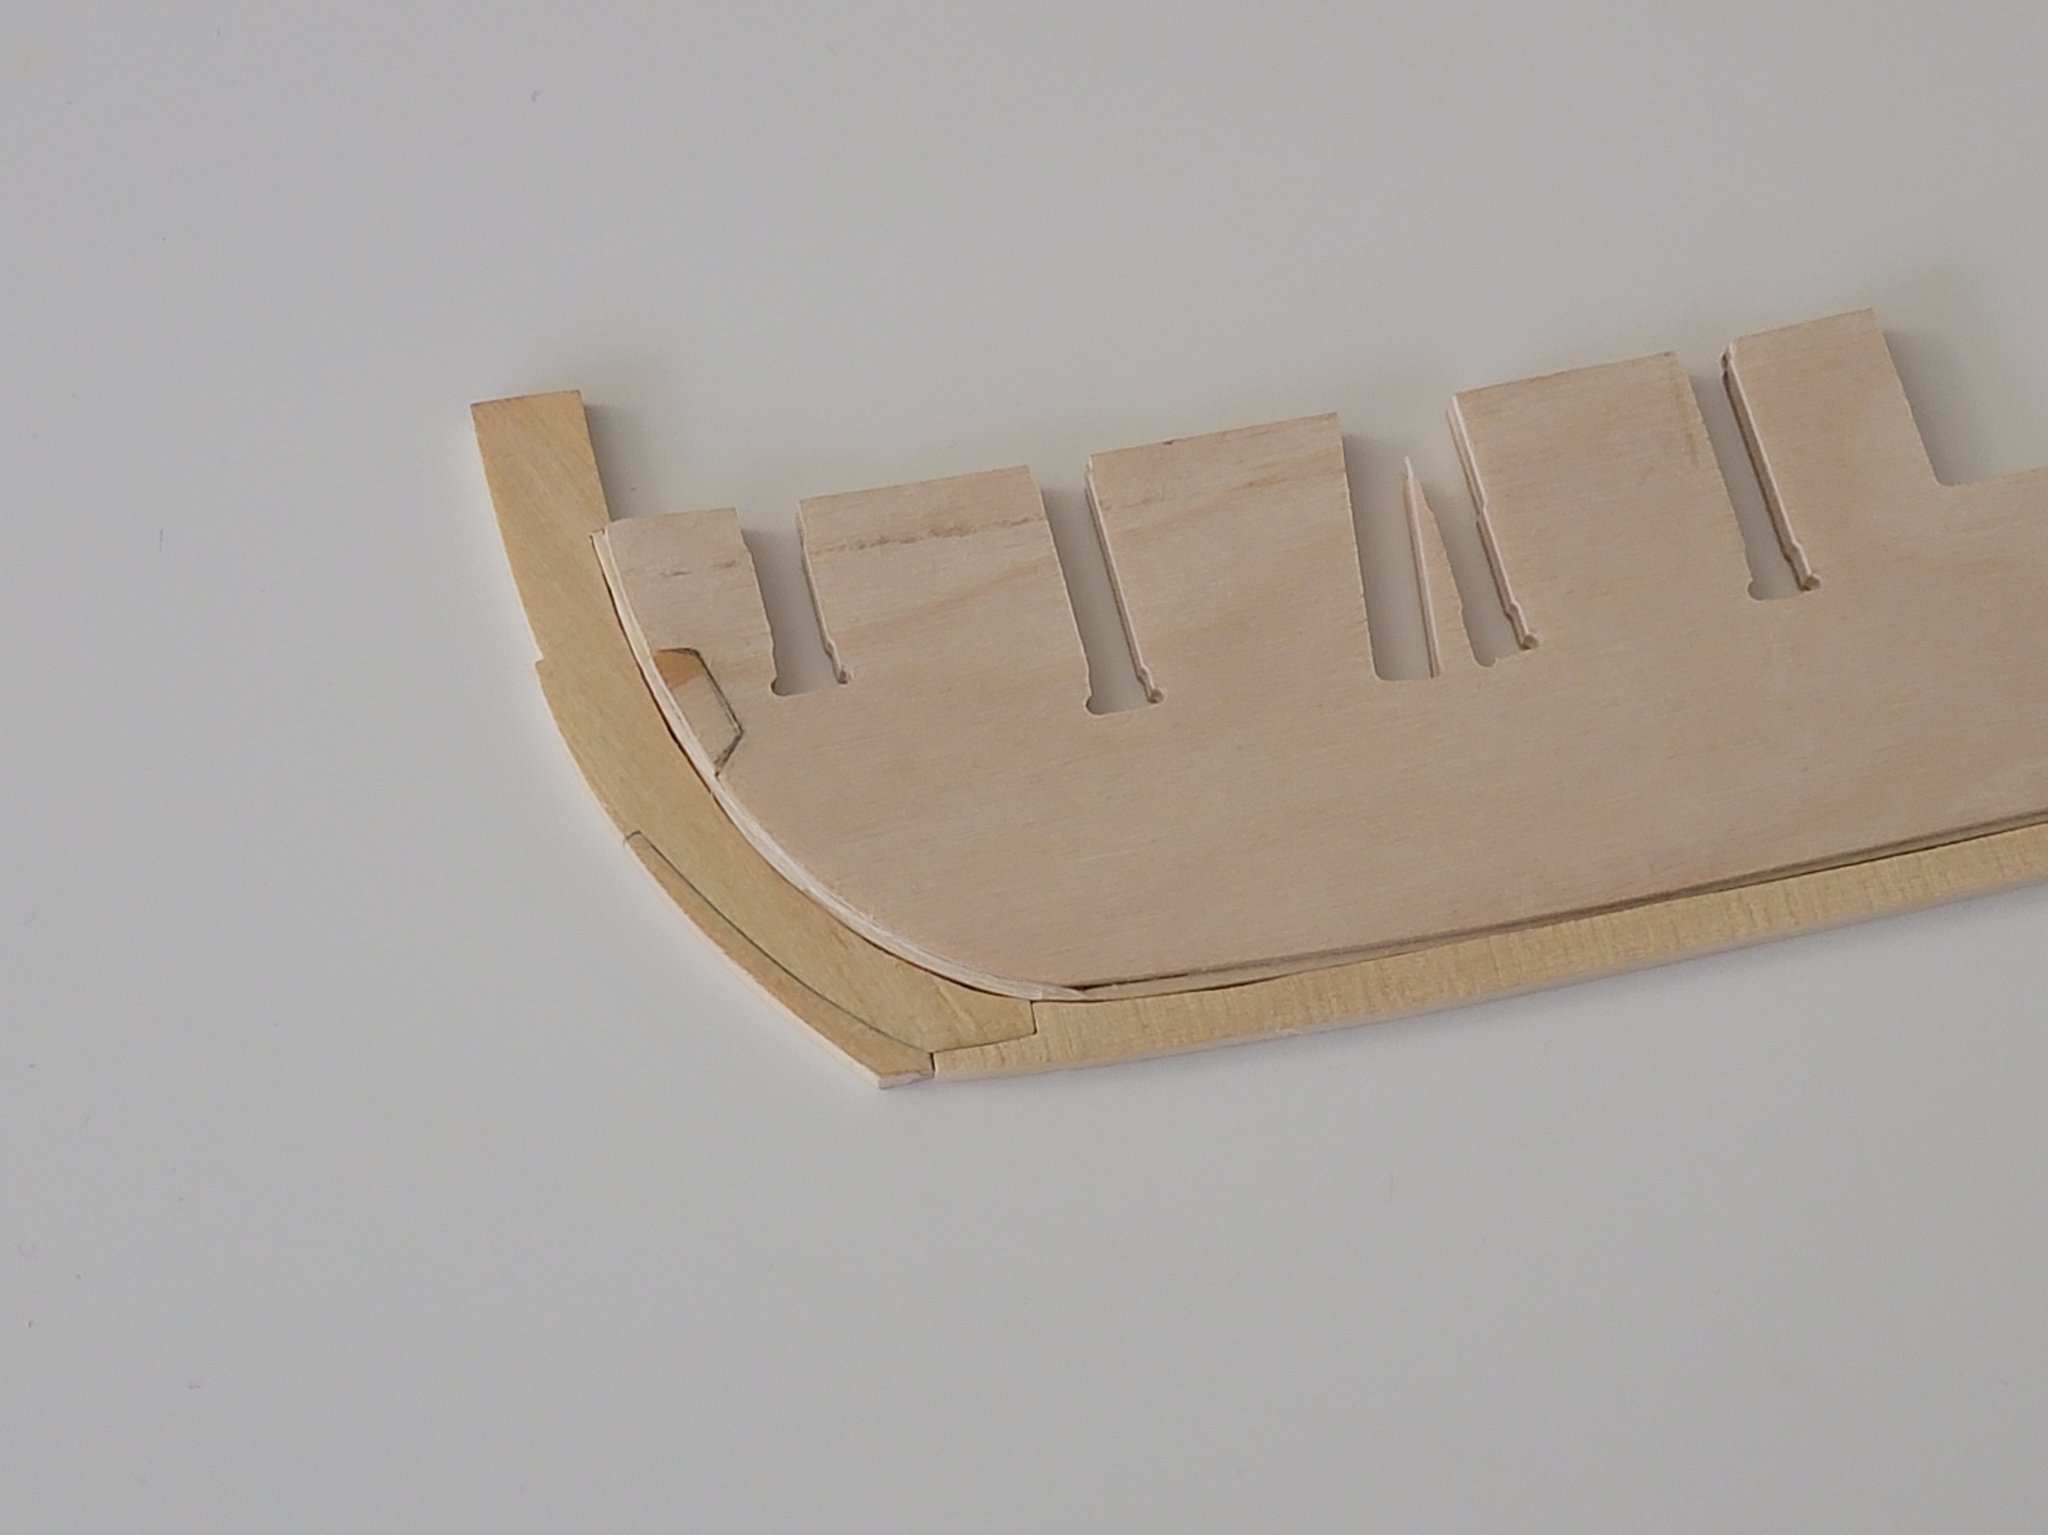
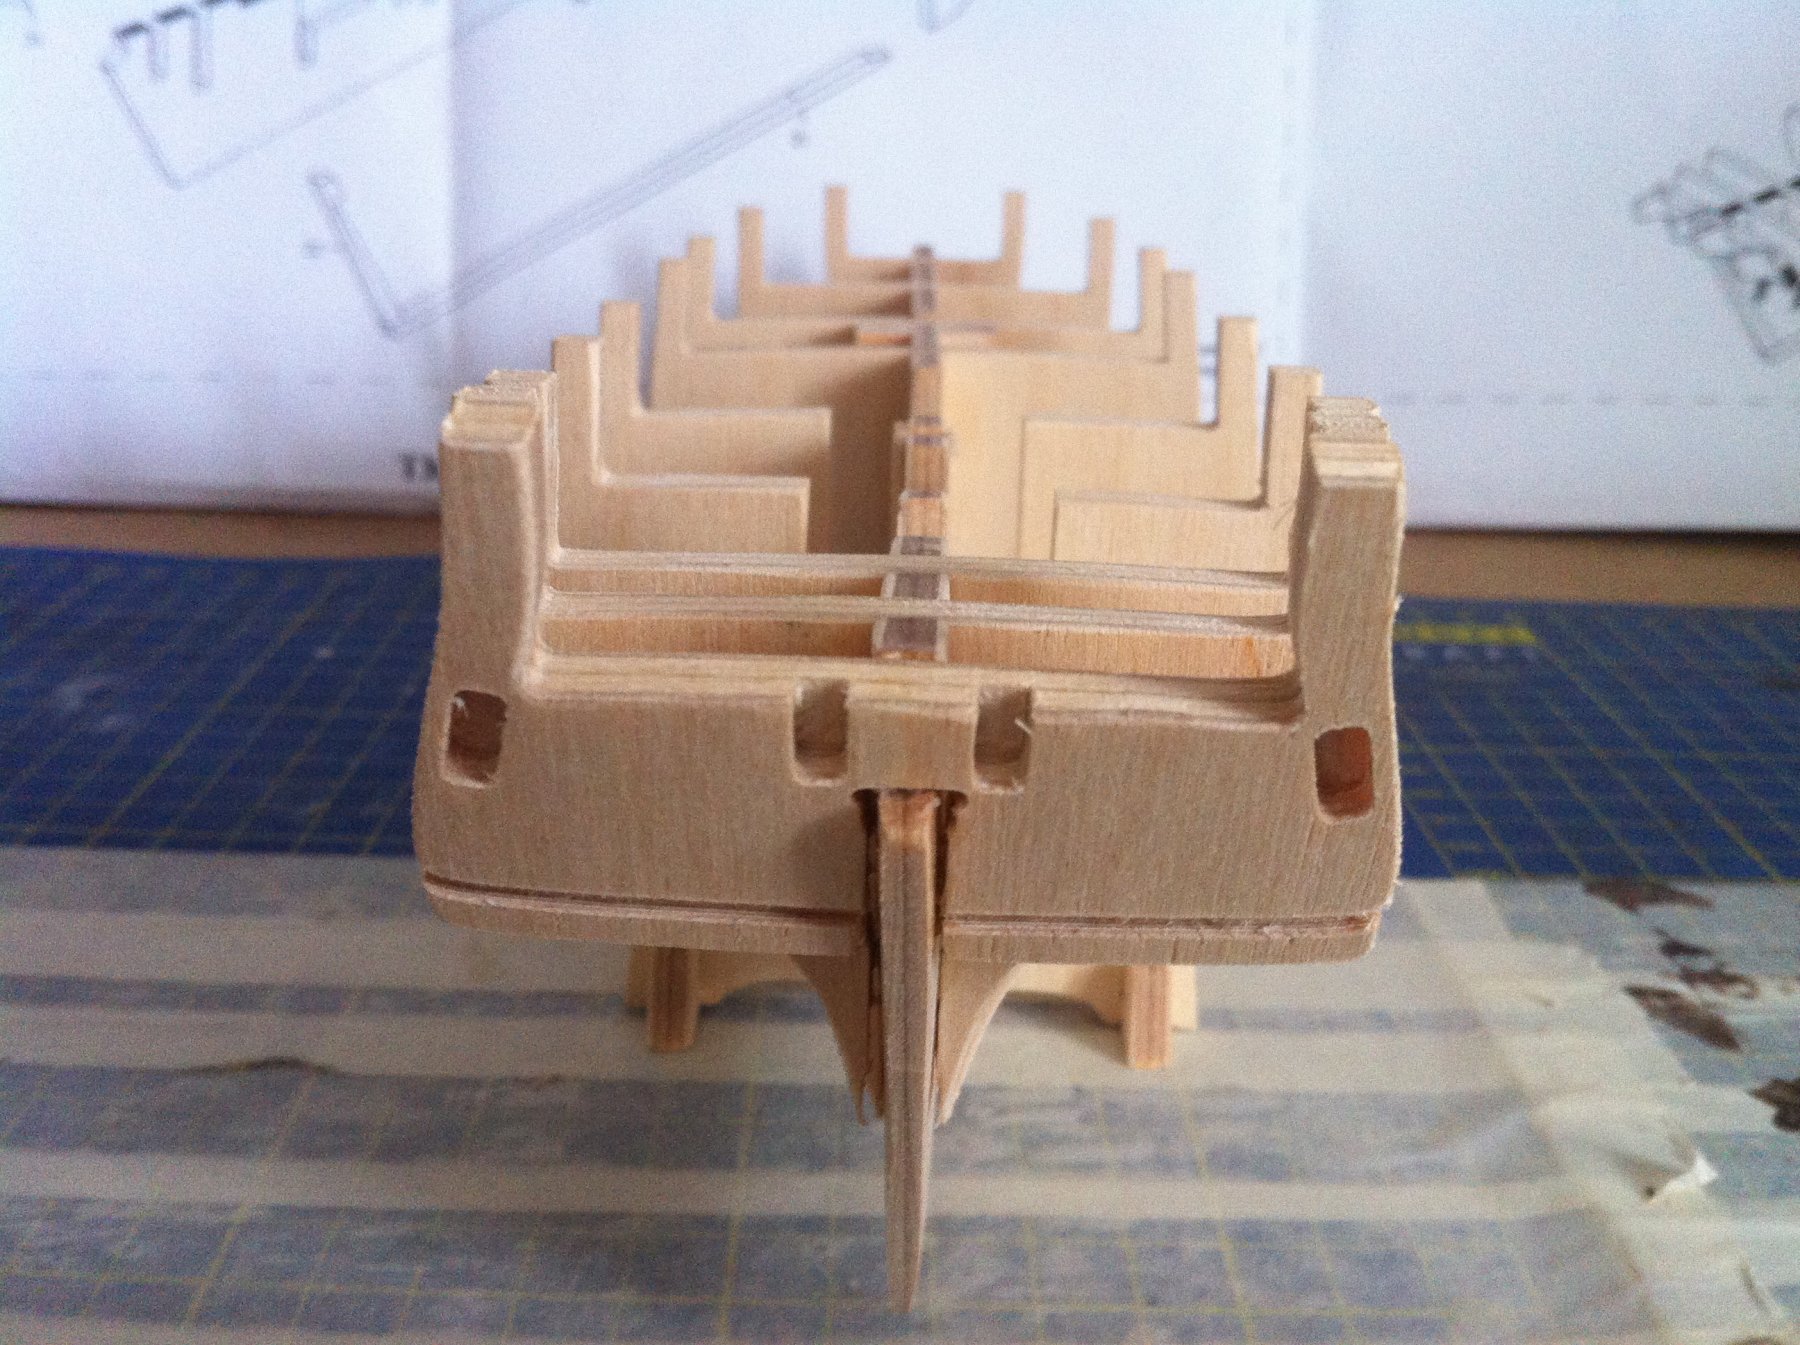
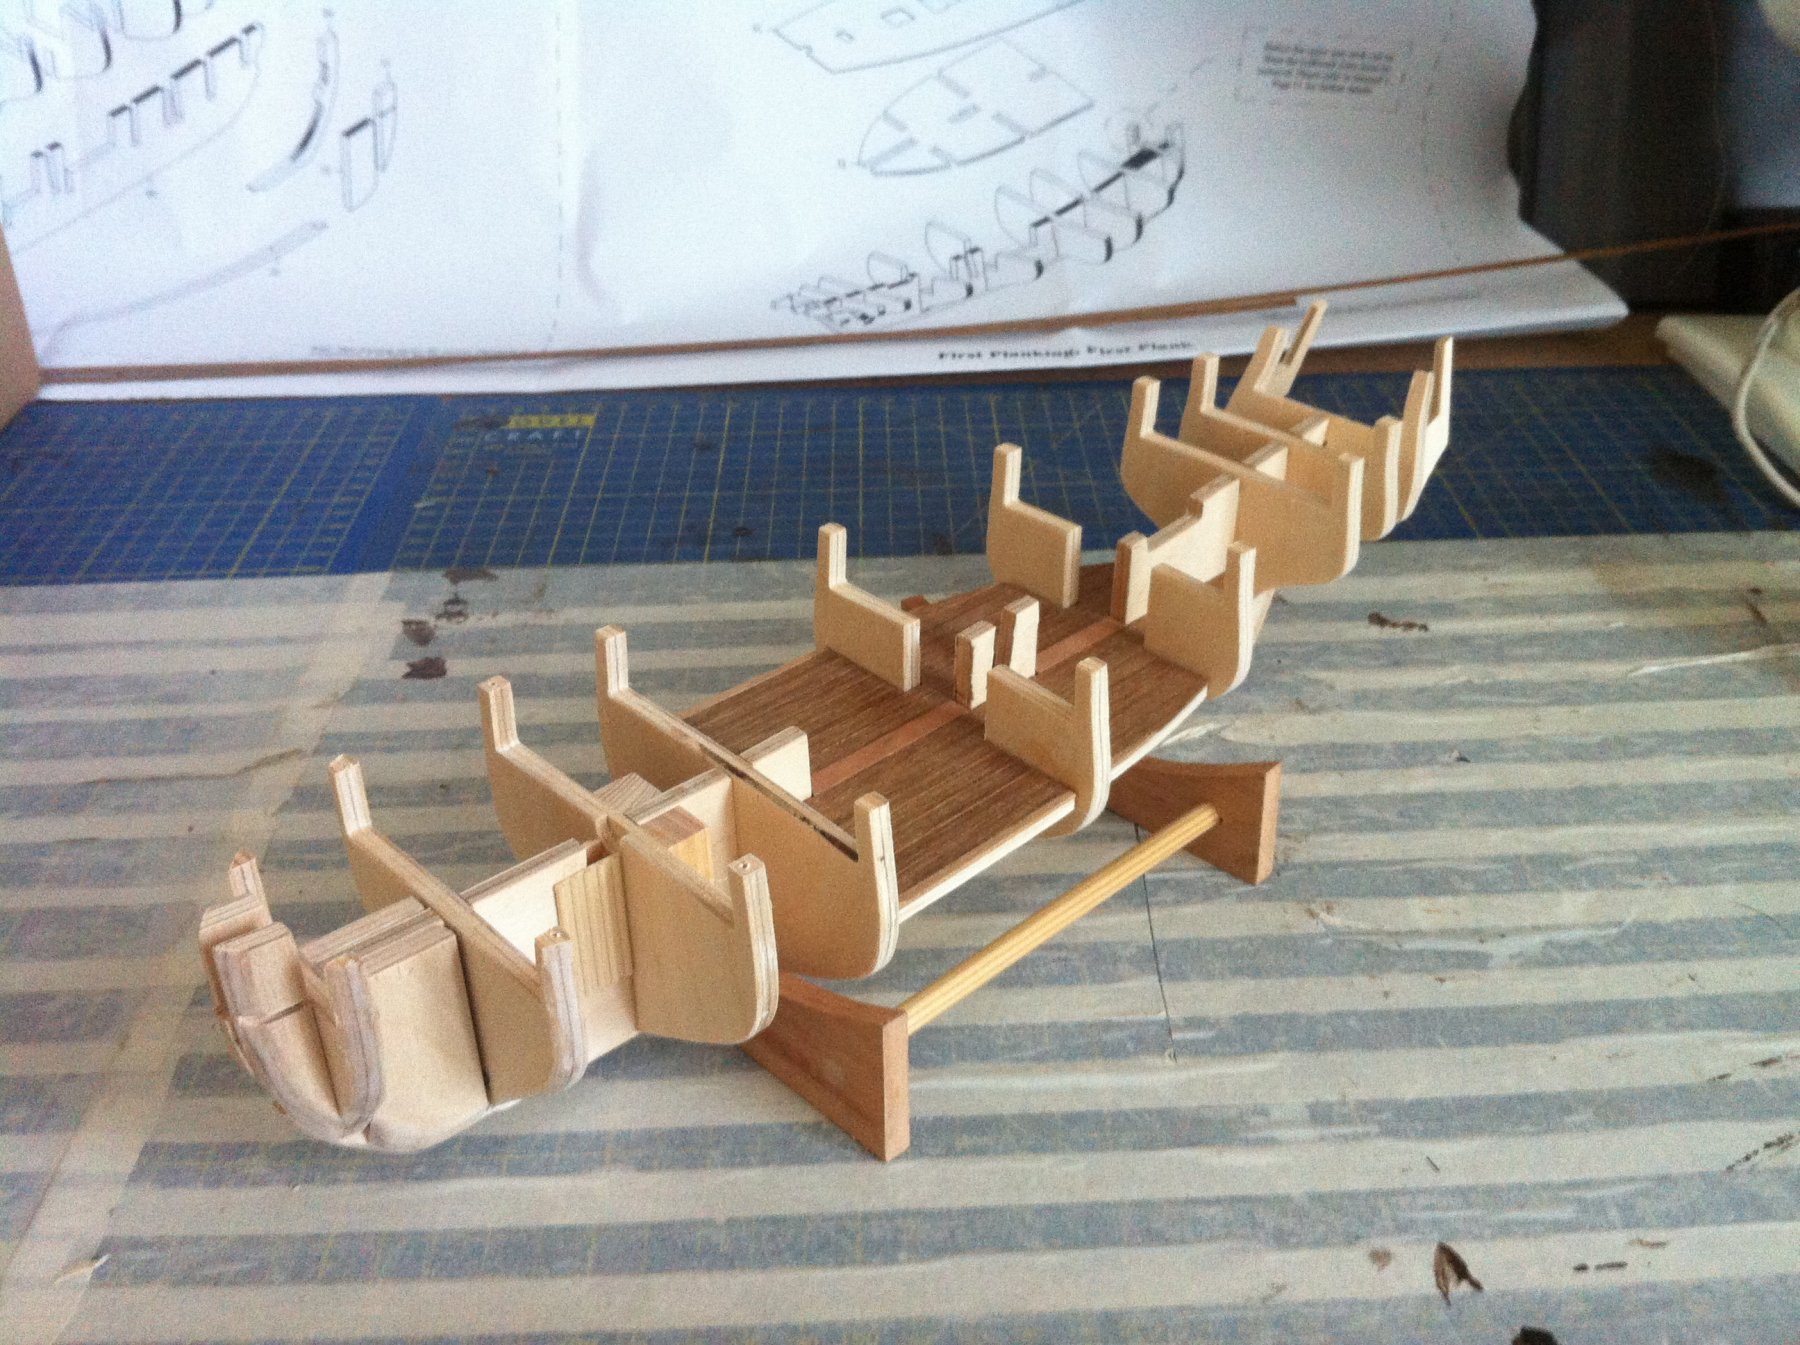
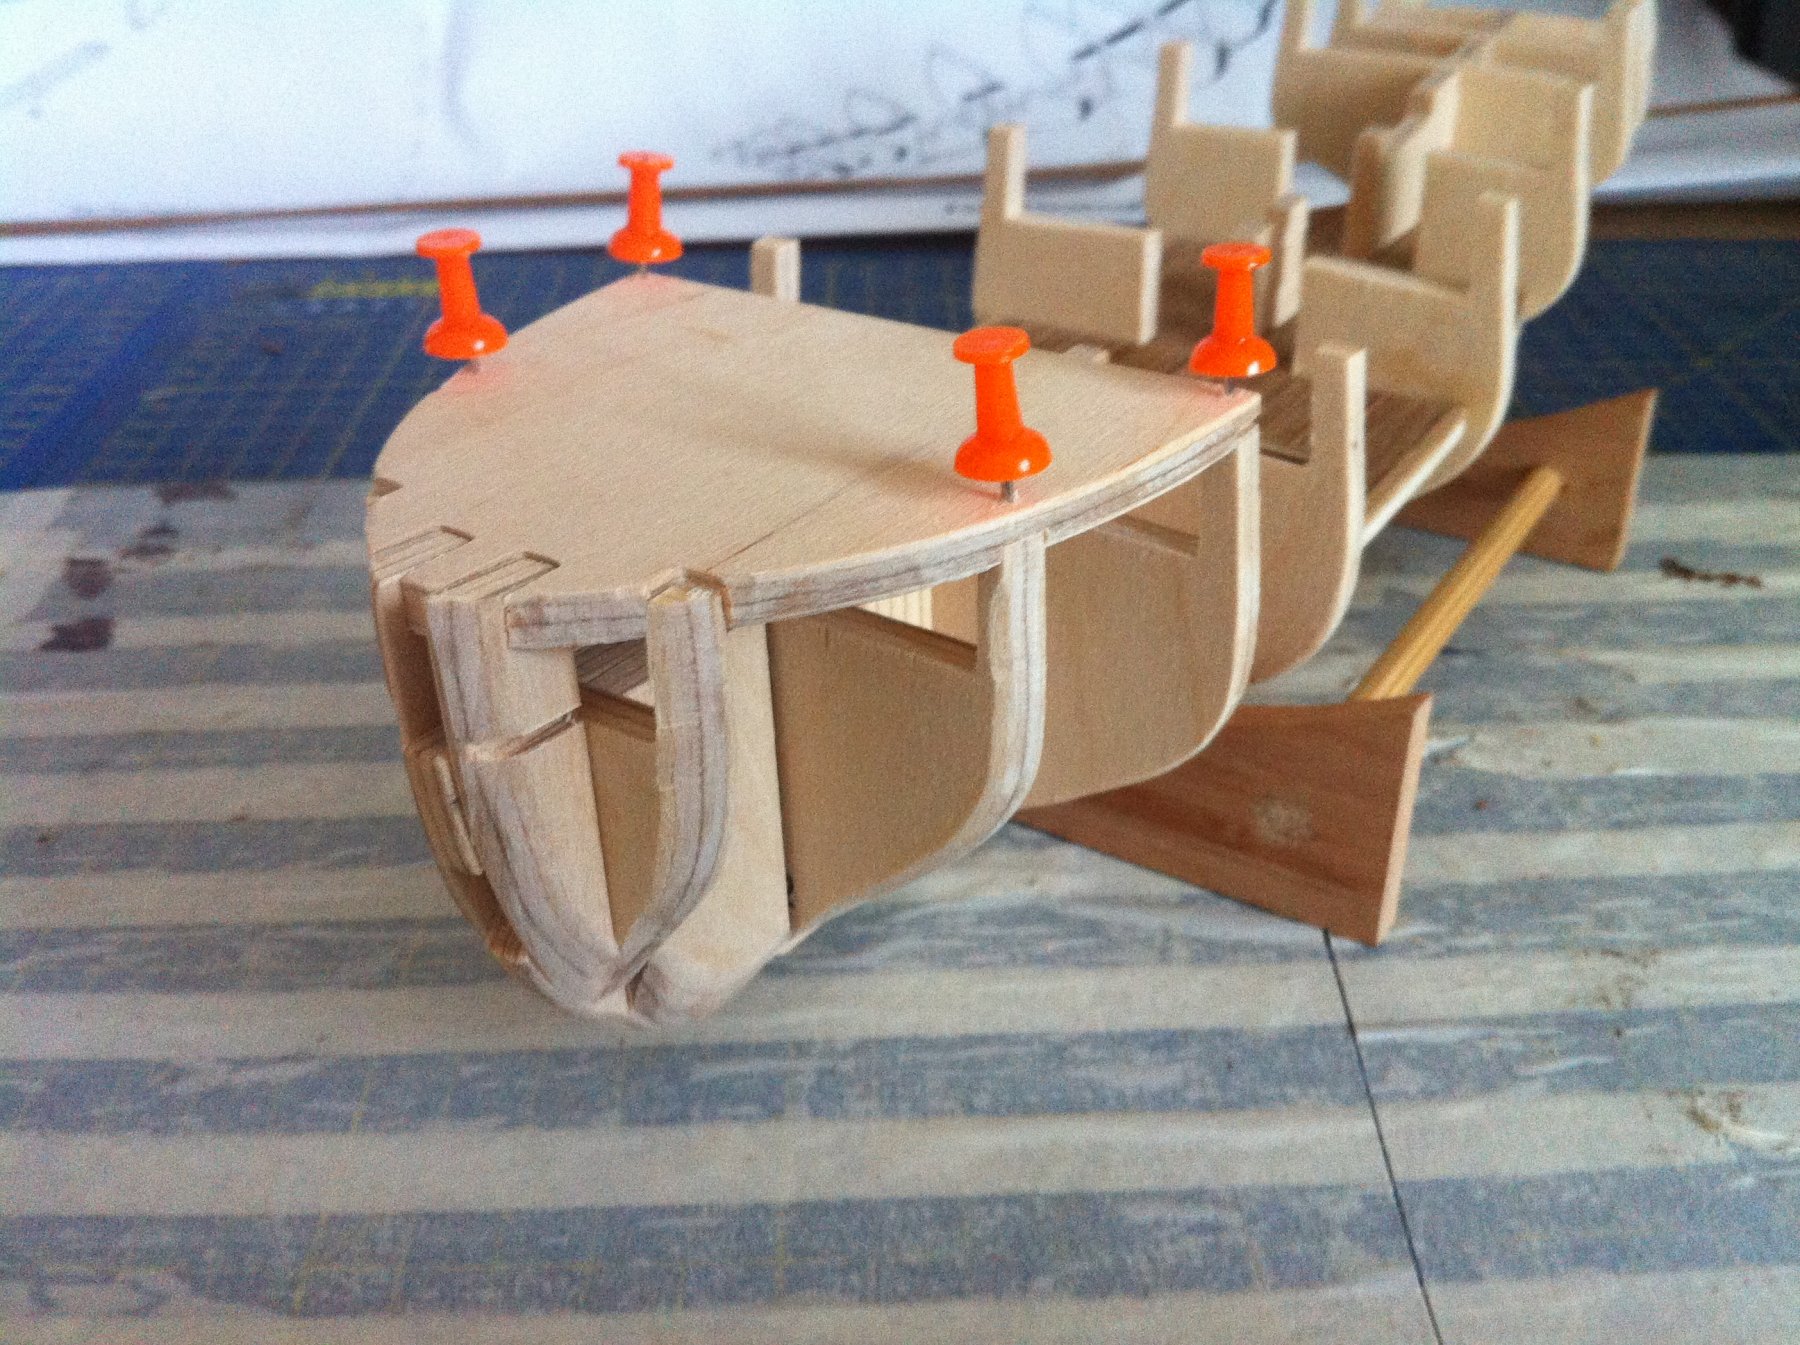
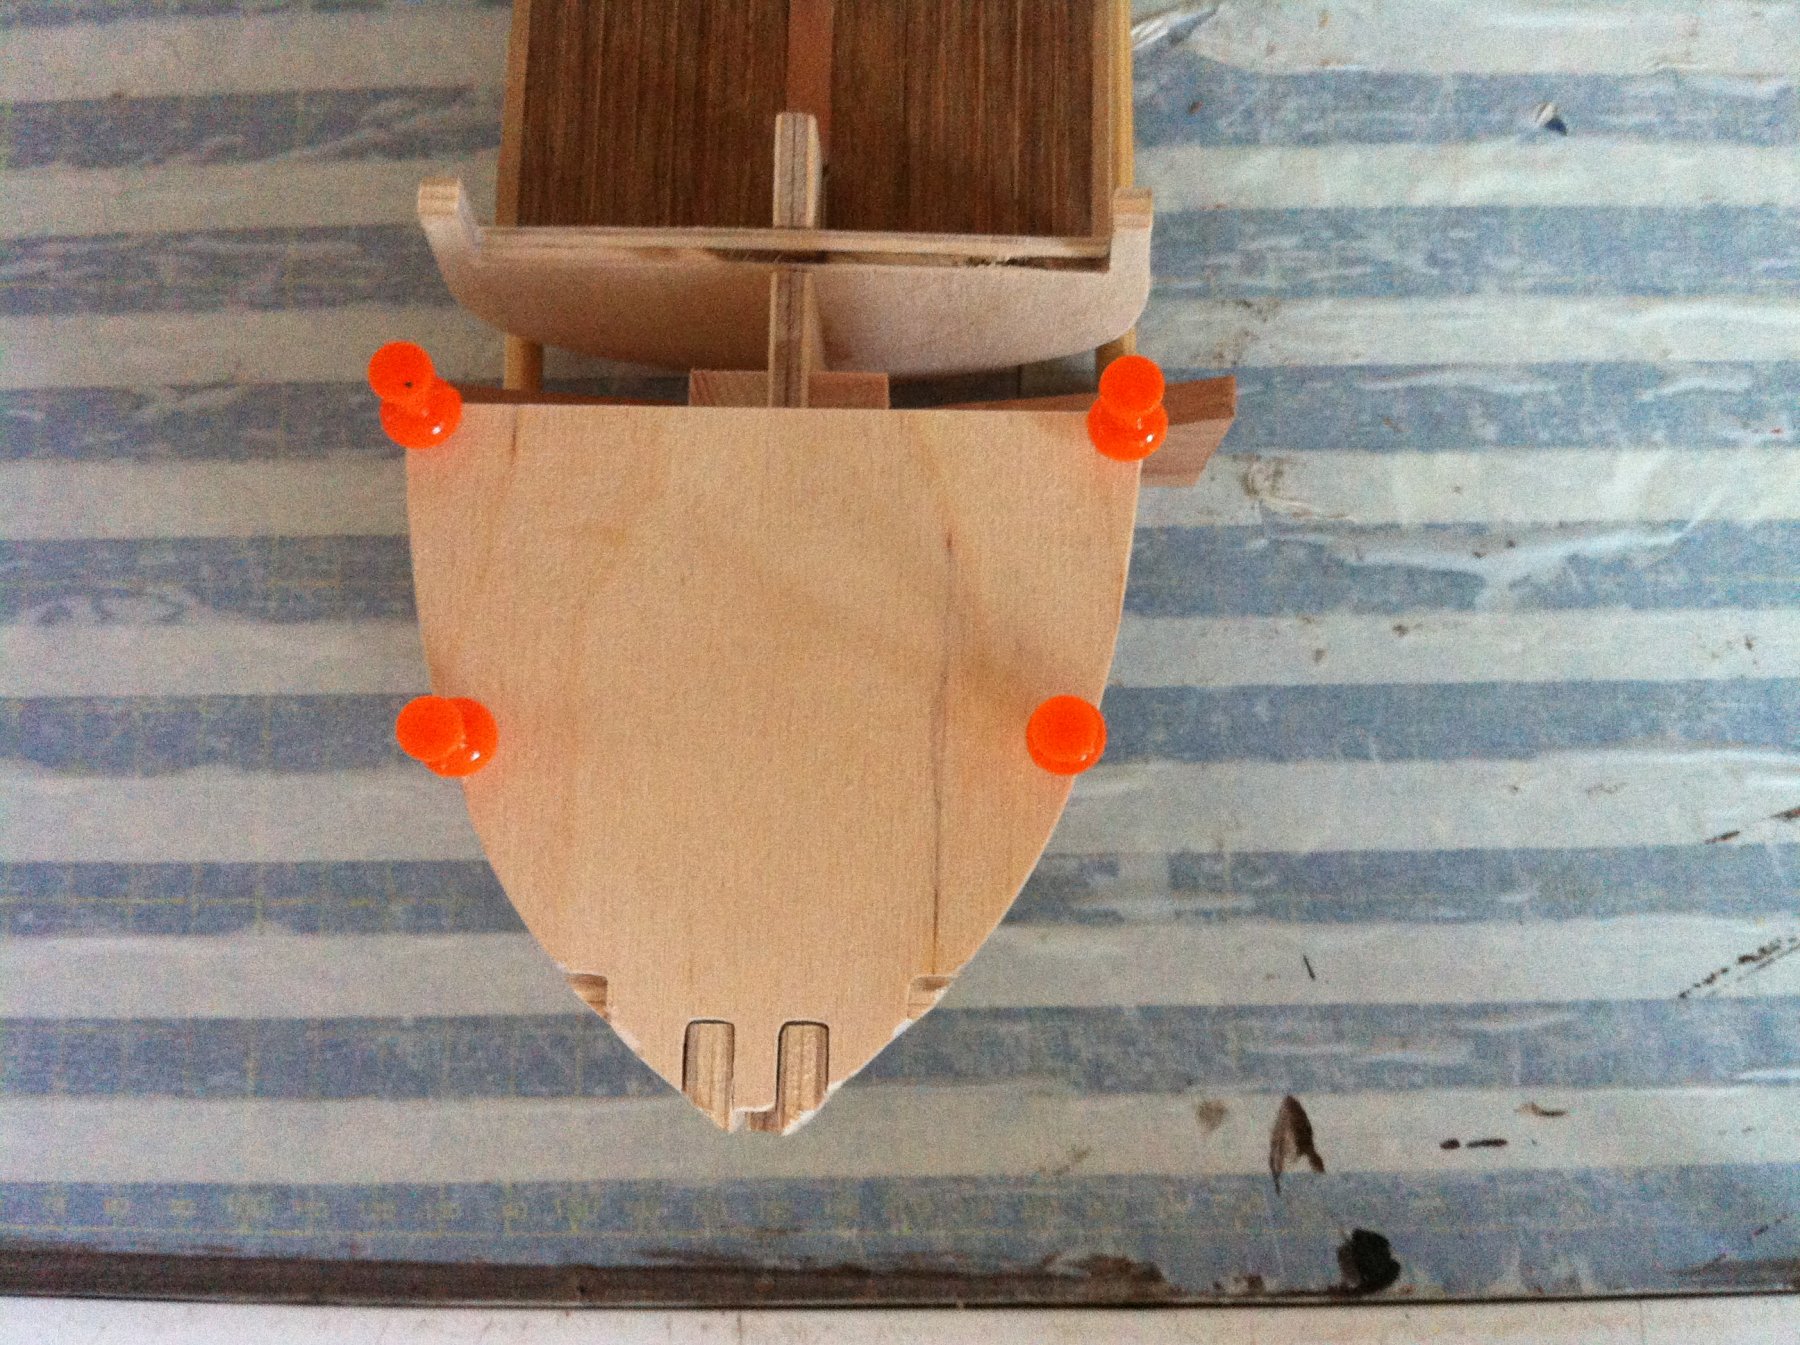
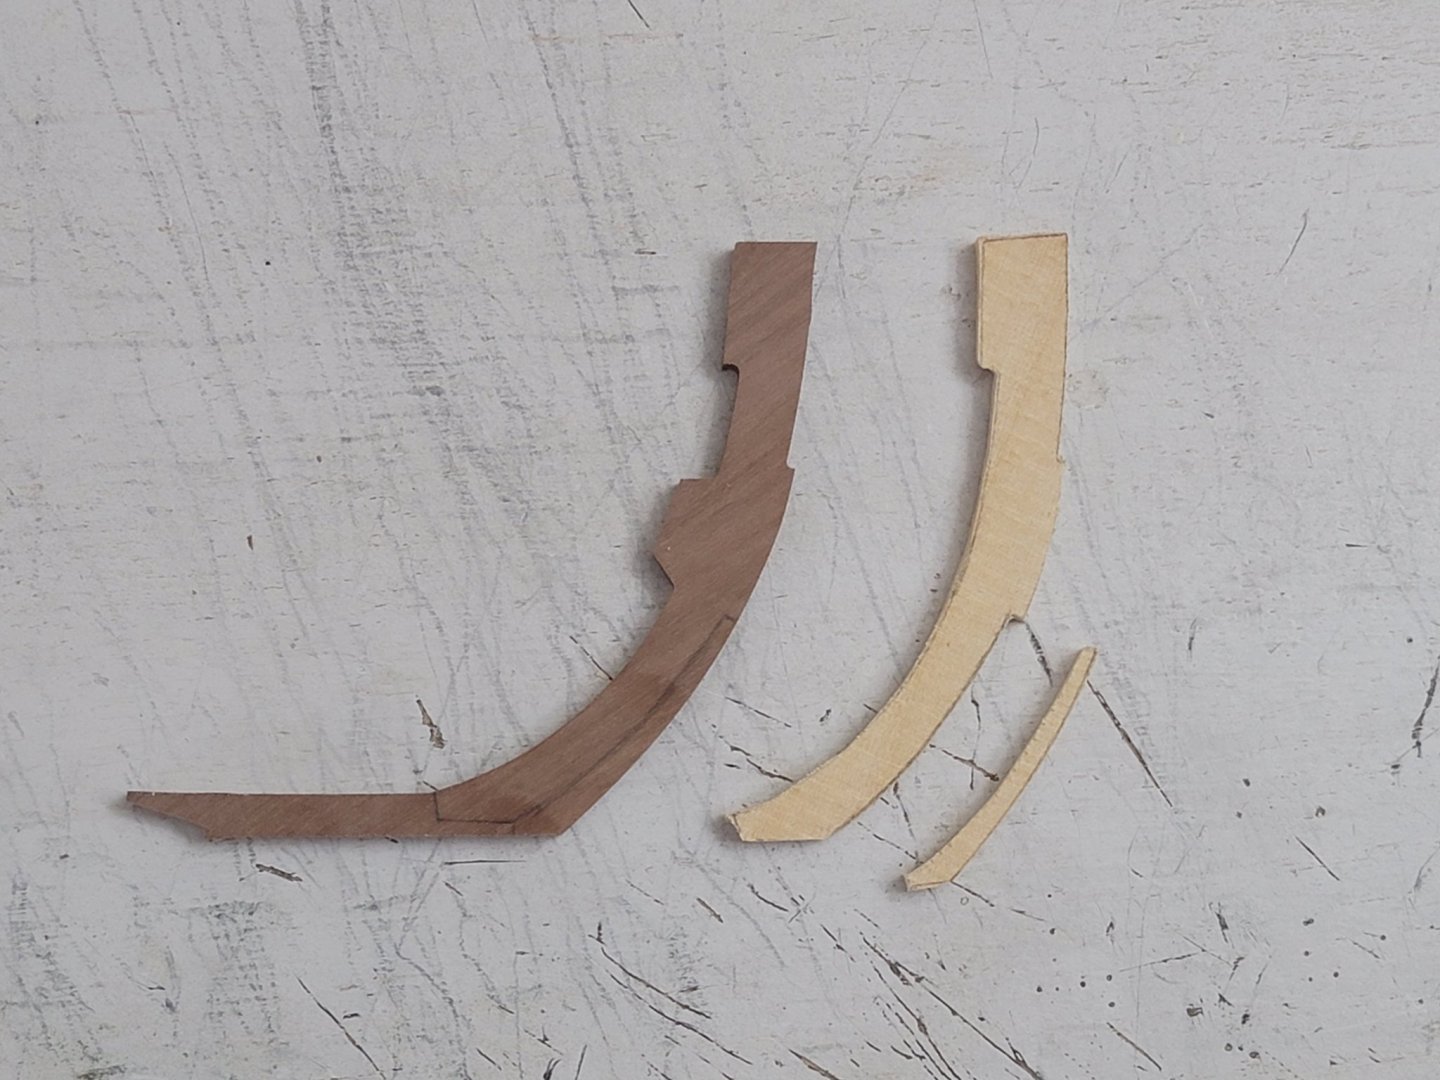
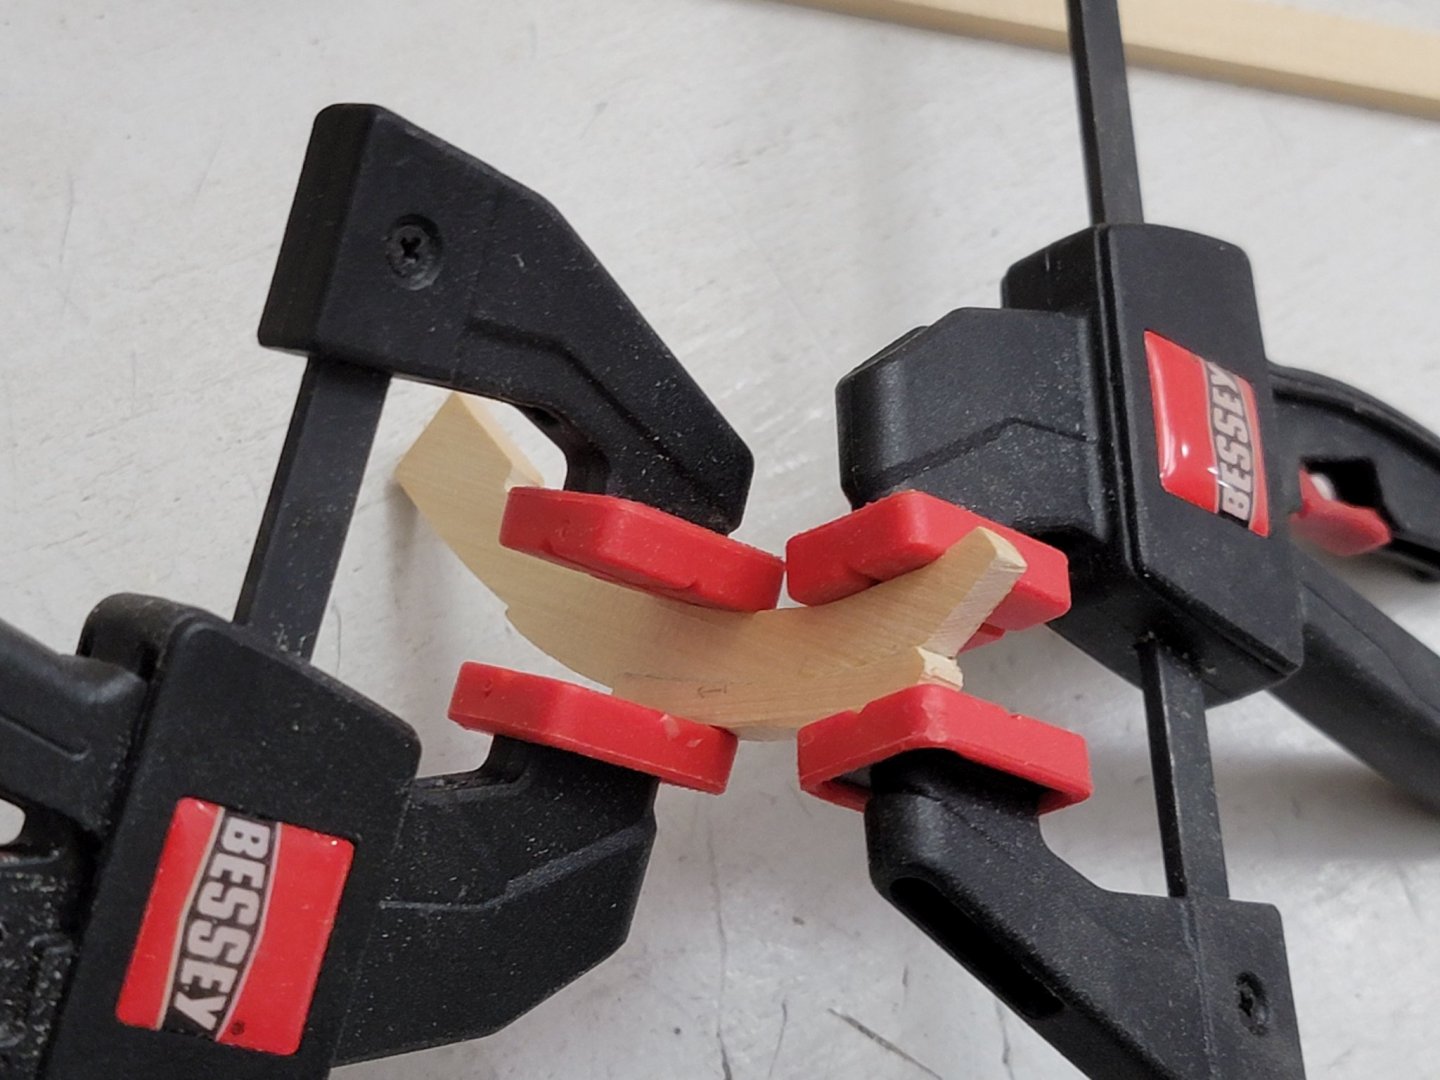
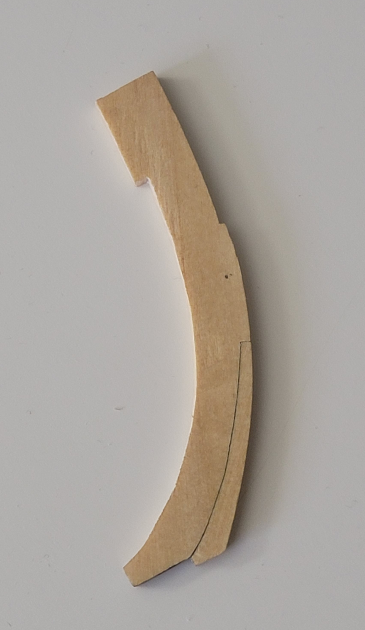
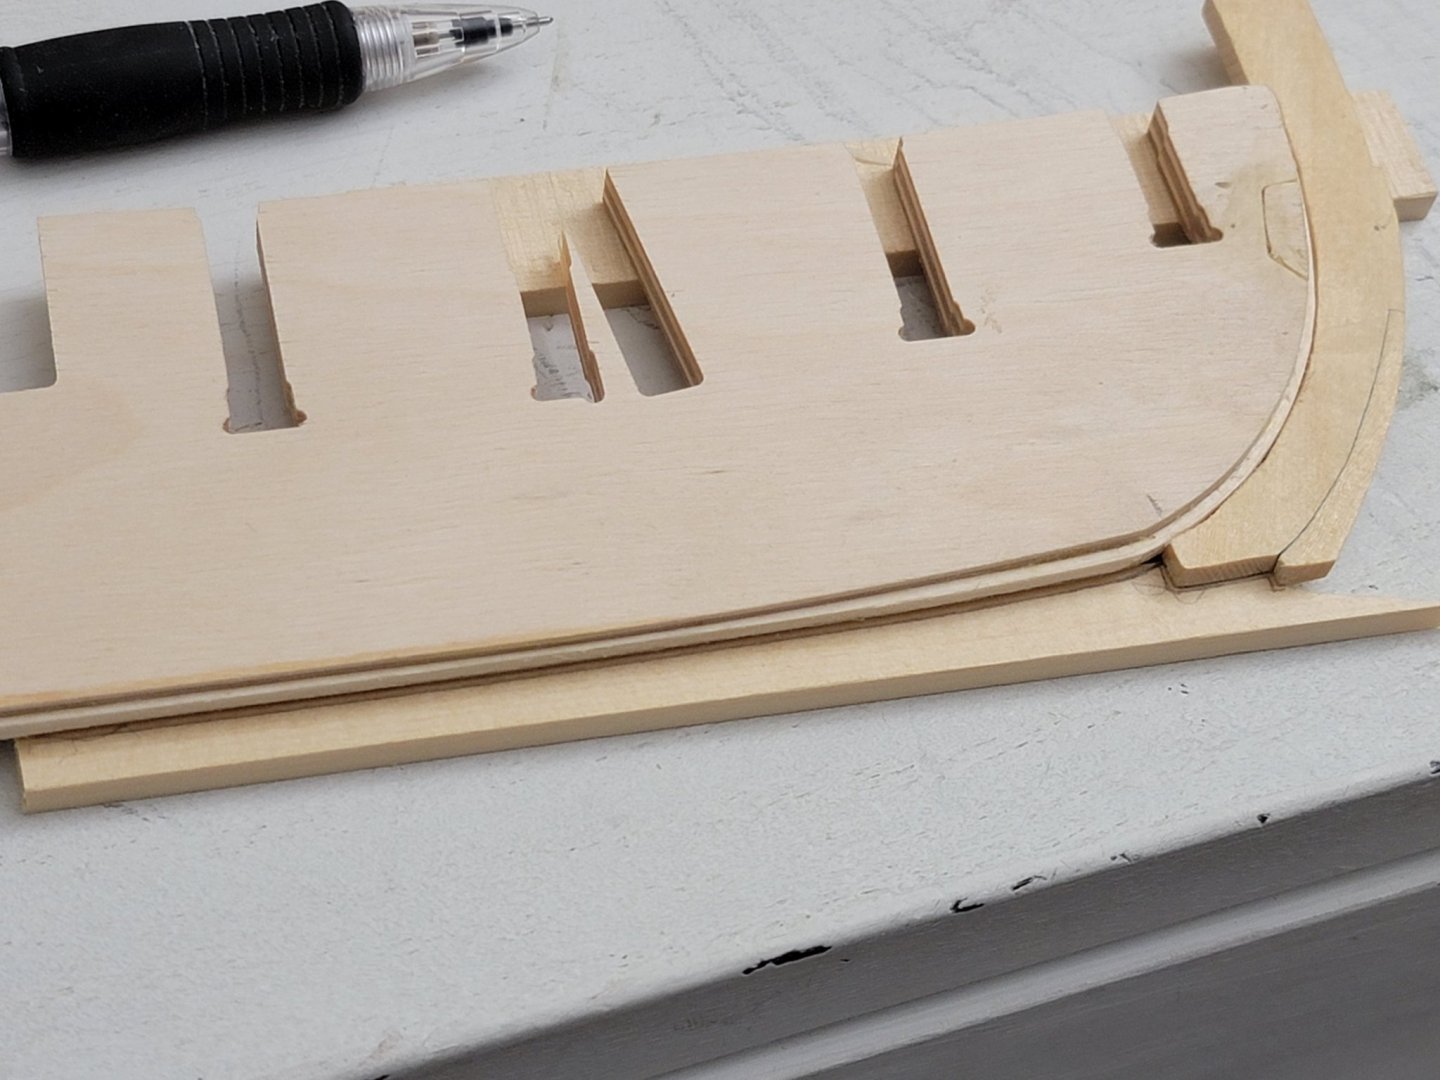
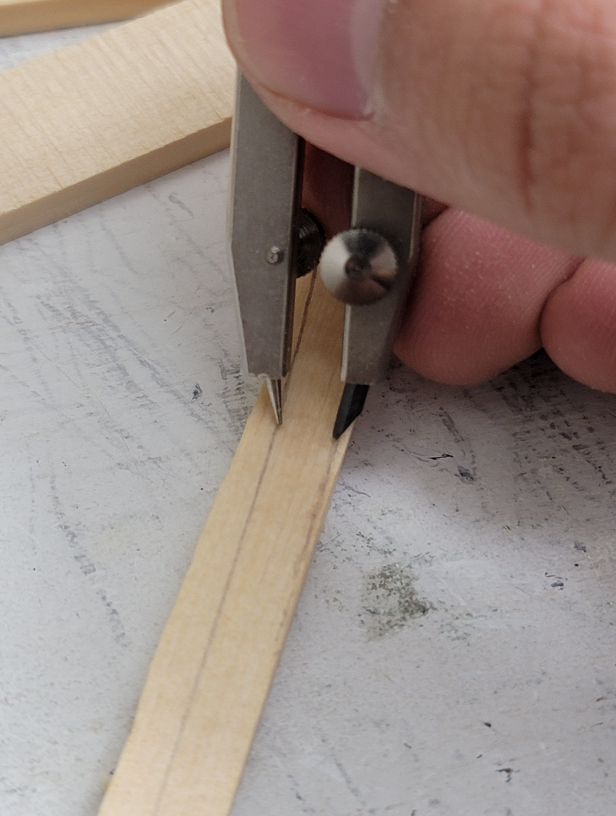
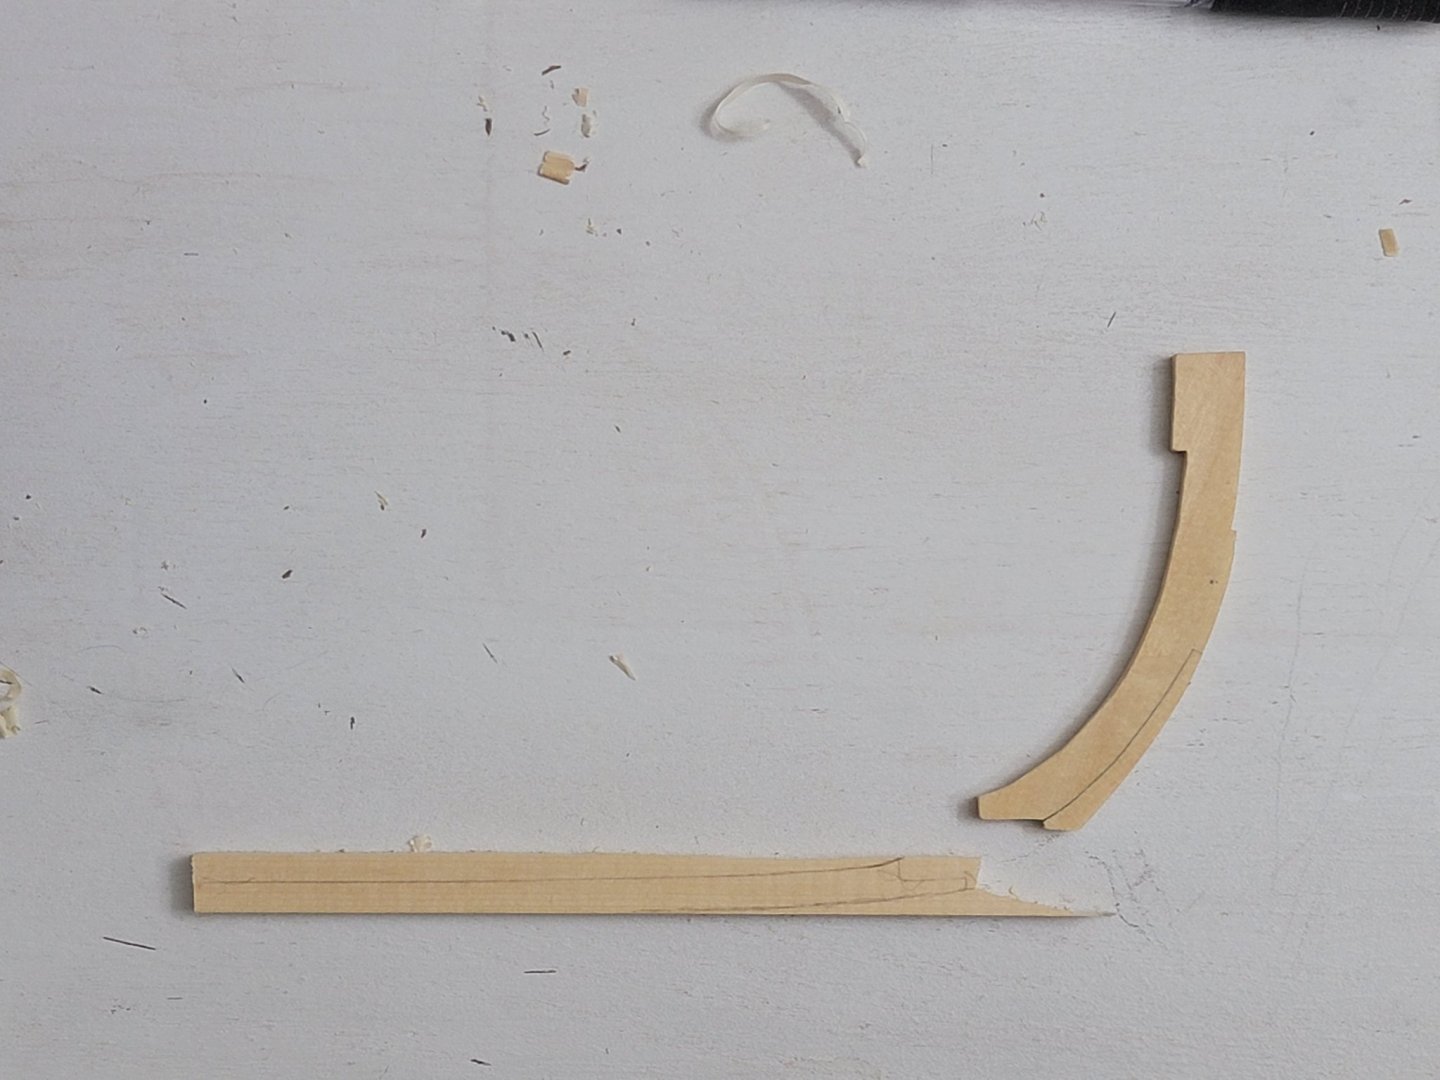
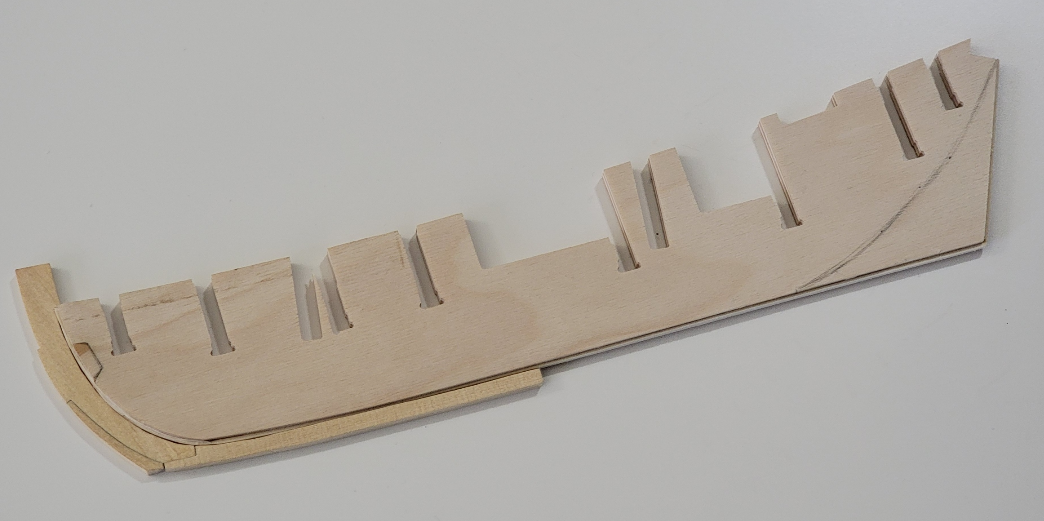
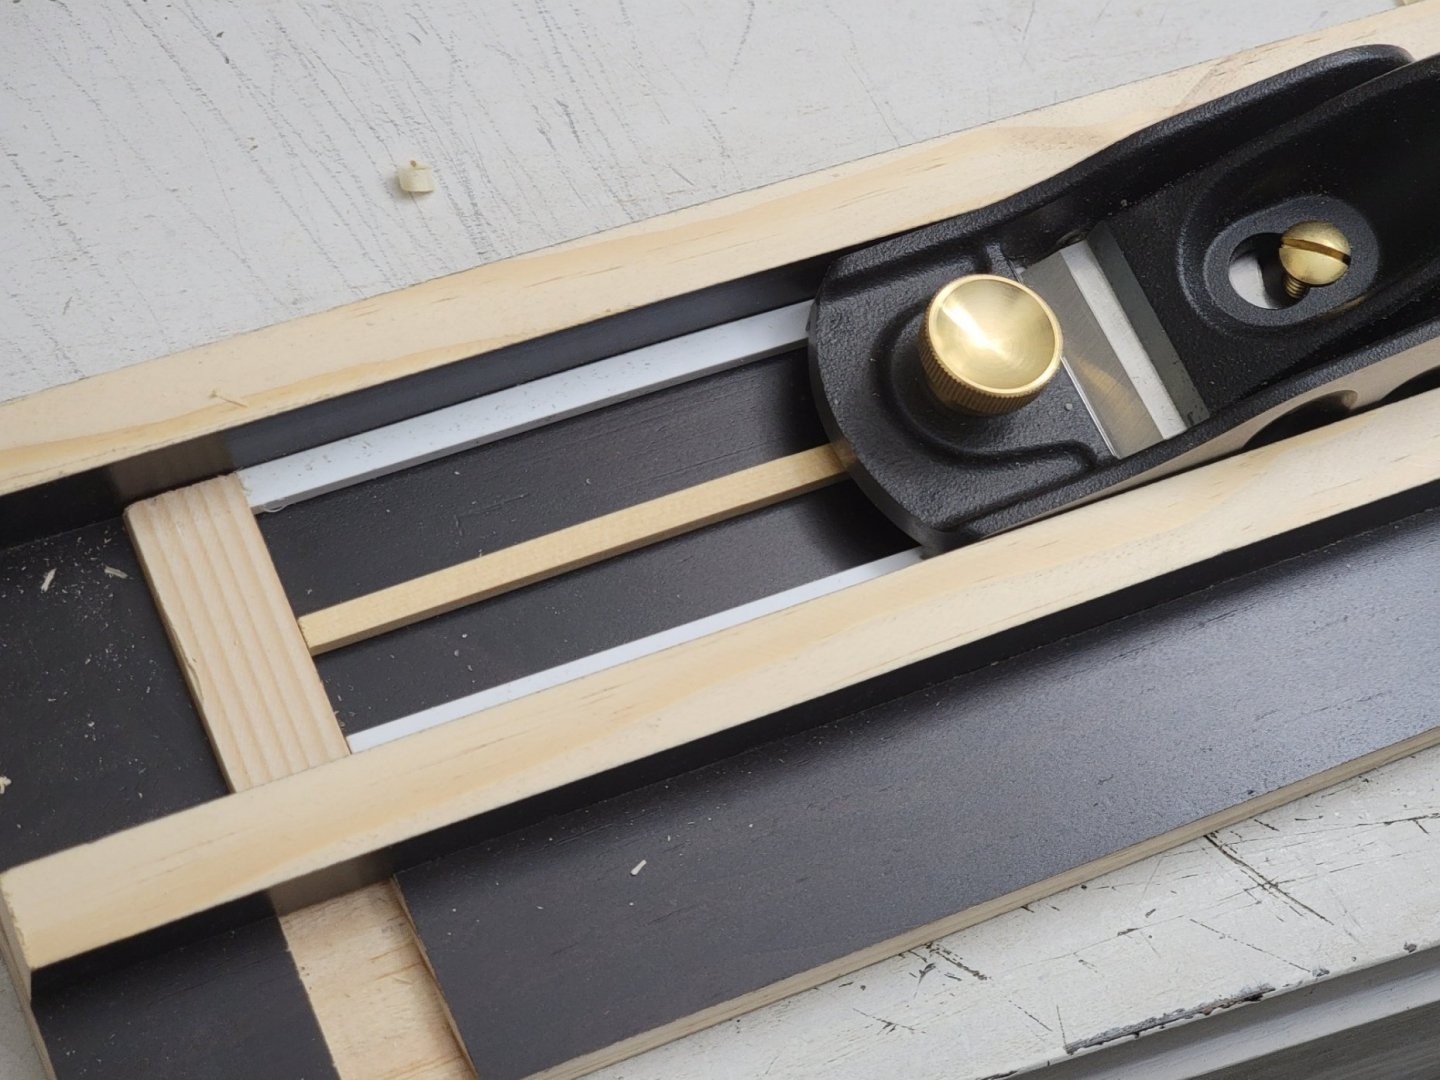
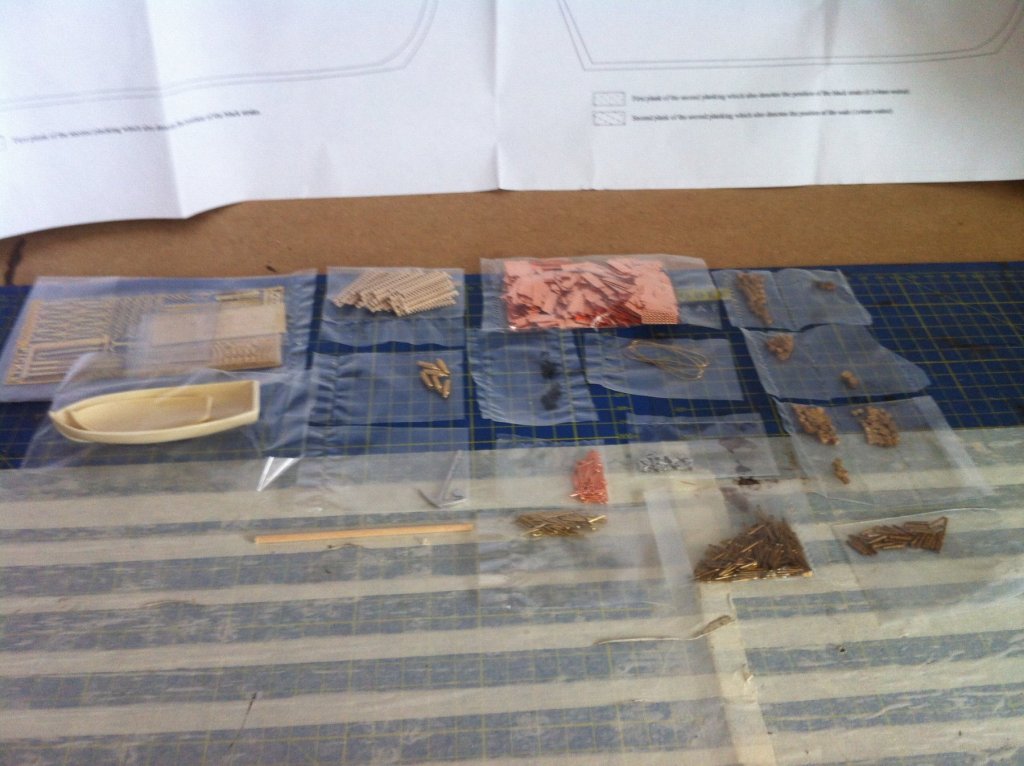
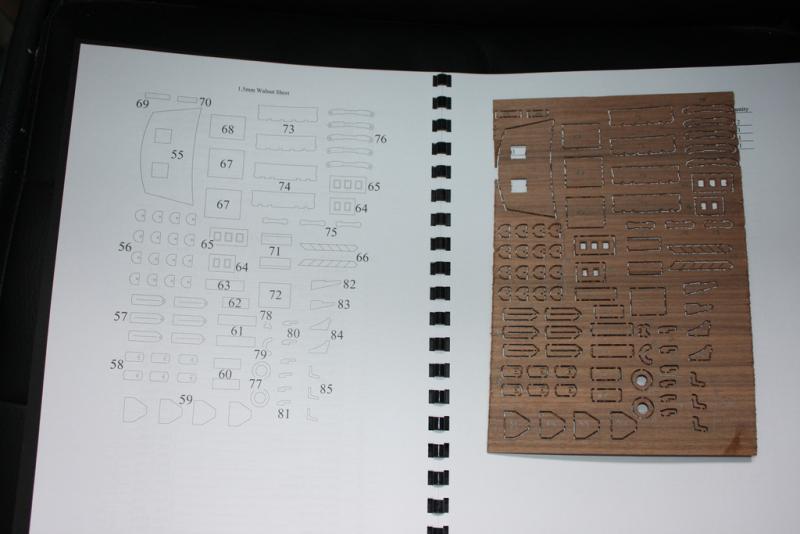
.thumb.jpg.62d1d69fed1f32364417cb1f9cdeb009.jpg) While I slowly progress with my Confederacy build, I decided to make a start with the HMS Pickle. I chose to build this small model as it will serve as a nice break from the big Confed ship. I plan to use Alaskan Yellow Cedar for the Pickle, so this will make it somewhat of a scratch build. I will not be copper plating and will only paint some areas of the ship (depending on how my planking goes!). @michael mott was very kind and generous to provide me with the wood and also took the time to mill the strips for me using his table saw. Not to mention all the invaluable modelling tips he provided which I will share as I progress through this build. I labelled this as an 'experimental build' since it is my first time scratch building a lot of the items, and also will try to experiment by not strictly following the manual and the provided plans. From what I have read on other logs, the plans are not accurate and are instead based on Pickle's sister ship. Also, I could not find accurate plans of the schooner on the National Maritime Museum. Based on this, I will predominantly use Chuck's practicum on the Cheerful and also Dubz's Sherbourne and Dali's Cutter Alert as guides to for this experimental build. I may also purchase the following books as I progress with this build: "The Colonial schooner" by Harold Hahn "Rigging fore-and-aft Craft" by Lennarth Petersson "The cutter Alert" by Peter Goodwin I also plan to frame the gun ports (as Chuck did for his Cheerful) instead of using the provided laser cut sheet. This way, I can have a single layer of planks across the hull and bulwarks. As always, any comments, tips, and guidance will be greatly appreciated! 😁 So now to the build! I made a small start to the ship where I first cut out out the stem piece from a sheet of the cedar. The small second stem piece in the tracing in the figure below was cut out from a different section of the sheet so a different wood grain can be seen. I used HB pencil between the joints (on one side of the joint only) to simulate the caulking: I then planed down the surfaces using a jig that Michael generously made for me (which I have shown later in the post). This made the surface incredibly smooth (much smoother and nicer than what sandpaper would have accomplished). I also marked the location of the bobstay which I will drill when drilling out the holes for the treenails. The first keel piece was then marked and cut out: Now for the planing jig! Instead of using a thickness sander, I used a planer and this jig Michael built for me: The thickness of the wood can be controlled using different widths of white plastic railing, and can be further finetuned by inserting strips of paper beneath the wood. I am fascinated by how accurately I can achieve different thickness of wood using this jig. And each piece is almost as smooth as glass! Next, I will be tapering the bulkhead former, treenailing the stem and keel pieces, and then gluing the whole assembly together.
While I slowly progress with my Confederacy build, I decided to make a start with the HMS Pickle. I chose to build this small model as it will serve as a nice break from the big Confed ship. I plan to use Alaskan Yellow Cedar for the Pickle, so this will make it somewhat of a scratch build. I will not be copper plating and will only paint some areas of the ship (depending on how my planking goes!). @michael mott was very kind and generous to provide me with the wood and also took the time to mill the strips for me using his table saw. Not to mention all the invaluable modelling tips he provided which I will share as I progress through this build. I labelled this as an 'experimental build' since it is my first time scratch building a lot of the items, and also will try to experiment by not strictly following the manual and the provided plans. From what I have read on other logs, the plans are not accurate and are instead based on Pickle's sister ship. Also, I could not find accurate plans of the schooner on the National Maritime Museum. Based on this, I will predominantly use Chuck's practicum on the Cheerful and also Dubz's Sherbourne and Dali's Cutter Alert as guides to for this experimental build. I may also purchase the following books as I progress with this build: "The Colonial schooner" by Harold Hahn "Rigging fore-and-aft Craft" by Lennarth Petersson "The cutter Alert" by Peter Goodwin I also plan to frame the gun ports (as Chuck did for his Cheerful) instead of using the provided laser cut sheet. This way, I can have a single layer of planks across the hull and bulwarks. As always, any comments, tips, and guidance will be greatly appreciated! 😁 So now to the build! I made a small start to the ship where I first cut out out the stem piece from a sheet of the cedar. The small second stem piece in the tracing in the figure below was cut out from a different section of the sheet so a different wood grain can be seen. I used HB pencil between the joints (on one side of the joint only) to simulate the caulking: I then planed down the surfaces using a jig that Michael generously made for me (which I have shown later in the post). This made the surface incredibly smooth (much smoother and nicer than what sandpaper would have accomplished). I also marked the location of the bobstay which I will drill when drilling out the holes for the treenails. The first keel piece was then marked and cut out: Now for the planing jig! Instead of using a thickness sander, I used a planer and this jig Michael built for me: The thickness of the wood can be controlled using different widths of white plastic railing, and can be further finetuned by inserting strips of paper beneath the wood. I am fascinated by how accurately I can achieve different thickness of wood using this jig. And each piece is almost as smooth as glass! Next, I will be tapering the bulkhead former, treenailing the stem and keel pieces, and then gluing the whole assembly together.

-
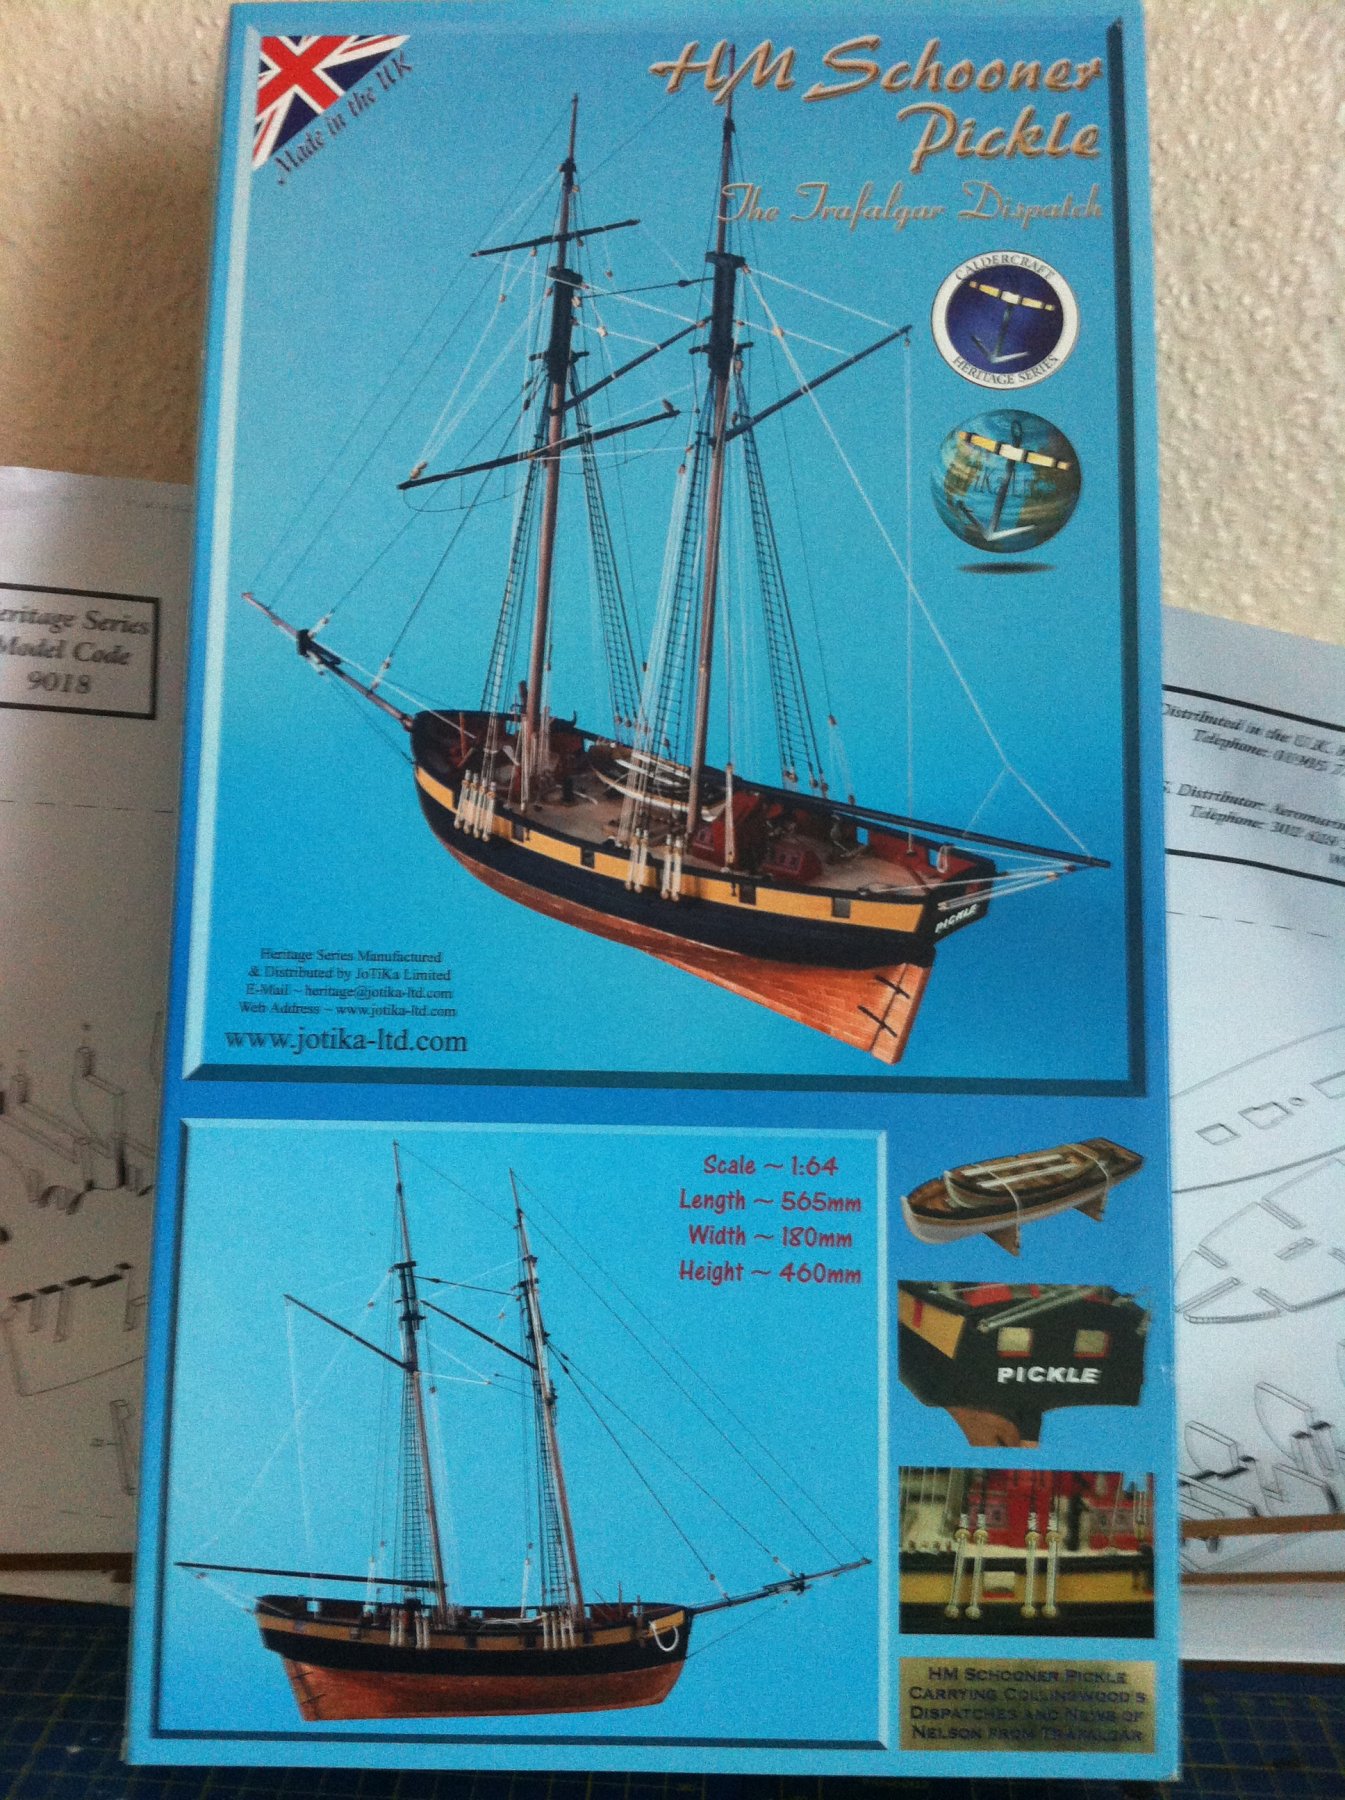
 The Building Log of the H.M. Schooner Pickle by JoTiKa. The first half of this log is a copy of the original log that was lost from the Forum. Luckily, I had always used Word to write my log before I had added the text to the Build Log so I still have the original text - and the same terrible photo's!! Introduction There are many newcomers to this hobby including myself. I have therefore included details in this building log which the newcomer or less experienced modeller may find of use. Modelling Background My modelling started as for so many of us as a child back in the good old days of Airfix models. Funnily enough, even then, as all my mates were building planes, cars and tanks etc. I almost always only built sailing ships (or tried to!). 25 years ago, I started again and bought the plastic model Gorch Foch from Heller - a fantastic model and quite complex with full rigging and the like. Hmmm, then we started a family and it wasn't until 20 years later when both my "little ones" had departed for University to study (well, that's the official version!!) that I found time on my hands and my thoughts came back to starting again with modelling. However, in the meantime during many jealous hours spent browsing in model shops (for my son's remote control cars and the like - not for me, of course!!) that I found wooden model ship kits. After a long search, and lots of investigations, I finally decided for JoTiKa and H.M. Pickle. Starting out Needing a helping hand in this new hobby, I carried out some research on the various Web-sites out there and found the Model Ship World site: www.modelshipworld.com. Not only have I posted this building log there but have been inundated with help and tips and tricks. Additionally, I have found lots of postings and links to other sites and publications that have been really useful, some of which are mentioned throughout this log. OK, so my model arrived and then I found what tools I needed - a full list required for this model will follow. Following various helpful postings on the Model Ship World forum, I ordered the Squires Catalogue. Browsing through there is even more confusing as there are 20 types and makes of just about everything!! From my DIY days, I have my Stanley knife, lots of sandpaper, wood-glue, rules, etc. etc. and with a trip to my local (very good) art shop, I will furnish myself with the appropriate brushes etc. However, I will wait and hopefully pick up my "specialised tools (tweezers, needle files, Pin vice and drill bits) from a Model show / exhibition. Reading / Reference Books Library It must be said that the excellent instruction manual that comes with the kit, together with the full-sized detailed plans are without doubt enough to be getting started with building this kit. Indeed, I saw no reason why I could not used the very detailed instructions to complete the kit. However, I thought it was always useful to have additional background information (which has indeed been the case) and so I bought the following: - Keith Julier's Period Ship Kit builder's manual which I shall read as appropriate as I begin a new section of the build, - Lennarth Petersson's Rigging Period Ship Models. Finally, for interest and future reference, after some research I borrowed the following books from my local library which I intend to purchase at a later date. - Peter Goodwin's The Ships of Trafalgar: The British, French and Spanish Fleets, 21 October 1805, - James Lees The Masting and Rigging of English Ships of War, 1625-1860. Finally, for reference the Simple Hull Planking Techniques for Beginners was downloaded from the Model Ship World forum. Background to H.M. Pickle For those who are interested, a bit of background to Pickle. Forever associated with Admiral Nelson’s final and most historic victory, the Battle of Trafalgar 1805, Pickle was chosen to carry the News of Nelson’s victory and death back to England. Commanded by Lieutenant John Richards Lapenotiere, Pickle was not directly involved in the Battle of Trafalgar but was permanently busy rescuing both friend and foe from a watery death. By 6pm the muster list for Pickle showed a total of 160 prisoners taken on board, the majority of these coming from the burning French Achille. Given the size of Pickle and the fact that she had a crew of just 40 it is remarkable that Lapenotiere was not only able to rescue so many but that they were then able to prevent the prisoners from taking Pickle as their own. After the battle, with Admiral Cuthbert Collingwood now in command, every ship, including Pickle, was required to maintain the blockade of Cadiz. Between the 22 and 25 of October, Lapenotiere continued rescuing seaman and prisoners and began offloading them to other ships, including Dreadnought, Euryalus, Revenge and Victory, all the while battling to survive the storm that was blowing in from the south west. On the morning of the 26 October 1805, Lapenotiere was signalled to come aboard Euryalus where he received written orders from Collingwood to sail for Plymouth with the dispatches. Knowing that the bearer of dispatches would receive a promotion, it was customary to choose a favoured officer for the task and Collingwood’s choice of Lapenotiere is often attributed to an act of gratitude. It is said that, while Lapenotiere was a passenger onboard a ship also conveying Lord Collingwood, an order was given on deck to the man at the wheel. Lapenotiere, realising that if the order were obeyed the ship would be on the rocks, immediately gave another order and saved the ship. Collingwood thanked Lapenotiere saying “If ever I have the opportunity I will do you a service.” It is also said that on receipt of his orders Collingwood reminded Lapenotiere of this promise saying “Now take these dispatches to England; you will receive £500 and your commander’s commission. Now I have kept my word.” Unfortunately no evidence of either of these events exists and Collingwood’s choice of Lapenotiere is better explained by the fact that Pickle was probably the only ship that Collingwood could afford to spare given his current circumstance. This is also backed up by Collingwood’s letter to William Marsden stating “dispatches containing the account of the Action of the 21st Inst, and detailing the proceedings of the Fleet to the 24th will be delivered to you by Lieut Lapenotiere, commanding the Pickle Schooner … having no means of speedier, or safer Conveyance with me at present.” At noon the same day, Lapenotiere and Pickle departed for England but his voyage was to be challenging to say the least. For the next seven days Pickle battled through stormy seas and, with her pumps blocked, the crew were reduced to forming a human chain in order to bale with buckets. On October 31st, with continuing gale force winds Lapenotiere ordered four of his 12 pounder carronades to be thrown overboard in an attempt to keep the schooner from being swallowed by the sea. November 2nd brought weather of the opposite extreme, but still no rest for the crew. With calm seas and no wind the sweeps had to be employed just to keep Pickle heading toward England. On 4th November 1805, Pickle finally reached Falmouth where Lapenotiere landed at shore in Pickle’s boat. From this point, Lapenotiere set off on his now famous post chaise using at least 21 changes of horses to travel more than 270 miles in 37 hours and costing £46.19s.1d, more than six months wages for a Lieutenant. Lapenotiere reached his goal of the Admiralty at round 1am on the 6th November and announced to William Marsden, First Secretary to the Admiralty, “Sir, we have gained a great victory, but we have lost Lord Nelson”. On 28 July 1808, Pickle was finally lost, while again carrying dispatches, under the command of Lieutenant Moses Cannadey. During her approach to Cadiz, she was grounded off Cape Santa Maria on the Chipiona Shoal. Pickle quickly sank but all of her crew were saved. The Kit And so to the actual kit which includes the following: Please note - if you want to look at photo's of the kit, please go to Blue Ensign's Pickle Log as they are much clearer than mine! Double plank on bulkhead construction in lime and walnut; all decking in high quality Tanganyika strip; 6 x 12pdr turned brass carronades, fully rigged and complete with walnut carriage assemblies; detailed brass etched components; over 500 copper plates; ship's boats in high quality resin with walnut components and brass fittings including oars, grapnels and boat hooks; precision CNC cut and profiled walnut and ply components; brass nameplate; all required blocks, black & natural hemp rigging; high quality birch dowel for the masting; fully detailed actual scale plans; two comprehensive step by step colour instruction manuals including constructional photos of the prototype and technical drawings. Recommended Tool List Craft knife; A selection of needle files; Razor saw; Small wood plane; Pin vice or small electric drill (the latter is the more recommended item); Selection of drill bitts from 0.5mm to 3mm; Selection of abrasive paper and sanding block; Selection of good quality paint brushes; Long nose pliers and wire cutters/snips; Good quality tweezers; Dividers or compass; Steel rule (300mm); Clothes pegs or crocodile clips; Set-Square; Good quality pencil or Edding pen; Masking tape; Good quality sharp pair of small scissors; Scalpel with selection of blades; Paints, Stains and Adhesives N.B. The paint, stain and adhesives listed below include the appropriate part numbers as supplied by JoTiKa. White PVA wood glue; Walnut wood stain for masts & booms (Admiralty Stains: Walnut, AS9105): Cyanoacrylate (super glue) thick and medium viscosity (Admiralty Glues, Thick (AG9103) & Medium (AG9102); Walnut wood filler; White spirit; Varnish to seal all unpainted wooden parts (Admiralty Varnishes: Matt, AV9110); Black paint for 'woodwork' (Admiralty Paints: Dull Black, AP9105); Black paint for 'ironwork' (Admiralty Paints: Matt (Metal) Black, AP9106); White paint (Admiralty Paints: Matt White, AP9111); Yellow ochre paint for ship's boats (Admiralty Paints: Yellow Ochre, AP9115); Red ochre paint (Admiralty Paints: Red Ochre, AP9116); Copper paint (Admiralty Paints: Copper, AP9125); Brown (wood/leather) paint (Admiralty Paints: Wood (Walnut) Brown, AP9119); Metal primer for etched metal parts.
 -
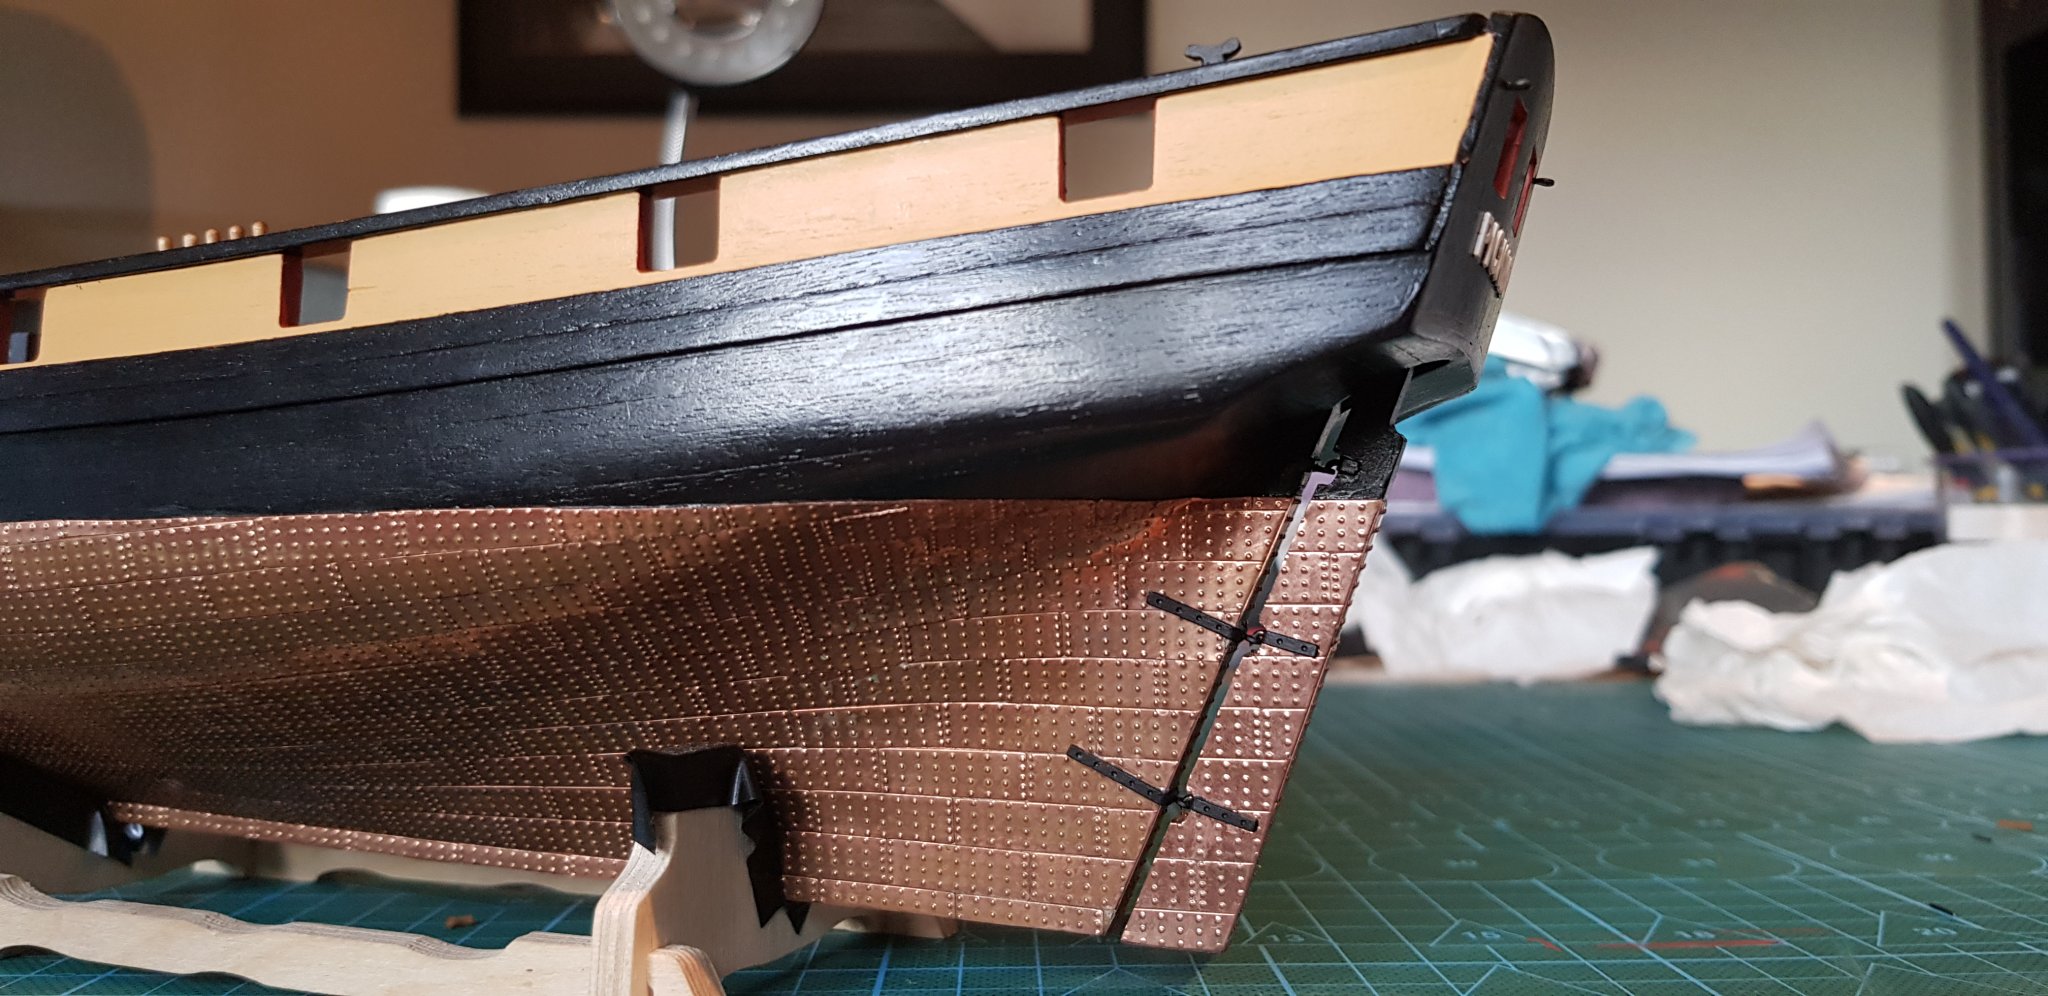
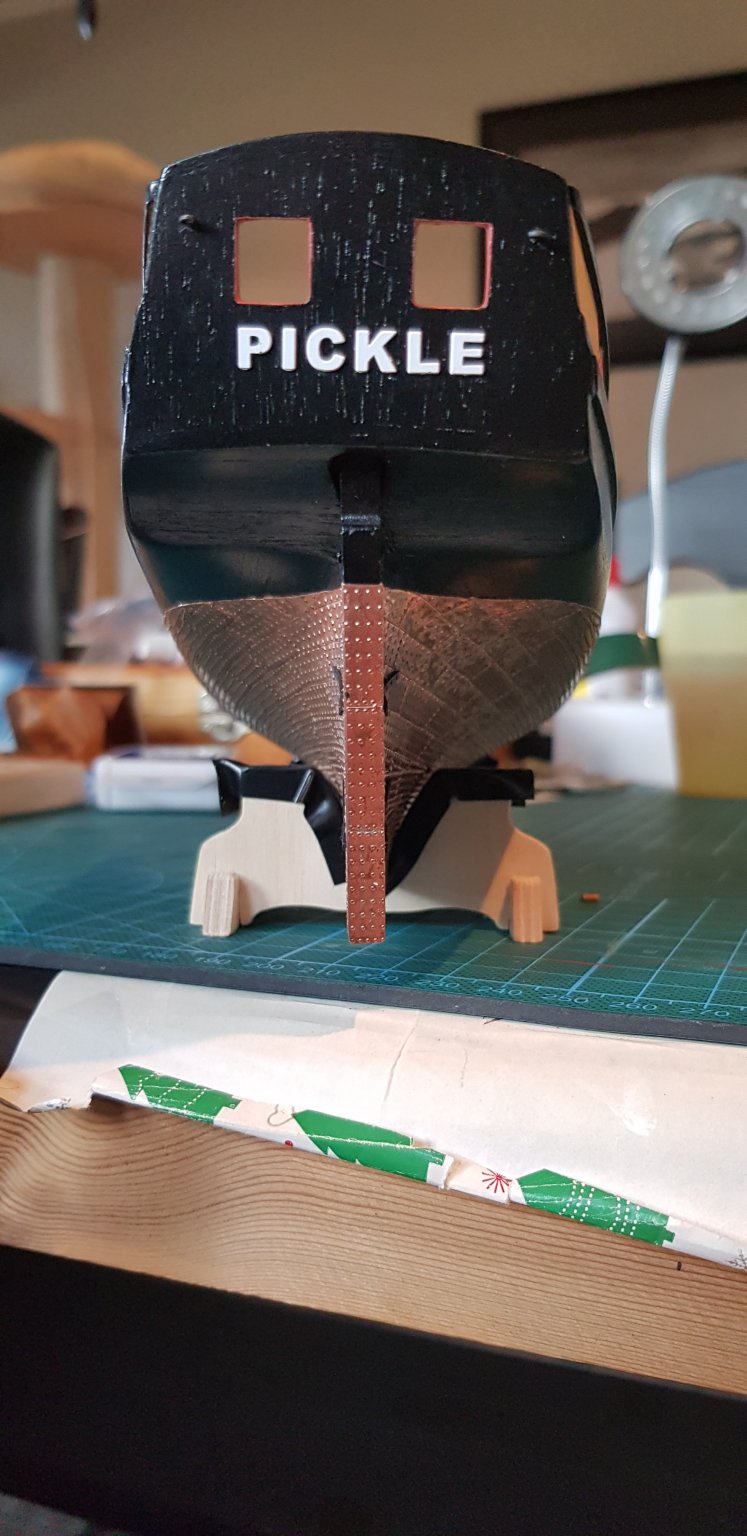
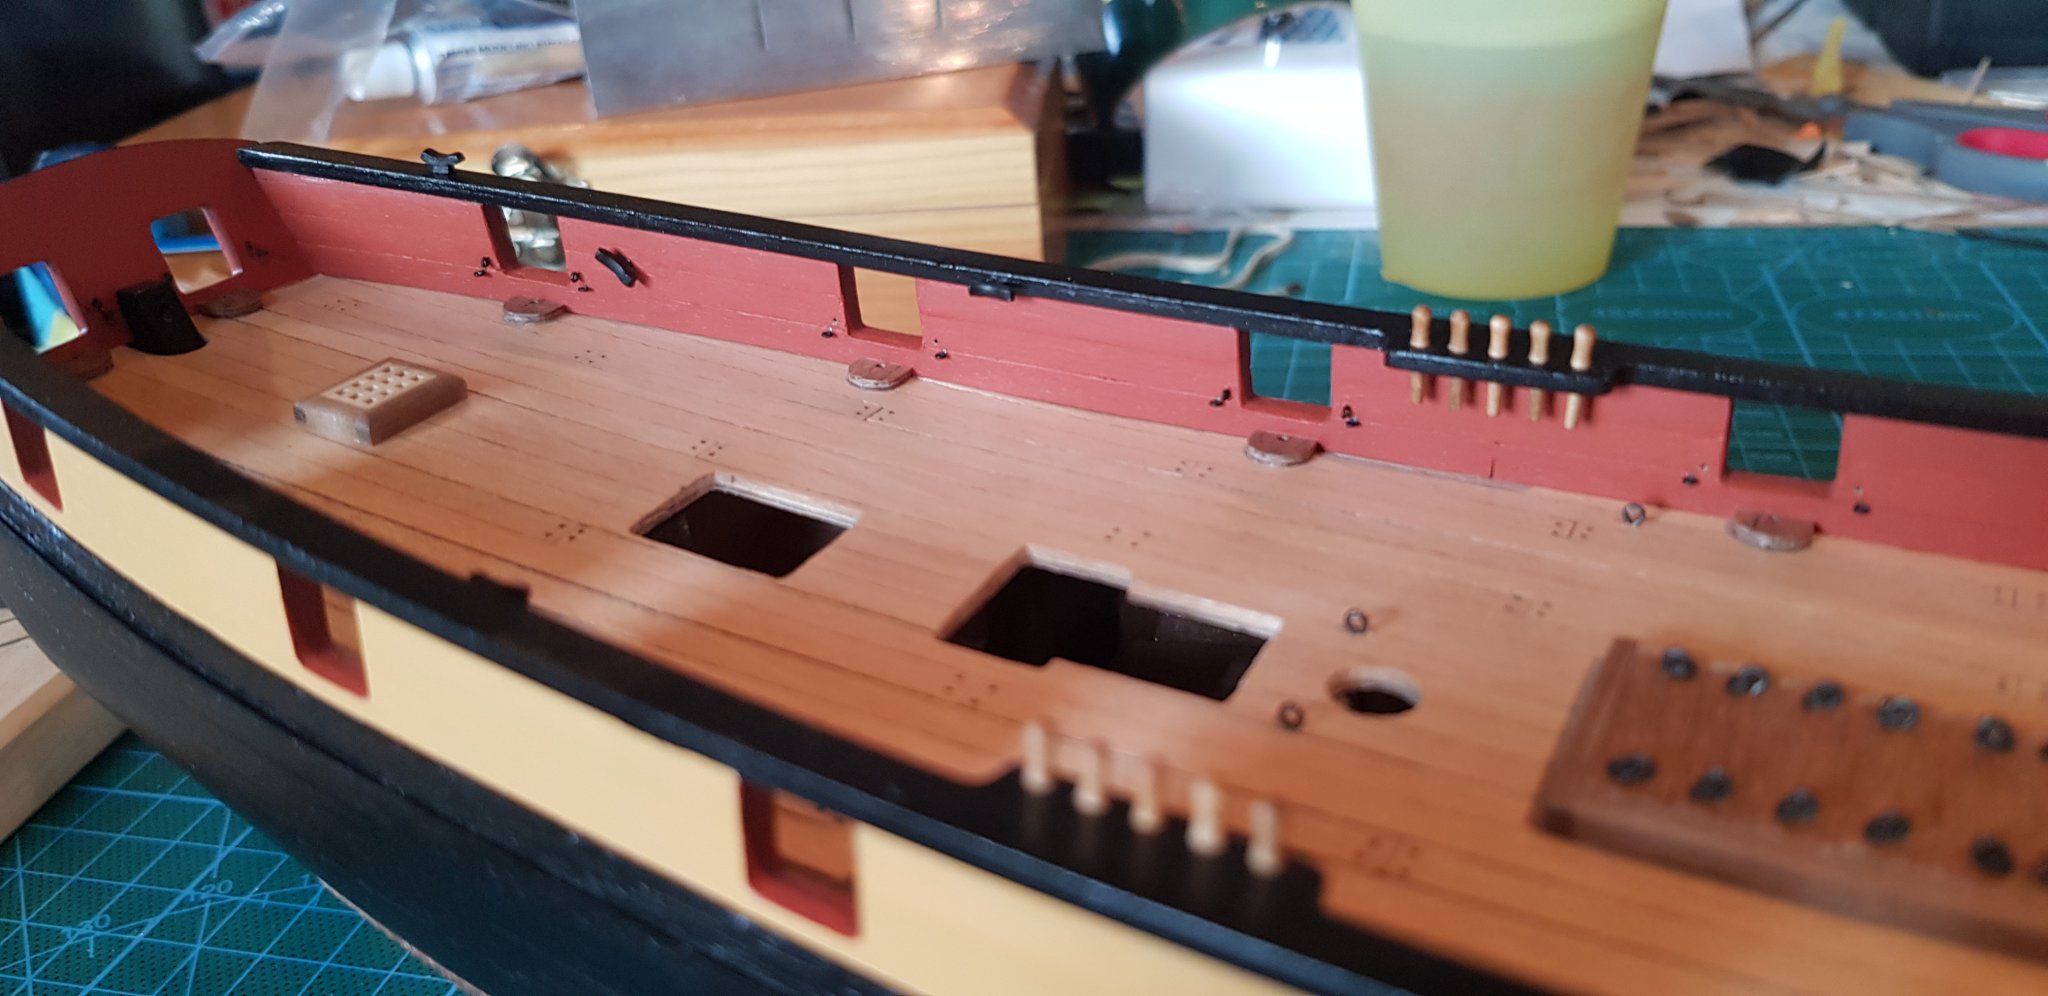
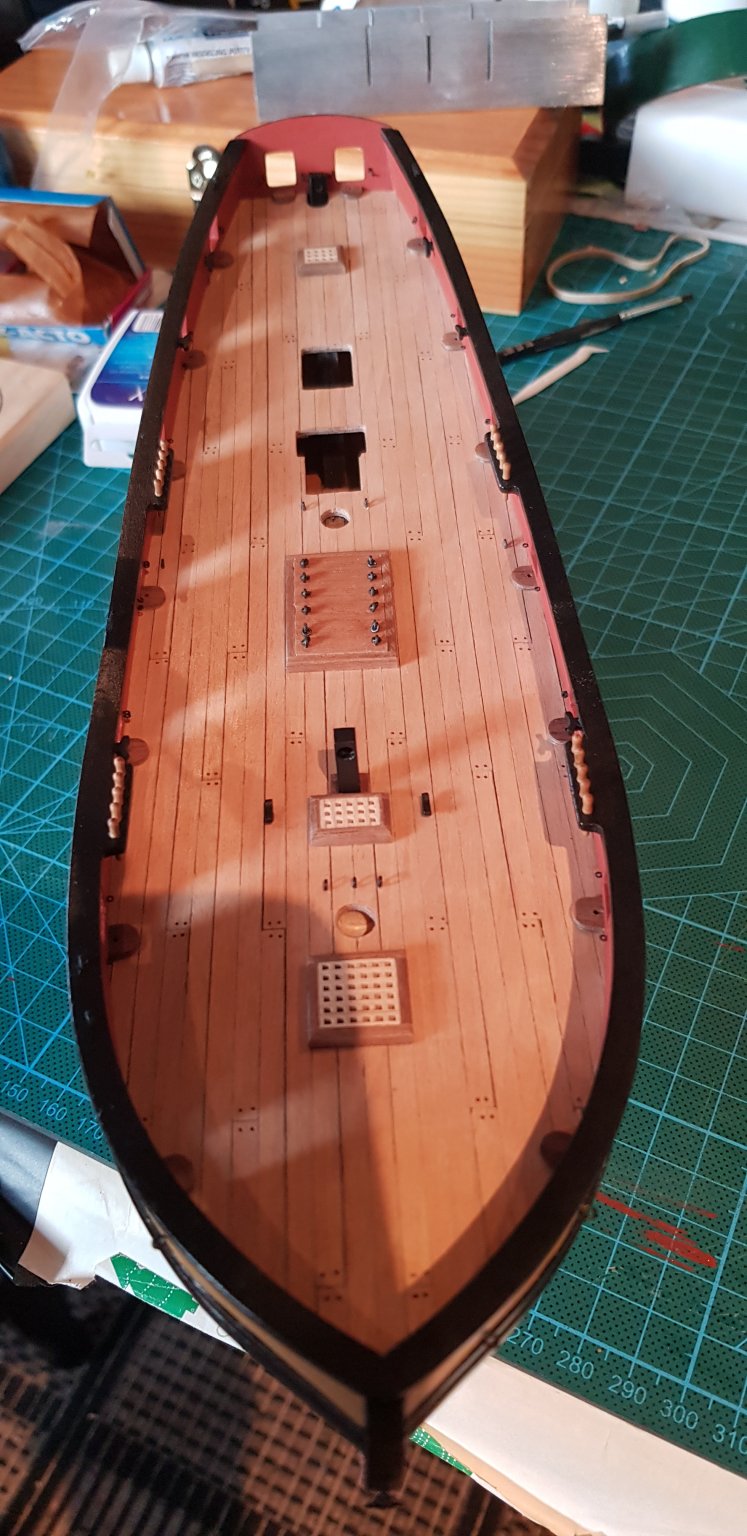
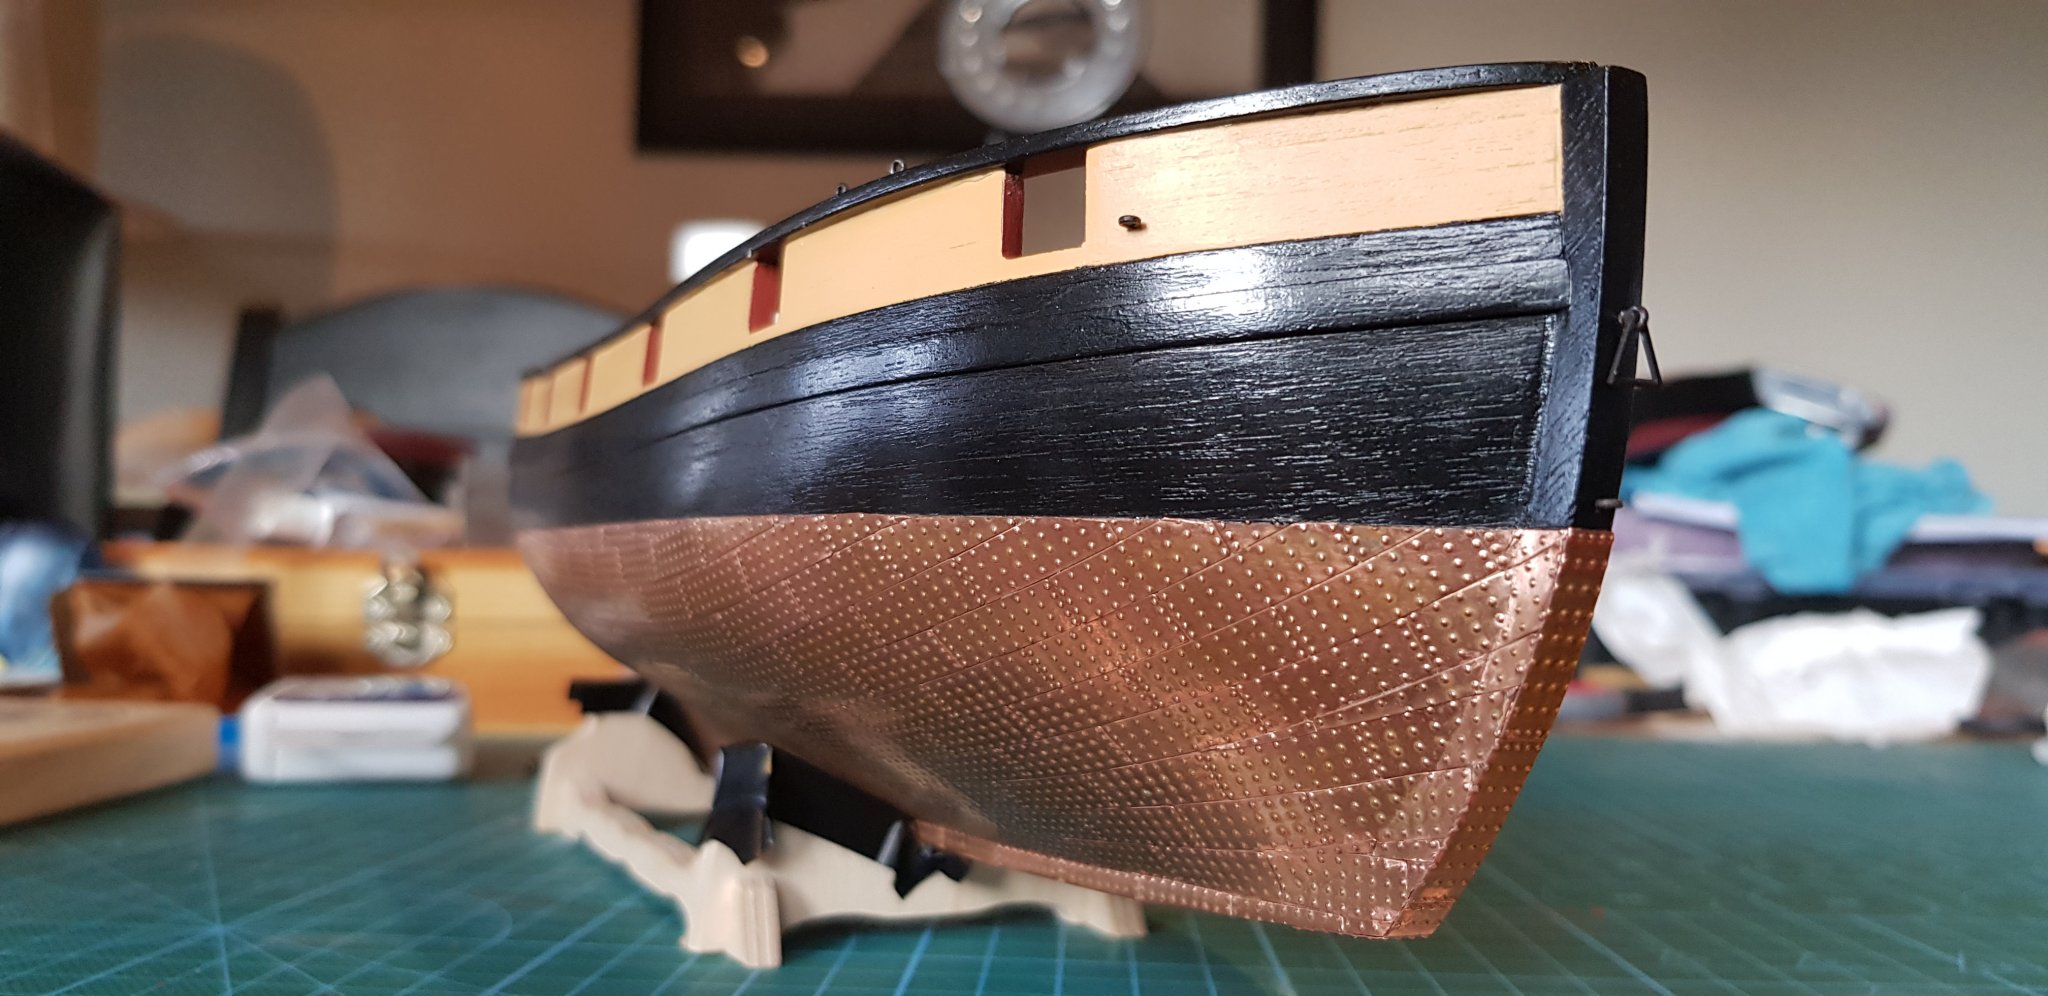
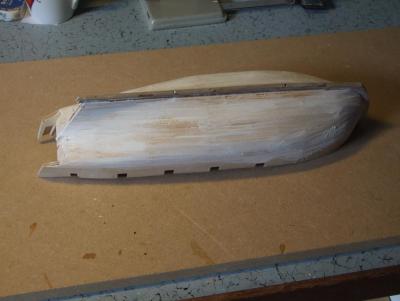
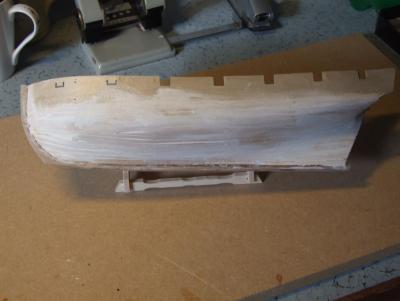
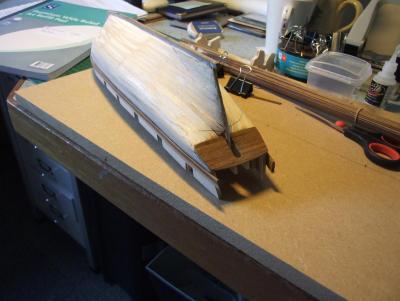
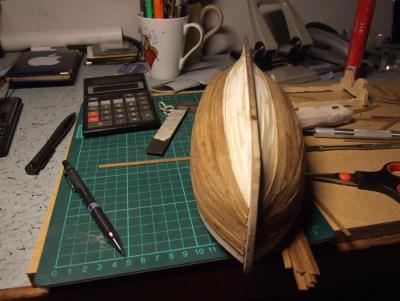
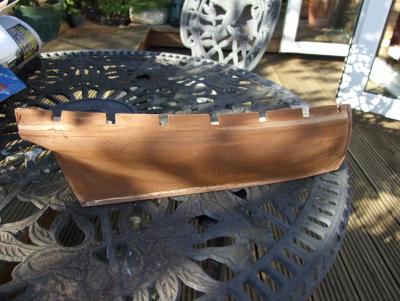
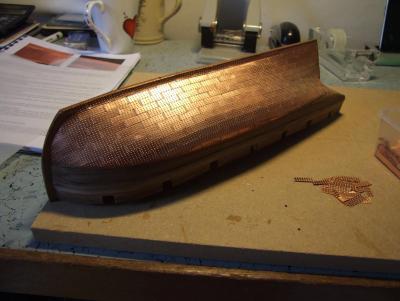
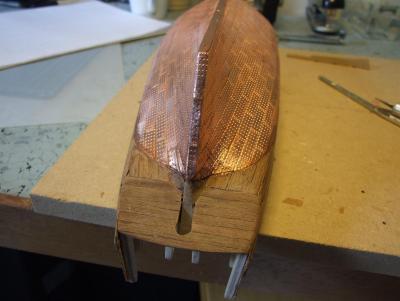
 Hello! I already introduced myself a few weeks ago and thought that maybe a building log is a good thing, because it's my first build. So al the help is welcome! I'm from the Netherlands, so my spelling won't always be on point ;). I began this ship in 2015 but paused at the first planking stage. Life came in between and i didn't knew if i would continue this wonderful hobby. But recently i picked it right up where i left and addicted ever since. I'm now finished the second planking and plating the hull with copper plates. Yesterdag i spent the whole afternoon with cutting out the gunports. I didn't make use of the gunport pattern that was included because of the issues i had with installing them. So i just planked it with walnut strips and cut the ports yesterday out. My goal with this ship is to just make it right out of the box with practically no modifications, because i want first run through the whole practice of building a ship.
 -
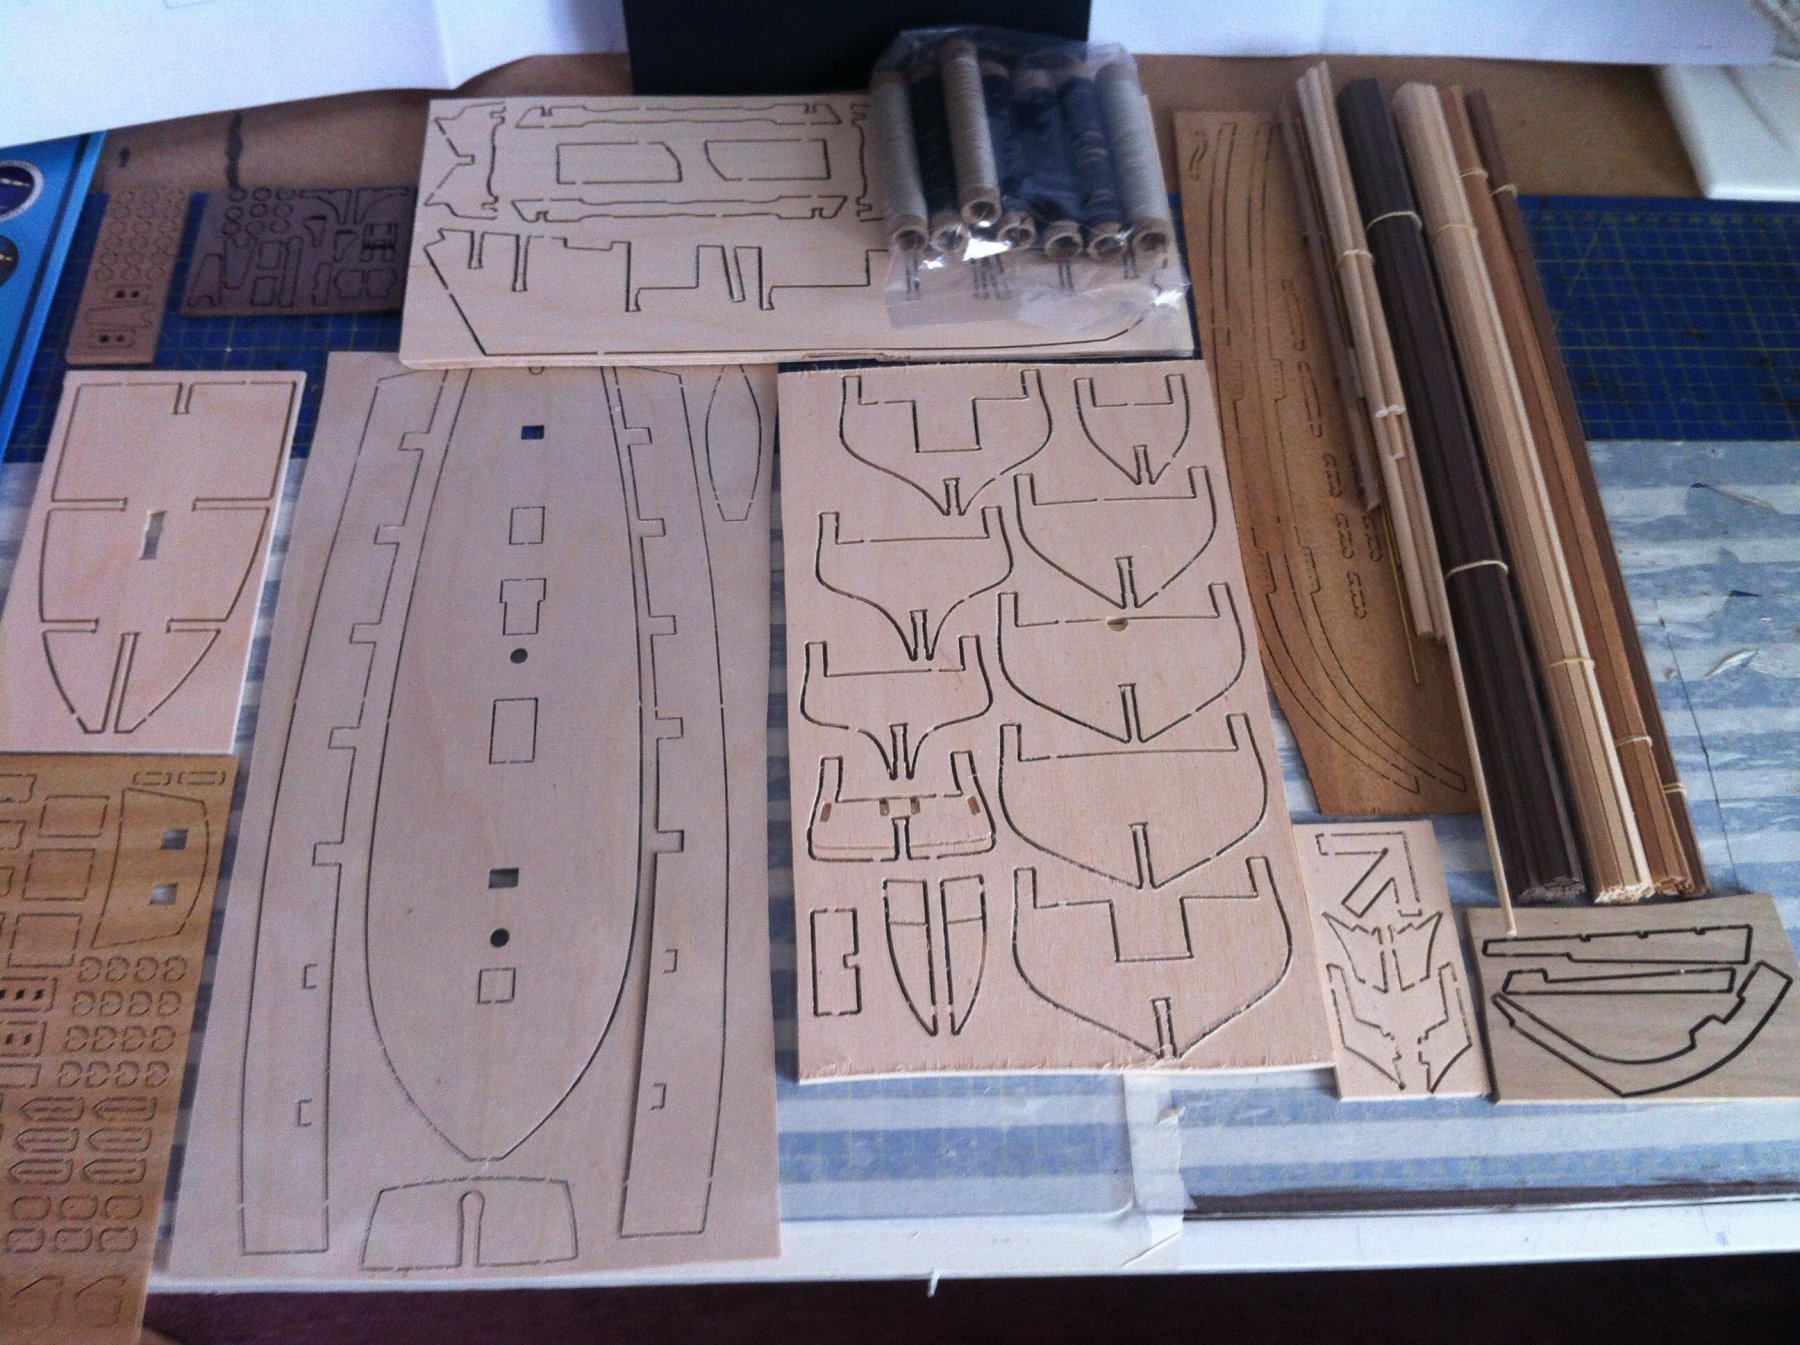
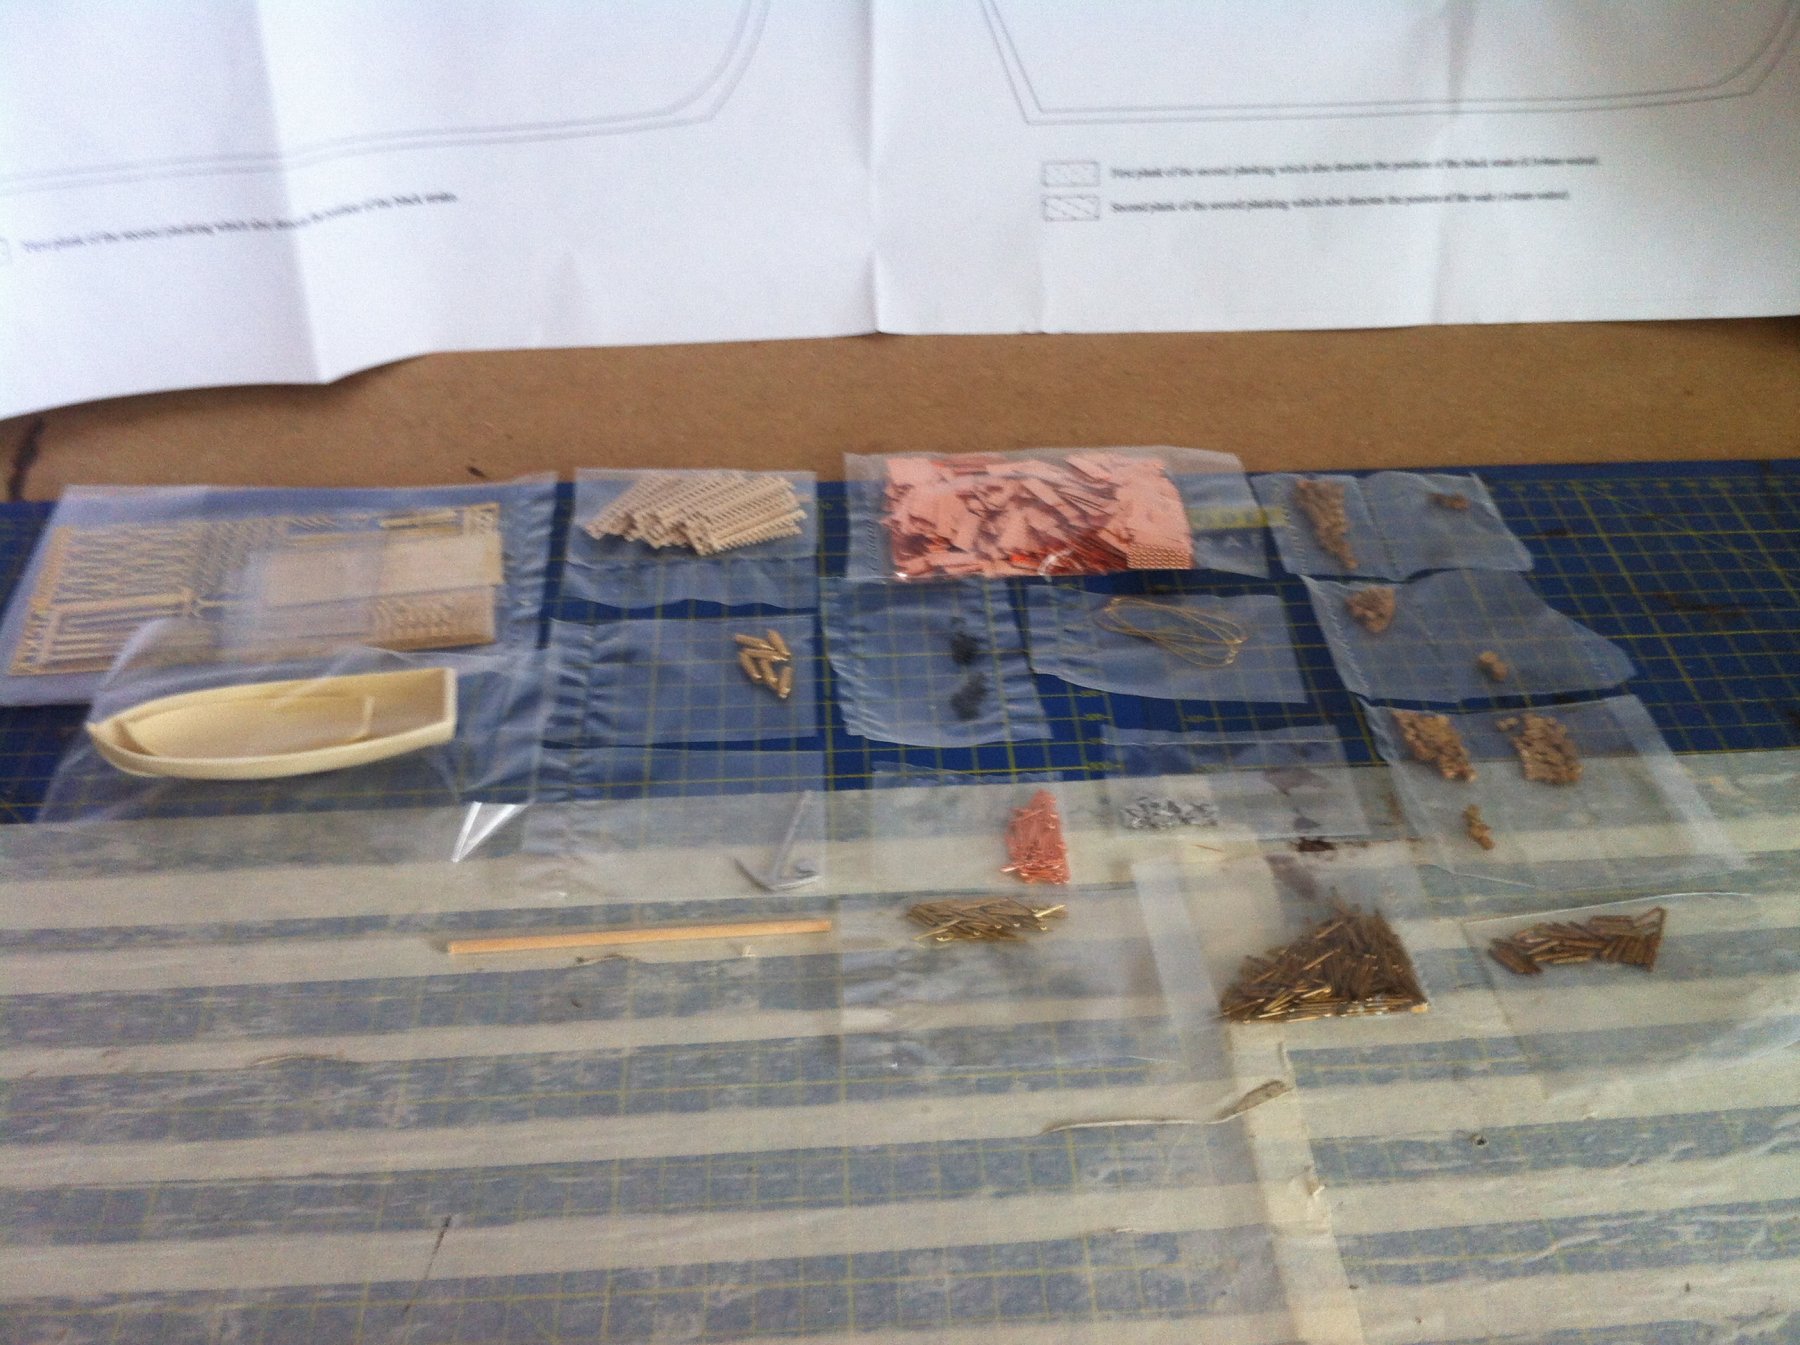
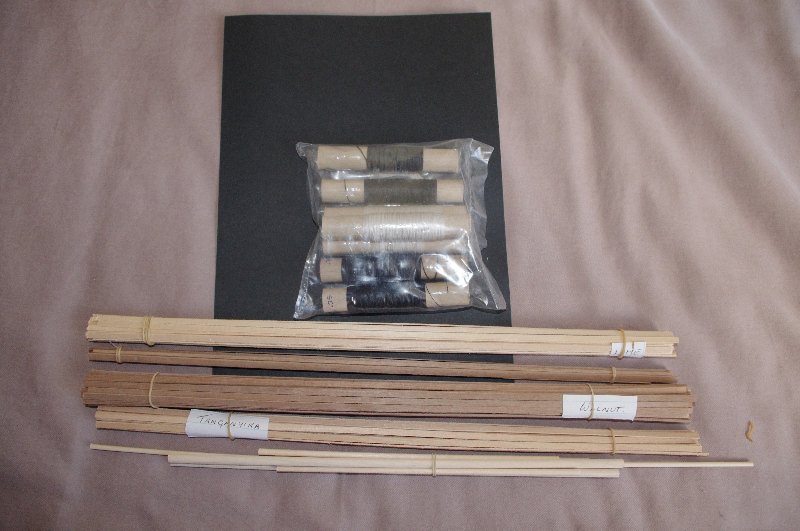
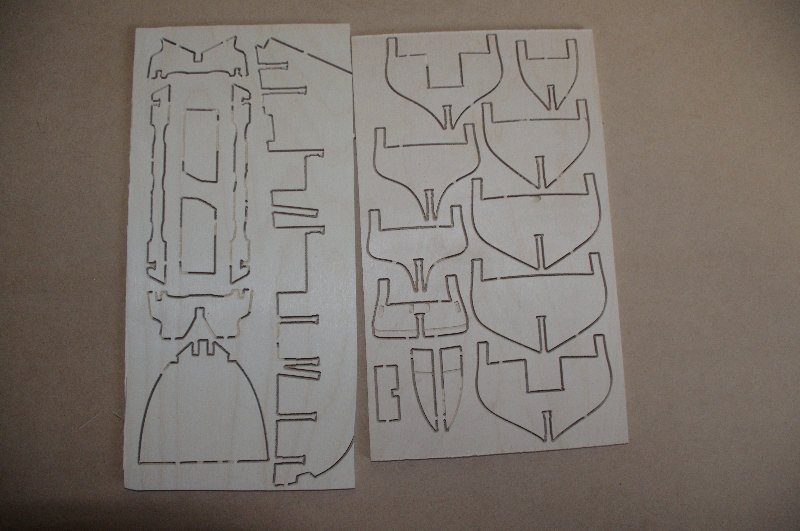
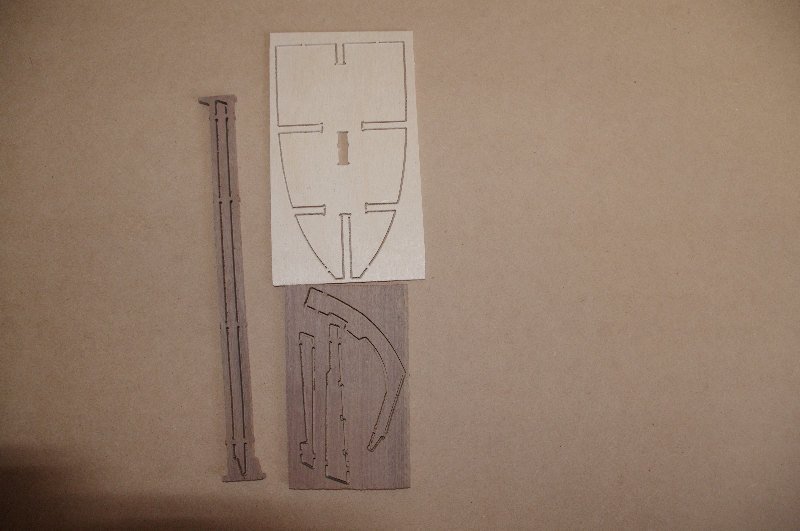
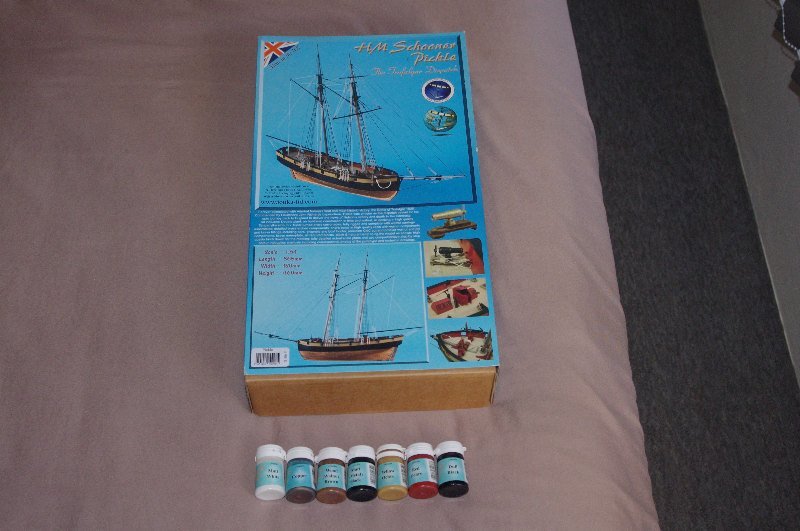
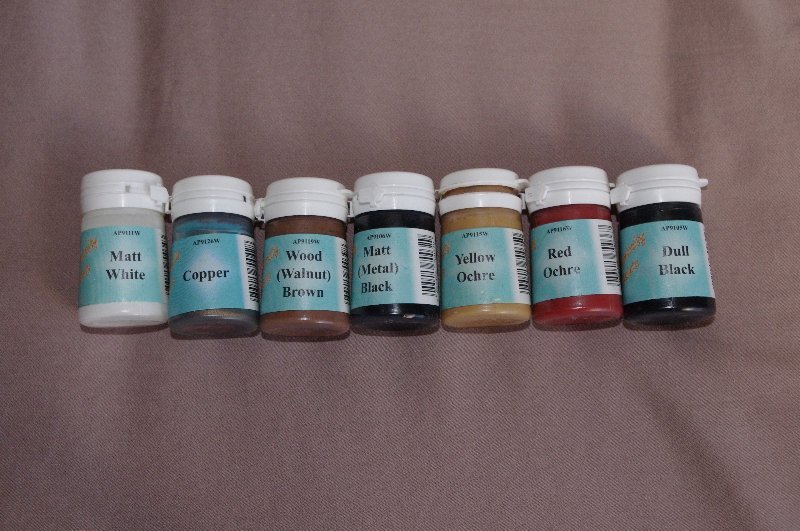
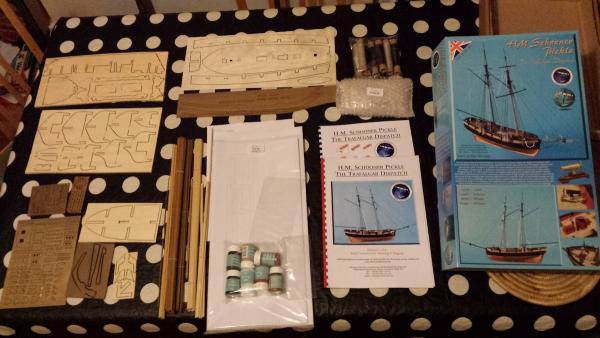
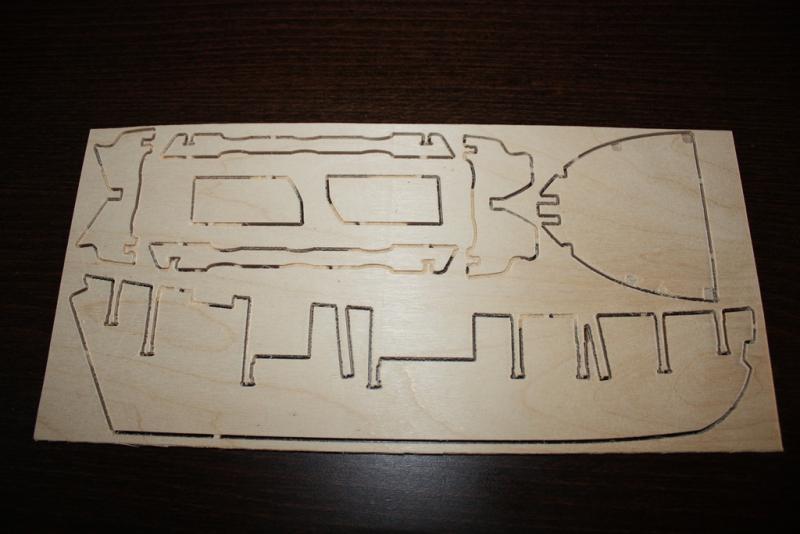
 Hello Everyone, Welcome to my build log of The Schooner Pickle and I hope you enjoy it. Most of you will know the history and significance of 'Pickle ' and it has been told in detail in other logs of this build, so suffice to say that she will always be famous for carrying dispatches from Admiral Collingwood detailing the Victory at Trafalgar and the news of Lord Nelson's death to England. On the 28 of july 1808 Pickle was grounded off Cape Santa Maria on the Chipiona Shoal on her approach to Cadiz. Pickle sank quickly but all her crew were saved. I also intend to keep an up to date time log of the build. The kit itself is I think of good quality, however their pre cut sheets seem to have been milled out instead of laser cut but they do seem quite accurate. the supplied timber is of average quality and a sample bunch of the lime strakes I measured varied from 3.7mm wide to 4.1mm, they are supposed to be 1mm x 4mm . The brass etched parts and the other parts, rigging blocks,pins, carronades ect are all of excellent quality and the plans and instructions are both detailed and comprehensive . I think this kit will be a good challenge for me firstly because of the scale, I did not realise how small some of the parts are and also because it is a bit more complex than the two other kits I have completed. This will be a slow build so please be patient with me. The instructions reckon it can be built in 4 to 6 months of evening work but my estimate for me will about 12 months of part time work. Following are some pictures of the kit itself and then I will post where I am up to at present I intend to paint this model so I also brought the recommended paint kit
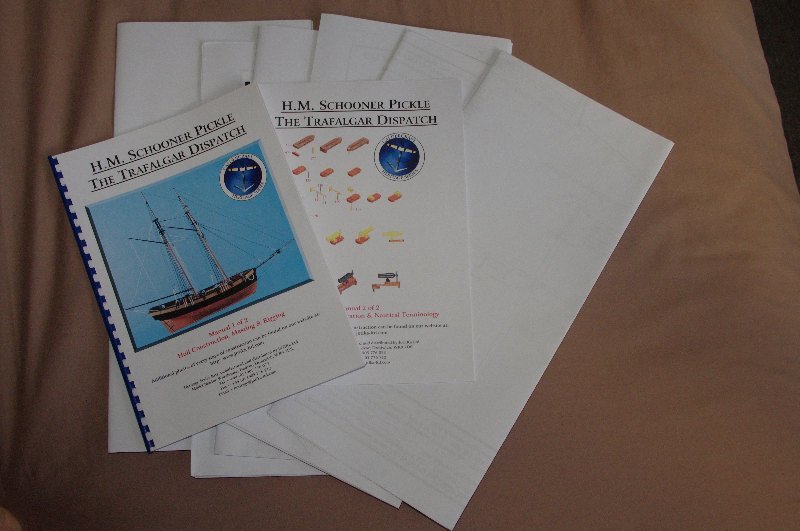
- 86 replies
-
- 1
-
-
- pickle
- caldercraft
- (and 1 more)
-
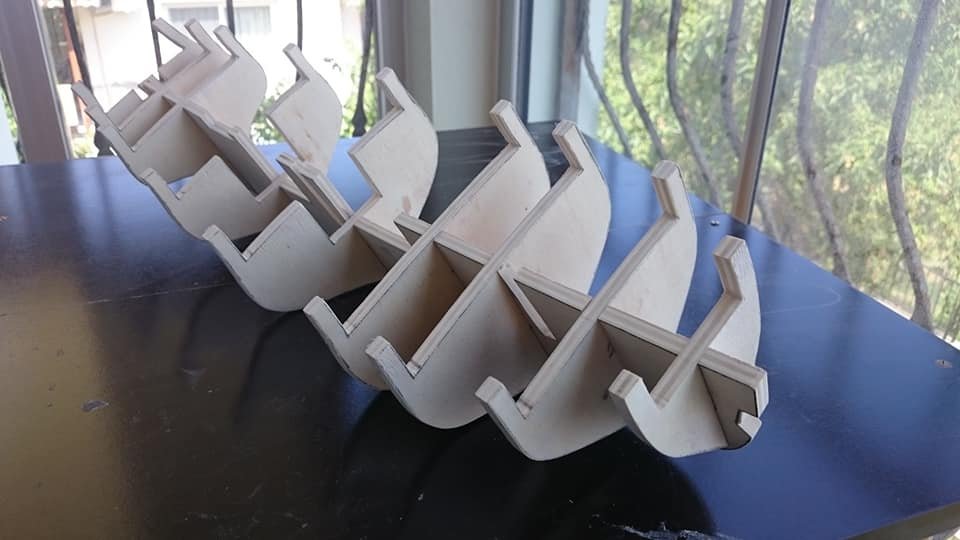
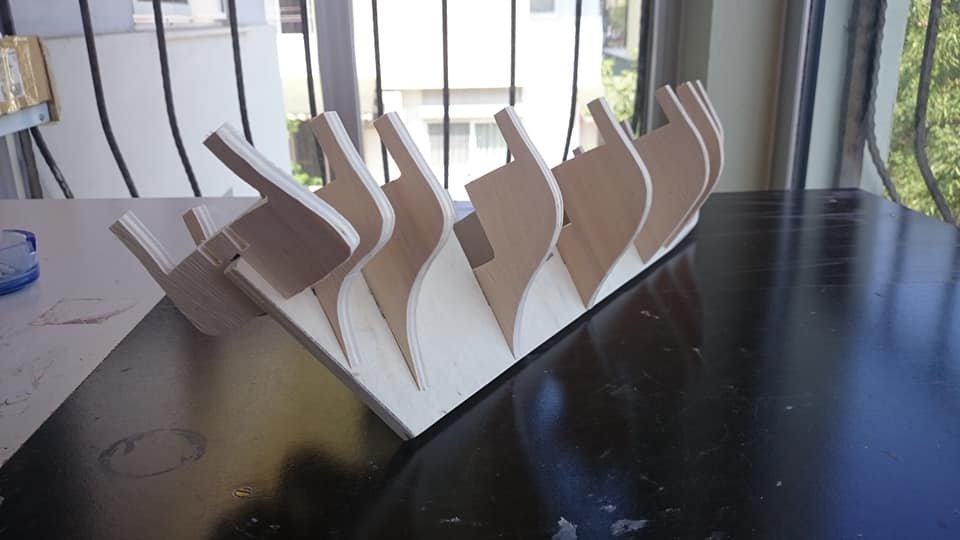
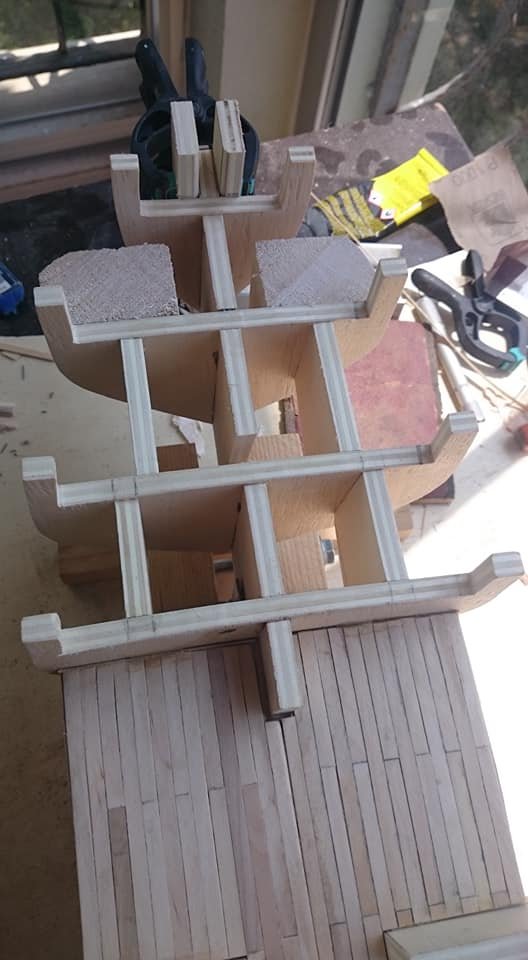
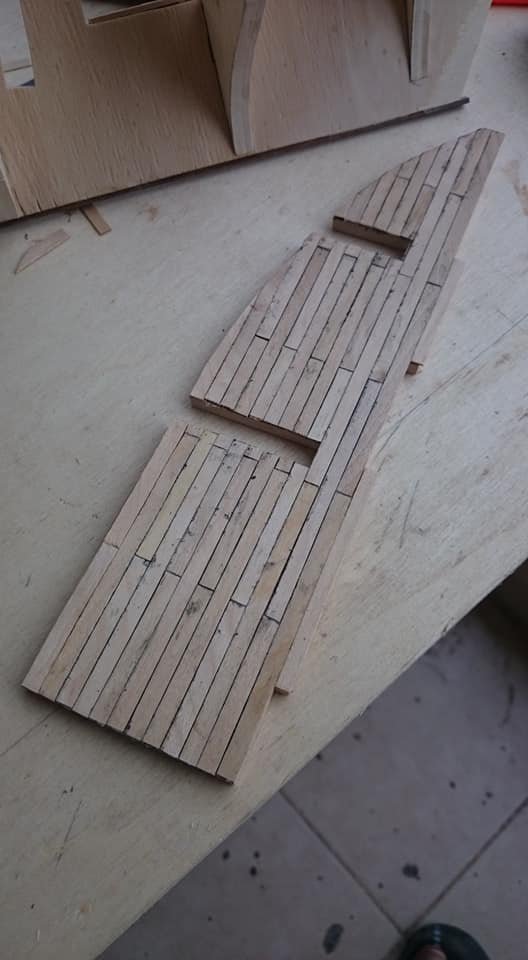
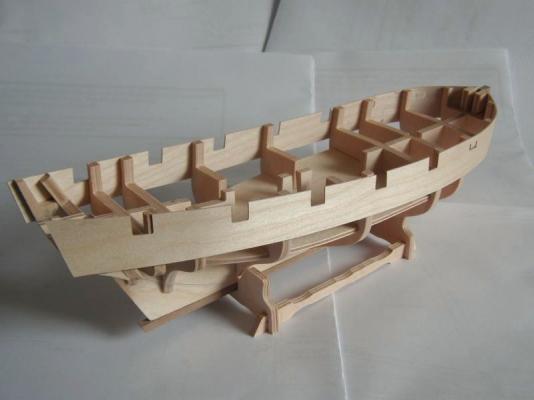
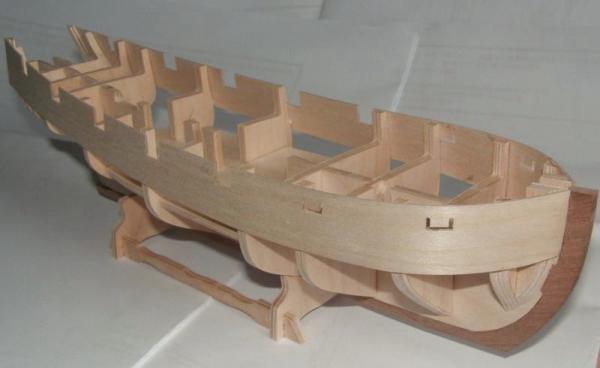
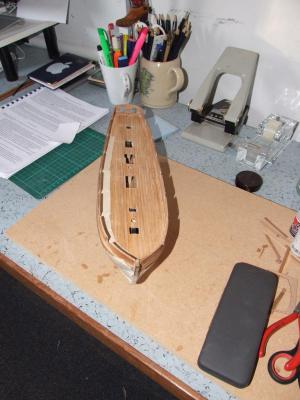
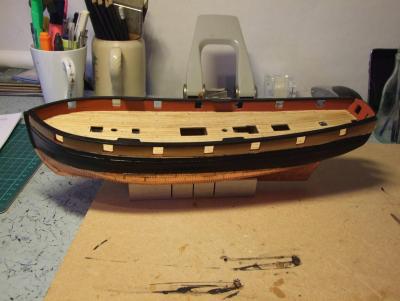
 Hi there everybody! New member from Norway here. Just made an account on this wonderful forum. I have spent many ours reading building logs, and i must say there are some extreme skills around! I have been a modeller since childhood, but only with plastic and R/C cars and boats. Until now. Started this Pickle build several months ago. Work and kids take time and effort so i put in some building when i have time to spare. Posting a few pictures from where i an now. As you probably already have guessed i am from Norway so please excuse my English 😊


- 53 replies
-
- 9
-
-
- pickle
- caldercraft
- (and 2 more)
-
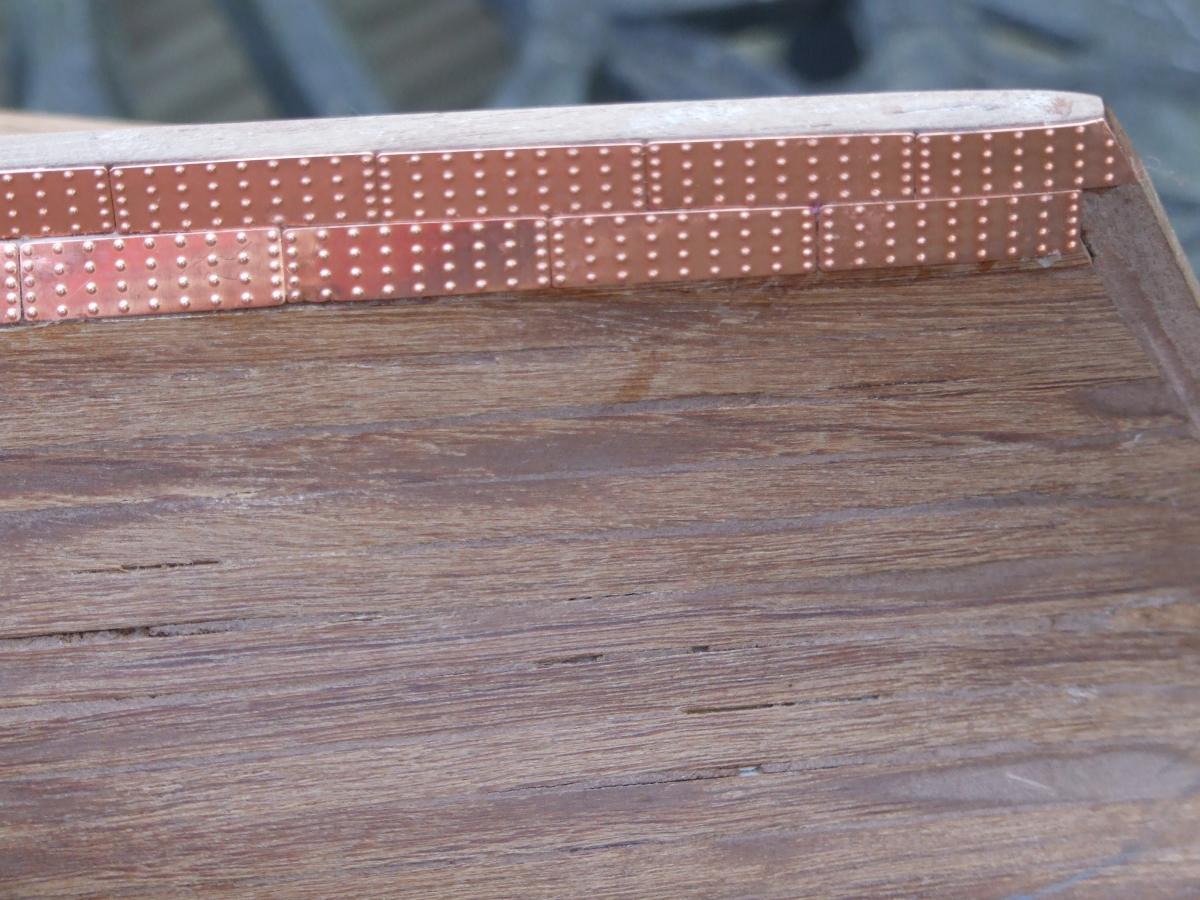
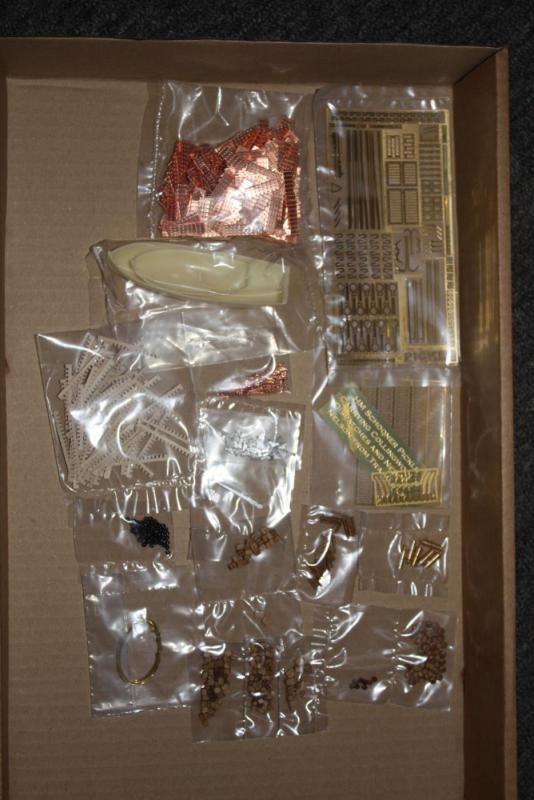
 On the old site there were a few build logs of Pickle which gave insight into this beginner level kit, but all that has been lost. I have a build log already done for this fine little model and I will re-post it here for the benefit of those, particularly beginners, who may be interested, and as a contribution to replacing our lost content. A little background to Pickle She is best known for carrying to England the bitter sweet news of the crushing defeat of the French / Spanish fleet at Trafalgar coupled with the news that Nelson had died. The Pickle was a purchased schooner originally named Sting but was renamed in 1802. Her origin is a little obscure with opinions differing. She is often referred to as a six gun Bermudian schooner, but there are grounds for thinking that she carried eight or even ten carronades given her size, and the corresponding armament of similar sized schooners and cutters etc. A model in the RNM shows her with 10 carronades, but details in works by Peter Goodwin and Rif Winfield list her with eight carronades. She is pierced for 14 guns excluding the stern ports, but the forward most two are adjacent to the windlass etc which would make operating carronades more difficult. She did have a career after Trafalgar and on 3rd January 1807, she captured a French privateer La Favourite of 14 guns off the Lizard. Eighteen months later, on 28th July 1808, the Pickle was grounded on a shoal as she entered Cadiz harbour, and was wrecked. The kit Pickle represented my return to POB kits after an absence of many years, and one I can recommend particularly for those who want to put a toe into this genre of model ship building. The kit is reasonably priced, the brass etched fittings are of good quality, and there is a good backup from Jotika. The instructions are clear and the kit builds up into an attractive model of a vessel with an interesting link to Nelson and Trafalgar. Although I didn’t use much of the supplied timber in my particular build, there is nothing wrong with it, and an out of box build will produce a very nice model, of convenient proportions.(it can easily be accommodated in a domestic setting) One advantage for newcomers to this type of kit is that it is not too bluff in the bows, which makes for easier planking, the rigging is much less complicated than say a ship rigged vessel, yet it provides an introduction to all aspects encountered in larger vessels including the coppering of the lower hull. The copper adds an attractive dimension to the build, but the supplied plates are a little over-scale in terms of the number and prominence of the nail heads. Amati in their Victory models range now provide a much better style of copper plate. In my build log I have sought to show in some detail the process of putting together this kit, my methods are my way and I don’t put them forward as the definitive approach to pob kit building, but I hope I will at least demonstrate what is involved with Pickle. First peek at the Box All the stuff was there, nothing outstanding about the timber, average quality I would say. The etched stuff These appear to be of excellent quality. The provided boats are resin hulls with added wooden and etched fittings. The brass turned carronades are very nicely turned out but measure only 13.36mm overall length. Assembly of these will provide a stern test of patience. I will cover all the aspects of assembly of this kit but in a rather more concise way than my original log. I started the kit in February 2010 and it was completed in November of that year, so not a project that will tie anyone up for too long. B.E.
- 87 replies
-
- 3
-
-
- pickle
- caldercraft
- (and 1 more)
-
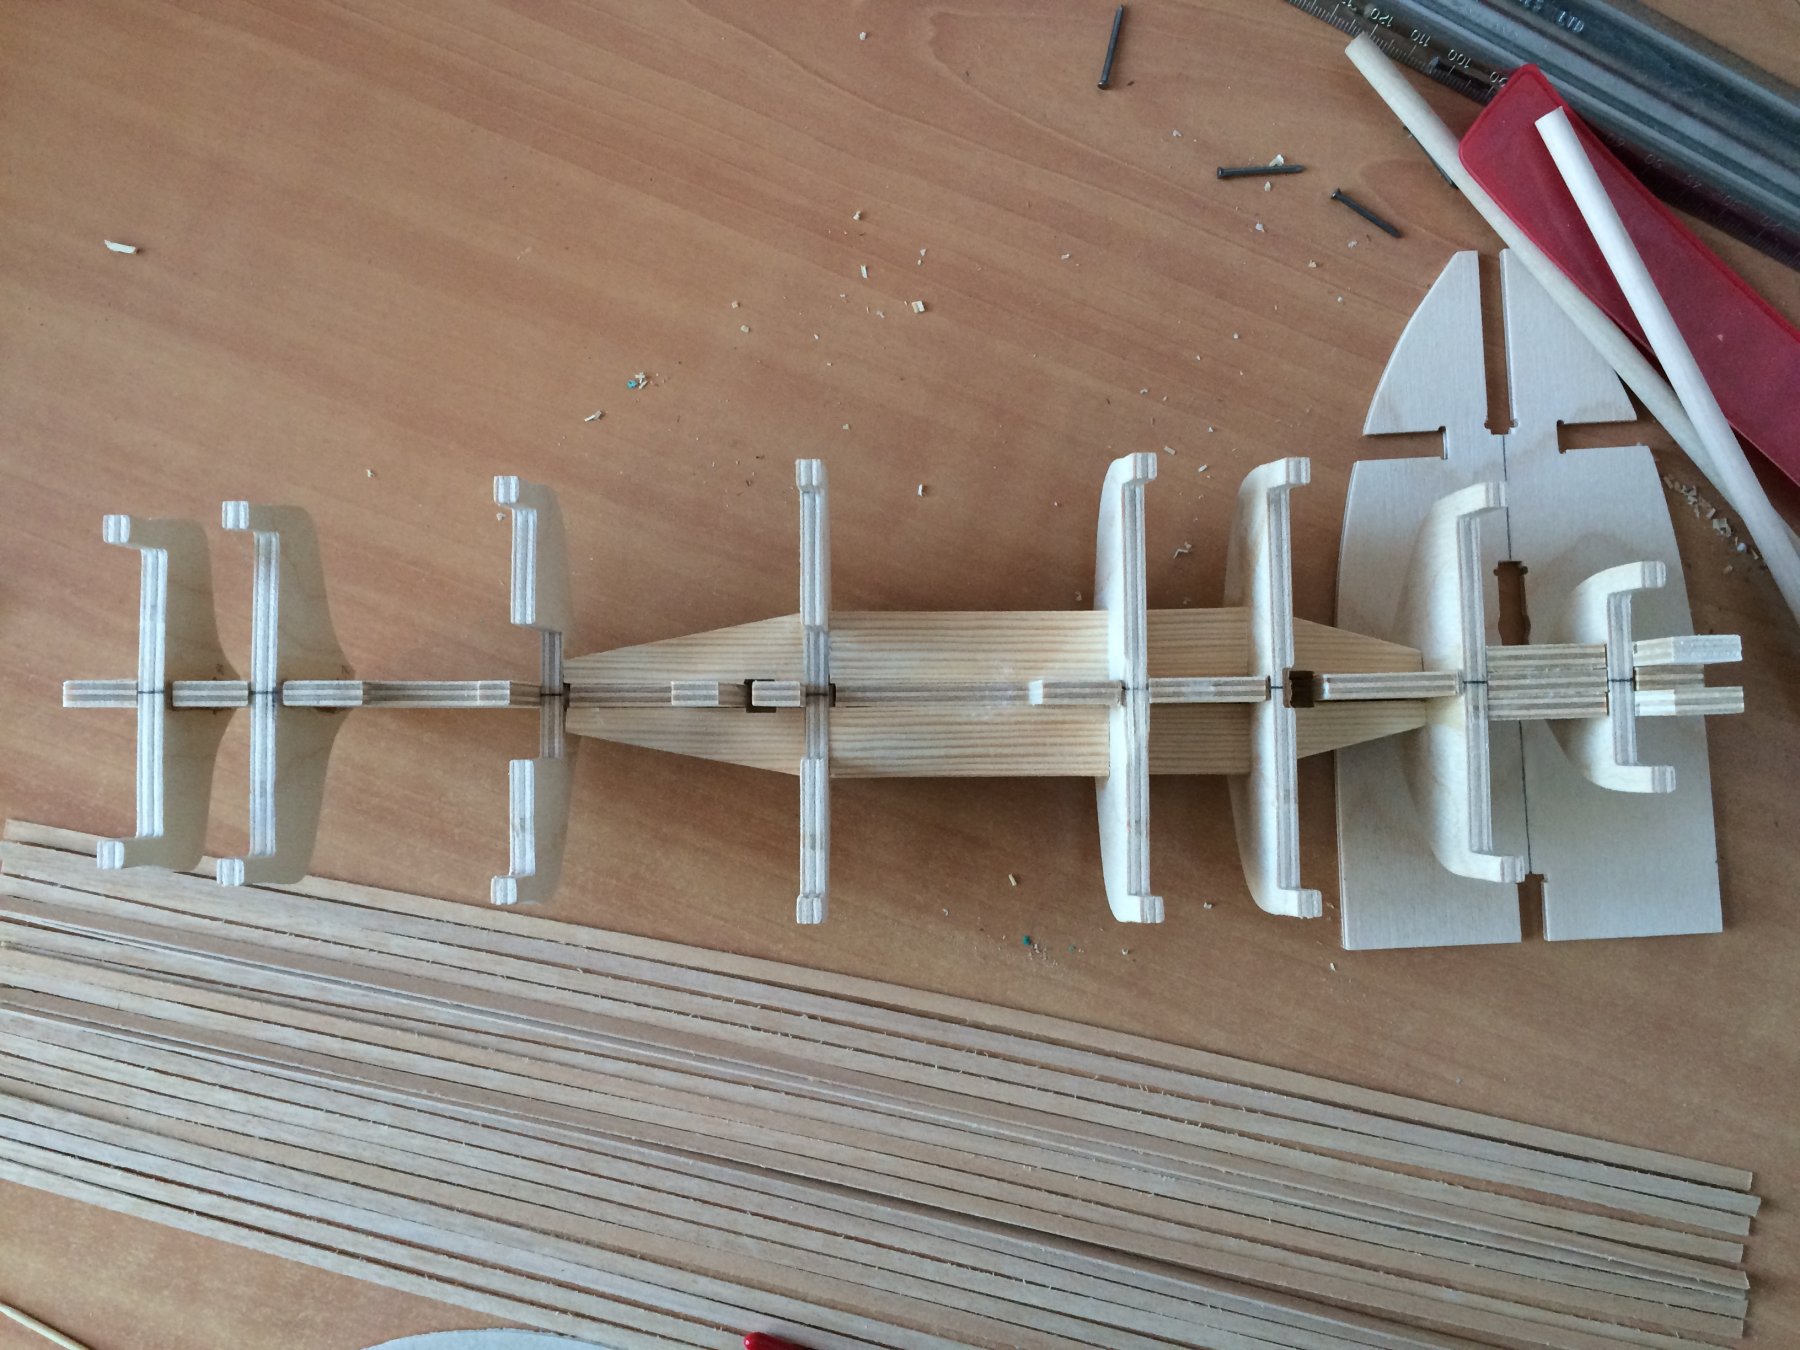
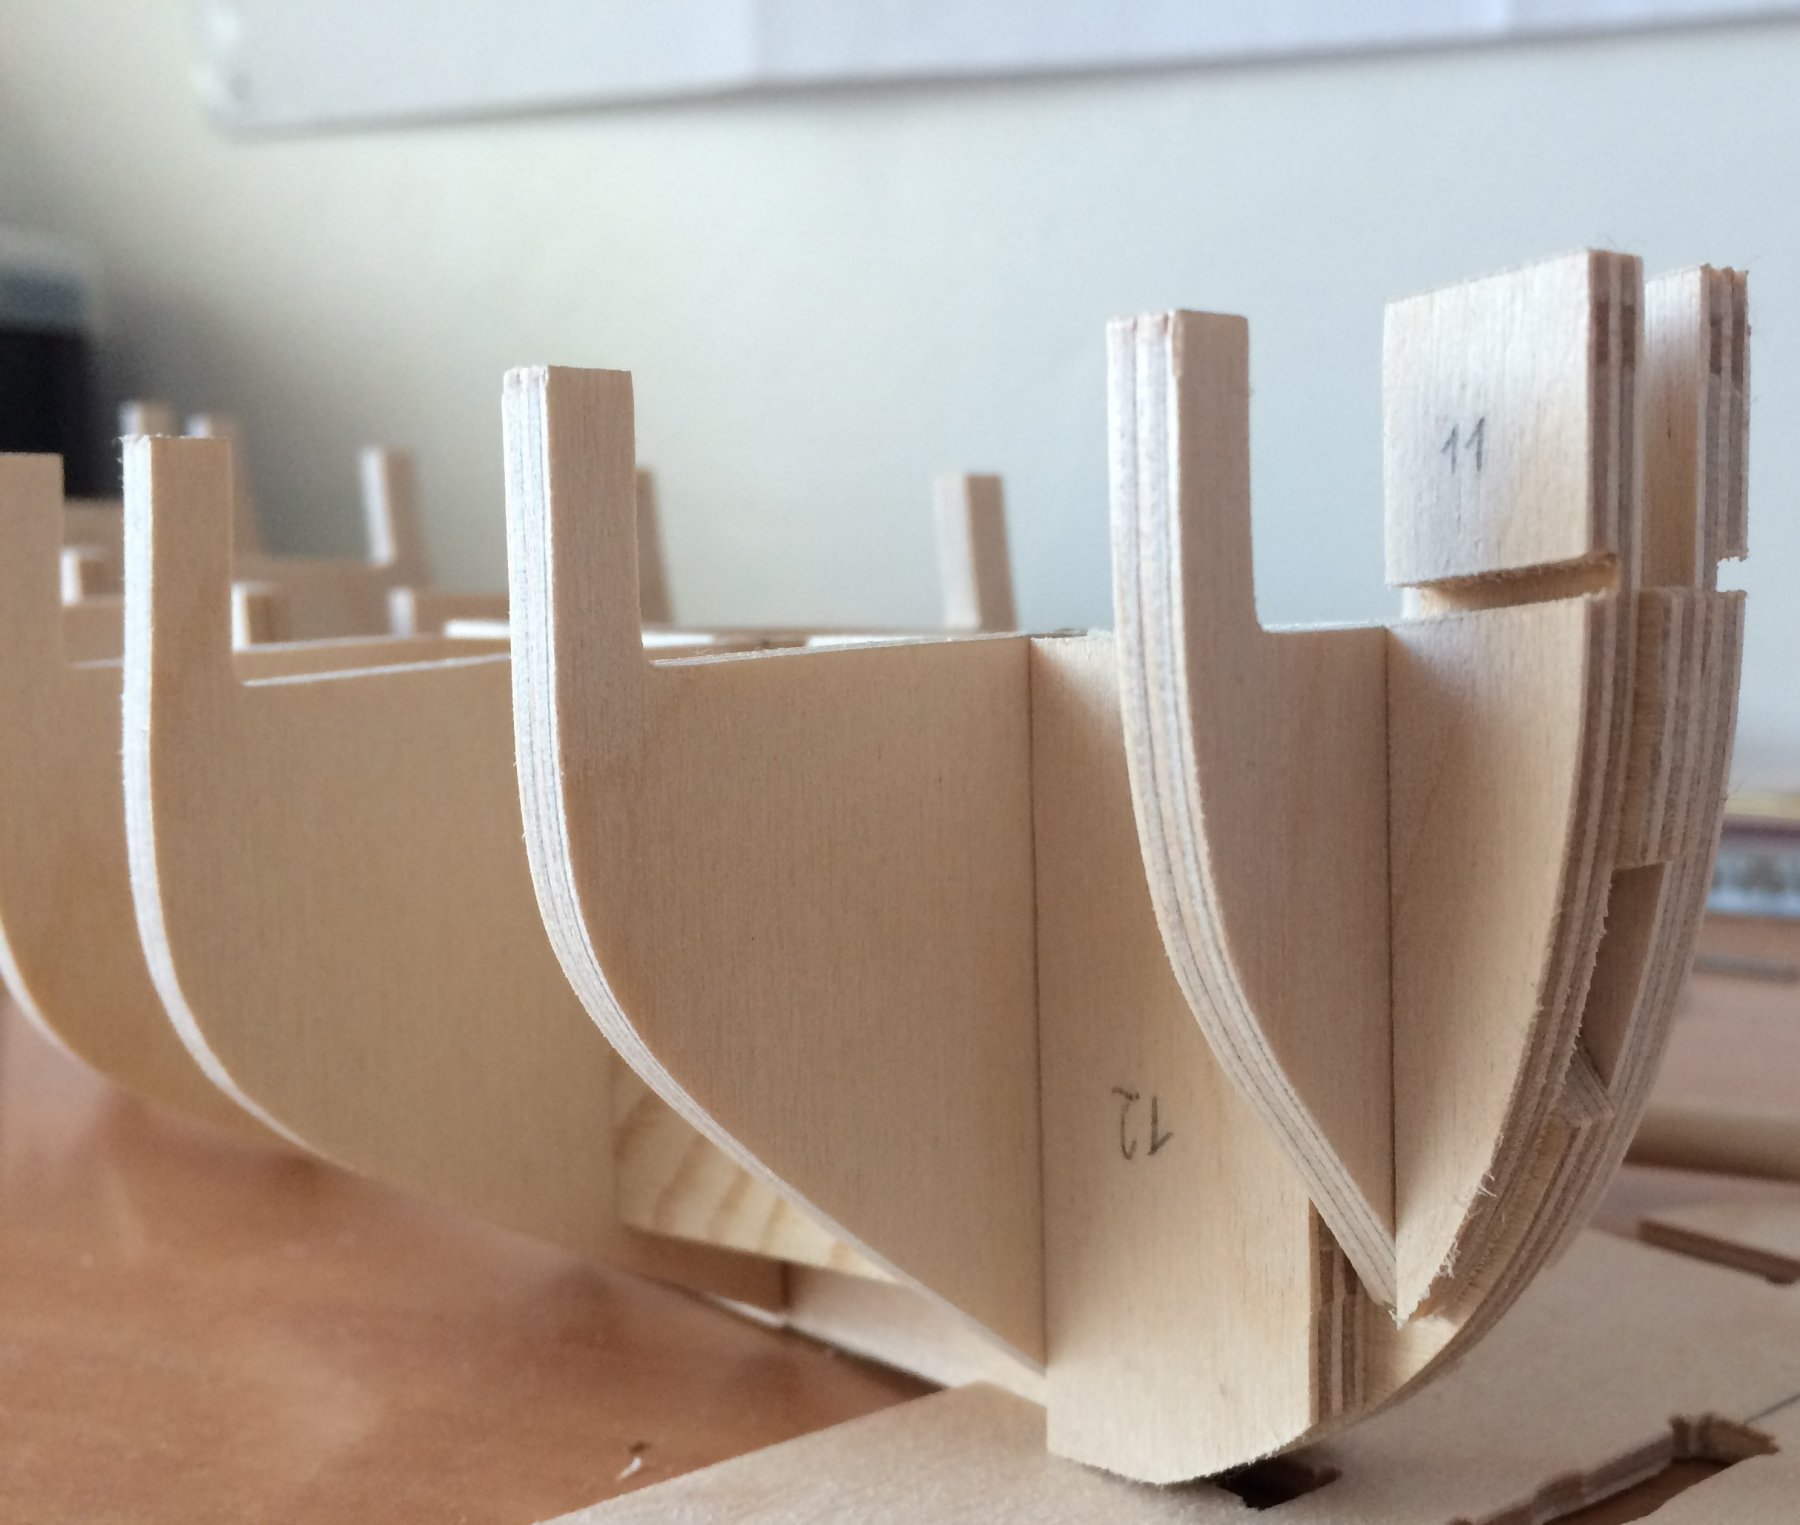
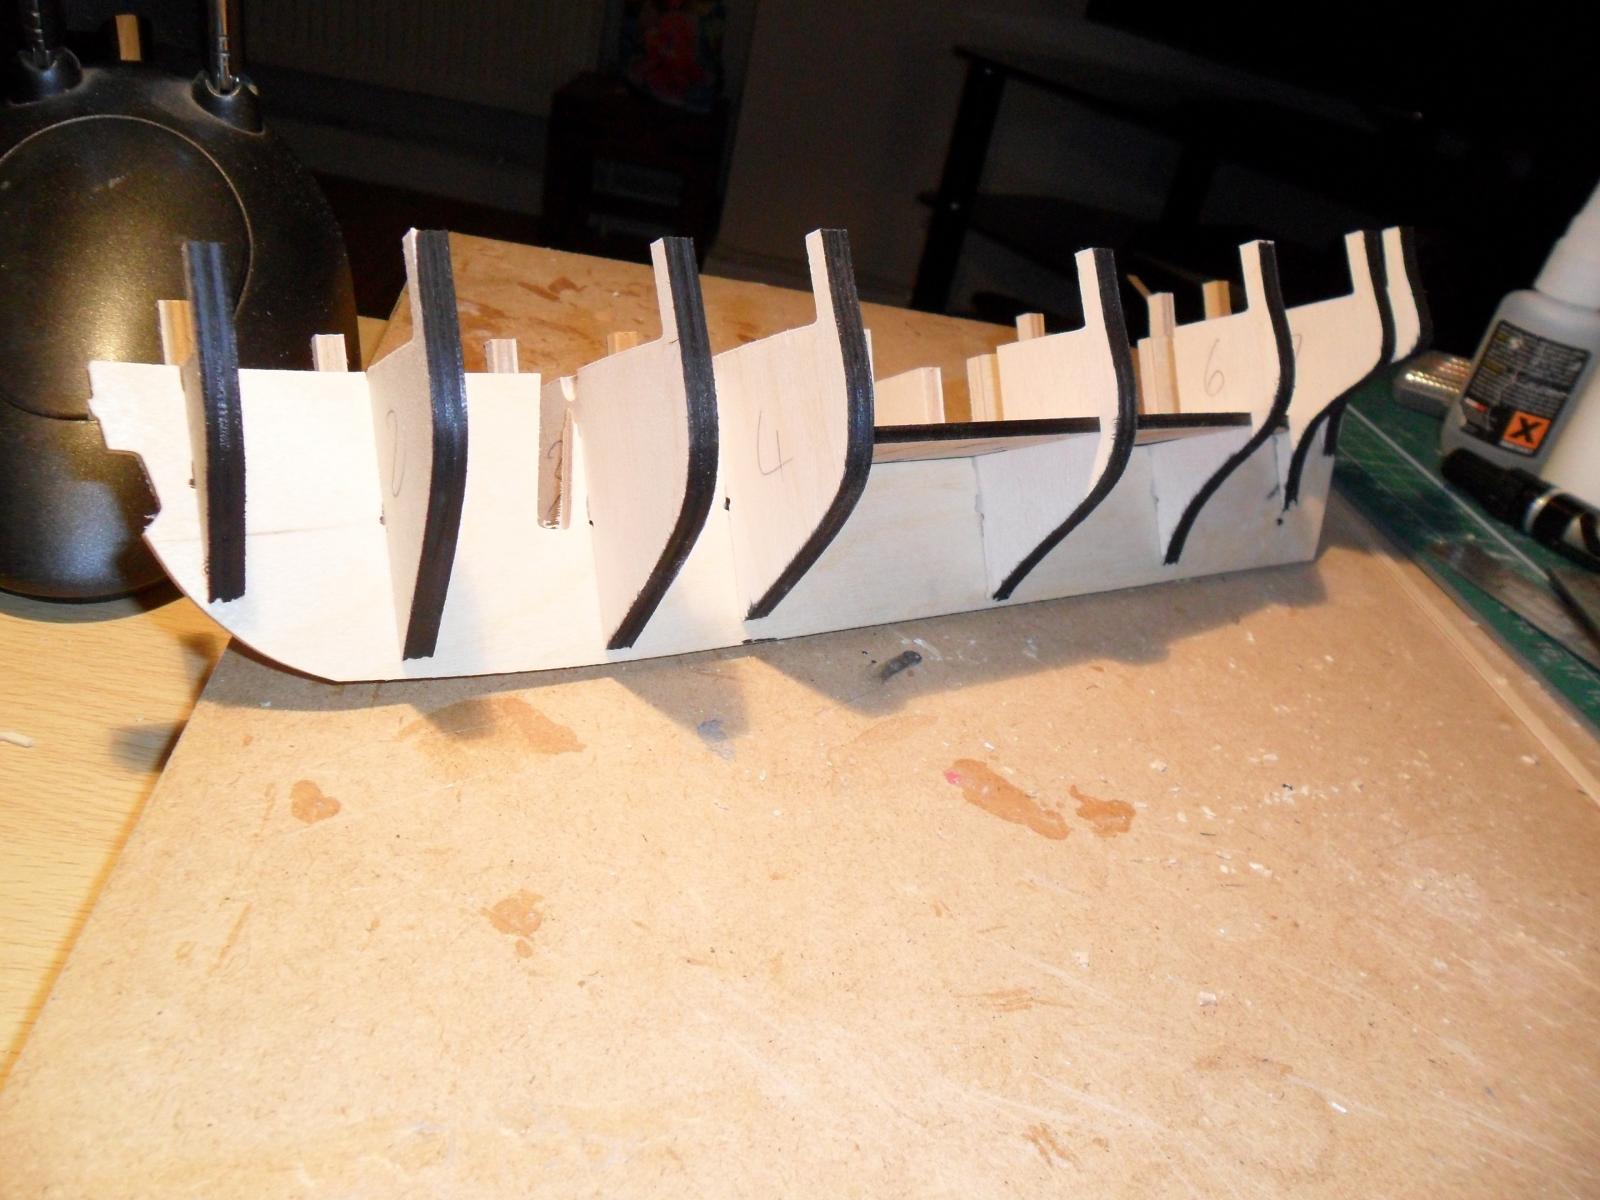
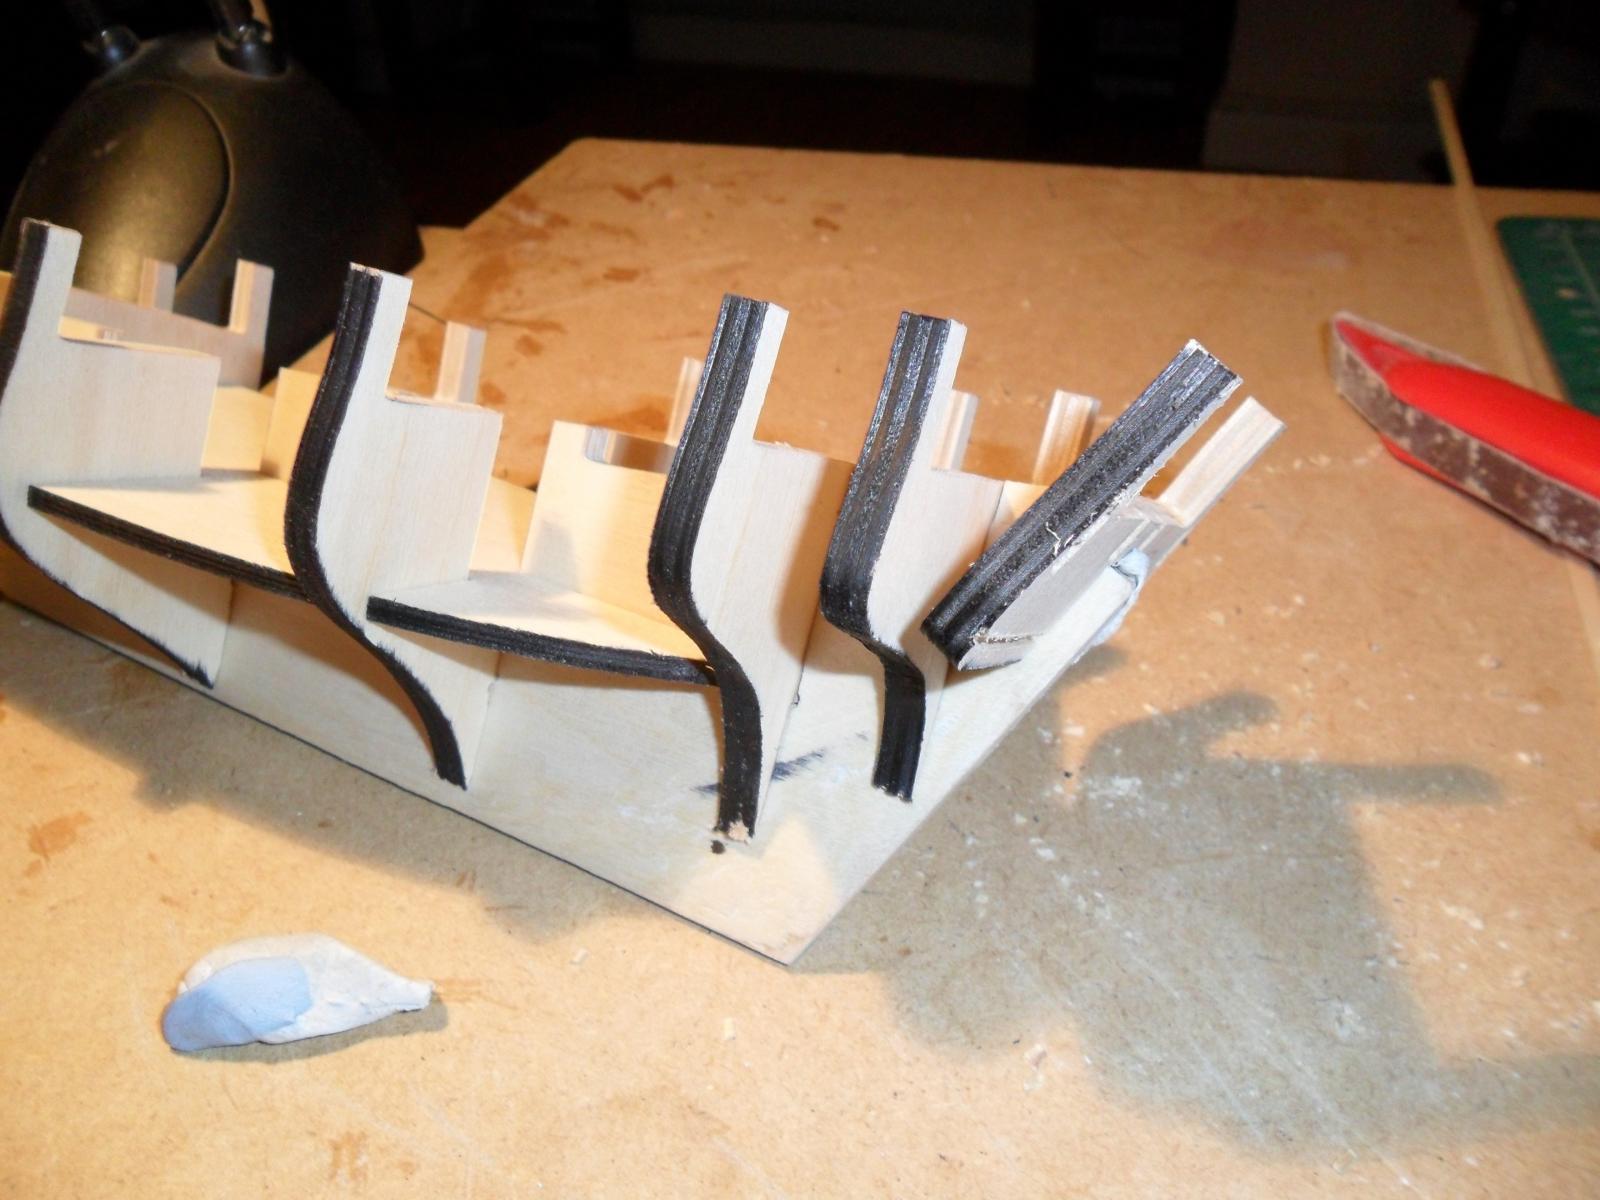
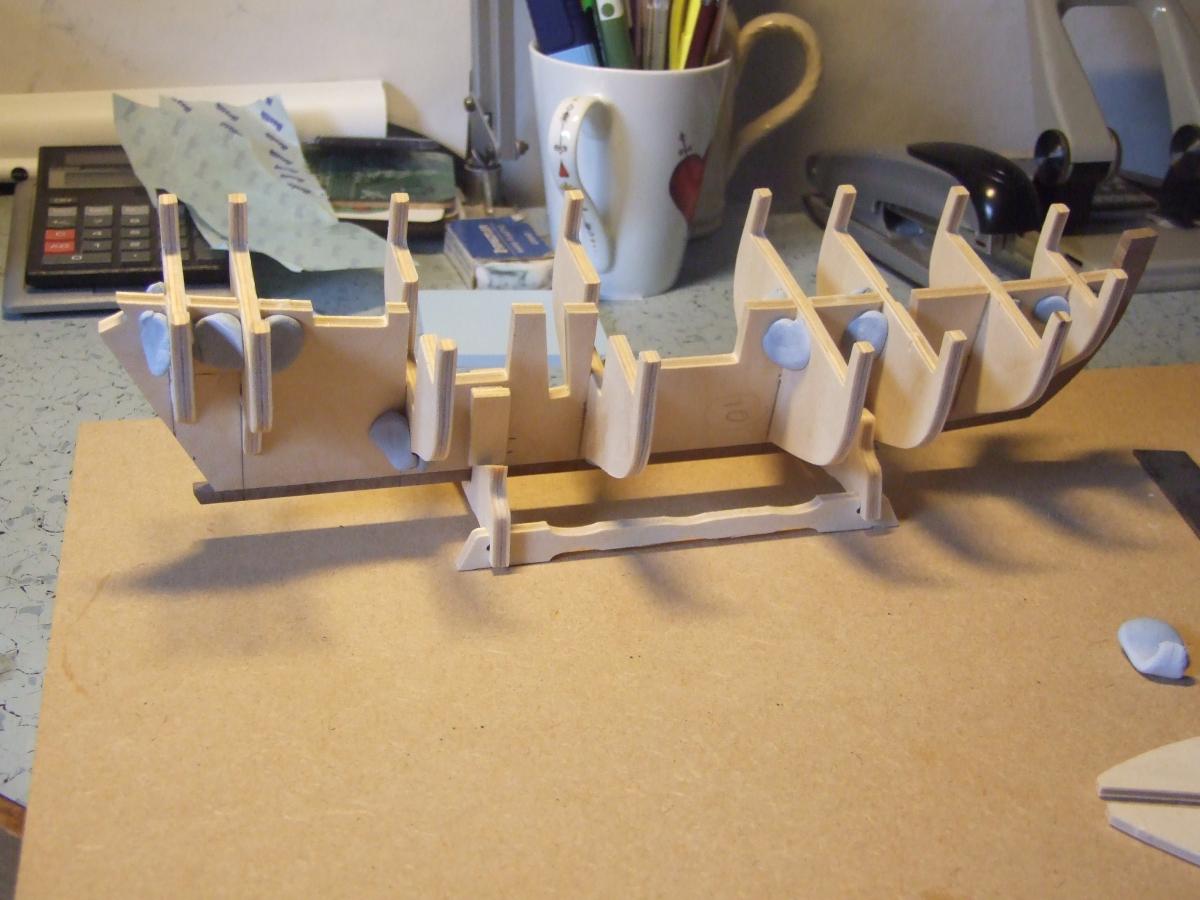
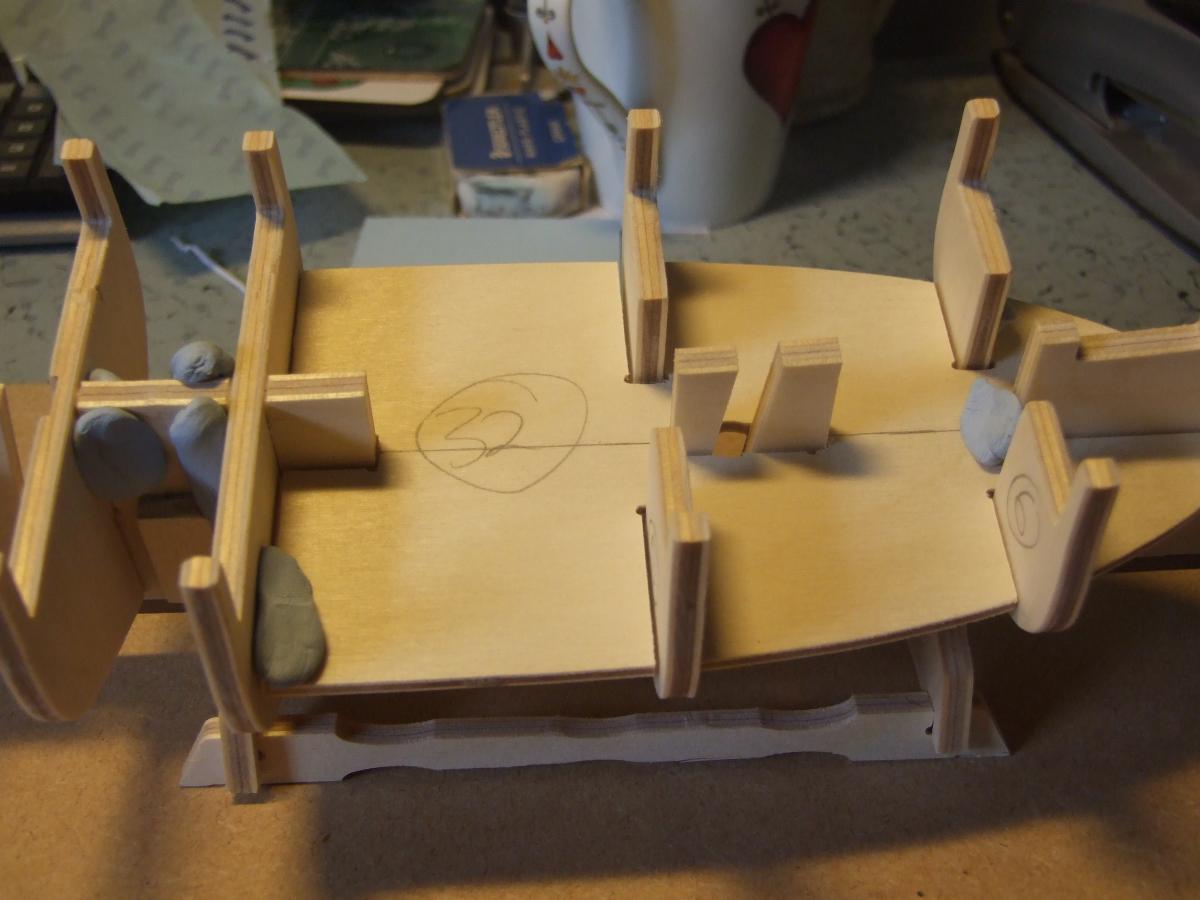
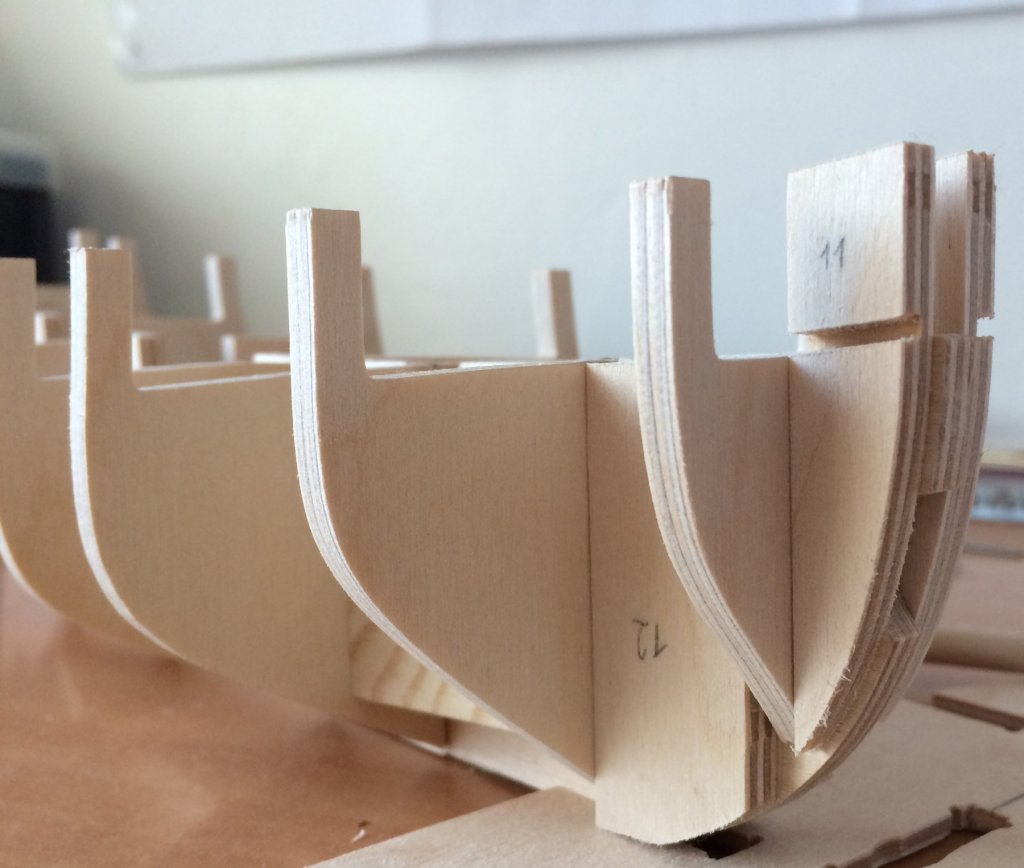
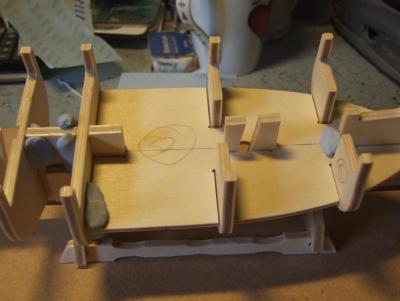
 Hello All and welcome to my build log! To make things clear - I'm a genuine beginner that only recently became interested in this wonderful hobby. I've never attempted anything similar or even worked with wood before. If you're just like me then this thread might serve as a great example of what can you expect from your first build. I'll do my best to cover not only my successes but also the failures. To kick things off I should probably show you the contents of the box, but then again there are already 12 other Pickle build logs on this forum and numerous other reviews available online. I'm also (obviously) not an expert and won't pretend that I'm capable of judging the quality or historic accuracy of the kit, so I've allowed myself to skip this bit. I will however tell you in a nutshell what made me go with this particular kit for my first build. This was mainly due to: - Caldercraft being a highly respected manufacturer, often acclaimed for high quality of materials. - The fact that the instructions are available online, so I could have a look of what's to come and reassure myself that I can do it. - Many other build logs available on the forum. - I'll be honest with you - the copper plating stole my heart. You can see where I'm currently at with the actual build below - I've glued bulkheads 1-8 in place (made sure that the angles are right with Lego parts). The keel was a bit bendy, so I've added some reinforcements between bulkheads 2/3, 3/4, 4/5 and 5/6. Good idea (I think) but poor execution means that there is still a slight bend, but it's not nearly as big as before. I've glued the plank termination patterns in place (11 and upside down 12 on the photo below) and am currently wondering: Should I add filler blocks here? I've seen some people do it and others not really and am a bit confused. I also had a go at the bearding line and trimming bulkheads 7 and 8, so that they fit it. Not sure if this was done correctly - I did this according to the instructions, but I've seen that quite a lot of people left the bulkheads alone and adjusted the bearding line instead. That's it for now. All comments welcome.
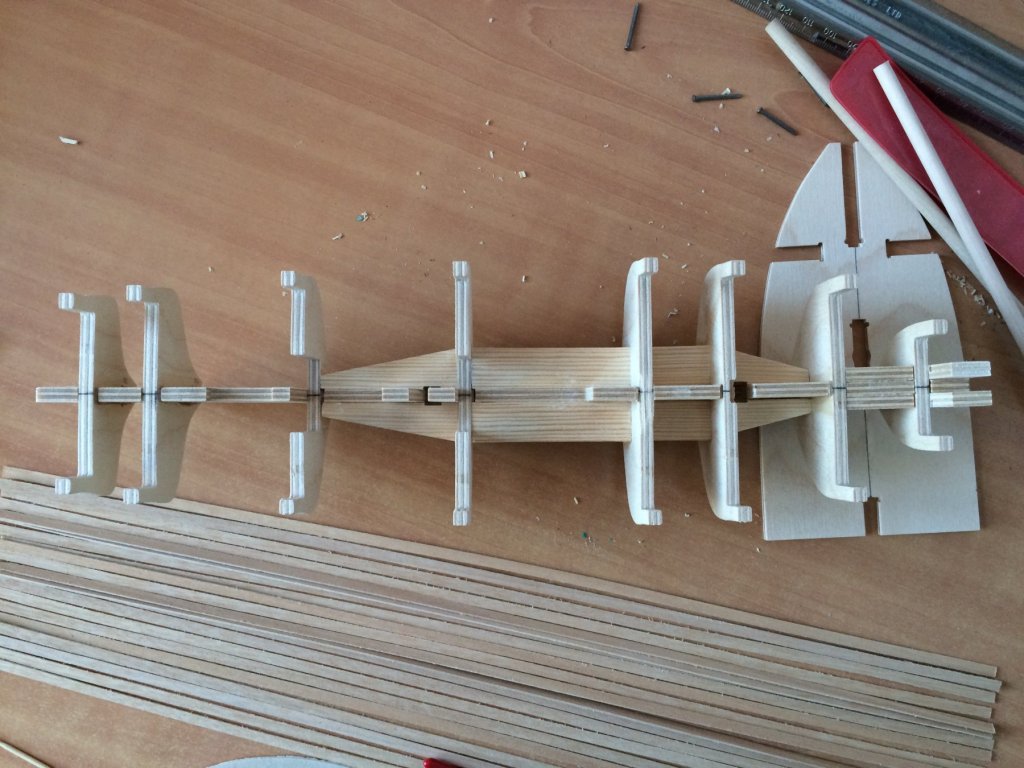

- 37 replies
-
- 6
-
-
- pickle
- caldercraft
- (and 1 more)
-
 Greetings, There are some wonderful build logs of this vessel on this site so I will focus on the things a new builder encounters along the way and give you my personal take on building models in general. I hope people will find this interesting. I cracked open the box last night, November 16th, 2014. The first thing I did was make a list. Let's see what I can do this evening. I will post at least once a week. This is going be great fun! Best Regards from Montreal Rick Shousha
 -
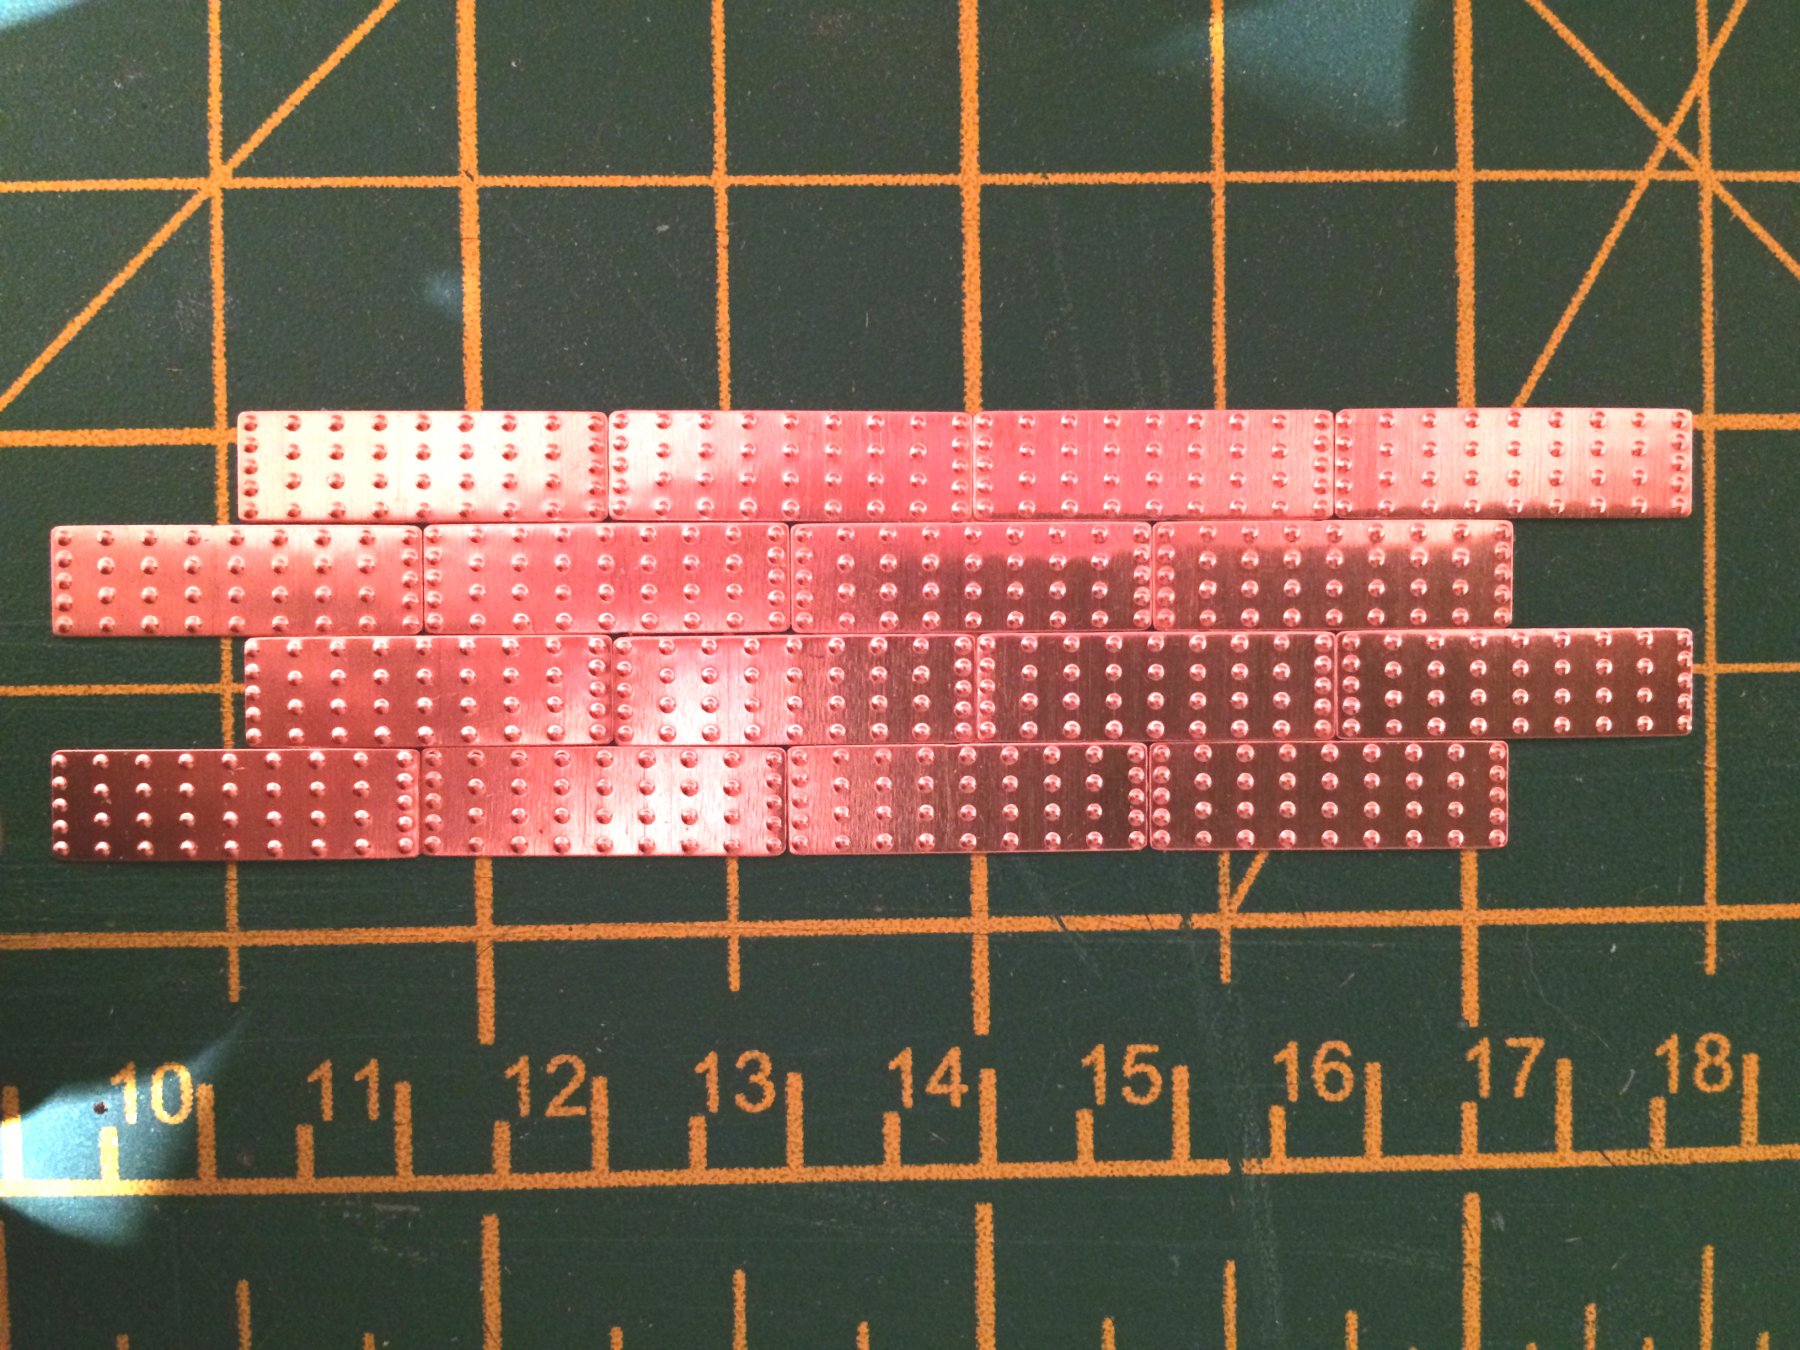
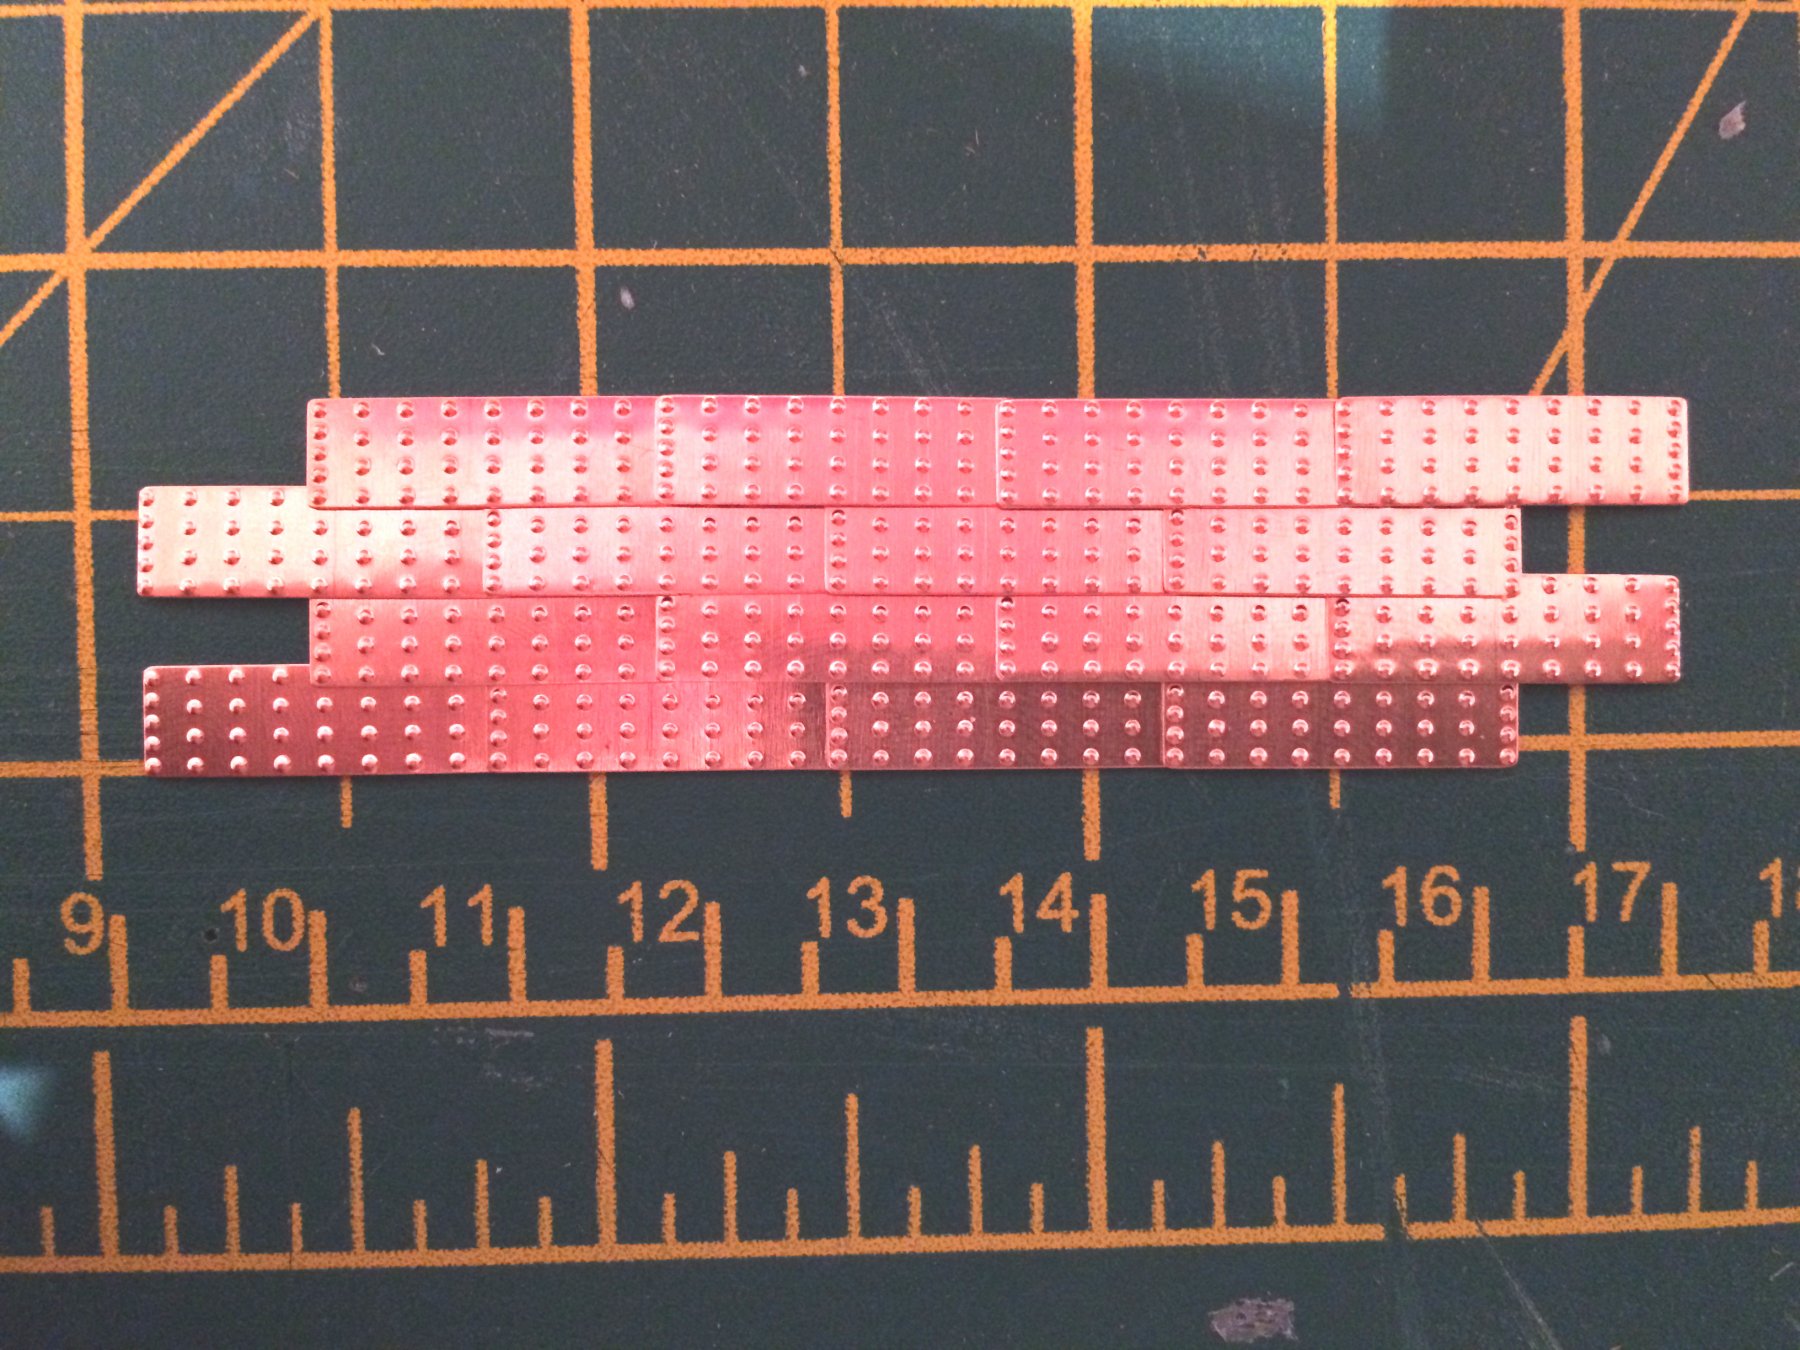
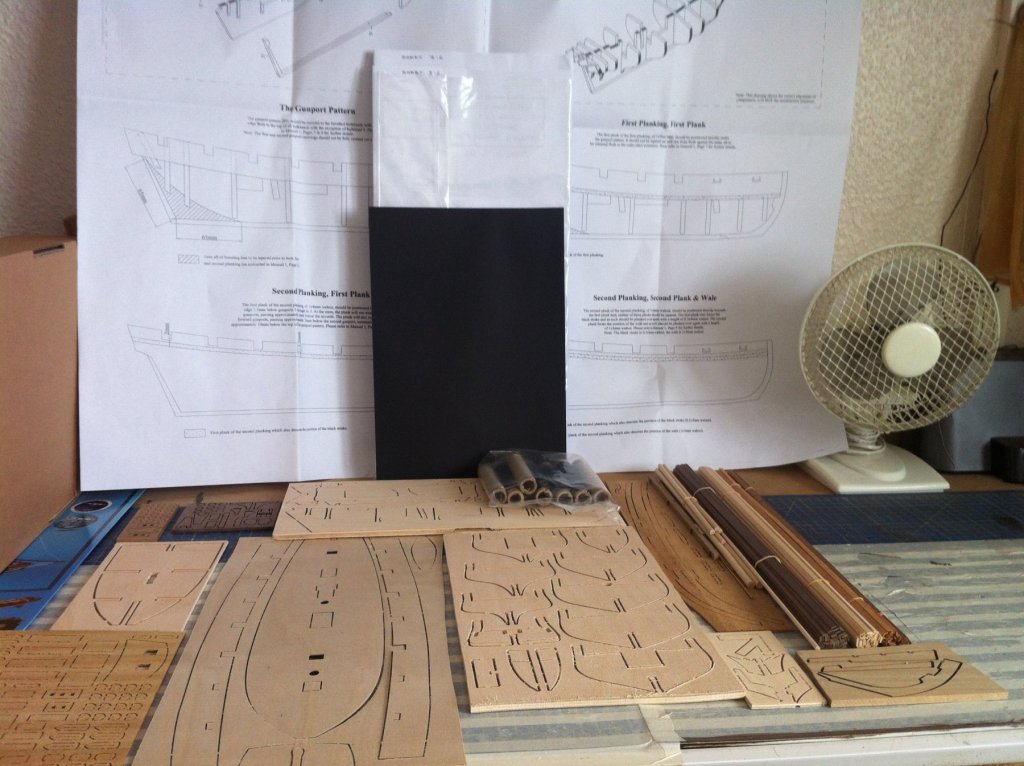
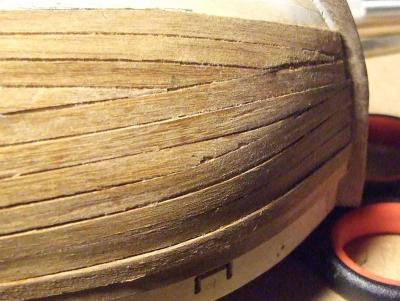
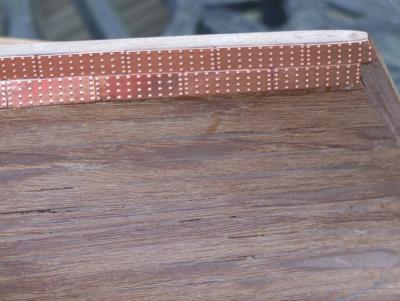
Hi All, I'm currently building my first ship (Caldercraft HM Schooner Pickle) and have a question about copper plating. The instructions suggest that the 18x5.5(x0.15) [mm] plates should be aligned like this (with edges sitting against each other): I find this peculiar and was considering doing this (sides lying on top of neighbouring plate): But this makes the plates look a bit narrow. Could I ask for your opinions on this? I was also wondering about the rivet pattern - is it a technically accurate representation? Should I have a look at different plates? I can see that Cornwall Moedl Boats has a bunch of other ones: - Option I (these are the ones that I have) - Option II - Option III - Option IV However the photos aren't all that helpfull. Can anyone post a picture of these and/or provide me with some advice?


- 14 replies
-
- 2
-
-
- pickle
- caldercraft
- (and 1 more)
-
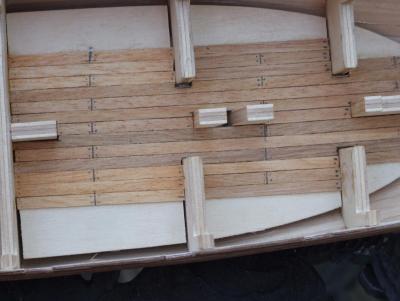
Hi, I'm currently working on my first kit (Pickle by Caldercraft) and have a question relating to the false deck which in this case will be partially visible on the finished model. I'm at a stage where it should be glued into position (according to the instructions), but without any planking (which should be done at a later stage). This seemed weird, so I had a look at other people logs (of the same kit) and realized that basically no one followed the instructions on this matter. I've decided to do the planking before I glue the deck into position, but am a bit overwhelmed by different techniques that people use to make it look more realistic and basically don't know what to do. This relates to: Caulking. I've seen people simply use a permanent marker along the edges of the planks, but am a bit worried about messing things up. Can I use a pencil instead? How will it react with the varnish? Won't I end up with graphite smeared all over the thing? Plank meeting points pattern. I'm sure there's a term for this that I simply don't know. The plans suggest using the 'three butt shift system' for the deck, with max. plank length at 29' (140 [mm] in scale). Should I apply the same principle for the false deck? Nails imitation. I like the look of the wooden nails and thought about using the toothpick technique, but I'm not sure if this is in any way accurate in relation to this particular ship. If it is: What should be the diameter (I was thinking about 0.4 [mm]). If it's not: Should I use actual metal nails instead? Also - is there something that I didn't think about / missed? Thanks in advance for any help.
-
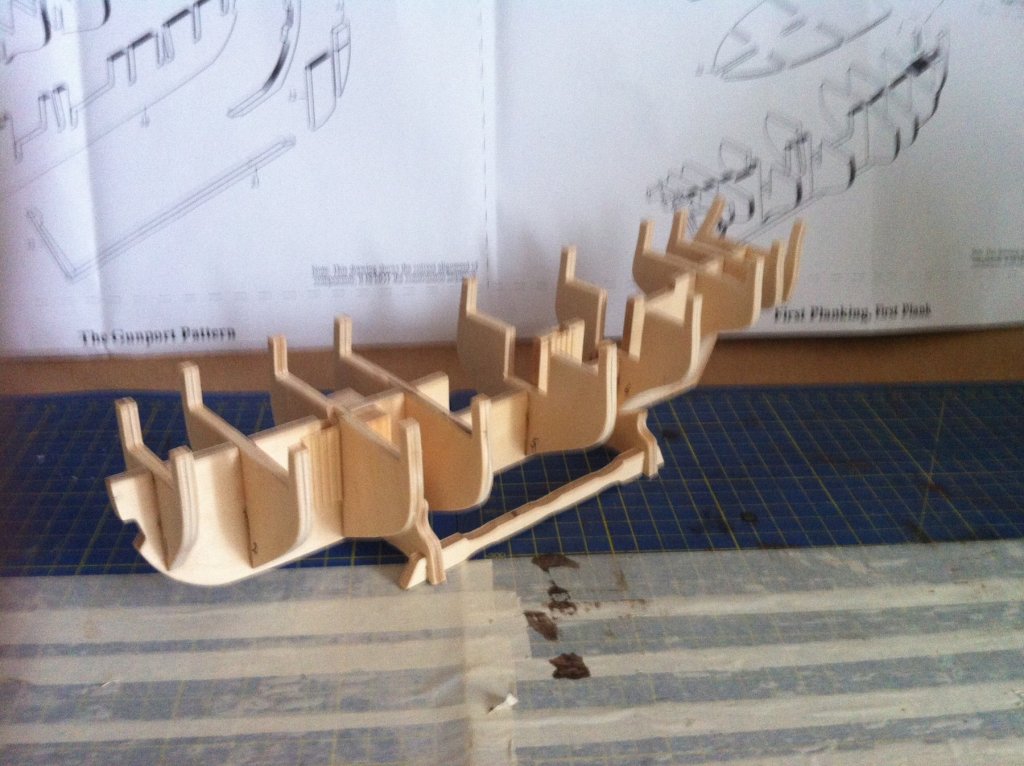
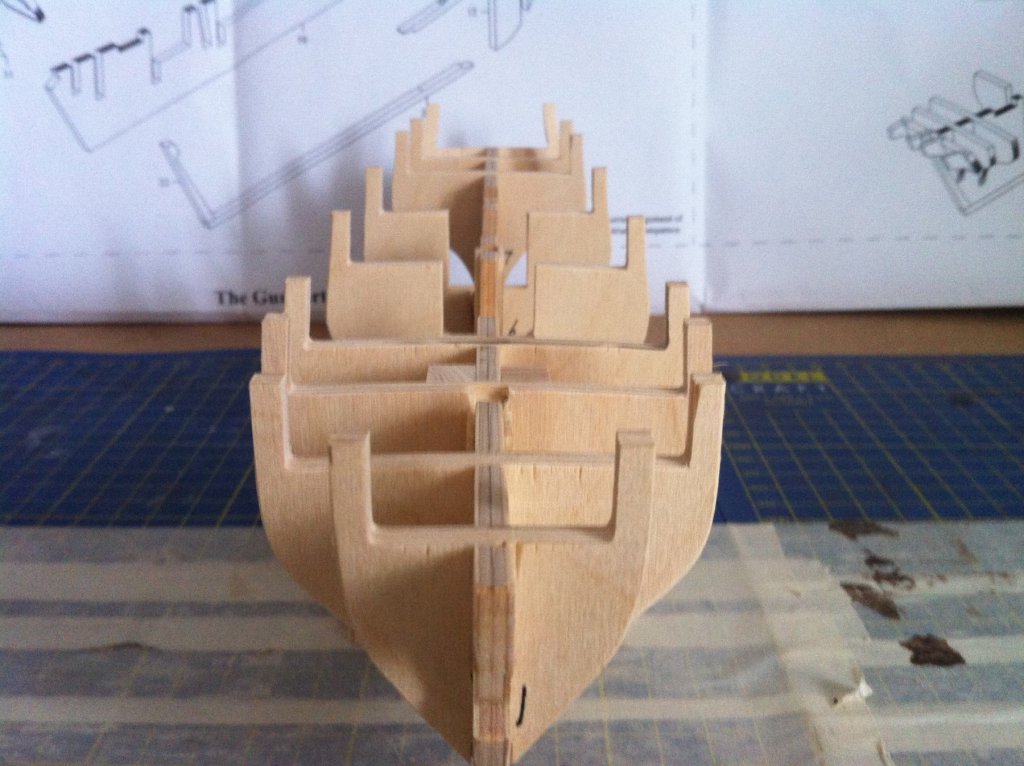
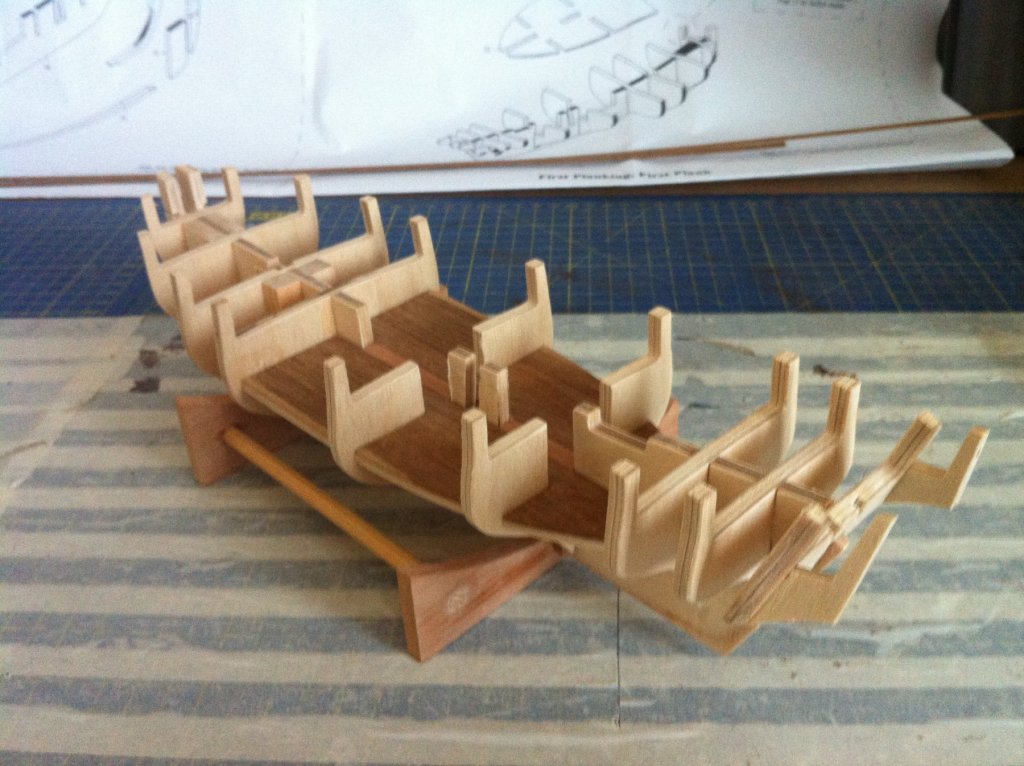
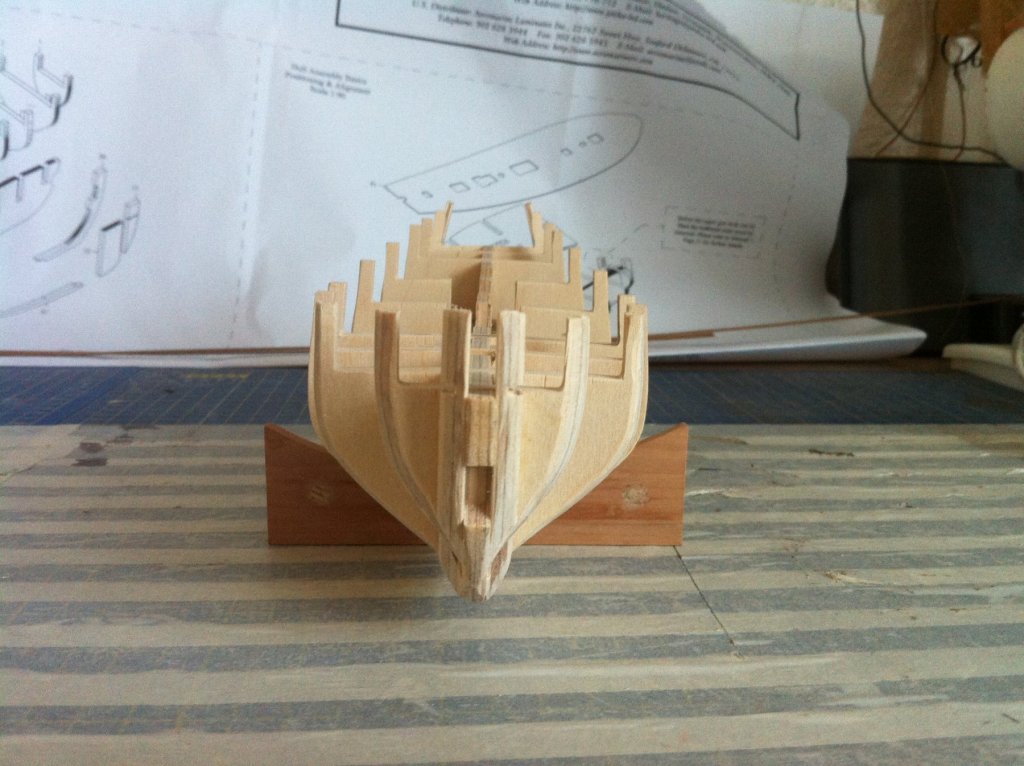
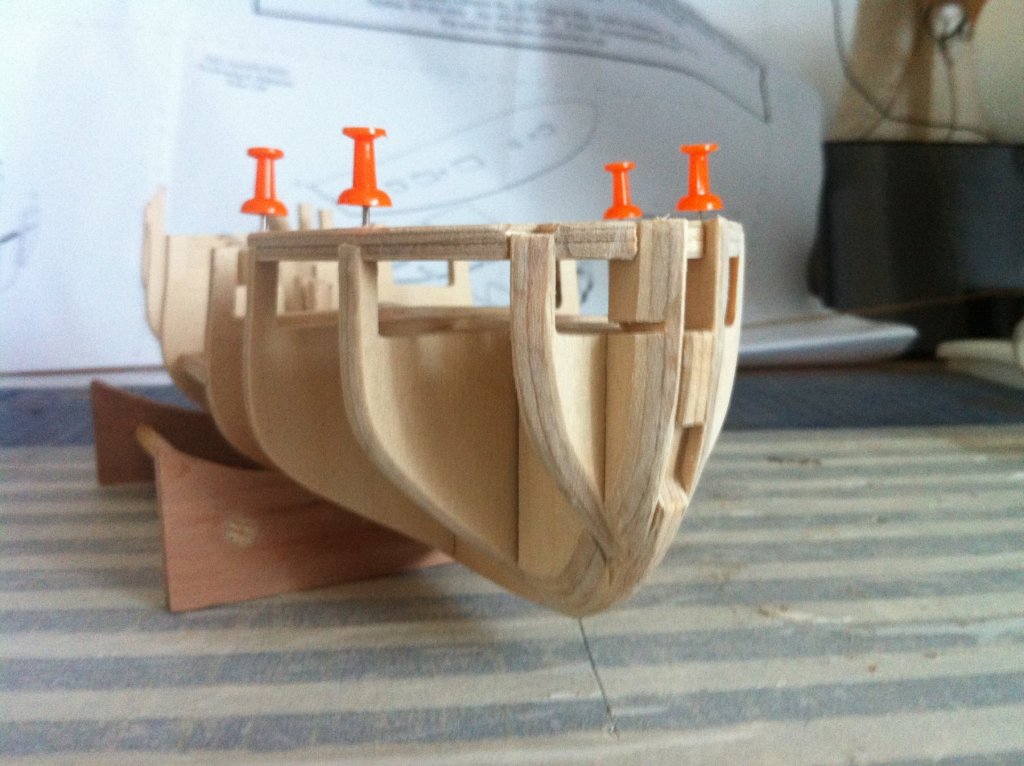
 HM Schooner Pickle was entrusted to carry the dispatches from Admiral Cunningham to the Admiralty in London informing them of the victory at Trafalgar and of the sad loss of the Admiral Lord Nelson. Pickle was finally lost in 1808 whilst again carrying dispatches, she ran aground off Cape Santa Maria on the Chipiona Shoal, there was no loss of life. First up we have the obligatory box shots. Nothing too complicated here and I do have a few ideas for some changes, we'll see how things develop. I have made a start on her, the Main Keel and Bulkheads have been glued up and faired to take the first planking. As you can see there is a slight warp in the Keel, this will be removed. It was at this stage I decided to plank the False Deck, it has made it so much easier so far. By fixing the False Deck in place the warp has all but gone, just a slight bow left. Using the Gunport Pattern Former the bulkheads have been faired. So that's it for now, I have made further progress but they can wait until my next post. Its all pretty straight forward so far but I hope you enjoy the pics. As always guys comments and suggestions are always welcome, both good or bad. Be Good mobbsie


-
 Hi, I'm just in the process of finishing up my previous build - a 1:48 model of a Hunt class Mine Counter-Measure Vessel, HMS Cottesmore, and I've got this kit in ready to build next. The hope is that it will give me the skills to finish off a Panart Royal Yacht Caroline that my late father started. Also, it looks like a really lovely kit. I'm not expecting to match the efforts of some of the other superb models of Pickle I've seen on this site, but hopefully I'll end up with something I can look at and enjoy I've received the kit, so watch this space for updates. And thanks for reading. A couple of 'what's in the box' shots attached. Rob
- 76 replies
-
- 3
-
-
- caldercraft
- finished
- (and 1 more)
-
 Welcome to my build of Caldercrafts HM Schooner Pickle kit. Introduction. The kit includes: Double plank on bulkhead construction in lime and walnut; all decking in high quality Tanganyika strip; 6 x 12pdr turned brass carronades, fully rigged and complete with walnut carriage assemblies; detailed brass etched components; over 500 copper plates; ship's boats in resin with walnut components and brass fittings including oars, grapnels and boat hooks; CNC cut and profiled walnut and ply components; brass nameplate; all required blocks, black & natural hemp to rig the model, birch dowel for the masting; fully detailed actual scale plans and two comprehensive step by step colour instruction manuals including constructional photos of the prototype and technical drawings A bit of ship background HM schooner Pickle was a 72-foot (22 m) two-masted vessel, built in 1799. She was bought for use as a flagship tender, but later served as a dispatch and communications vessel due to her fast-sailing characteristics. Pickle is famous for delivering the despatch to Britain that The combined French/Spanish fleets had been defeated at Trafalgar and also of the loss of Vice-Admiral Lord Nelson. John Lapenotiere, Pickle's commanding officer was a 35-year-old lieutenant, desperate for further promotion. The delivery of the dispatches announcing victory at Trafalgar was a defining point in his career. While sailing back to England, Lapenotiere encountered the 18-gun sloop Nautilus, whose captain, John Sykes, decided it was his duty to carry the news. The resulting race between Sykes and Lapenotiere to be first home has become famous in naval history. Arriving in Falmouth on 4 November 1805, Lapenotiere gambled half his salary on a post-chaise (a hired carriage) to speed him to London. He arrived at the Admiralty 37 hours later, after 19 horse changes, just ahead of Sykes. His efforts were rewarded with promotion to the rank of Commander.
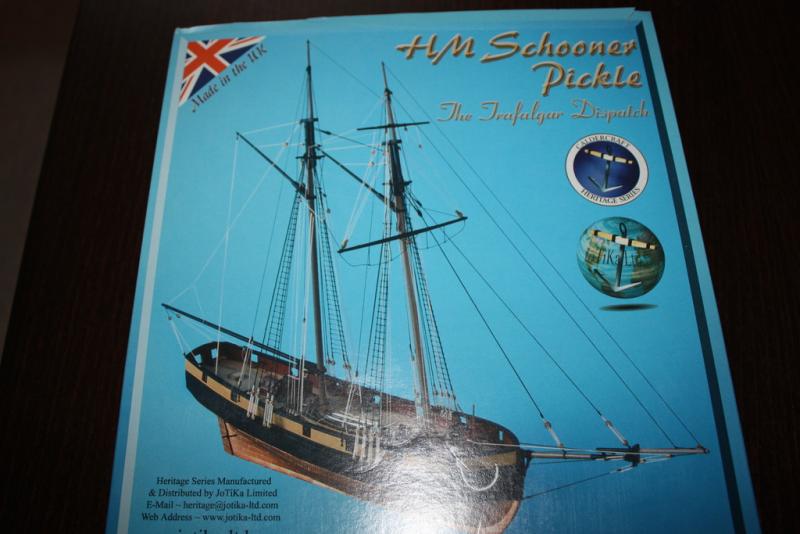


-
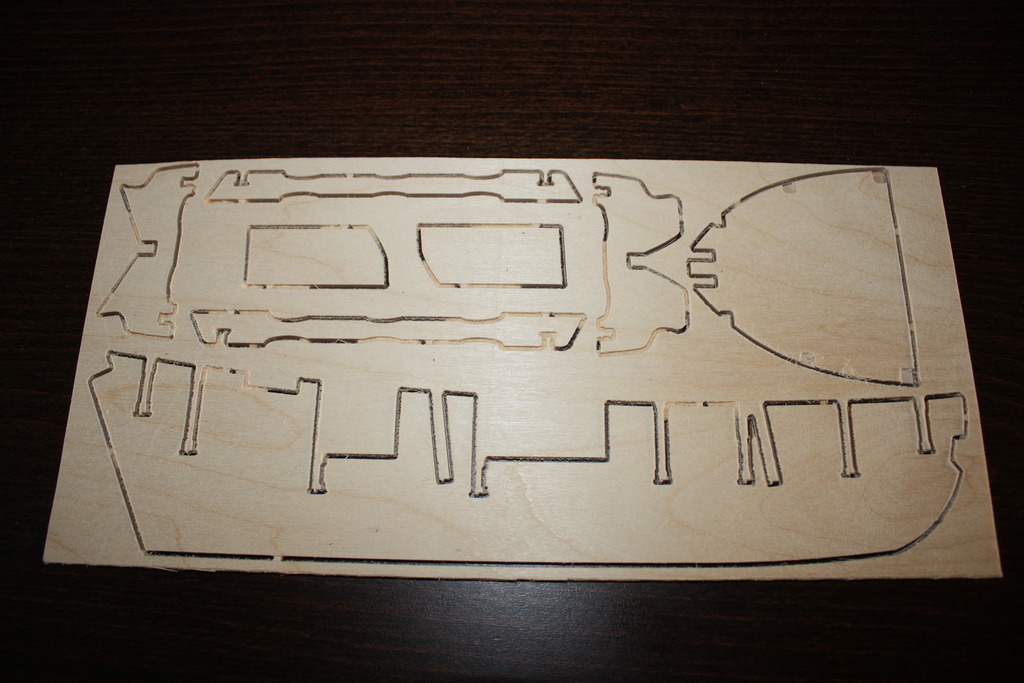
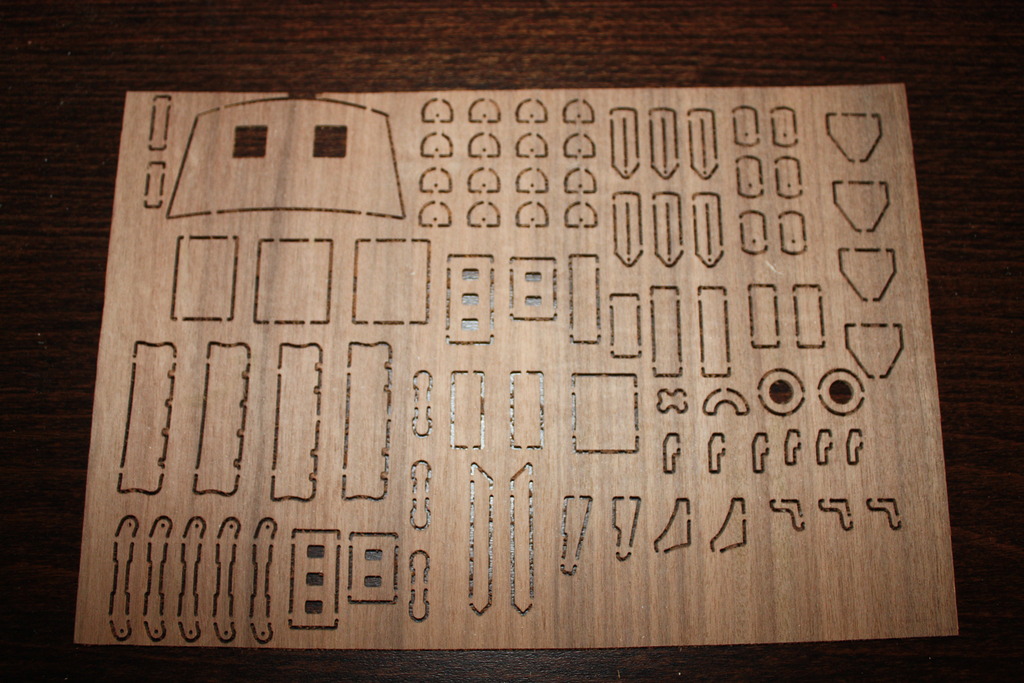
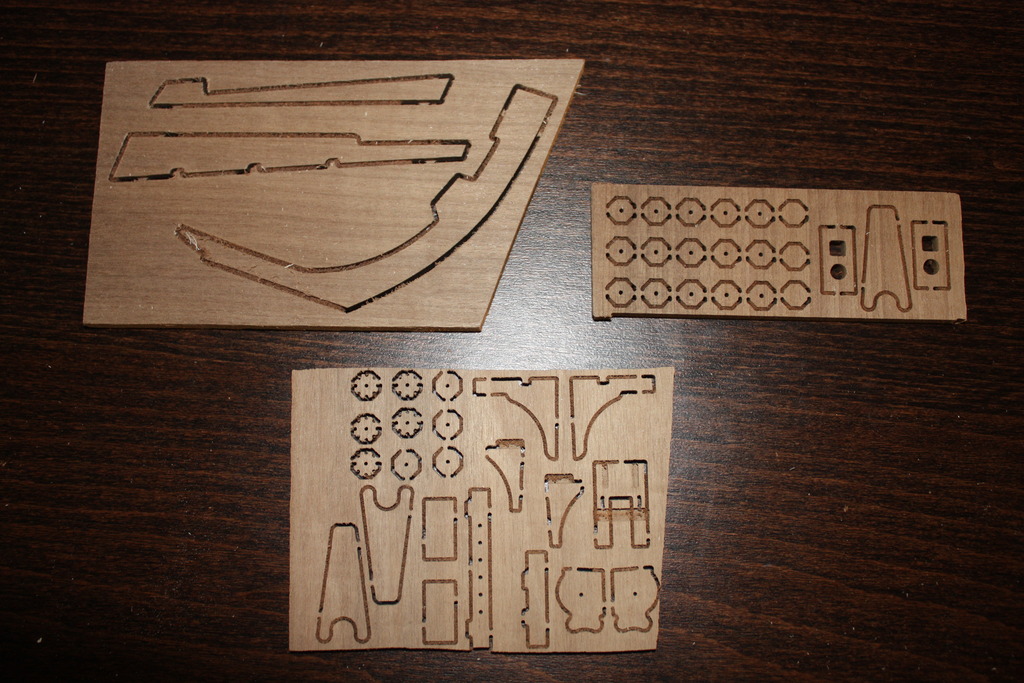
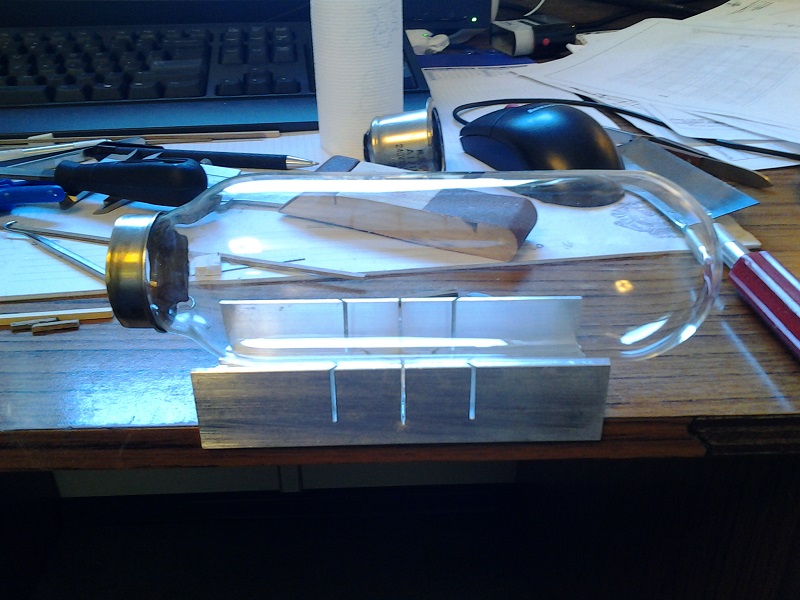
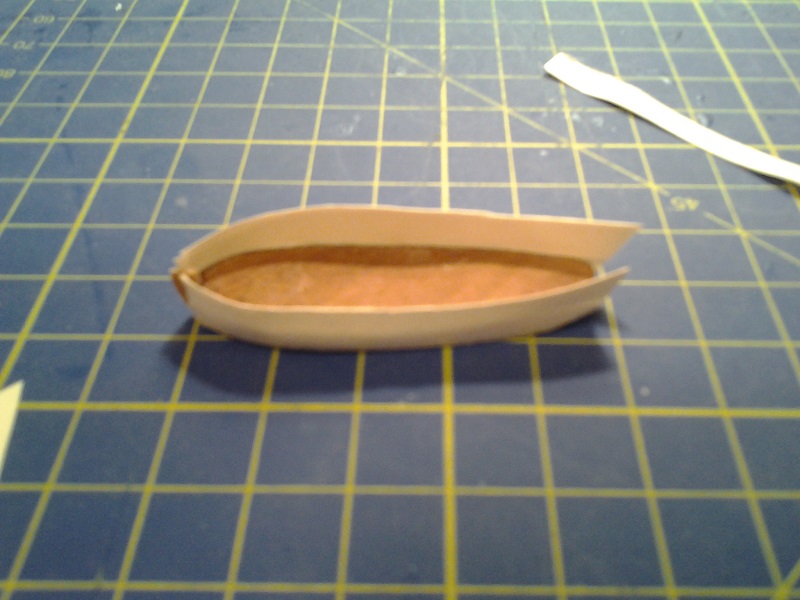
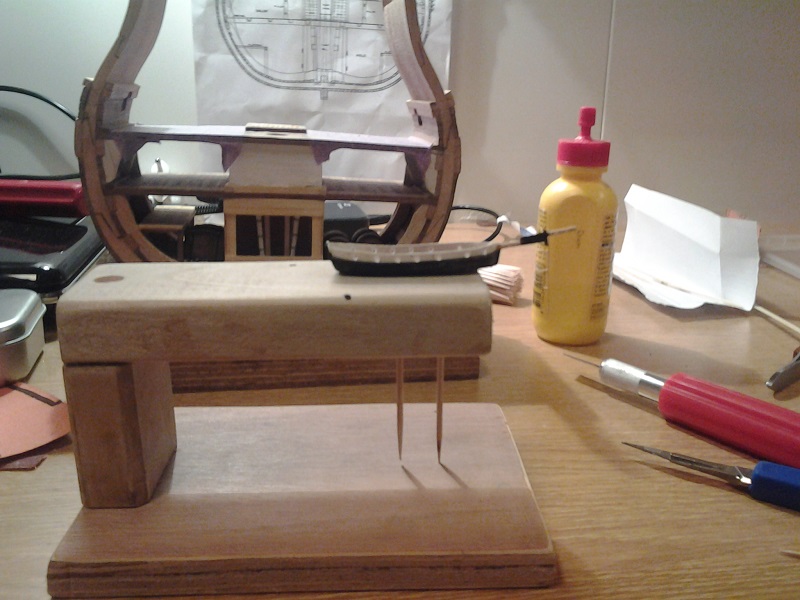
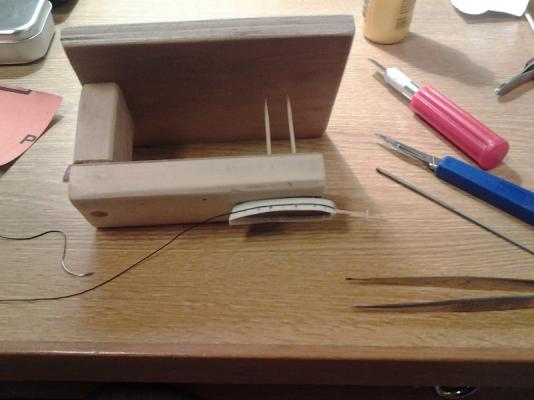
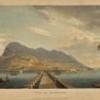 When I was cleaning on my vessel I found an old big light bulb. As I love the ships in bottles I thought it would be nice to put a little ship in there. As the entrance is not that small as a bottle it is a nice exercise before I start with a real bottle. I made a little waterline hull from wood and made some bulwarks from a sea chart which is a nice and strong paper. I made a stand to hold the model and drilled holes for the gun ports. These are squared with a little key file. The bowsprit is made from sanded down tooth picks. I made the gunwales of a suture kit which contains very fine silk thread (you can still see the needle on the end of the thread). And I painted the lower part off the hull. Jantje
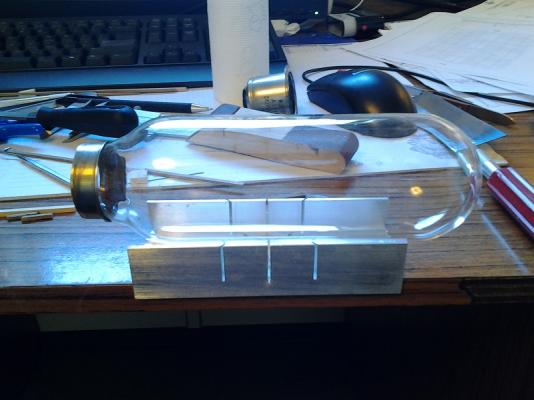


-
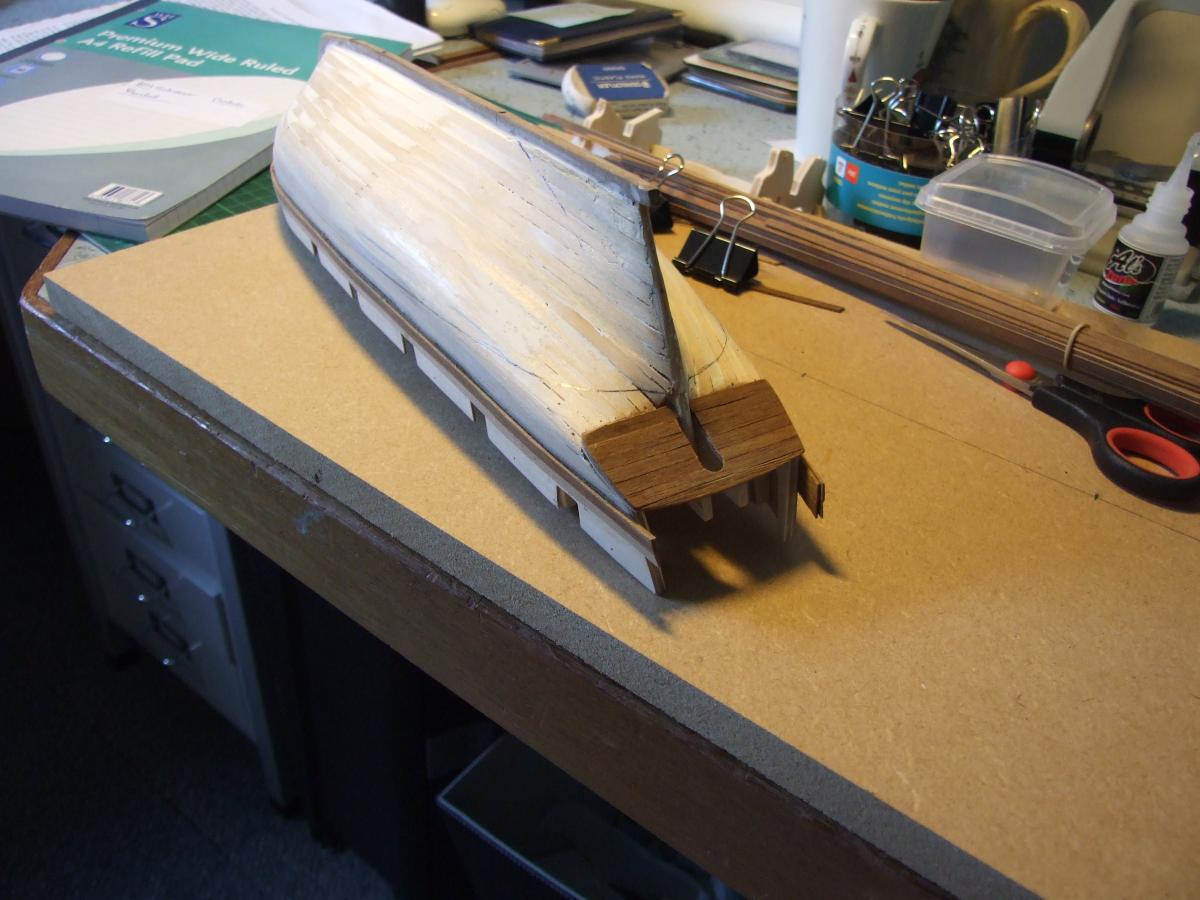
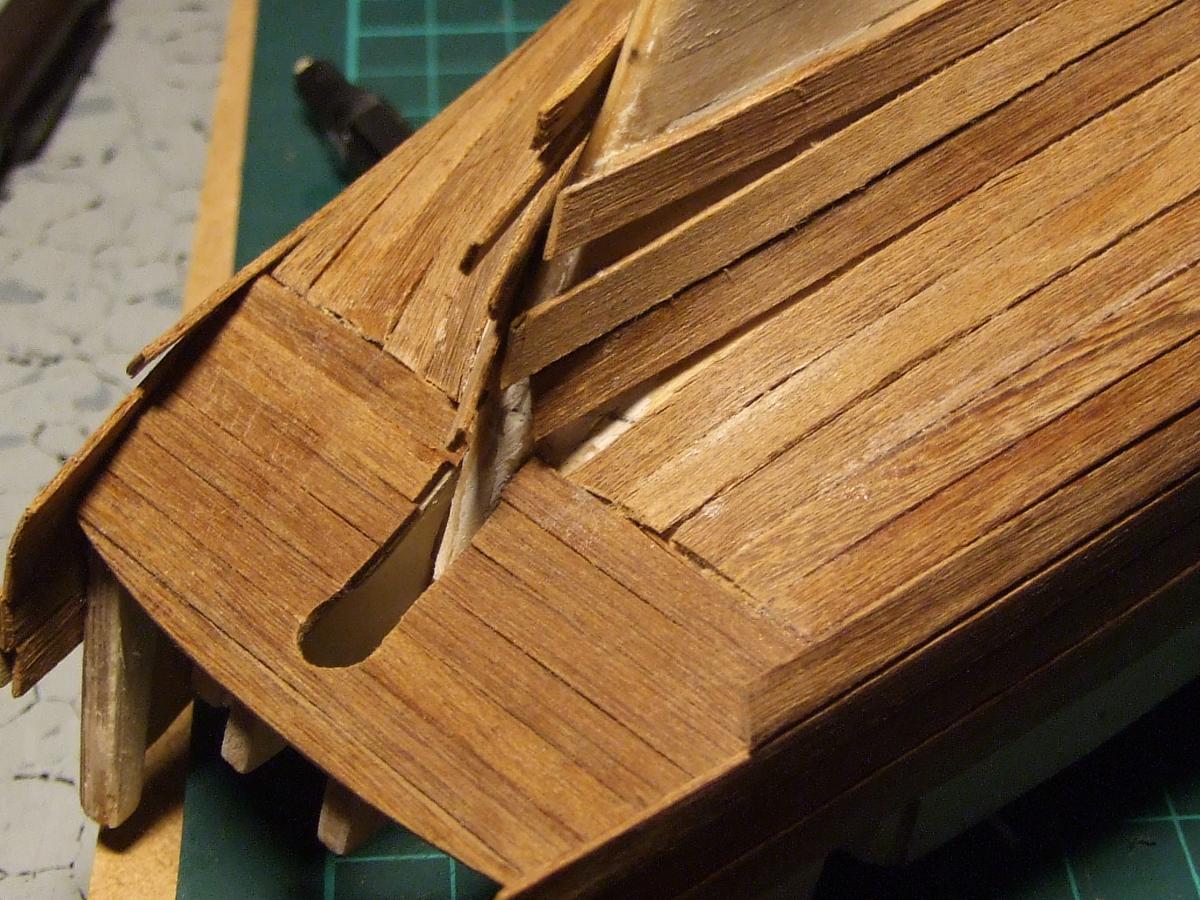
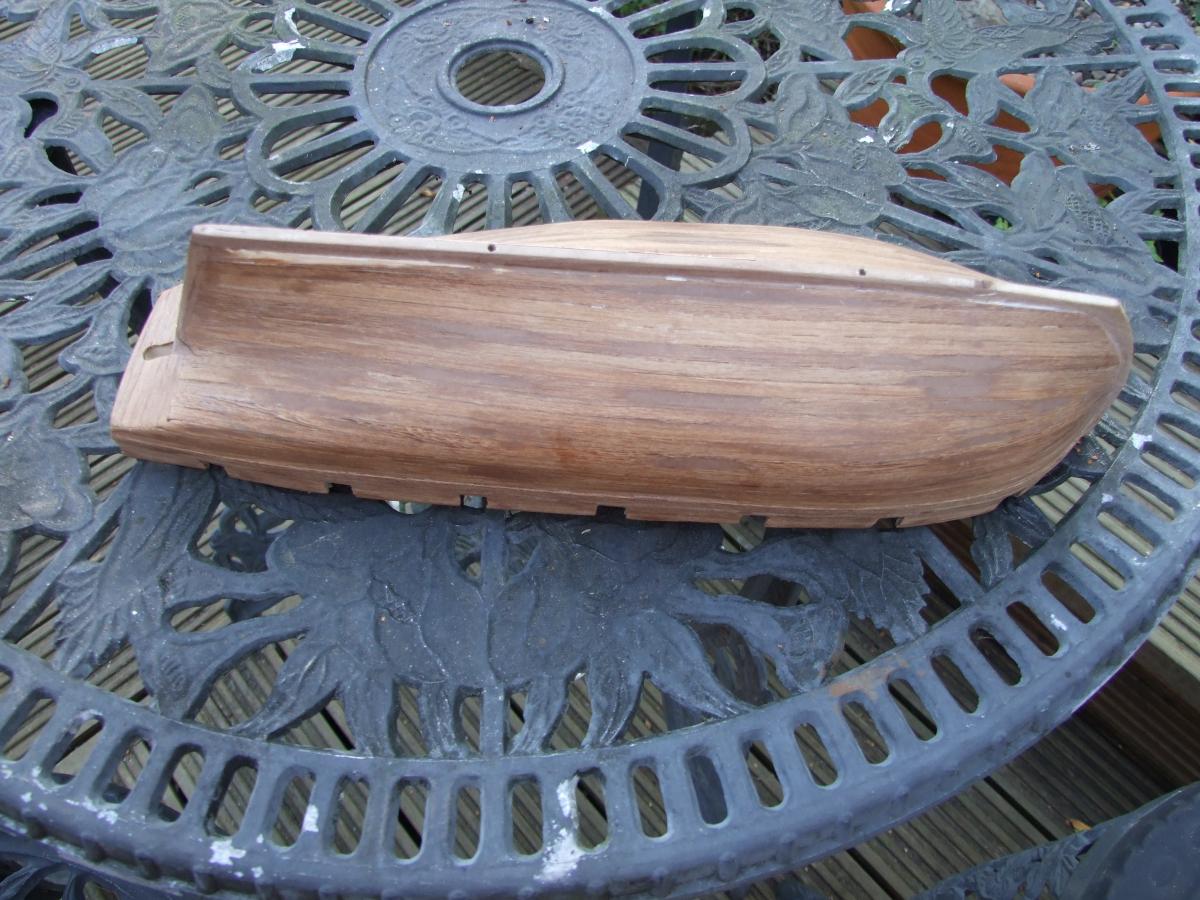
 Firstly - Apologies if my nautical parlance is not up to scratch but this ship modelling is a steep learning curve. HM Schooner Pickle is my second pob build, and I have decided to post a build log for a couple of reasons: Looking through MSW as a first timer was a constant source of help and ideas, the Build logs, downloadable files, and topics on the help forum got me past many hiccoughs (& mistakes on my behalf) and got me to the end of HM Cutter Sherbourne with a model that, though I constantly wish I had done "that" different etc, I am proud of. Secondly it has been mentioned by many people that lots of content has been lost since the "great crash" so hopefully my contribution could help fill the void - and though I am still very much a beginner, I will be pointing out things that I do differently this time around - possibly helping other starters. HM Schooner Pickle On recieving the long awaited parcel (3 whole days) I curbed my instinct to get "stuck in" ,and as well as the obligatory examination of all the wonders enclosed (Brass turned carronades, copper plates et,al) I took the time to completely read the two manuals (far better than those included with Sherbourne)and look over the plans thoroughly. So far so good no unpleasant surprises. First things first, I removed and cleaned up the edges of all nine frames & the Keel, and dry fitted them - no problems there. Next step was to taper the keel from the bearding line to the stern, this was surprisingly easy to do with a chisel bladed hobby knife and sandpaper, continuously checking the measurements with a vernier - this is also not something mentioned in the Sherbourne manuals and plans and would make a world of difference. The next step is hopefully where I will simplify my efforts compared with Sherbourne: Being a newcomer I did not understand the importance of bevelling the bulkheads to follow the curve of the hull. The result was a first planked hull that needed at least 4 hours with sandpaper and about 2lb's of filler, and even then the second planking was difficult due to very flimsy sections to attach to. Perseverance, and initial enthusiasm was all that got the second planking completed. With this in mind I am starting with a trick I believe will help (I am not sure after so many hours on the internet where this one was from, but whoever you were THANKS in advance) The idea is quite simple (once someone else has had it); to get a strong smooth first planking the bulkheads need to be bevelled to continue the shape of the hull, and give the greatest surface area to glue to, but the furthest outside point of the bulkhead needs to be kept to keep the hull lines correct. The idea is that you colour the edges of the bulkhead with something such as a black permanent marker, then start bevelling the bulkheads as per the kits instructions - or the guides on msw - but allways leaving some black showing from top to bottom on each bulkhead. I will let you all know how this went for me after the weekend - the boss requires heavy sanding to be done outside and it's rain till sunday!! Skippy

-
 Hi all, welcome to my build log. I'm a new menber and last Friday I started the build of JoTiKas HM Schooner Pickle. It's a very nice little kit. I think I don't need to show the box and all the parts of the kit, because here are some very fine build logs of the Schooner Pickle. Forever associated with Admiral Nelson's final and most historic victory, the Battle of Trafalgar 1805, Pickle was chosen to carry the News of Nelson's victory and death back to England. And here are the first pictures: Almost ready for the first planking.
-
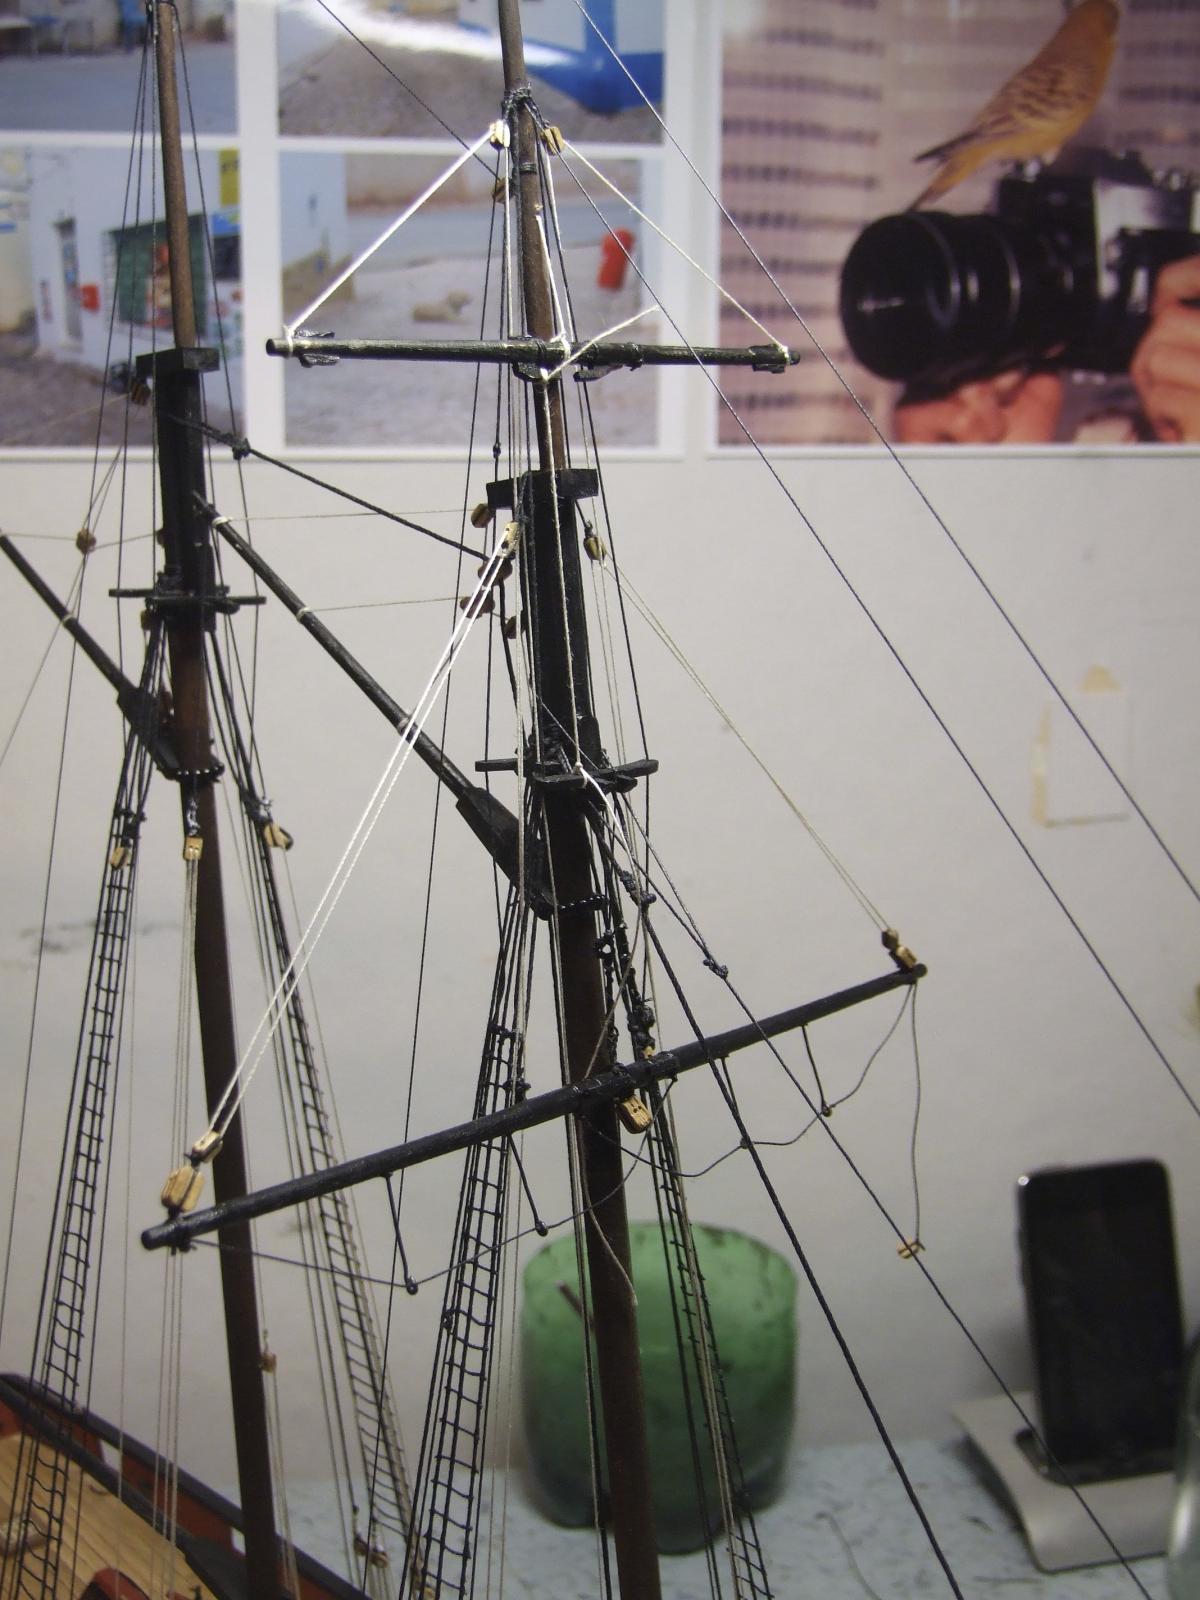
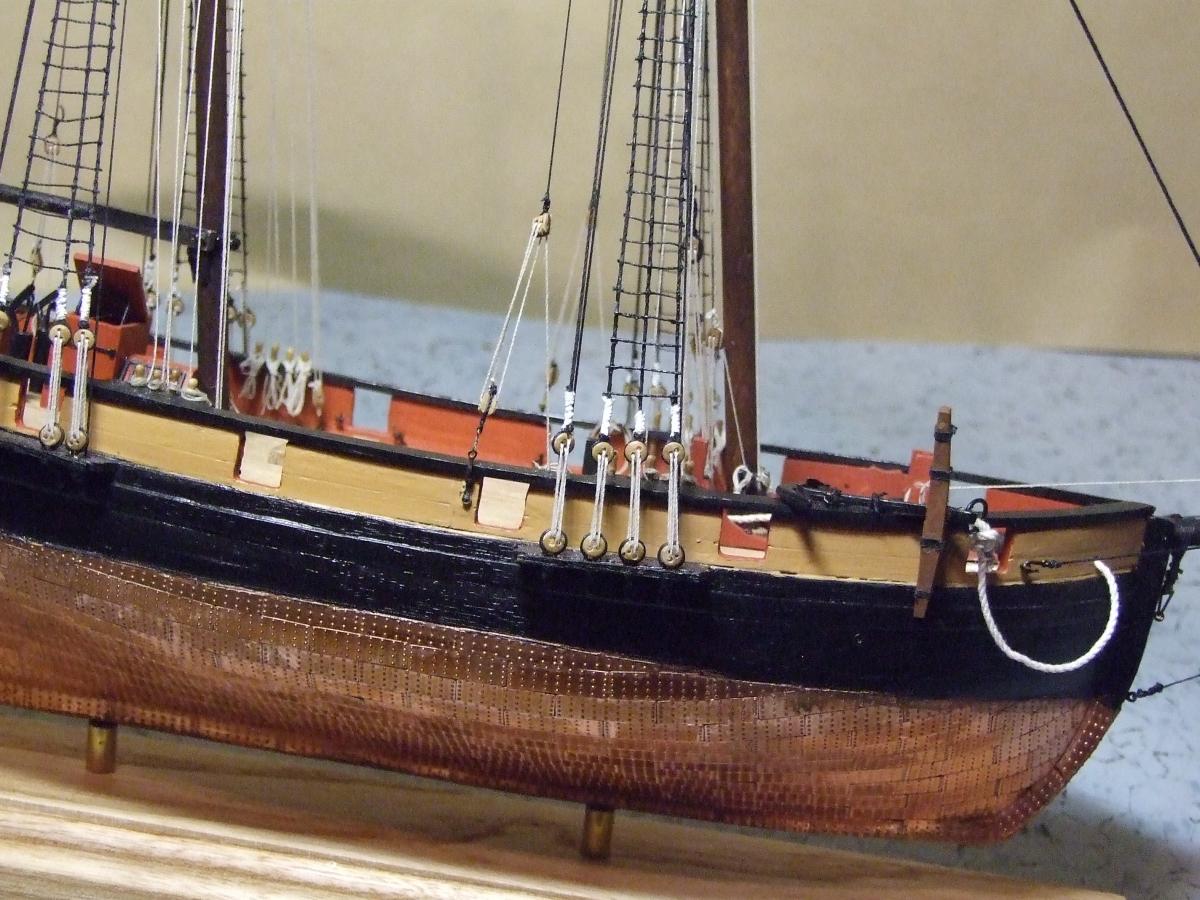
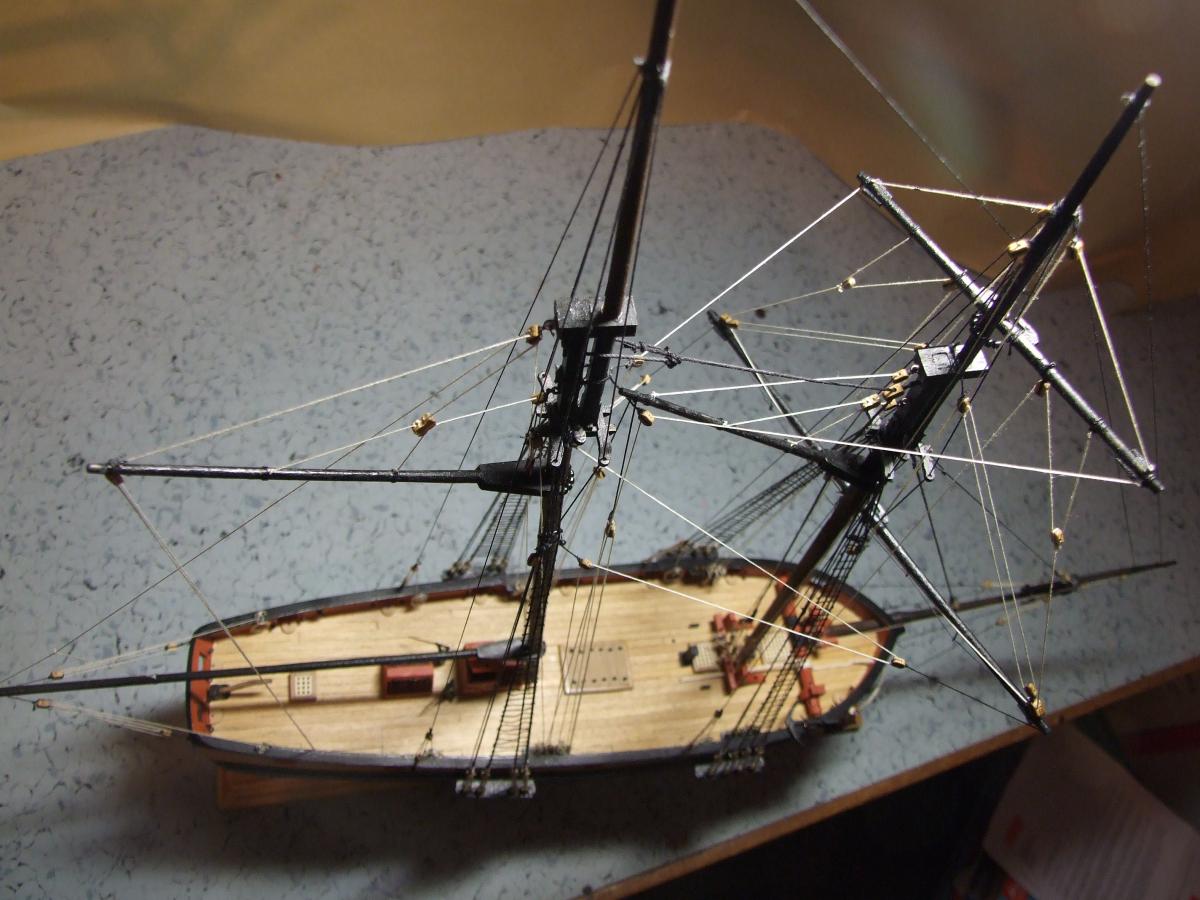
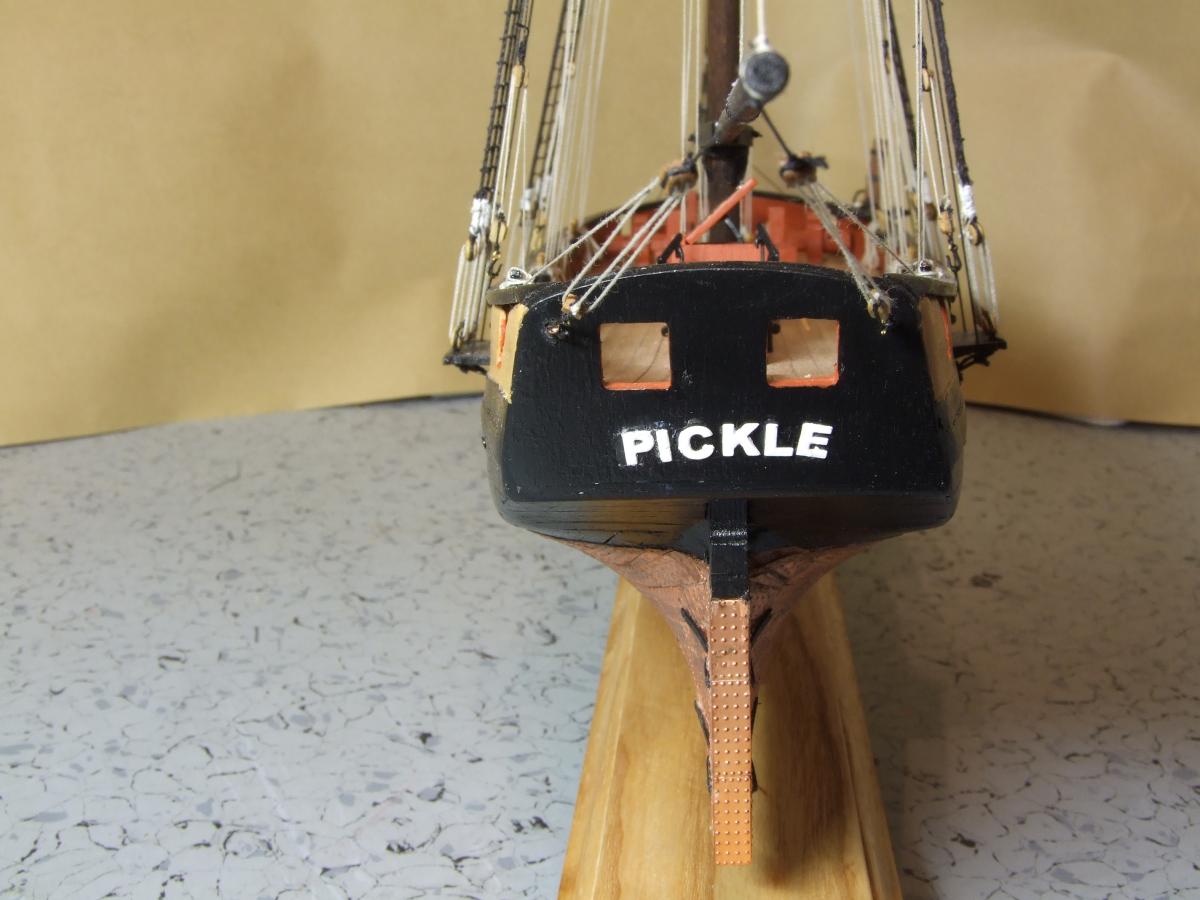
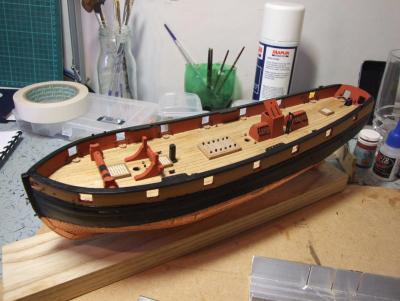
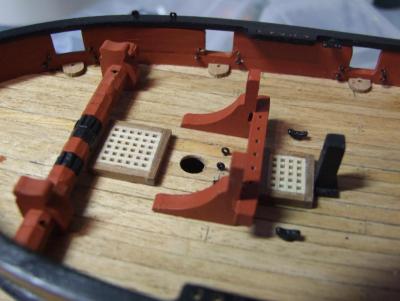
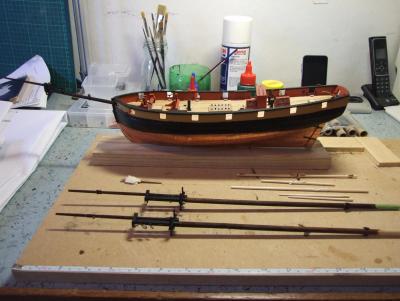
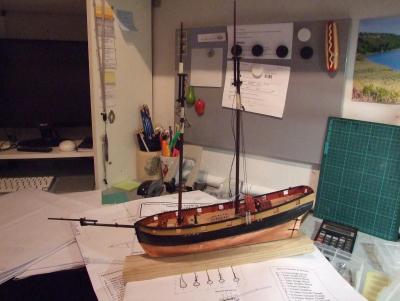
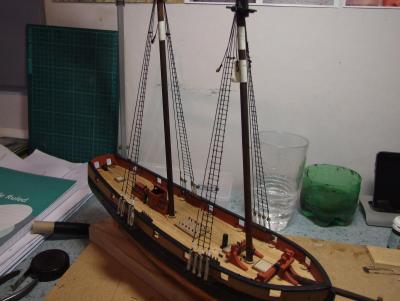
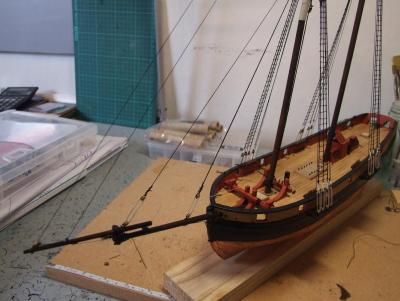
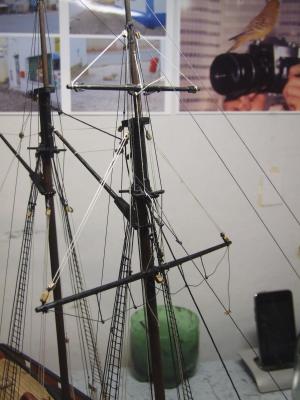
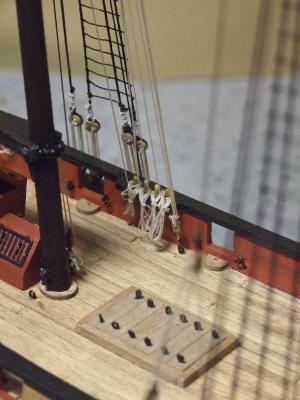
 This was my first attempt at model ship building. It is incomplete as the cannon were not built. I found 1:64 to be too small for me. The job was hurried because i wanted to try out all the aspects of the build to see how i liked it. I liked it a lot which is why i am about to take a very great deal of time building the AL 1:48 HMS Surprise. The following photographs form a pictorial record of the build. Sorry....no words. Mike.
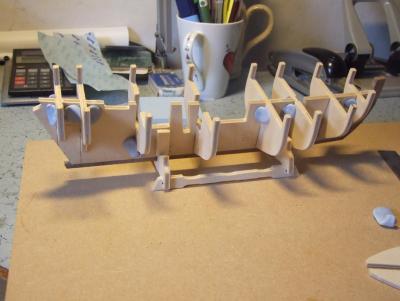


- 5 replies
-
- 2
-
-
- caldercraft
- pickle
- (and 1 more)