Blueskippy
-
Posts
42 -
Joined
-
Last visited


-
 GrandpaPhil reacted to a post in a topic:
HM Schooner Pickle by Skippy - FINISHED - Caldercraft - 1:64
GrandpaPhil reacted to a post in a topic:
HM Schooner Pickle by Skippy - FINISHED - Caldercraft - 1:64
-
Blue Ensign reacted to a post in a topic:
HM Schooner Pickle by Skippy - FINISHED - Caldercraft - 1:64
-
Blueskippy reacted to a post in a topic:
Cruizer-class Brig-Sloops of the Royal Navy
-
Blueskippy reacted to a post in a topic:
HMS Victory by robipod - Caldercraft - 1805 version - first build
-
Blueskippy reacted to a post in a topic:
HMS Agamemnon by mobbsie - FINISHED - Caldercraft / Jotika - 1/64
-
Blueskippy reacted to a post in a topic:
HMS Vulture 1776 by Dan Vadas - FINISHED - 1:48 scale - 16-gun Swan-class sloop from TFFM plans
-
Blueskippy reacted to a post in a topic:
USF Confederacy by Augie & Moonbug - FINISHED - Model Shipways - 1:64
-
Blueskippy reacted to a post in a topic:
Hr. Ms. O 19 1938 by Piet - FINISHED - scale 1:50 - submarine of the Royal Navy Netherlands in service 1939 - 1945
-
Blueskippy reacted to a post in a topic:
Niagara by Bahamas Diver - Model Shipways
-
Blueskippy reacted to a post in a topic:
Royal Caroline by sparrow - Mantua/Panart - Royal yacht 1749, scale 1:47
-
Blueskippy reacted to a post in a topic:
HMS Blandford by hamilton - FINISHED - from Corel HMS Greyhound - 1:100
-
Blueskippy reacted to a post in a topic:
HMS VICTORY by Kevin - FINISHED - Caldercraft - 1/72
-
augie reacted to a post in a topic:
USF Confederacy by Augie & Moonbug - FINISHED - Model Shipways - 1:64
-
WackoWolf reacted to a post in a topic:
USF Confederacy by Augie & Moonbug - FINISHED - Model Shipways - 1:64
-
 Hey all you have done is open the box, and we are already at the end of page 2. Syrens 112 page record will be broken before you get your tools out at this rate lol. I will sit and wait patiently with the others.
- 2,191 replies
-
- 2
-
-
- confederacy
- Model Shipways
- (and 1 more)
-
riverboat reacted to a post in a topic:
HM Schooner Pickle by Skippy - FINISHED - Caldercraft - 1:64
-
Hi Piet have been quietly watching and am seriously in awe of your sub. Skippy Ps. Your flying technique sounds eerily familiar to a recent holiday flight I was on. Lol
-
Landlubber Mike reacted to a post in a topic:
HM Schooner Pickle by Skippy - FINISHED - Caldercraft - 1:64
-
tkay11 reacted to a post in a topic:
HM Schooner Pickle by Skippy - FINISHED - Caldercraft - 1:64
-
The Sailor reacted to a post in a topic:
HM Schooner Pickle by The Sailor - FINISHED - Caldercraft - Scale 1:64
-
hopeful reacted to a post in a topic:
HM Schooner Pickle by Skippy - FINISHED - Caldercraft - 1:64
-
hopeful reacted to a post in a topic:
HM Schooner Pickle by Skippy - FINISHED - Caldercraft - 1:64
-
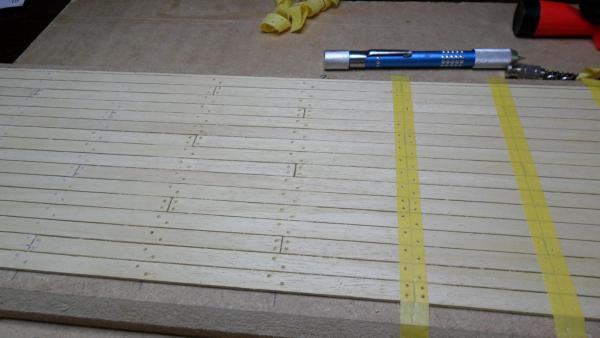
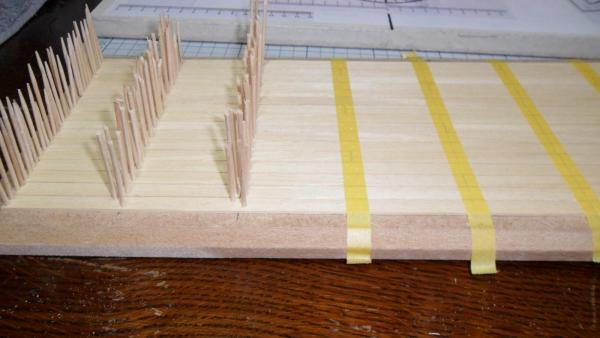
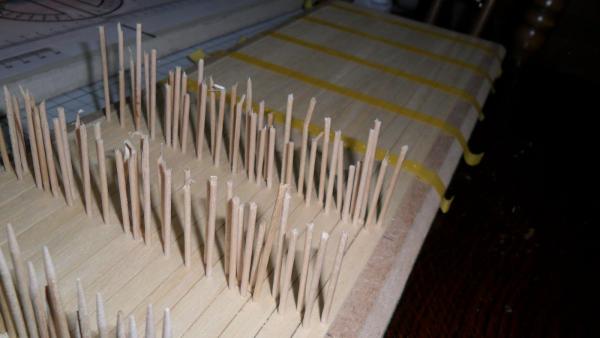
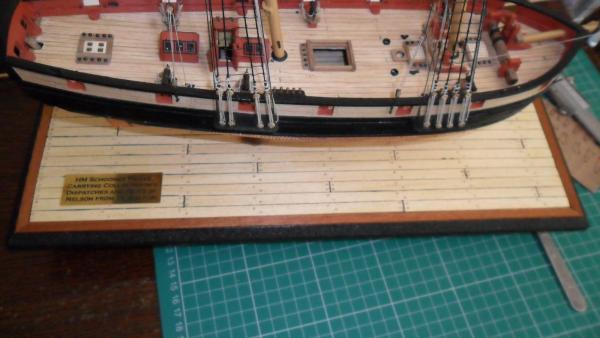
A short deviation from the main build: Whilst in a local hobby shop I acme across some larger section planking going cheap (app 1.5mm x 8mm) and this gave me an idea for the display stand: I cut the strips to size and laid them with a butt shift: I then drilled for the treenails and inserted these with pva: Then .5mm black cord caulking, a walnut border and some coats of semi gloss varnish and here we are: It mirrors the Pickles' deck and I think looks ok.
- 31 replies
-
- 6
-
-
- pickle
- caldercraft
- (and 1 more)
-
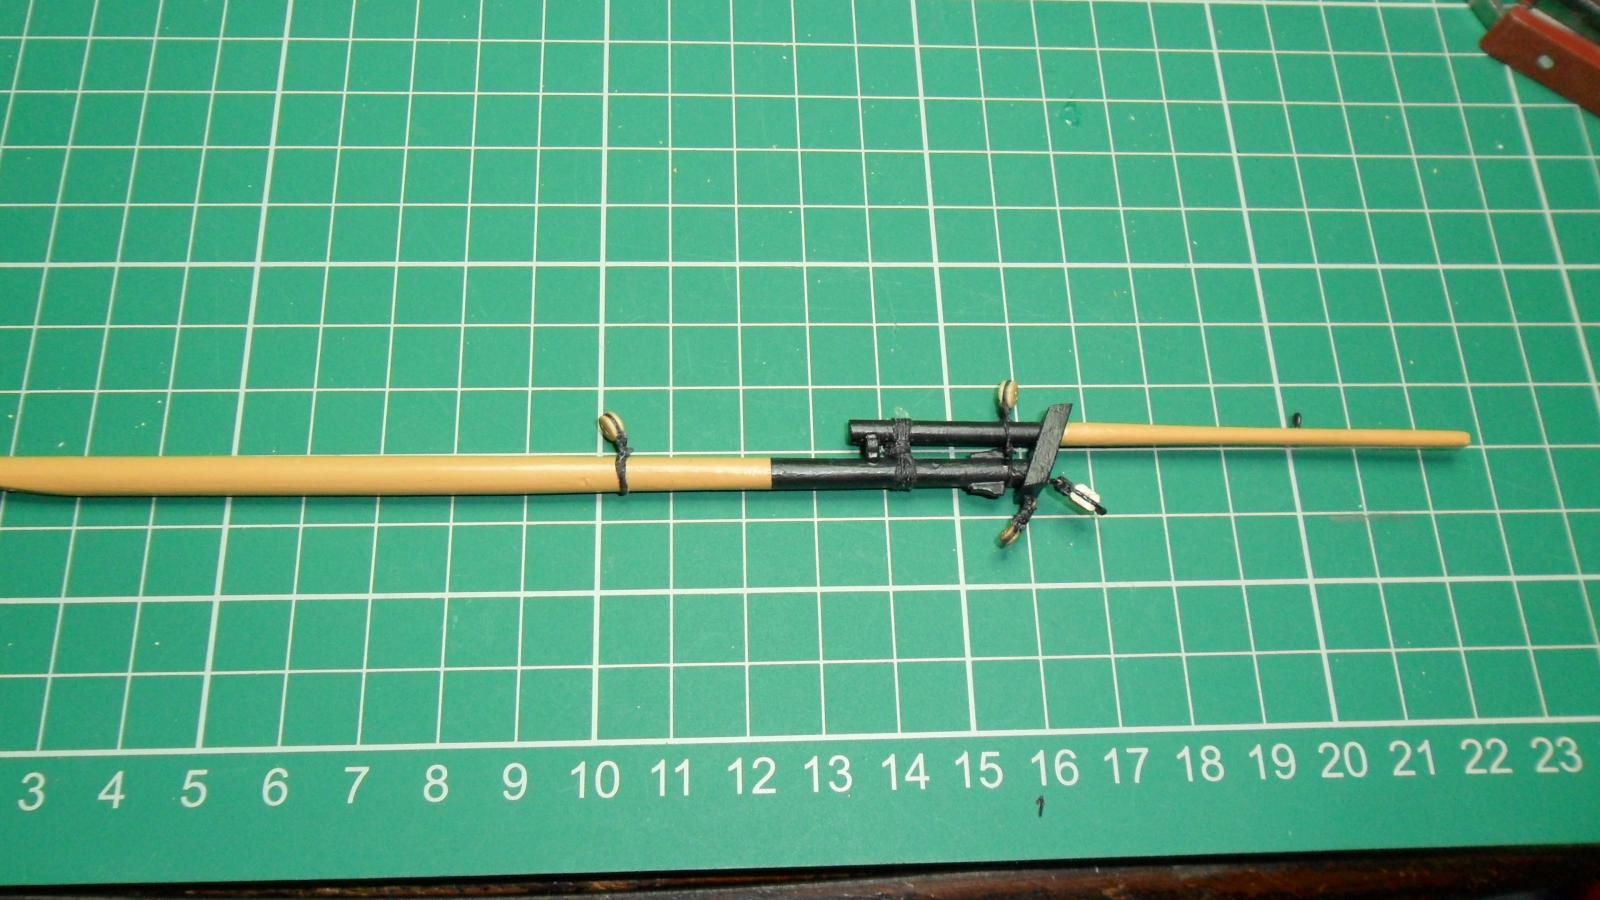
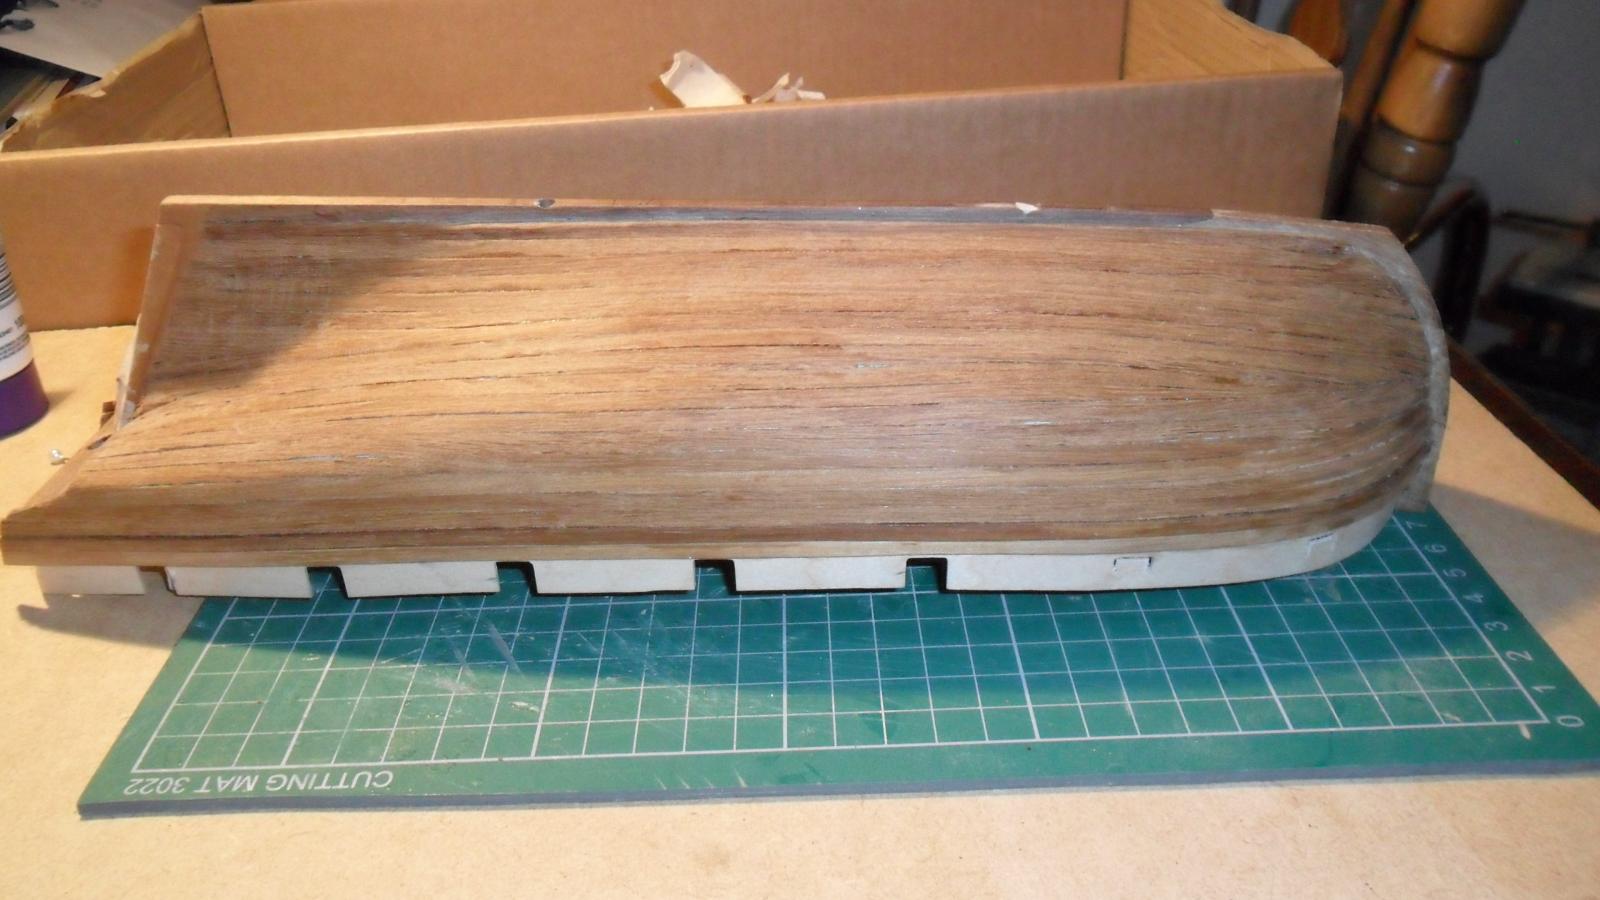
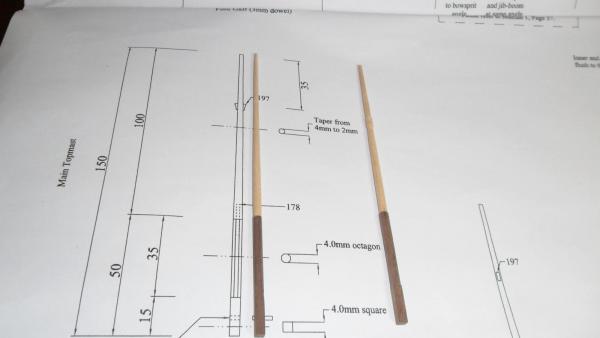
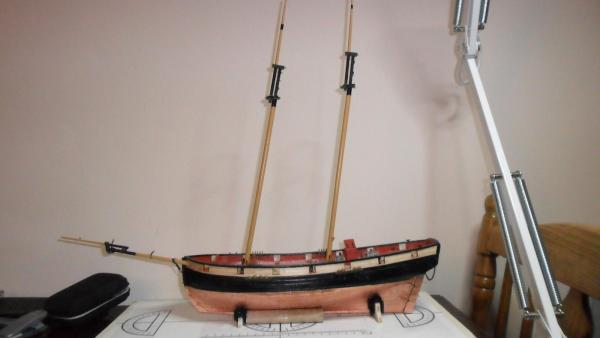
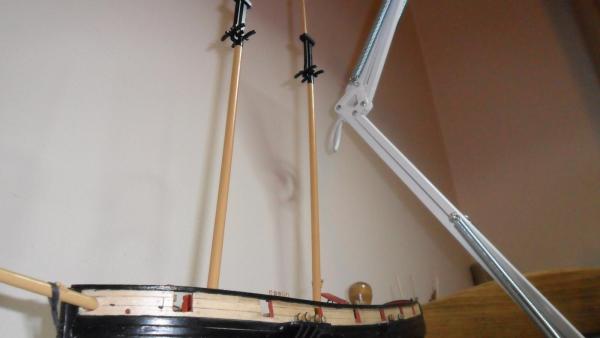
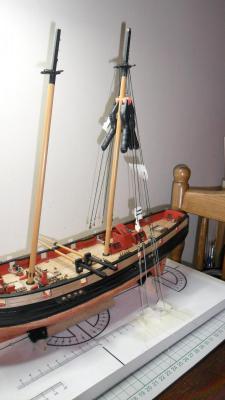
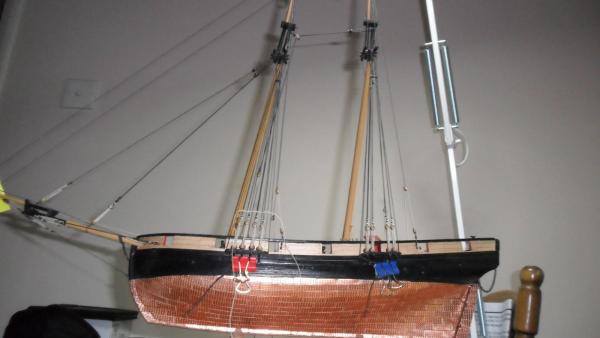
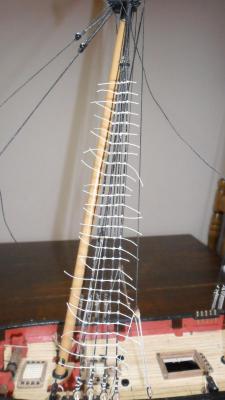
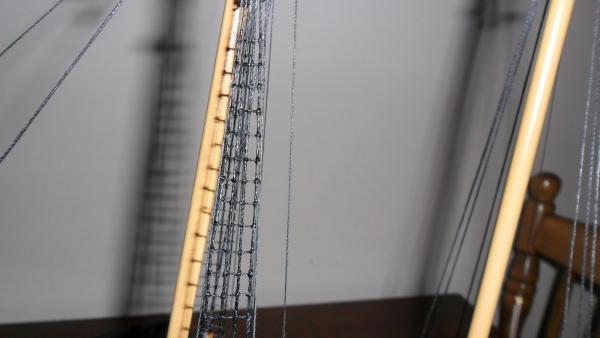
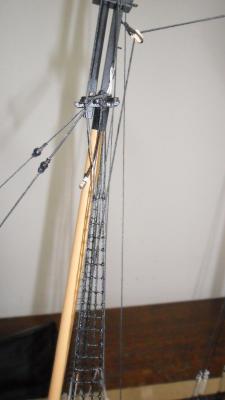
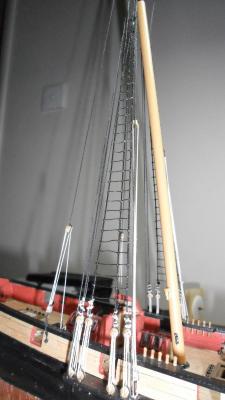
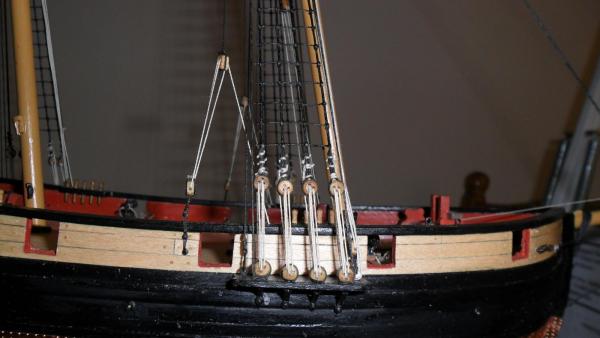
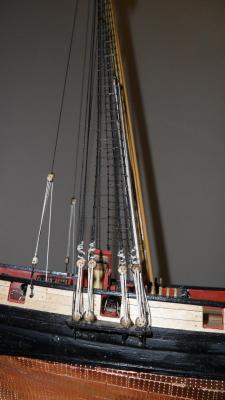
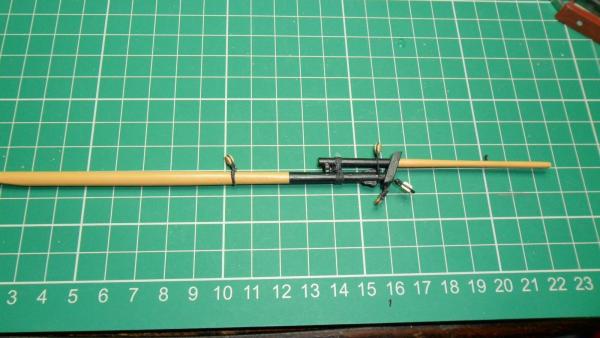
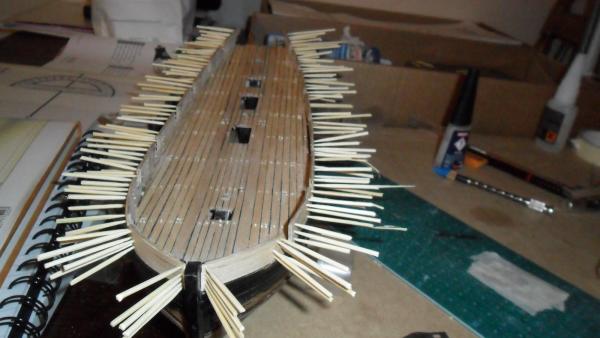
Masts and Standing Rigging So the next step was to manufacture the masts and crack on with the standing rigging. The masts were made as per the instructions, from square stock and dowel joined with brass pins: These were then painted (as the supplied wood did not stain very well) Yellow Ochre and Black, and stepped into position: Then the standing rigging was added, as per the instructions. First the shrouds, and main/fore tackle: Then the back stays: Followed by everyones favourites;;;;;; the Ratlines: These were stained with indian ink and our favourite job is finished. I did deviate from the kit in two areas: In BE's Pickle log, he pointed out that the instructions stated that the fourth shroud on each mast was in fact a "Backstay" and as such would not be included in the ratlines. His pictures showed that this was visually awkward with the ratlines across only three shrouds giving little room for the crew to clamber aloft, and he eventually decided to link all four "Shrouds" with ratlines - with pleasing results compared with the instructions. I decided to go a slightly different route, according to Petersson's "rigging fore and aft craft" the Fore mast has all four shrouds "ratted" and the main is linked only across the first three shrouds - the gap between shrouds 2 and 3 being wider to admit the gunport, giving a wider expanse over just the three shrouds and therefore more room for the crew to climb. and this is the way I went.... mmmm??: My second deviation - also from Petersson - was to add the finishing touches to the Fore and Main tackles. this was achieved by inserting an eyebolt at either end of the channel and running a rig through the dangling pendants on each mast using 2 single and a double block on each. Well after adding the rest of the stays, the standing rigging is done. Just booms, spars, running rigging, ships boat/s and finishing,,,,,, loads yet eh!!

-
Gregor, Another option for you to think about is RB Models: http://www.rbmodel.com/index.php?action=products&group=011 I used theirs in my sherbourne and found them of high quality and very low cost. You may be able to see them in my galkery pics listed after my signature. Btw your Sherbourne is looking superb.
-
Cheers Jason. The hour was only the assembly part, that did not include painting/blackening. The photo is if the best one by far and I refuse point blank to post close-ups of any of the others lol. Kudos on doing that many for your Snake.
-
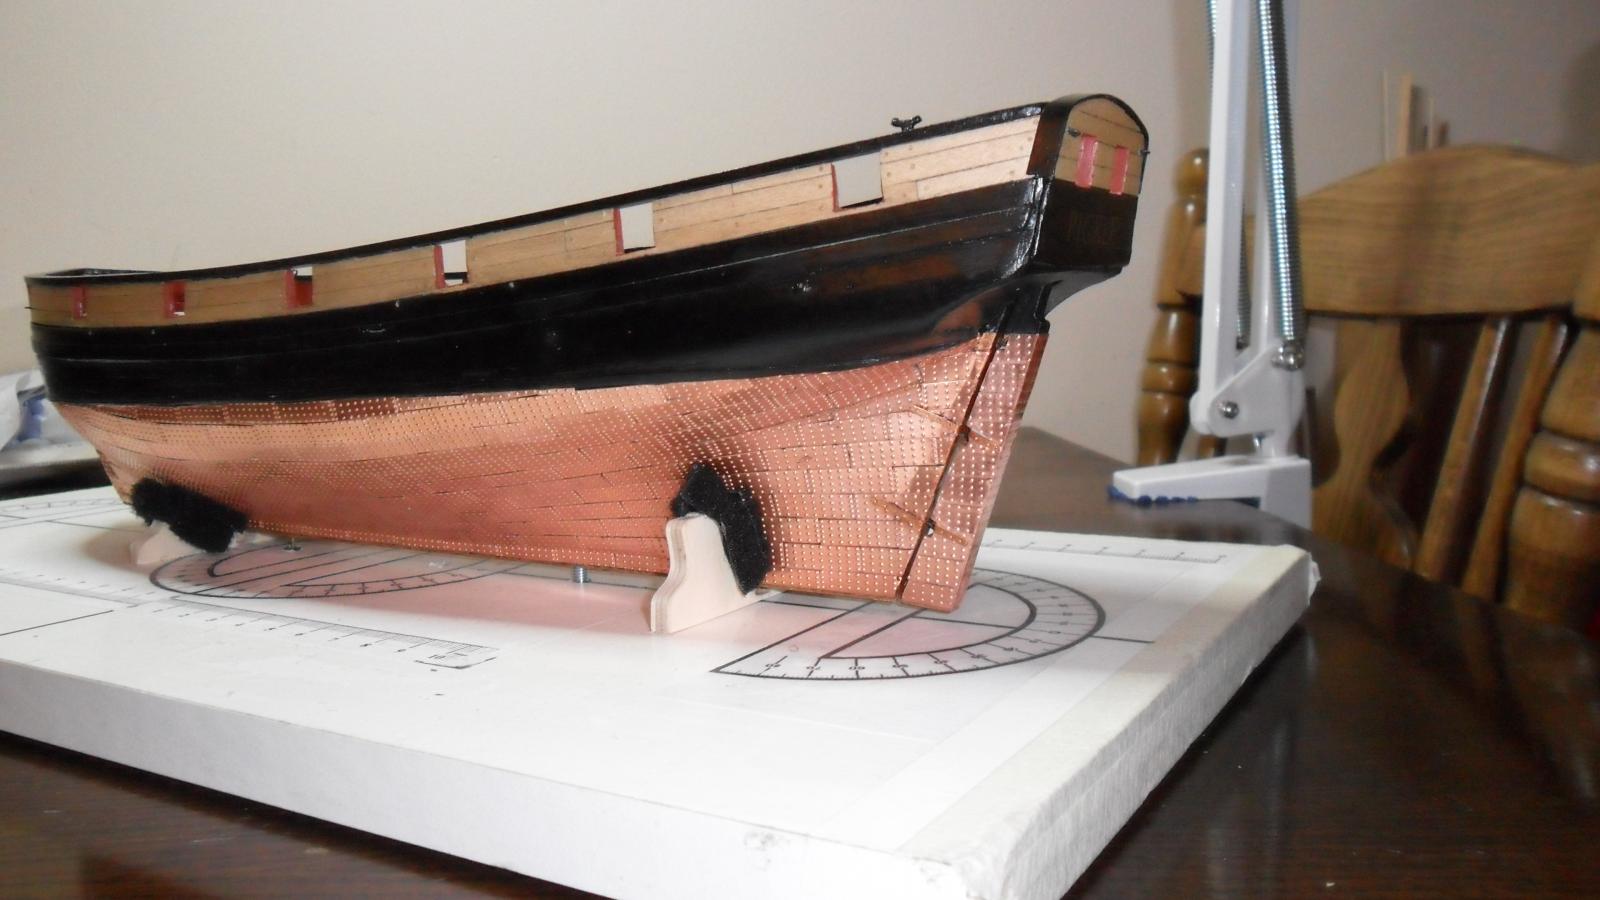
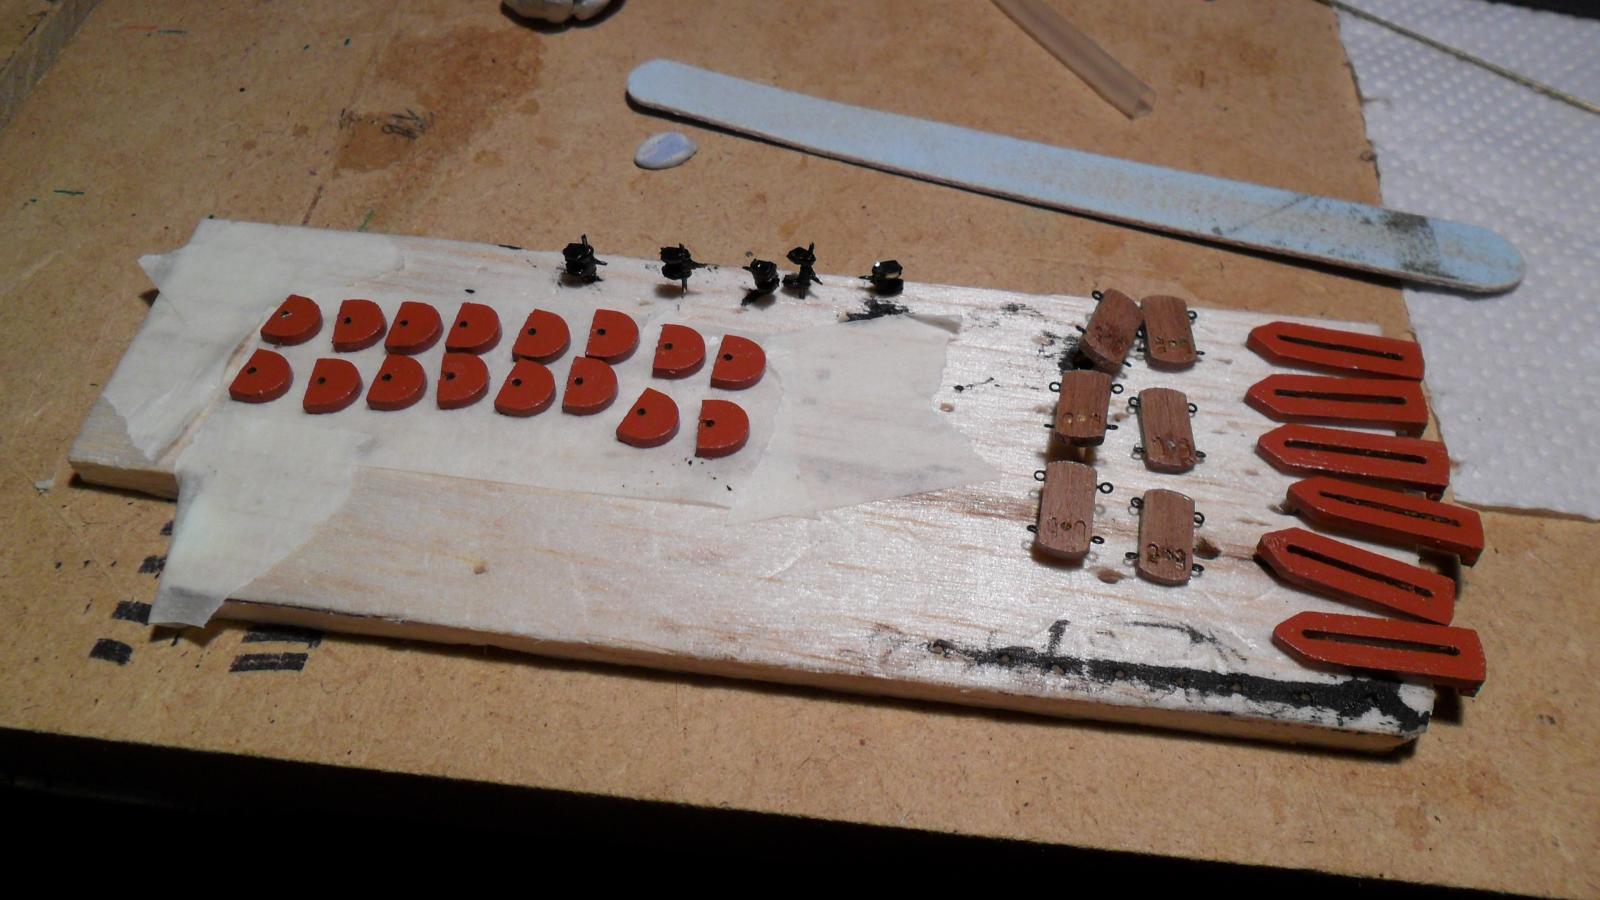
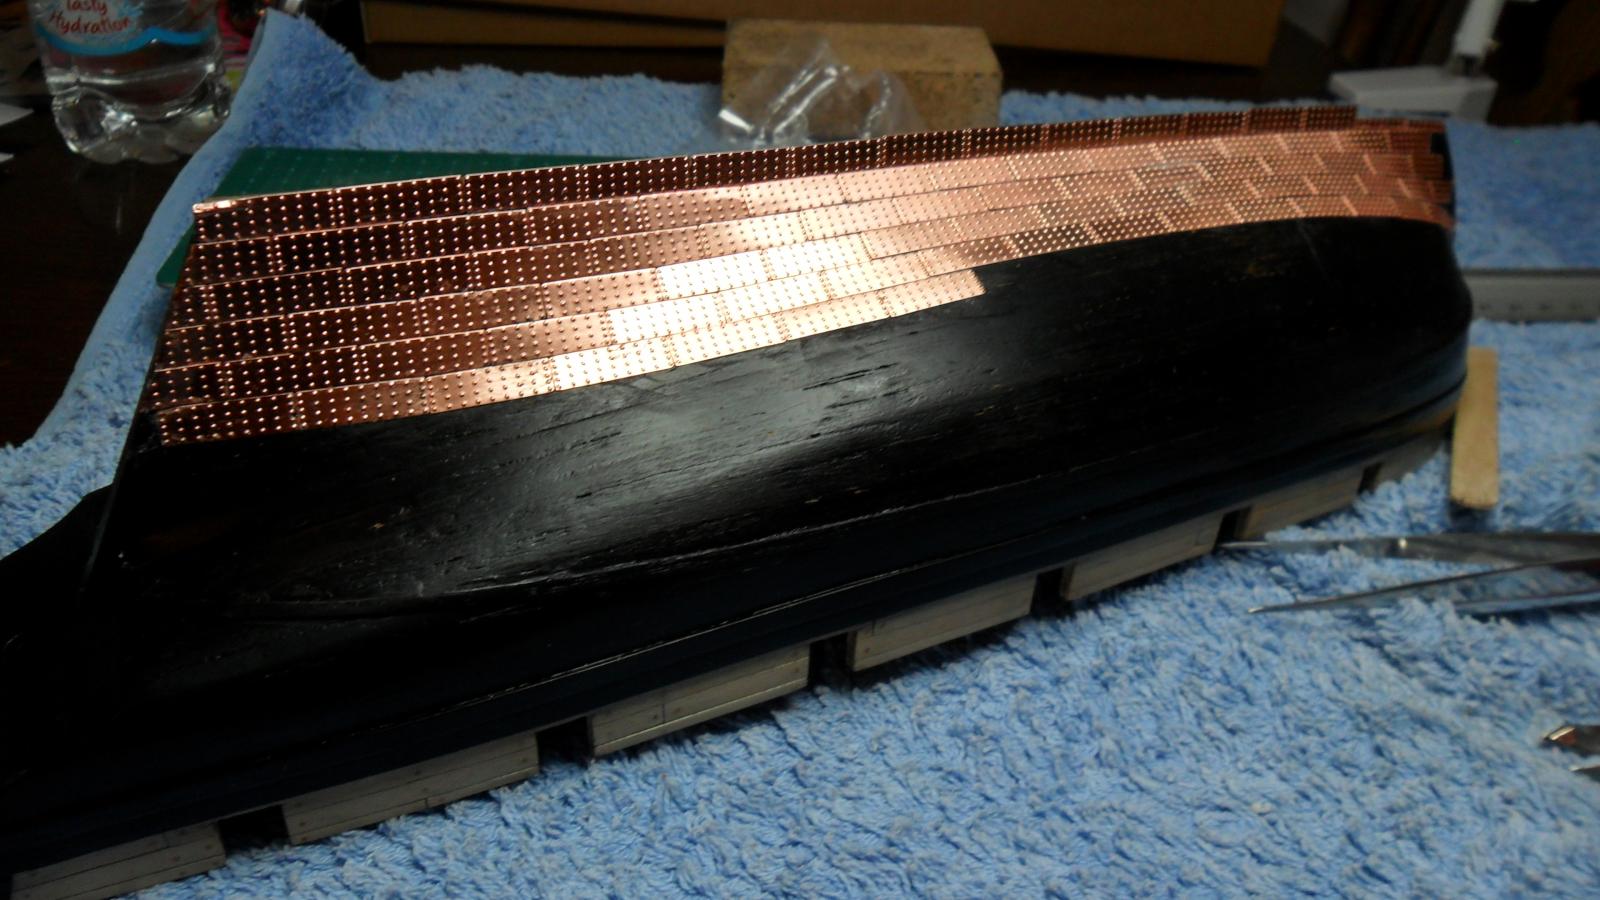
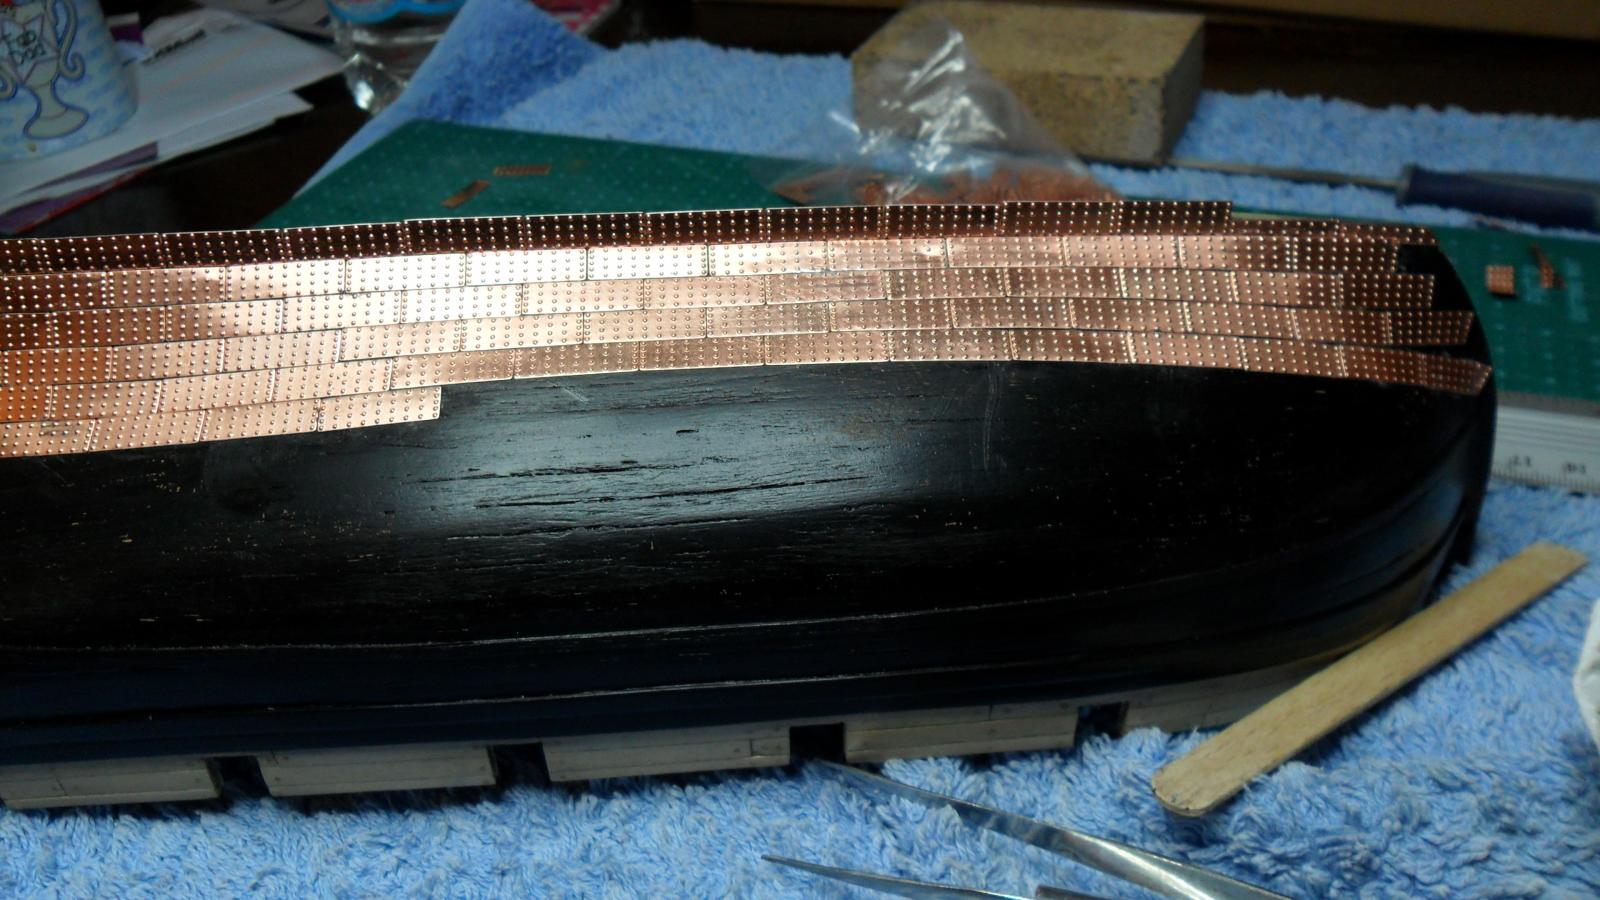
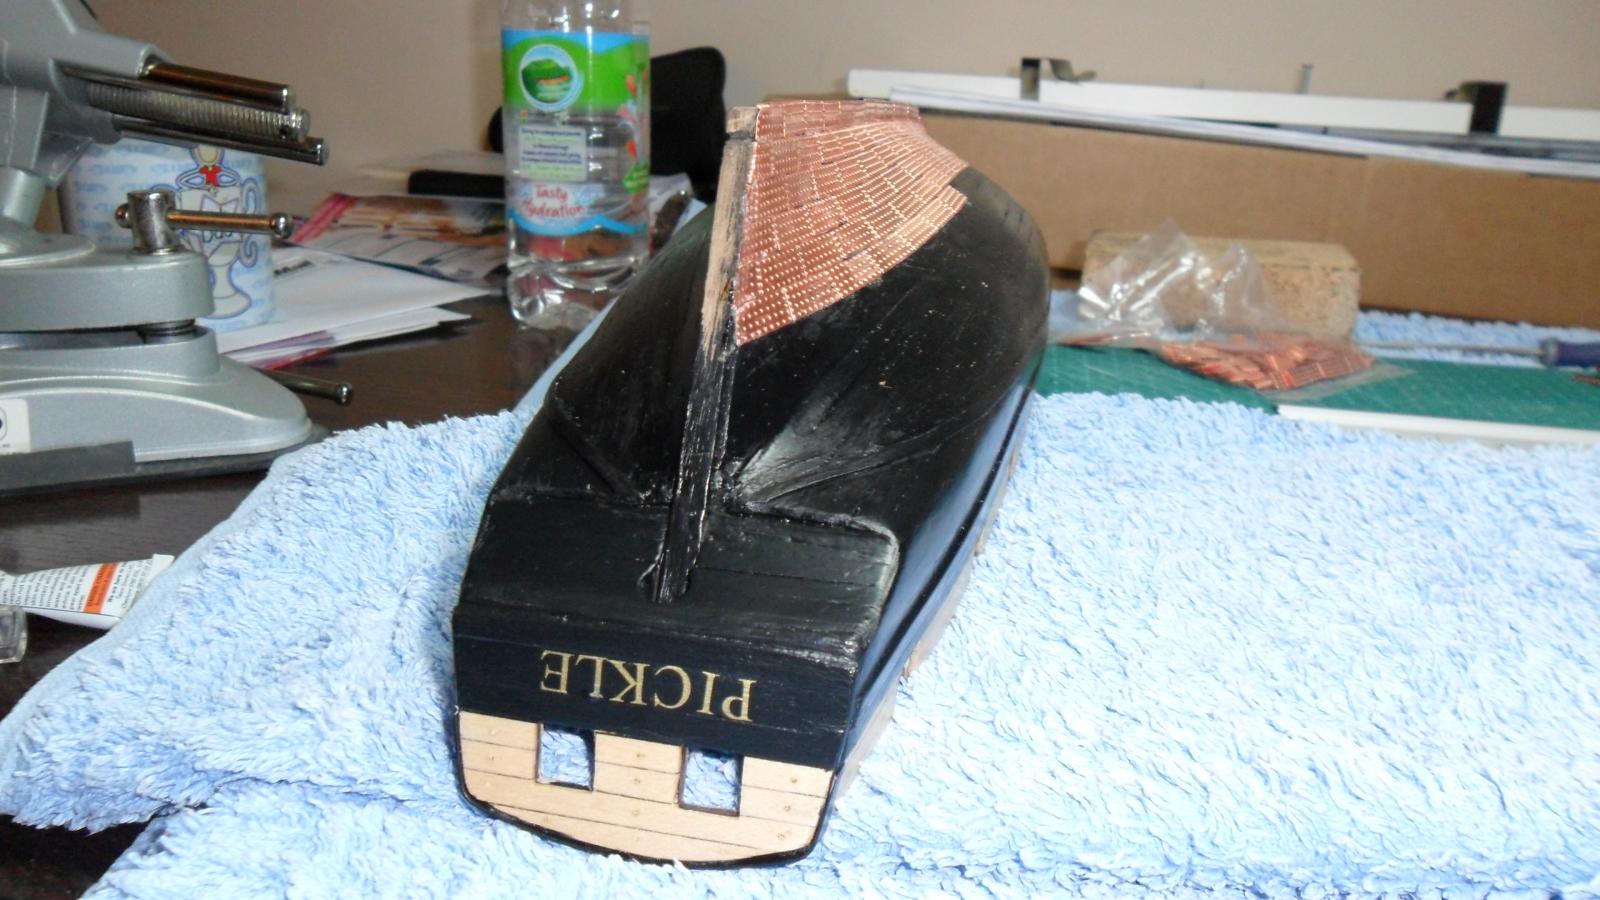
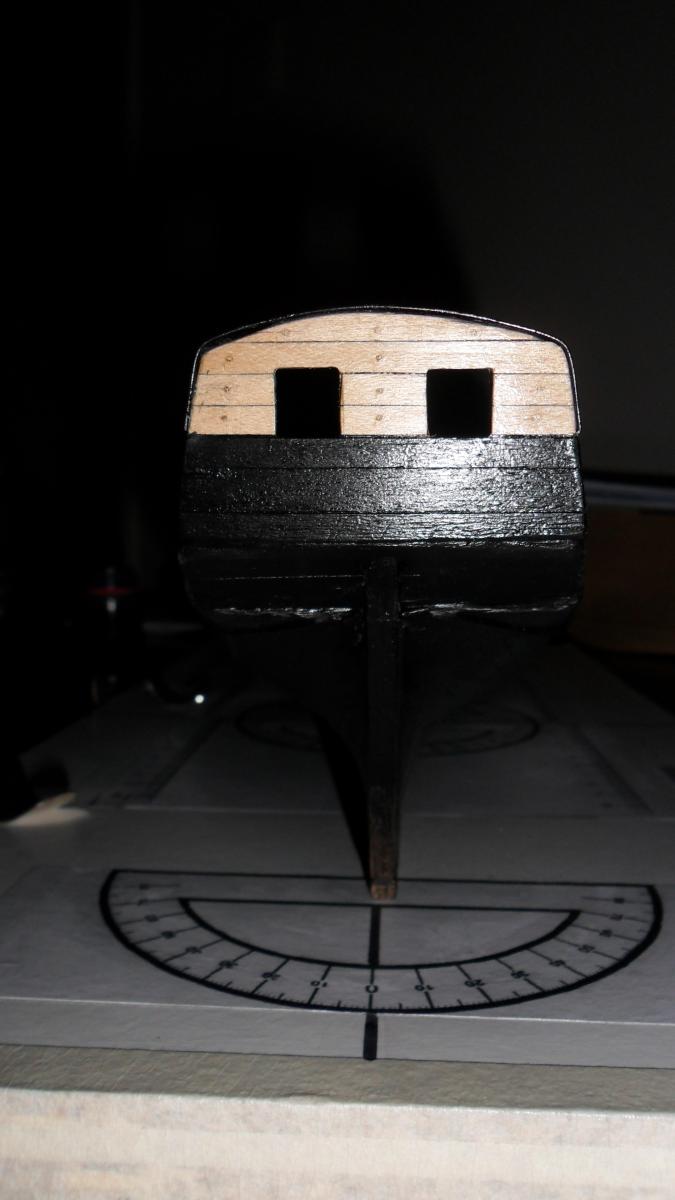
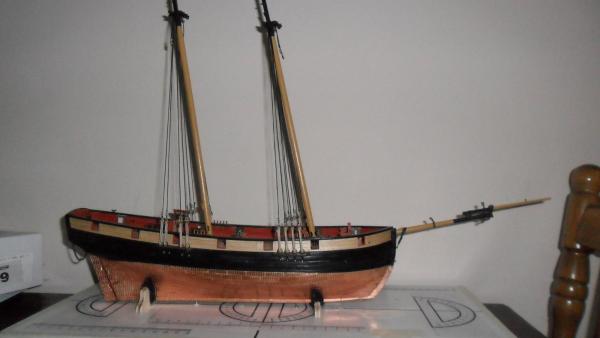
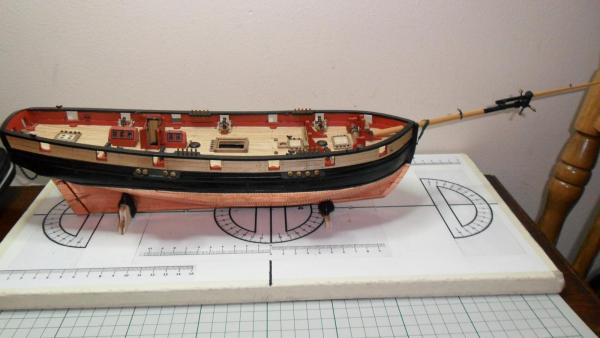
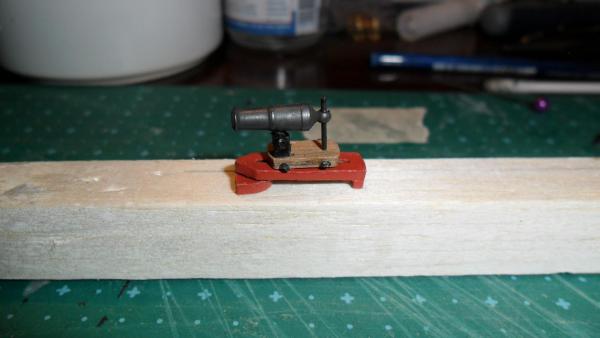
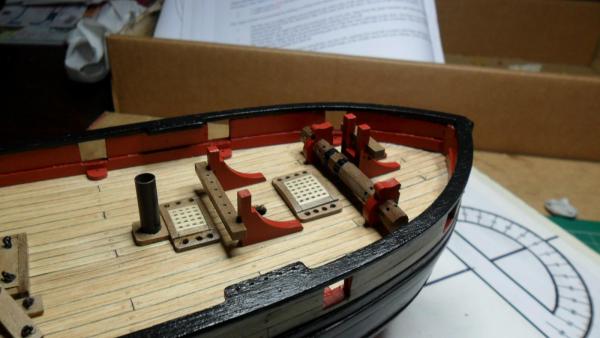
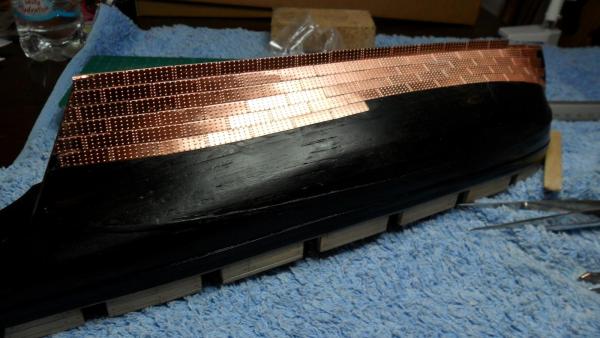
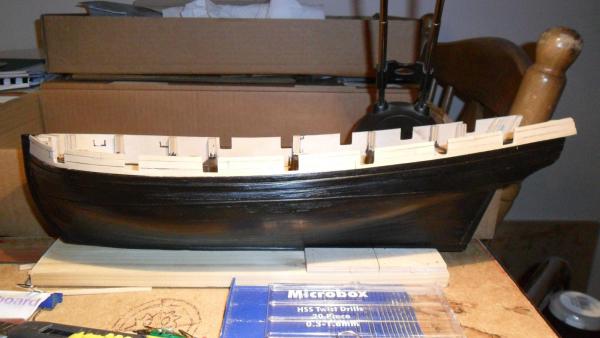
Plating Finished and Deck furnishings installed With the arrival of the extra copper plates work continued andthe Plating was finally finished: I am reasonably happy with the plating, though on close inspection it is rough in a few areas, but as a first effort it is not an embarrassment My next build is not plated, but I think that the next time I need to plate I will try either the Amati etched plates or even go the whole hog and try the copper tape that the Model Shipways builders use. After the plating was completed I made up the Bowsprit and mounted it along with the final fixing of the deck furniture: You may notice that The Carronades are fitted but I have not described their build......... Simple "They are an absolute %#~@*!!!!" The instructions, the quality of the parts and the final impression is superb. The size of the things is absurd: the overall finished item is app. 1.5 inches long and about .75 high (guesstimate) and has a grand total of .... wait for it.... 18 pieces: 4 wood, 5 brass etched pieces, 4 etched eyelets, 4 pieces of brass wire and the barrel itself. They take about an hour each (without the rigging, and on a good day) and would try the patience of a saint! my finished articles are ok for "stand-off" viewing but that is about it: For a better narrative of building them it would be better to look elsewhere on this site, as there are a number of superb examples that far outrank mine LOL. Next up is the building of the masts, and then Pickle can go "Vertical"


- 31 replies
-
- 1
-
-
- pickle
- caldercraft
- (and 1 more)
-
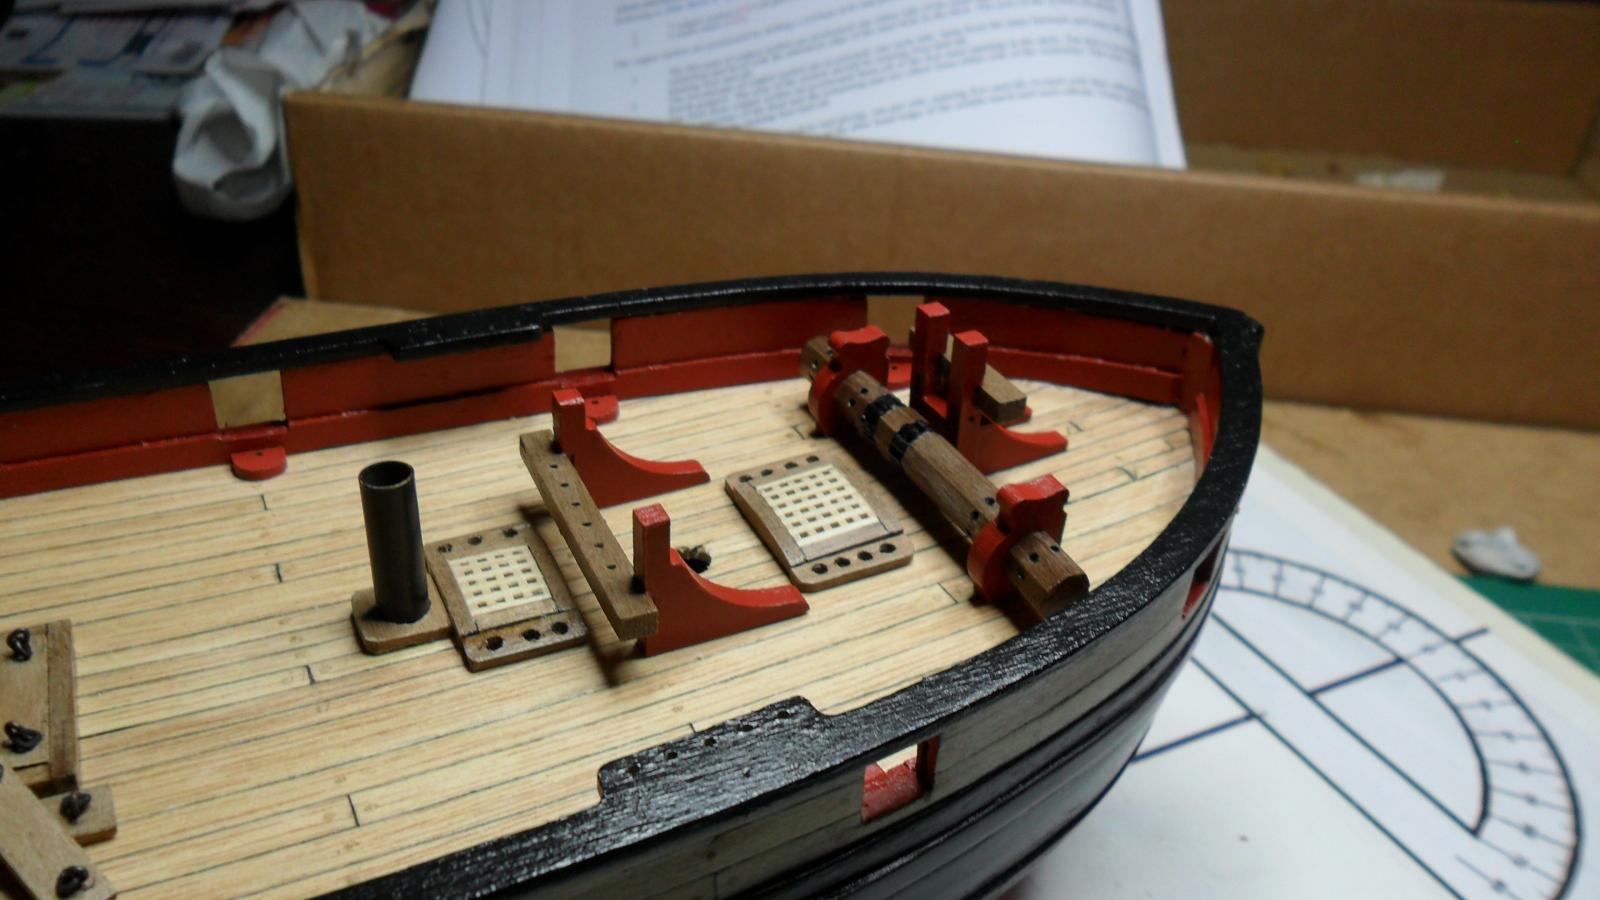
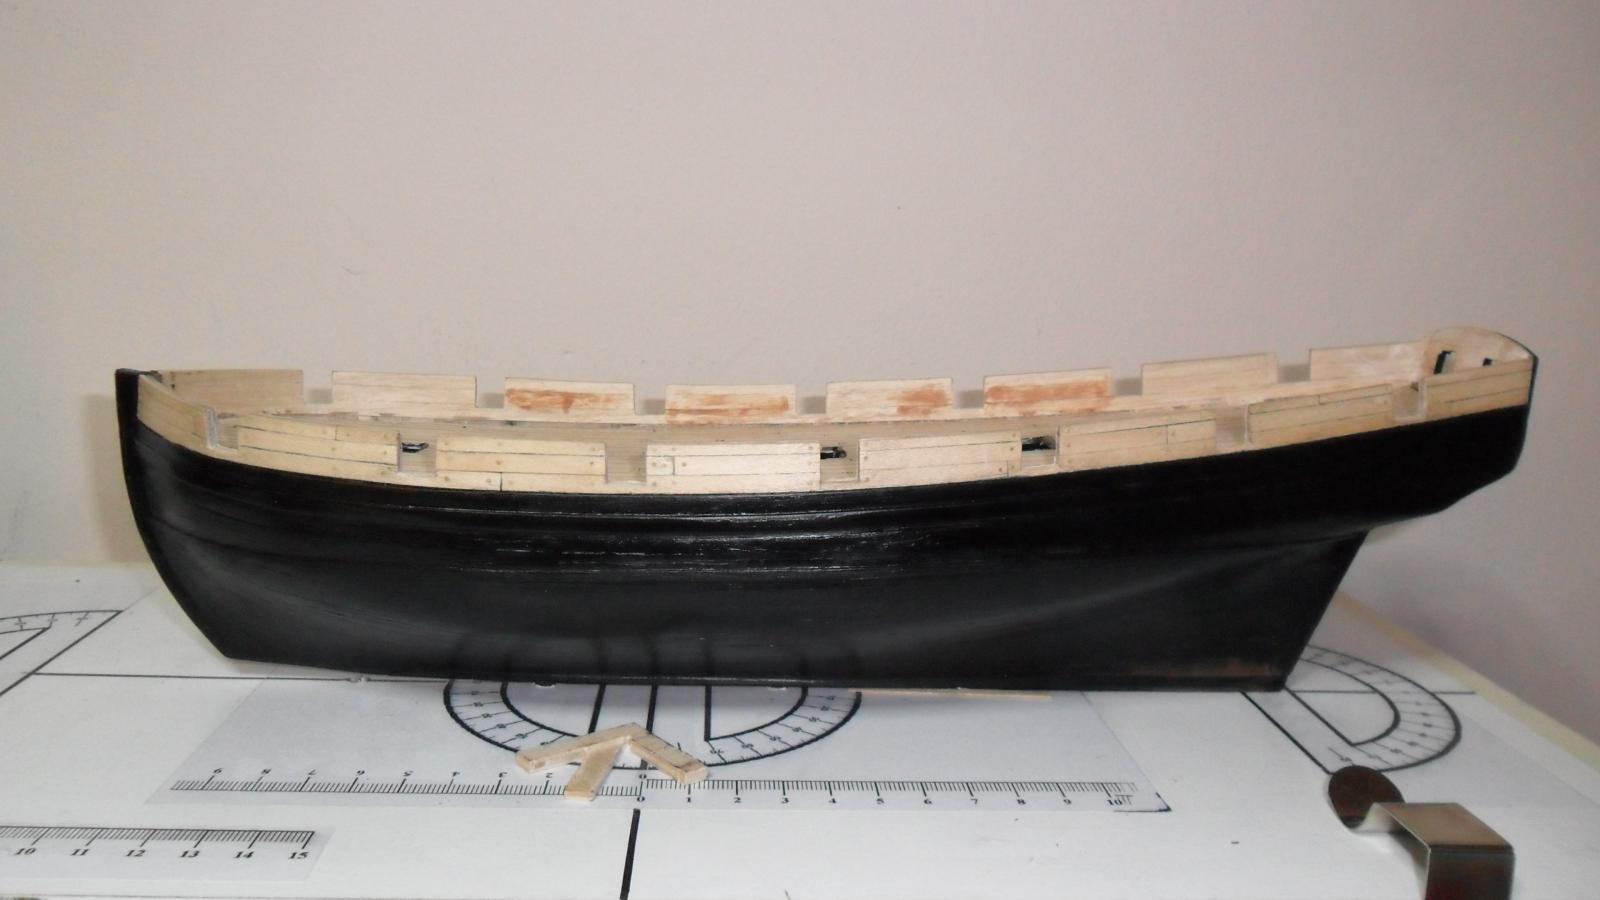
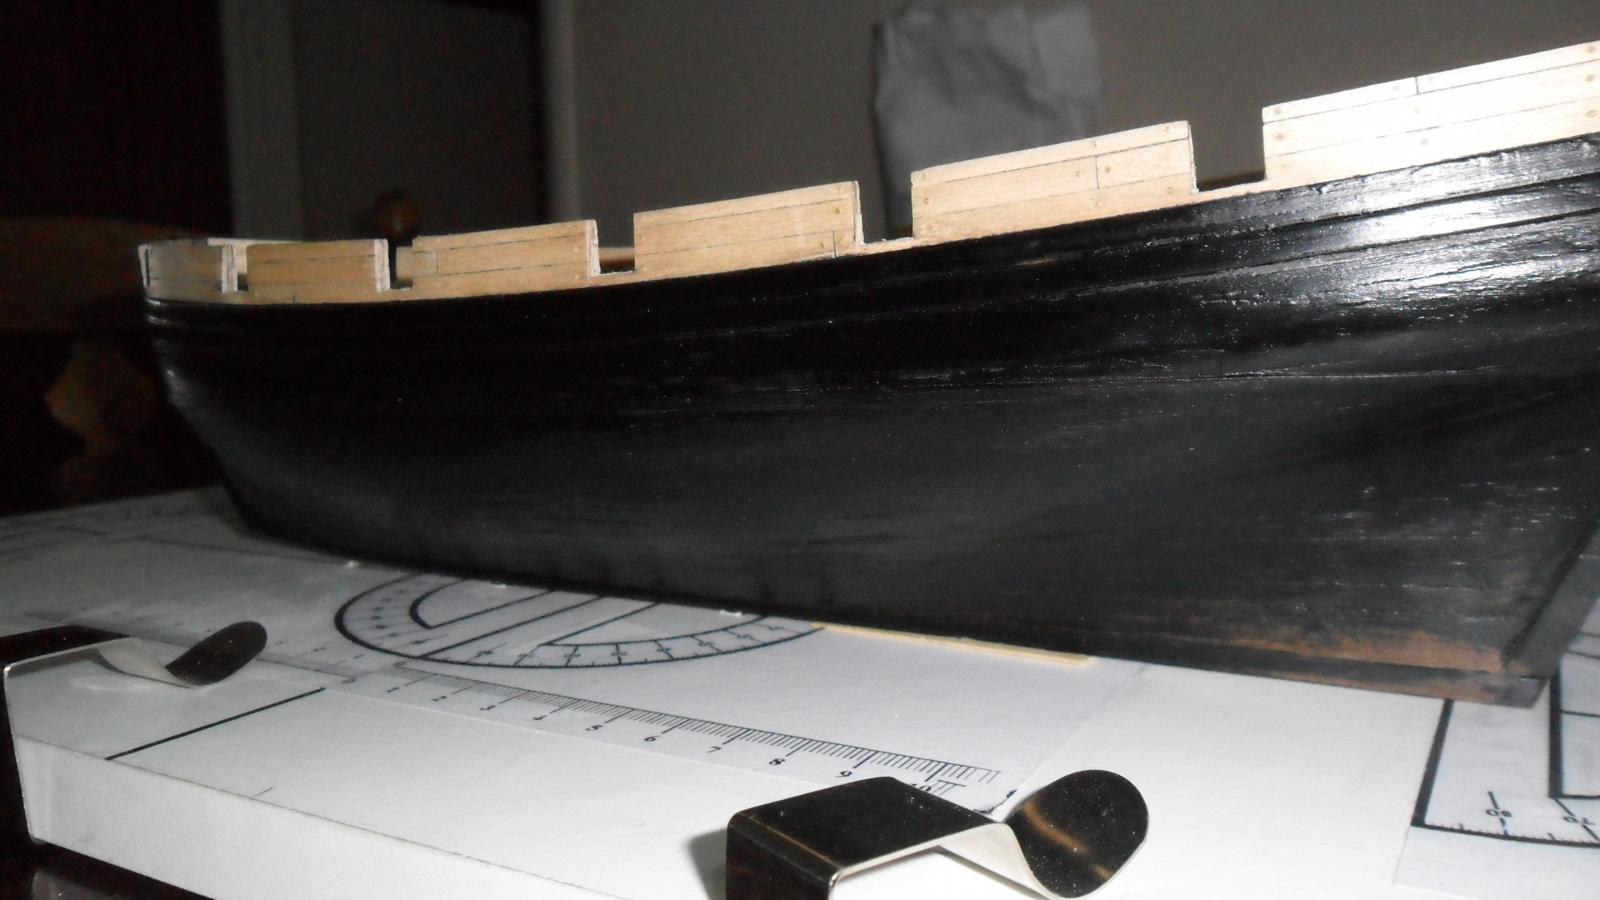
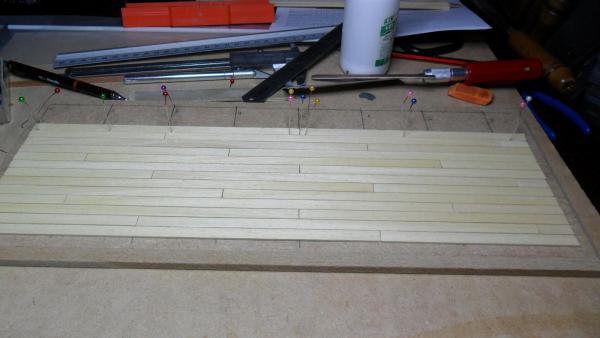
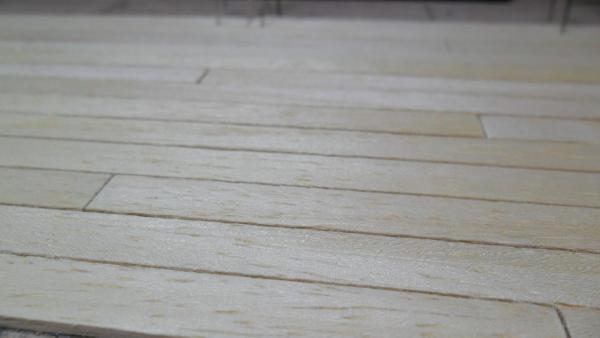
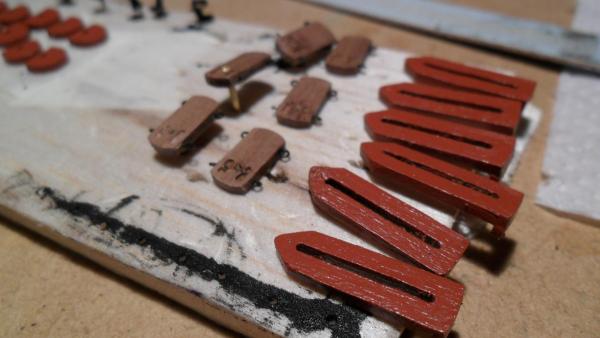
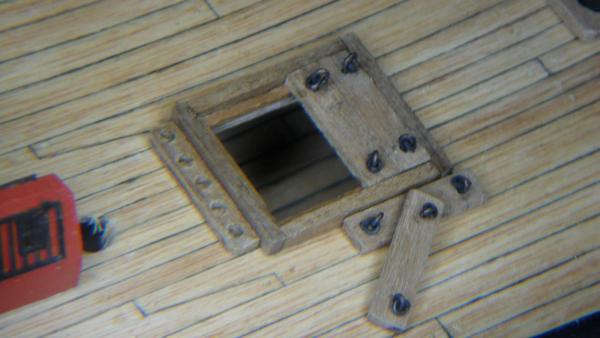
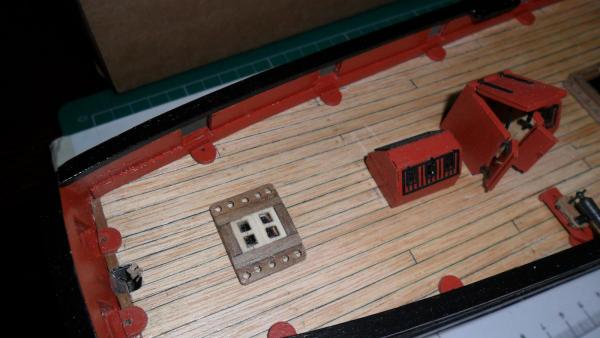
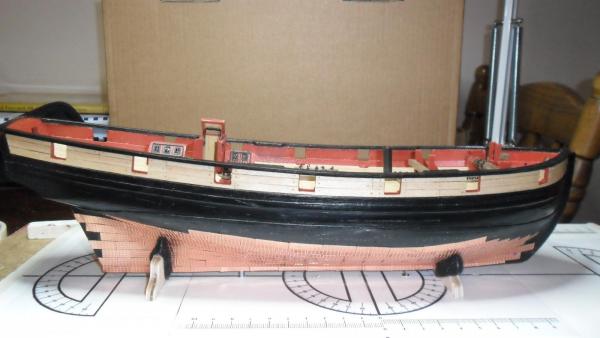
Thanks Guys for your comments. Beef, yes I was pleased with the maple - at last a good choice by me!!!" Catch up I am going to run through all of the jobs I have done since the last update - because of my pc problems I am a fair bit ahead, and because of the plating and decking problems (to be revealed) I have a fair few bits done, but out of sequence. Decking As I mentioned early on, I wanted a different effect on the decking than the Sherbourne, and went ahead with the Cartridge paper caulking. Unfortunately though the effect was exactly what I wanted in places, it was very varied. So I ordered some .5mm tanganyka from CMB and re-laid it (on top of the previous) with HB caulking on both sides of the planks: This picture was taken later as in my frustration I forgot to take any pictures - I am very pleased with the effect, and using 3mm 4mm & 6mm planks worked well, though I wish I had bought the 6mm in a different wood to frame the inner and outer decking better. Deck Fittings I built up the deck fittings as per the instructions, but with four additions/changes: As per many other modellers, I exchanged the multi-part windlass for a 6mm walnut rod, planed (succesfully-ish) to an octogon. I added cannon ball holders either side of the gratings, and along the back of the main hatch. I replaced the rear grating with a glazed (humbrol clearfix) 4 pane window affair. And finally the walnut "Chimney" was replaced with a chemically blackened brass one (Carr's - superb stuff, and easy to use too. I had mixed results with the Krick stuff): And this is the Pickle as she stands today: Ps. I spoke to caldercraft today and they are sending a pack of 100 plates foc..... though I did get the impression they did not believe me completely

- 31 replies
-
- 1
-
-
- pickle
- caldercraft
- (and 1 more)
-
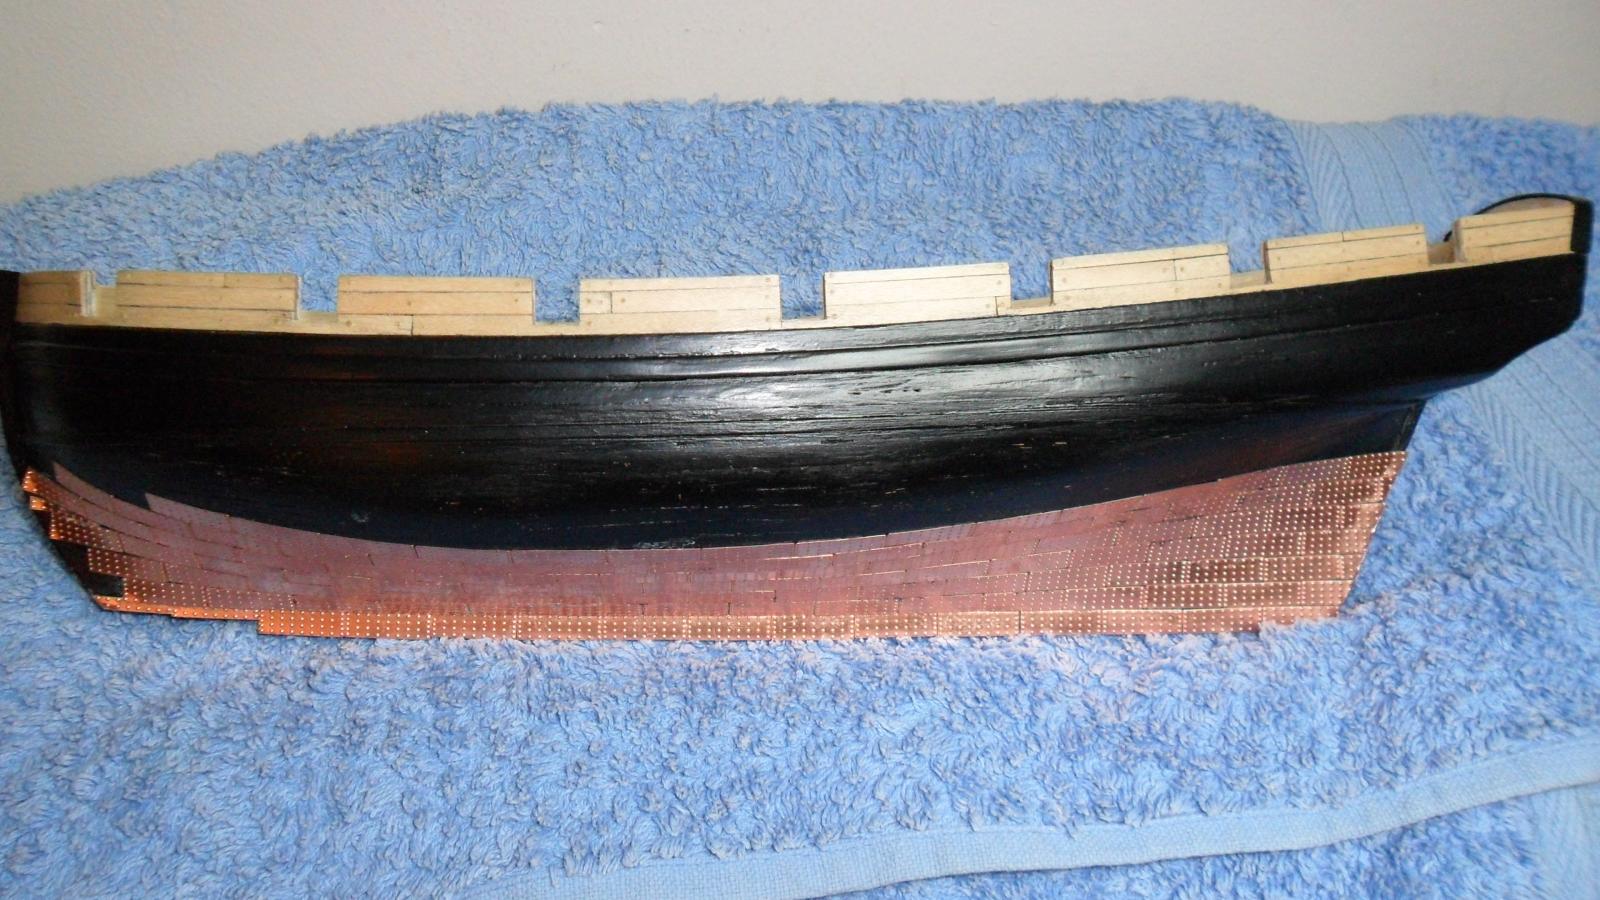
Due to a few problems the next few posts are a bit out of sync, as I moved from job to job whilst awaiting supplies. Plating and Shipmate Firstly I am going to follow a growing trend that I have seen on a couple of other logs and introduce my building partner Billy: Now for the model: the plating went very well and I am very pleased with the initial results: But for some reason there were not enough plates provided. As this was my first venture in to coppering there were obviously a few mistakes, and I did scrap about 15 or so plates, but I estimate that I am at least 50 - 60 short. I first checked other build logs and found that in general Caldercraft seemed to supply ample plates, so I set about checking my measurements. After 3 tries, I have decided that my waterline is correct -I used the supplied jig for lifting the front of the keel and a 50mm height is what I seem to have. I am completely at a loss and have decided to leave it as is and order some new plates. so until then I will get on with the many other Jobs awaiting me and Billy.


-
Thanks guys, I have been inspired by the all the logs on the site - love your scratch built launch Tony, and your Pickle BE is special and a great source of reference for me. Pickle is looking better than I hoped at point, though as you will see as I catch up, a few problems do develop quite soon !!
-
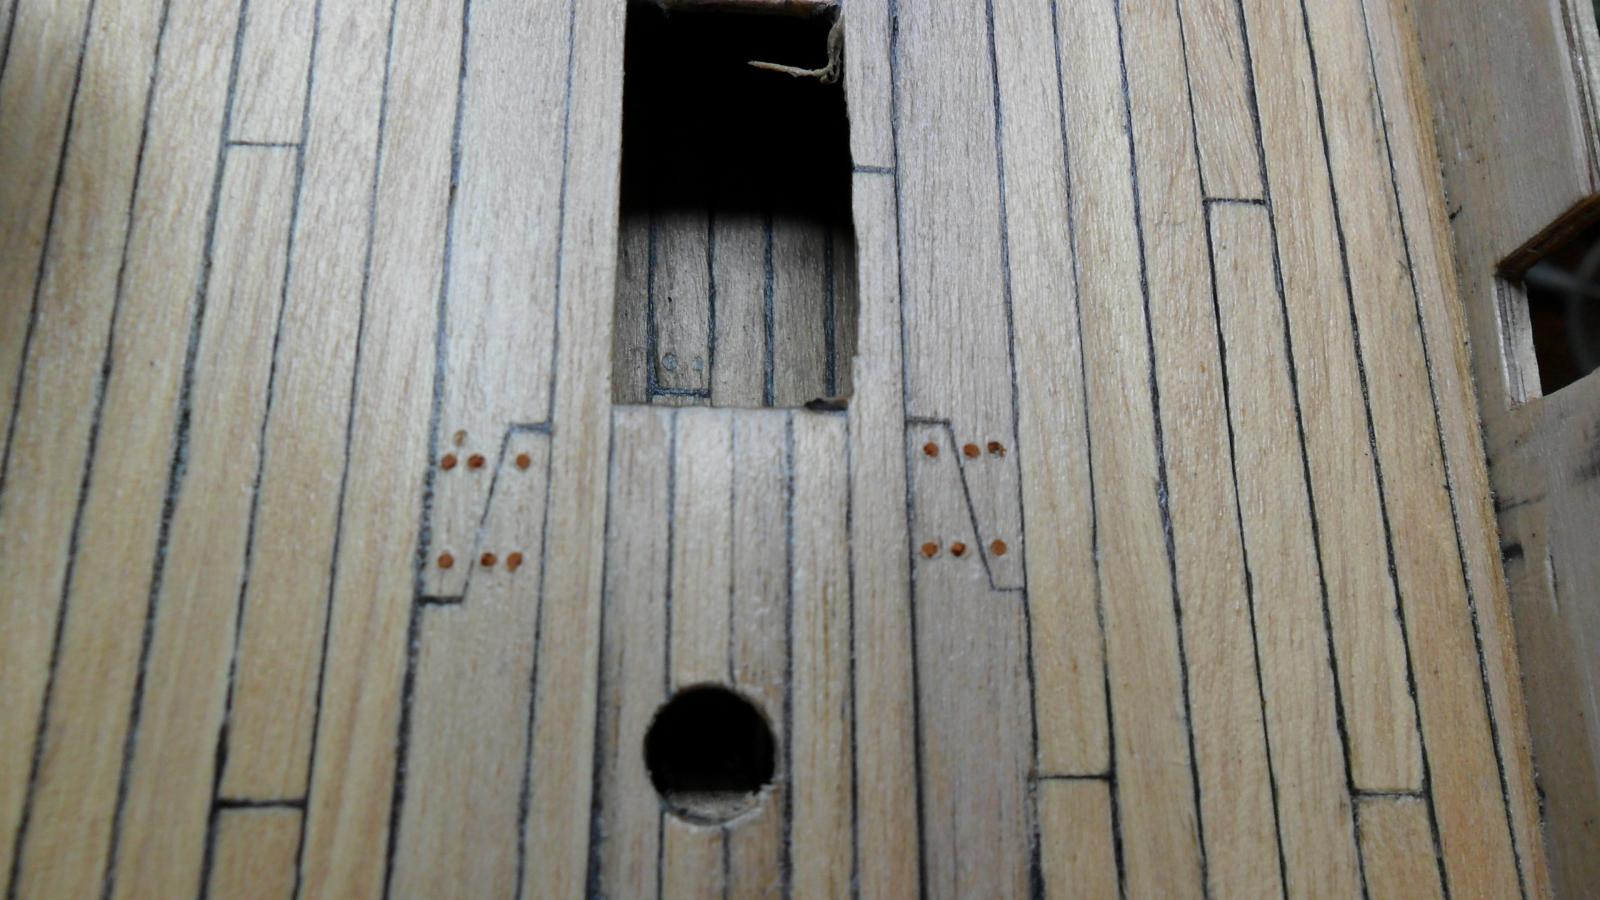
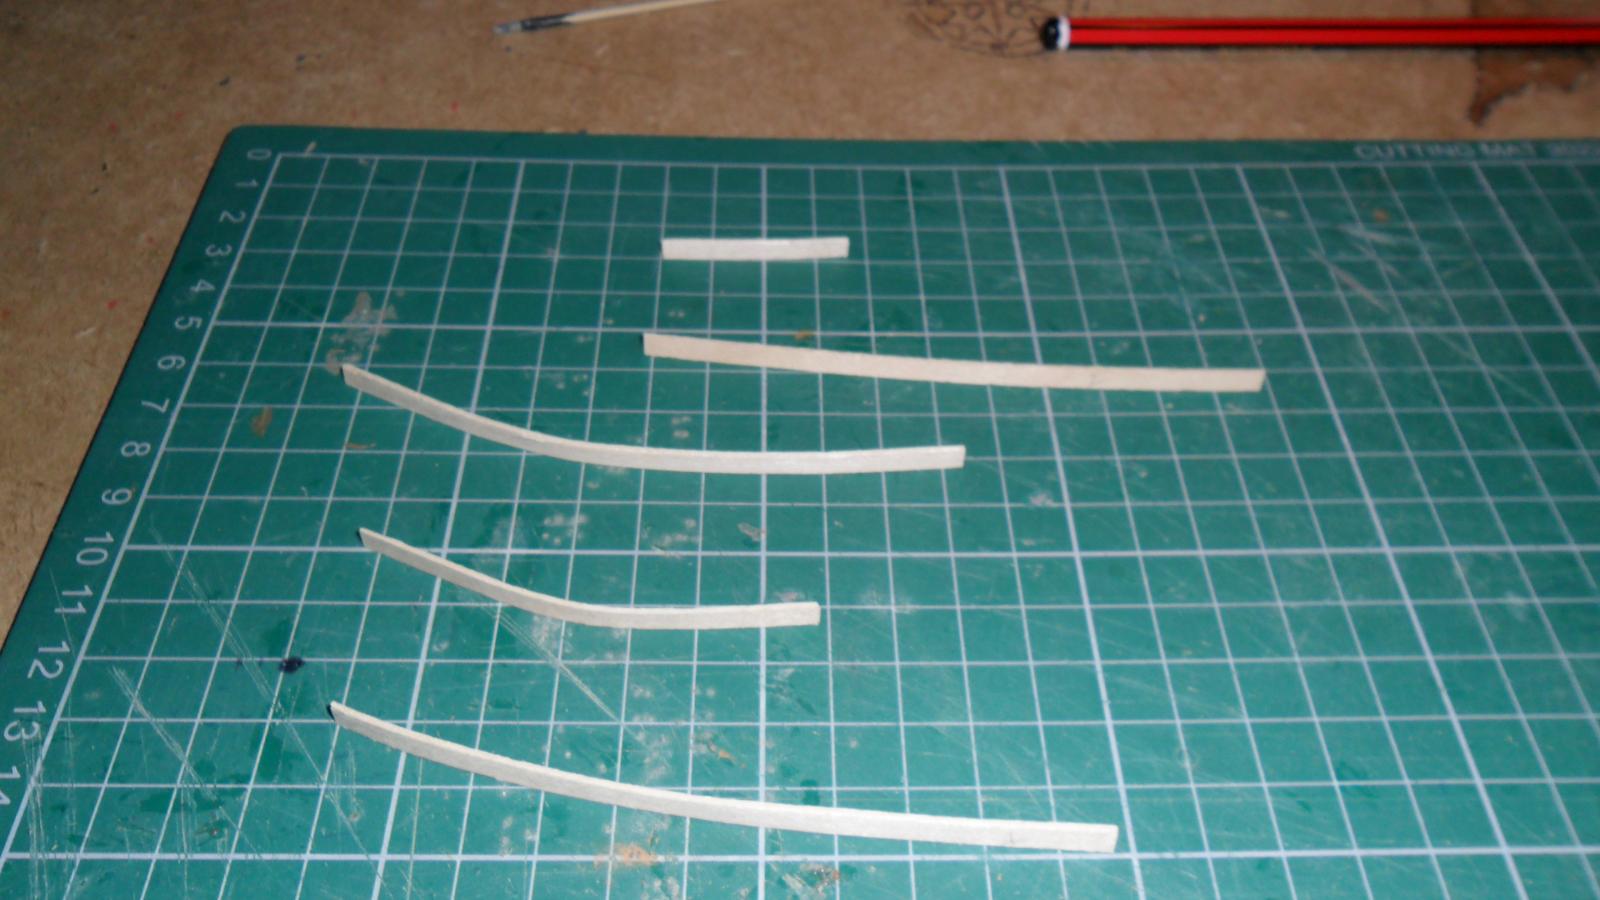
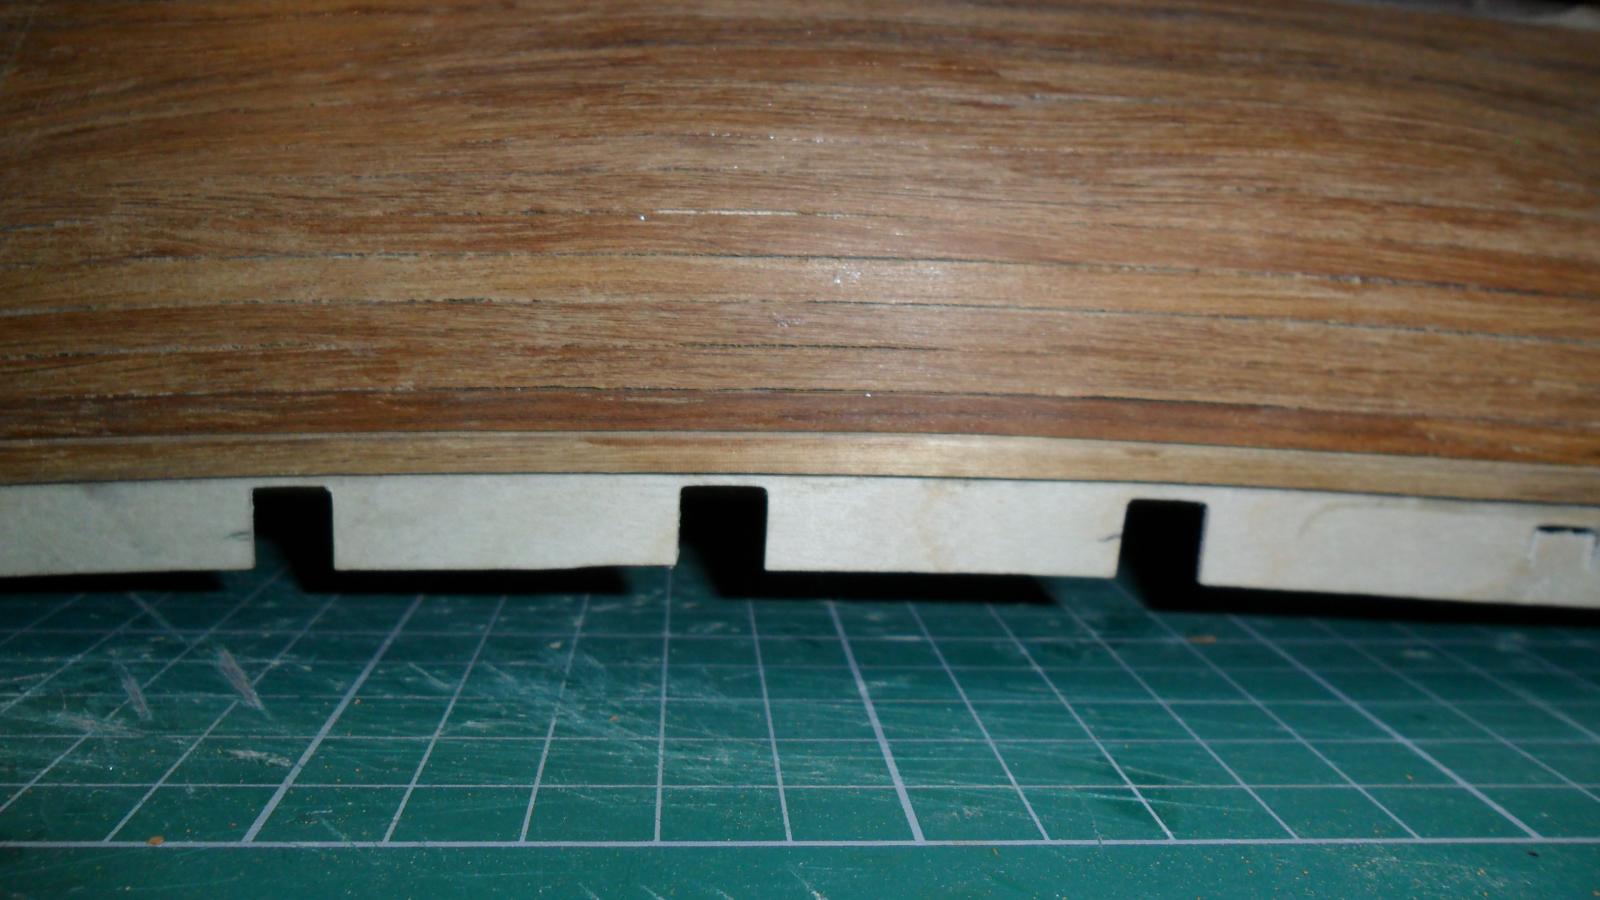
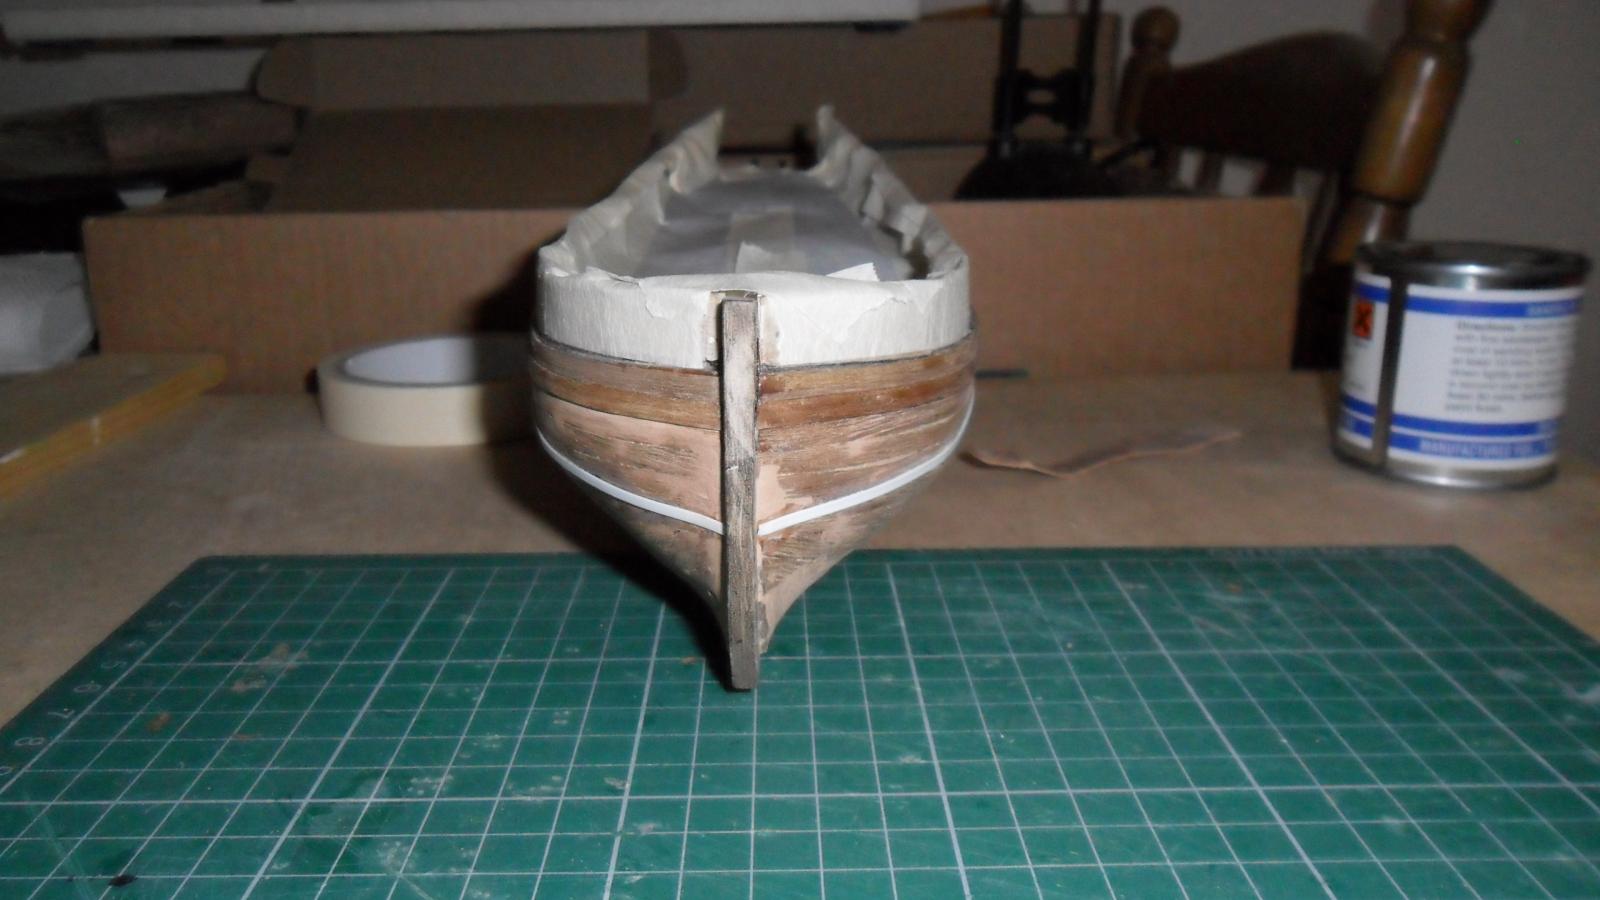
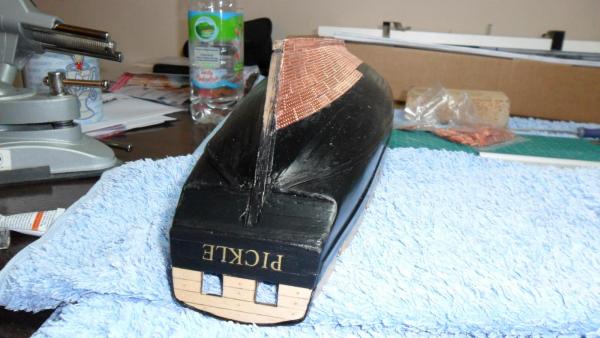
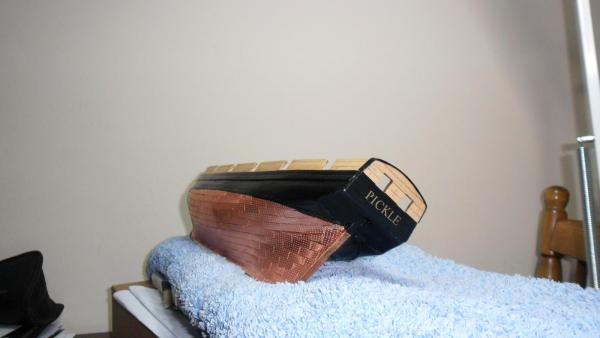
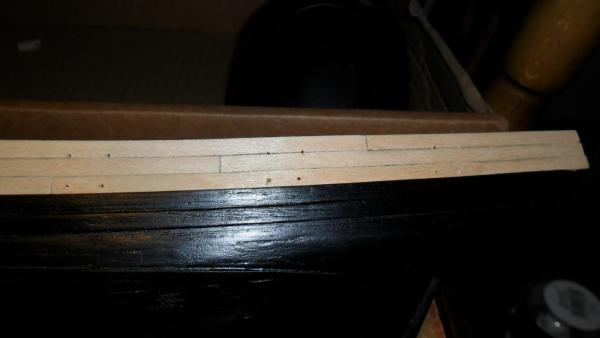
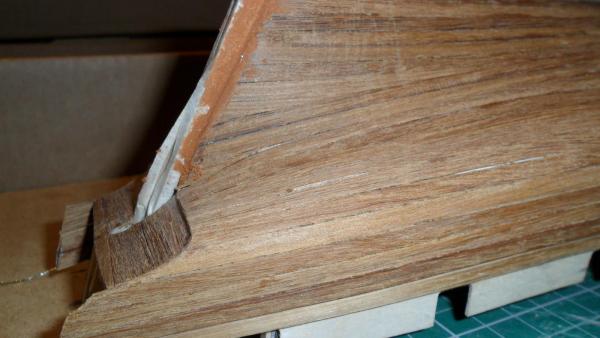
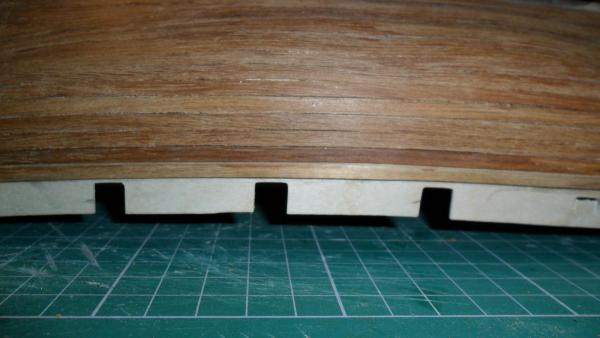
I have been unable to upload pictures to my pc, hence the delay in posting. Planking above the Black Strake The next step was to plank the area designated for yellow ochre paint, as mentioned before I have decided to use a light wood rather than paint, and some Maple was sourced for this. First the planks were cut to length and clamped wet to the hull - following my earlier problems these were left on the hull until perfectly dry: I then used pencil caulking and glued into place, then using holes drilled through from the inside I marked and cut the gun ports: Next the treenails were drilled and the coctail sticks were brought in: Lastly the treenails were cut back and sanded and the job was finished:


- 31 replies
-
- 2
-
-
- pickle
- caldercraft
- (and 1 more)
-
I agree with you Jason BE's idea was poached by me also on Sherbourne, great idea - easy and effective. By the way your "Snake " is looking superb
-
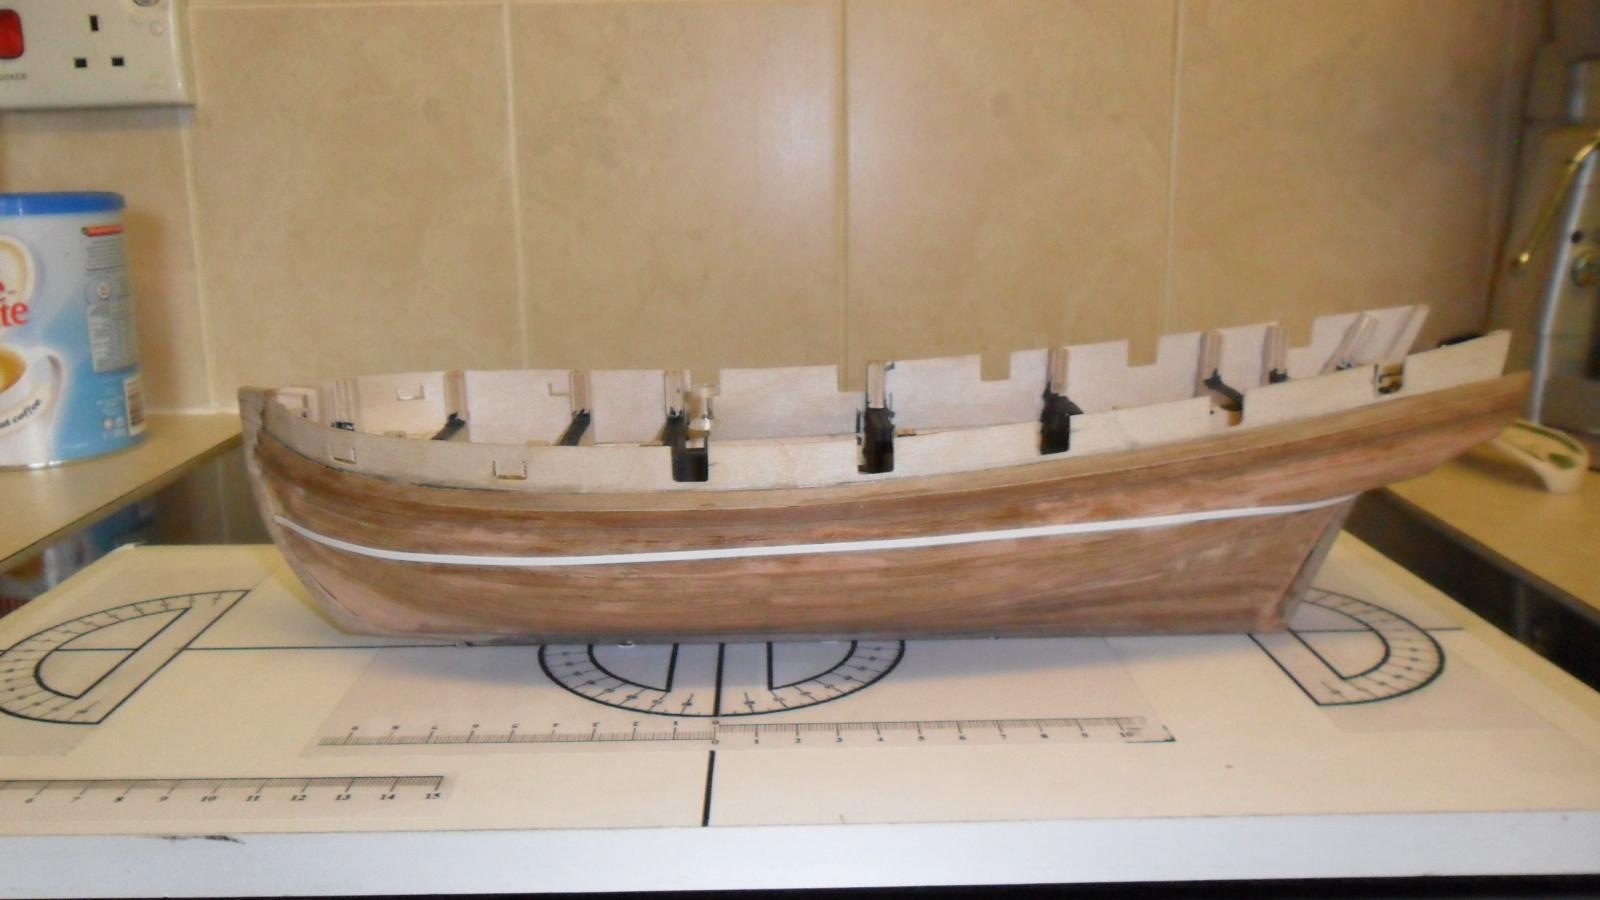
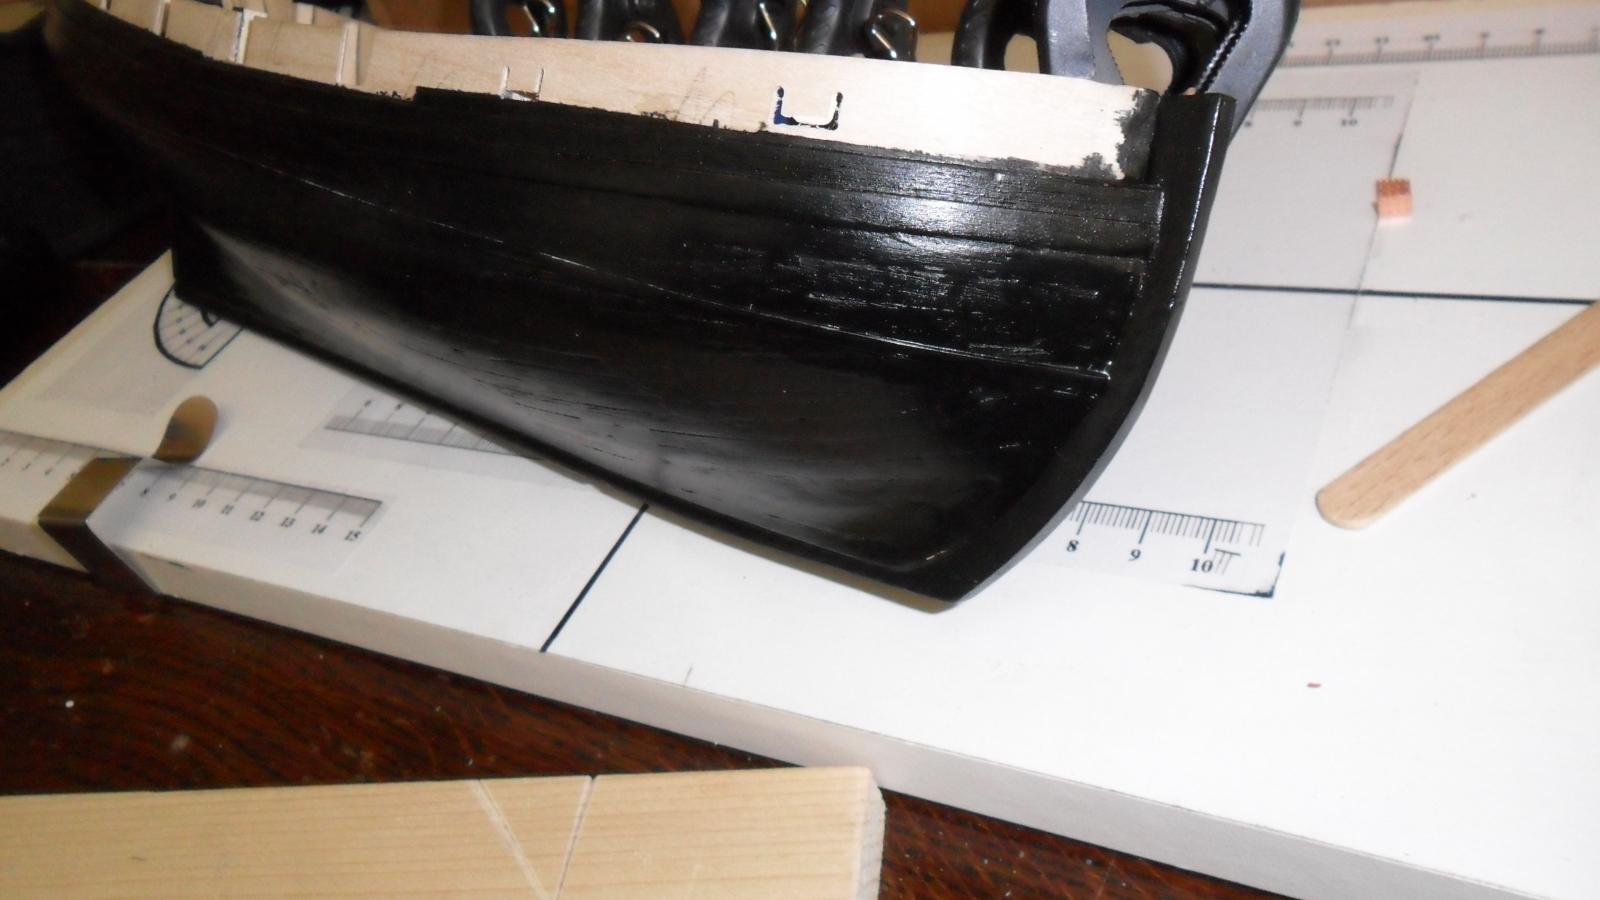
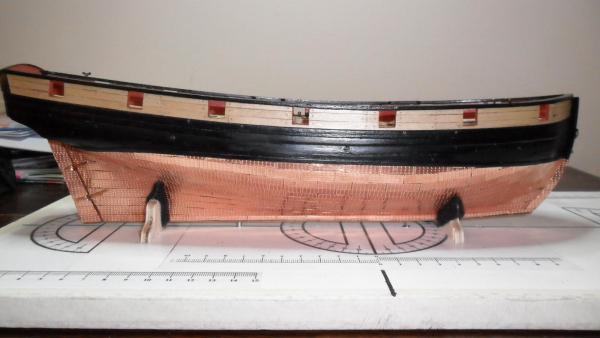
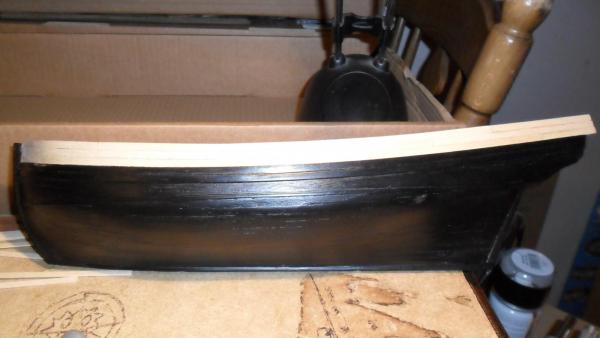
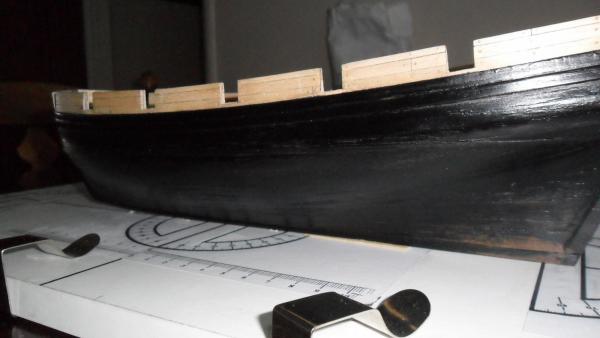
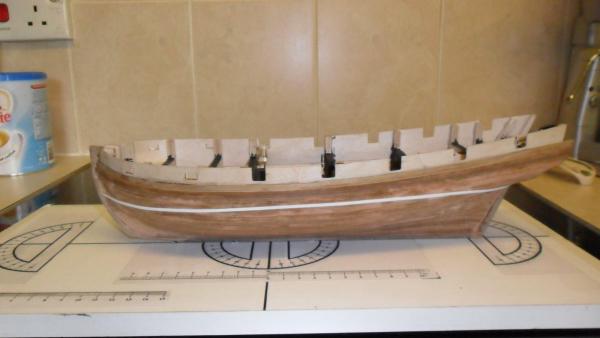
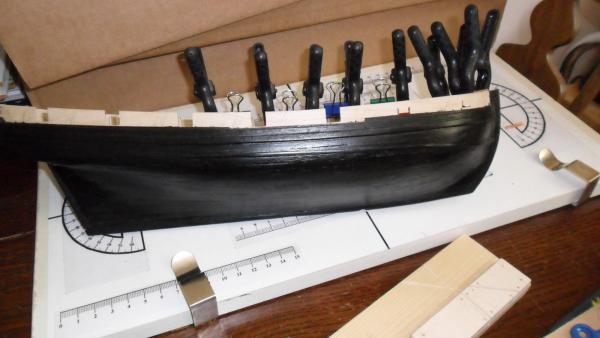
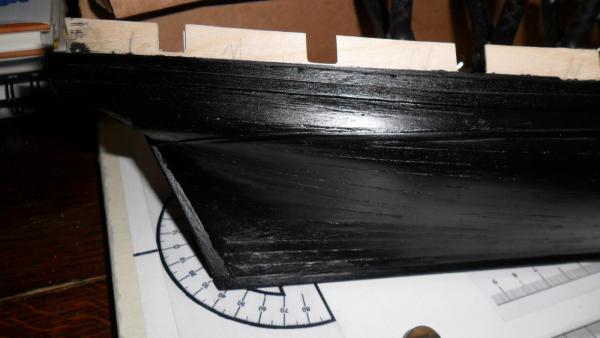
Second Planking, Waterline & Paint So ahead with the Second Plank, I had decided that the planks above the whale were going to be in plain wood - with all the work we do with planking I wanted some showing, and as this wood should be Yellow Ochre, I decided that a pale wood varnished would be nice. The planking went ahead with few problems, except I followed the instructions and forgot some of the advice on this site. JoTika/Caldercraft state that the wood should be soaked to aid in bending, and then glued damp to the hull with CA, this is all well and good but their supplied walnut SHRINKS after soaking leaving gaps - admitedly this is only my second effort at planking and chamfering could be some of the cause, but definitely not all. But overall, as this whole area would be painted & filler could therefore be used, not a total shambles, and so a strip of plasticard was added at the waterline to mark the edge of the plating as per Blue Ensigns build, and the help topic on plating....... along with the mentioned filler, which also helped where my initial fairing of the bulkheads was not upto scratch (must try harder, as my next build choices all have large unpainted/unplated areas) Then it was an easy task to mask and spray the whole thing in Satin black: Three things I have come to understand is that whether the instructions are good - as per Pickle - or scarce - as per Sherbourne - it is a good idea to dilute them with a good pinch of MSW advice! You can not spend too much time in preparing the bulkheads etc ! - though you can obviously oversand! Soak and pre-shape planks, then allow to dry thoroughly before fitting! Think,,,,,,,, Think,,,,,,, then do!


- 31 replies
-
- 1
-
-
- pickle
- caldercraft
- (and 1 more)
-
Timmo, that panel looks perfect, you have me worried now Granado is one if my choices for a next build, and that has set the bar high.... O will follow your progress with interest/dread lol! Keep up the good work