-
Posts
4,519 -
Joined
-
Last visited
Content Type
Profiles
Forums
Gallery
Events
Posts posted by Blue Ensign
-
-
-
Well done Vitus, she should look very nice atop the gallows on the spare topmasts.

B.E.
-
You seem to be making excellent progress Bob, and that pencil caulking looks spot on for scale, glad you're enjoying the build

B.E.
-
Nice approach to the knightheads Bob, I think you will master this kit despite the initial problems, and she will turn out to be a beauty.
B.E.
-
She looks very impressive Andy, great shot of the rigging at the Main Mast top.

B.E.
-
Those rails look very smart Ray, great modification

B.E.
-
-
A new adventure starts, I wish you much enjoyment of your new project JP.

Regards,
B.E.
-
Anchor Buoys are tricky little beggars to make and rig, and those look really good Mike.
I hope I can achieve similar when I get around to doing them.
Cheers,
B.E.
-
She surely does look impressive Len, love the broadside paint job, excellent work.

B.E.
-
Very nice work Vitus, and what a wonderful decorative effect you have achieved on the planking.

Regards,
B.E.
-
-
Nice work Kester, the sail looks very convincing.
B.E.
-
-
What an amazing insight you must have to presume knowledge of what we "OTHERS" have regarding understanding or otherwise the differences between 18th century shipbuilding practice and the offerings provided by kit manufacturers.
I think you will find that many of us fully appreciate the shortcomings in kit design, and not just relating to Victory.
B.E.
-
-
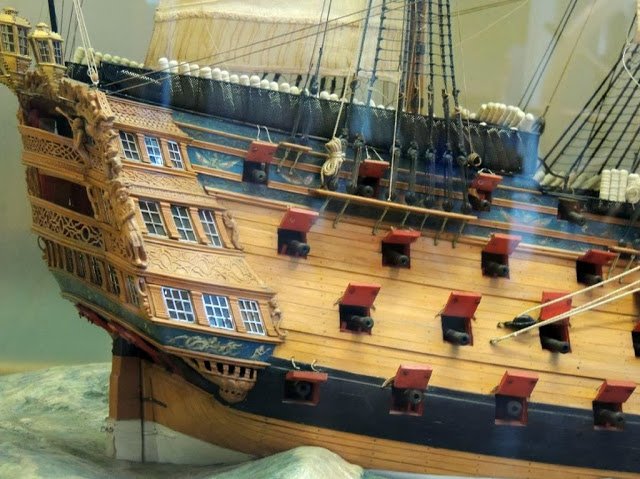
Hi JP as a bit of inspiration, here's a couple of examples of Victory models depicting her in pre great repair days.
Firstly the stern of Victory in a model by Wyllie in the Portsmouth Naval Museum.
Secondly, detail from a conversion of the Heller Victory by an excellent modeller, Michael D whose log is on my home forum.
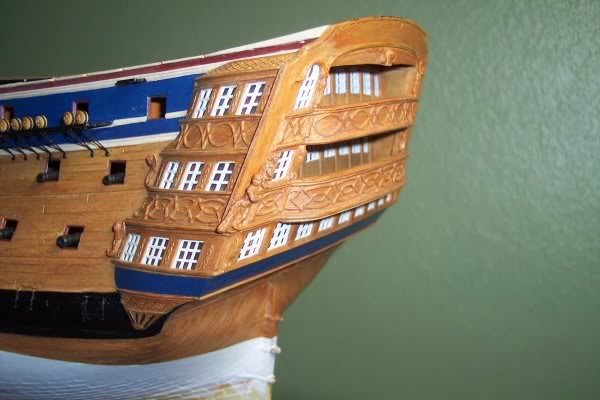
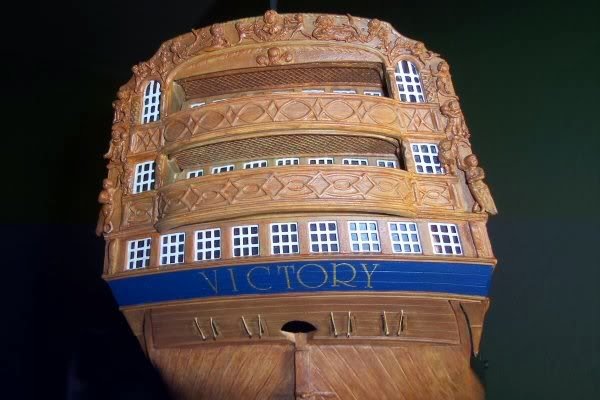
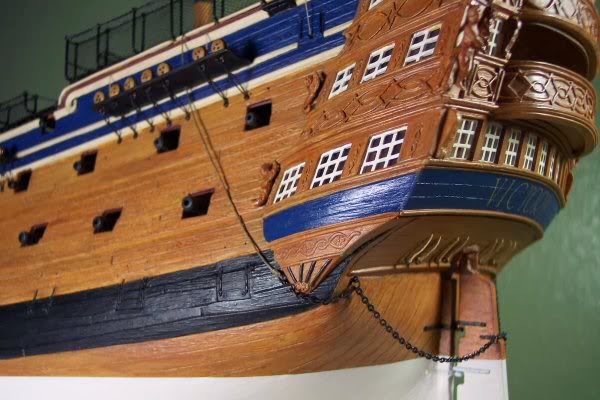
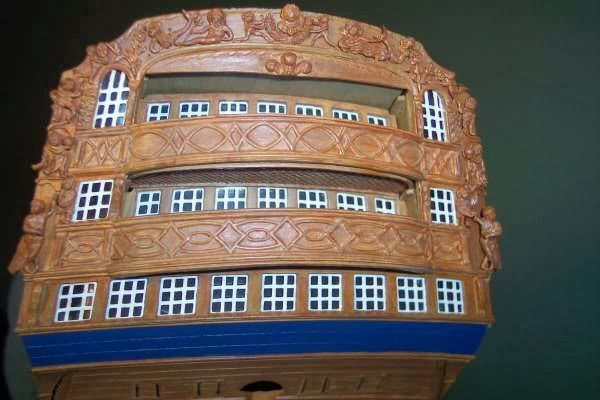
But remember it's not just the stern gallery that differed on the pre 1803 Victory, the Figurehead was also significantly more ornate.
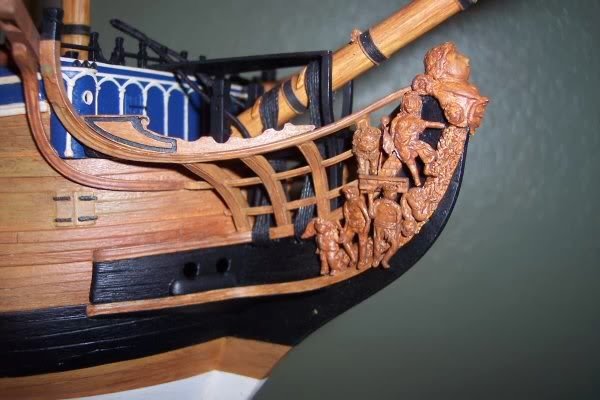
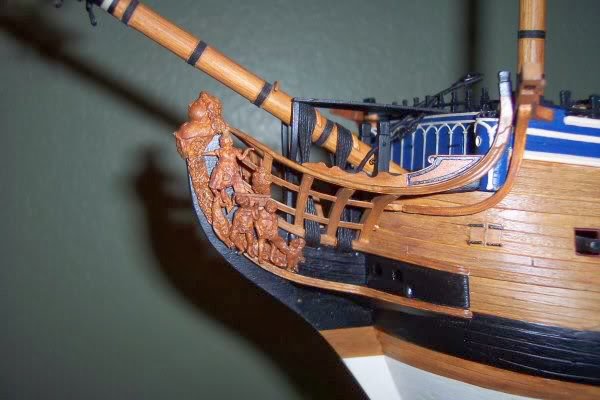
Michael modelled the Figure detail in Fimo from the details of the model figurehead also in the Naval Museum Portsmouth.
Food for thought eh?
Cheers,
B.E.
- Beef Wellington and NMBROOK
-
 2
2
-
Hi JP The stern of Victory was enclosed in the great refit of 1803, and she looked at Trafalgar much as she looks today, with the exception of the absence of the Prince of Wales feathers. This is confirmed by the drawing made by Livesay on her return after Trafalgar in 1806.
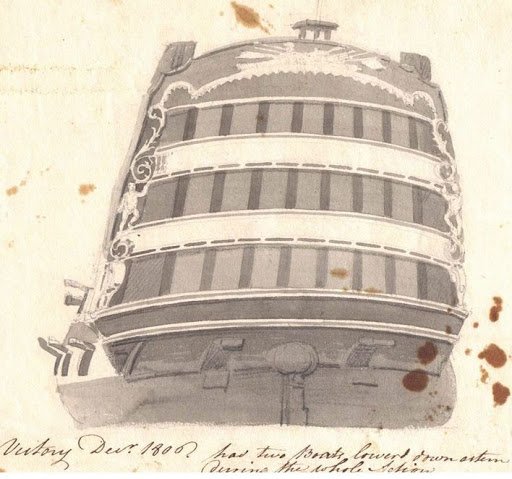
The Pocock painting (your bottom right) an extract from Nelsons Ships has a fair amount of artistic licence, but the earlier painting by Swaine in 1793 shows her with the open galleries.
If you intend to model her as at Trafalgar then if your kit follows her current stern you will not be too far out.
B.E.
-
Adeline, it's never too late

I know that may sound a little self serving, but as I said before, I am very flattered, and I hardly feel like I deserve such praise.
Thank you all so very much.
Andy
"a little self serving" Andy, isn't that what you've been all about of late,
 and pretty damn good at it as well. I shall be looking to you for tips when I start in earnest.
Cheers,
B.E.
- realworkingsailor and augie
-
 2
2
-
I'm with Daniel, don't go there, ca makes a mess of copper plates and needs to be removed from the surface asap to avoid marring the surface, particularly if you want the copper to take on a natural patina over time. Any residue will show up.
B.E.
-
Great fix job on the cathead sheaves, and I do like the look of your carronade Jason.

B.E.
-
-
Neatly done Andy, looking good, are you leaving the shroud seizings natural? Love the Bowsprit attachments, very tidy work, anyone would think you were a sailor with ropework like that.

B.E.
- realworkingsailor, mtaylor and augie
-
 3
3
-
It must be very frustrating not to be getting the satisfaction from a build time after time, also for those who get interested in following a build only to find it abruptly ends.
This one did look interesting and you look to produce a very nice finish to your work Arjan, I do hope you find a project that sustains your interest thro' to completion.
B.E.


HMS Snake by Beef Wellington - FINISHED - Caldercraft - Scale 1: 64 - First wooden ship build
in - Kit build logs for subjects built from 1751 - 1800
Posted
Love those deck shots Jason, ery fine work indeed.
B.E.