Landlubber Mike
-
Posts
4,544 -
Joined
-
Last visited
Content Type
Profiles
Forums
Gallery
Events
Everything posted by Landlubber Mike
-
 Very nice Ulises. I bet having that behind you makes you feel a lot better. I think I would have gone crazy if I had to line up all those gunports
- 786 replies
-
- 1
-

-
- Royal Louis
- Finished
- (and 1 more)
-
Thanks for sharing this. Very interesting! I might have to try this approach with my garden hose, which is always getting twisted and in knots
-
On my Badger, I did sails in the following order: 1. standing rigging; 2. attached the sails to the yards; 3. attached the yards to the masts. Attaching sails is very fiddly work. I don't know how you could ever attach them to the spars after the spars were already attached to the masts.
-
Hi Joe, looks really great. Sorry to hear about your problems with the walnut. Hopefully Caldercraft gets the message with all these complaints about the thin laminated walnut that they include in their kits. I loved my Badger kit and would give it perfect marks but for the walnut.
- 302 replies
-
- 1
-
-
- granado
- caldercraft
- (and 1 more)
-
I'll echo what others said and say it's Captain's choice Paint is great in that it can help cover up mistakes. Some people on here do an amazing job with paint. I don't know that I have the patience to thin paint down and paint 10-30 coats though to really do it right like some people do. I also find some paint a little too garish for me on a model, like white paint (even when using a dull white). I know for me, I really like the natural wood effect, particularly when the wood is oiled. That being said, since some wood is difficult to work with like ebony, to add some color to the model, I'm looking into using dyes and stains instead. There are a lot of black/ebony dyes and stains out there, and I think I found a couple of red stains from General Finishes that could work nicely if I decided to go with red bulwarks and gun carriages.
-
I have the same book, and am very happy with it. I've used it extensively to research the accuracy of my Corel Unicorn kit. The use of the NMM models is very well done.
-
Great work Jason. The ratlines really bring the ship alive. I actually enjoyed doing the ratlines on my Badger - there's something therapeutic (to me at least) about a repetitive task once you get in the groove.
-
Very, very nice work Ian. The rudder chain looks really spot on. Is the chain fully installed now? The rudder chain was literally the last, or second to last thing that I installed on my Badger because I worried about it getting caught. You could always tape it or otherwise secure it to the hull. I like the extra moulding you put at the bottom of the stern counter. It looks nice, and it looks like it helped secure the chain in place.
-
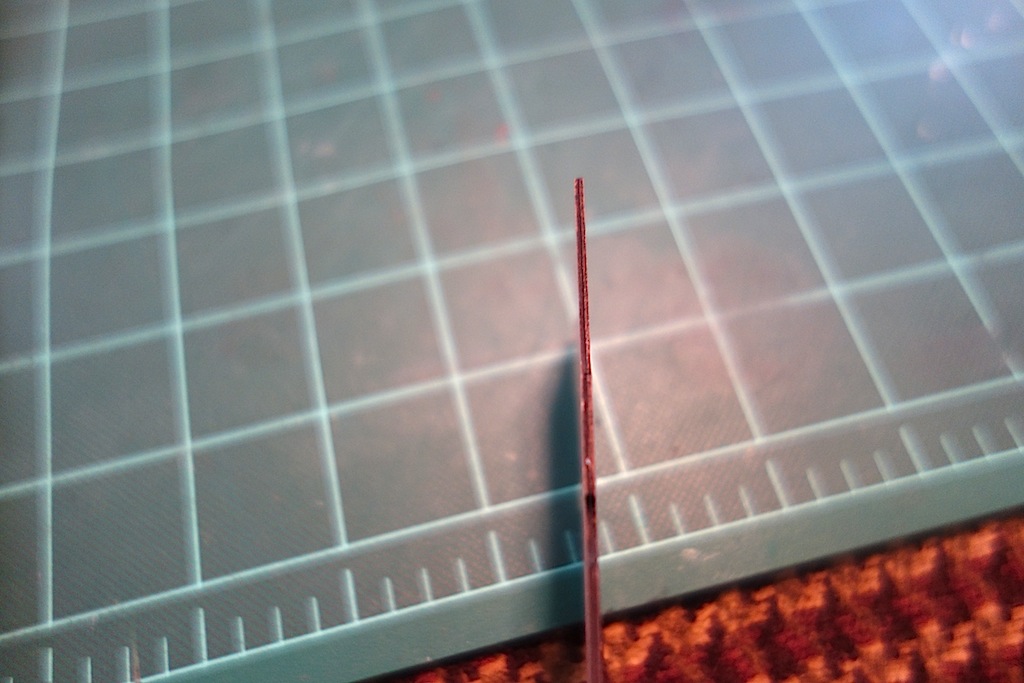
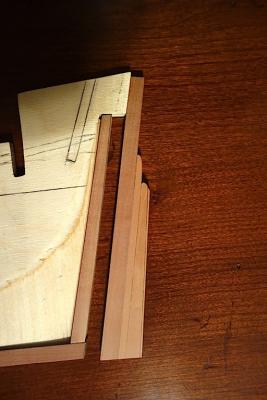
Hi Spyglass, I took a closer look at the parts sheets you mentioned (including some macro close-ups, which were the best I could do). Here are some pictures: It does look like these parts sheets in my kit are essentially walnut ply (or some other wood). It almost looks like there's a very thin piece of plywood in the middle, with very thin walnut ply glued to either side. The Caldercraft Badger kit was somewhat similar, though I think it was just walnut ply for three layers. I sure hope it's not like my Badger kit - that walnut would crumble if I sneezed on it, which was incredibly frustrating Caldercraft at least added plenty of extra pieces so that I could choose the best from the bunch, or just make my own from the extra wood of the sheet.

-
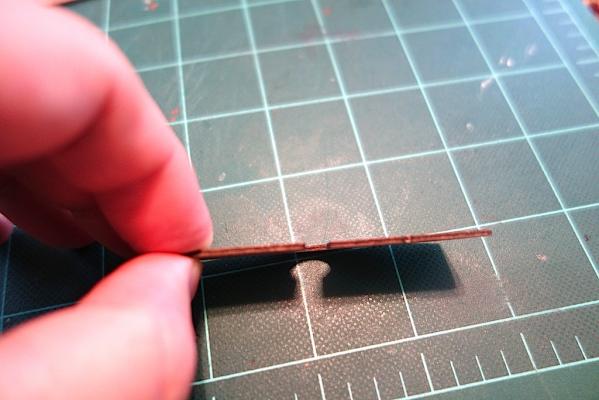
Thanks Alistair. The MDF is very, very solid material. It will definitely make for a good stiff skeleton for the build, though fairing the bulkheads could be a challenge. I didnt realize that about moisture and expansion, thanks for the tip! Thanks also for the tidbits on the deck ply and bitts. I'll keep an eye on them going forward.
-
Quick update - last night I put together the rudder. I figured that it was probably easier to design it now with the keel flat and without bulkheads. It's a bit oversized at the moment as I am still working out the stern counter and the stern in general, and I need to figure out where the waterline will end up, so I figured that I would give myself a little extra lengths at the top and bottom to work with. It still needs the pintles (and carve outs for the pintle-gudgeon connection), iron works at top (if they end up being visible), the spectacle plate and the sole (essentially, a false keel for the rudder). I ended up using the rudder design in the AOTS Blandford book, both in terms of general shape and composition. There is a different design in the AOTS Pandora and TFFM series, which have tabled joints. Since the Unicorn fell in between the two, I went with the Blandford design which was a little easier to execute and matches up with the stem design that I modeled off the Blandford as well. One thing to note - the kit gives you three sets of pintles/gudgeons. From my limited research, it looks like ships such as the Unicorn would have had four sets. Next up is to install a nut into the keel to take the eventual mounting hardware, and to start gluing on the bulkheads. I'm going to design the stern once the bulkheads are on so that I can see the run of the various lines and decks and design the framing of the stern accordingly.

-
Hi Spyglass, On the ply for the decks, I do have very thin ply for them. I haven't tried fitting them or otherwise studied them yet - can I ask what is strange? The keel and bulkheads are in MDF for sure. The list of kit parts also notes them as MDF. The main mast bitts are of differing sizes, thanks for the heads up! Part 42 is 55mm in wood, and only 51mm on the plans.
-
Super crisp is a good description Alistair. Jason, your Snake just looks perfect. The lines, joints, etc. are so well done there's not a blemish in sight. I hope to get to your level of "crispness" some day
-
Happy birthday my friend. Beautiful part of the country you are in - love the redwoods and sequoias. Can't think of a better birthday present than to be where you are now
- 2,250 replies
-
- 1
-
-
- model shipways
- Charles W Morgan
- (and 1 more)
-
No worries on that SpyGlass - I tend to think, plan, overthink, and then plan and think some more, and repeat. The Badger took me over 5 years
-
Hey, easy now Chris I'm slowly working my way towards the dark side. The Unicorn is what's going to push me there a lot quicker You're right though about spending money to replace items you paid for with the kit. With these kits I was fortunate enough to pay significantly below retail, so I don't feel as bad incurring the extra costs.
-
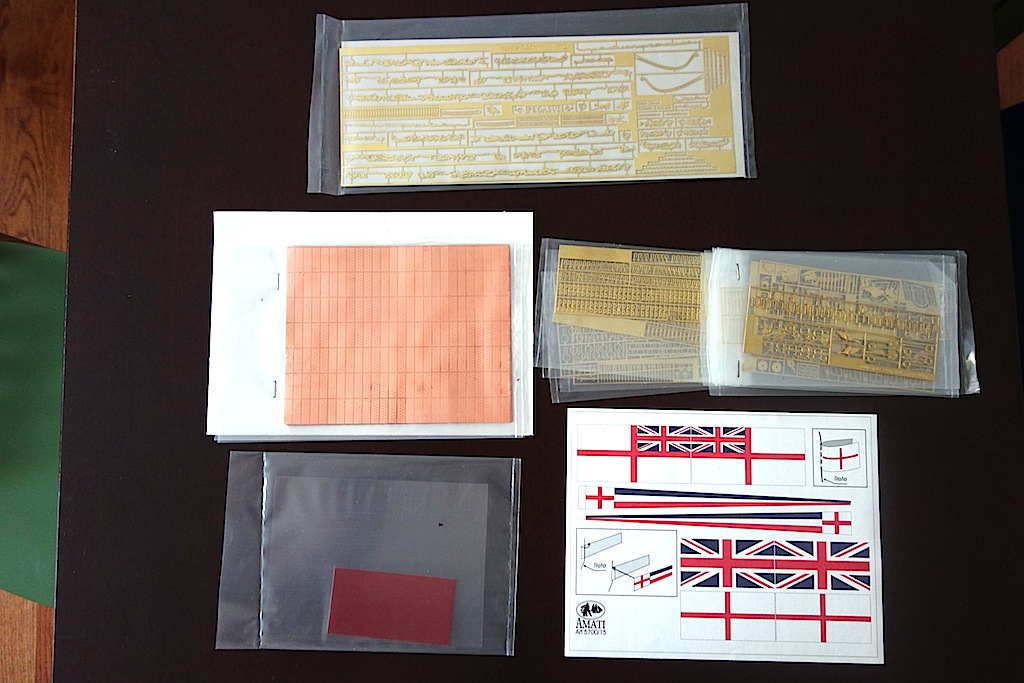
Thanks for the heads up on the flags guys. Interesting that Amati missed that detail, but maybe these are stock flags that they use in other kits from the 19th century. Now I'm going to have to check my Badger - I think the flags I used are the correct ones. In any event, I was probably going to replace them anyway, as the flags I believe are of more of a vinyl material. I like the way cotton allows you to add more natural folds and creases
-
Thanks very much guys. As John said, we might have all been happier if we hadn't seen the Chapman drawings I don't mind so much the historical inaccuracies, as this is a more basic kit and Corel has taken a few short cuts to make it easier for newer modelers. But two nights ago was really the breaking point for me when I tried to plan out the stern area and felt like something was wrong. The stem wasn't lining up on one of the plans, the stern wasn't on the other. So I overlaid the plans to see if there was a discrepancy, and that's when I realized the plans are all over the place with gun ports in different positions, etc. I knew that one of the plans was a bit shorter than the other, but I mistakenly assumed that at least the rest of the plans roughly conformed. Problem for me is that I've been using both plans to plot out the ship. So, I think I'm just going to have to use the plans to eyeball things, and build the ship more by feel. Despite all my recent whining, I think I'm finally getting close to figuring out the stern area. I am very likely to go with Chuck's framing approach, building out two (maybe more) stern extensions, with the outer pair shorter than the inner pair to create the curve in the transom. They will sit on bulkhead 16, which is already angled pretty close to Chapman's angle for the transom, and I will drop bulkhead 17 and probably cut off the bit of the keel that runs just aft of bulkhead 16 because it will run right into the middle set of windows. The extensions will serve not only to anchor the transom, but also to define the shape of the stern counter. The outer pair of the stern extensions will serve as the outer edge to run the hull planking to the stern at the quarterdeck area. Without bulkhead 17 and without gunport patterns as in other kits, I've been struggling to find a way to run the hull planking to the transom, which is considerably wider than the width of the ship at the edges of the hull planking. I think framing the stern as Chuck did with the Winchelsea could work very well. Of course, this is all more tricky than it sounds as the wale feeds right into the stern counter, so a lot of planning is going to be needed to get the shape of the extensions just right.
-
Thanks very much guys, I really appreciate it! Alistair, on the friezes, there are two paths I could take. One would be to use them, but to paint them so that they have a patina look using dry brushing techniques and/or washes. I think the former would be better given that there aren't many, if any, nooks and crannies in the friezes for the wash to settle into. The alternative would be to carve them. I'm not sure if I really want to go that route, as the PE pieces are gorgeous, and it seems like it would be a big waste of the kit. Plus, I'm scratching enough of the Unicorn that it will be nice to just build the kit with as many of the kit components as possible. On the Hunt practicum, it was helpful in a few very select areas with my Badger, but I doubt that I will be relying heavily on it for the Pegasus, if at all. Frankly, I was very disappointed in it. As you say, he does a lot of complaining in it and uses other models for pictures. On top of that, he makes a ton of errors during the course of the build and fesses up to them. Chuck's practicums are much, much better in my opinion.
-
I've decided to start the Pegasus alongside my Unicorn build. My Unicorn is fast becoming a completely bashed/scratch build which is fine, but I'm working off of plans that are inconsistent with each other and with the kit parts which has been very frustrating. Last night I overlaid the profile view of bulkhead plans onto the profile plans of the completed exterior, and things like the gun ports, stem, etc. are not lining up. So, to avoid being completely exasperated, I think having the second kit to turn to will keep me engaged in the hobby and give me a mental break from the frustrations of the Corel kit. I have no problems with the simplifications that lead to historical inaccuracies, but when the plan sheets don't line up with each other, and don't line up with the kit parts, I have a big issue with the kit. I still plan on working on the Unicorn, and am excited to do so. Right now I'm just having a little trouble figuring out the stern area, so possibly by going through the process with the Pegasus, the stern construction will make more sense to me.
-
My approach to the build: The Pegasus kit seems to be a very accurate kit. There are some questions about the size of the cannons that have been documented, but overall, it seems to me that one can build a very accurate kit out of the box. For my build, I not only have the full TFFM series, but I also recently ordered the lines and profile plan from the National Maritime Museum (available at the link below). I plan to use those resources to help me add additional details to my build. http://prints.rmg.co...MS_Pegasus_1776 I also have Bob Hunt's practicum for this kit. I bought it a few years ago when I bought this kit from a MSW member, in large part to help me get through my Badger build. I'm not sure how much I'll get out of the practicum at this stage, but it probably does have some decent nuggets that will be helpful. At this initial stage, I plan on doing the following: 1. Avoid the use of paint. Like with my Unicorn, I'm hoping to avoid paint to the extent possible. I probably won't completely "paint with wood" as the kit wood seems to be very good, but I will use some dyes and stains that I bought from General Finishes to add some color to the model (black, red, maybe blue). I need to see how well the kit wood takes the dyes and stains. After working with Jeff's wood however, I might replace some of the kit wood with respect to the outside hull planking, the deck, and the masts. For example, I probably will go with boxwood for the masts and some of the accents and trims. The only paint that I can see using at the moment is paint to provide a burnished look to the decorative items, and maybe the figurehead (though, I might carve my own to get it closer to the NMM plans). Overall, I don't want a brightly colored model. So, in addition to avoiding paints, I might try different washes, stains, dyes, finishes, etc. to come up with a darker, more muted older look to the model like some of the museum replicas and modern masterpieces. Not sure how to do that, so I have a feeling there will be a lot of experimentation. 2. Sails. I liked how the sails came out on my Badger, so I will add sails to this build. I probably will add a mix of furled and unfurled sails. 3. Replacement and scratch details. I'll have to go through the kit in more detail, but it looks like the cannons are a bit oversized so those will likely be replaced. The kit also comes with cast metal small boats - to avoid the use of paint, I might try scratch building them. There are also a lot of other interesting details that you can add to the kit that are outlined in the TFFM series that I might try. Finally, the stern decoration is a bit different on the NMM plans as Blue Ensign points out - not sure what I will do there, but I might end up modifying the stern decorations to more closely conform to the NMM plans. Should be fun! Hope I can keep up with the high bar set by the other Swan class builders
-
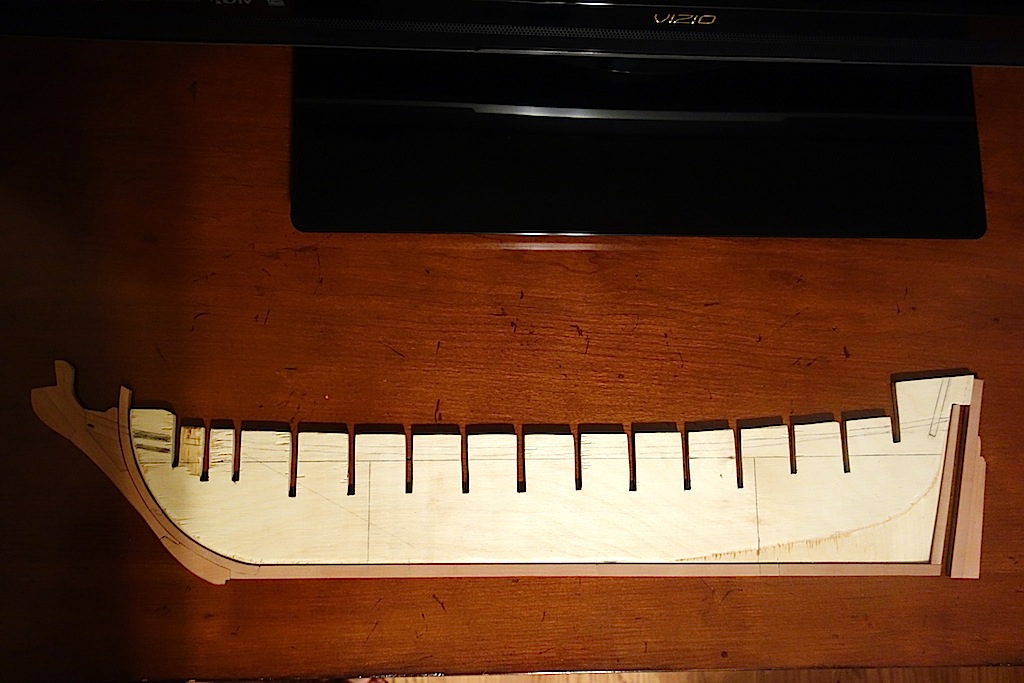
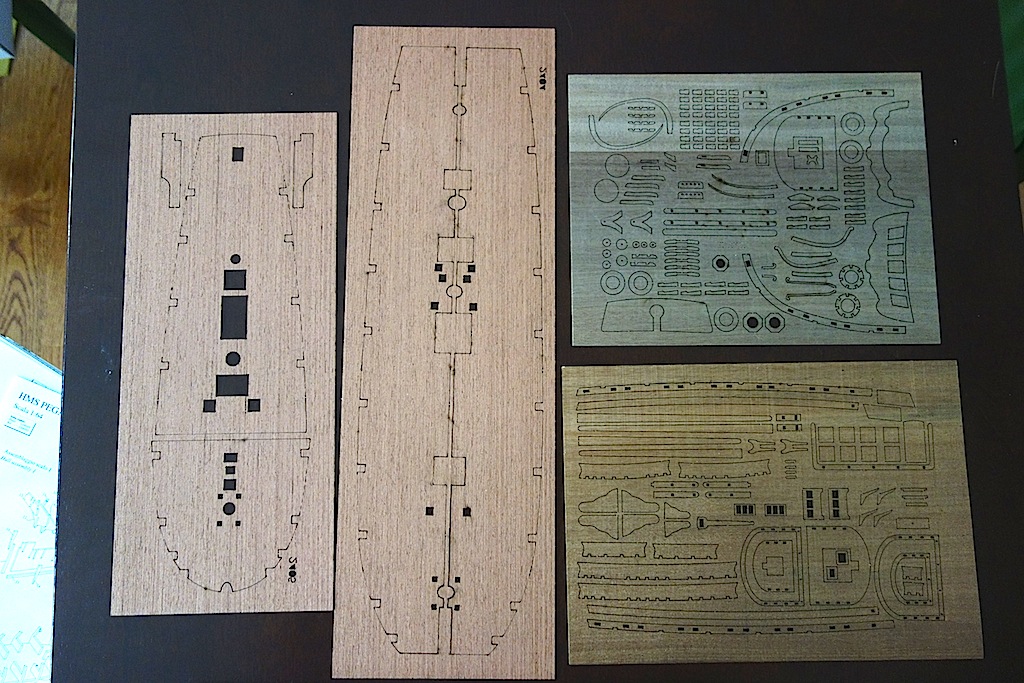
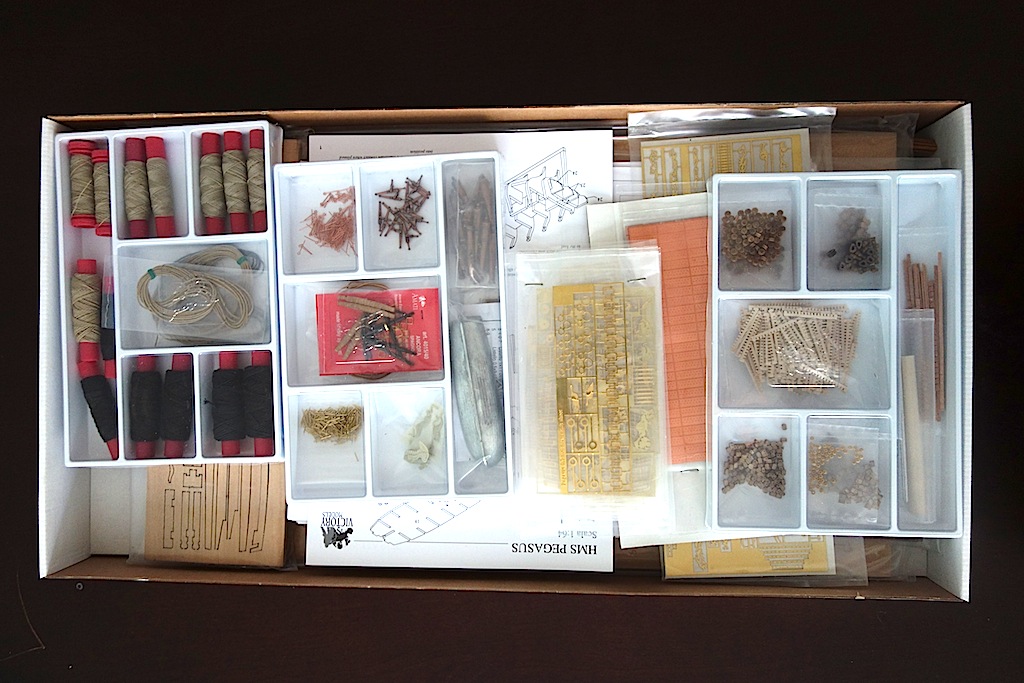
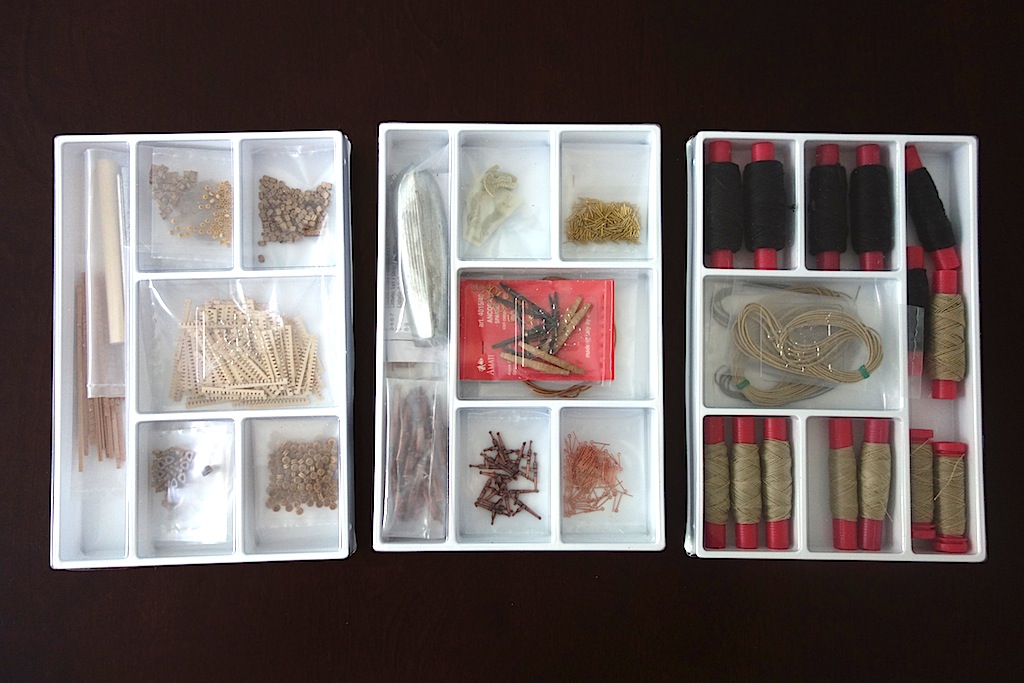
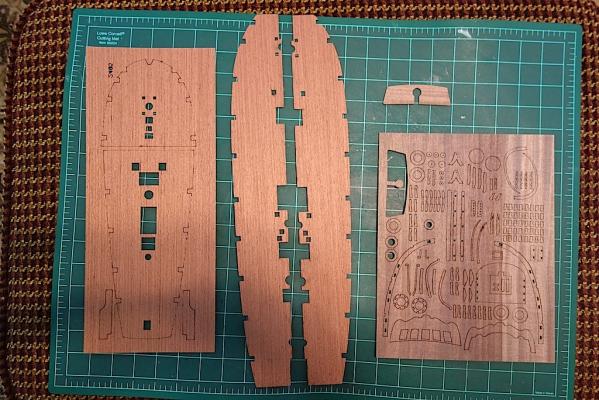
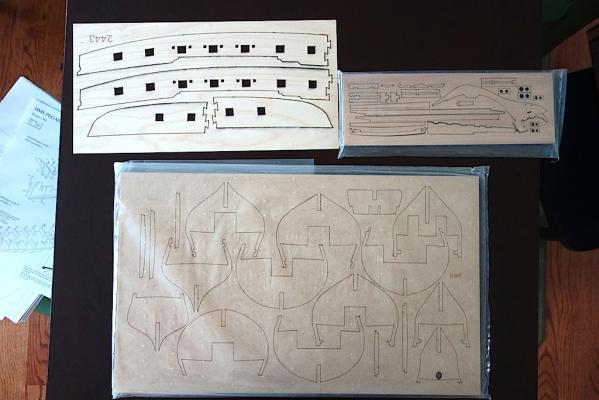
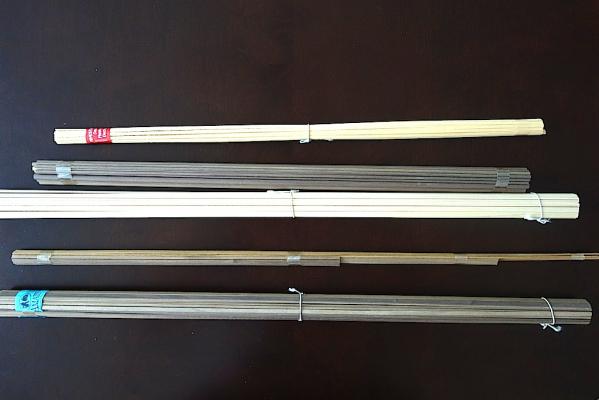
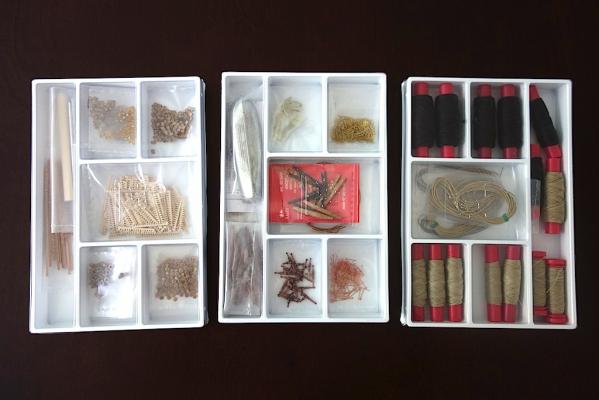
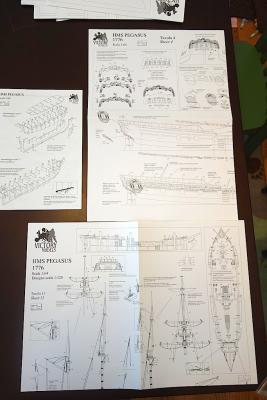
The kit is very high quality all around. It definitely is a big step-up in quality from my Caldercraft Badger. Here are some pictures for those of you that like eye candy: Wood - the keel and bulkheads are on a very solid piece of MDF, with no warp issues. I'm surprised more kit manufacturers don't use MDF, given all the issues people are having with warped keels and the like (such as what I had with my Unicorn). Building materials - nice kit pieces, but in particular, the copper plates are very, very nice. Some questions about the size of the cannons, and the anchors seem a bit too triangular, but otherwise very nice, high quality parts. The photo etch detail pieces are very well done. In some areas, PE pieces are laid on top of each other to create a more three-dimensional decoration. Plans - the plans are very detailed and nicely laid out.


-
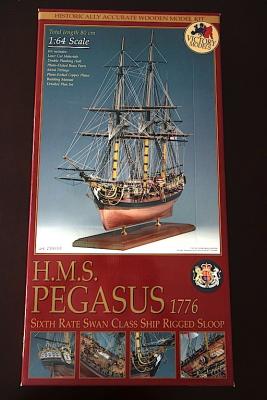
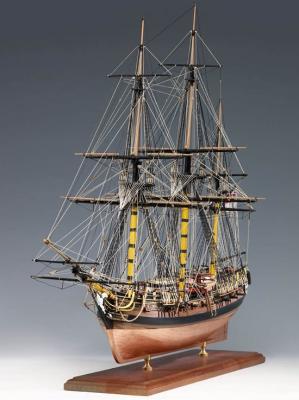
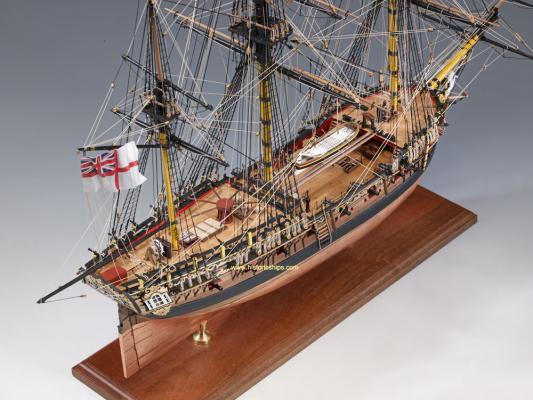
The Pegasus will be my third build that I will work on alongside my current Lyme (based on Corel Unicorn) build The Pegasus is a 14-gun 6th rate sloop, the sixth built of the Swan class. Despite being a gorgeous ship (due to having been built before the Admiralty issued orders to minimize decorations (especially for lesser rates)), her history is not all that colorful. She was launched on December 27, 1776, and in October 1777, was lost in a storm off the coast of Newfoundland. The Pegasus was 301 tons burthen, 96 feet 7 inches (29.4m) in length, with a beam of 26 feet 10 inches (8.2m) and a depth of hold of 12 feet 10 inches (3.91m). She had a crew of 125, carrying 14 six-pounder guns and 16 swivel guns as armament. The kit is at scale 1:64, which works out to a length of 31.5 inches (800mm) and a height of 27 inches (600mm). Links of Interest Keel and Bulkheads: Preparation of Keel Modification of Bulkheads Bulkheads Installed Main Deck: Installing Main Deck (adding supports) Building Hatches Start of Deck Planking Deck Planking, Main Mast Partners, Capstan Step Bitts More Deck Planking, Stern Extensions Main Deck mostly completed Hull: Gunport Patterns Start of First Layer of Hull Planking Stern Counter Wales Second Planking (spiling) Lower Hull Planking Completed Black Stain on Wales and Hull Upper Hull/Waist Blocks Upper Hull completed/stained Main deck planking completed Bulwark Planking
-
It's disappointing that it's so hard to find flat plywood. I've discovered the my new plywood keel for my Unicorn has a very slight warp of maybe 1-2mm at the end that I need to address. I've been thinking about the bracing approach that you mentioned since it it very slight. Replacing the stem and stern post with boxwood would be very nice. Be careful going down that path, as you might want to build the stem from the individual parts that compose it (close to a dozen) I ended up doing that with my Unicorn, but I wonder how much will be seen once all the headrails are on. Alternatively, I think you can get away with scribing lines onto a single piece for the stem to represent the joints, and maybe define them with pencil. I might end up trying that with my upcoming Pegasus build. Do you have the AOTS book on the Diana? It's pretty good in case you are looking to add details to the build.