cwboland
-
Posts
255 -
Joined
-
Last visited
Content Type
Profiles
Forums
Gallery
Events
Everything posted by cwboland
-
Bob I've been looking at this "kit" for a possible future build. Will be interesting to see how she comes together. I'll follow along.
- 682 replies
-
- 4
-

-
- halifax
- lumberyard
- (and 1 more)
-
Thanks Mark and Patrick. I really enjoyed building her, but like I said, I think I'll stay away from scratch for a while. Always mulling things over in your head turns into quite a headache after a while
-
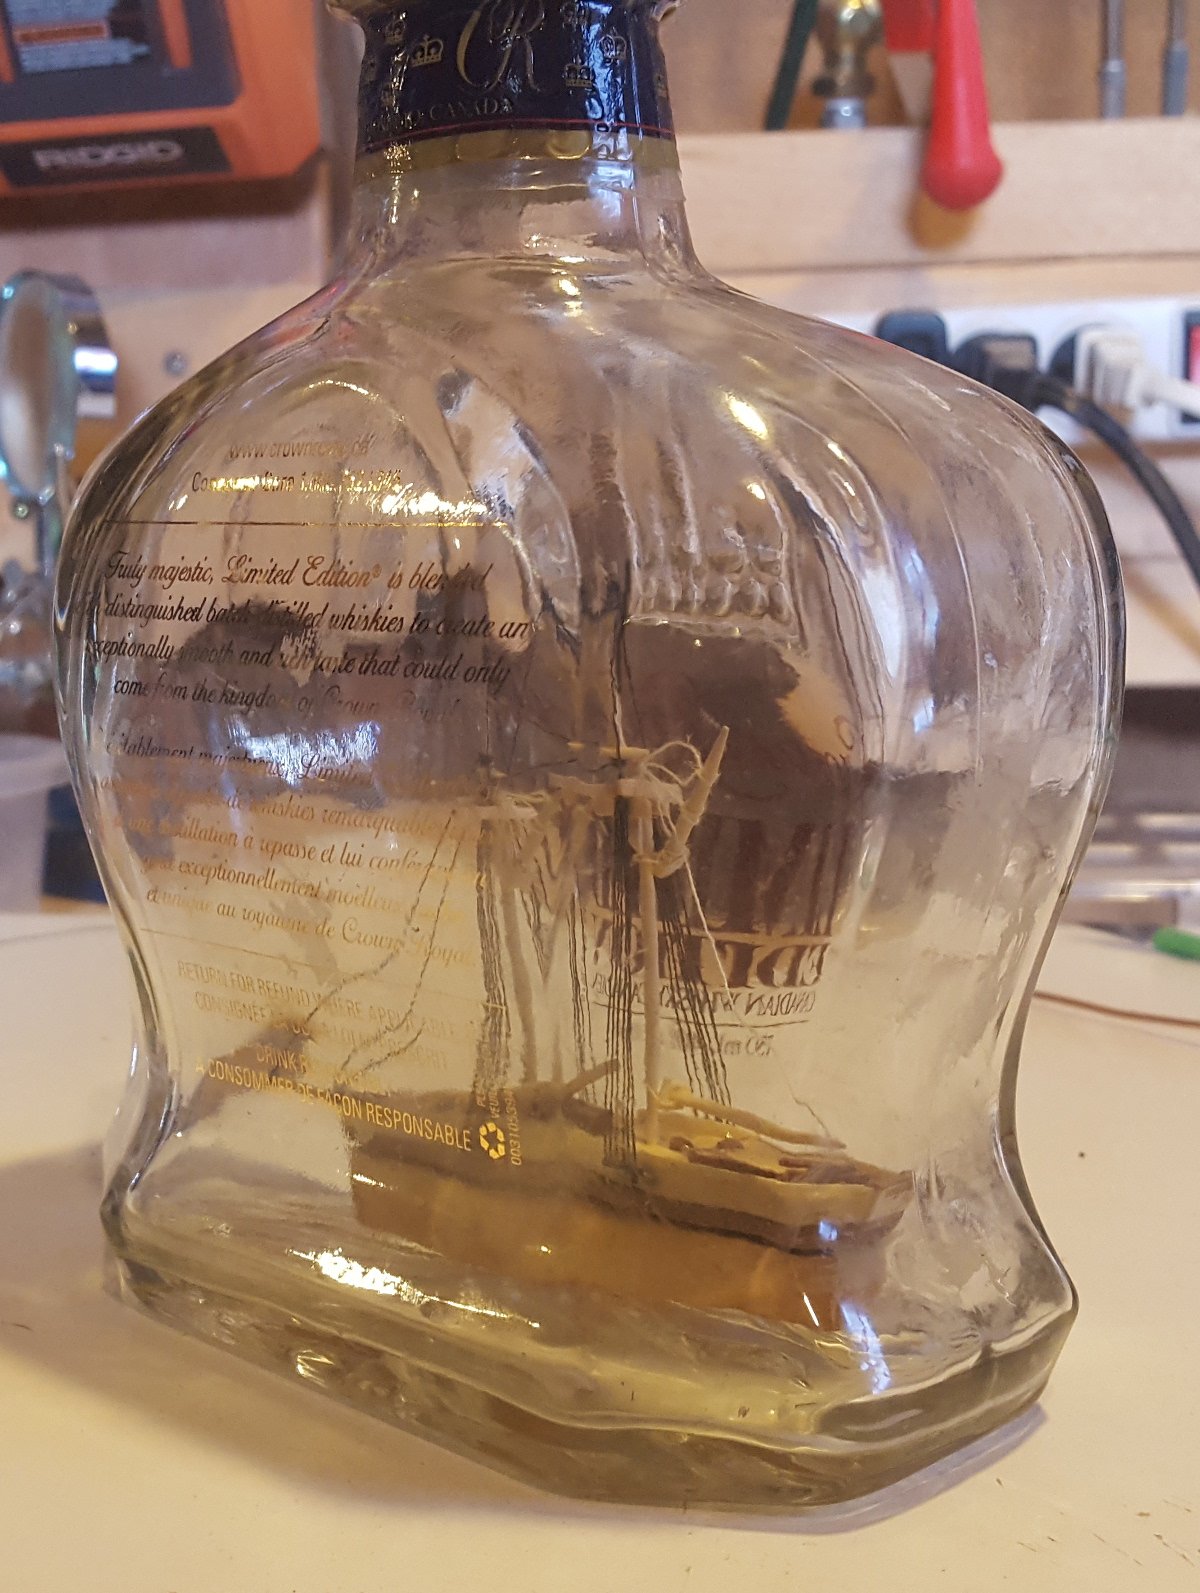
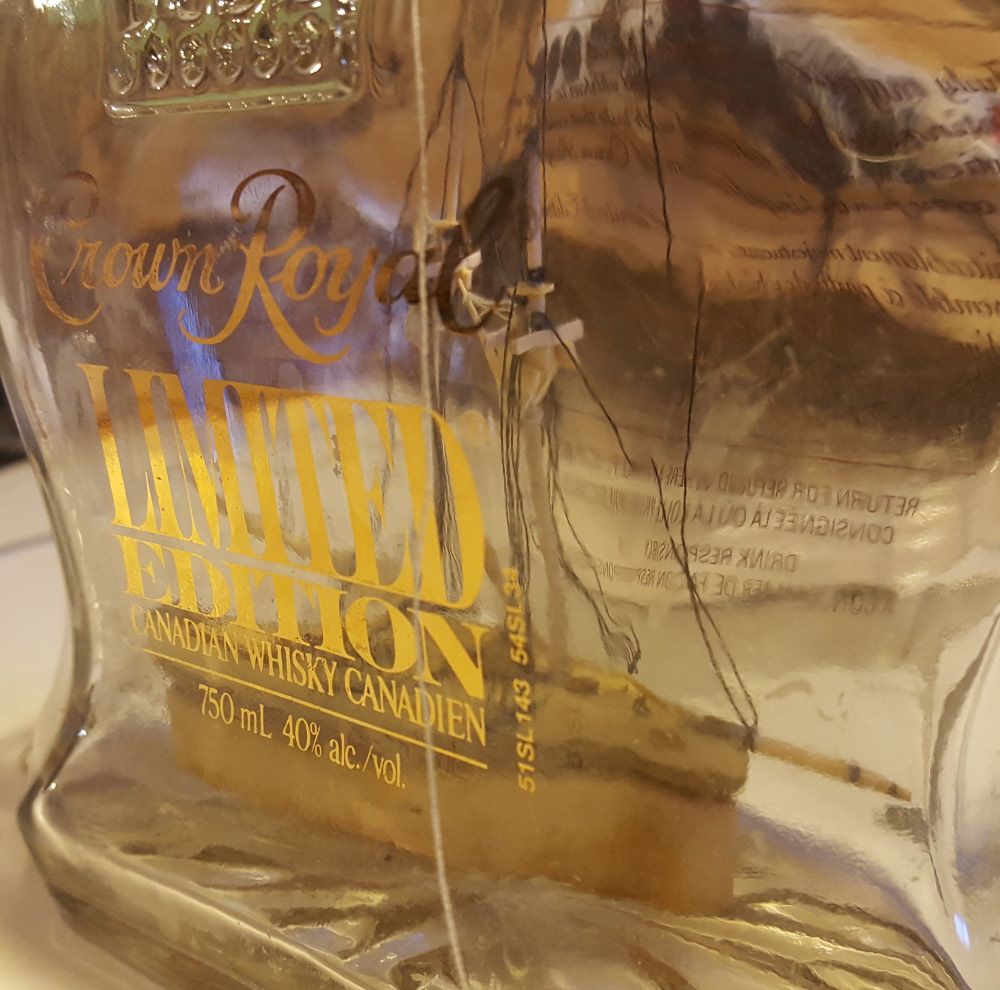
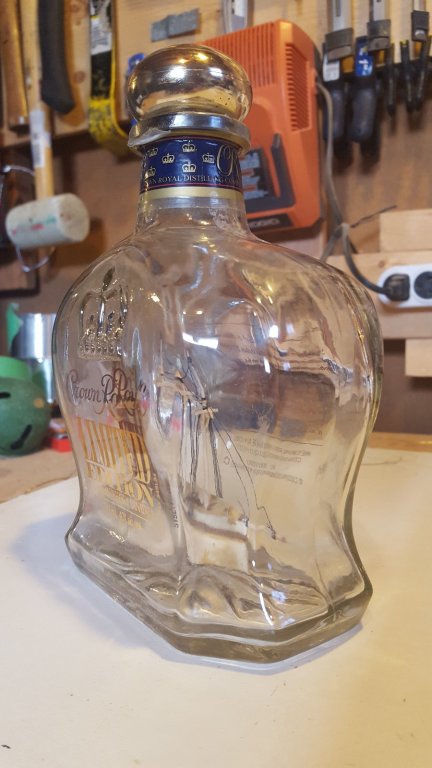
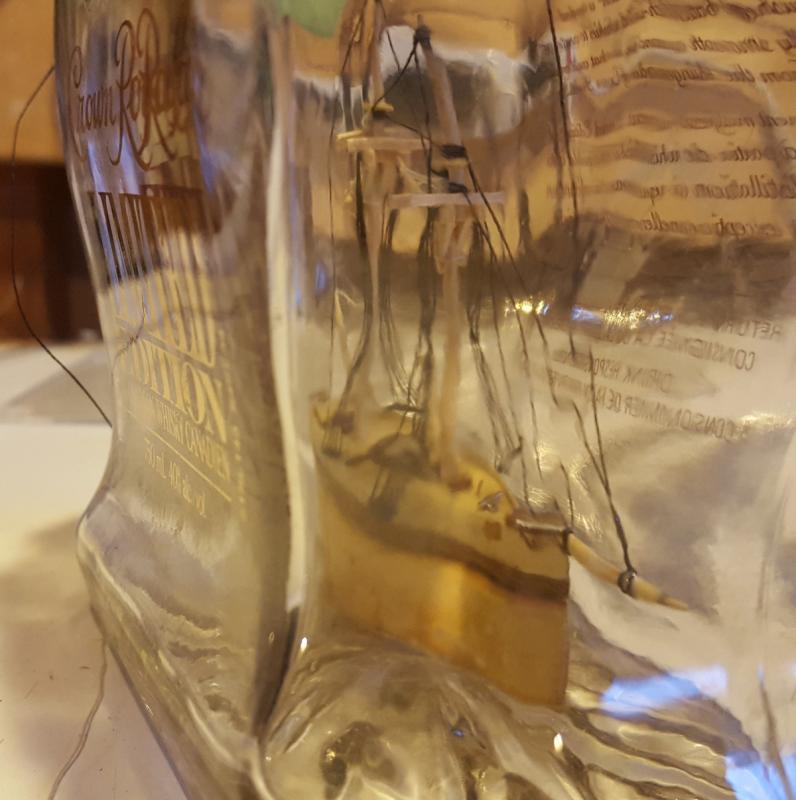
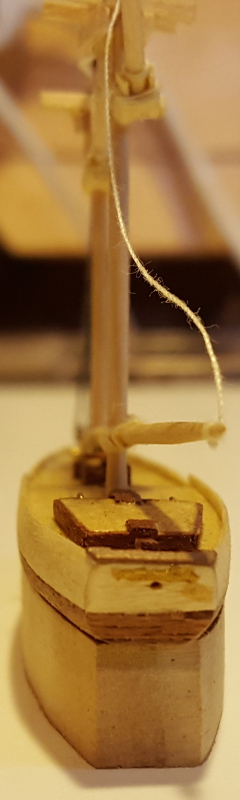
After another long hiatus out of country, I finally managed to get some time in the shipyard. This will be the final update in this build, as I finally got around to installing the shrouds and securing the cap on the bottle. You'll notice I didn't install the top forestay. I didn't want to risk breaking anything in the bottle and have to start all over again. Attaching the shrouds was quite tricky, as you can imagine. I had to lay the bottle on its side and try to press the bent brass rod I was using as channels into the pre-pressed holes. Using a piece of copper wire and a lot of patience, I managed to line up the ends of the brass rod with the holes and push in the channel with another piece of wire. The cap was finally attached using some epoxy to secure it in place. All in all, I think this first foray into scratch building was a success, but I think I will stick with kit builds for the immediate future. Maybe I'll start a new scratch build in the future, probably the Triton section, but will have to aquire a pile of good wood to do this properly.


-
Hi Rob, Check out Chuck's pinned topic about Activity Streams. This should explain how to do what you want Edit:Typo fixed
-
I can't believe its been 5 months since my last update. Work has been a little crazy lately, and I haven't spent much time at home to get anything done on the build. I did manage to get the fore shrouds completed before getting lost in work, but didn't get any pictures taken. The last couple of days have been pretty busy at home too, but I did manage to get some build time in. I was able to get the base in the bottle.... ...as well as the hull... and masts. I was also able to start tying the forestays to the bowsprit. I was only able to get two of the stays tied to the bowsprit, but only because of time, and the third top stay came untied from the foremast. I 'll have to figure out a way to re-tie the stay to the mast while it is inside the bottle without causing any damage.

-
Airbrush
cwboland replied to Mike Dowling's topic in Painting, finishing and weathering products and techniques
Hi Mike. I've been looking at the lower end badger airbrushes for a few years now and they seem to be priced around CAD$100. May be something to look into. I don't currently own one, or any airbrush for that matter, so not sure how they compare with other brands. -
Small update today. I worked on the foremast shrouds this afternoon, but I didn't like the way they came out. I'll have to look at then another day and will probably redo them. They just weren't tight enough to look good. Sorry no pics today. The work just didn't justify any.
-
Another day spent in the yard and more progress made on the Bluenose. I decided to cut out a wooden base for inside the bottle to make mounting easier. I also added some 1mm brass pins for locating the base on the hull. I also added a little bit of brass paint to both sides of the bow and the stern as identification markers. The type is not legible as the scale is too small, but the bow markers should read BLUENOSE II and the stern marker would read BLUENOSE II LUNENBURG. This was all in preparation to start running the shrouds. This is a dangerous project in itself. I had to cut about 7mm of 0.5mm brass wire and tie indivdual clove hitches to the wire on both sides of the mainmast. I used the rigging diagram that Igor was generous enough to send to locate the chainwales and drilled two 0.5mm holes for the bent ends of the wire to fit into. These “chainwales” will be removeable to allow the masts to be inserted into the bottle without any issue. I still have to do the upper shrouds and the shrouds on the foremast, but that is a project for another day.
-
@Daniel, Thank you. I noticed your post a little late and was able to sort it out, as per my last update. I've also decided to forego the sails, opting rather for the barren look of almost having sails, but without all the painful work of trying to figure out how they are going to hang on the rigging without actually rigging them. I've seen this done effectively on some commercial souvenirs and the look is quite stunning if done properly.
-
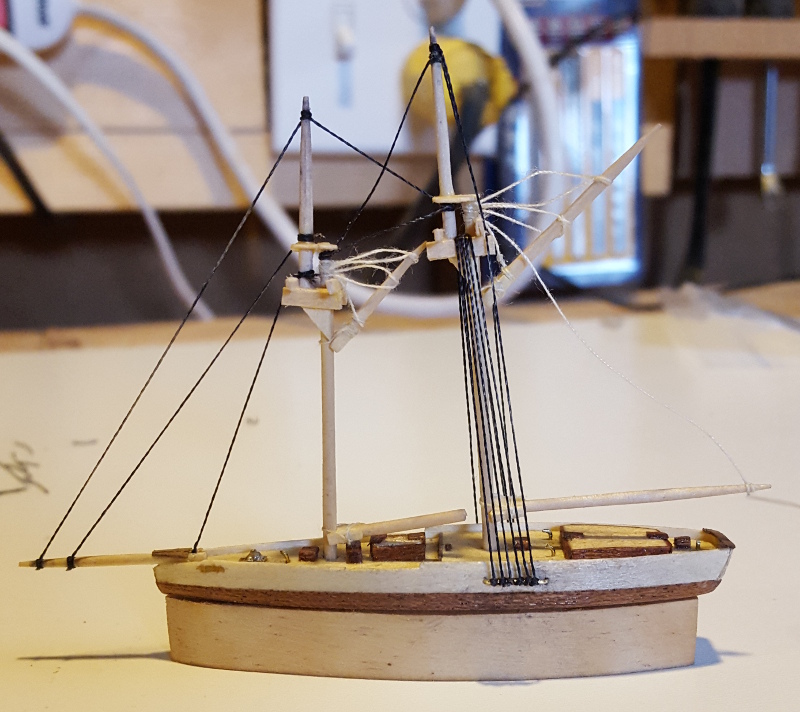
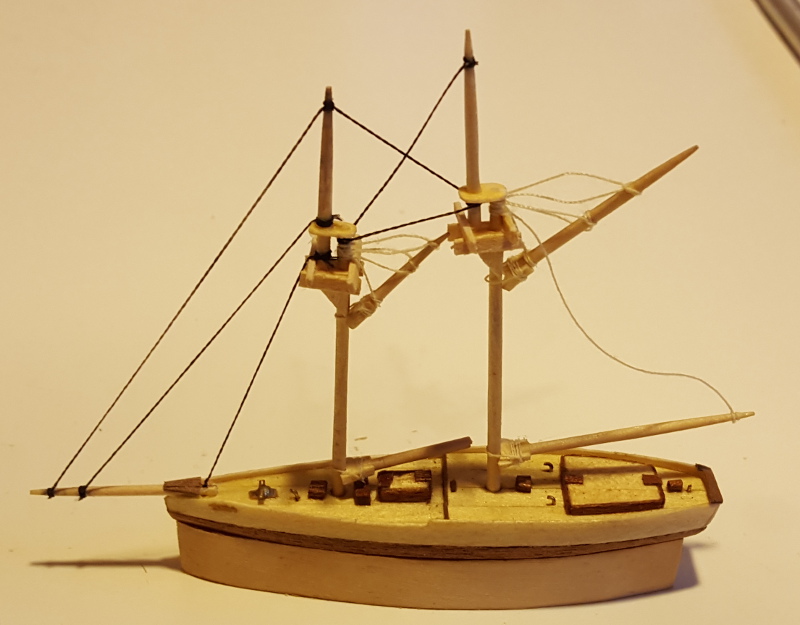
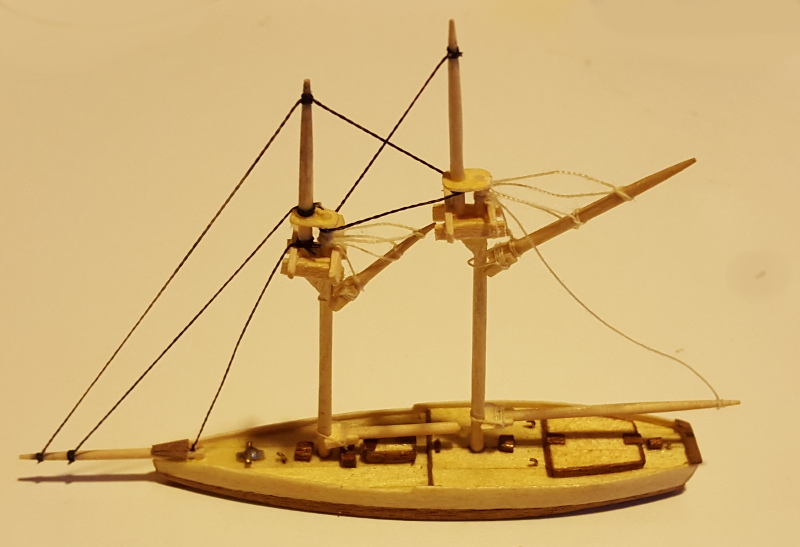
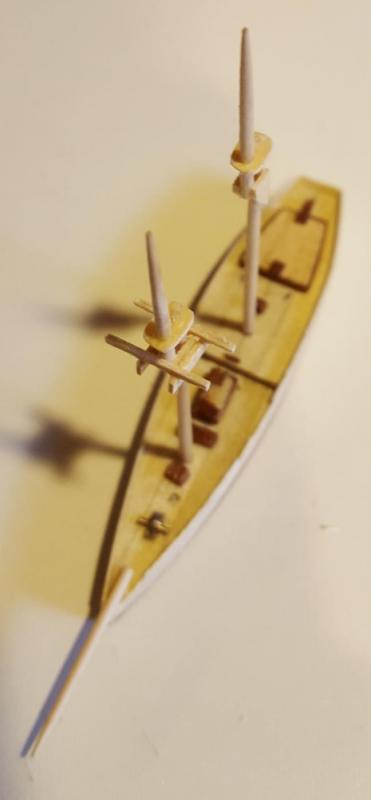
Todays adventures were just that. Adventurous. I started off the build day with looking over the rigging plan (thank you again Igor). I decided to keep the rigging as simple as possible to minimize the amount of knots I would have to tie, but have enough so that the model would be recognizable. As common sense would dictate, I started with the standing rigging. I started with some denim-weight thread that I had from a sewing kit for the standing rigging. It came off the spool a dull khaki colour, so I took a blunt sharpie marker to it to give it the “tarred” look. I started with the middle line running from the bowsprit to the lower end of the fore-topmast. I hadn't decided at that point if I was going to run the jib line or not, and decided after all the standing rigging was in place that the it was required to make it look normal. To secure the bottom end of the jib line, I drilled a 1mm hole in the end of the bowsprit and plugged it with a toothpick while the line was in the hole. The toothpick had a small drop of glue on it before inserting it into the hole. Afterwards, I raided the Admirals sewing stock for some light tan thread for some of the boom rigging. I found that with a little ingenuity, I was able to tie two clove hitches to the boom stays and run the line around the mast, tightening the second hitch to secure the boom to the mast. I decided, foolishly, to start with the mainmast for ease of access. I only realized afterwards that this was a bad idea, and I should have started with the foremast as the foremast booms are a lot shorter and require a fourth set of hands to tie all those nasty clove hitches. The rigging itself isn't complicated, just time consuming. There is a total of six clove hitches on the mainmast topsail boom, three on the boom and three on the mast itself. If you look closely, you can ALMOST make out the three between the crosstree and the mast step. The foremast was completed in the same fashion as the mainmast, but I had to remove both just to secure the booms for the foresail and the fore-topsail. I have yet to complete the shrouds and ratlines, but am unsure how I will be securing them to the hull as they will not fit through the neck of the bottle and I have no way to tie them to the masts inside the bottle itself. I am sure a solution will present itself in one way or another in the future, when I decide to get there. I may already have something in mind. As for a display base inside the bottle, I'm currently thinking I will use a silicone-based sea spread across the bottom of the bottle with some kind of plug inside to mount the hull onto. Will have to decide quickly as the time approaches fast, especially if the Admiral keeps letting me get away from the kidlets for a little while each day.
-
@Dave B, Welcome aboard, and thank you and Patrick for those kind words of encouragement. And thank you to all those that press the Like button at the top of the posts.
-
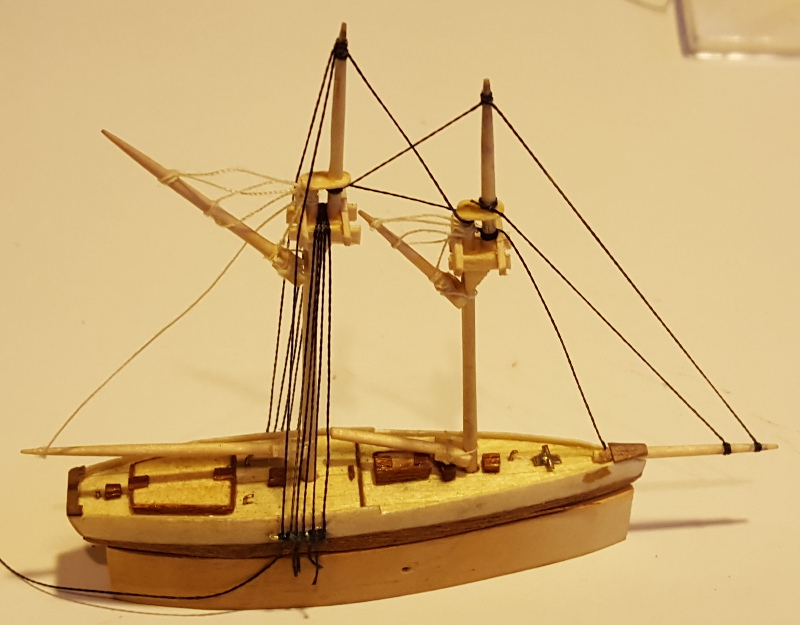
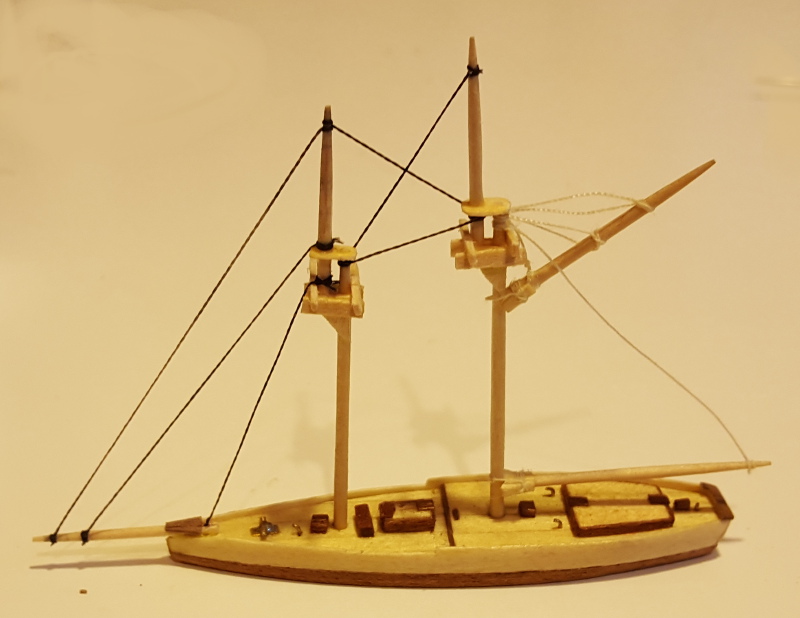
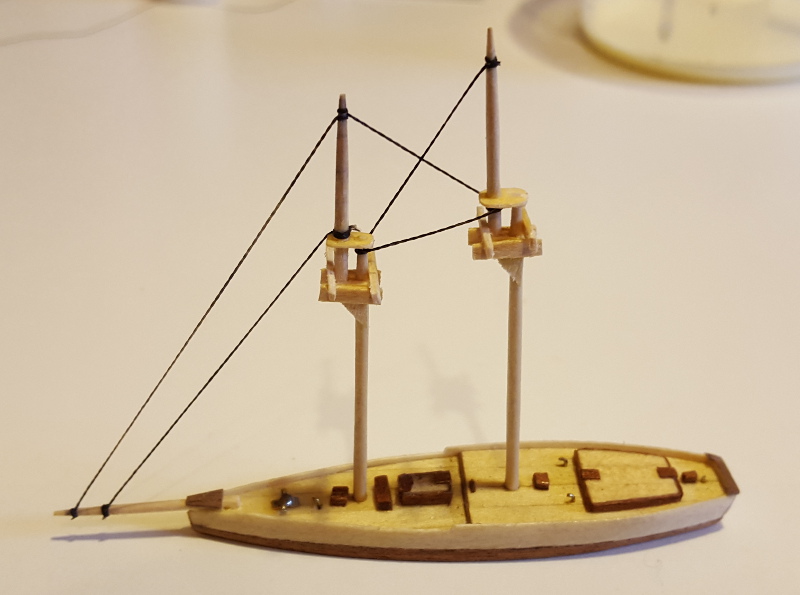
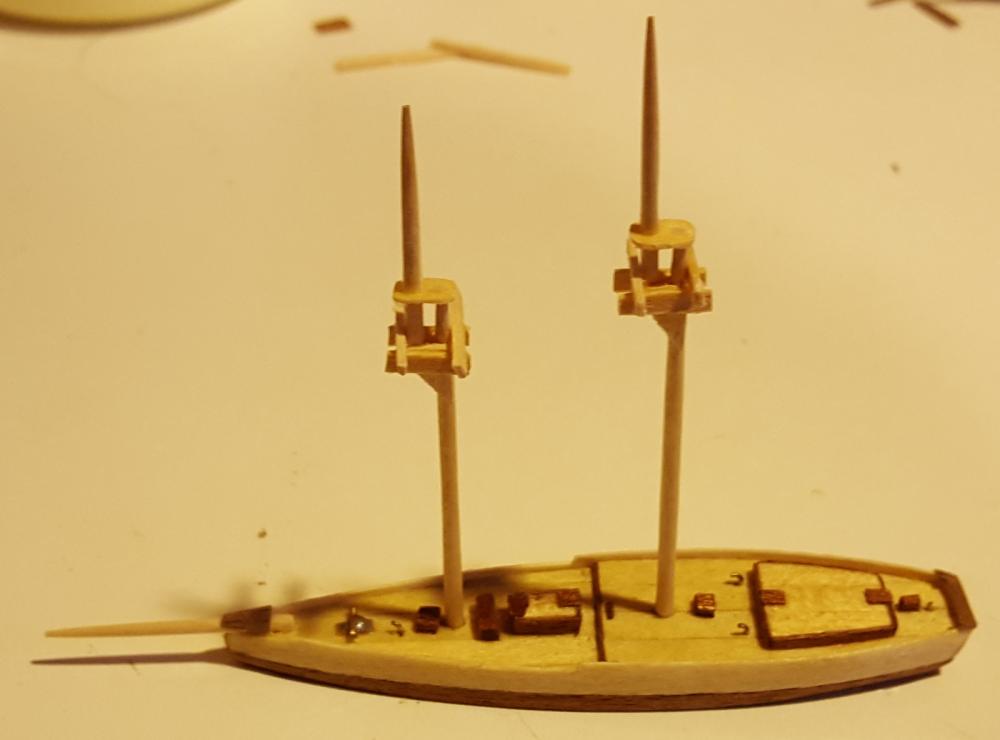
G'day all. Another fun-filled afternoon in the shipyard, or as much time as the Admiral would allow anyway. After yesterdays stepping of the foremast, I completed the shaping of the boomstays. They are a little out of scale in thickness, but I think they are OK for using 2mm thick materials. Was also able to complete the stepping of the mainmast as well as the cross trees on both the fore and mainmast. The last picture there is how she sits now, with both the bow and stern counters in place. Both counters are made from 0.5mm walnut and shaped using a #11 blade and sandpaper. I will not be putting on the caprail as that would just try my patience, and my hands aren't as steady as they could be. Besides, I don't think I would be able to accurately slice 0.5mm widths of walnut for those areas. I also found today during a test fit into the bottle that I had to trim out the inside of the neck of the bottle. I was able to do this using a medium-coarse grinding stone on the trusty rotary tool. I've been able to use this more for this build than I have since I bought it about 10+ year ago. Still glad I have it kicking around. During this test fit, I also found I'm going to have to leave the masts off the hull to insert them into the bottle. With the crosstrees fitted and both masts laying on top of the hull, the opening of the bottle is just a hair too small for all three pieces to fit, nevermind with the booms on. Speaking of the mast booms, I'm not sure how I'm going to attach them to the masts. Not sure if I'm going to just glue the lower booms to the deck houses immediately beneath them and use some fancy rigging for the upper booms, or try to attach all the booms using some fine thread as rigging line. I know for sure that I'm not going to attempt to make sails and flags for her. I just don't have the material to make the sails look even semi-scale at this size. Even paper would be too thick for something this size. Thank you all for your comments and likes. All are appreciated. If you have any ideas as to how I'm going to accomplish the booms, or even attempt sailmaking, send them my way. I'll try them out if I think they might work. Then comes the problem of mounting them onto the masts and all the accompanying rigging for them.
-
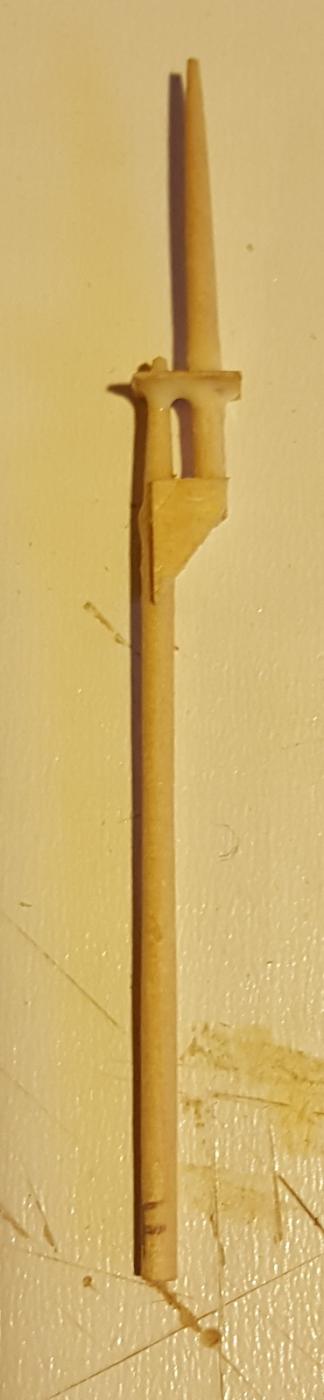
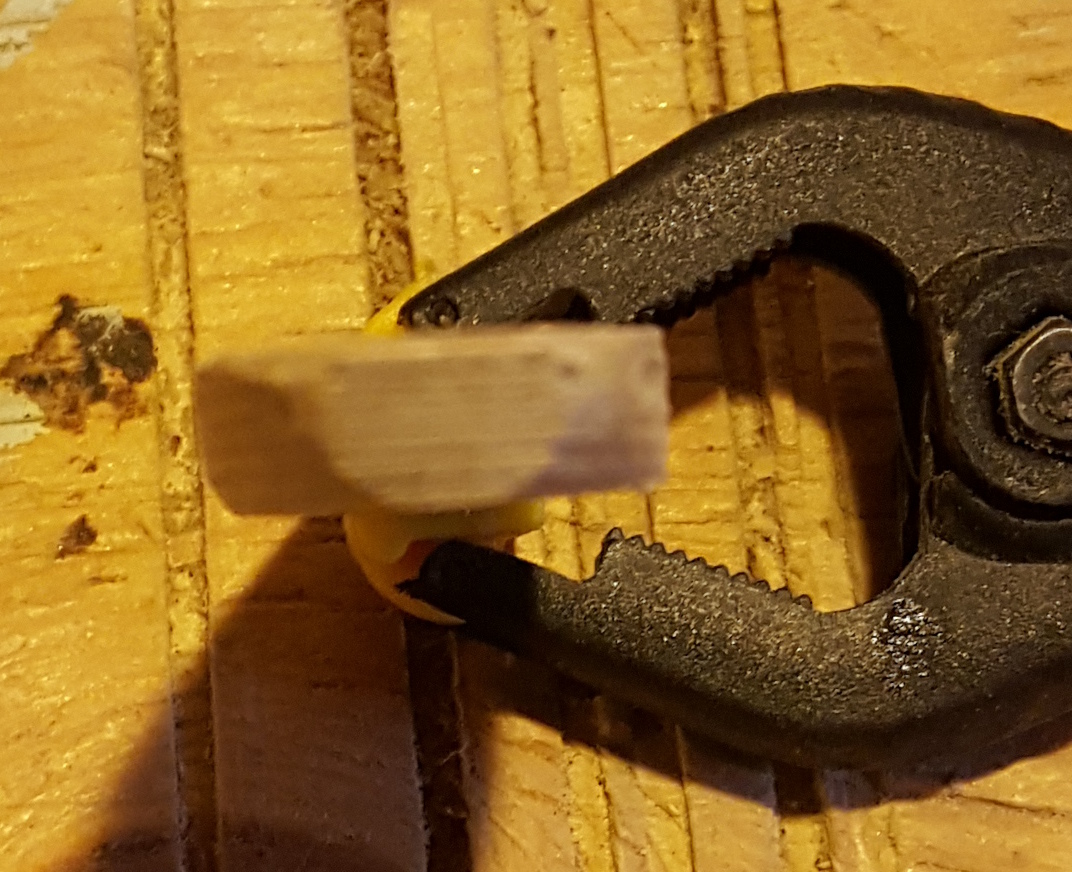
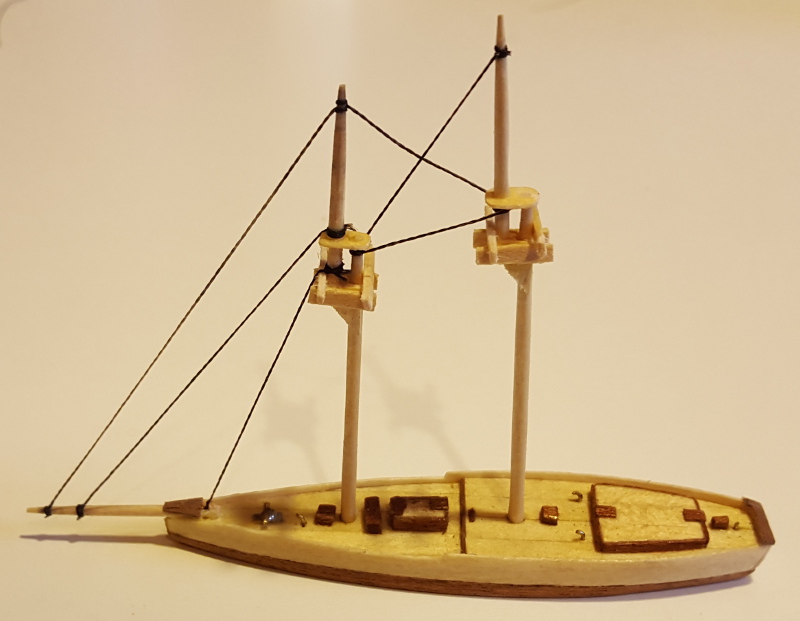
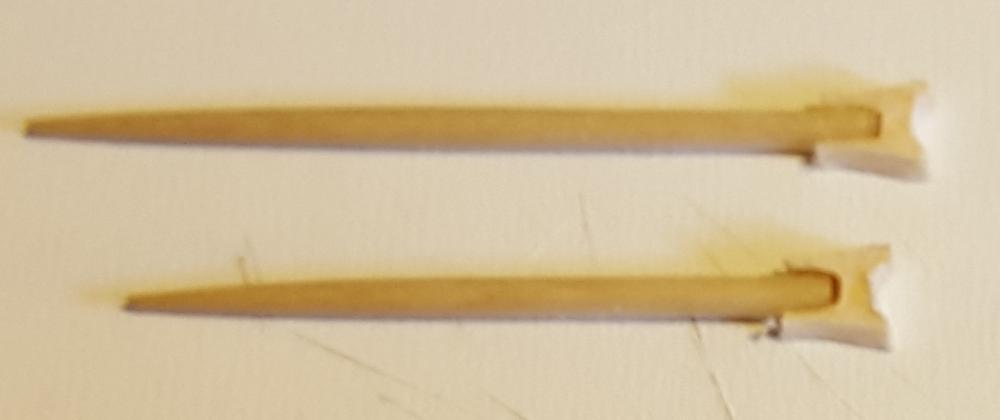
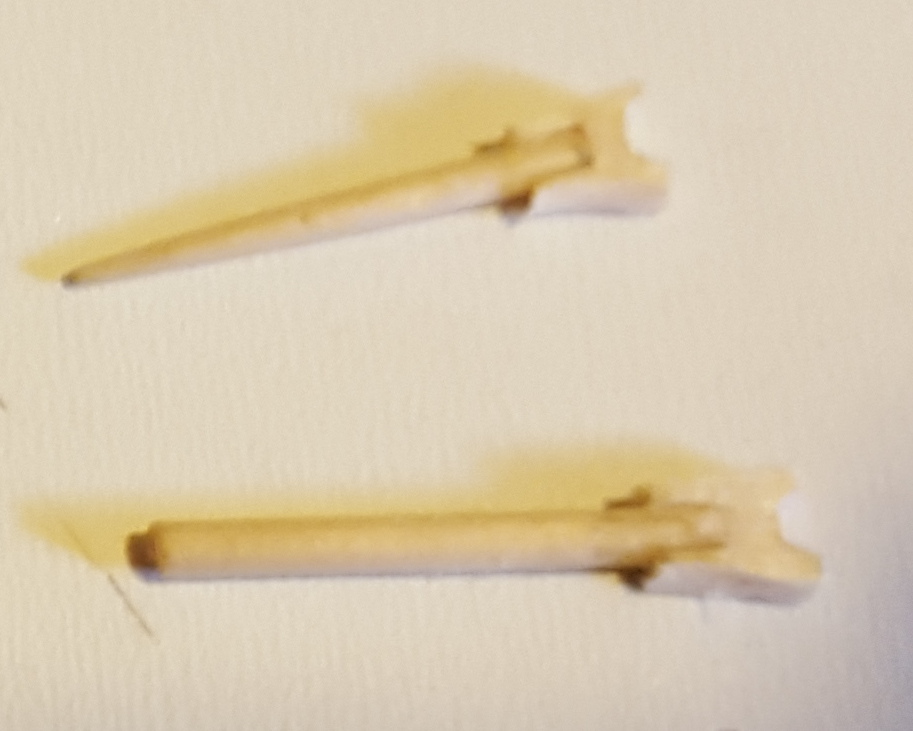
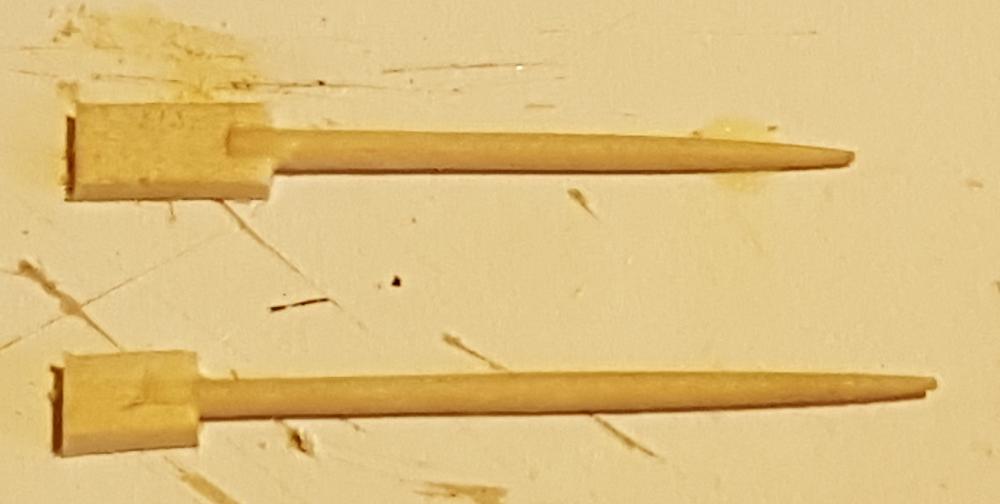
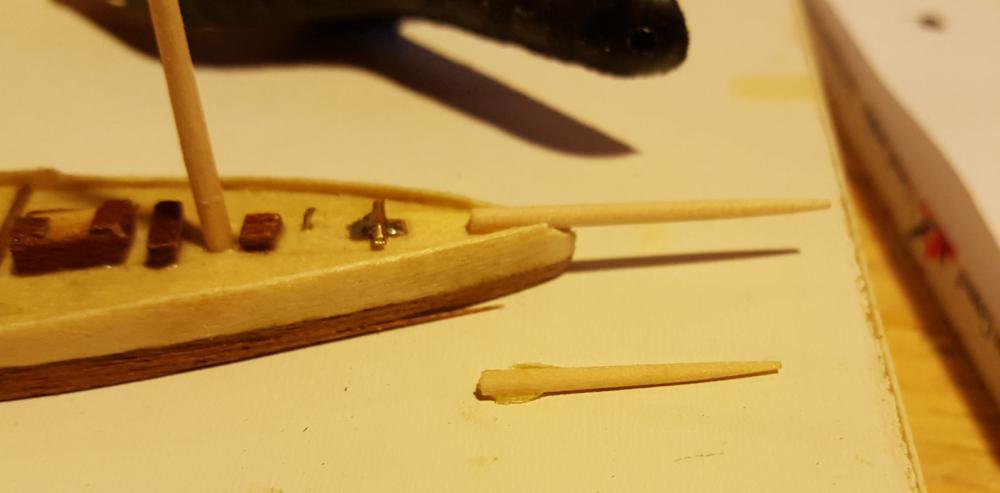
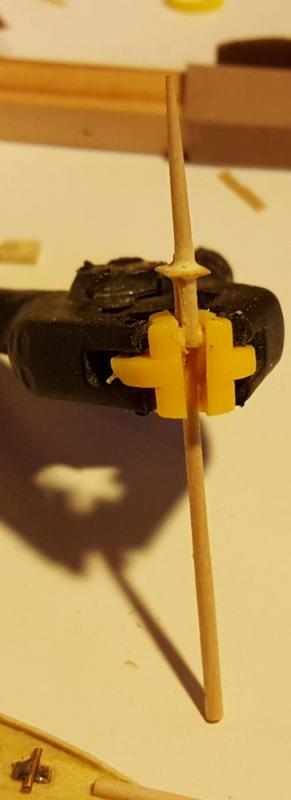
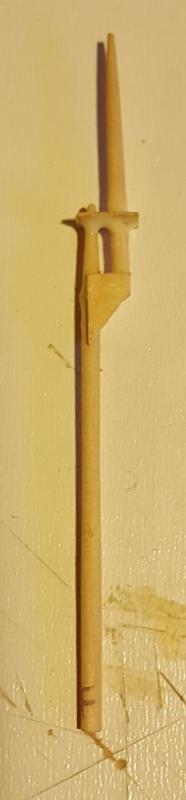
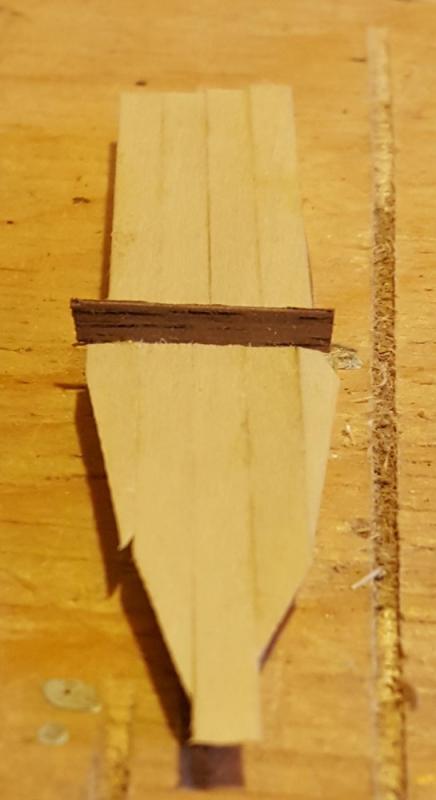
Today was a painful day in the shipyard. I decided to change out the bowsprit as I wasn't happy with the way it looked. As you can see, the new bowsprit is much more in line with the scale I set out to attempt. I also started to form and fit the boomstays. Using a 1/64” cutoff bit for the rotary tool on the flexshaft, I was able to carve out the slots for the booms. Using the booms as a holding point, I will be able to carve out the groove to place against the mast. Finally, I plan on shaping them using a sanding drum on the rotary tool to rough shape it, then use some fine sandpaper to achieve the final shape. Another major milestone accomplished today was to start stepping the masts. I started with the foremast. The top clamp is 0.5x4mm limewood and the lower braces are made from 2x4mm limewood sanded down to 1mm thick.
-
Did you use styrene to caulk between the planks? It looks really good and almost vintage
-
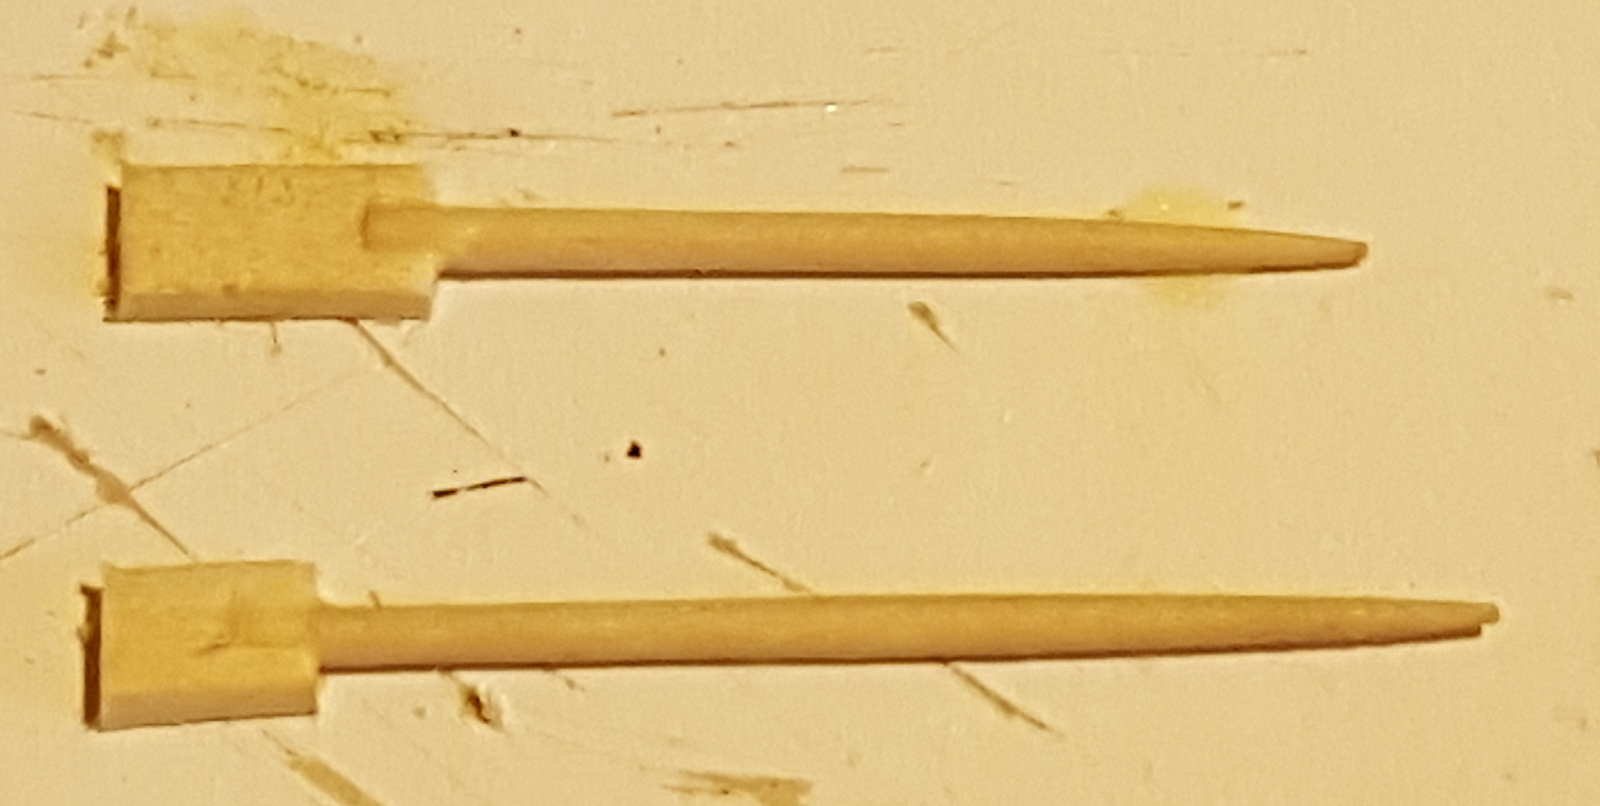
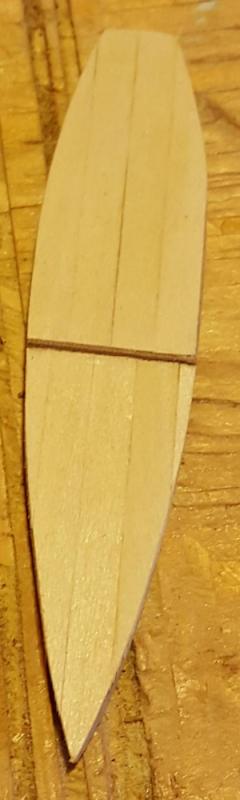
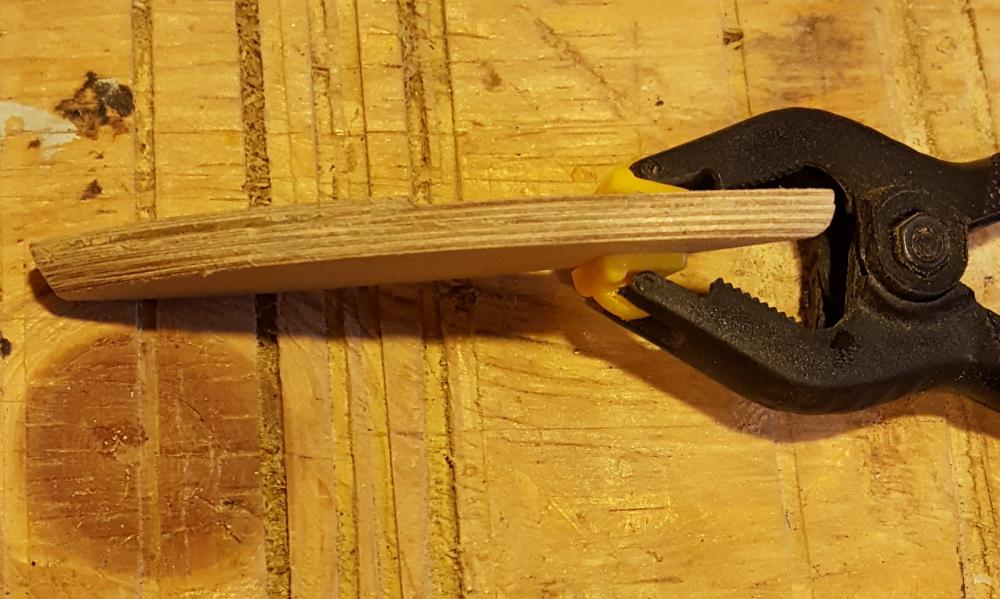
Finally back into the shipyard after a fun-filled family weekend. Today, I managed to get the bulwarks and hull planking completed and shaped. Luckily I had some small elastics to use as clamps for the stern portion of the planking as the shape of the hull makes holding the planks by hand or spring clamps nearly impossible. Once the bulwarks were dry, I was able to chuck up a toothpick in the rotary tool and sand it down to an approximate shape and size for the bowsprit. I think now, looking back on this picture, the bowsprit is a little bit too short. Next time in the yard, I will decide if it needs to be replaced and lengthened.


-
Thanks all for the comments and likes. @Patrick, I'm going to be using the same 0.5x4mm Lime for the bulwarks as was used for the decking, and 0.5x4mm Sapelly for below the waterline. I haven't even decided if I'm going to paint the bulwarks, but it may look wrong if I don't. Only time will tell.
-
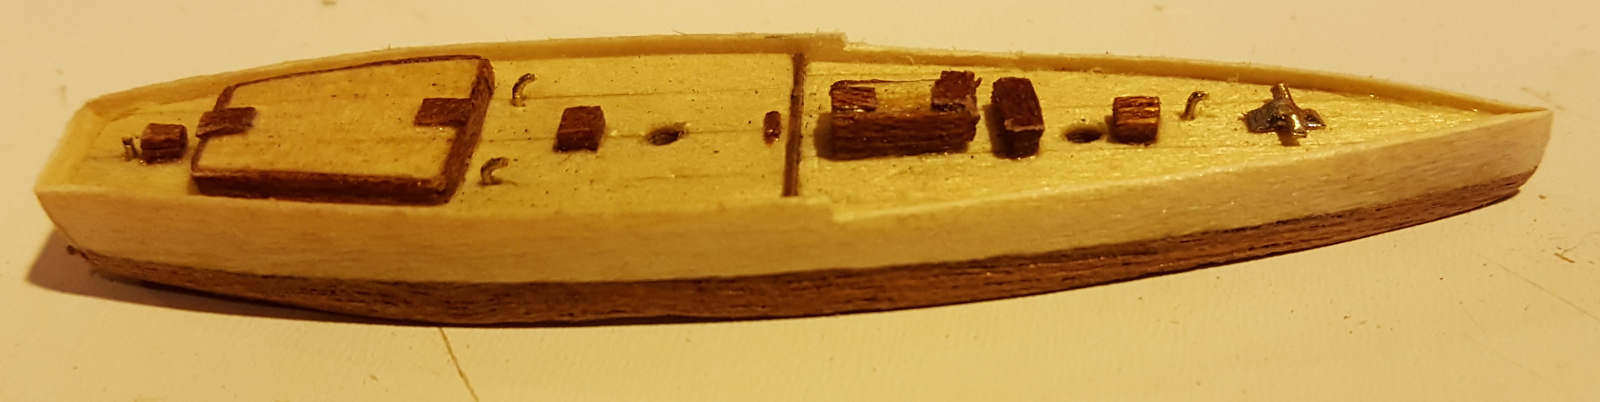
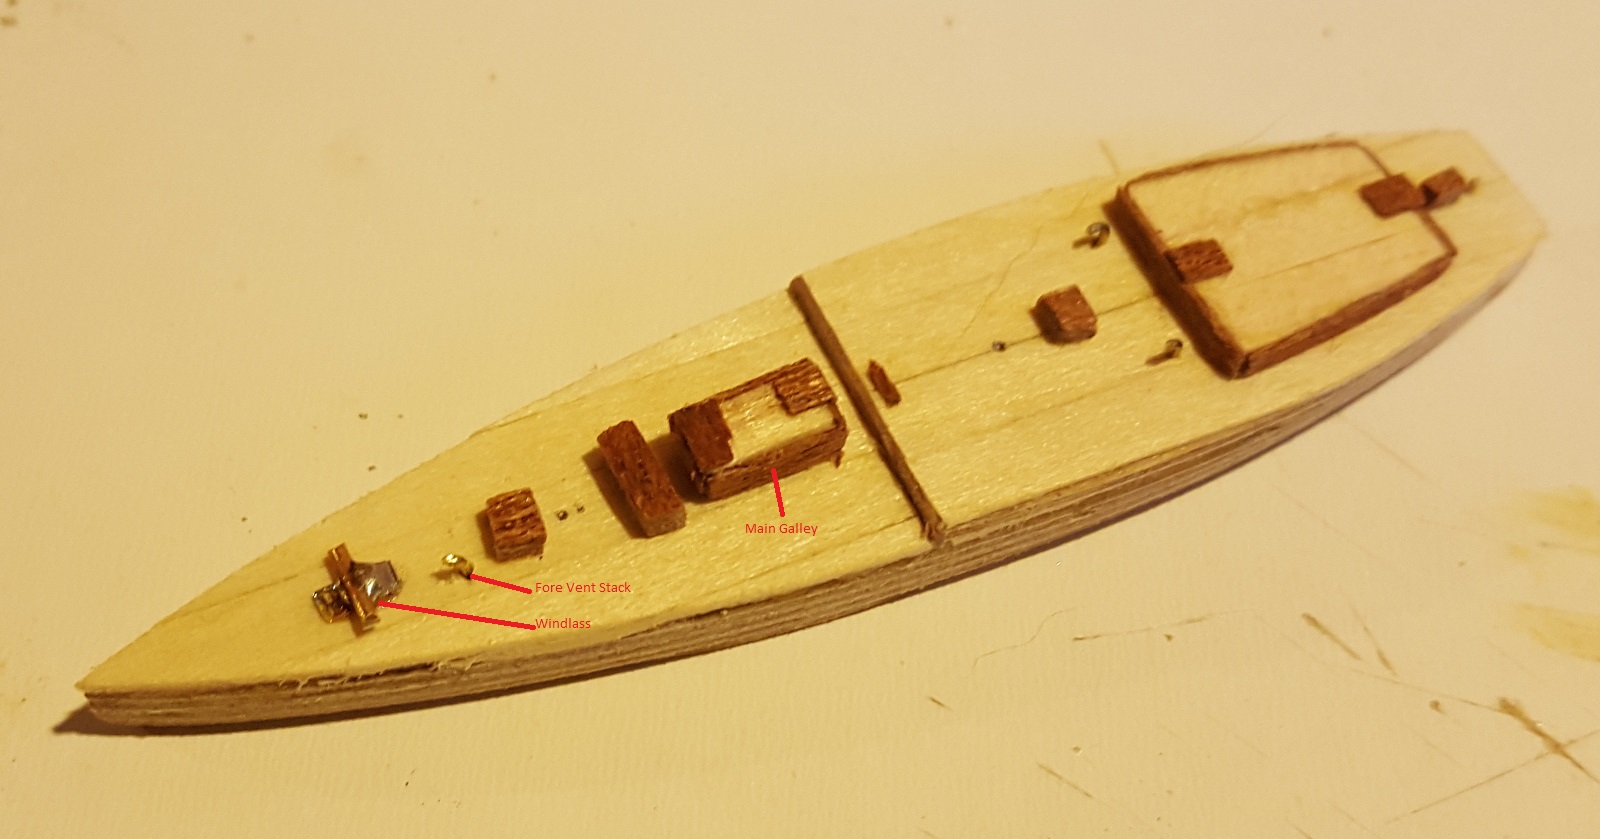
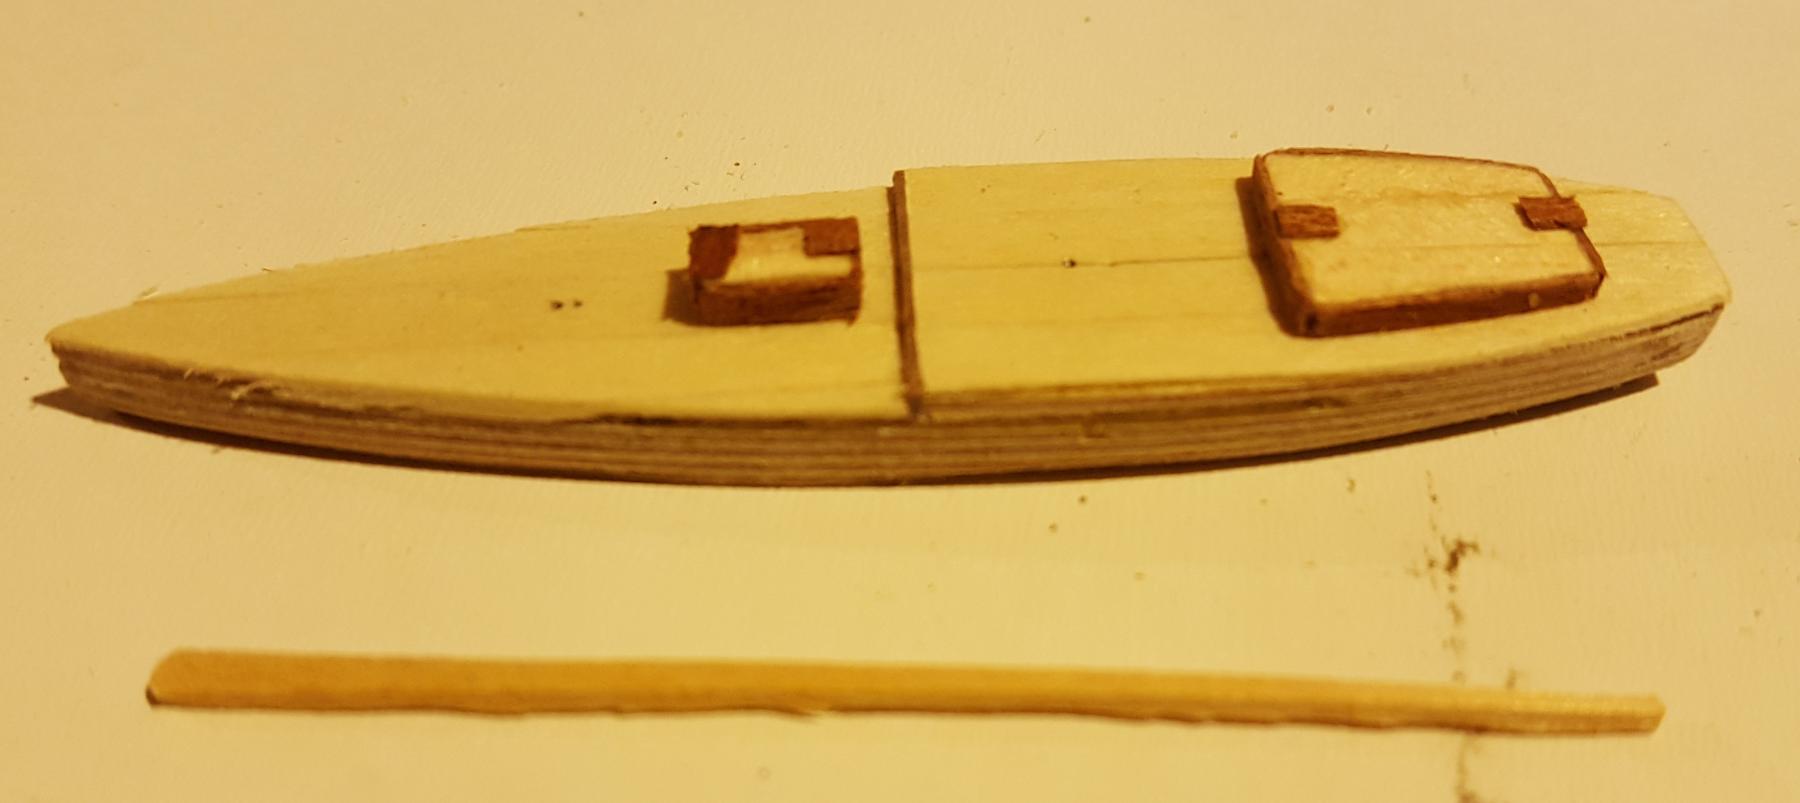
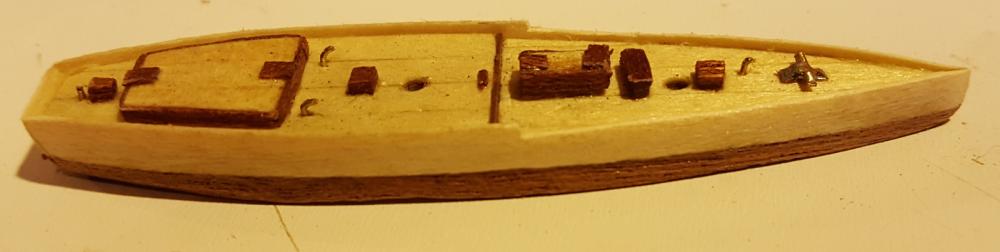
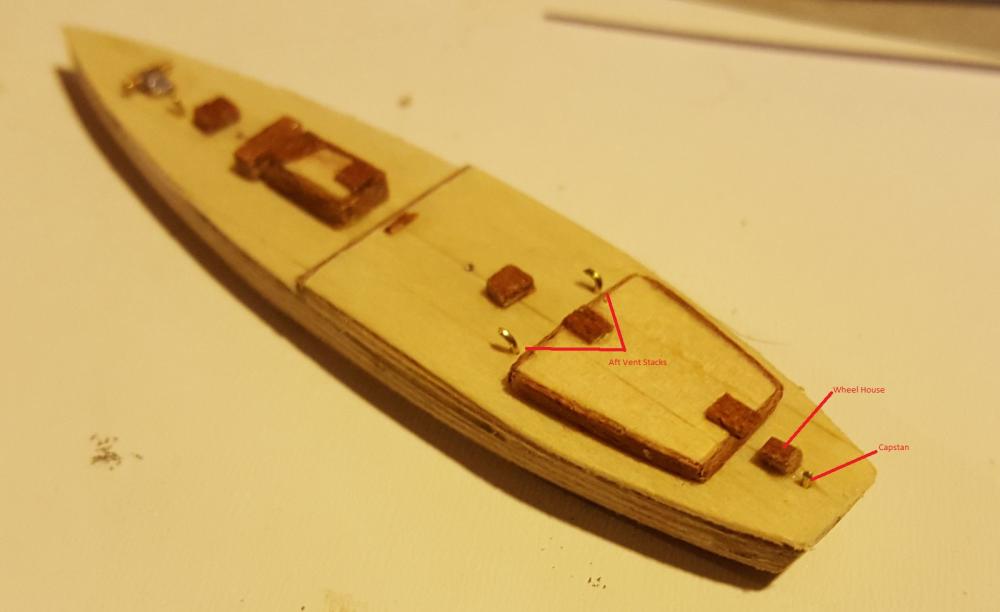
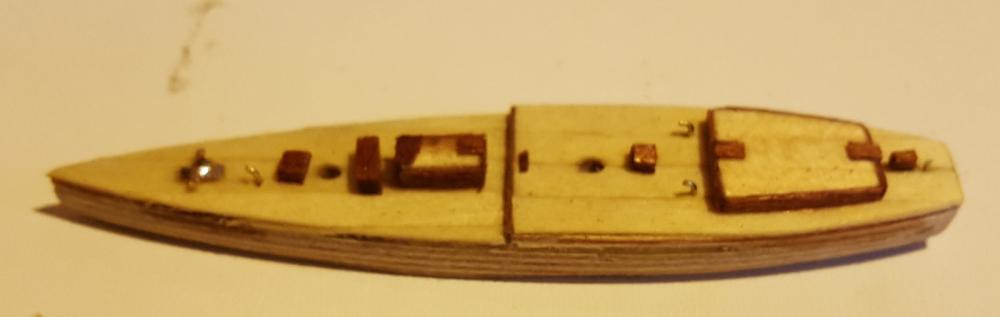
Small update today. Finished putting the deck fixtures on. I also added some brass details, such as the capstan on the aft deck behind the wheelhouse, the vent stacks and the windlass right at the bow. Also today, the deck and all the fixtures were given the first coat of satin poly before the bulwarks go on in the next update. I was able to shape the two masts as well. Using my rotary tool, I chucked up a round toothpick and, on the lowest speed, sanded it down to an approximate size of 2mm dia. These will be the foremast and mainmast. The fore-topmast and main-topmast will be made later.

-
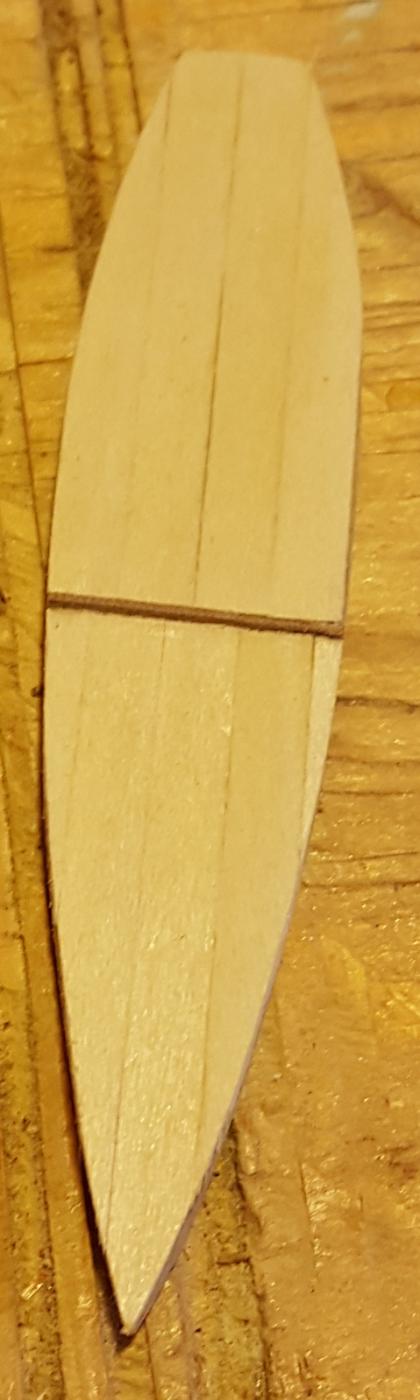
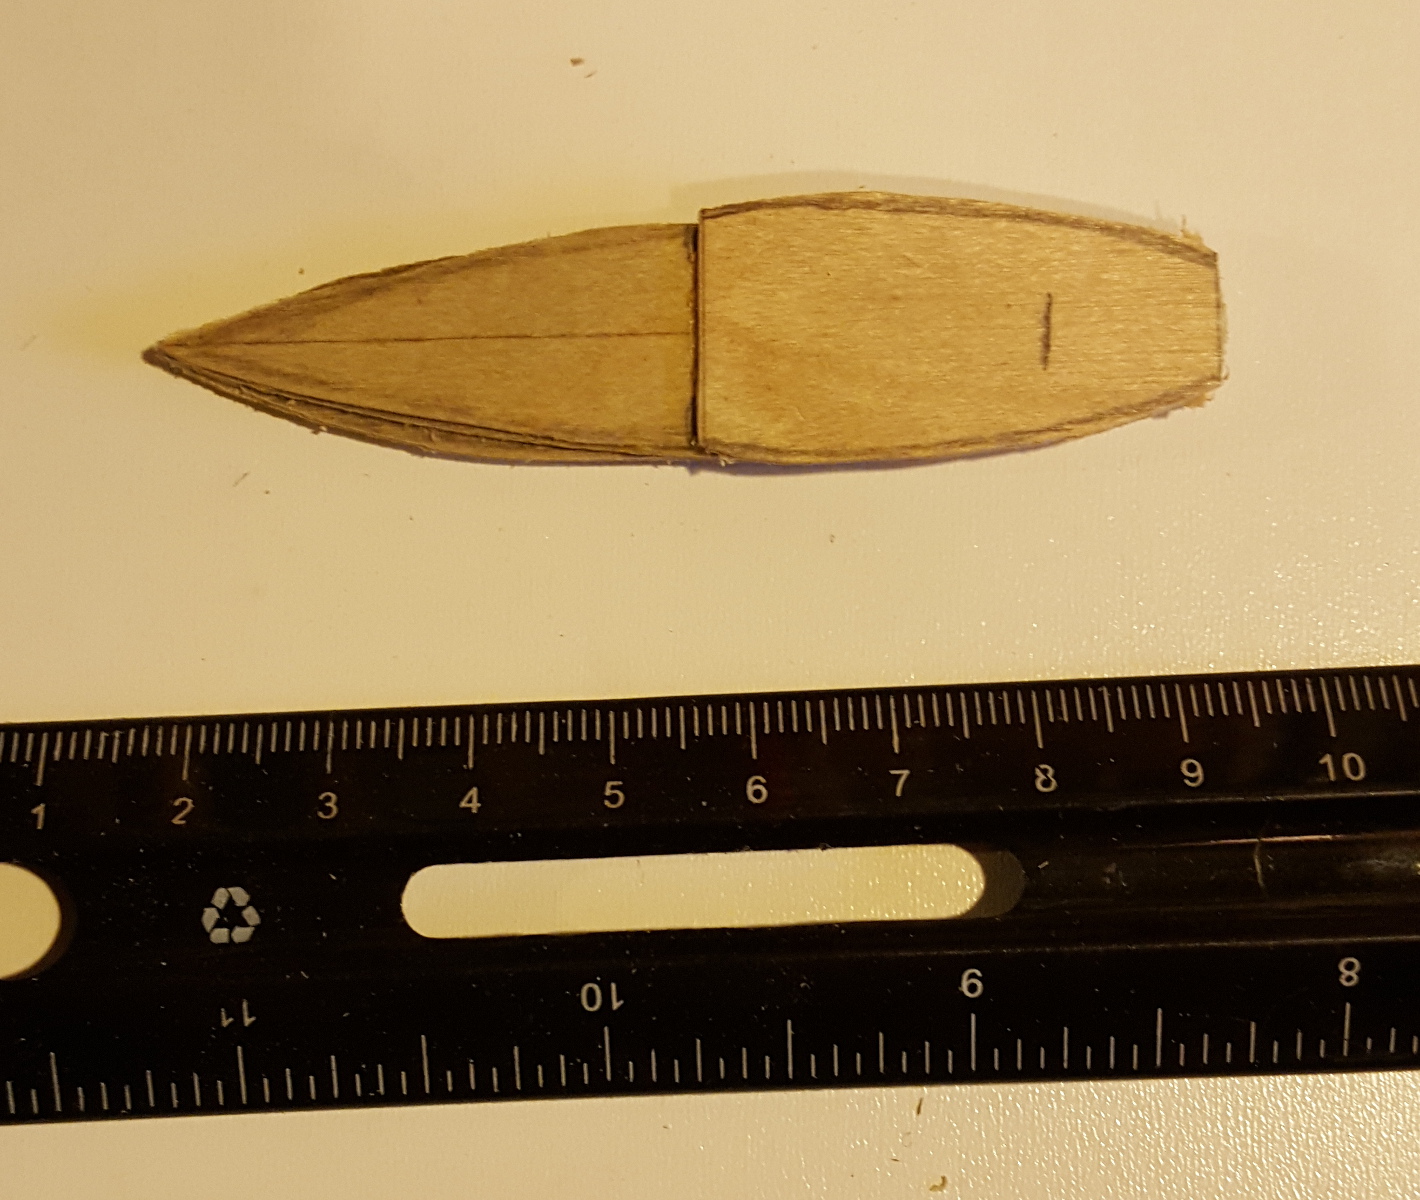
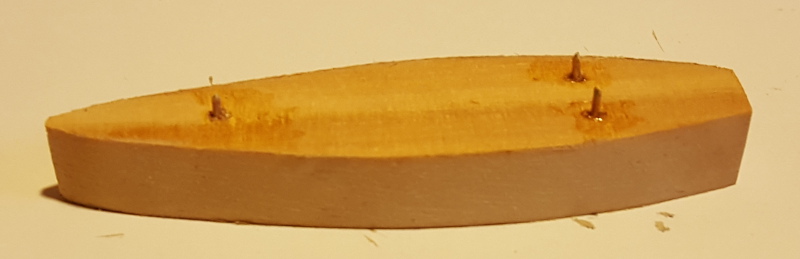
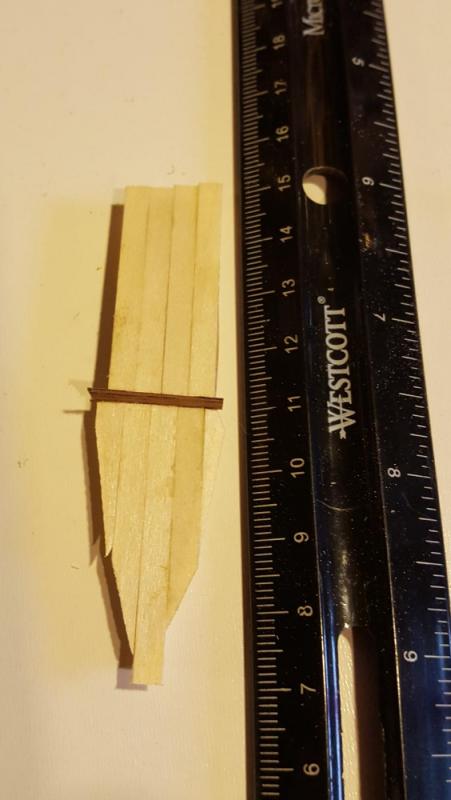
Back again for another update. Well for lack of a matchstick, I had to resort to using a ruler to give an idea of the scale. Started today off with shaping of the hull. I focused mainly on the stern portion as that curves under the waterline severely into an almost bowl shape. Luckily having various grits of sandpaper came in handy. Getting the right shape wasn't as easy as it looks. Going back and forth between the 1:75 and the work bench took up most of the time getting her shaped properly. After the shaping, I started planking the deck using some 1x3mm strips I had laying around from a previous build. I also tested these strips for use as the bulwark and some sapelly strips for below the waterline, what little of it will be seen. I was also able to start on some of the deck structures. Here are the forward galley and skylight and the main companionway. The pencil marks on the deck are location markers for the masts. I look forward to hearing all your thoughts and criticisms until I am able to provide the next updates.


-
Igor, I can only aspire to your level of detail in my BN2 build. Looking great at your usual small scale
-
@Patrick, thanks for the vote of confidence. I just hope I can do her justice. @Igor, I was able to take lots of photos of my 1:75 AL BN2, but I wouldn't mind seeing a formal rigging plan. I'm not sure at this point how detailed the final rigging will be, but I wasn't planning on adding full sails, maybe only rigging the booms and gaffs, as well as all the standing rigging minus the ratlines. I will try to keep the shrouds and stays in as best I can, but I don't think I'll be able to tie small enough knots to secure the ratlines themselves. Thank you all for the likes and even just dropping by.
-
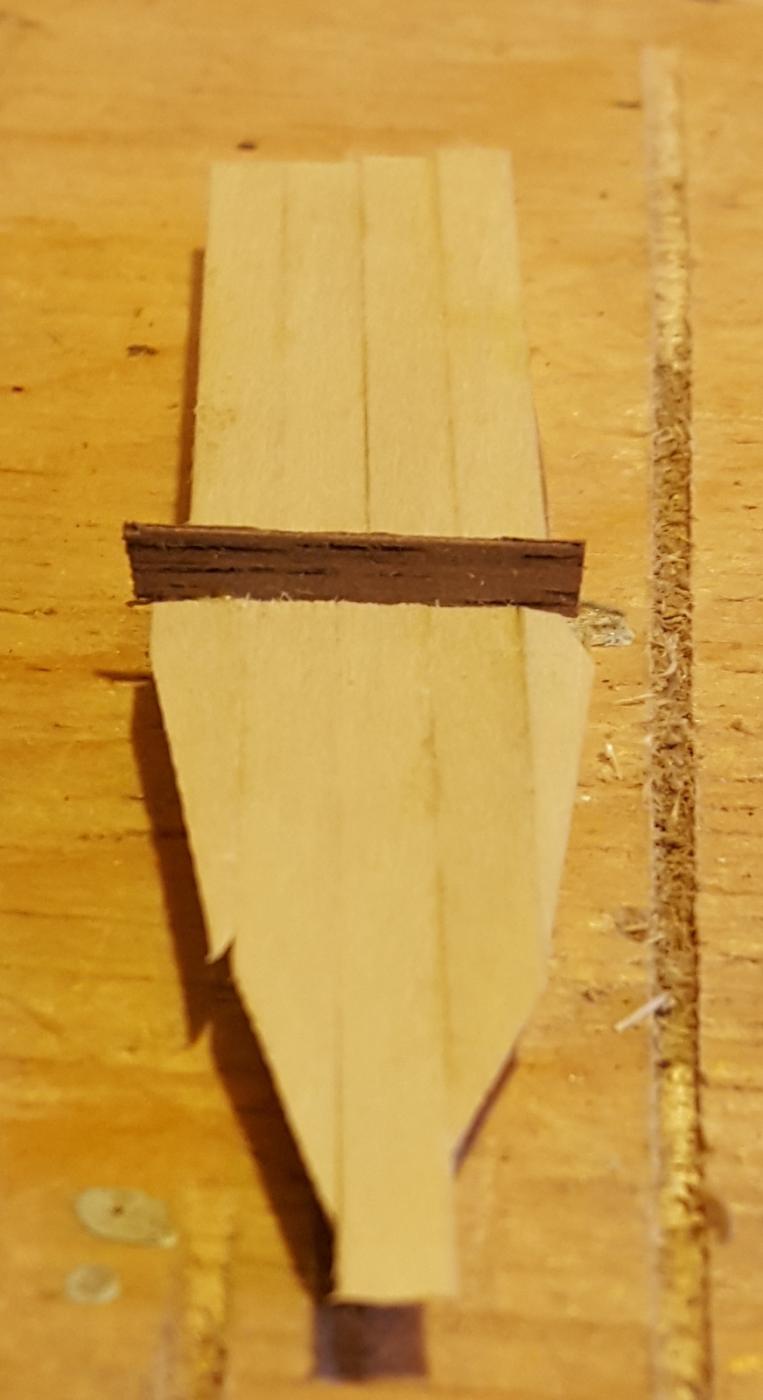
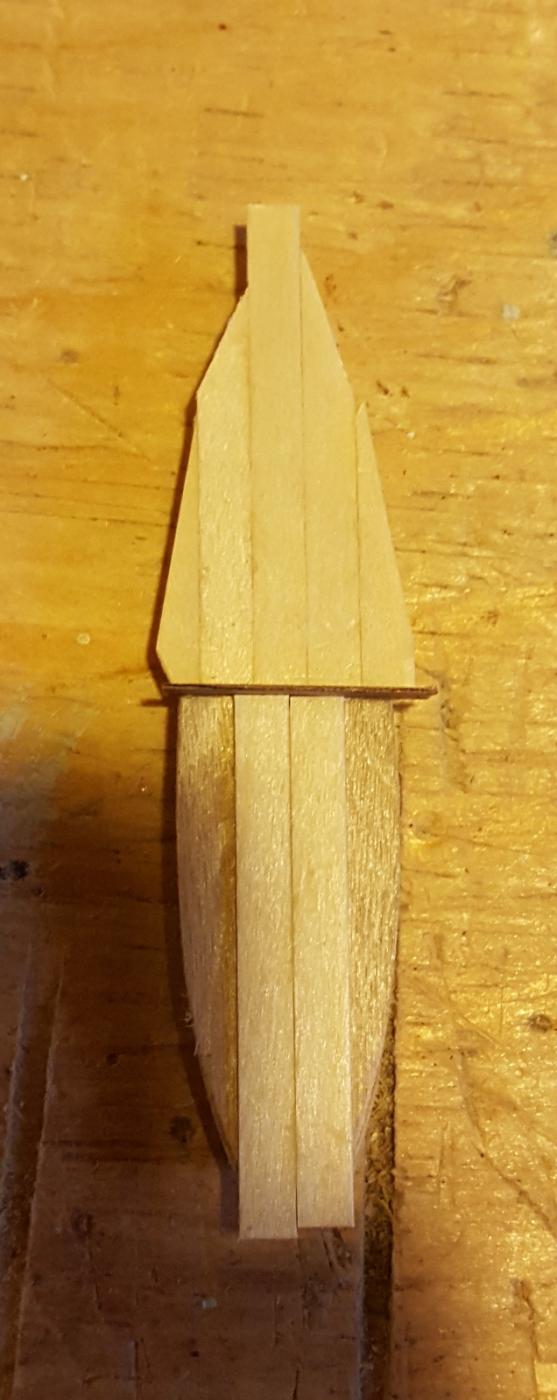
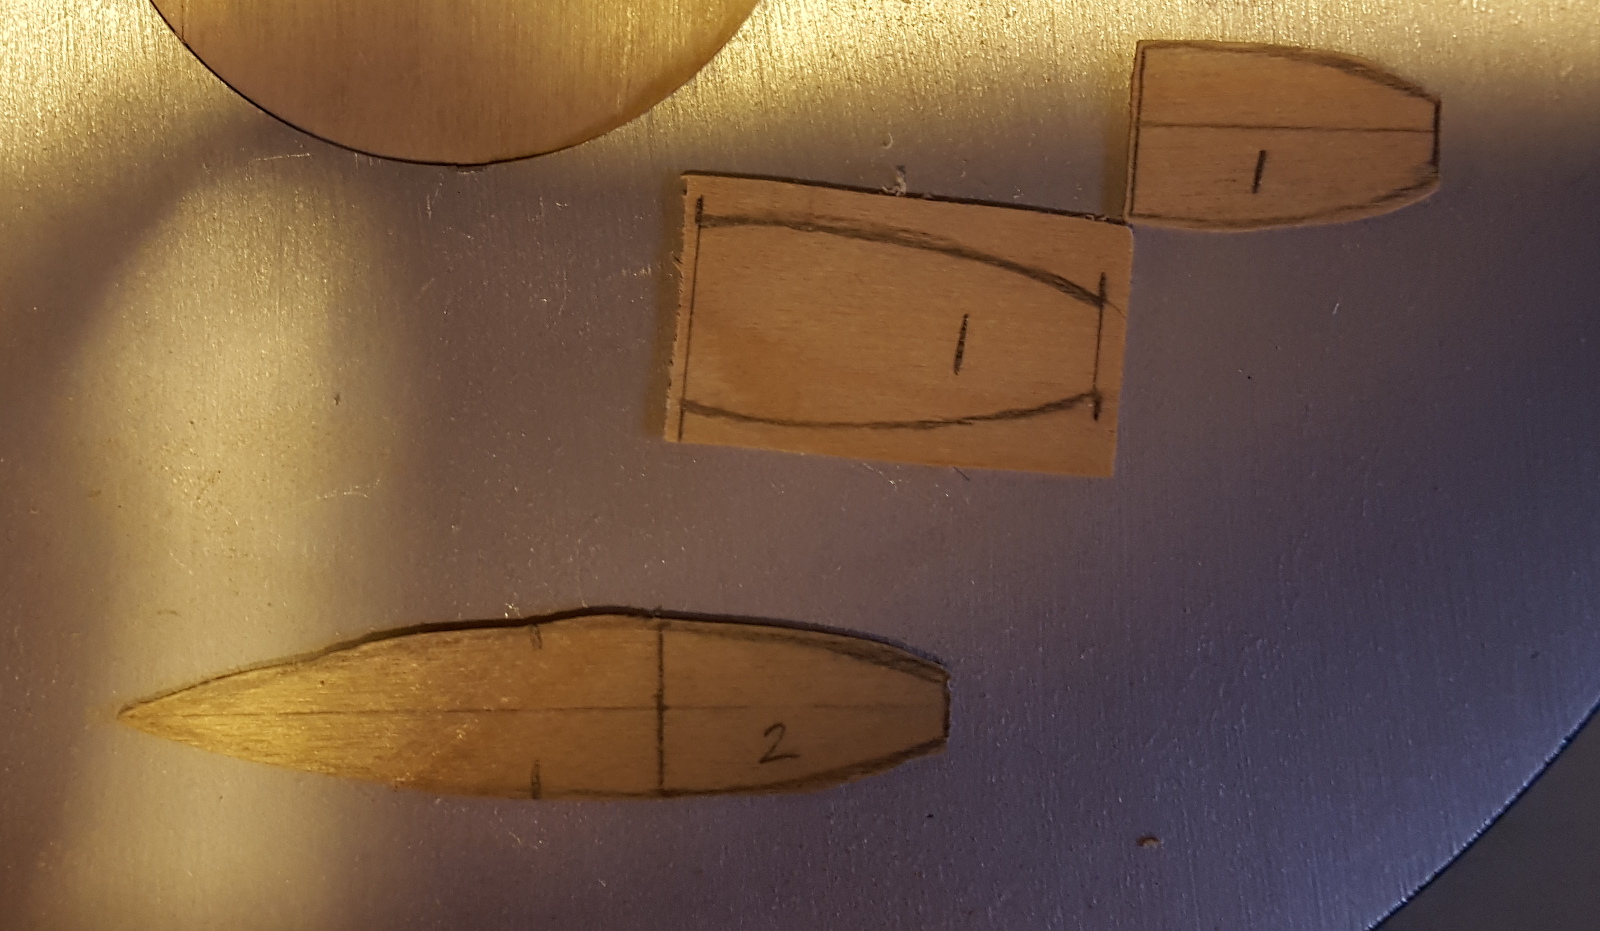
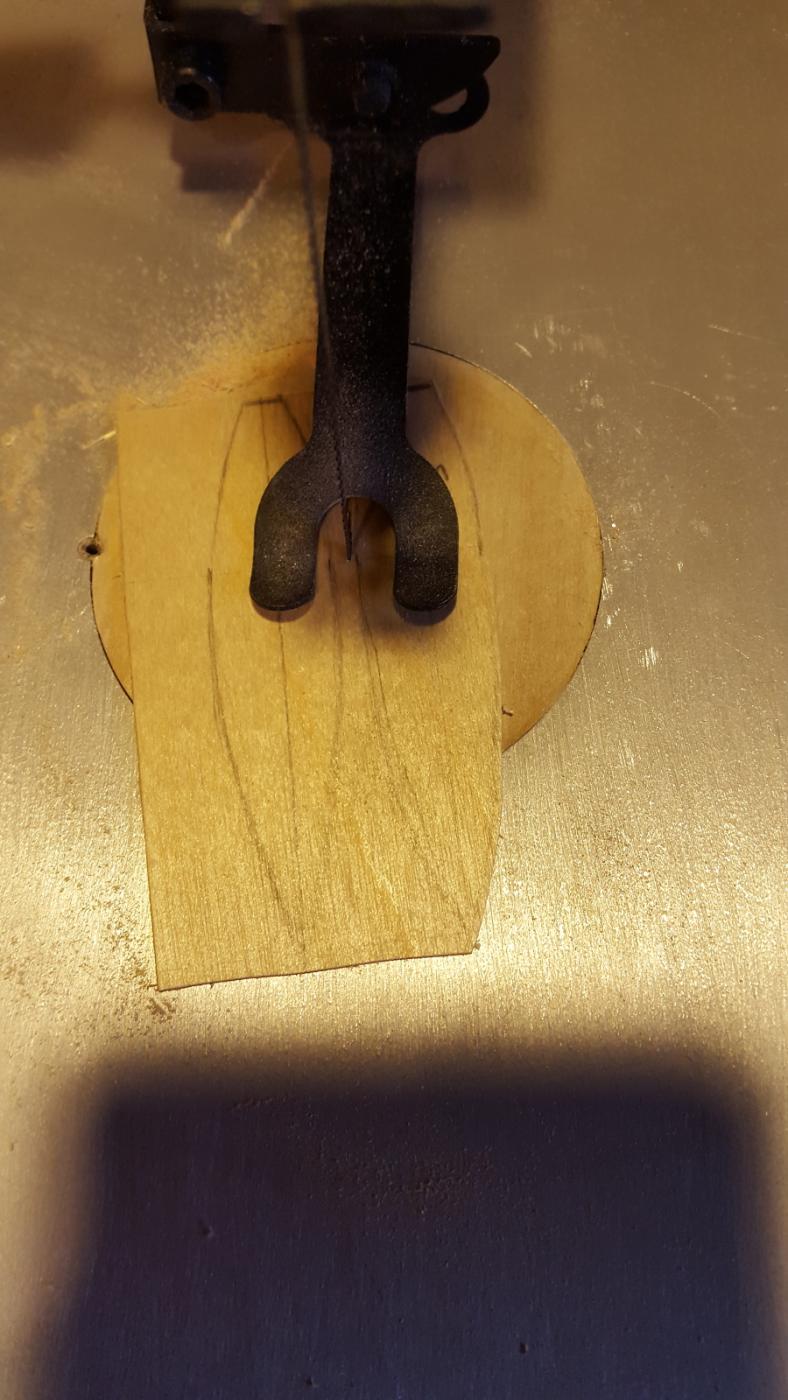
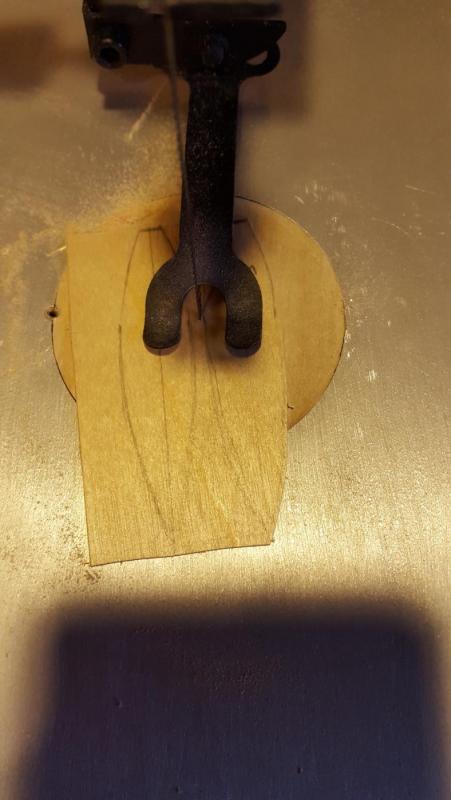
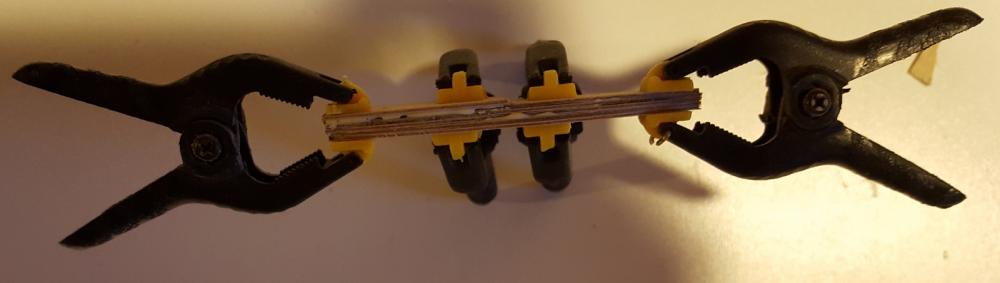
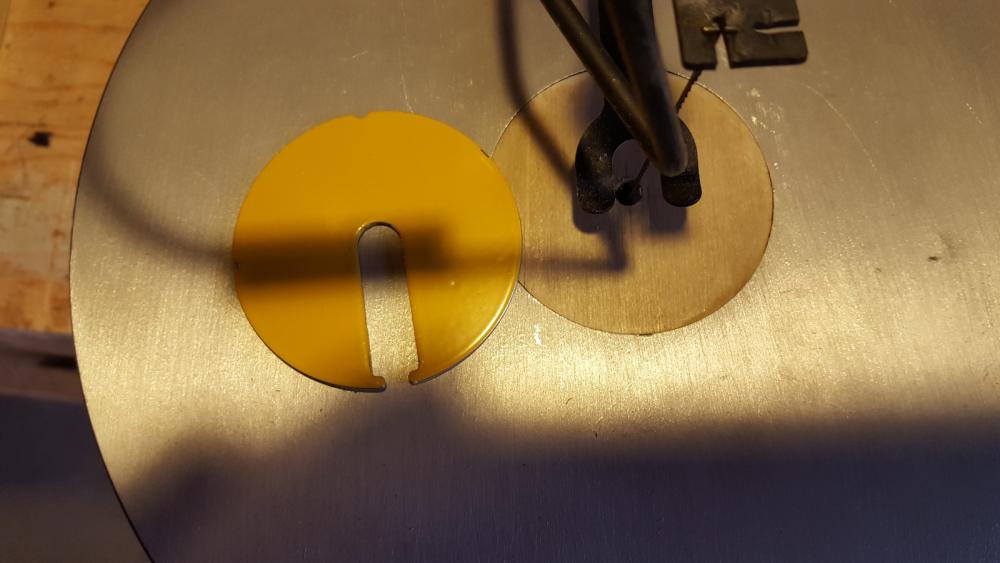
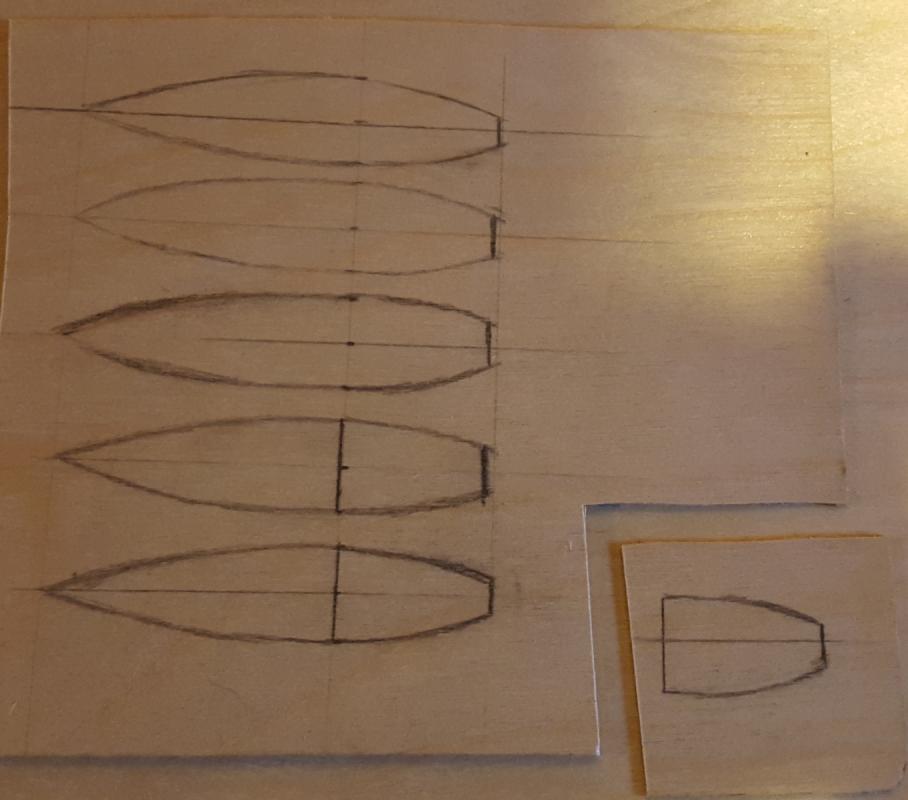
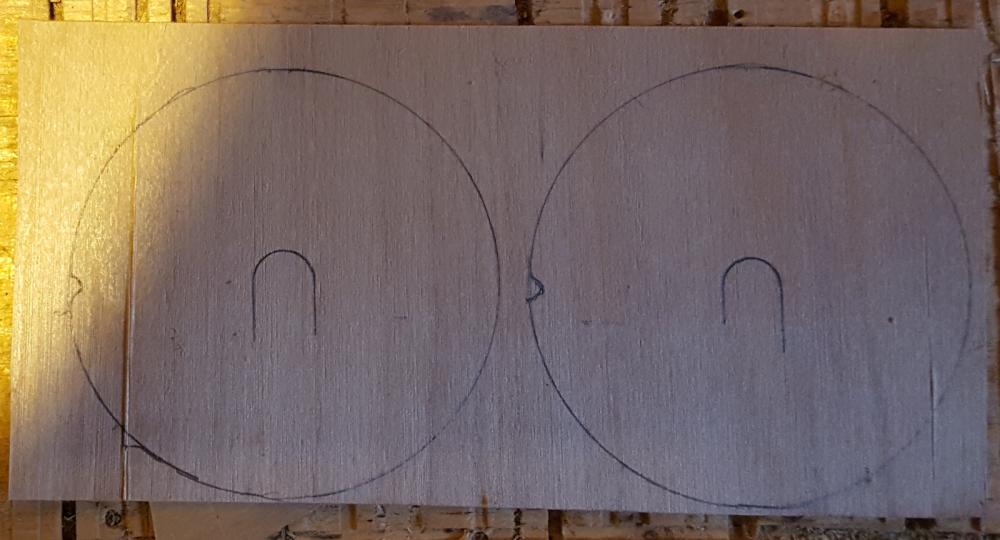
Small update today. I was able to trim and fit the zero clearance insert for my scroll saw. Using the old insert, I was able to sand down the insert to the same size and adjust as needed until it fit into the saw table. Here is a photo comparing the old, original insert and the new insert. As you can see, I didn't use the slit method like the original insert, but rather opted for a hole just big enough for the pins on the end of the blade to fit through. Once this was in place and the saw adjusted for workpiece height and cut speed, I was able to cut out the remaining pieces of the hull. After comparing the 1:75 scale AL build I have to a dry fit of all the pieces together, I noticed that the upper main deck wasn't as long as it needed to be, so I went ahead and drew up and cut out a new one. You'll notice that the new upper main deck covers almost half of the deck surface, similar to the original and other models around, whereas the old one only covered about the rear third of the deck surface. Finally satisfied with the dry fit, I laid out all the pieces, in numbered order, and glued them up. If I had one of Igor's giant match sticks, I would be able to give you a better idea of the size rather than just measurements. Until next time, comments, questions, and criticisms are all welcome.

-
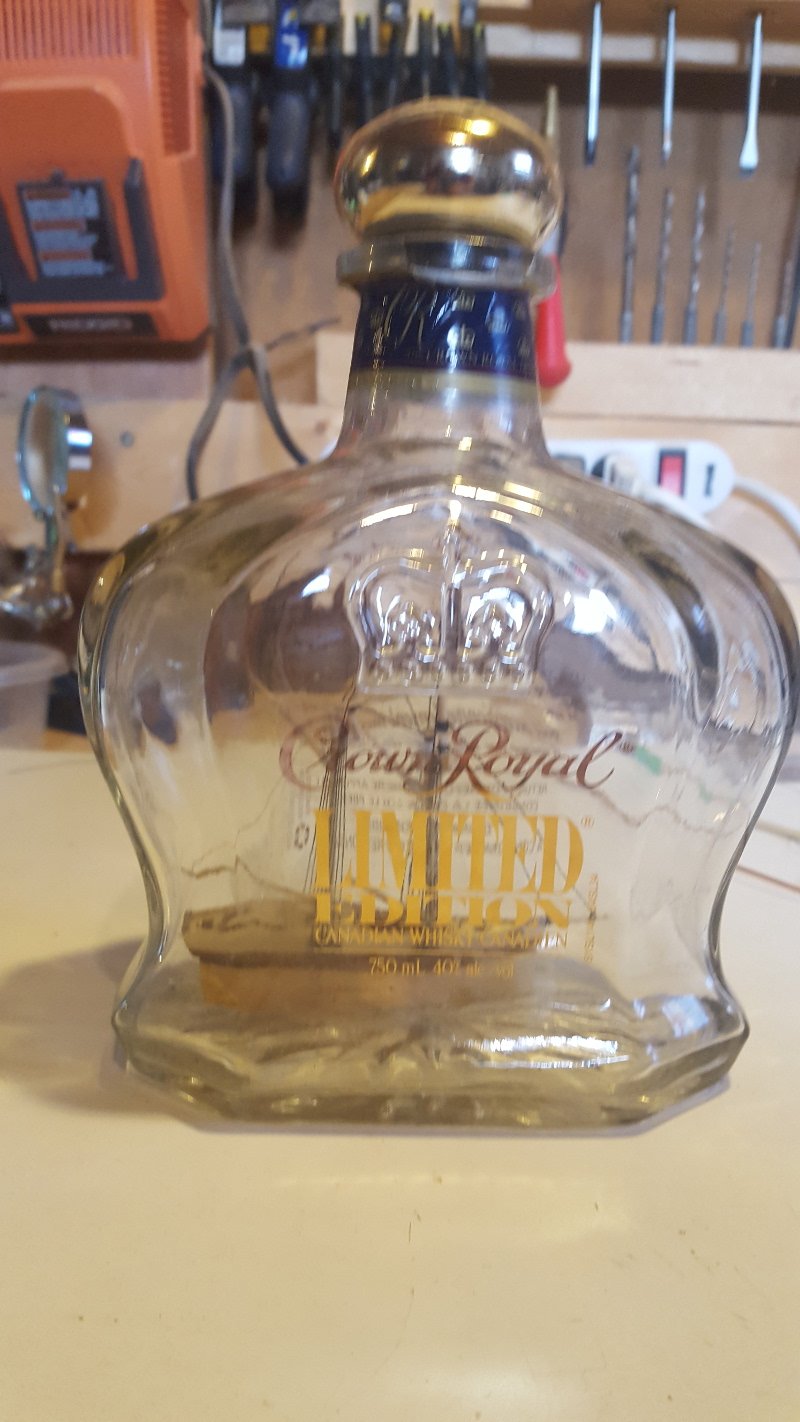
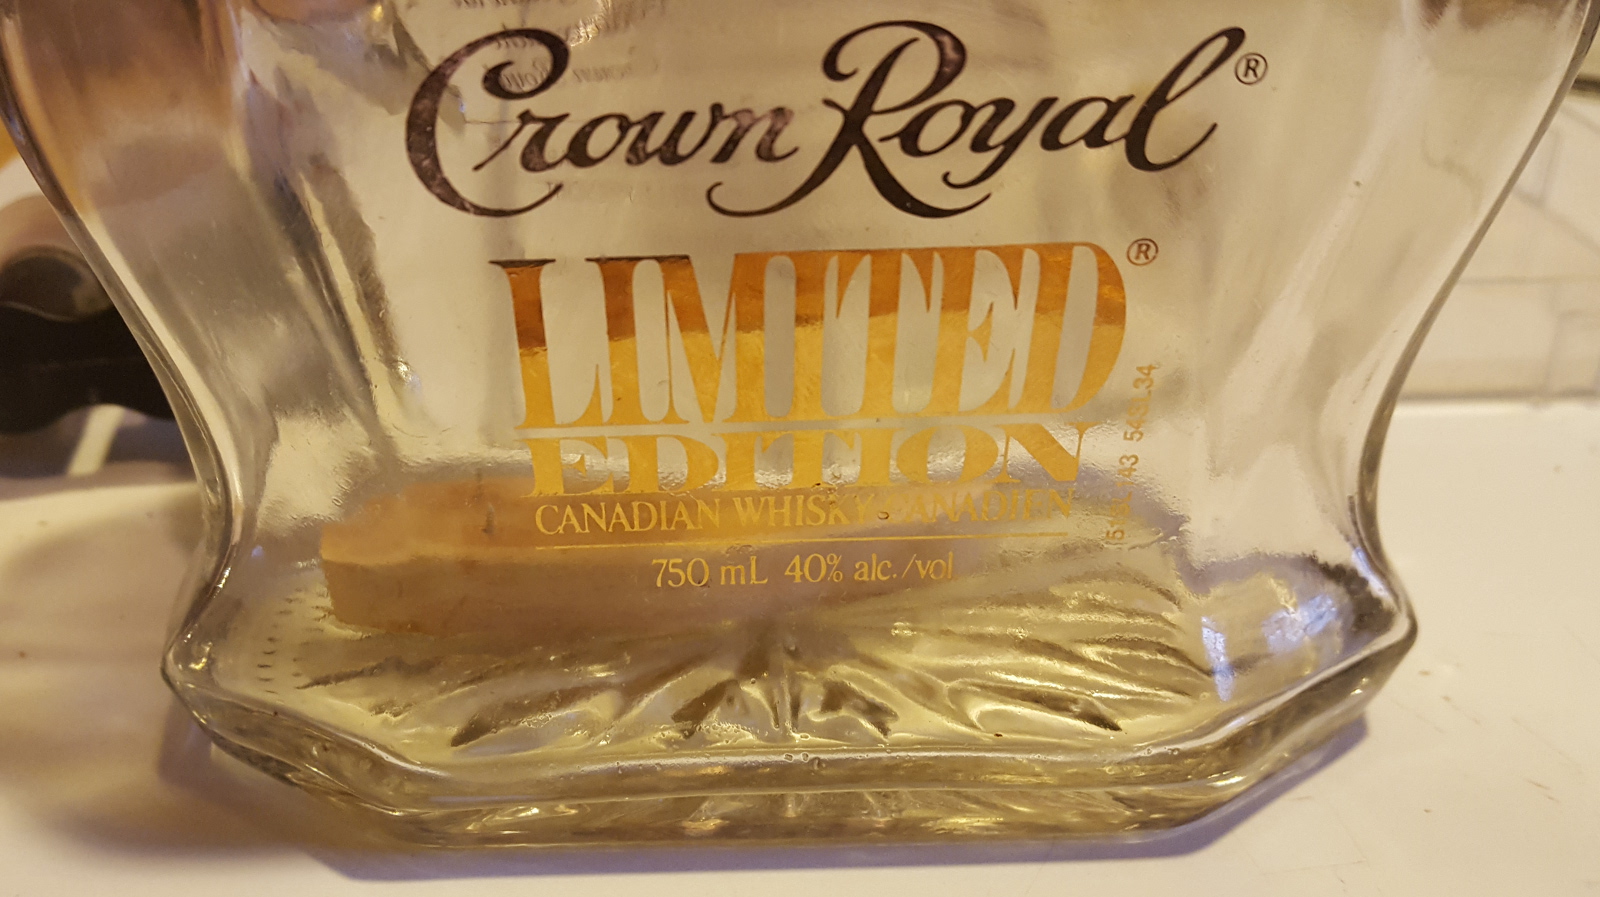
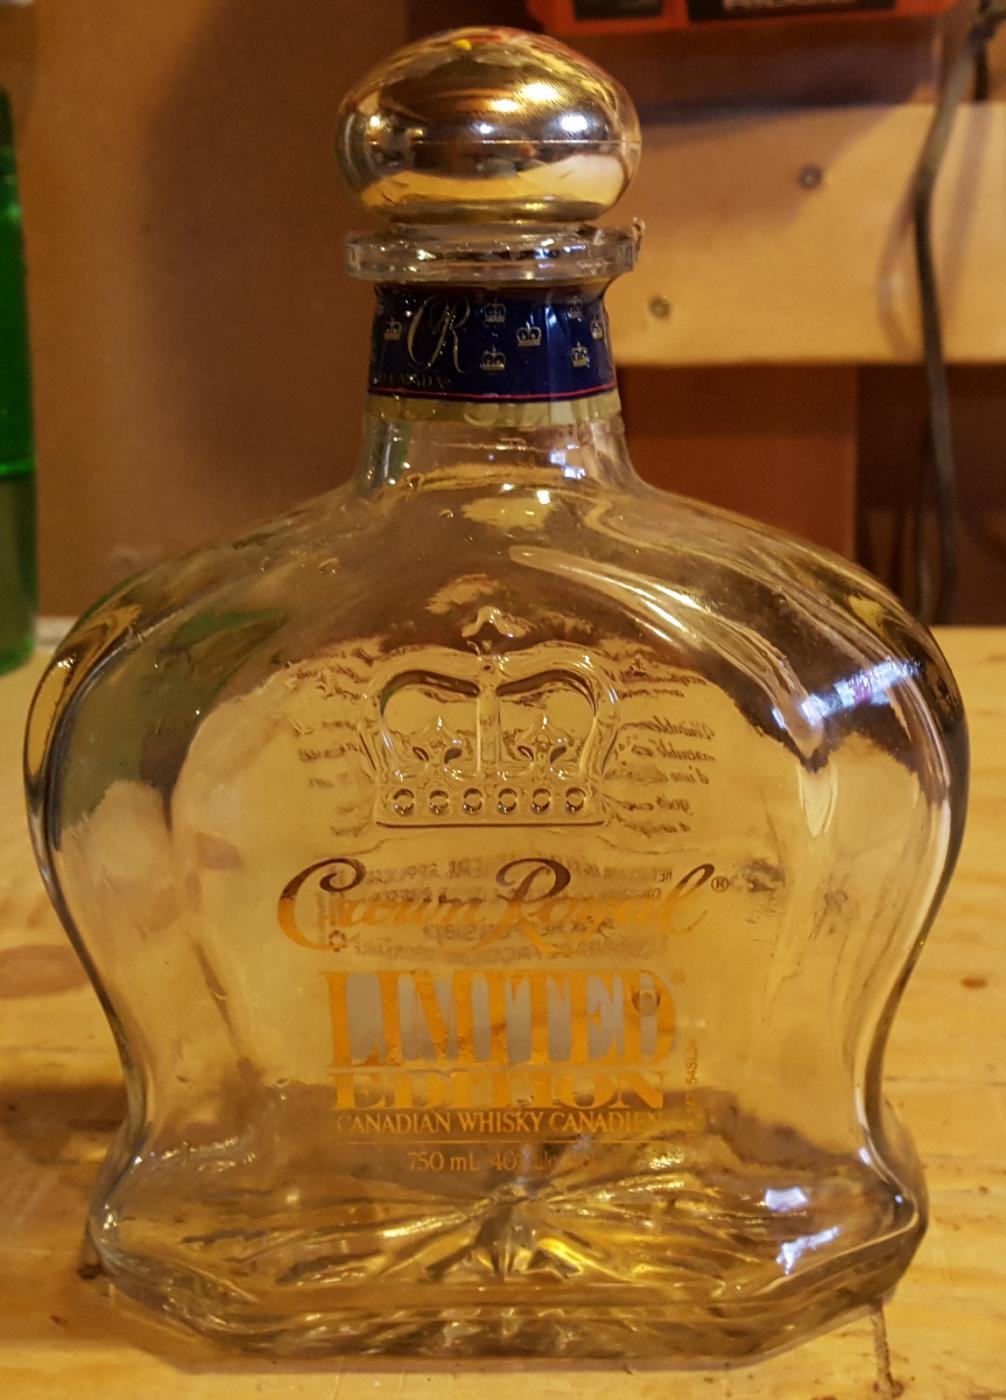
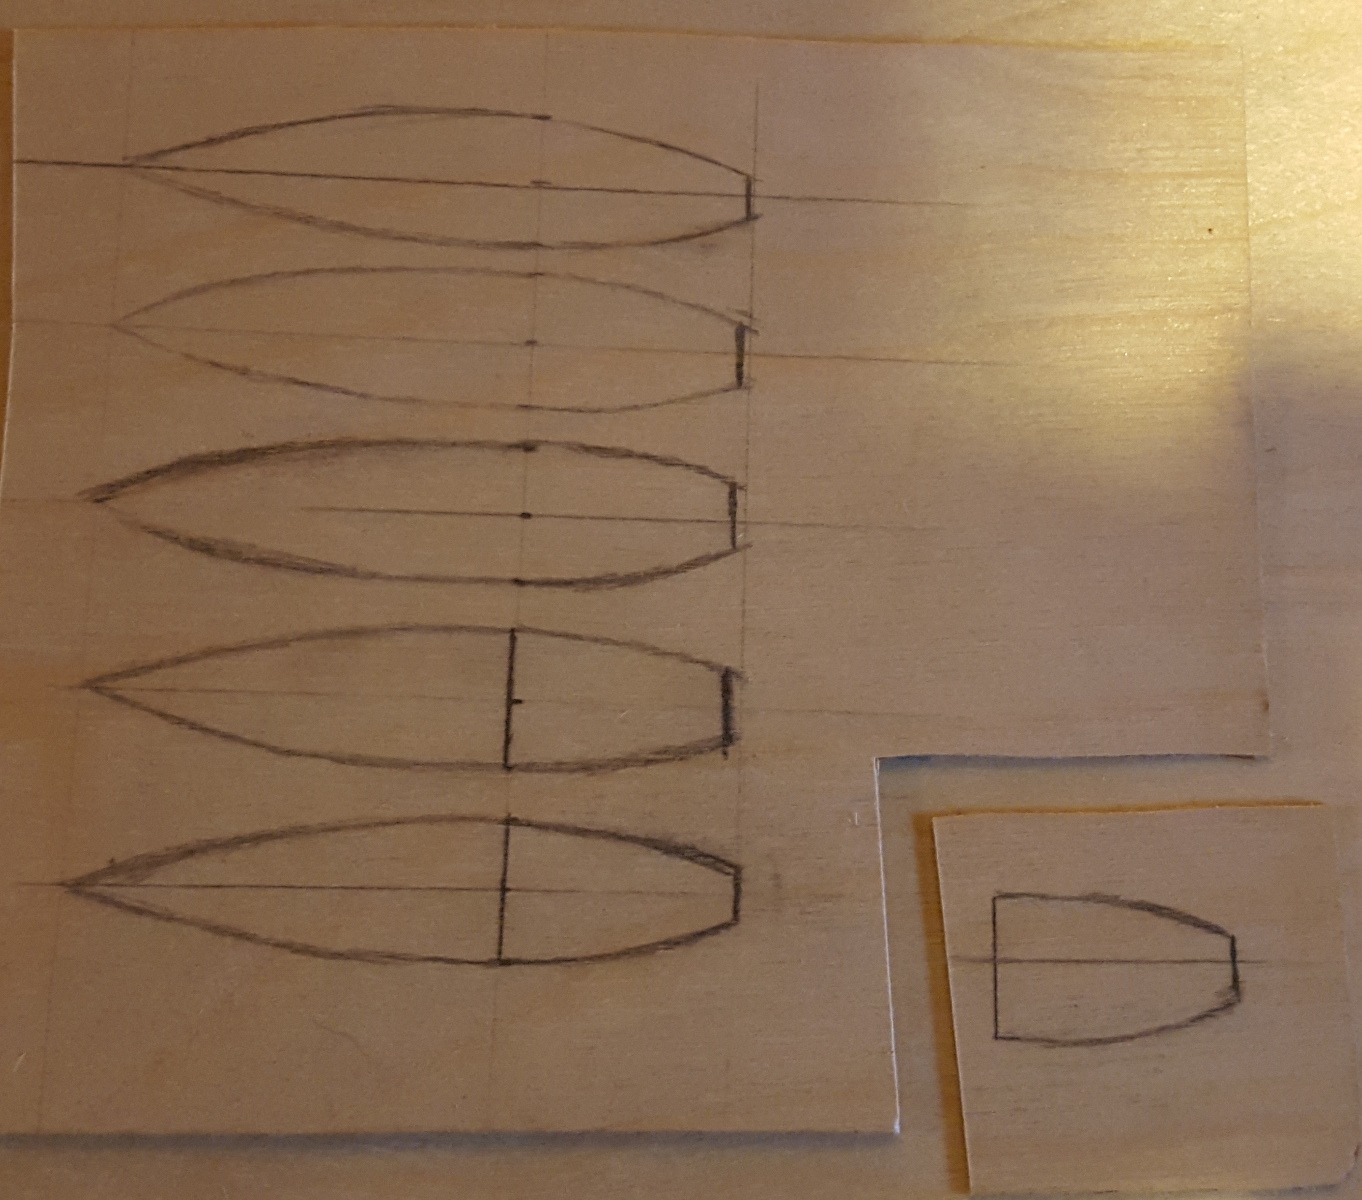
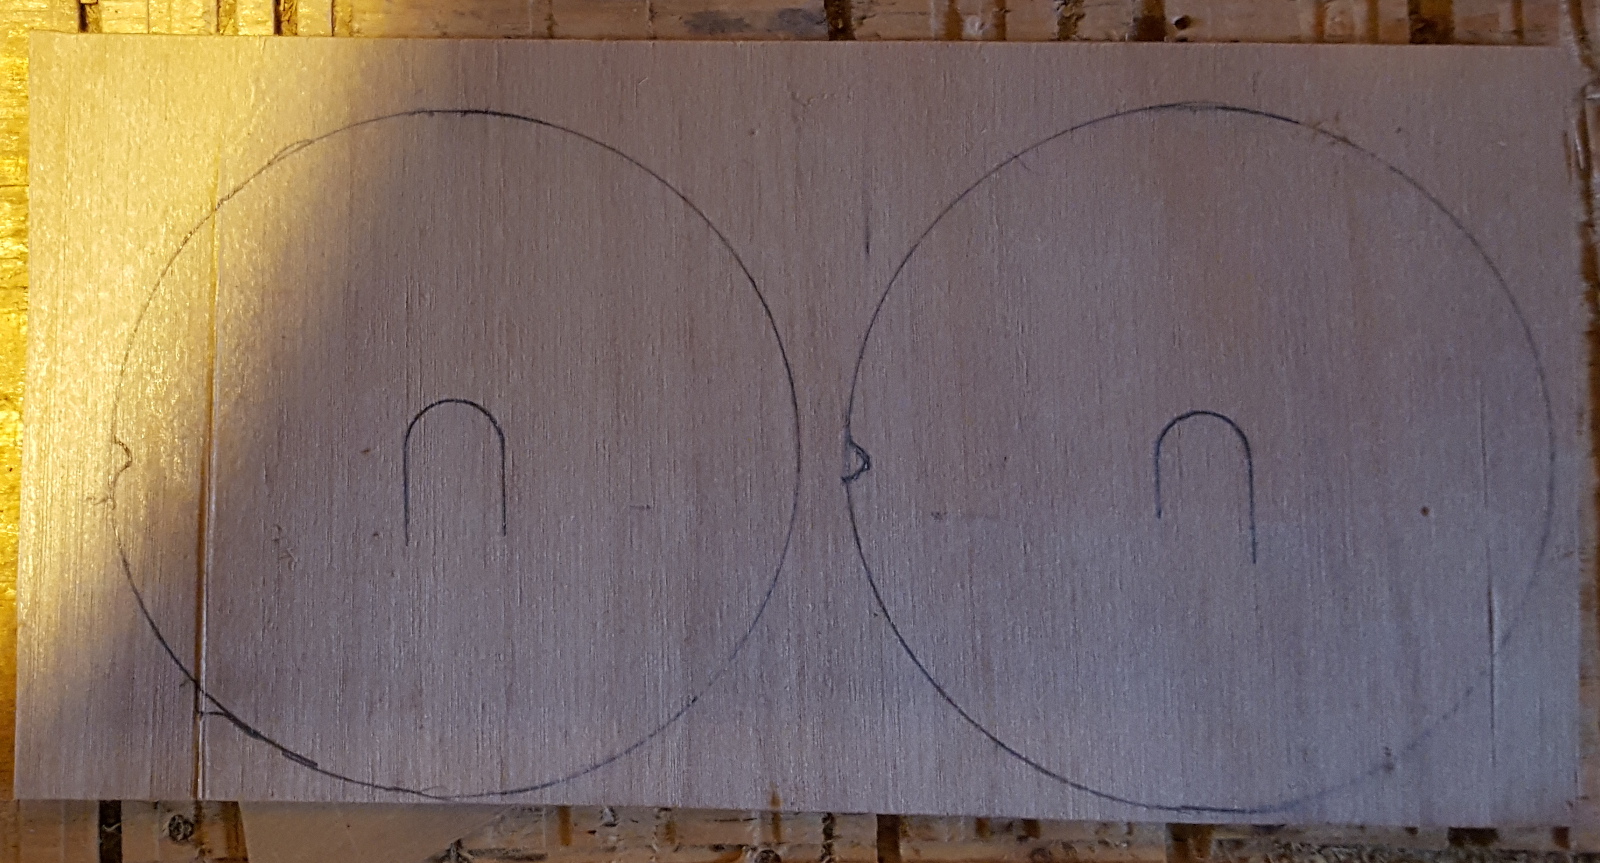
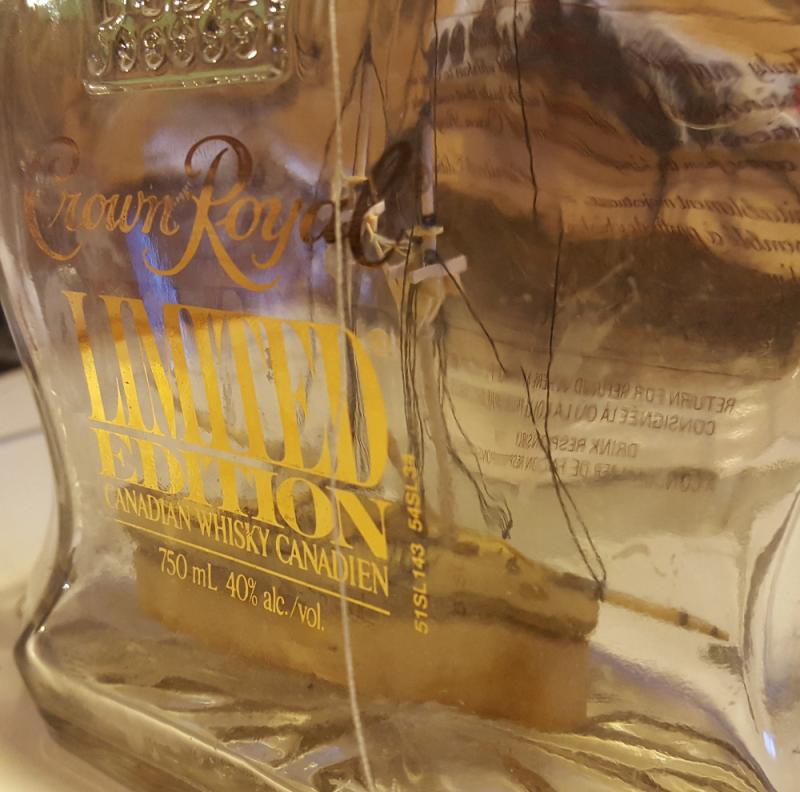
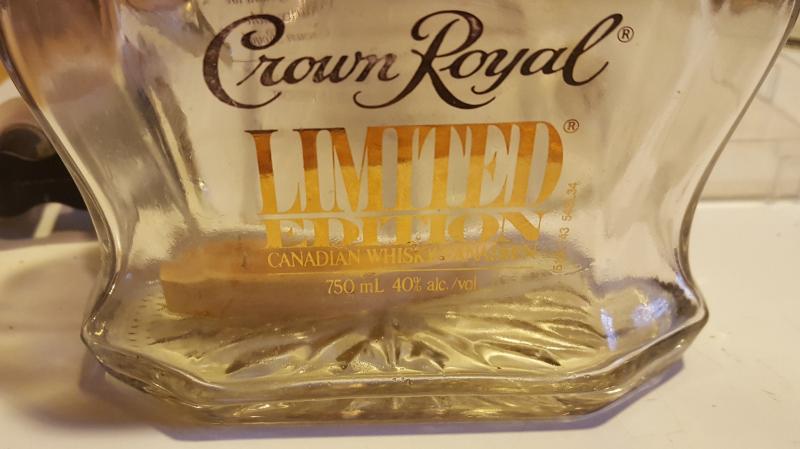
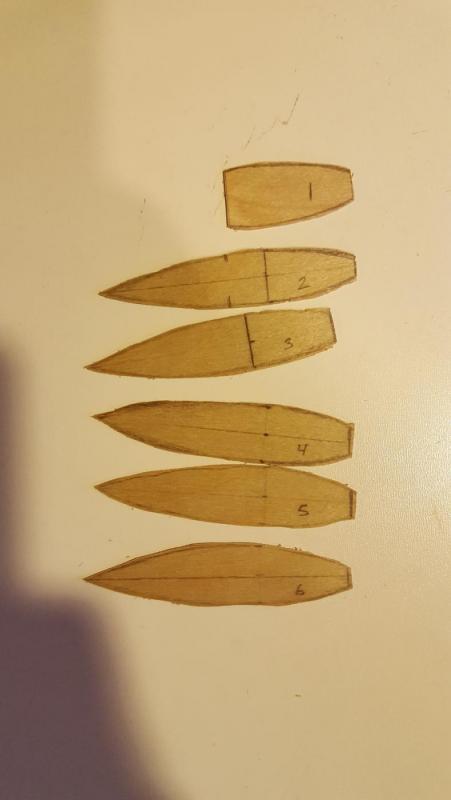
This is my first foray into scratch building, so I thought I would start with something small yet recognizable. This bottle Bluenose II is actually going to be a gift for a friend that hails from the East Coast of Canada and calls Halifax home, although he has been all over the better part of this vast country. I would like to start with a little bit of history. The original Bluenose was constructed in Lunenburg, NS in 1921 as a fishing schooner. She spent only a year of her short life on the Grand Banks off Newfoundland fishing for Cod, and then went into racing other schooners of similar style and purpose. She finally succumbed to a death at sea off the coast of Haiti in 1946. She is immortalized on the back of the Canadian dime, as well as having her own 50 cent stamp. Bluenose II was constructed as a replica in 1963 using the original Bluenose plans. The only difference between the two is the twin propeller engine on the Bluenose II. The province of Nova Scotia purchased the BN2 for $1 CAD in 1971. The replica was deconstructed in 2010 and a reconstruction was completed in 2013 with the same name On to the build. A while ago, by friend had purchased a bottle of Crown Royal Limited Edition Canadian Whisky. Once empty, this bottle became the inspiration for this build, as it is clear with gold leaf lettering on it. That and I thought that the Canadian Whisky would tie in nicely with a little piece of Canadian heritage. With no formal plans to go off of, this is going to be kind of like putting together Ikea furniture without the instructions. I did however take a boatload (pardon the pun) of photos of the AL Bluenose II I had build a couple of years ago. From the pictures I had determined the hull is roughly bullet shaped (the projectile itself, not with the casing) at the top deck. I have no idea what the scale is going to be, but I have determined the beam width is about 1.5cm, with a deck length of 7.3cm. I believe at this point I am just going to try for a waterline model, simply because I don't think I can carve out the keel from the 1/16” plywood I'm going to use for the hull form. After cutting out the rear deck on the scroll saw, I felt that opening in the insert in the table was too wide for such thin plywood so I had to pop out the insert in the table to trace a new one onto the thin ply. Two were needed as the insert is about 1/8” thick, twice the thickness of the ply. So we will wait at this point for the glue to dry on the two inserts before I attempt to slit them and cut out the rest of the formers. Until later, any comments, questions, or concerns are greatly appreciated, whether good or bad.

-
Al, I have used a file brush before on larger files. Works well for cleaning, especially really soft woods like pine or balsa that trend to gum up the teeth in the file. Haven't used one on my smaller files as I don't use them often enough
-
Wow. Still amazed at the detail you're putting in Daniel. And i can't see any mistakes. Maybe your macro lens is better at picking them up than my eye.