cwboland
-
Posts
255 -
Joined
-
Last visited
Content Type
Profiles
Forums
Gallery
Events
Everything posted by cwboland
-
I have also heard of people using paraffin wax (ask the admiral if she has any). It can also be found at the local supermarket. Fairly inexpensive if I recall
-
Great job on the stove Jay. I would suggest trying to use a mini lathe to turn some pots out of either brass or wood, if you have access to one. It wouldn't take much to add a handle to some of the smaller pots afterwards.
- 572 replies
-
- 4
-

-
- constitution
- frigate
- (and 1 more)
-
Looks good Mike. Can't wait to see your current progress on her
-
Great job on the metal work. I can hardly believe the tiny details you are able to get.
-
Sounds like a good idea Ben. I look forward to watching your progress and picking up a bit of history at the same time
- 40 replies
-
- 3
-
-
- edmund fitzgerald
- iron shipwrights
- (and 1 more)
-
Jay, Just catching up on your log. Great idea to paint the LEDs to reduce the overall light output
- 572 replies
-
- 3
-
-
- constitution
- frigate
- (and 1 more)
-
Hi Igor, What are you using for sea? It looks like pigmented epoxy from the photos, but it's hard to tell for sure
-
Great job fitting the deck structures. She's really coming along nicely.
- 66 replies
-
- 2
-
-
- bluenose ii
- artesania latina
- (and 1 more)
-
Thanks all for the comments and likes, or just generally checking in to see my progress. Hannah now sits in front of the Bluenose II I recently completed on top of the china cabinet until I can built a shelf for all these models that keep coming my way.
-
Great idea. And a nice little stand to boot
-
HM Mermaid Rigging questions (edited by admin)
cwboland replied to Rick01's topic in Masting, rigging and sails
Druxey,that's pretty close. 3'0" works out to about 910mm -
Nice looking build so far. Will keep an eye on this. Just something to consider though. You may want to do the ratlines and shrouds (those things that look like rope ladders) with thread as well, rather than trying to paint those thin plastic shrouds that came with the kit.
-
TS, Hard to say, but to my (poor) eyes, it looks to be a single block tied to the davit, with the line running to the double block and back to the single, before running back outboard and finally being tied off to the davit, with lots of running line left to belay out and loosen the strap.
-
Hi Robert, She's coming along nicely. Keep up the good work. Just a word of caution, though. I would count your deadeyes before you get too much farther. I ran into the rigging stage and was short almost a whole set of the larger deadeyes for the ratlines and shrouds. Had to wait almost a month to get them from a retailer here in Canada.
- 66 replies
-
- 1
-
-
- bluenose ii
- artesania latina
- (and 1 more)
-
Completely agree Mike. I think I'm hooked too. Might look into plans for a Bluenose that I can scale to fit into a 26oz bottle of Rye. Would be a great gift for a buddy of mine.
-
Hi Igor, must be a fairly tall bottle you'll be using to have the masts so high. Can't wait to see how she turns out in the end.
-
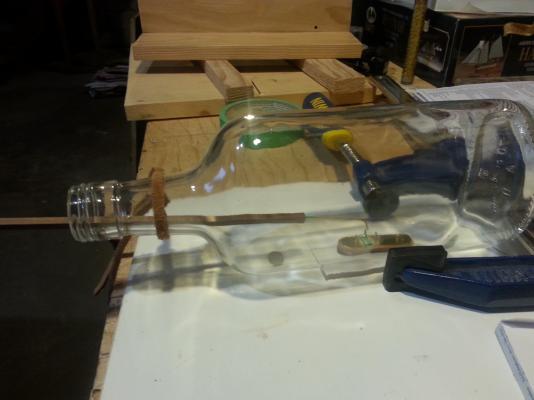
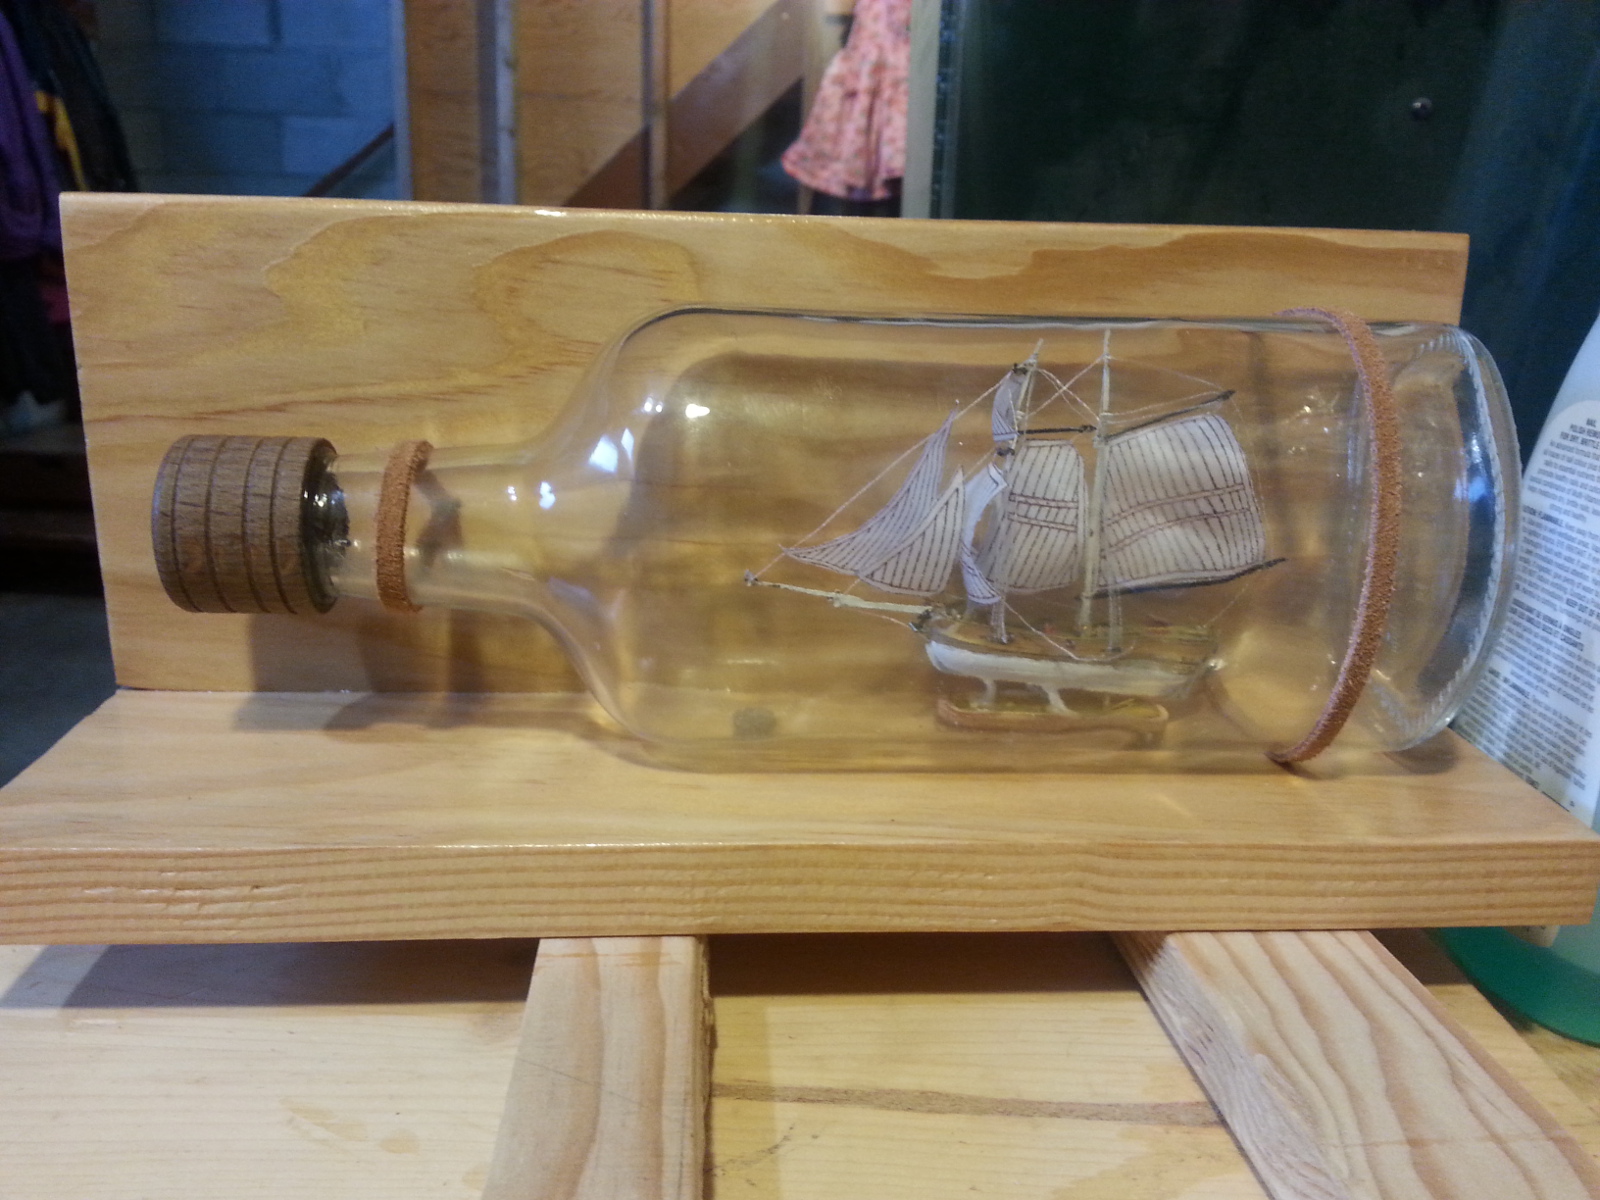
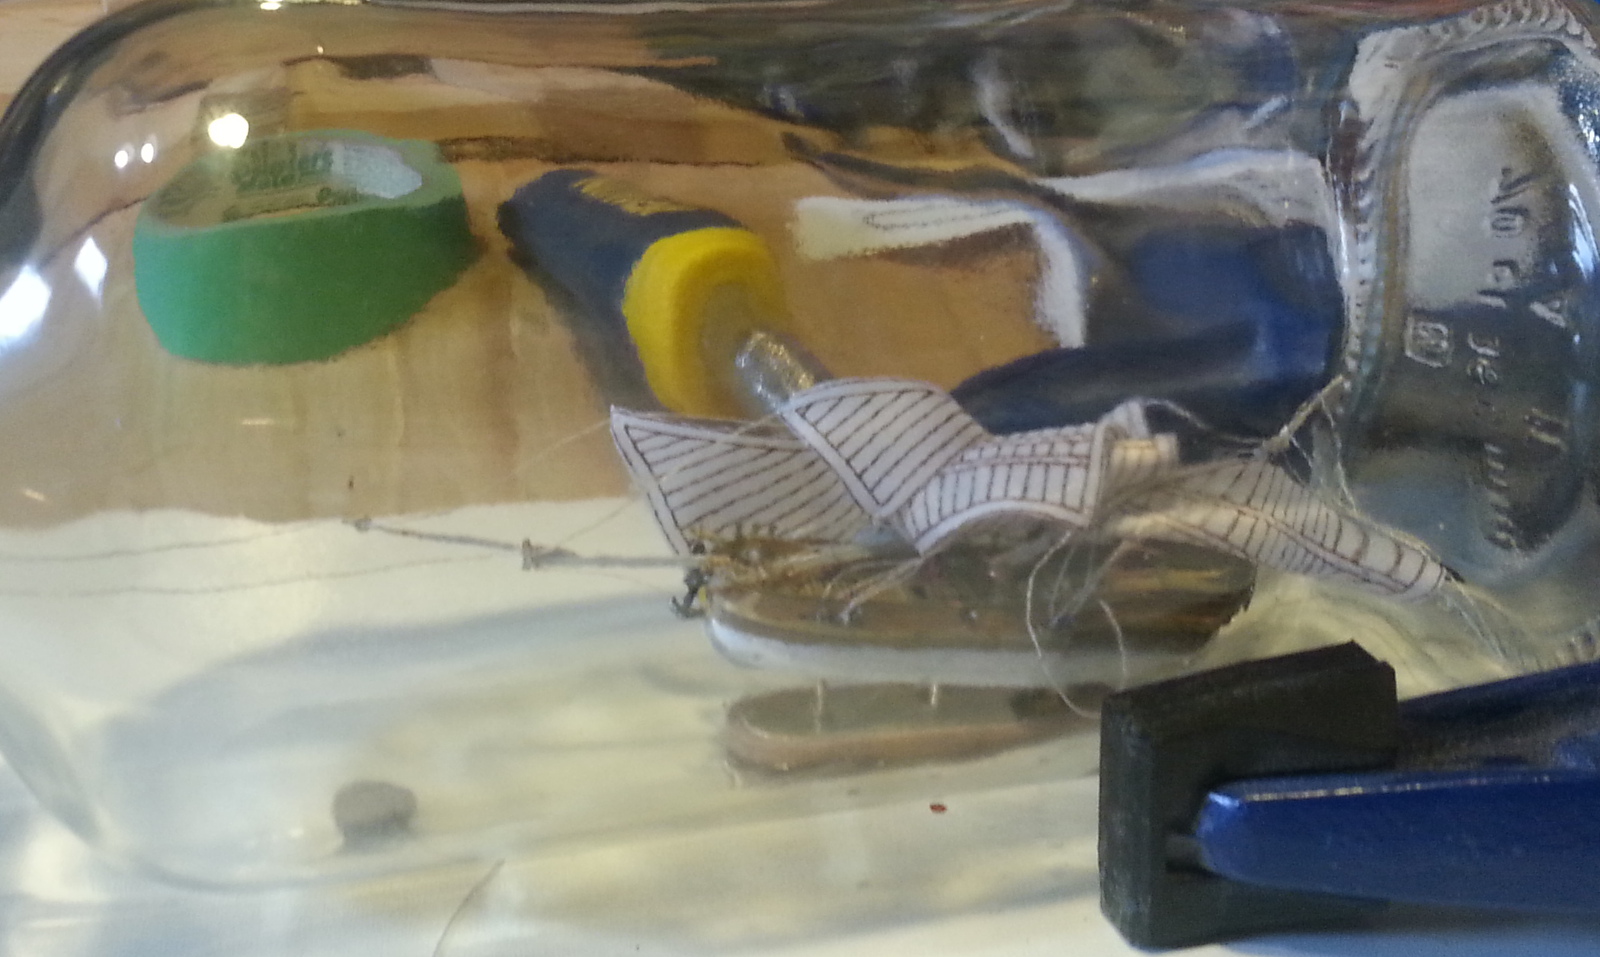
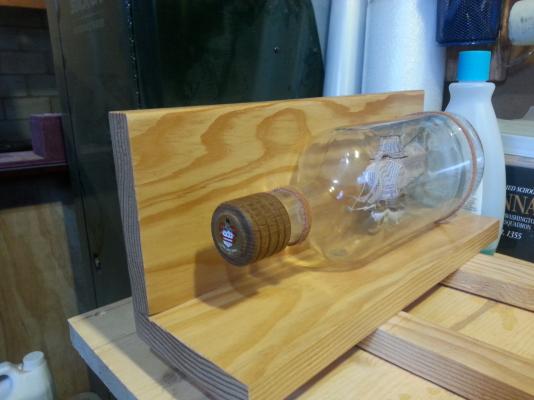
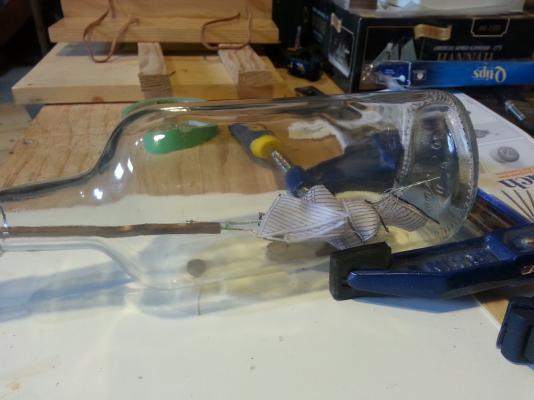
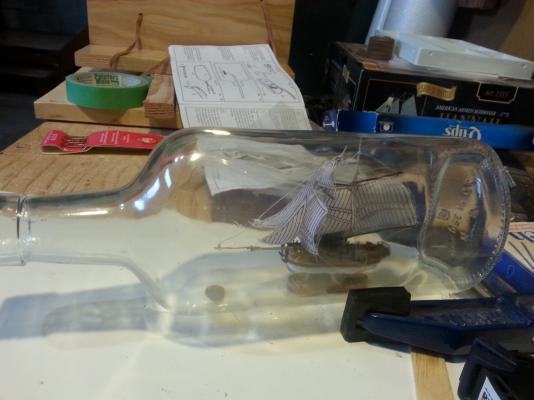
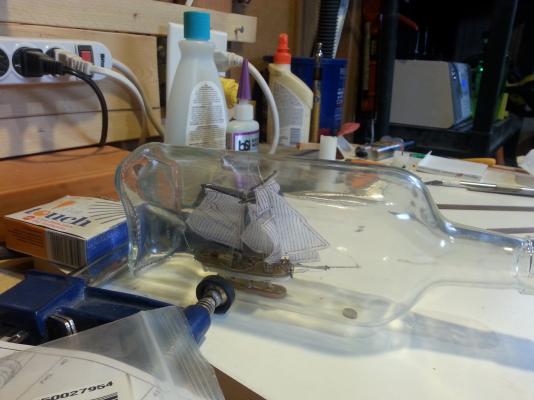
Finally managed to insert the Hannah into the bottle. Took a little bit of fiddling to get in to sit on the stand properly, but I managed to do it without having to file down the neck of the bottle itself. That was a couple of days ago. Had to let the epoxy set up enough to raise the masts and tie off the pull lines. Finally complete, got the cork on the bottle. Used clear indoor/outdoor silicone to seal the cork in place rather than epoxy or CA, as the silicone can be removed if the ship needs to be stood upright in the event of an accident. Finally complete, she sits pride of place right next to the Bluenose II on top of the (current) china cabinet. The Admiral suggests that I build a dedicated shelf for the two of them. I have to find the time to be able to do that among all the other projects she's got me doing right now. So ends my version of the Amati Armed Schooner Hannah SIB.

-
Thanks Nathan. Hopefully I will be posting an update tomorrow or on the weekend. We'll see how fast I can get over this head cold. Just can't seem to see straight or concentrate real well, and need that so as not to break anything in the process.
-
Great work so far. She does build into a beautiful model when complete. I finished her back in December or January as my first build
- 66 replies
-
- 1
-
-
- bluenose ii
- artesania latina
- (and 1 more)
-
You must have steady hands and good eyesight to be able to work at such small scales. I applaud your work.
-
I agree with Mike. Nice to see another one of these being built. I'm almost done one myself
-
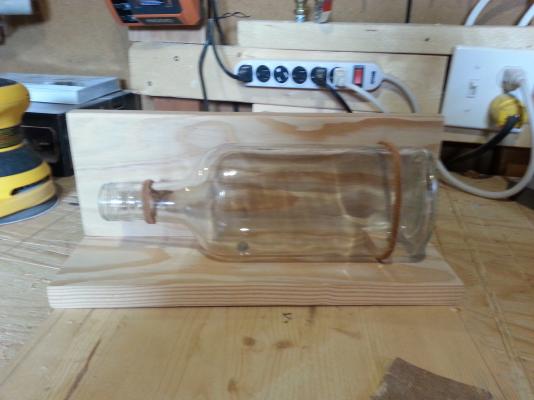
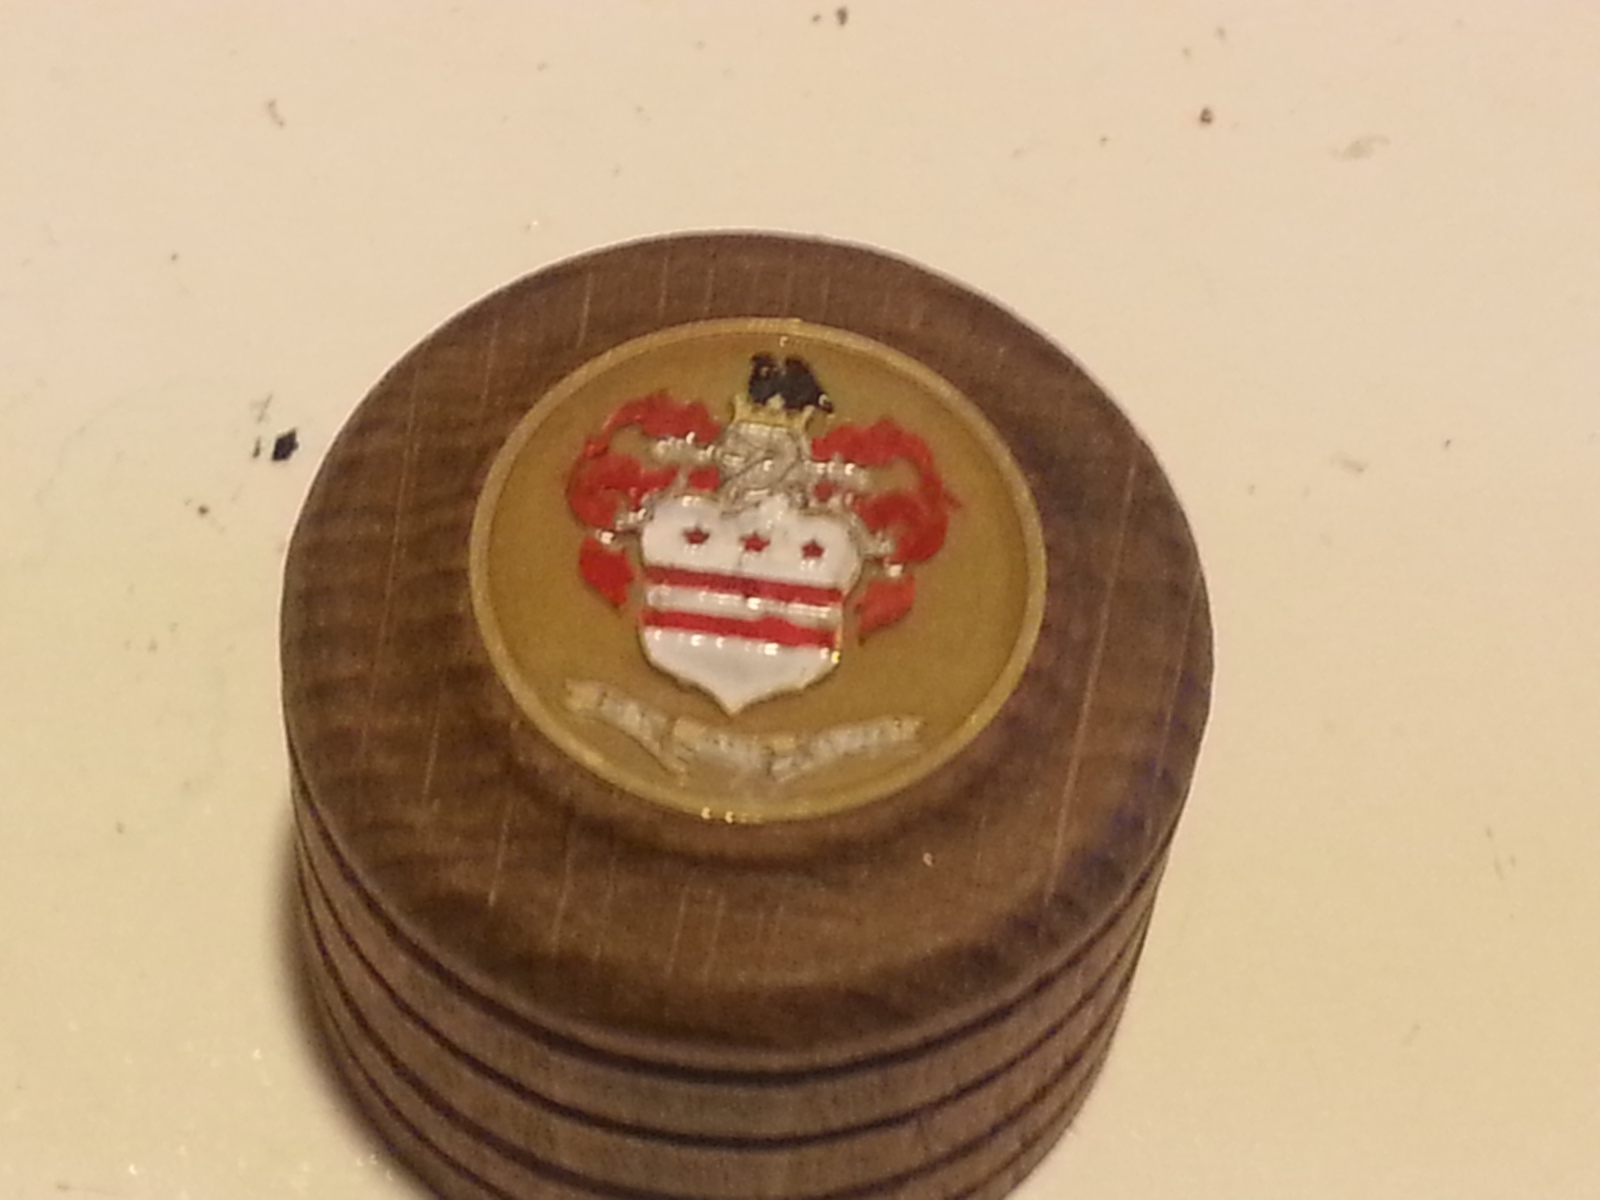
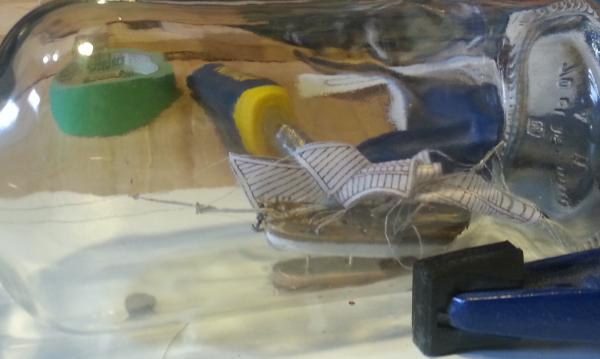
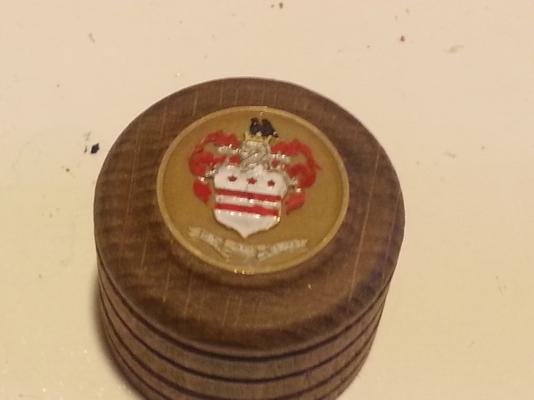
Just a small update today. Re-painted the keel after the surgery from the last post. I also borrowed Mike's idea to paint the seal on the bottle cap. Still some minor touch-ups to do. All the colours I used are Tamiya acrylics, except the grey. I used Model Master Steel for the grey, as I thought it looked more like a knights helmet than any of the other greys I have lying around. There does seem to be some clouding on the brass plate on the stand in the bottle that is probably from the CA used to place it in the bottle. Any ideas on how to clean that off? I was thinking some acetone on a cotton swab, probably some more of the Admirals nail polish remover. You should be able to see it in the below picture, on either side of the tape. Next update should be inserting the Hannah into her final resting place in the bottle, raising the sails, and corking the bottle.
-
Great job on the research and interpretation. I look forward to following along with this unique build
- 572 replies
-
- 1
-
-
- constitution
- frigate
- (and 1 more)
-
Thank you all for the likes, comments and ideas. @Daniel - I'll have to check out some of those links. I've got a couple more bottles laying around that might make some good SIB builds, or maybe that truck and excavator Igor posted in the Unusual Builds thread @b dylan - Great video and good idea with using the forceps. I was thinking about getting a set, either new or from some doctor friends. Just haven't been able to find the time.
-
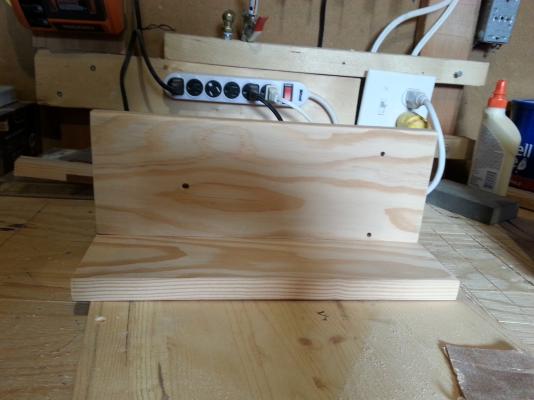
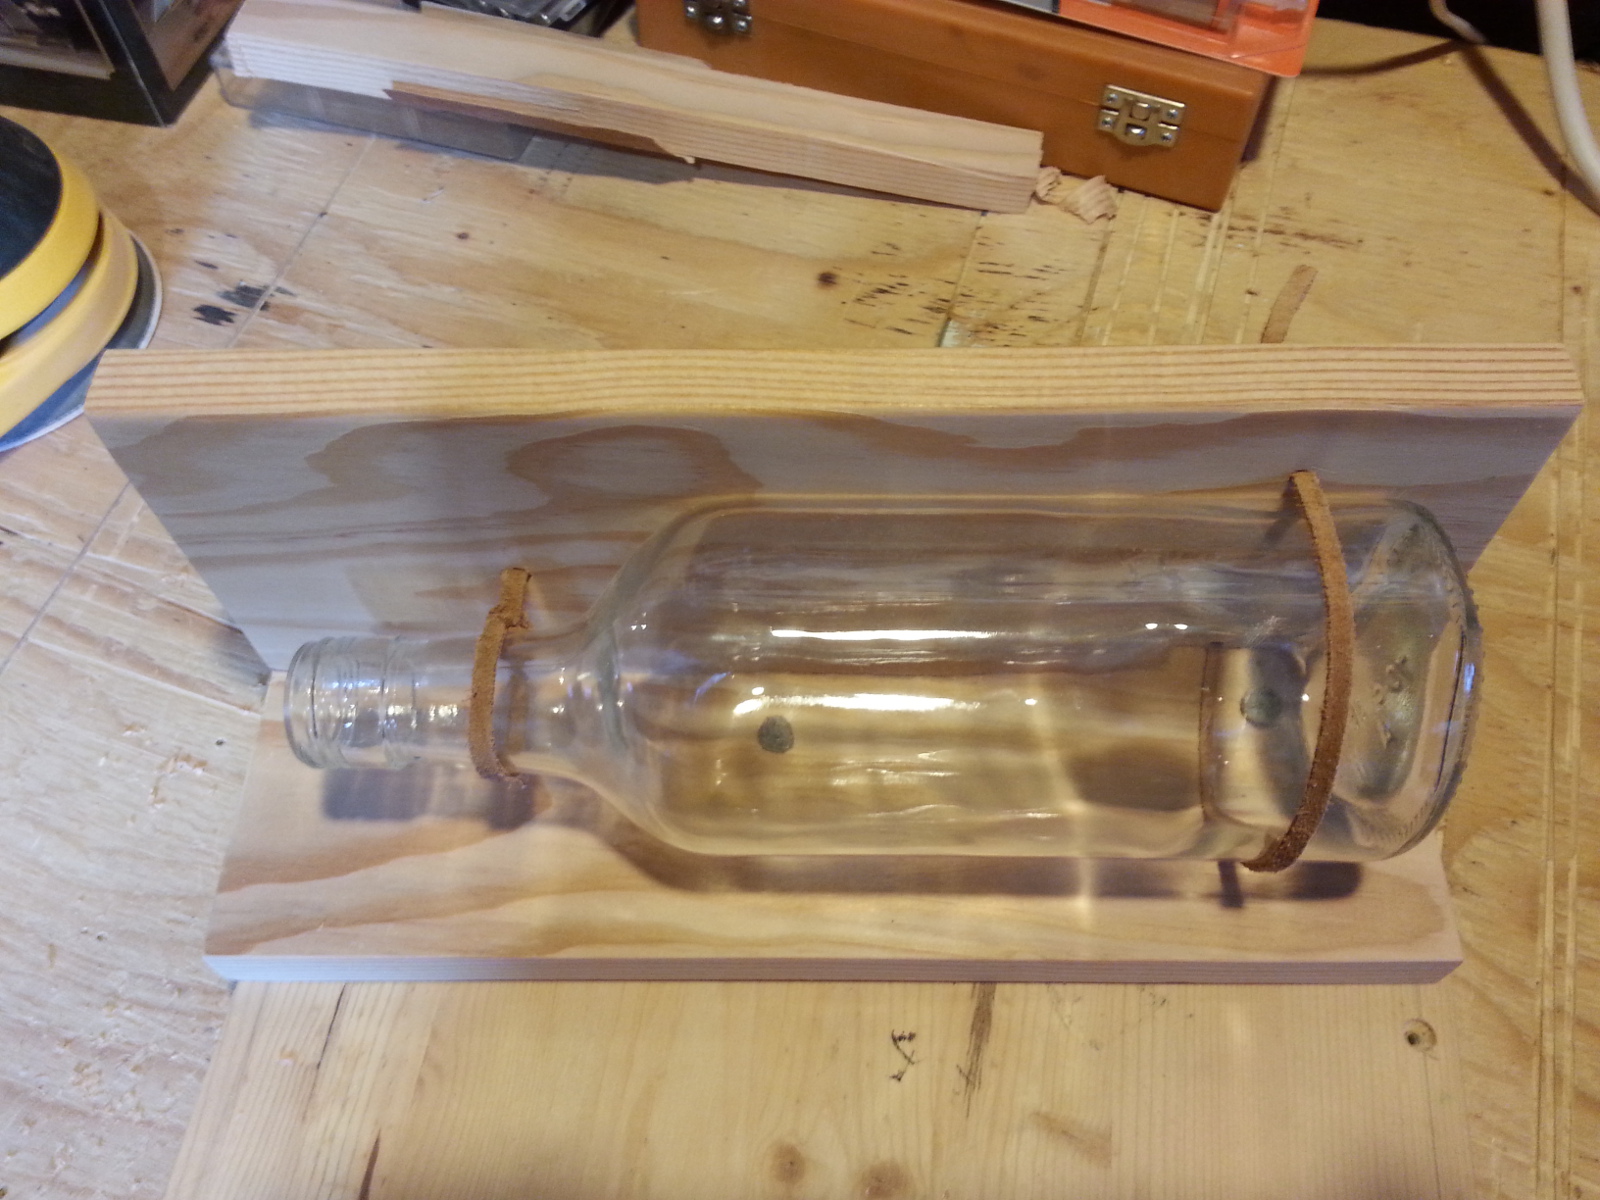
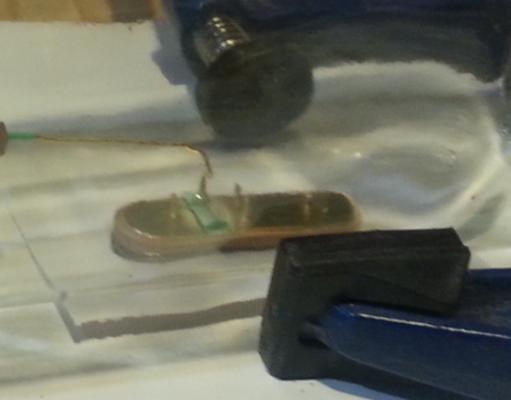
Finally back in the shipyard and work continues on the Hannah. Built a small wooden stand, similar to the one in the link that Hamilton (post #31) provided a while ago. This was crafted with some spare Douglas Fir I had laying around in the shop. Simple construction was the key here. I just had to narrow the two pieces I was using, as the original boards were about 6” wide and too big for what I needed. I was able to finish the stand using a water-based semi-gloss finish from Minwax. Three coats of this (similar application to a WOP) and it's as smooth as glass with a mild sheen to it. I also managed to get the ship's stand into the bottle. Using the tool provided, I placed some tape on the stand and applied some CA to the brass wire and placed it on the tape. I found this easier than using two-sided tape on the wire and trying to get it to stick to the brass sheet on the stand. Five minute epoxy was then applied to the bottom of the stand, and the whole assembly was slid into the bottle. The location for the stand was determined using a sheet of paper, with the outline of the stand traced onto it, taped to the bottom side of the bottle. After about ten or fifteen minutes, the brass tool and tape were removed as the epoxy had cured enough that it would not move if pressure was applied to it. I also had to perform some minor surgery on the Hannah herself. If you look back to the placing of the brass keel, it sticks down below the hull too far. This was causing issues with the test insertions into the bottle I did. Using some of the Admirals nail polish remover, I was able to un-stick the CA that I used for gluing the keel in place, cleaned out the slot, and re-laid the keel.