


Jaydee37
-
Posts
90 -
Joined
-
Last visited
Content Type
Profiles
Forums
Gallery
Events
Posts posted by Jaydee37
-
-
I found the Constitution a terrific model to build. It is rated as one of the most difficult. If you decide to go ahead with this model, I strongly recommend the build posted on this site by AndyMech. It is loaded with helpful ideas and suggestions. Also, I would be most willing to respond to any questions you may have as you go forward. Have fun modeling!
- Steve 12345, mtaylor, AndyMech and 2 others
-
 5
5
-
Great log, Landlubber Mike! I think it will be very helpful to me when I get to that stage in my build.
- Landlubber Mike, Altduck, jud and 1 other
-
4
-
-
-
-
I am building the 1/96 Revell model of the U.S.S. Constitution and I am thinking about creating furled sails as an alternative to full sails or no sails. I have looked at the various posts here about furled sails that are very helpful. My question is this - when sails are furled, are they all furled or just certain ones on the Constitution? Your thoughts and ideas, please!
-
Thank you for your response. I have never tried airbrushing and I thought this might be an inexpensive way to try it without a major expense.
-
Has anyone had any experience with the Preval Spray System for painting their model?
-
-
-
I'm looking for a source of U.S flag decals to wrap around a flag staff on a 1/95 scale ship. The plastic piece that came with the kit is poorly done and looks worse after it is painted. I've searched online and, so far, I've come up empty. Any ideas?
-
Thanks Joe!
-
Thanks Meatloaf109. I'll file that for future reference and perhaps that info will be helpful to others!
-
Thank you very much! I'm awaiting the delivery of Lindberg's Tuna Clipper. I like a little variety in my fleet.
- Clyde Puffer and dragzz
-
2
-
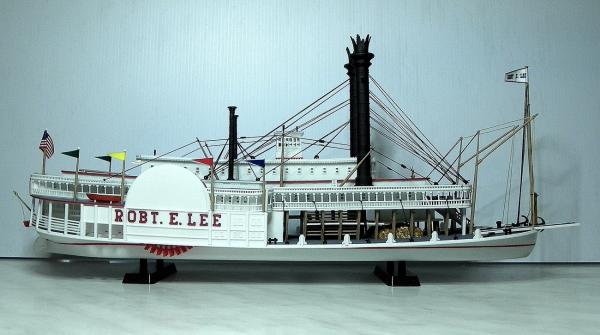
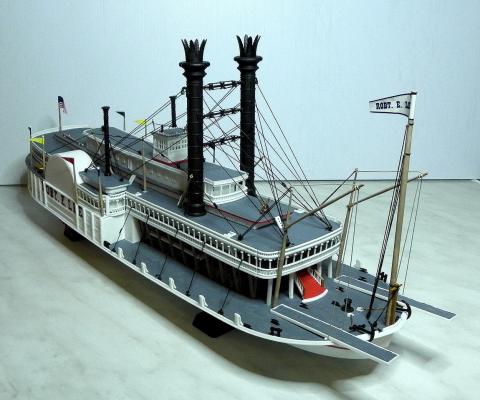
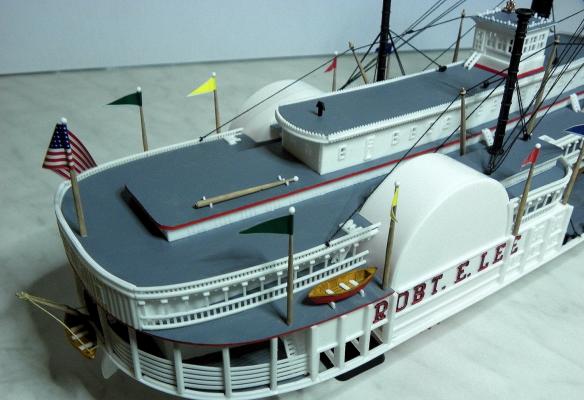
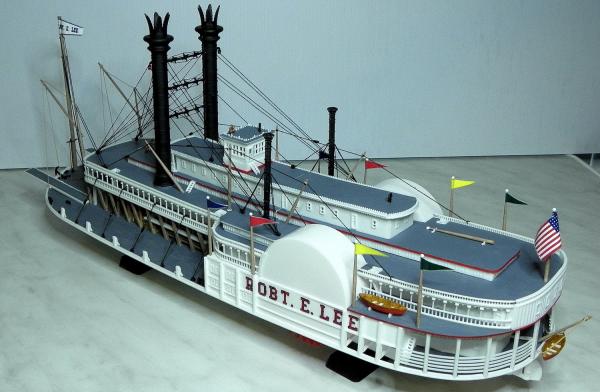
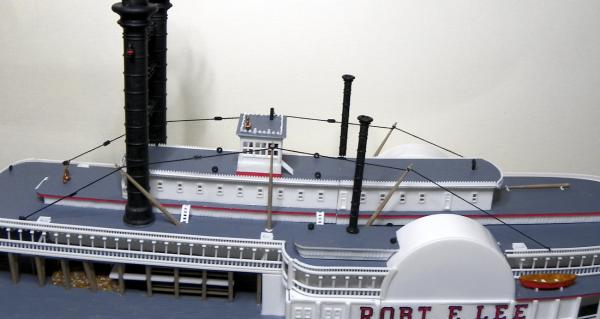
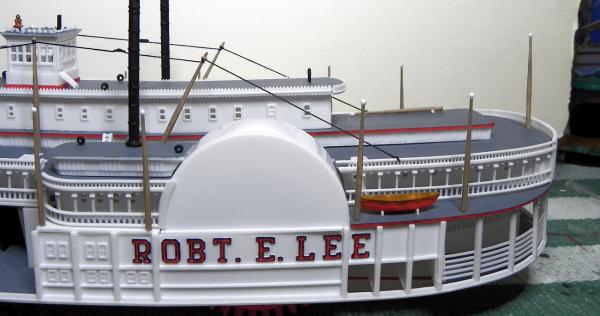
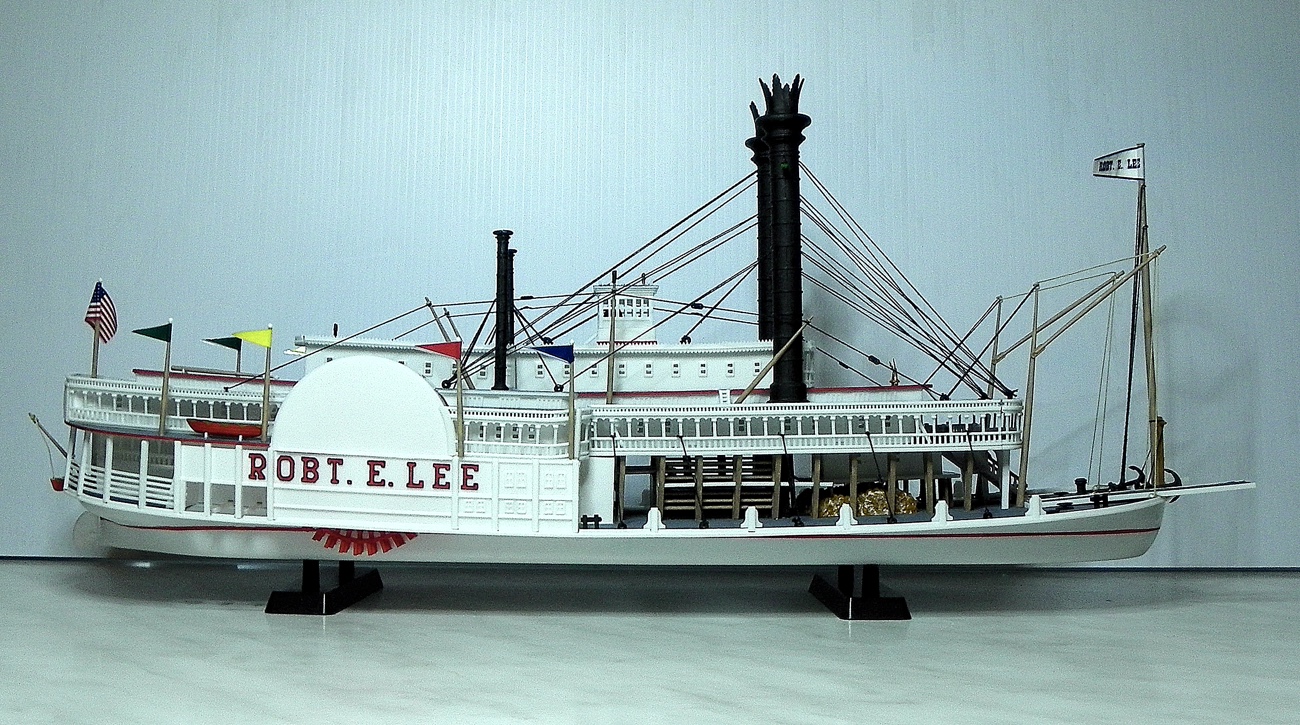
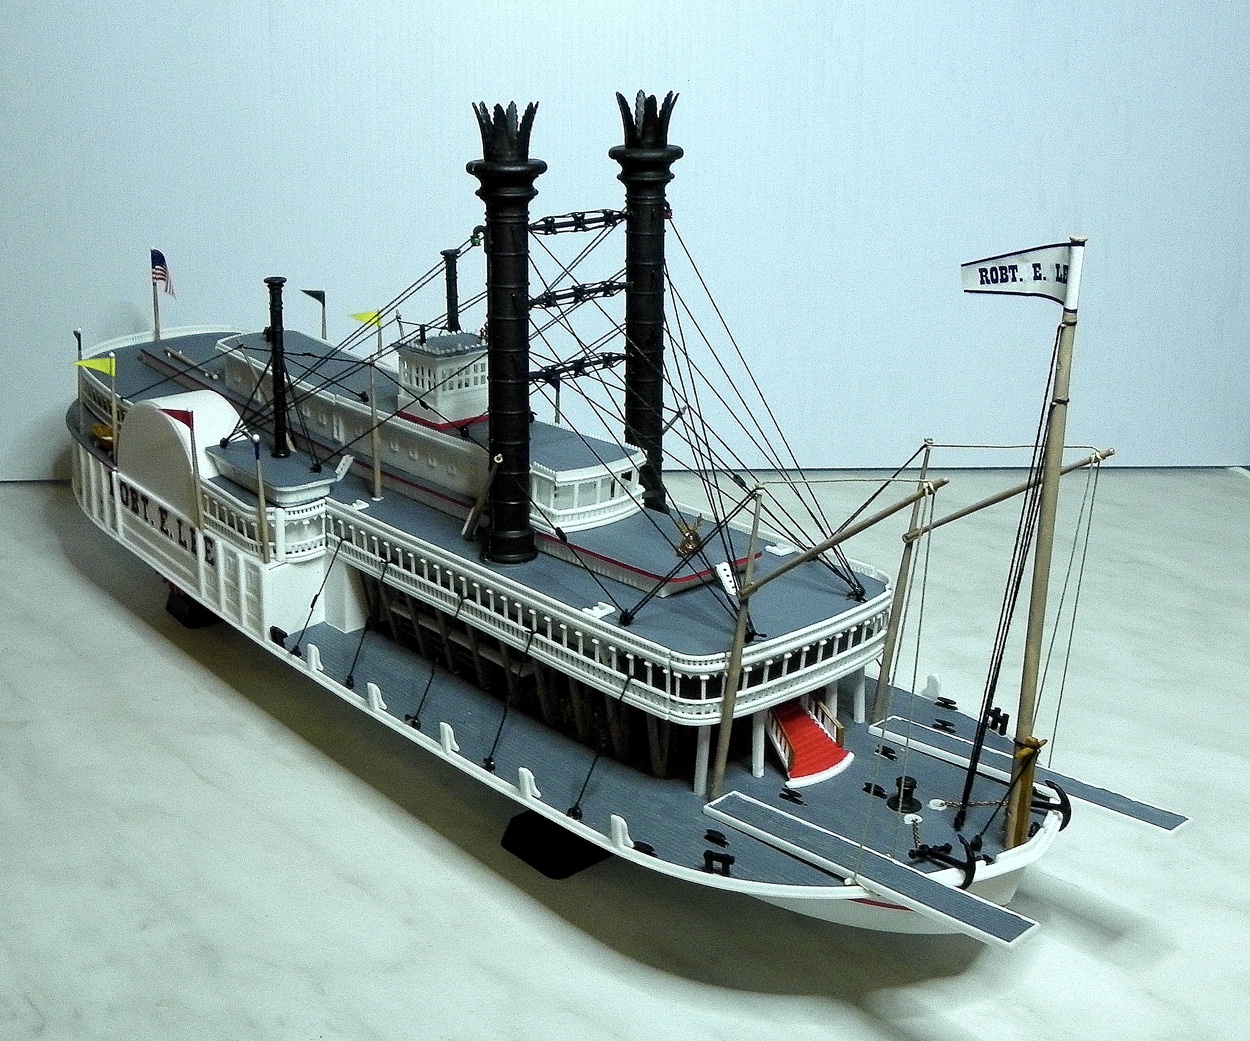
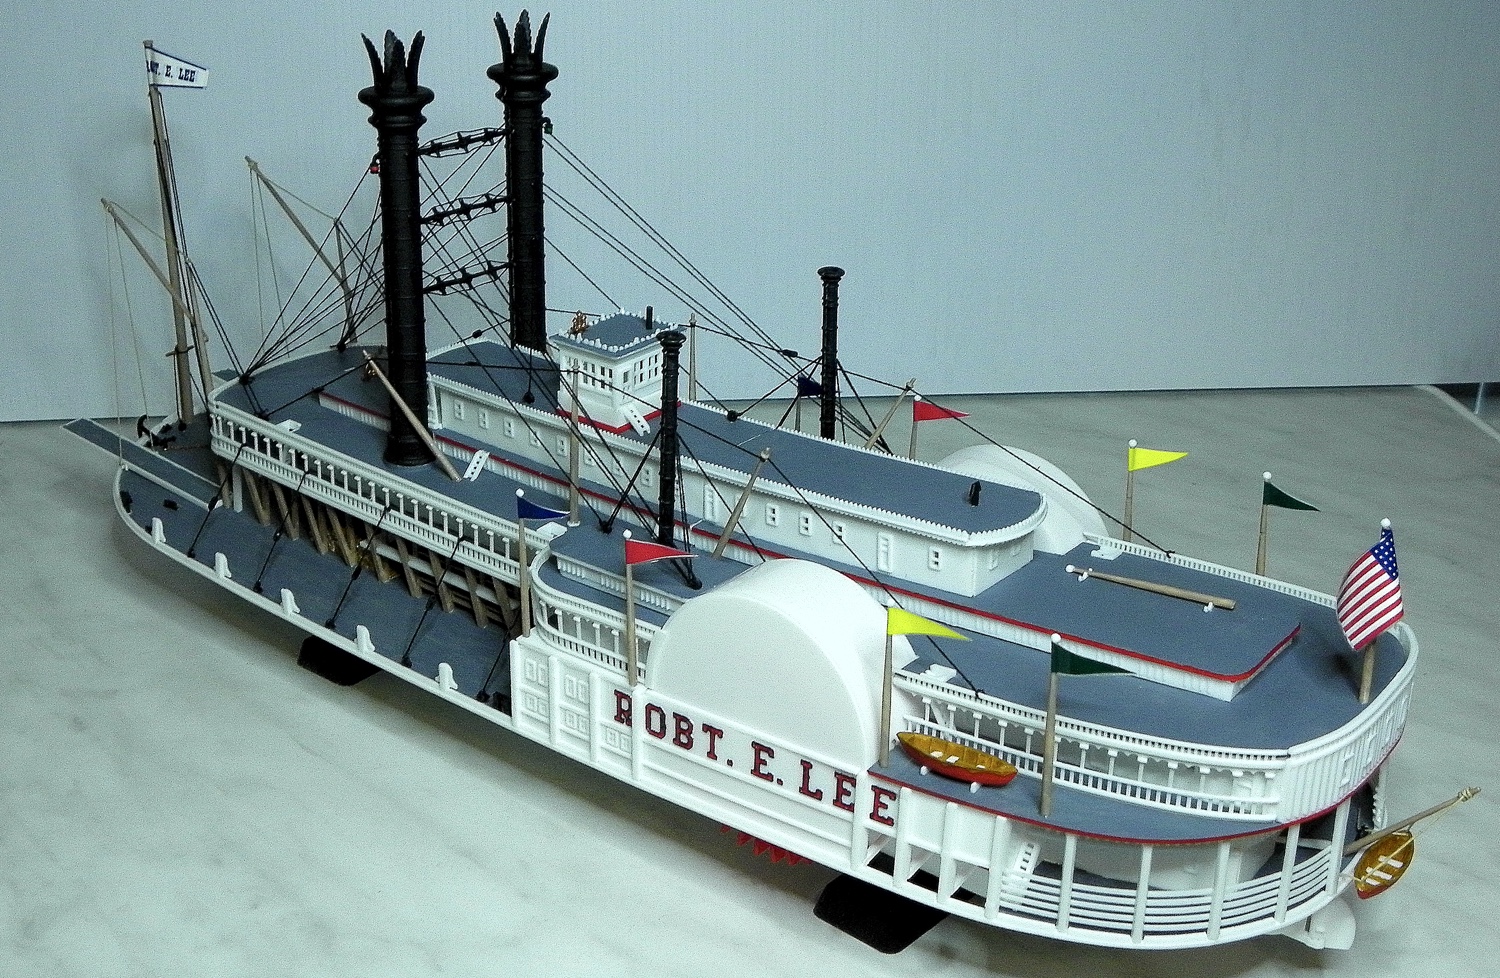
The flags and banners are hoisted and my Robert E. Lee is finished.

- GuntherMT, Fright, GrandpaPhil and 9 others
-
12
-
-
I ordered a package of plastic figures from China through eBay. They were inexpensive and the quality reflected the price. I thought they were poorly molded and carelessly painted. I might have been willing to pay more but there weren't many options. At this point I don't think I will use them. I can always add them at a later date if I change my mind.
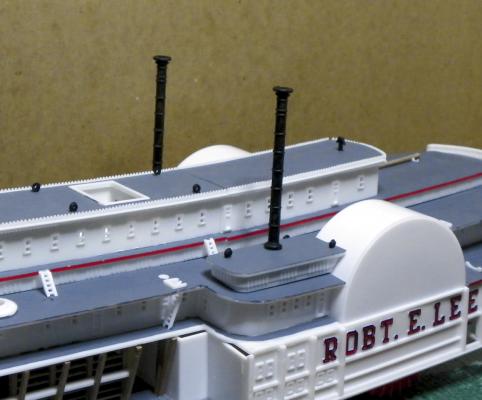
I was looking at the directions for the flags and streamers. They say to cut out the flags, fold them over and glue them together. However the flags are decals. The lettering for Robt. E. Lee is not a decal but the instructions say to apply it as a decal. Any thoughts?
-
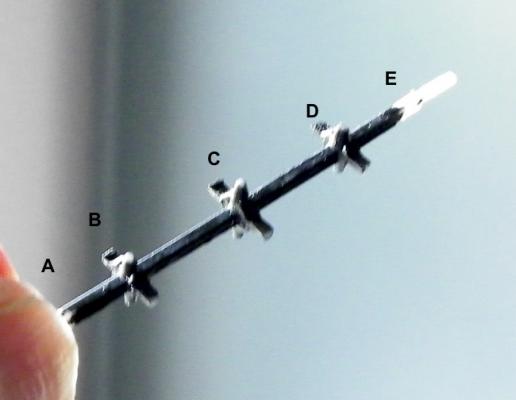
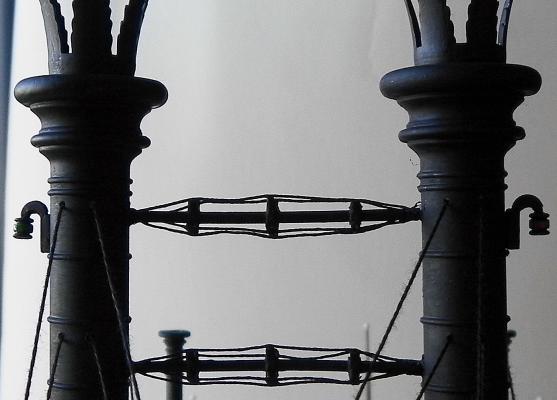
The Smoke Stacks were assembled and painted earlier, as were the Port and Starboard Running Lights. The Braces that are placed between the Stacks posed a question of how best to attach the threads that run across the outer tips of the Braces from A to E. I posed this question on the Forum and the responses suggested I might create the attachments by stretching sprue to make thin pieces of plastic. In the end, I decided to stick with thread and it came out pretty well.
The Hog Chain Braces (3 on each side) and the rigging was added.
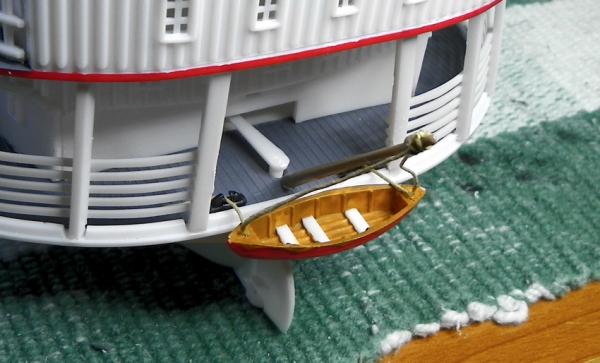
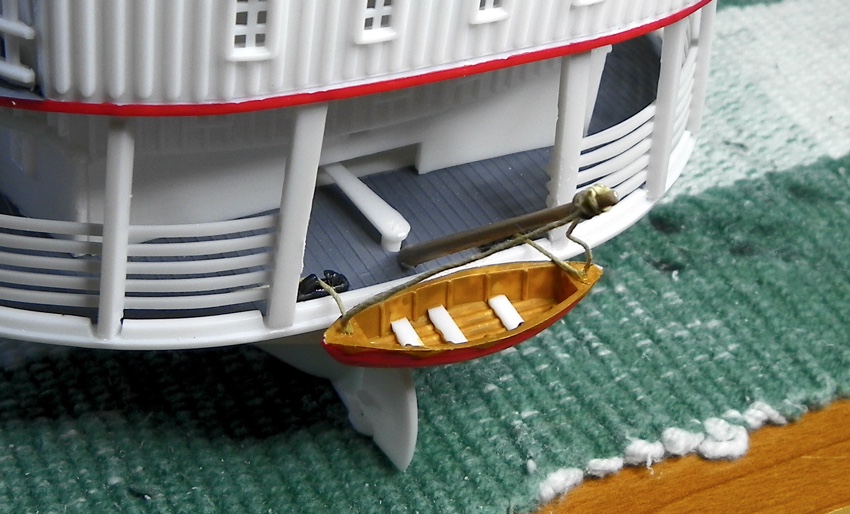
Next the Lifeboats and Flag Poles were installed.
 Guy Wire Rings and Cargo Posts were installed on each side of the forward Deck.
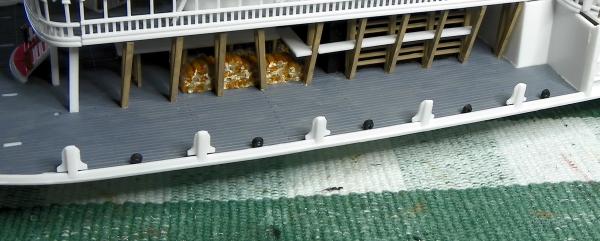
The Front Deck parts were added:
7 Cleats
Capstan
2 Chocks
3 Guy Wire Rings
2 Derrick Boom and Mast Assemblies
2 Gang Planks
2 Anchor Assemblies
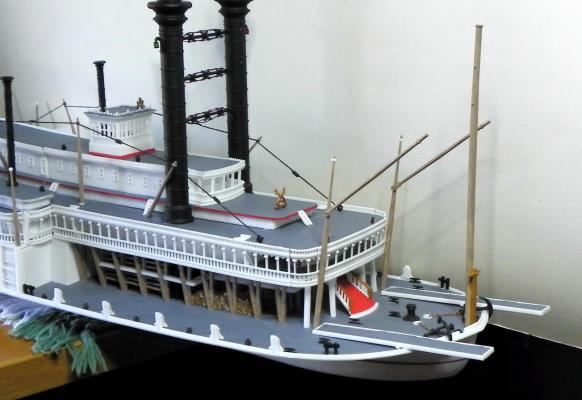
It’s now time for the Rigging. I will substitute the black thread that came with the model with a heavier thread that I found in the jewelry-making section of a craft store. The same thread I used on the Hog Chain Braces. I used the lighter thread on the Smoke Stack Braces.
-
I'm still at it. New photos coming soon. Thanks for checking up on me.
-
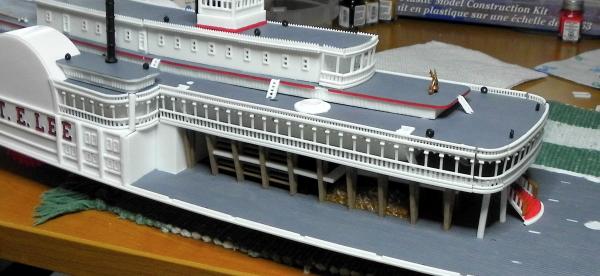
The Steam Escape Pipes were painted black and installed on the Engine Room Skylights on each side of the ship.
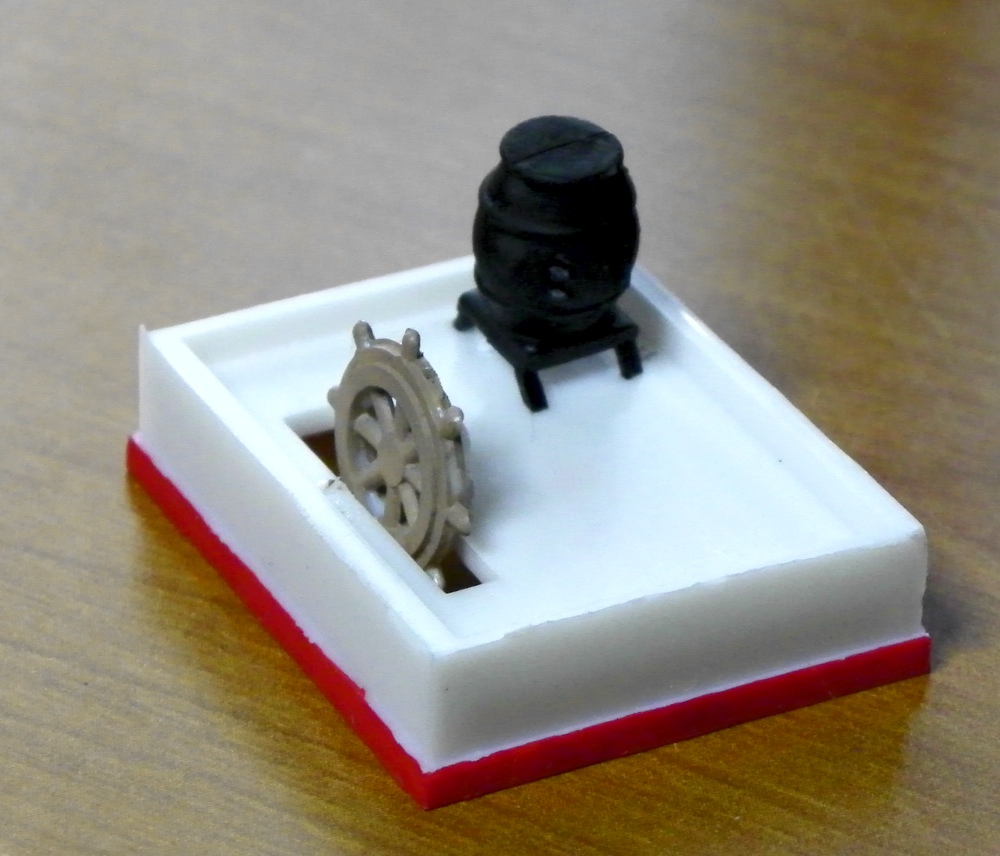
 The Pot Belly Stove and the Pilot Wheel were glued to the floor of the Pilot House.
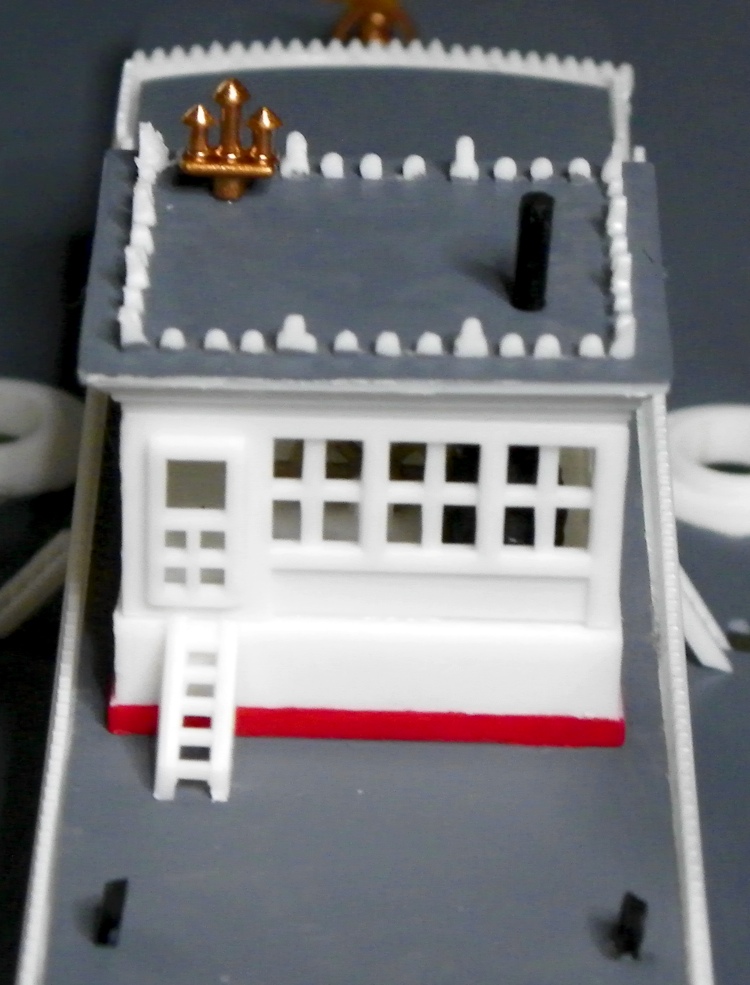
The walls and roof of the Pilot House were added with the Whistle attached to the Roof. Somewhere along the way I lost the Chimney for the Pot Belly Stove, so I fashioned a replacement out of a wooden toothpick that was just the right diameter. After the Pilot House was installed a ladder was added for access to the Pilot House.

The Front and Rear Deck Railings were added.
 When the Front Railings were installed there were large spaces on the corners remaining that would suggest I did something wrong. However, the perimeter of the deck is a fixed measurement and the railings are only one size, so I’m not sure what happened. To correct this I added some spare plastic pieces to fill in the gaps.
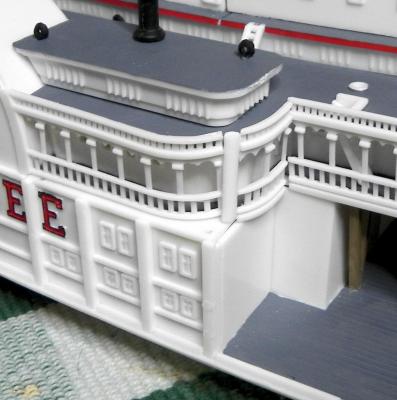
-
-
-
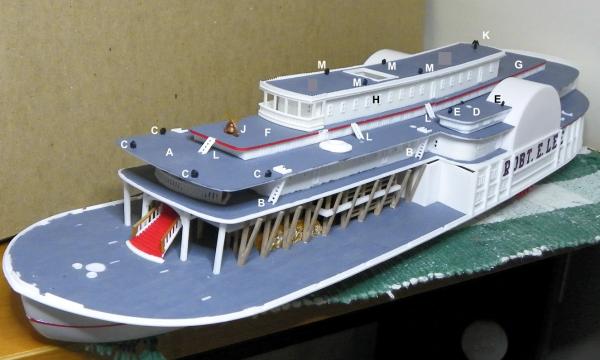
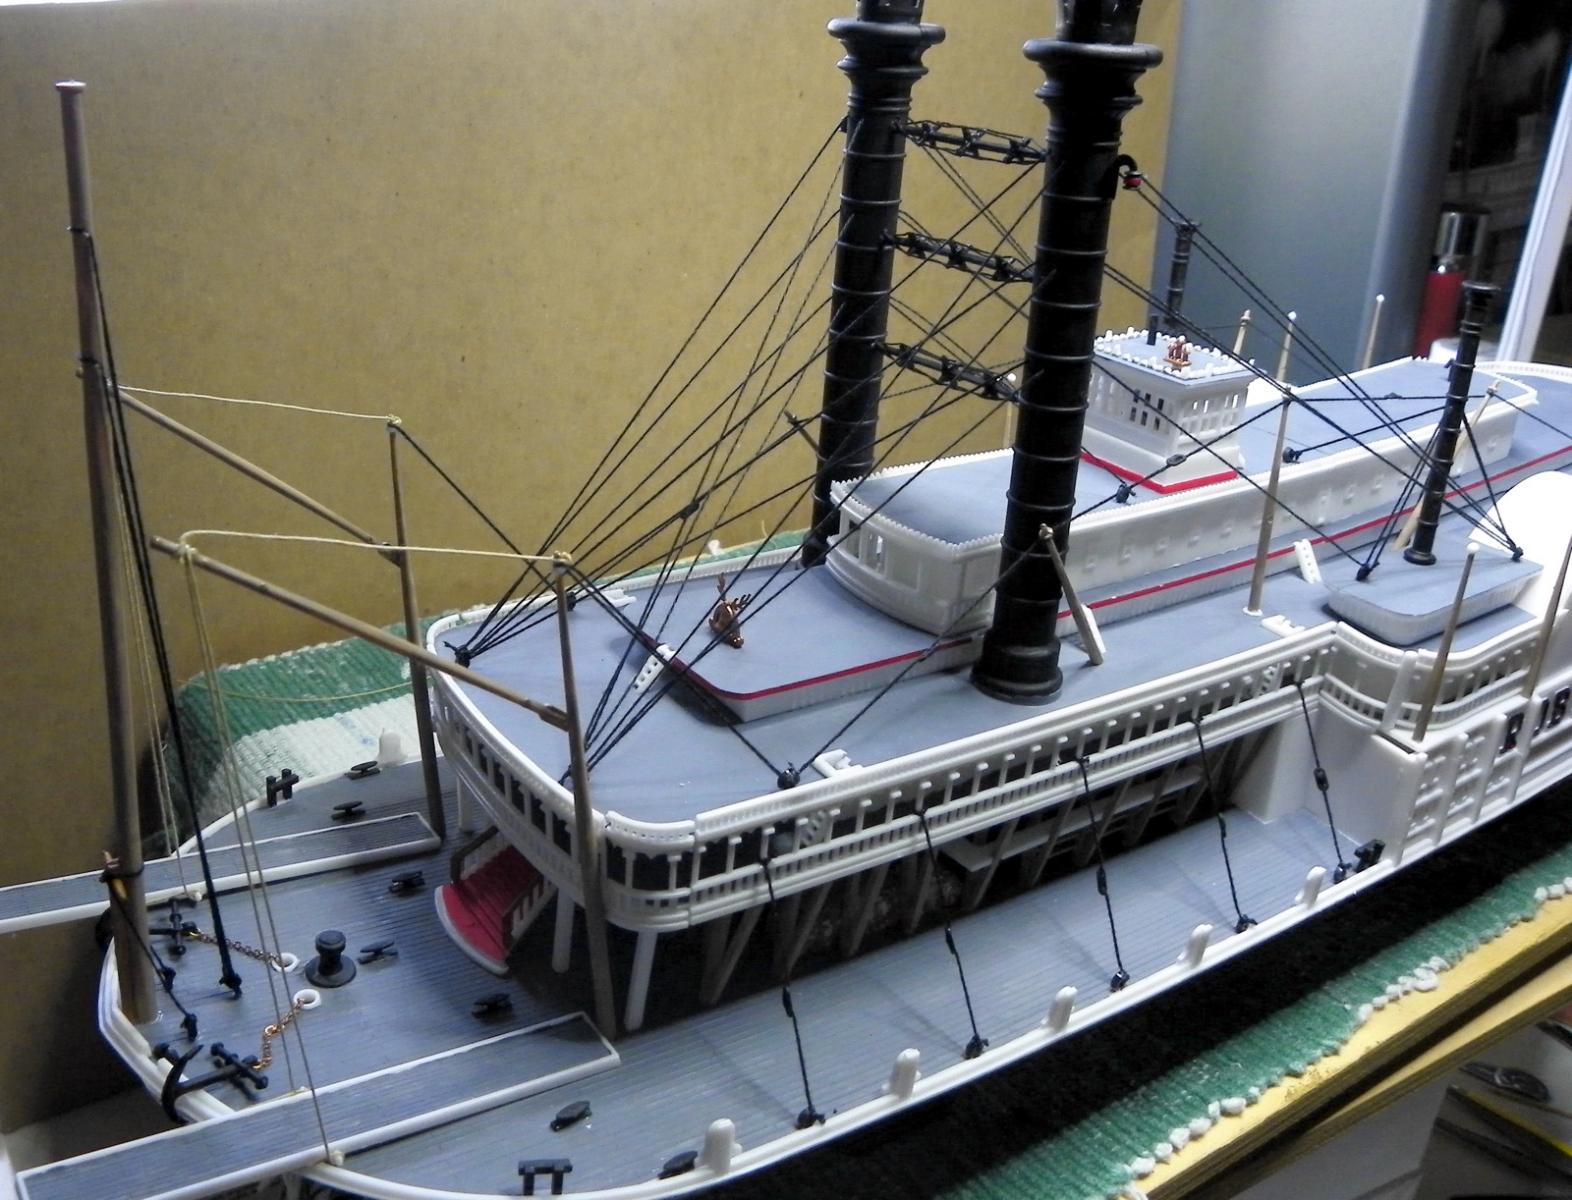
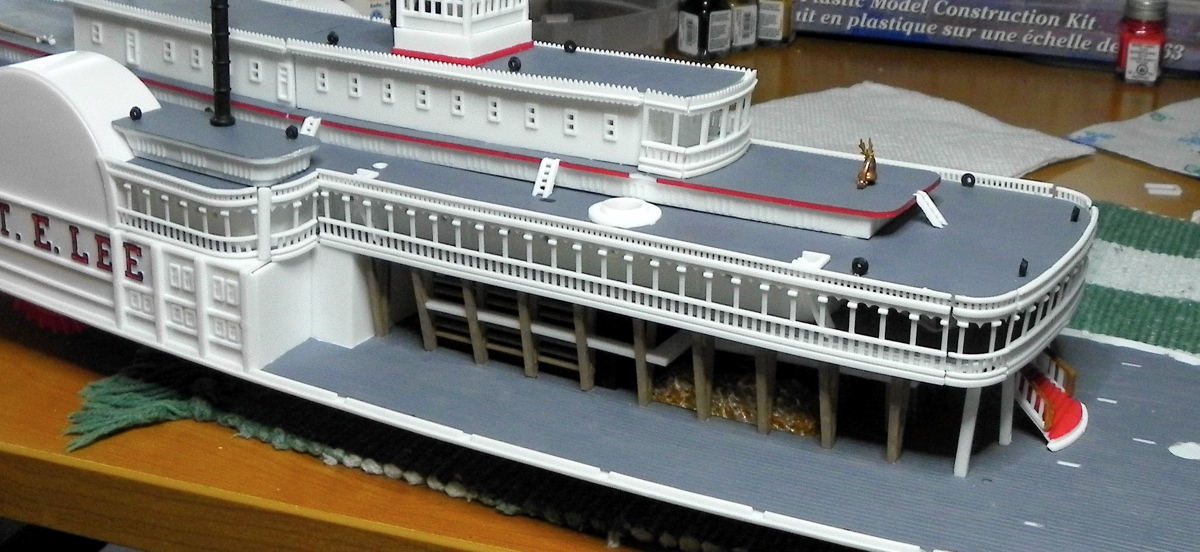
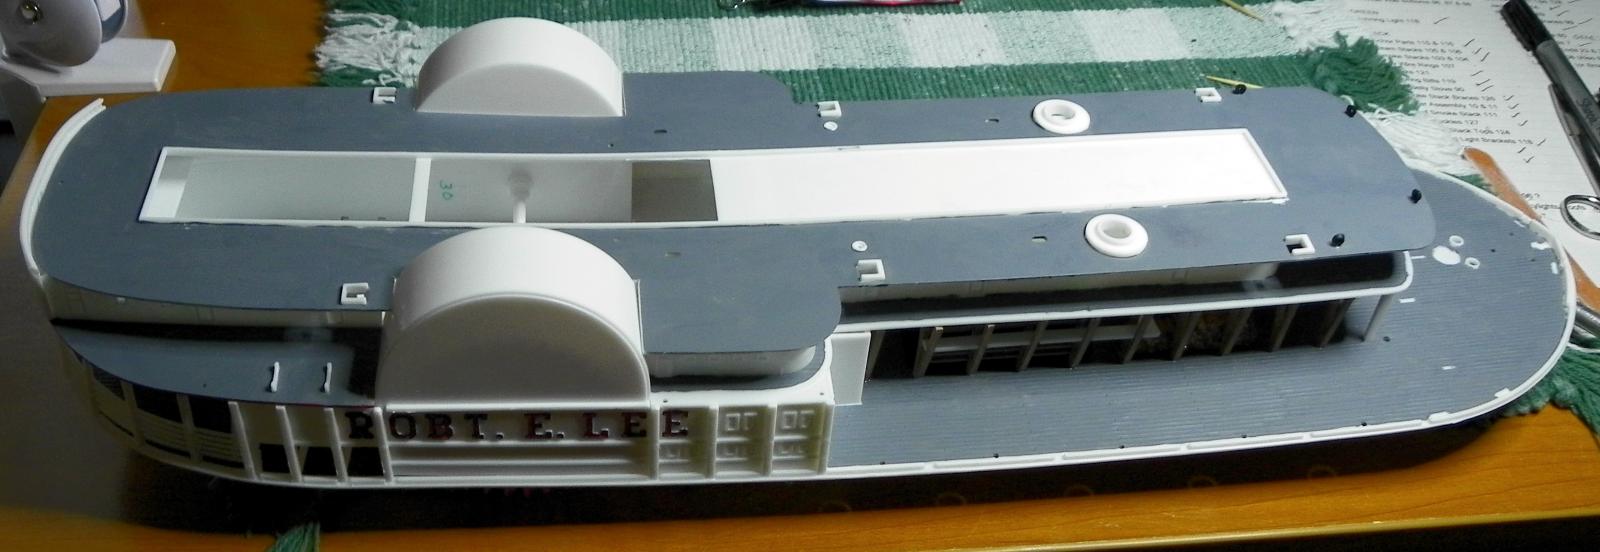
Now that I have installed the Upper Deck A, I can begin to redo the sections I messed up on earlier. The first thing was to attach 6 ladders from the Boiler Deck to the Upper Deck B and 6 Guy Wire Rings to the Upper Deck C. The Engine Room Skylights D were glued to the Upper Deck on the inside of the Paddle Wheel Housings and 2 Guy Wire Rings E were added to each Skylight.
The Forward Deck Section F and the Rear Deck Section G were then glued to the Upper Deck. The Front and Rear Cabin Walls and Roofs H were assembled and attached. The Ship’s Bell J, Rear Smoke Stack K, 5 Ladders L, and 4 Guy Wire Rings M were added.
- hexnut, Clyde Puffer and Fright
-
3
-


USS Constitution Masts
in Masting, rigging and sails
Posted
I'm building the Revell 1/96 USS Constitution and I'm a bit confused about the placement of the Yards and the Studding Sail Booms. If I rig the ship with full sails the Yards are in the raised positions and the Booms are in the Outboard positions. Is this correct?