HOLIDAY DONATION DRIVE - SUPPORT MSW - DO YOUR PART TO KEEP THIS GREAT FORUM GOING! (Only 20 donations so far - C'mon guys!)
×


Jack12477
-
Posts
5,665 -
Joined
-
Last visited
Content Type
Profiles
Forums
Gallery
Events
Everything posted by Jack12477
-

Bugatti Type 35B by CDW - FINISHED - Italeri - 1:12 Scale
Jack12477 replied to CDW's topic in Non-ship/categorised builds
Double WOW ! -
Bugatti Type 35B by CDW - FINISHED - Italeri - 1:12 Scale
Jack12477 replied to CDW's topic in Non-ship/categorised builds
I'm in
-
SU-85 WW2 Soviet Tank Destroyer by CDW - MiniArt - 1:35 Scale
Jack12477 replied to CDW's topic in Non-ship/categorised builds
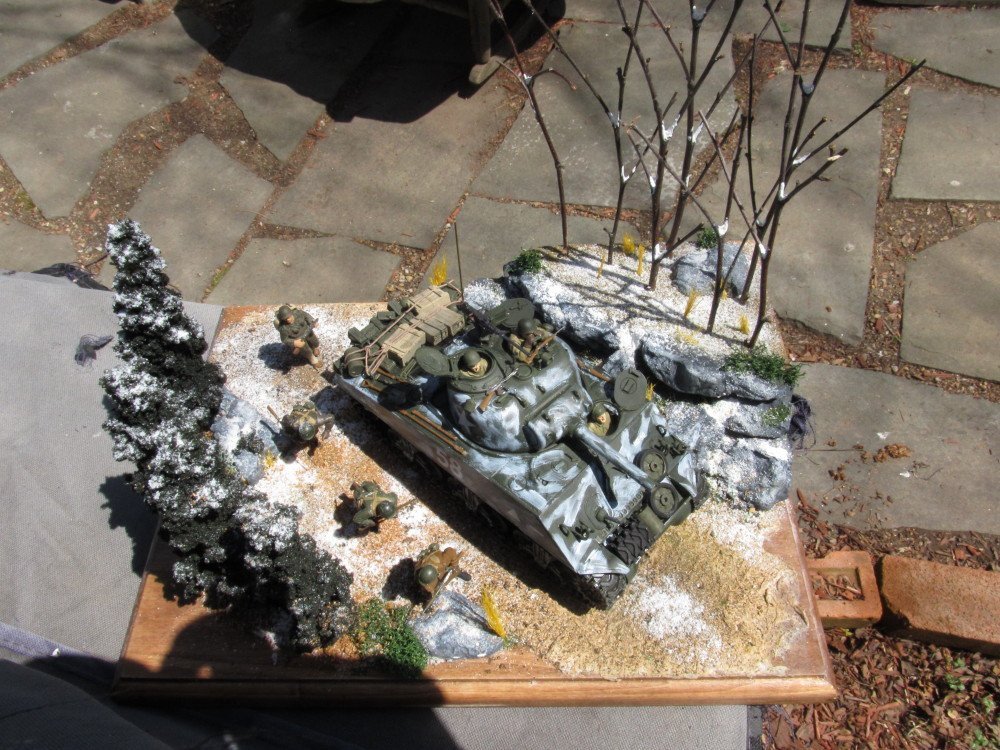
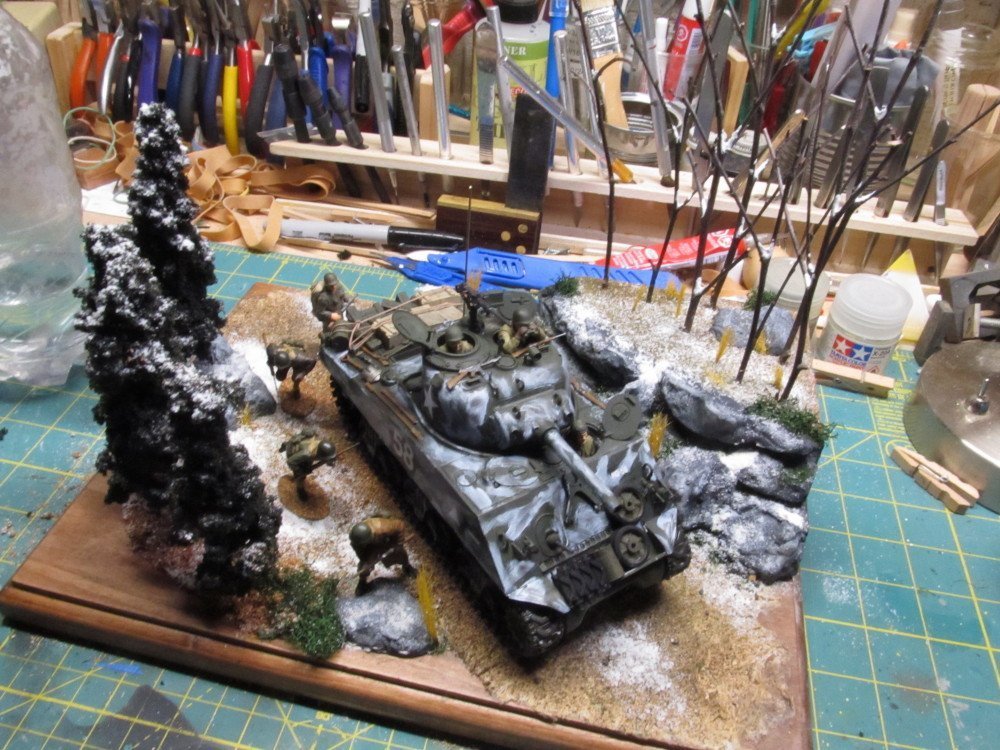
What did you use for snow ? Woodland Scenics ? Looks good ! -
Is that a Hudson River sloop or Jersey coastal sloop or ??? in those vintage photos.
-
I remember as a "wee-one" Dad and his brothers talking about O, OO and O27 scale/guage, but I don't recall the particulars either.
-
S scale came out sometime around 1948-1950 and I believe was introduced by American Flyer as the first 2 rail DC current model trains. My Dad had O scale 3 rail with I believe an AC transformer which required a rather clumsy method of reversing direction of the engine. Sometime after 1948 he sold his O scale railroad and bought American Flyer S scale with 2 rail track which he said was easier to wire. I was a young-un then 😉😇. He later sold the American Flyer and bought HO scale. He still had his layout at age 100.
-
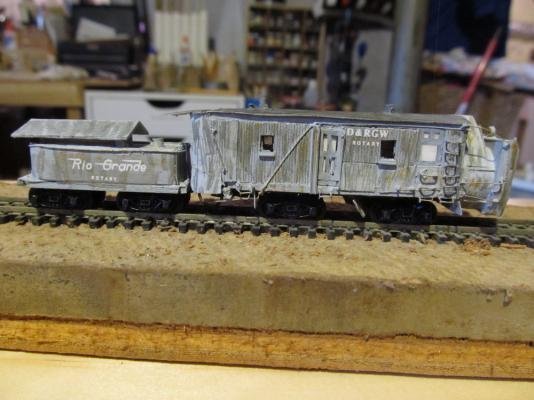
I started my N scale when Rapido first brought to the states around 1967. Still have all the original track, switches, etc, plus rolling stock. My layout was dismantled to make space for my son's HO scale US1 Trucking set. We go to ride the D&RGW Durango & Silverton narrow guage back in 1977. Built a card stock and wood model of the Rotary in N scale. Will be following along.
-
Glenn Curtis Trivia: "Although his formal education extended only to eighth grade, his early interest in mechanics and inventions was evident at his first job at the Eastman Dry Plate and Film Company (later Eastman Kodak Company) in Rochester, New York.[3] He invented a stencil machine adopted at the plant and later built a rudimentary camera to study photography.[3]" wikipedia Later known as the mimeograph machine
-
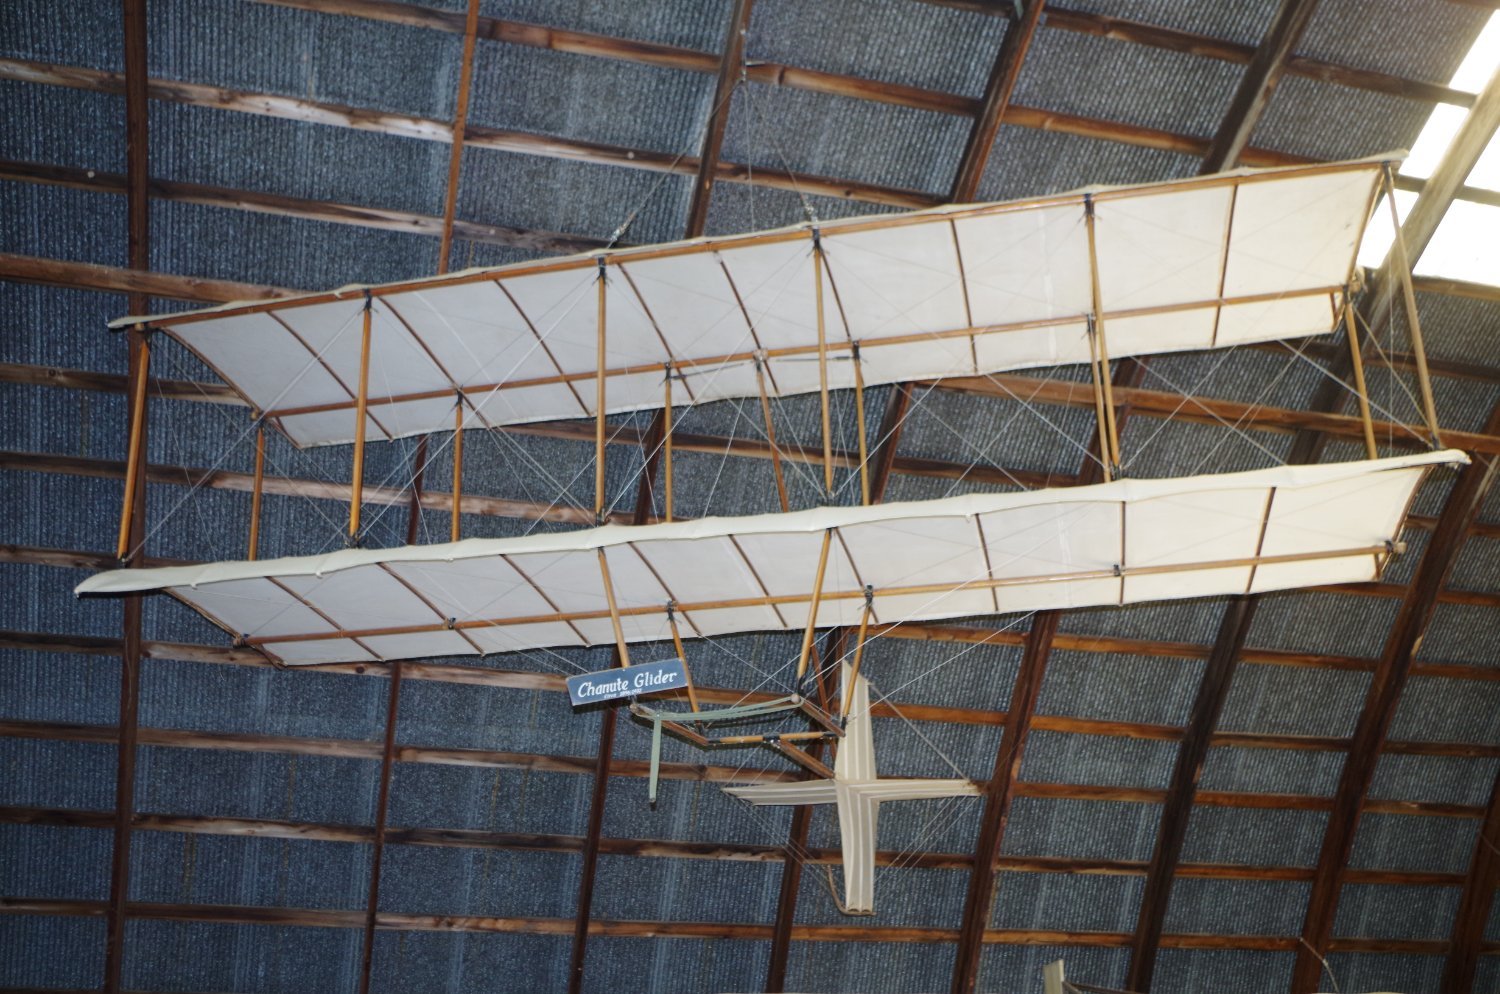
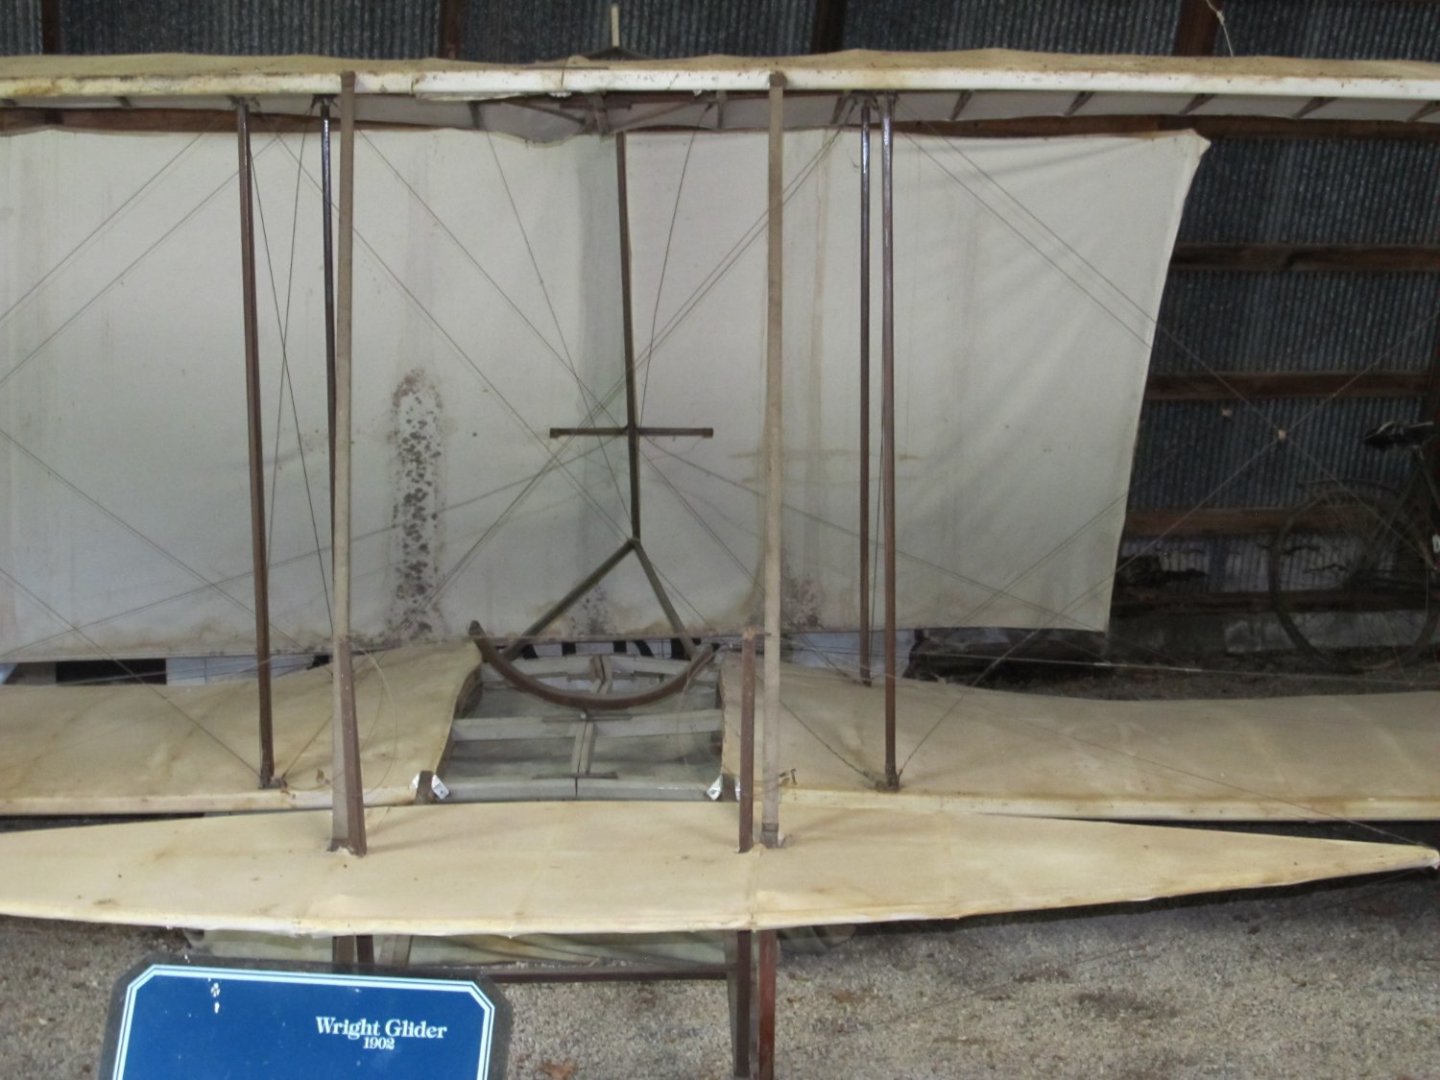
Chanute's Glider

-
From Olde Rhinebeck Aerodrome Museum

-
You might want to direct him to this thread US Coast Guard amazing stories here on MSW.
-
SU-85 WW2 Soviet Tank Destroyer by CDW - MiniArt - 1:35 Scale
Jack12477 replied to CDW's topic in Non-ship/categorised builds
Same here, except I was newly married, in my late twenties, living in apartment. We had to climb down a lower balcony to get the snow drift away from the building door, then had to dig 2 cars out of a snowdrift. Then went back inside and partied with the other tenants. -
SU-85 WW2 Soviet Tank Destroyer by CDW - MiniArt - 1:35 Scale
Jack12477 replied to CDW's topic in Non-ship/categorised builds
That hurricane nearly bankrupt the two major insurance companies in Florida. Even the offshore reinsurance companies had to struggle to cover the losses. -
SU-85 WW2 Soviet Tank Destroyer by CDW - MiniArt - 1:35 Scale
Jack12477 replied to CDW's topic in Non-ship/categorised builds
After watching that video and the TV NEWS footage of the storm surge flooding, I think I’d rather endure 30 below windchill and 4 feet of snow than even one of those hurricanes. Stay safe ! -
Chris, just consider the source and ignore it. I think if he had half a brain it would be lonesome. Congrats on another great model
- 150 replies
-
- 11
-

-

-
LBI is Long Beach Island New Jersey, Barnegat Lighthouse is located at the northern tip. PNW is Pacific Northwest, Oregon, Washington State, maybe Northern California
-
As long as you are upright, ventilating, mobile, and consuming nourishment you're doing good Denis
-
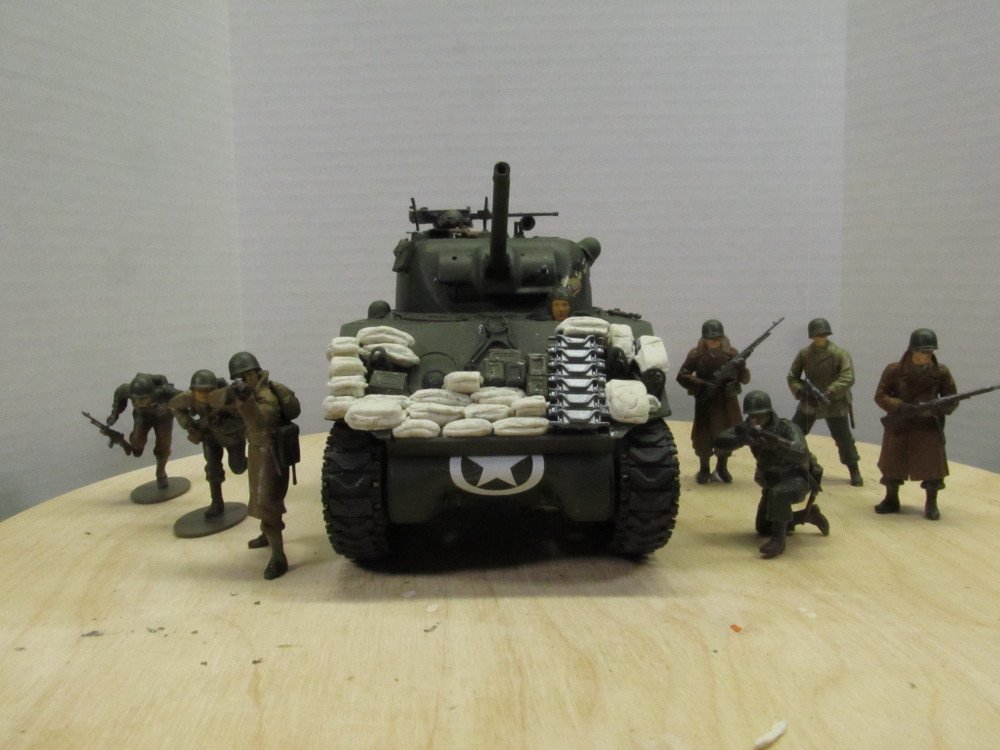
Alan see photos of my 1:35 figures with bases. I just glued them to the diorama base then covered them with Woodlands Scenics material, hides them well
-
I knew the Librarian would locate copies 😊😇
-
Crumpled newspaper, covered in vinyl mesh window screen strips, or narrow strips of thin cardstock woven into a grid, then covered in standard kitchen paper towels [ use the brand with small tear off strips] soaked in very very runny hydrocal to form the base. Let it set up. Then add more hydrocal over that to build up the terrain. See if you can find any Kalmback publications on model RR scenery, even old issues of Model Railroader or Railroad Model Craftsman magazines.
-
You could add some 1/16 or 1/8 inch square stock to the inside 4 corners of each tower for extra rigidity. I can't tell from the photos which size would be suitable. But glue them vertically inside each tower in each corner.
-
Timber-framed outdoor kitchen - Cathead - 1:1 scale
Jack12477 replied to Cathead's topic in Non-ship/categorised builds
And don't raise cows for milk or meat. Worst methane producers on planet ! 🤣🤣😇 -
Good to see you back, Alan. Castle is looking good.
-
Timber-framed outdoor kitchen - Cathead - 1:1 scale
Jack12477 replied to Cathead's topic in Non-ship/categorised builds
As programmers for a major computer manufacturer, a colleague and I used to have a ceramic mushroom on our desks. When asked what it was, we would respond that is a "programmer's flower" .......... -
Timber-framed outdoor kitchen - Cathead - 1:1 scale
Jack12477 replied to Cathead's topic in Non-ship/categorised builds
Yep ! Keep 'em in the dark and cover them in s............