Jack12477
-
Posts
5,674 -
Joined
-
Last visited
Content Type
Profiles
Forums
Gallery
Events
Everything posted by Jack12477
-
 Ole woodcarver trick: using a sharp blade, make a stop cut across the plank perpendicular at two points along the plank. Then use your Veritas miniature chisels to carve away section of plank till you get to the base decking. If you place the bevel edge of chisel down flat against the plank then raise it slightly you can use it as a small knife blade. Reverse it so the bevel is up after you have enough material removed and use it as a regular chisel. The stop cuts will prevent any unwanted tear out. Practice on a piece of scrap planking. You're using the chisel as if it were a plane.
 -
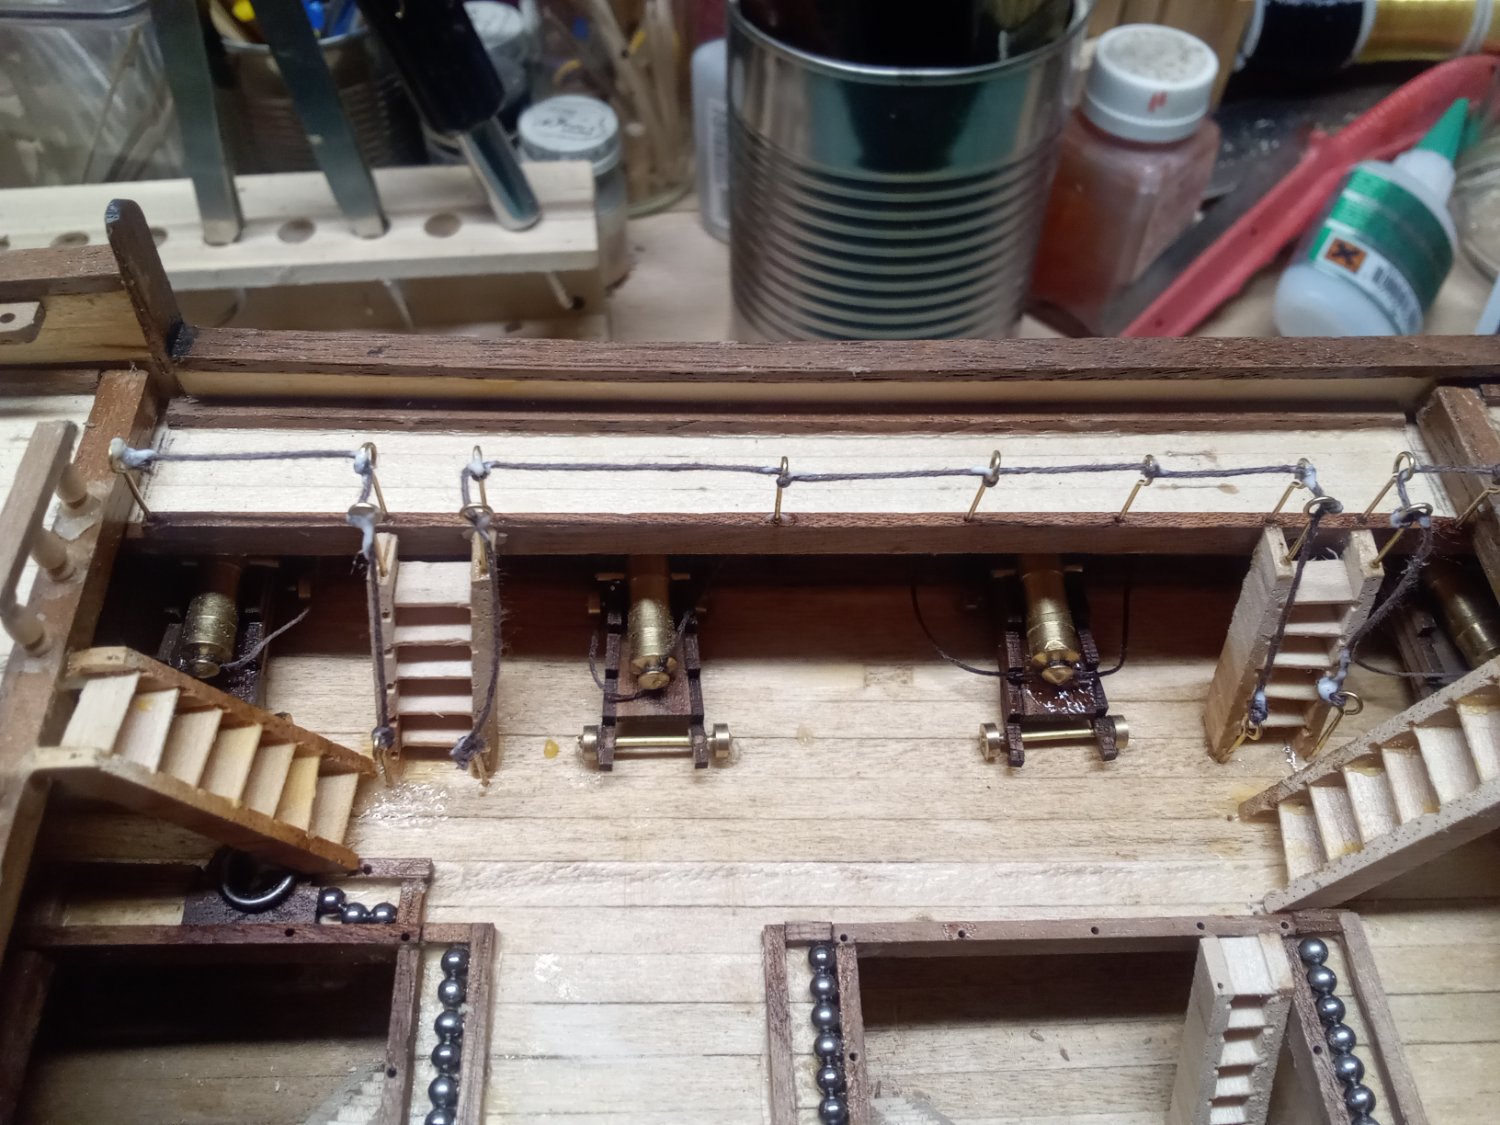
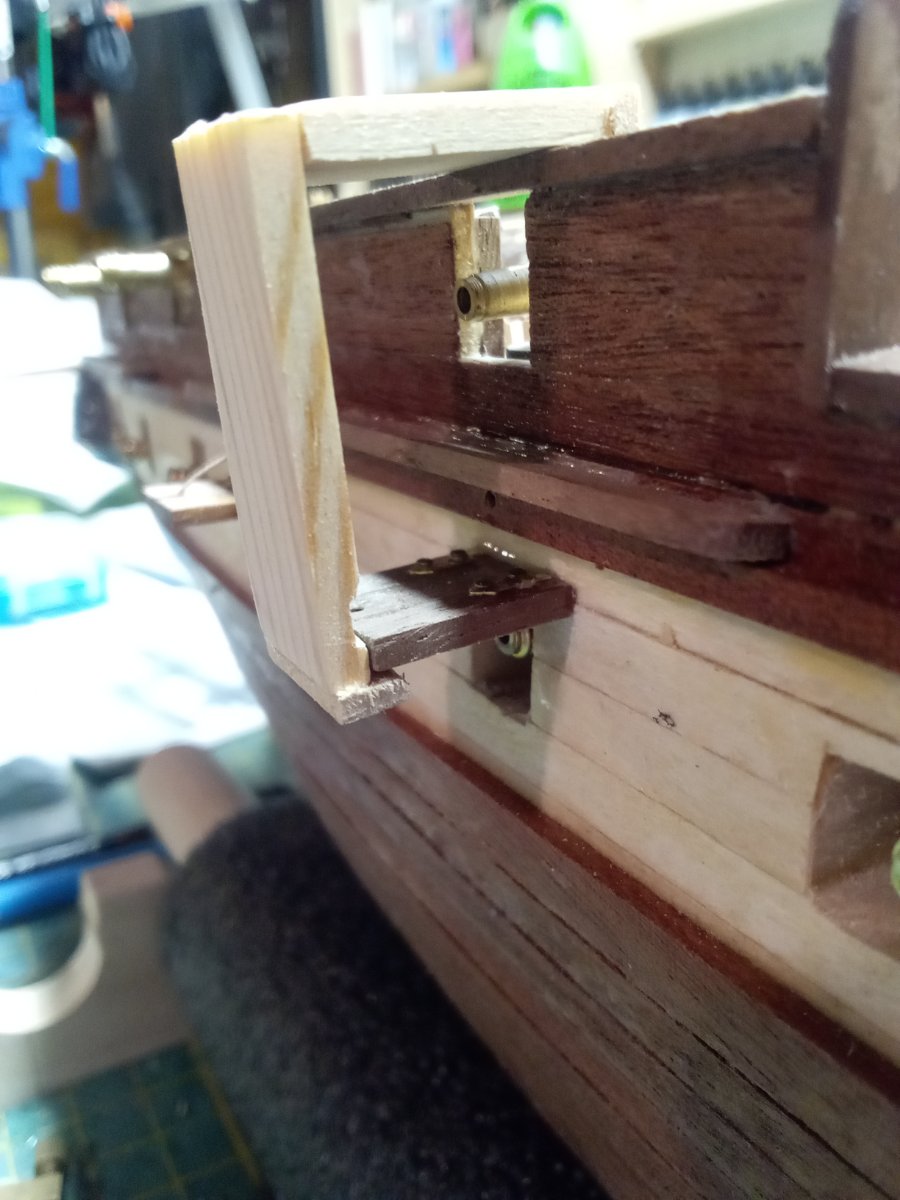
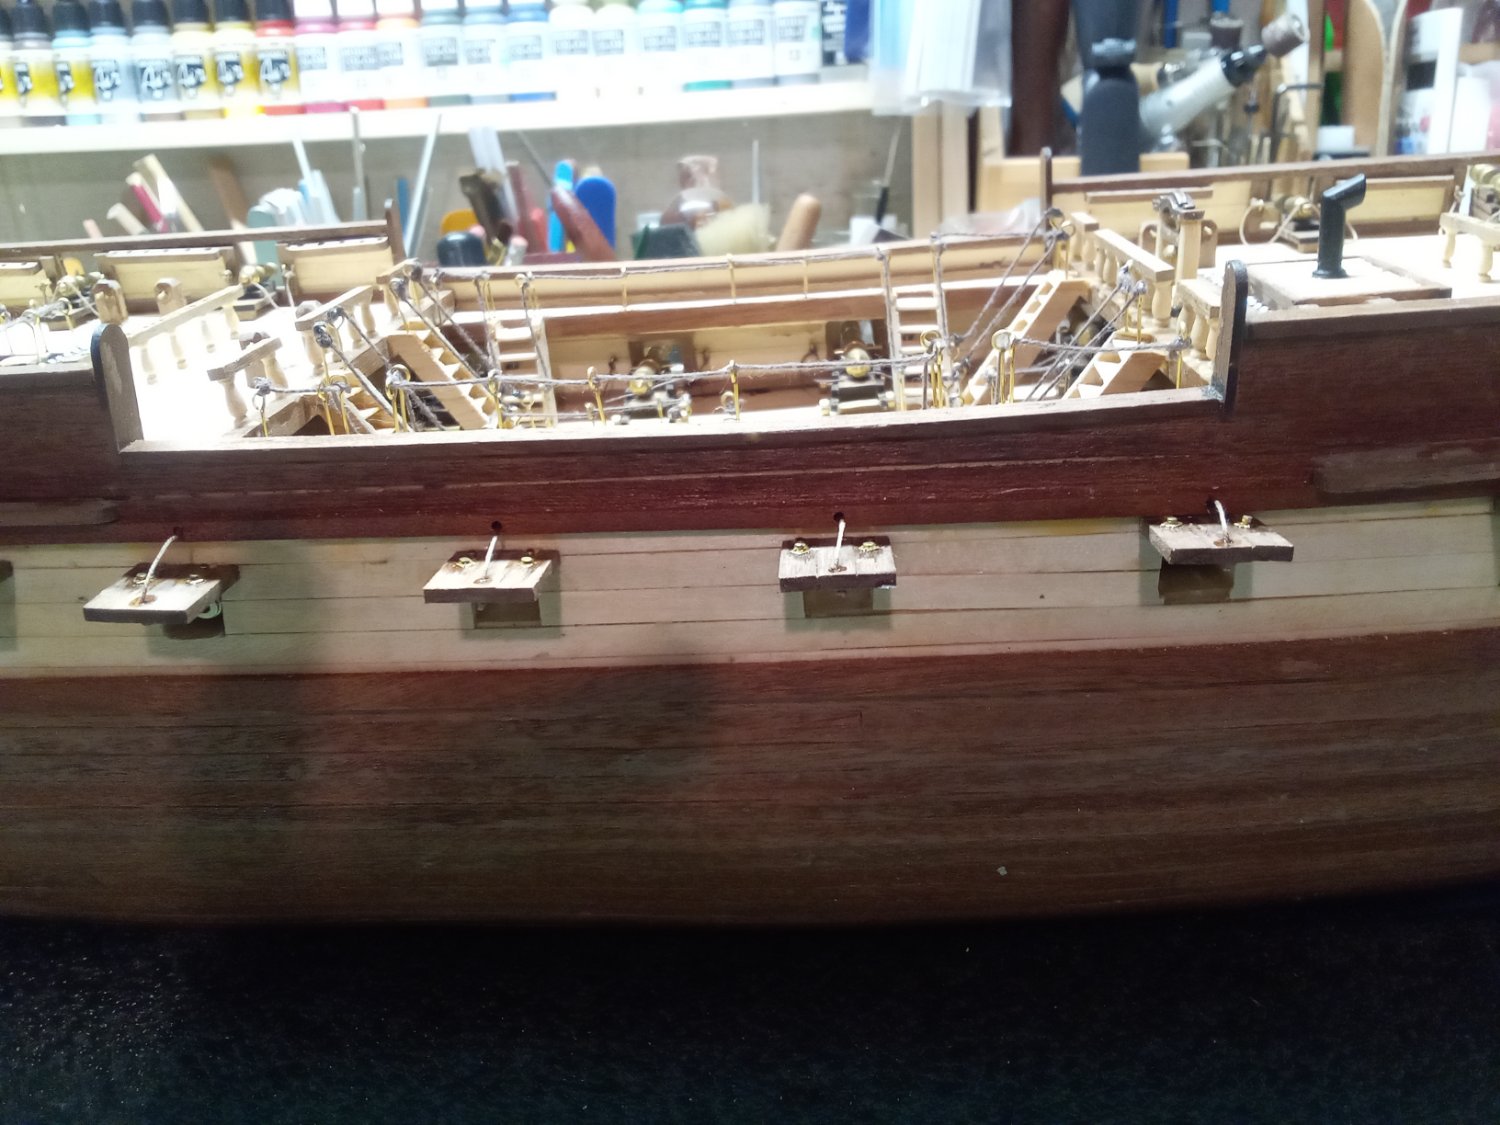
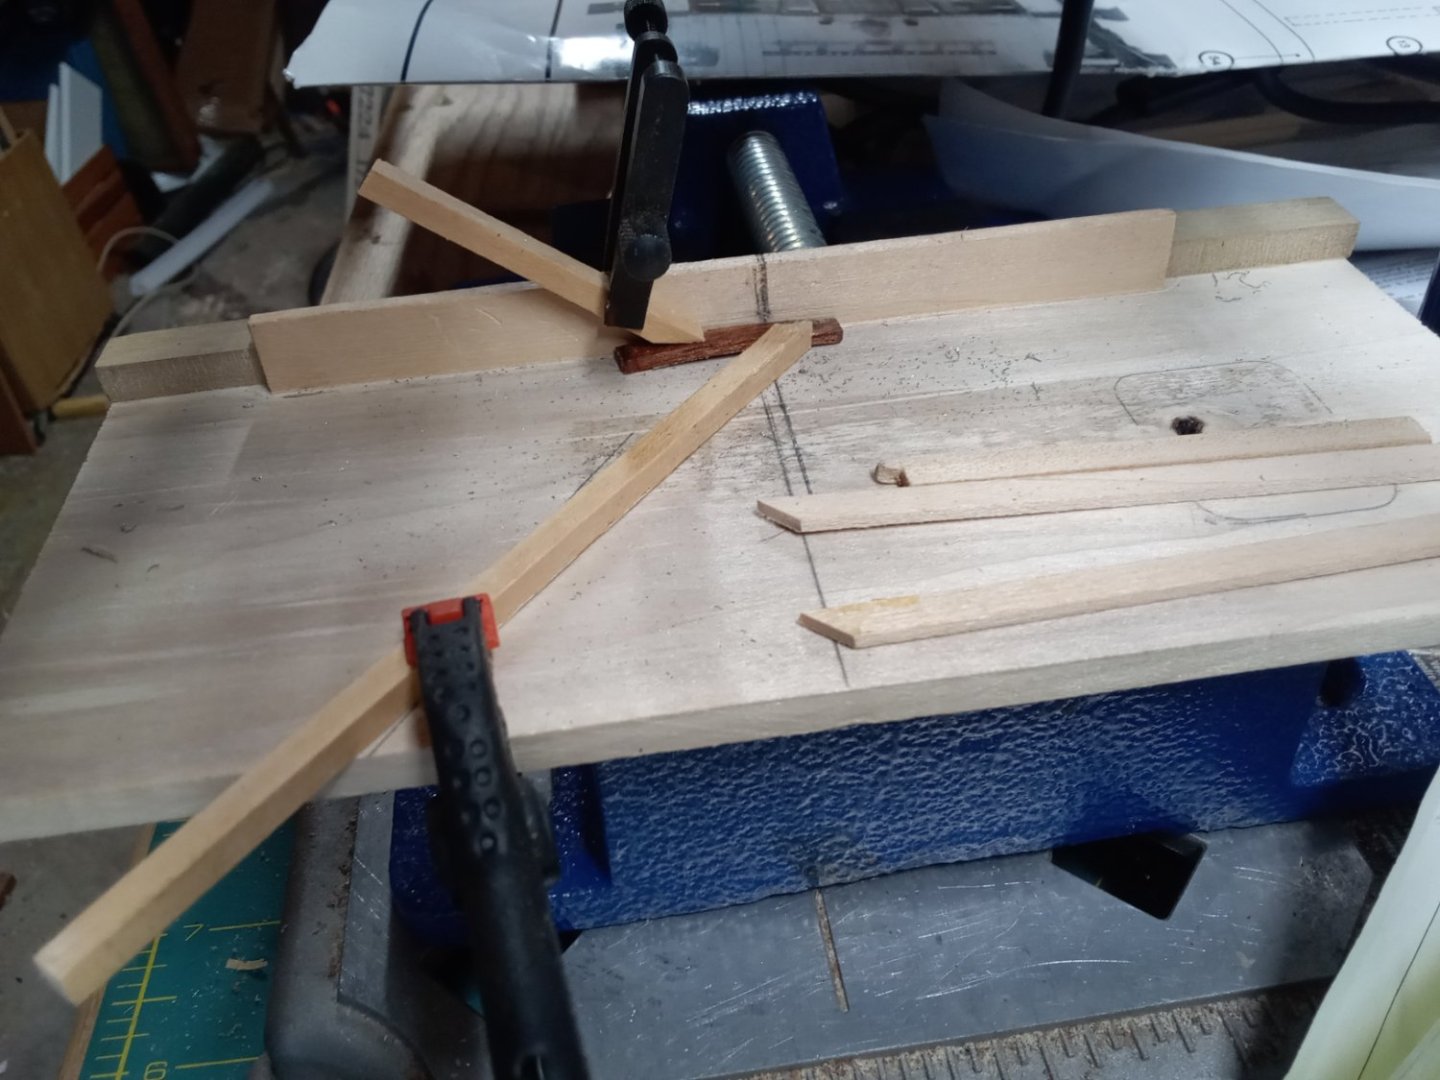
Thanks guys! The jig was created out of frustration. I was using 25 second gap filling CA glue to attach the lids but it just wasn't setting up and trying to hold the lid flush and level with just my fingers wasn't working. PVA glue was even worse setting time. So I had to wing it with the jigs (see photo below), they just hook over the rail and keep the lid snug and level. The weight of the jig provides enough clamping pressure. Gary, @FriedClams the paint collection is a result of all the plastic models I have built over time plus some new jars purchased in anticipation of my next plastic model. 😀 I still have a few jars of Floquil left over from my now defunct N-Scale Model Railroading projects. The layout is gone but the buildings and rolling stock are safely packed away. I'm really enjoying your shadow box dioramas. I

-
Same thing happens here with citiidiots moving up to the country from NYC boroughs, building a house, then complaining about the manure smell, noisy farm animals and equipment emanating from the farm down the road. Complaints got so bad we now have "right to farm" laws to protect the farmers from the citiidiots.
- 332 replies
-
- 11
-

-
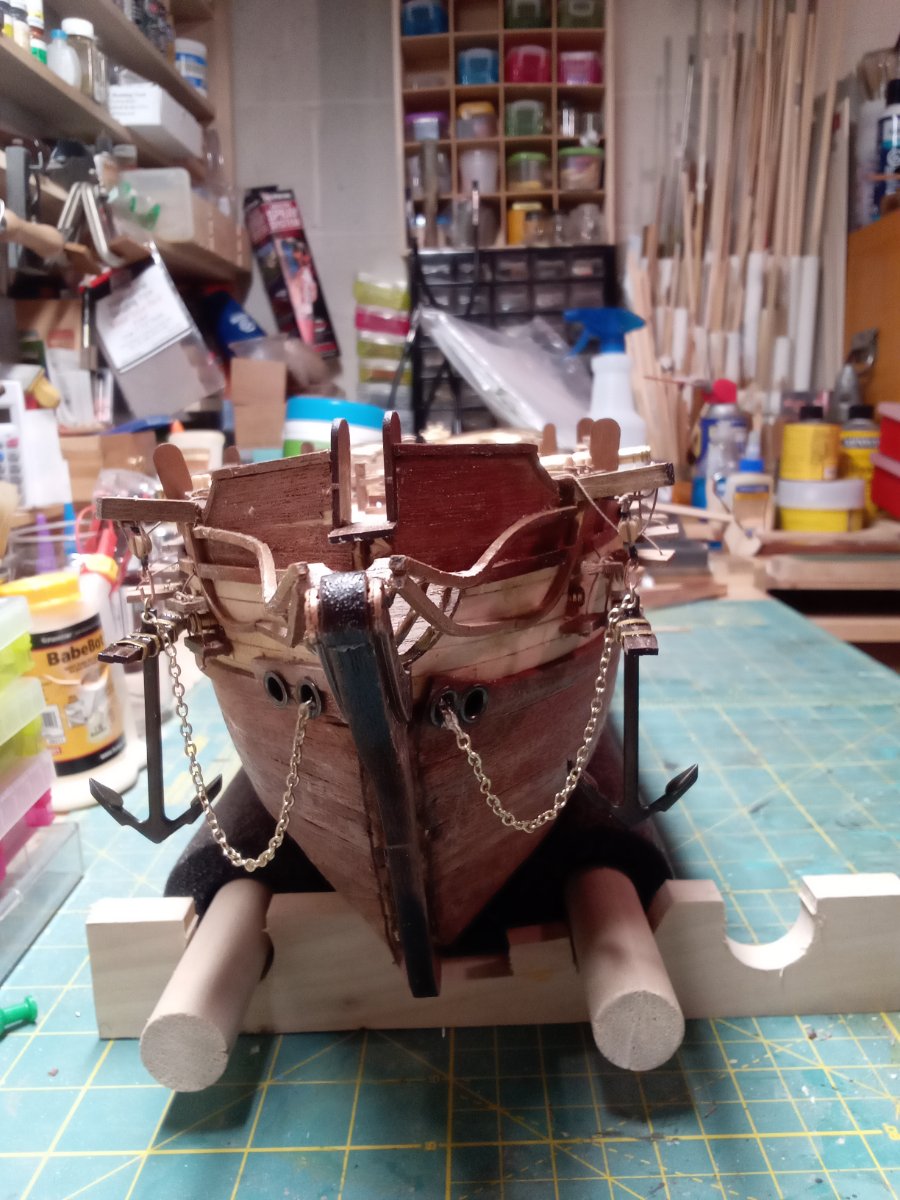
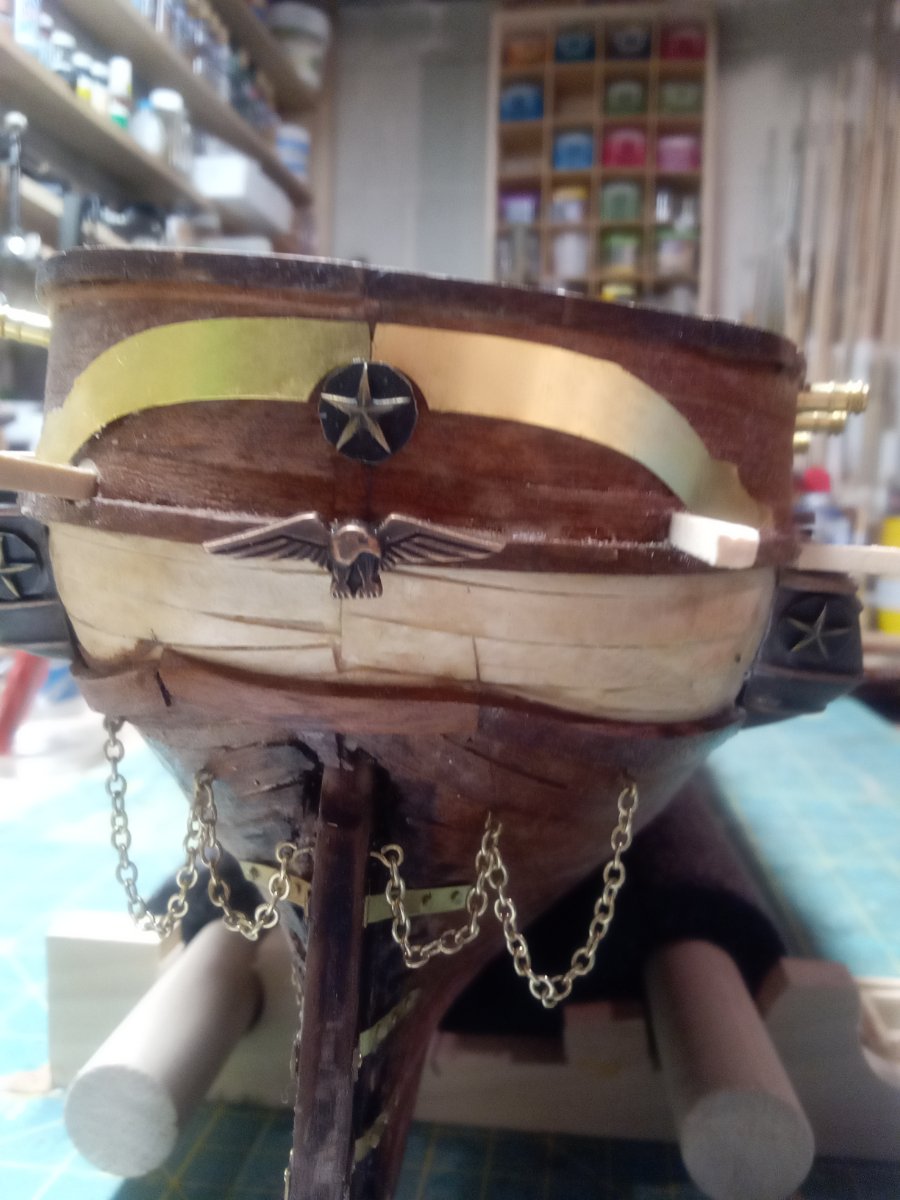
Anchors are now rigged. ⁹


-
Or FORD
-
Forgot some photos


-
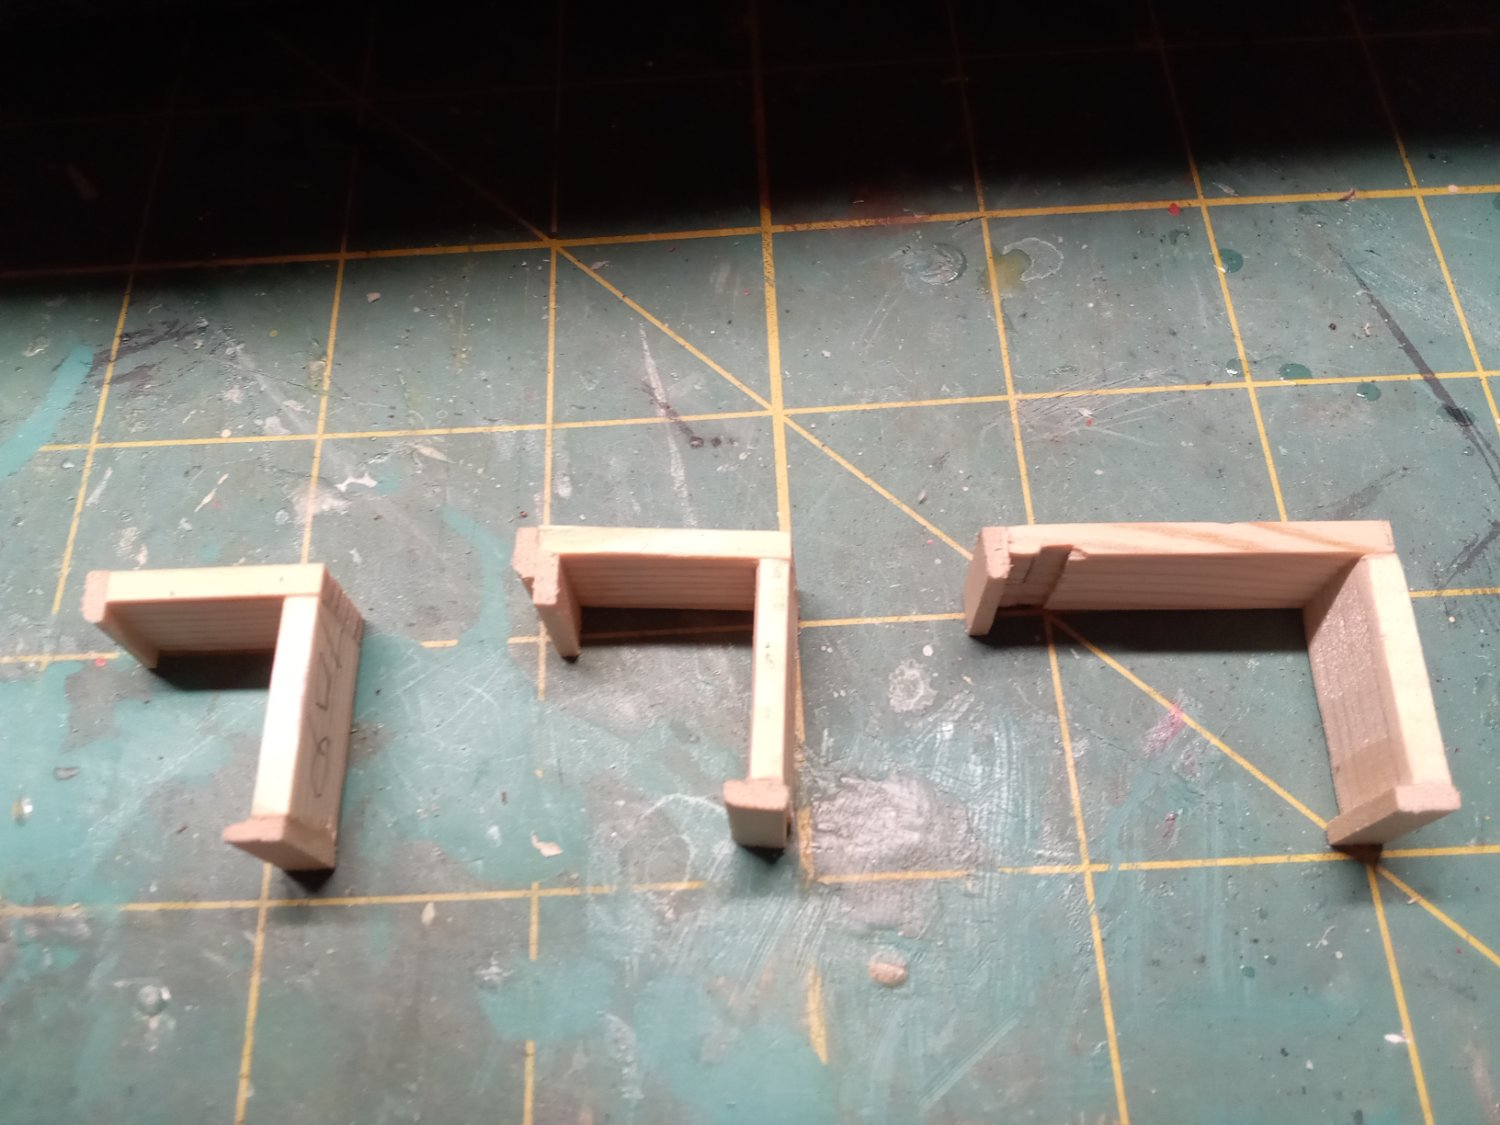
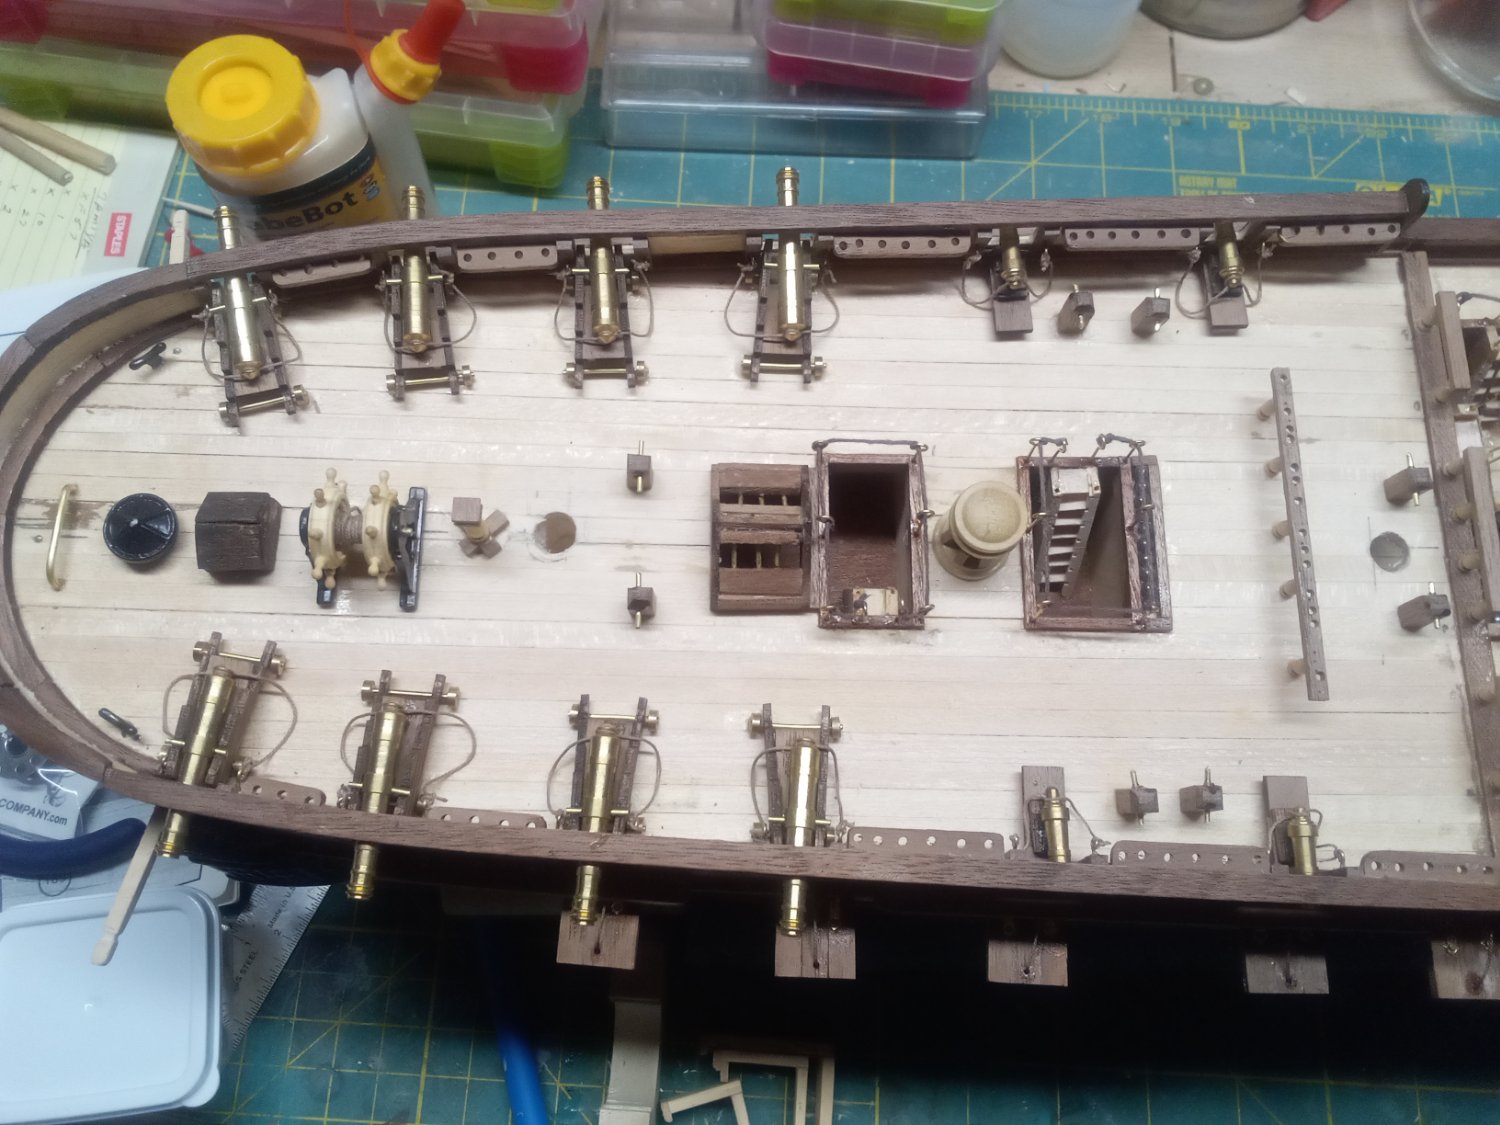
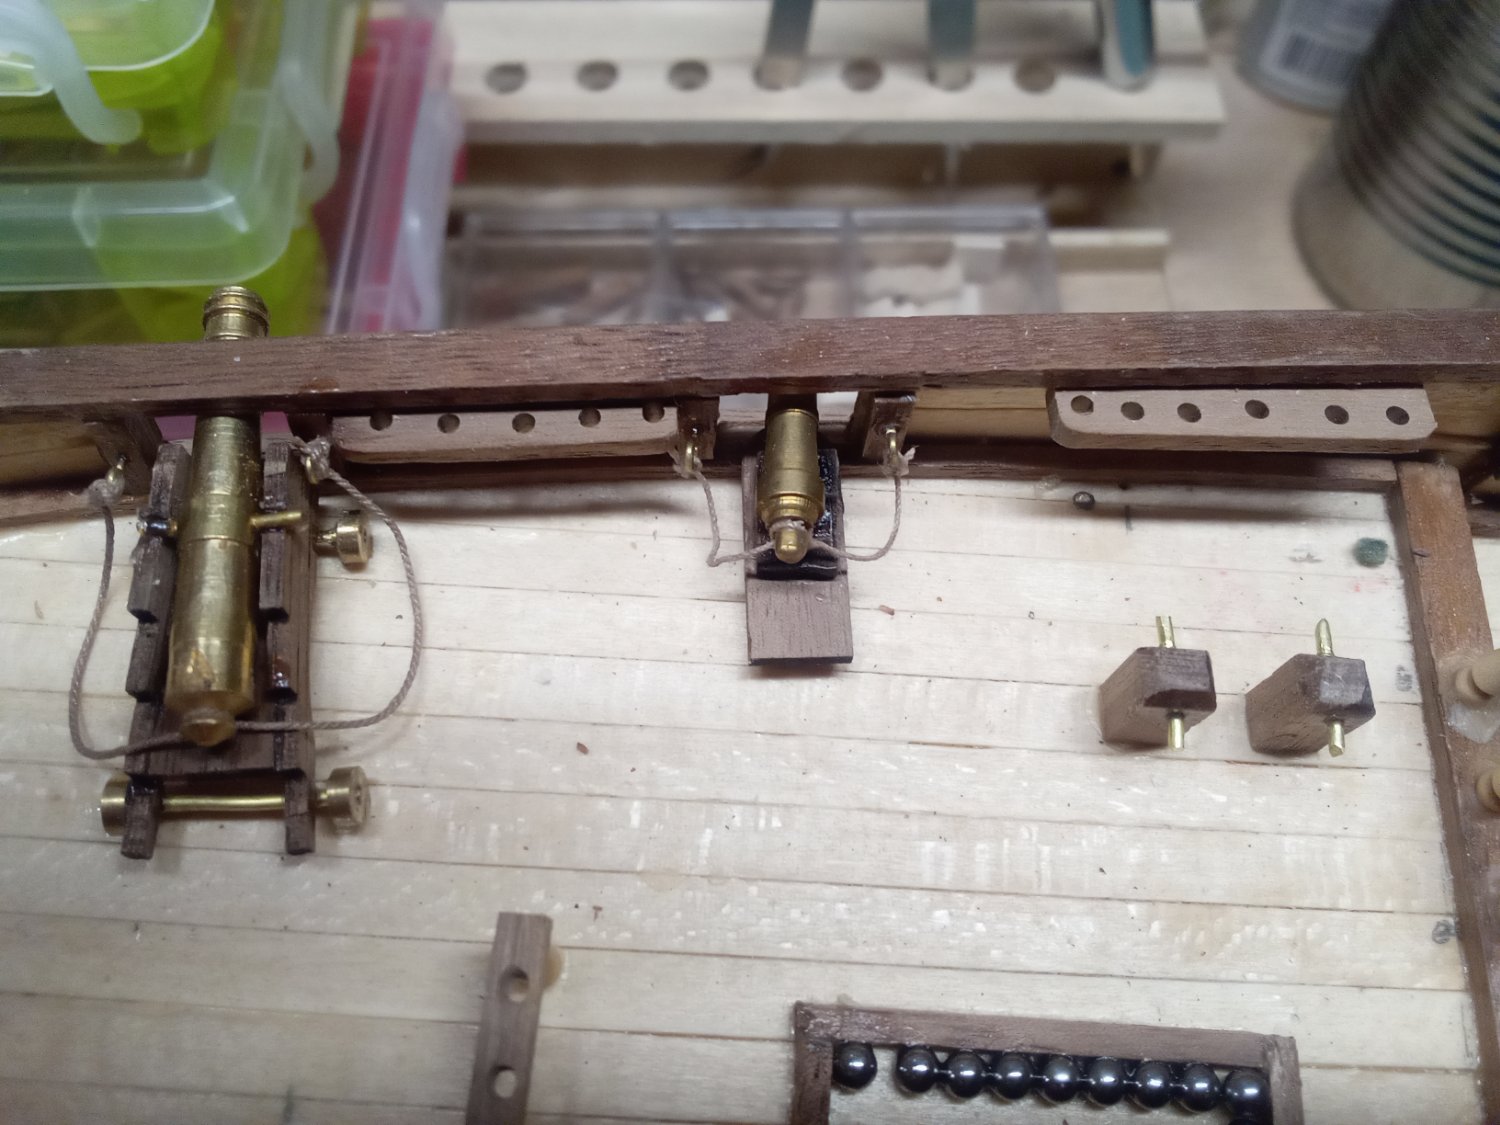
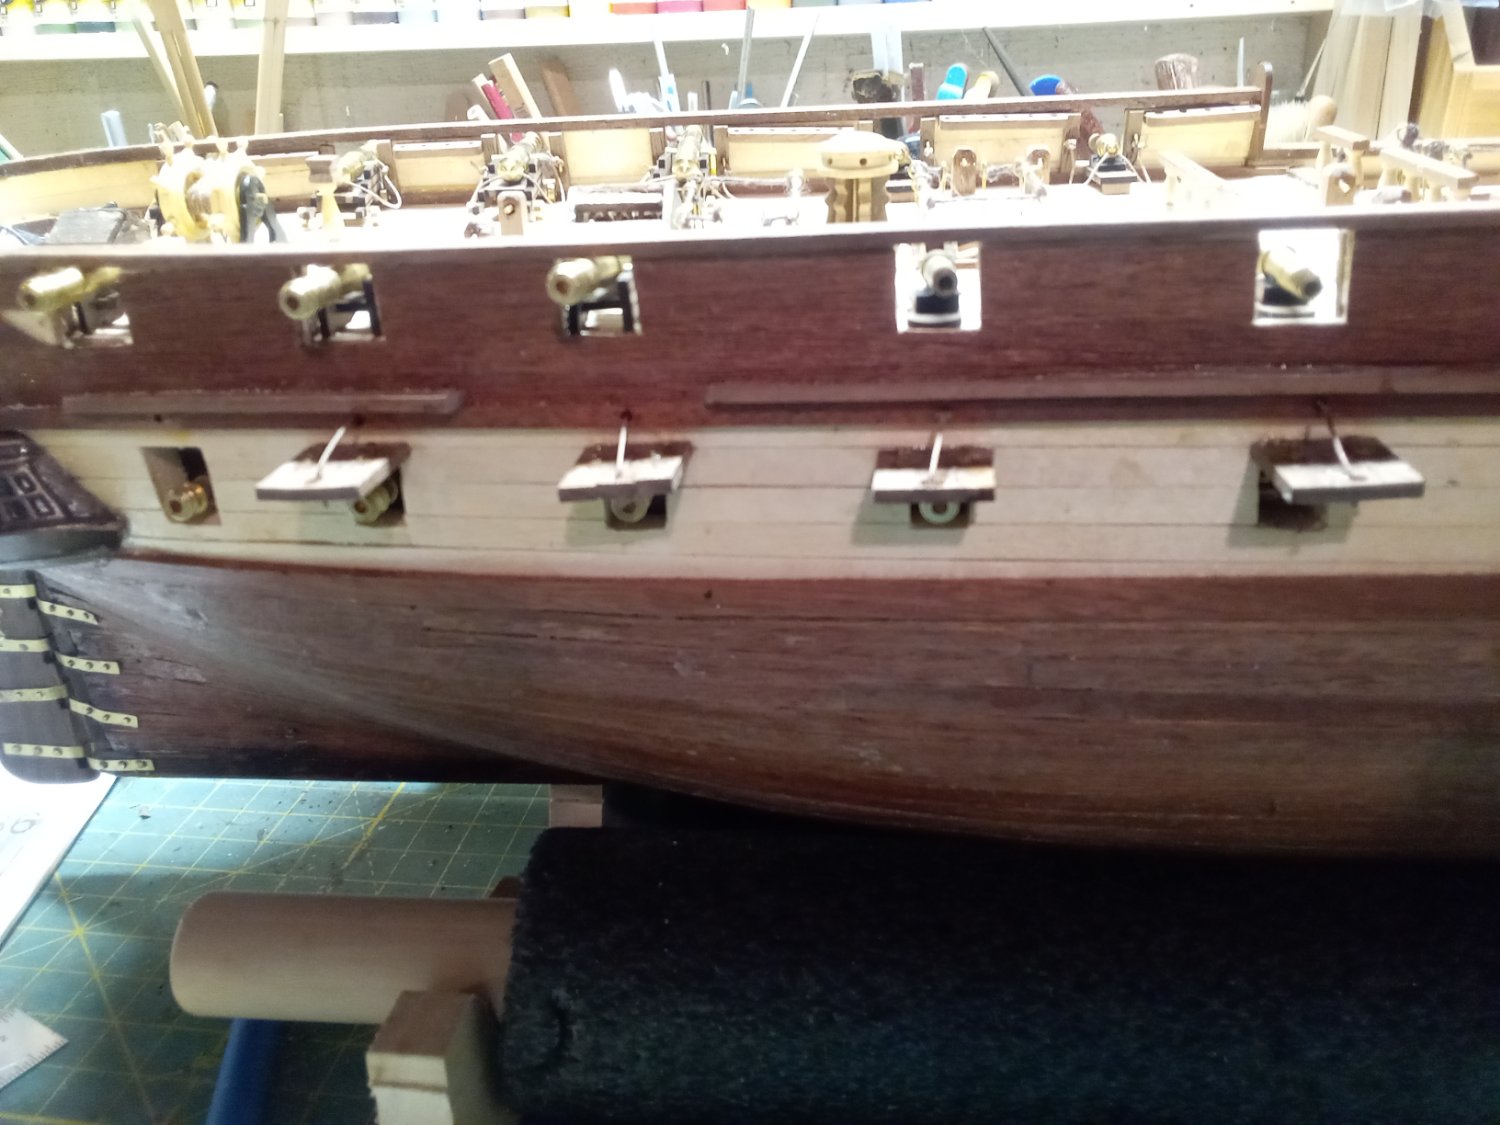
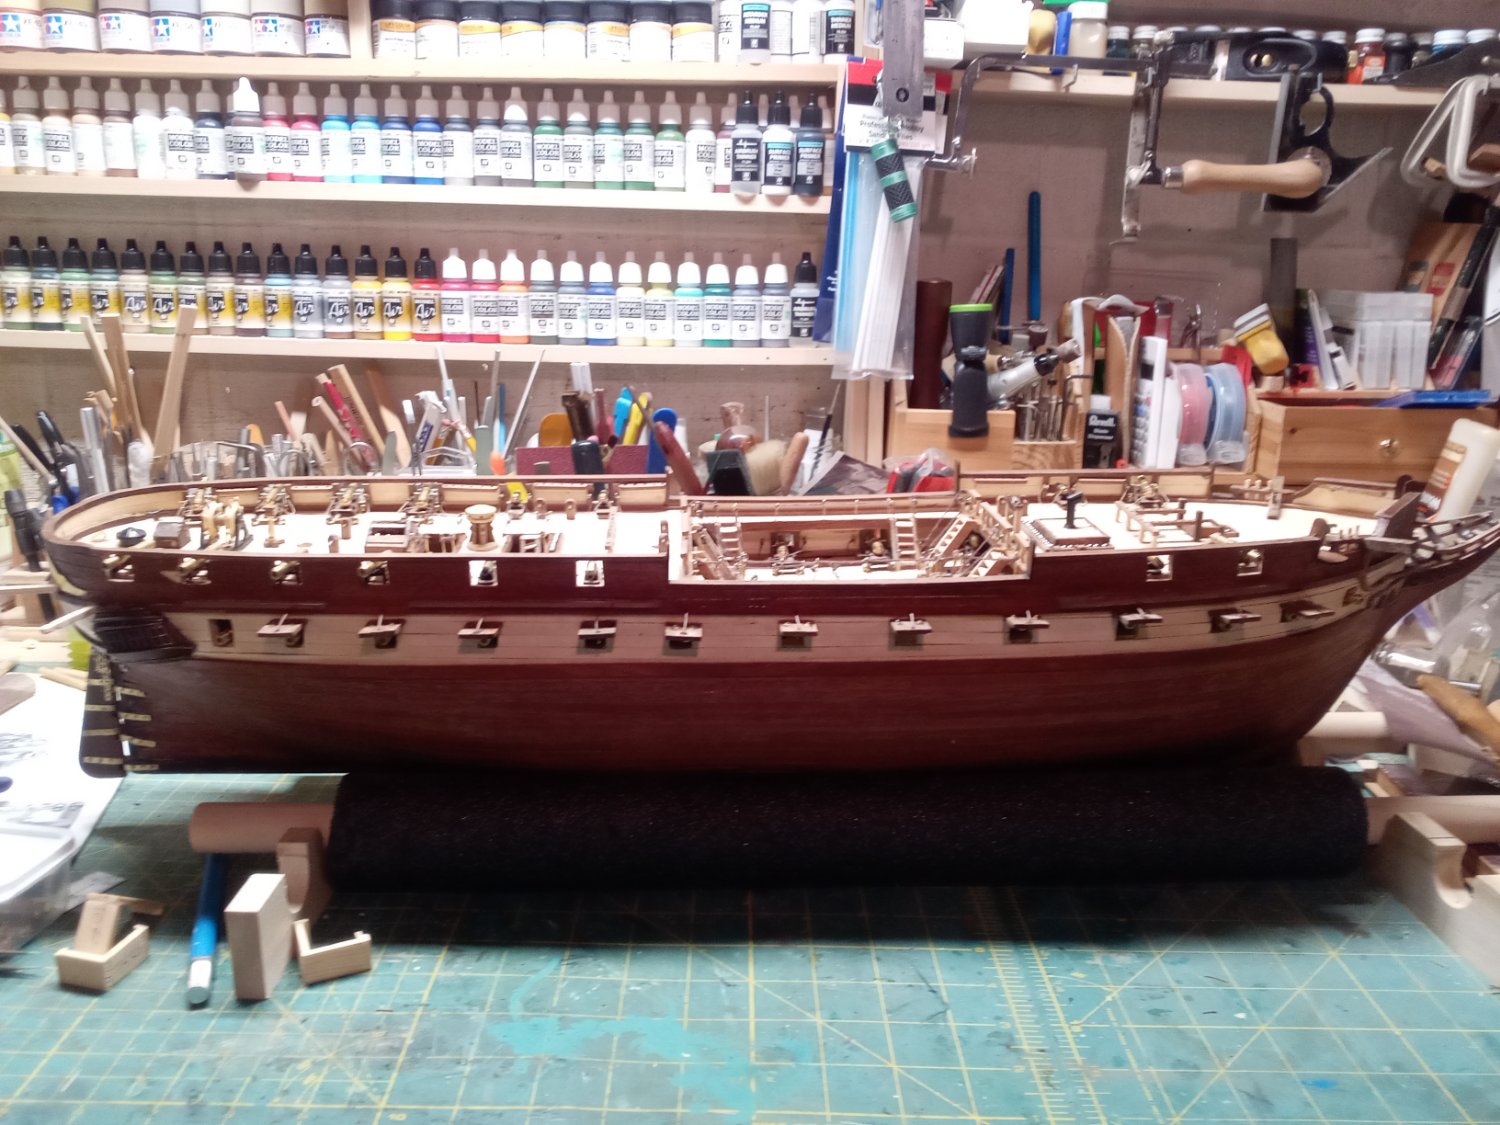
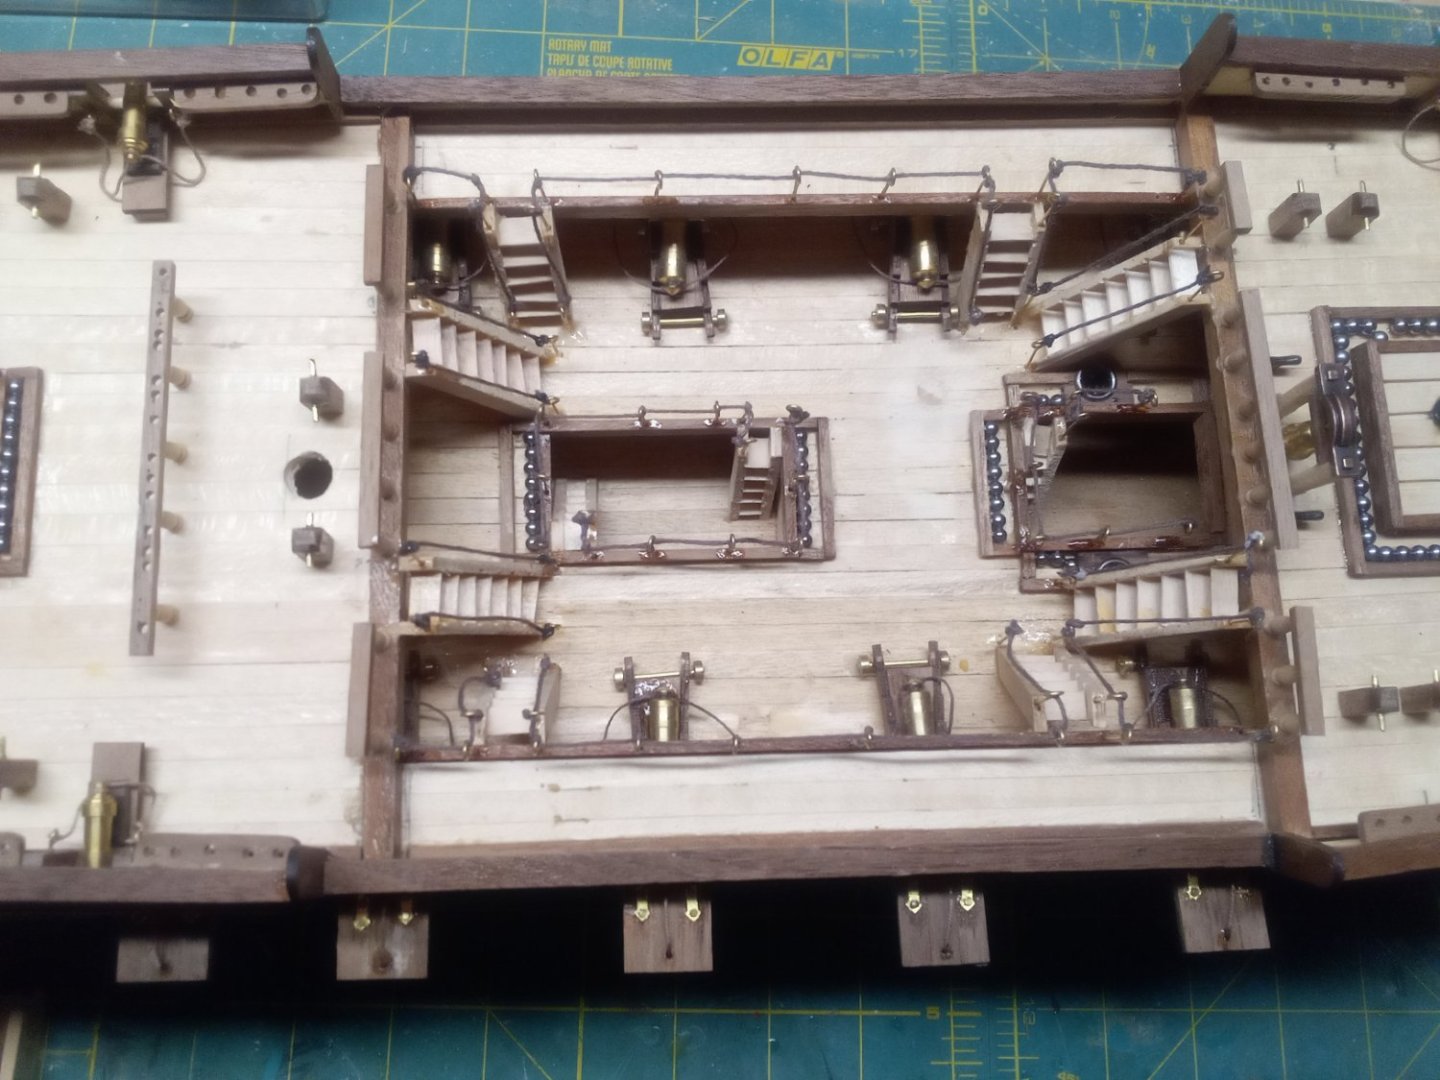
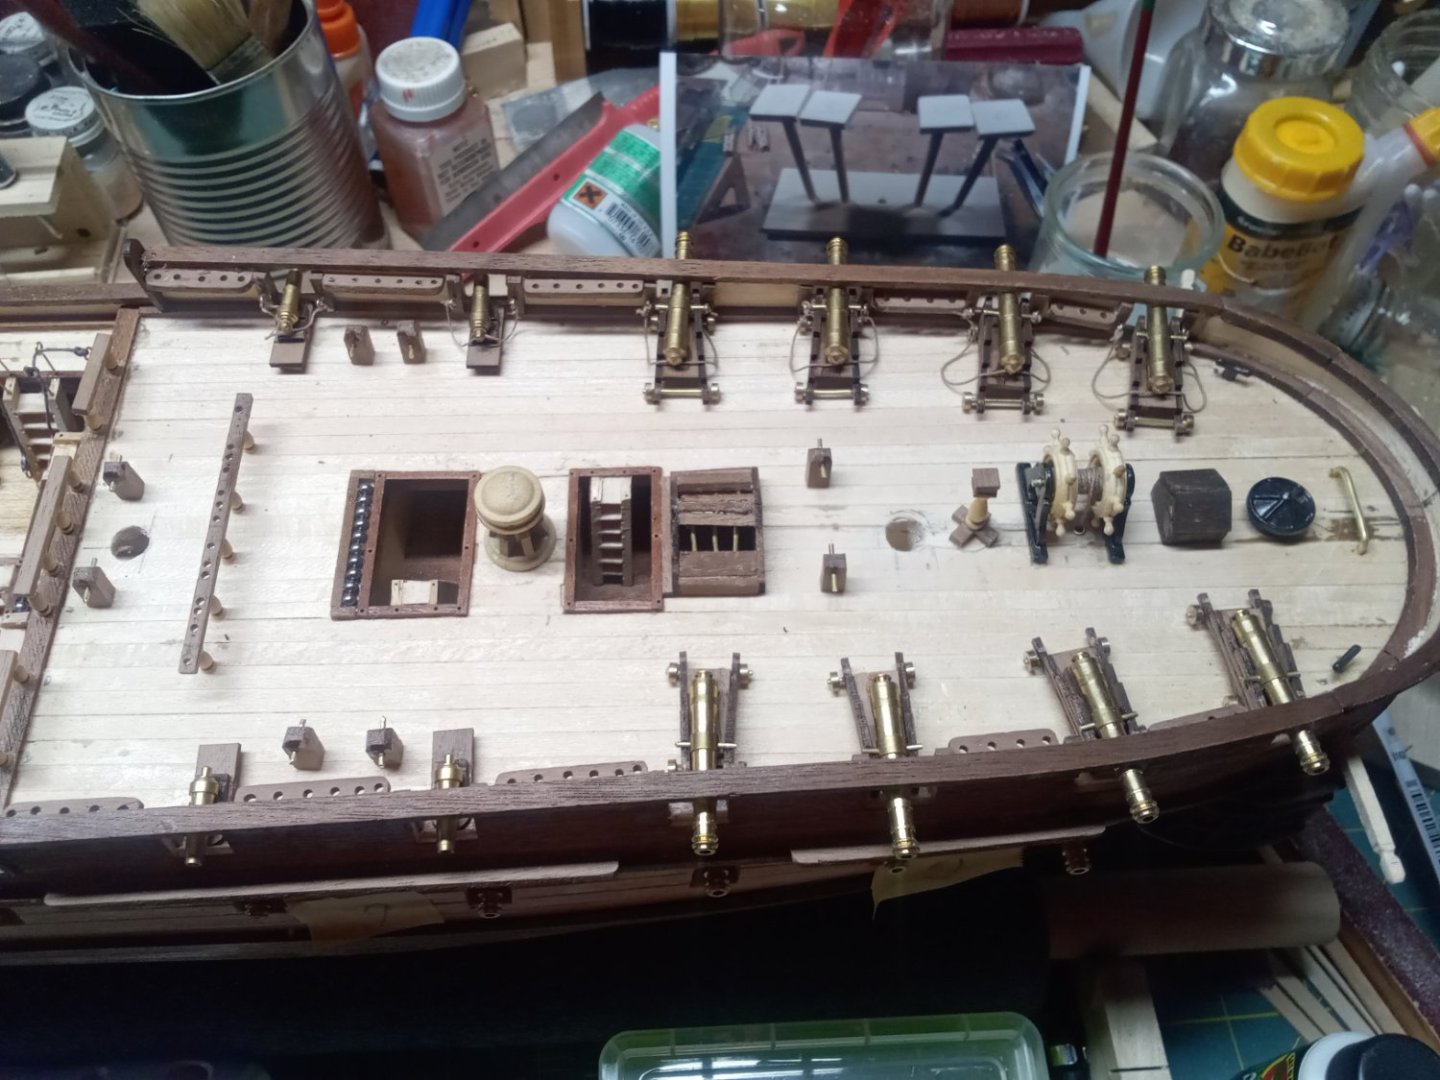
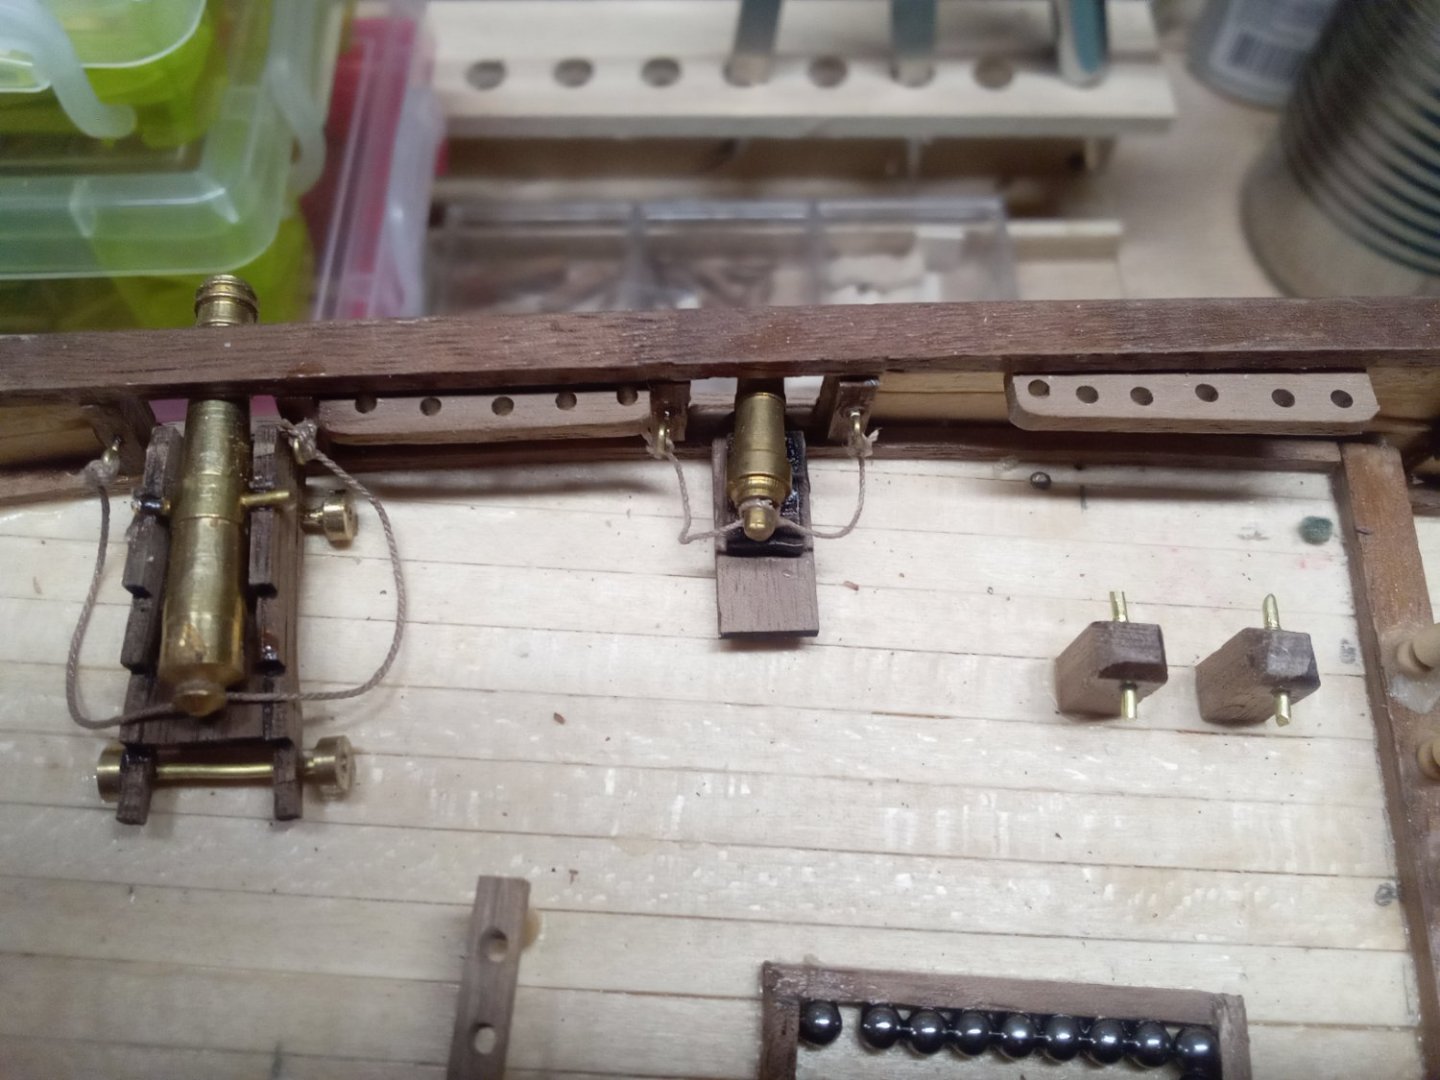
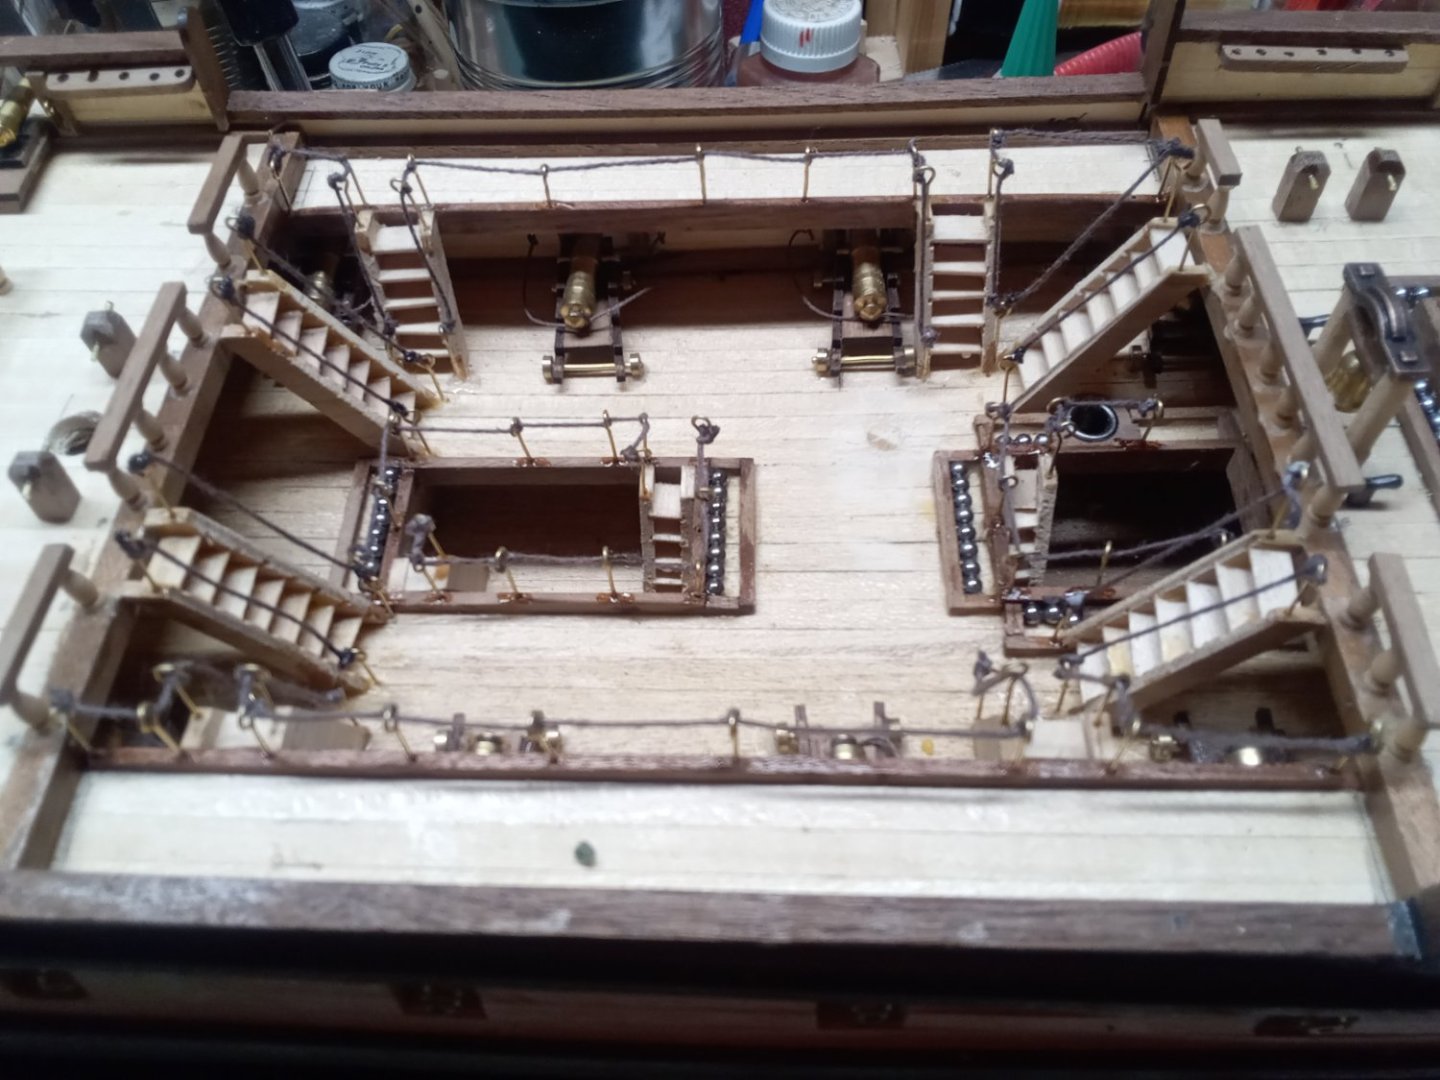
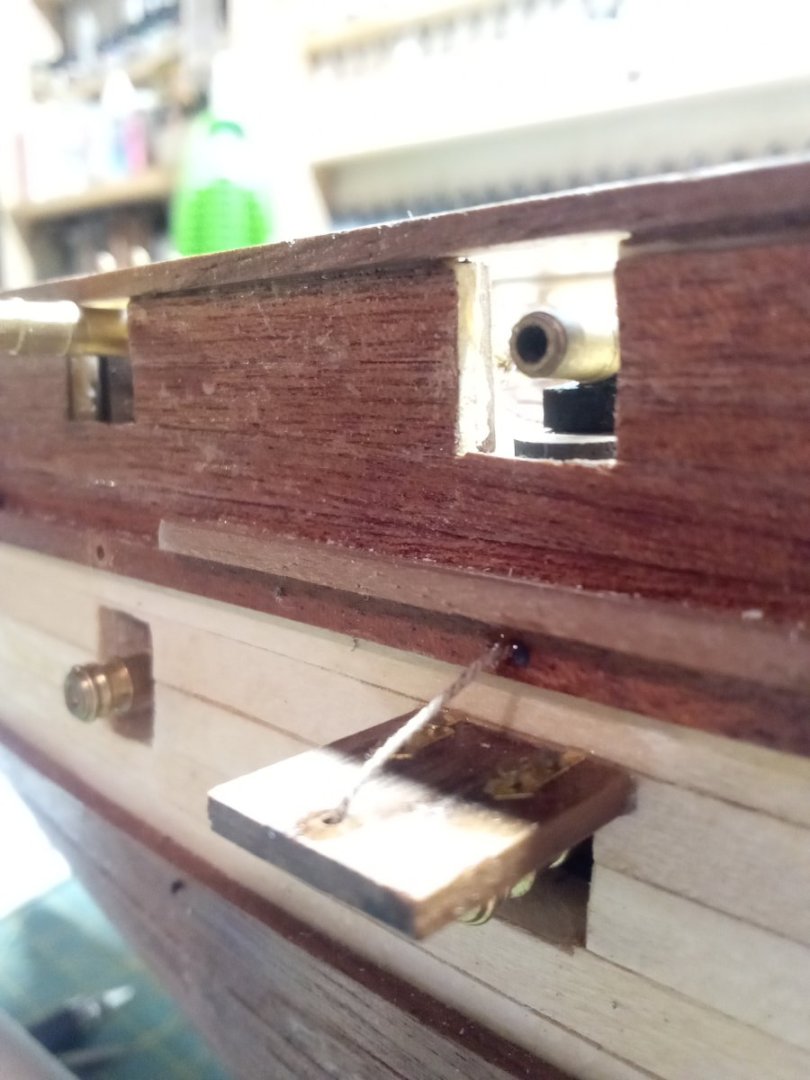
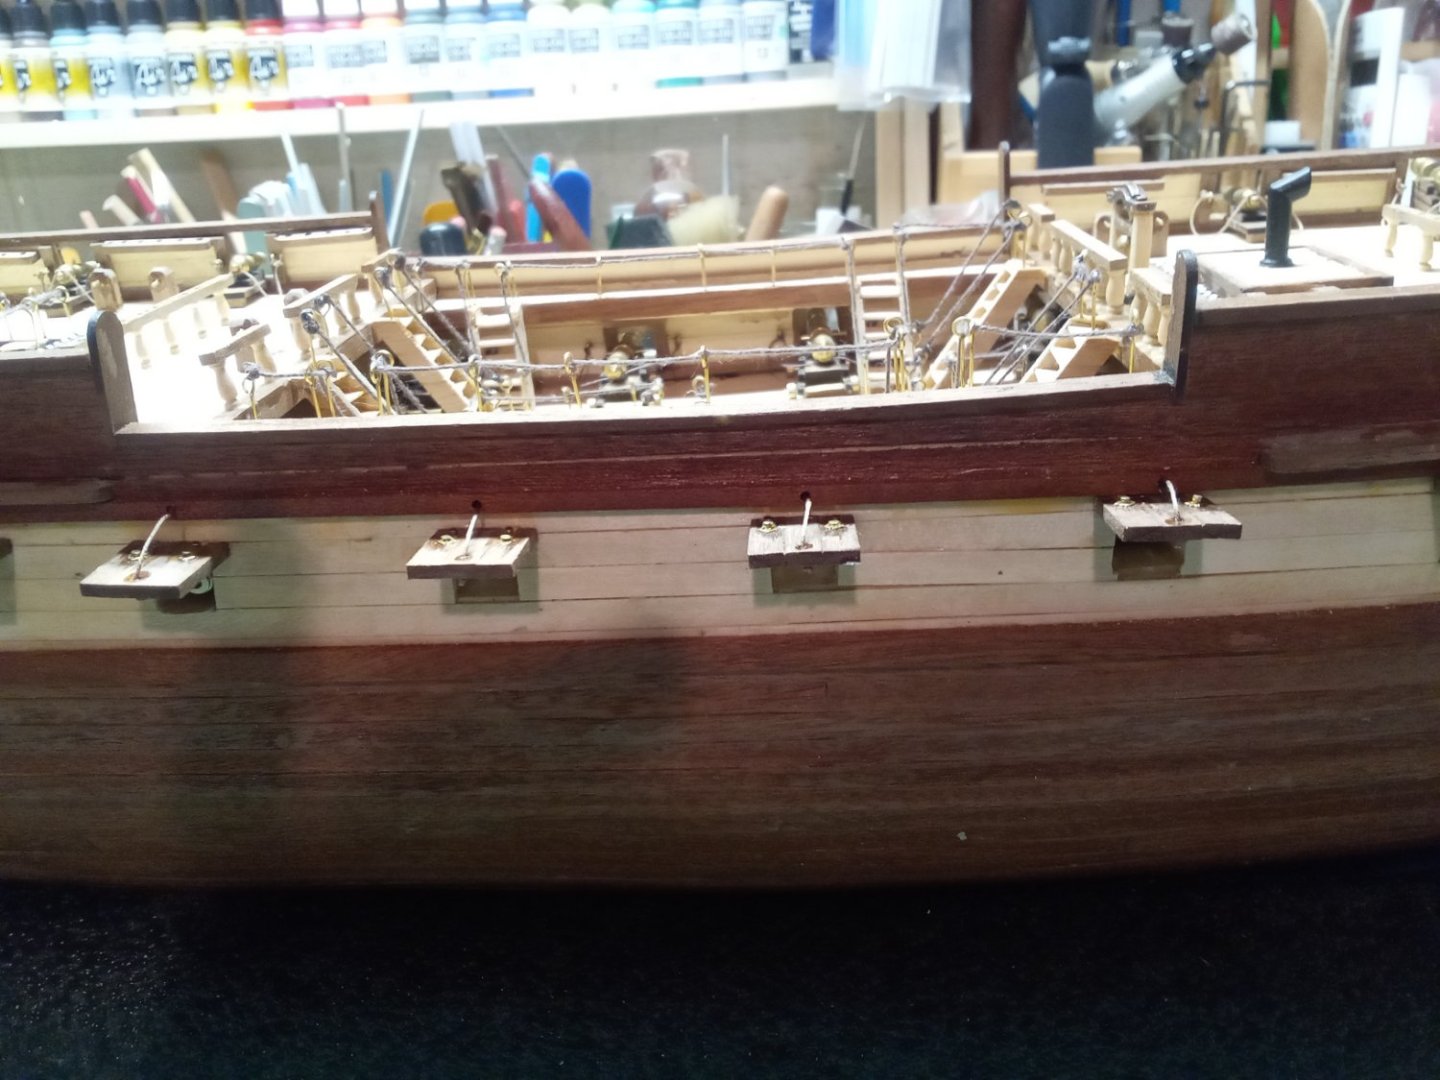
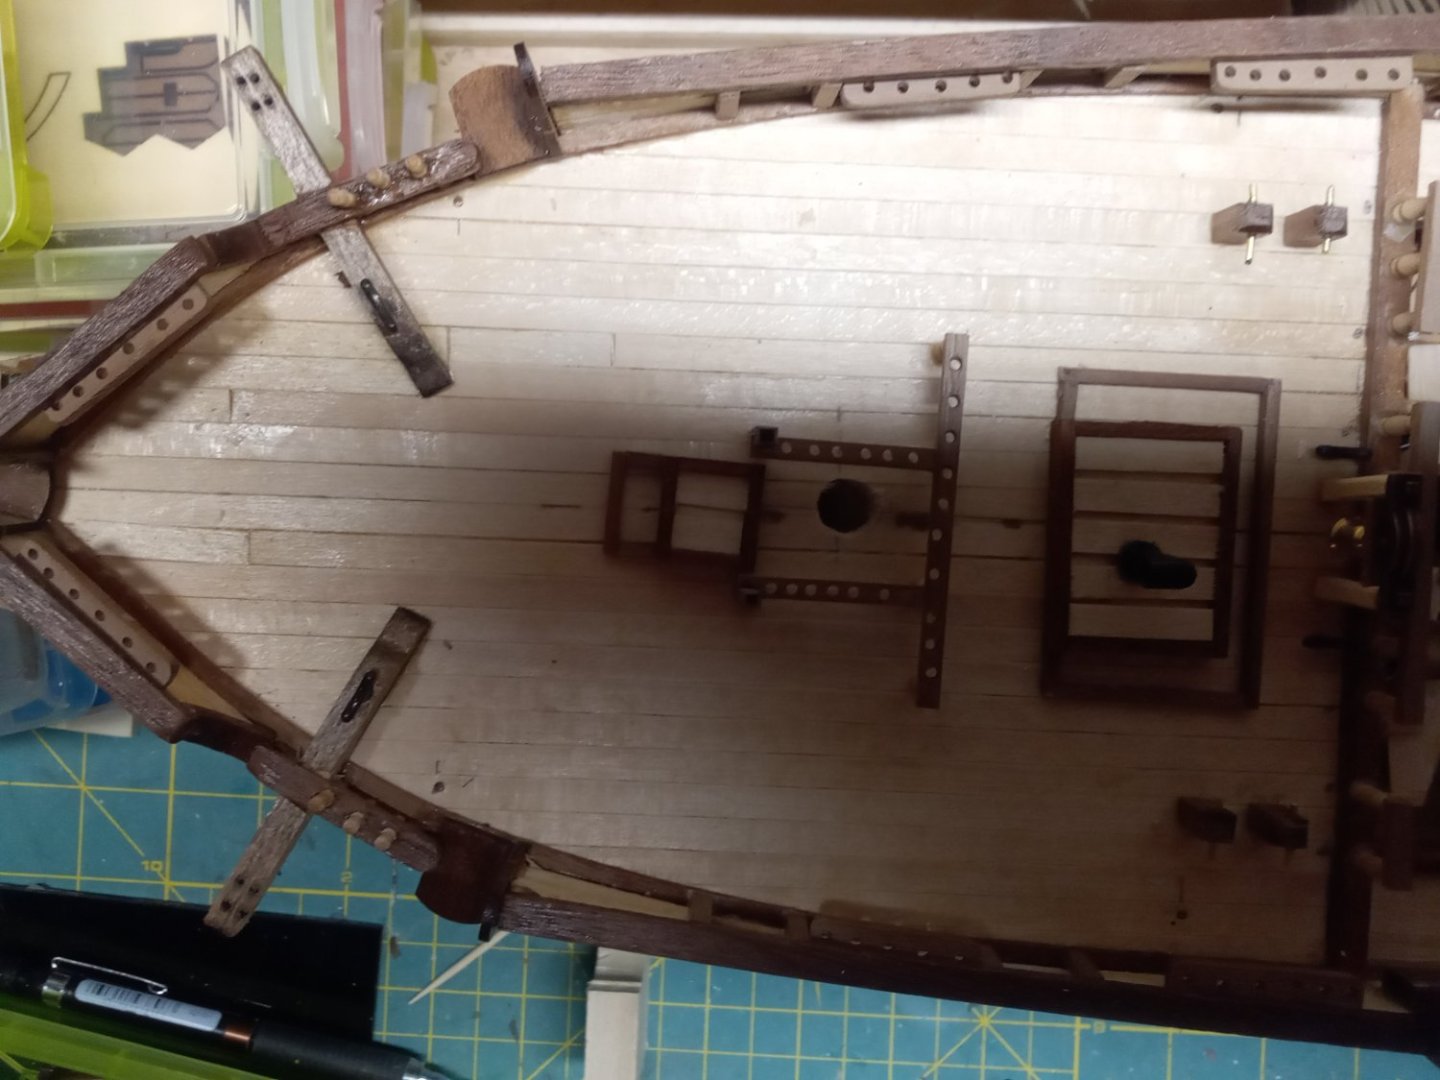
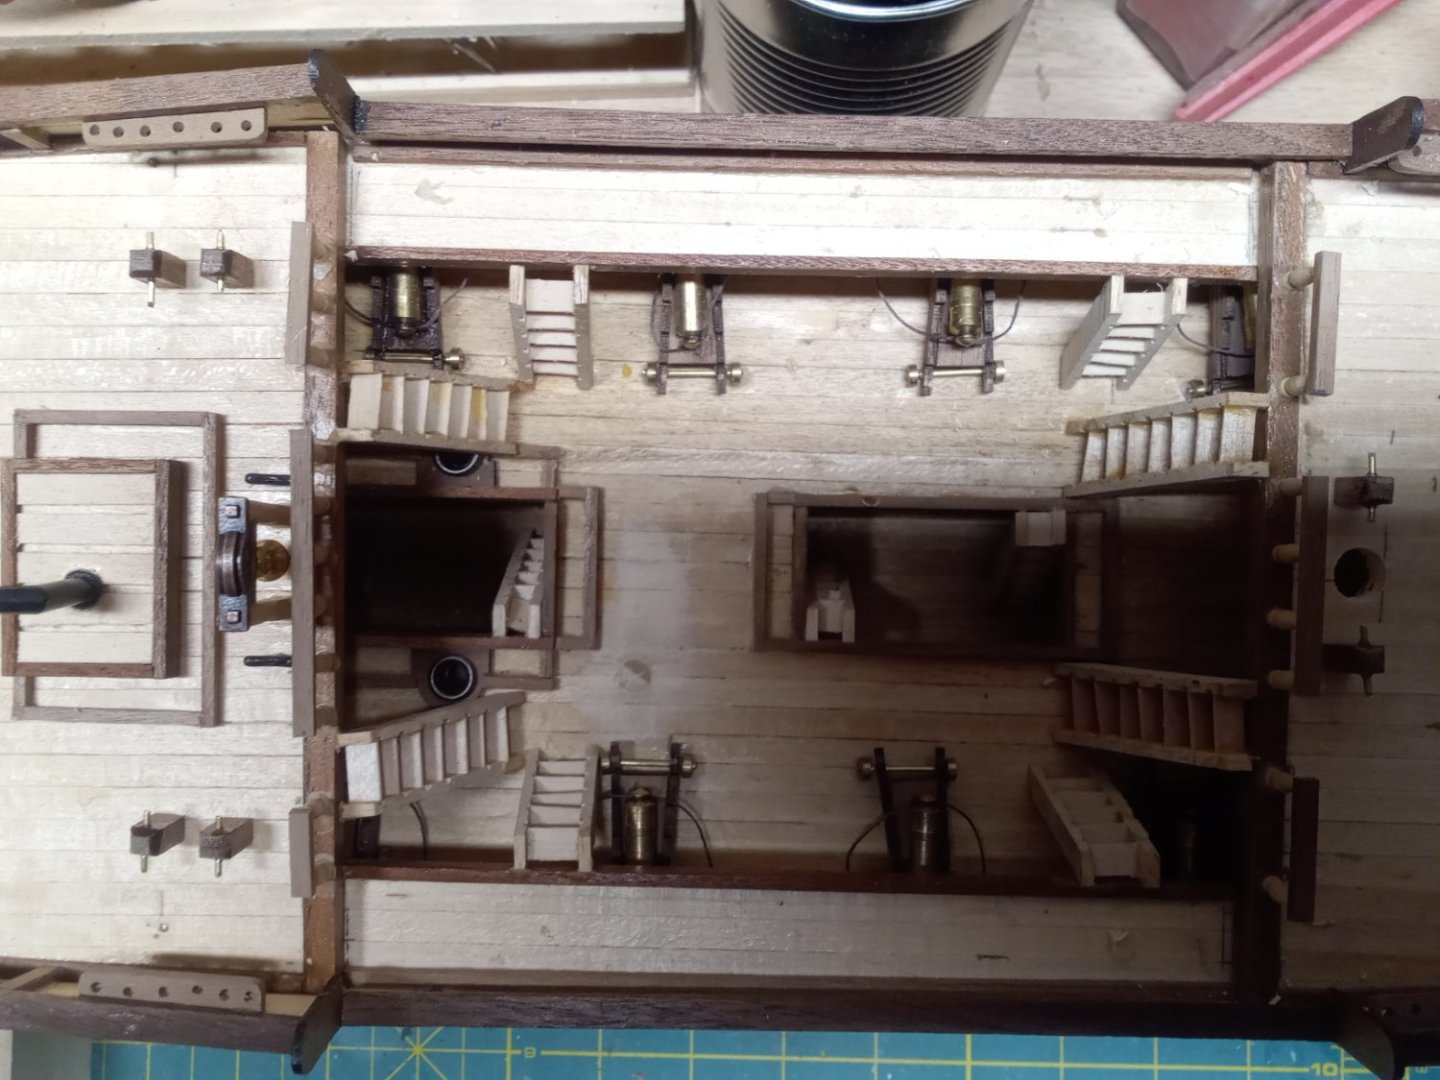
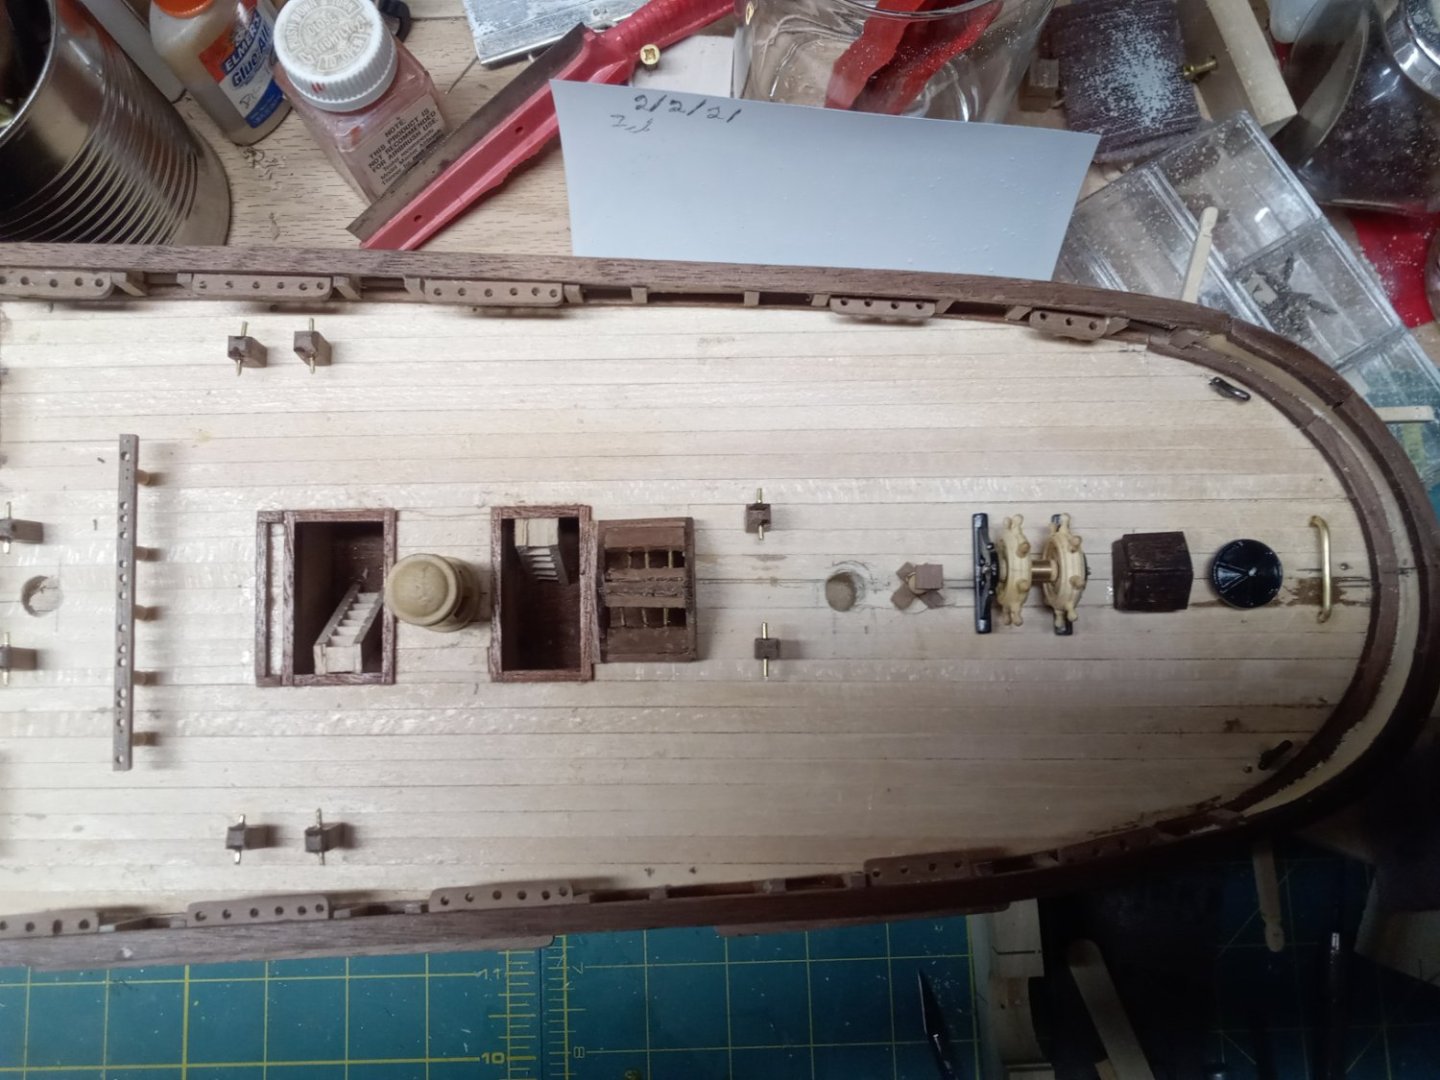
Some updates: I have been working mostly on installing all the deck structures, guns, railings, gun port covers. I didn’t install the block and tackle rigging on the guns; too frustrating, so I settled for just the recoil ropes. Some photos follow: After completing the deck, I started installing the gun port covers. Had to come up with some jigs to hold the covers in place till the glue set. jigs Final results The last port at stern and bow require a split cover with sling which I have to figure out how to rig. Then I have to turn it around and repeat on the port side.


-
Timber-framed outdoor kitchen - Cathead - 1:1 scale
Jack12477 replied to Cathead's topic in Non-ship/categorised builds
It has a beautiful color. Thanks for explanation. Gorgeous table too -
Timber-framed outdoor kitchen - Cathead - 1:1 scale
Jack12477 replied to Cathead's topic in Non-ship/categorised builds
Eric what species of wood are those beam/posts with that beautiful purple hue ? Is that Purpleheart ? Or ?? -
Look in the jewelry making section of Michael's craft stores. They carry very fine braided wire and crimps etc. I used them to make the cables for my ice yacht model.
-
Very nice Steve.
-
Coming along nicely, Grant. It does look like a weather beaten old building, shed, etc.
- 333 replies
-
- 10
-
-
Steve, I live directly across the river from there. Been to the Airshow a lot but not daring enough to take a ride. But I did get to talk with the founder Cole Palen on a number of occasions. One of the Engineers I worked with flew in his airshow as the drunken pilot "Col I am smashed" as I recall! Just discovered your build log. My college roommate had a Chris-Craft on Candlewood Lake CT. Fantastic boat. As I recall his was a square stern. Pulling up a barrel to watch.
-
Nice ! Very futuristic.
-
Looks like you might be getting hot tongue and cold shoulder for dinner later 😋 😉 😜 🤔
-
I'm in!

-
Roddenberry privately told friends that he was modeling Star Trek Original Series on Jonathan Swift's Gulliver's Travels, intending each episode to act on two levels: as a suspenseful adventure story and as a morality tale. Roddenberry stated: "[By creating] a new world with new rules, I could make statements about sex, religion, Vietnam, politics, and intercontinental missiles. Indeed, we did make them on Star Trek: we were sending messages and fortunately they all got by the network."
- 46 replies
-
- 10
-
-
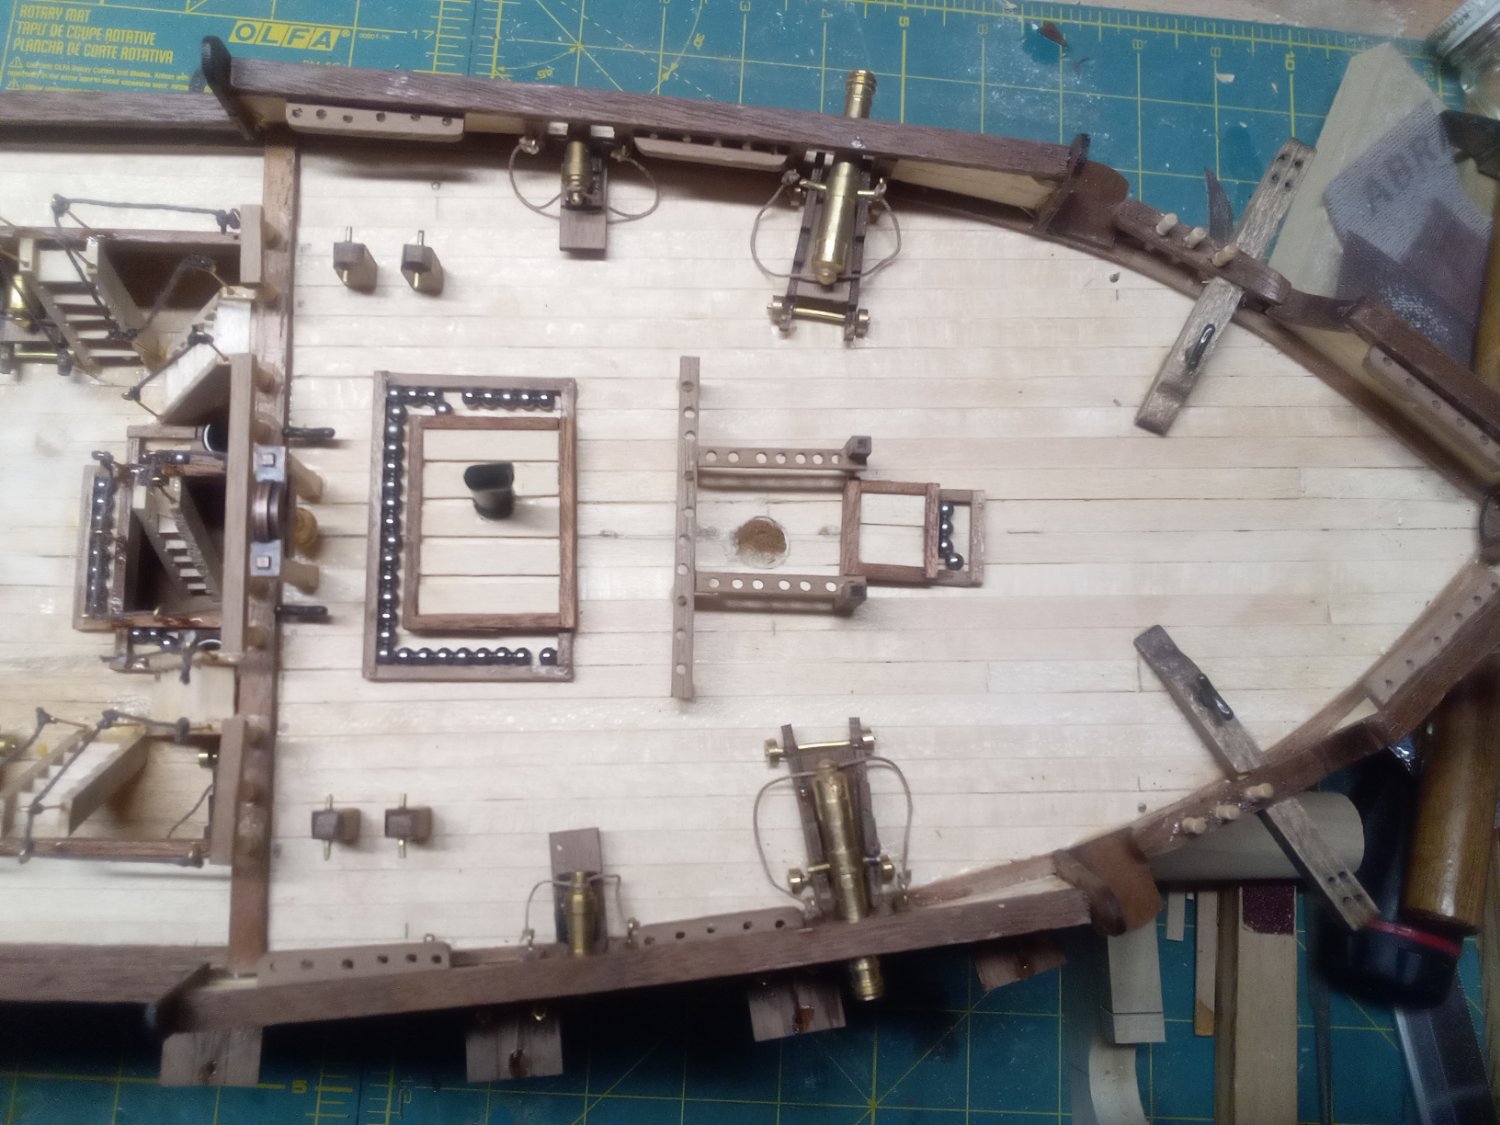
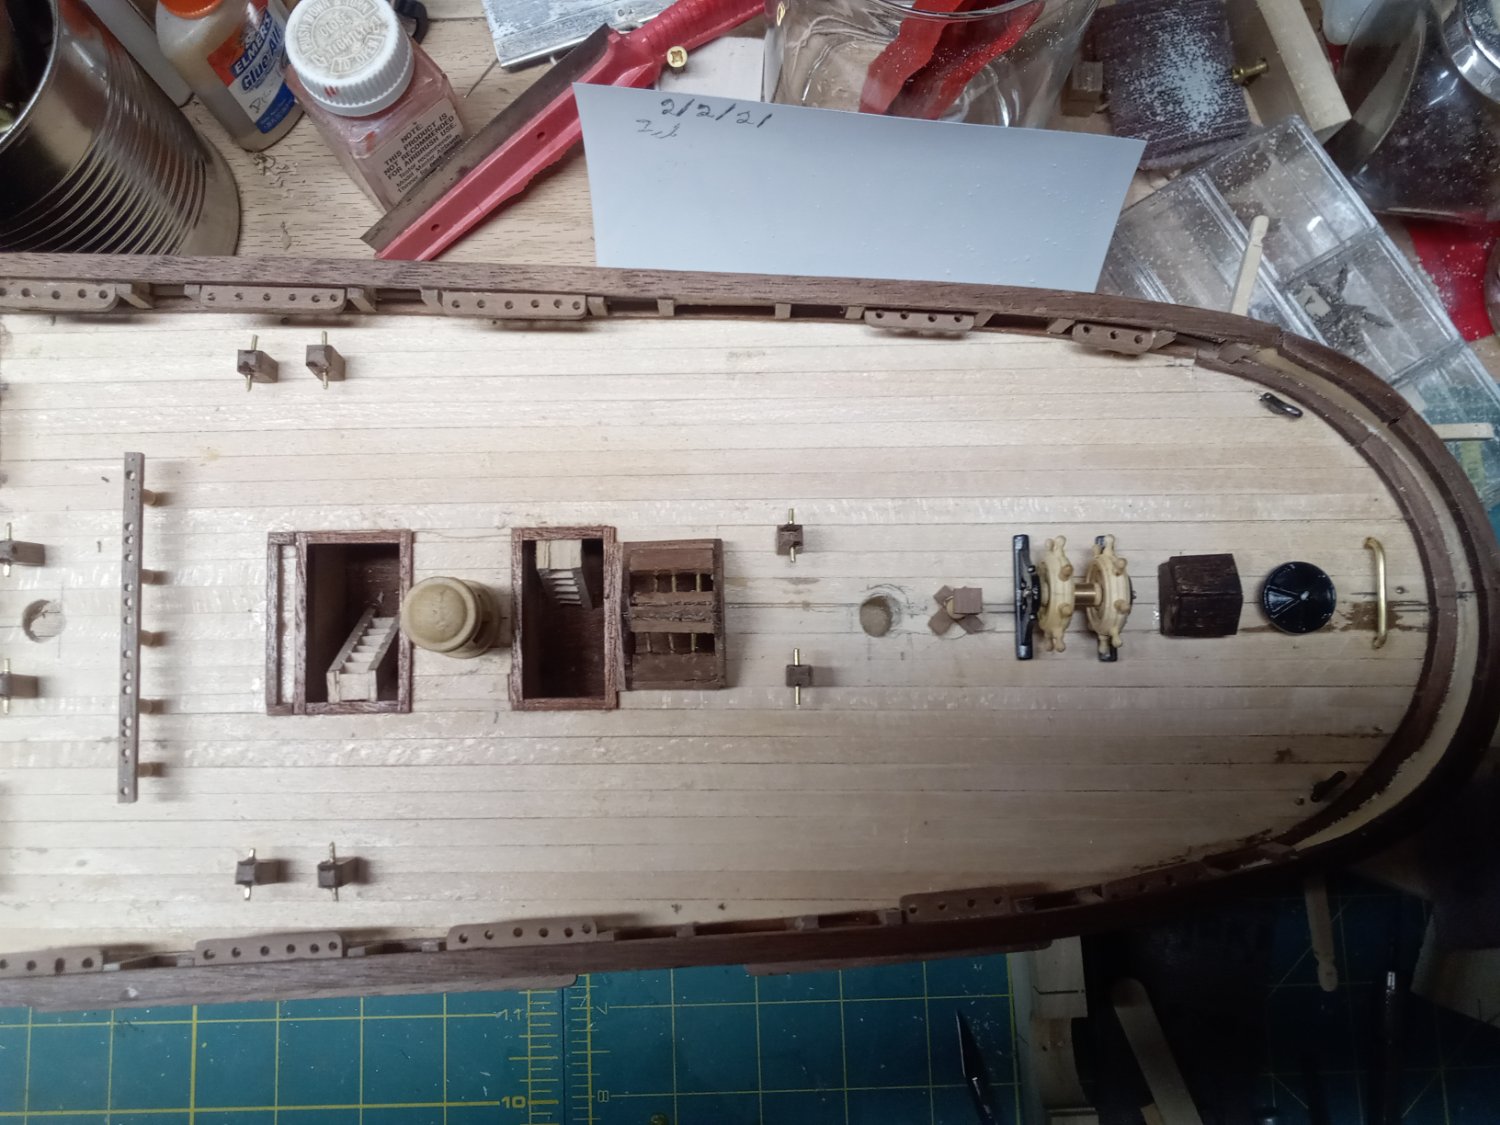
Small update : Finally got the main deck populated with the furniture I had to assembler
-
You can delete it yourself. Just click on the 3 dots ... next to post #1, in drop down select delete.
-
Glad I could help. Castle is looking good.
-
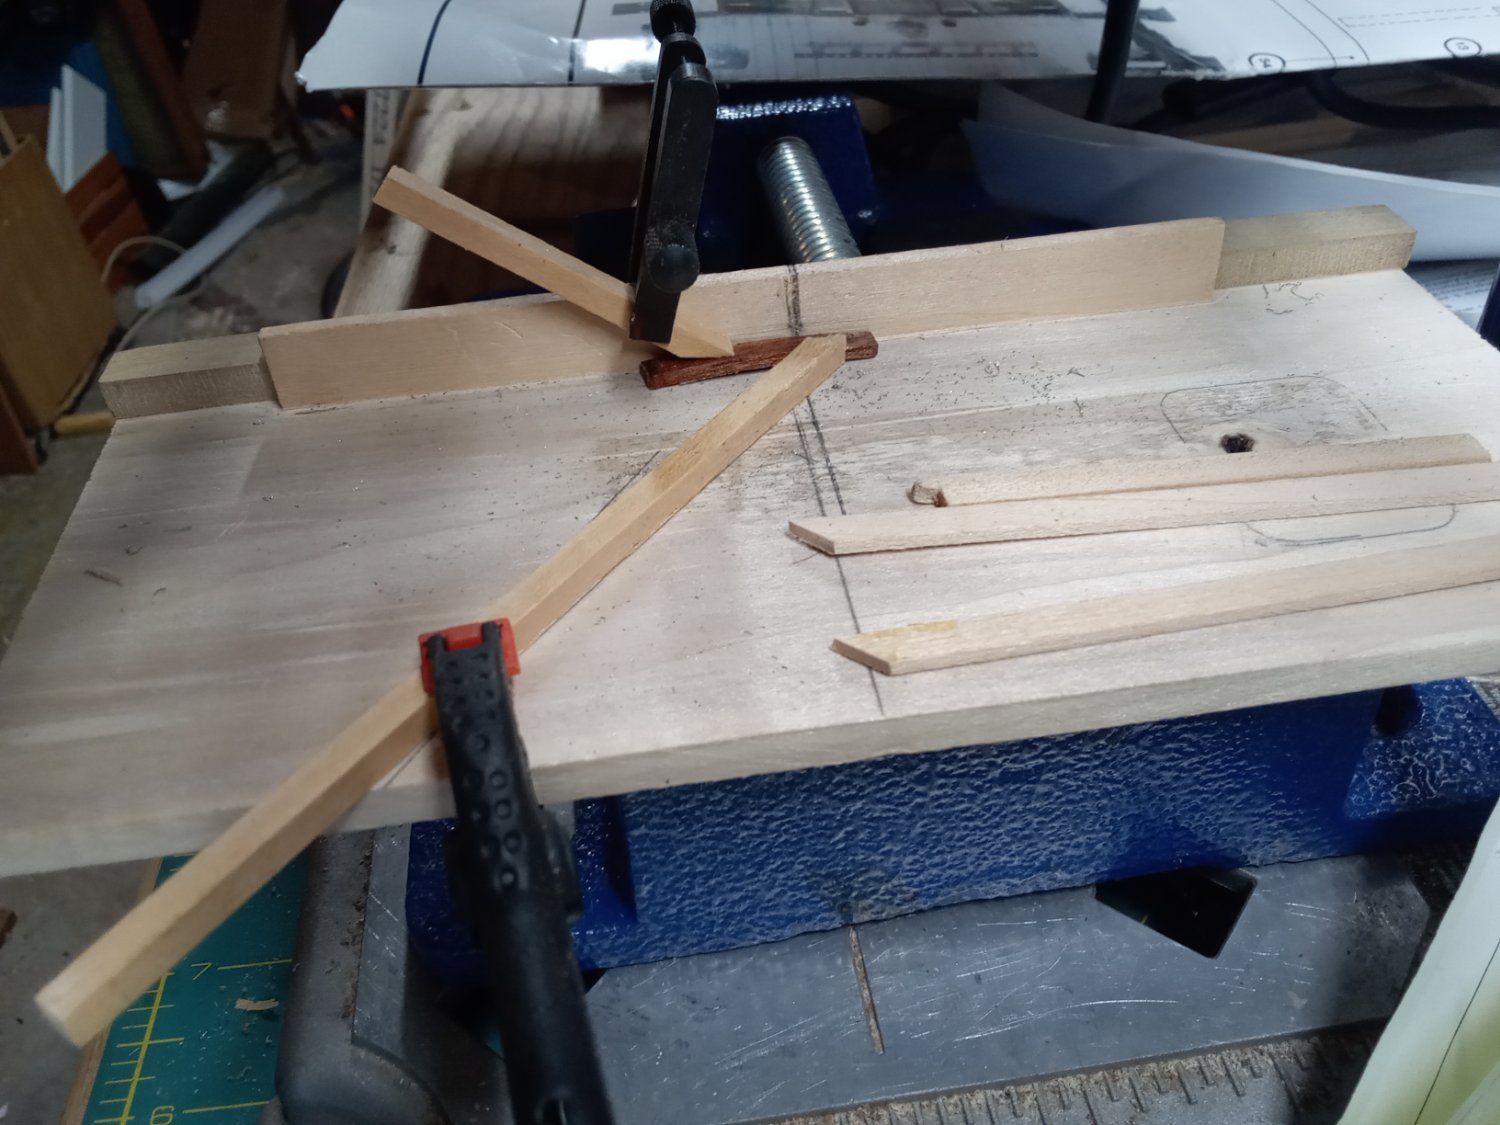
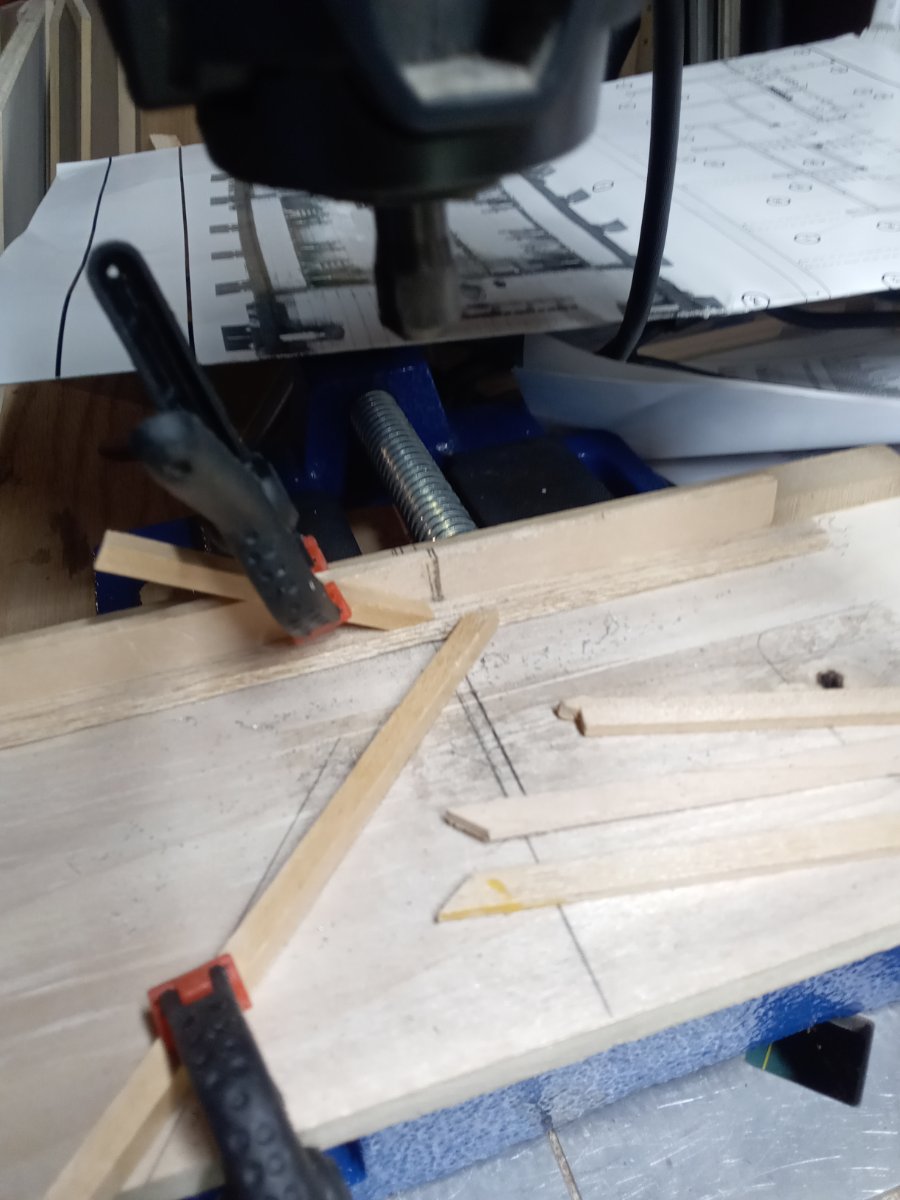
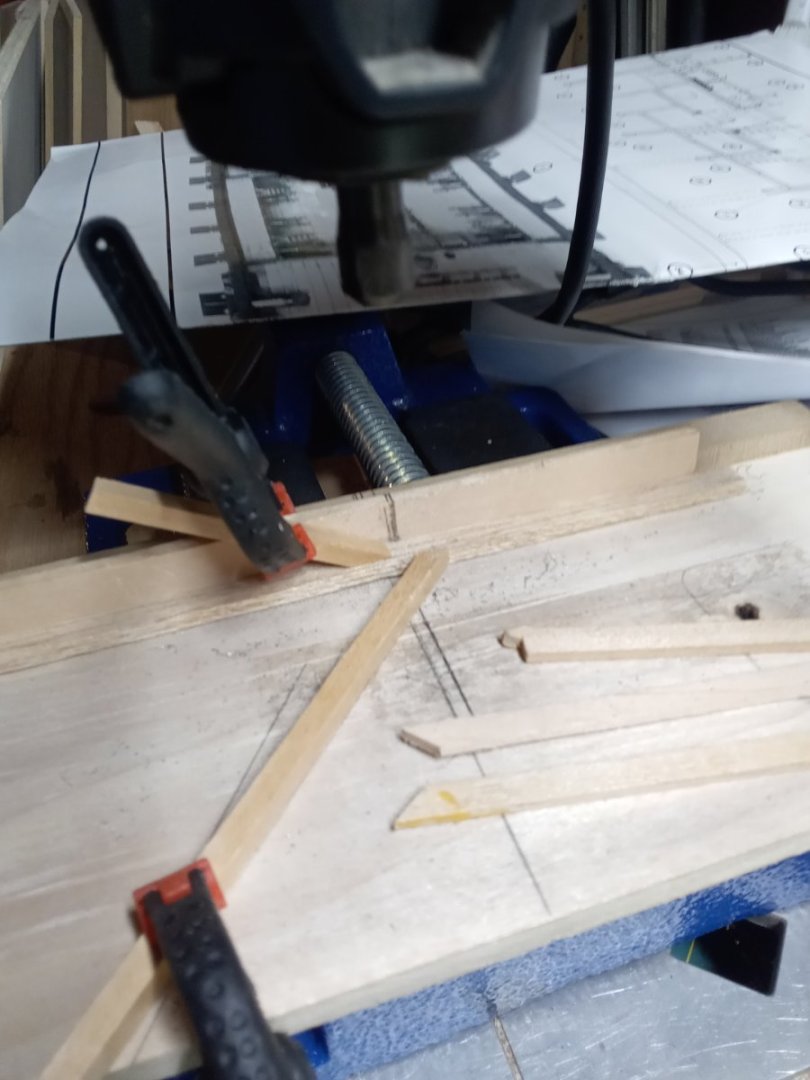
Make some featherboards. You could probably fashion them from popsicle sticks or 1/4 inch sq dowels cut with 45 degree at one end. See examples of my crude boards for my Dremel drill press stand in photos below.
-
Build yourself a mini shooting board. Lowes has dimensioned poplar boards 1/4 x 3 or 1/4 x 4 or 1/4 x 5 in 2 ft and 3 ft lengths, cut one to 6-8 inches length for the base; pick up some 1/4 inch square and/or 3/8 inch square "dowels" to use as stops and guides. It doesn't have to be very big, just enough to square your blocks with a file or sanding sticks.
-
Yes, you can use Hydrocal to create the mounds. When you get closer to that we can help walk you thru it. There's a couple ways to do it, Paper towels, nylon window screen, plaster cloth, etc. ScaleHobbyist is my go-to supplier. Before you get too far along, make a tracing of that hill outline shown on that wall former M15. Save it for later. You might also want to start looking at Woodland Scenics rock molds for cliff faces, et al. Looking at the box art I would suggest using them for some of the rock outcroppings. They work well with the Hydrocal. Also check out @hollowneck HMS Sphinx build log, starting at post #400, on his use of Woodland Scenics' ShaperSheet to create an ocean. That same technique and material can be used to create scenery around your castle.
-
See Medieval Fortified Village by Ekis