hof00
-
Posts
1,654 -
Joined
-
Last visited
Content Type
Profiles
Forums
Gallery
Events
Everything posted by hof00
-
 You'll get back into it Chap. No Stress!! If it's any consolation, I've got "Sanson" and "Endeavour" waiting for my attentions. (Sanson to be finished after Pen Duick.) Definitely a hobby and more an "Object De Art." (My View anyway.) Cheers....HOF.
- 291 replies
-
- 3
-

-
- bounty
- billing boats
- (and 1 more)
-
Hi Chap, Have you had a look at the "Billings" catalogue? If you have a look at the Artesania Latina.net catalogue, there are just heaps of bits and pieces. (You just need the Part # then get Cornwall Models to order the bits in for you, Unsure if you can purchase direct from A/L) Cheers....HOF.
- 130 replies
-
- 1
-
-
- mare nostrum
- artesania latina
- (and 1 more)
-
Very nice!! The Wheel House looks great. If you're going to make another "Painted" version, you could do a Diorama with the Boat on a Slipway for Maintenance and use the Engine as if it was being worked on? (Just an idea....) Cheers....HOF.
- 130 replies
-
- 1
-
-
- mare nostrum
- artesania latina
- (and 1 more)
-
Hi Dan, Could you not make tightly fitting Blocks of wood between the Bulkheads where the warp is apparent? Save some work perhaps? Cheers....HOF.
-
Doug, It's a Tease!! Seriously, I'm looking forward to the results also. Cheers....HOF.
- 130 replies
-
- 1
-
-
- mare nostrum
- artesania latina
- (and 1 more)
-
Hi Steve, Nice progress, looking really good. The White is White Lead Paint, producing a dirty White finish. The alternative seems to have been a mixture of Wood-Coal Tar that gave an almost Black finish, Sulphur was often added to the mixture to ward off Toredo. ("Historic Ship Models" - Wolfram Zu Mondfeld)
- 291 replies
-
- 6
-
-
- bounty
- billing boats
- (and 1 more)
-
Very Nice work Chap!! I really like the "Upgraded" version to an otherwise mediocre kit. Brings back a few memories.... Cheers....HOF.
- 130 replies
-
- 1
-
-
- mare nostrum
- artesania latina
- (and 1 more)
-
Thanks Chap!! The research continues.... Cheers....HOF.
-
Has anyone heard of a "Gaff Reef?" Currently building A/L Pen Duick and the Rigging in question runs in a series of Single Blocks and Lines under and the length of the Main Boom. I am finding it difficult to reconcile the plans with where it starts/finishes and what items are terminated to it. Google is not all that helpful today.... Any advice/diagrams would be very much appreciated. Cheers....HOF.
-
Thanks Steve, It was a real labour of love.... (Kit Level - Expert, I found out why) Cheers....HOF.
- 207 replies
-
- 1
-
-
- billing boats
- cutty sark
- (and 1 more)
-
Hi Peter, Nice work and nice recovery regarding the old wood components. Cheers....HOF.
-
Nice work Chap!! That's coming along pretty damn quickly!! I like the approach of Laminated Ply Filling Blocks at the Stern, bit of a Kit "Upgrade" amongst all the other "Downgrades." Cheers....HOF.
- 130 replies
-
- 1
-
-
- mare nostrum
- artesania latina
- (and 1 more)
-
Very Nice Sir, Sergal/Mantua seem to have the same doctrine, no matter what. The Bulwark extensions protruding above the False Deck, and now, the Stern.... (Same as the Cutty except a little smaller. ) For the Stern on the C/S and other stuffI I used the Amati Heated Thingy, in the Soldering Iron, (Bulbous thing). soaked the Planks and steamed in the supplied wooden "Form." With Hardwoods, the results are really good also, a satisfying "Crunch" as things are bent!! (Apologies, I'm in no doubt preaching to the converted here.) Cheers....HOF.
- 453 replies
-
- 7
-
-
- thermopylae
- sergal
- (and 1 more)
-
Nice set-Up Pierre!! (Puts my Plastic boxes to shame....) Cheers....HOF.
- 46 replies
-
- 1
-
-
- batelina
- marisstella
- (and 2 more)
-
Hi Julie, I call it Model Ship "Paralysis." Don't worry, it will pass.... Had the same with Pen Duick in the past couple of weeks, Dredging myself out of t, then, my Glasses Frame broke.... (Lucky I have a spare pair that I can see, sort of. ) Ditto Richard, life does get in the way. (And, my sentiments also, your Endeavour looks far to good, pause, but for Gods sake, don't stop now!! ) So much of a beautiful work of Art to let it go.... (Re:-Pen Duick "Struggles.) Cheers....HOF.
-
Hi Chap, Those extensions, (Bulwark), are you supposed to Plank/Form the Bulkheads before trimming the Extensions off? (The Cutty was the same, I had to plank the Bulkheads before trimming off the extensions and plank the Deck after this.) Just another thought, just maybe the manufacturer doesn't see the requirement to fair the Midships Bulkheads? Just Dumb questions.... Cheers....HOF.
- 453 replies
-
- 6
-
-
- thermopylae
- sergal
- (and 1 more)
-
Hi Steve, Keep up the good work!! Don't know about Ireland, but it's quite difficult to source Ship Building material here. Looks like the Bulwark Rails are part of a Laser cut Sheet? You could give them a bit of Stain perhaps? I have bought Planks, (Various Timbers/thicknesses), and "Rip" them down. (Stuff from "Midwest.") Just sing out if you think I may be able to offer any assistance. Cheers....HOF.
-
C'est La Vie.... Thanks Chap.
-
Sorry Chap, Just had a look at your Kit Contents, seems like A/L have "Skimped" on Walnut Keel Components. (I believe they have moved manufacturing to China.... Could be wrong.) Anyway, same doctrine applies, as above. (Just please Stain the stuff!! ) Don't know about you, but this model looks fantastic in "Naked" Wood. (Your Choice.) Cheers....HOF.
- 130 replies
-
- 1
-
-
- mare nostrum
- artesania latina
- (and 1 more)
-
Hi Chap, Hope the following is of some use.... The way A/L seem to do things is the all Keel components are fitted after the 1st Planking, Sand the first cover to match the width of the False Keel, make sense? No thinner as the Keel components are a the same. Fix the Keel components and maybe "Pin" with stuff like I did. (Hang on, I saw a DVD Instruction Manual?? No Good? Portuguese/Spanish? ) Anyway, once the Stem is firmly affixed "Offer up" the Bulwarks, you will need to bevel the junction of Bulwarks to fit nicely with the Stem. If you have the correct gap between Deck and planking, (2.5mm from memory), things should flow from there.... (Wot could possibly go wrong? ) Plank the Insides of the Bulwarks, fit the Waterways and you're almost there!! The Stern Bulwark stuff is, a real "Pain." (Think I discarded and made my own out of very thin ply, 1/32" using the original as a template.) Thin Basswood is a good alternative. 2nd, 0.5mm Walnut planking after Keel components affixed. See what you think of the following, Cheers....HOF.


- 130 replies
-
- 2
-
-
- mare nostrum
- artesania latina
- (and 1 more)
-
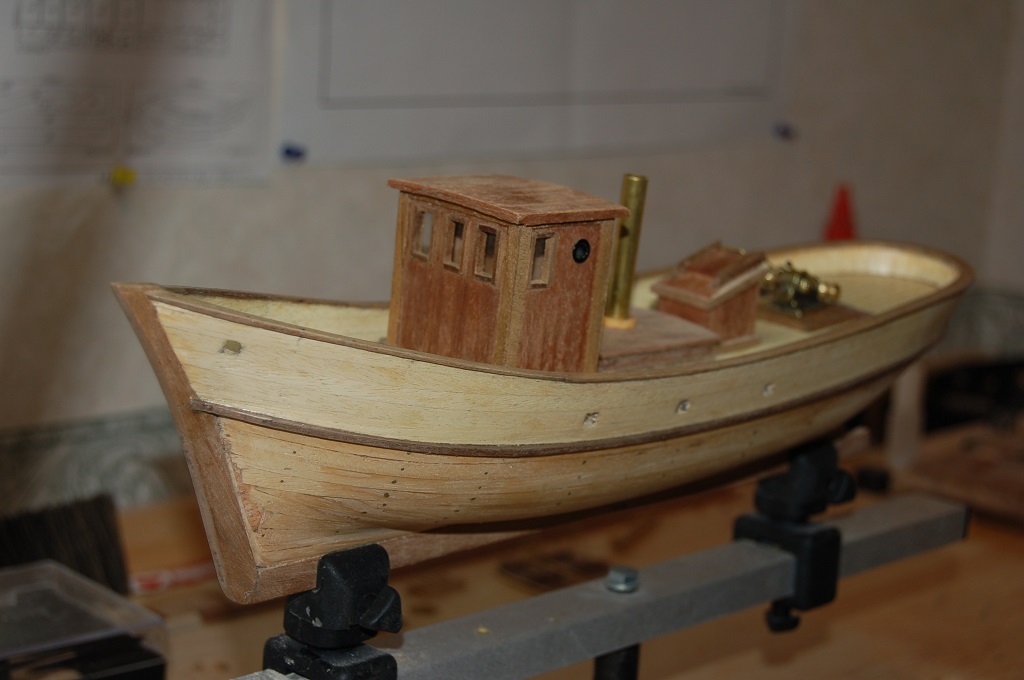
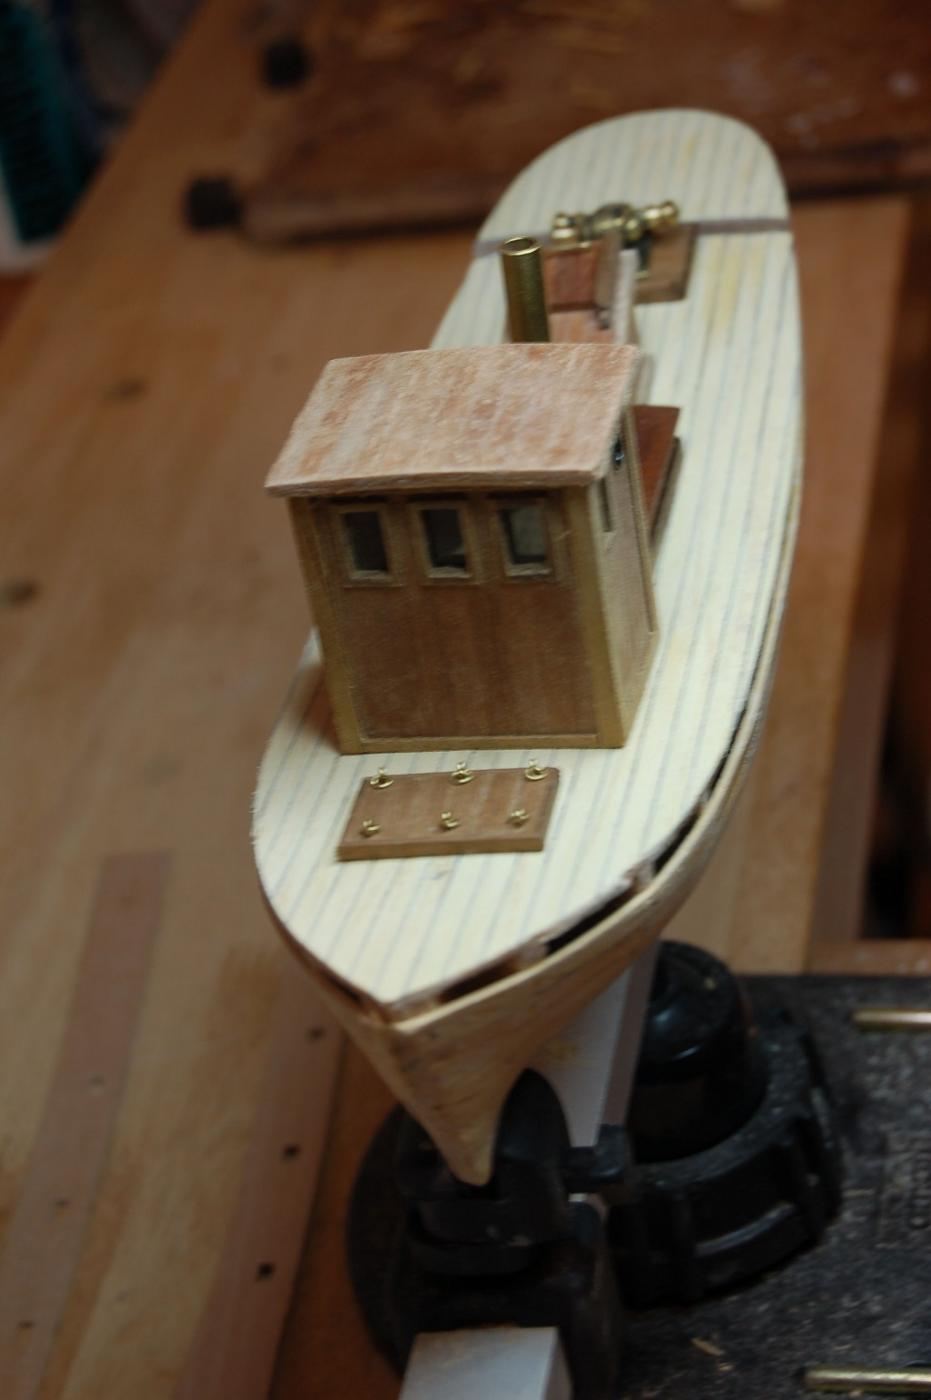
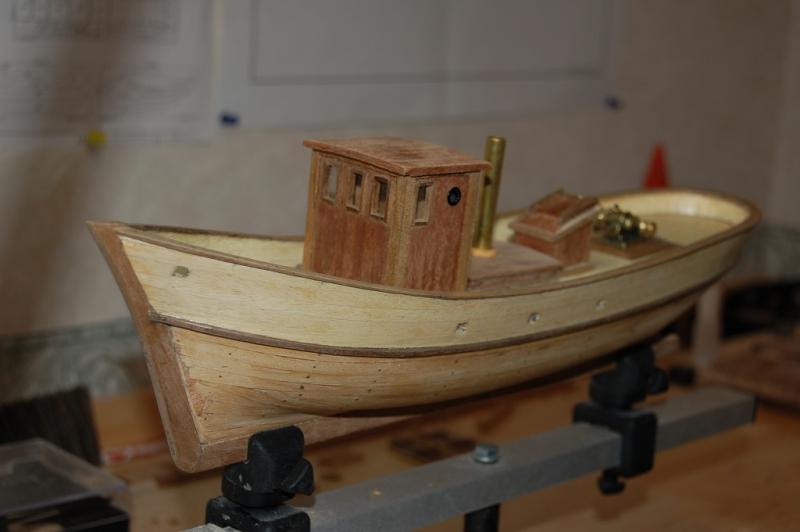
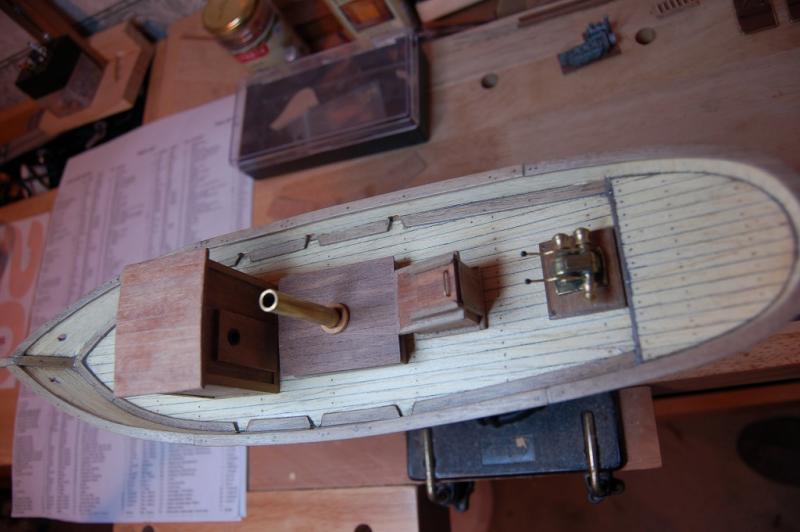
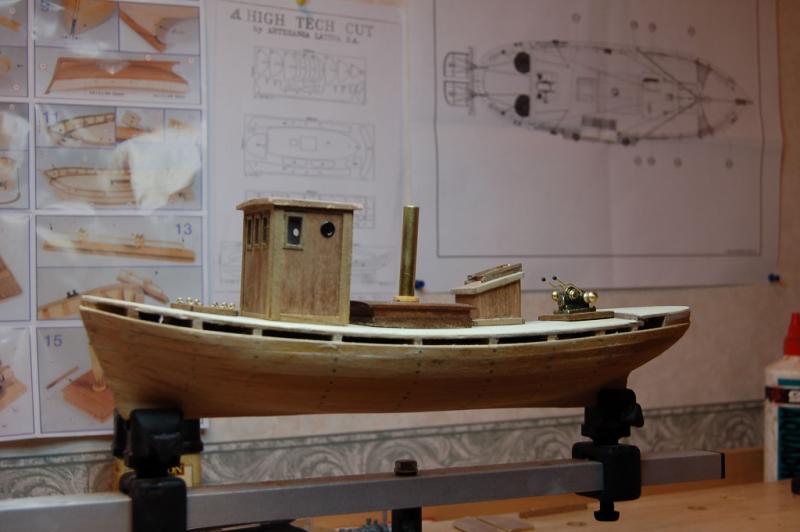
An "Upgrade!!" Never had this on mine..... Well I Guess if you want to "Super detail." The Engine Cover/Funnel hides this. (I built my Cover so that I could remove it but since the model is in a Glass Cabinet, it's a bit difficult to remove and view.... Cheers....HOF.
- 130 replies
-
- 1
-
-
- mare nostrum
- artesania latina
- (and 1 more)
-
Hi Derek, From your last photo, it's really getting there!! Keep up the good work!! Cheers....HOF.
-
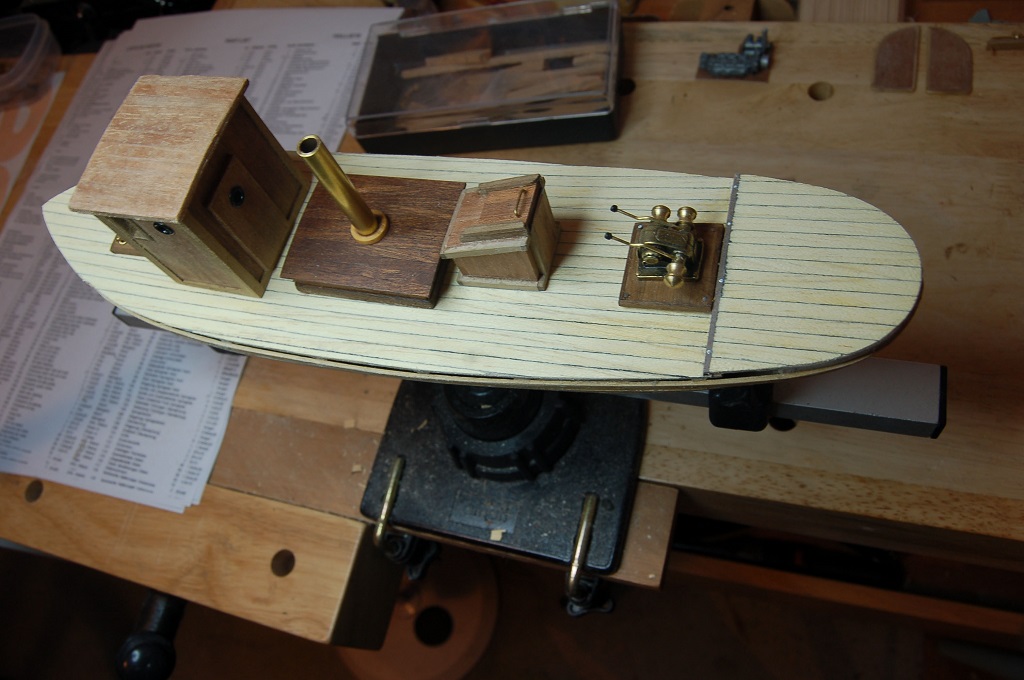
Yup, Agree Rexy. There is a lot of skill and wherewithal even with this. Really interesting to get the Brass/Dowell cut to the right angle/length when it comes to the Stern Stuff, don't know what its called, but the infrastructure/Block/Tackle, required for the Nets/Trawl equipment? For me, the hardest part for the build.... Steve, thanks for the compliment. (We all aspire to the perfect build I guess.) (Just a question, Wots the Red Thread?) Cheers....HOF.
- 130 replies
-
- 1
-
-
- mare nostrum
- artesania latina
- (and 1 more)
-
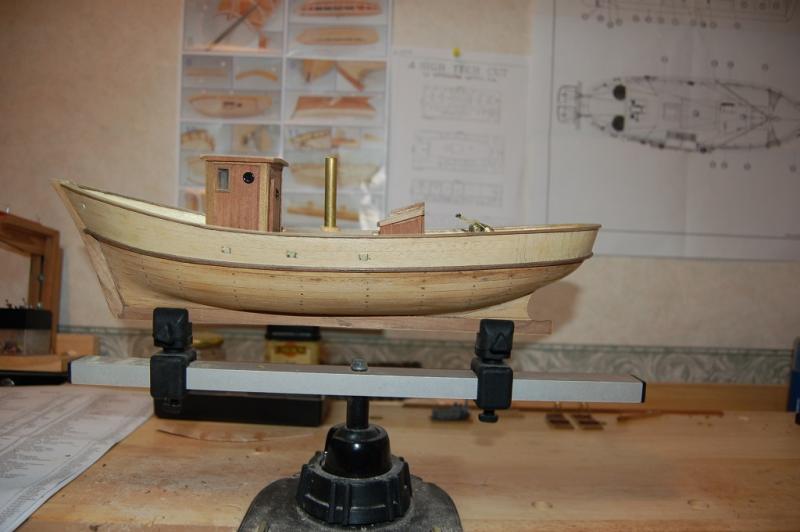
Hi Chap, Nice start, brings back memories. I have a fair few photos of my Mare Nostrum build if you feel that these would be helpful at any particular stage. Cheers....HOF.
- 130 replies
-
- 1
-
-
- mare nostrum
- artesania latina
- (and 1 more)