HOLIDAY DONATION DRIVE - SUPPORT MSW - DO YOUR PART TO KEEP THIS GREAT FORUM GOING! (Only 20 donations so far - C'mon guys!)
×


DaveRow
-
Posts
691 -
Joined
-
Last visited
Content Type
Profiles
Forums
Gallery
Events
Everything posted by DaveRow
-
 Nice work there Rowan. Looks very sleek. I'm a few steps behind in my build. Dave R
 -
Hi Pat, In for the long haul it seems. Thanks for looking in. Dave R
-
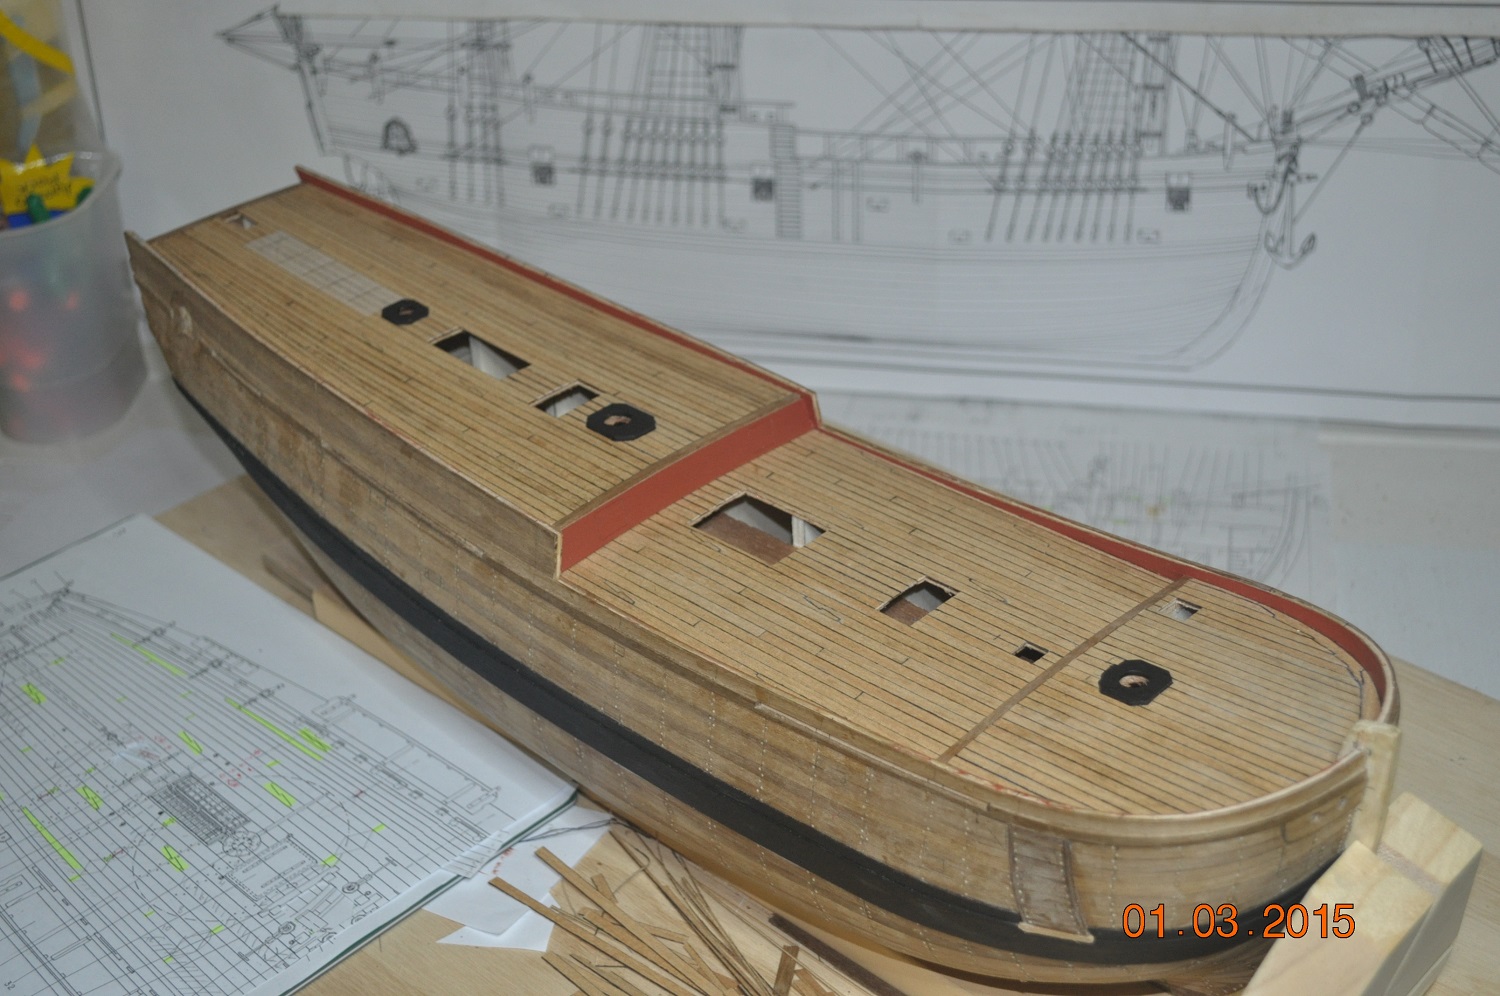
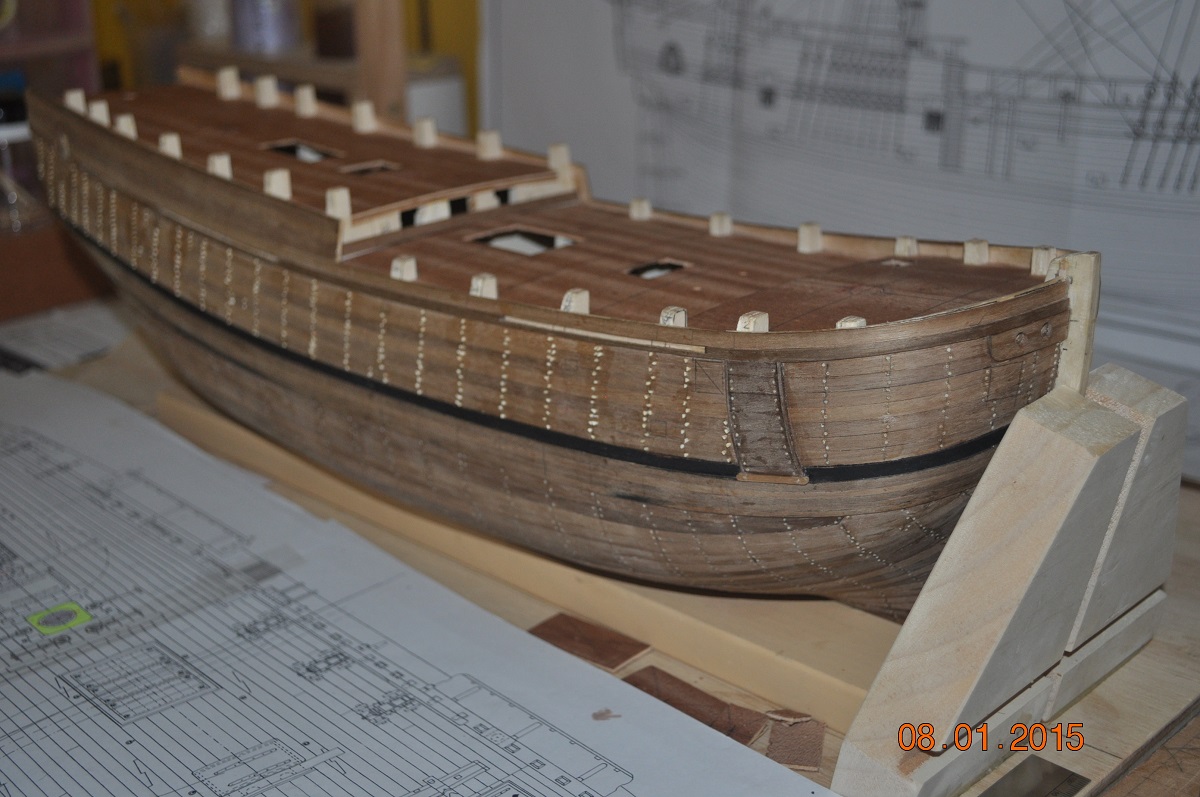
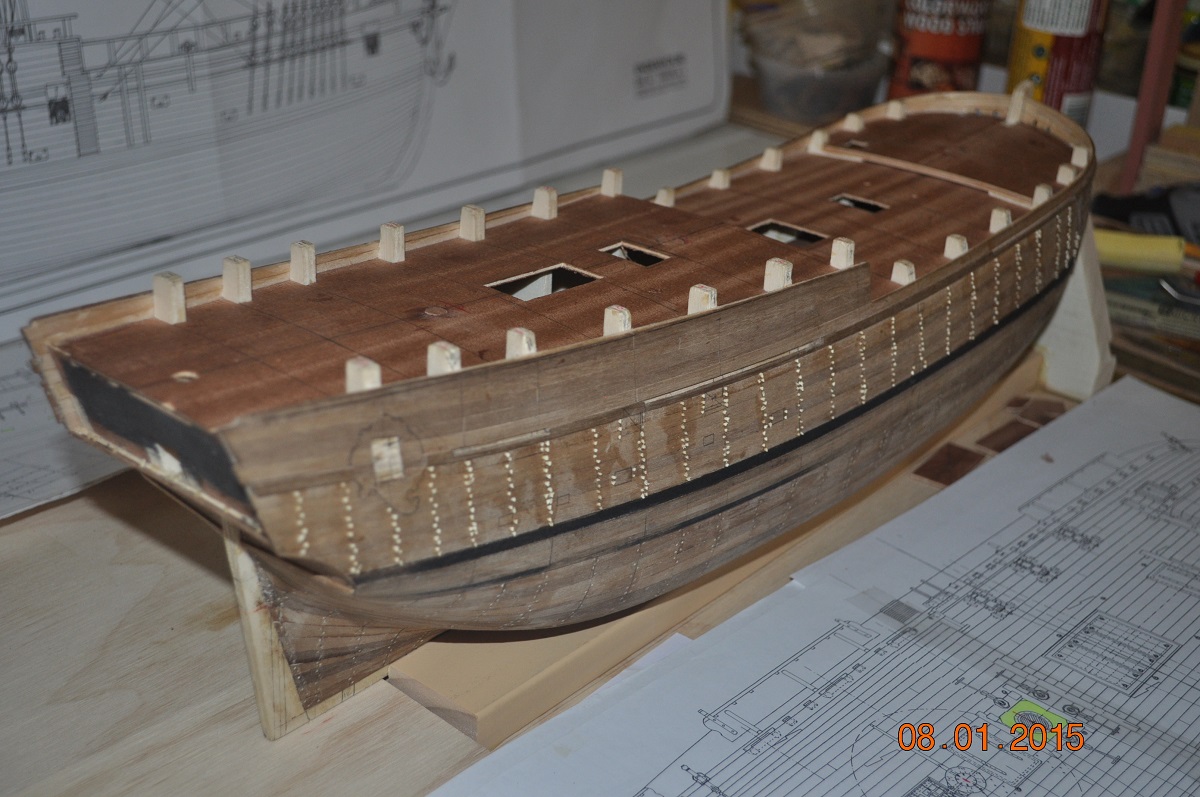
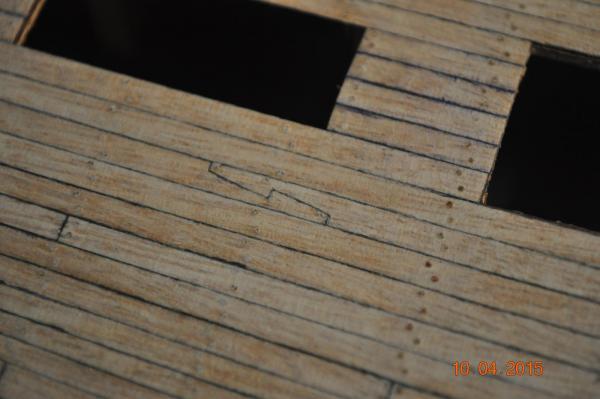
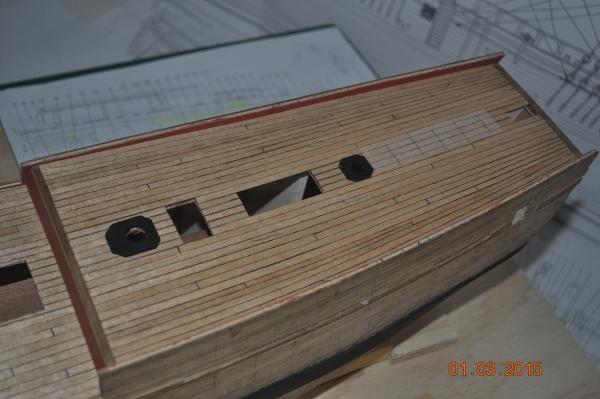
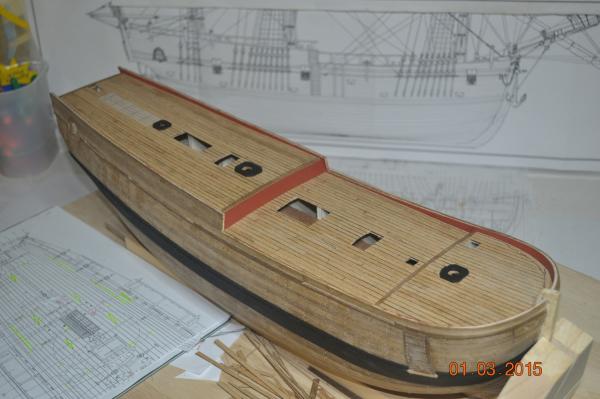
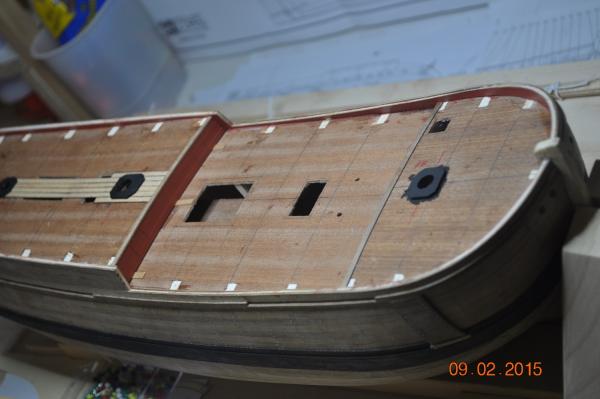
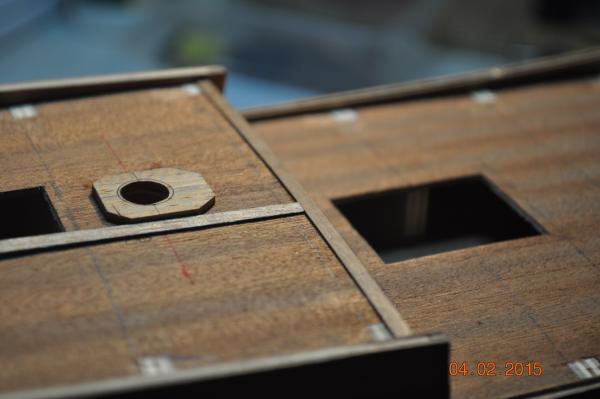
The shipyard has been busy plugging the deck planks. Below are a few snaps of the finished layout and plugs. I am fairly pleased with the finish, not consistent, but looks worn after a time at seas maybe. The effect, ? I'll stick with it. Onto the gunwales next. Dave R
-
Back from holidays. Started on the deck plugging, another several hundred to drill and plug. Dave R.
-
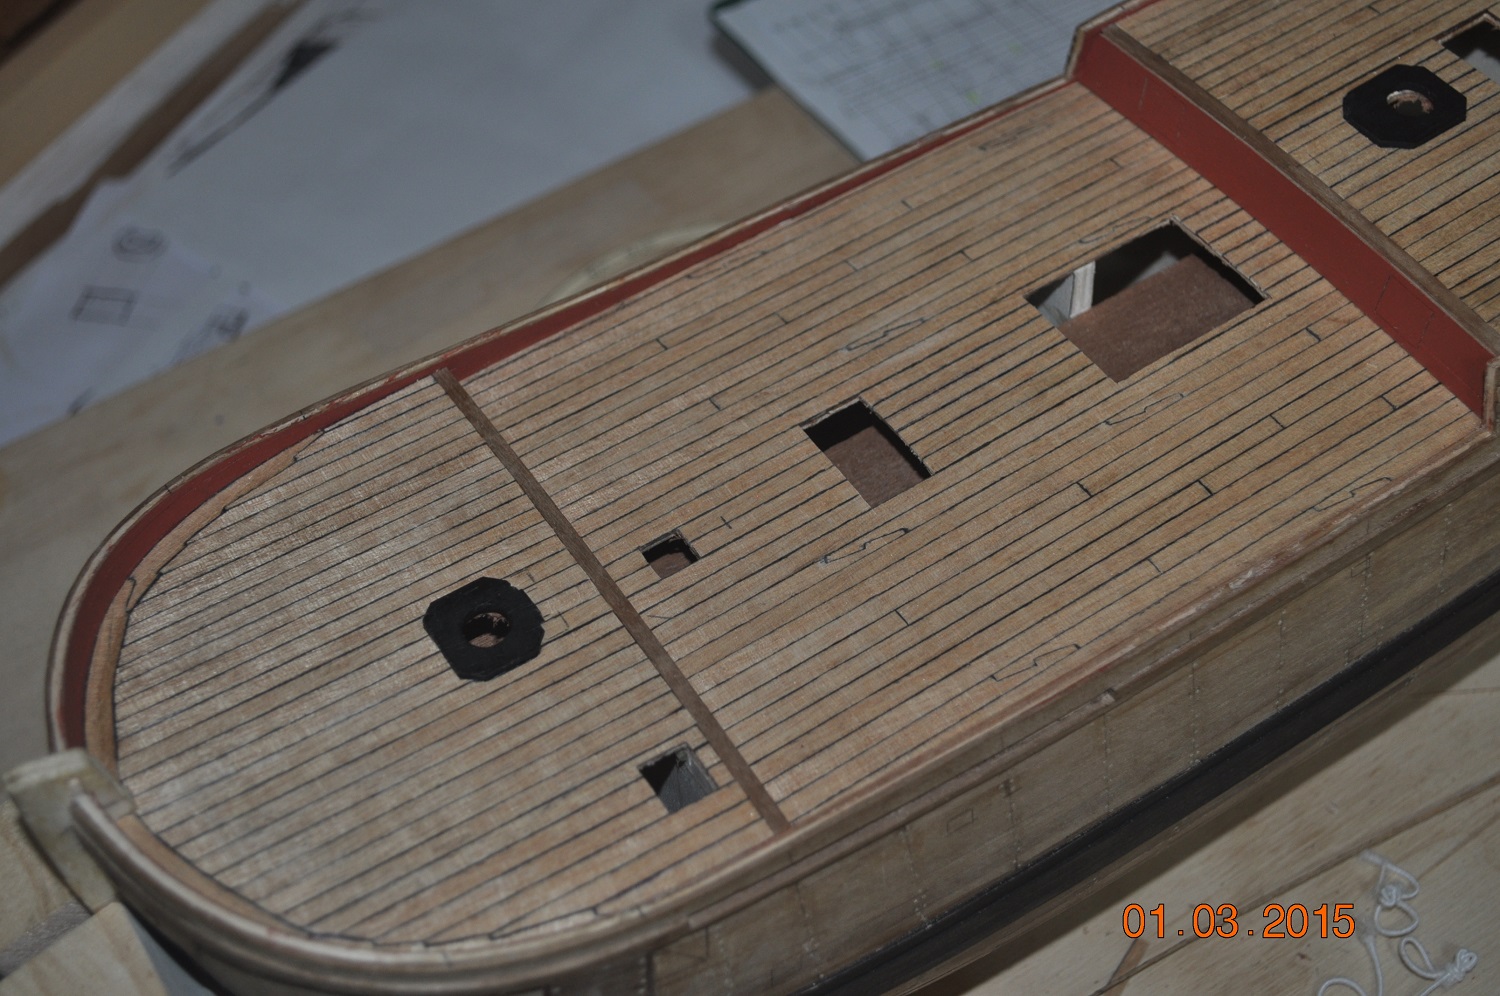
Hi All, The shipyard has finally applied the deck planks to the decks. I did my best to work out a layout similar to that in the AOTS, with some minor changes to accommodate the materials and my capabilities. I found it challenging to get all the planks tapered and touching together, taking into account each plank width and the width of the deck(even width planks was the aim). Some small gaps if one looks carefully, however once above deck fit-out and rigging is applied, maybe get lost ? Short break then onto ? hatches and hinges. Cheers Dave R.

-
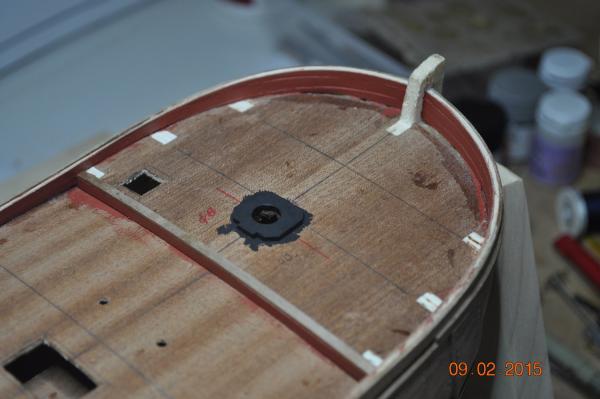
Been keen to get started on the deck planking, get something done. I am not able to do real fiddly work, as my left hand is in a splint(from cutting my thumb). At the shipyard, "ochre" red has been applied inside of the gunwales and some of the mid planking about the Main Partner is in place. I reckon the partner(where the mast penetrates the deck) stands out quiet nicely. Plenty of planks to cut, some to shape, keep me busy for a while. Dave R
-
Hi Steve, Probably good advice on changing to a cheap drill, will look out for one and go for another modification. Thanks Dave R
-
Hi Pat, Your right, as when I turned down the 3 mast bottoms, it was easy to slow the Dremel down(not much torque in it) when applying a bit of extra force to take more off. I'll take Steve's advice and look out for a cheap drill with a chuck. Dave R
-
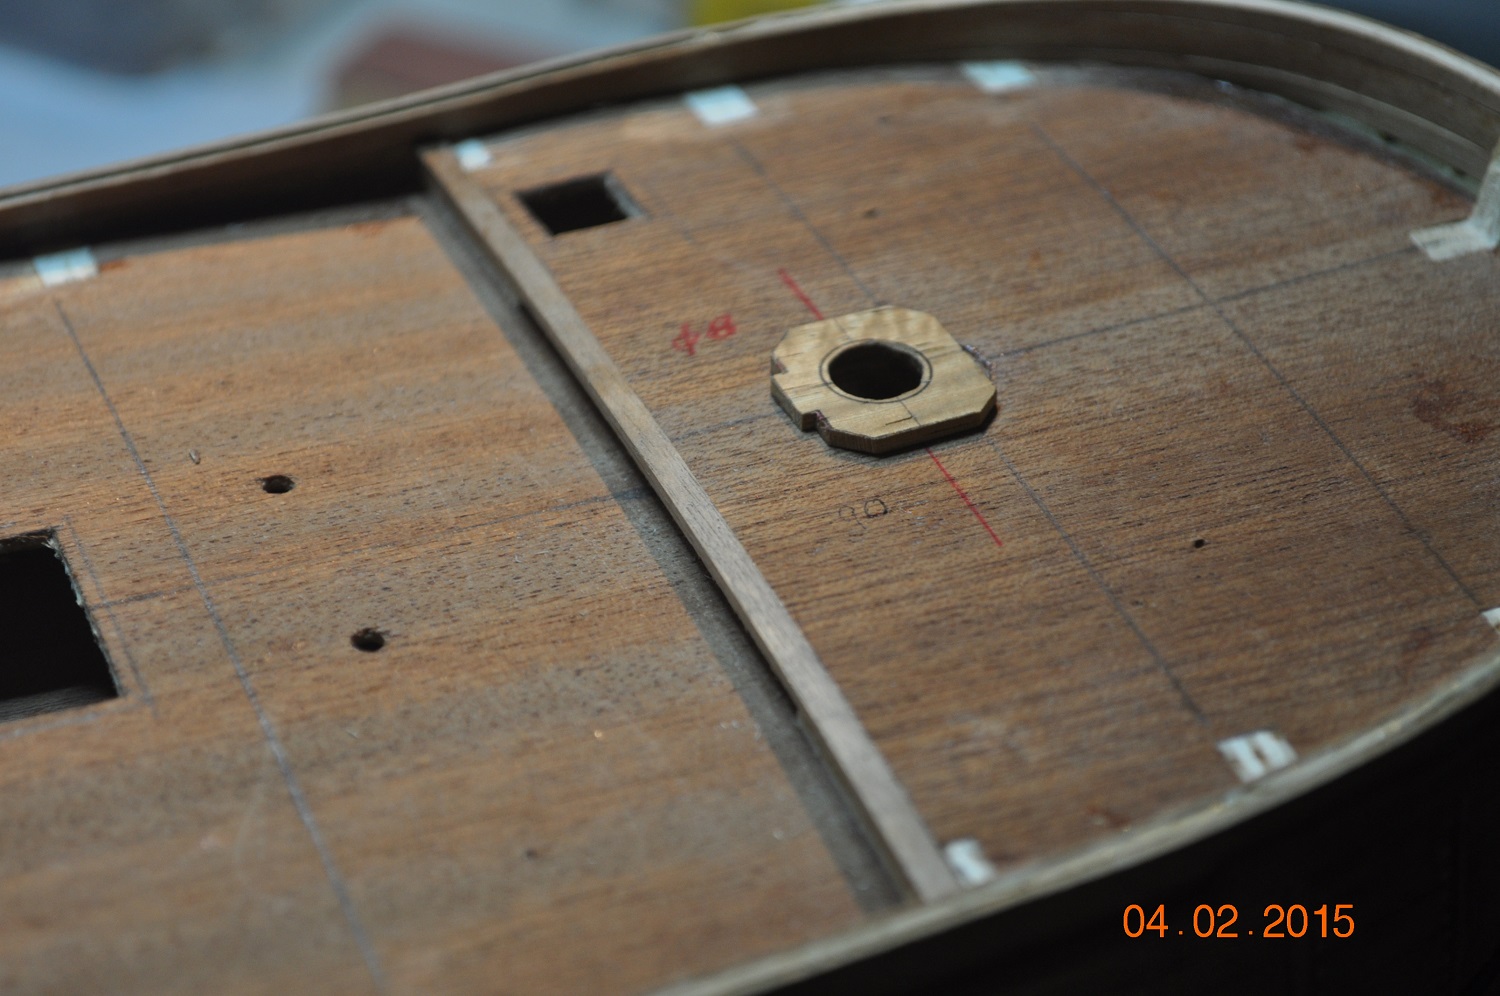
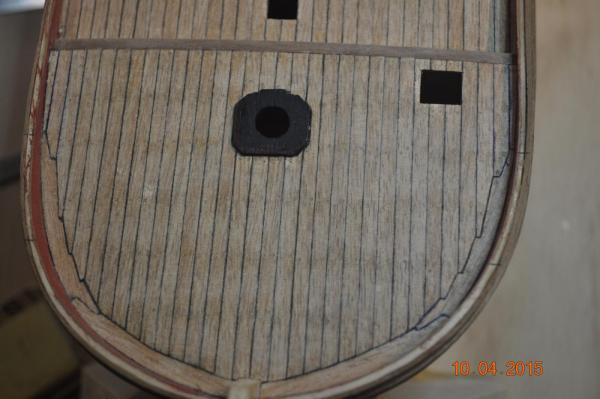
Bit more work today. Edge boards to front and rear decks(where each steps down). 3x1mm board is recessed 0.5mm so the 0.5mm decking butts flush to them. Each overhangs ~1.0mm for the bulkhead boards under to butt up. Dave R

-
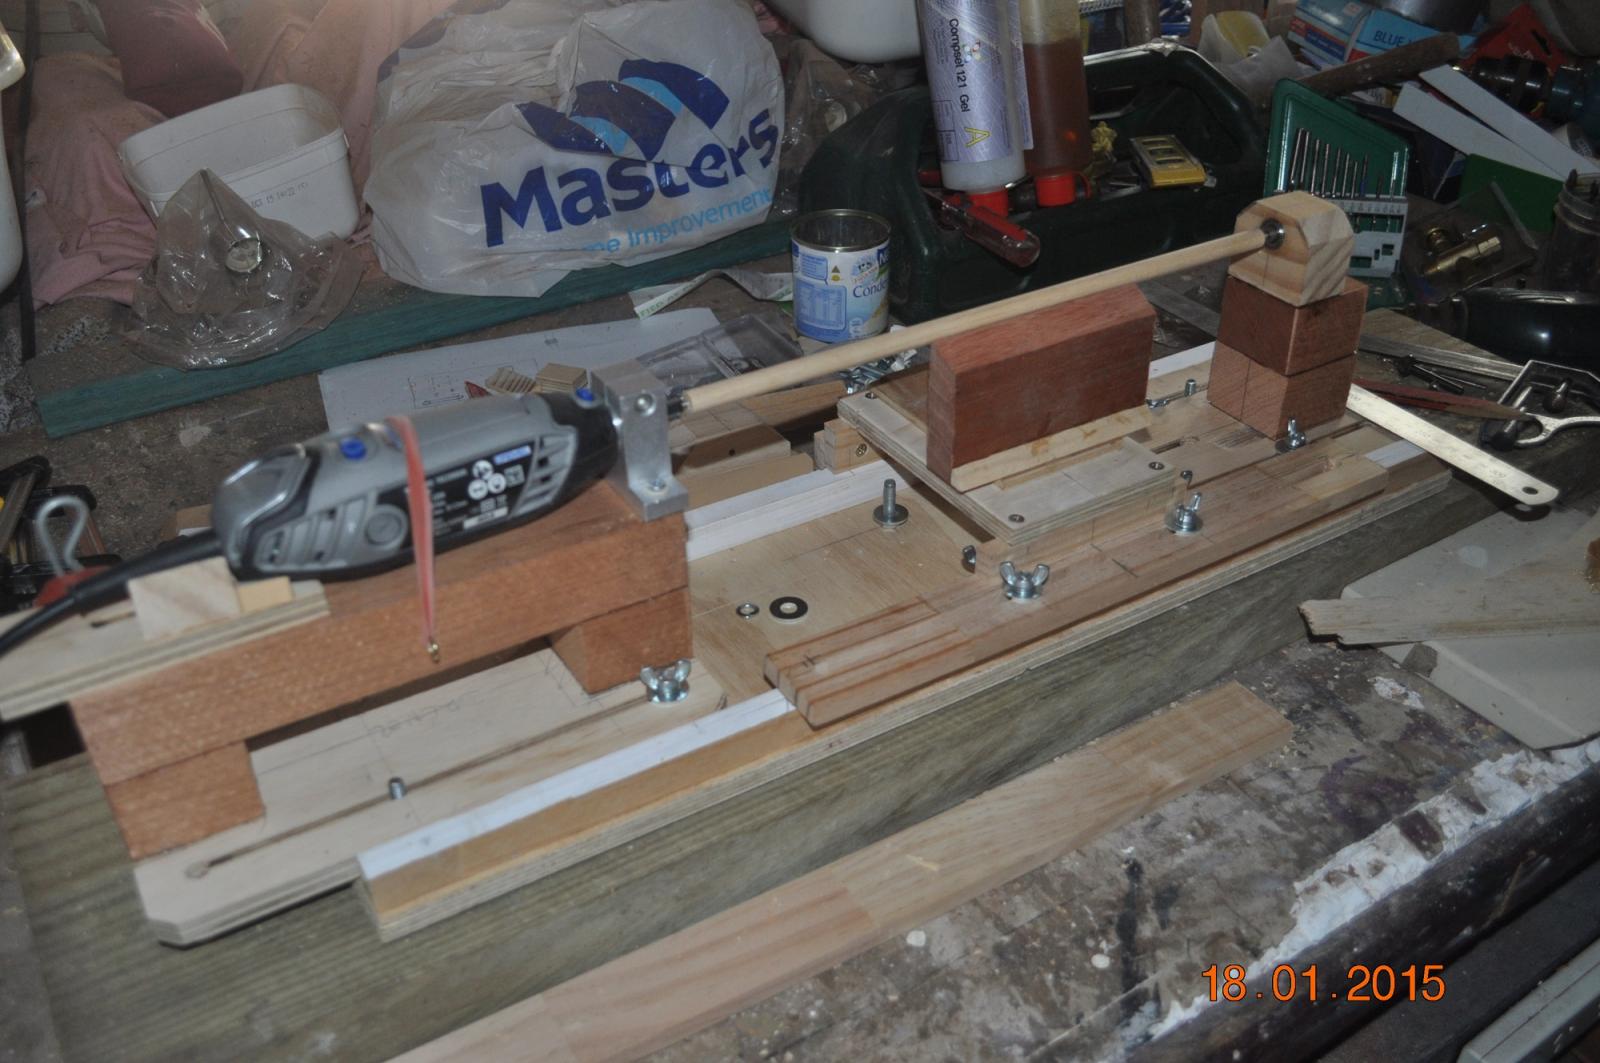
Here is my home made Lathe using a Dremel tool and scraps of timber. The picture is after 2 rebuilds(improvements), not fully assembled. Both the drill drive end and fix end move on slides which allows 100mm to 350mm long dowels to be worked on. Just for the Endeavour mast and spars. The tool rest also slides between - raised to clear the end wing nuts of the slides. With the long dowels, the middle bows so I am looking at maybe a small roller that rests on the other side of a dowel, mounted on the other side of he tool rest to oppose the force of the cutting tool. All good fun making these things - keeps the mind active. Dave R

-
Work at the shipyard has been somewhat slow. Before going ahead with decking and other components I stepped the 3 masts - mainly to set the mast partners on the deck. I made 3 partners for where the masts go through the deck. Turned down each mast to required diameter. Fore 8mm dia Main 9mm dia Mizzen 6.5mm dia (should of been 6mm by my calculations but seems so small) Each mast goes through a mid collar on the lower deck and down to rest on the keel, the partner and collar allowed to set the rake and plumb sideways of each of the 3 masts. So onto the decking next. Dave R


-
HMB Endeavour by mikec - Eaglemoss
DaveRow replied to mikec's topic in - Kit build logs for subjects built from 1751 - 1800
Hi Mike, Your detail pictures are great. Will surely help me when I get to this stage. Makes sense seeing things made than trying to working out from views on plans. Keep them coming - great stuff. Dave R -
Great work Ron. You give me inspiration, that I will get there one day. Lucky me will have all the logs of Endeavour builds to sift through for help. Dave R
-
Great step by step info there Pat. That helps explain a few things as, I am long way away from making masts and spars, but have had a look in on them in the AOTS, and looked daunting to me. I will be doing a lot of hand shaving and sanding I reckon, milling machine, what milling machine ? I've made a home made Lathe, that's about where I'm at. Keep up the great work in the shipyard Pat. Dave R.
-
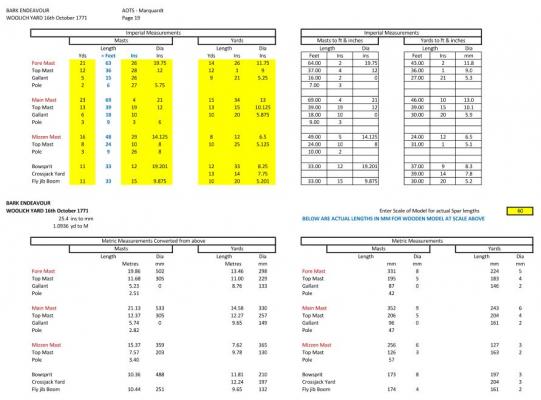
If anyone is interested, I have posted a pic of a spreadsheet that basically converts the imperial lengths of Mast & Spars to mm based on the scale of your model. It is based on the HMB Endeavour and is populated with the lengths from the Woolwich Yard 16 Oct 1771. Has Parkin and AOTS tabs. I will shortly add "below/above deck" for the masts into the sheet. If you would like the spreadsheet, PM me with your email and will email to you. Dave R.
-
Hi Greg the peg sailor, The lengths in the spreadsheet are direct from the AOTS Table. And yes in my less experience as a builder assume the main mast lengths are stepped to the boats keel. Mizzen would be not as tall as Main. Dave R
-
HMB Endeavour by mikec - Eaglemoss
DaveRow replied to mikec's topic in - Kit build logs for subjects built from 1751 - 1800
Coming along very nice Mike. Crows Nests look very real, whole boat looking great. Dave R. -
Hi Steve, I agree something is not right there. I am hesitant at scaling directly off plans unless I have a reference to check against. I have been dabbling into the masts recently - interested to check this out. The AOTS Main Topmast on page 83(1/16" = 1 ft) scales approx. 39' 6" As a check I looked up Ray Parkin HMBE and on page 34 he has a table of Masts and Yards(Woolwich Yard). The Main Topmast is at 13 yds &19 inches = 39' 19"(40' 7") reasonably close ?. Should we work with this these lengths, and the proportions of size of the view on page 83. ? AOTS p88 - scale of 1/8"=1' scales at 61' which is no good - and don't trust the scale on the page. Correct you are at 3/16"=1' scales approx. just under 41' - pretty close to the Parkin table size of 40' 7" Good pickup Steve. Dave R.
-
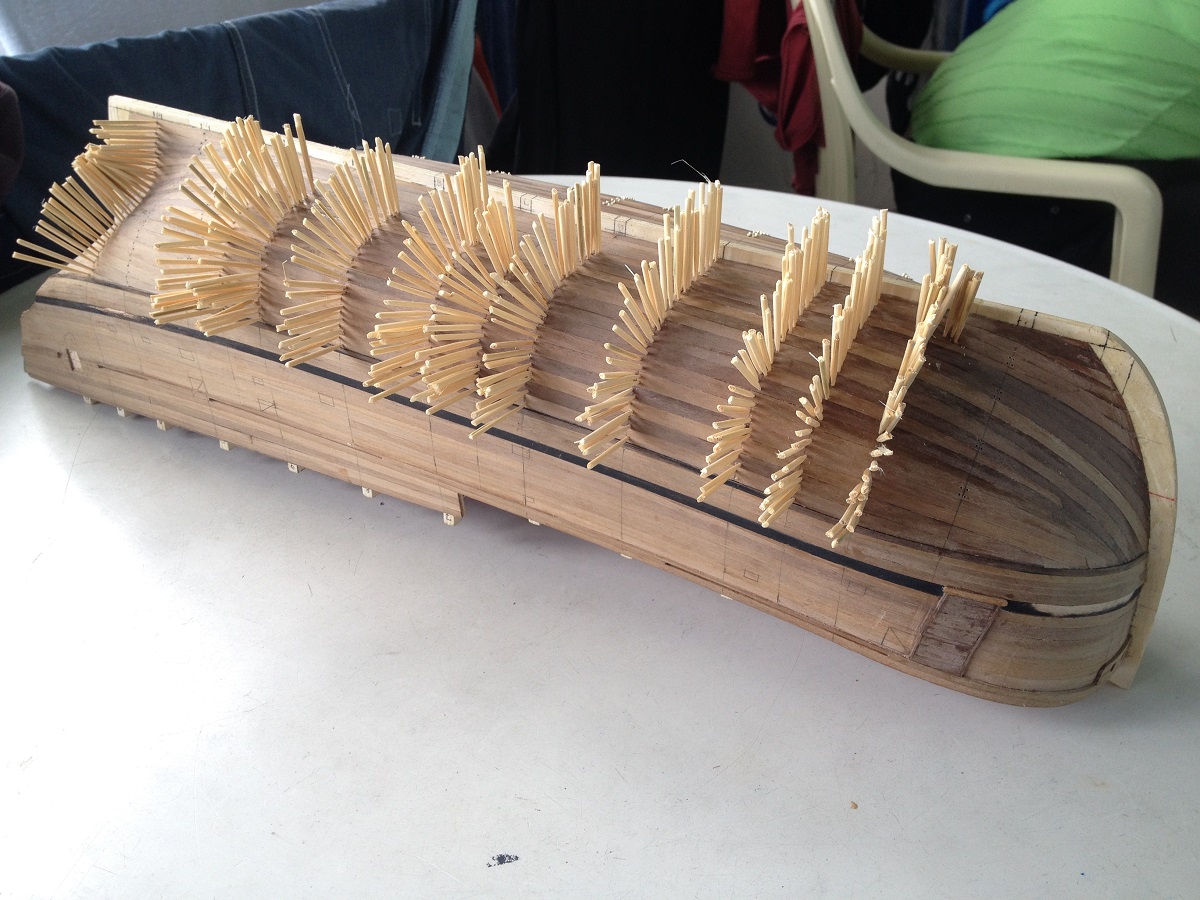
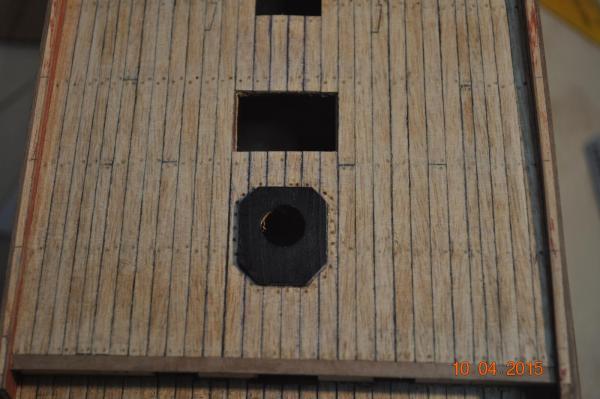
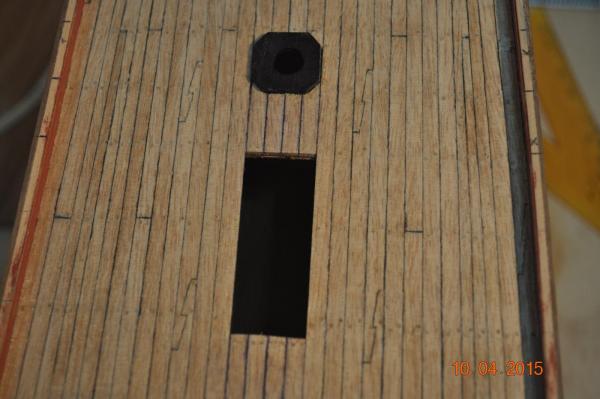
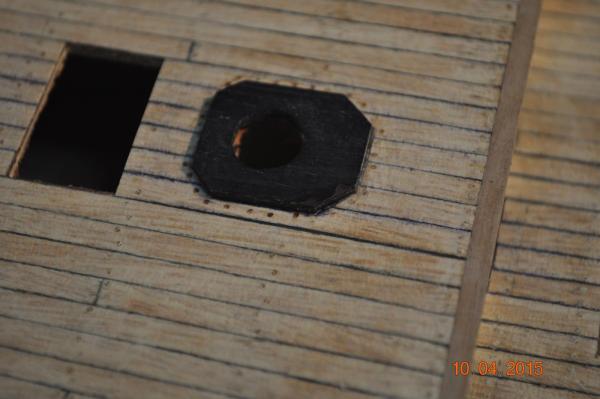
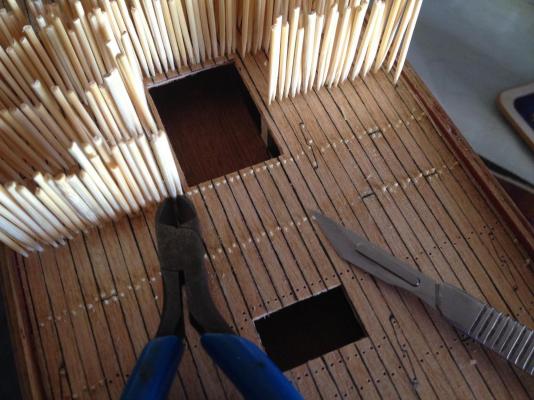
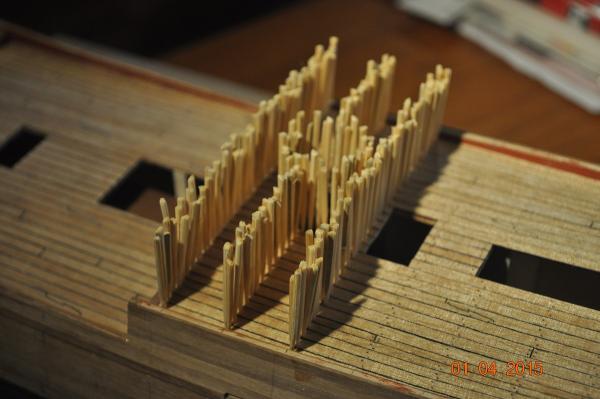
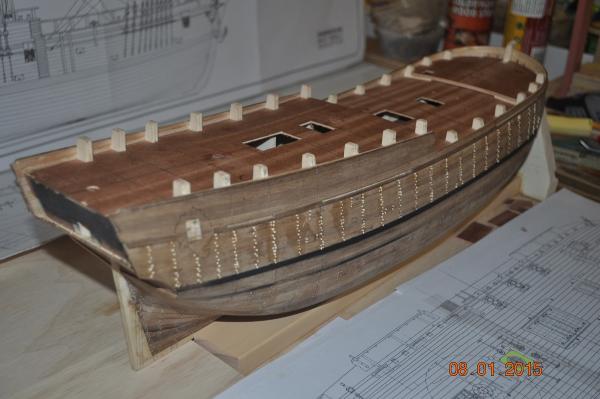
All the best for the new year Wooden Boat Builders. I made a "dock" to hold the hull vertical so measurements can be taken and for the fit-out works. 12mm ply base with 2 batten runners either side of the keel bottom. The bow is held by 2 pcs. of pine raked either side of the bow keel. Holds the hull very firm. Shortly after I cut my left thumb severely(very annoyed at myself) which has slowed the pace of the build considerably. The hull has some 3,000 tree nails to date installed and most cut flush to the hull(ready for a final sand). Started the deck by cutting the access holes - at least I could do that with 1 hand. Been contemplating how to mount the 3 masts onto the keel, as the kit ! does not mention this. Have come up with a mast stand that clips over the keel that I lower down on the bottom of each mast and glue onto the keel. design and pics to follow. Working with 1 hand is frustrating. Dave R.


-
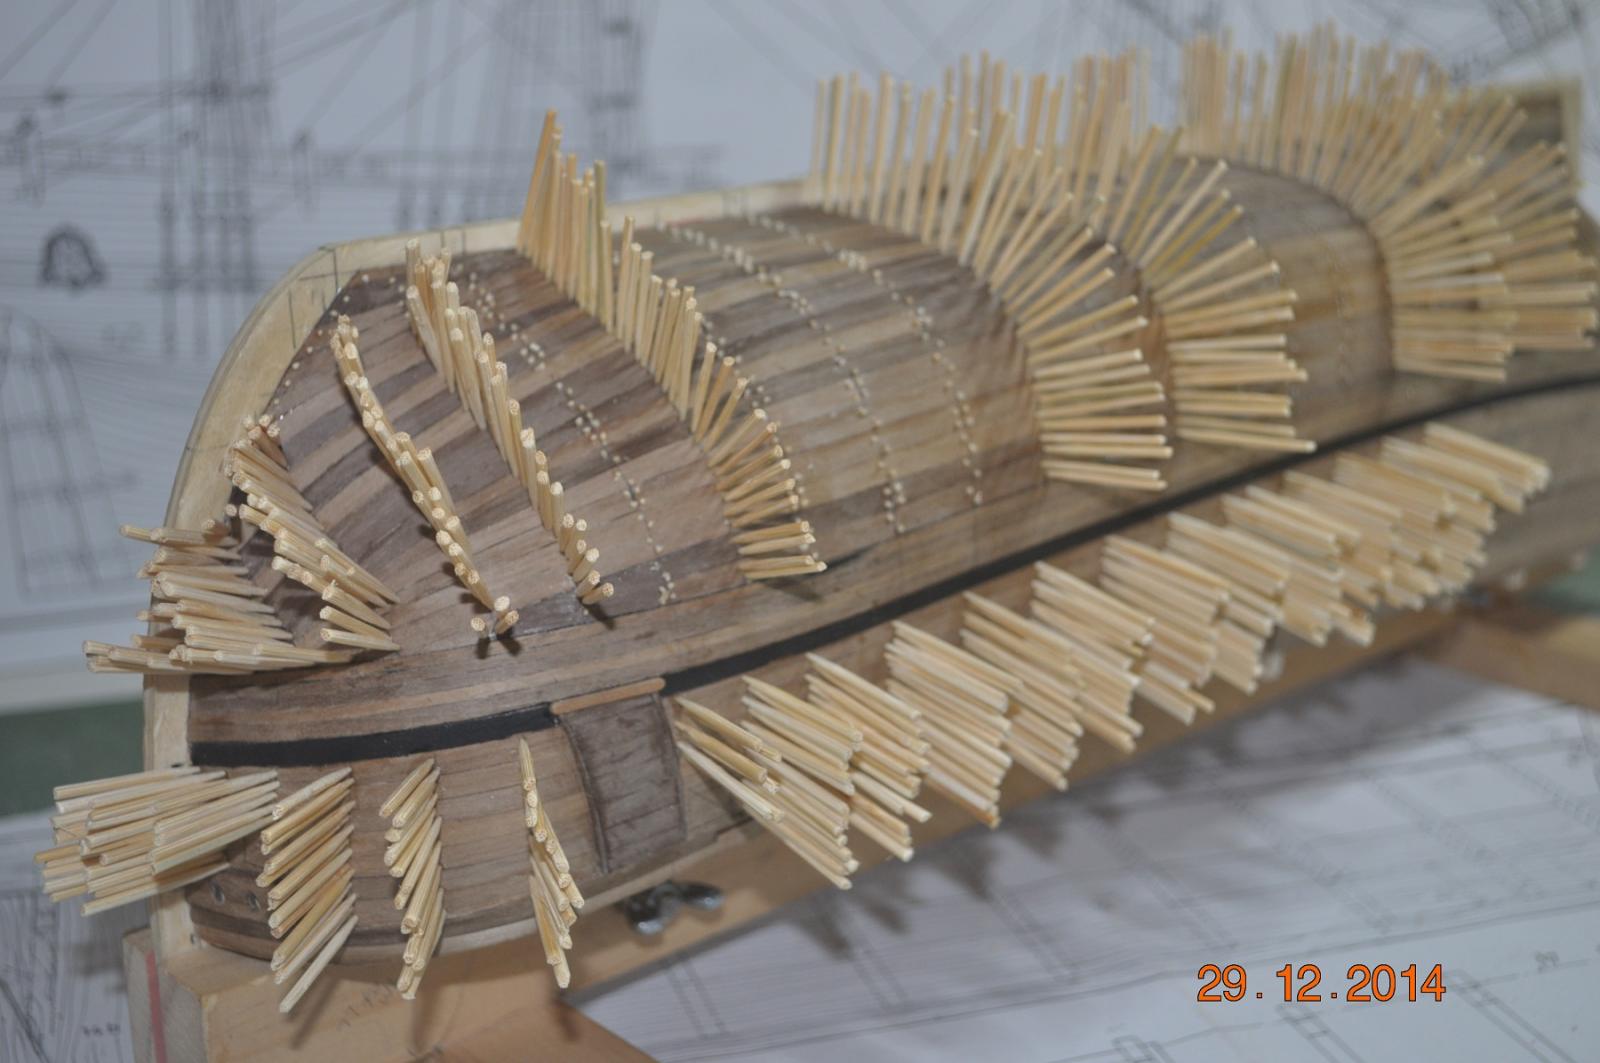
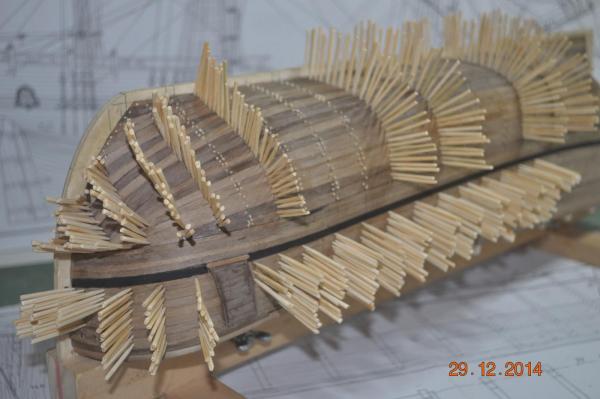
Well, the Shipyard has been tree-nailing the hull for some weeks now. I go at it hard for a couple of sessions then a rest. With Christmas and family about, time is precious with close ones. Be glad when it is done, to move onto the hull fitments and the deck. Dave R.
-
Coming along very well Steve. I'm a million miles behind you're build, but one day will get there. Dave R.
-
Jason(Beef Wellington), Thought about the PVA glue vs Epoxy for the Tree nails. PVA won out, much faster and non-structural. Dave R
-
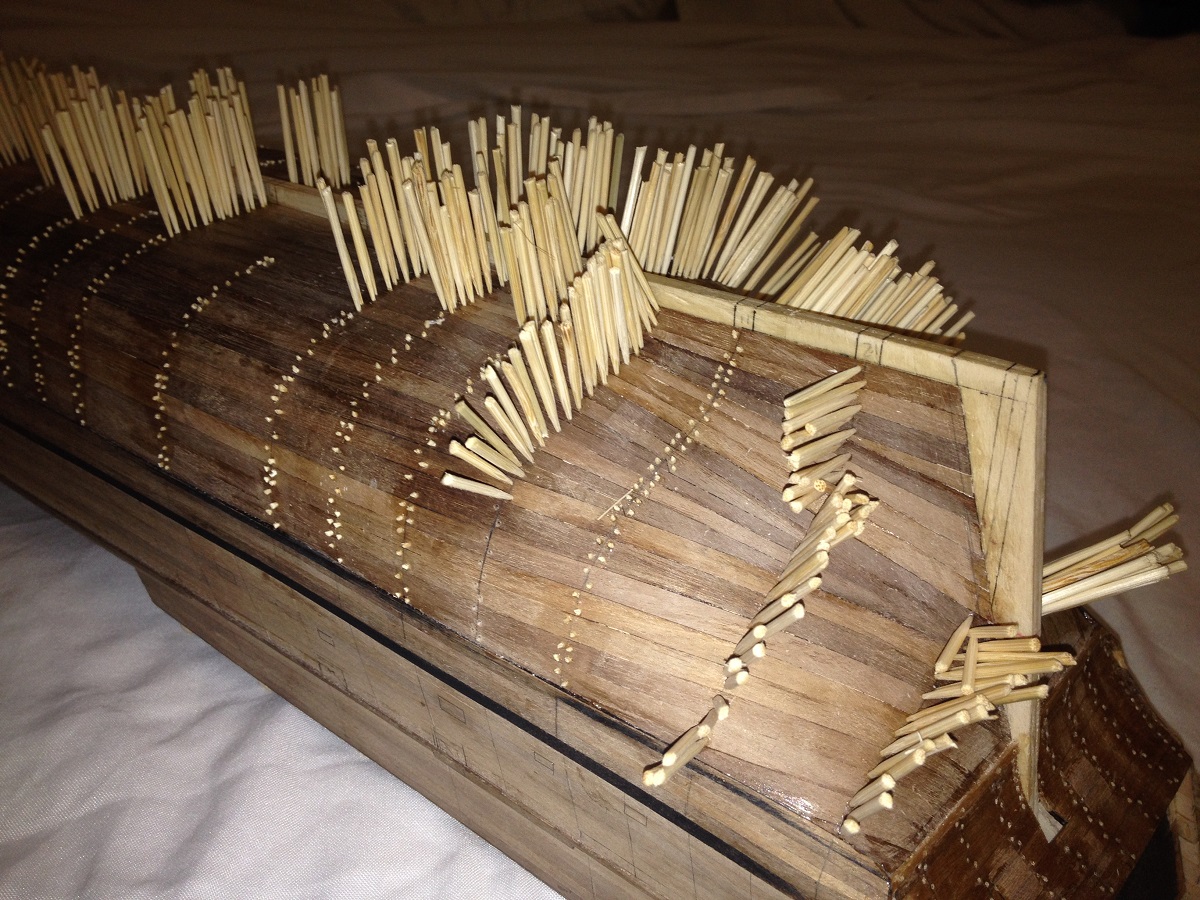
Well onto the Tree Nails(TN) on the hull. Approx. 1300 done with just as many and more to go. 0.4mm hole with half a toothpick in it for a TN. My test area showed once sanded the "whiteness" blends in with the darker plank timber - Beech. I hope so. Dave R


-
Looking good Steve. I keep in touch with your log - pick up on the details for when I get there. Currently Tree Nailing the hull. Dave R.