


JSGerson
-
Posts
2,156 -
Joined
-
Last visited
Content Type
Profiles
Forums
Gallery
Events
Posts posted by JSGerson
-
-
-
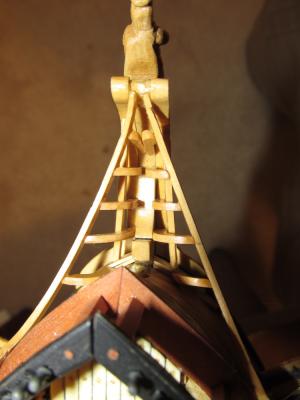
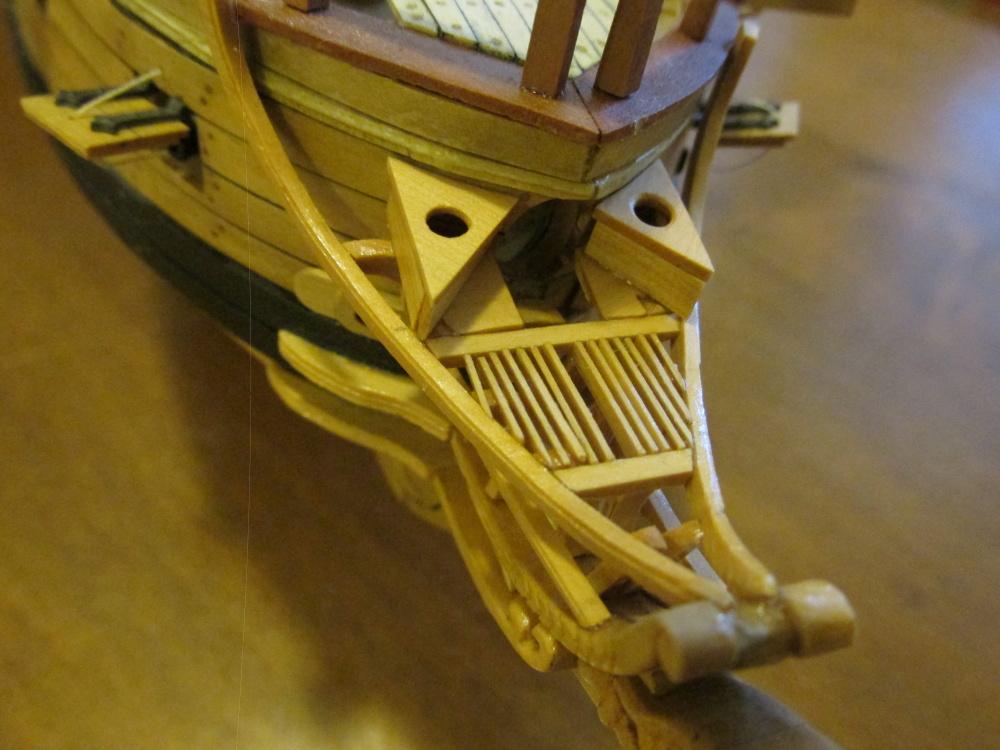
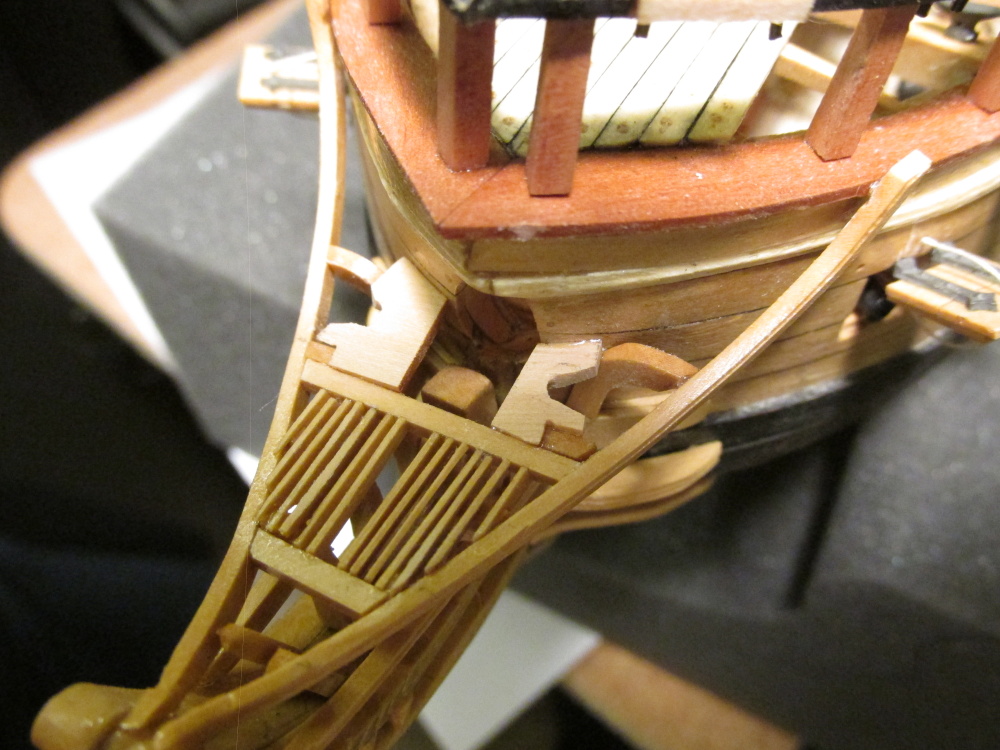
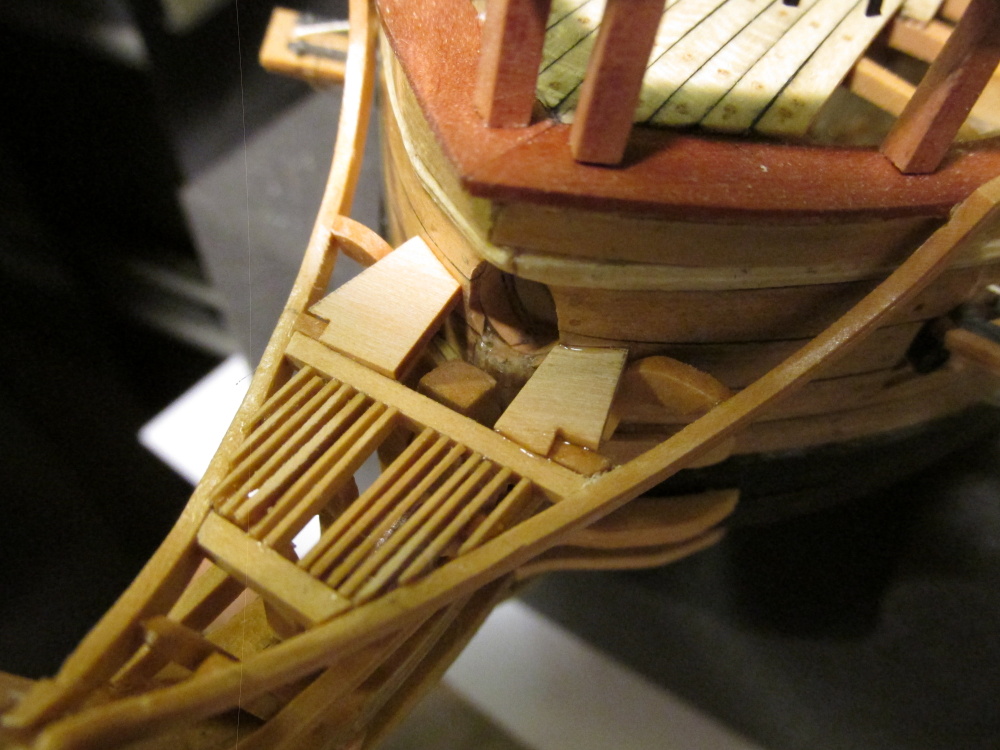
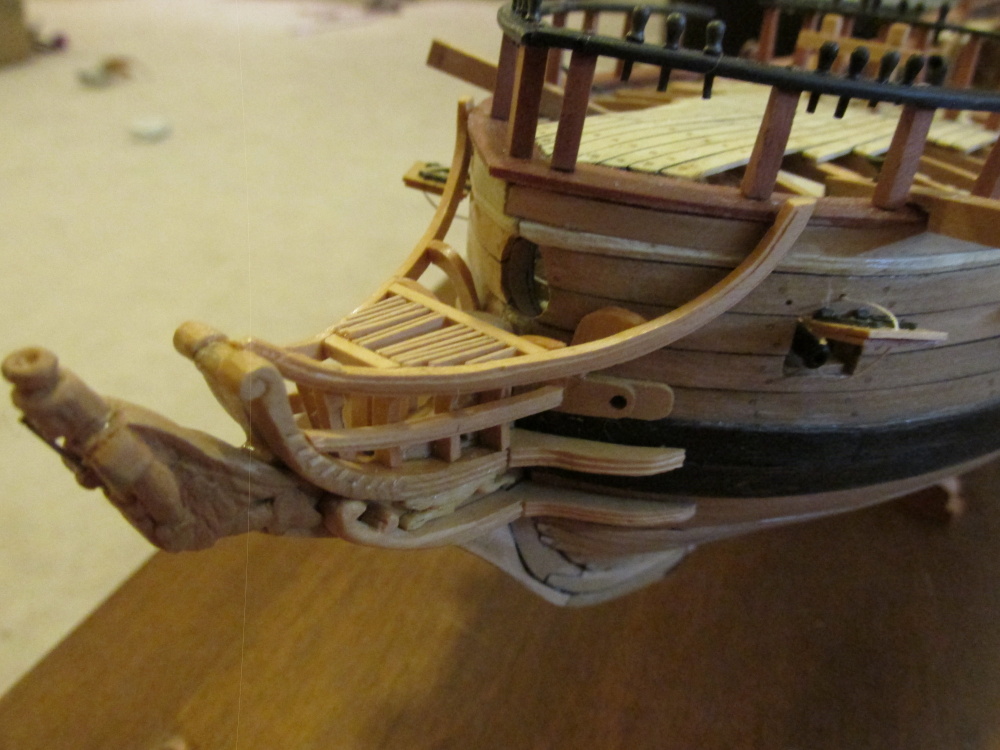
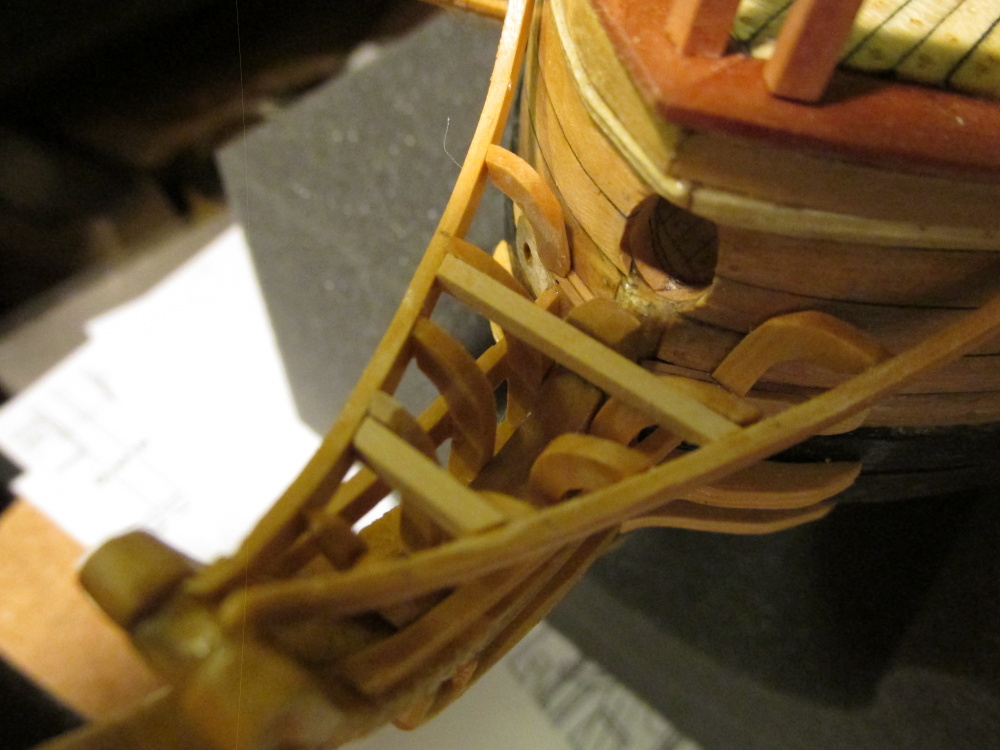
This was remedied by drilling and carving out a crude U-shaped opening. As long as it was a clear shot, as it were, to the sea it worked. This part of the structure would not be seen.

-
In addition, only a portion of the base is to be seen. Once the base was installed I realized I shaped it wrong – it covered too much. The area directly below the seat was not open enough.

-
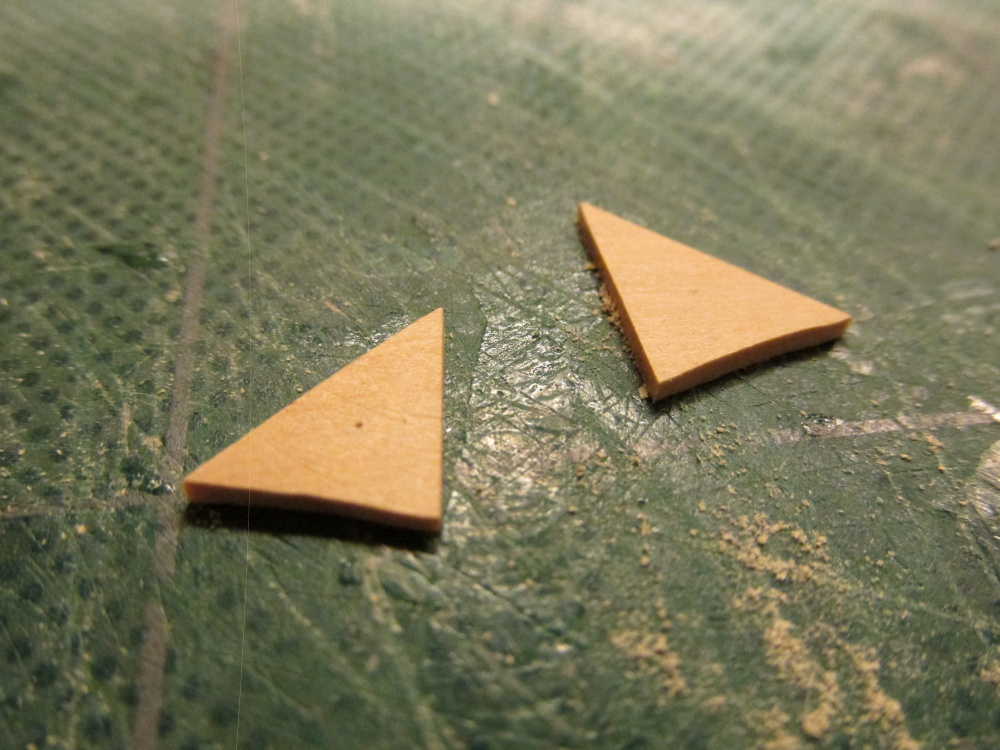
As I have mentioned before I am following fellow Rattlesnake builder Pasi Ahopelto. His seats of ease varied a bit from that shown in Hahn’s plans. Each seat is made of 4 pieces of boxwood, the base, 2 sides, and the seat. The base was the trickiest part because it had to fit flush with the grating and wrap around the cross beams and rail supports.
-
-
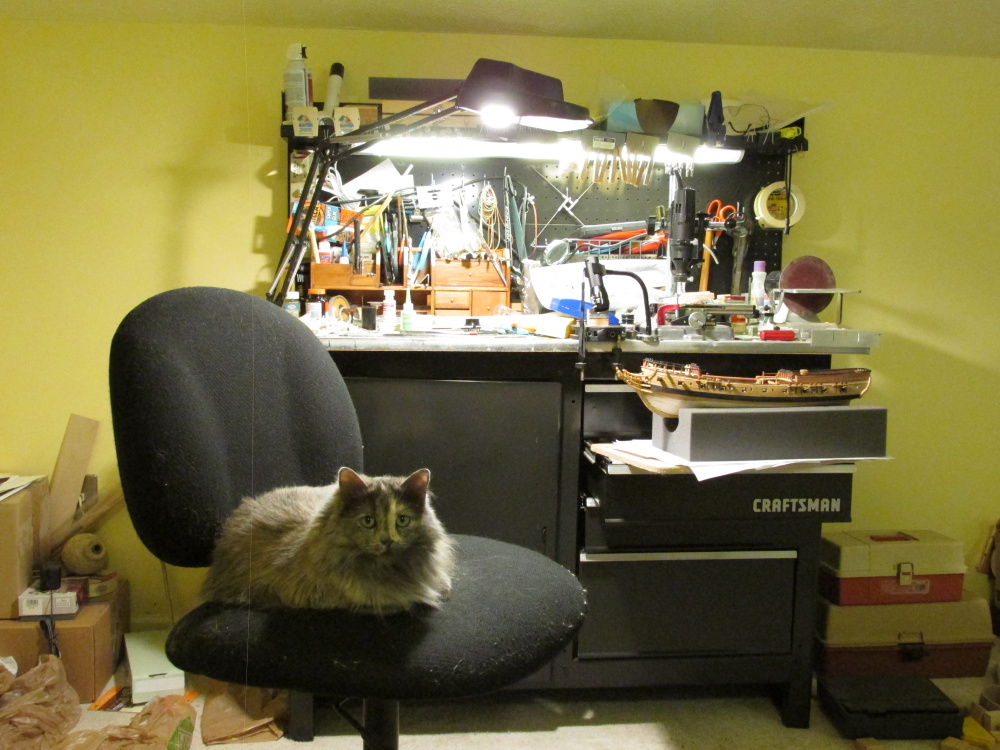
Peaches, my cat, is extremely affectionate. She will actually asked to be picked up and held ...tightly multiply times during the day. To get her off the chair and make it seem like her idea, I show her my secret weapon - a comb. She loves to be combed and combine that with a tummy rub, she will come running. Crazy for a cat, right? Once she has been sated, the chair is mine again.
I hope to get the seats of ease done by this weekend. Next week I'll be attending the Nautical Research Guild Conference in Charleston SC which not too far from where I live. I hope to learn a bunch to stuff and have a good time.
http://www.thenrg.org/2013-nrg-charleston-conference-details.php
So things on the model building side may slow down again.
-
I have very little modeling experience and my "attempt" at a rub on was, well an attempt. I used clear scotch tape. I put the sticky side down and drew out my template. I then flipped it over, lined up my marks and gently stuck the rub on letter in place ( messed a couple letters up as they get put on backwards so when you flip the tape over it will be in order). The tape once flipped over will of course stick to your hull allowing you to rub the letters on. I can make a mock up and take some pic's if you want ?How did it work out with your lettering? Having never tried reversing the dry transfers with tape, how did you make the letters stick to the transom and not the tape when you rubbed the tape? Wouldn't the tape peel off the dry transfers when you removed it?
Of all the build logs I've looked at for the Rattlesnake, yours is the first I've seen for the painting stage. Since my model isn't and won't be painted, I look forward to watching yours as you progress.
-
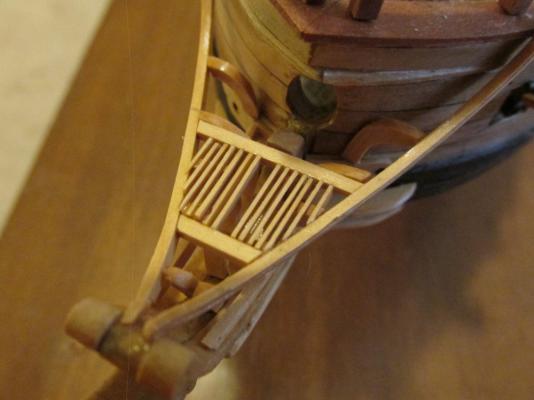
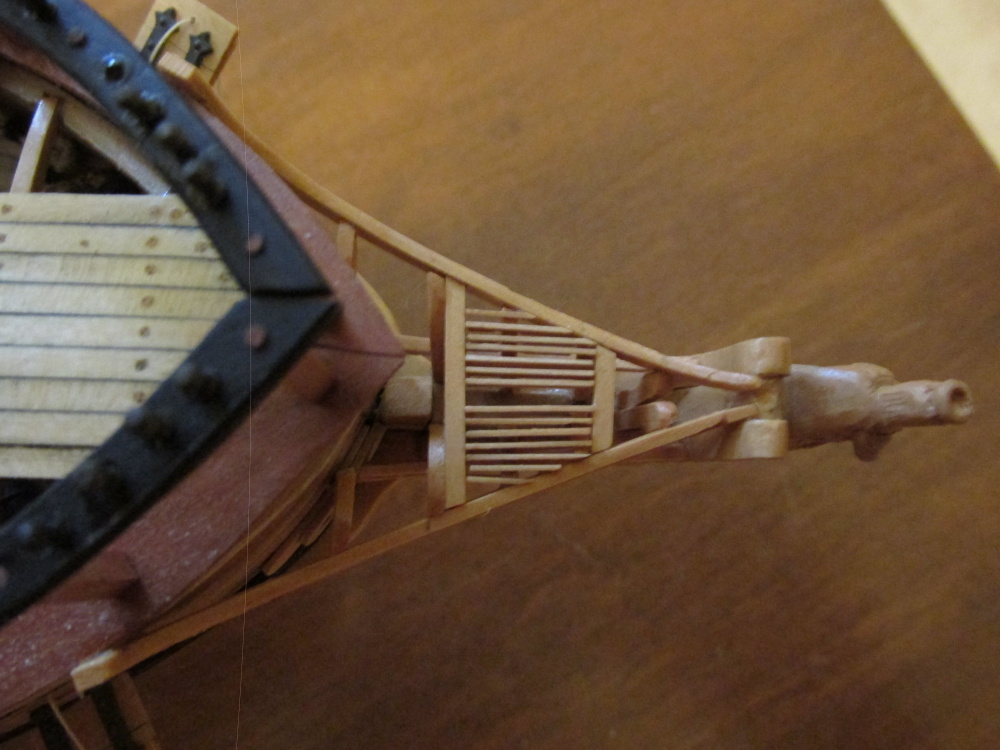
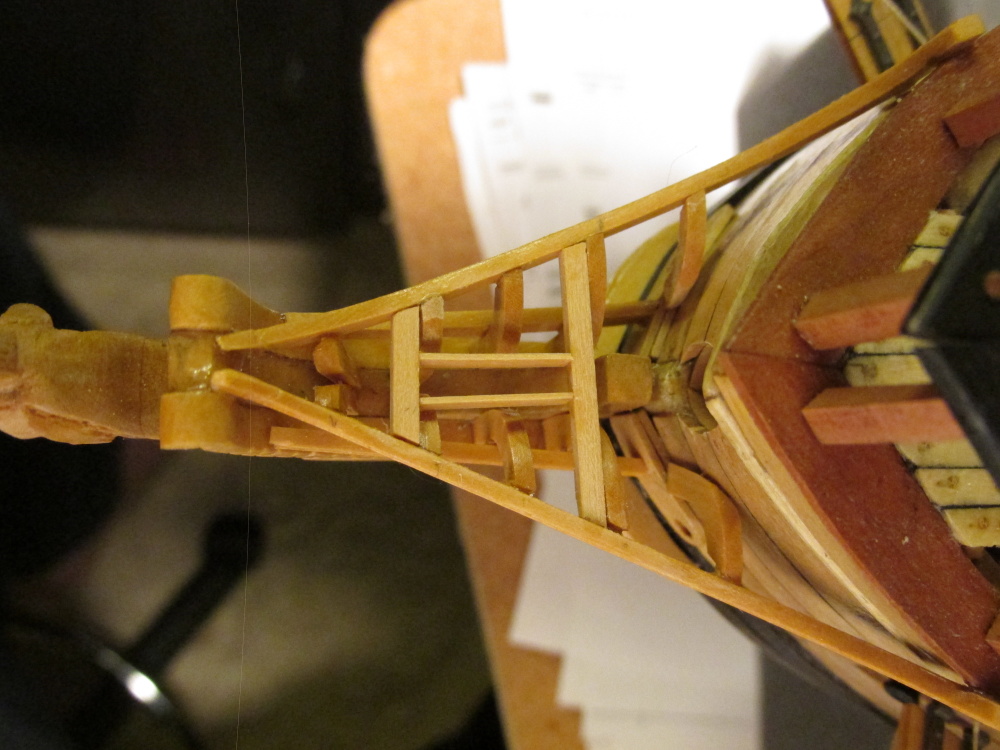
As the slats installation approached the rails, accommodations also had to made to custom fit each slat around the rail supports and rail angles. As each slat was placed into position, I waited at least 30 minutes before working next to it for the next slat less I touch it and knock it out of position. Work progressed very slowly. The results although not perfect in the close-up images, I believe will work. Next comes the seats of ease themselves.


-
It appeared that Pasi used Hahn’s plans only as a guide in that he made his slats the same width as the cross timber. I chose to make mine narrower. Even the Hahn plans were not drawn very consistently as to their width. As the installation progressed, it became obvious that this was not going to be easy. Working with an eye loupe on my glasses (I wear tri-focals), trying to hold the model at a steady and proper work angle while maneuvering the delicate slats into precise position, with proper lighting so I could see what I was doing, before the CA glue dried, proved to be a challenge. Oh did I mention that I had to fight to get my work stool from my cat? I mean how can anyone disturb a contented cat?

-
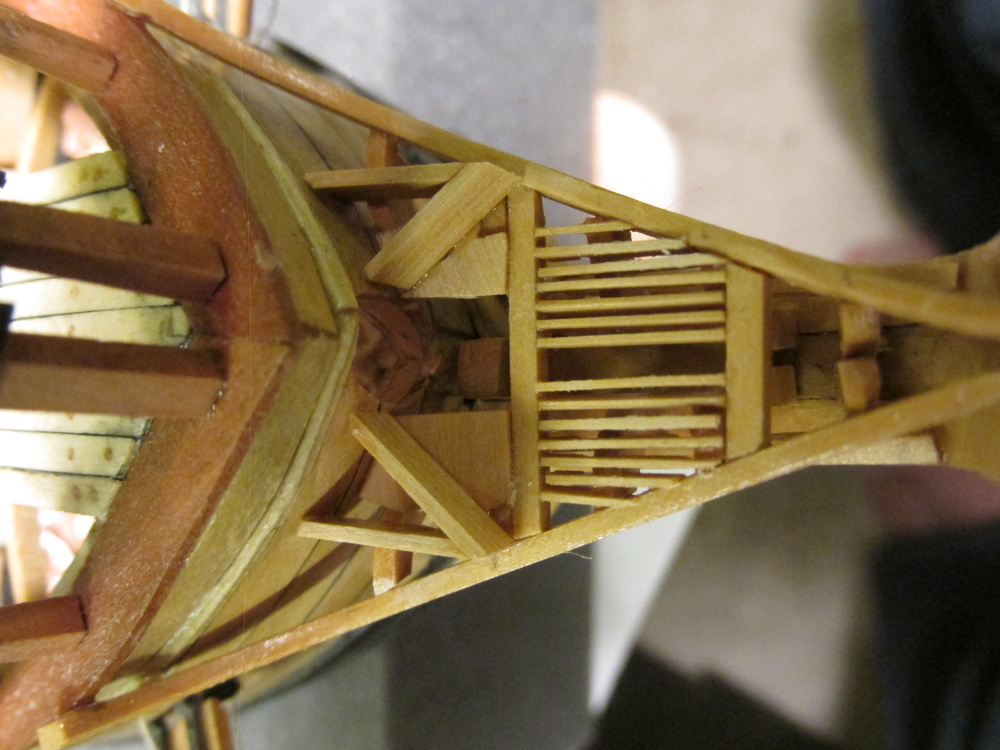
Then the first of fourteen 1/64” x 1/16” grating slats were installed starting from the center. Following Pasi’s photos, I left a wide space in the center to separate the two gratings.

-
I couldn't follow Pasi’s build exactly as he built his model because he was working to a larger scale: ¼” – 1’. In particular, he used lap joints for his grating which I was not able to duplicate at my smaller scale. I therefore used butt joints because cutting clean, equally spaced, notches in the cross timbers either completely across or half way for lap joints was beyond my ability and it would not be noticed to the casual observer without a magnifying glass.
First, the cross beams made of 1/16” square boxwood were cut to size, fitted, and installed.

-
As you can tell from my log, I haven't started the masts or yards. In fact I have never made any masts or yards before. I hope you will create your own build log so I can learn from you by following your build and photos.
-
Welcome aboard! I hope my experiences in building this model helps you to build yours even better than mine. As you may of read early in my build log, this is my first build of this type, so I hope you will forgive any errors I have made along the way. Good luck to you.
-
I'll be away from building anything this weekend so the earliest you will something will be at least a week away. For the notches, I think, due to the scale, butt joints would work for you. I'm thinking of using 1/32" x 1/16" boxwood (which I will have to mill myself) for the grating and will either notch completely across the cross beam or butt joint. Remember, Pasi was working to 1/4": 1' scale so he had the luxury of larger scale and therefore more space. The seat of ease does have a place for the user's feet. Using the seat, the sailor is facing inward towards the center-line and Pasi did provide a flat surface there. It should be interesting to see how this turns out.
What are the "sister blocks" you referred to?
Take care
Jon
-
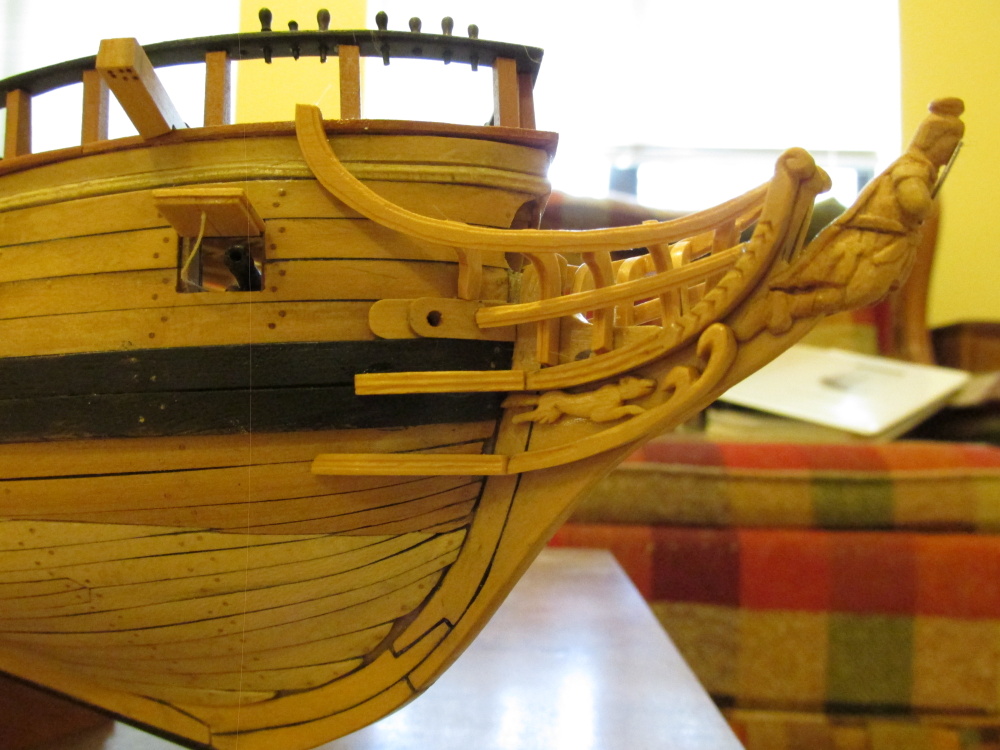
The next step is the construction of the grating and “seat of ease” otherwise known as the “head.” Again, for some reason (I suspect Mr. Hunt was running out time to publish the Practicum and he was building four boats at once), the Practicum is totally silence on its construction. For guidance in this phase, I will fall back to fellow Rattlesnake builder, Pasi Ahopelto’s wonderful but now unavailable build log. Luckily I made a copy of it for reference while he was posting.
-
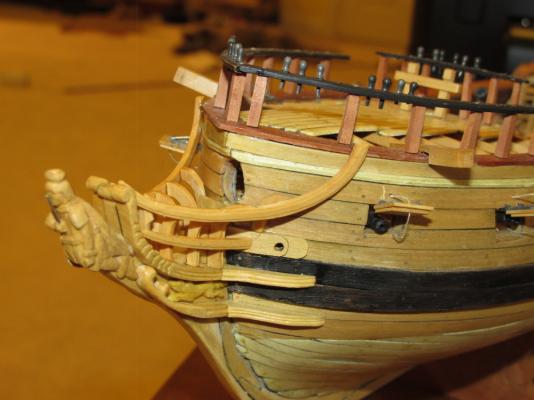
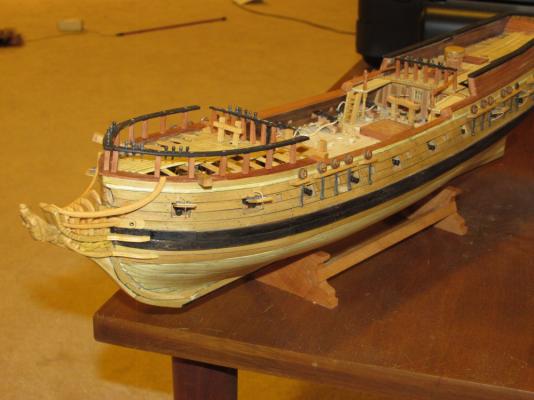
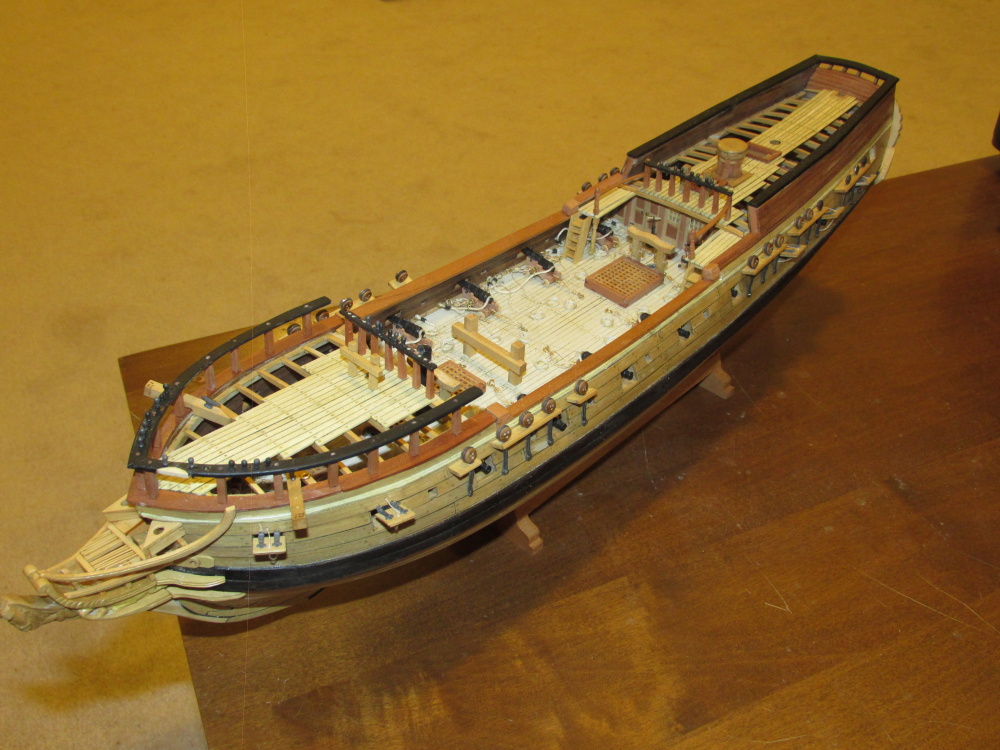
Here is what the bow looks like at this stage.

-
Back to the Head Rails Again
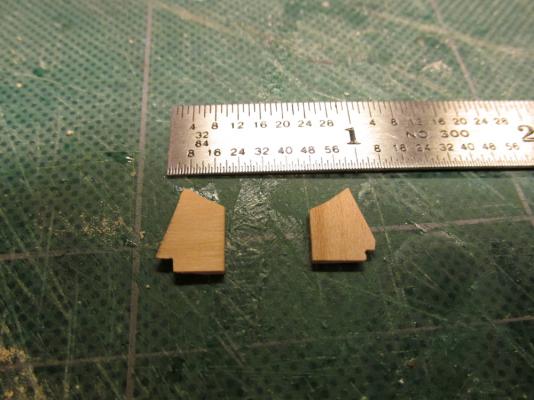
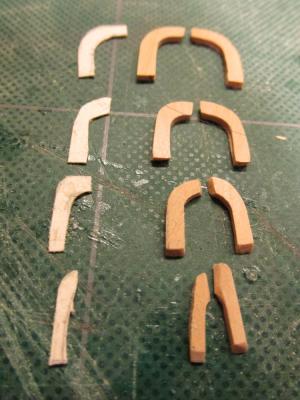
According to the Practicum, there are four cross timbers per side that need to be constructed and installed. According to everybody else there are five. The one that is missing from the Practicum is the timber coming off the Hawse Reinforcement Boards. Why this was omitted is anyone’s guess. Each one must be custom sized and fitted.
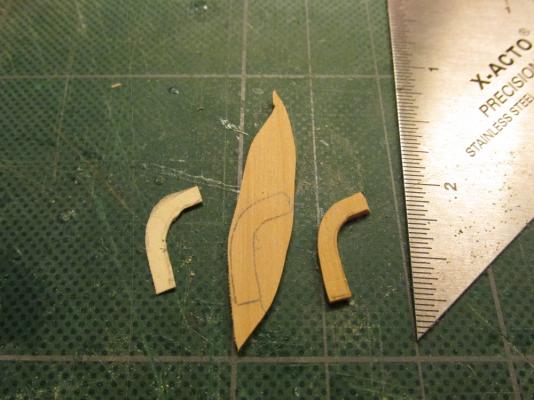
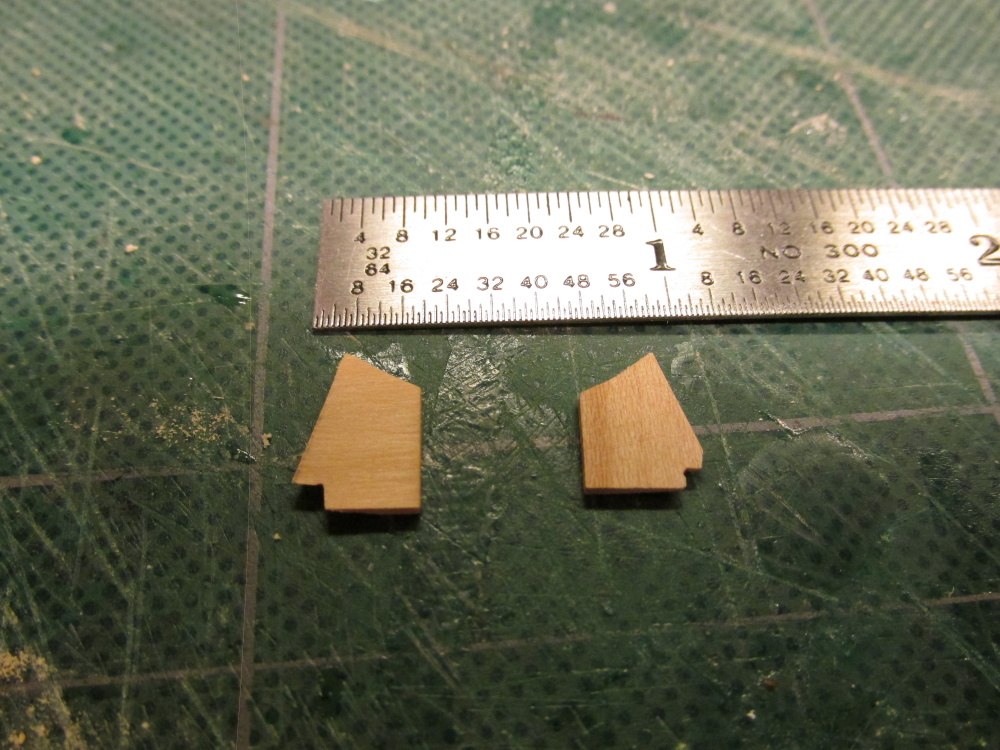
First rough measurements were taken to form each cardstock template. The template was then traced onto 1/16” boxwood (In my case, scrap pieces leftover from constructing the head rails). The pieces were cut out with the scroll saw. After filing, sanding, and repeated fittings, the parts were finally formed. They had to be custom fitted due to minute dimensional variances on each side plus the numerous angles the pieces had to fit into. Because the head rails were only glued at the ends with very little glue surface areas, one or two were inadvertently knocked off with the most minor hit. The whole bow structure didn’t become truly stable until all the parts were glued together. In the picture below I show only four sets of timbers. I discovered the fifth one after I started to install them.
-
See my response on my build log to your query texxn5
-
You can't print white. That is the problem. The only way using the decal method I can think of is to reverse print:
- Paint the plaque white
- On the computer, make an dark opaque background (black or some other dark high contrast color) with white lettering
- Print the decal
- When placed on the white plaque the lettering will be white (because the decal will be transparent there) with a dark background
I did something like this for a logo which had white areas, on the propeller of the Albatross DVa model. In that case I painted a small white dot on the propeller and put the decal over it.
If you try it, let us know how it worked out.
-
I saved myself from committing error by making a cannon mock-up out of card stock to make sure the cannon would poke through the gun port at the proper height at each gun port location. That little test would have spotted your error by noting that the gun point height was changing as you moved the mock-up around.
-
If I might interject, Warner Woods West does not have a website. You can reach him at
warwoods@infowest.com
and he will send you his price list
-
Thanks, and it is surprisingly easy to do!
-
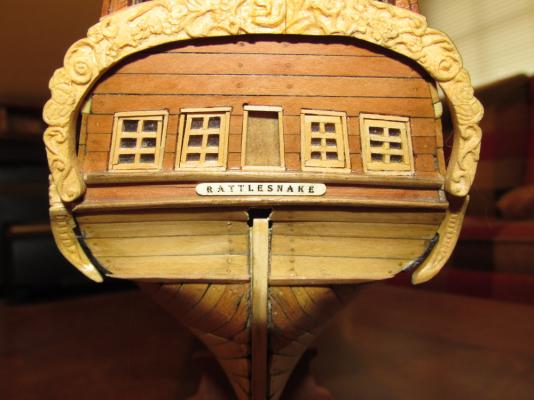
Because of this discussion on lettering, I chose to try homemade decals for my nameplate. Take a look at my log for details.
-
The lettered nameplate in turn was then glued in place. I knew that ships of that era did that because the actual USS Constitution is done the same way. I chose Holly, a light colored wood, to add some contrast.
- CaptainSteve, MEDDO and sport29652
-
 3
3


Rattlesnake by JSGerson - FINISHED - Mamoli - 1:64 - Using Robert Hunt’s practicum
in - Kit build logs for subjects built from 1751 - 1800
Posted
Thanks. I'll be starting work on the rudder and tiller soon, probably next week. Not much construction will take place this week due to the Nautical Research Guild Conference in Charleston SC.