


JSGerson
-
Posts
2,163 -
Joined
-
Last visited
Content Type
Profiles
Forums
Gallery
Events
Posts posted by JSGerson
-
-
Masts…Again
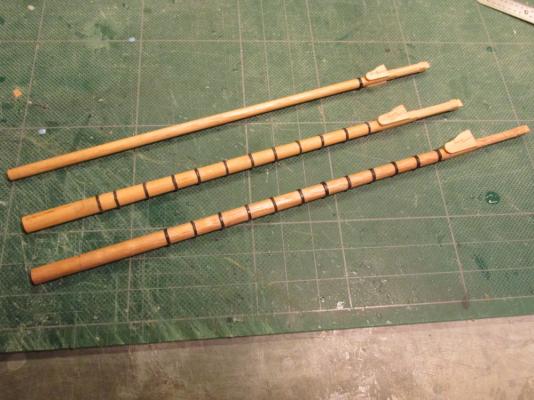
Meanwhile, back at the masts, all three lower masts were completed to this point:
- Martin W and CaptainSteve
-
 2
2
-
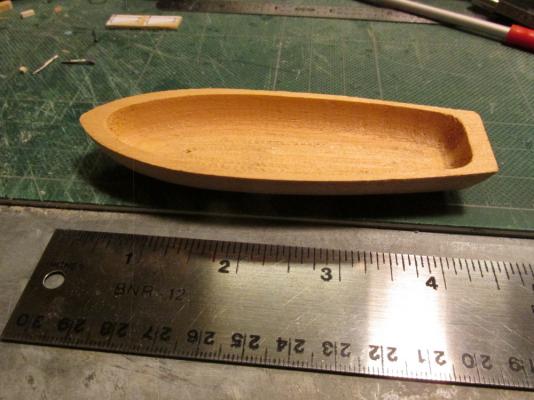
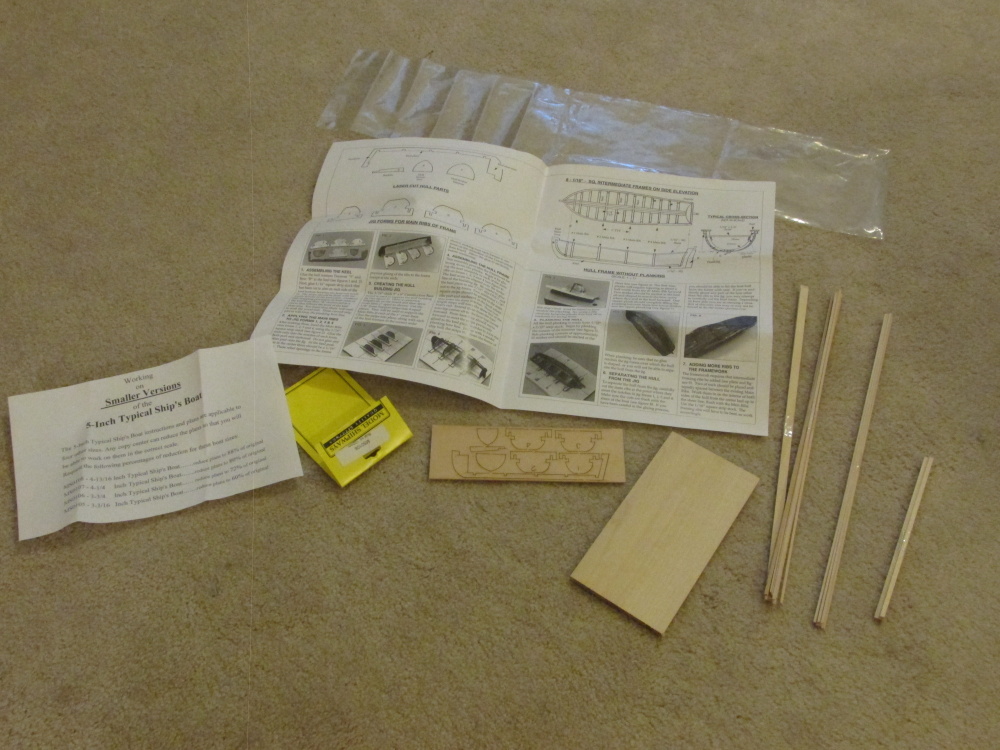
The boat shell (without rudder) that came with the Mamoli kit is about 4 3/8" (see photo), and the Model Shipways' boat that you construct "bread & butter" style is just shy of 5". I purchased the 4 3/4" kit because the next size up was 5 3/16". All of the boat are similar but not quite. So who is to say with certainty which one the actual ship had. If I really screw it up, I can always fall back to the kit's boat (I hope not).
-
I'm curious to see how this turns out too!
-
Ship’s Boat
Due to a number of everyday life interruptions that we all endure, the mast construction proceeds but at a slow pace. At the same time I have begun the construction of the ship’s boat. And here I have taken a complete deviation from the kit and the Practicum. Instead of using the wooden shell provided by the kit, I decided to build a POF ship’s boat using Model Shipways kit No. MS0108 and made a separate log here.
-
After the strips were dry, they were cut to their final size and glued into place.
- petehay and fnkershner
-
2
-
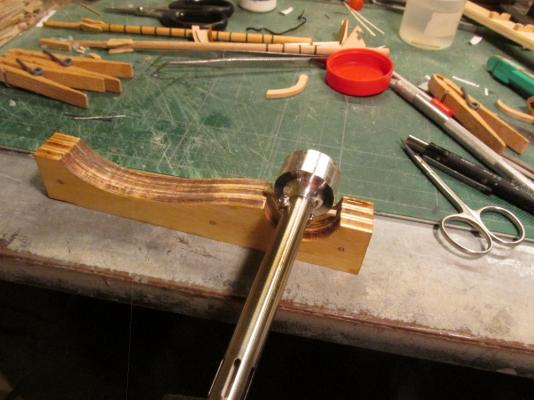
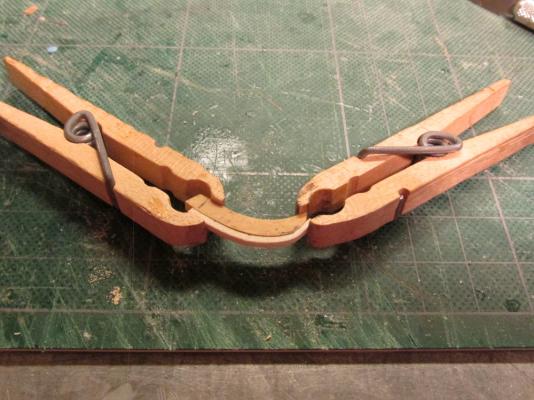
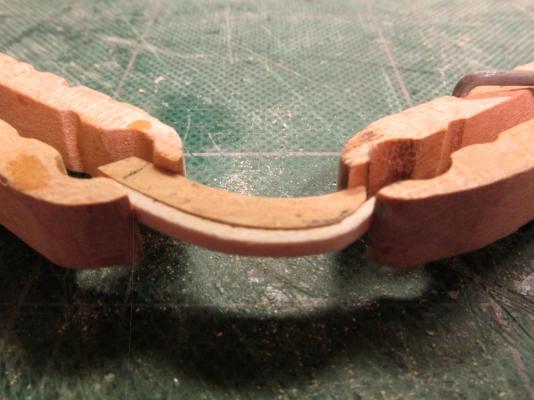
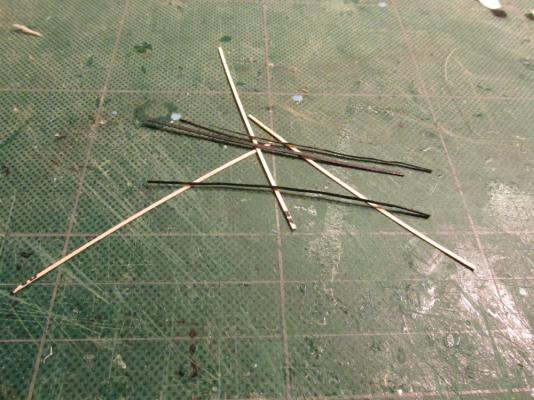
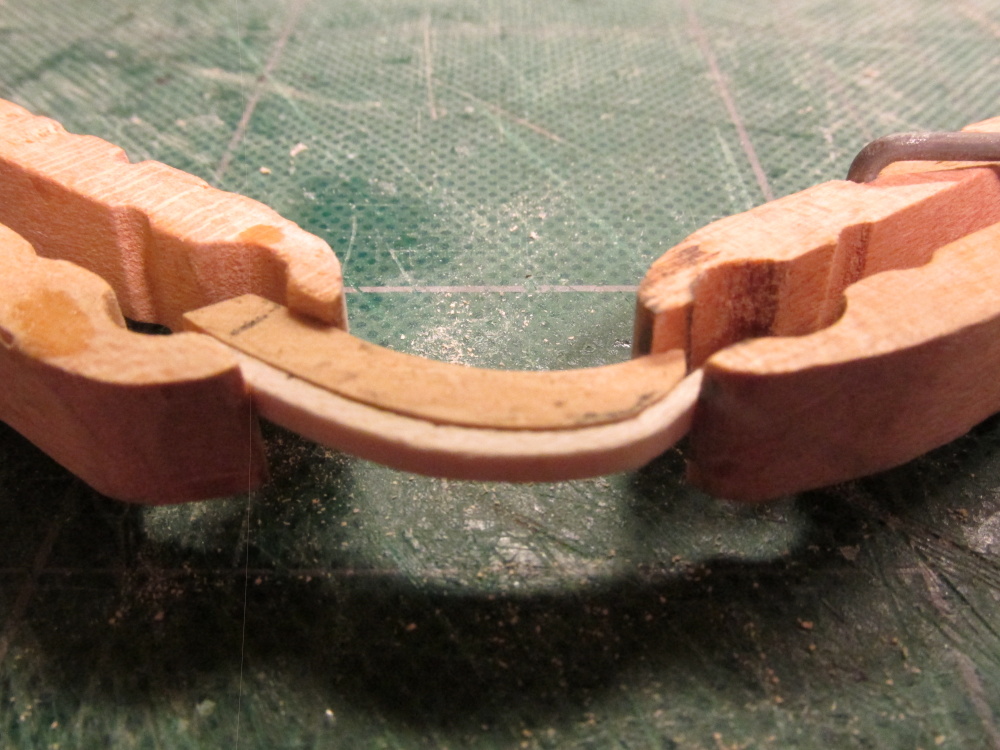
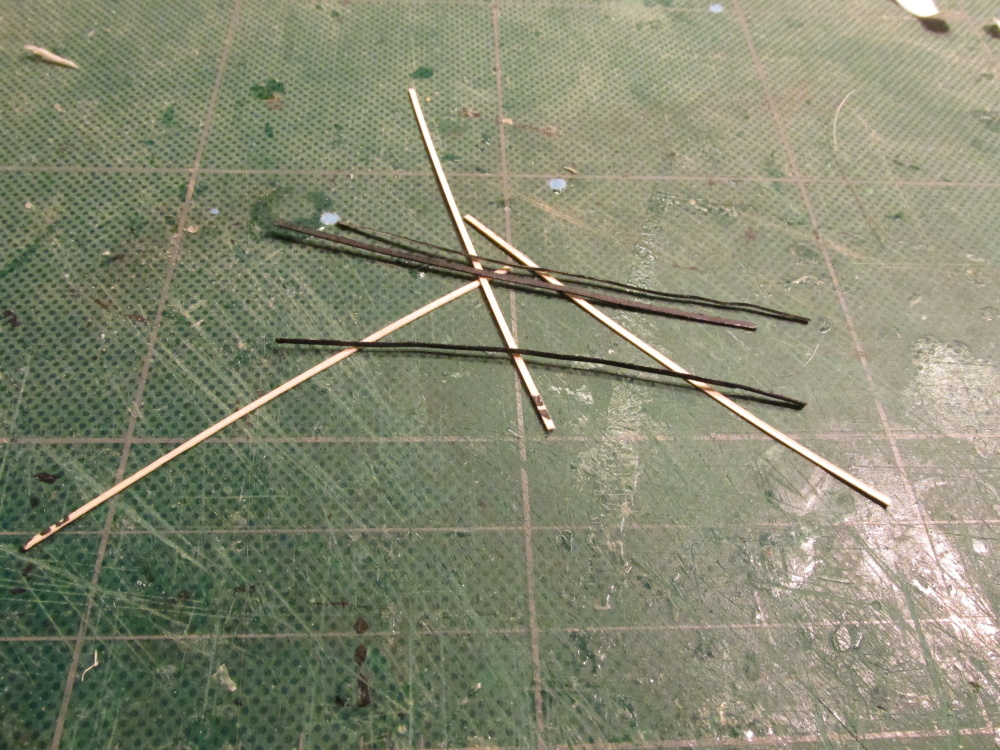
The length of the bow strip was measured by using a strip of paper. Placing the paper in the position where the curved wood strip would have to go it was cut to size. Then the paper was flatten out which provided a direct measurement of the length of wood needed. After cutting the wooden strips to length, they were soaked for at least an hour. Using a heated plank bender, the strips were bent into the approximate shape and placed on a simple wooden form made in the final shape for the occasion.
-
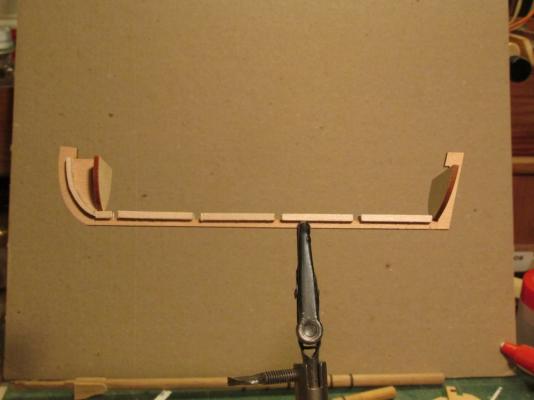
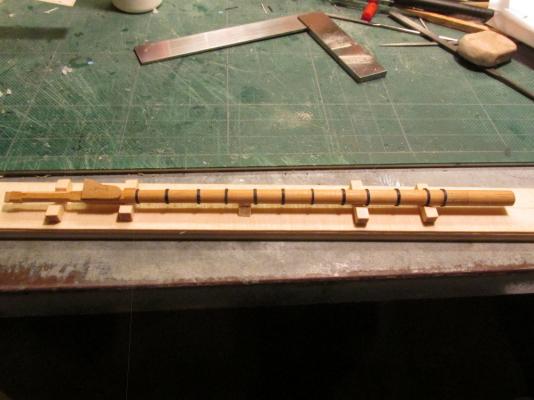
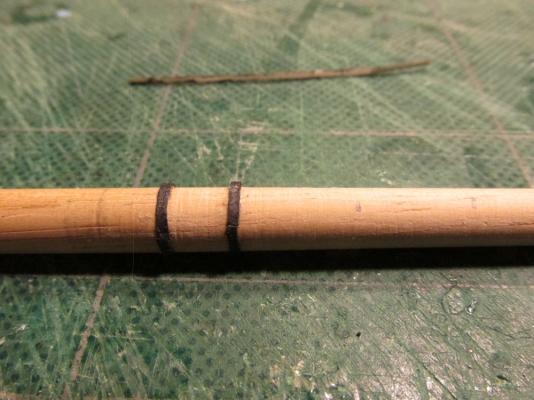
1/16” square strip stock was then glued to both sides of the keel between the rib notches, flush with the top of the keel. The notches are where the ribs are to be installed later. Because the strips must also curve up the bow, they had to be pre-curved.
-
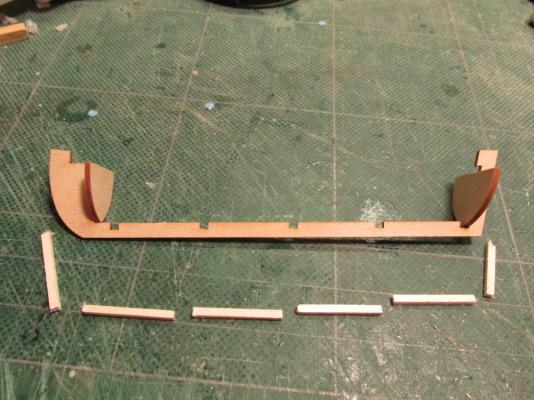
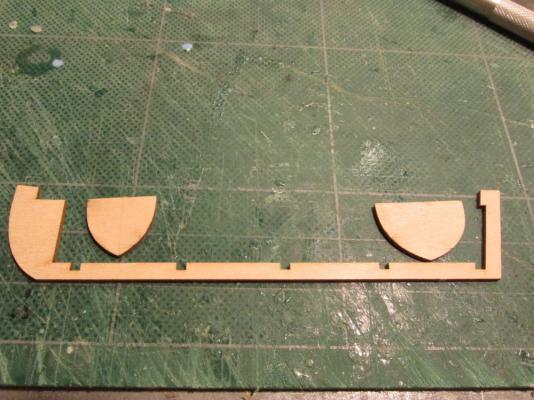
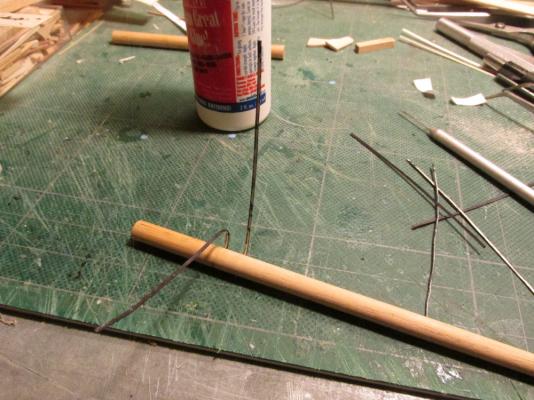
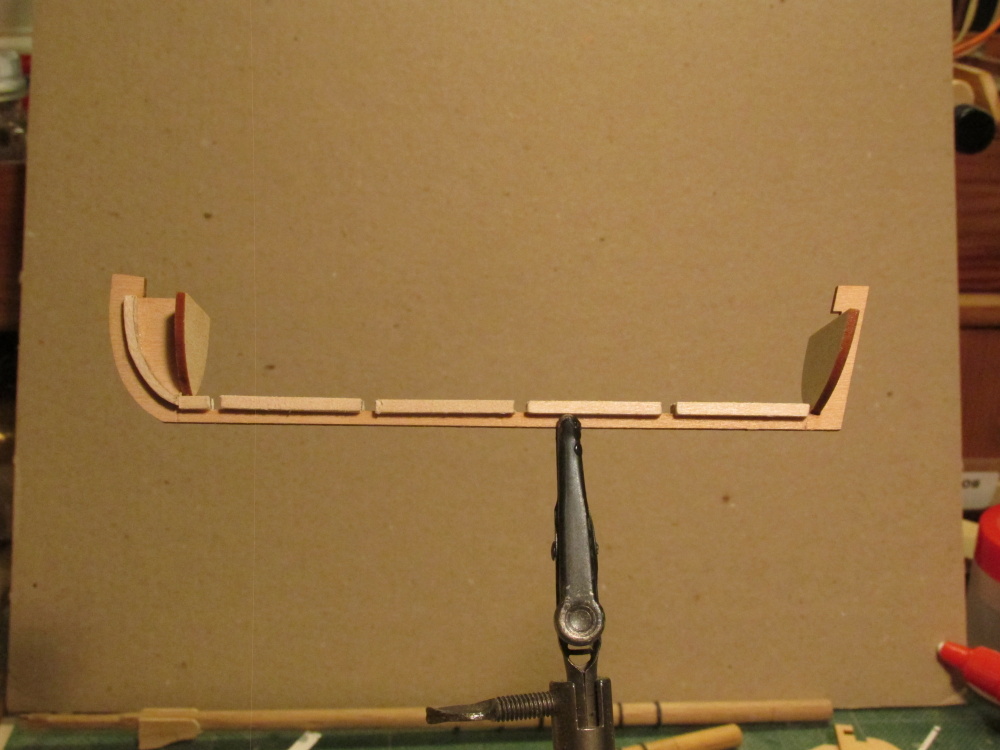
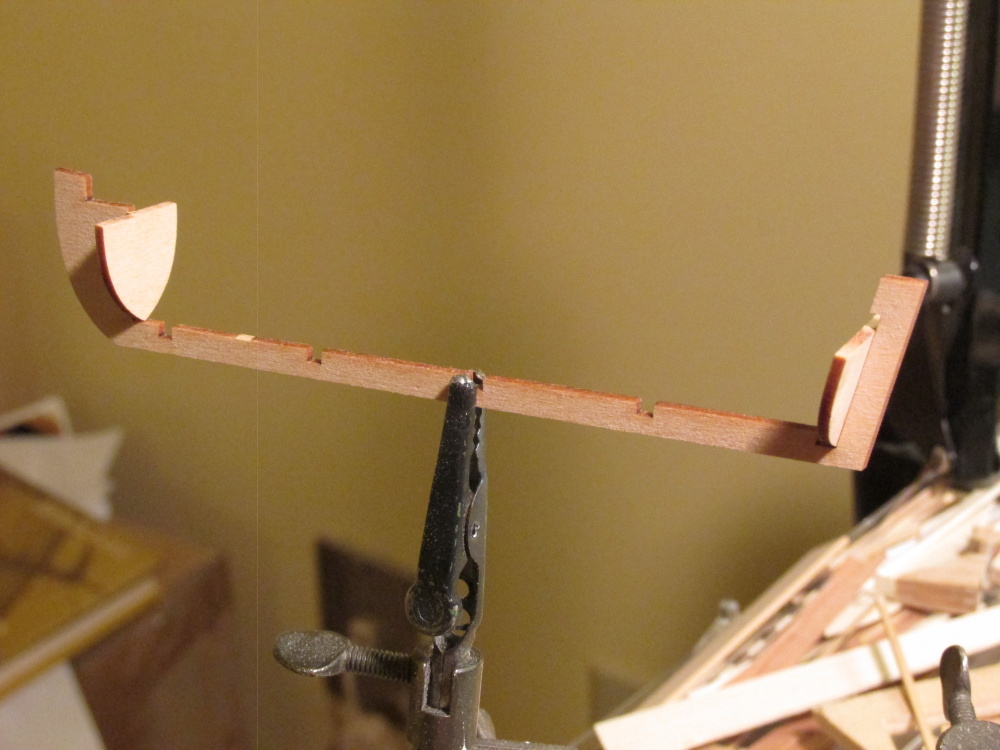
Assembling the Keel
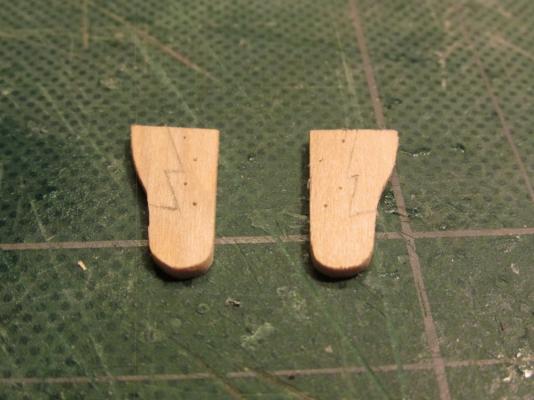
The single piece laser cut keel is combined with the stem and the stern post. The bow bulkhead and the transom were glued to keel.


- fnkershner and Aussie048
-
2
-
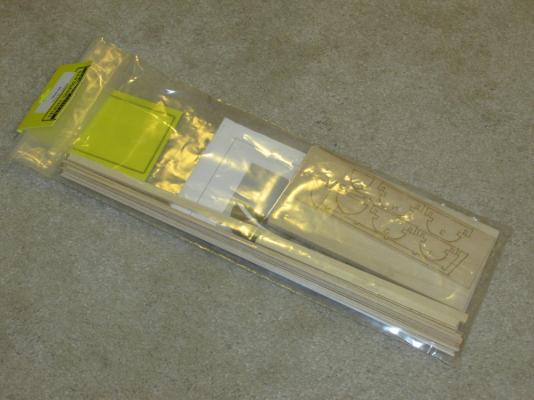
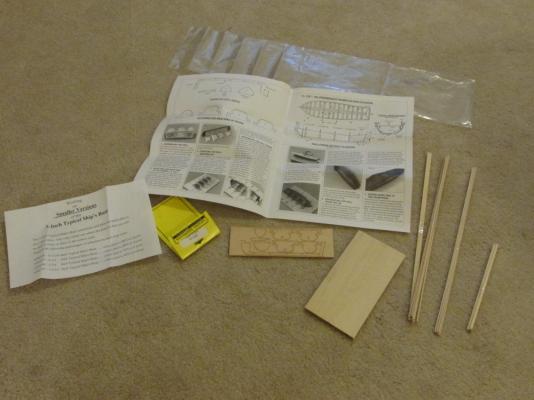
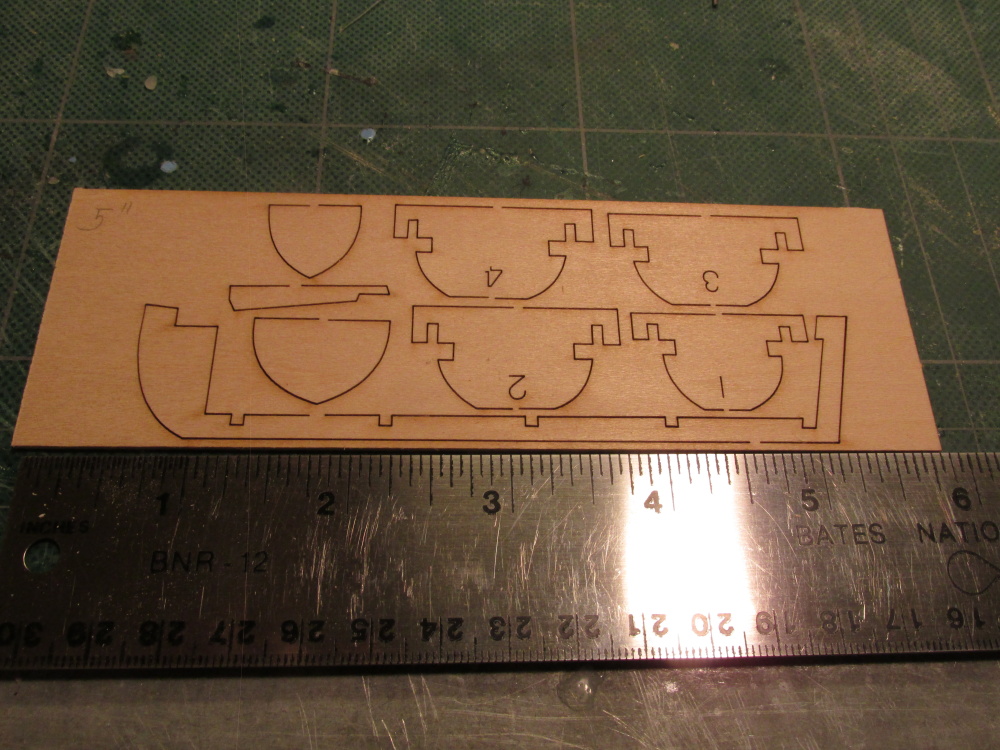
Model Shipways Typical Ship’s Boat* (SMALL)
*As labelled on the kit. On the website it’s called: Plank-on-Frame Lifeboat Kit
I am building the Mamoli 1:64 scale 1781 American Privateer Rattlesnake with the help of Robert Hunt’s Practicum. In the process of building the Rattlesnake, I had to make the ship’s boat. The Mamoli kit provided the model builder with a pre-cut wooden shell for the hull from which the builder could then create a completed model (which the Practicum addresses). If I had built the Model Shipways’ version of the Rattlesnake, I would have had to make the ship’s boat “bread and butter” style. Somehow neither option satisfied me. So I decided to go all out and build a ship’s boat from the keel up or as the case turn out, from the keel down.
Model Shipways makes 5 sizes of kits; I purchased the Typical Ship Boat No. MS0108, a Plank-on-Frame construction kit (POF).
Model No.: Size
MS0105 3-3/16'' (81mm)MS0106 3-3/4'' (95mm)MS0107 4-1/4'' (108mm)MS0108 4-3/4'' (122mm)MS0109 5-3/16'' (135mm)This is my first POF as well as my first small boat build, so this will be all new territory for me. Not only that, I won’t have the Practicum to hold my hand until the hull is built.
The kit is fairly simple, one laser cut sheet provided the keel, the bow bulkhead, the transom, and the frames to create the bot’s ribs. A bunch of stock wood pieces which I believe to be Basswood as it is fairly soft was also included. The instructions are straight forward but not overly detailed so a lot of the skills and nuances of model building must be brought with the builder. Unfortunately the resolution of the photo images in the instructions is low and therefore hard to see detail.
- KevinR, CaptainSteve and fnkershner
-
3
-
I saw the woolding's in Lee's The Masting and Rigging of English Ships of War 1625 - 1860 and then I looked at Hahn's plans. They didn't look like wooldings in the plans. Maybe American ships were more progressive than English ships in 1781, I'm no expert. I did think about using the wooldings, but the Hahn's plans showed rings, so I put in rings.
As for the lathe, I'm a total newbie. I really don't know what I'm doing and am learning by trial and error...mostly error.
-
Sport - I thought I mentioned, I used file folder cardboard stock.
-
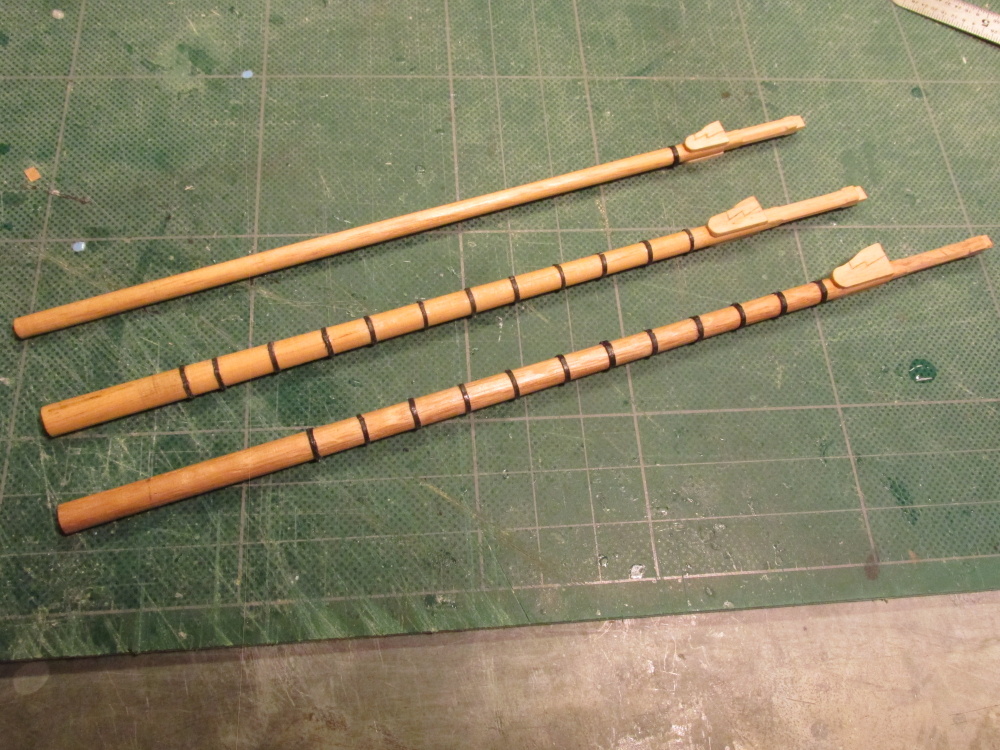
According to the Practicum, the next step is the construction of the mast top. I’m putting that on hold while I construct the other two masts. I plan to construct all three masts at approximately the same time.
-
The Practicum stated that if one were to use the cheeks that were supplied by the kit they had to be modified to match the plans. My kit did not have the pre-made wooden cheeks so I had to scratch make mine from 1/16” boxwood which the Practicum did address. However, having read Blue Ensign’s build log, I knew that the Cheek was actually made of two pieces, the Hound and the Bib which the Practicum did not address. Following Blue Ensign, I scribed the Cheeks to make it look like the two pieces complete with tree nails. Additionally the mast has a rake to it which must be taken into account. The Practicum did not address this. A slight bow downward angle was added to the top of the cheek (not obvious in the photo) to accommodate the rake in order to make the top of the cheeks level.

-
As stated previous, the Hahn Plans provide cross sectional dimensions (provided one recomputed them for the 74% reduction in Plan size). The only dimension that couldn't be used was the total length of the mast since it didn't reach into the bowels of the model.
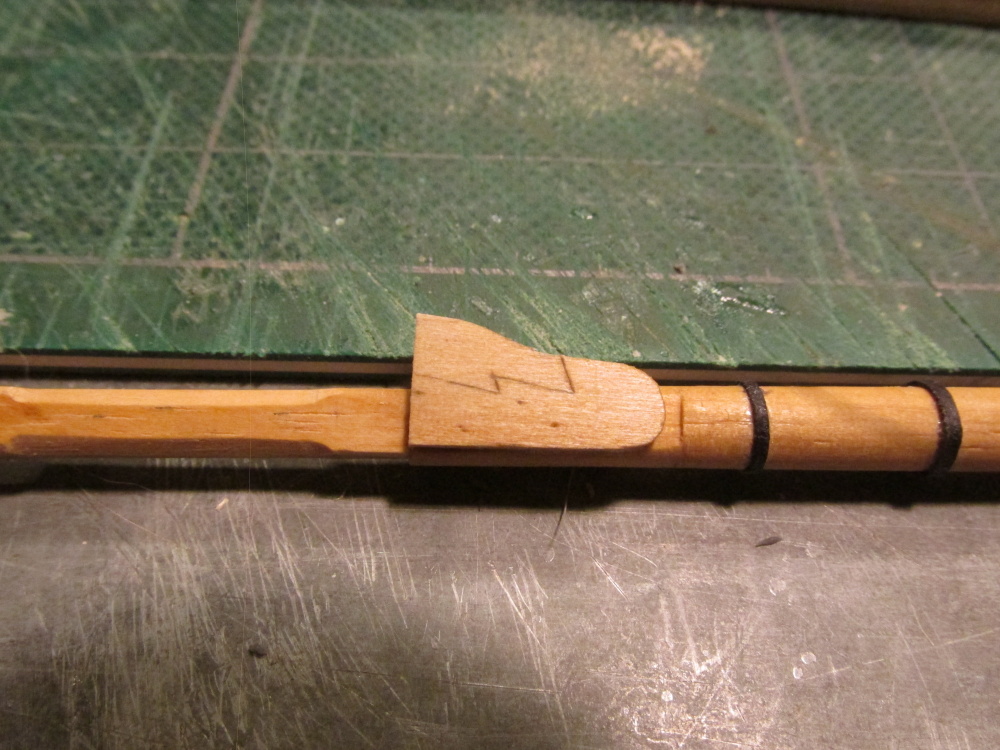
Starting with a ¼” dowel, it had to be inserted into the deck opening and marked where it protruded through the forecastle deck. Now the mast could be measured 7” long above the forecastle deck. With the dowel marked and cut to a working length for the lathe, and armed with course sand paper on rasp like holder, and a micrometer, I proceeded to create the contour of the fore mast taking measurements along the shaft of the dowel as material was removed to match the plans. All fine and good.
Now I had to square the top of the mast, not so easy, the mast was now tapered except where it was held by the lathe. I wanted to use the Byrnes saw to provide nice clean and precise cuts. I needed to remove material from the round cross section and end up with a 3/16” square cross section. Not trusting my own measurements, I removed a little at a time, and measuring each time I cut. Also the dowel had to be rotated exactly 90° to make cuts again. What made it so tricky was that I had to hold the dowel at the unmodified ends so it was square against the saw fence.
Actually I did try it the other way first, squaring off the mast top and then placing it in the lathe. Whether I set up my lathe wrong or something else, when the lathe began to turn, the dowel broke as it twisted where it was square cut. It wasn’t pretty.
Surprisingly (or not) the Practicum did not address the iron rings around the mast. Following Blue Ensign’s lead I made them out of file folder card stock. They were colored black with a Sharpie pen and glued into place with Weld Bond glue first gluing one end of the strip then waiting a bit before wrapping and gluing it around the mast and trimming off the excess.

-
NOTE:
The last item in Modeling the Rattlesnake - Chapter 9 is the Ship’s Boat. I’m going to put that off for a bit. I will explain latter.
Rigging the Rattlesnake - Chapter 1
I never thought I’d see the day; it’s been a little over four years to get here.
The Masts
The Fore Mast
The Practicum starts off with the construction of the Fore Mast. The masts do not have a simple shape; they have cross sections that are round, square, octagonal, and rectangular. I did not follow the Practicum exactly. The Practicum would have the builder make the square cross section first and then taper the round cross section area next, but I had a small simple wood lathe I wanted to try.
-
Great video. I've added it to my "How To" library of modeling techniques.
-
That's one good looking ship, Igor! I hope mine comes close to that. I go along with Mr. Larkins, more pictures!
Make sure you protect it by putting it in a case. It would be a shame if it got dusty or damaged sitting out in the open.
For mine, the last few weeks has been going slow for one reason or another but some progress has been made. Hopefully I'll post something new soon.
-
Thank you for clearing that up. I'm no sailor, but it didn't seem practical to have those perfectly round coils on a working ship. It is for that reason (plus I had no luck in making my own "pretty" coils) that I didn't try too hard to put them own my own model for the cannon rigging. Now whether I still did my correctly for a working ship I really don't know. No doubt I will get constructive criticism for that.
Always an education
Jon
-
A pleasure to watch you work!
Any tips on how you would model good looking flat rope coils to look like the first picture in response No. 386?
-
Pardon me for pointing this out as I am not an expert in any stretch of the imagination, but I believe in reply #375, the first two photos are identical yet one is marked "front view" and the other "aft view."
Just wanted to say that it is an education just watching you put this model together.
-
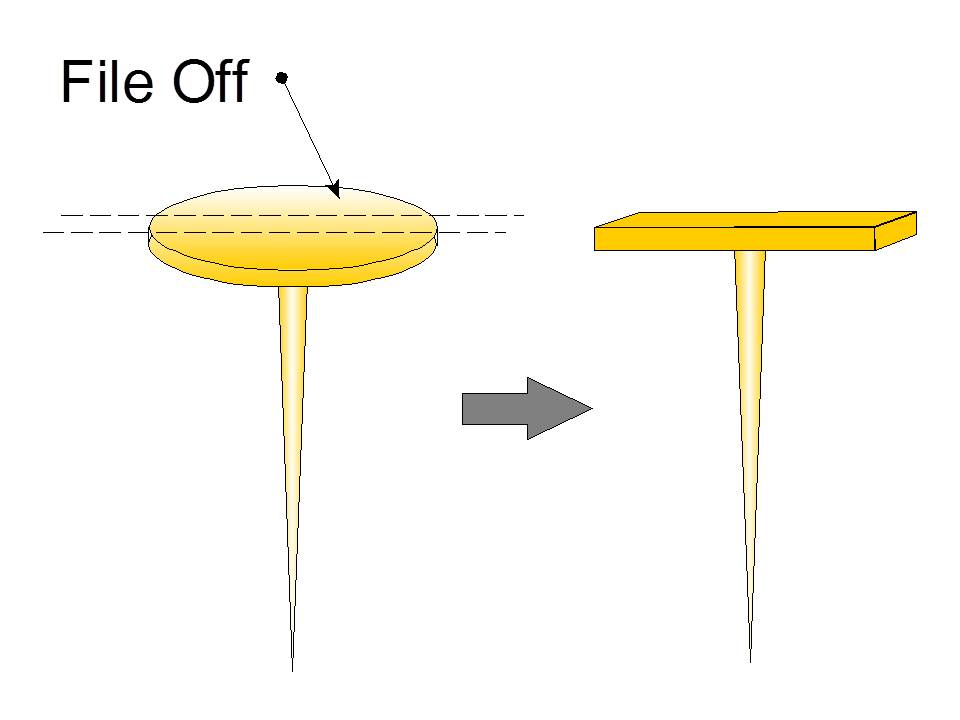
Small Cleats
When building my first wooden model in thirty years, the Evergreen I needed to tie lines to the deck. I was winging it because the kit didn't have any detailed plans for any of the rigging and I knew nothing about rigging. I needed tiny cleats. Somehow I got an idea to use the tiny rail nails used by railroad hobbyist. In cross section a nail is the shape of a T, very similar to a cleat - a very short T.
I filed the edges of the nail head as shown in the diagram below. This gets you the basic shape. You can file the ends to a more pointed shape and add an upward bend to either side. Just drill a hole and insert to the depth required.


-
Scott - Welcome aboard the Rattlesnake Armada! It's nice to see another "Rattler." There are a number of us building this classic here as you know and probably many of the problems that you may encounter will already have been discussed at length on other builds be they Rattlesnake or others. There are no stupid questions. If you don't know or can't find the info, just ask. Enjoy your build.
-
Welcome aboard the Rattlesnake Armada! There are a number of us building this classic here as you know and probably many of the problems that you may encounter will already have been discussed at length on other builds be they Rattlesnake or others. There are no stupid questions. If you don't know or can't find the info, just ask. Enjoy your build.
-
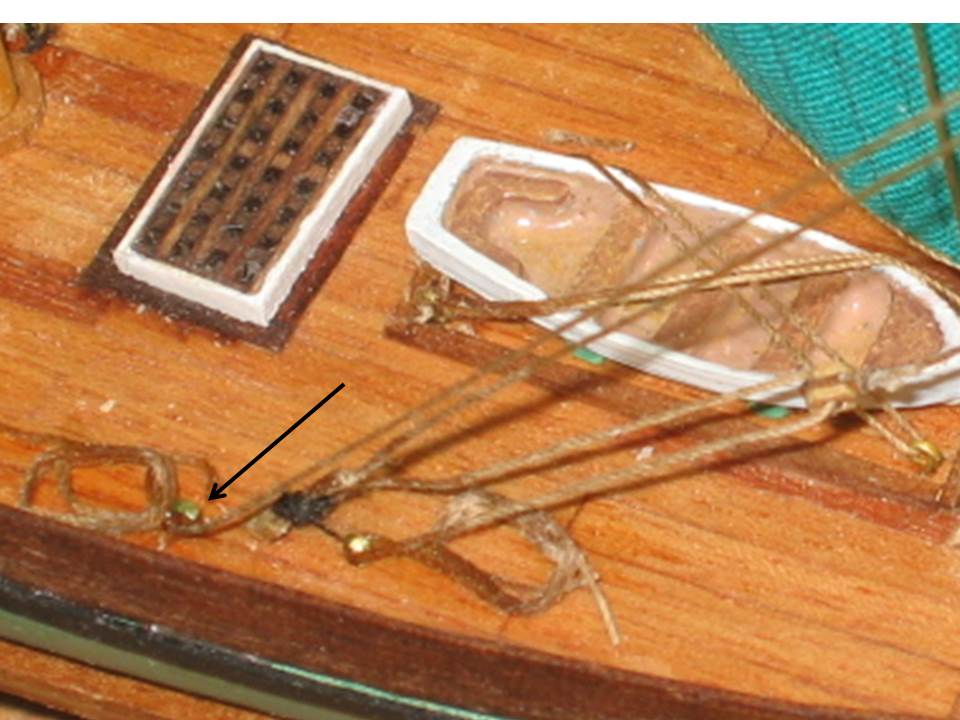
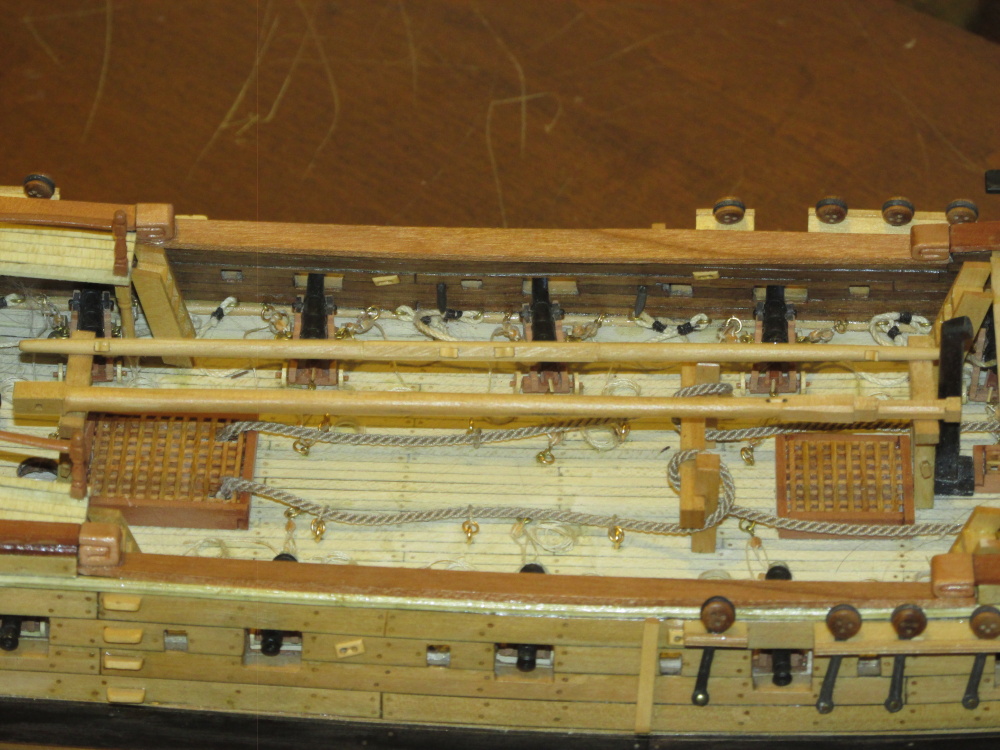
The spares were then glued to the bits. In this photo they haven’t been lashed down yet.
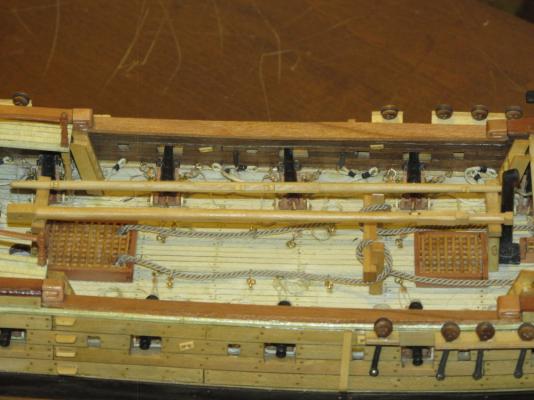
- Mirabell61, JPett and sport29652
-
3


Ship’s Boat by JSGerson - FINISHED - Model Shipways
in - Kit build logs for subjects built from 1751 - 1800
Posted
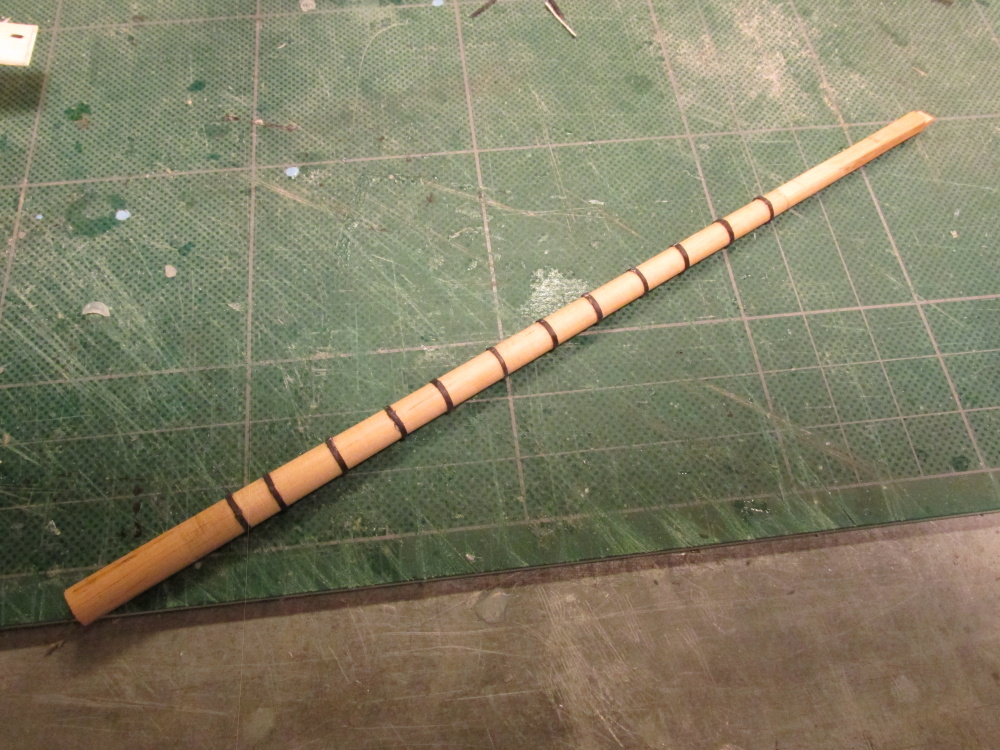
The Main Ribs
The kit provides 4 rib jigs to form the main ribs. Nos. 2 – 4 are the same size. Using the “paper” method, 4 pieces of 1/16” square stock were cut to length. The idea is to soak the strips and then bend them around jig form and glue them, just at the ends, to the jig. I soaked the wood for 24 hours. At a later point in the build, the ribs are to be cut from the jig.