


frenchguy
-
Posts
113 -
Joined
-
Last visited
Content Type
Profiles
Forums
Gallery
Events
Posts posted by frenchguy
-
-
Hi all,
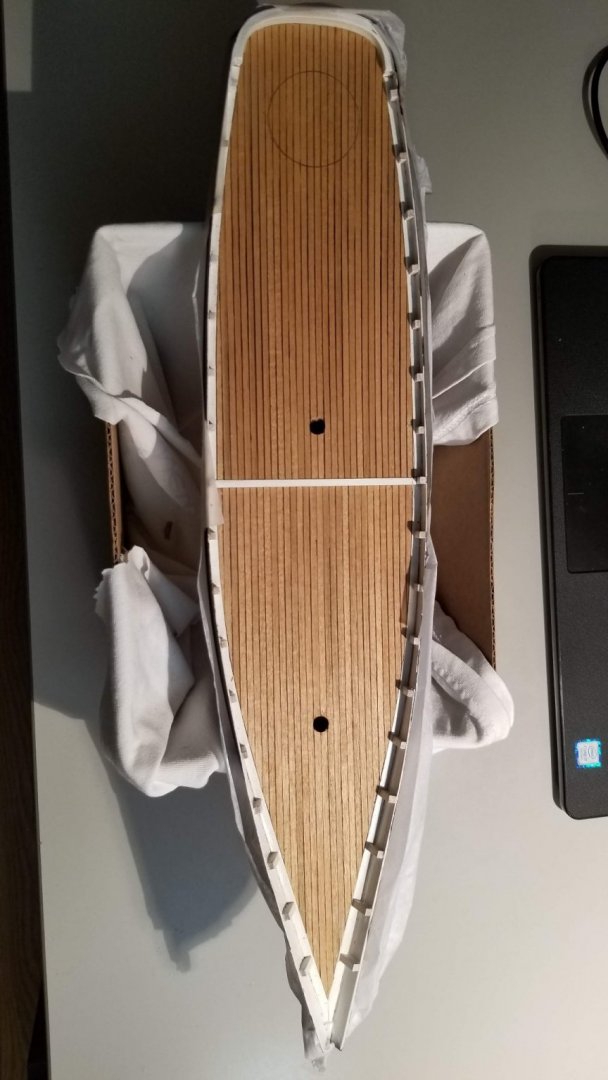
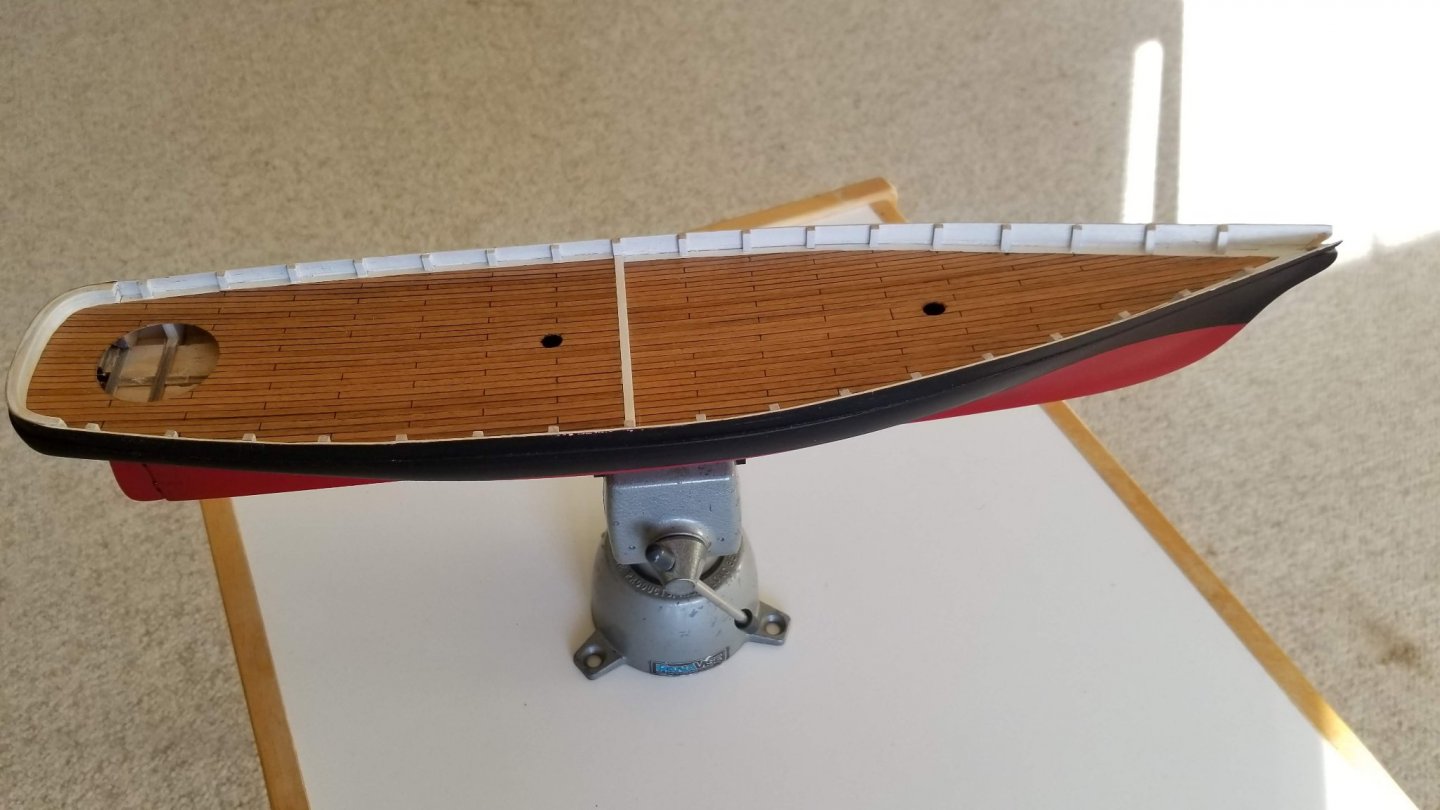
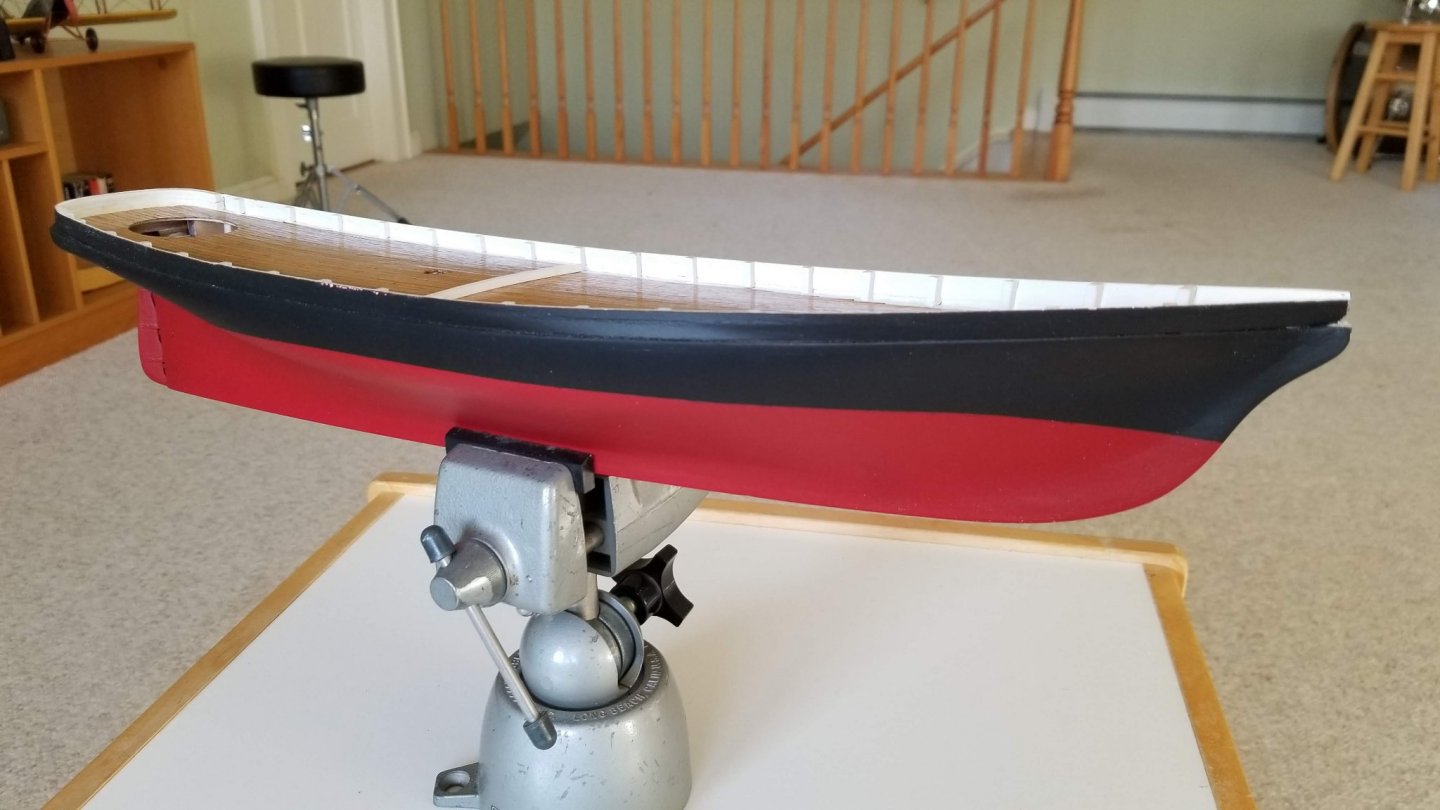
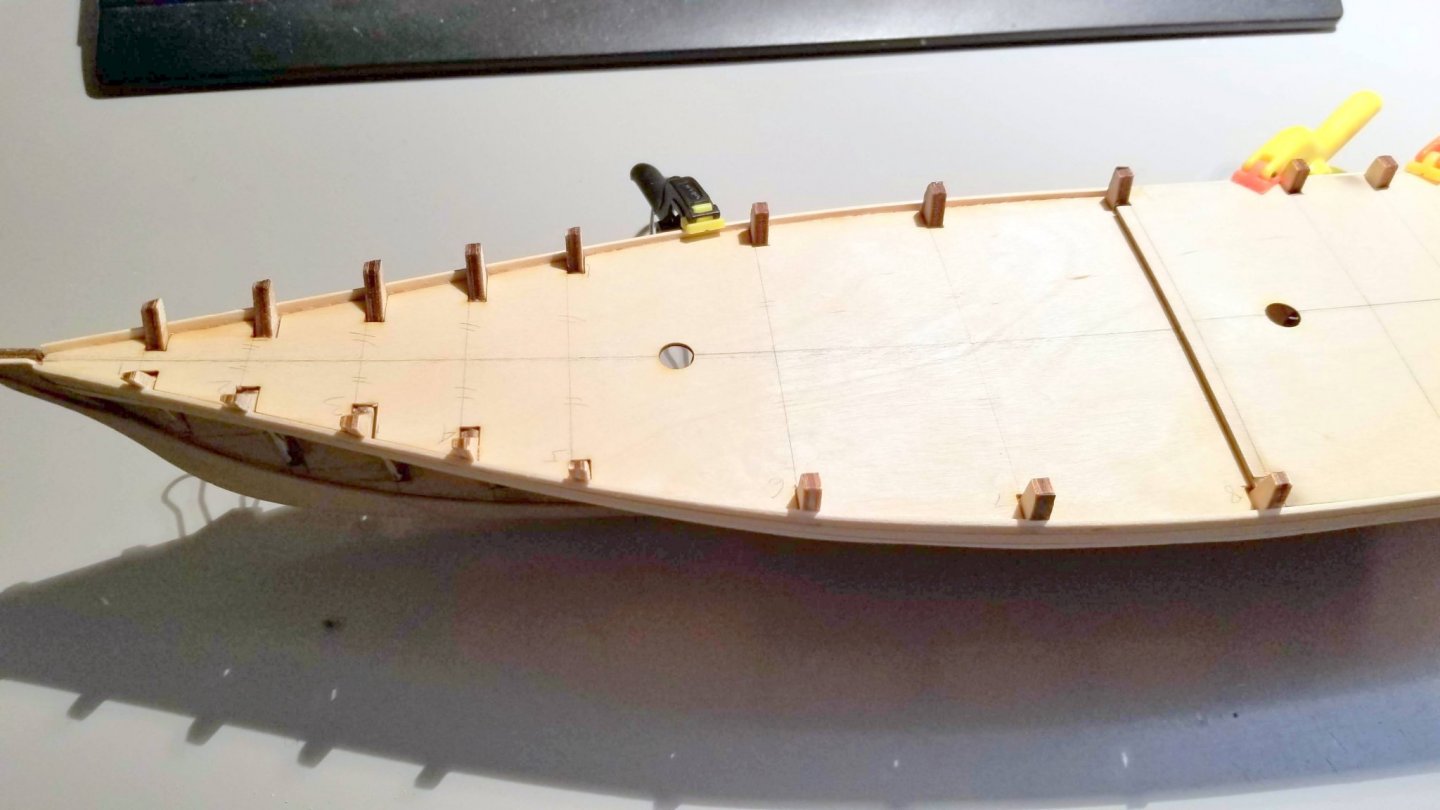
I totally forgot to update this blog with work in progress. So here it is: modest progress, but hull has been painted and the deck finished.
I am splitting my building time between this model and "Wide a Wake", a model of a lapstrake steam launch.

- Moab, GrandpaPhil, Mirabell61 and 1 other
-
 4
4
-
Hi Jason, I am following your build with interest. I built the Alexandra about 10 years ago with a Cheddar steam plant. It still give me great pleasure to sail her from time to time. I am actually considering building a new steam chaloupe, from a plan. I will be very likely using the same team plant as you are using, but the horizontal version, which will give more overall stability.
Cheers, Stephan
-
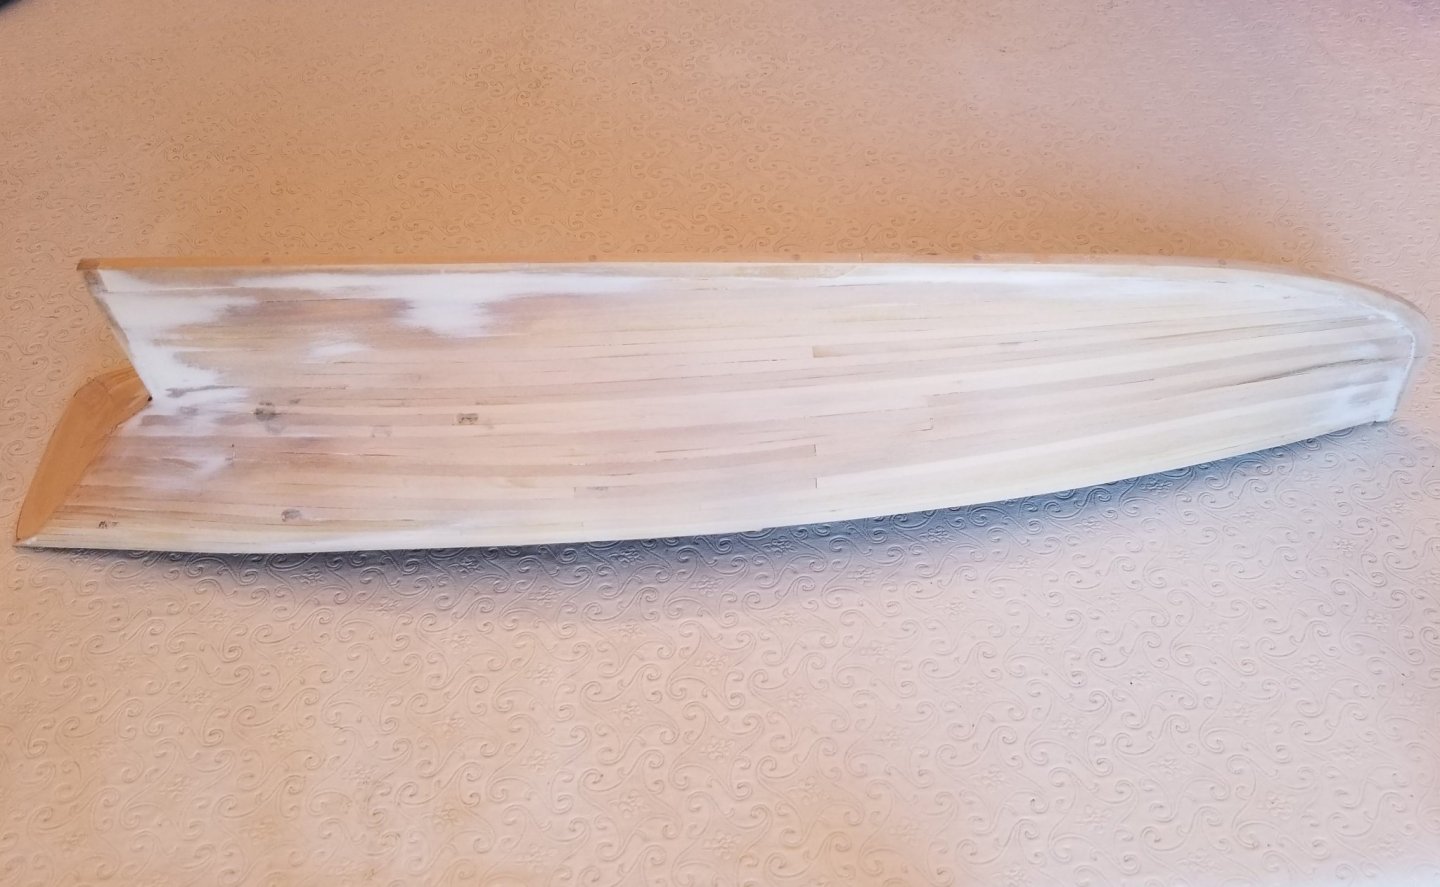
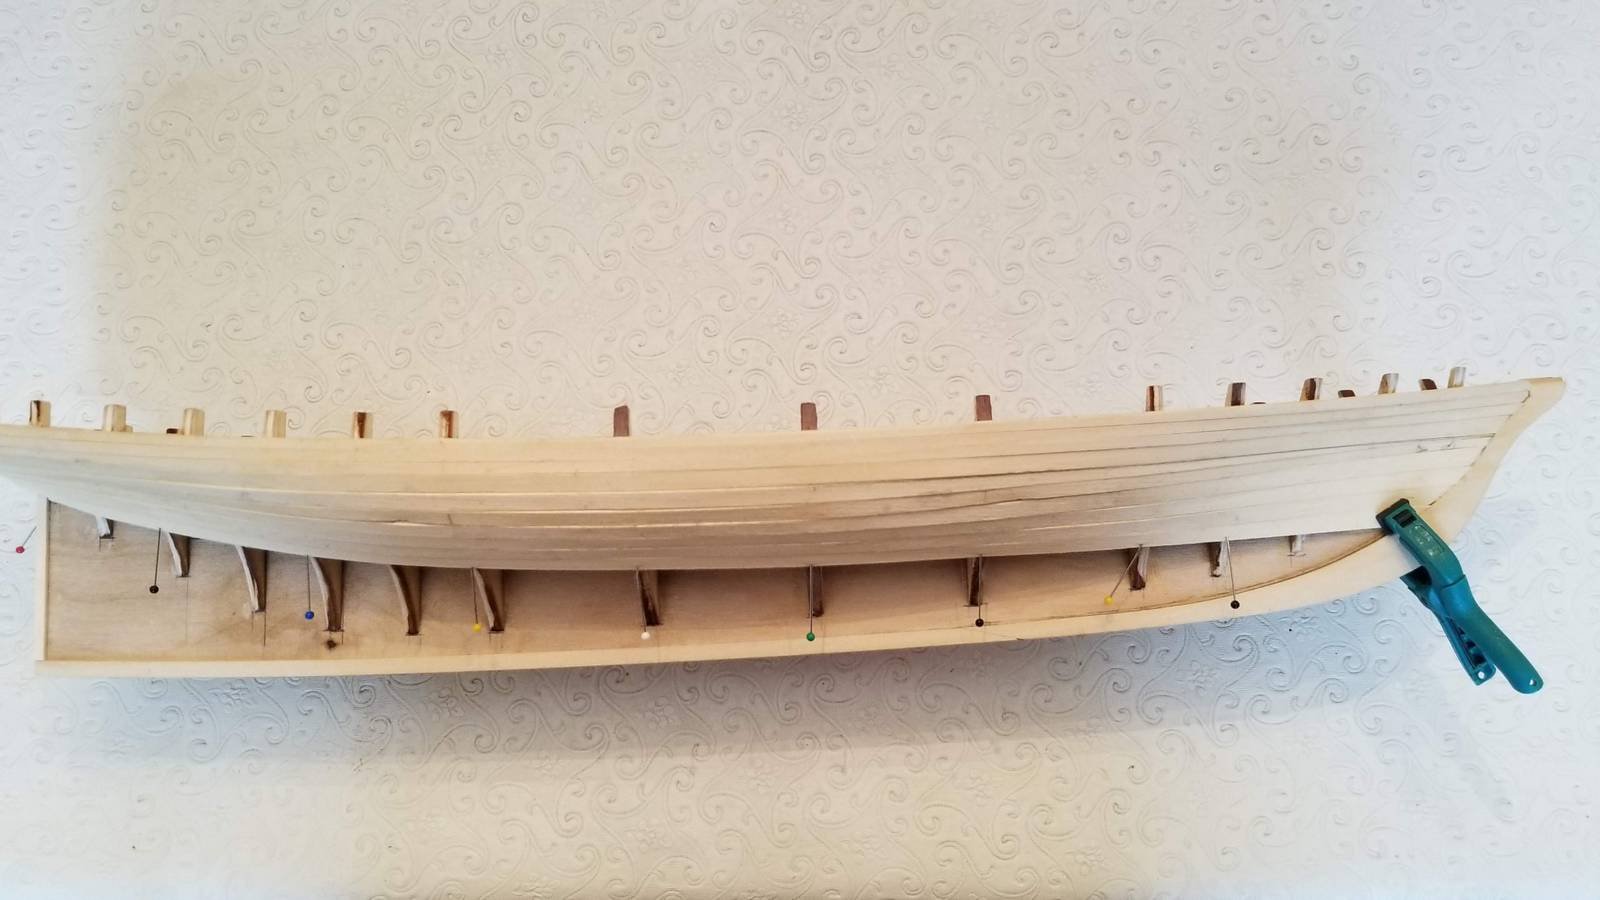
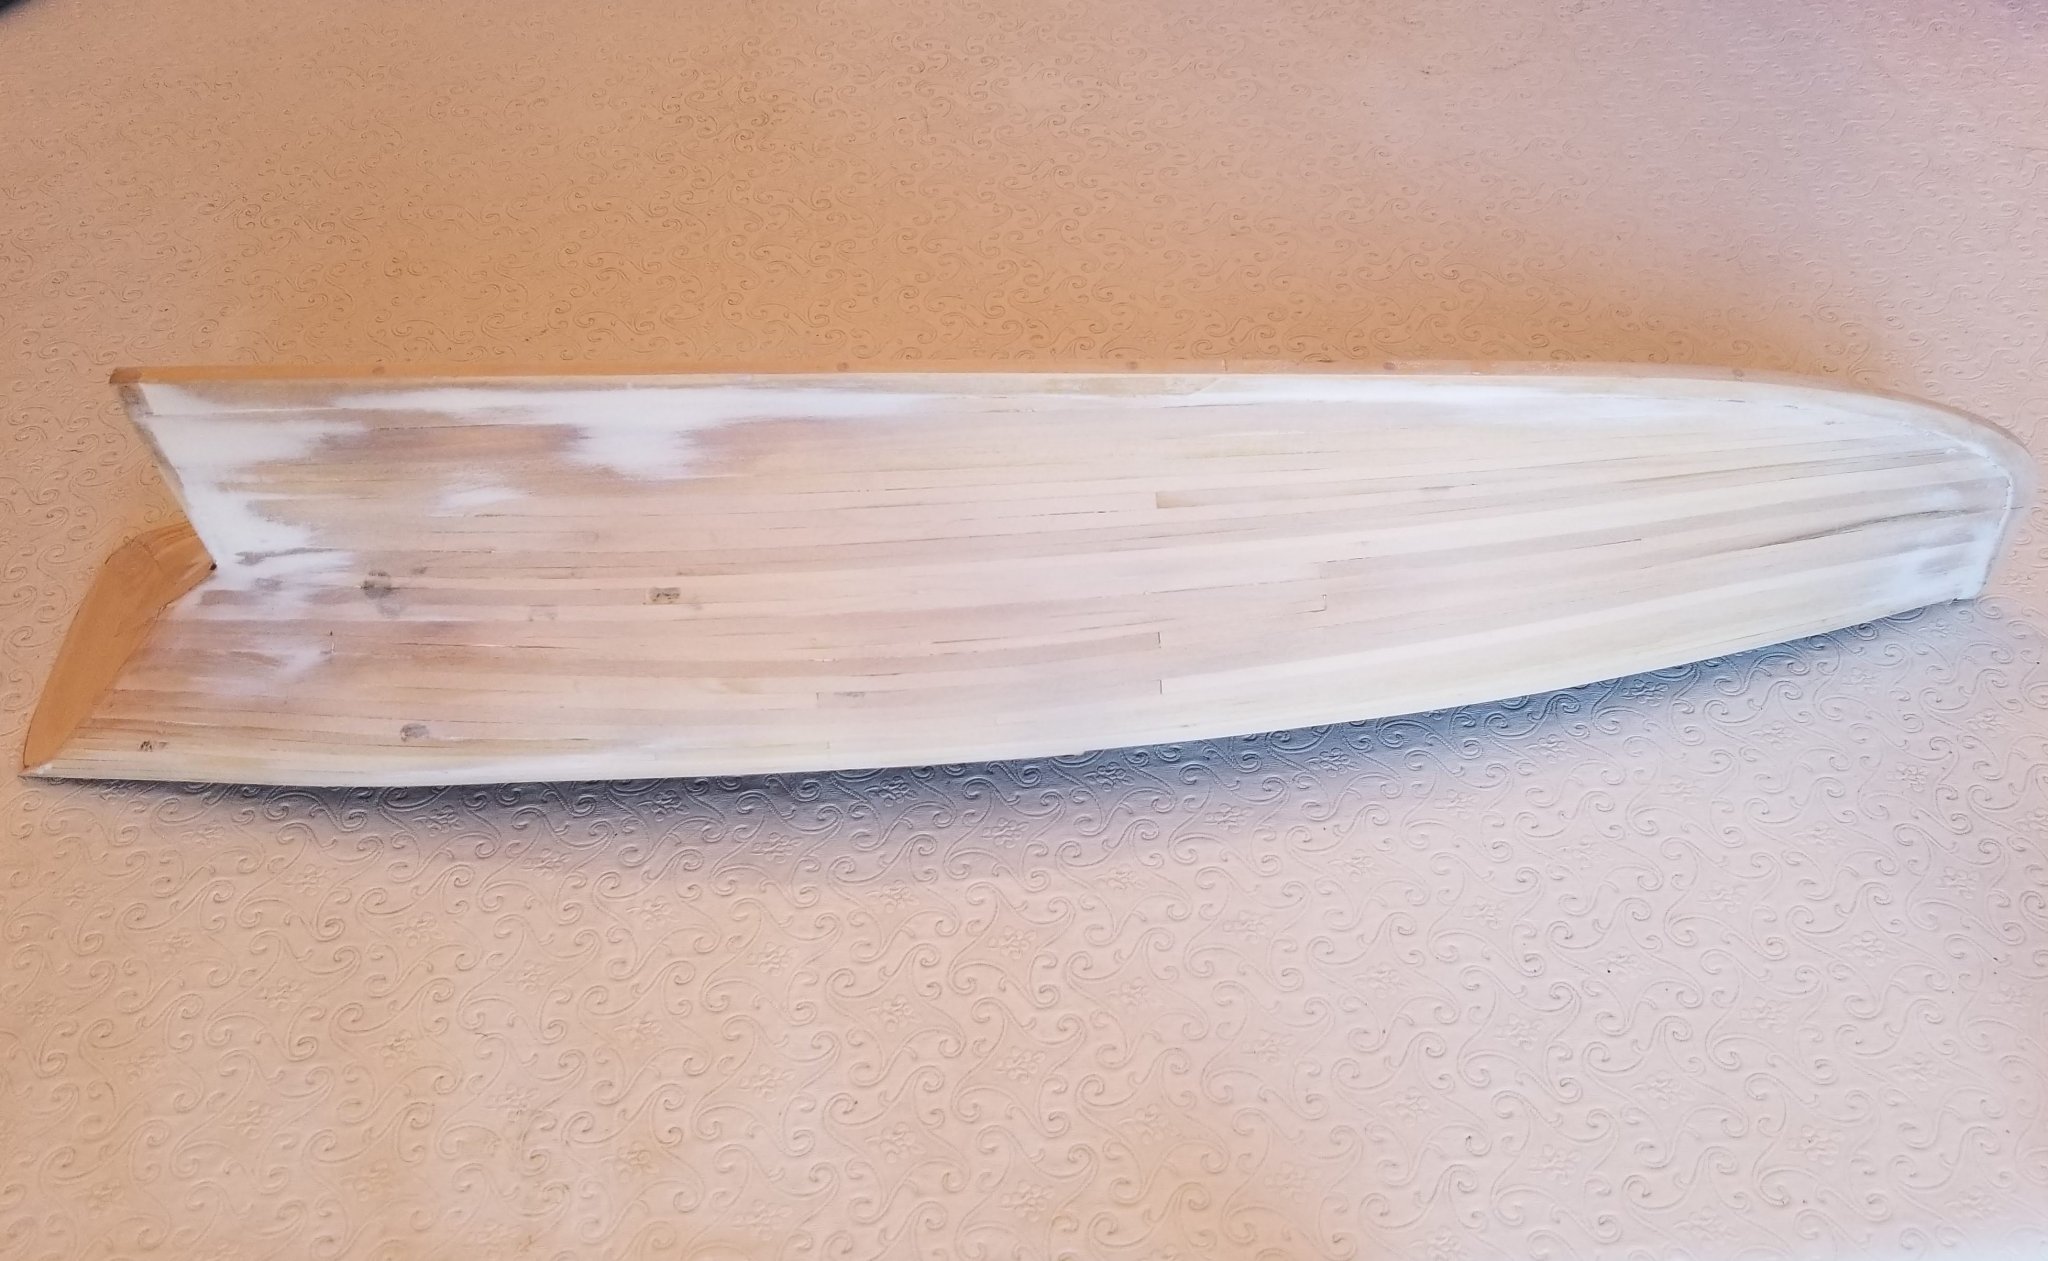
I finished the hull planking and started sanding. Not as neat as I wanted, but it will be Ok. I will use Gesso to finish the hull before painting, and it does a good job at preparing a smooth finish. That stuff dries very hard, so I learned the hard way to apply in thin coats with sanding in between.
I will not copper the hull, instead I am thinking a black and red finish, but we're not there yet.
Here are a few pics of the planking.

The dents were caused by me using these clips.

Clearly, some filling will be in order.
Starboard side sanded..
- yvesvidal and GrandpaPhil
-
2
-
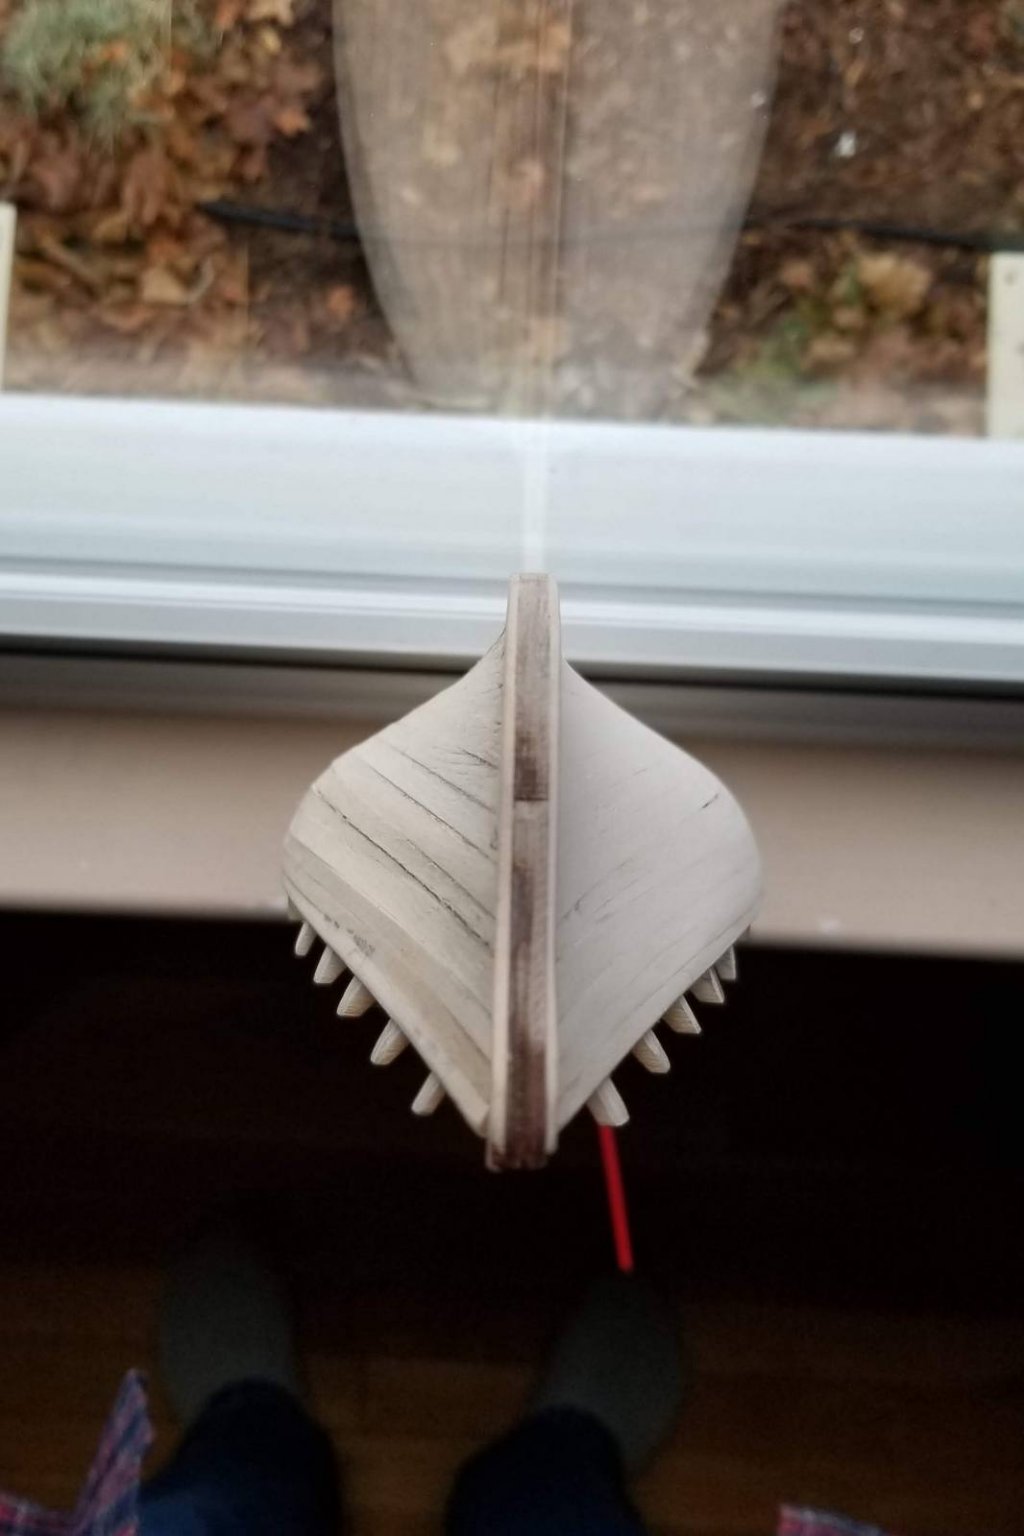
I started the hull planking. I laid first a 1/8th wide strake flush with the top of the rear deck and flush with the bottom of the foredeck, followed by two more 1/8th wide strakes on each side. The use of smaller strakes from the top down was to better follow the sharp bulkheads 14 and 15 round shape at the stern. The top strake has been shaped in a quarter round for the transition from 1/16 thickness to the thinner bulwarks.
I am now using the kit supplied 1.5mm x 5mm (roughly 1/16 x 3/16) planks to continue the planking.
Here are a few pics (sorry I realize they’re not best quality)

-
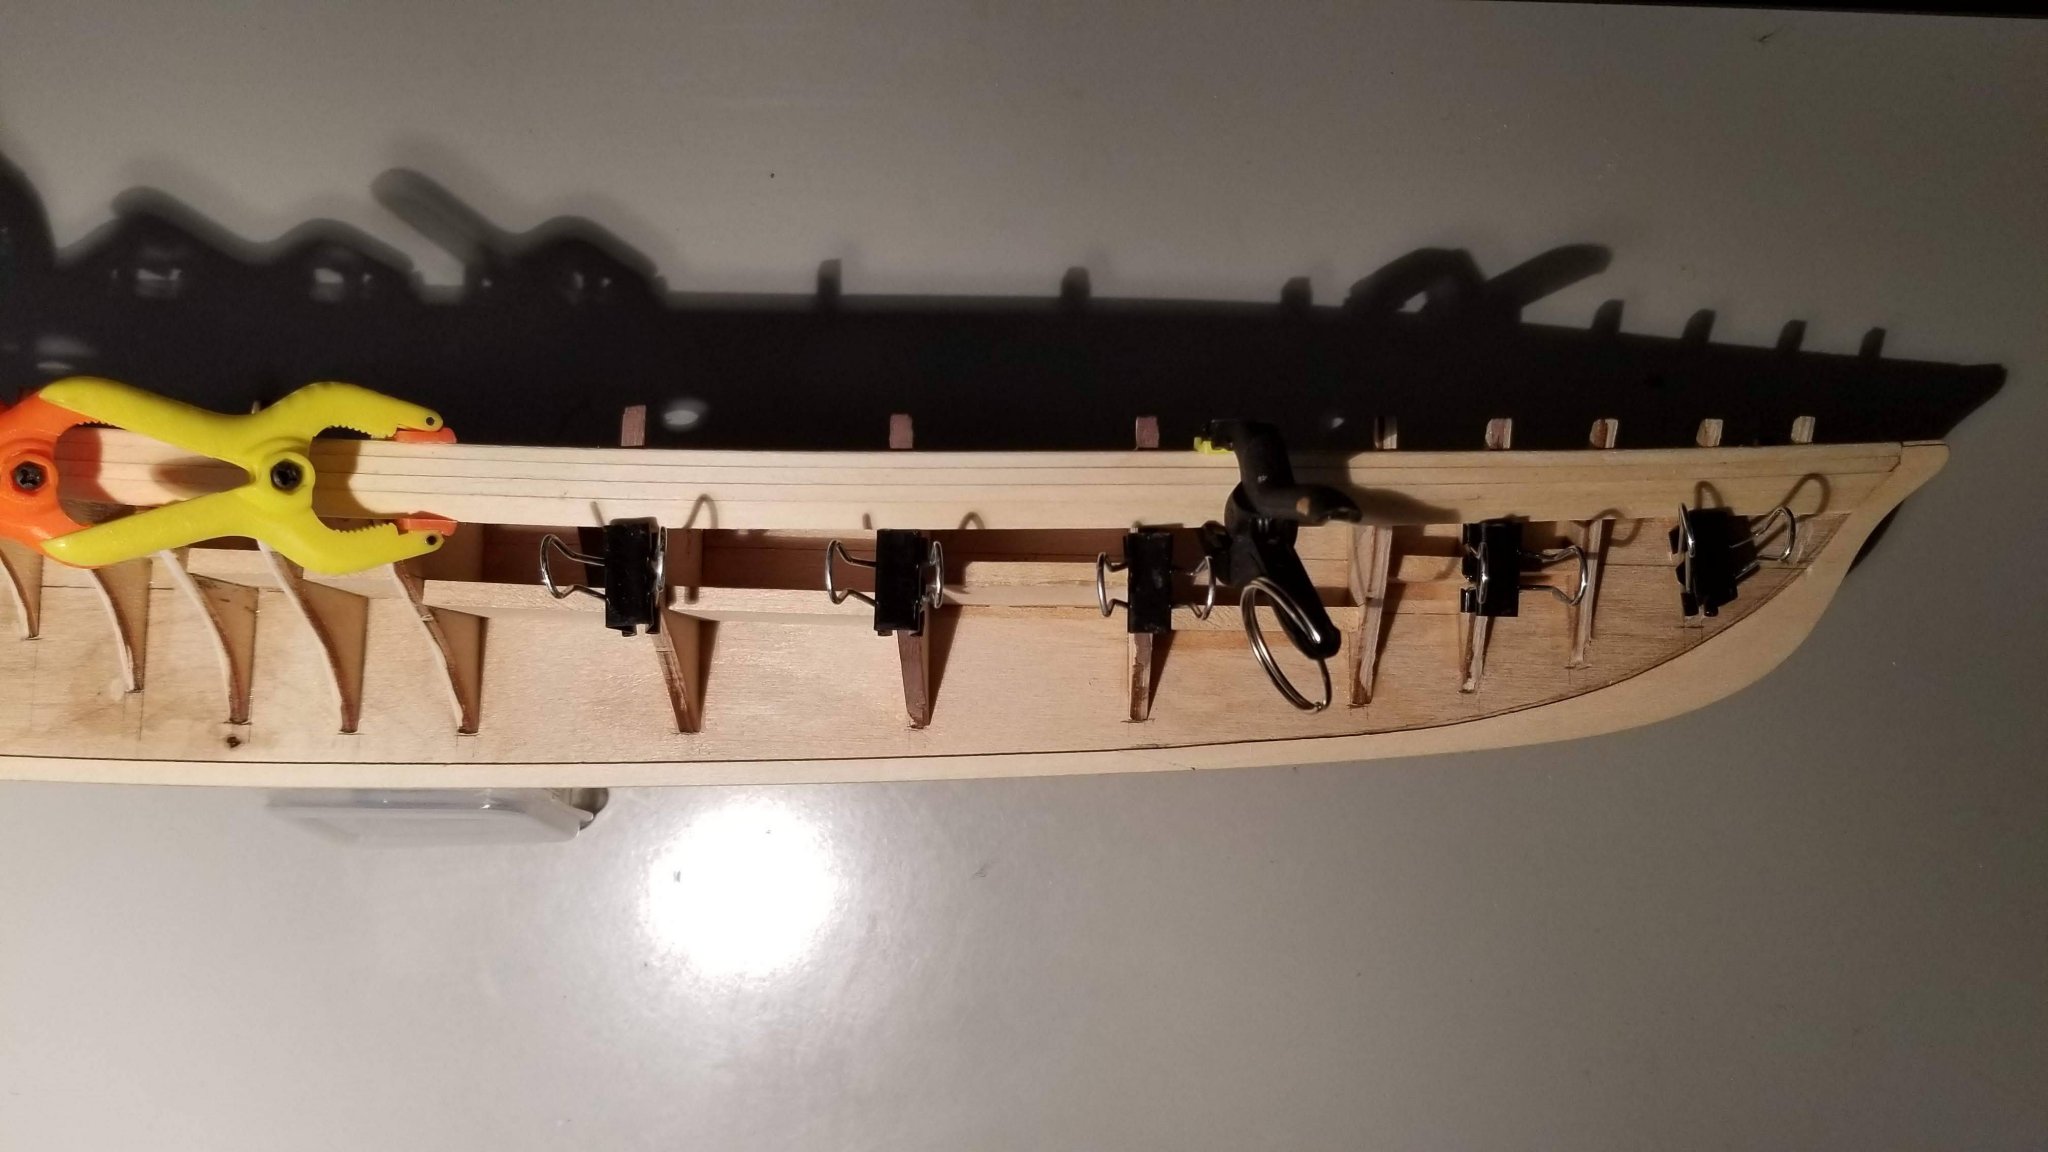
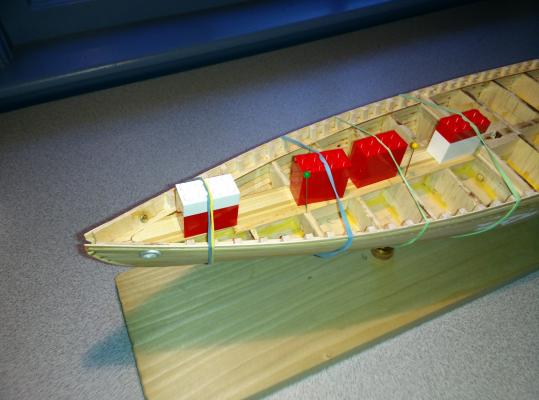
Hi Matrim, yes I used Lego blocks quite a lot while building my Benjamin Latham. See here. The advantage is that it minimizes the use of pins which leave holes.
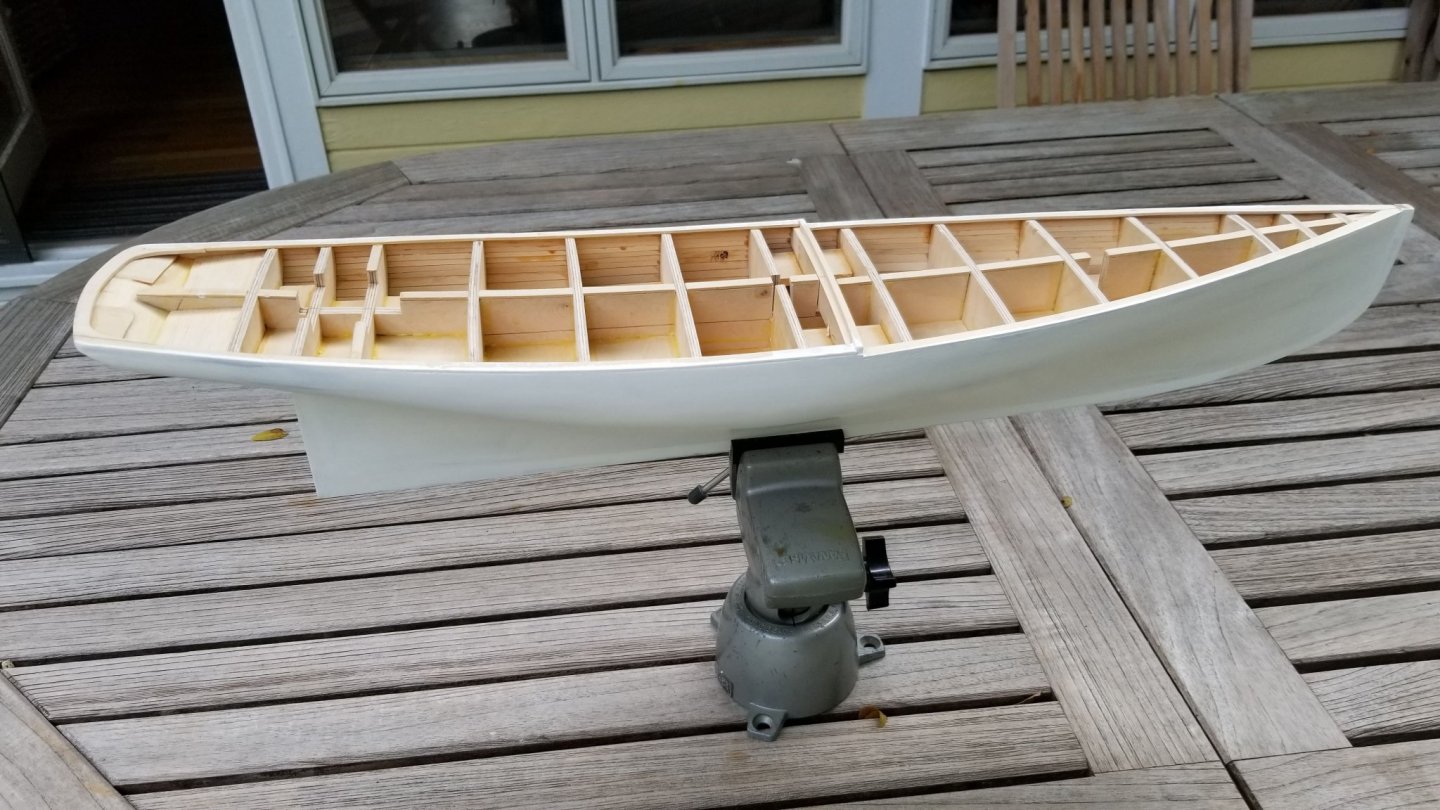
As I mentioned, I did some minor adjustments on the bulkheads before gluing them in place. As I am preparing for the planking, it is clear some of them are clearly out of whack, in particular frames 2 and 5 which, if left as is, will give a weird looking pinch to the bow, which was clearly not on the original model. From what I concluded, the foredeck and quarter decks are the reference to use, and the frames have to be adjusted accordingly so that the planking follows a fair line. Some bulkheads will need some wood to be added, but most will require a good filing and tapering. Again, much easier to do with all the bulkheads firmly in place.
Pictures of work in progress to be posted soon.
-
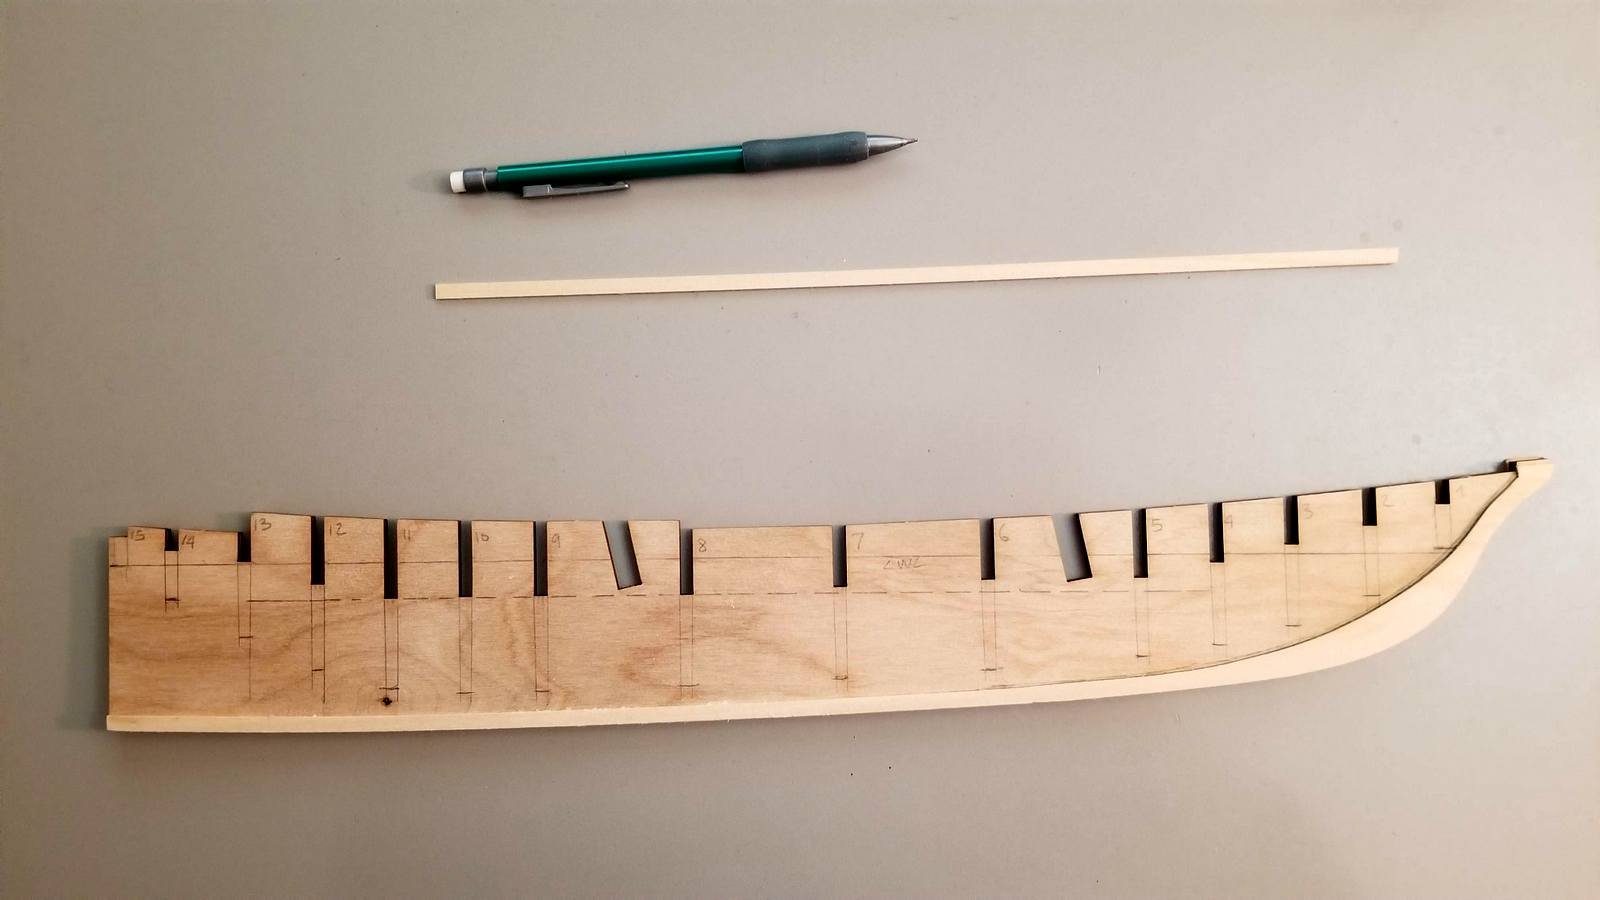
After soaking the keel in ammonia, followed by a lot of steaming, I was able to reduce the warp to something acceptable. Once held in by my square aluminum support, there is no warp noticeable.
Because there is no mention of cutting a rabbet in the instructions, and to facilitate the planking later on, I added a 1/16 thick band along the bow and the bottom of the keel, sanded so that the keel is now about 1/4. This will also allow to tapper the bow as per the original model. I will do the same on the sternpost later on.
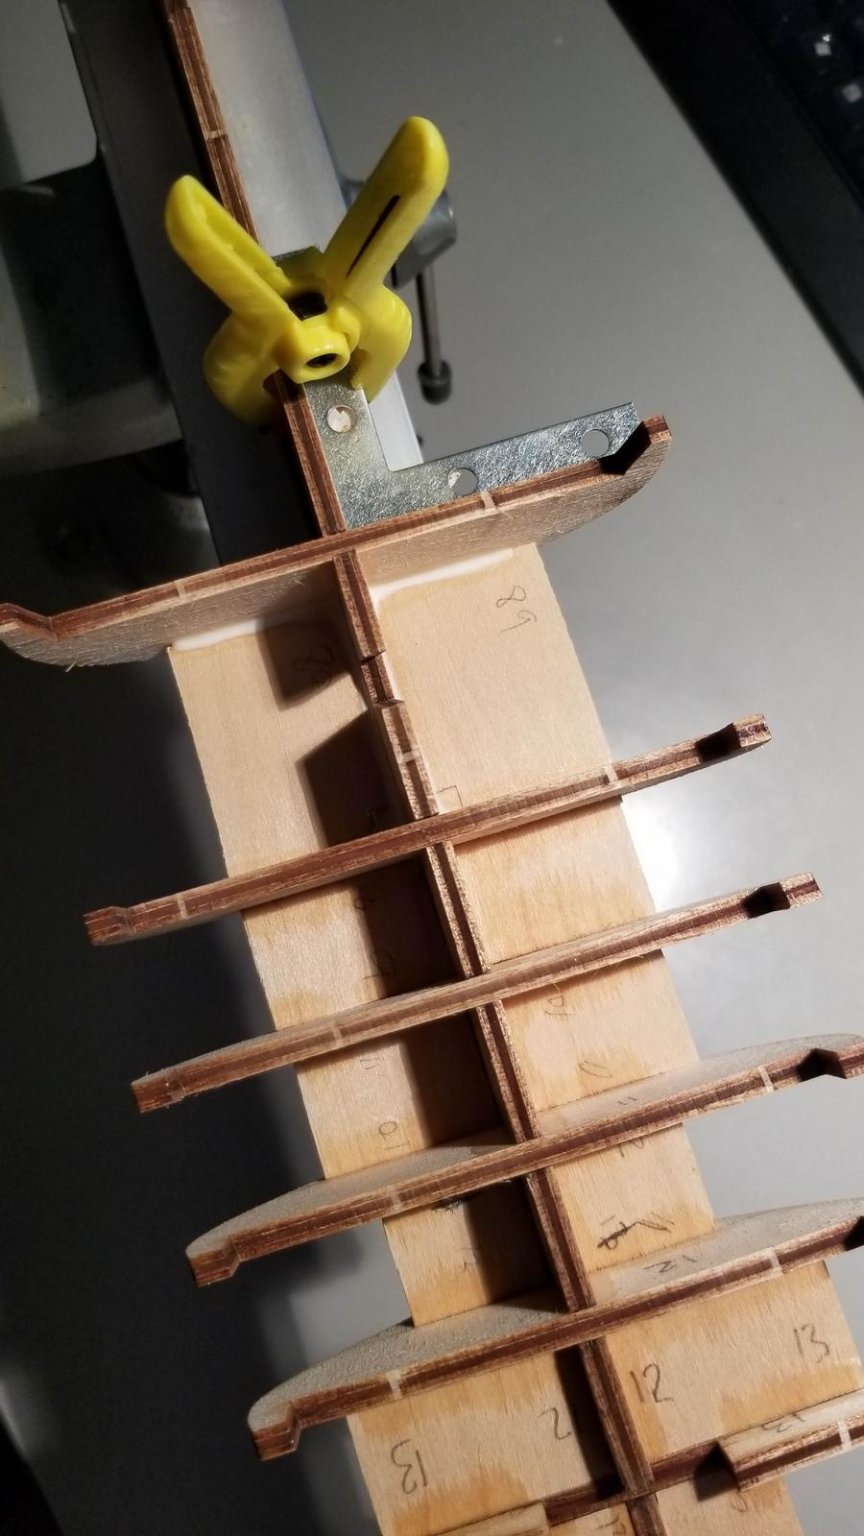
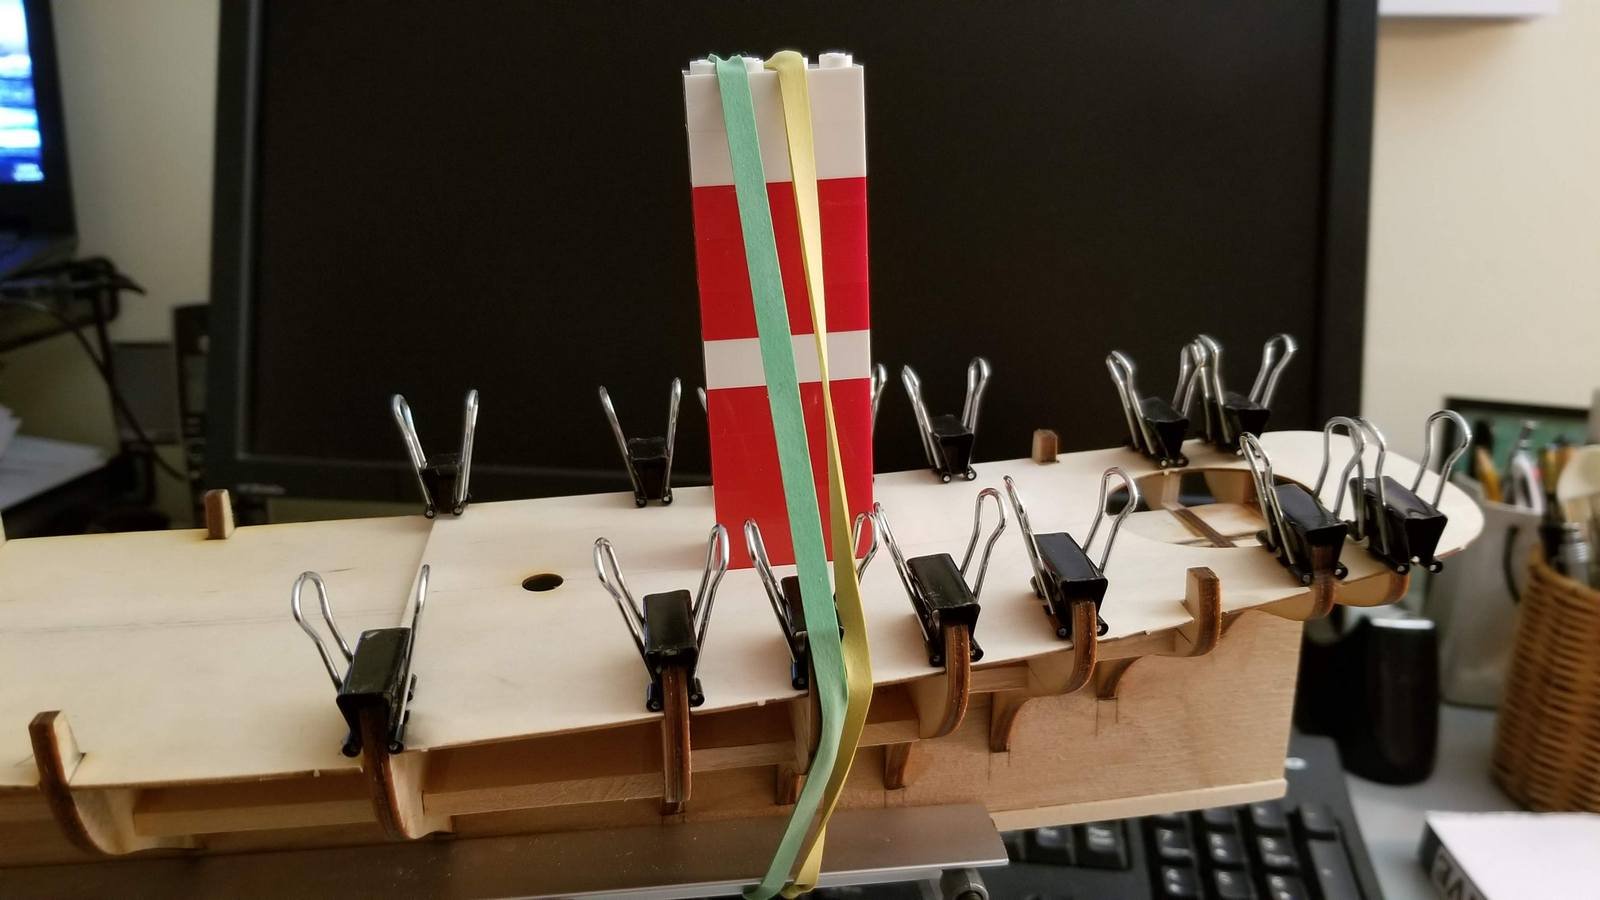
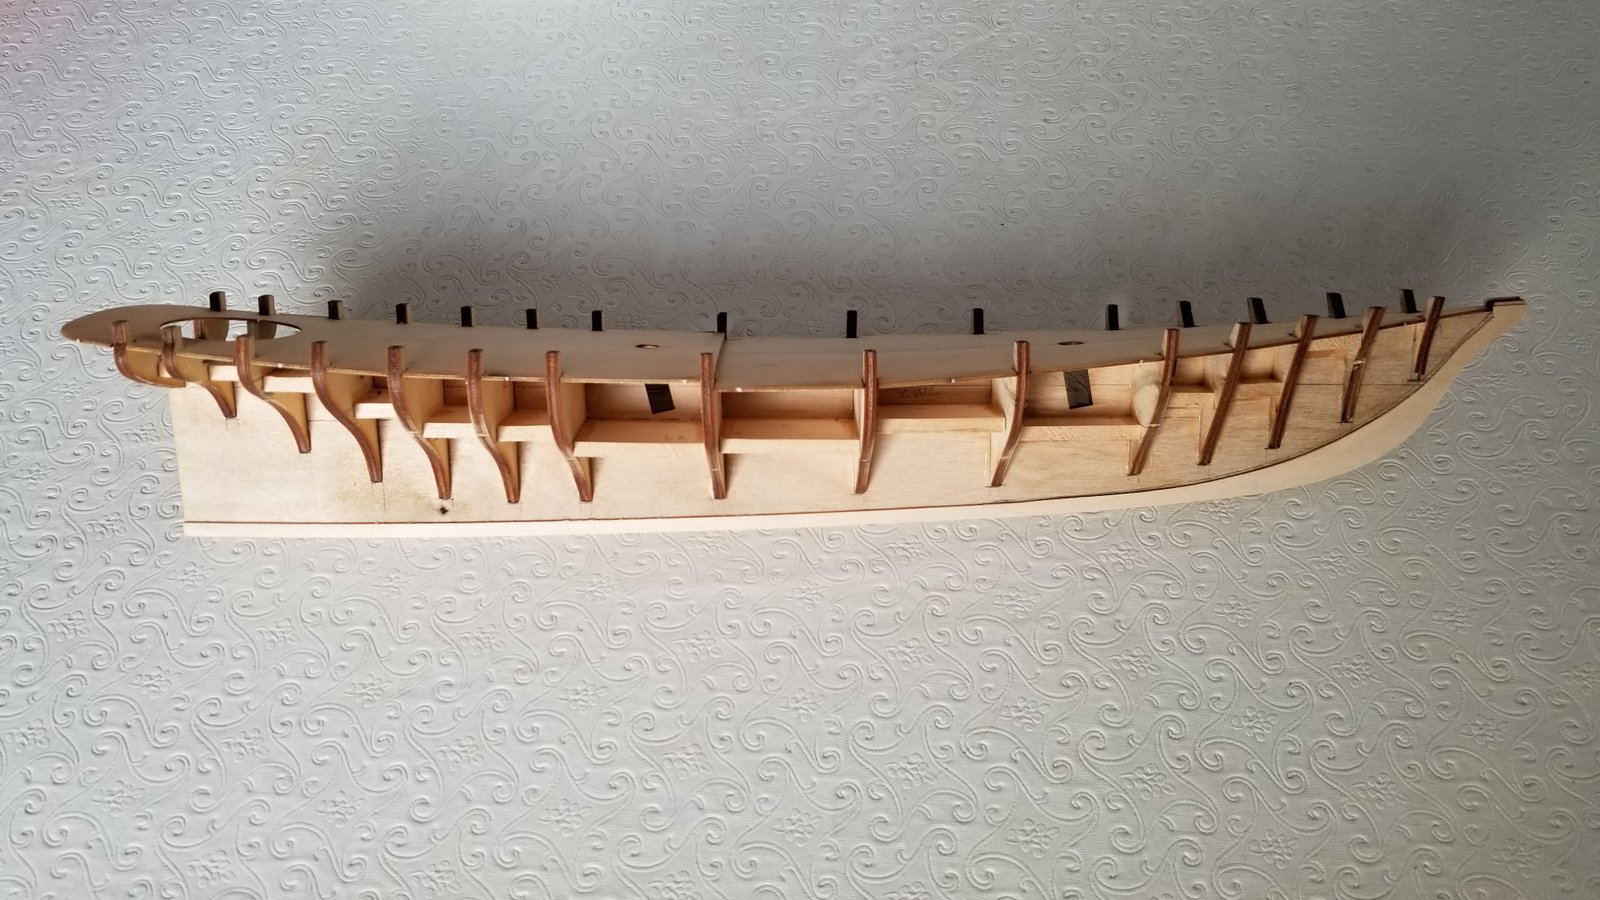
After some adjustments, I glued all bulkheads in sequence, starting from the stern. I added 3/16 spacers between each bulkheads. Their purpose is twofold, first to improve integrity of the hull over time, and second to provide a solid bulkheads foundation so that I can file and tapper the bulkheads “in situ”. I prefer that method by far as it is much easier to tapper them to a fair line that way. I started from the stern, and I use a small right angle metal bracket along the way to ensure the bulkheads are perpendicular to the keel.
Both decks were then glued per the instructions. Note that the idea of using Lego blocks while the glue is drying should be credited entirely to Elia, a member of this group!
Here are some pics of work in progress.
Next, I’ll work on the stern part.


-
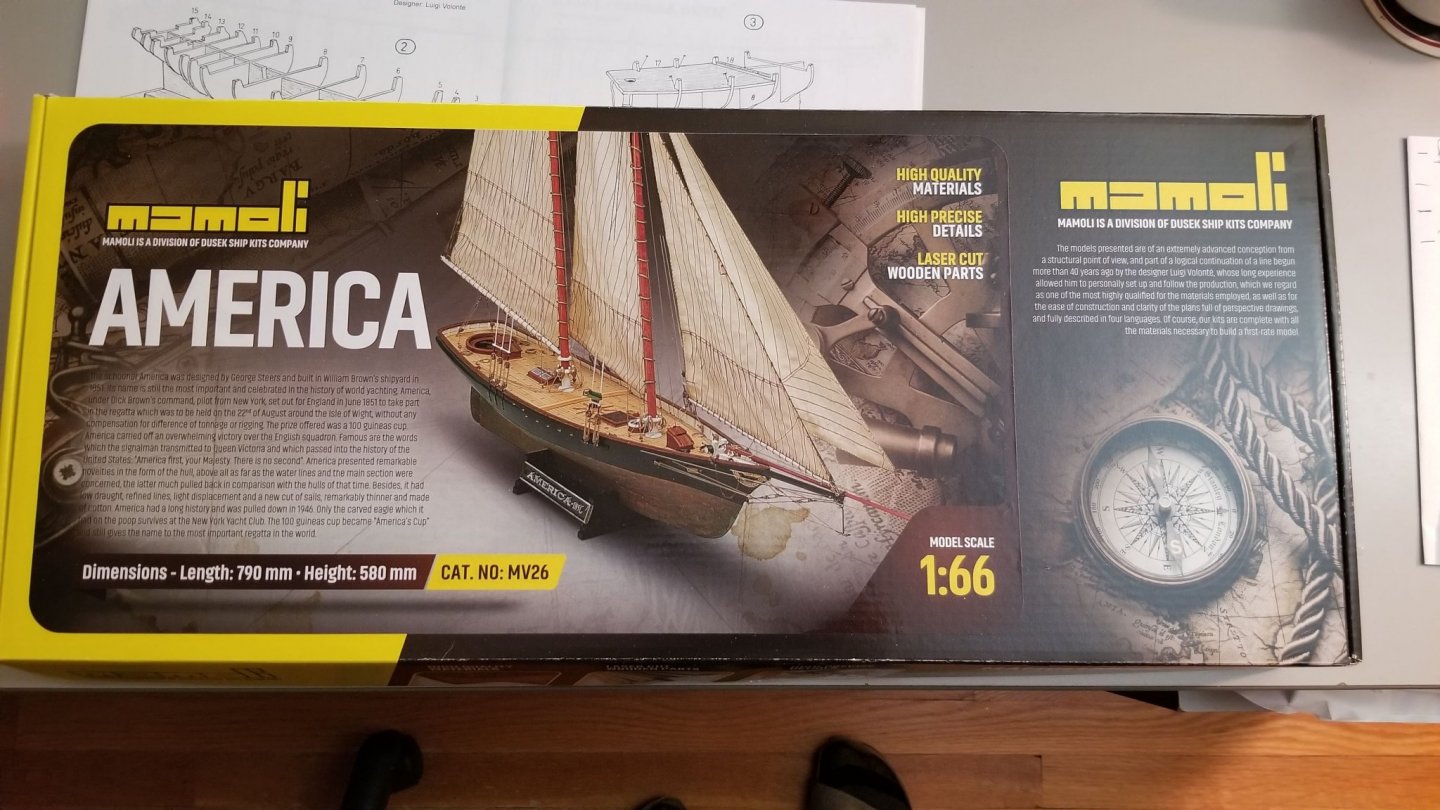
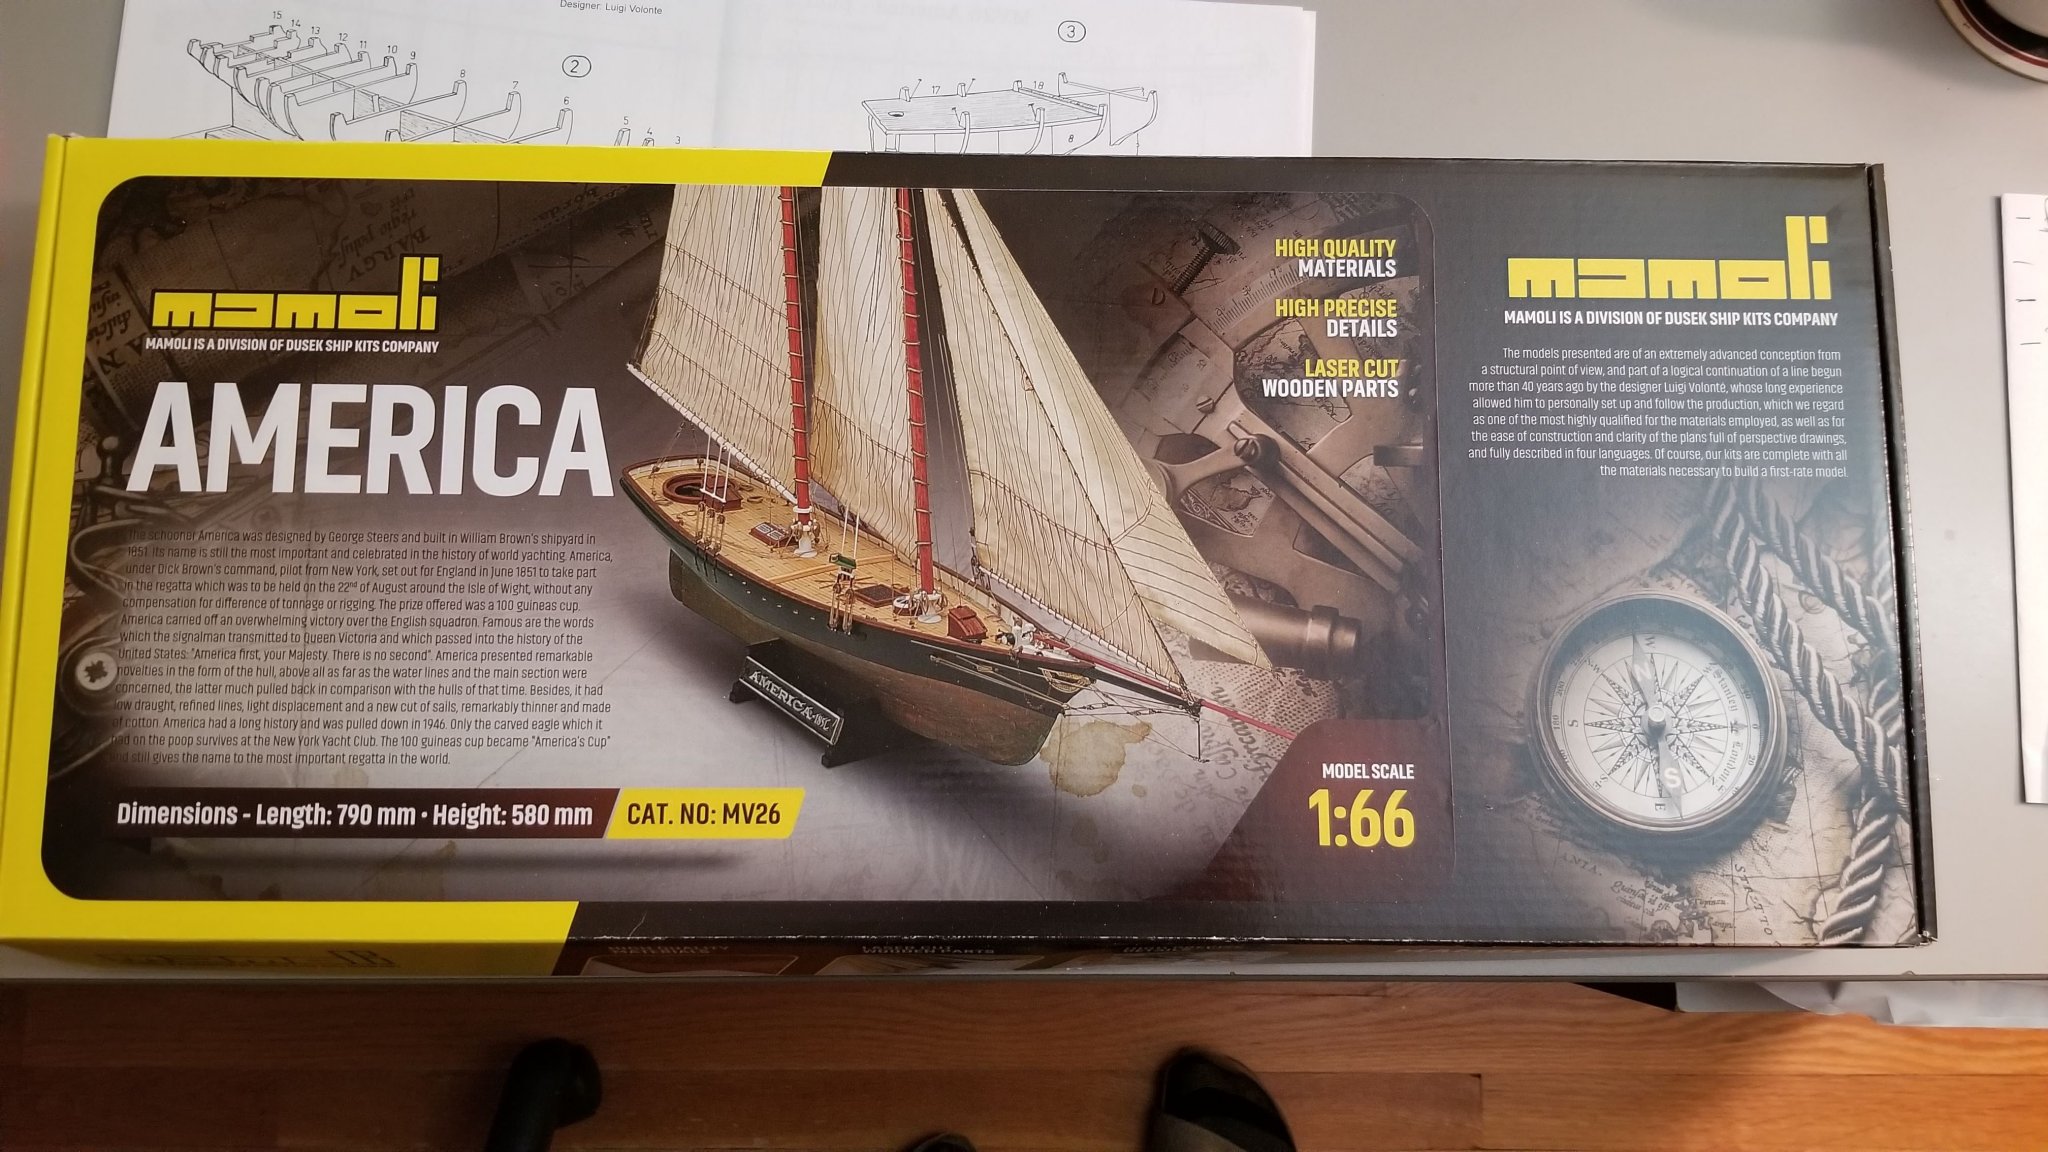
I received the kit today. It seems I have another version from the version built by Hamilton in 2015, as I have only 3 plans supplied with the kit. And, oh, the keel and bulkheads don’t match the plan anyway, so I don’t know which is at 1:66 scale, the parts or the plans??
The wood is so-so, but the biggest issue is the plywood is seriously warped. It will require some serious TLC, otherwise my America will look like a Venice Gondola. The supplied blocks are ugly and not to scale (but then again, they always are in all the kits I have built). The laser cut parts are ok.
As previously reported, the English instructions are somewhat funny, but rest assured, the French translation sucks as well 😊
All right, so let’s go with it…
-
So, after finishing my Benjamin W. Latham, and after a busy summer, I have been thinking about my next build. I had several options: resuming my Hesper build now that the hull is completed, build another fishing schooner like Elsie, build the Emma C. Berry which has been collecting dust on my shelves, and also having visited Rochefort in France this summer, I saw the Hermione -again- and building the kit from A.L. tempted me.
Not to bore anyone, but here was my line of thinking. As tempting as the Hermione is, and after seeing several build logs, I finally decided to stay away from this kit, as I thought a kit at that scale does a poor rendering of the real vessel. I then went back to the schooner list. My ideal choice would be a POB, scale 1/4 . Unfortunately, there are not many such kits on the market. An option would be of course to scratchbuild. After seeing the beautiful Elsie model from Erik Ronnberg at the Cape Ann Essex museum, I got the plans and looked into building it POB on that 1/4 scale. But Elsie looks a lot like the Benjamin W. Latham, so I decided to abandon this idea.
Which brings me to America. A legendary schooner, well (?) documented, many models existing. Here again, no POB is available at 1/4 scale. There is the bluejacket POF, the Mamoli POB at 1/66 scale, and I think there was a Constructo available at some point. I got the 1/48 plans of the BlueJacket America and studied them carefully. As Chapelle said in his book The History of American Sailing Ships, “a great many plans of the America have been published in the past, unfortunately , however, not two agree.” However from my research, the B.J. version seems to be the closest one to the original America, especially as she competed in 1851. Because I am interested in building models as close as the real one, a scratchbuild POB option based on the B.J. plan seemed a good approach.
However, I tabled that idea for now, and decided to start the Mamoli kit instead to get a general idea of the model. I expect there will be a lot of kitbashing involved, based on the building logs I have seen here. I ordered the kit and will post the progress here.
Stay tuned….
-
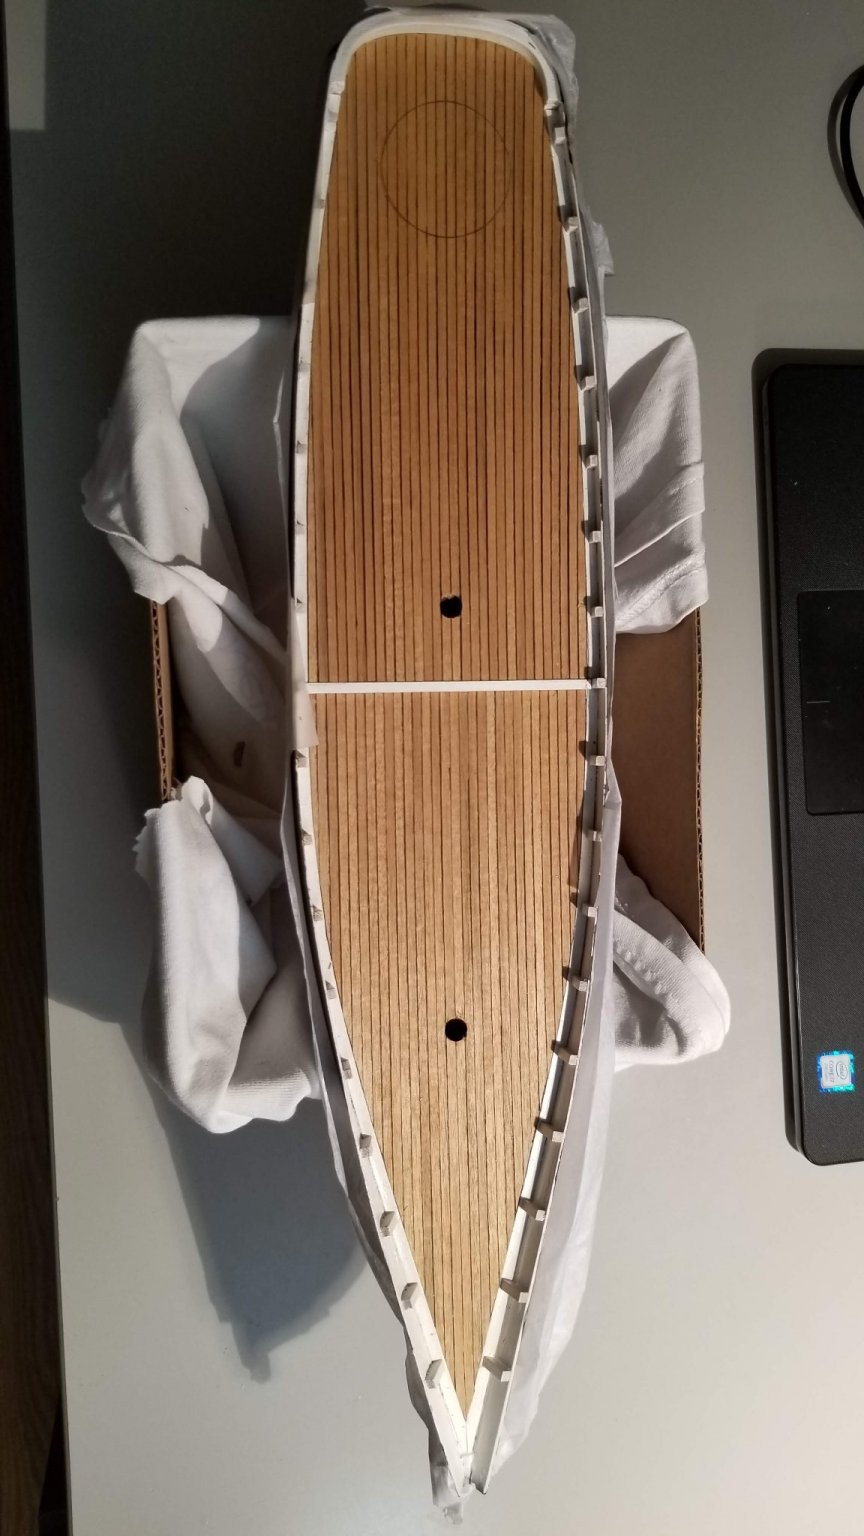
So, I finished my Benjamin W. Latham back last December, and resumed working on Hesper. I realized I did not make pictures of the planking in progress, so I have a couple pictures of the planking completed. After planking and sanding, I applied several layers of Gesso, sanding between layers, to provide a good basis for painting and also coppering. Starting this fall, I'll work on planking the deck, bullwarks, stanchions, railing etc..
-
-
-
I created an album in the finished kit gallery:
Now back to Hesper..
-
Well, hard to believe but I actually finished this build!!!! Well, almost, I still need to varnish the display board. I started this kit four years ago, and the lesson is that it's way too long. After a few months , I don't remember exactly where I left, I actually prepared spars that I already done and misplaced (and found them later!), etc..
As usual, I see a lot of areas that could be improved. I have also to admit that I may have rushed the past few months, because I really wanted to get it done before the 4 years deadline 😉.
So, when the varnish is dry, I'll take pictures and post in the finished model gallery.
Now is the time to think about a new project. Benjamin Latham was my 8th model ship. I could resume scratchbuilding Hesper (see my other blog), or start the Emma C. Berry which has been sitting on my shelves for years (never did a plank on frame before). Also, I have seen recently some building blogs of Hermione, a kit available from Artesania Latina, but on the expensive side. I have never built vessels that old, and I have special bonds with l'Hermione, which I can detail if I start that project. So we'll see.
Cheers
Stephan
-
Hello Tasmanian.
For the deck, I airbrushed the Badger Model Flex Marine Color, 16-418 Slate Gray.
Stephan
-
Hi Tim,
I would highly recommend it, but of course I love fishing schooners 🙂
The plans and instructions by Erik Ronnberg are very detailed, as expected, and again I have the good fortune to see his model at the Cape Ann Essex museum http://www.capeannmuseum.org/collections/objects/schooner-benjamin-w-latham/
Plus the scale of the model makes it easier to work on details.
Stephan
- Tim Curtis and Elia
-
2
-
Hi all,
here are some pictures of the work in progress. As you can see, I'm not too good at taking pictures..
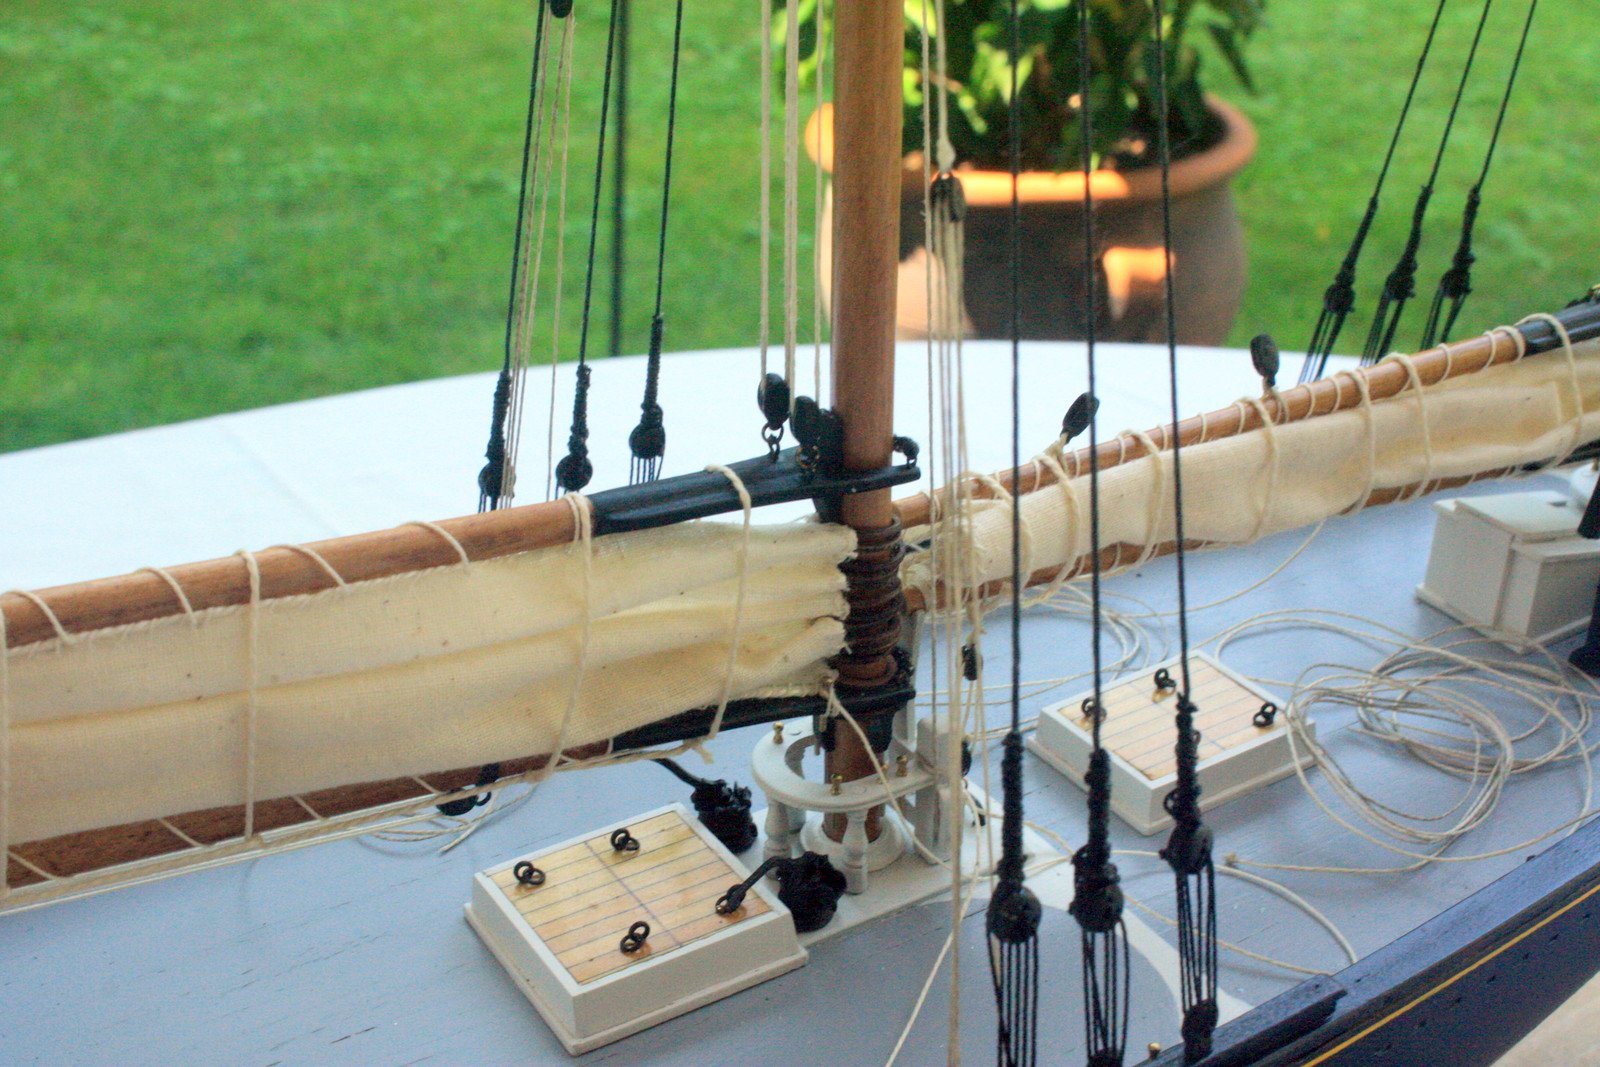
Standing rigging is near complete (still need to do the ratlines, and pin racks). I finished the running rigging for the main mast and started eh fore mast. Still a lot to do, touch up paint on blocks, more details etc..
And I'm still exploring ways to remove the fuzz on my lines..
Stephan


-
Hello Tim,
Thank you for your comment . the build is not completed yet, as I am finishing up the rigging. I'll post a few pictures of the work in progress shortly.
Stephan
- Tim Curtis and Elia
-
2
-
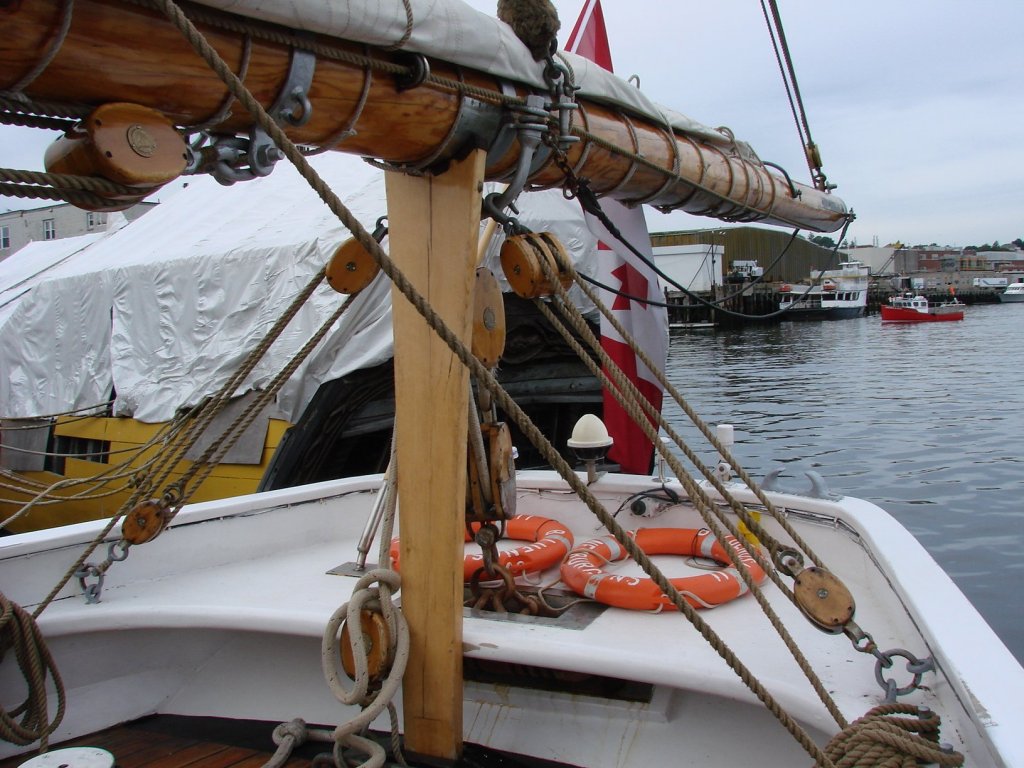
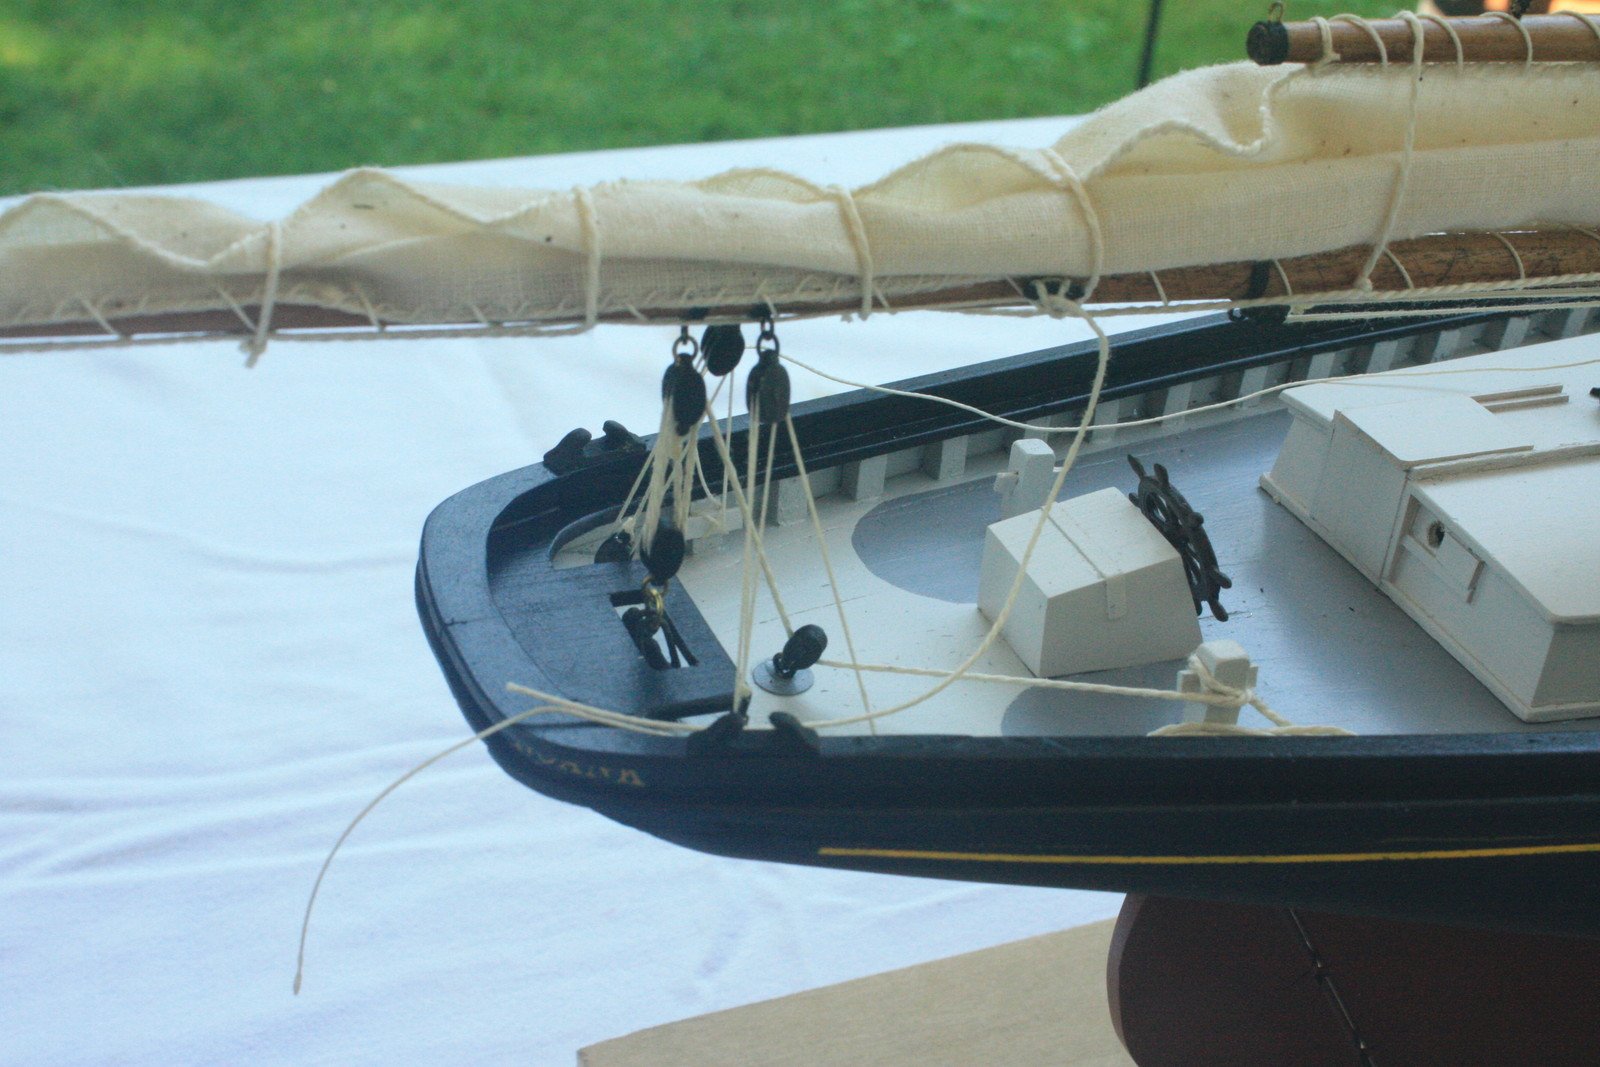
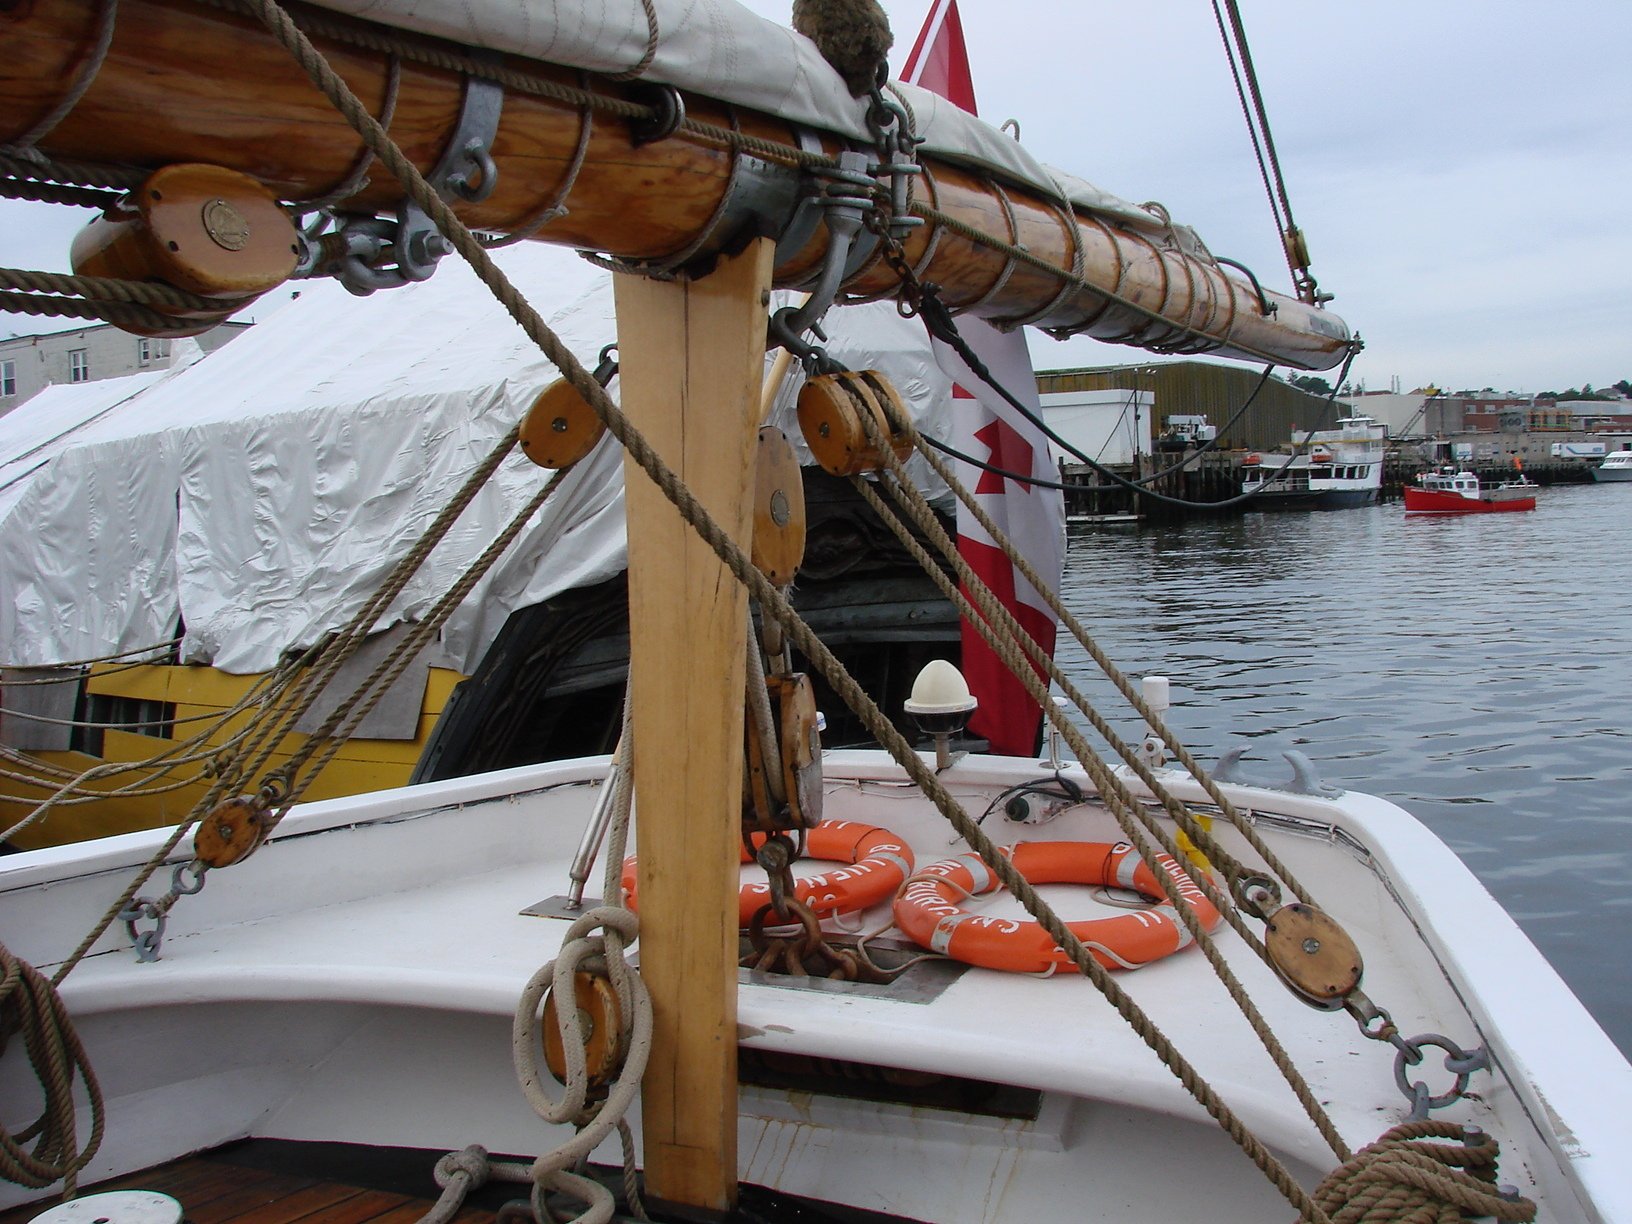
Sorry , one more picture, this one again of the Pride of Baltimore II when she came to Boston last year for the Sail Boston festival. I took this picture because I wanted to see how the sails were furled for my B.W. Latham. You can see the other end of the Boom Tackle, the end which is unhooked from the boom and attached to the rail when sailing downwind...
And you can see the end of the Boom Tackle line belayed to the boom jaw.
- tasmanian, coxswain, Tim Curtis and 3 others
-
6
-
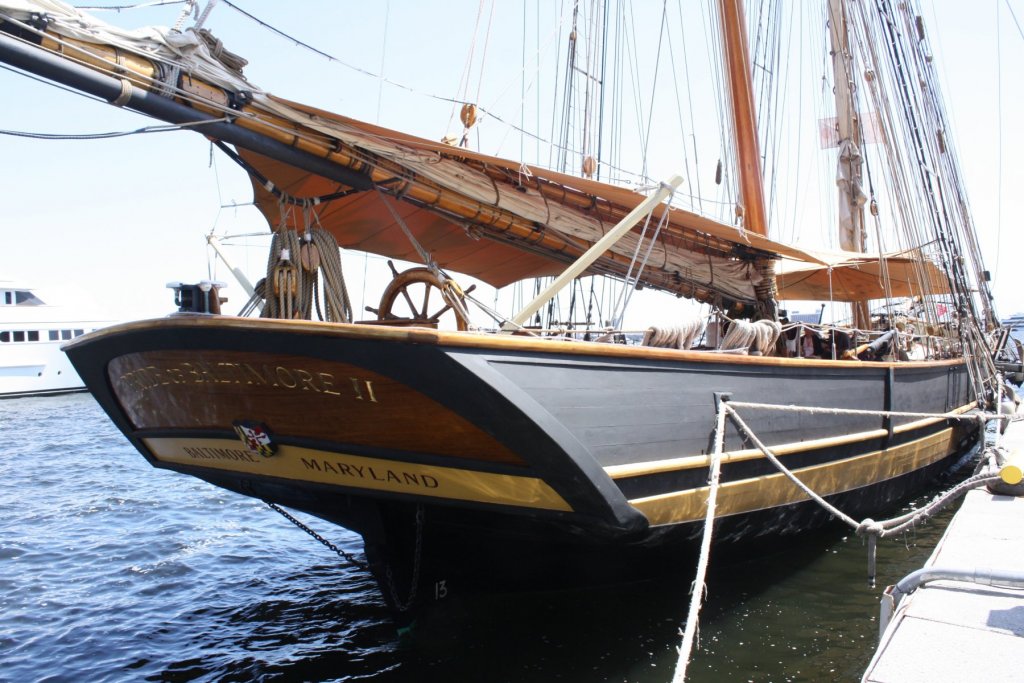
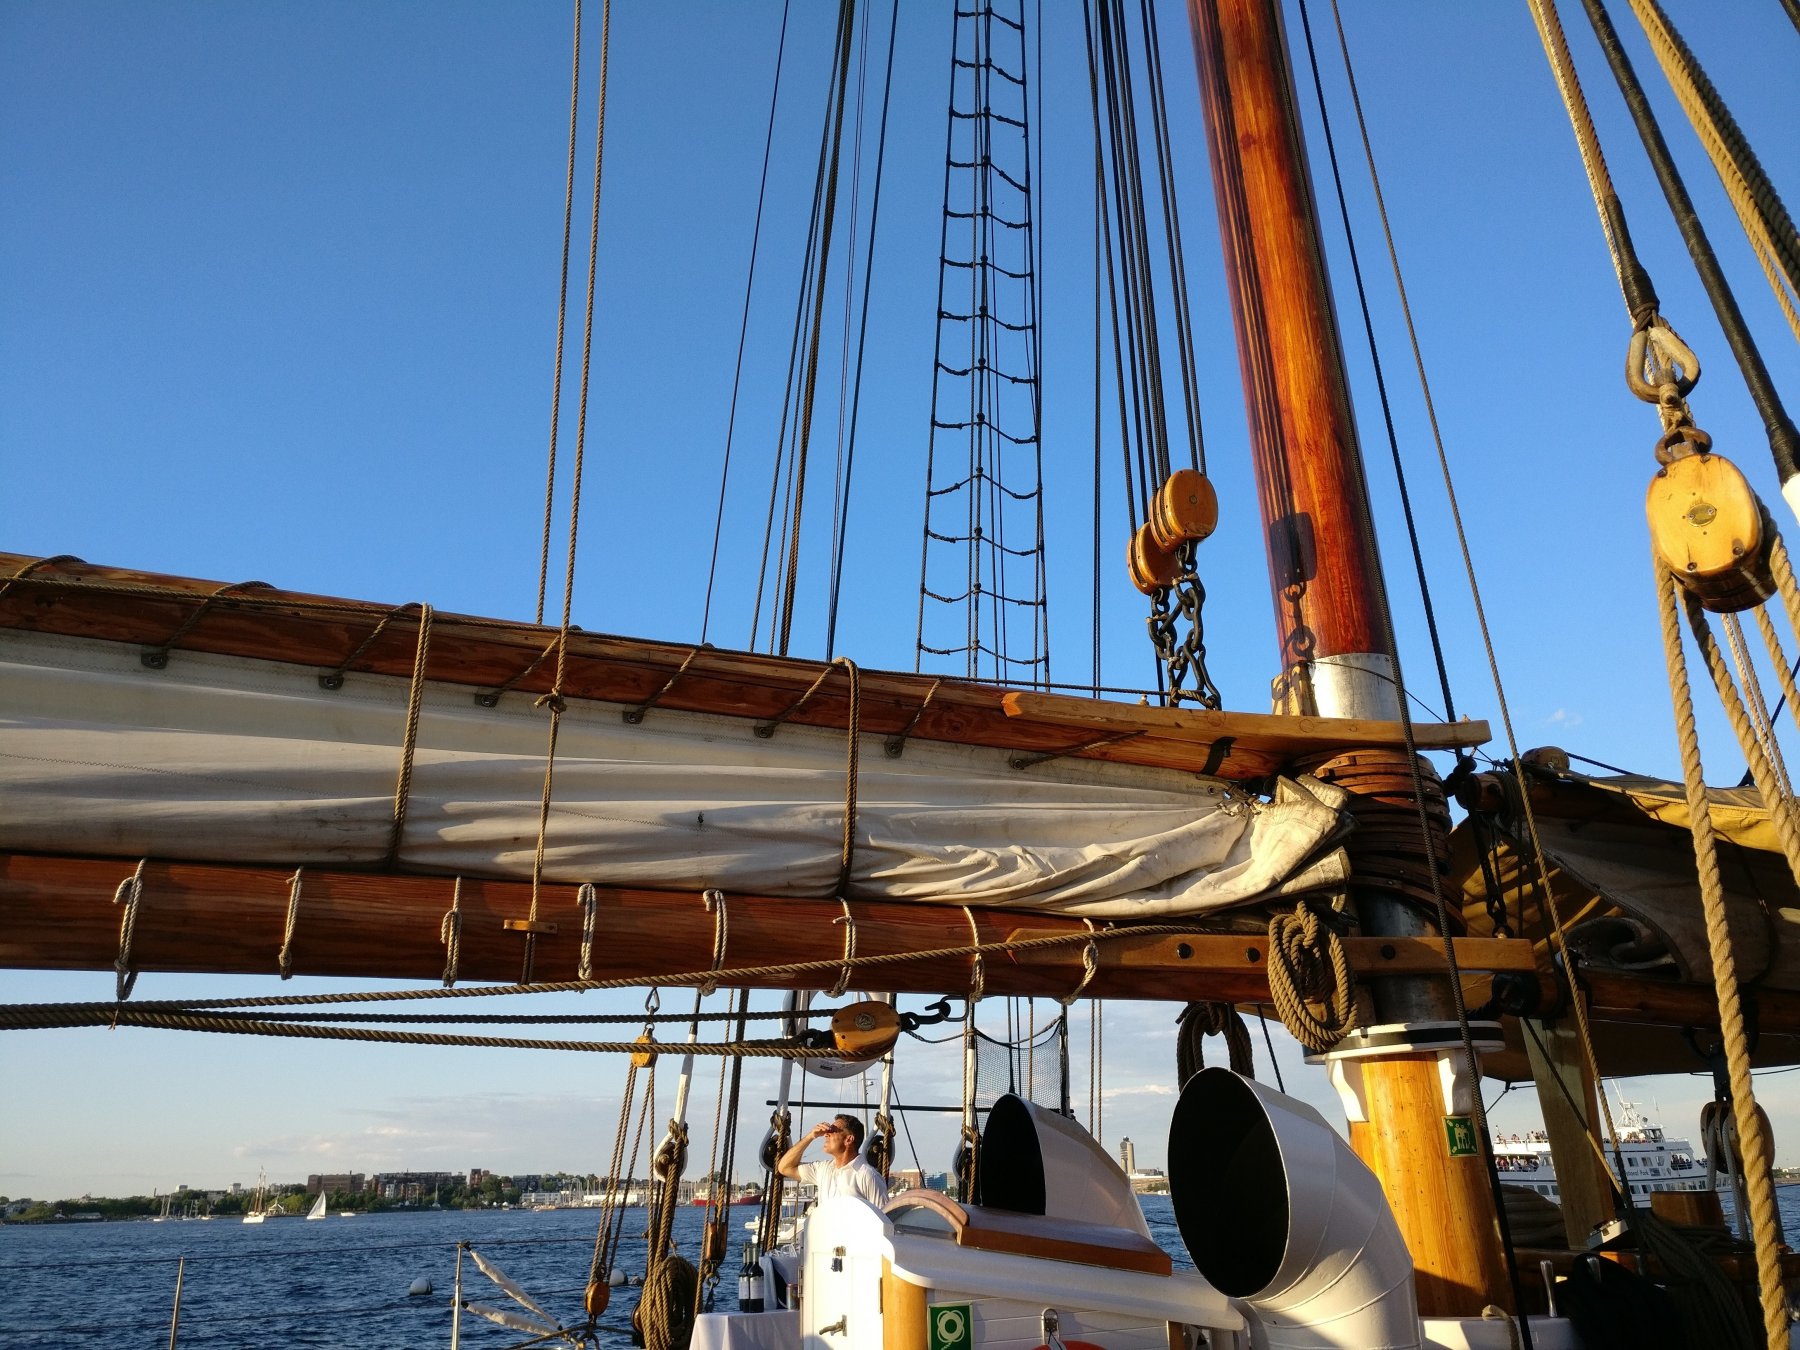
I was going through my pictures of the Bluenose II when she came to New England some years back, and the Pride of Baltimore when she came to Boston in 2009. Maybe not the best pictures, but on the Bluenose, you can clearly see one end of the Boom Tackle (and great details of the Main sheet & Crotch tackle which are the same on the Benjamin Latham), and the whole Boom Tackle on the Pride of Baltimore boom.
I should look at my pictures more often to verify details, especially rigging. We are fortunate in Boston to see schooners replicas come to visit regularly..
- Tigersteve, Elia and pjofc4
-
3
-
There is a detailed explanation in Chapelle book page 357 on Boom Guy or Boom Tackle. The first paragraph reads “ Their purpose was to hold the booms outboard when running before the wind the vessel running”, which really does not make sense, but what I believe he meant to say is that the boom tackles prevented an involuntary jibe when sailing downwind, and the boat was rolling because of waves. In modern sailing terms, we call them boom preventers.
In normal operation, they were belayed to a pin on the boom jaw. When sailing downwind, one end was detached from a hook on the boom, and attached to a hook on the rail cap, which prevented the boom to suddenly shift from one side to the other.
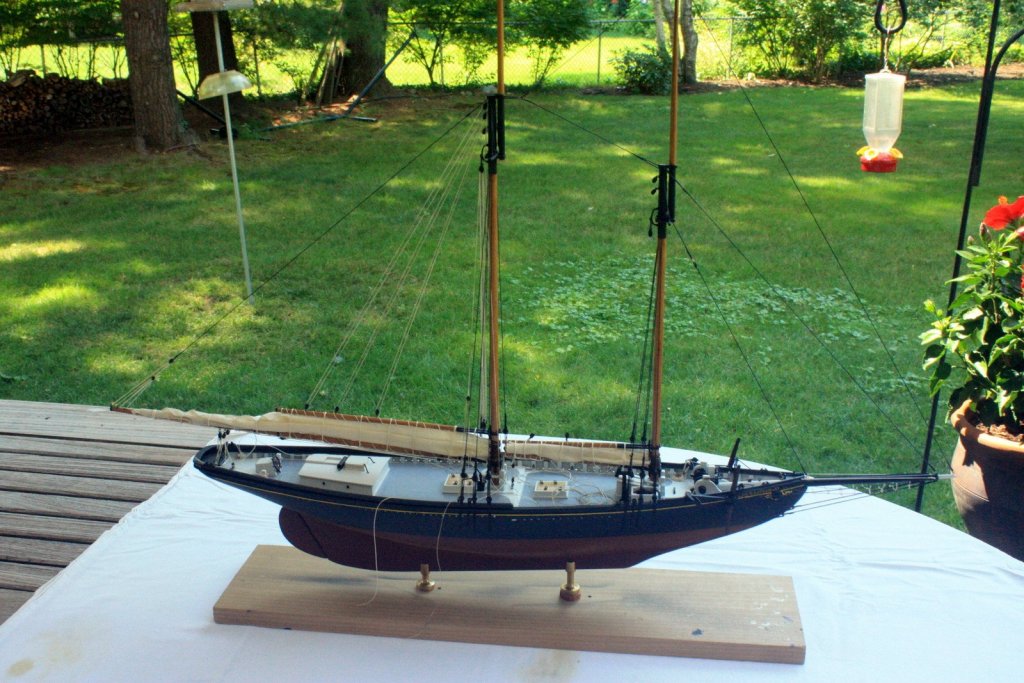
I am still working on my model, and nearly completed the standing rigging. Next and finally, the running rigging. 4 years to complete this model is way too much. Did I mention I am retiring soon, so I can do some real work on my models? :-)
-
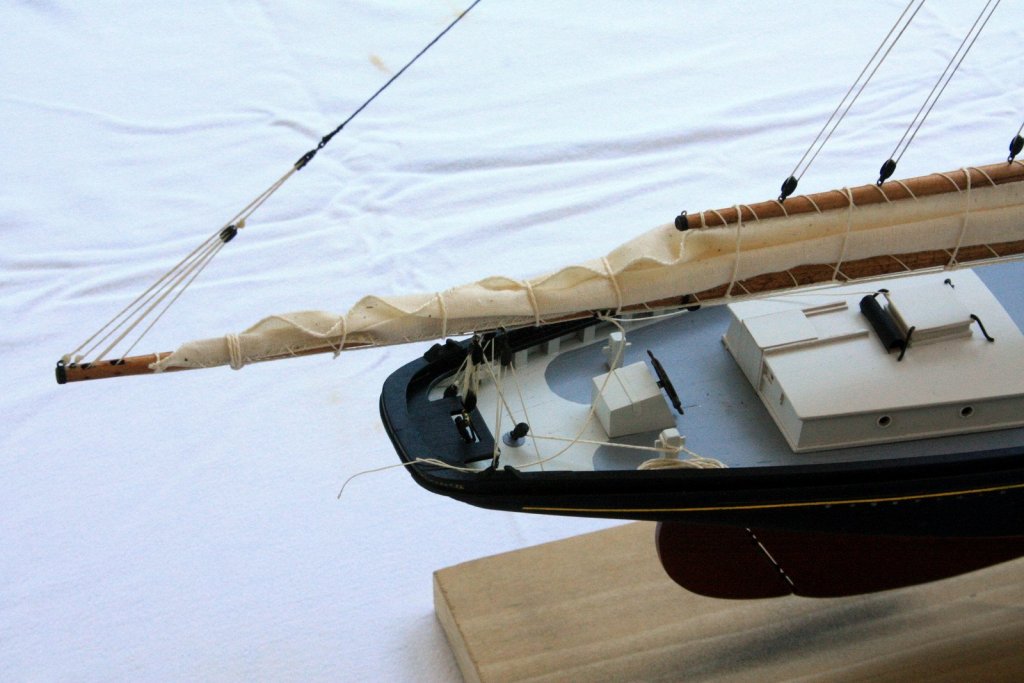
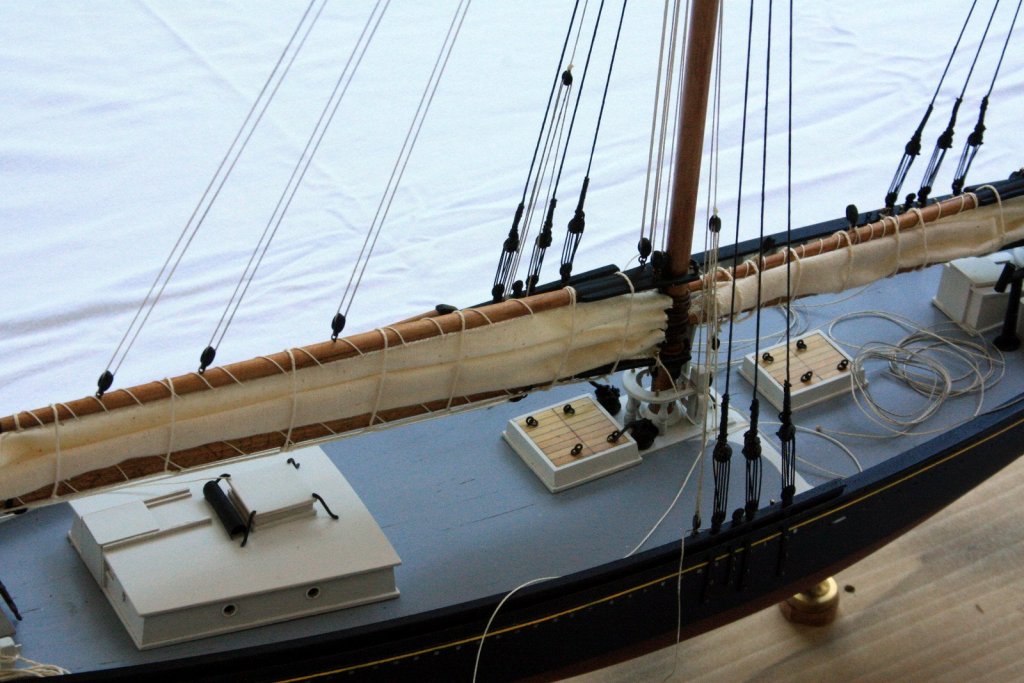
I can't believe my last post was April last year. Anyway I finally found some time to resume the construction. With great help from my significant other, the main sail was roped, and seized to the hoops, then laced to the boom and gaffe. It is now ready to be installed with a temporary furling (I'll complete the furling when the rigging is done).
Next, rigging the main mast; with a bit of luck, I'll be done this Summer given the pace...
-
Hi Yves,
Emma C. Berry will be my next build after I finish my Benjamin Latham.
Have you made any progress since your last post?
Cheers
Stephan
-
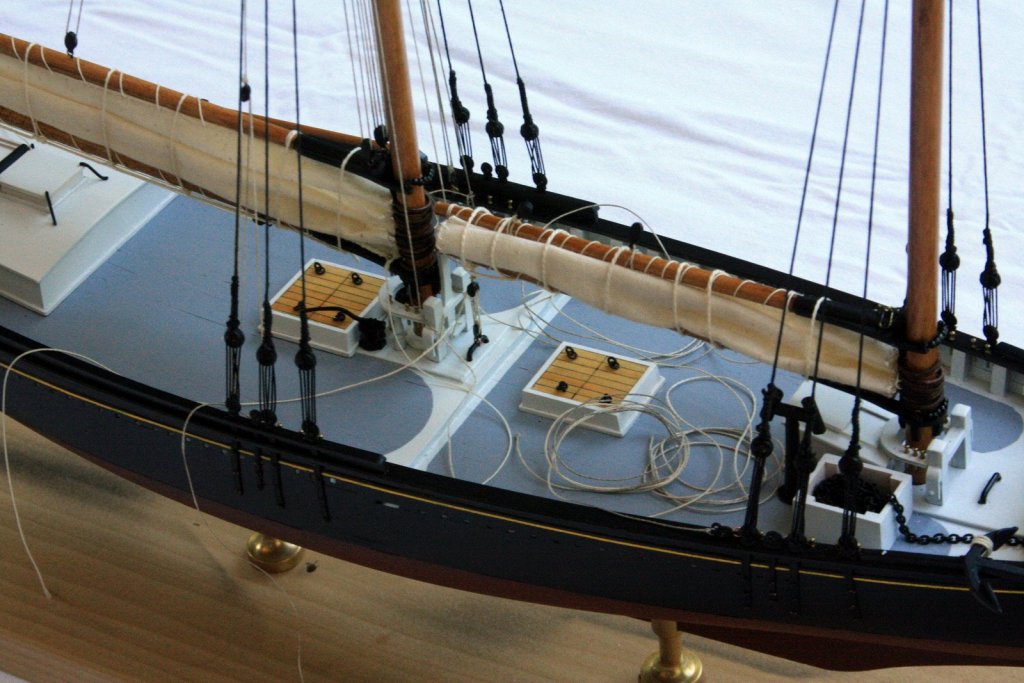
Ok, masts and spars ready. Let the rigging begin! The last mile! Well, in my case, more like a marathon, the real sailboat is waiting, and so is the garden. Let see if I can be done by end of Summer.
I am planning to have her with furled sails. I am still heavily inspired by the model Eric Ronnberg built that can be seen at the Essex Cape Ann museum, of which I took many pictures, going back and forth between Chapelles's book and these pictures.
I'll try to post pictures of work in progress.
Cheers!

- Elia, alde, Duanelaker and 4 others
-
7
-


Suggestions for new BlueJacket Shipcrafters kits, please.
in Traders, Dealers, Buying or Selling anything? - Discuss New Products and Ship Model Goodies here as well!!
Posted
I would vote for a 1:48 POB model of "Hesper", a Pilot Schooner of Boston, well documented by Erik Ronnberg in NRJ and other places.