HOLIDAY DONATION DRIVE - SUPPORT MSW - DO YOUR PART TO KEEP THIS GREAT FORUM GOING! (Only 72 donations so far out of 49,000 members - Can we at least get 100? C'mon guys!)
×


palmerit
-
Posts
1,045 -
Joined
-
Last visited
Content Type
Profiles
Forums
Gallery
Events
Everything posted by palmerit
-
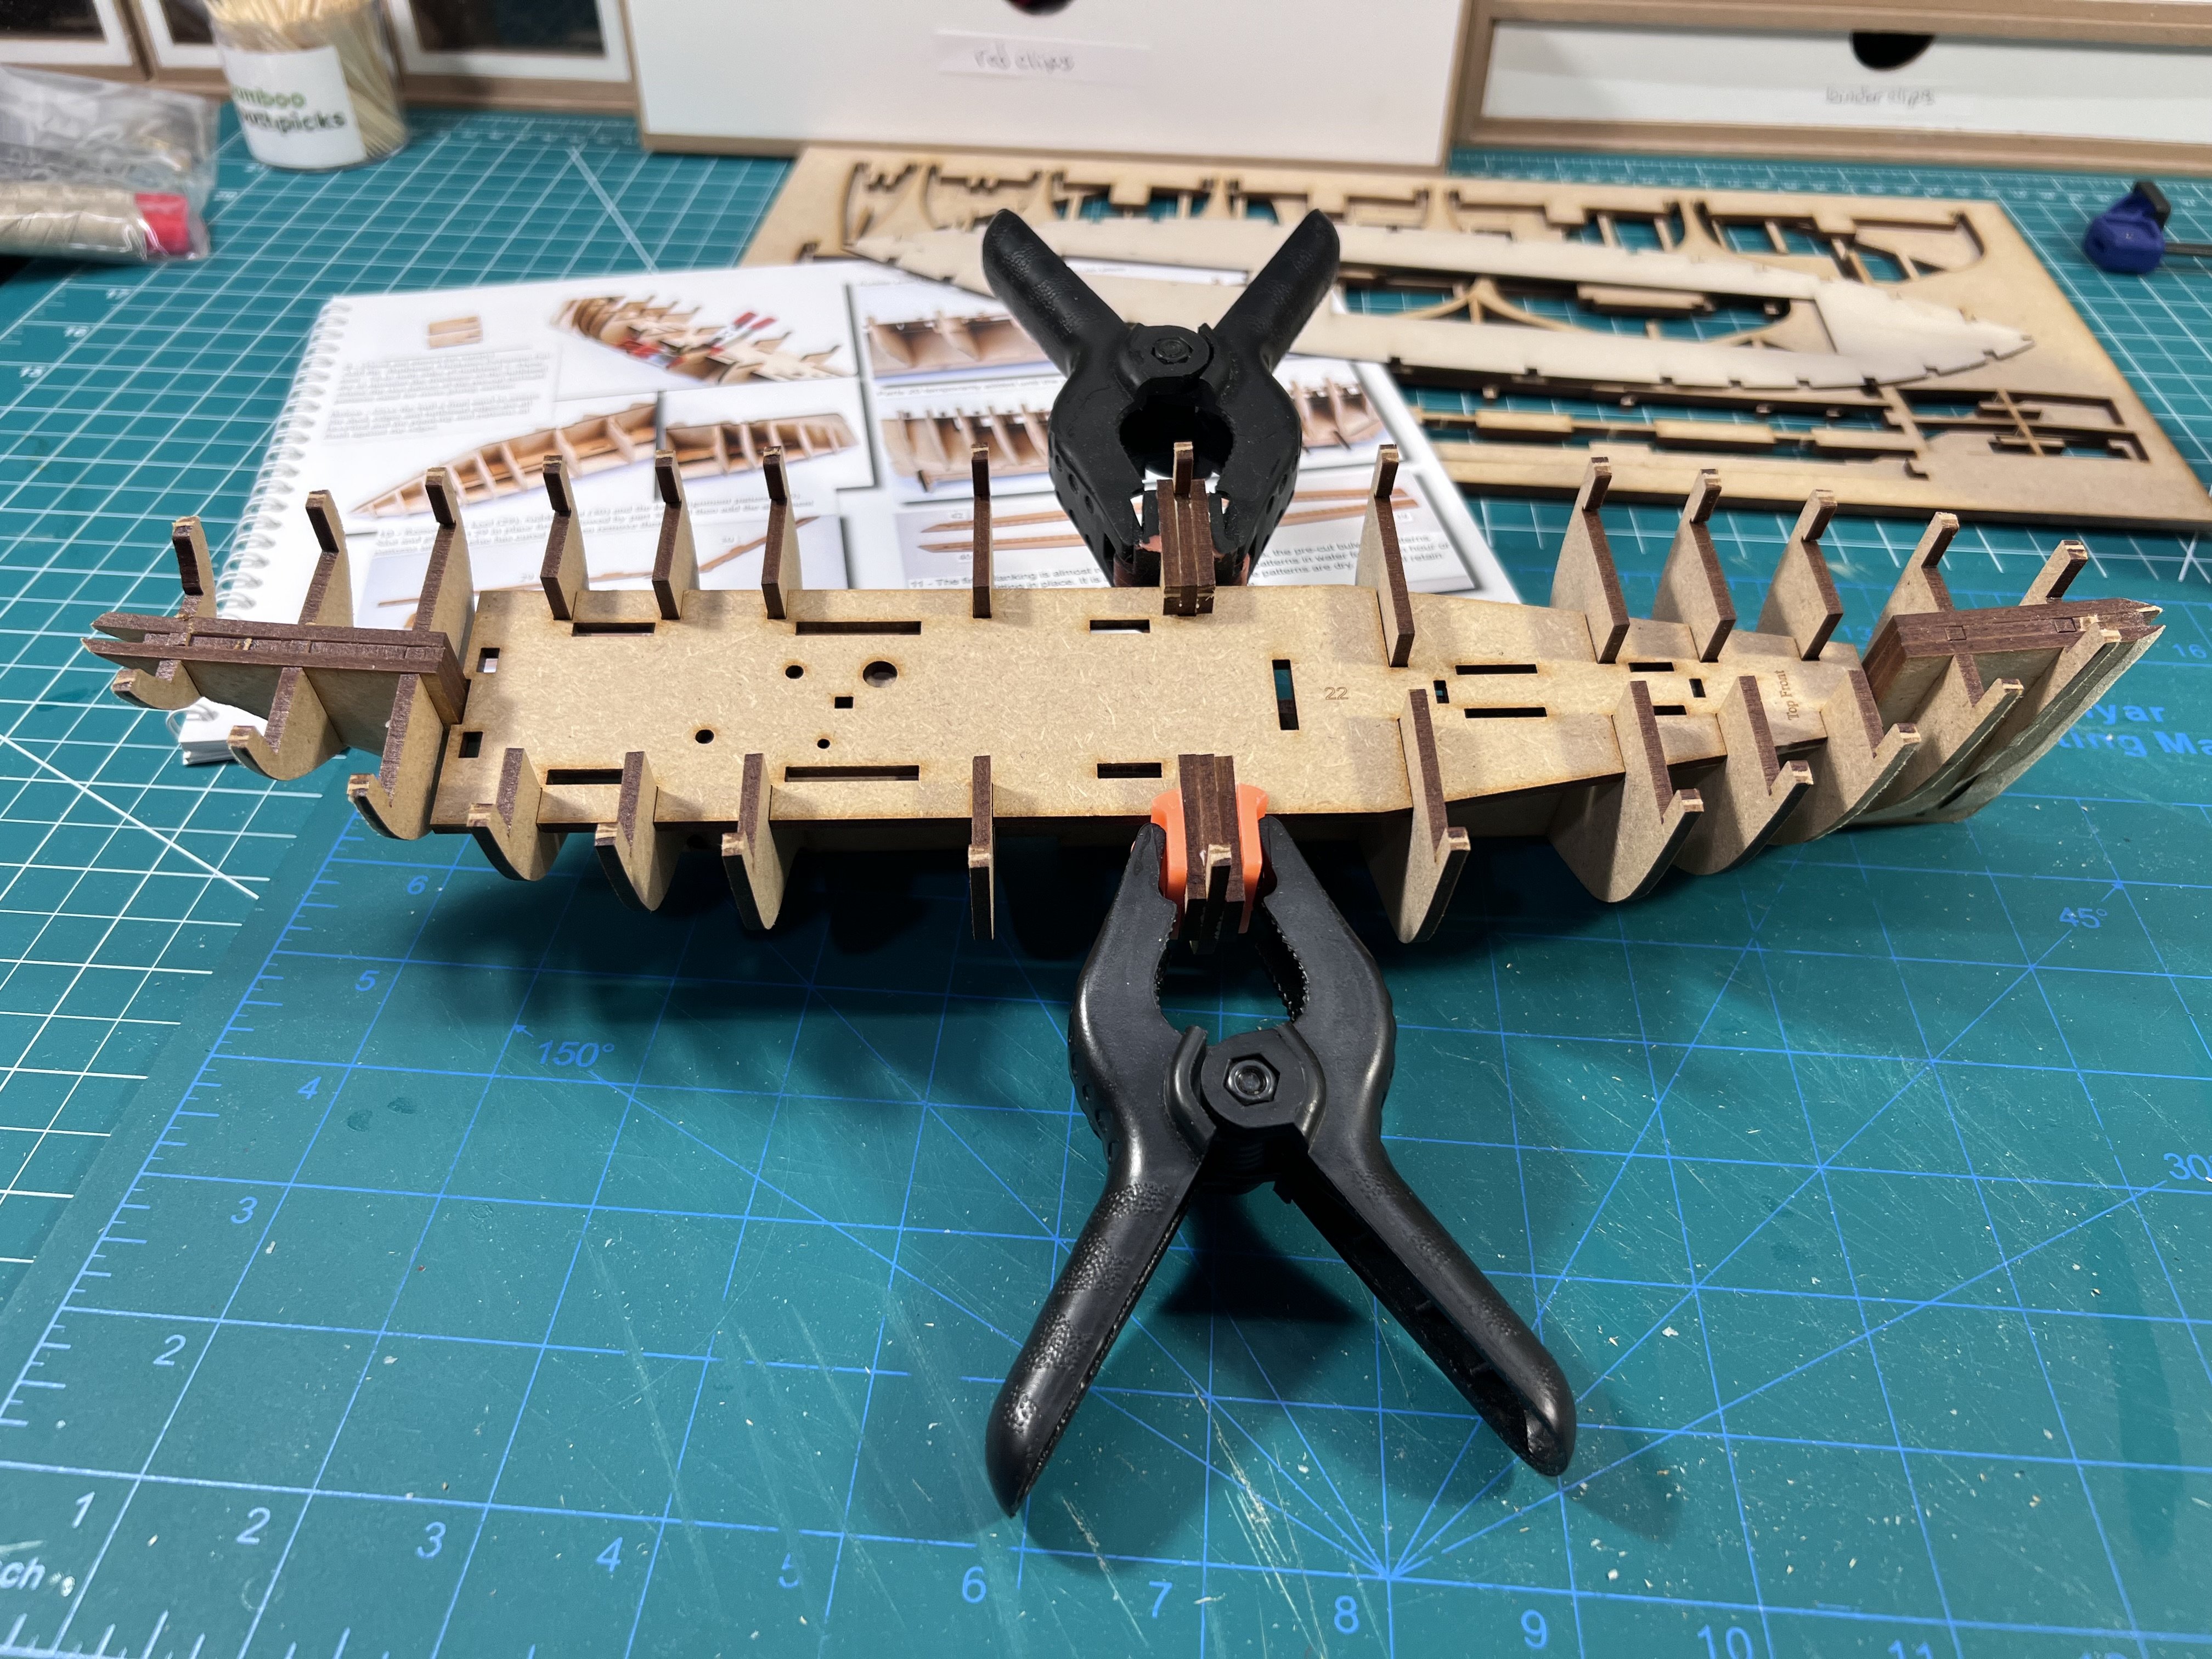
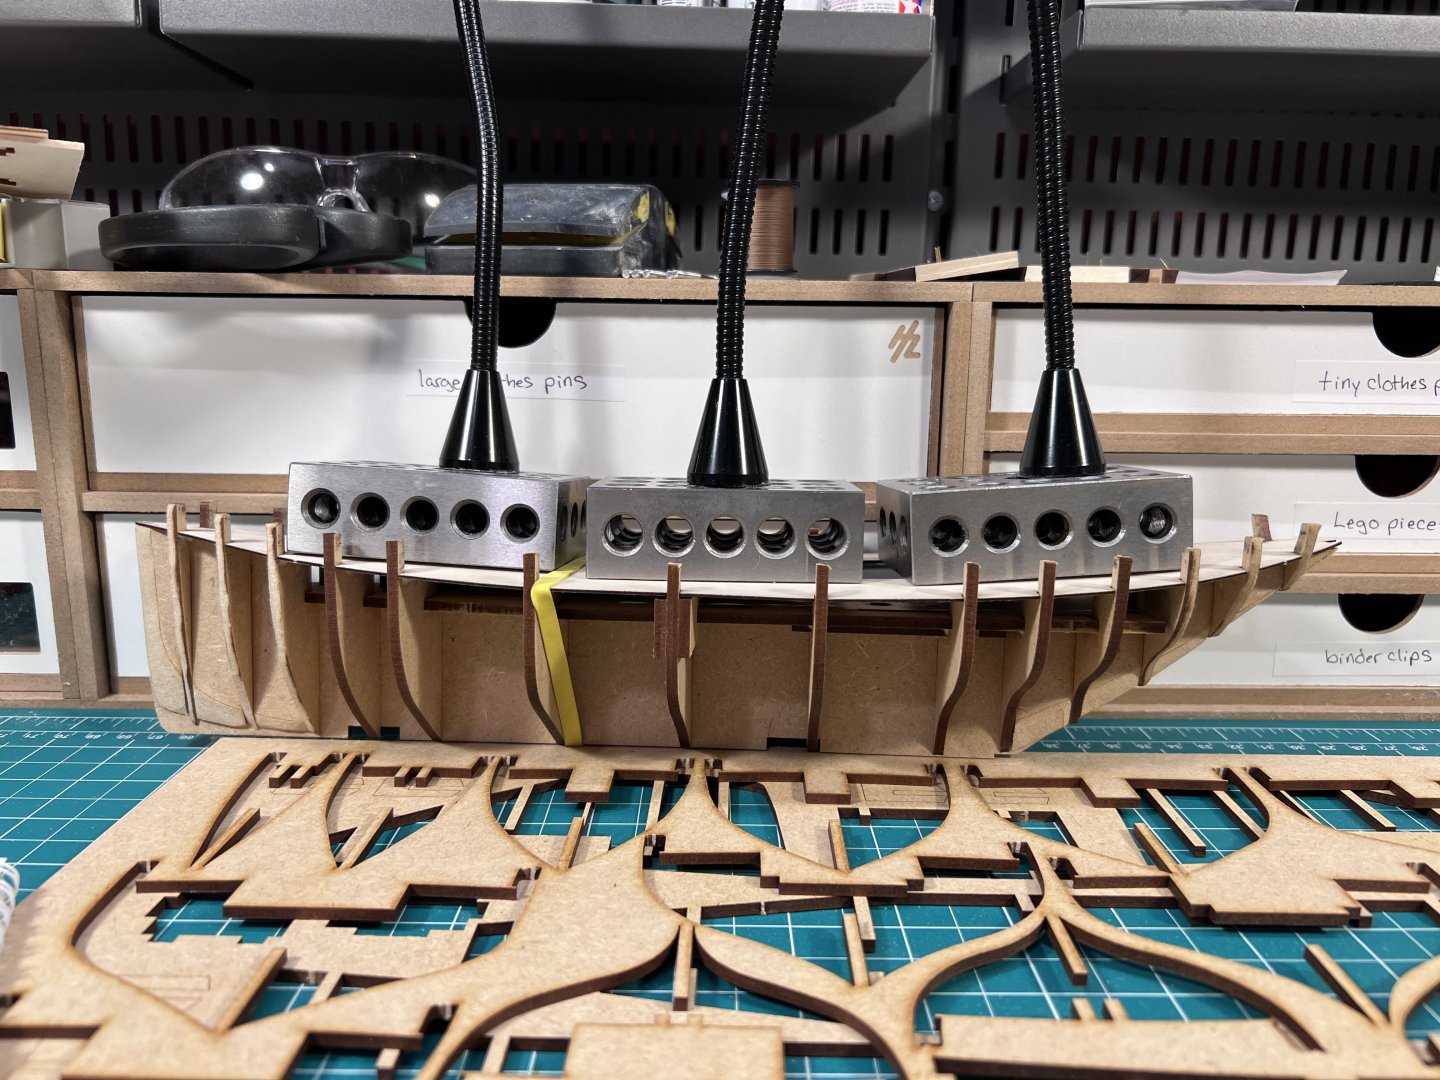
Some 3-2-1 block (metal, heavy) to weigh down the sub deck.
- 43 replies
-
- 4
-

-
- Lady Isabella
- zulu
- (and 1 more)
-
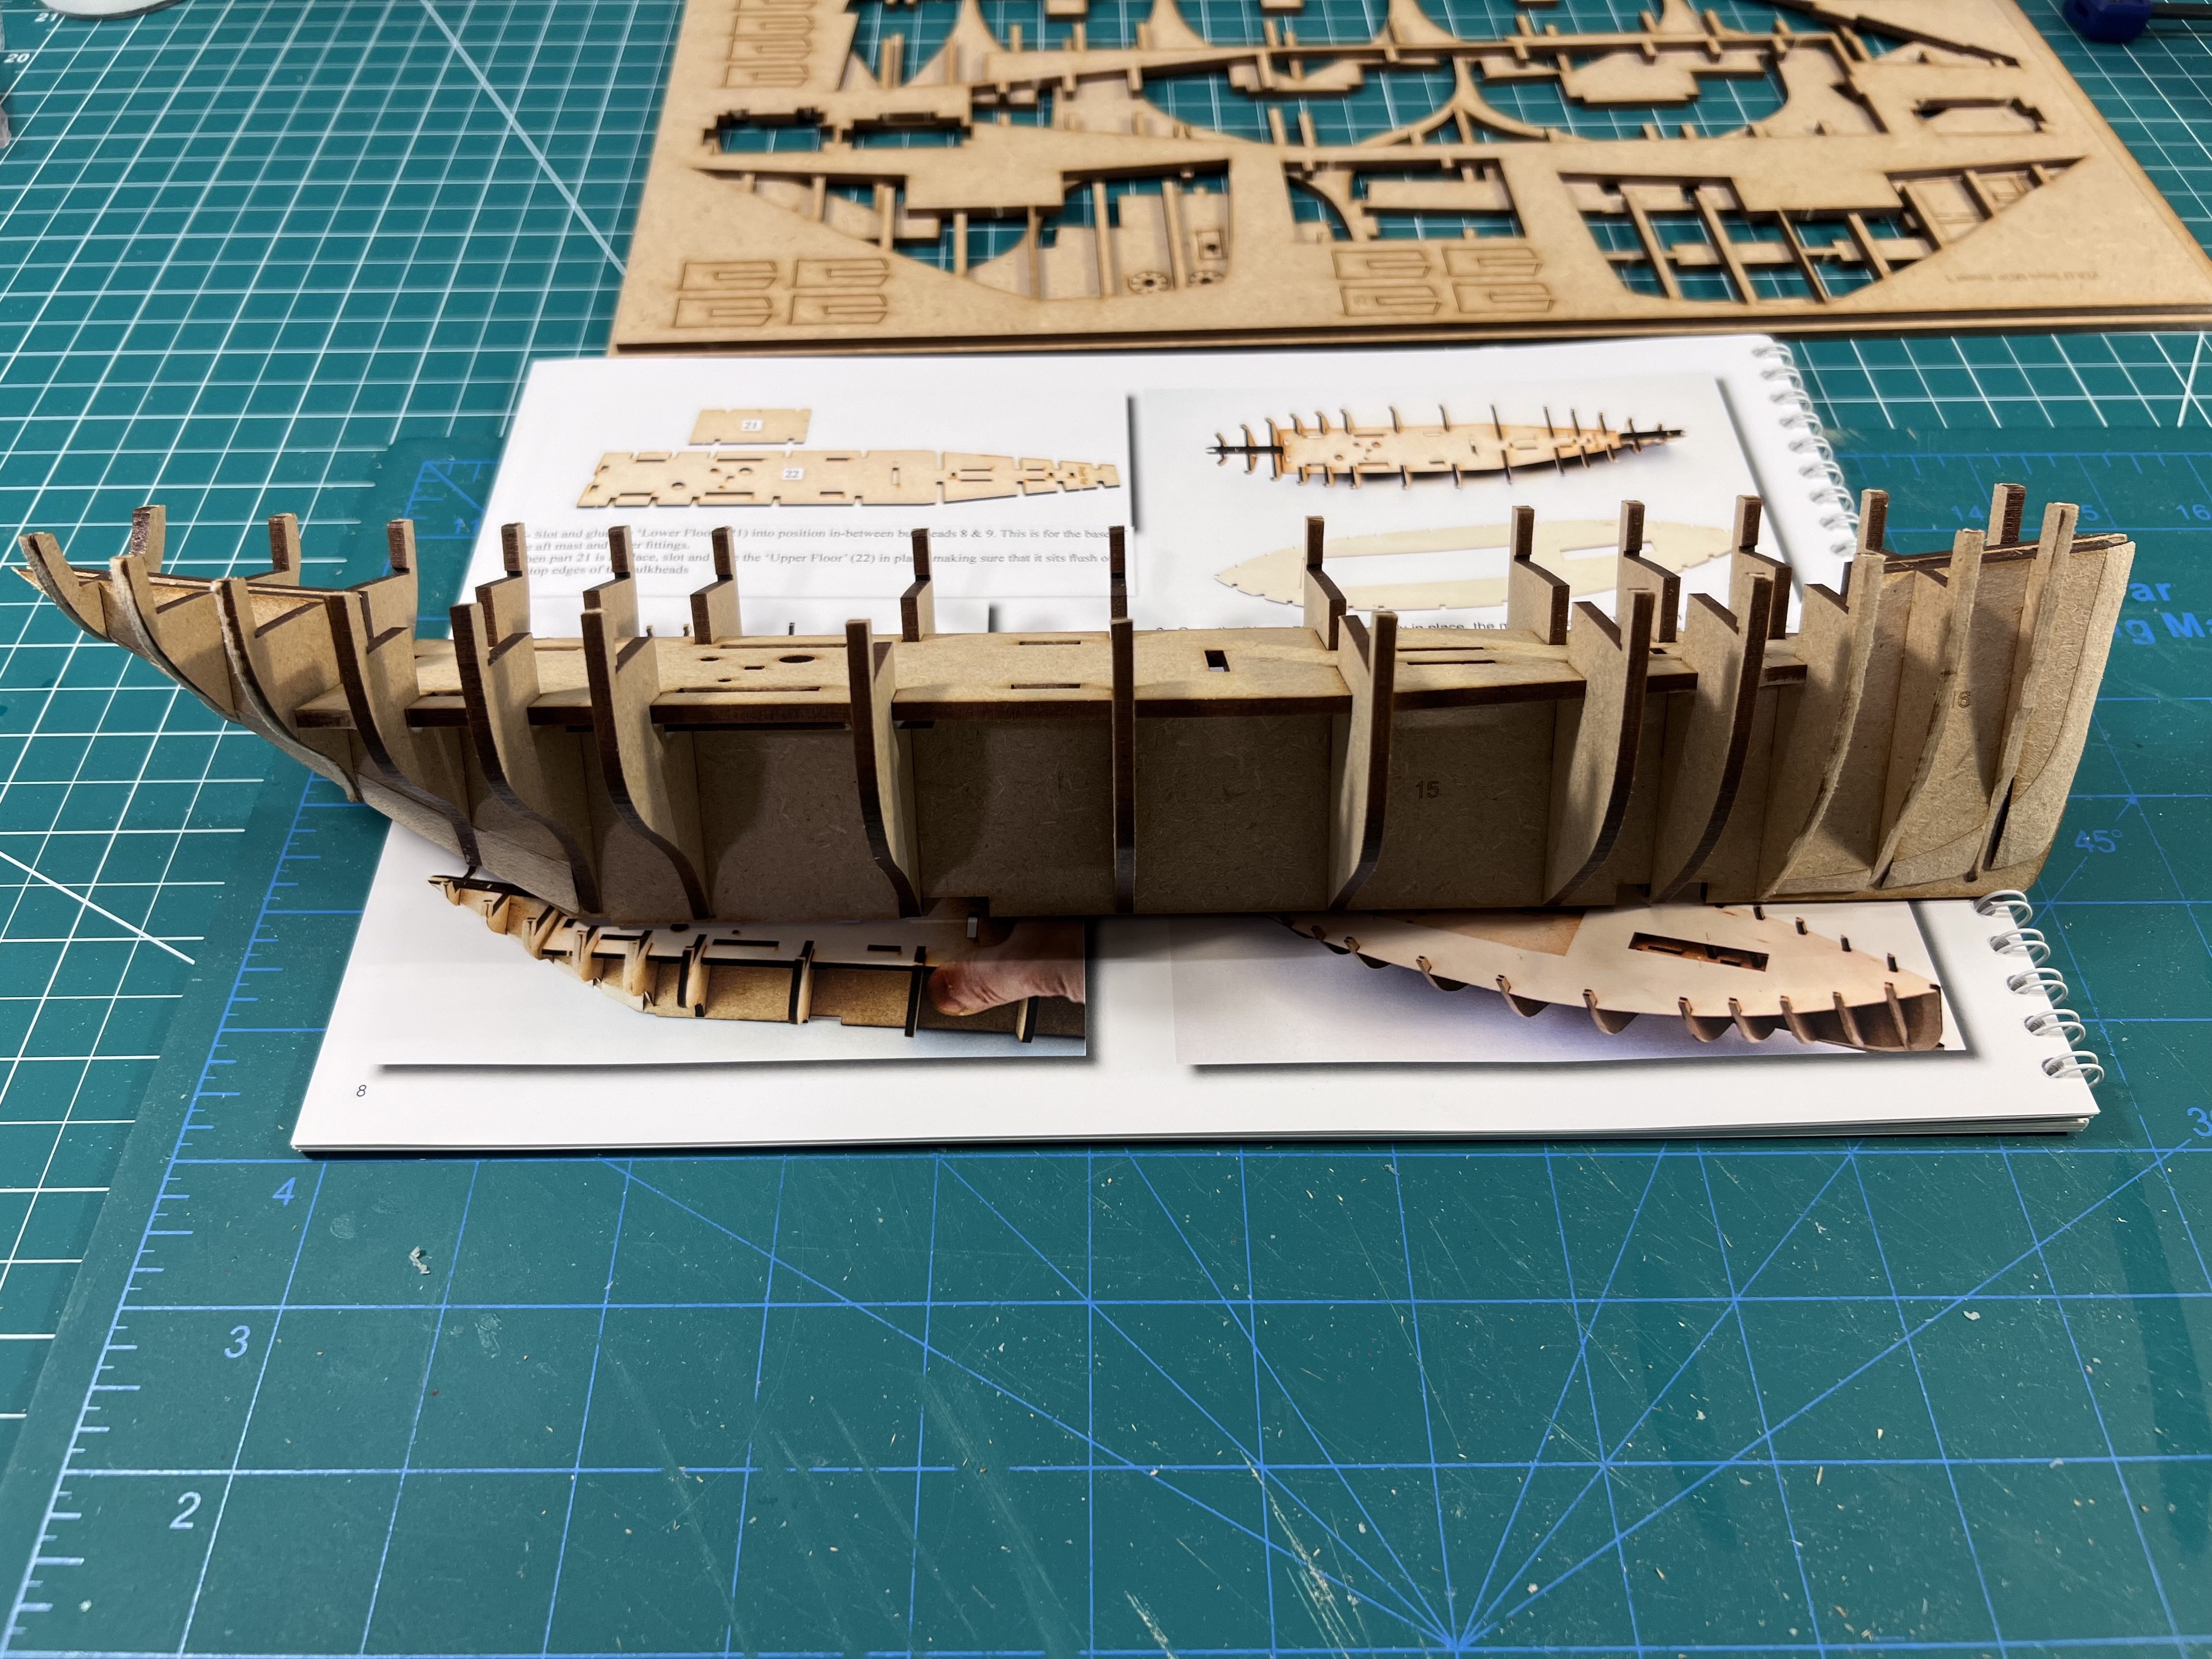
Putting together the bulkheads and other supports. I can see the engineering genesis from this early model (one of the first Vanguard models) to the more recent models in terms of the various kinds of supports and internal architecture. Thus one goes together really well and the bulkheads essentially go into place square, but these ones are glued into place whereas the Sherbourne and Ranger were assembled without glue and then glue was added later to where the pieces come together for some redundancy.


- 43 replies
-
- 1
-
-
- Lady Isabella
- zulu
- (and 1 more)
-
Boy would I love to see some YouTube videos of these someday. If you ever take these on the road and go on tour let us all know 😉
-
I forgot that I had asked this very same question a year ago. My recommendation is still the same as what I said above. You can see other responses. And how I ended up getting the Duchess, which will be a few models from now.
-
I'd recommend a Vanguard Model. The Sherbourne is highly recommended. There are also the "fishing boats" - I've done the Ranger, now doing the Zulu 'Lady Isabella', have the Erycina on the shelf. Of course there are more complex Vanguard models, but I'd imagine any of these Novice boats would still be a significant challenge with lots to learn after the Bounty Launch. And the end result looks great. The Sherbourne was my first - though in parallel I worked on the Model Shipways Shipwright boats (Dory, Pram, Smack) and the NRG Half Hull and a Lego model of the Endurance. After the fishing boat, I'm probably going to the Vanguard Grecian. Have the Vanguard Duchess on the shelf. I bought it assuming it would be my second model. But then decided I'd have more fun learning more and trying more things with less complicated models. On the Vanguard models, the materials are great, the design is great, the instructions are great, the end result is great - even if like me you don't really know what you're doing. Easy to recommend.
-
Planking disaster
palmerit replied to sgrez's topic in Building, Framing, Planking and plating a ships hull and deck
I've seen that some people use contact cement and swear by it. Others say just as strongly to stay away. I'd also suggest wood glue. I tried using CA glue on entire planks - the Vanguard instructions describe doing that - but I made a mess. CA doesn't give me enough time to make sure a plank is in place. Maybe someday I'll be able to use CA when planking more often. The only time I use CA glue when planking is when securing the plank end to the bow. I just apply CA to the very end. If I mess up, it's easy to get acetone in there to undo the glue. Using CA on the very end - assuming you really get it set in the right way in the right place - can then make it easier to apply wood glue to the rest of the plank. Also, the bow (and stern) ends are often the hardest to secure in place to let wood glue dry. While some say if the plank is shaped right you don't need any clamps or rubber bands, there's also the fact that wood glue sets better under pressure, at least from what I've read. I'm no expert though. Still trying to work it out for myself and exploring different options. -
I think the tool is called a proportional scale divider, but I've never used one.
-
I'm going to follow because I want to know how to use brass black properly. Painting brass parts is also challenging, even when finding a good primer for PE parts. I bought, but have yet to use, and to compare, Birchwood Brass Black and Blue Jacket's Brass Black 52. I saw both recommended here. Again, I haven't tried them or compared them. I've seen some posts here that have all sorts of complex multi-step processes, such as first using acetone, using distilled water, avoiding touching pieces because of body oils, sometimes doing a light sanding, and the like. When I've seen Olha Batchvarov use brass black on her YouTube videos, she's used no prep. I can't remember what brand she uses.
-
Great choices. You'll find that the Sherbourne is definitely a step up from the Dory, Pram, and Smack. The biggest new part of the Sherbourne will be doing the strip planking, which none of the Master Shipwright models require. And the rigging is definitely more complicated. The Modelkitstuff videos of the Sherbourne are great. Also check out the planking tutorials at the top under Modeling Techniques : https://modelshipworld.com/forum/98-planking-downloads-and-tutorials-and-videos/ After you do the Sherbourne, the Vanguard fishing boats are a nice next option I think. Probably similar in difficulty to the Sherbourne. But planking and rigging take a few simpler models to figure out. You'd probably be able to do a harder model, but these other Novice models still provide a nice challenge and an opportunity to learn more. I imagine the boats you bought before and half shelved are fairly "old school" models (the Vanguard representing a new approach), which require a lot more work to get pieces aligned and square, and a lot more hand-shaping of pieces, and far less detailed instructions. I'm going to do several more Vanguard models before I give one of those models a try myself. I have the Model Shipways Syren in my stash, which is probably one of the best of that style, being designed by Chuck Passaro, but it'll be several more models before I try to tackle that one. When you get to planking, definitely check out how bad some of the first attempts can be - mine being one of the worst. Since the Sherbourne is painted, you can use a lot of filler and sanding to make it better. You can see where I started and where I ended up. Kind of miracle. I found the NRG Half Hull model a good experience to better understand planking. It's a different kind of modeling (it's a half hull, not a full model, and it involves cutting out planks to shape from sheets rather than bending long planks into shape). But at least for me it gave me a good sense of what I'm trying to achieve when planking when bending planks in two directions.
-
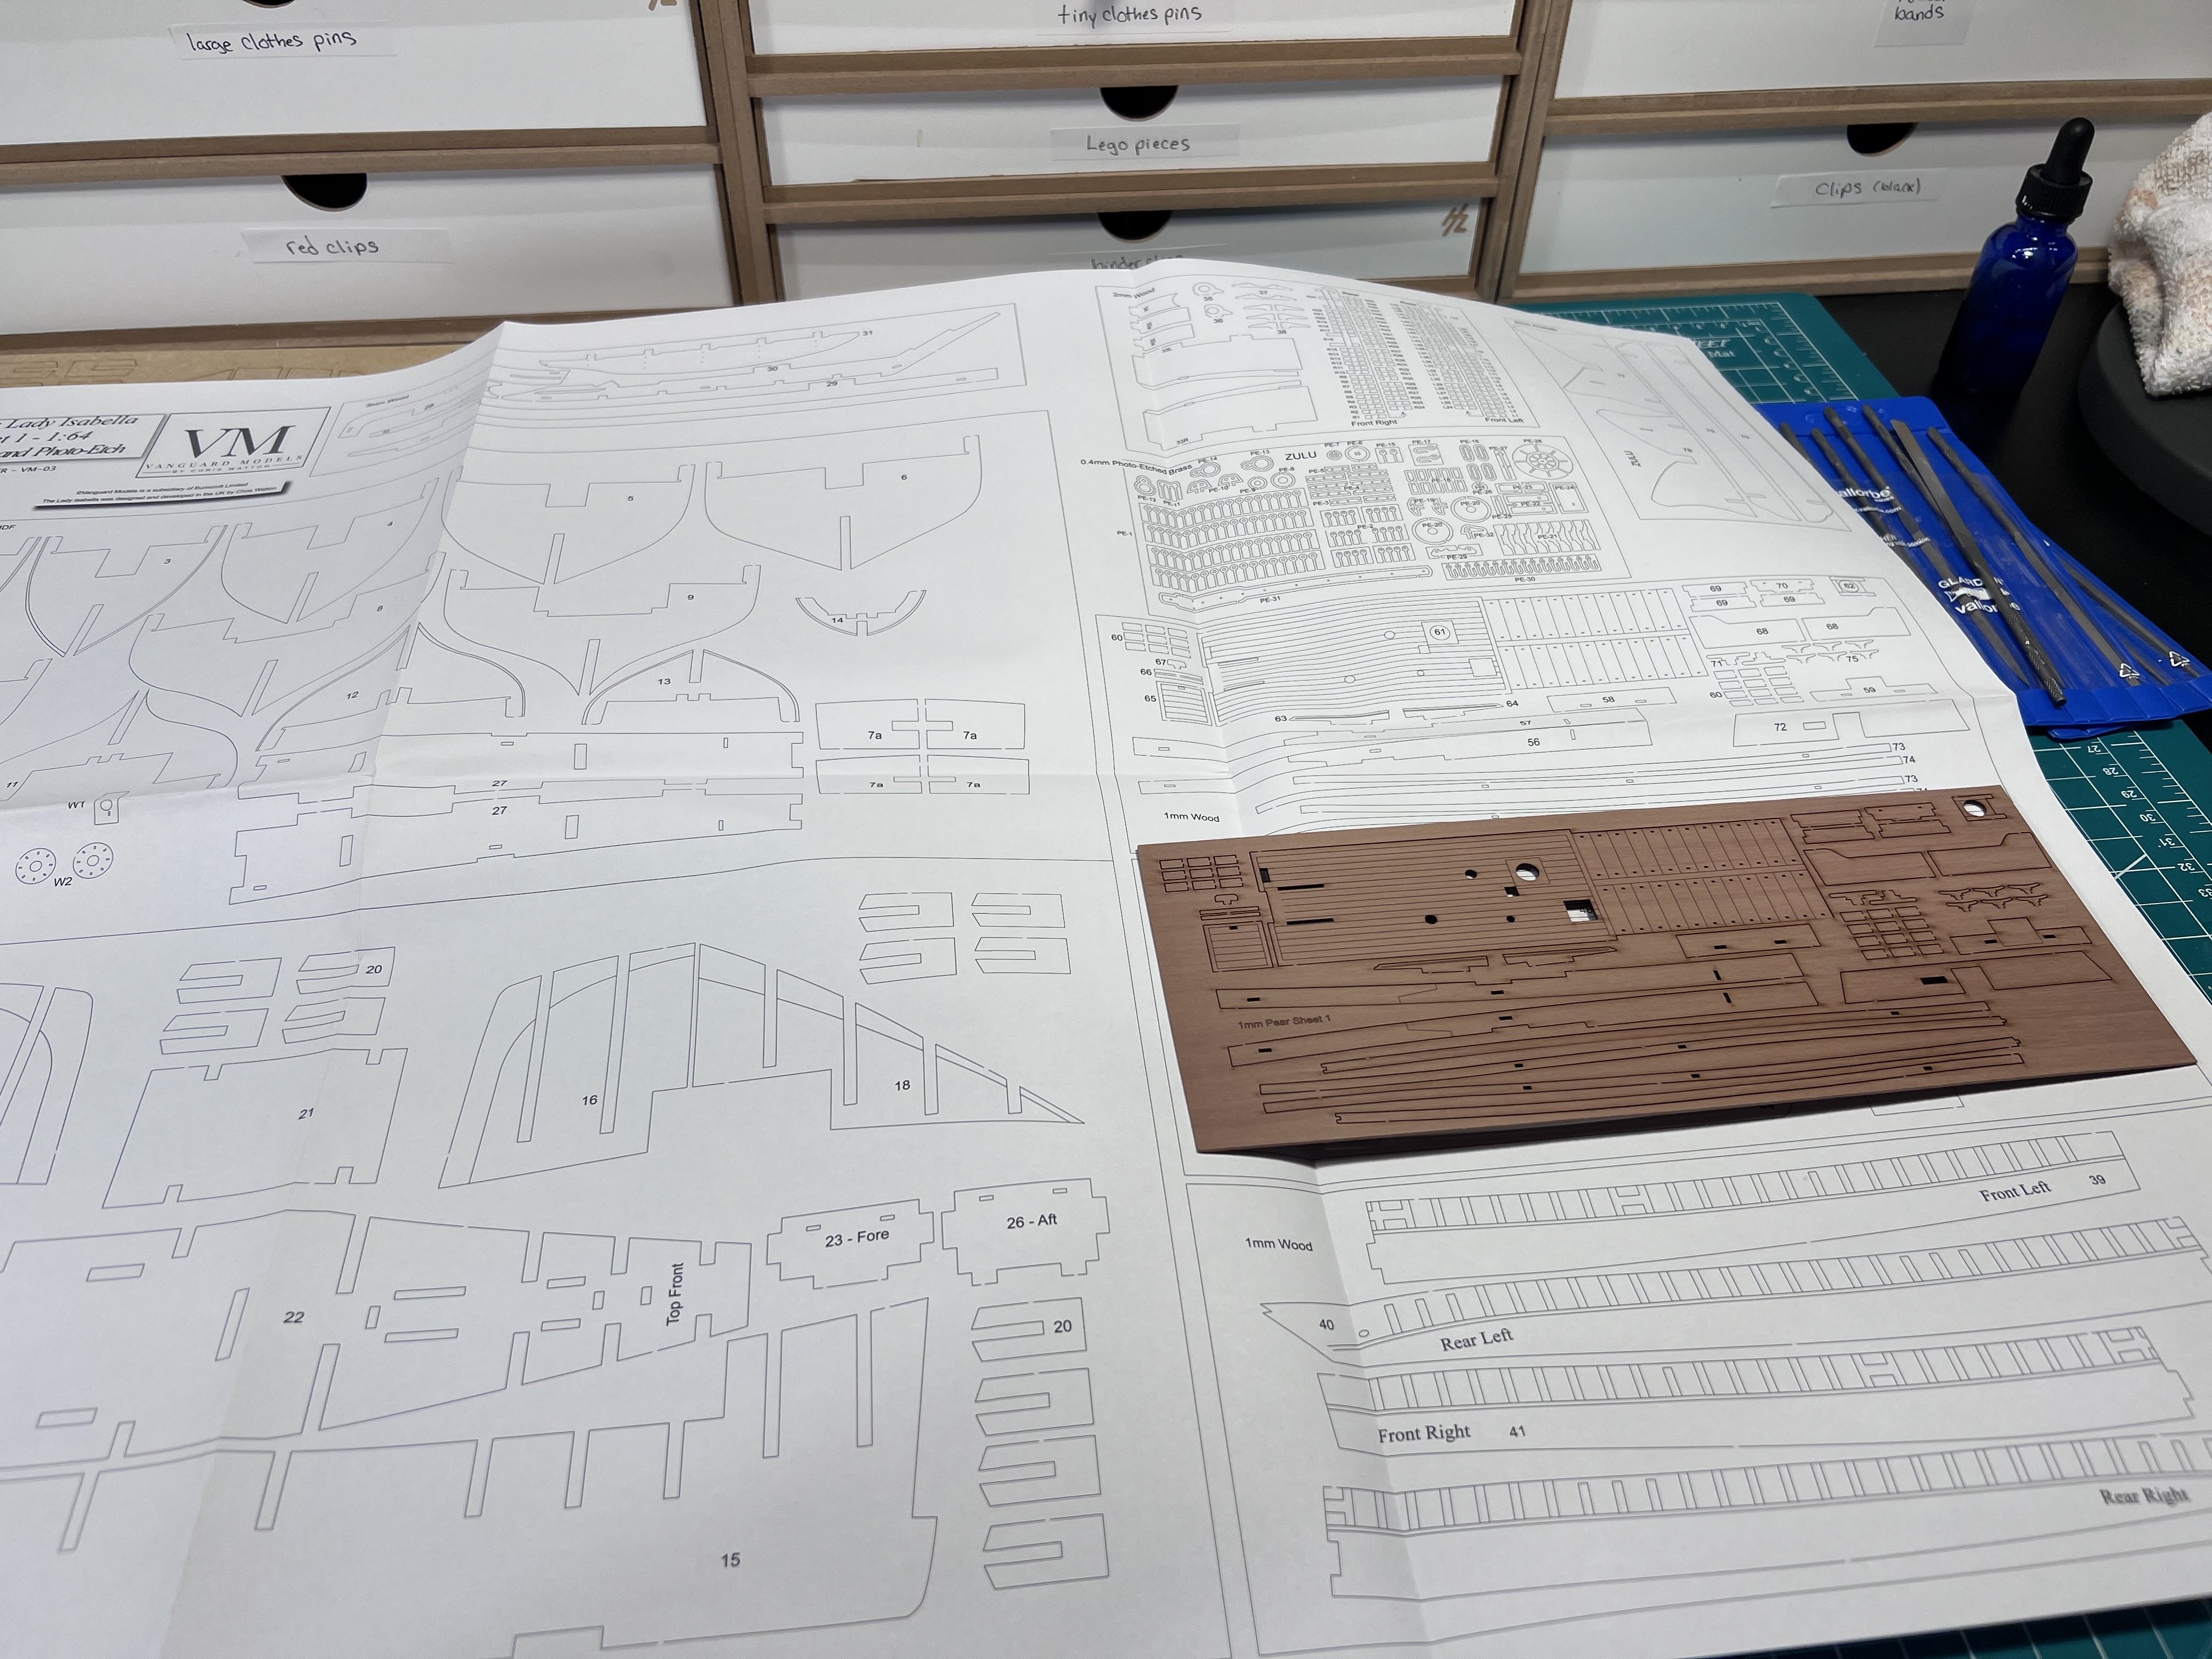
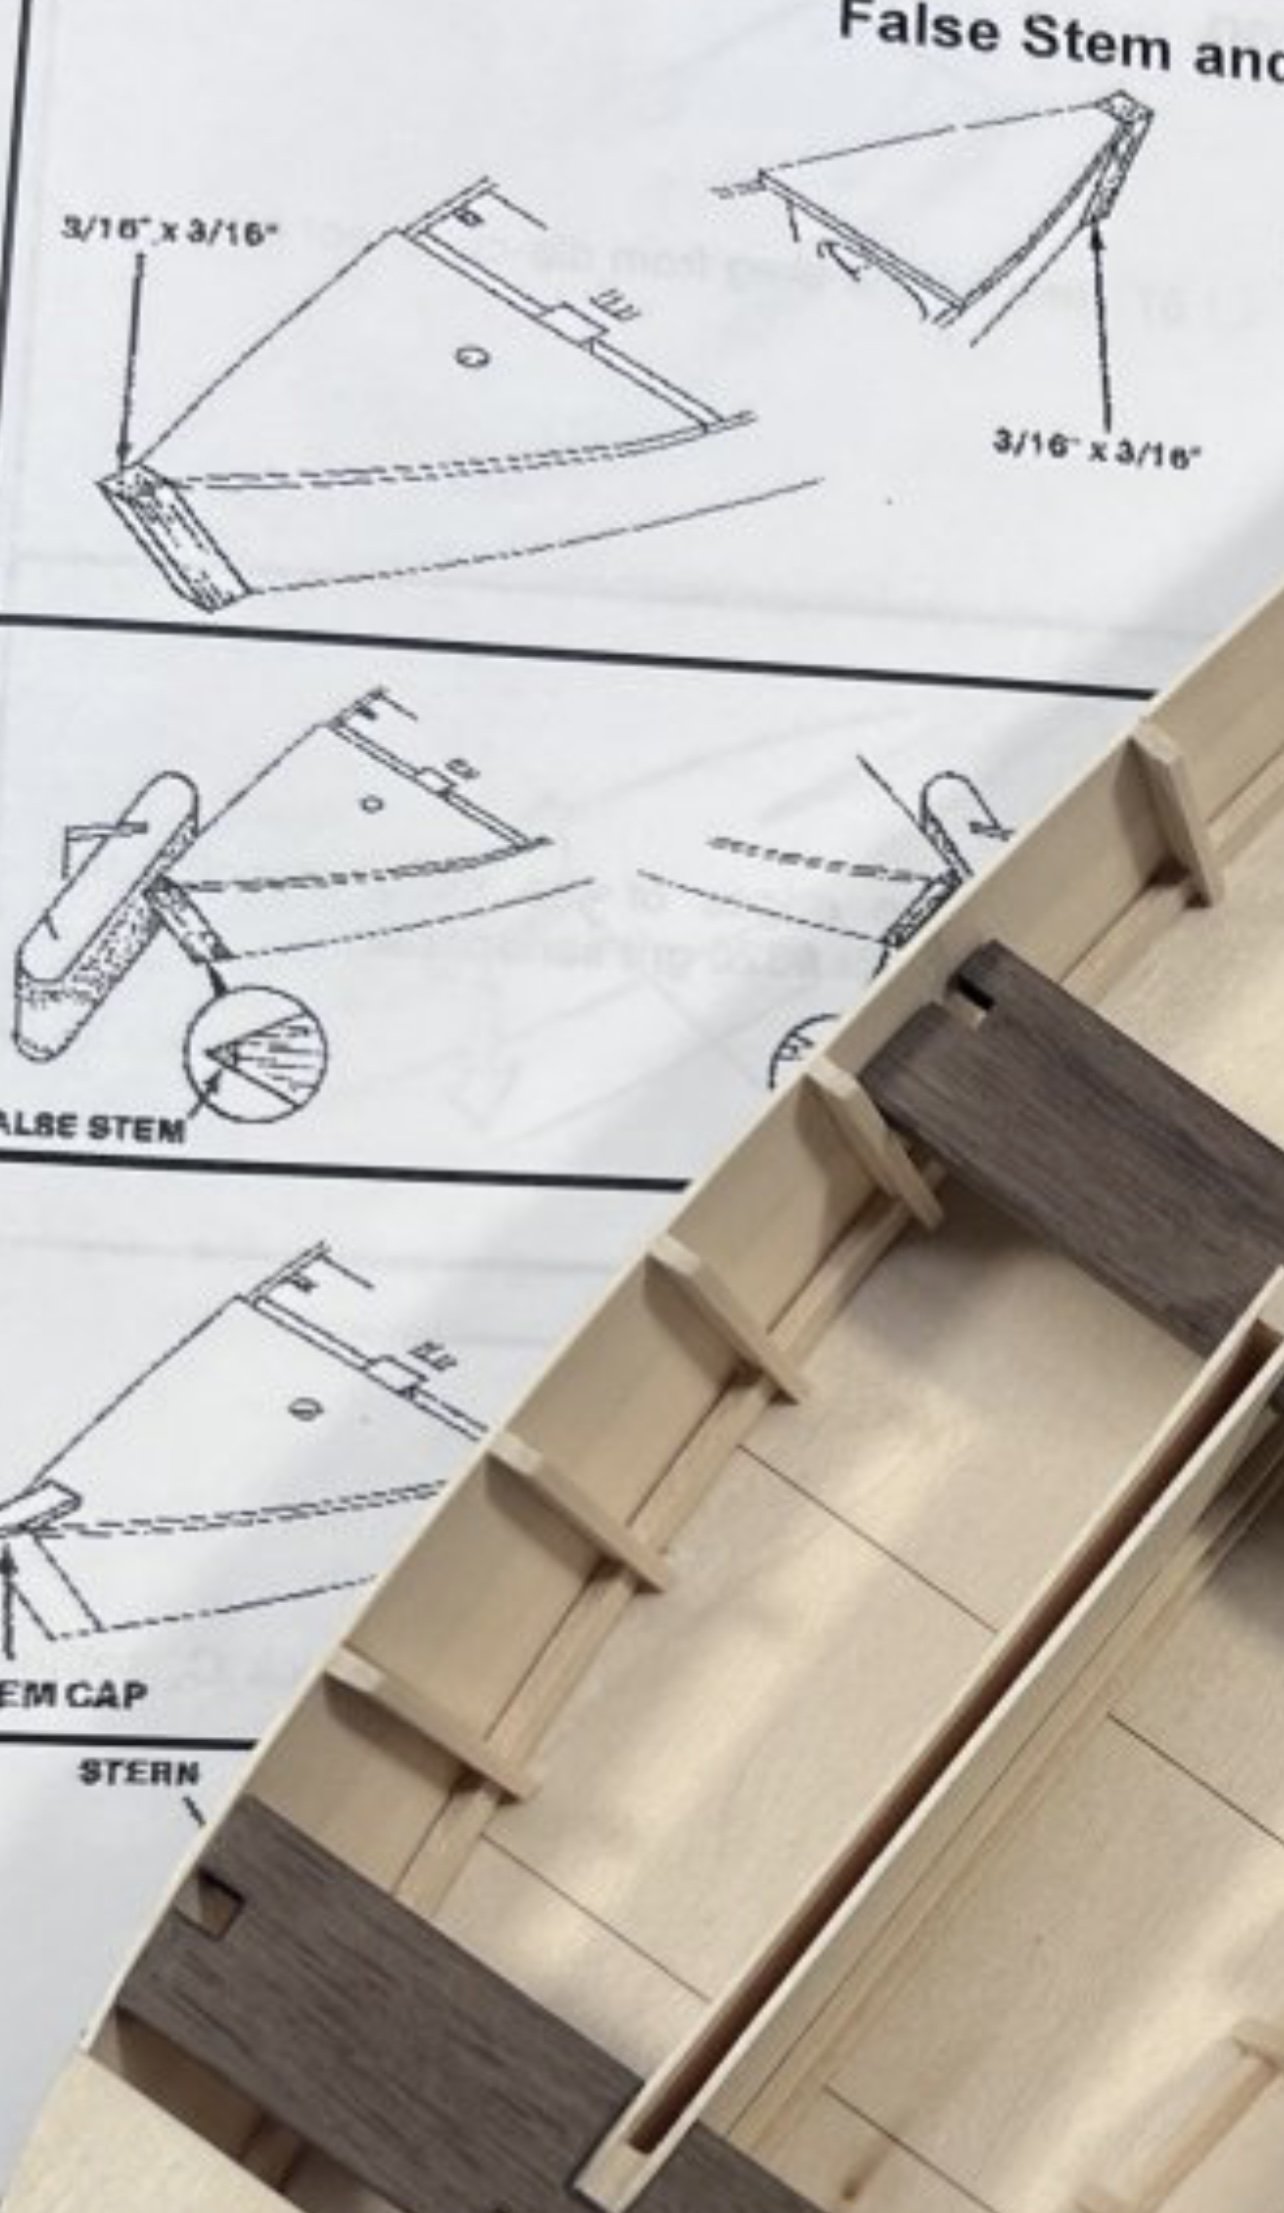
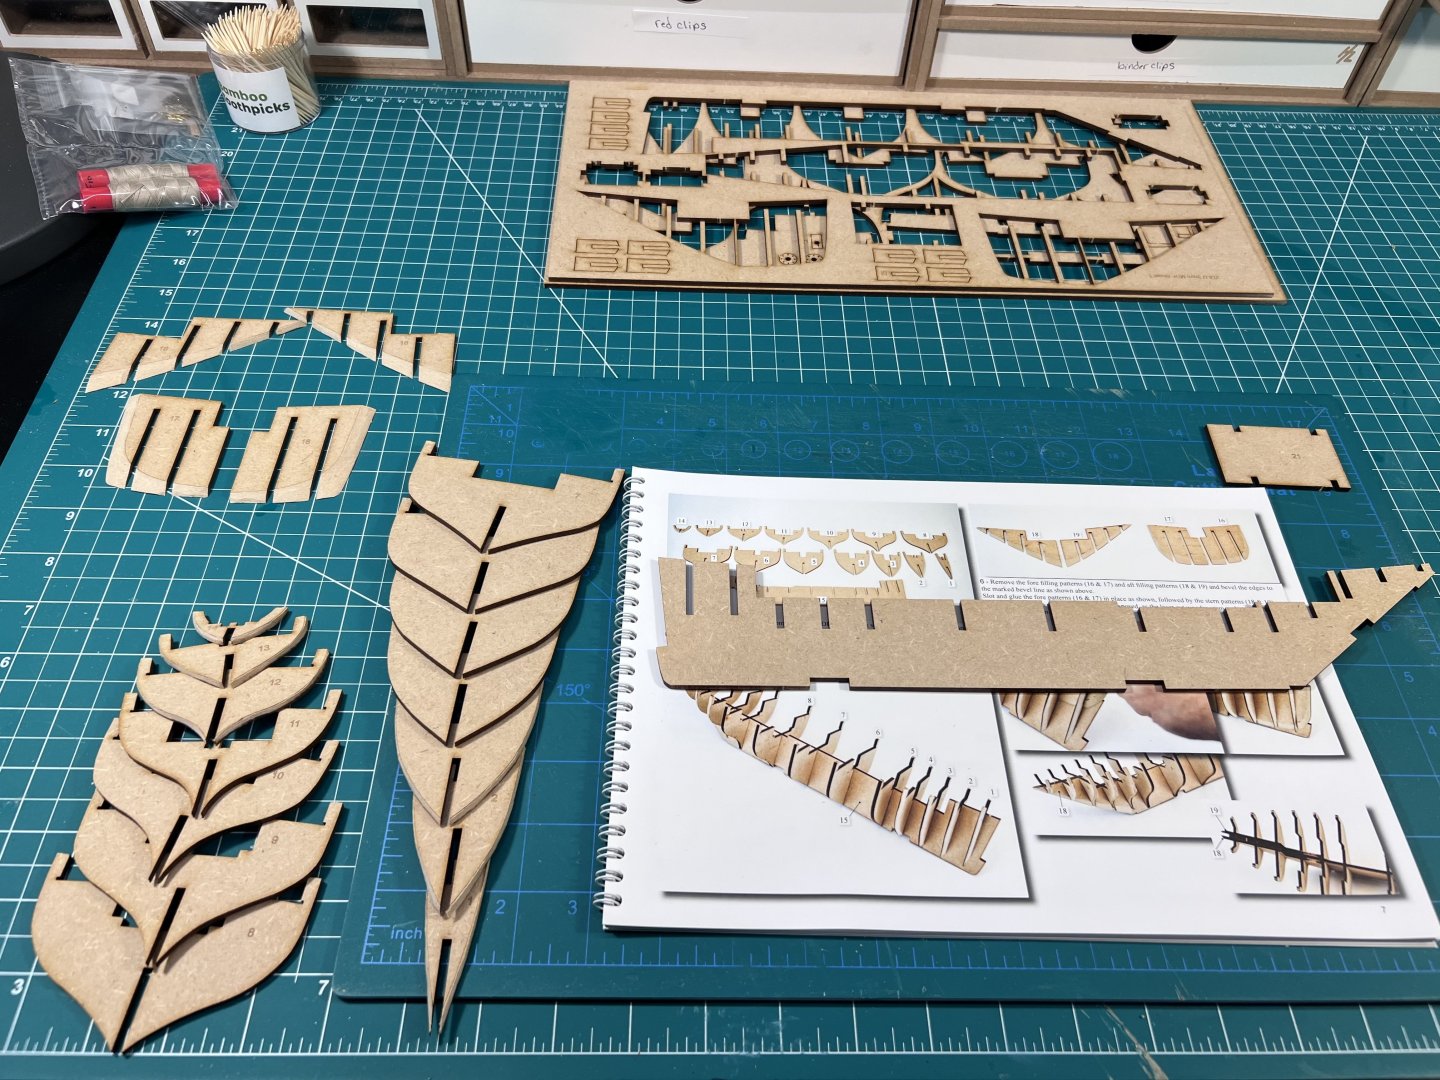
With this Vanguard model you need to pull out the plans early to use plan sheet 1 to find where the parts are on some of the laser cut sheets. The Sherbourne and Ranger had the part numbers on the sheets.

- 43 replies
-
- 1
-
-
- Lady Isabella
- zulu
- (and 1 more)
-
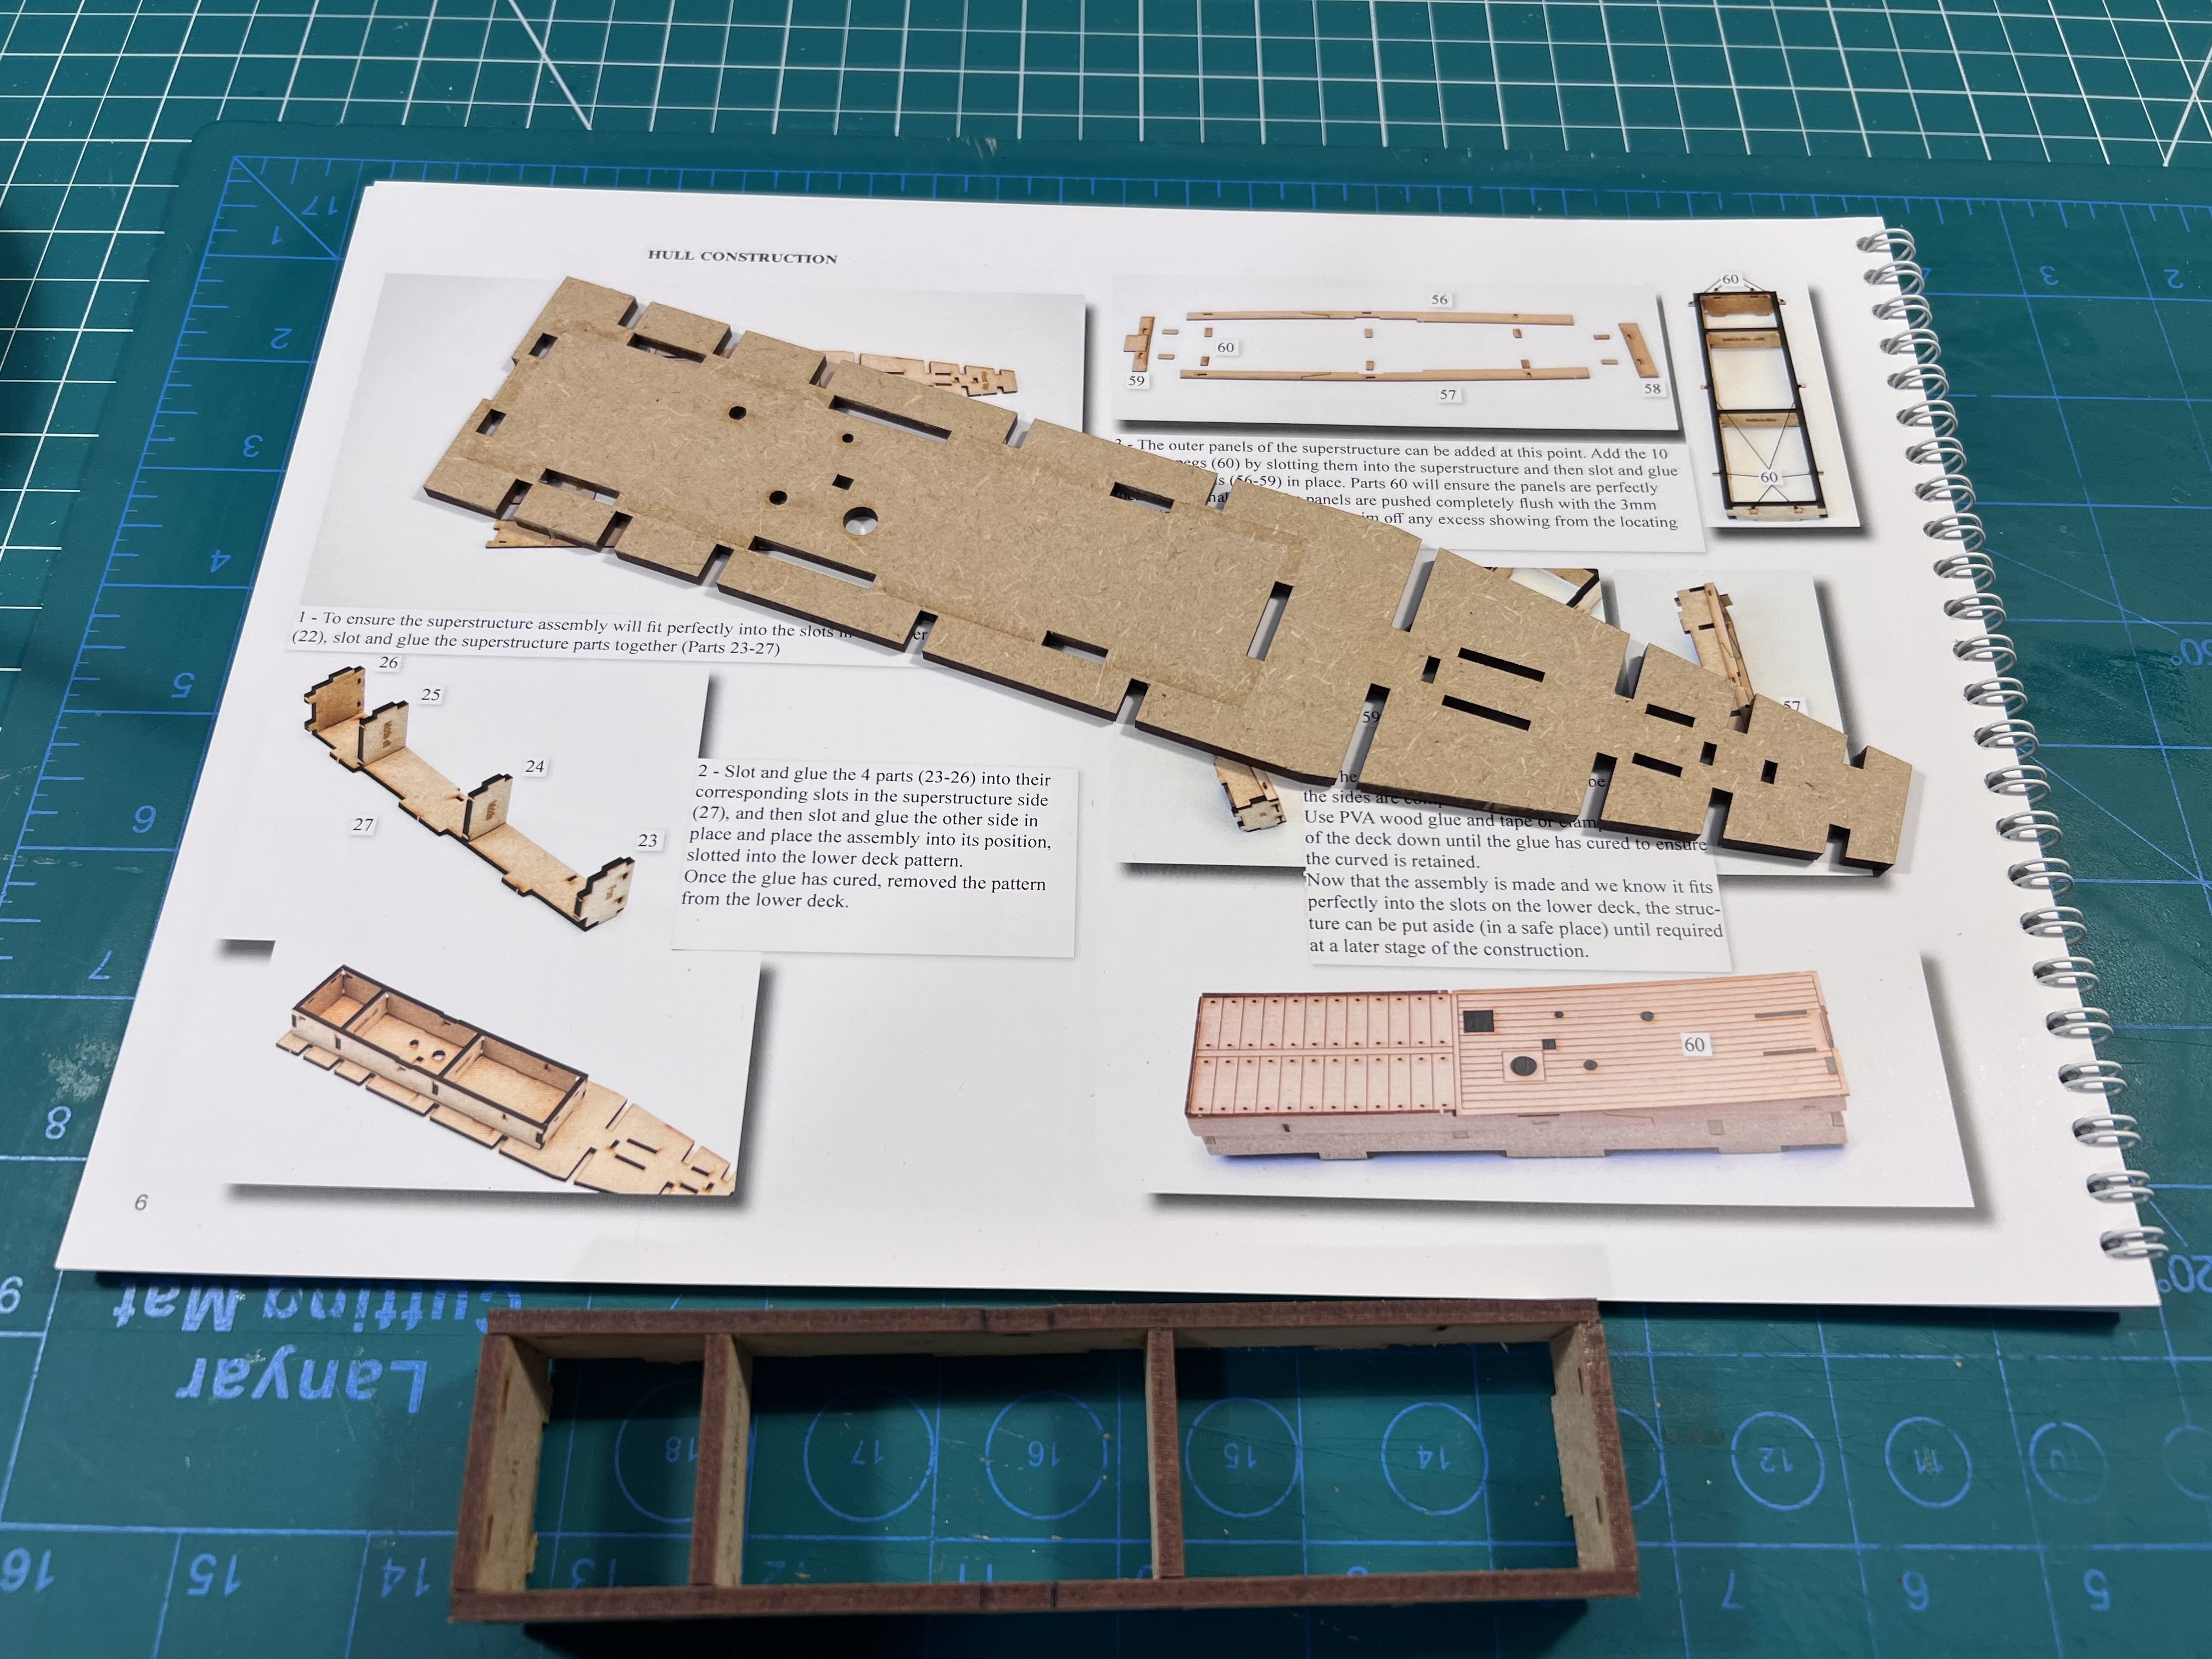
Reading is important. You make the superstructure and slot into the lower deck without gluing to make sure it has the right form. The photos might make you think you glue the superstructure to the lower deck. You don’t until much later, despite the photo.


- 43 replies
-
- 1
-
-
- Lady Isabella
- zulu
- (and 1 more)
-
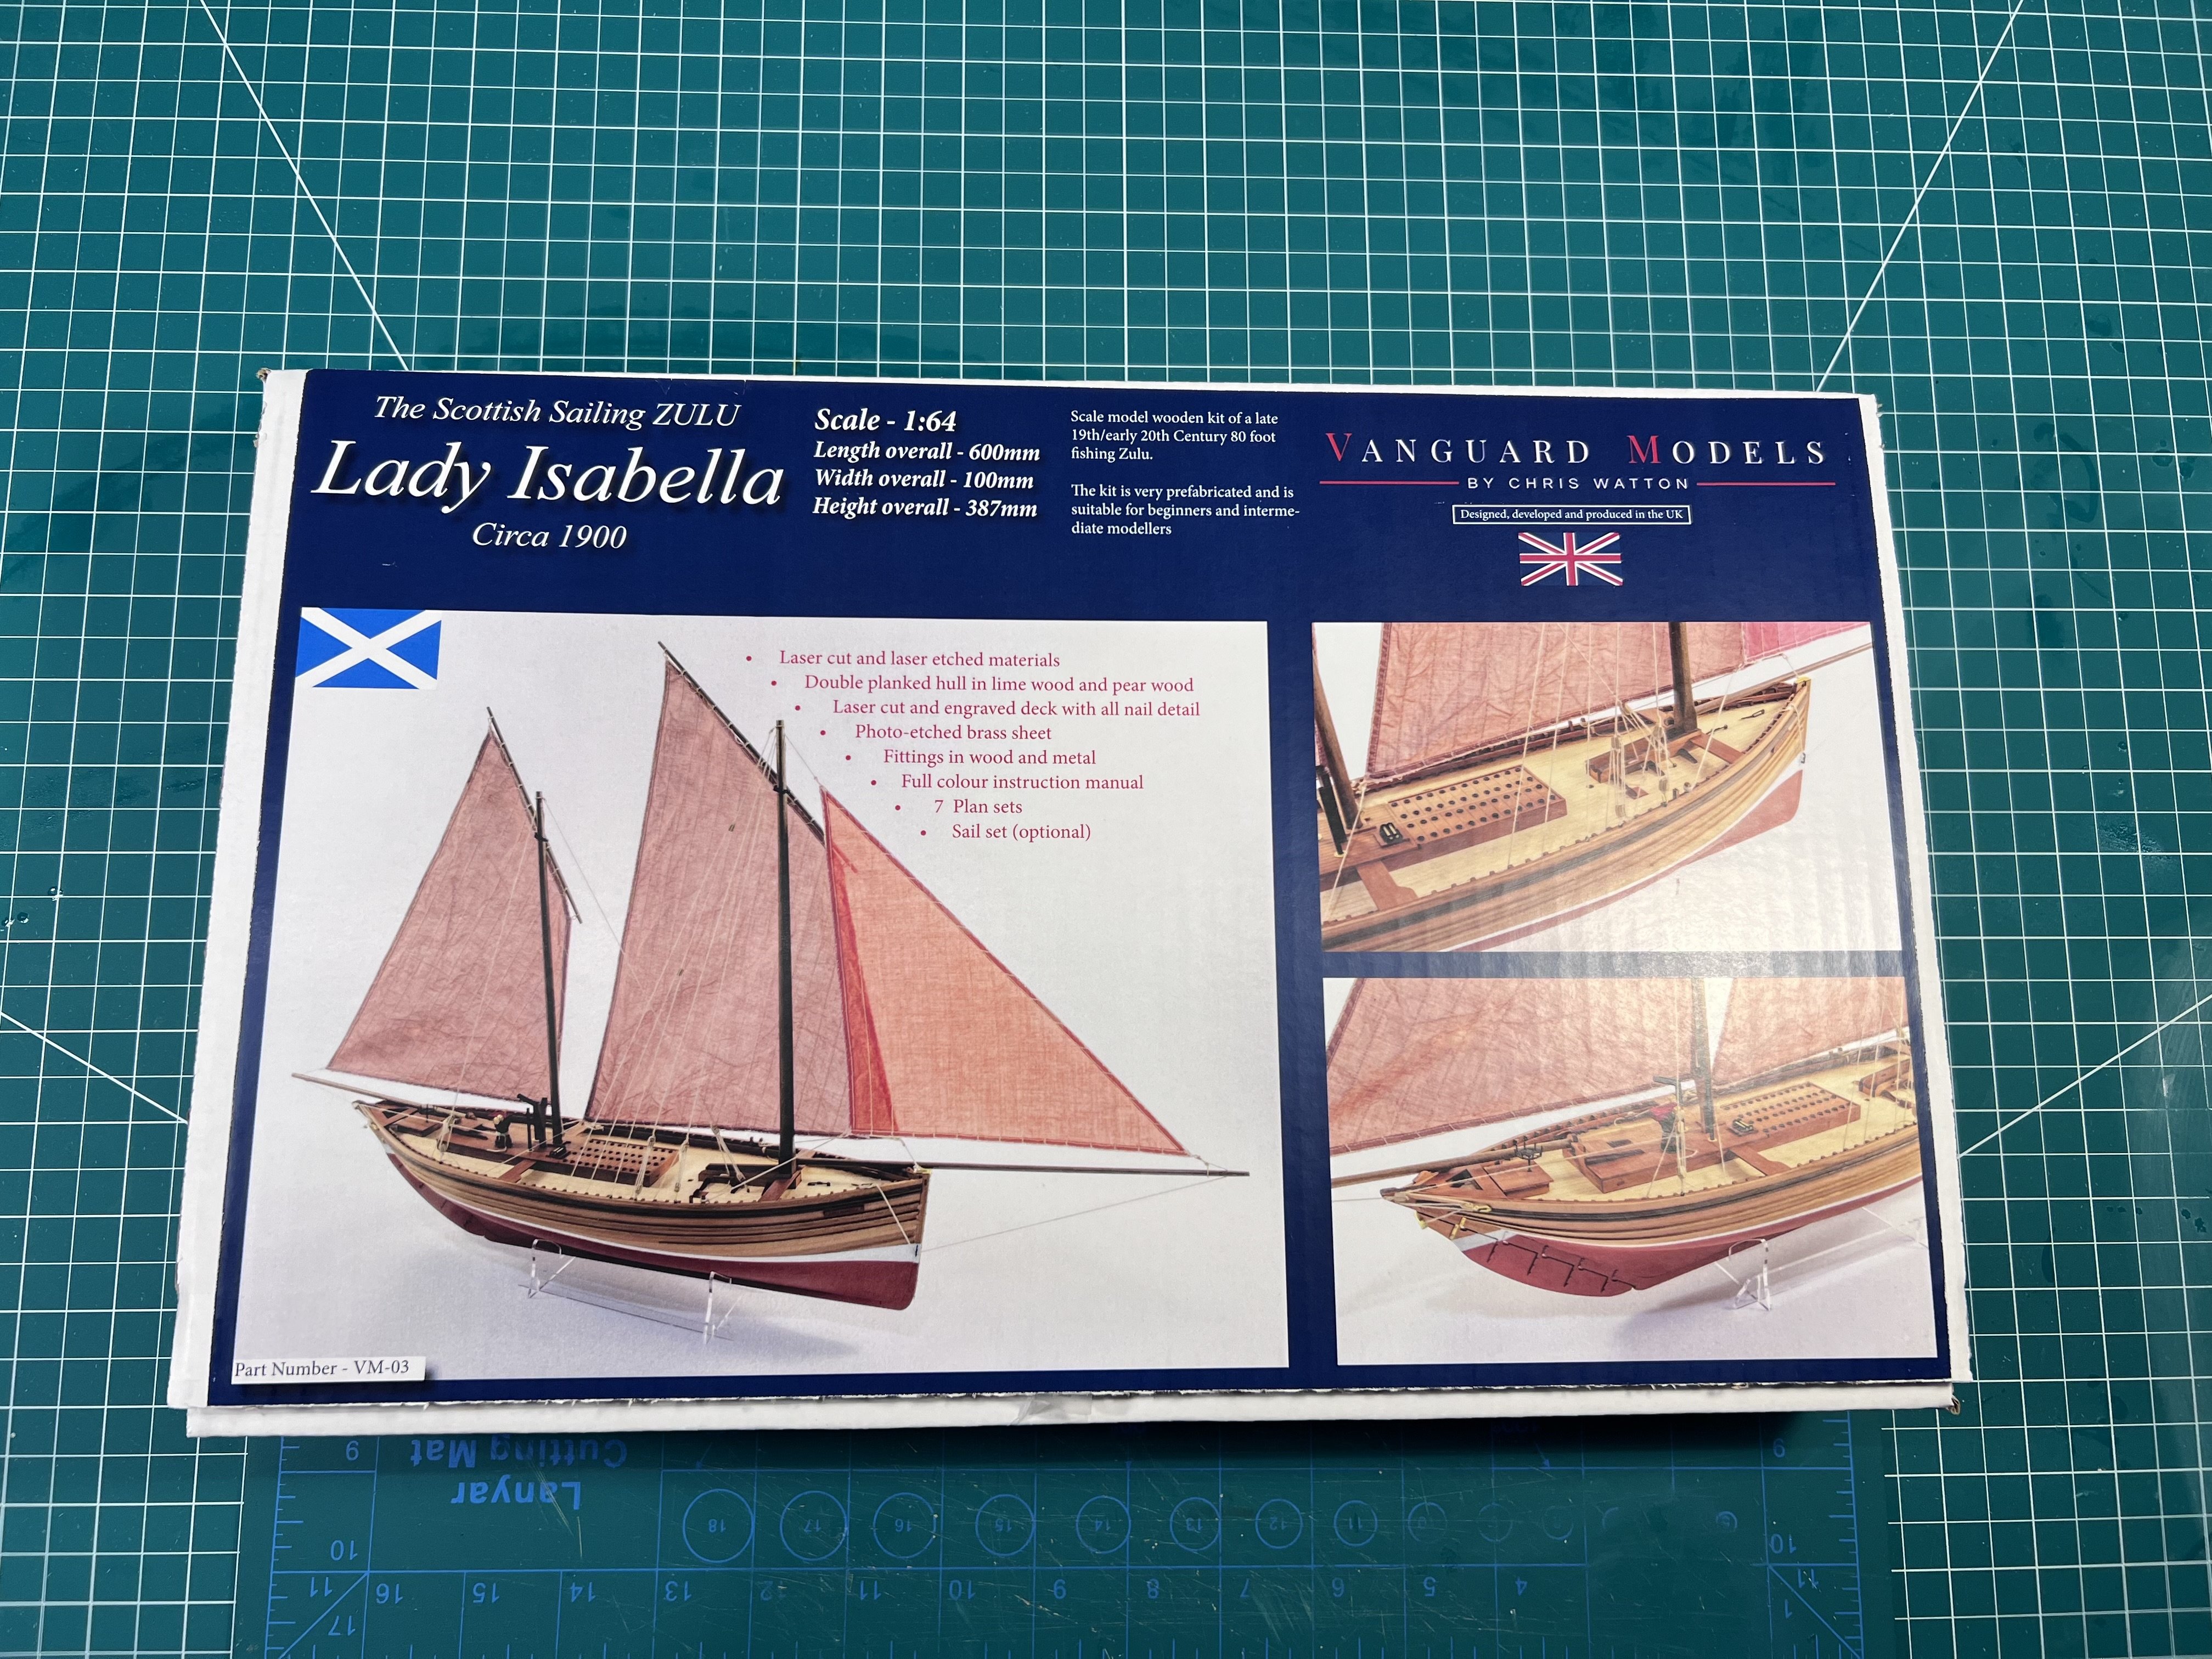
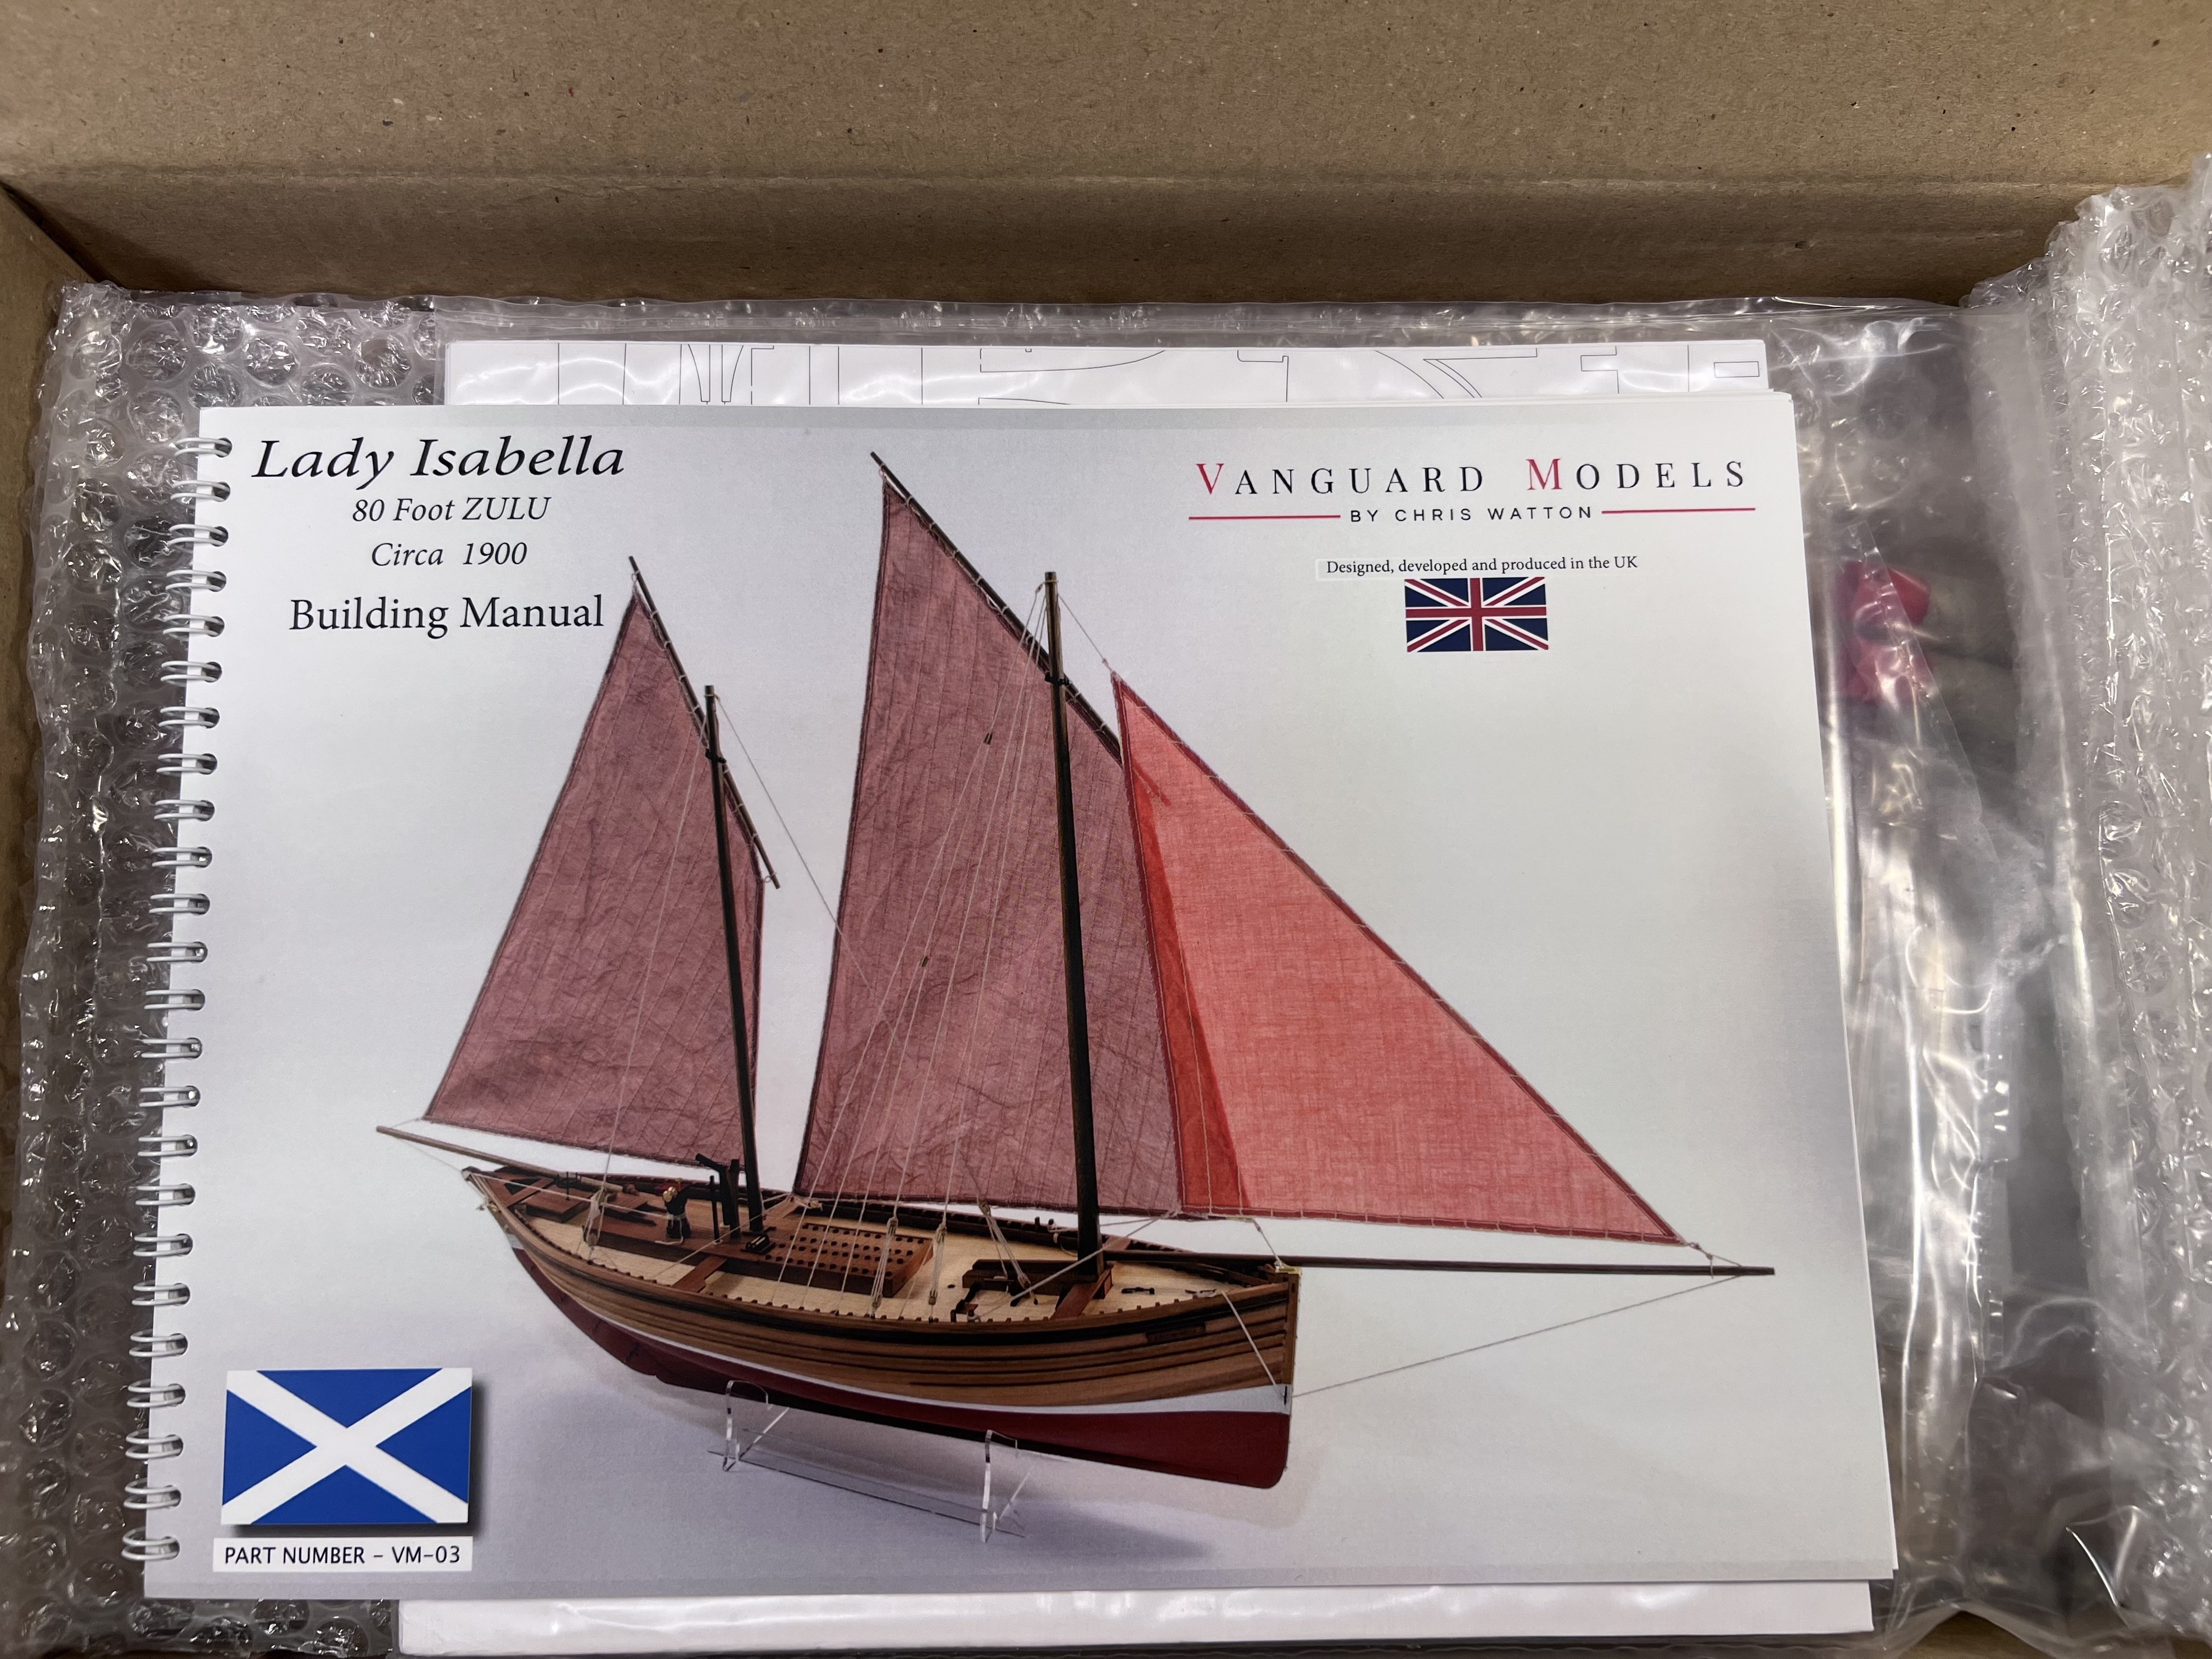
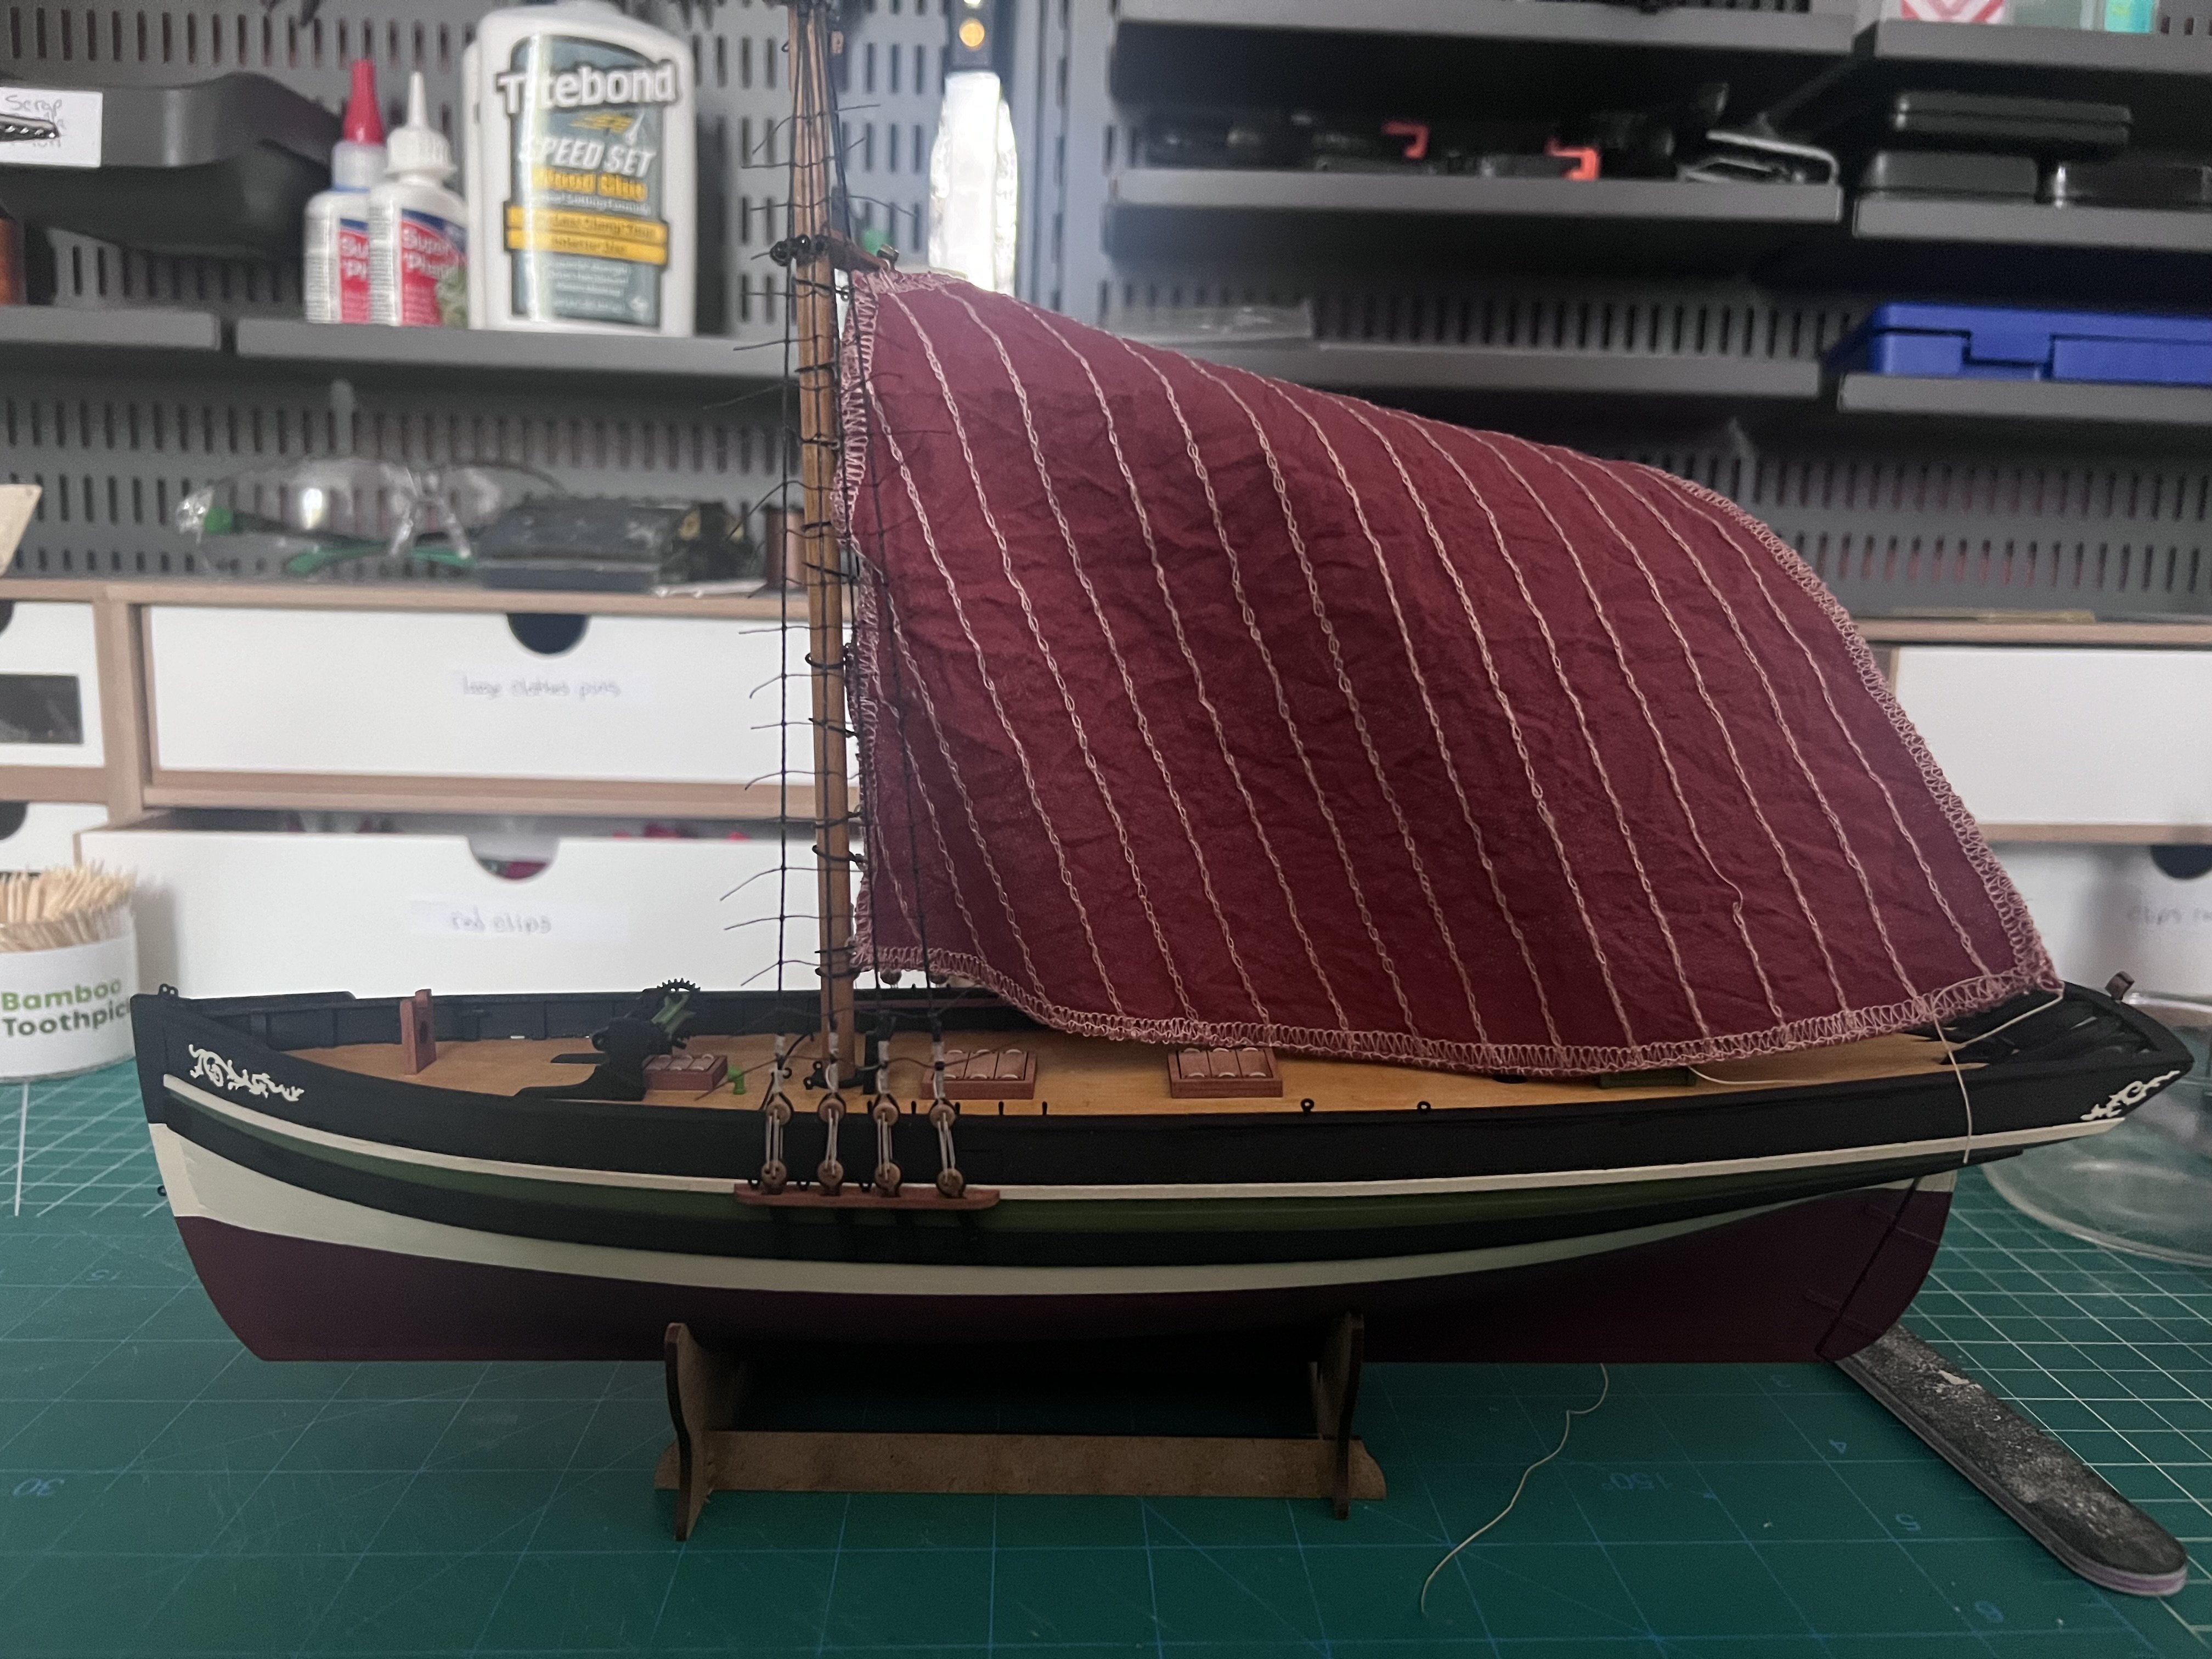
Like I've done on some - not all - other build logs, I'm going to have the second post be a place where I add some notes for other people who might be working on this boat so they don't need to search through the whole build log. No guarantees I'll add anything interesting here. But if I do, I hope it's helpful. The first bit is buying the replacement premium sails. I don't know if they are sold anywhere but the Vanguard web site: https://vanguardmodels.co.uk/products/zulu-lady-isabella The shipping cost to the US isn’t too bad. These are cloth sails after all.
- 43 replies
-
- 1
-
-
- Lady Isabella
- zulu
- (and 1 more)
-
My next Vanguard model, which I've had in my stash since last fall, is the Zulu ‘Lady Isabella’, one of the six fishing boat models Vanguard currently sells. Like the Sherbourne and the Ranger, this is a Novice kit. Its rigging looks to be a lot simpler than both the Sherbourne and the Ranger. This model is number 03, one of the first Vanguard models, so it'll be interesting to see how different it is from the other two models I've built. Of the fishing boat models, the Ranger (Novice) (which I just completed), the Lady Isabella (Novice), and Erycina (Amateur) are a bit larger boats, with the Lady Eleanor (Novice), Saucy Jack (Amateur), and Nisha (Amateur) a bit smaller boats - all are 1:64. This kit comes with sails. The sails that came with the Ranger weren't the best. I had seen that sails are an option online on Vanguard's web site for the Zulu (and the Erycina, which I have in my stash). I reached out to Chris Watton and he said that the ones for sale online are premium quality (and that once the free sails have been used up, these kits will again be sold without sails). I think all the fishing boats have optional premium sails. I ordered a set for the Lady Isabella and for the Erycina to replace the sets that come with the kits. I'm also planning to order blocks and rope from Syren for this one, maybe the next one too. This hull seems to have a bit at the top that's left unpainted. My hope is that my planking skills are up to the challenge. Otherwise, I'll just paint again.


- 43 replies
-
- 2
-
-
- Lady Isabella
- zulu
- (and 1 more)
-
I’m done with the Vanguard Ranger. It’s my second Vanguard model after the Sherbourne. The first couple of photos are in progress shots, but the rest are of the completed model. I still have a few clips holding some rigging while it dries (the tied off rope has a coat of diluted white PVA), but I’m done. I’m going to try to take some nicer photos with my Nikon - maybe next weekend - still need to do the same for my Sherbourne that I finished a while back. My next Vanguard model (in my stash) is the Zulu ‘Lady Isabella’, another fishing boat. For this one (and the Erycina, also in my stash) I’ve ordered from Vanguard the nicer sails instead of using the ones that come with the kit. I’m thinking of also getting blocks and line from Syren.


- 133 replies
-
- 8
-
-
- Ranger
- vanguard models
- (and 1 more)
-
The Vanguard fishing boats are a nice alternative. I'm working on the Ranger now (another Novice kit, but still challenging in other ways, including the addition of sails). It's a bit longer (and a little narrower) than the Sherbourne. I have the Erycina and Zulu, two other fishing boats, in my stash. The three fishing boats I don't have from Vanguard are somewhat smaller variants. I bought the Duchess, thinking it would be my second Vanguard model. But working on smaller less complicated models has allowed me to try different things and practice on different aspects of modeling. I have a model like the Harpy (and the newer ones from Vanguard coming out) on my wish list. The Grecian is probably what I'll do after the two other fishing boats. Just an alternative couple of options.
-
It certainly is expensive. Lego is releasing a new $1000+ Death Star Model with nearly 10,000 piece - that I'm sure my son would love and he'd probably finish in a few days.
-
-
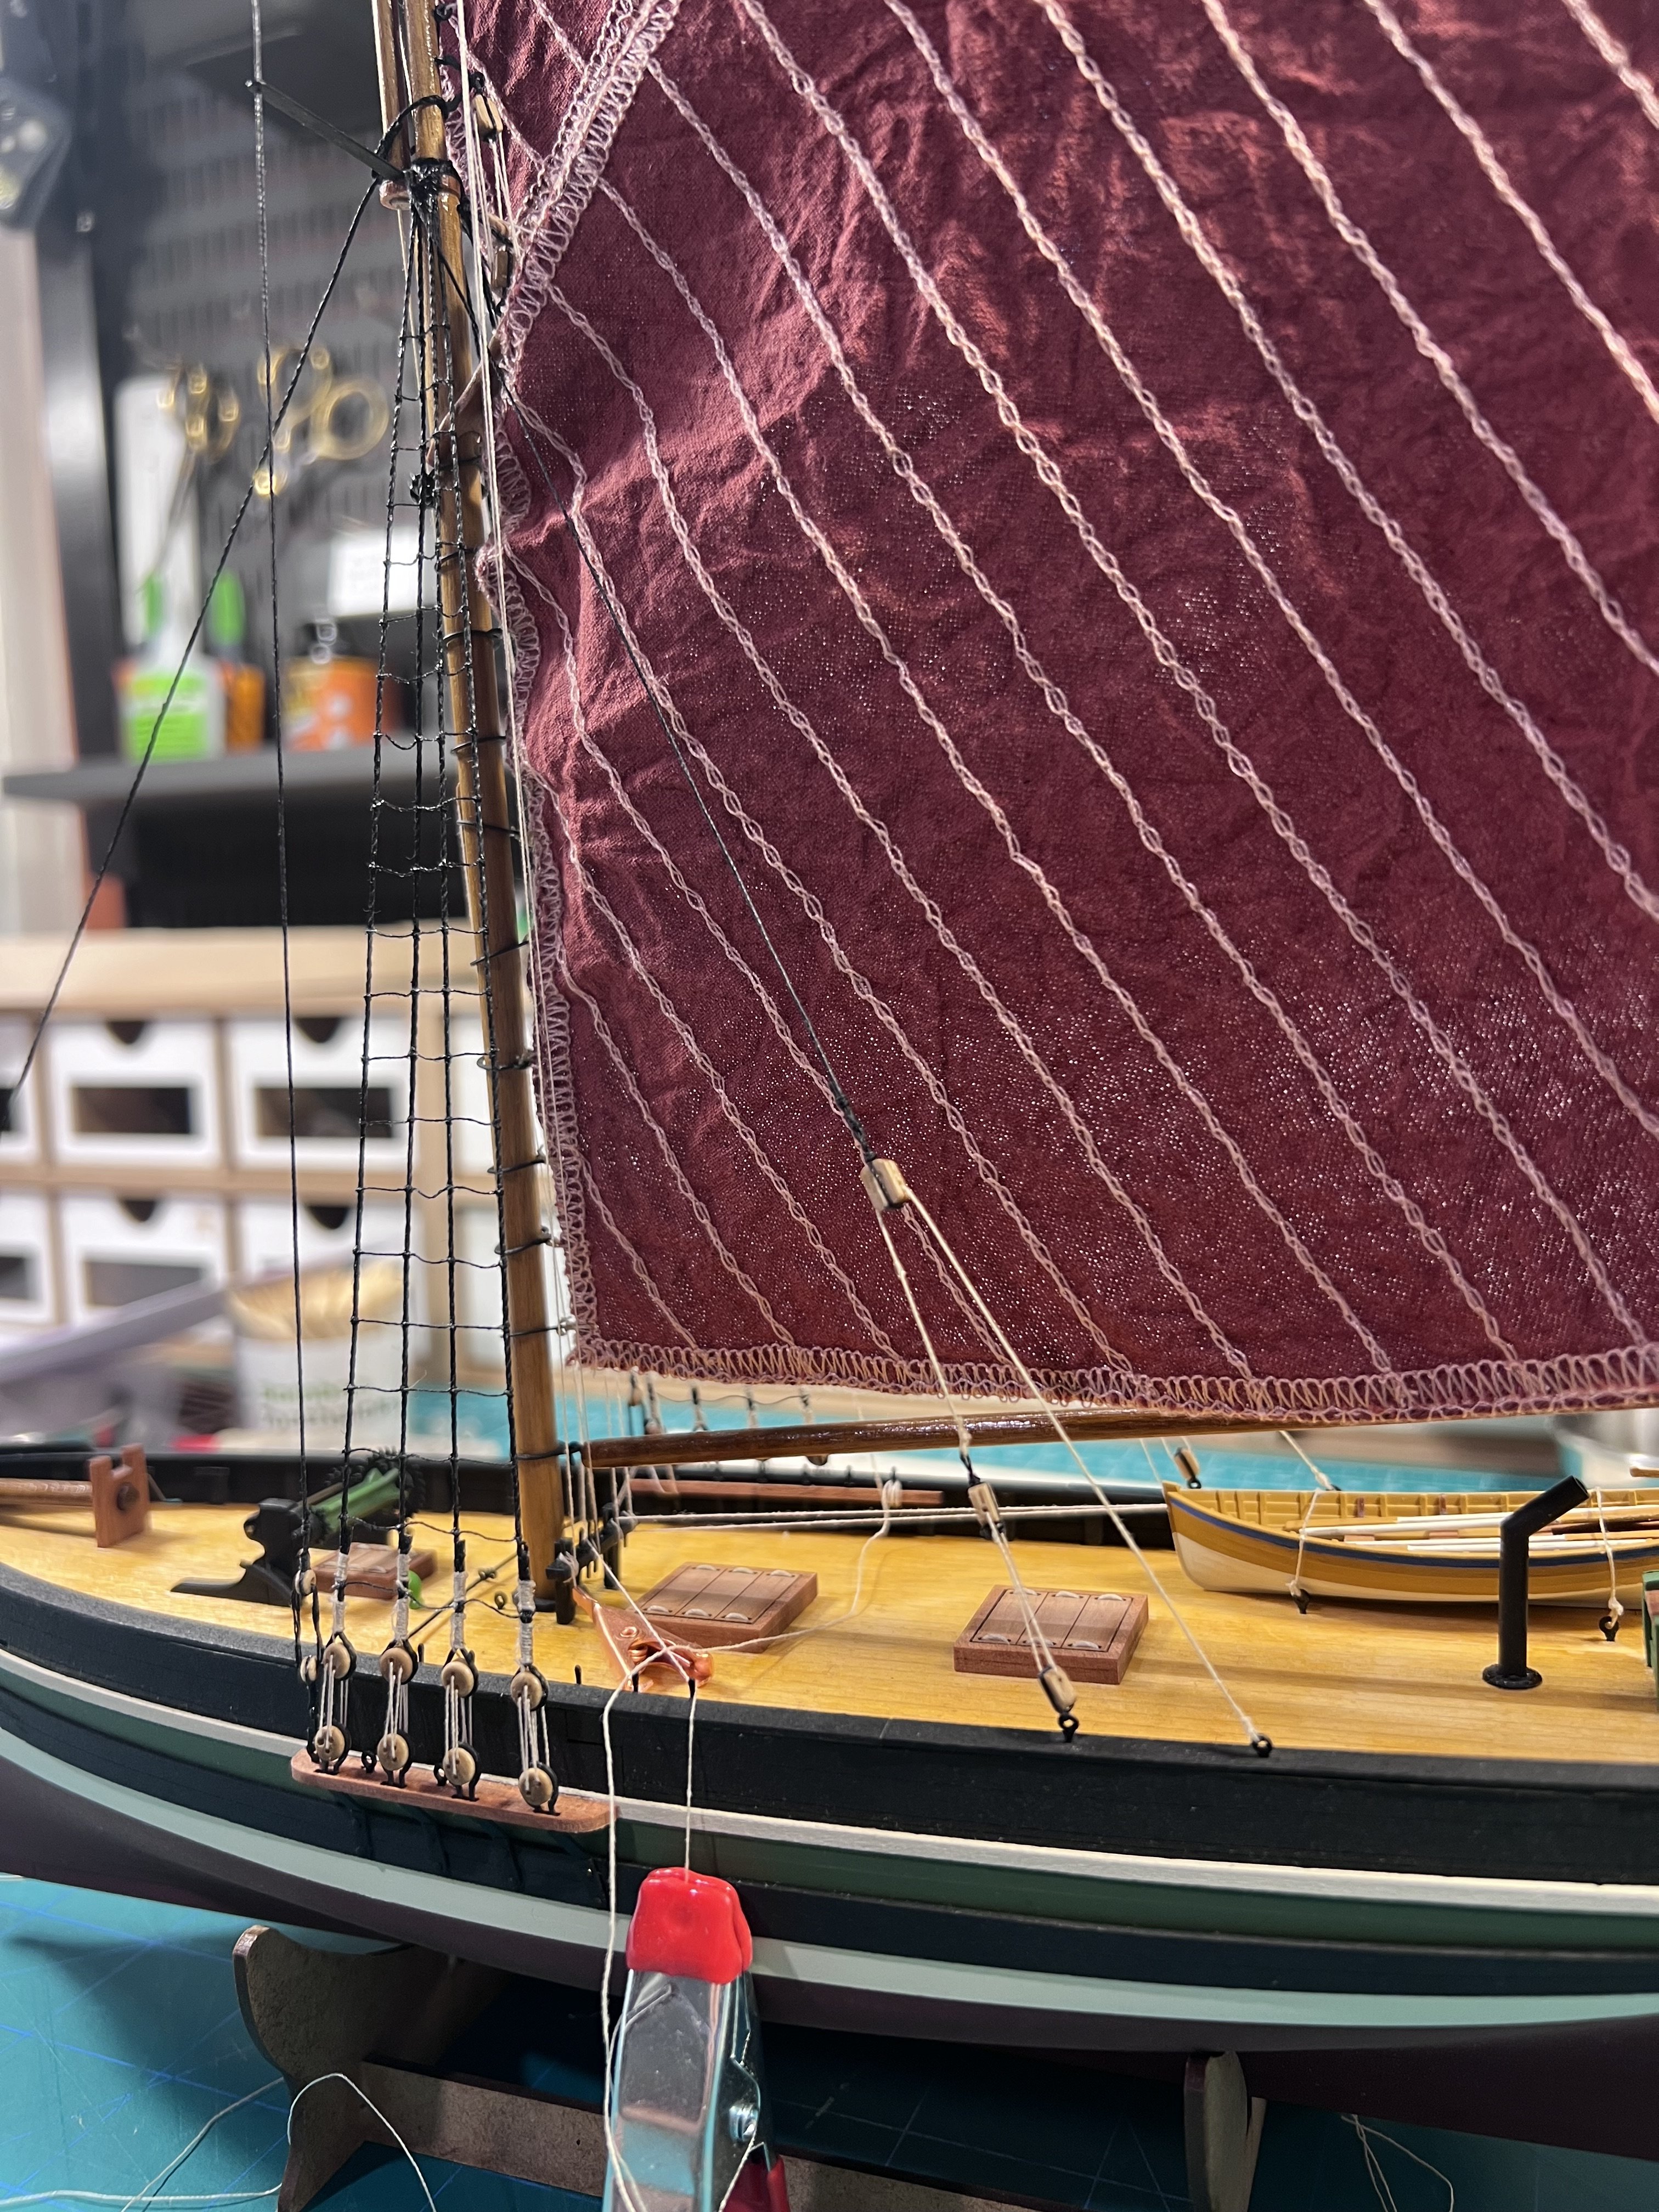
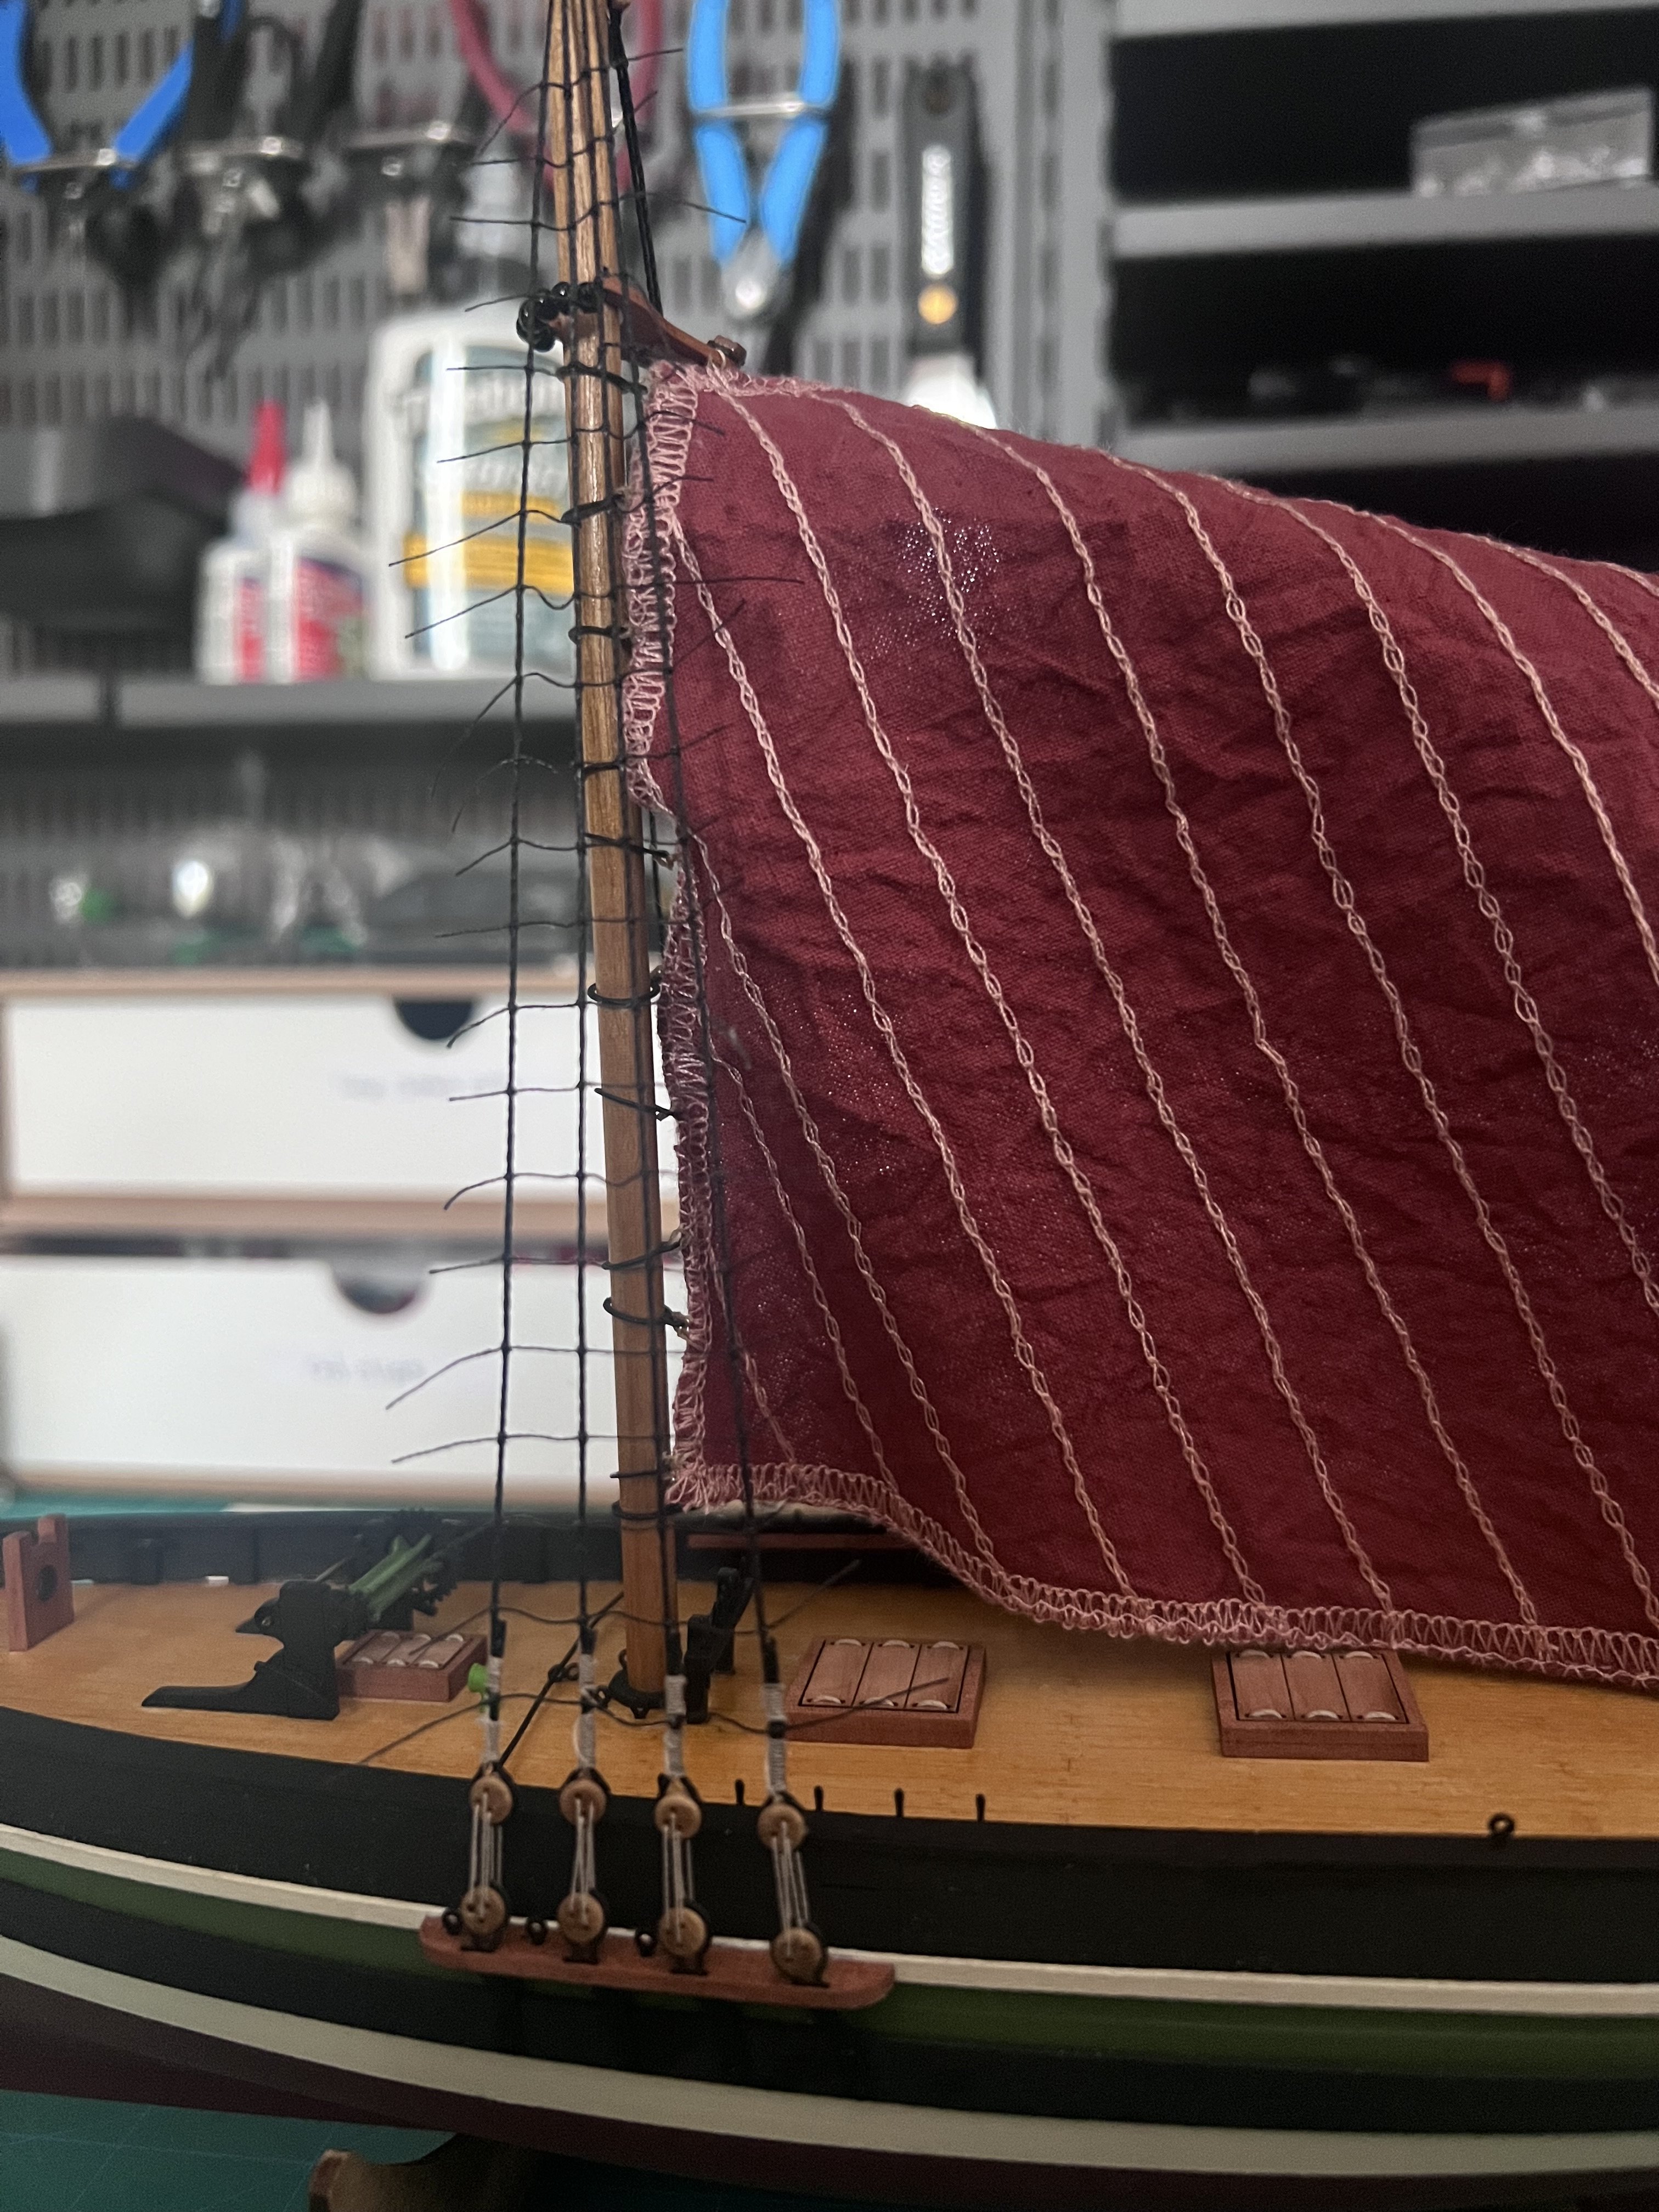
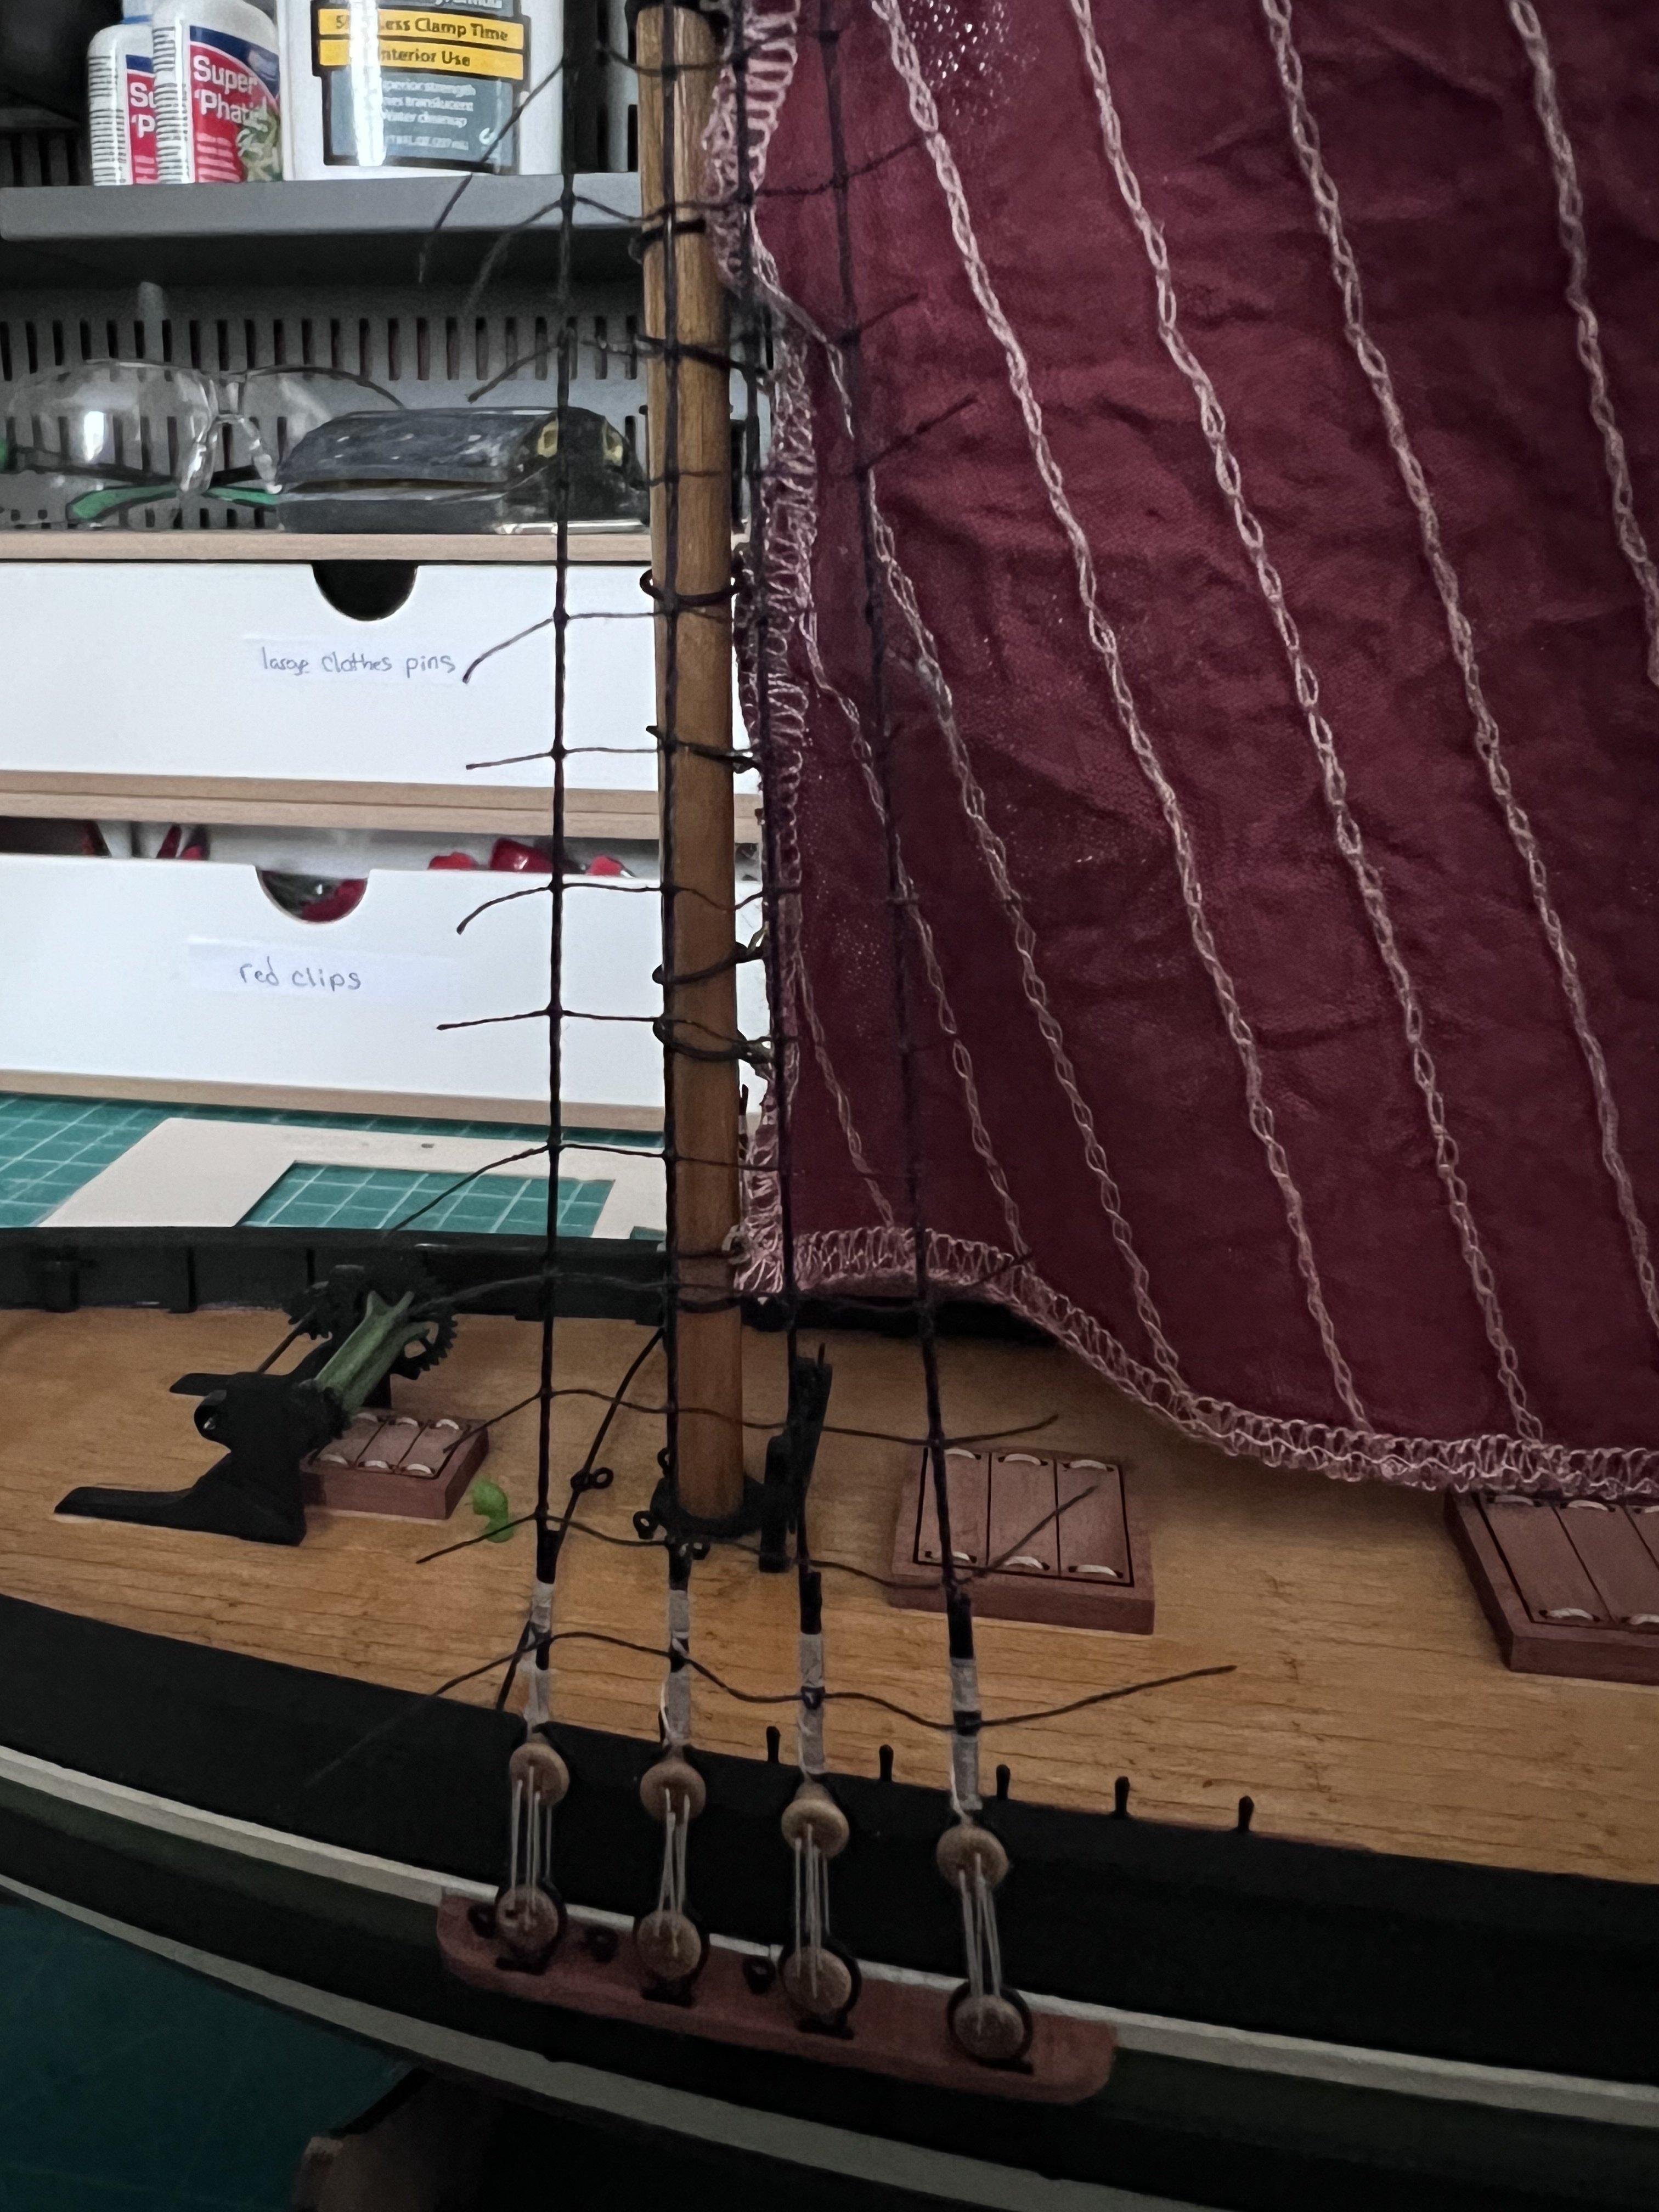
A lot of the rigging on this “interacts”, making it important it seems not to prematurely tighten a lot of it. It’ll be quite the acrobatics to tie some of this off.

- 133 replies
-
- 5
-
-
- Ranger
- vanguard models
- (and 1 more)
-
More progress with the rigging. I use flat (without teeth) alligator clips to hold the ends of the lines (that will be tied off later on pins and cleats) so I can tie everything tight into place later in the process.


- 133 replies
-
- 5
-
-
- Ranger
- vanguard models
- (and 1 more)
-
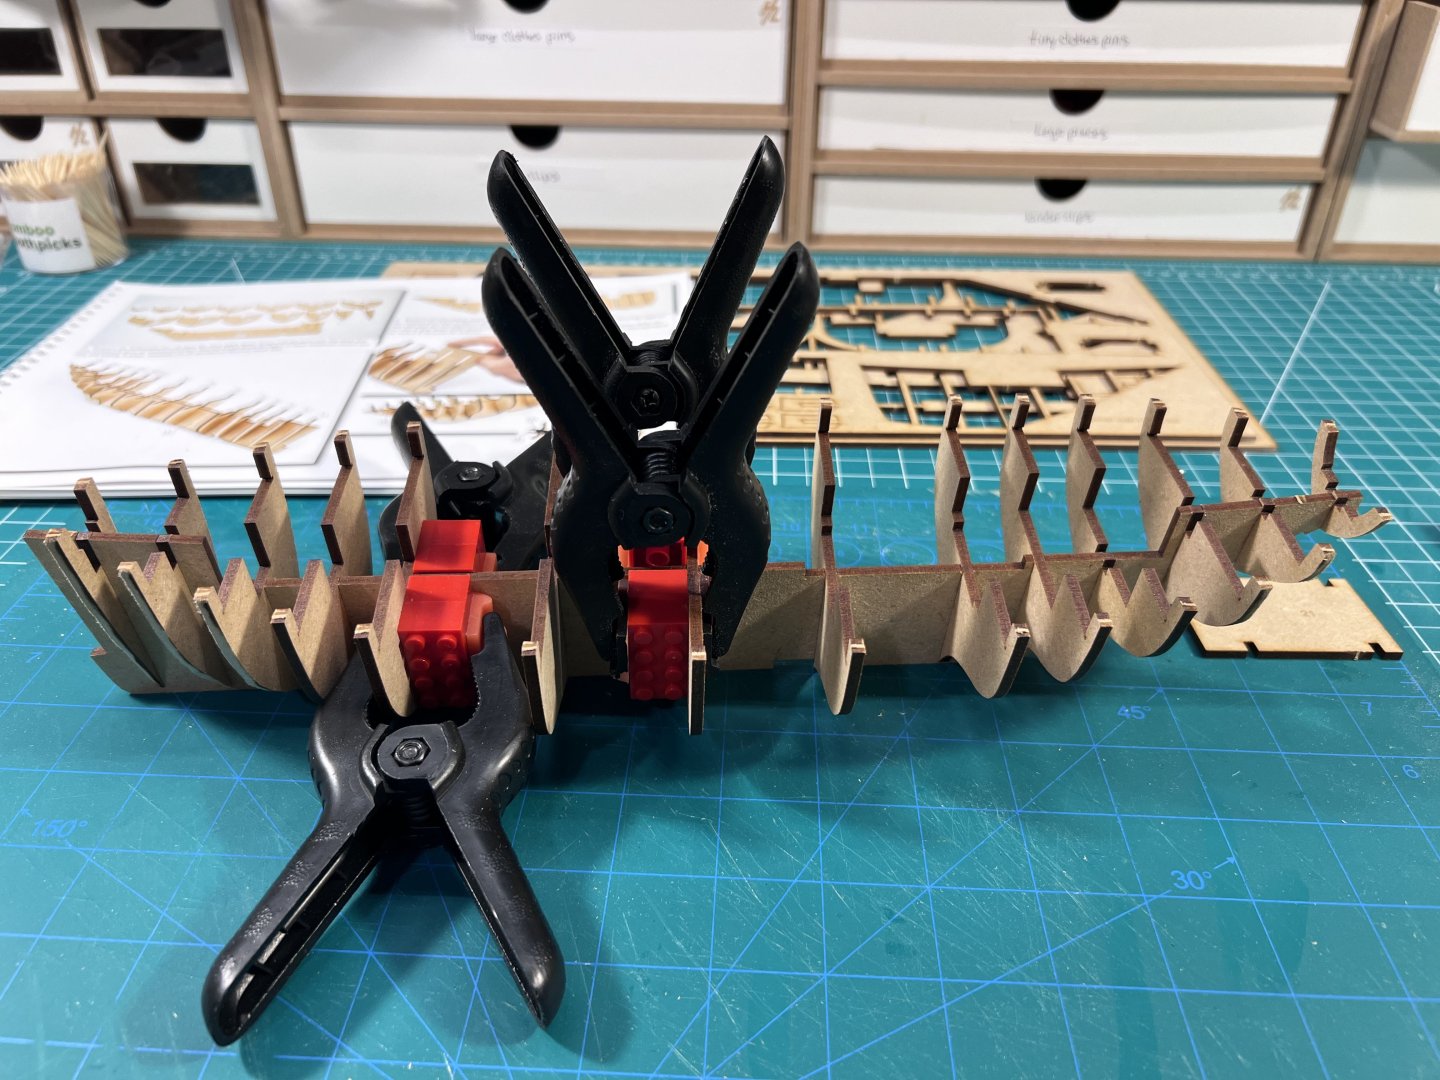
Legos, clamps of all sorts, rubber bands of various sizes. And micro squares and triangle. Care and patience. (I find a lot of uses for 1-2-3 block - as small weight, as bases for magnetic quad hands - and for keeping things square. Just note that real machinist squares will often be covered in a light oil to prevent rust, which can discolor wood.)
-
This one is on my list - not (yet) in my stash.
-
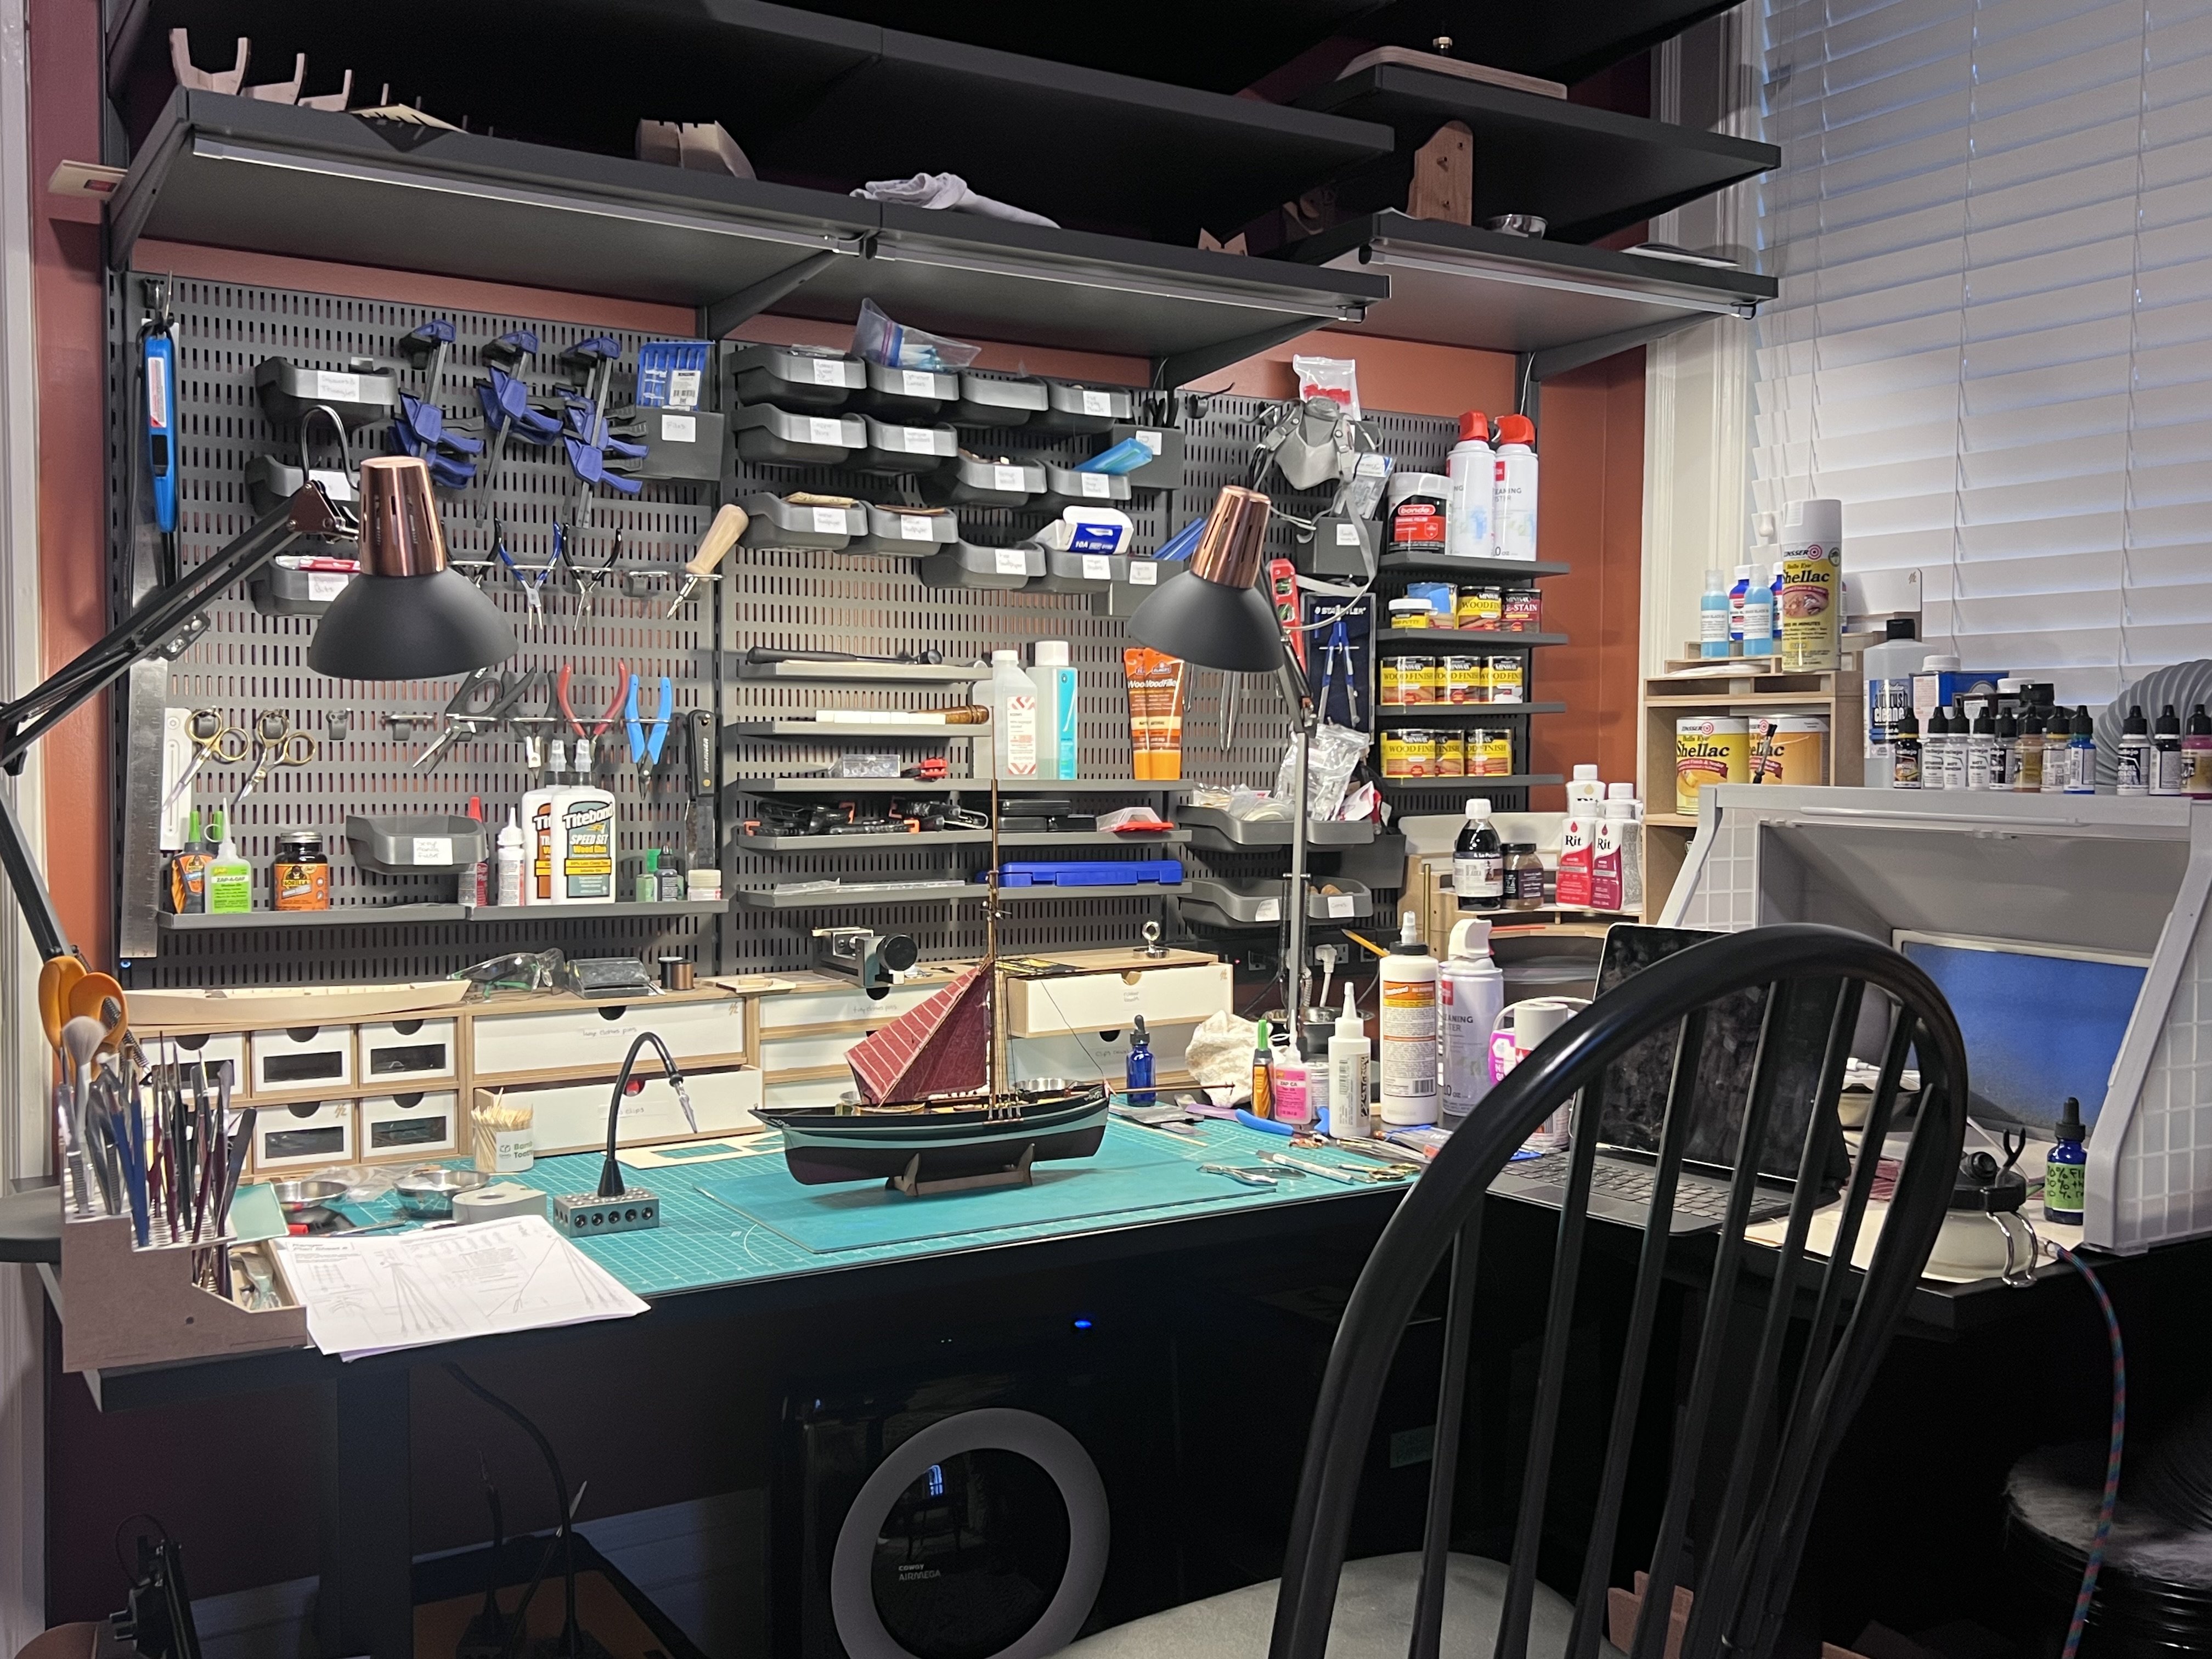
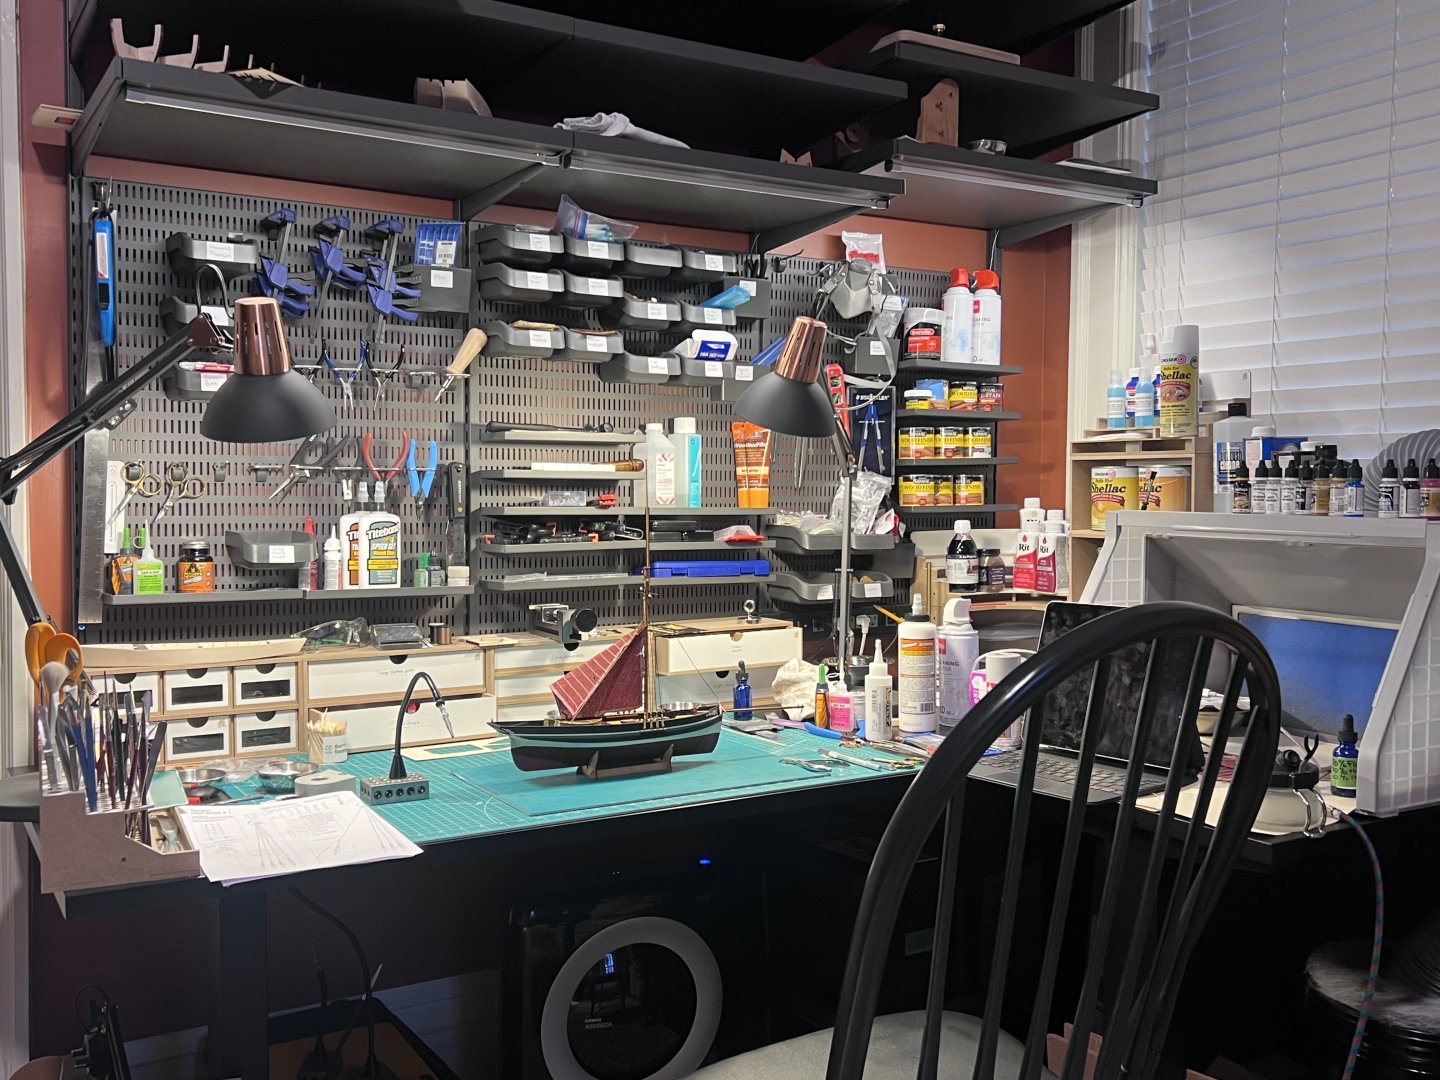
Work area pictures only
palmerit replied to Johnny Mike's topic in Modeling tools and Workshop Equipment
After quite a while using a couple of folding tables and a drop cloth in the middle of my younger son’s room - while at college - after moving in there from the dining room, we redid his bedroom and I got a corner as my work area. It’s densely packed but (somewhat) organized.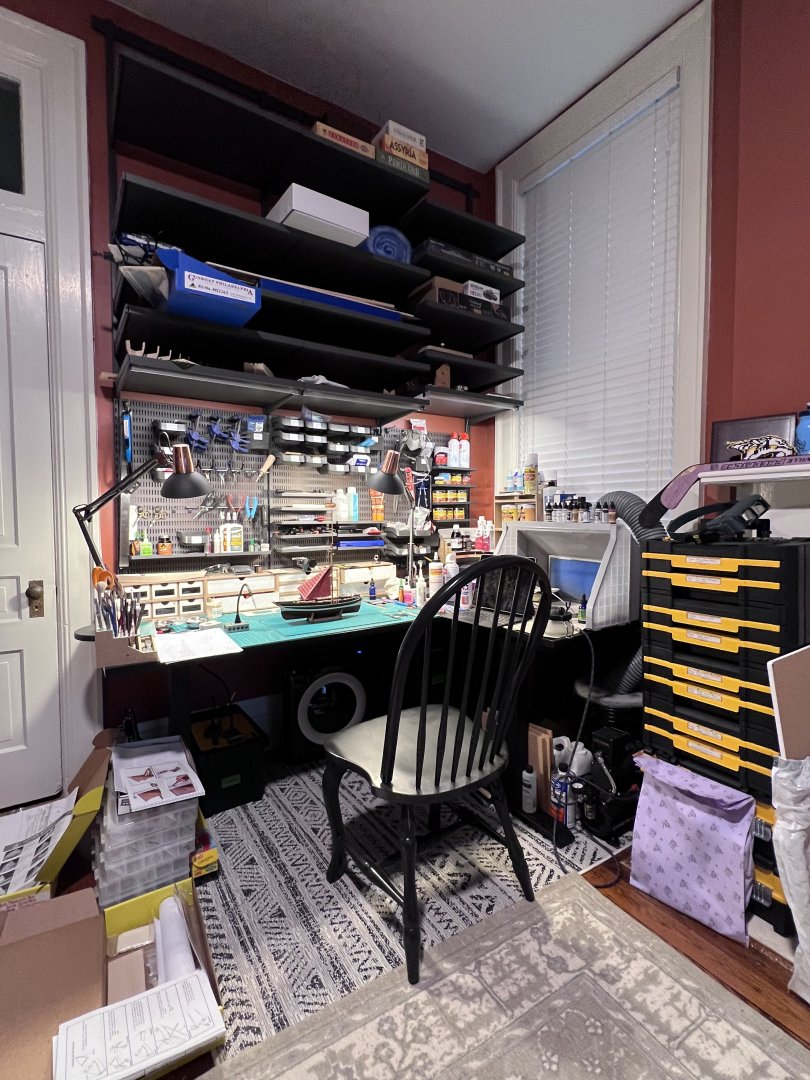
- 52 replies
-
- 15
-
-
I'd go with an airbrush. You can do multiple light coats and the etching on the pear pieces really does come through. You could probably get the same result by thinning down paints and applying with a brush but I haven't tried that on a Vanguard model. I do touch ups with a brush, but I haven't painted a full Vanguard ship with brush paint. I did use brush paint on some of the Model Shipways models I built, and their paint was pretty thick, but it seems to look okay given that these were larger scale work boats. I think at a small 1:64 scale, it would be harder to not show brush lines that would be completely out of scale I think. If you already have non-airbrush paints you'll want to play around with how much to thin them to get the right consistency so that you don't clog the airbrush. I like Vallejo Air paints, which are formulated for an airbrush. I still thin them with a combination of thinner, retarder, and something else - the formula I use is on my Sherbourne log. I have an Iwata Eclipse HP-CS airbrush which is highly recommended. It's not cheap (not the most expensive, but up there). I've seen Badgers recommended that are cheaper. I would steer away from an Amazon no-name when it comes to airbrushes and get a real one from a reputable brand. Airbrushes have high engineering tolerances. You might get luck with an off-brand, you might not. There are tons of good web sites and YouTube reviews on air brushes - what to buy, how to use them, how to clean them after they clog (and they will sometimes clog). I did get a no name compressor. Literally, it's "NO-NAME Brand". https://spraygunner.com/products/cool-tooty-airbrush-compressor-with-tank-by-no-name-brand It's worked well for me. I also got a spray booth so I could spray in the house. https://www.amazon.com/dp/B07MGGYH2W?ref_=ppx_hzsearch_conn_dt_b_fed_asin_title_2&th=1 I can't say this is the best version out there, but it works for me, and I when I bought it it had a pretty good discount price on it. I followed the prices for a while to get a deal. I don't have the exhaust vent going outside but into a large bucket with some water and detergent in it. I googled around and found that as a way to spray inside when you can't easily vent outside. I started with a "spray booth" made from a cardboard box in the cellar but then decided to move back into the house. wrt the PE parts, I'd definitely look into blackening. My first attempt I just airbrushed them and the paint peeled right off. Second attempt I used Vallejo primer and then painted and the paint peeled off again. More recent I've used Tamiya enamel thinner in a shake can (I don't want to mess with enamel in my thinner) followed by Vallejo air paints and it worked a lot better doing that with little thinning. A Fine Scale Modeler YouTube video showed different ways to airbrush PE, which is how I found the Tamiya shake can. But since you kind of need to keep the PE parts in the sprues when air brushing, you end up having to file the parts after you remove them from the sprues and then need to try to repaint them, and that's a bit of a pain. If you just take them off, file off the debris, and then blacken them, that's probably the easiest to do (and likely ends up with the best look) - I have to say I haven't tried blackening myself yet. Next model.
- 63 replies
-
- 2
-

-
-
- First build
- Cutter
- (and 2 more)
-
It’s also weird that the thwarts have a small notch on the sides but nothing goes through the notches. I’m guessing those should have a side frame going down through them?

- 33 replies
-
- 2
-
-
- crabbing skiff
- Chesapeake Bay crabbing skiff
- (and 1 more)