Louie da fly
-
Posts
7,993 -
Joined
-
Last visited
Content Type
Profiles
Forums
Gallery
Events
Everything posted by Louie da fly
-
 Druxey, I agree - your version is far more informative and I believe gets across what a truly miserable day it must have been. There are similarities, but quite significant differences as well. I find the sterns of the barges absolutely fascinating. Without a real-world example to compare them to, it would be hard to believe these were accurate representations of actual vessels. What conceivable purpose would a stern like that serve? Steven
- 641 replies
-
- 3
-

-
- greenwich hospital
- barge
- (and 1 more)
-
Beautiful precision work, Glenn. This is the original steampunk. It is fascinating watching this build progress. (On a totally different subject, I've sent you a PM relating to the Glass Wreck.) Steven
-
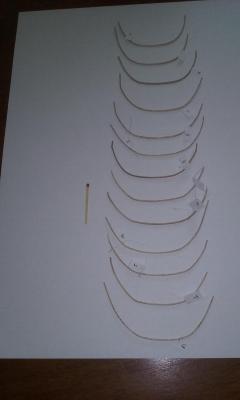
Here are the frames I've made so far. It's interesting that even though they're supposed to be progressively narrower as they progress towards the ends from amidships, they seem to be anything but consistent in shape. However, I believe this is because of variations in the wood and the conditions under which it was clamped into place. In any event, the springiness of the wood will enable them to return to their correct shape once they're in place on the plug and held in with planking and wales. The hard part was getting the wood to bend around a quite sharp corner at the futtock. Once that's been achieved the rest should follow without too much trouble (I hope). Steven
-
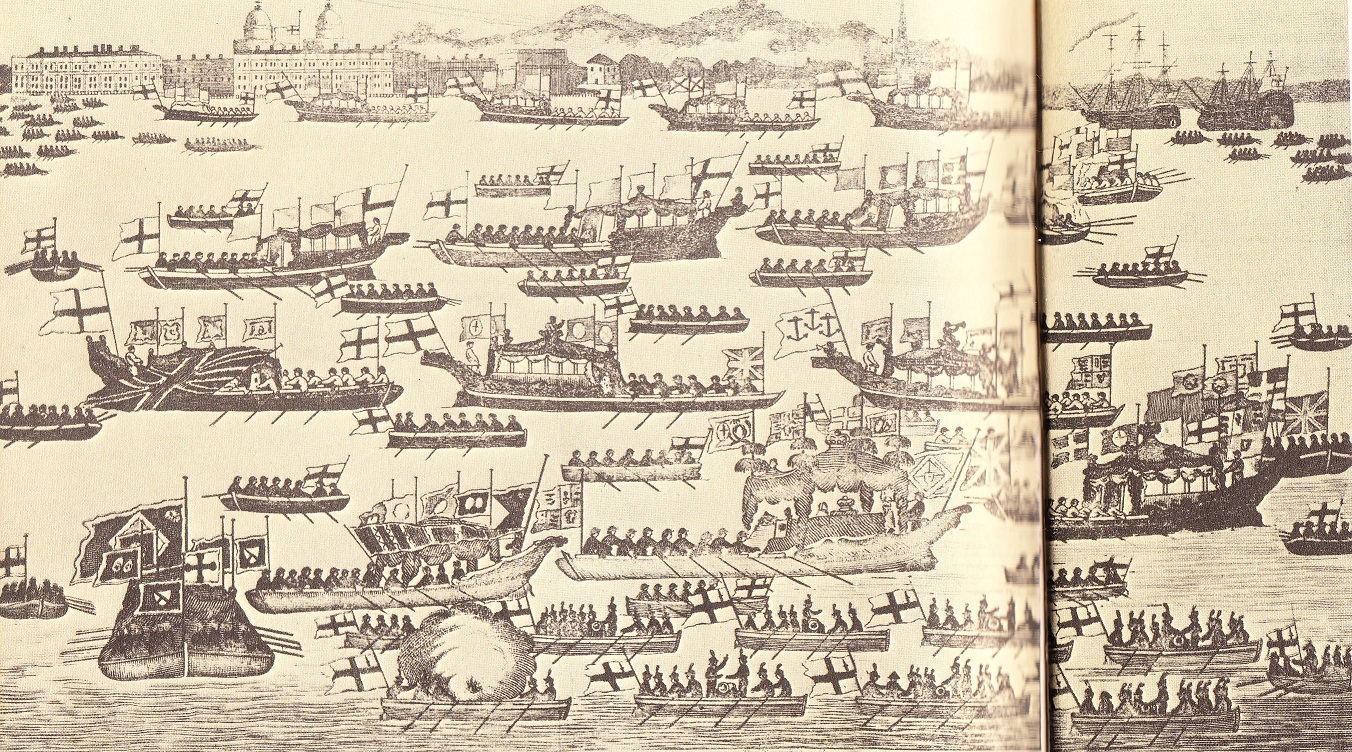
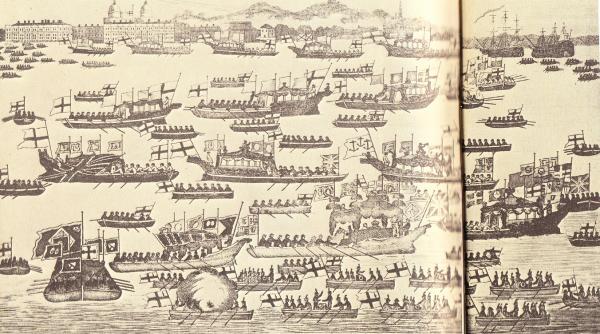
Thought this might be of interest. As far as I know, it's a contemporary picture of Nelson's funeral procession down the Thames. Not very accurate representations of the barges, but it might contain some useful details, and a bit of an insight into the spectacle on the river. You can see what I think must be the barge carrying The Body on the far left, draped in a Union Jack. [edit] No, I think I'm wrong - it's the one bottom centre with the crown on top of the canopy and another on top of the coffin. I think I can see Hornblower at the tiller, too . . . Unfortunately I don't know where it came from. It's in an old book on Nelson, and is unattributed. (Sorry about the fold in the middle). Steven
- 641 replies
-
- 8
-
-
- greenwich hospital
- barge
- (and 1 more)
-
Thanks for the advice. I'll do a little experimenting before I commit myself to doing it on the model itself. I'm also a little concerned that the frames fit too tightly in the grooves at the moment and might not lift out cleanly when it's all glued up. So I need to look at that as well and sort it out before the gluing stage. And then there's the issue of sequencing - obviously the frames have to go in place before I glue the keel to them, but what about the wales? I had in mind to put the top wale and one of the lower wales on before I started planking, to hold the frames together and in their correct shape. I THINK I should do that after the keel, but I'm still trying to think it through to make sure I don't paint myself into a corner. Steven
-
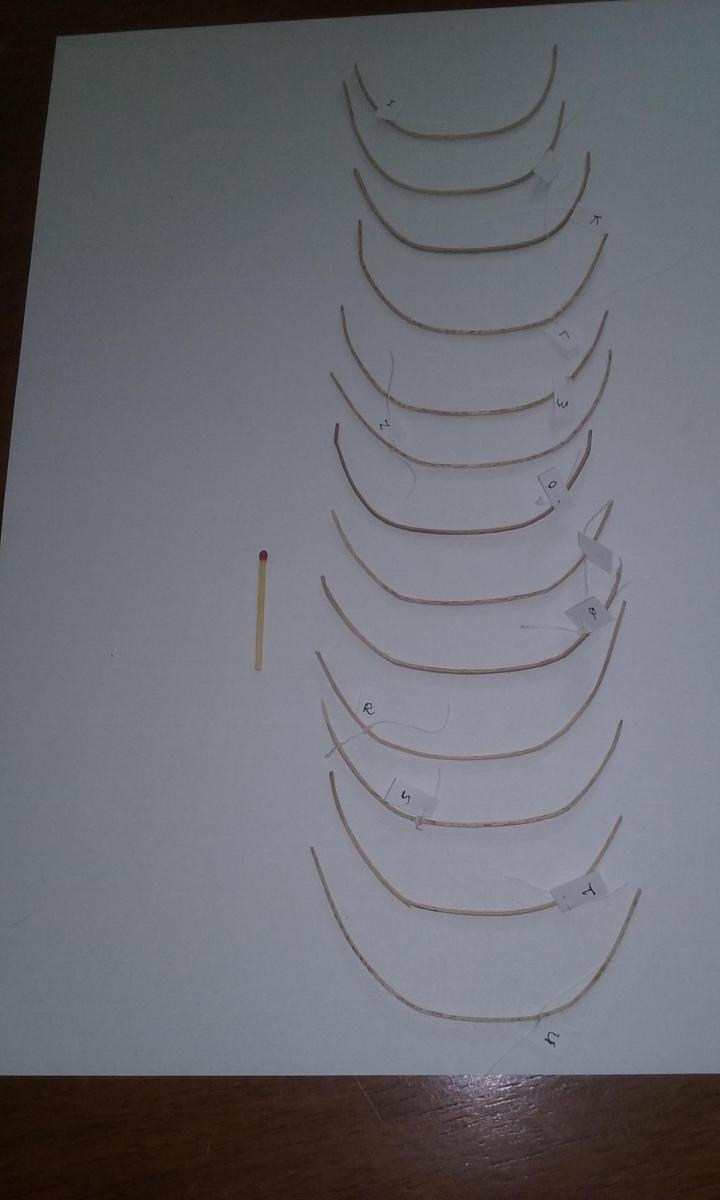
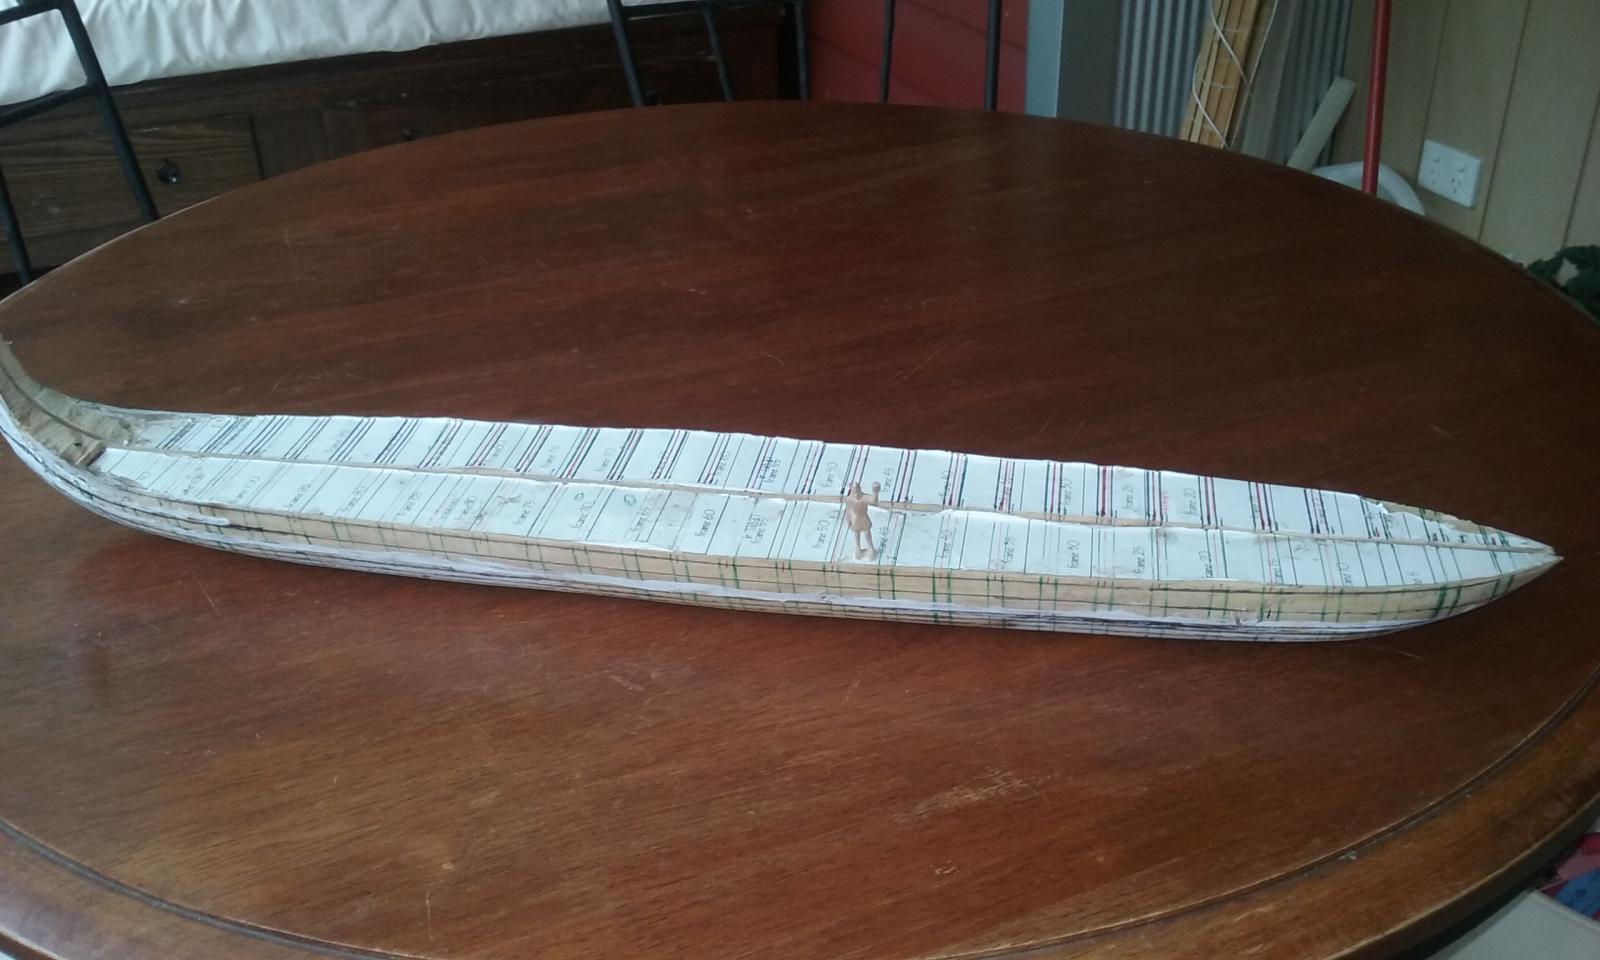
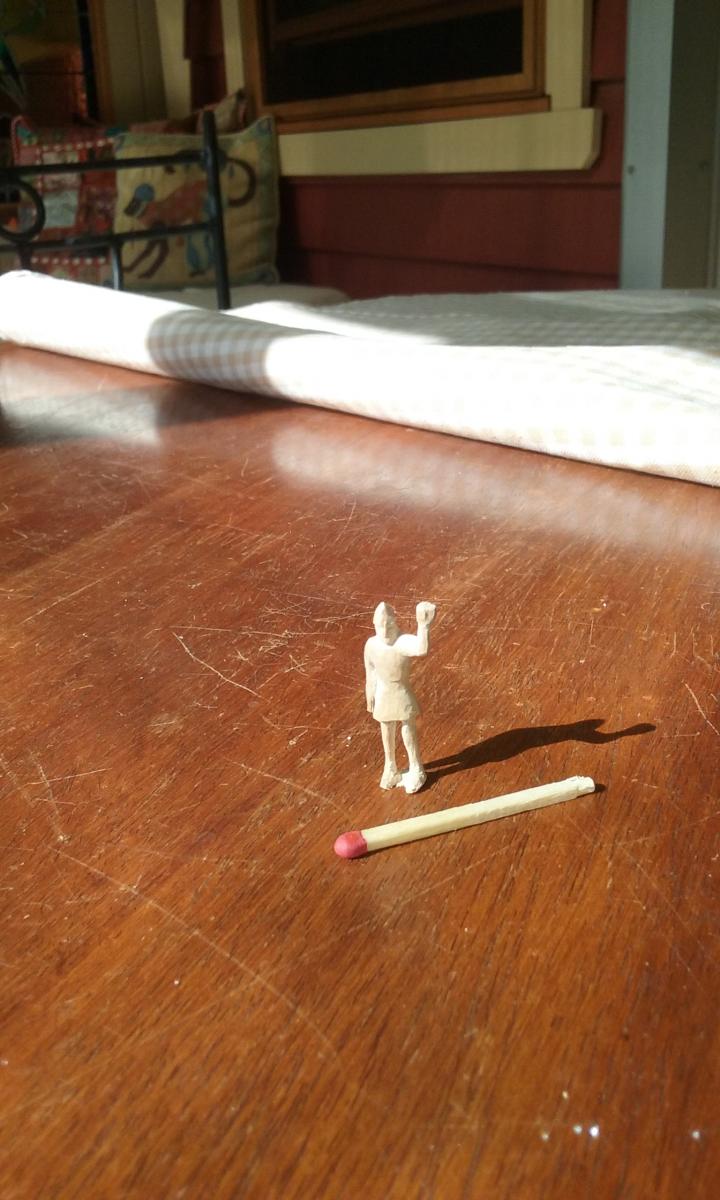
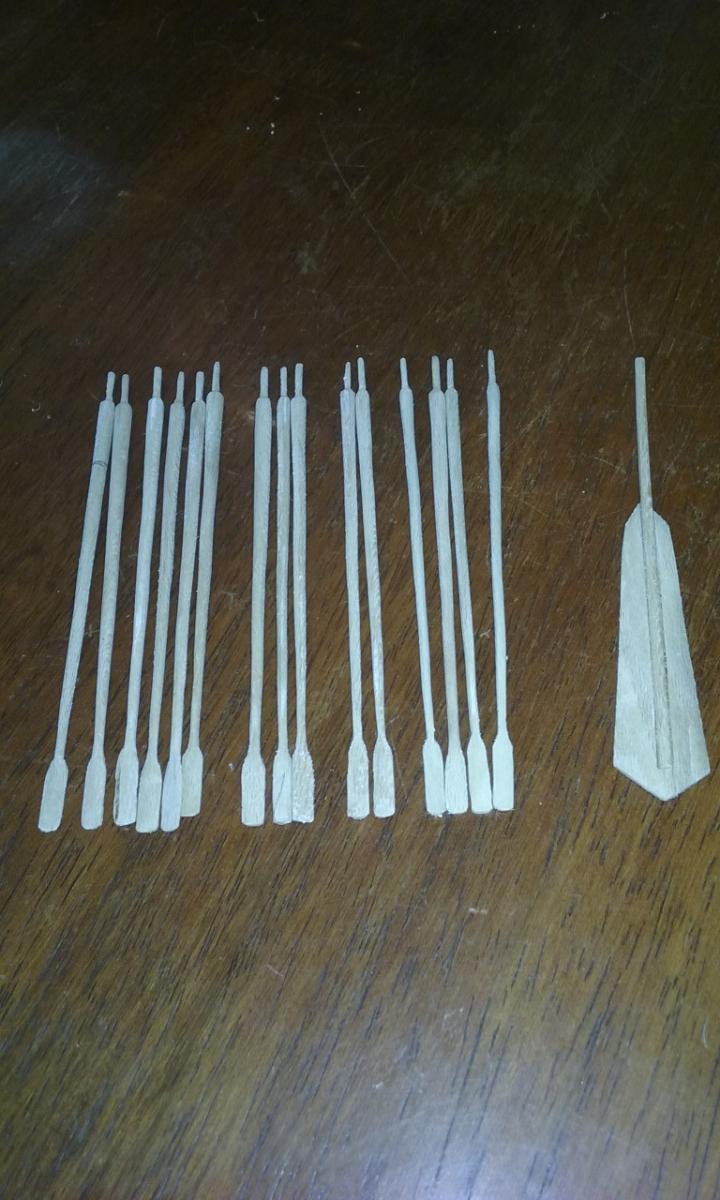
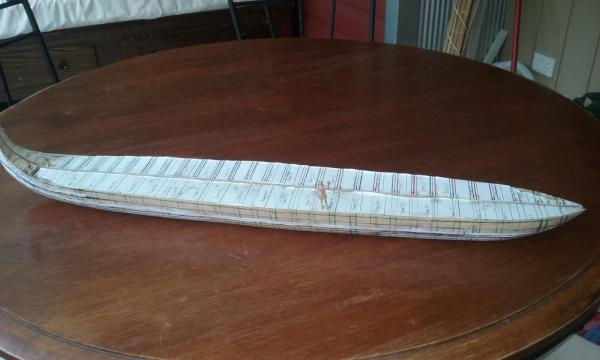
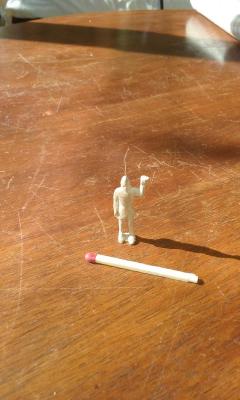
I’m afraid the plug isn’t very pretty – in fact it’s quite messy; the result of a series of trial and error attempts to get the spacing of the frames right and work out the lines the wales need to follow. I’m very much learning as I go along. However, it’s not the plug that needs to look good – just the ship itself. I’ve sanded the first crew member down smooth and made him look quite respectable – except for one hand. The idea is for him to be standing on deck holding onto a shroud, and I’m not going to finalise that until the ship has reached the point of having shrouds so I can get his hand the right shape. I've also got to tidy up his feet and check that he stands properly. I’ve made 13 oars so far, but it’s quite likely I’ll have to discard several as I’m not happy with how they turned out. Though I made the first ones too thick, I can shave them down and get them right. But some I either made in too much of a hurry or too carelessly and they are out of round and can’t be fixed. It just means it’ll take longer to finish them all off. I initially had a problem with keeping tabs on which frames went where. They are so thin that you can’t write on them, so I worked out that I could make little name tags for them and tie them on with cotton thread. Seems to work ok. Once they're all bent to shape I can put them in place and start gluing everything together (at last!) Druxey, I looked at those saws and though they’re very attractive I’m not likely to be able to justify getting one. I’m doing this all on a shoestring – I even thought twice about spending 9 dollars on a couple of clamps. Additionally, now I’ve got cutting out the frames down to a system, it all works very well, and I’m enjoying doing it. It probably takes marginally longer than sawing them out, but that’s ok. My major goal at the moment is to finish all the frames to go in the plug, put them in place and glue the keel, wales and planks to them. I had a problem with keeping the glue from sticking the frames to the plug – the grooves in the plug are too thin for beeswax and I don’t want to use oil in case it soaks into the frames and makes them reject the glue. So I had the bright idea of making up a ‘slurry’ of soap and water and painting that into the grooves. Once it dries out it should coat the grooves and the plug with a thin film of soap, which should reject the glue but not soak into the frames. I hope so, anyway. Steven

-
A nice piece of work, Dick. I never cease to be impressed by your insight into what, to me, are mysterious or even meaningless details in old pictures, and your ability to turn them into parts of the ship which in hindsight are obviously what the picture represented. It's the old "I should have thought of that!" moment. I wonder if a ship up on the slipway like that might not have had the preventers removed, so they wouldn't appear in Trombetta's picture. Steven
-
Oh, I intend to. But currently the budget won't allow it. There are a number of tools I'd dearly like to have - including a drill press, a scroll saw, even a normal bench saw, a small lathe and others I'd normally consider impossible to do without. But they'll just have to wait until I can afford to get them. In the meantime I just have to get a bit inventive and work around what is lacking. And by the way, thanks for the compliment. To have you call me a serious modeller I consider high praise indeed. And thanks everybody for all the 'likes'. Steven
-
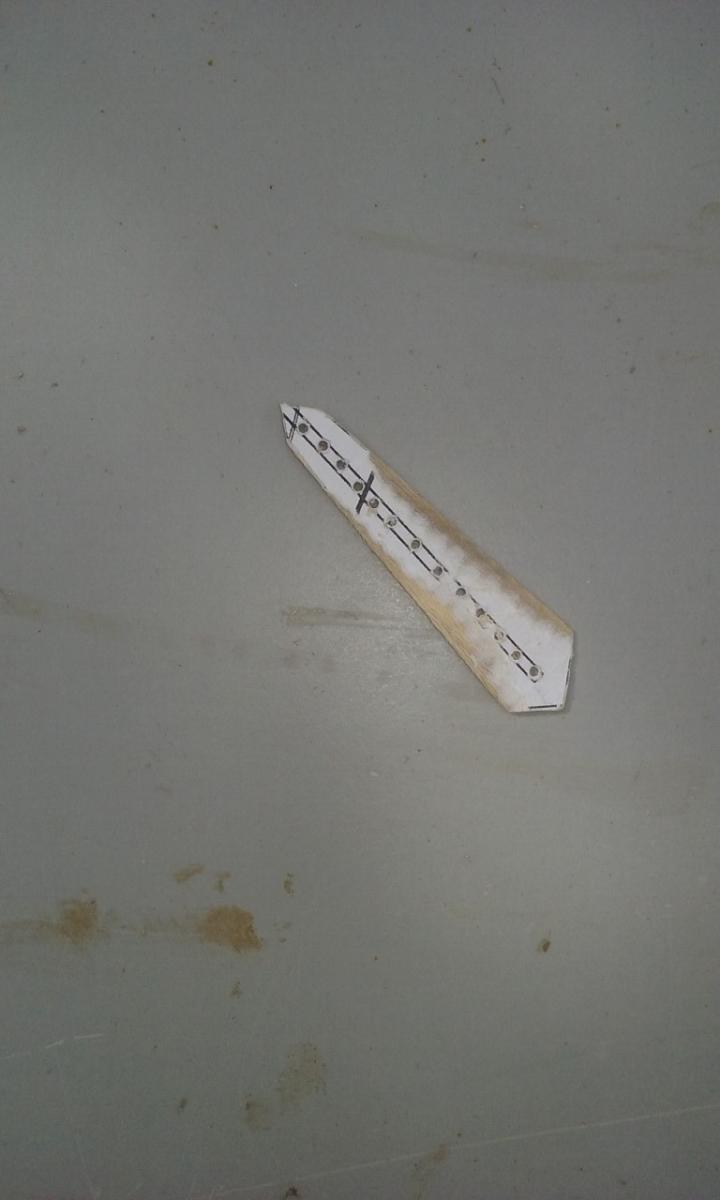
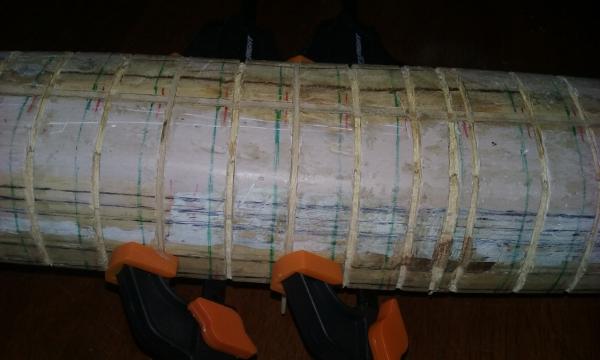
No, I don't have any of these, but maybe I should check them out. Here's some photos I didn't get the chance to put up in my previous post, by the way. Two frames clamped in place: from above: and from below: And the first of two steering oars - I made it in two pieces. I cut the blade then drilled holes in a line and turned them into a slot that the loom would fit into and the completed steering oar. A neater job than if I'd tried to carve it from a single piece of wood. Plus the oars I've made to date.


-
I've had to widen and deepen the grooves in the plug for the frames. They weren't sitting in the grooves properly and were twisting. I've made maybe half a dizen frames so far a d I've started to develop a systematic way of making them after a lot Iif trial and error. My first problem was how to cut the frames from 1mm thick wood and make them 1mm wide all the way along their length without the wood shifting under the steel rule as I cut along it. I finally discovered two important lessons. First, only make the frame a little longer than its final length. That way it doesn't move so easily when you cut it. Secondly, just scire along the cut line to start with. This gives the blade a groove to follw when you cut deeper. I usually get the frame fully cut off in three or four passes of a Stanley knife and it follows the line well. I bought some light clamps to keep the frames in place in the grooves while they dry, and I've discovered that one hour in cold water is enough to make them sufficiently supple to follow the curve without breaking.
-
This is a magnificent build, Druxey. It shows what can be done and gives us all a standard to aim for. Very inspirational. Steven
- 641 replies
-
- 4
-
-
- greenwich hospital
- barge
- (and 1 more)
-
2 recent discoveries of ancient ship-wrecks
Louie da fly replied to Landrotten Highlander's topic in Nautical/Naval History
Zeh, I'd like to send you the link to the discussion about the Mary Rose but I don't have access to a computer - only my phone. But if you do a search on Msry Rose forecastle on MSW you'll find it and links to some more sites with portolans. By the way if you want to see the Calicut Tapestry (and I can recommend it) do a google image search for Vasco da Gama tapestry and you should be able to find it. Apparently there were a series of tapestries made to commemorate the voyage. I think only one of them shows the ships. By the way, am I right in thinking Vasco means Basque? If so, maybe it wad a nickname - 'the Basque guy'. The reason I'm interested is that fir some reason the Basques seem to have been at the cutting edge of ship design at the time - they seem to crop up everywhere. And it was a very exciting time. In few short decades they progressed from simply rigged single masted, relatively small ships to (relatively) huge complex 3 and 4 masters capable of travelling anywhere. I've got huge respect for the shipwrights of the time. They were true pioneers,equally worthy of respect with the great artists and architects who were their contemporaries. Speaking of caravels, a guy here in Australia, about an hours drive from where I live, has built a reconstruction of a caravel and sails it around. There's a legend here that a wreck found in the sands 150 or so years ago and then reburied by the sand was from a Portuguese expedition which got as far as Warrnambool on our south coast in the early 16th century and mapped it but turned back aftet one of the ships was wrecked. People have been searching for this wreck, the so-called Mahogany Ship, even as recently as a couple of years ago with echo-locators, but with no success. Fascinating- it'd be great if they found it - but if it turned out to be something ordinary and boring we'd have lost one of our local legends. So I don't know if I really want it to be found . . . Steven -
Well, only 87 oars to go, and I've started on the frames. There is quite a sharp corner at the futtock and I kept breaking the frames trying to bend them around it. I finally tried boiling a frame in water for half an hour then left it in the water for another two and a half hours and it worked beautifully. Then I discovered I could get the same result soaking in cold water for 3 hours. So I'm on my way. I clamped the frame to the groove I'd cut in the plug overnight and it came out beautifully. Now to cut another 18 or so to put on the plug and plank over. The current plan is to put the other 106 frames in after the planking is finished. Oh, and I think I've worked out how to make the oarsmen without having to carve 50 of them individually. No photos at the moment I'm afraid. Steven
-
In 'Hornblower and the Atropos' C.S. Forester describes (probably not from personal experience, though may have gone and looked at them in the museum) being in charge of one of these barges as part if Nelson's funeral procession. From his description I got the impression they were considerably bigger and heavier - but the barge in question WAS loaded up with The Body in its heavy coffin. However accurate, it nakes a good read.
- 641 replies
-
- 4
-
-
- greenwich hospital
- barge
- (and 1 more)
-
2 recent discoveries of ancient ship-wrecks
Louie da fly replied to Landrotten Highlander's topic in Nautical/Naval History
Yes I know the Miller Atlas. I think it's fantastic. The old portolans often have surprisingly good pictures of ships, particularly from about 1500 to 1580. Some months ago I did a google image search under portolan/portulan/portulano etc and came with a treasure trove of pictures. Not terribly good on detail but very enlightening on the general shape and form of ships of the time. I put a few up on a discussion about the Mary Rose's forecastle, if you're interested. Best wishes, Steven -
2 recent discoveries of ancient ship-wrecks
Louie da fly replied to Landrotten Highlander's topic in Nautical/Naval History
Yes that's a very interesting resource and I got all excited when I found it. I was very disappointed when I discovered it was produced decades after the event. Even the Calicut Tapestry isn't fully representative of Vasco da Gama's ships. Though it was made a very short time after the events, it was produced in Flanders, not Portugal. And the artist probably used a Flemish ship as his model, not a Portuguese one. From looking at a lot of carrack pictures, they were all quite similar, but there were definite regional differences. Still all we can do is make a 'best guess' with what information we do have and try to get as close as we can to how the real ships were. We all have lots to learn. But that's what makes it fun. Steven -
Thanks, Vivian. It's been a long time getting around to starting, and progress is a little slow. But I'm enjoying it. Steven
-
2 recent discoveries of ancient ship-wrecks
Louie da fly replied to Landrotten Highlander's topic in Nautical/Naval History
Yes, I find that whole period of ship design fascinating. And certainly naus did develop into the kind of ship you linked to. That's more of a galleon shape - with a beakhead and without the gigantic forecastle and sterncastle that would have made late "super-carracks" like the Mary Rose so unwieldy. Steven -
2 recent discoveries of ancient ship-wrecks
Louie da fly replied to Landrotten Highlander's topic in Nautical/Naval History
Actually only 23 years, and we don't know how old the Esmerelda was when she sank. The Flor de la Mar is dated to 1511 but I believe the picture to have been produced some decades later. Pictures of which the date is known, such as the Calicut Tapestry of 1504 (of Vasco da Gama's voyage to India) and Jacopo de Barbari's picture of Venice of 1500 still show the classic carrack shape. By the time of the Santa Caterina do Monto Sinai of 1520 ships were getting bigger and more sophisticated, but a nau wrecked in 1503 will have looked very like the ships mentioned above. -
2 recent discoveries of ancient ship-wrecks
Louie da fly replied to Landrotten Highlander's topic in Nautical/Naval History
Can't shed much further light on these particular vessels, but the Esmerelda in particular is a very exciting find. She'd be very similar to the Nave Tonda that Woodrat is currently building on the scratch build forum. There's also info on this type of ship in the "Important links to ship modelling resources" section under the heading "Archaeological studies on carrack wrecks" and also "The Cavalaire Wreck - Basque Carrack of c.1479", (which being from the Iberian peninsula would have had a lot in common with the Esmerelda). It's a shame so little of the vessel itself has been recovered. But it eoul be good to learn more of the artefacts they've found. Steven -
That's true. But I find it much more interesting researching and scratch building older ships, where the information is almost always incomplete and where imagination and educated guesswork have to take the place of hard data, than to work from a set of complete plans where everything is known and set down. As far as I'm concerned the research and speculation is a major part of the enjoyment, even if it means not ever really knowing if you got it right, even if what you build may be outdated by later discoveries. It's true - it's all about the journey. I know many others prefer to have the certainty and the plans all laid down properly, but for me the fun is just as much about the detective work as it us about the build itself. To me the two are complementary and both contribute ewually to the enjoyment of the build.
-
Well that's good, then. I didn,t want to be the person who tells you stuff that makes you throw away something you've just spent lots of time and effort making because it turns out to be wrong. As far as I can see, the differences were only in detail, not in kind. I wasn't aware they had the Red Bay capstan, but I'm not really surprised seeing how complete the wreck is. Steven