Louie da fly
-
Posts
7,993 -
Joined
-
Last visited
Content Type
Profiles
Forums
Gallery
Events
Everything posted by Louie da fly
-
 Good to see you back, Dick. I never cease to be impressed by the level of research you get into to get the details exactly right (as well as can be known at this distance in time). And the level of workmanship, as well. I'm probably showing my ignorance, but what's that vertical spar next to the bowsprit? By the way, I've recently come across quite a number of contemporary representations off carracks on Pinterest that I haven't seen before. Would you like me to post them or have you got as much as you need? Steven
 -
I hadn't thought of it till now and it's a worthwhile idea. However, the carvings are basically just a break from doing the ship itself, and I probably get distracted enough from the real work of shipbuilding. I get good enough results for my purposes (which is just adding a bit of interest to the model) with the tools I've got - anything finer probably wouldn't be visible with the naked eye. And I have to guard myself from my tendency to go off on tangents. Before you know it I'd be carving statues of Elvis from grains of rice . . . Steven
-
Thanks, Cog. I hadn't thought of that. But I think the real culprit is lack of light. Compare the first two photos taken in good light with the rest of them . . . Steven
-
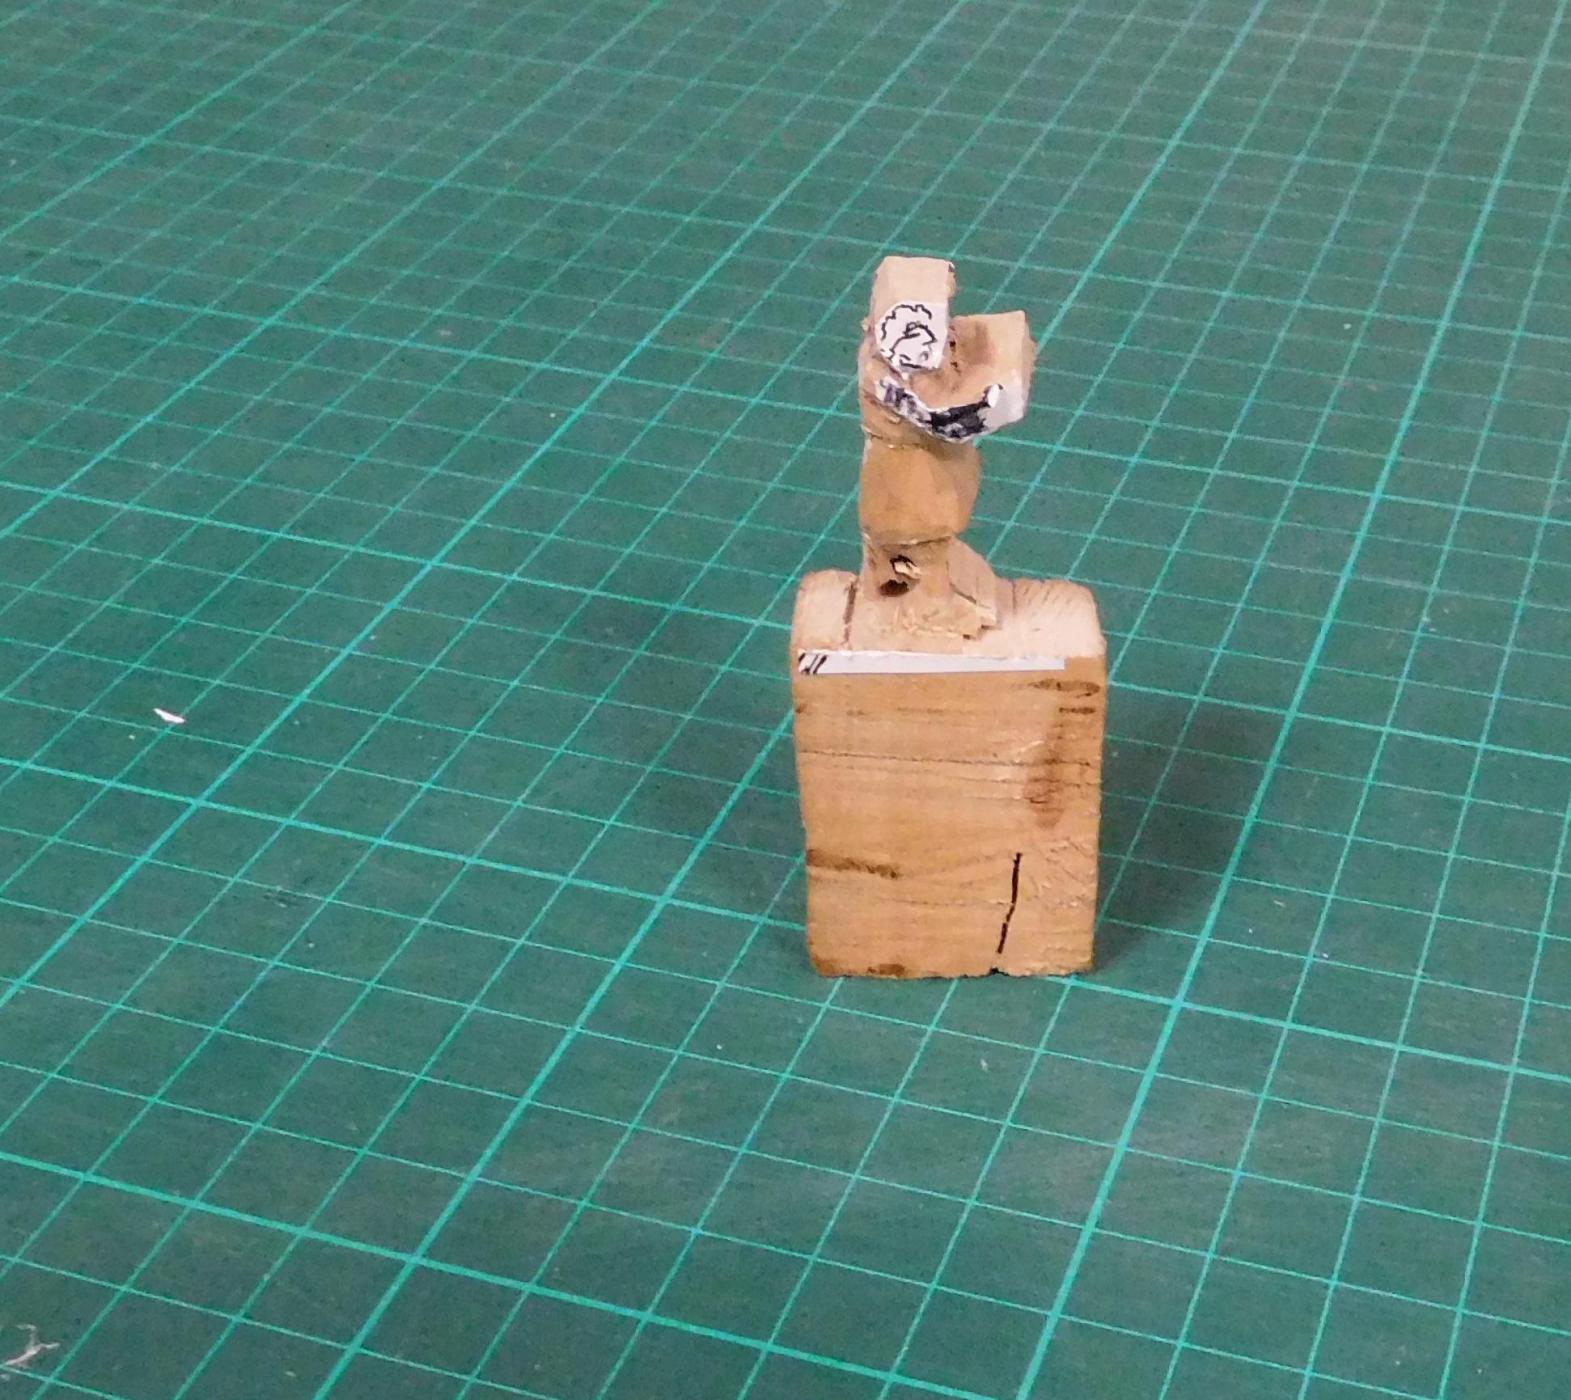
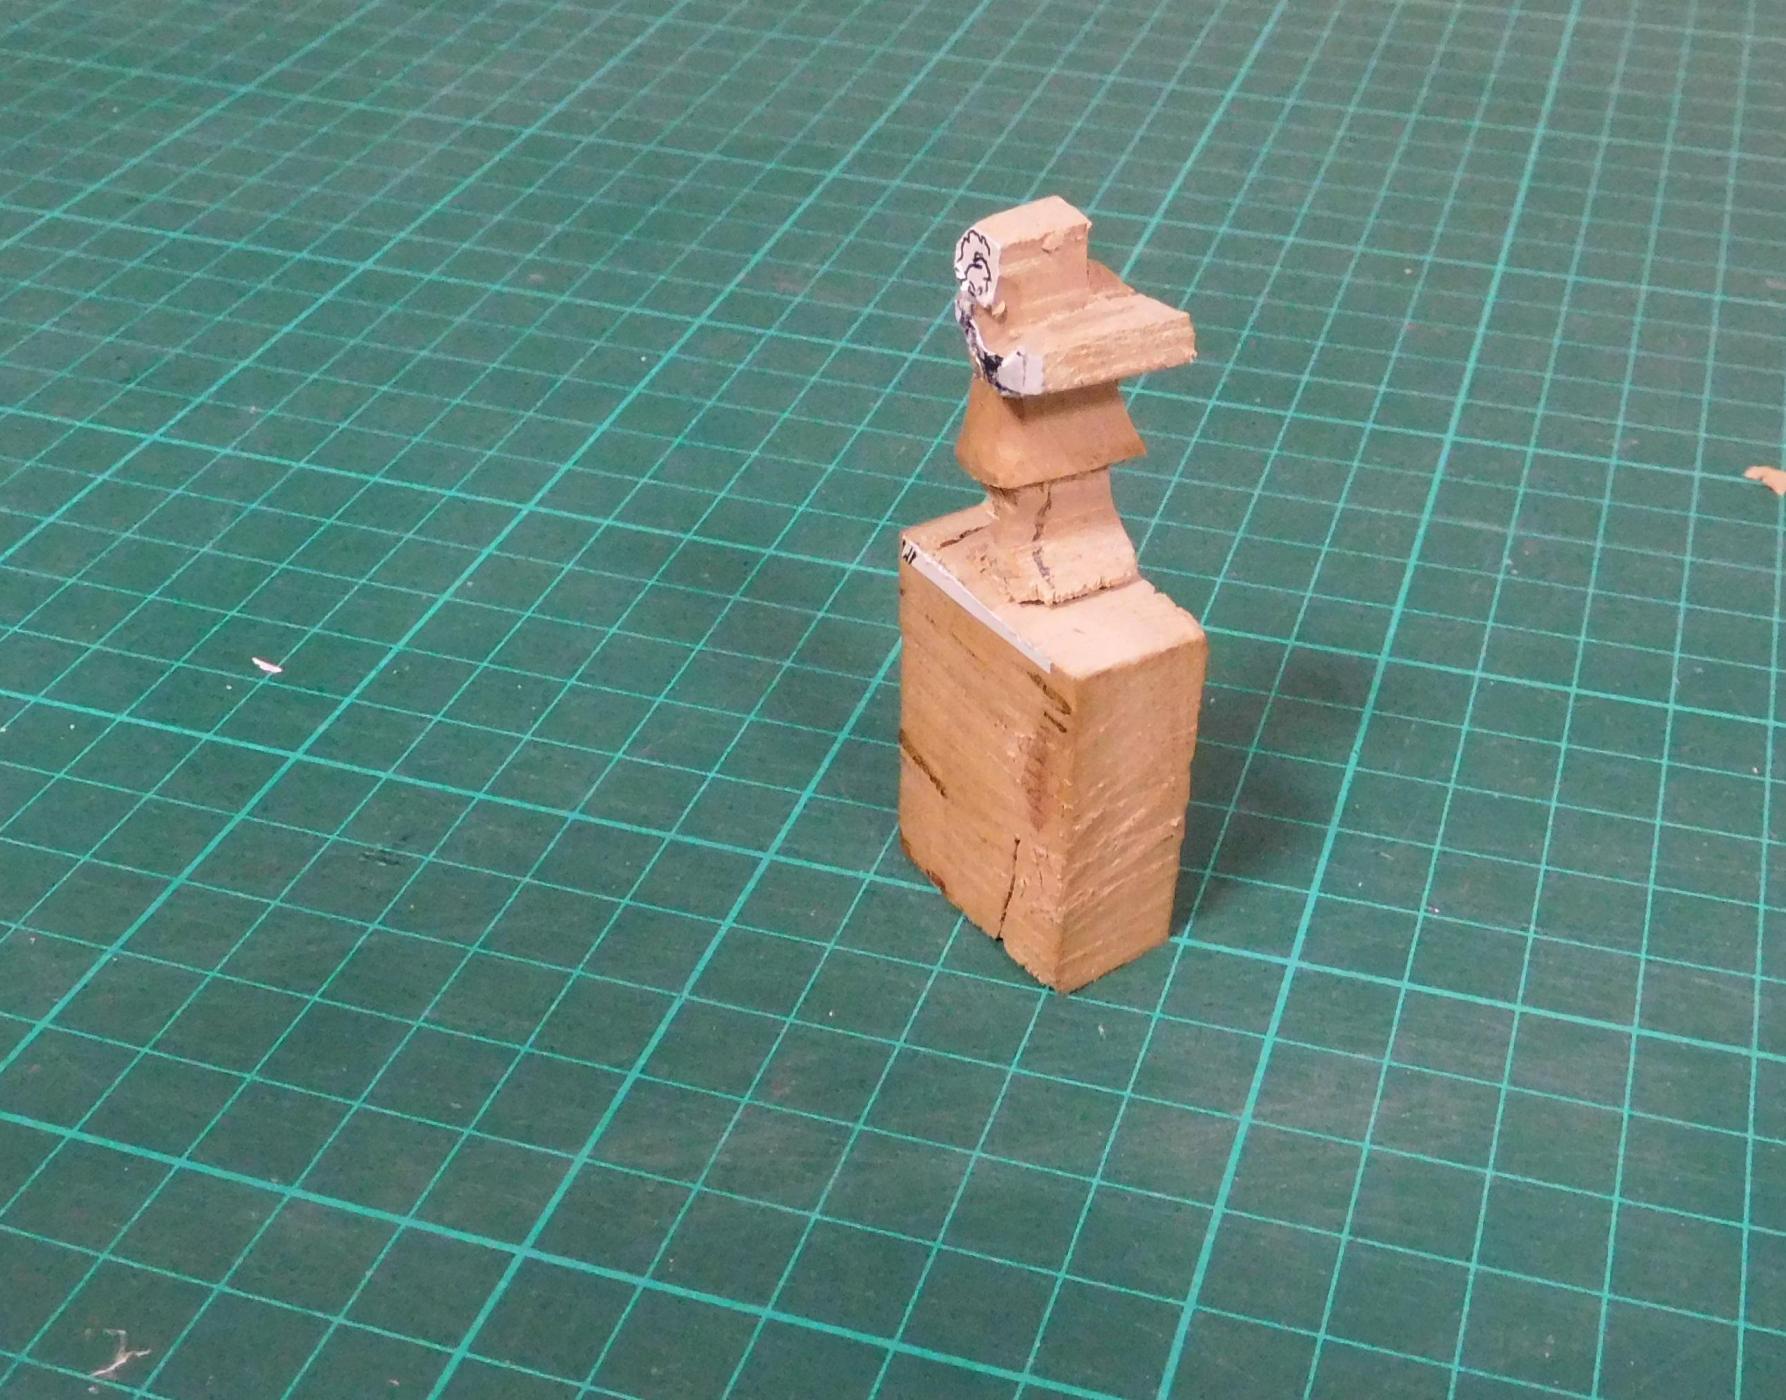
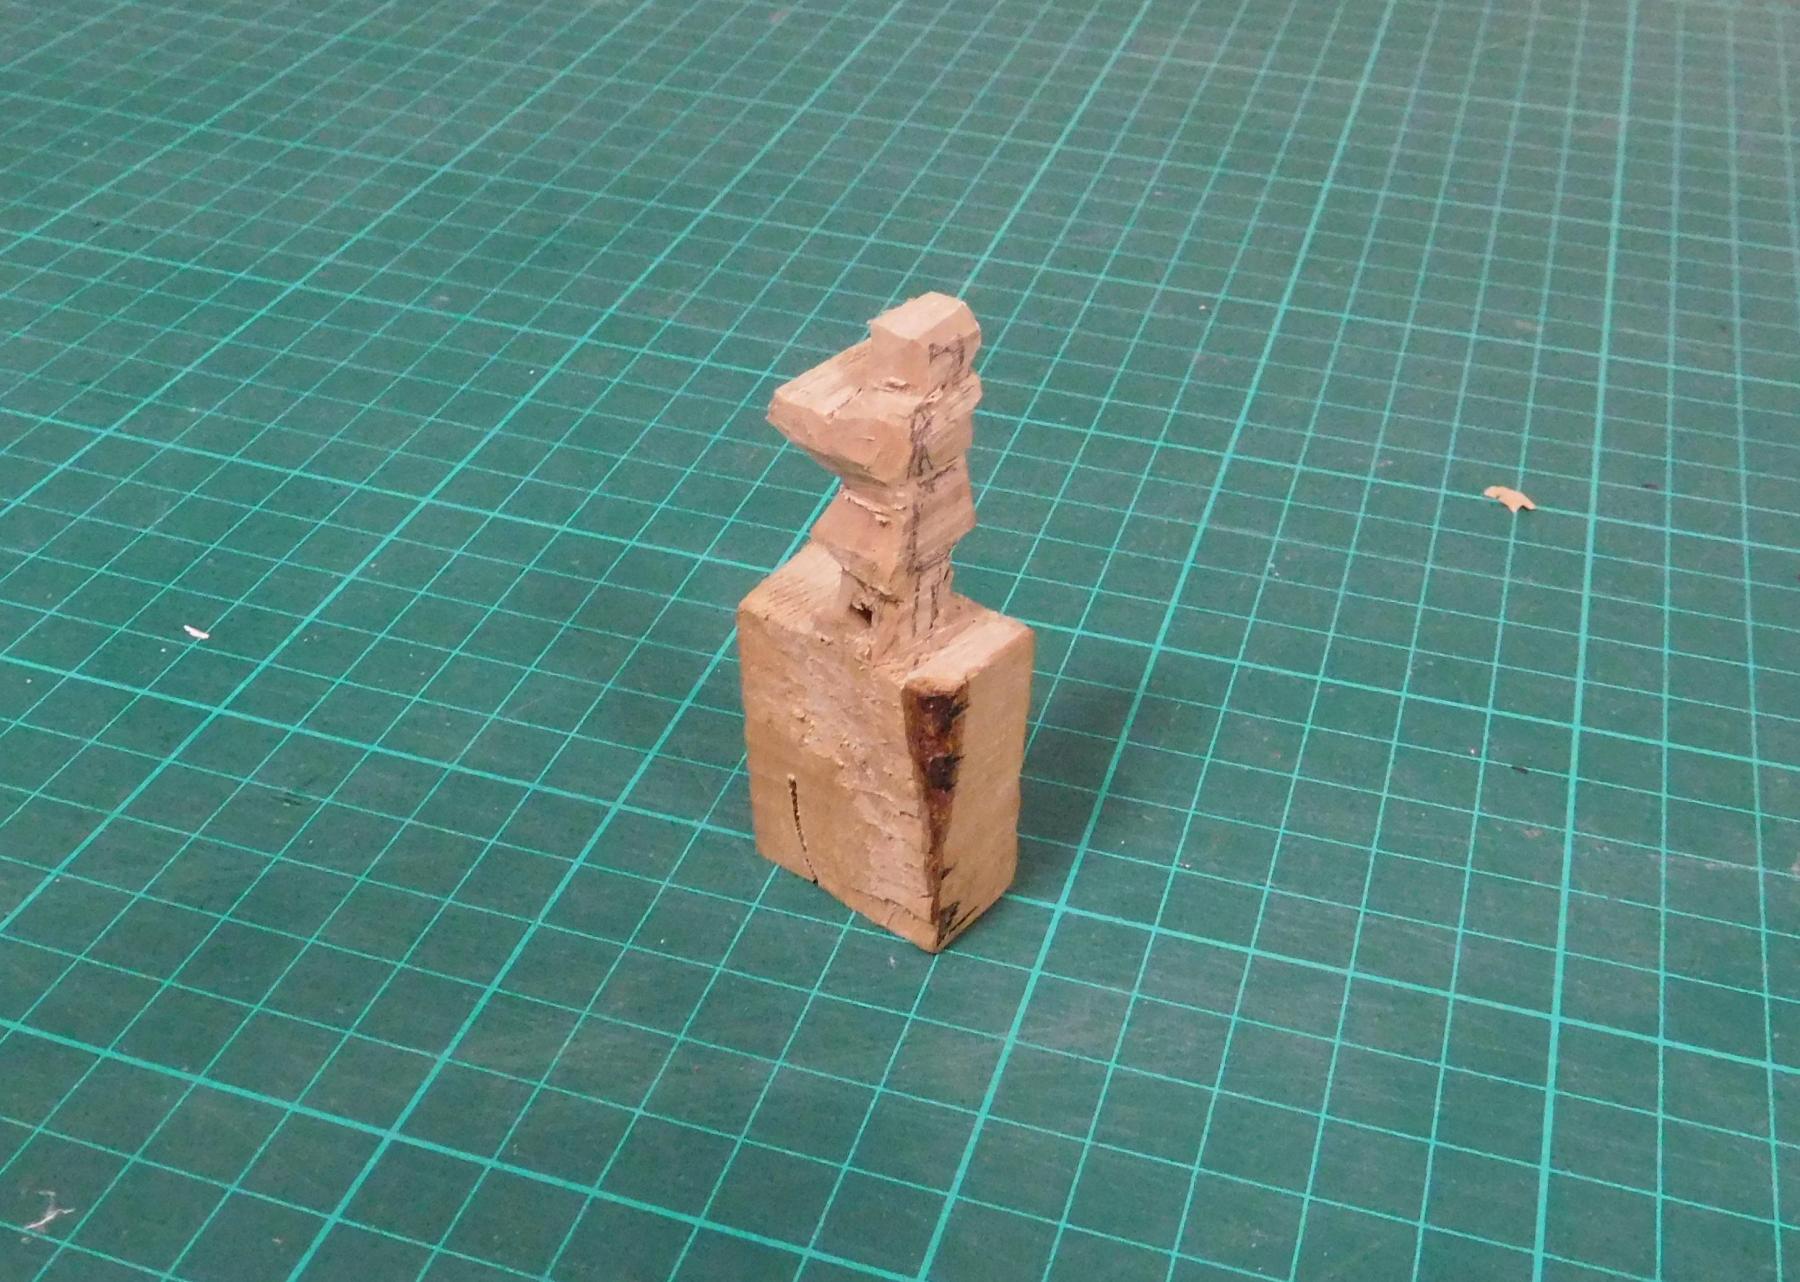
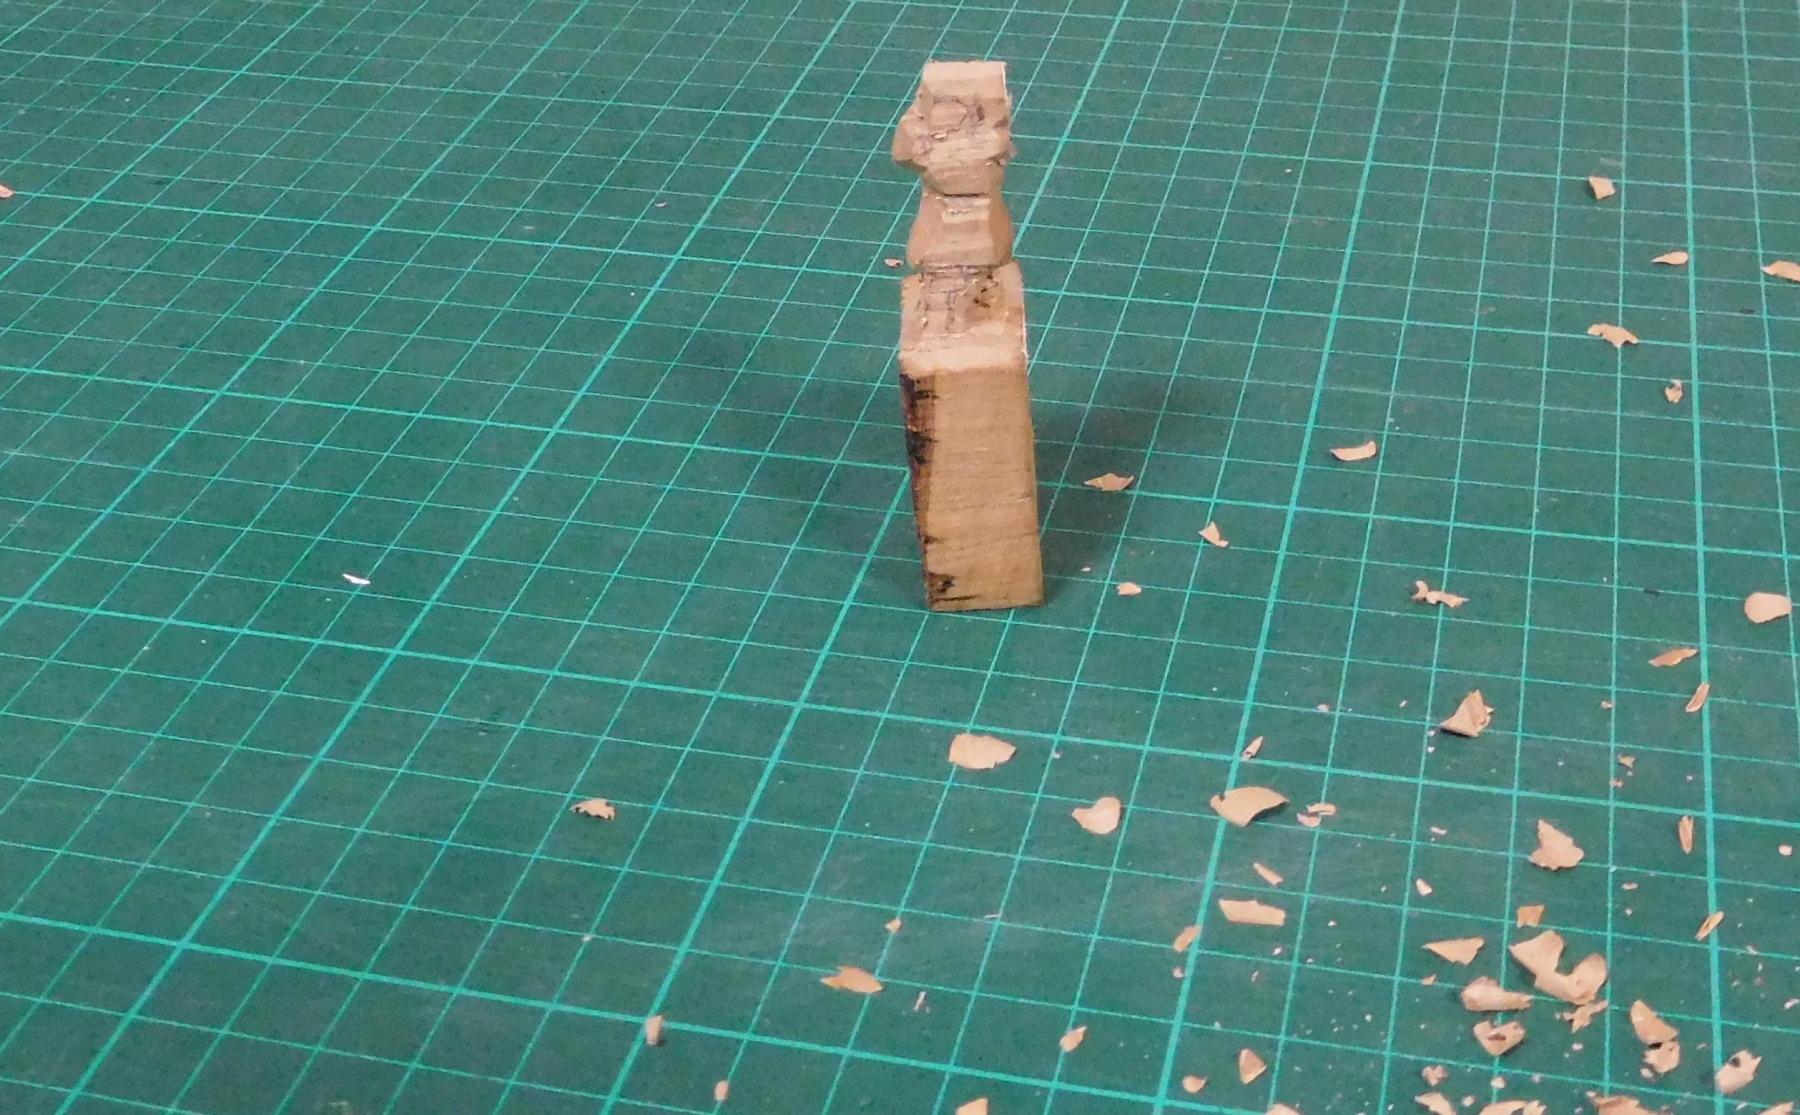
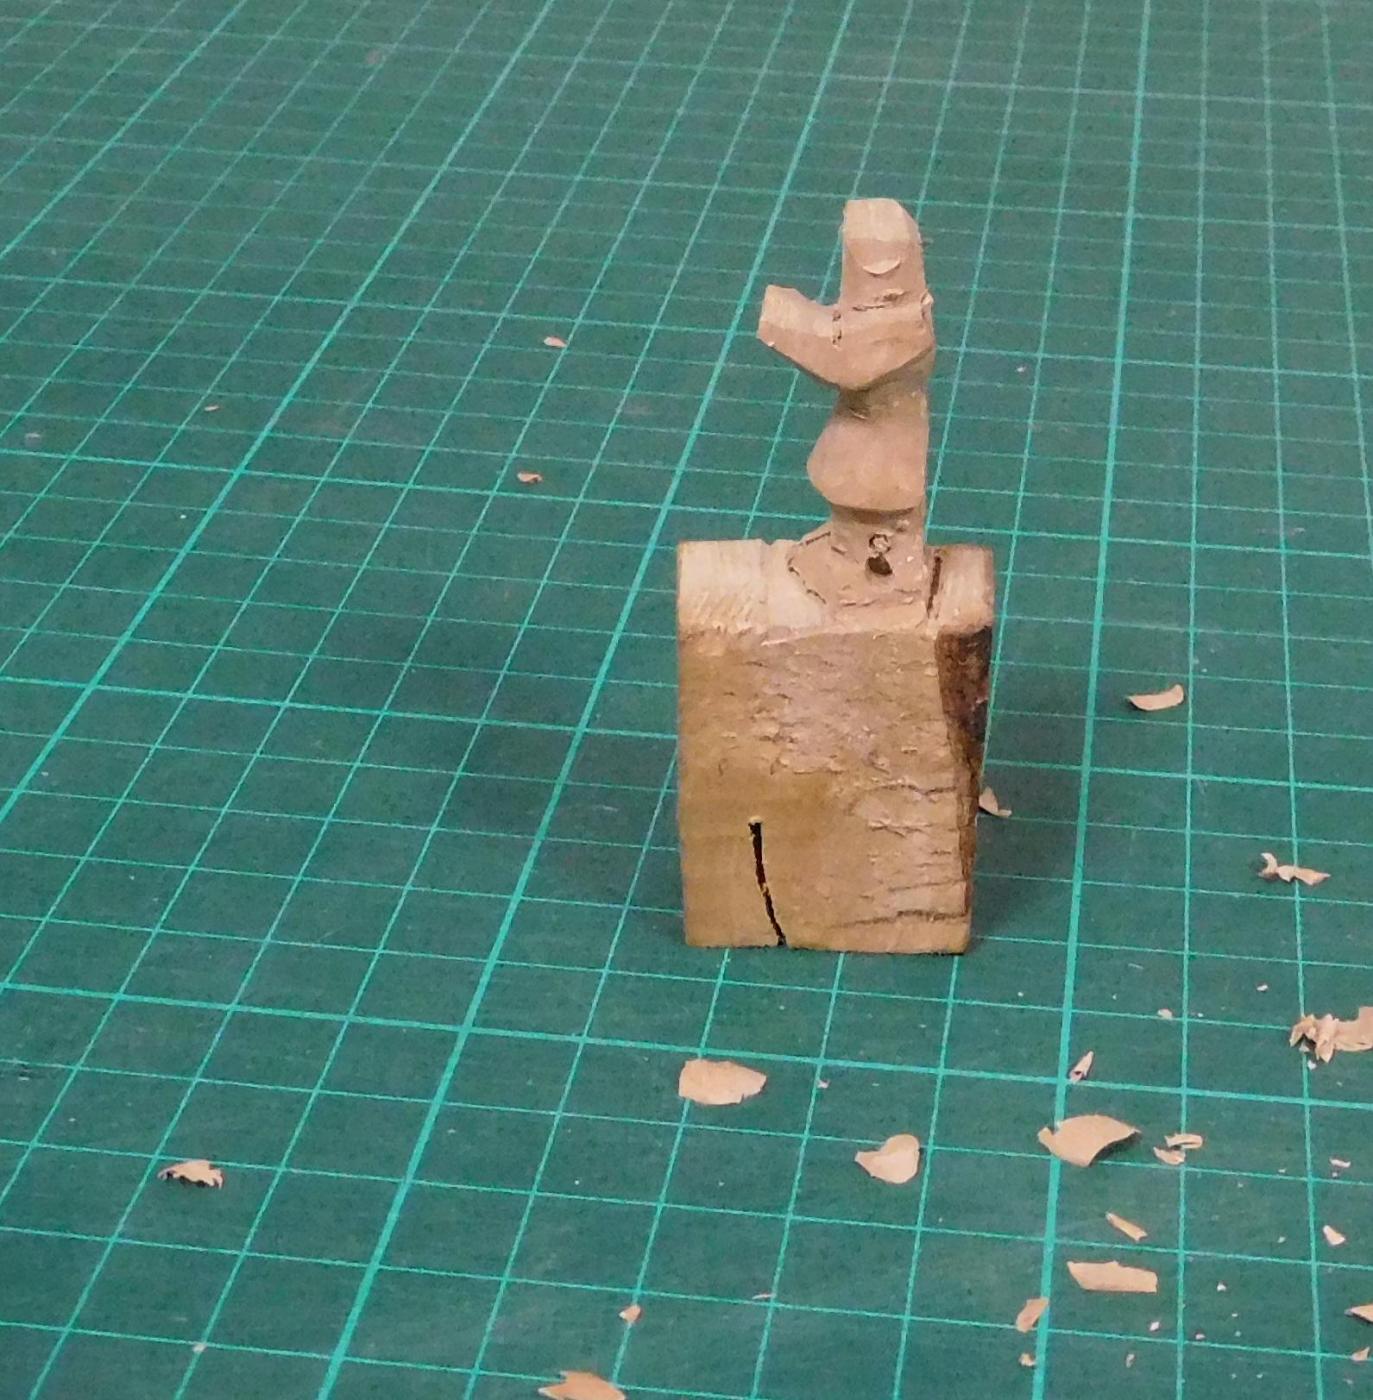
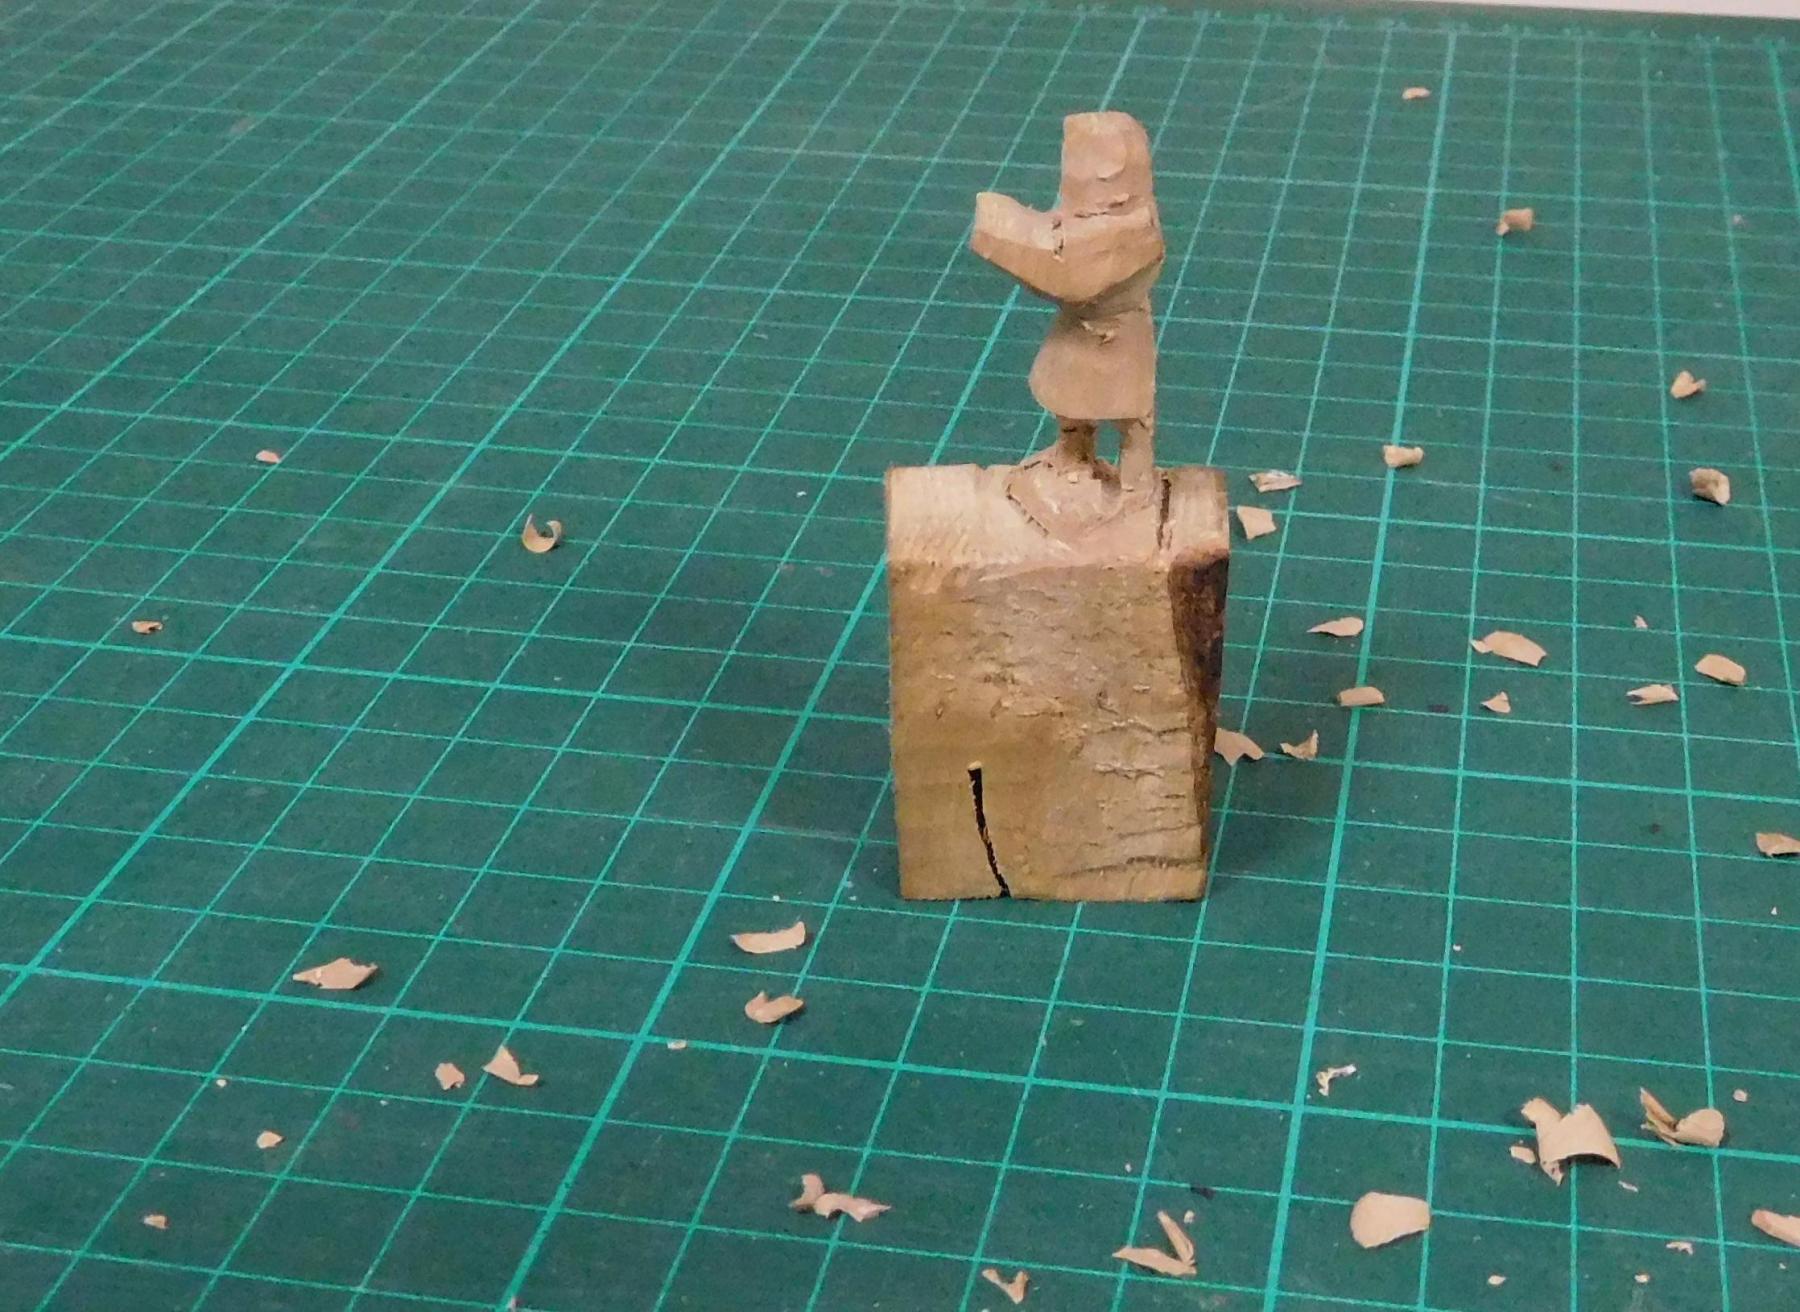
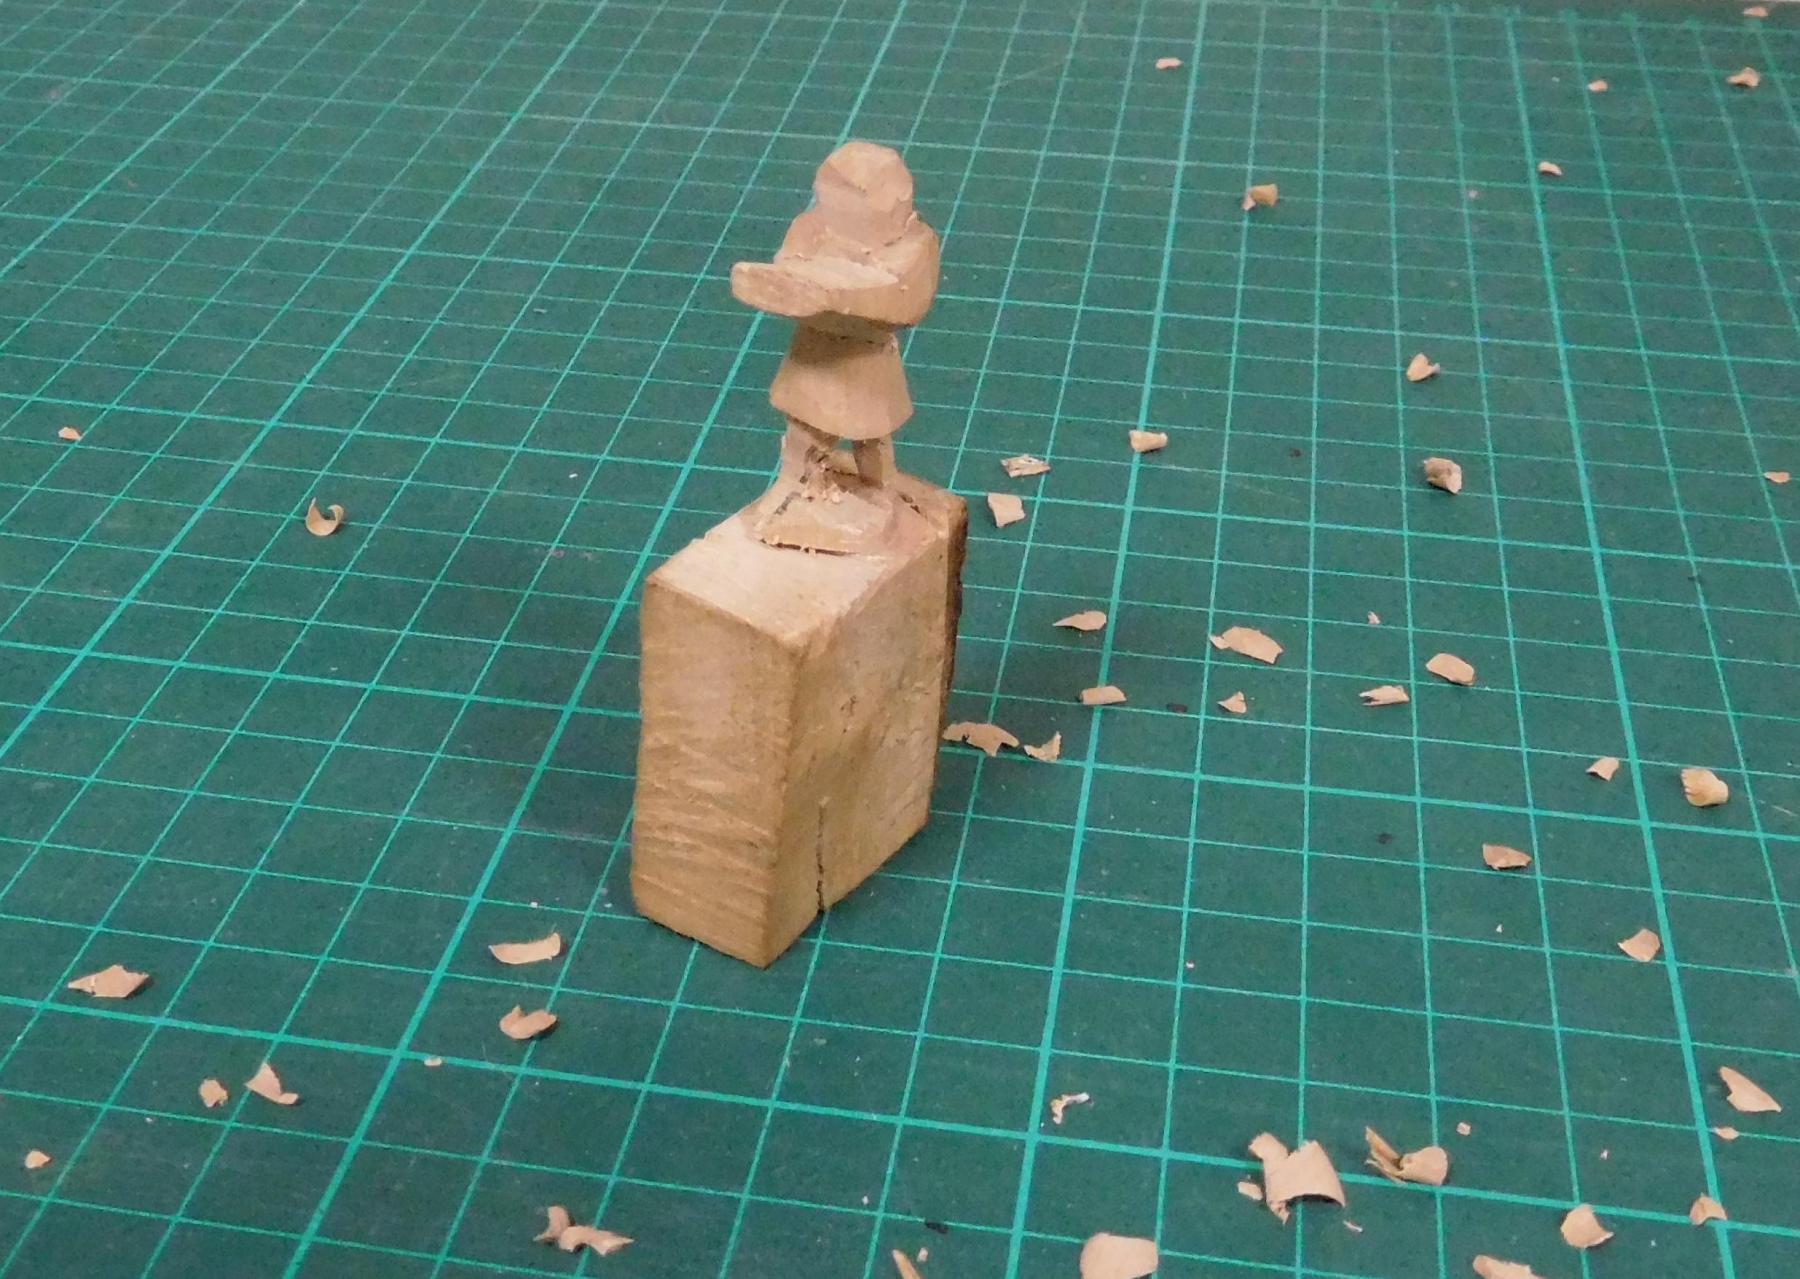
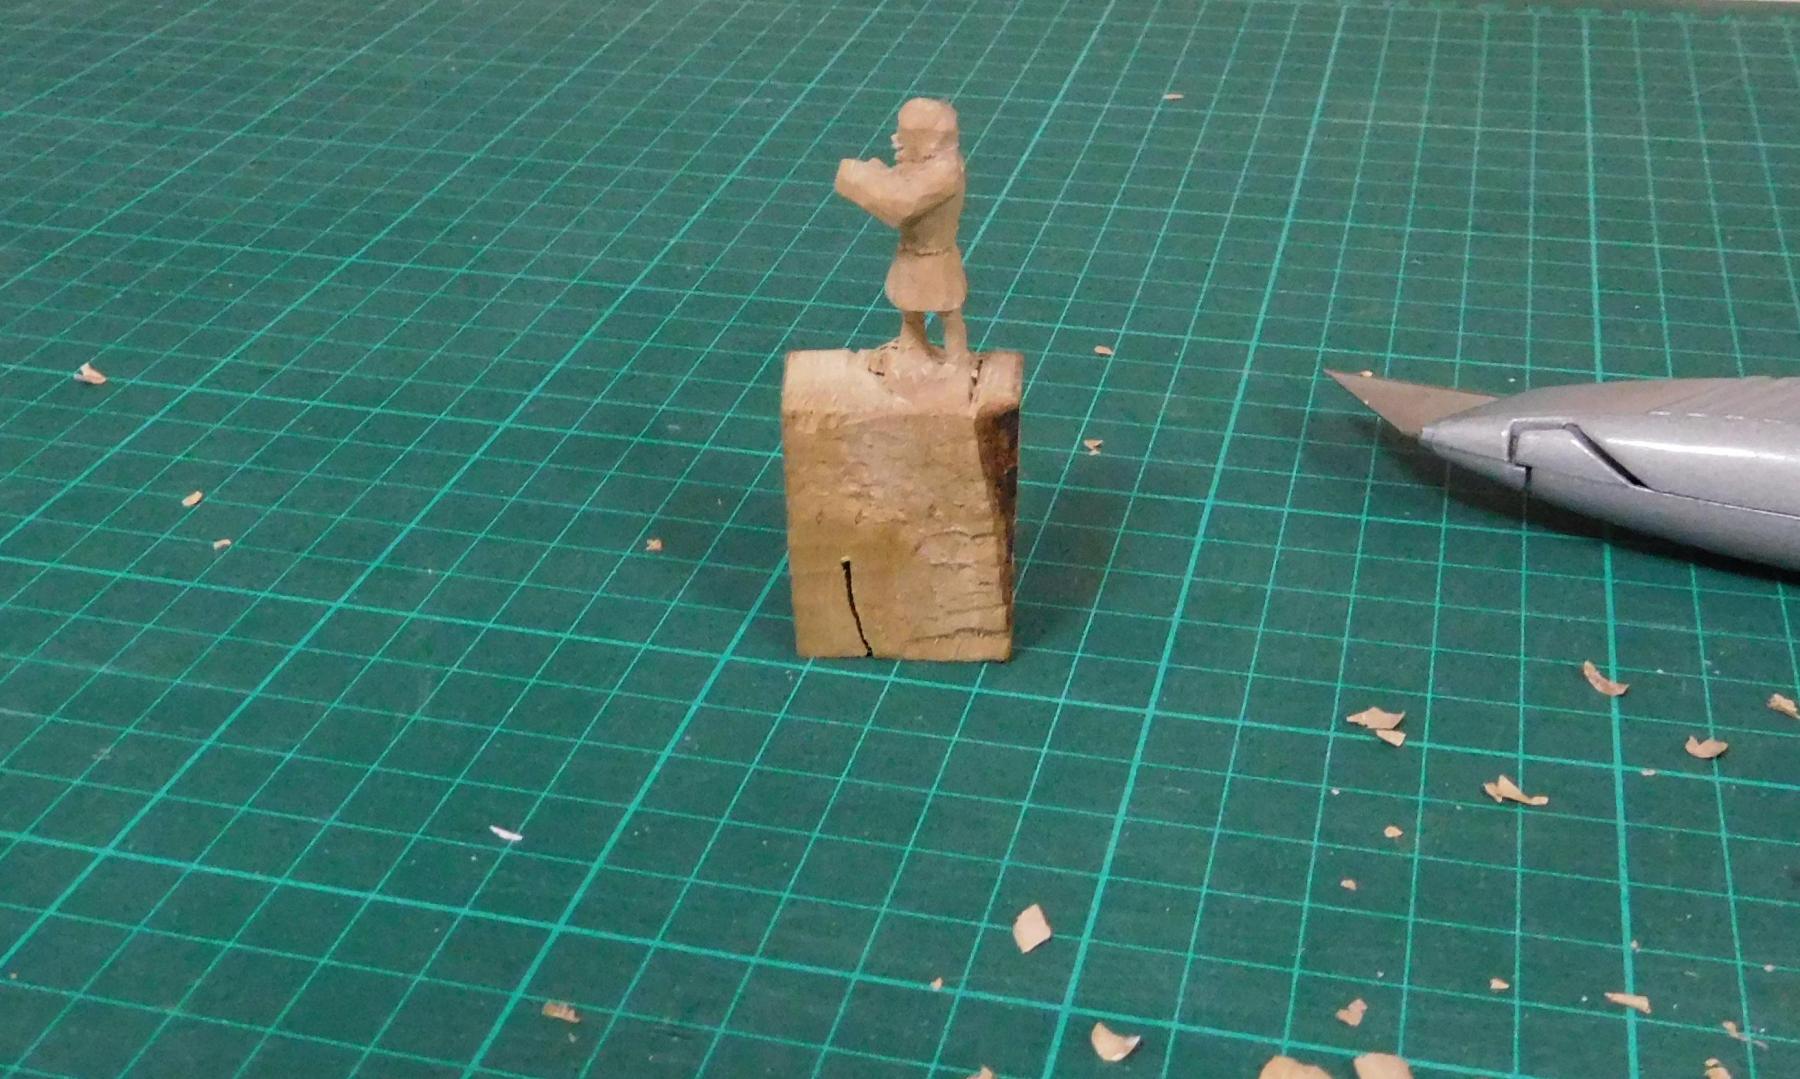
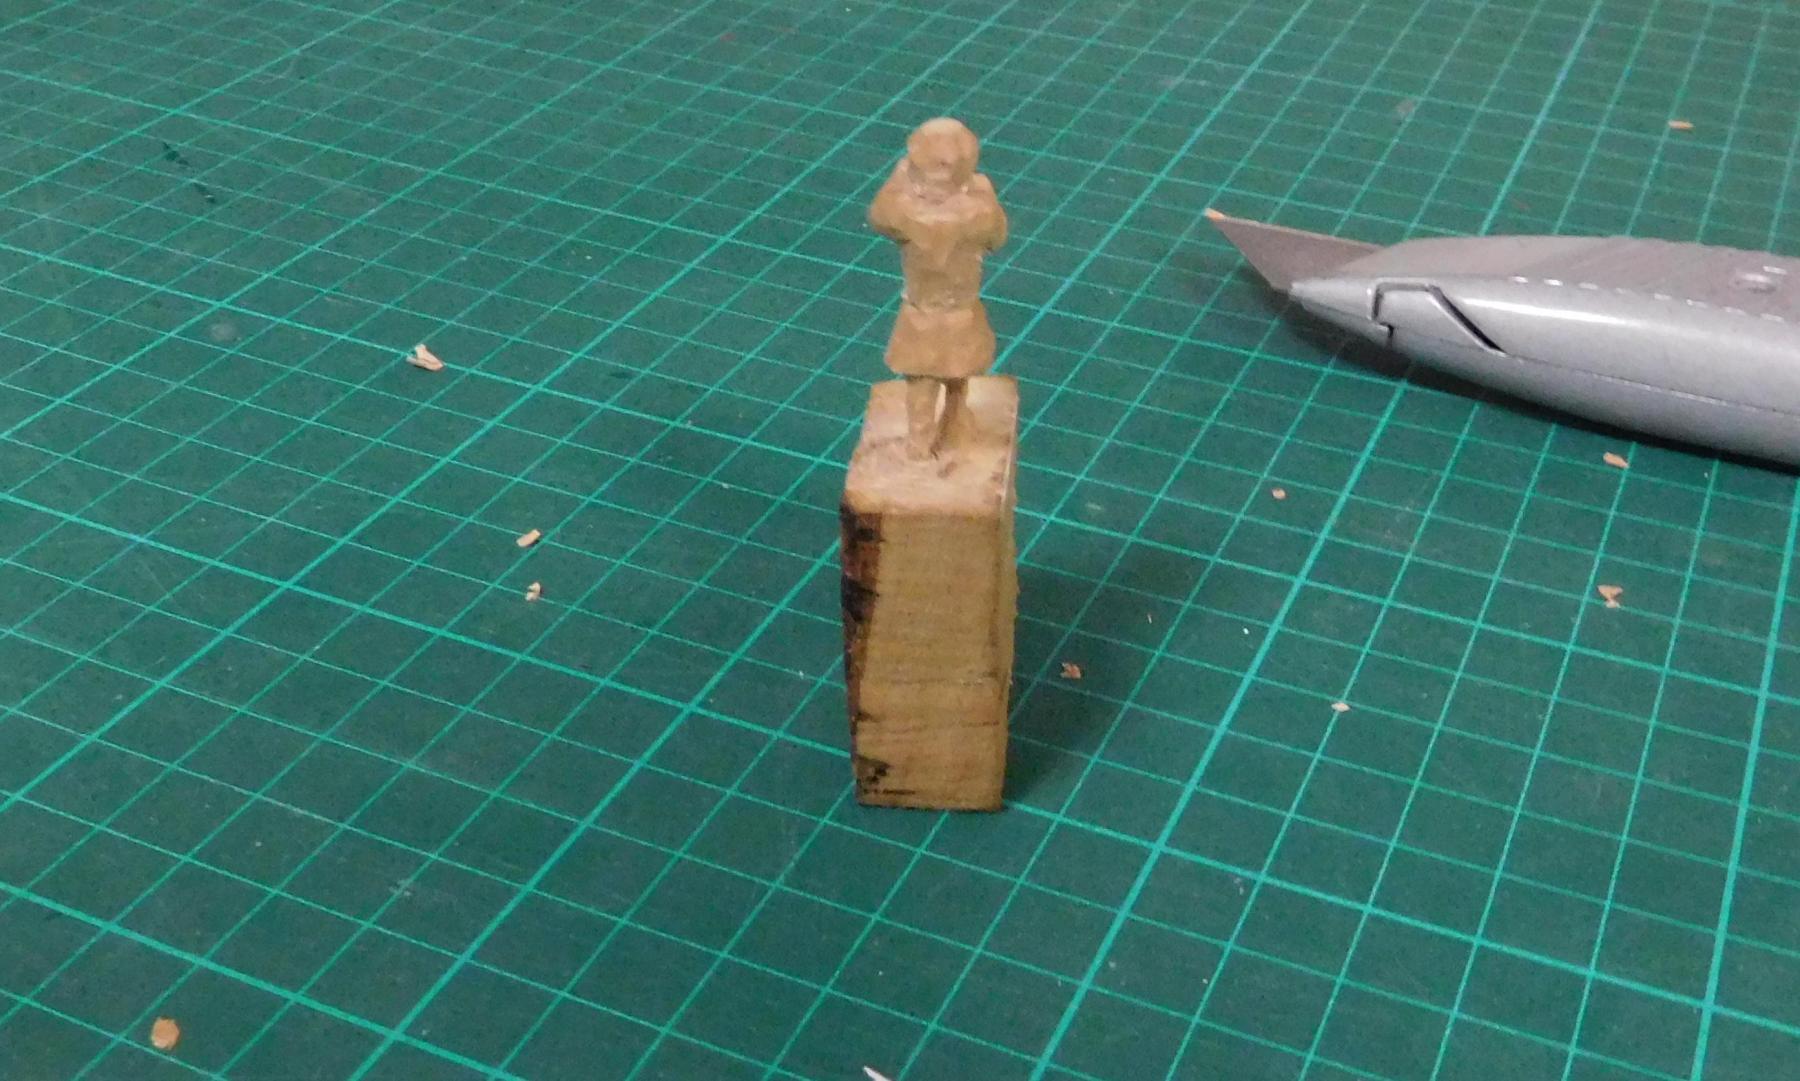
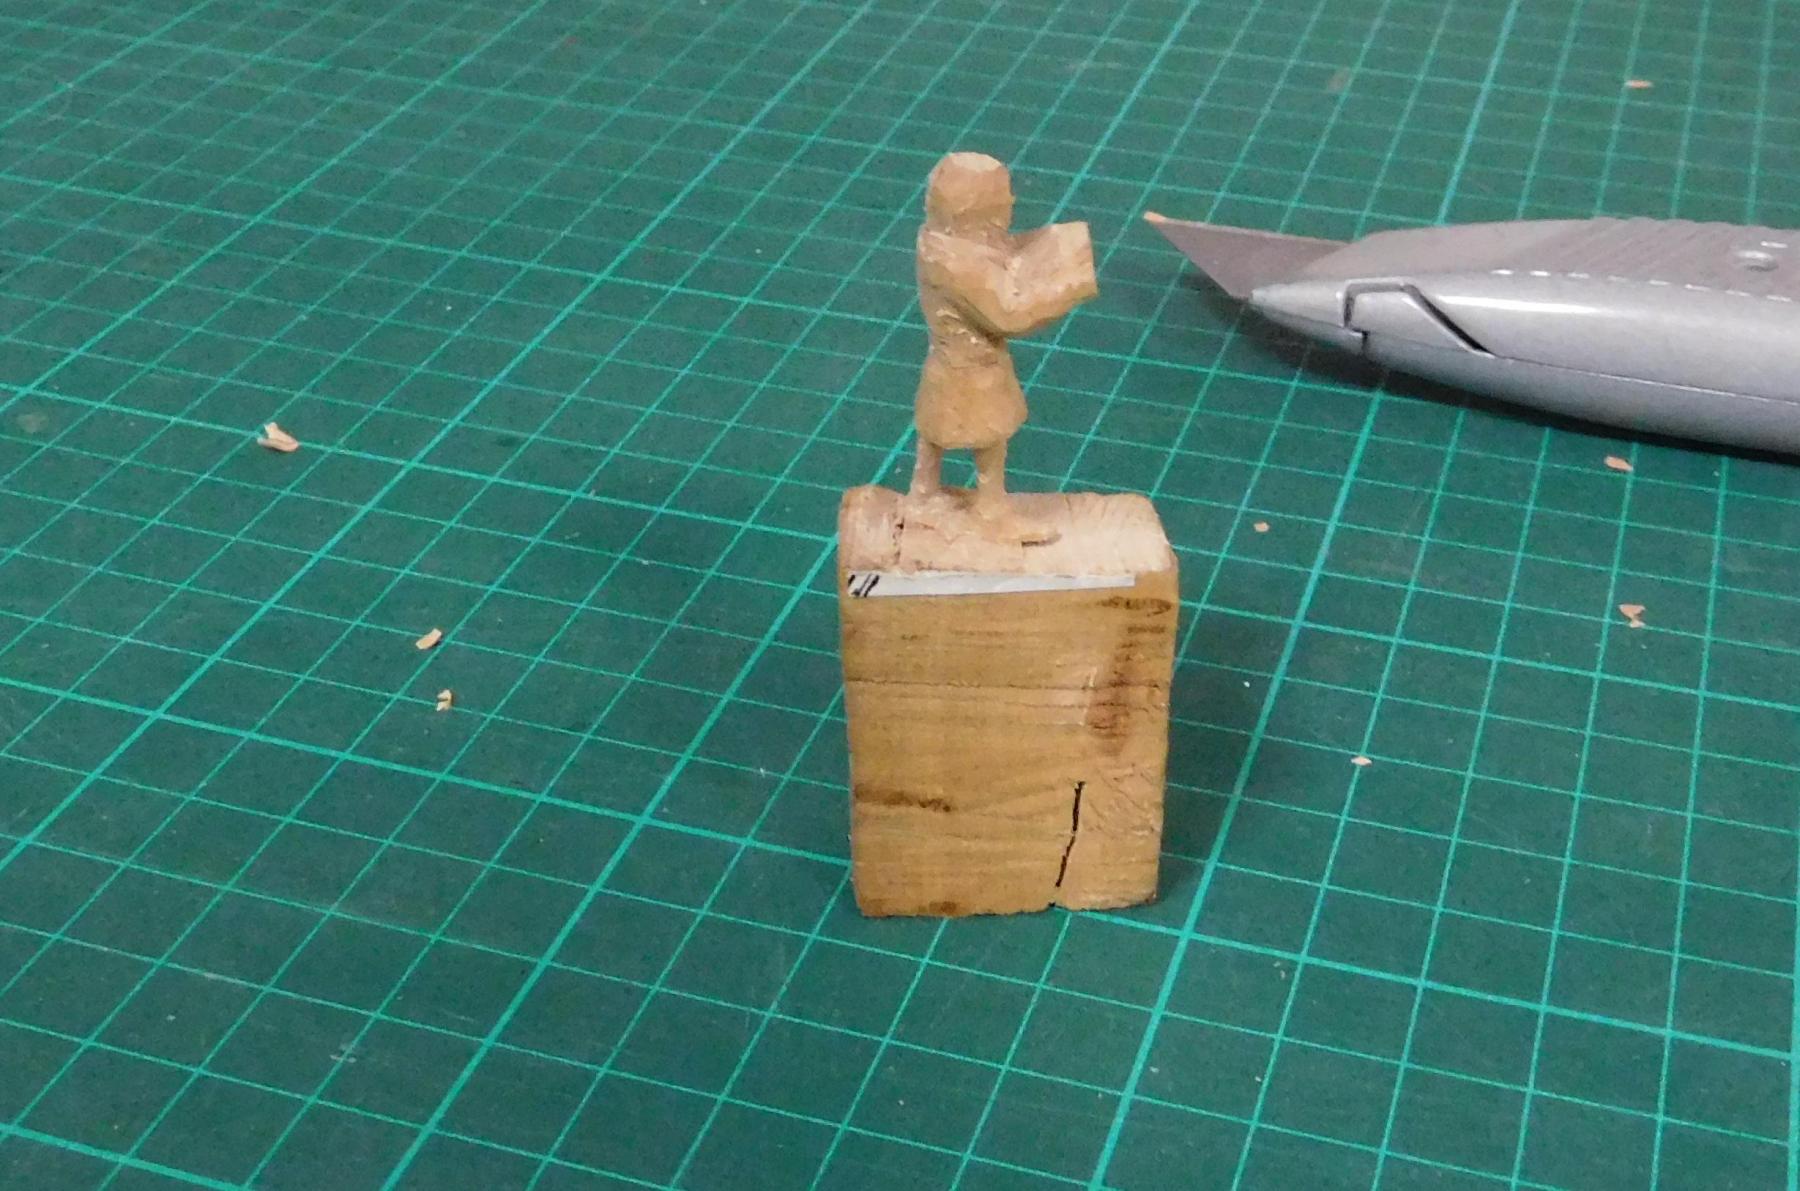
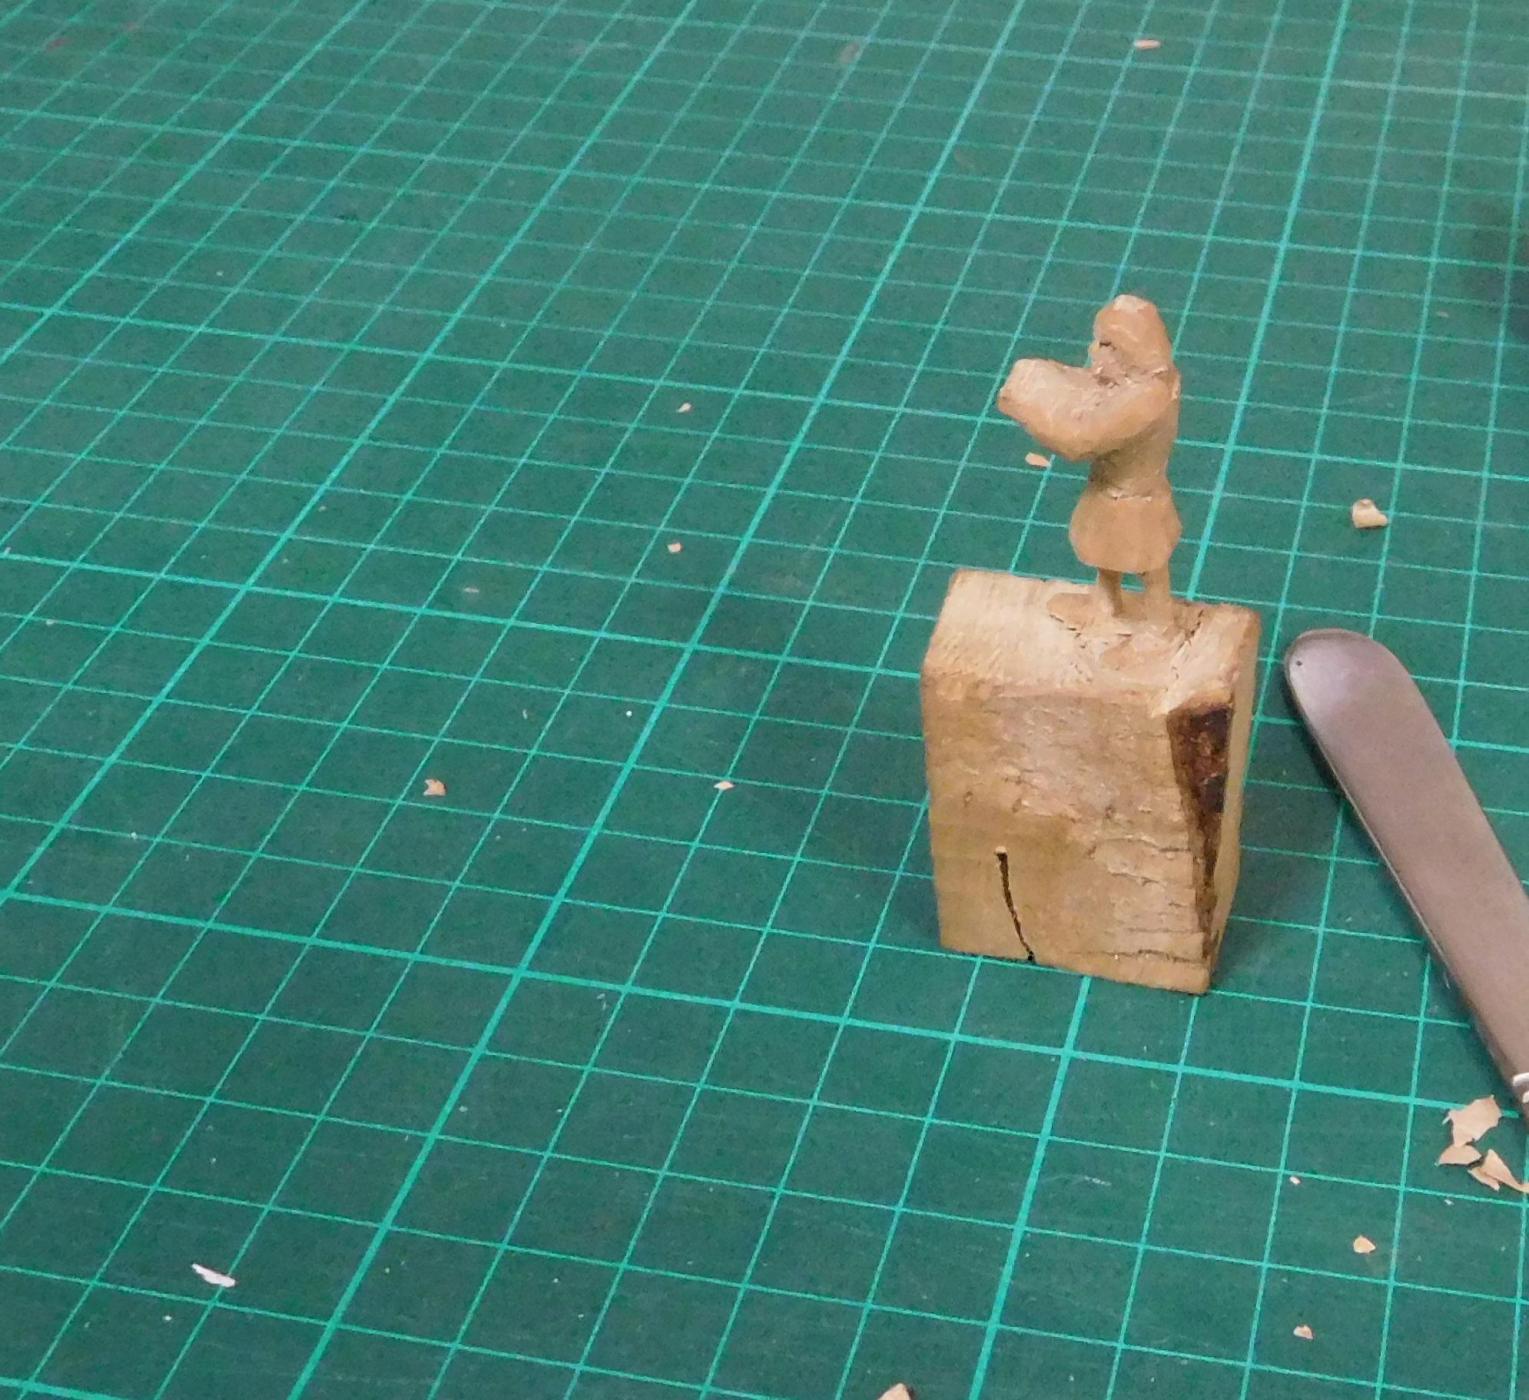
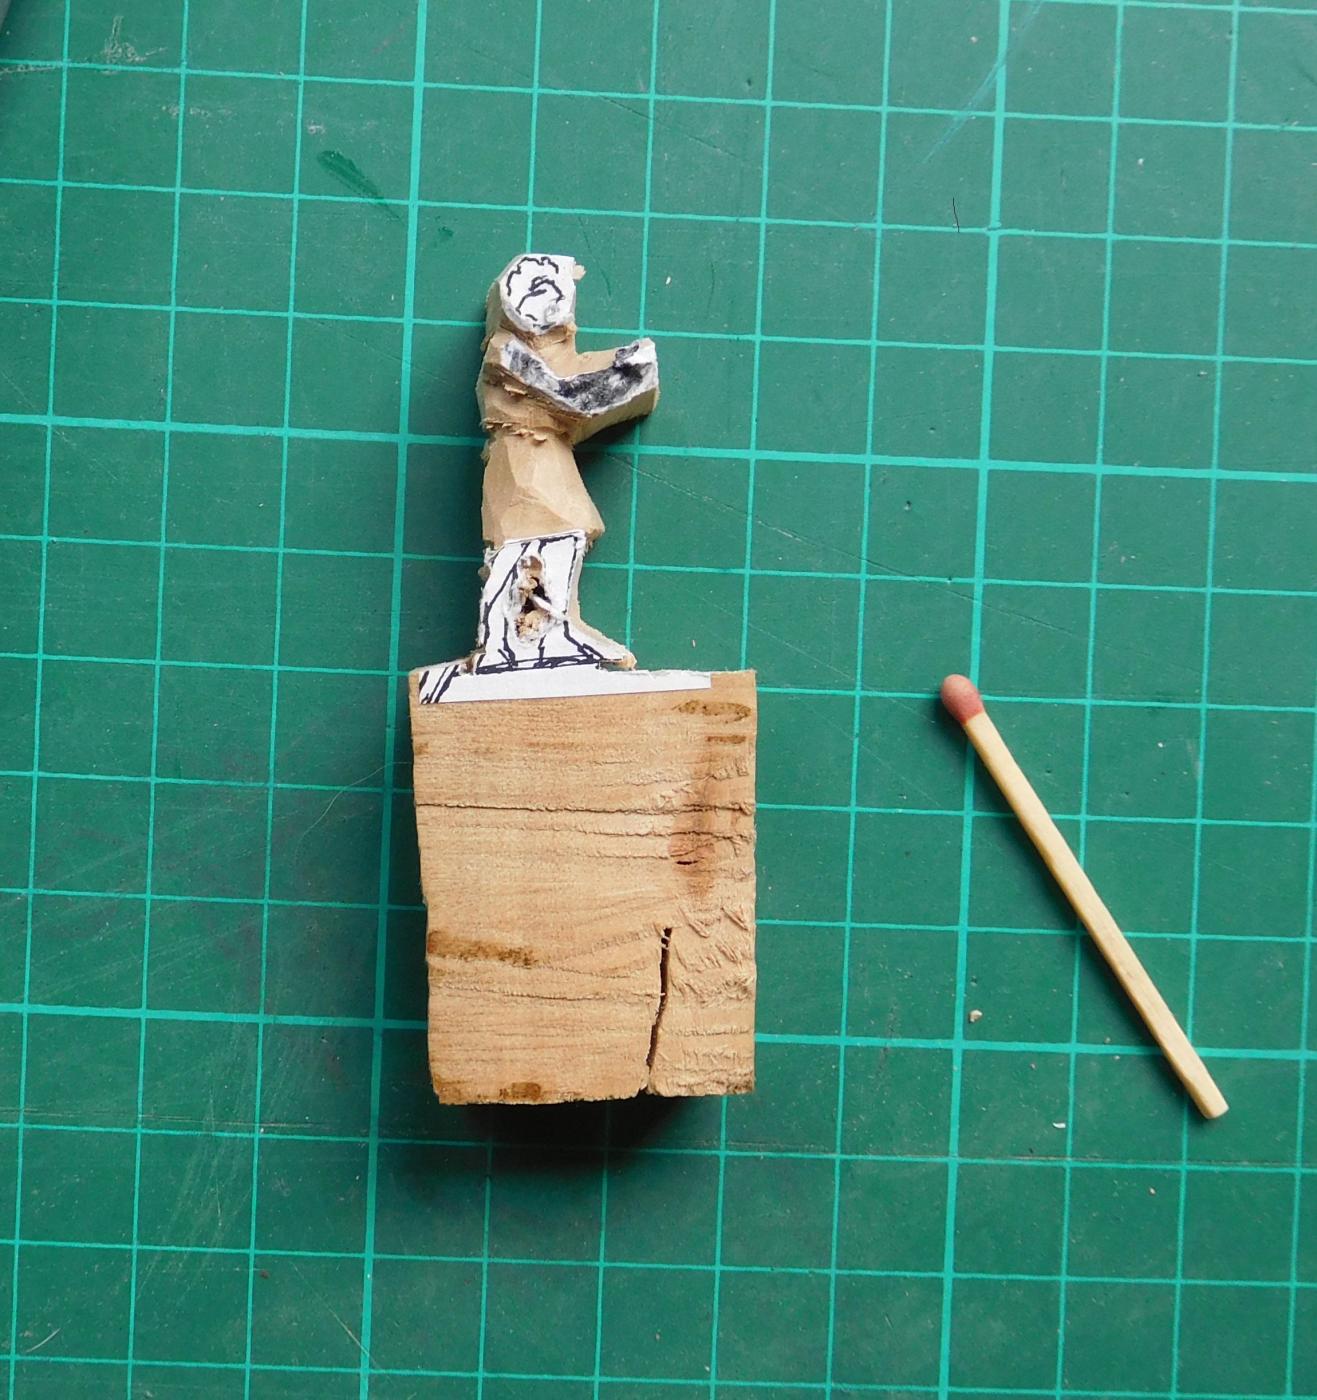
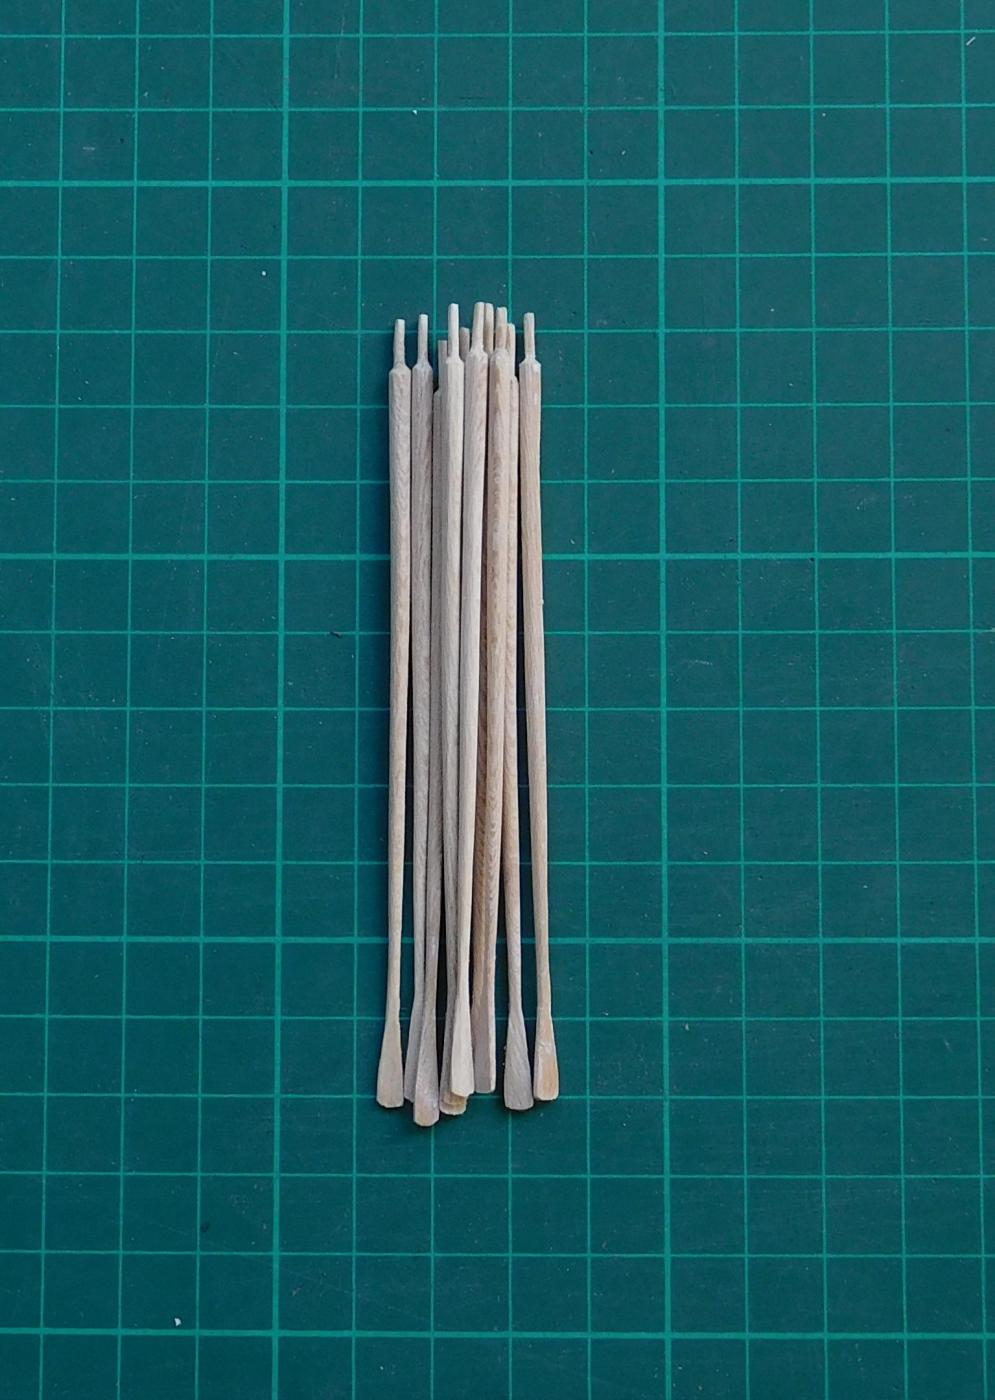
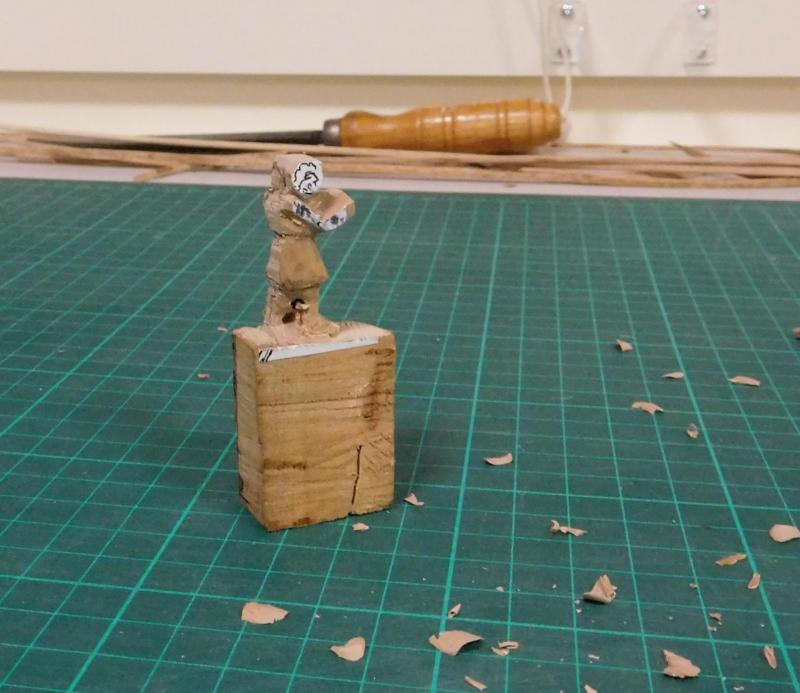
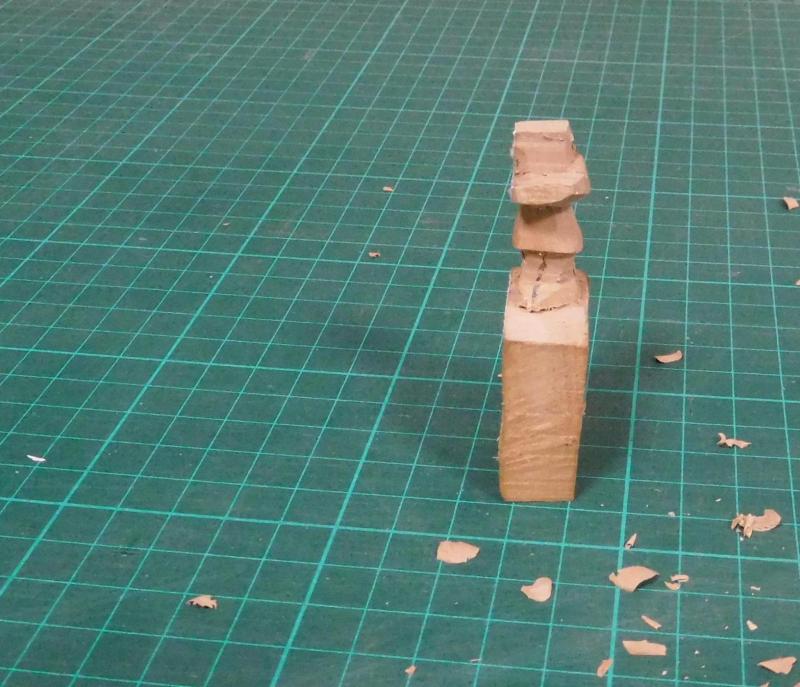
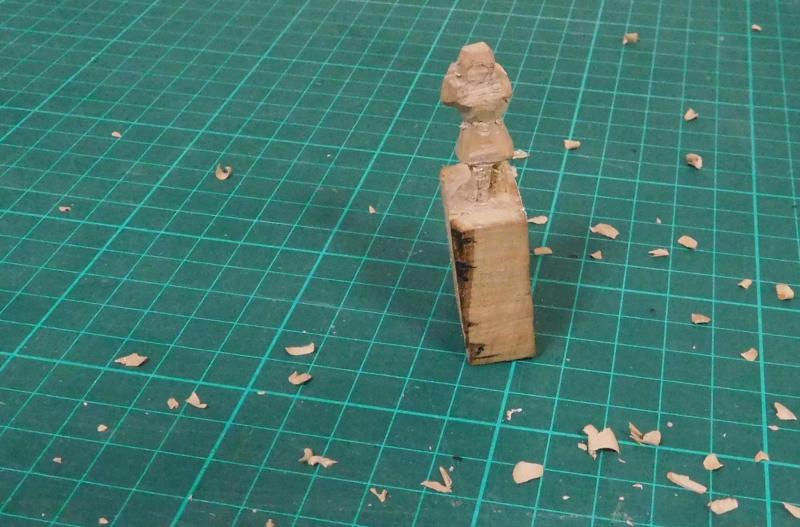
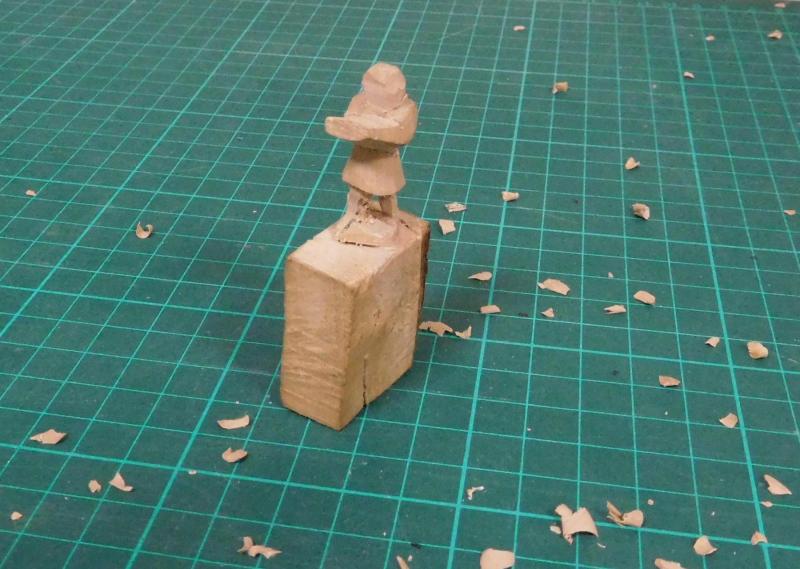
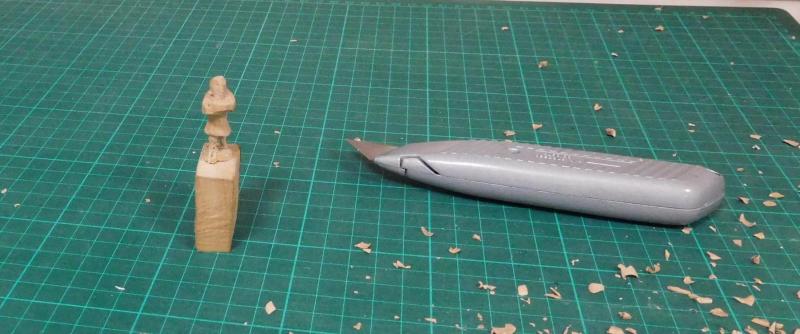
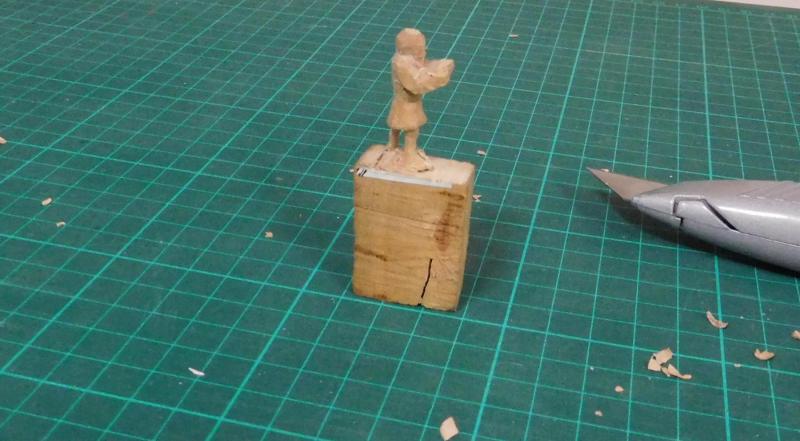
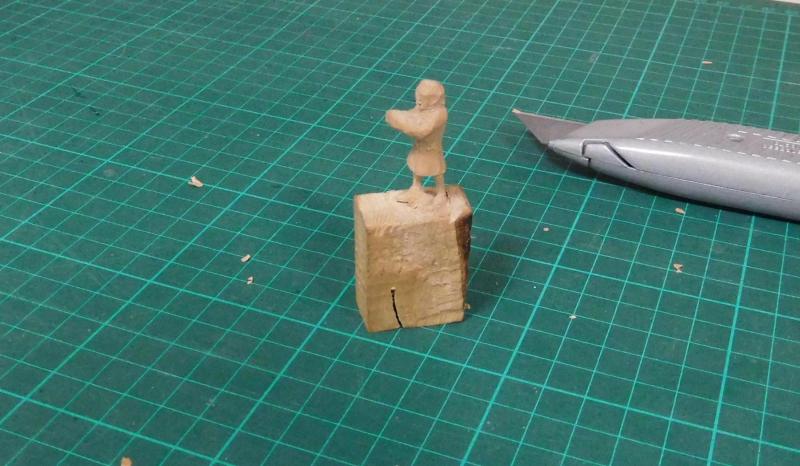
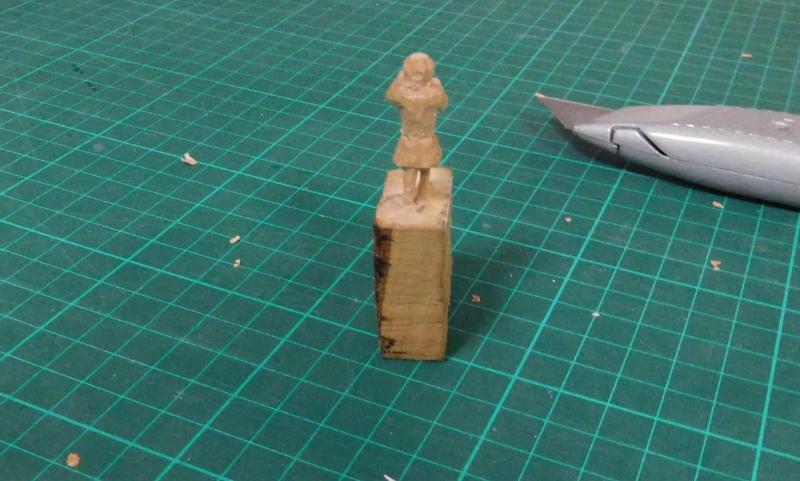
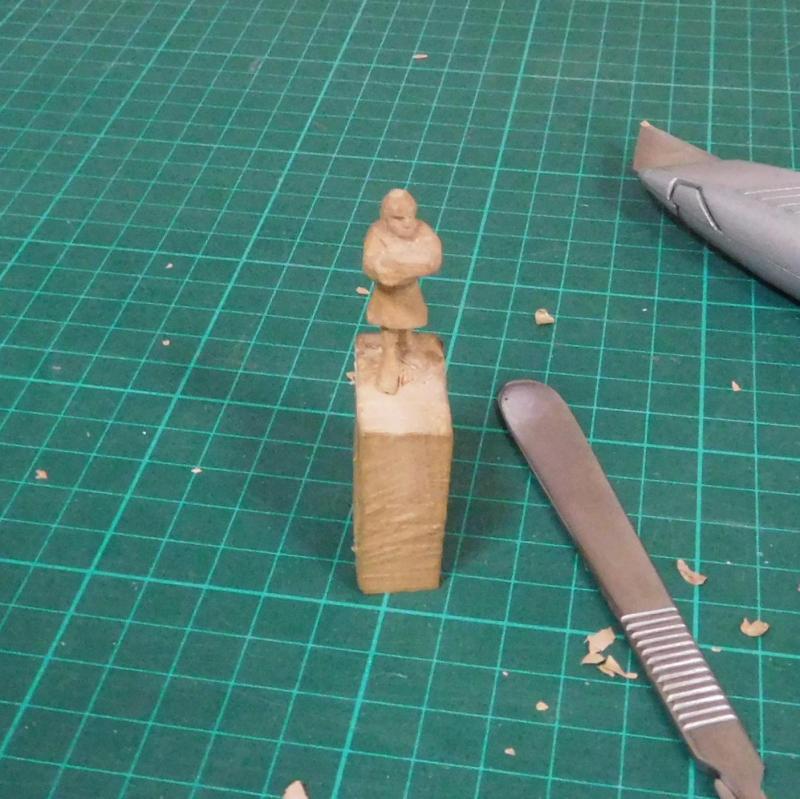
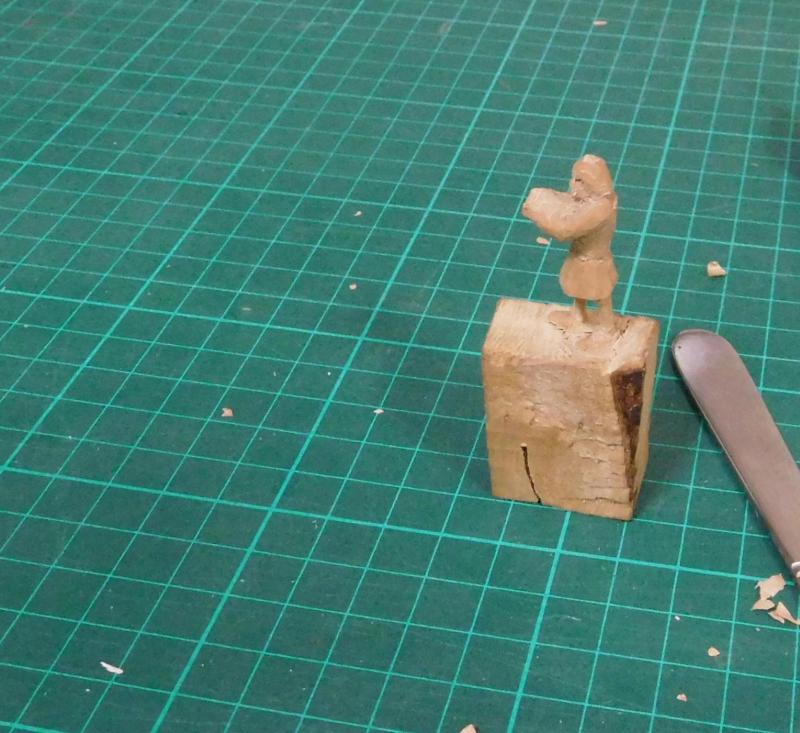
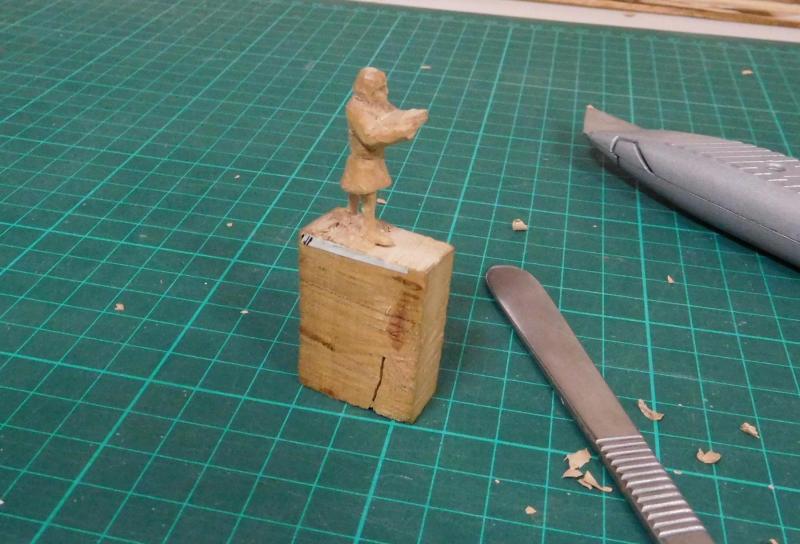
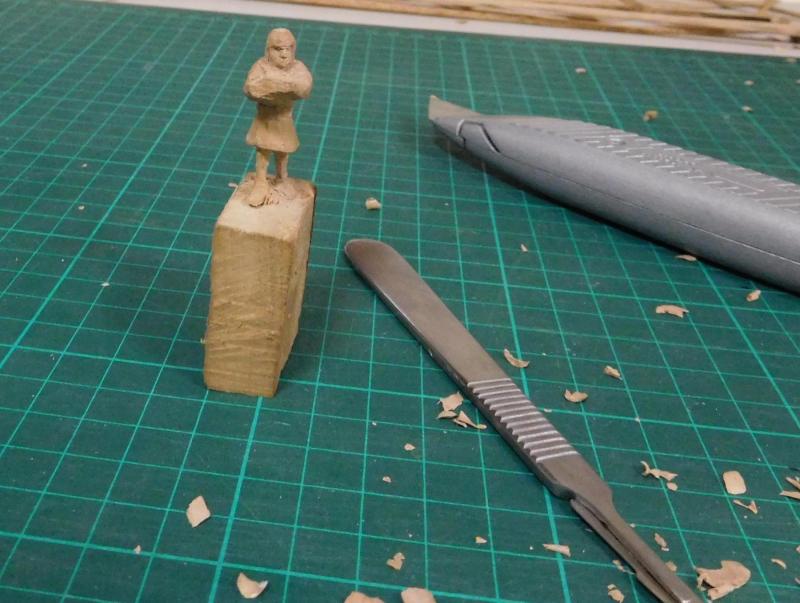
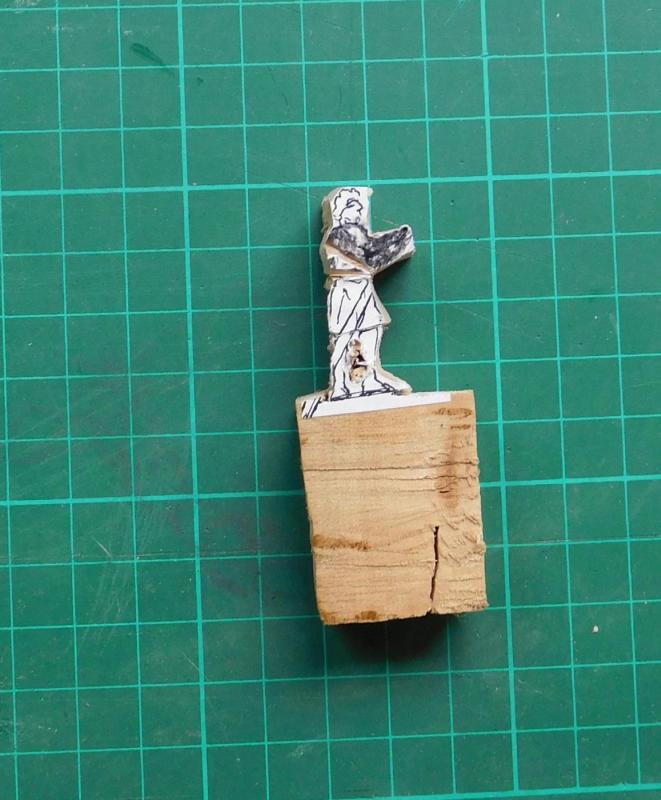
I'm mostly through the shaping of the steersman. He's made of pear wood, from a neighbour's tree. Starting out with a couple of photos from the previous post:starting by cutting back from the part nearest the surface (in this case his right arm and shoulder) and trimming back everything else behind it. The rest of it I did last night. I wasn't timing it, but I think it took somewhere between 2 and 3 hours. I continued the rough cutting to general shape, just getting rid of unnecessary wood.About this time I've roughly drawn the shape he should be, looking from the back. I also drilled a couple of holes to give me a start on separating his legs. Later I realised I'd been rather premature doing this, and in future I won't drill the holes till later in the process, when I've got the legs better defined. Then trimming further, gradually getting closer to the shape wanted, coming from the other side. Now roughly shaping the head. This is when I realised I shouldn't have drilled to separate the legs just yet - I got the hole off line and it came out too close to his left leg - I was worried I'd either stuffed it up completely or at least that he'd end up with his legs really spindly. Getting the head roughed out and defining the shape further. The legs are fairly well shaped now, but I'm still concerned I've made them too thin. Nearly there. Up to this point all the shaping has been done using the large Stanley knife. It's only when I get onto the fine stuff that I bring out my scalpel with the No. 11 blade. I far prefer a surgical scalpel to a craft knife - the blade stays in place and it doesn't have a screw thread to keep coming undone. Getting the feet carved out and shaping the shoes. And here he is. I've started with the scalpel in earnest, given him a face and hair. The legs turn out to be pretty good - you have to remember they wore hose (stockings), not trousers, so it's just like having a bare leg. The shoes are pretty much shaped. I've left the arms unfinished as until I know exactly where the steering oar and tiller will be in relation to the ship, and where he'll be standing, I'm not totally sure where his hands will have to be. He'll be holding the shaft of the steering oar in one hand and the tiller in the other. The final cutting for such things as folds in the clothes, hair texture etc will have to wait till I have better light. And then I'll file and sand him smooth with tiny rat-tail files and fine sandpaper. Unfortunately the photos didn't come out all that well. I think the problem is that I took the photos with too little light. Steven


-
Thanks, Glenn. The feeling is mutual. I wish I could do the precision work you do. I'm really not very good at that kind of thing, but carving comes pretty easily to me. Thanks for the offer. It'd be good to find out if anything's known about the rabbet. Steven
-
So, am I right in thinking the 'rivets' on the stack are just dimples and the tubes are really held together with solder? Otherwise I have no idea how you could rivet at such a fine scale, with so little room to work in. I look forward to the PM. I've been fascinated by the Serce Limani ship since I came across a report on her in an old National Geographic maybe 20 years ago. At the time I was more interested in the cargo and artefacts - 11th century glassware, pottery, tools and weapons - I was doing Byzantine re-enactment at the time and I made pottery copies of a couple of the bowls and a pretty little jug. Nowadays I'm much more interested in the ship itself. Back to the subject at hand . . .(sorry for the derail). Steven
-
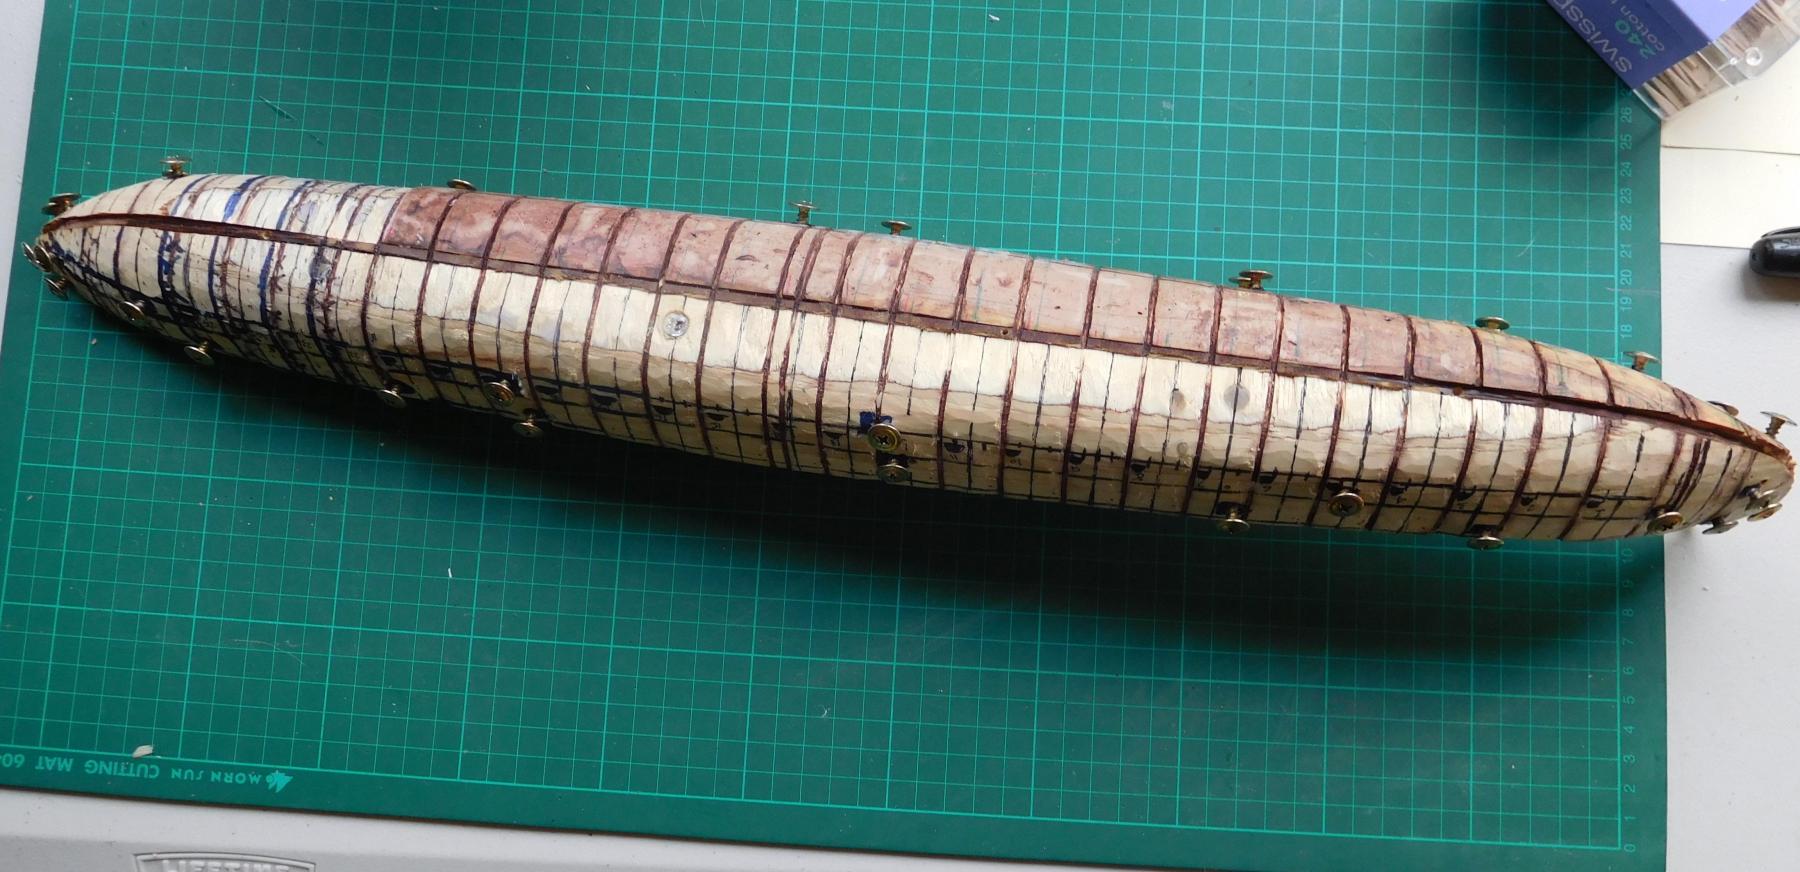
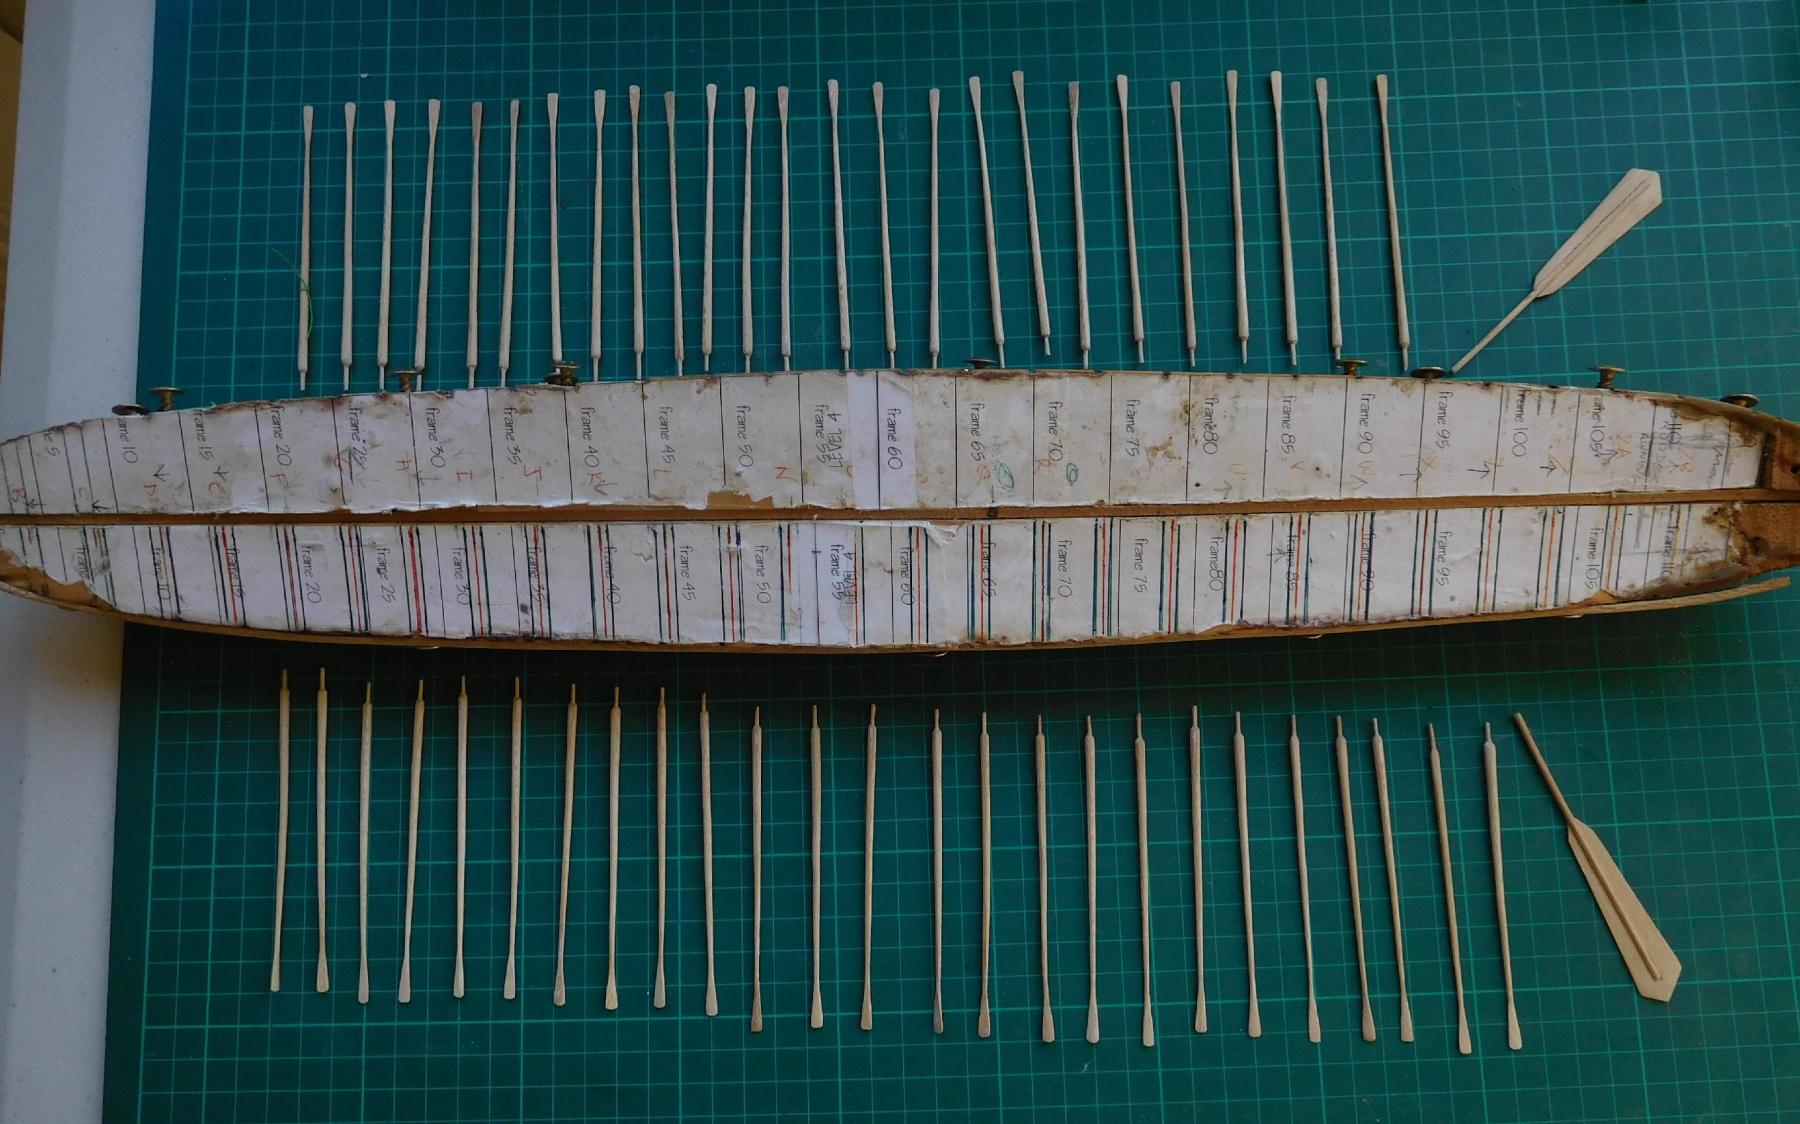
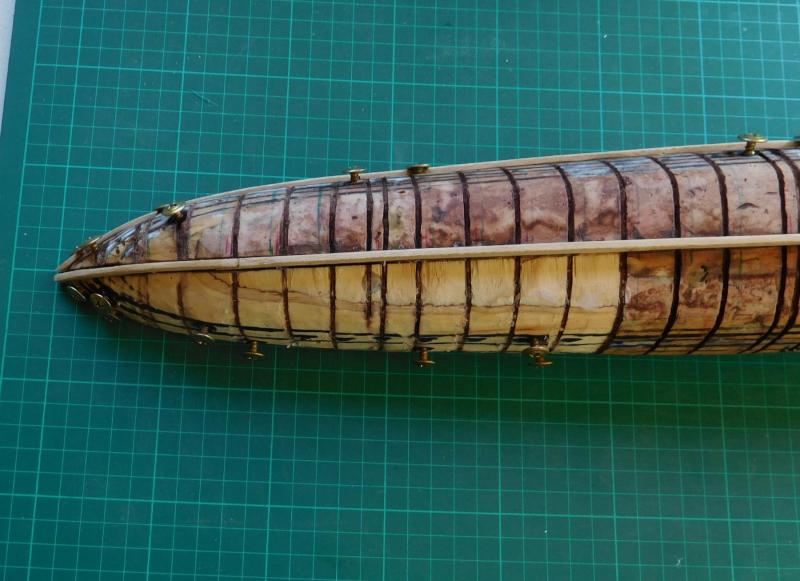
Still trimming the grooves out of the plug. It's a long job. I'm a bit over half way through (the lighter timber is the bit I've trimmed). I discovered a mistake I'd made earlier in placing the frames nearest the bow and had to reconfigure my layout. Took awhile to figure out what was wrong, but I took a break and came back fresh and worked out what to do. The plug isn't very pretty, though, and I don't have the precision I see on other people's models. But I think it should turn out well in the long run - the hull itself should be fine, and then I can retire the plug. As I mentioned before, there are 124 frames in all. I'm not going to place all of them on at once - just too complicated - instead I'll be putting on every second one and planking over that, and adding the other 62 once that's done. In the meantime as a break from trimming the plug (it does get very boring) I've started carving the new helmsman (note I'm still using that gigantic matchstick).


-
Uniforms of the Royal Navy and Marines circa 1724?
Louie da fly replied to timboat's topic in Nautical/Naval History
And some more - here from a couple of decades before your time period, and here from a couple of decades after. They're not all that different, and maybe you can interpolate the details and come up with something appropriate for the time in between. Are these for a ship you're building? Steven -
Beautifully precise work on the stack. I am gobsmacked at the quality of your work. Putting the flange on the wrong side has such huge consequences from what would have been a small moment of inattention. Somehow it makes me feel better about the mistakes I make to know even the best of us can do the same. And of course you've fixed it and are back on track. Such a magnificent model. Steven
-
Uniforms of the Royal Navy and Marines circa 1724?
Louie da fly replied to timboat's topic in Nautical/Naval History
You're after sailors and marines rather than officers? Unfortunately they usually don't get much notice from contemporary sources - only the Important People do. But you might try looking for contemporary paintings of naval actions and see if any have scenes on-deck, rather than of the overall action (something like an earlier version of the scene on the deck of the Victory at Trafalgar). You might find something worthwhile either here or in the links from it, though I think most of them are too late for what you have in mind. The top picture here is of a midshipman from 1731. That's the closest I've been able to get so far. Here's a site that has contemporary pictures of buccaneers, filibustiers etc, many of whom are of the "lower classes". Mostly French, I'm afraid, but might help. And another here which could be of use, though they cover a wide range of dates. And a site with a couple of pictures of the 17th-18th century uniforms of the Royal Marines (Prince George of Denmark was married to Queen Anne of Britain). Steven -
Ancient Tireme being maintained by the Greek Navy
Louie da fly replied to dgbot's topic in Nautical/Naval History
Not a problem, Robin. I doubt I'll ever get to see her, but it's wonderful just knowing she exists (and is still going out once in a while). Steven -
PRINS WILLEM by juzek
Louie da fly replied to juzek's topic in - Build logs for subjects built 1501 - 1750
A very impressive build. And that carving is exquisite. Steven -
Ancient Tireme being maintained by the Greek Navy
Louie da fly replied to dgbot's topic in Nautical/Naval History
Oh, she was out on the water just recently. One of our members got to be part of the crew. And they plan to do it again next year, I think. Steven -
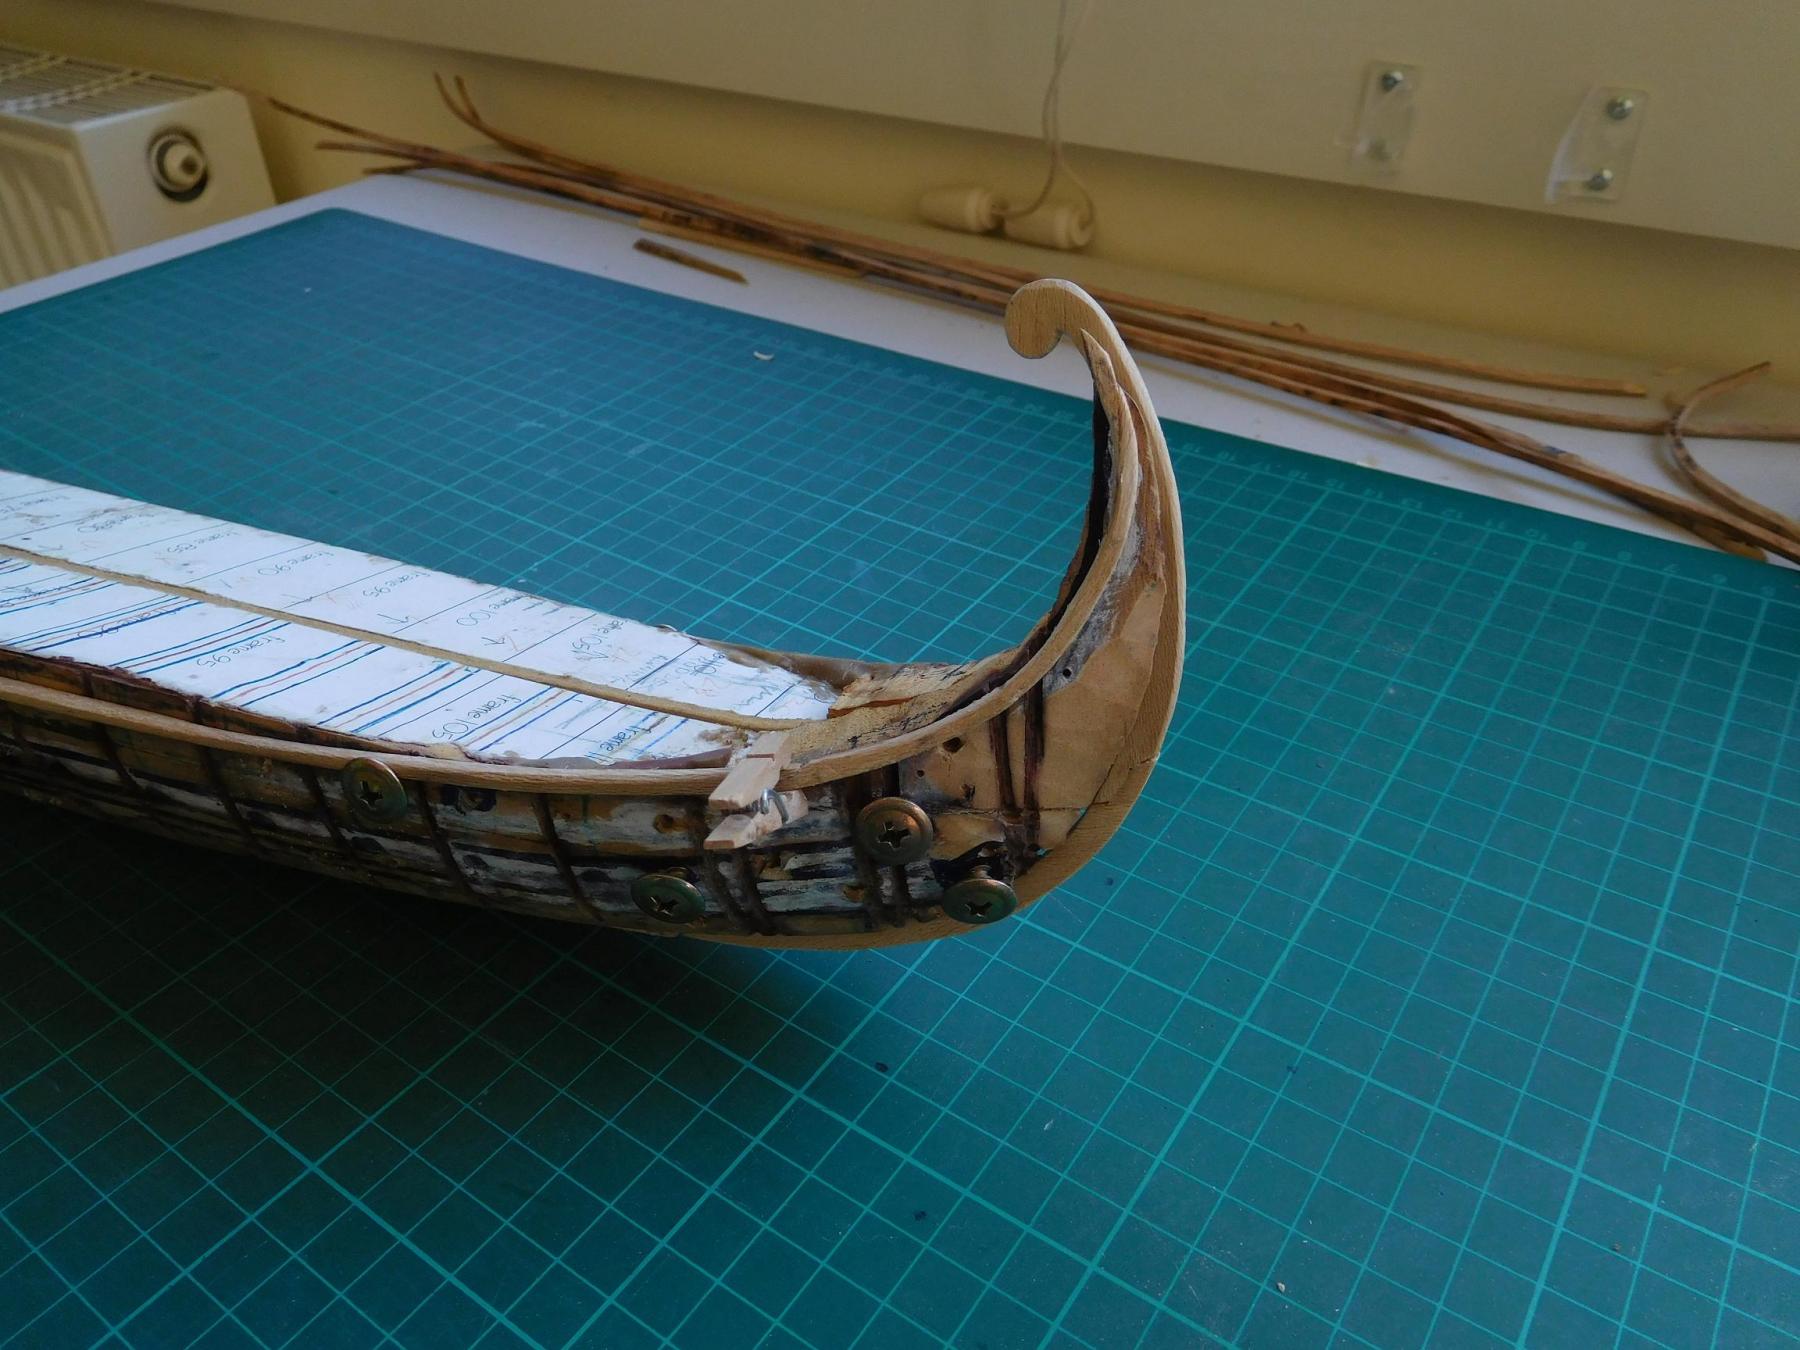
Thanks for the congrats, Druxey. Yes, I thought it would have to be rebated, but I just didn't have any information or experience, except for a vague memory of a stempost from a Viking ship with rebates carved into it for the ends of the clinker planks. But different technique, different part of the world. Dick, unfortunately as far as I'm aware no stempost or sternpost survived from any of the Yenikapi galleys (unless Glenn knows of some . . . ?) But they've definitely found at least one keel with a rebate. Anyhow, I think I will extend the rebate into the stem and sternposts, just on general principles. Steven
-
I doubt anybody ever measured the Golden Hind's length - I believe all those figures would be rough estimates, and probably the tunnage is too. I agree with your statement . Let Mathew Baker be your guide and use your best judgment and you'll probably end up with a model closer to the real thing than anybody else has ever built, even if all the small details are different. Steven
- 756 replies
-
- 4
-

-
- galleon
- golden hind
- (and 2 more)
-
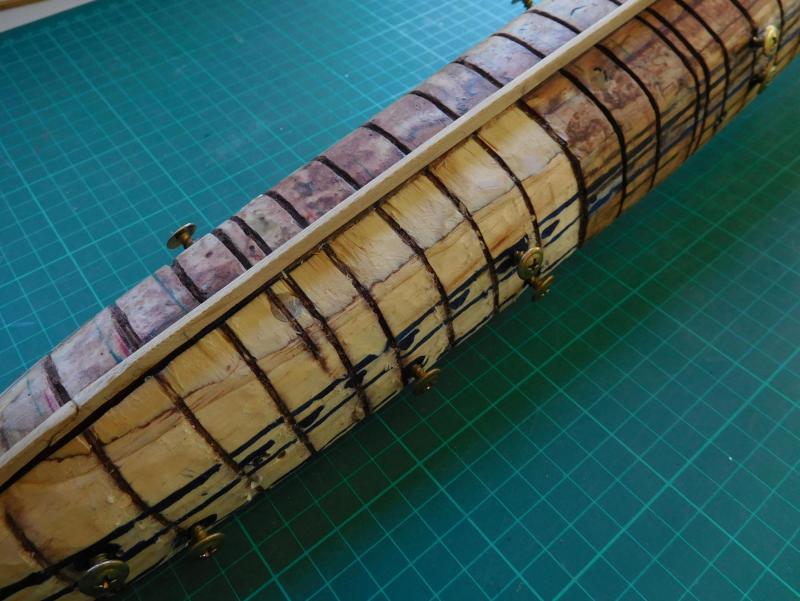
Today's a red letter day. I finally finished the last of the upper bank oars! Here are the final ten And here they are roughly in place - plus the steering oars. The second last oar was very frustrating - I'd got it trimmed to shape and was starting the rounding process, when SNAP! There was a knot right where the blade met the shaft. I tried gluing it back together, but it just wasn't strong enough. So I had to make another oar. Very annoying. I've noticed about 5 of the oars have a bit of a bow in them, and I'm hoping to be able to take it our with heat bending - but I'll have to be careful. I've also bent the tailpieces of the wales into their final shape - this is the port one - the starboard one is bent to shape but not smoothed off yet. I've also started cutting the plug back so the frames don't get stuck in the grooves when it's time to remove the model from the plug. The lighter coloured wood is what I've done so far. Surprisingly easy to do with a stanley knife. And as I cut away a section I re-draw that part of the guidelines for the wales and the locations of the oarports (in blue). It's not neat, but it does the job, and the hull is the important thing, not the plug. And I've also started smoothing off the wales, the keel and the sternpost/"tail" in preparation for putting everything together. By the way, I have a question - Can anybody let me know if the rebate/rabbet for the garboard strake is supposed to continue into the stempost and sternpost? Both stempost and sternpost on this model are somewhat unusual and I'm not sure what I'm supposed to do there. Steven

-
Hi Dan, Have you seen Glenn's Serce Limani model here? Such similarities in the lines of the ships, and something like 9 centuries apart.
-
That is so beautiful, Glenn. And your usual exquisite workmanship. Interesting with the masts coming up through the hatches like that.
-
Glenn, as usual a brilliant piece of work. By the way, is there any chance you'll be putting up a build log of the Serce Limani ship, or is that impossible because it's for work rather than play?
-
Very beautiful, very elegant. I'm not sure your future trireme will be as pretty. Steven
- 473 replies
-
- 5
-
-
- greek bireme
- dusek
- (and 1 more)
-
PRINS WILLEM by juzek
Louie da fly replied to juzek's topic in - Build logs for subjects built 1501 - 1750
Is that a piece of mirror glass you used as a scraper? Nice idea. And the kitchen scourer for the final finish - I like it. Steven -
I couldn't agree more. Every time I try to rush something or work to a deadline - even if it's only a deadline I've set myself - I end up making mistakes and have to throw stuff away because it's not up to standard. By the time next year's show comes around you'll probably have completed the Mary Rose to your own satisfaction and feel good about putting her on show. Steven
-
There are 16th century drawings of a lateen yard being pulled around the mast on a galley - by Rafaello, if I remember rightly. It also shows the shrouds on the leeward side loosened to allow the sail to draw properly. But that was the Mediterranean - no ratlines in the shrouds. I doubt an English ship would have done the same. Lovely model of the Mary Rose, by the way, Bear. How did she do in the annual contest? Steven