Louie da fly
-
Posts
7,993 -
Joined
-
Last visited
Content Type
Profiles
Forums
Gallery
Events
Everything posted by Louie da fly
-
 A very impressive build, particularly from card. Such a strange stern the fluits had. Steven
 -
PRINS WILLEM by juzek
Louie da fly replied to juzek's topic in - Build logs for subjects built 1501 - 1750
This seems to be a very unconventional build technique, but it works brilliantly! Nice to see new and unusual ideas. I'm very impressed. And beautifully precise work. Steven -
That's for sure. And I was feeling bad because I have to make 100. You are a glutton for punishment, Robin. Steven
- 473 replies
-
- 4
-

-
- greek bireme
- dusek
- (and 1 more)
-
Thanks for all the likes, everybody. I keep meaning to thank people in my posts and then forgetting. They are much appreciated. Steven
-
That's a very attractive colour for a very attractive vessel. How many of those wales does it have sticking out the back? Steven
- 473 replies
-
- 4
-
-
- greek bireme
- dusek
- (and 1 more)
-
Yes, but why are the crewmen naked? Is it true what they say about the ancient Romans? Steven
-
PRINS WILLEM by juzek
Louie da fly replied to juzek's topic in - Build logs for subjects built 1501 - 1750
A very clever construction method - a 3-piece plug and staples! I take my hat off to you, Juzek. Steven -
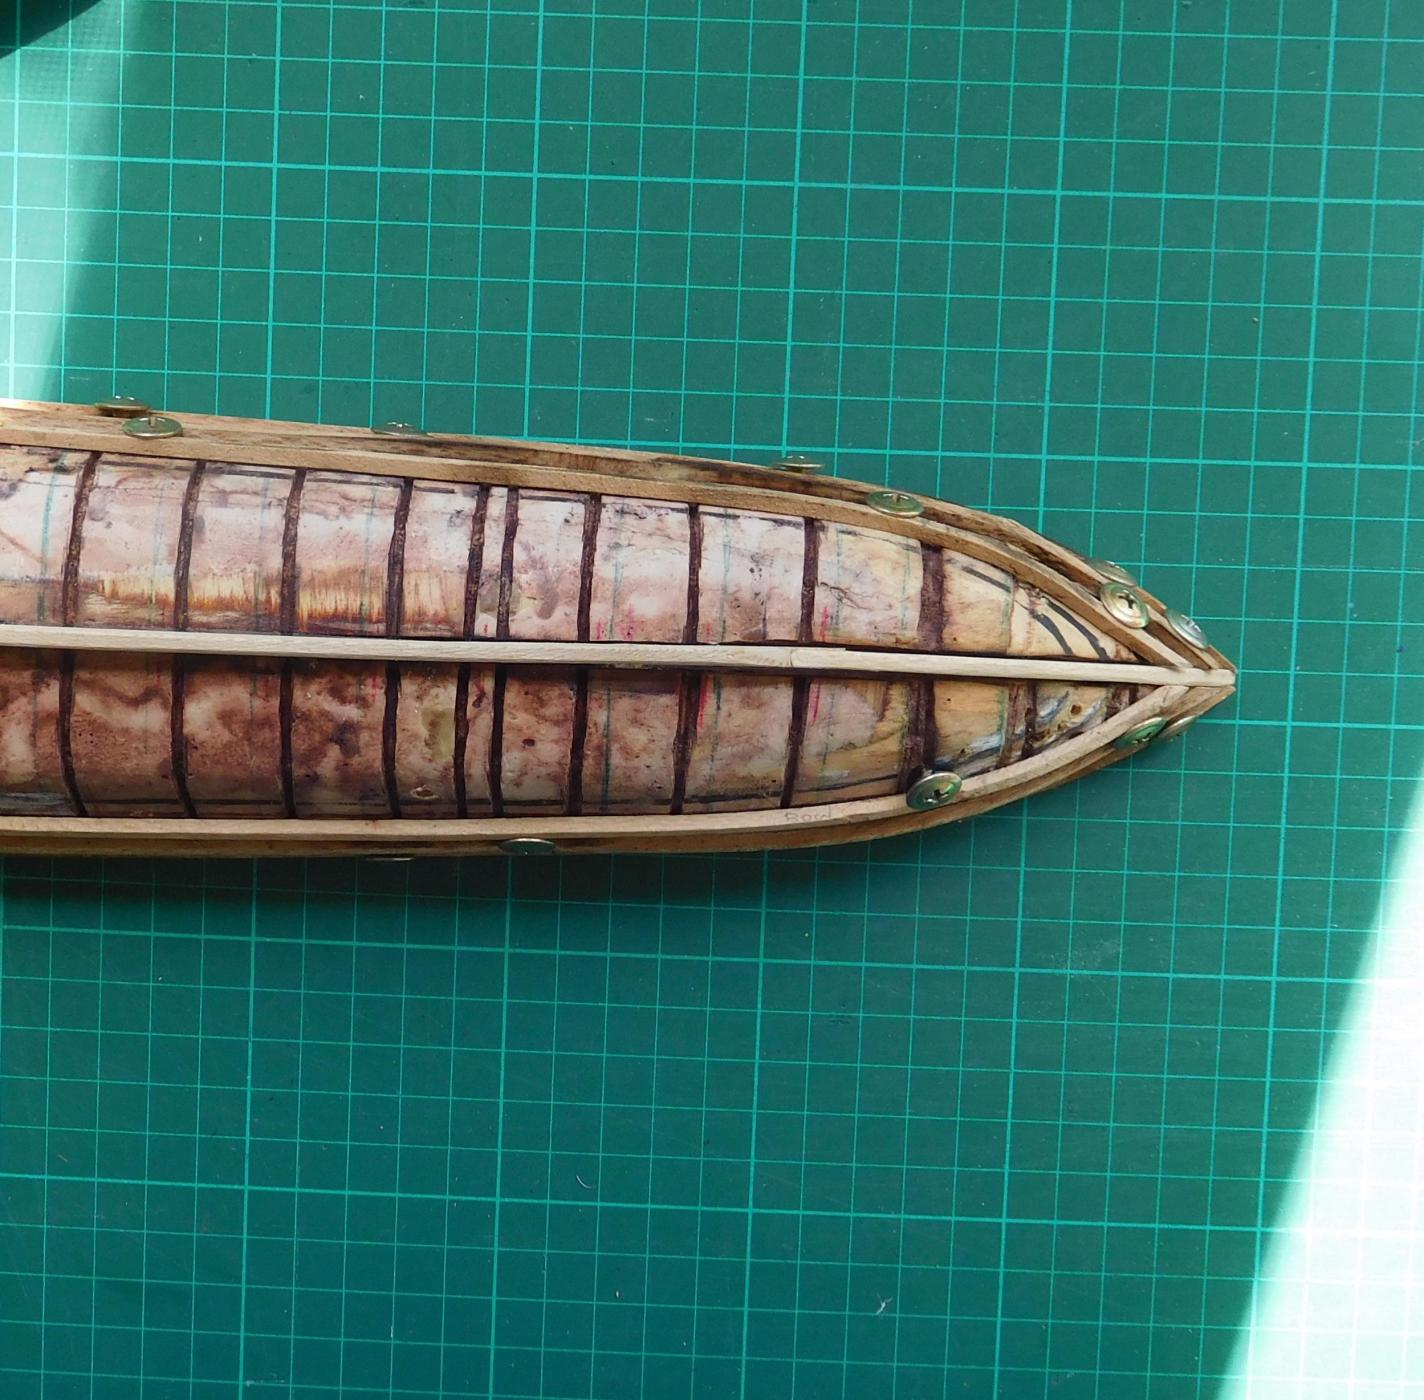
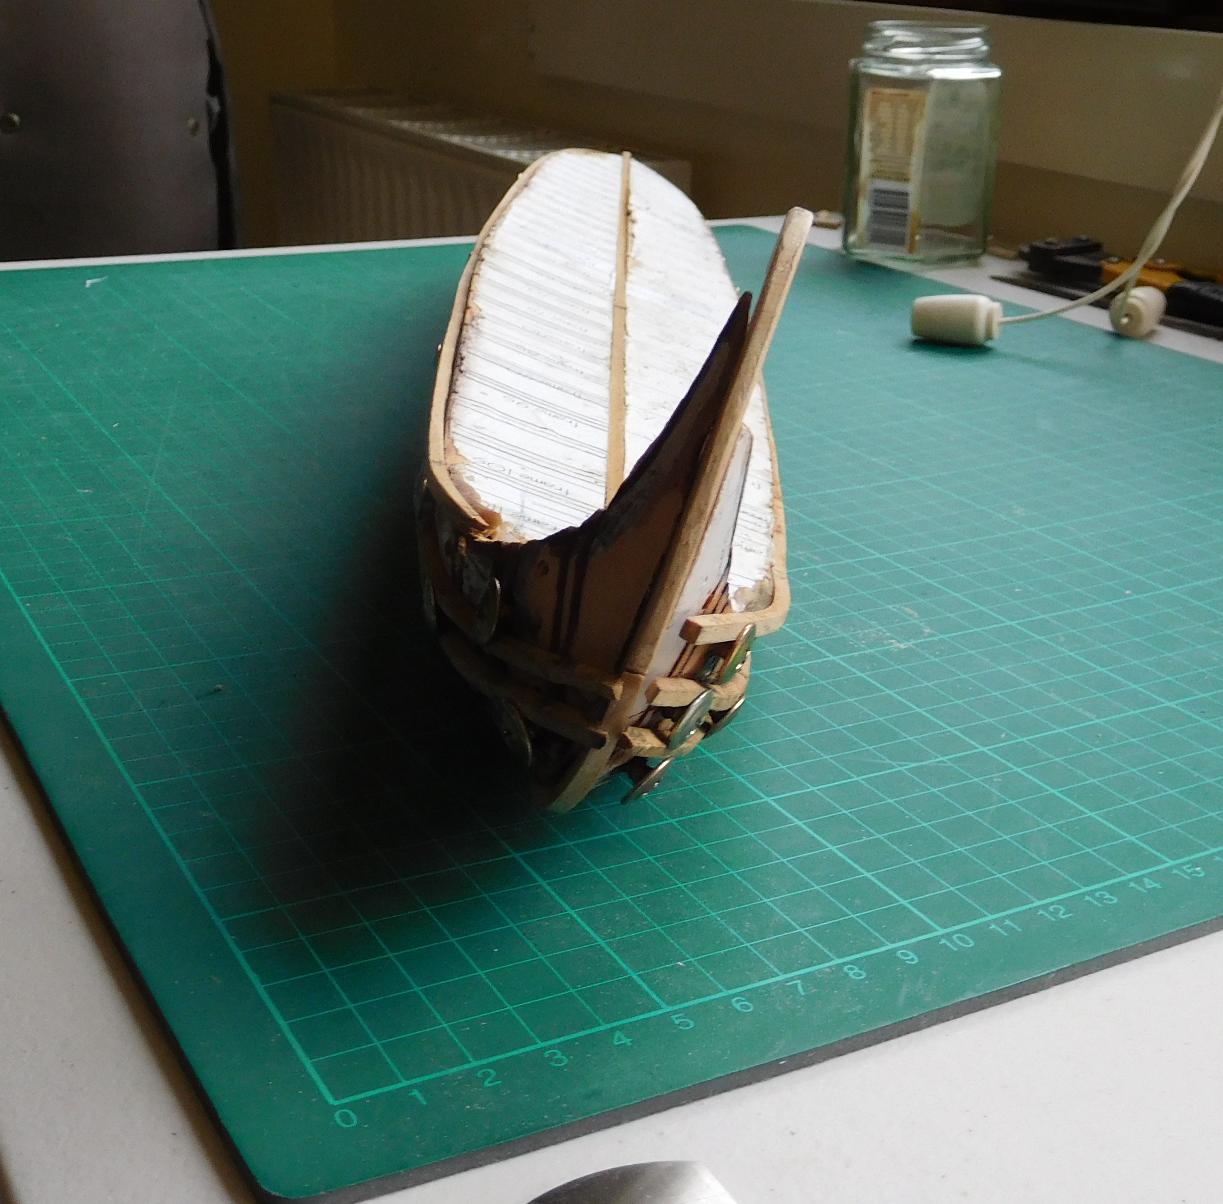
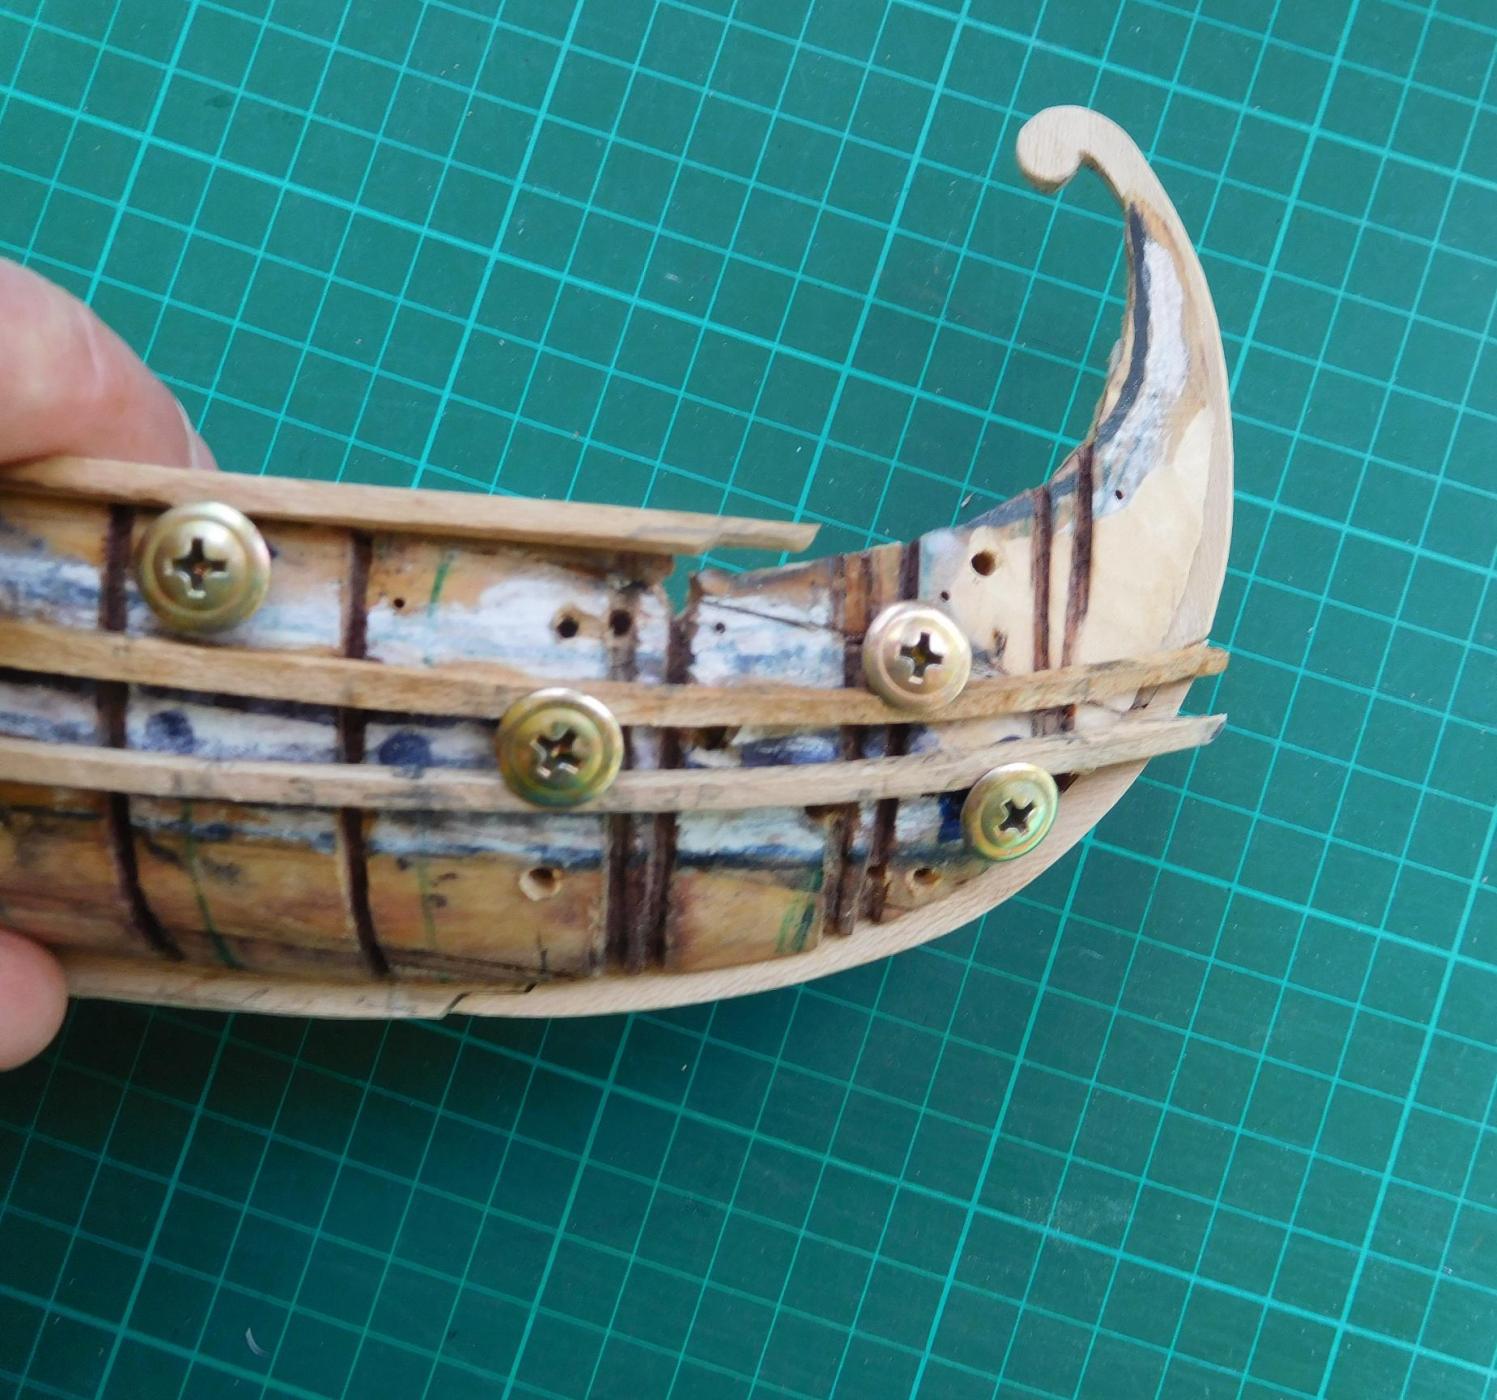
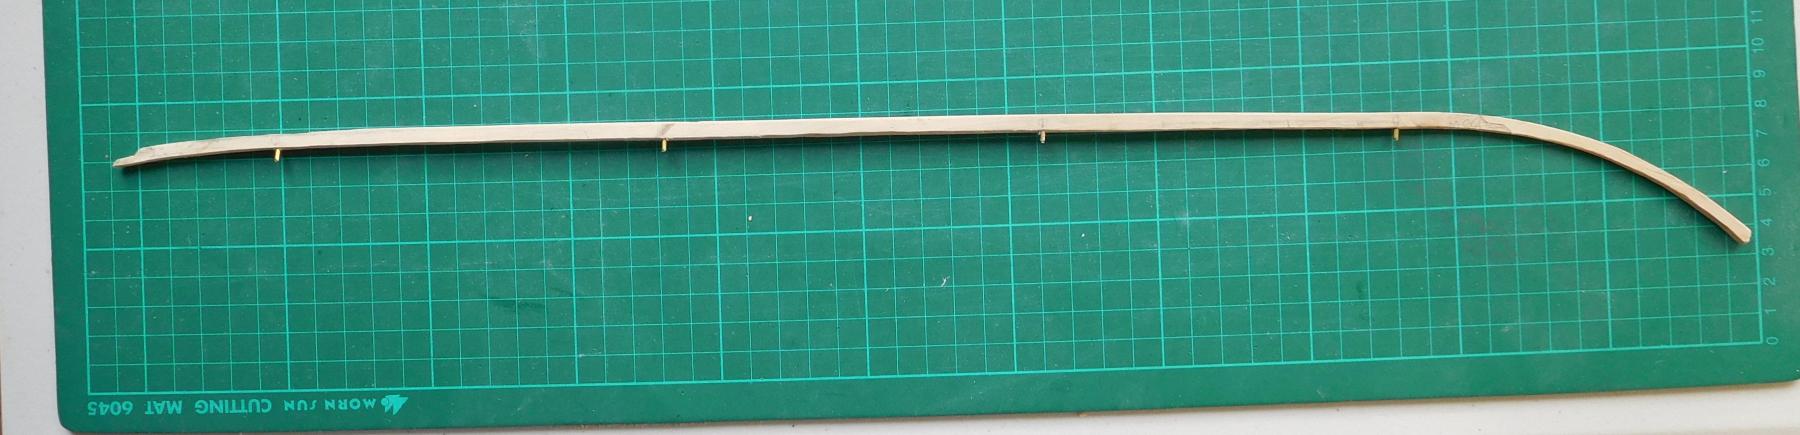
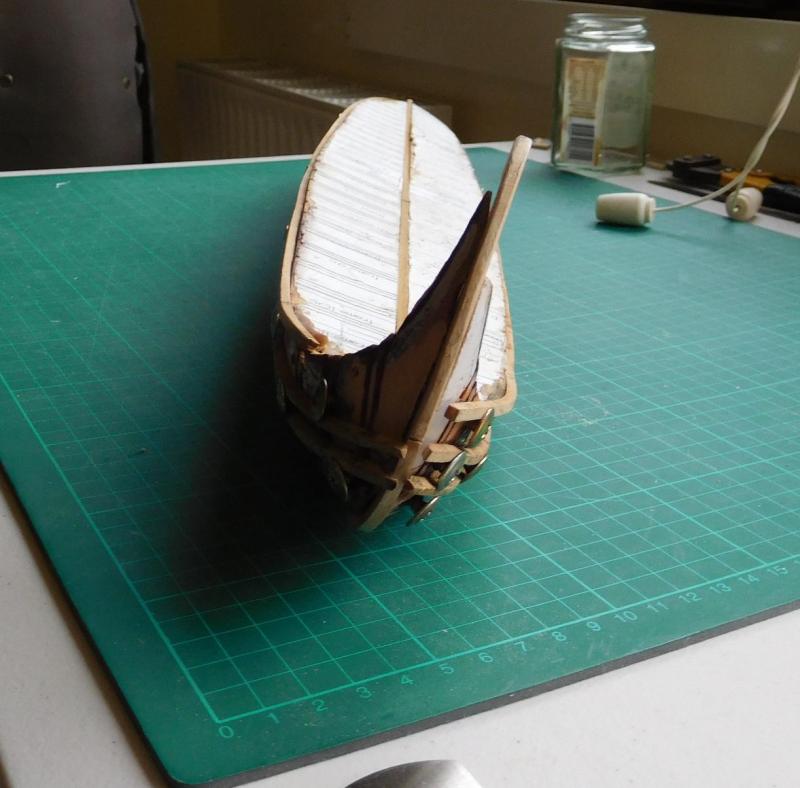
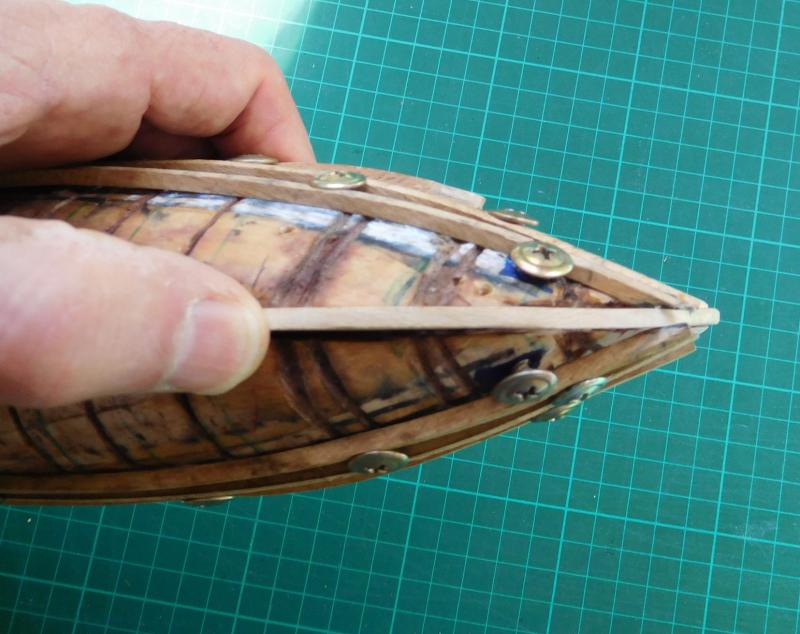
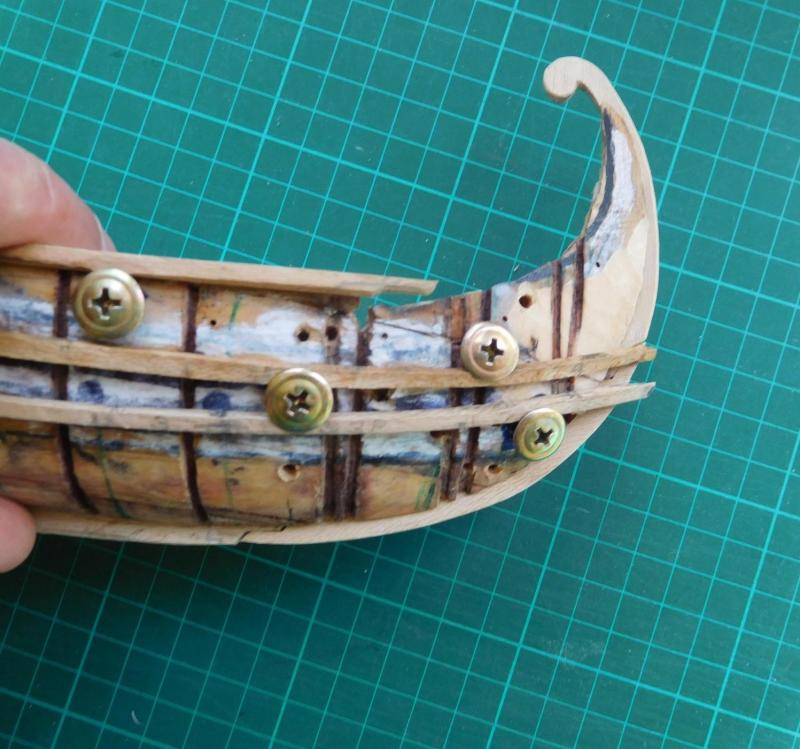
Four oars to go . . . Yes, I should probably have them done by now, but I find every time I try to hurry I make mistakes. So now I just do them when I feel like it. Takes longer, but this is supposed to be fun, not a job or an ordeal, right? I've trimmed the plug at the stern - just shaved some of the thickness off - and now the wales are long enough and will join the keel nicely. They fit nicely at the bow: Here's a side view of the stern: The sternpost assembly (including the 'tail' of the keel) is just sitting there at the moment. I'll glue it in place when I've done some more preparation. As I mentioned in an earlier post the 'tail' of the gunwale is a separate piece which I've been bending to shape. I'm leaving it off for the moment until everything else is finalised. You can see the scarph joint where it's going to go. Here is the stern seen from right behind. The wales are still only loosely in place, but they've got enough 'give' so they'll fit nicely when it comes to gluing them on. And here is the stern seen from underneath. I'm pretty happy with how everything's fitting together. I'm usually a 'bash to fit' type of guy, so getting this level of precision is a bit unusual for me (and strangely therapeutic) . So far it's all being kept together by temporary screws - I'm just trying to make sure everything fits. Once that's done I'll be shaving the plug down so the grooves for the frames vanish (though I'll still be able to see where they've been). I realised that because the tail is a reverse curve, to take the hull off the plug I'll have to rotate it around the tail rather than just pull it straight off. If the frames sit in grooves they'll jam when I try to rotate. Then I put the frames in place (well, every second one, actually - the others will be put in place after the planking.). I'll be holding them to the plug with push pins near gunwale level; then put the keel in place and glue it to the frames; glue the bottom two wales in place and plank up to the second wale; Pull out all the push pins, put the gunwale on and glue it in place; Finish the planking. I've been waiting a long time to start the planking - it'll be a great relief to actually start putting the hull together so I finally have something to show for all the preliminary work I've been putting in. Steven

-
That does seem to help, but I still have trouble getting it all to focus properly. It keeps overriding what I'm doing, and never seems to be in focus when I want it to. These user friendly high tech cameras do have their downsides. Steven
-
Nice. Steven
-
That's a very elegant shape. And the holes are beautifully exact. Steven
- 473 replies
-
- 5
-
-
- greek bireme
- dusek
- (and 1 more)
-
Sorry, Bluto, but I think my jig is much more crappy and amateurish. Works, though . . .
-
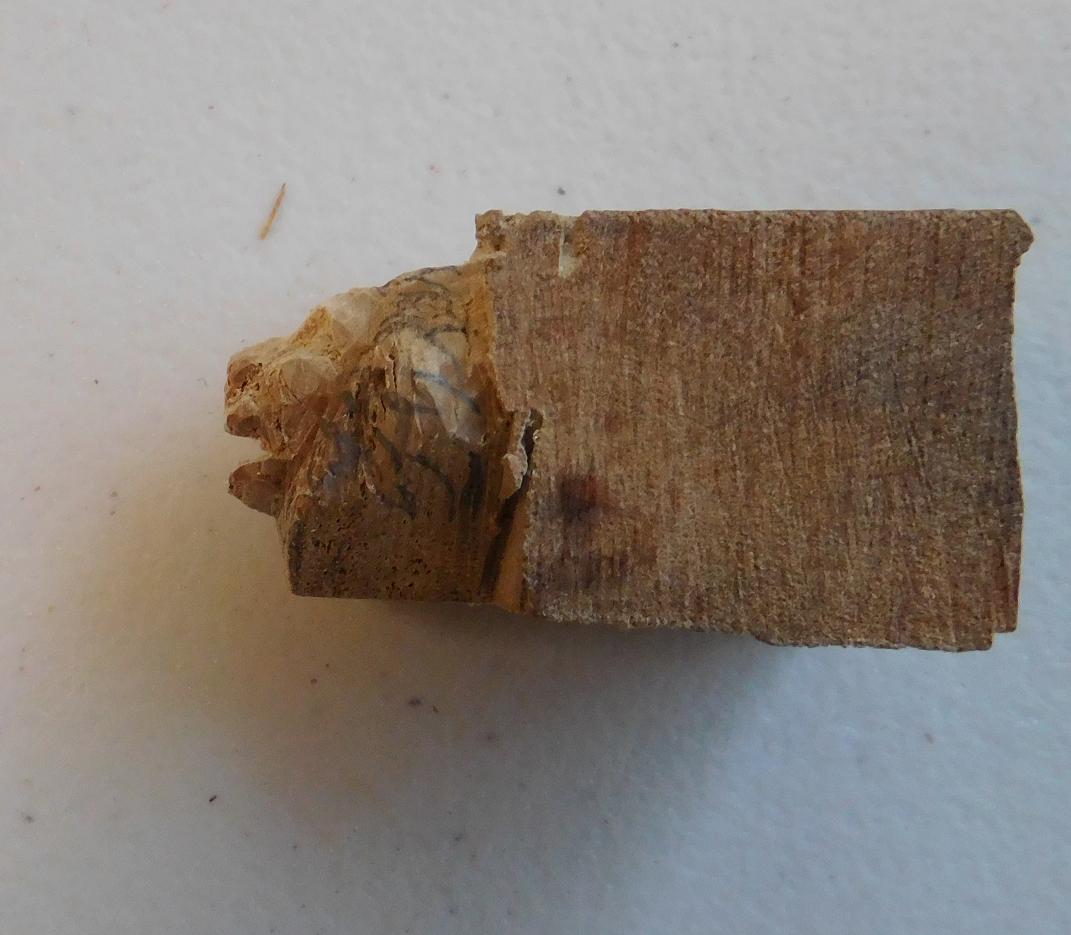
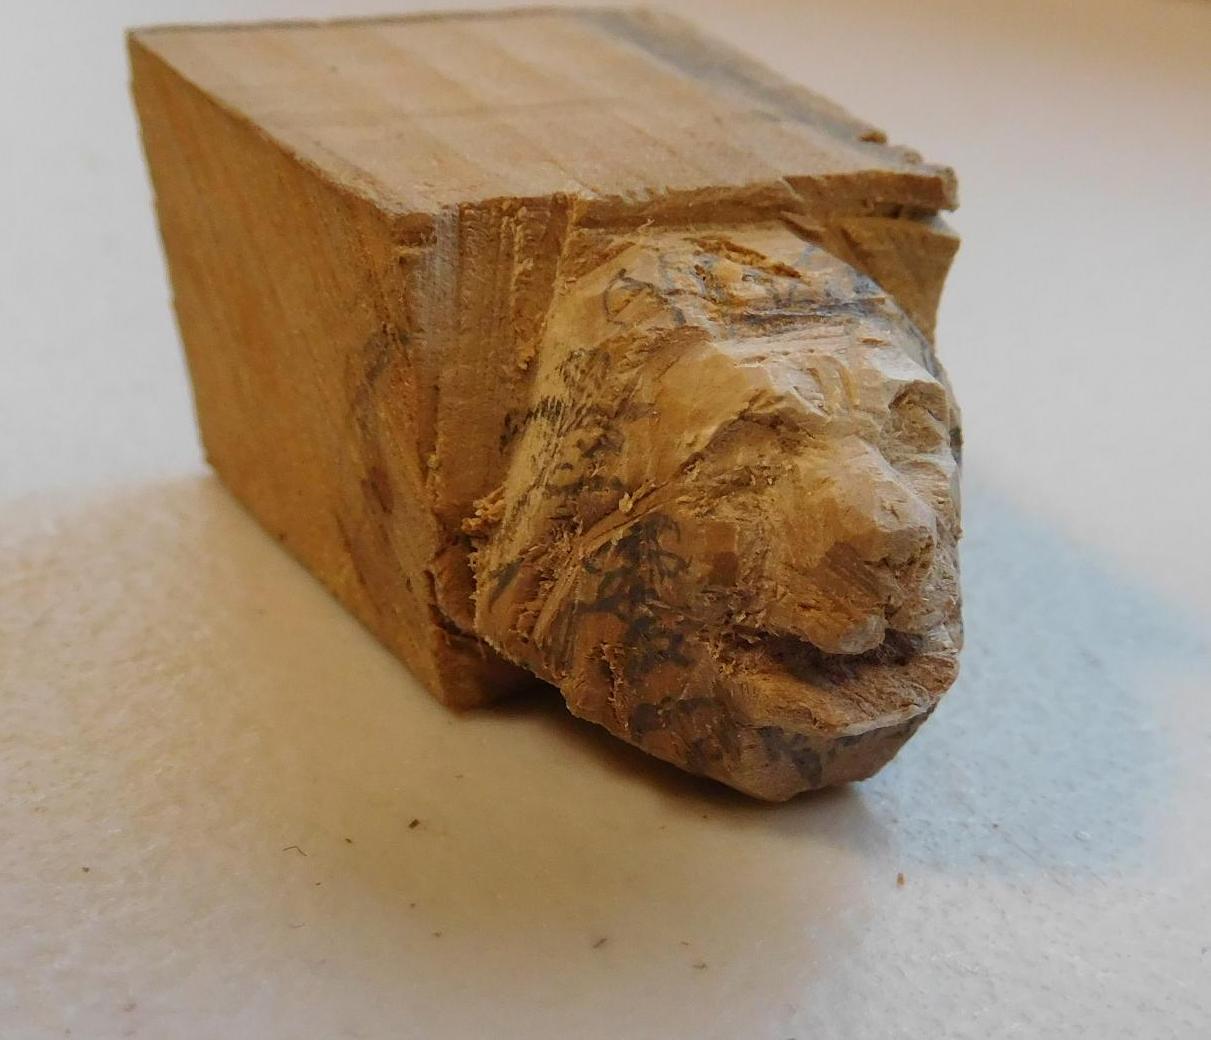
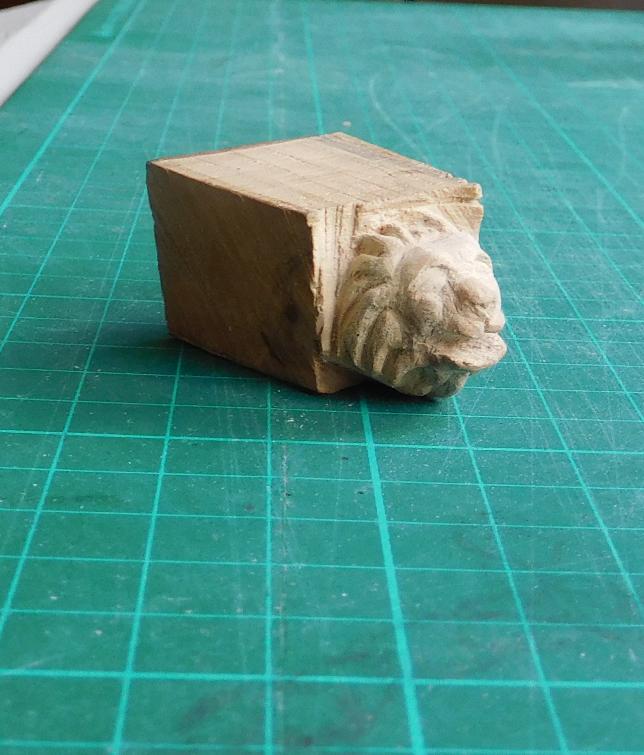
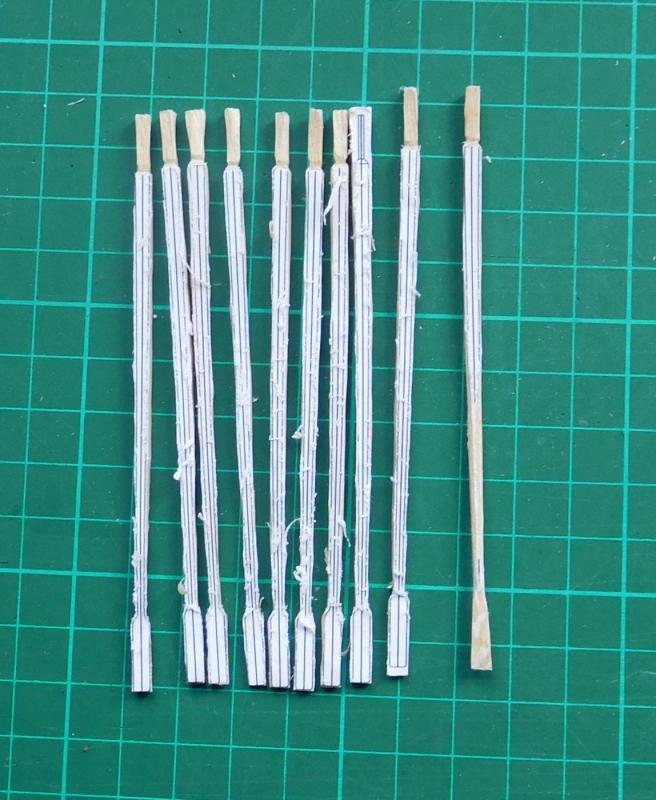
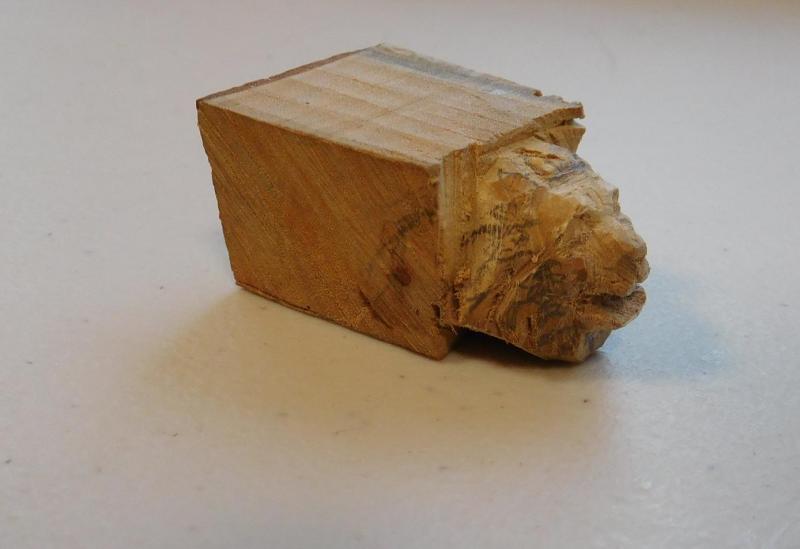
Five oars down, five to go! I've smoothed off the lion's head somewhat and worked on his mane. Close to finished, but I'll have to put him to one side until I've done the hull so I can cut the back to fit against the bow of the ship. Something wrong with either my camera or my technique - a lot of the time it doesn't focus properly. This is the best I've been able to do. I took a leaf out of Druxey's book and put little brass pins in the top of the keel to fit in corresponding holes in the plug. I was hoping the guy across the road could make the holes with his drill press - I don't have one myself and I don't trust myself with a hand-held (electric) drill at this scale - the keel is about 4mm thick and the hole is 1.5mm diameter. But his chuck would take such a small drill-bit, so I had to go to Plan B. I used an awl and the pointy end of a triangular-section rat-tail file to start the hole, and then when it was well enough established I was able to make it bigger with the hand-drill. It all worked surprisingly well. I should have doe it this way earlier. The hole was still a bit tight and I was able to hammer the pins in (they're just brass escutcheon pins) and then cut off the heads. They sit nice and firmly. I've tried fitting the keel to the plug with the pins and it works well. As Eeyore said about his birthday present - it goes in and out like anything! I was fiddling with the keel and unfortunately I lost hold of it and it fell on the floor, and the tail broke off at the scarph joint. Perhaps a blessing in disguise - it makes fitting everything properly easier, and I can align it exactly against the plug when the time comes to glue it back together. But now the keel sits in place I've discovered that the wales are just a tiny bit too short (about 3 millimeters - 1/8") to join the keel properly at the stern. I'd got very disappointed at this, then - epiphany! I don't have to cut new pieces and scarph them to the wales to make them longer, I just need to re-shape the plug very slightly and shorten the keel a little (only a few millimeters), and they should come in nicely. A job for the coming weekend, perhaps, if i get the time. Oh, and I've found a contemporary picture showing a support for the steering oars which I like the look of. It's a Byzantine representation of scraping the hull of a ship. You don't see the steering oars, only the stocks the ship is up on, but the shape looks good. I'd been puzzling over what I was going to do and now I've got something I'm happy to go with. Steven


-
She's starting to look really good. Keep up the good work. By the way, another advantage of copper is that it's softer and easier to work than brass. (I know from personal experience working small scale in both metals - I'd far rather work with copper than brass). Steven
- 473 replies
-
- 4
-
-
- greek bireme
- dusek
- (and 1 more)
-
I saw them building the full-sized replica in Fremantle some years ago. I've still got a bit of oak they made from an off-cut with the name 'Duyfken' stamped on it. A rather treasured possession. Such a pretty ship. Steven
-
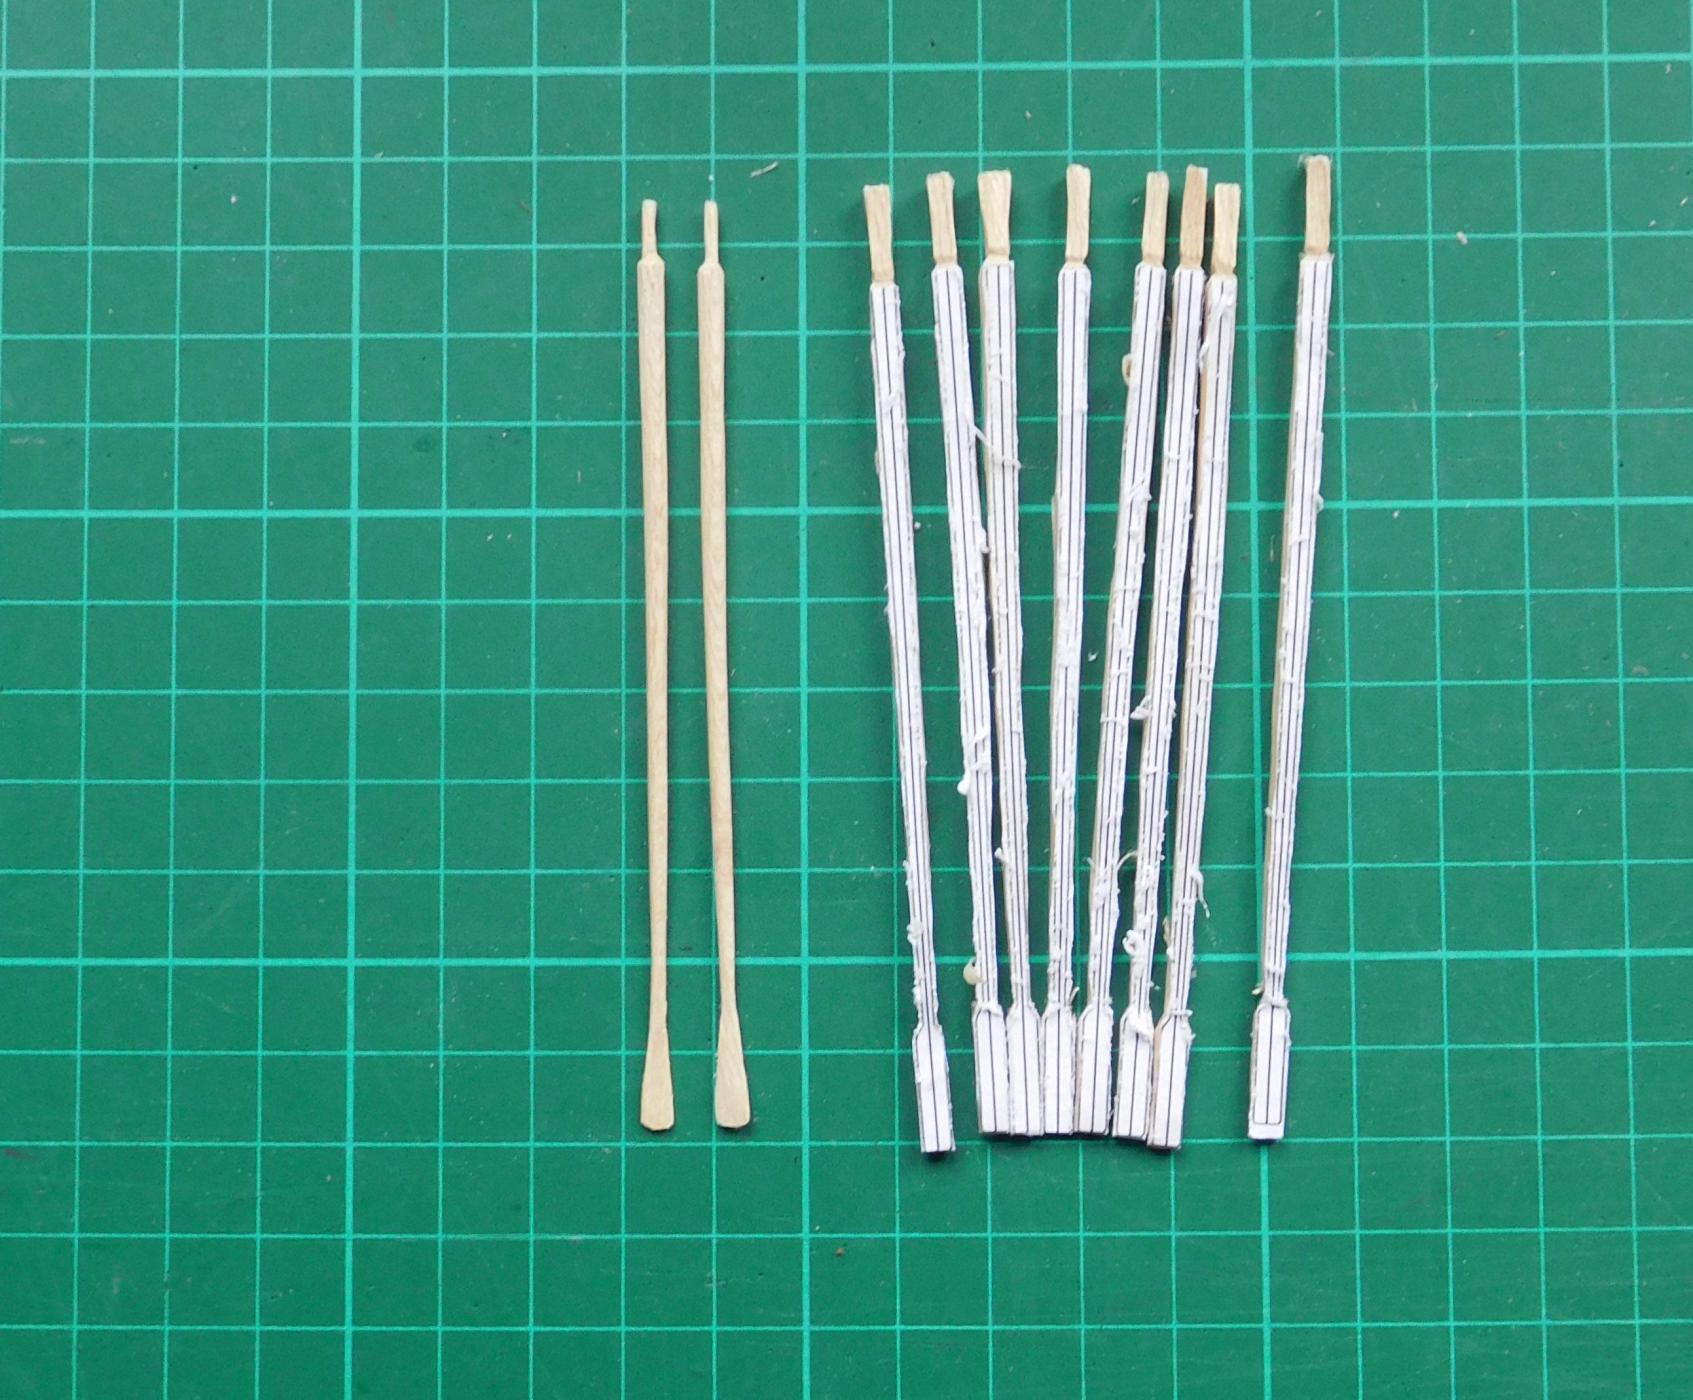
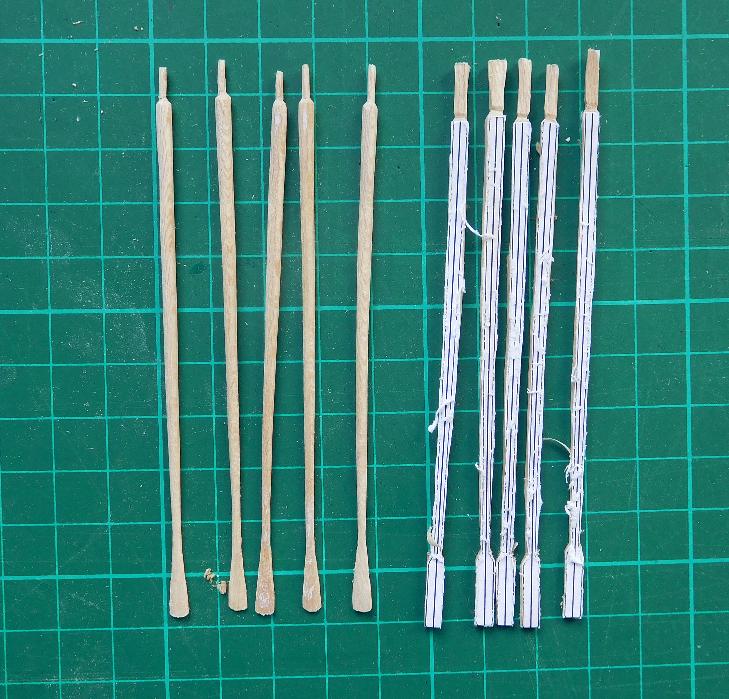
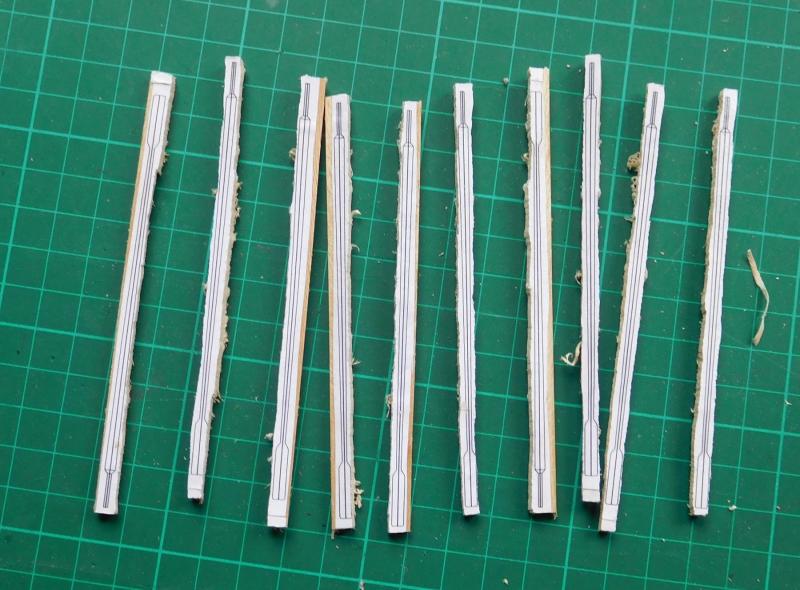
Here are the last ten oars for the upper bank. First, sawn roughly to shape then trimmed to follow the outline of the oars. They'll take a few days (or evenings) to make, but it's good to see the end in sight. That's 40 oars carved with hand tools so far - and approaching 50. I won't be doing the lower bank until the hull is built, as I have to work out how they'll fit inside. I've got to the stage that I need to trim the wales to length so they can join the keel smoothly. Then I have to put metal pegs in the keel (something I learned from Druxey's latest build) so it lines up with the plug. As I don't have a drill press and I don't trust myself to be accurate enough with a hand drill, I have to wait till the guy across the road is available to help - which means I won't be doing it till the weekend. Getting the hull made is taking far longer than I expected - mainly because the things I've been doing towards it mostly can't be done in the evenings, so I go from weekend to weekend, and do 'fill-in' jobs like carving crewmen and oars (and lion's heads!) in the evenings between. Steven
-
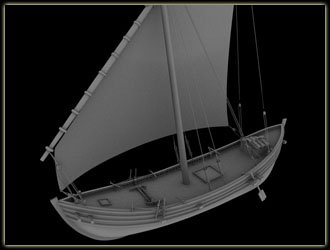
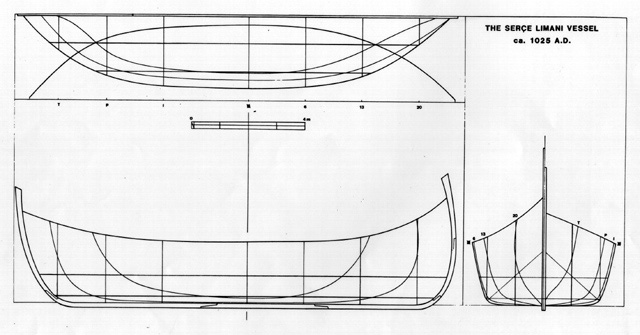
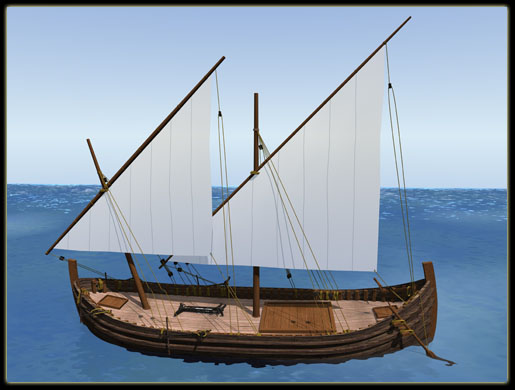
Here are images of the 7th century Yassi Ada ship and the early 11th century Serc,e Limani ship lines and 3d image. Some things just don't change all that much. It's interesting that both ships of which we have the lines have very flat bottoms and an almost rectangular cross-section. Good for carrying cargo, maybe not so good for sailing. Steven
-
Are you going to square-rig it? The earliest reference I know to lateen rig is 6th century. Steven
-
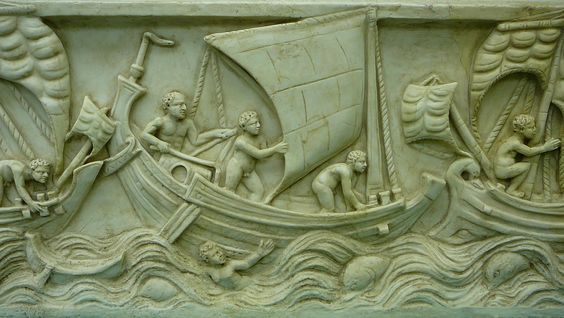
And here's the picture from the sarcophagus. Pretty close, I think. Steven
-
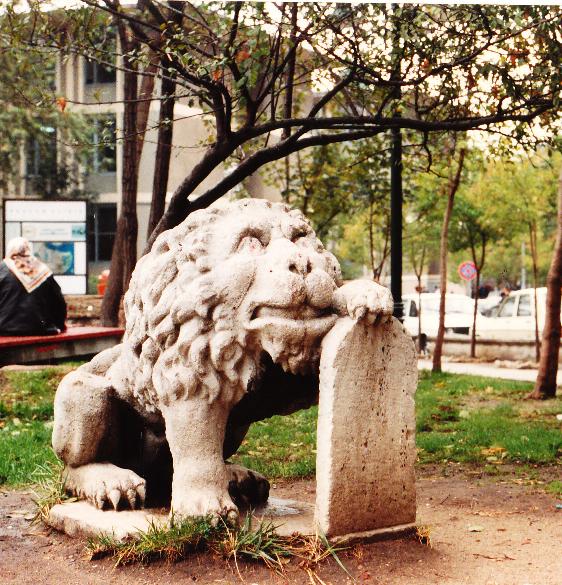
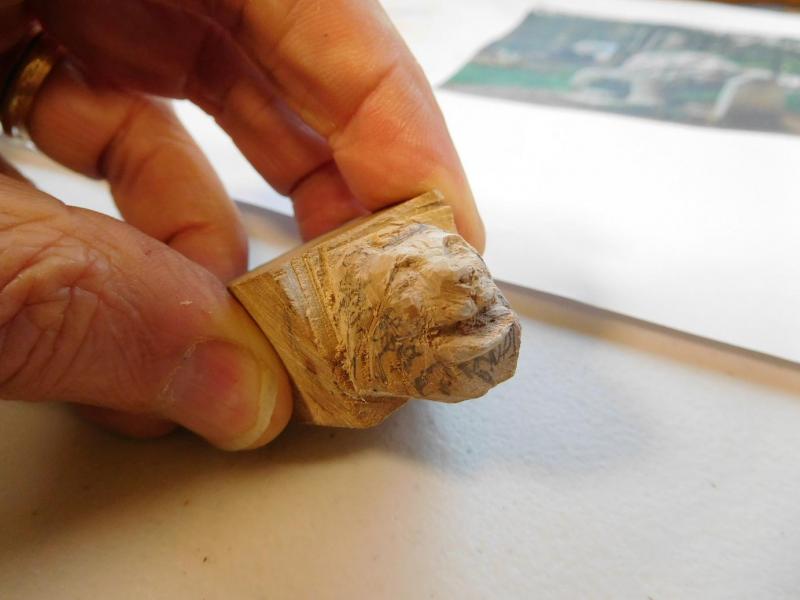
More progress on the lion's head. I'm pretty pleased with him, but if I wanted him to be a copy of the Byzantine lion I saw in Istanbul I've missed out. If anything he's a bit too natural and not stylized enough . . . Here's the original And here's my carving With my hand for size comparison. I've made him with his mouth somewhat more open, so the Greek Fire nozzle can fit through. Still a way to go - got to do his mane and smooth him off. Then when the bow of the ship is finalized, I'll cut away at the back of the head to fit it to the ship. Steven


-
Though the ships I mentioned above are 6th to 11th century, I just came across a photo of a 3rd century Roman sarcophagus with a boat on it almost identical with your model. A very long-lived style. Steven
-
I've done some more since, and he's looking better still. But too dark for photography at the moment.