-
Posts
679 -
Joined
About David Lester

- Birthday 10/01/1952
Profile Information
-
Gender
Male
-
Location
Cobourg, Ontario
-
Interests
reading, woodworking, architecture
Recent Profile Visitors
-
 David Lester reacted to a post in a topic:
Bluenose by Admiral Rick - Model Shipways 2921 - Scale 1/64 - Canadian Fishing Schooner
-
 David Lester reacted to a post in a topic:
Endeavour J class by TerryPat - Amati - 1:80
-
 David Lester reacted to a post in a topic:
HMS Pegasus 1776 by Knocklouder - FINISHED - Amati/Victory Models - 1:64
-
 Admiral Rick reacted to a post in a topic:
Endeavour J class by TerryPat - Amati - 1:80
-
 Knocklouder reacted to a post in a topic:
Endeavour J class by TerryPat - Amati - 1:80
-
 David Lester reacted to a post in a topic:
Endeavour J class by TerryPat - Amati - 1:80
-
 David Lester reacted to a post in a topic:
Endeavour J class by TerryPat - Amati - 1:80
-
David Lester changed their profile photo
-
 etubino reacted to a post in a topic:
Shamrock V by David Lester - FINISHED - Amati - 1:80 - J Class Yacht
-
 David Lester reacted to a post in a topic:
HMS Pegasus 1776 by Knocklouder - FINISHED - Amati/Victory Models - 1:64
-
 David Lester reacted to a post in a topic:
Endeavour J class by TerryPat - Amati - 1:80
-
lubellwoo started following David Lester
-
 David Lester reacted to a post in a topic:
Endeavour J class by TerryPat - Amati - 1:80
-
 Auger reacted to a post in a topic:
Light hearted reading ( if there is such a thing!)
-
 David Lester reacted to a post in a topic:
HMS Pegasus 1776 by Knocklouder - FINISHED - Amati/Victory Models - 1:64
-
 rvchima reacted to a post in a topic:
Charles W. Morgan by David Lester - Model Shipways - 1/64th scale - FINISHED
-
 David Lester reacted to a post in a topic:
Bluenose by TerryPat - Model Shipways - 1:64
-
 rvchima reacted to a post in a topic:
USS Constitution by David Lester - FINISHED - Model Shipways
-
 TerryPat reacted to a post in a topic:
Shamrock V by David Lester - FINISHED - Amati - 1:80 - J Class Yacht
-
 king derelict reacted to a post in a topic:
Bluenose by rvchima - FINISHED - Amati - 1:100
-
Congratulations on finding a solution for the baggy wrinkle problem. I have spent a lot of time looking for an easy and effective approach. I did try baggy wrinkles once, on my Pride of Baltimore. I used pieces of beige tapestry wool. I cut the yarn to length, then thread it onto the line and fluffed it up a bit.The result was ok, but just ok. We have some of those cloths you referred to kicking around too, so I'll be sure to give this approach a try next time. Your Bluenose is looking great. The Tom Lauria method of sail making works really well. I have a question for you though. How did you attach the reef lines? It doesn't look like you knotted them. Did you simply pass them through the hole and fix them with a bit of glue? Is it hard to get them to lie flat? It doesn't look like you've glued them to the sail for their full length, but I'm having a hard time imagining them being well behaved and just lying in place. You're doing a beautiful job on this model. David
-
 Cast Off reacted to a post in a topic:
Rope Hanks Conquered!
-
That's too bad, Rod, after all that work. I would certainly give the silkspan option a try, especially if you have some. I've only made sails on one occasion. I followed Tom Lauria's method and I was reasonable happy with the result. I think you might be too. David
-
 Mr Whippy reacted to a post in a topic:
Mayflower by David Lester - FINISHED - Model Shipways - Scale 1:76
-
I have always found basswood to be all but impossible to stain successfully. It always wants to go blotchy. So here's what I do to colour it instead and it works quite well for me. I buy cheap Folk Art Paint from Michael's (flat finish) in a medium brown colour. I water it down quite a bit and apply it to the basswood. With a bit of trial and error with the thickness of the paint, it's possible to get an even colour that still allows the wood to show through. Here are two examples: In this one, I've used satin poly on top of the paint- Here, I've used amber shellac over the paint- Anyway, for what it's worth, that's one approach to dealing with basswood that I have found to work. David
-

Buying Filler Blocks
David Lester replied to mikiek's topic in Building, Framing, Planking and plating a ships hull and deck
There's are excellent article on the NGR website. It's Nautical Research Guild - Resources - Articles and How-Tos - Framing and Planking - Constructing Bow and Stern Filler Blocks. I've use this method with success a few times. -

Chafing mats or Service on lines
David Lester replied to Dr PR's topic in Masting, rigging and sails
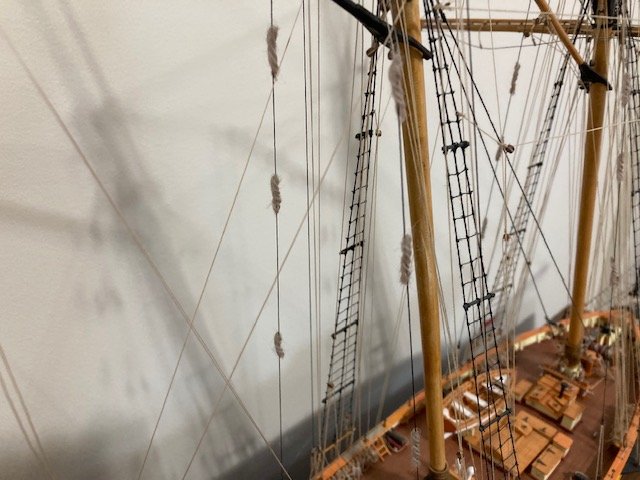
Does anyone have a really good method of making them for a model? I have pored over fly tying websites looking for something, and tried many different things without success. The real problem is getting a result that is small enough to be in scale. A few of my models have called for them, but I only actually added them in one case and it's only somewhat successful. I used pieces of tapestry wool of approximately the right colour. I was able to fluff them up quite a bit, but as soon as I used a bit of glue to attach them, they tended to flatten. I know they don't look quite right, but this is the closest I've been able to get. It would be great to be able to add really credible looking ones when they're called for. David- 15 replies
-
- baggy winkle
- service
-
(and 2 more)
Tagged with:
-
I've also been having the same problem with that index for the last little while. But even when it's working, I have found what I think is the quickest way to open any build log. Once I have found two or three build logs that I want to visit frequently, usually relating to the model that I'm working on at the time, I make a list of their names on a Word document. I name them anything I like - doesn't have to be the builder's handle. Then I turn each name on the Word document into a hyperlink that directly opens the build log. The forum website doesn't even have to be open first, the link will open it right at the page I want. It's literally only one click. If you want to, you can also create several different links for different pages within the same build log. It only takes a few minutes to create the list and hyperlinks in Word and then it's incredibly fast to access the build logs. Just an idea. David
-
Hey Dan, You're doing a really nice job on this canoe. I just finished the Indian Girl and I thought it was as hard a hull to plank as I have come across yet. I considered either the Peterborough or the Canadian, but ruled them out because I didn't believe I could do a good enough job on the planking to leave it exposed! At least with a painted finish, there's lots of room for imperfection. Kudos to you for doing such a fine job. I hope you don't mind me throwing an idea out there, but did your kit come with a really rough piece of burlap that you're supposed to use for the seats? Mine did and I didn't like it very much. So my wife suggested that I use a piece of needlepoint canvas instead and I think it does a pretty good job of representing the cane seats. Anyway, I think you have a really beautiful model. David
-
Good Morning Tim, You have done a great job on your Bluenose. It's really nice and I can't get over how well you've done the brass work which is hard to to do without getting everything overscale. I agree that those dories are a real pain in the neck to do, and I can't remember how many times I have soaked them in acetate to unglue and then redo them, but I would encourage you to not give up. The nice thing is, you build them completely off the model, so there's no danger of undoing all the beautiful work you've done. You don't need to add them until you're completely happy with them. I'm currently building my fifth Bluenose and my third once from scratch and I have finally managed to get the dories to work. If you need more material you can buy a sheet of 1/64" plywood from BlueJacket and it's not expensive. Here are my tips: be sure to clamp the sides to every one of the frames while the glue is setting and clamp the bow end together. This part is not too hard to do. It might also help to cut a temporary piece of wood to jam between the sides at midpoint to help them keep their shape. There's only really tricky bit that I can't really find a work-around for is getting the stern piece to sit squarely, so I focus all of my frustration on it and work at it until it's sitting right (or close enough.) Once it's in place, the hard part if over. I also found the bottoms very hard to install and difficult to glue because there is so little edge, but I solved that problem. For every dory except the top ones, I simply omit the bottom, there's no actual need for it, and for the top two I don't use the thin plywood provided, but I cut new bottoms from 1/16" material. This helps enormously and they glue into place easily, and you only need two of them! Once they're ready to come off the form, it's just a matter of detailing them to whatever degree you like. I tend to keep it to a minimum. Two other smaller issues: The first is their colour. The real dories were a very bold yellow and I found that if I painted them a bold yellow that they drew the eye too much and I felt detracted from the overall effect. So I found a toned down colour, more of a buff really. It blends in with the decking, and doesn't draw the eye, but still looks more or less authentic. The other one is the number of them. I believe Bluenose carried eight dories. I found two stacks of four to also look too distracting, so I do two stacks of two and it conveys the idea without being a distraction. Here's a shot from my last scratch-built effort. Anyway, maybe some those techniques might encourage you to give the dories another try, and again, congratulations on a great Bluenose. David
- 145 replies
-
- Bluenose
- Model Shipways
-
(and 1 more)
Tagged with:
-

Model Shipways USS Niagara 1:64 scale shopping list?
David Lester replied to cardensb's topic in Wood ship model kits
Hi Shawn, I would start by downloading the parts list from MS. It will tell you how many blocks of each size, then just order a few more than needed to compensate for the ones that go flying off into the abyss of the workshop floor. Similarly with the rigging line and again order some extra to accommodate do-overs etc. For eyebolts, just order lots and lots. They're not expensive and you don't want to be counting them out sparingly for fear or running out. Another alternative that I have taken to, is to make your own eyebolts. I buy 32g. and 28g. annealed wire from BlueJacket and you can make as many as you need in whatever size you need. One big advantage to them is that there is no gap which the rigging line seems to always find. You probably won't need to upgrade the deadeyes, although if you want to, the parts list will tell you what you need. Apart from these things, I can't think of much else, if anything that you might need to shop for. I normally find that there is plenty of wood and it's usually decent in MS kits. The only thing that I often prepare for is replacing the rail cap if it's included as laser cut pieces. Minor differences in my hull shape sometimes mean that custom made ones fit better than a pre-formed one. Just check the parts list to see if Niagara has laser cut rail caps. They're usually 3/64" or 1/16" thick. for a few bucks you can add a sheet of each to your order; you're be sure to find some use for it, even if the pre-formed caps fit well. The Niagara is a really nice build and I hope you enjoy building it as much as I did mine. All the best, David -
MBerg started following David Lester
-
wmherbert started following David Lester
-
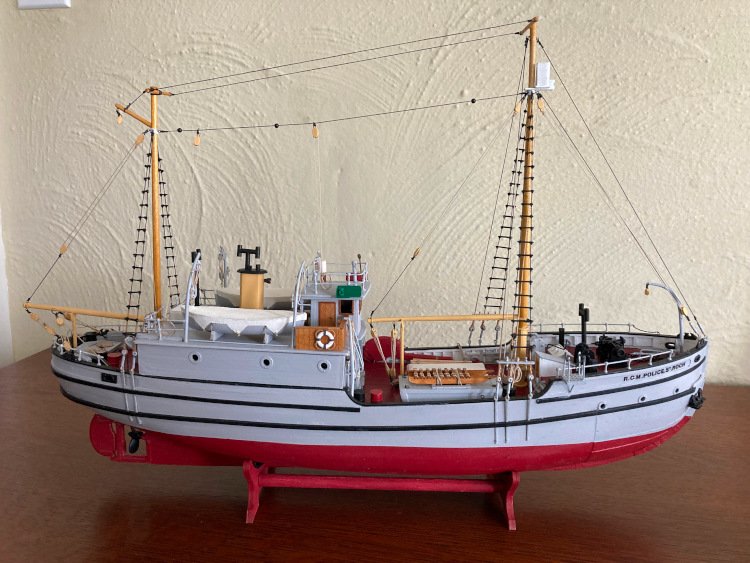
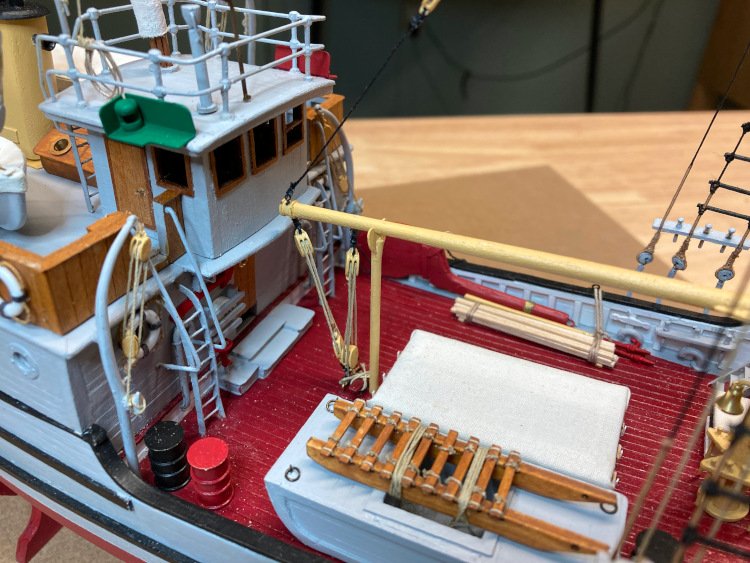
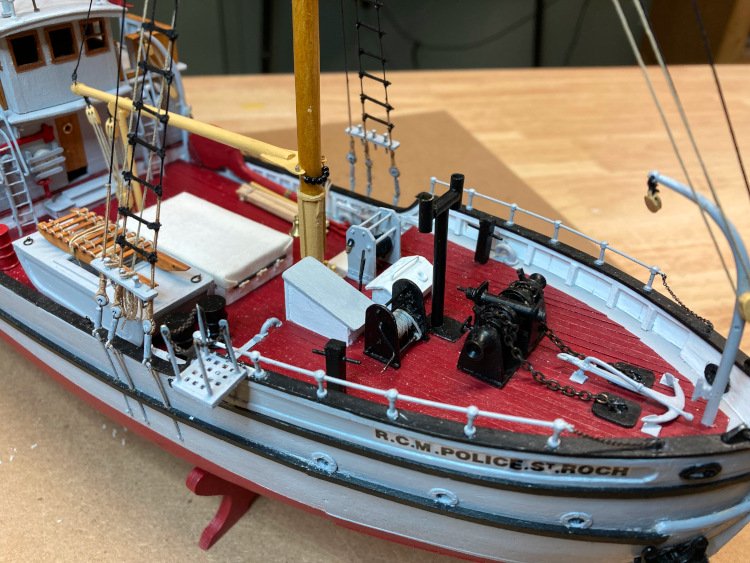
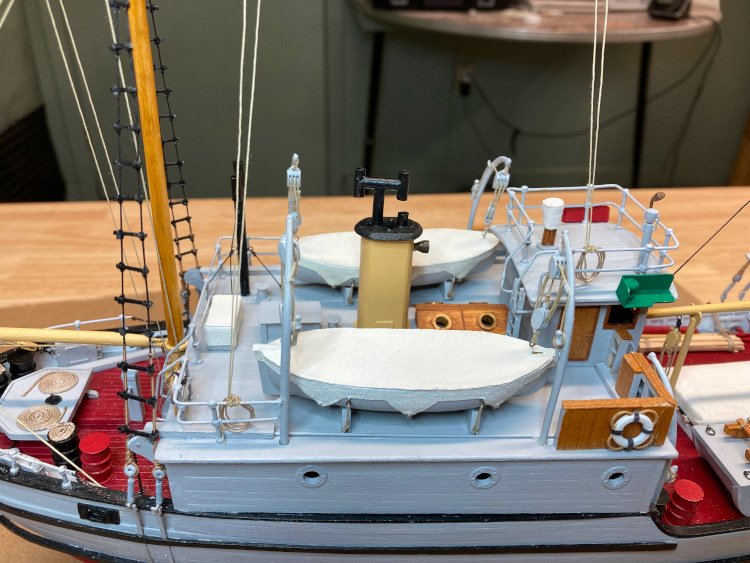
Thank you everyone for all the kind comments and likes! Now I just have to find a place to put it; my collection is getting out of hand. Thanks again, David
- 64 replies
-
- St. Roch
- Billing Boats
-
(and 1 more)
Tagged with:
-
Thank you Harvey! Really appreciate it. I would like to visit it myself, but we never get to Vancouver anymore. Our son used to live there, so we were there quite often, but not so much these days. (We're over 2,000 miles away.) Thanks again, David
- 64 replies
-
- St. Roch
- Billing Boats
-
(and 1 more)
Tagged with:
-
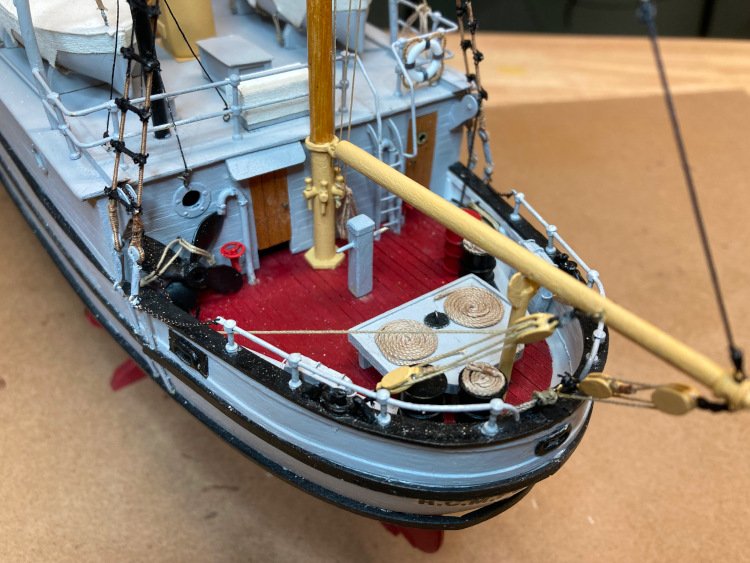
Hello All, I believe I have finished! One of the attractions for me with this model was the limited amount of rigging, but it still caught me by surprise how quickly it wrapped up. There isn't too much to discuss about it either. It's very straightforward. From the 360 tour on the website, I was able to sort out a couple of details that aren't evident in the plans. So that's it for my St. Roch. This was quite a fun small build, not too challenging. The most fun was sourcing and making improvements on some of the poor quality fittings included in the kit. Thanks again for checking in. Much appreciated. David
- 64 replies
-
- St. Roch
- Billing Boats
-
(and 1 more)
Tagged with:
About us
Modelshipworld - Advancing Ship Modeling through Research
SSL Secured
Your security is important for us so this Website is SSL-Secured
NRG Mailing Address
Nautical Research Guild
237 South Lincoln Street
Westmont IL, 60559-1917
Model Ship World ® and the MSW logo are Registered Trademarks, and belong to the Nautical Research Guild (United States Patent and Trademark Office: No. 6,929,264 & No. 6,929,274, registered Dec. 20, 2022)
Helpful Links
About the NRG
If you enjoy building ship models that are historically accurate as well as beautiful, then The Nautical Research Guild (NRG) is just right for you.
The Guild is a non-profit educational organization whose mission is to “Advance Ship Modeling Through Research”. We provide support to our members in their efforts to raise the quality of their model ships.
The Nautical Research Guild has published our world-renowned quarterly magazine, The Nautical Research Journal, since 1955. The pages of the Journal are full of articles by accomplished ship modelers who show you how they create those exquisite details on their models, and by maritime historians who show you the correct details to build. The Journal is available in both print and digital editions. Go to the NRG web site (www.thenrg.org) to download a complimentary digital copy of the Journal. The NRG also publishes plan sets, books and compilations of back issues of the Journal and the former Ships in Scale and Model Ship Builder magazines.


