HOLIDAY DONATION DRIVE - SUPPORT MSW - DO YOUR PART TO KEEP THIS GREAT FORUM GOING! (Only 20 donations so far - C'mon guys!)
×


Rick01
-
Posts
652 -
Joined
-
Last visited
Content Type
Profiles
Forums
Gallery
Events
Everything posted by Rick01
-
Just noticed this when I was looking at some Master Korabel kits. It's not a bad illustration https://craftysailor.com/collections/fittings/products/windlass Rick
- 714 replies
-
- 2
-

-
- lady nelson
- victory models
- (and 1 more)
-
If you look closely at the one you've illustrated you can just make out a set of holes for the levers added to the main drum (rt side of the windlass). I guess that may be for additional leverage if ever required. I agree that building your own is really the best way of getting something that is true to the period and actually usable! About the only thing we all agree on is the shape of the support/mounts for it. 🙂 Rick
- 714 replies
-
- 1
-
-
- lady nelson
- victory models
- (and 1 more)
-
Hopefully this will help. It's a bit flashy but gives a clear idea of the basics http://collections.rmg.co.uk/collections/objects/68378.html . All the manufacturers seem a bit slack in this area as Popeye has said. Rick
- 714 replies
-
- 2
-
-
- lady nelson
- victory models
- (and 1 more)
-
The windlass supplied isn't the best, there should be a pawl and ratchet in the centre with holes either on the drum or on extensions past the supports. The holes are for levers to be inserted to turn the windlass and the pawl locks the operation so that it only operates bringing the anchors up, flip it up and the system runs free allowing the anchor cable to run out. Rick
- 714 replies
-
- 3
-
-
- lady nelson
- victory models
- (and 1 more)
-
You can always strip yours down and rebuild it. 😉 This is usually the way, previous builds help improve the later attempts bringing the problems to the fore and providing clues as to how to improve the kit. Rick
- 241 replies
-
- 1
-
-
- mermaid
- modellers shipyard
- (and 1 more)
-
The belaying points are fairly straightforward. I used Lennarth Petersson's book as a guide. With the hatches and other structures I think the only one I didn't have to move was the windlass, even the anchor cable goes back to the main cargo hatch if you look closely! Rick
- 241 replies
-
- 2
-
-
- mermaid
- modellers shipyard
- (and 1 more)
-
When it comes to placement of the deck furniture at least you do have King's sketch which allows a more accurate plan than the guesstimate in the instruction manual! Rick
- 241 replies
-
- 1
-
-
- mermaid
- modellers shipyard
- (and 1 more)
-
I'd be tempted to rotate the companionway 90 degrees facing it forward - it looks as if it's only that way to allow for the binnacle. Rick
- 714 replies
-
- 1
-
-
- lady nelson
- victory models
- (and 1 more)
-
Check this out - I know it's Russian but it is a cutter and shows a pin rail split by a gun port plus a neat boom support on the transom plus of course another deck layout!! 🙂 https://modelshipworld.com/index.php?/topic/17571-avos-1806-tender-by-greenstone-master-korabel-172-test/& Rick
- 714 replies
-
- 2
-
-
- lady nelson
- victory models
- (and 1 more)
-
How/who do I contact when this model becomes available locally? Rick
-
Will this be available in Australia and if so who will be carrying it? Rick
-
You can't see it clearly but I did have twin sheaves on the catheads. It's about three years back since I built this and it was my second build so I can't recall clearly but if I'm right I considered a boom jaws/support but decided that I couldn't see anywhere that would take one with the required strength to fully support the boom or be relatively out of the way for deck operations. Maybe the rear of the companionway would be OK but that then stops the "lid" from opening flat. I followed the convention of satin finish varnish on wooden exterior surfaces with black finish on rails and wales and a white finish to the hull below the bottom wale. As I said - you buy your base model then add extras to suit your own style! I've also seen them with access to crew quarters up in the bows via a sliding hatch near the windlass and with anchor cables leading back to the second hold. Have a look at my "Mermaid" build, that deck layout is different again and is taken directly from its commander's sketches and is a similar size cutter to "Lady Nelson" but was built in Indian dockyards. The more you look the more you get confused!! Rick
- 714 replies
-
- 2
-
-
- lady nelson
- victory models
- (and 1 more)
-
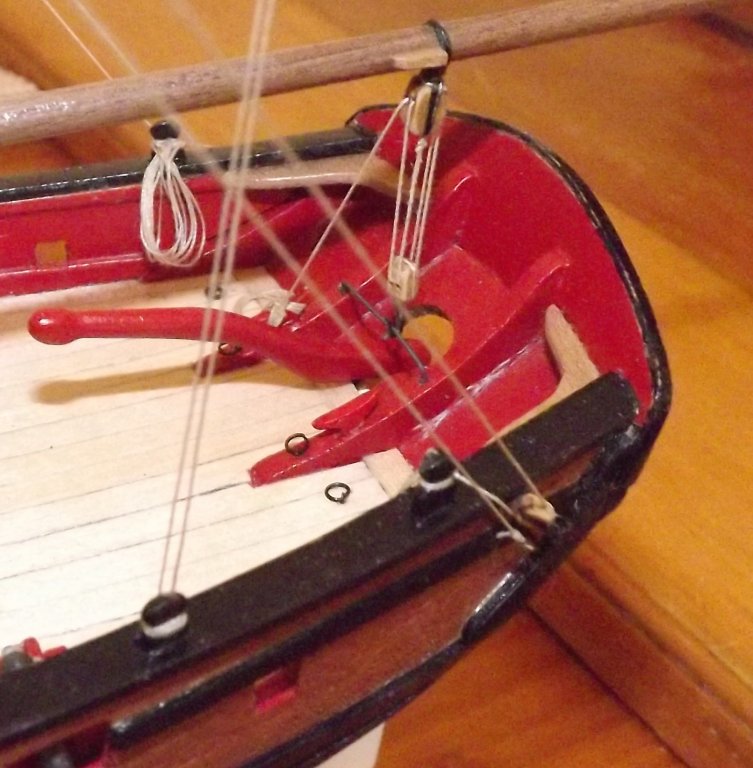
I dropped part 25 so that it supported the bowsprit which in turn is resting on part 27. A line from this part to the groove in the bulwarks gives a line that is near parallel to the waterline (bugger - just noticed that I reversed parts 32/33 !! ). As for the reinforcing knees I did add these at the stern as the whole assembly just didn't appear strong enough without them. you'll notice that I've also added a horse above and behind the tiller. It's almost as if you bought a basic hull then optioned it up yourself - same as buying a car these days. What size motor/how many cylinders = how many guns/weight of guns. Leather/cloth seats = companionway opens forward/aft. 🙂 Rick

- 714 replies
-
- 2
-
-
- lady nelson
- victory models
- (and 1 more)
-
You could always cut them off flush to the cap rail, fill, sand and paint until there's no longer any sign of them. It's got to be less of a problem than making your own. 😉 Rick
- 714 replies
-
- 1
-
-
- lady nelson
- victory models
- (and 1 more)
-
I'm afraid I cheated here. Looked at the castings and decided, after checking out various period models, that I'd omit them totally. Rick
- 714 replies
-
- 2
-
-
- lady nelson
- victory models
- (and 1 more)
-
Check this out for a short discussion/build of the type of windlass your cutter would have carried. Rick
- 714 replies
-
- 1
-
-
- lady nelson
- victory models
- (and 1 more)
-
OK - the windlass actually is used to raise and lower the anchors. Bit hard to see on that one but you can just make out the anchor cable running off the windlass and through the gunwales. The illustration in the drawings is pretty cramped but the ratchet system would stop the anchor cable running out unless that tab was lifted. As I understand it the bowsprit would have had a peg running through its support (part 26) just in front of the windlass pinning it in place, this would be knocked out and the bowsprit moved in or out in increments possibly using in/out haul rigging not connected to the windlass , the bowsprit obviously needs to clear the top of the windlass to allow for it to be hauled further in. In that illustration you've found the pinrail runs along side the bowsprit and would be attached to some other fixed mounts there and is coincidental to the rest of the fixtures there. Hopefully this makes sense - if not yell and I'll dig up some illustrations (I hope). Rick
- 714 replies
-
- 1
-
-
- lady nelson
- victory models
- (and 1 more)
-
Not sure about brass blackener on copper I couldn't source it in Aus. when I did my build so got "crude but effective" hit them with my gas blowtorch then painted with Tamiya "gunmetal" . It stuck to the eyebolts quite effectively. I've a collection of those metal cast pumps, I'm getting quite good at making both pumps and gun carriages now. ;-) Rick
- 714 replies
-
- 1
-
-
- lady nelson
- victory models
- (and 1 more)
-
It's been a while since I did mine, but as I remember I started at the bow and worked back. Are you painting the windlass, pumps etc. and I assume you're going to ditch the supplied pumps and make your own. You also need to install ringbolts in the gunwales for the ship's cannon tackle at this point. Not a fun job if you forget and the have to do this once the masts and Rigging have been completed (not saying why I know this 😉 ). Parts 32 & 33 you may want to consider a thinner 32 then drill it for 2 belaying pins, otherwise you end up belaying ropes to the knight heads only. On the stern, the "brackets" either side of the tiller have eyebolts fitted, I omitted the two immediately to the rear and substituted a horse instead. Seemed to make more sense and I have seen this arrangement on other models of this era. Whilst down this end check page 30 of Petersson, it shows an elbow again with belaying pins which I've added. There never seem to be enough belaying points - I'm pretty sure they'd have a few extra over and above the standard rigging requirements. Rick
- 714 replies
-
- 2
-
-
- lady nelson
- victory models
- (and 1 more)
-
It also makes the construction simpler, trying to line up that many "frames" properly is a pain in the backside! Rick
- 241 replies
-
- 1
-
-
- mermaid
- modellers shipyard
- (and 1 more)
-
Didn't make sense to me so I omitted it completely and ran the second layer of planking right up to the top of the bulwarks. Did the same on the inside of the bulwarks and omitted the simulated "frames" mentioned at 5.7.3 as my own investigations of contemporary models seemed to indicate that the frames were planked over during that period. Rick
- 241 replies
-
- 1
-
-
- mermaid
- modellers shipyard
- (and 1 more)
-
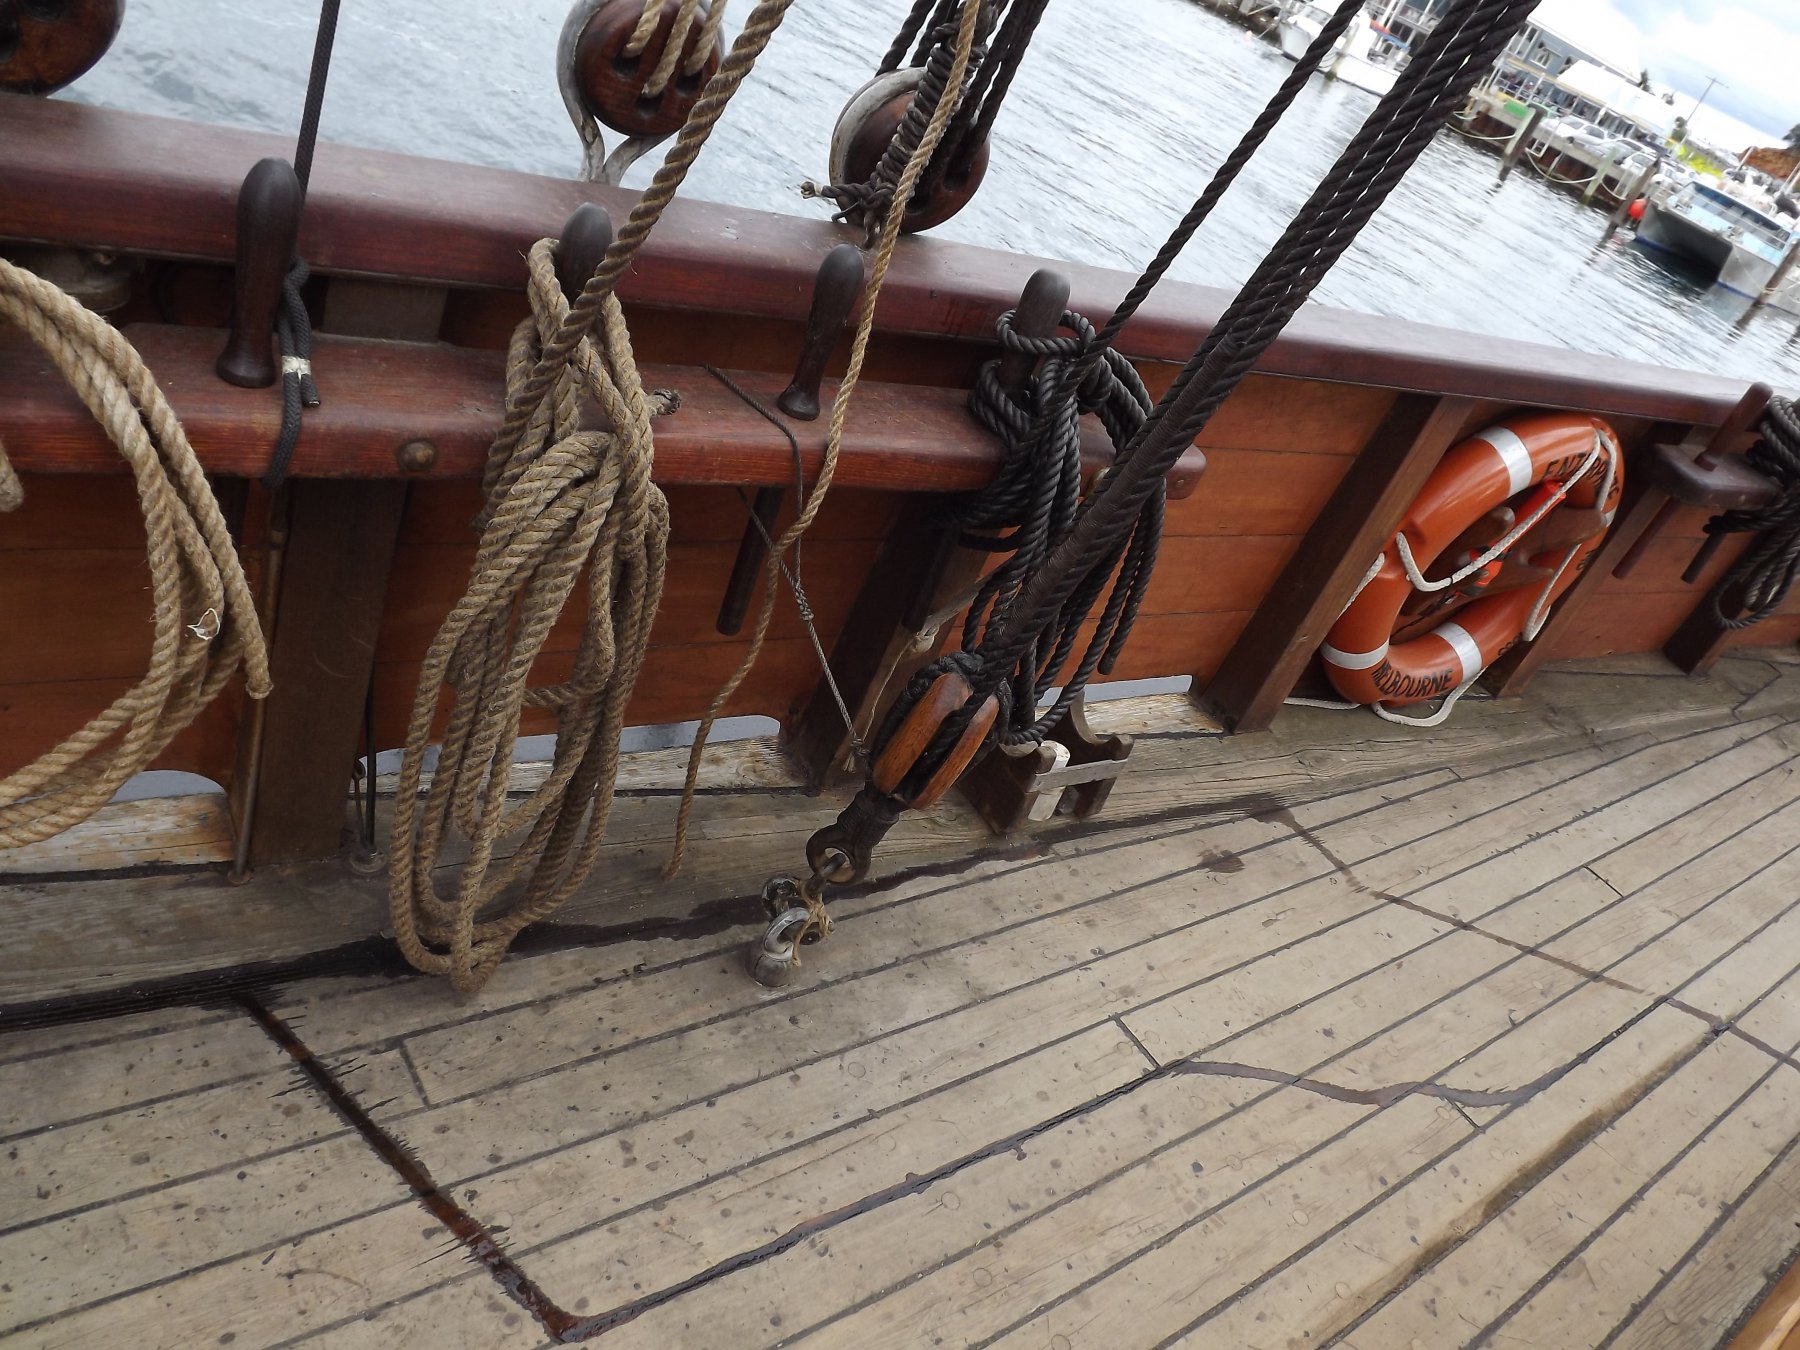
Tree nails for the decking haven't been mentioned yet but in case you're considering them here's a photo of full size decking showing how they blend in. I believe whoever spilt the tar pot was probably keelhauled and then left for our local White Pointers!! Rick

- 714 replies
-
- 3
-
-
- lady nelson
- victory models
- (and 1 more)
-
Before you get too far fitting the second planking take time to sort through it all and pull out any rough/cracked/knotty bits. As I remember my kit there was a small? amount of rubbish included which I put aside as there were always short lengths that were salvageable. Rick
- 241 replies
-
- 2
-
-
- mermaid
- modellers shipyard
- (and 1 more)
-
Looking good - this log will work beautifully as the definitive guide to "The Cutter Lady Nelson" with the "deliberate" errors showing how you need to think each set of actions through. Rick.
- 714 replies
-
- 3
-
-
- lady nelson
- victory models
- (and 1 more)
-
If and when you do I'm going to love following your builds! Rick
- 714 replies
-
- 1
-
-
- lady nelson
- victory models
- (and 1 more)