Rick01
-
Posts
652 -
Joined
-
Last visited
Content Type
Profiles
Forums
Gallery
Events
Everything posted by Rick01
-
Construction is a little slow at the moment - as an amputee I'm battling with a broken hip (not that big a problem) but the crutches together with a partial tear of my rotator cuff and an inflamed bursar are causing mobility problems! However I've managed to build lower and upper masts and started to dress them so I should be able to start some of the rigging shortly. I should probably add that fine work is a real problem due to the restricted movement of my shoulder.
-
Just take it slow and remember that the first layer of planking can be experimented with and will take a reasonable amount of sanding. Any problems arising don't hesitate to ask if you're at all unsure - we've all been there with our first (and with me 2nd, 3rd etc) models.
-
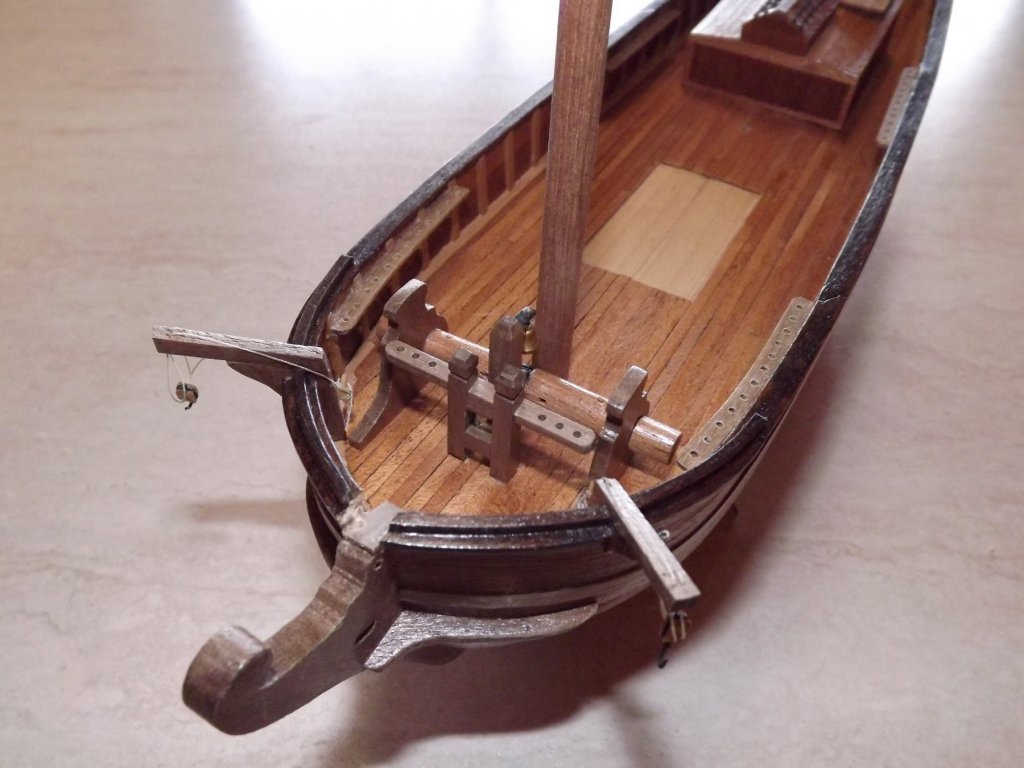
Getting on slowly. Bow section near complete and looking pretty crowded. Foremast is a temporary installation to get positioning of windlass etc. correct. Catheads have been rigged before fitting as it's so much easier than trying once crammed into the space available. Work is a little slow at the moment as I tripped a couple of weeks back and broke my femur - all pinned screwed and plated OK but sitting for any length of time to work on the model is rather painful!
-
I have a large sheet of MDF and just use bulldog clips to hold the plans, propping the plans up behind my worktop.
-
Hows the planking coming on? I find the last couple of runs can be real sods when attempting a perfect fit! I guess work and your cough have probably been in the way a bit recently.
- 714 replies
-
- 3
-

-
- lady nelson
- victory models
- (and 1 more)
-
Help reading plan
Rick01 replied to Rick01's topic in Building, Framing, Planking and plating a ships hull and deck
Thanks for the help everyone it's given me something to work with now. -
Help reading plan
Rick01 replied to Rick01's topic in Building, Framing, Planking and plating a ships hull and deck
Full plan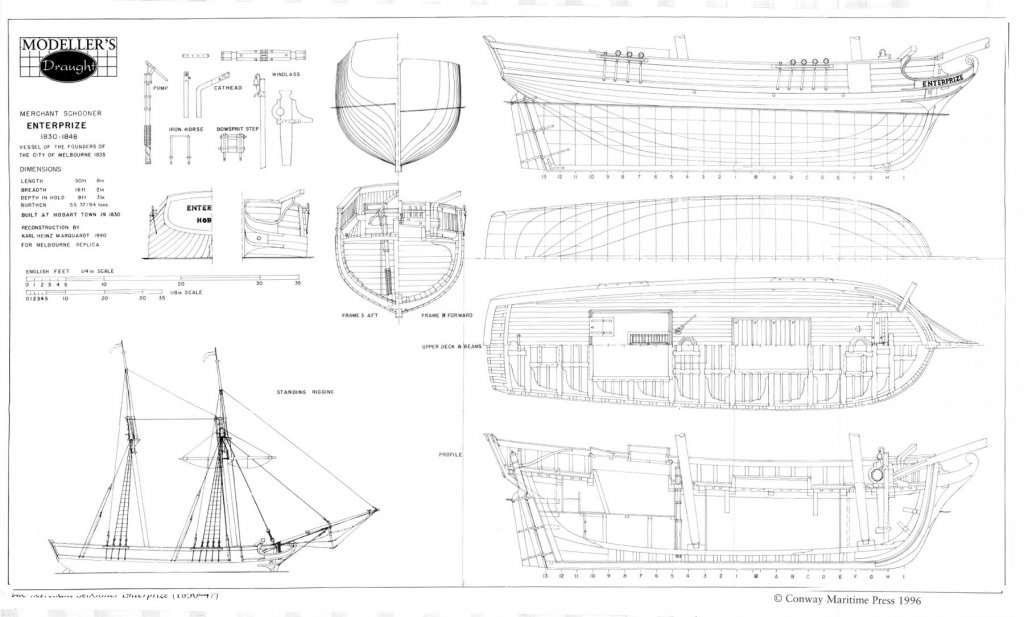
-
Help reading plan
Rick01 replied to Rick01's topic in Building, Framing, Planking and plating a ships hull and deck
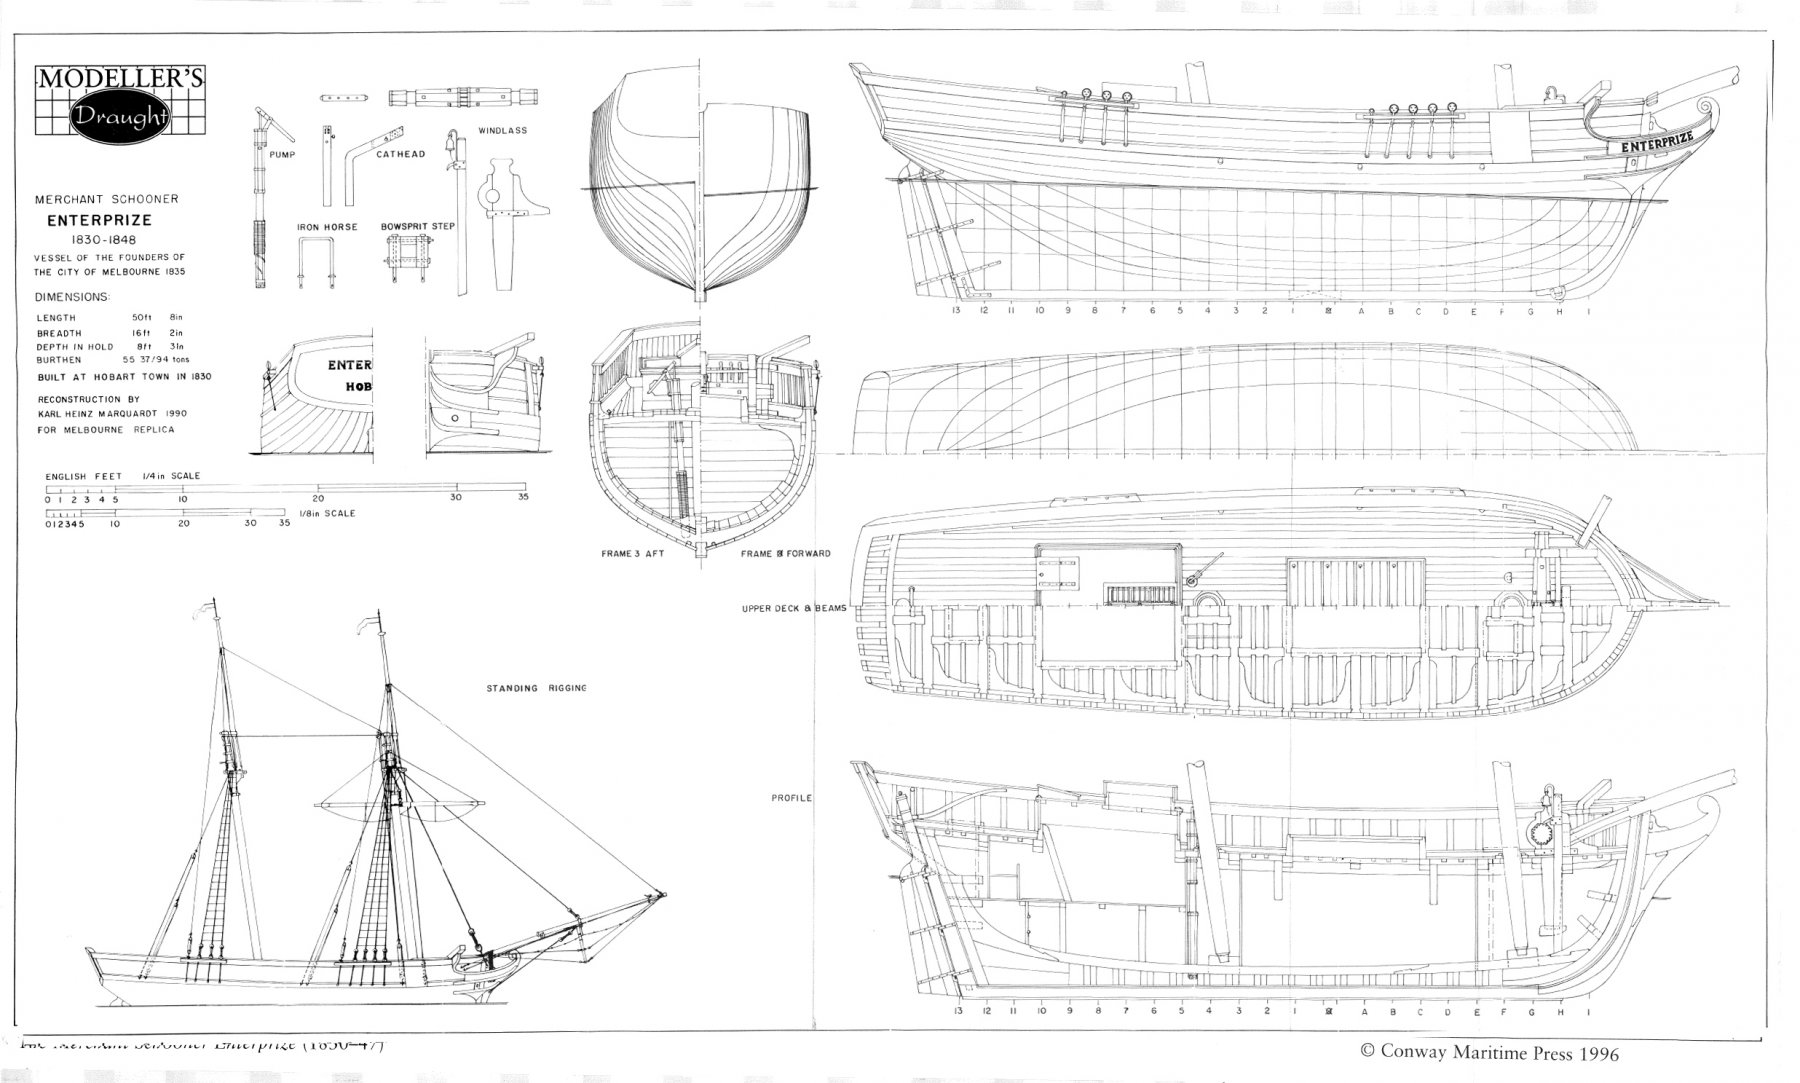
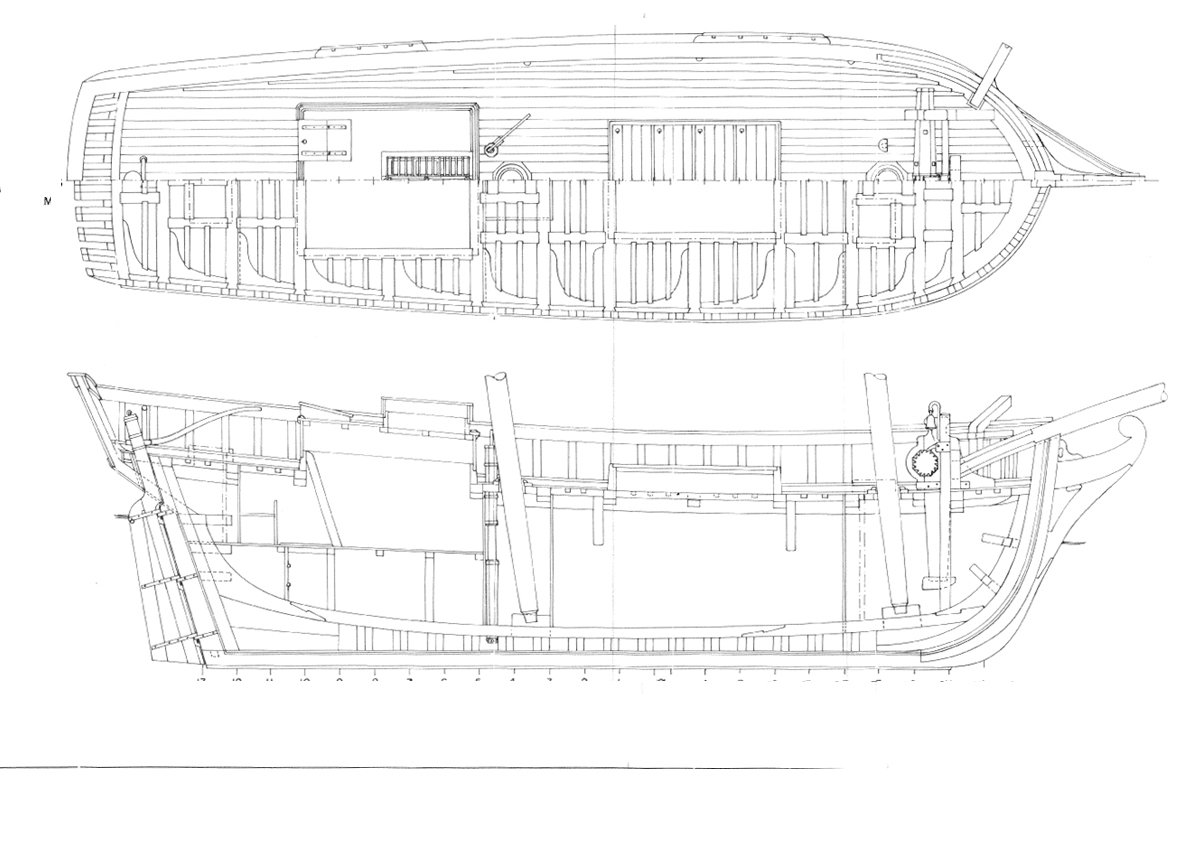
Vessel is an 1830 topsail schooner built in Hobart. Profiles as attached. There are no original plans of the schooner but this plan was drawn up by Karl Heinz Marquardt based on drawings of the Topsail Schooner Enterprize and ship building practices common at that time. Length over deck 53', beam 18' 4", draft 10' Hope this helps.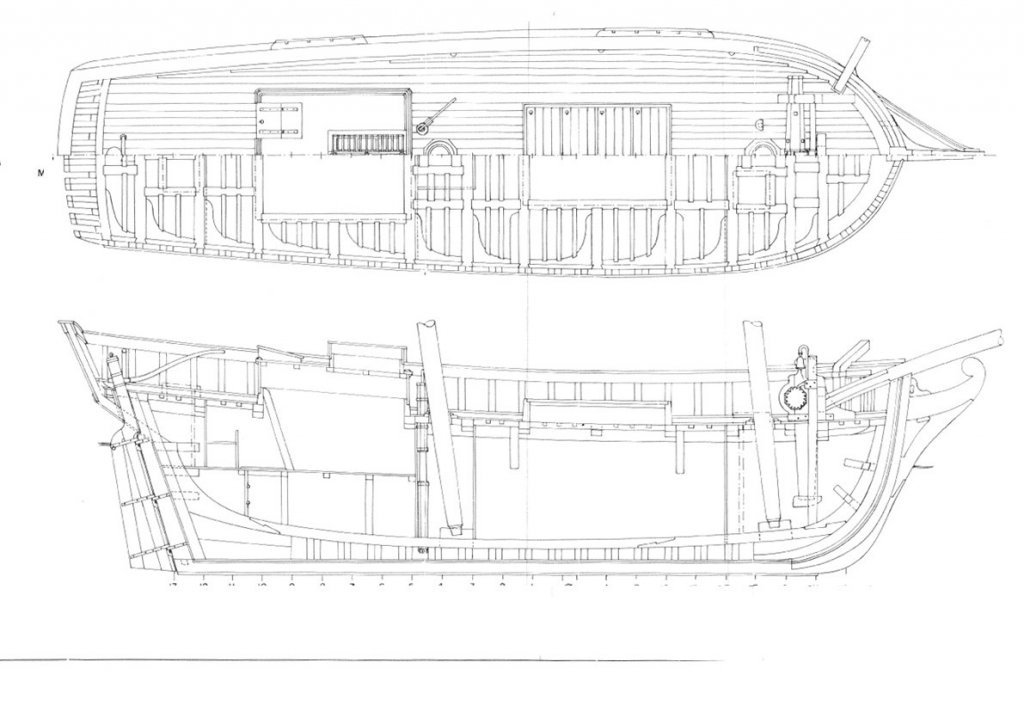
-
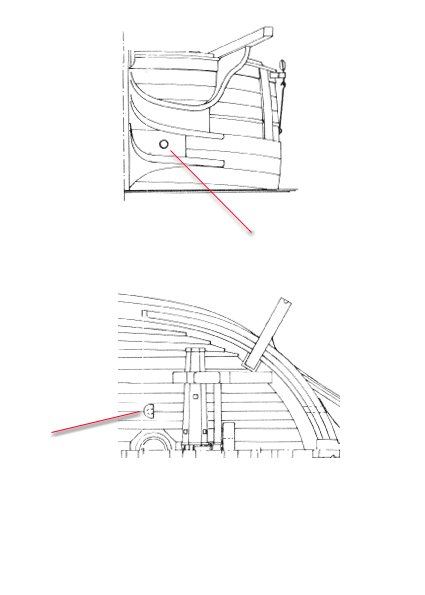
I'm having a problem understanding a section of a plan for a 1830 topsail schooner. There appears to be an anomaly surrounding the hawse hole for the anchors. From the attachecopy you can see that there appears to be a hole well forward to allow the anchor cable to be pulled aboard but it is situated below the deck level. From above there doesn't appear to be any way for the cable to be fed round the windlass but at the same time it appears that there is (possibly) a hole in the deck alongside the fore mast which I would guess as being for the cable to be fed down to the rope locker. Can anyone clarify these points please.
-
This is only guesswork, however I would expect to see the double system used on heavier yards. Having said that I've seen more use of the double system than the single and my knowledge of nautical terminology/usage is so close to zero as makes no difference. I tend to look at things on a purely mechanical basis.
-
As far as I can see truss pendants were used where an obstacle of some sort would prevent the yard being fully lowered if held by parral trucks as in the rigging for cutters and topsail schooners. Oversimplified but it works for me.
-
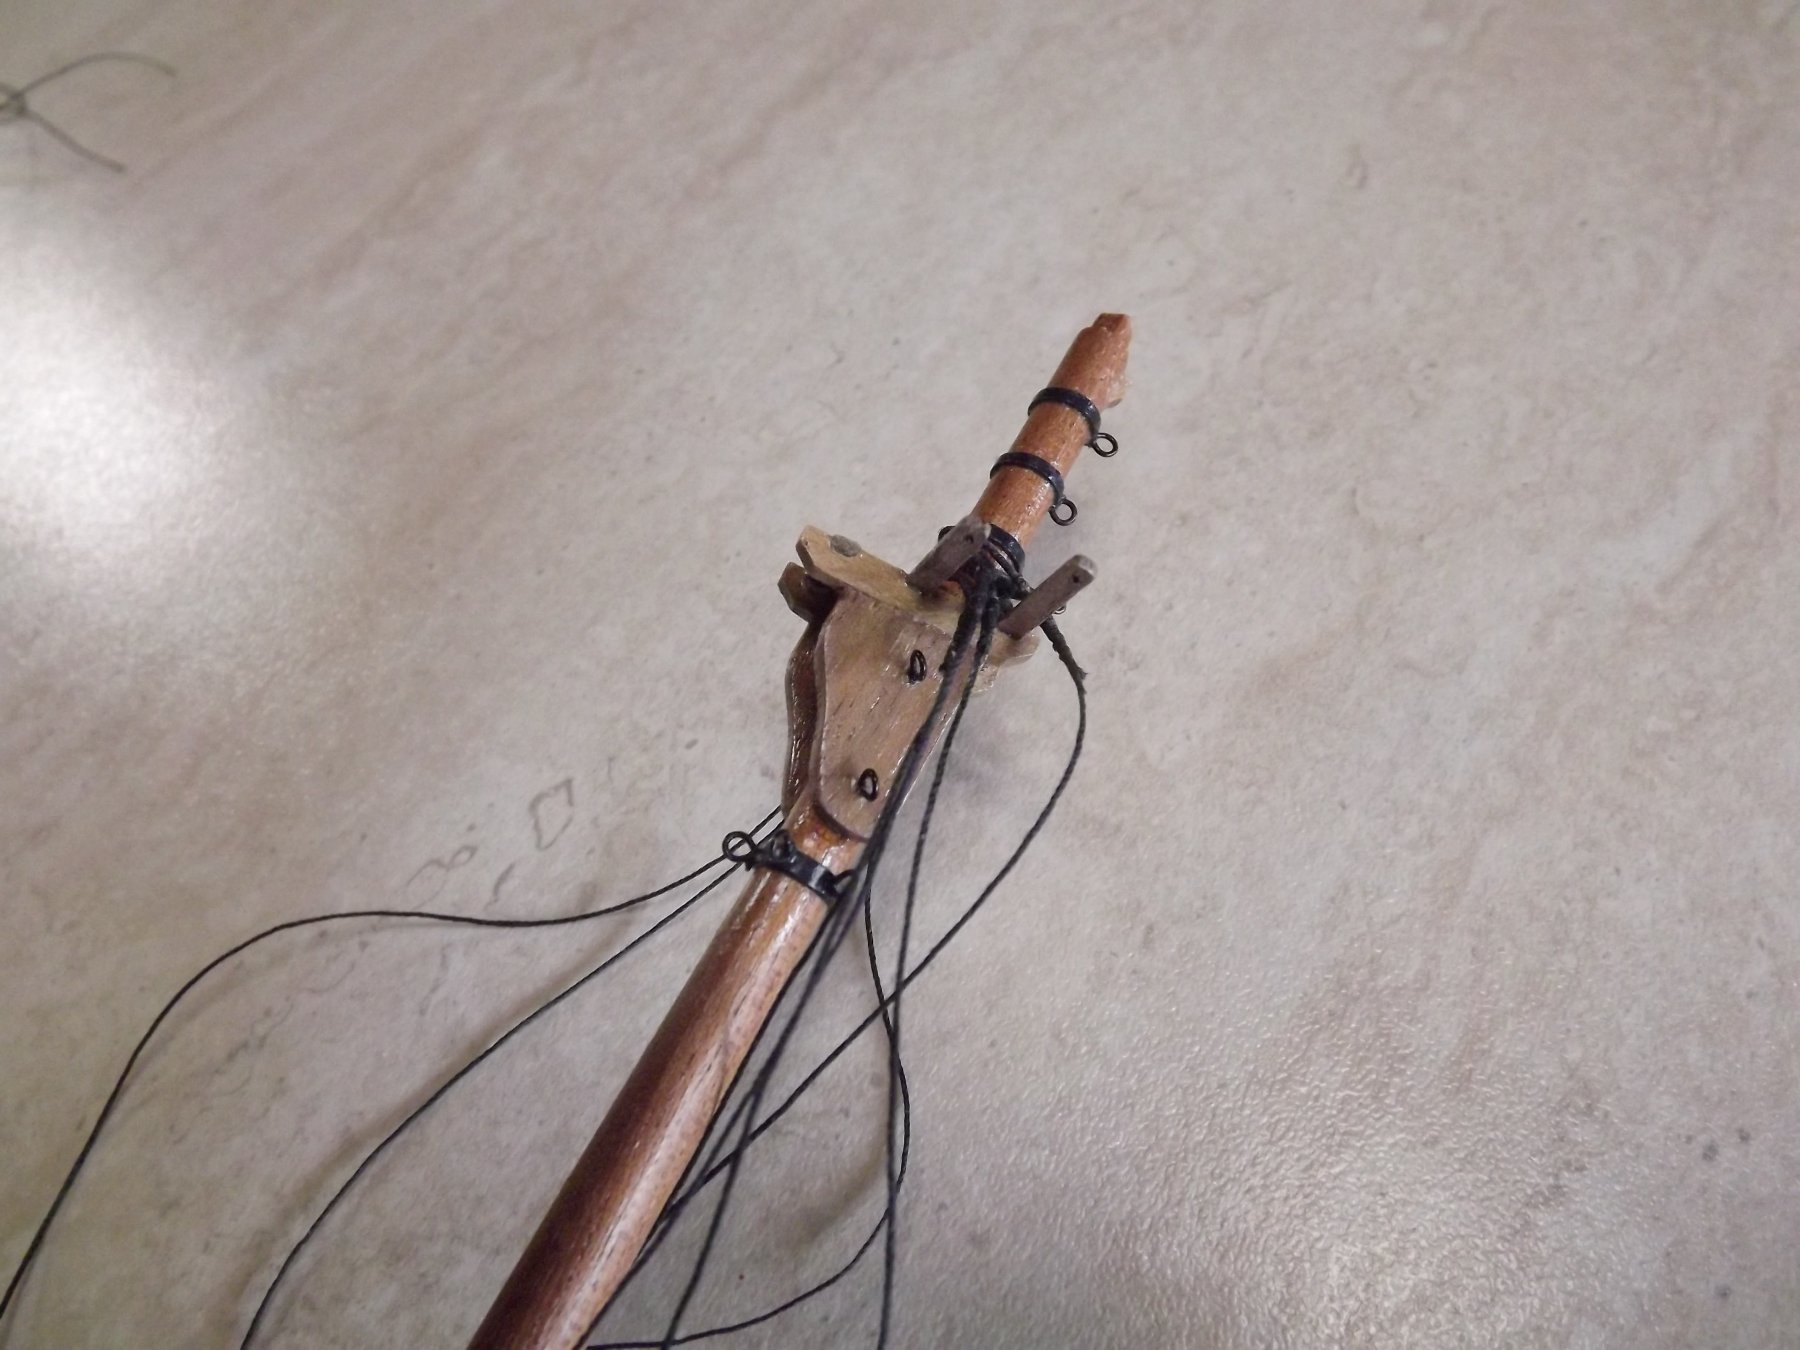
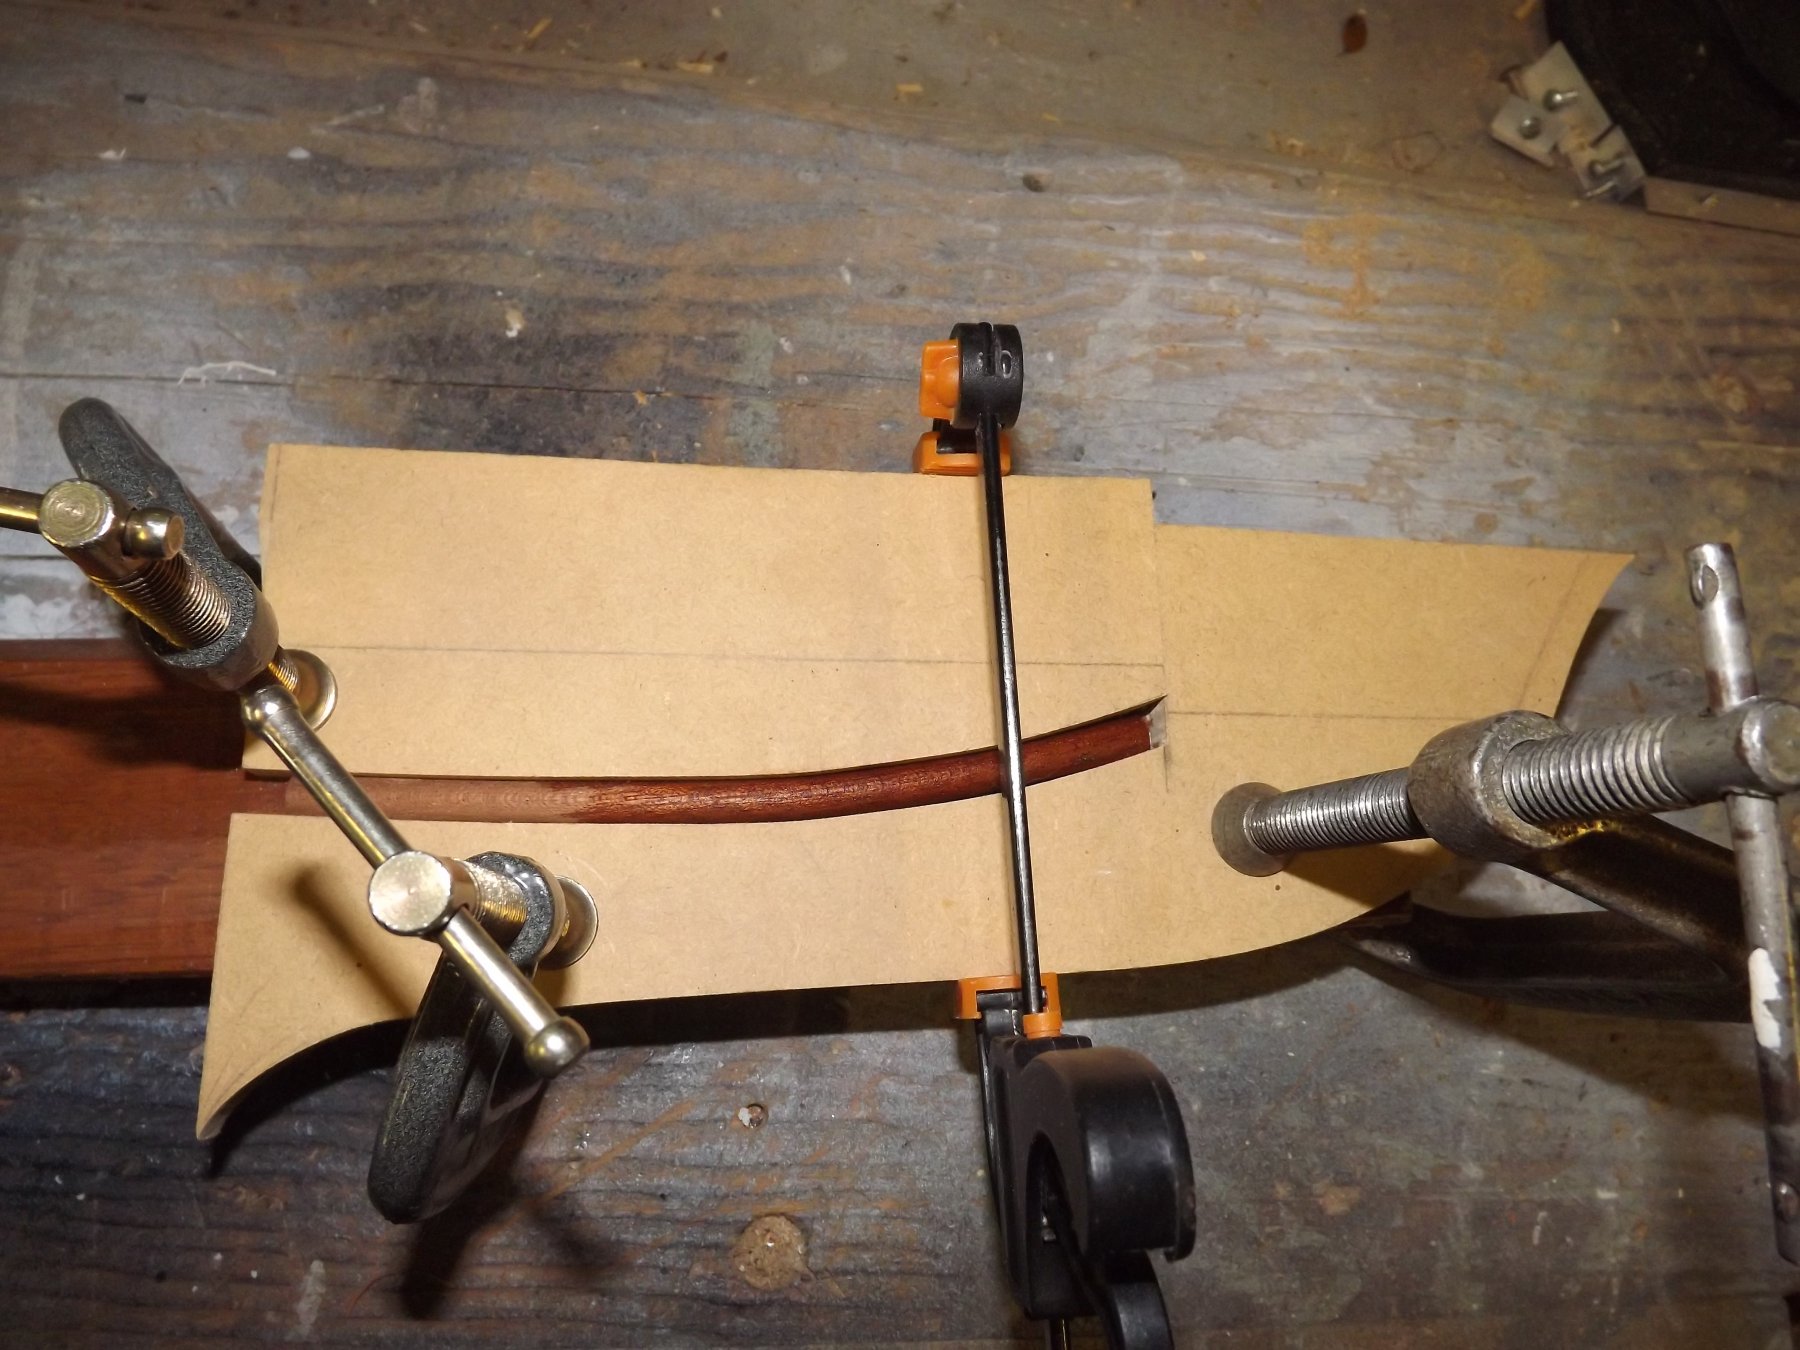
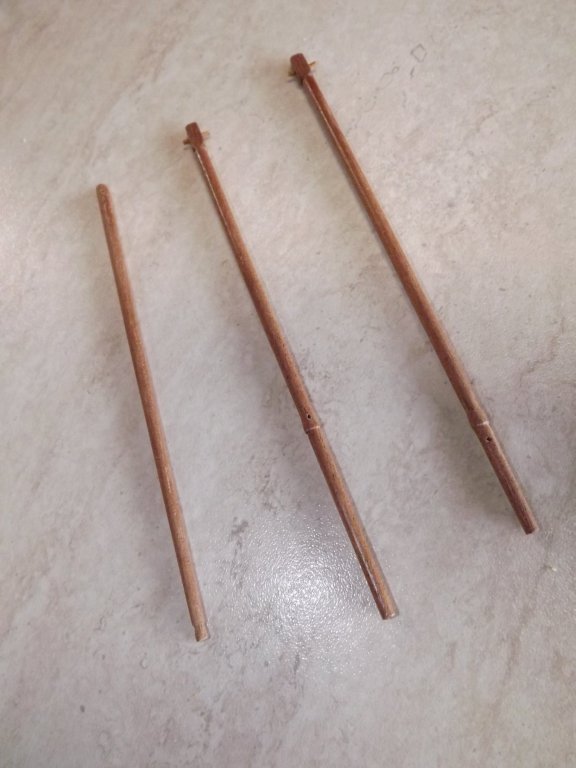
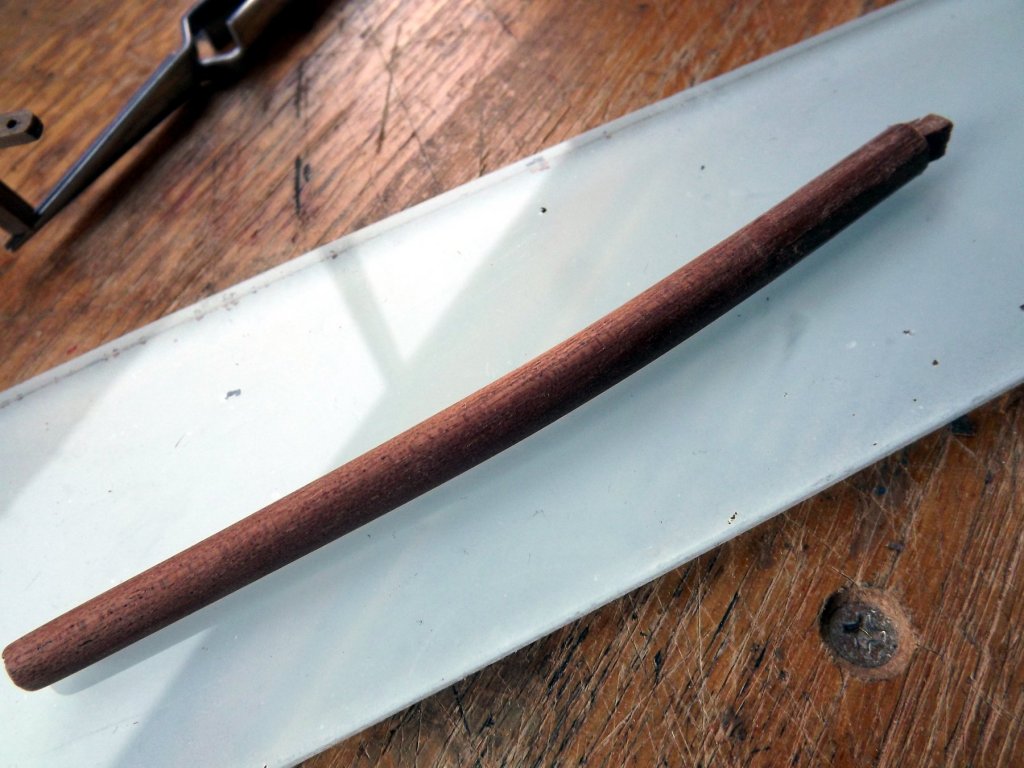
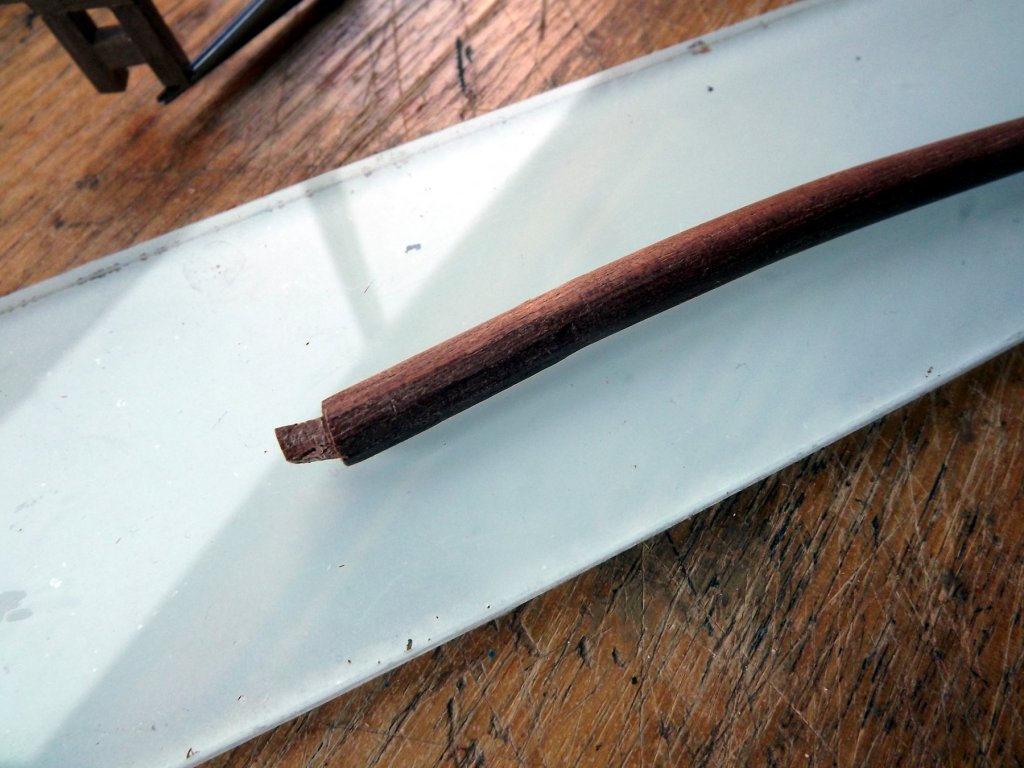
Bowsprit step completed after a couple of tries and two days of fiddling to get everything to line up. Bowsprit roughed up as it was needed to ensure the step fitted and sat in the correct position. I had to ensure it was tapered correctly, starting with an 8mm dowel placed in the chuck of a hand drill used as a lathe I tapered it to measure 7 mm down to 6 mm and then had to square the end to fit the step at the correct angle - that was a real pain as there was a lot of guesswork and fitting by eye, however I got there in the end. Getting the curve needed 24 hours of soaking but it did come out OK.
-
More to the point - coughing with sharp implements in one's hand isn't exactly recommended! Hope your Dr can fix you up quickly.
- 714 replies
-
- 5
-
-
- lady nelson
- victory models
- (and 1 more)
-
LOL Our guys only have their own outside run with climbing frame and sun beds. Heating is provided courtesy of 12 floor vents throughout the house that fit cats perfectly (or so they think).
- 714 replies
-
- 3
-
-
- lady nelson
- victory models
- (and 1 more)
-
You very nearly set Australian/US relations back to the Battle of Brisbane with your first paragraph (if you've never come across this WWII pacific theatre episode Google it ). However someone who looks after cats so well can't be all bad so I will continue to assist as and how I may. Will have to say WOW really can't think of any other comment here.
- 714 replies
-
- 4
-
-
- lady nelson
- victory models
- (and 1 more)
-
New member from North Sydney Australia
Rick01 replied to Fernando E's topic in New member Introductions
If you haven't already have a look at the various posts on here regarding the Mermaid - nice kit but with a few inaccuracies. By the way "Welcome". -
Thanks for the links - I searched EBay pretty well from here and these guys didn't show up at all! I'll bookmark them for further investigation.
-
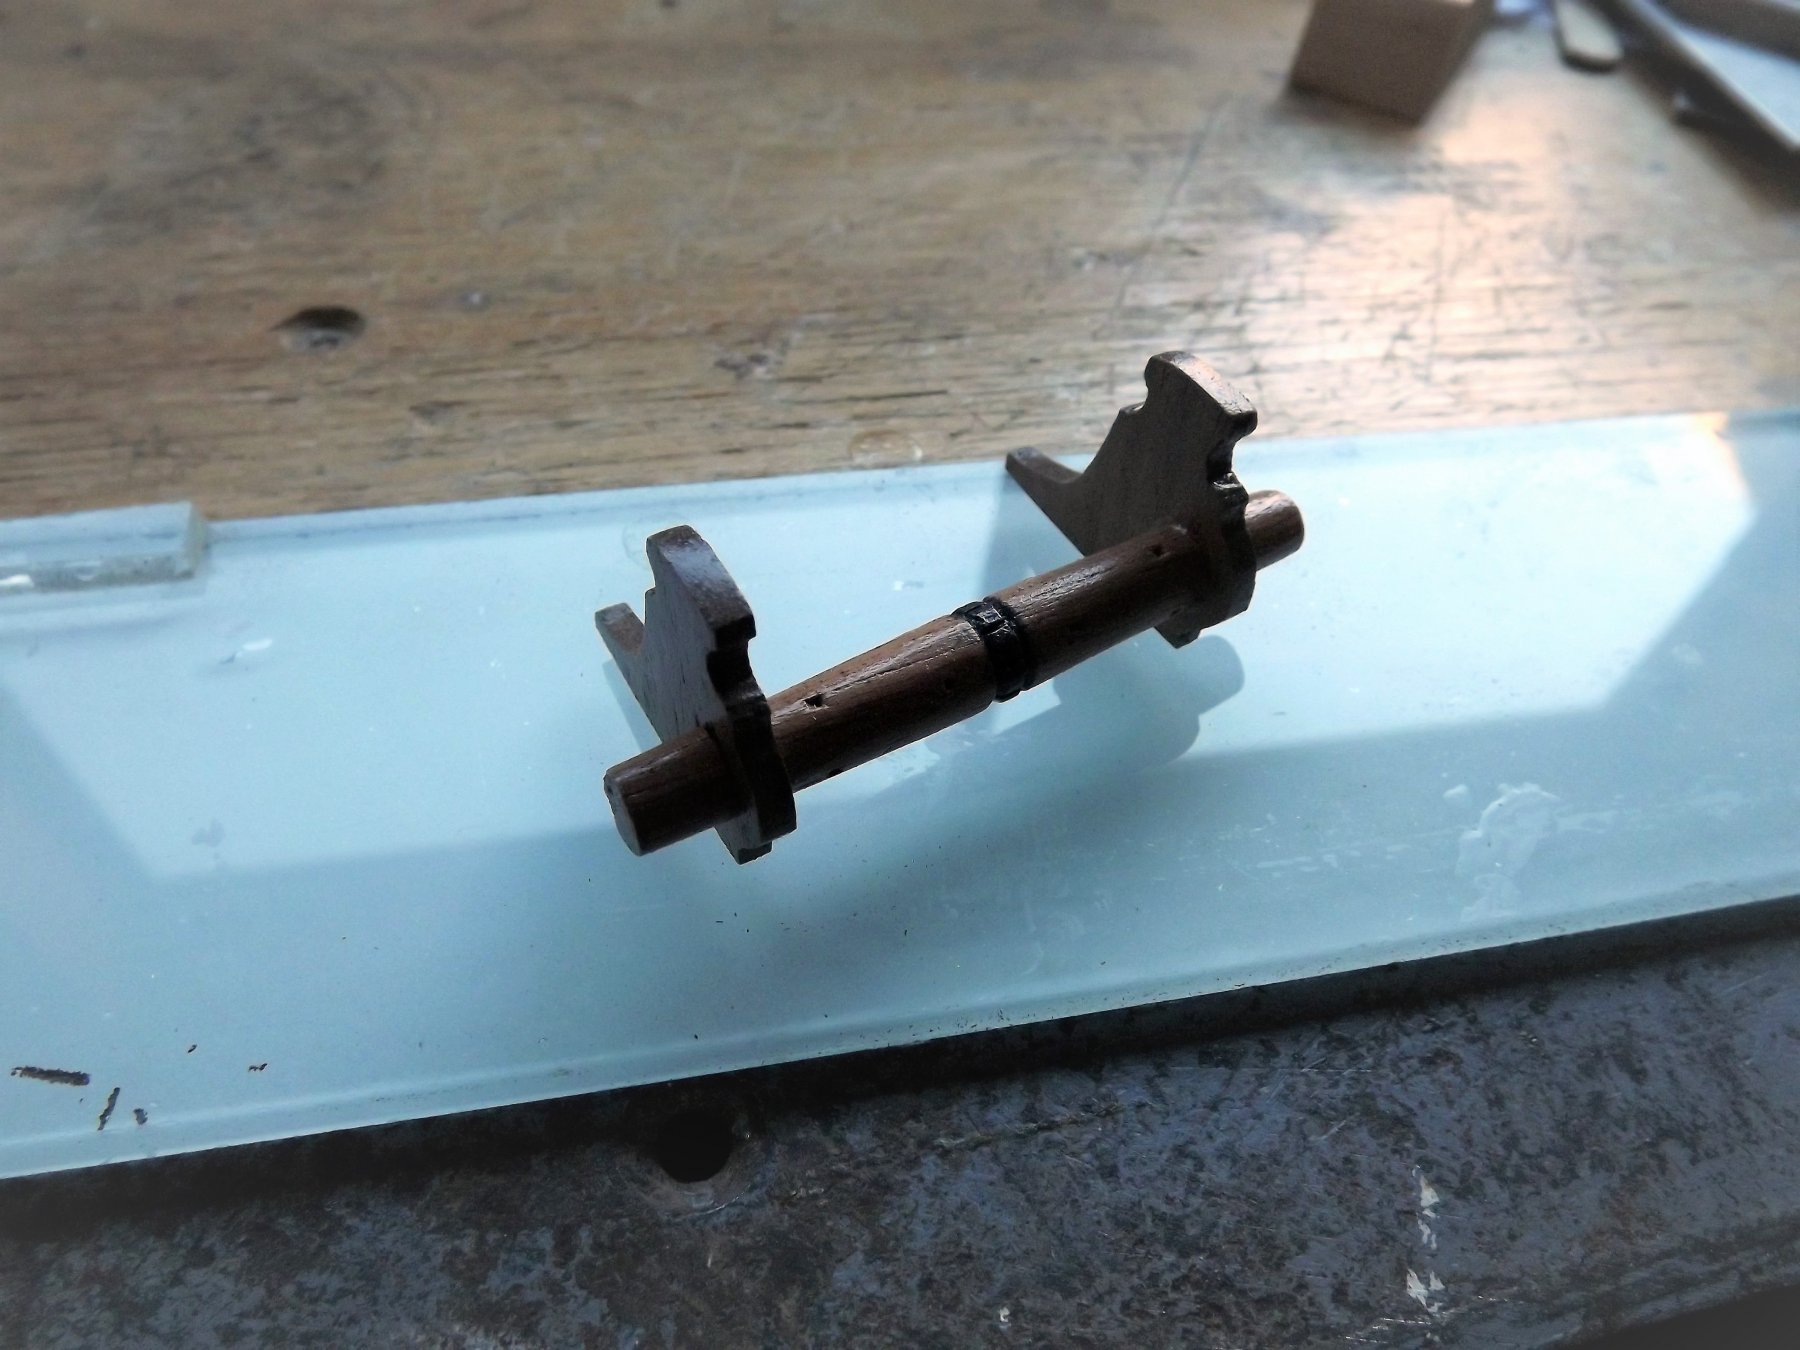
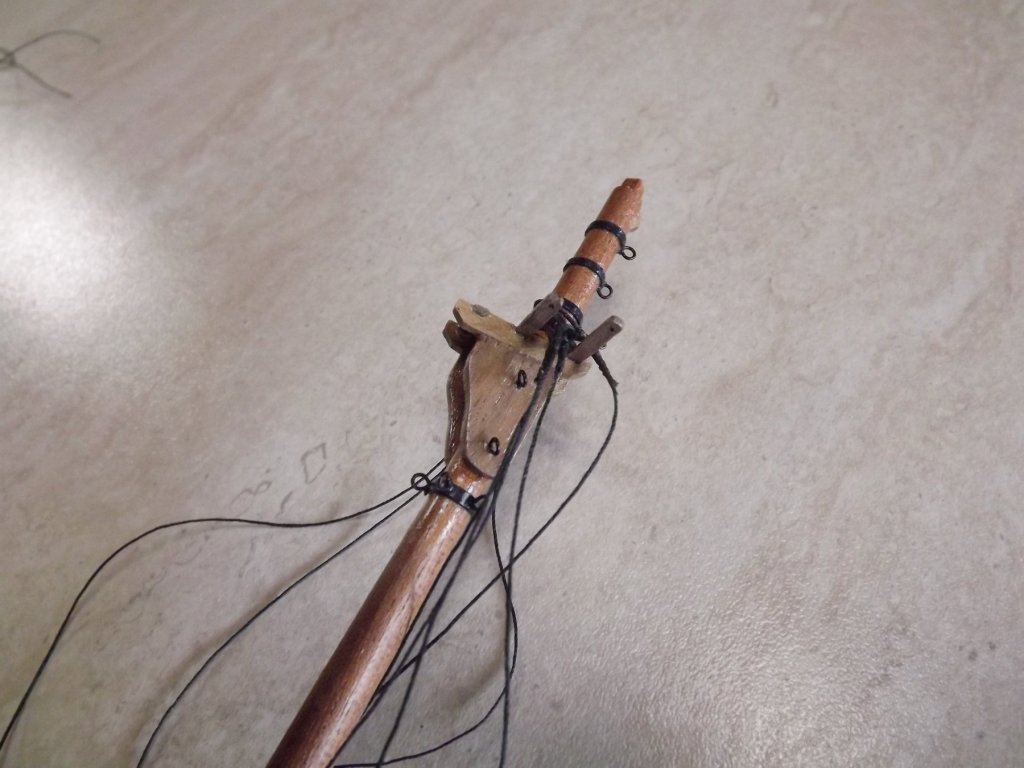
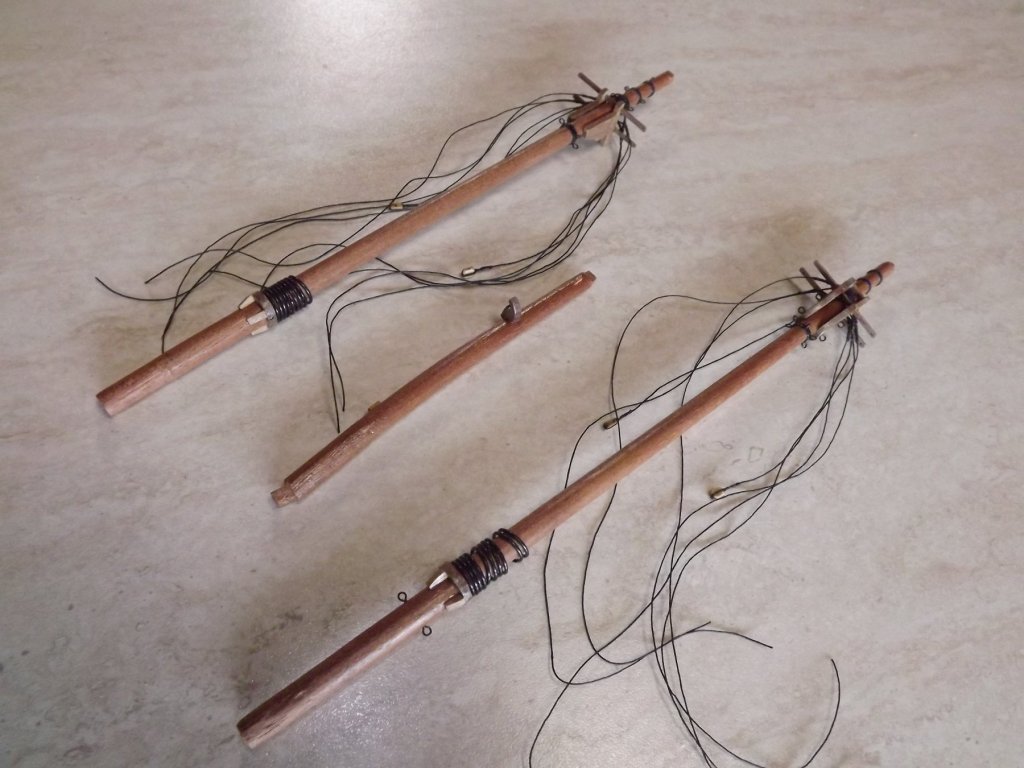
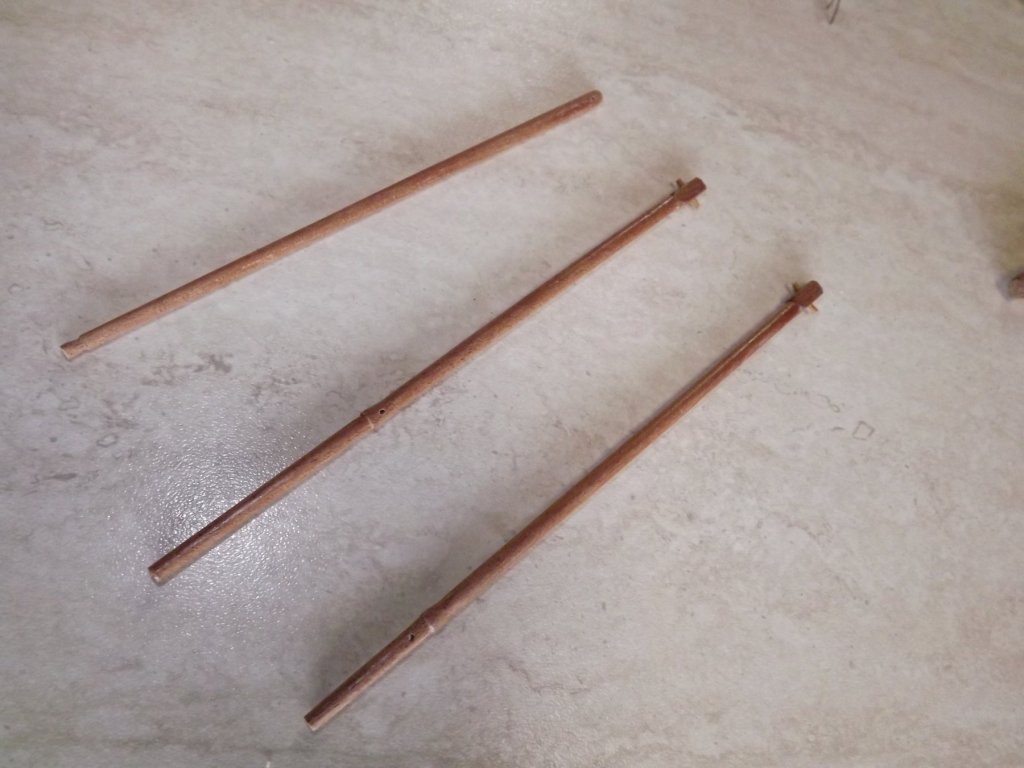
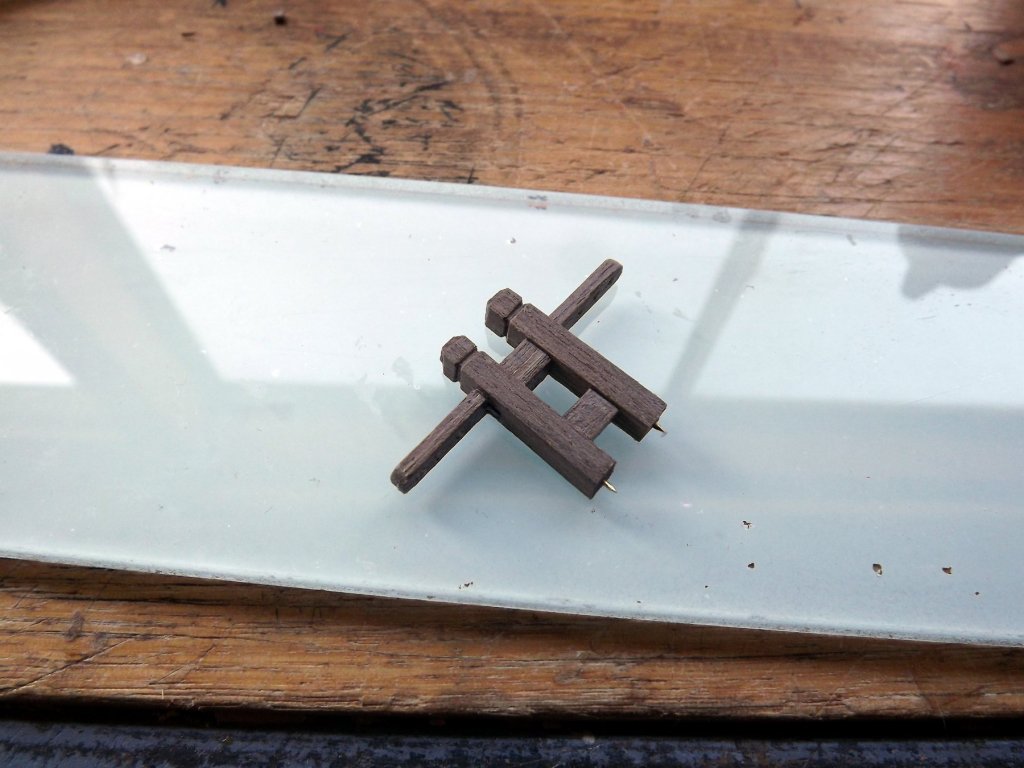
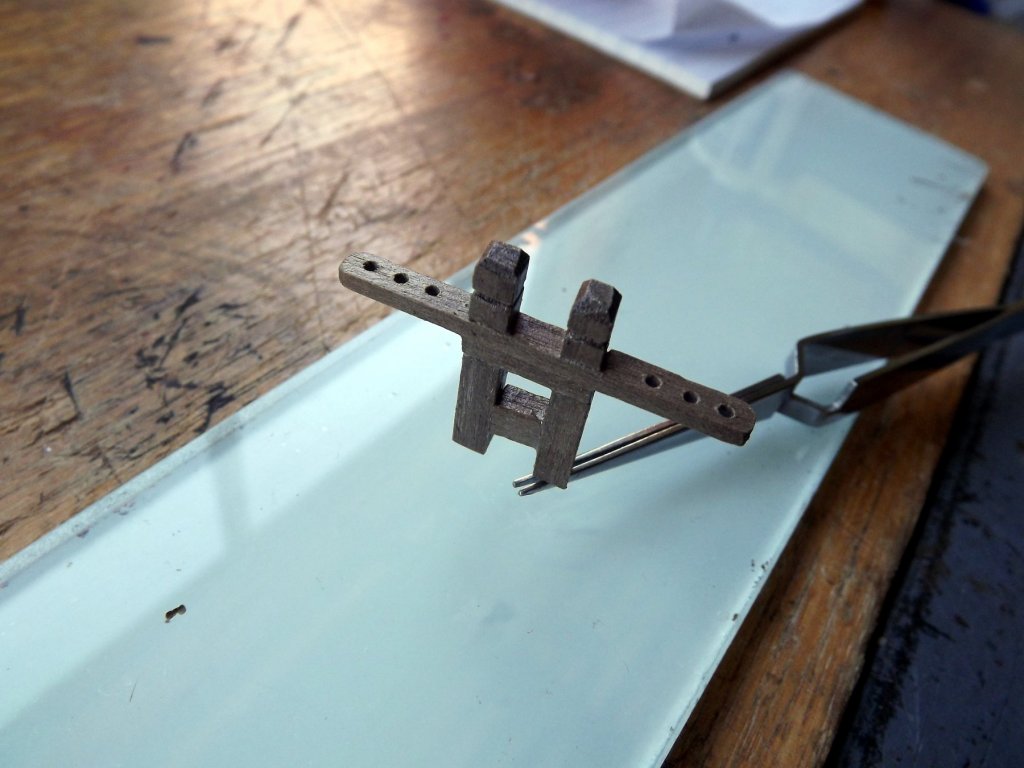
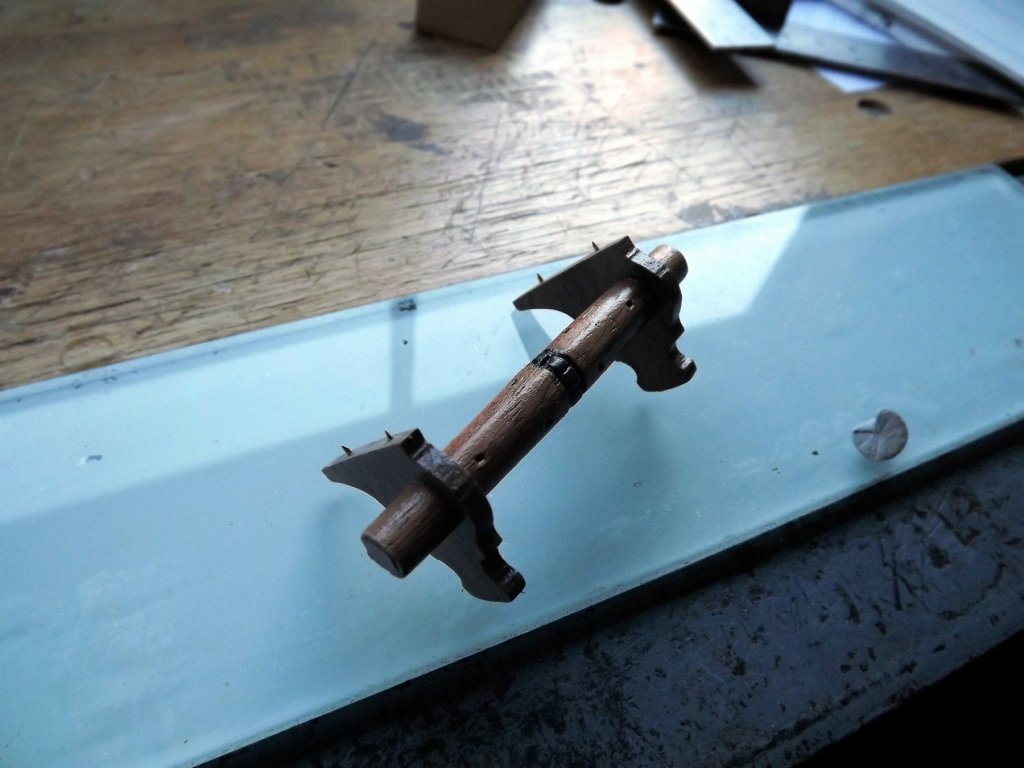
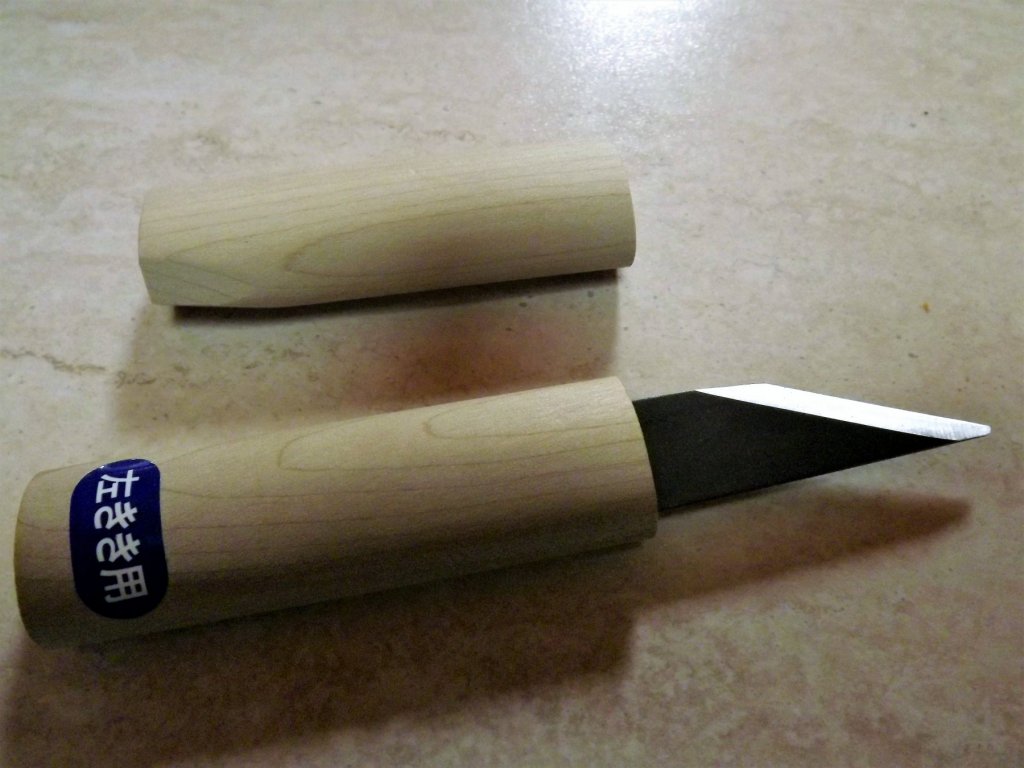
OK fixed Allan's point - these comments don't upset me I'm on here for help and assistance as much as anything. Some adjustment of the rudder still needed but that will be quite simple. I've made a windlass and added locator pins to help secure it when fixing to the deck - only used 8 brass nails to get the 4 pins - the others are flying through the fourth dimension somewhere. Bowsprit is under construction and as it has a curve at the base I'm attempting to bend 8mm dowel after soaking for 24 hours. We'll see how this goes! And now one for you Jay - I'm very slowly upgrading my cutlery - here's the first item and now all I need to learn is how to sharpen these things!! Few more deck fittings to make then masts and calculating the size and quantity of deadeyes, blocks etc.


-
I've actually used a makeup brush for a few years now and love the way it lays paint/varnish down. Love the knives but wonder - have you thought/experimented with a slight curve on the tail like this http://www.thewritingpenstore.com/p-1356-stabilo-easyoriginal-rollerball-pen-left-handed.aspx. I use one of these pens as a leftie and find that it helps anchor it quite securely. It's OK I think I can still remember some of the mods I made to the kit!
- 714 replies
-
- 2
-
-
- lady nelson
- victory models
- (and 1 more)
-
Actually it does us all good to be reminded why we use particular tool from time to time. It's so easy to forget and then just tell a beginner "use a ..mm drill bit, forgetting the "brad point" clarification. LOL
- 714 replies
-
- 2
-
-
- lady nelson
- victory models
- (and 1 more)
-
Did Did your mother never tell you not to play with knives? Now back to boat building.
- 714 replies
-
- 2
-
-
- lady nelson
- victory models
- (and 1 more)
-
Jay - finish will be "as is".The history of this little schooner is that she was a simple trading ship purchased in Sydney by John Pascoe Fawkner - and became the ship that sailed from Van Diemen's Land (Tasmania) in 1835 with the first permanent white settlers that started what has become the City of Melbourne. There are only a couple of contemporary sketches of her and no plans so in reality this is model is an approximation based on trading schooners of the period. When purchased she had been used to ship coal so one wouldn't expect any paint scheme at all. Allan - you're causing me problems!!! :-) Whilst looking at the hinge plates I spotted eye bolts on the top plate - obviously for chains to secure the rudder however I can't see any securing points for the chain. So over to you mate, where and how should the chains be secured to the hull?
-
One minor problem here in Aus. Your $15.00 blades seem to be double that plus postage even when sourced locally https://www.japanesetools.com.au/ and I'm not sure I trust EBay. Buying from USA gets a good selection at reasonable prices but postage kills it. :-(
- 714 replies
-
- 2
-
-
- lady nelson
- victory models
- (and 1 more)
-
No problem Allan - somehow I missed that probably as I was limited in the brass strip I had available at the time. I'll need more strip at some point so next visit to Floataboat in Melbourne I'll see what's available and look at rectifying this.
-
Hi Jay - remember I'm retired so it allows me extra time to work on stuff. Going to slow down now as I attempt building things like the cat heads and windlass.