Rick01
-
Posts
652 -
Joined
-
Last visited
Content Type
Profiles
Forums
Gallery
Events
Everything posted by Rick01
-
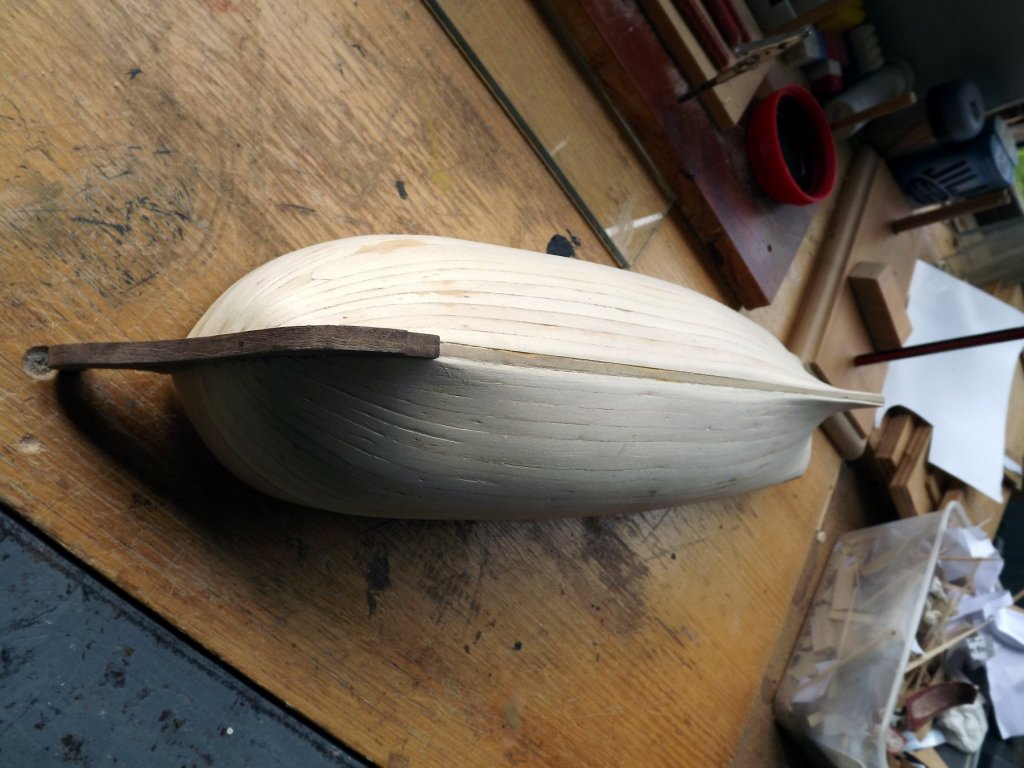
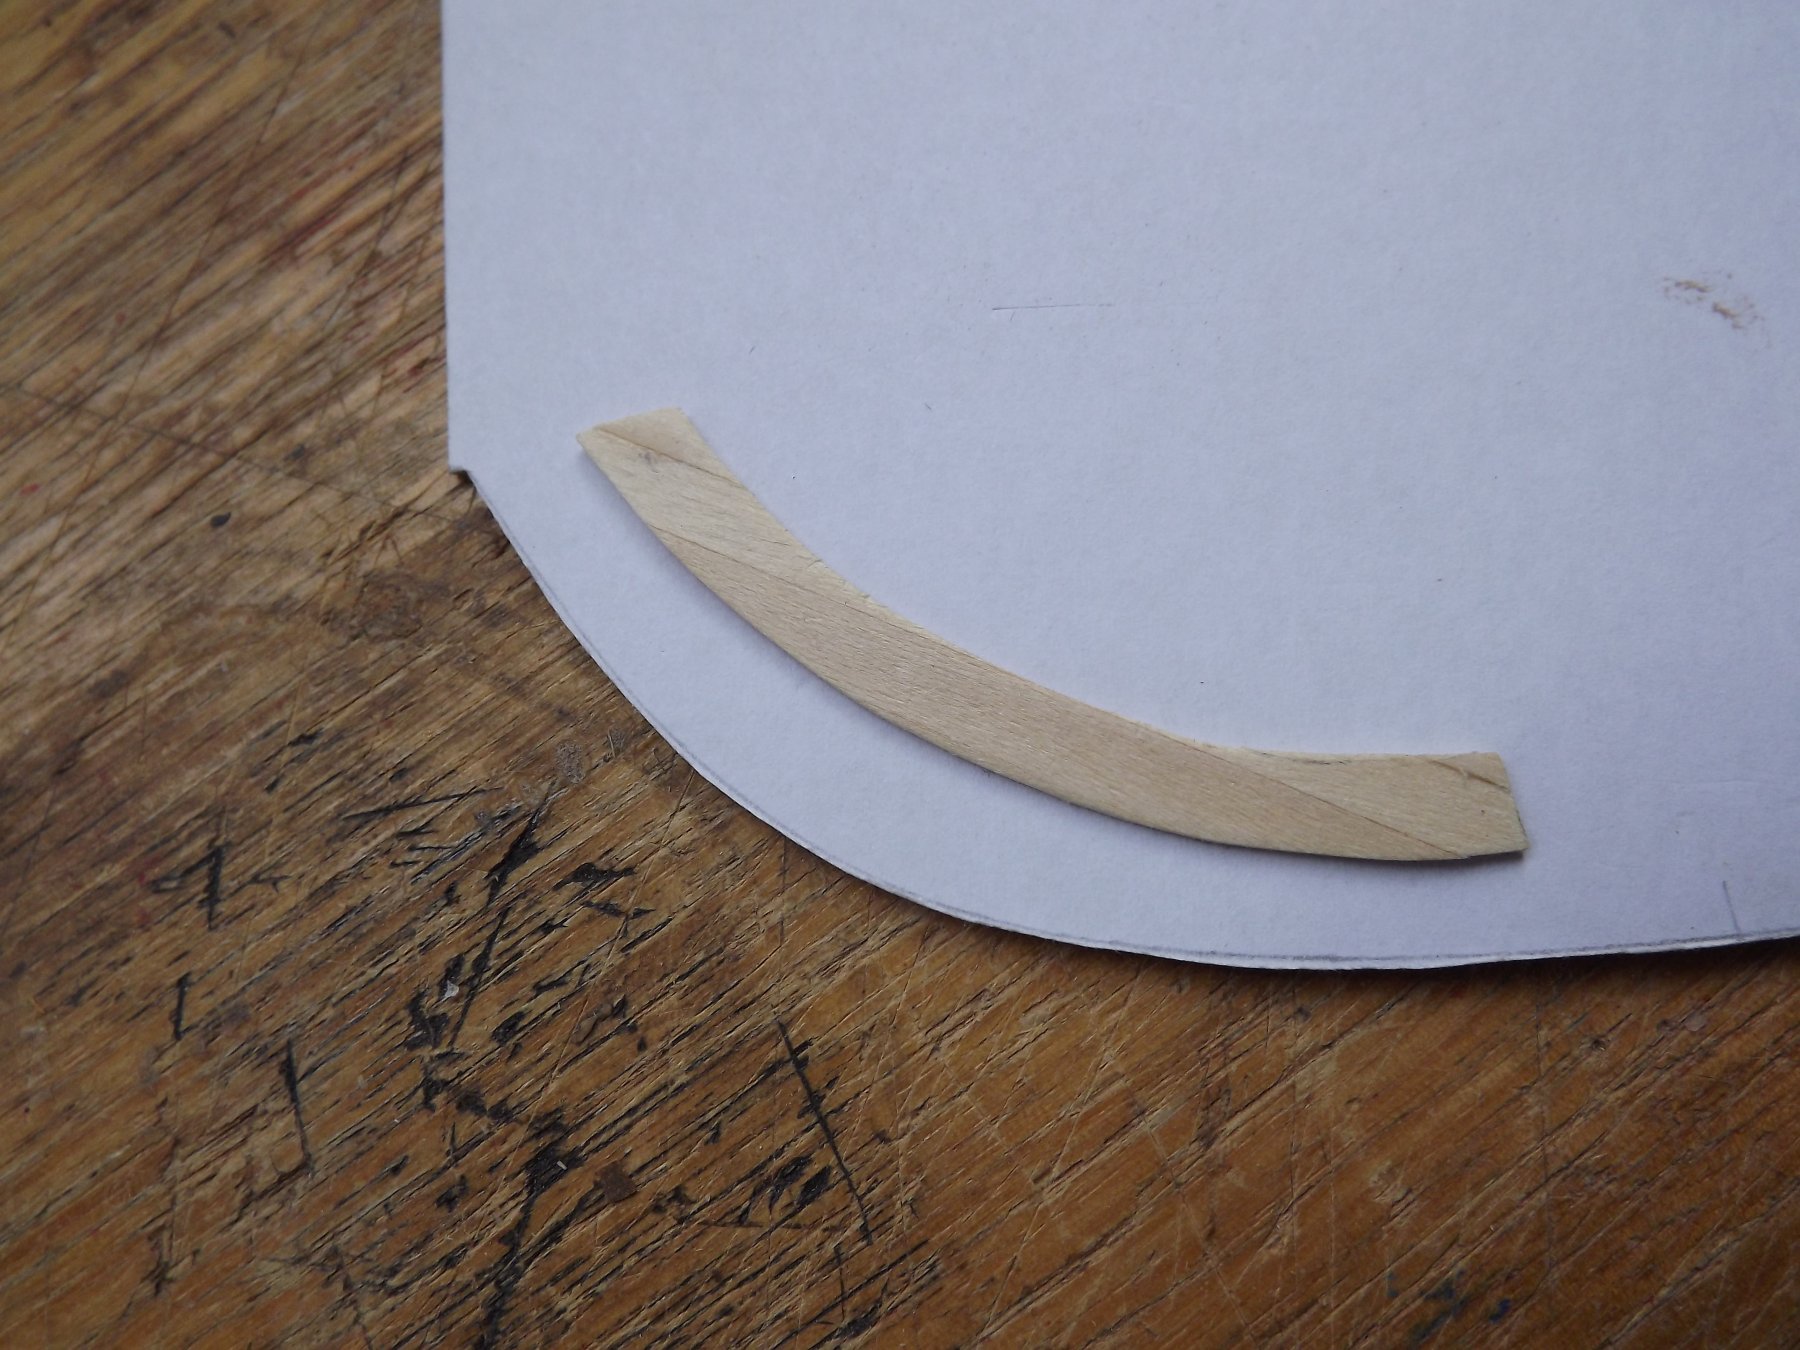
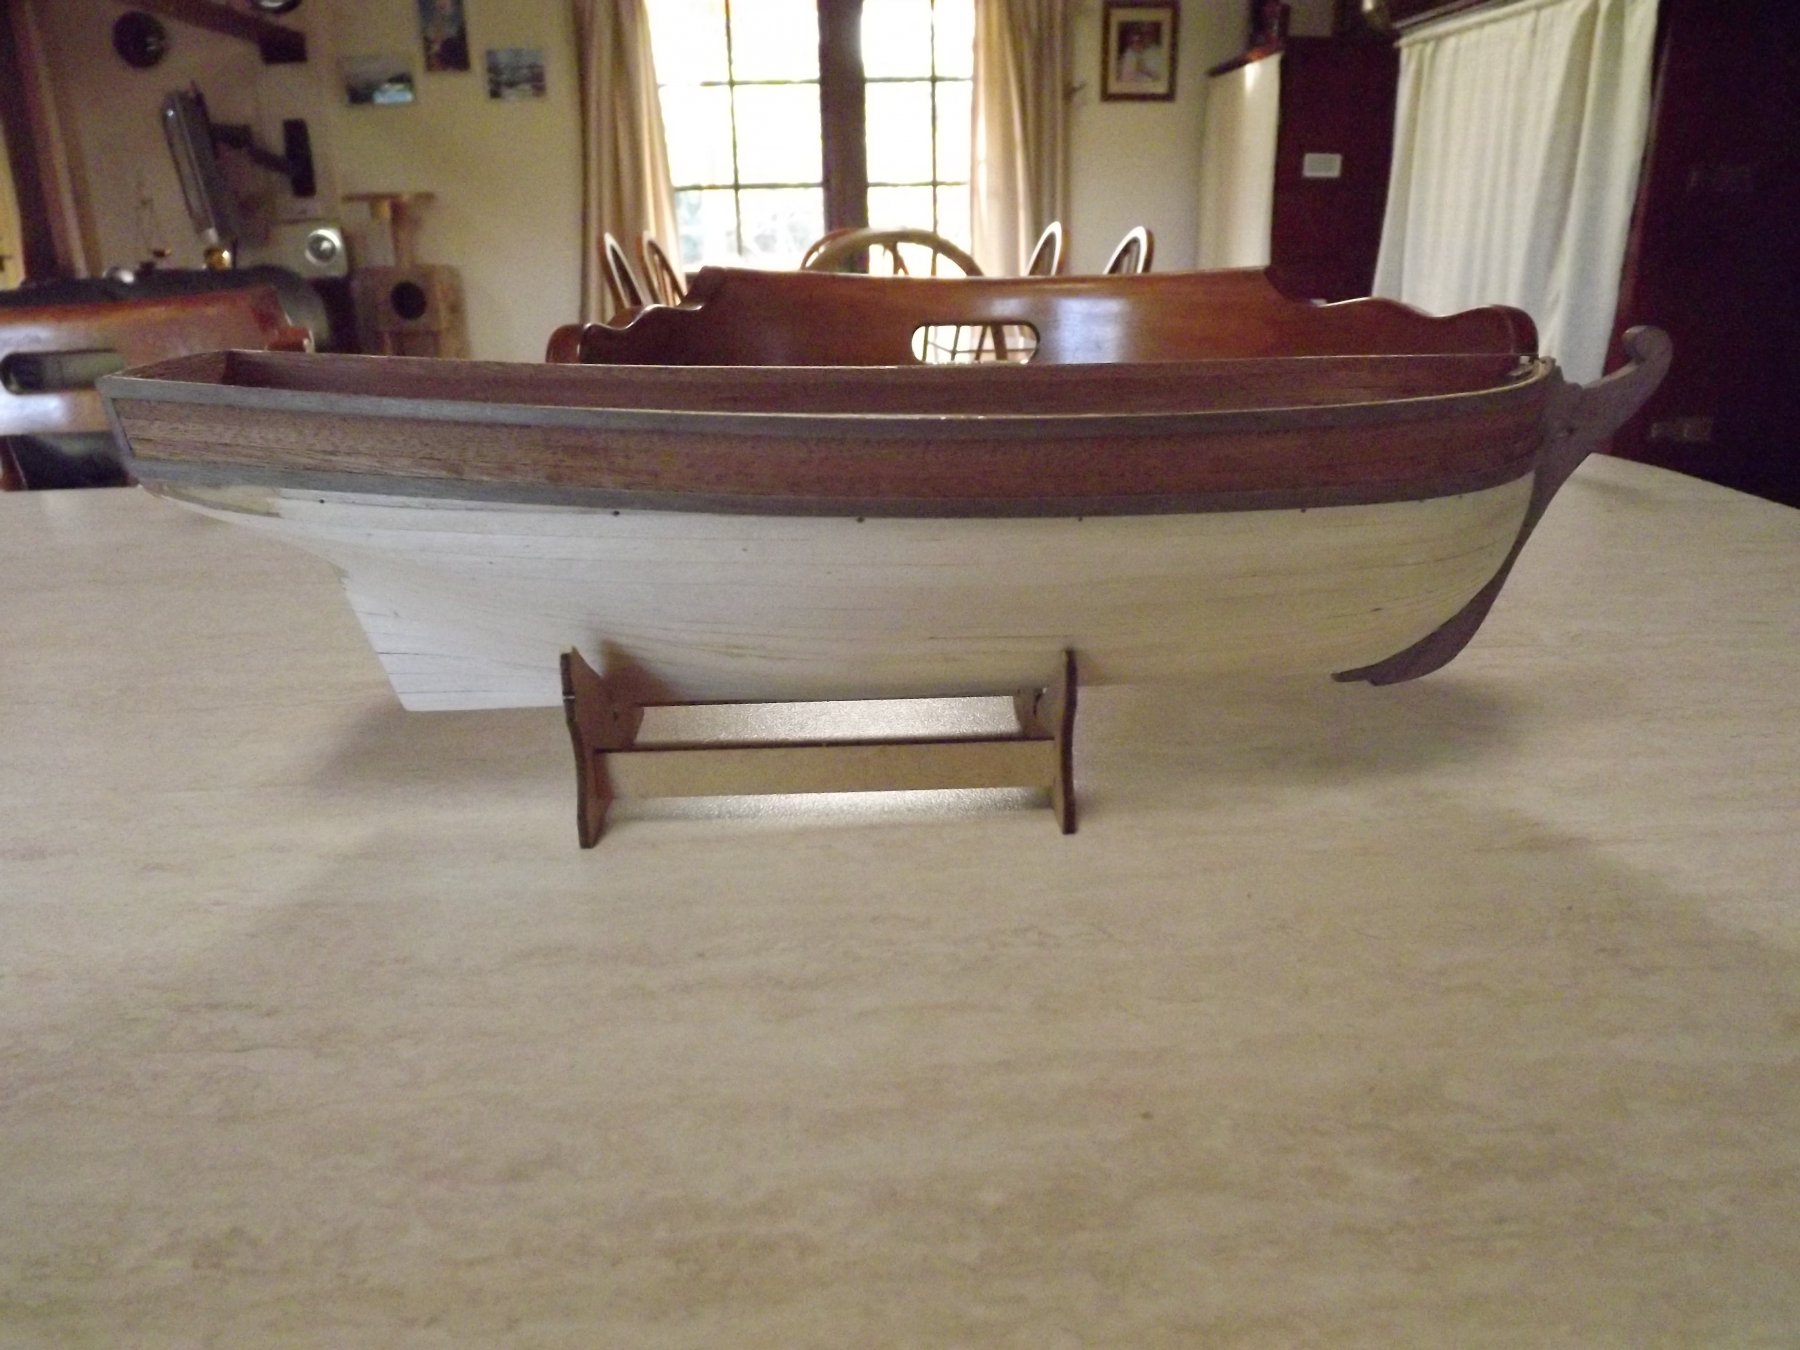
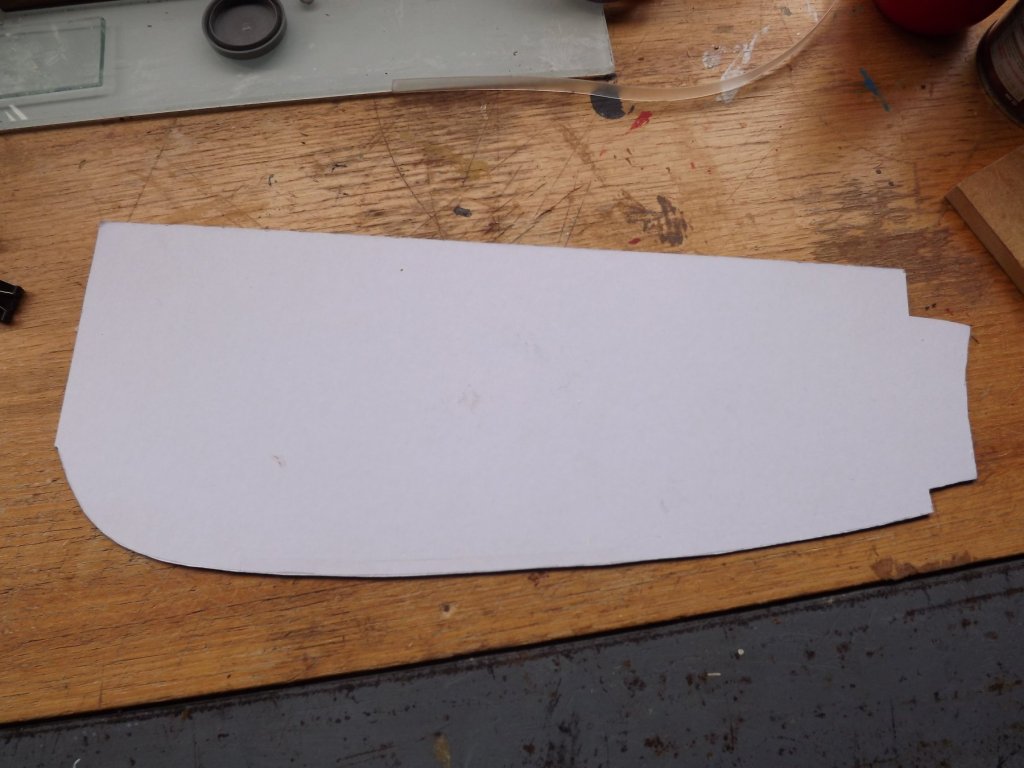
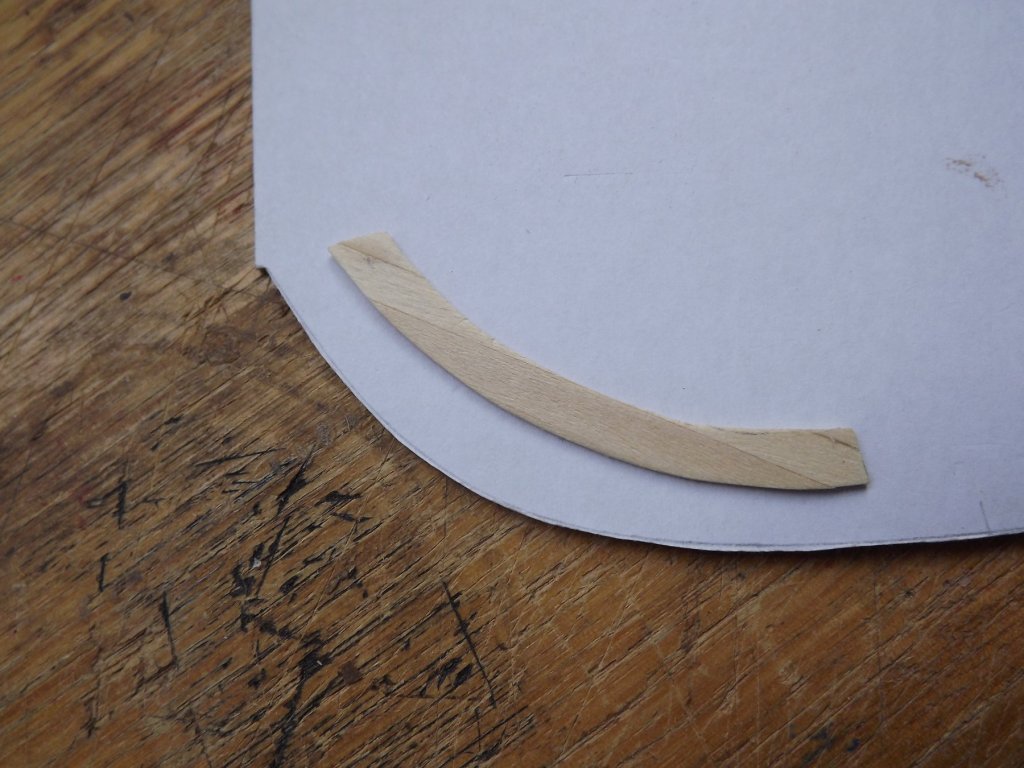
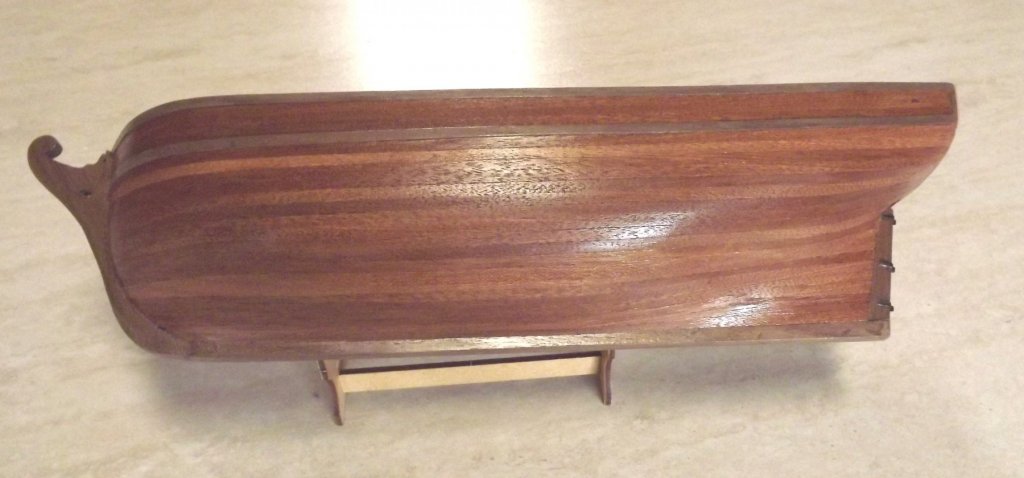
I've got the capping rail under construction now. First made a pattern by tracing round the gunwales top onto a heavy card, then cutting out the relevant curve. Next was to soak then clamp a strip of lime for the basic curve. Once that was dry I edge glues three strip of lime and using the pattern as a guide cut the sharp curve needed at the bow. I'll be staining the finished product with walnut which has the added benefit of stiffening up the very soft lime timber.

-
A question about Lady Nelson by Amati
Rick01 replied to CharlieZardoz's topic in Wood ship model kits
I'd say it's quite acceptable - check some of the other builds of this model for detail on the possible problems you may find. I finished a build of it recently but modified the rigging fairly extensively using L. Petersson's "Rigging Period Fore-and-aft Craft" as a guide as the kit is somewhat over simplified. -
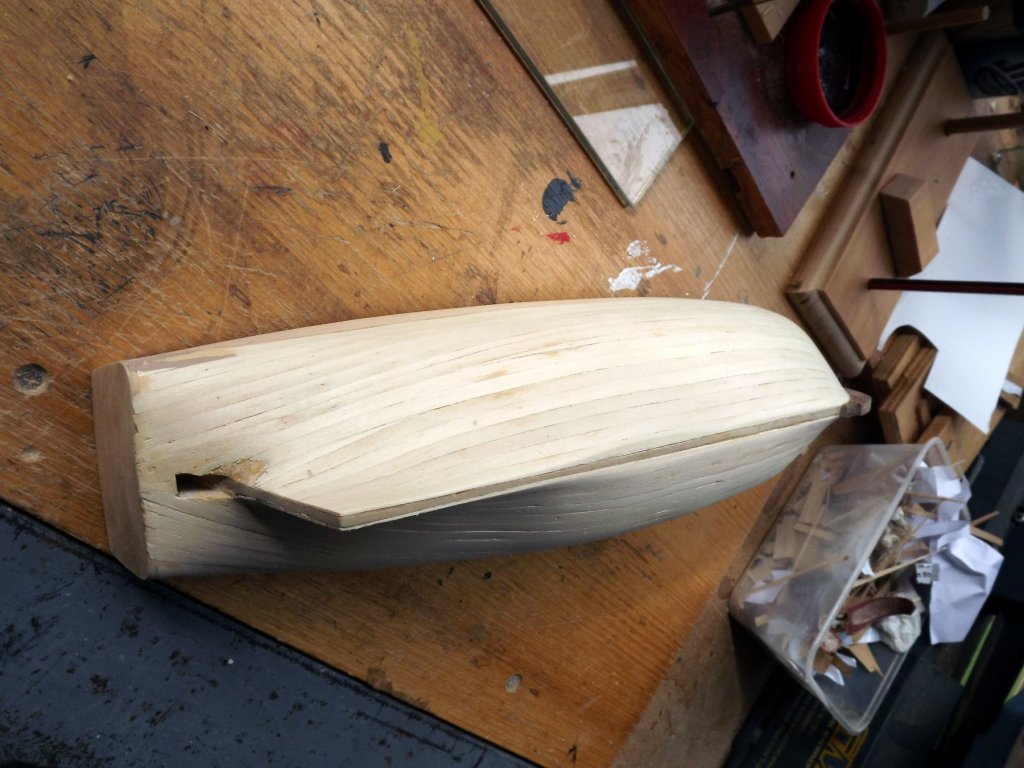
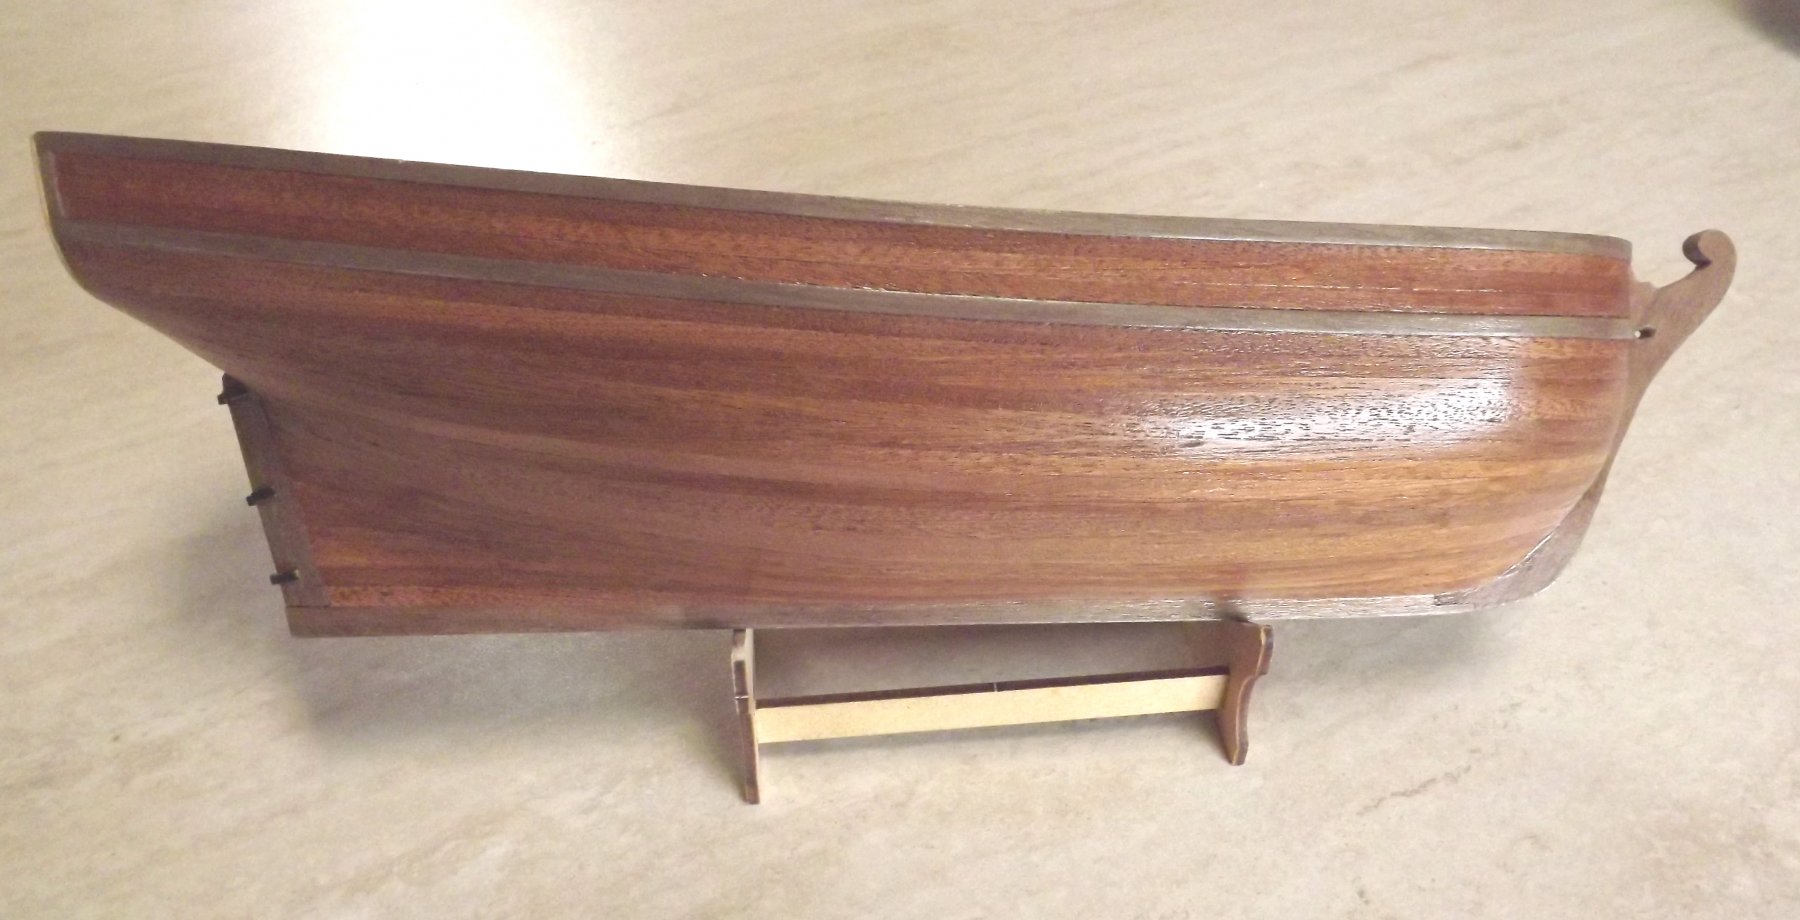
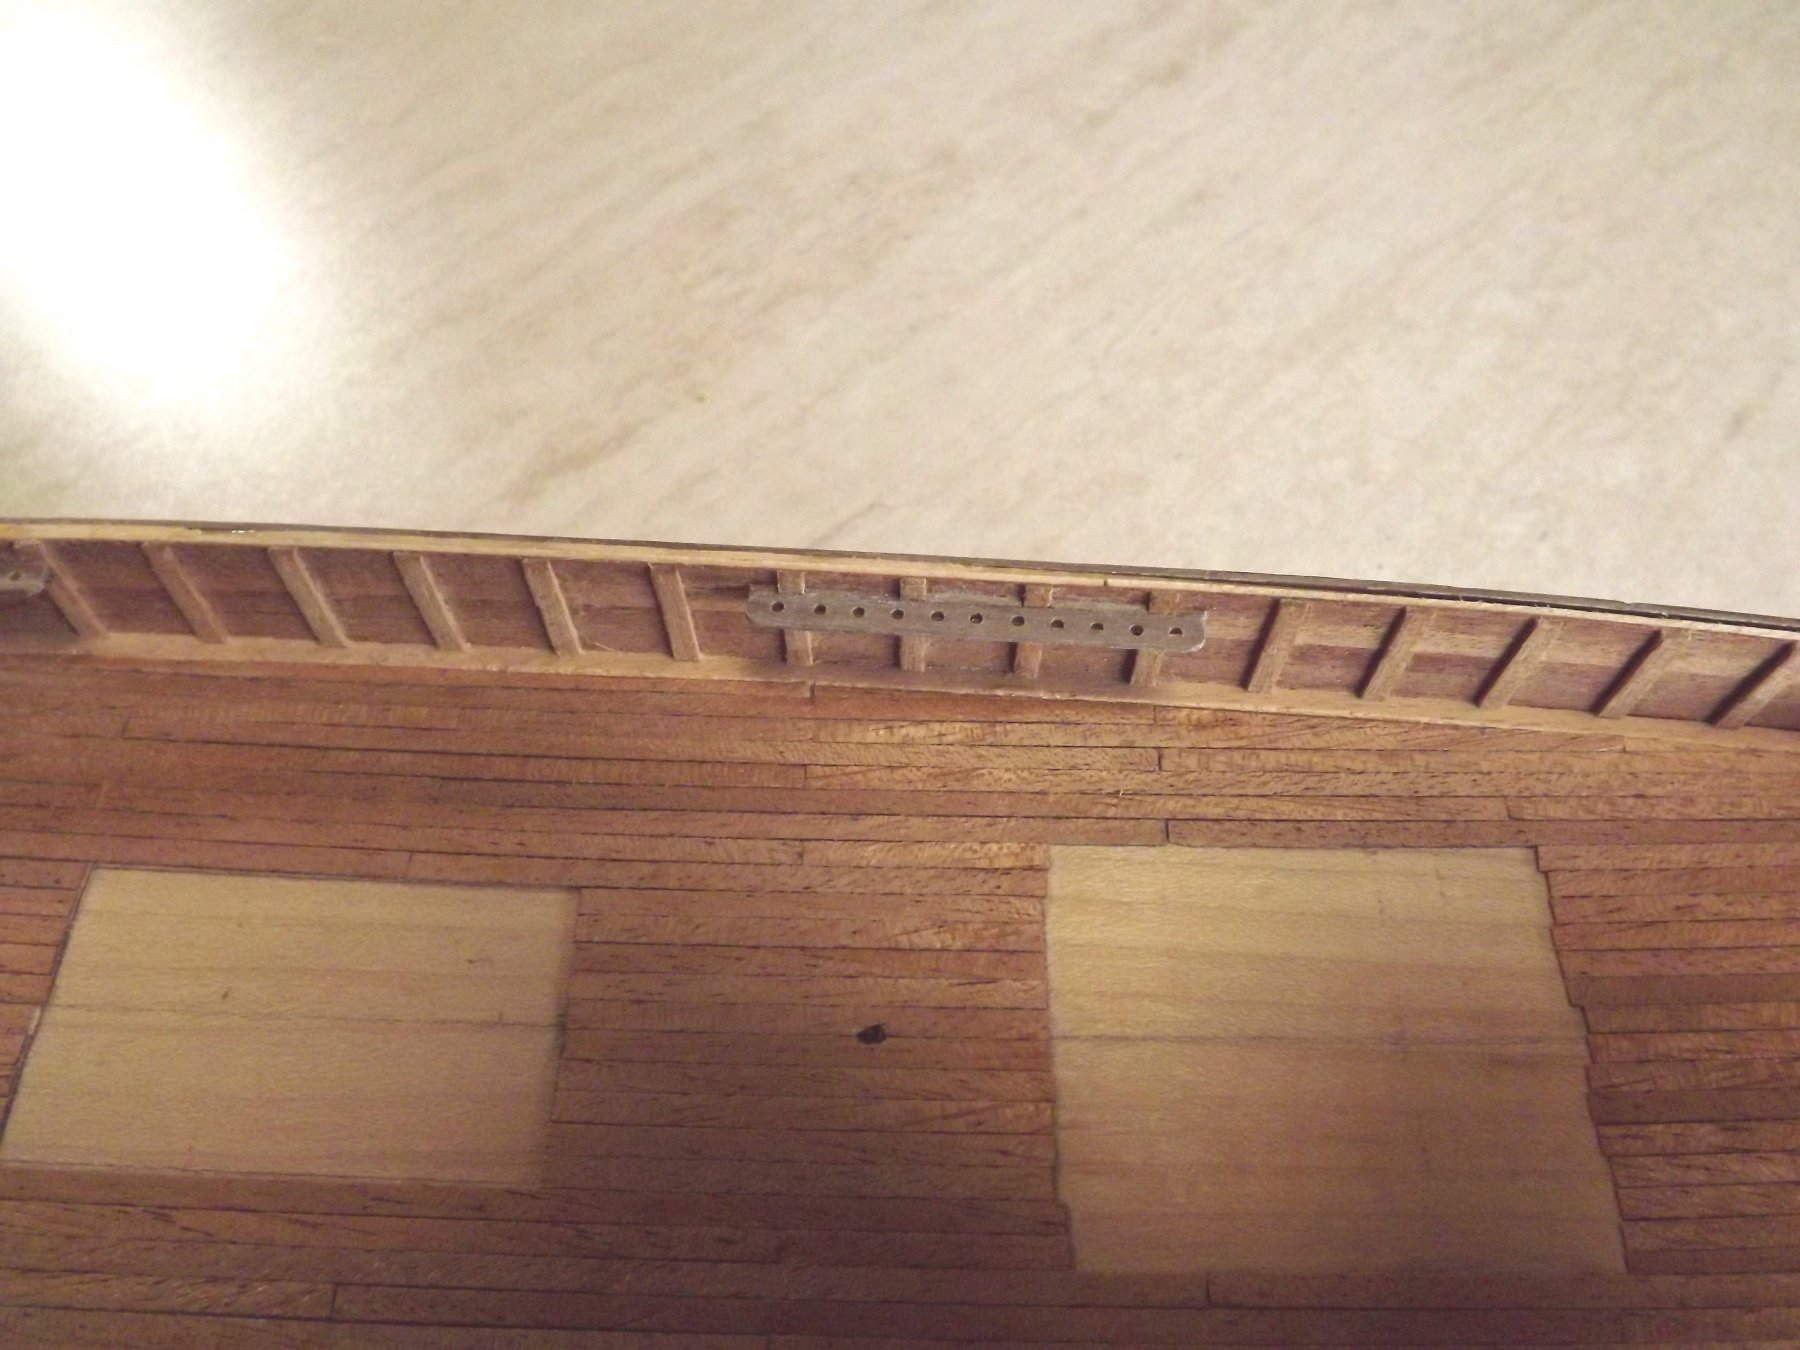
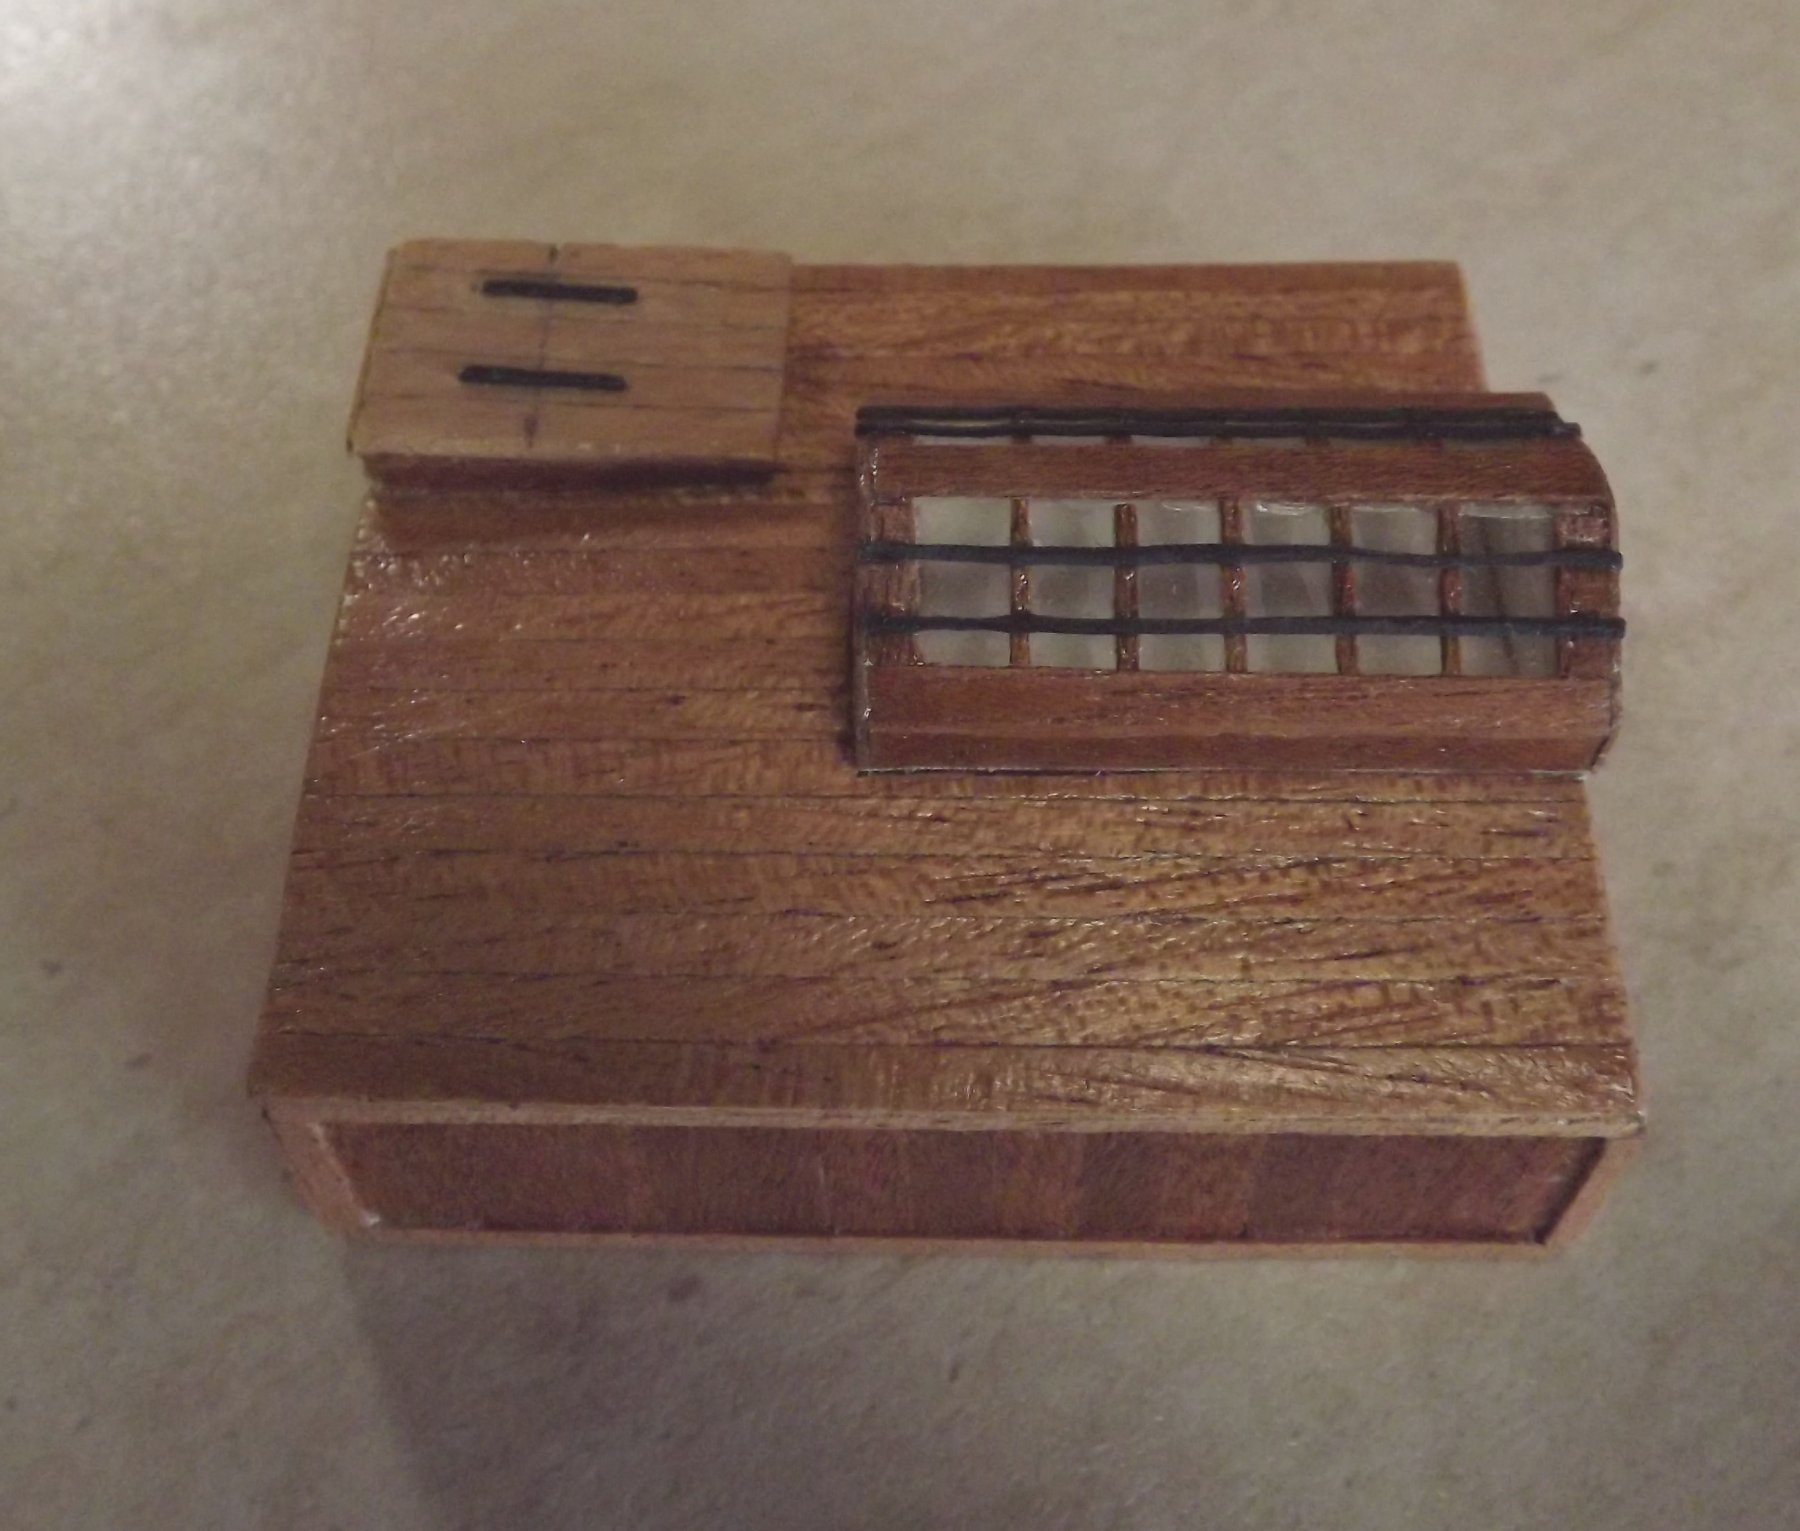
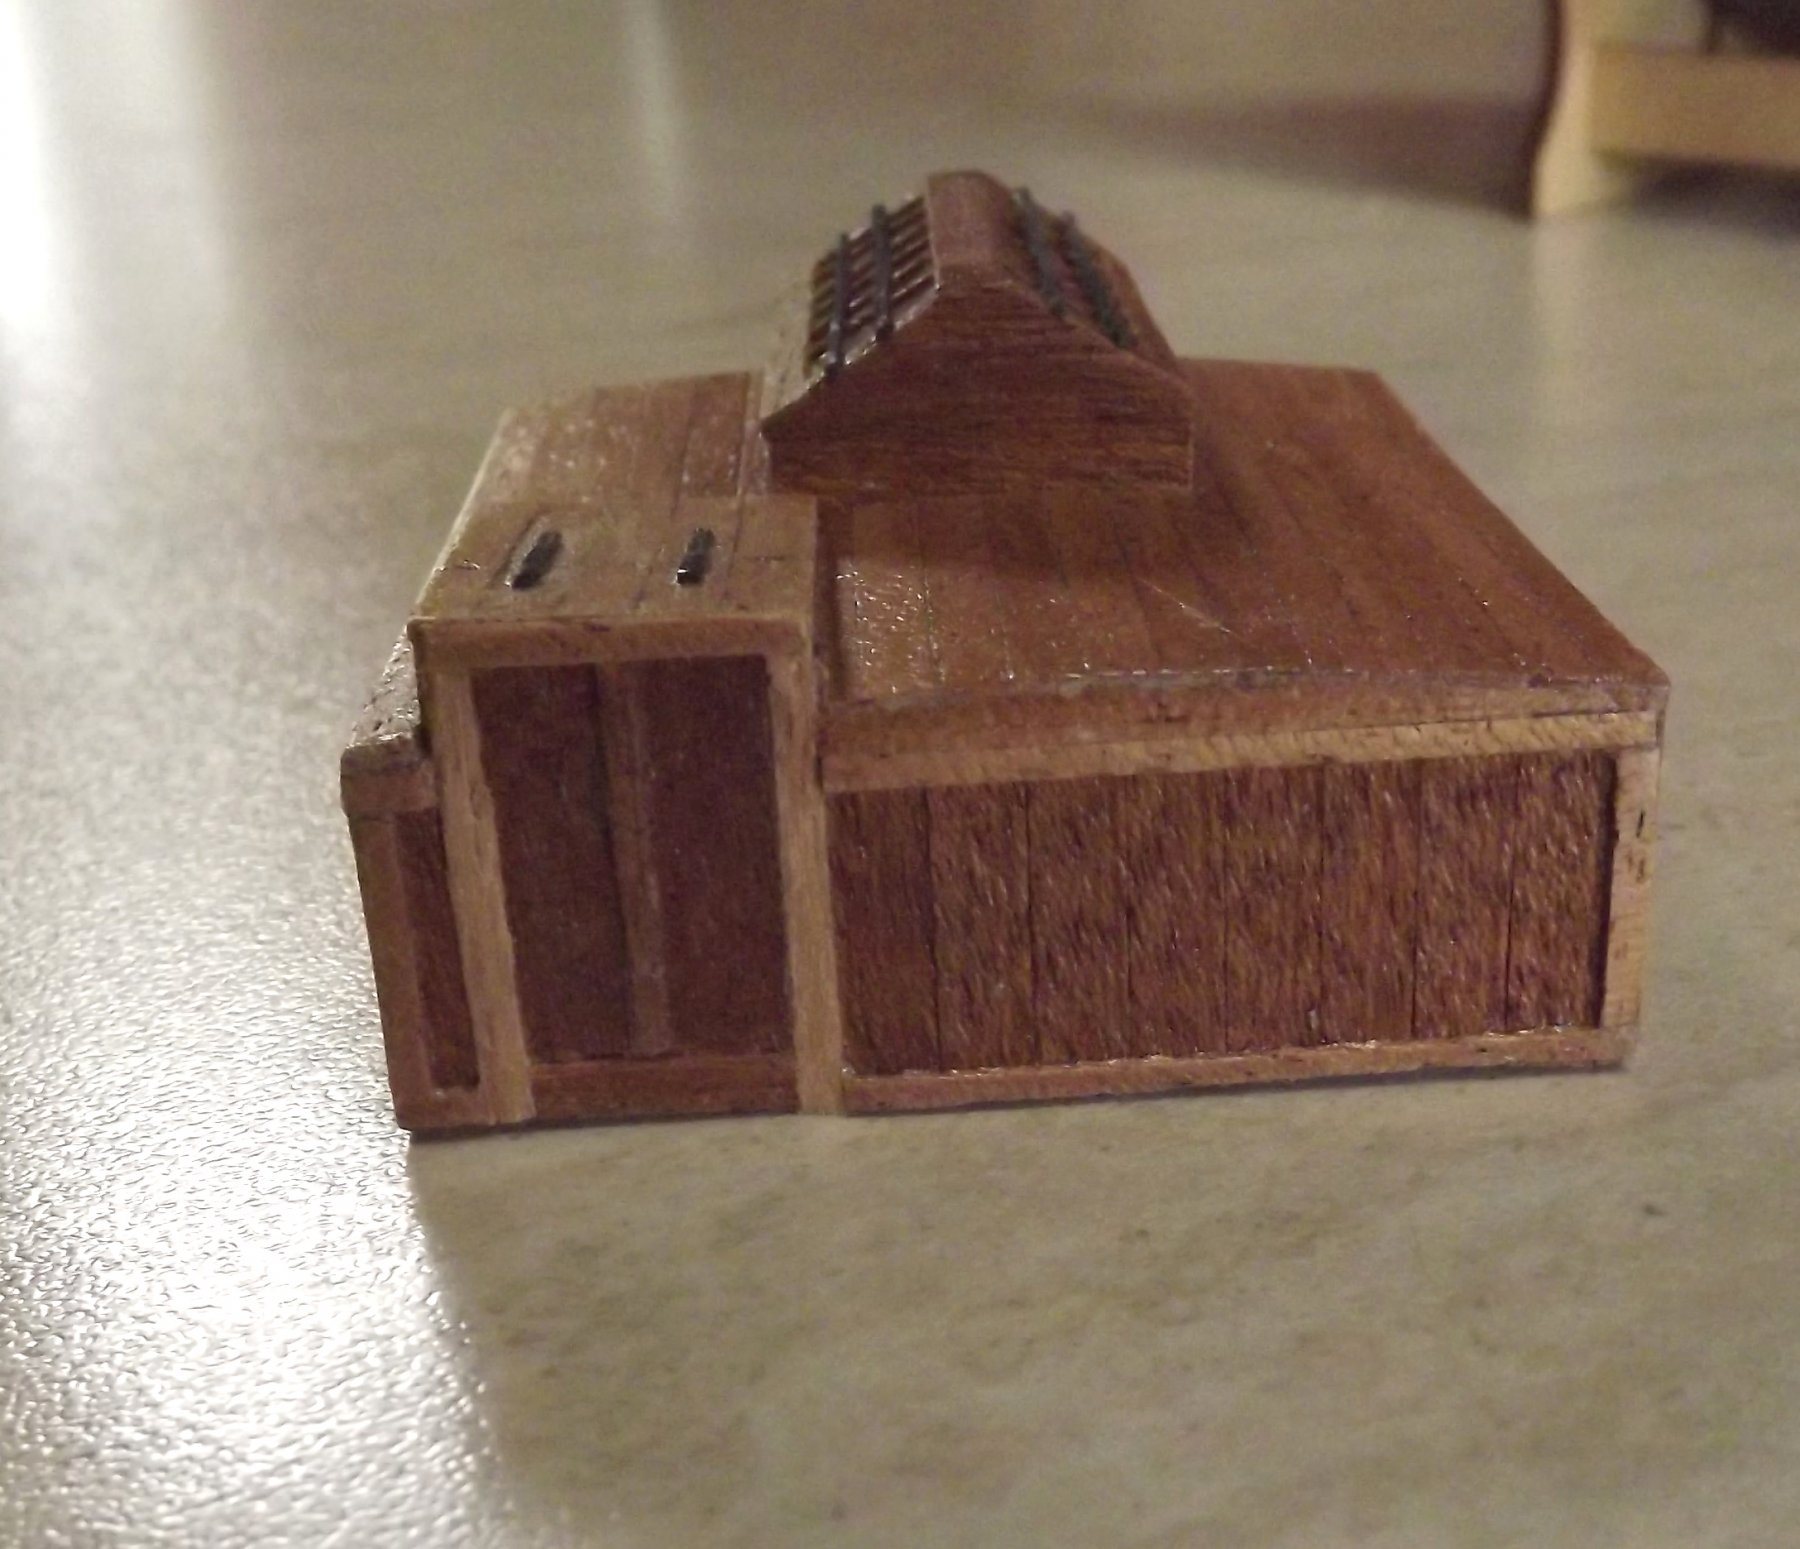
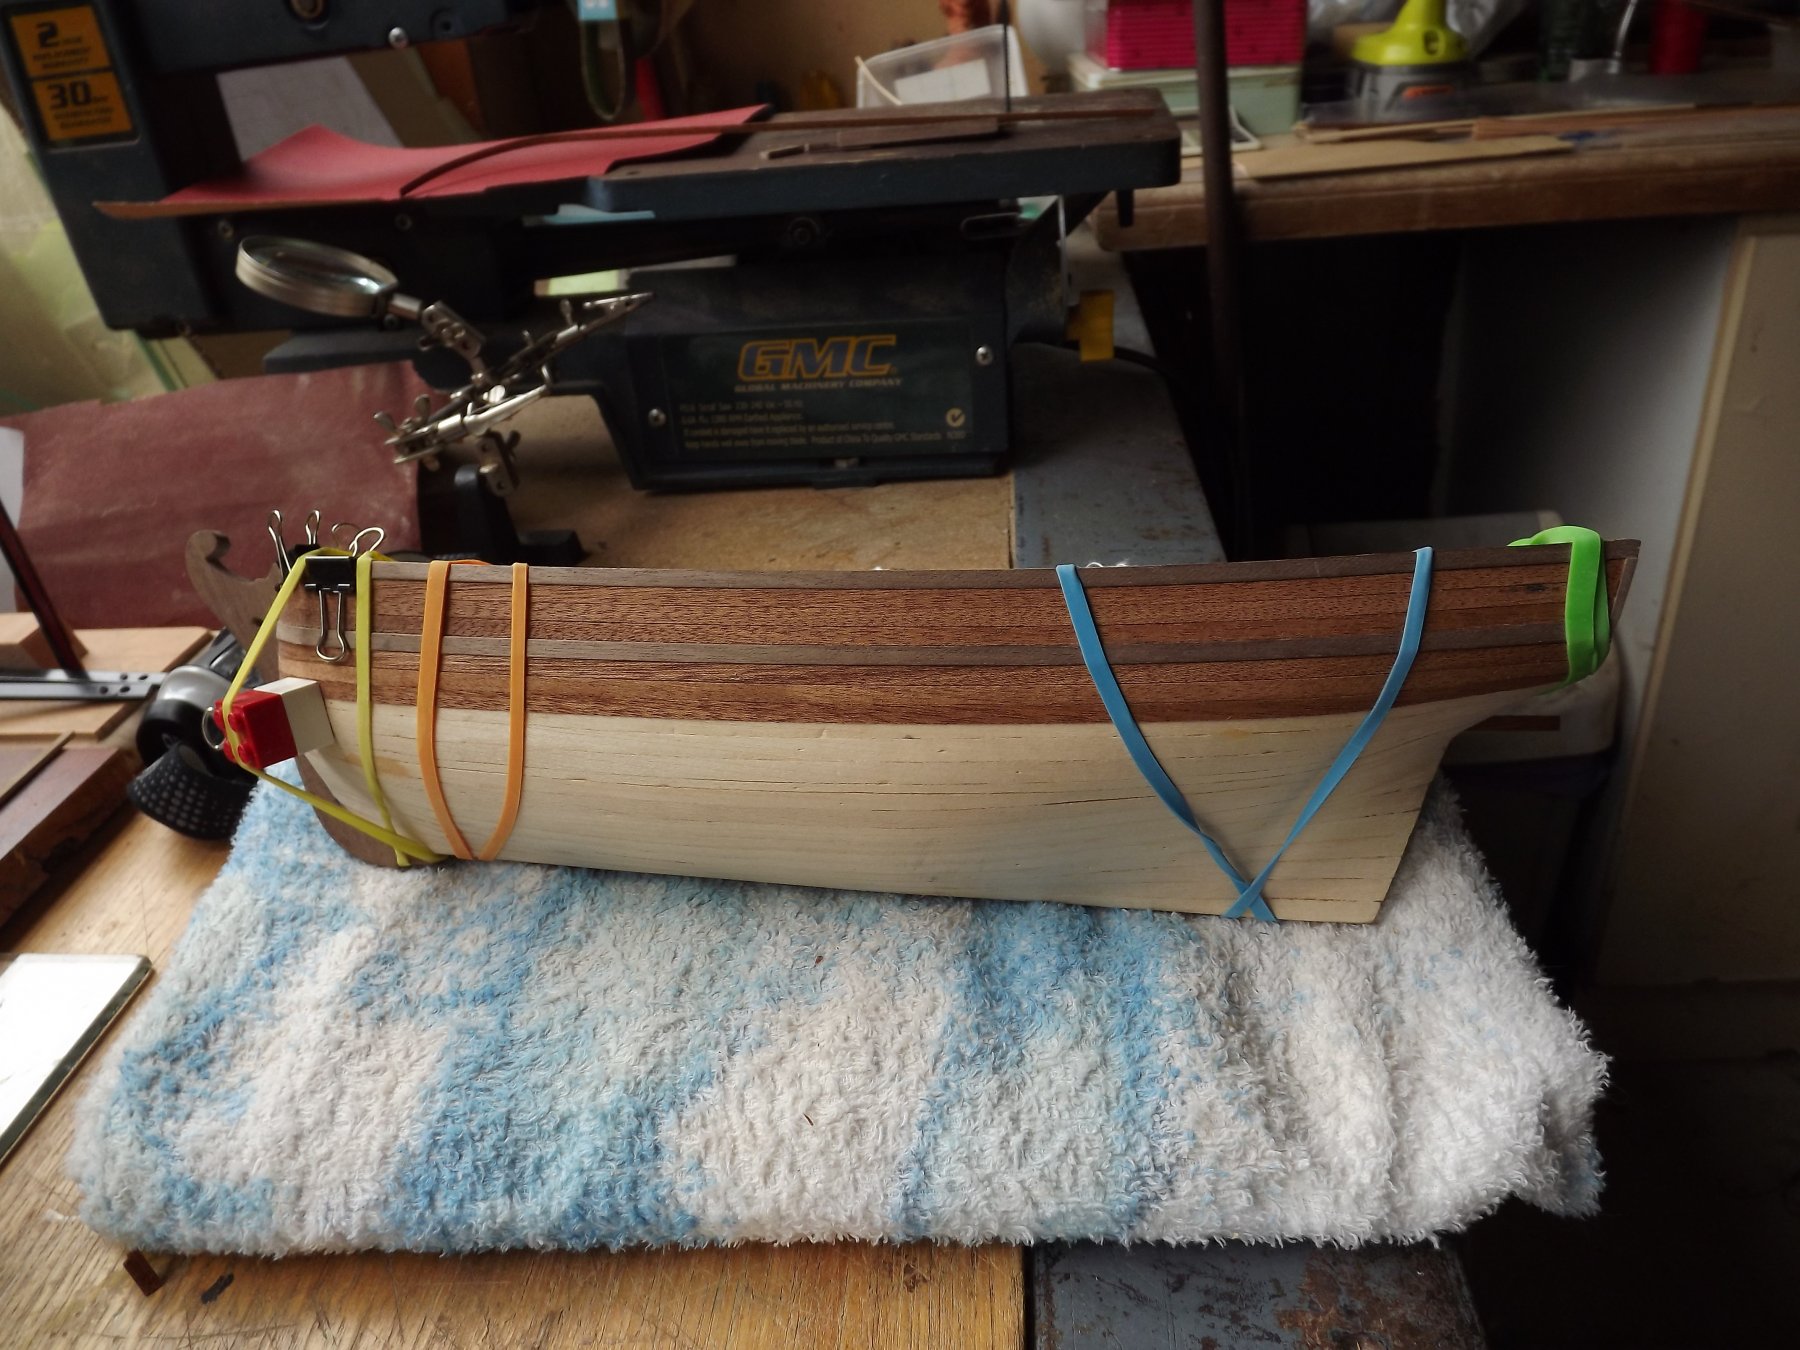
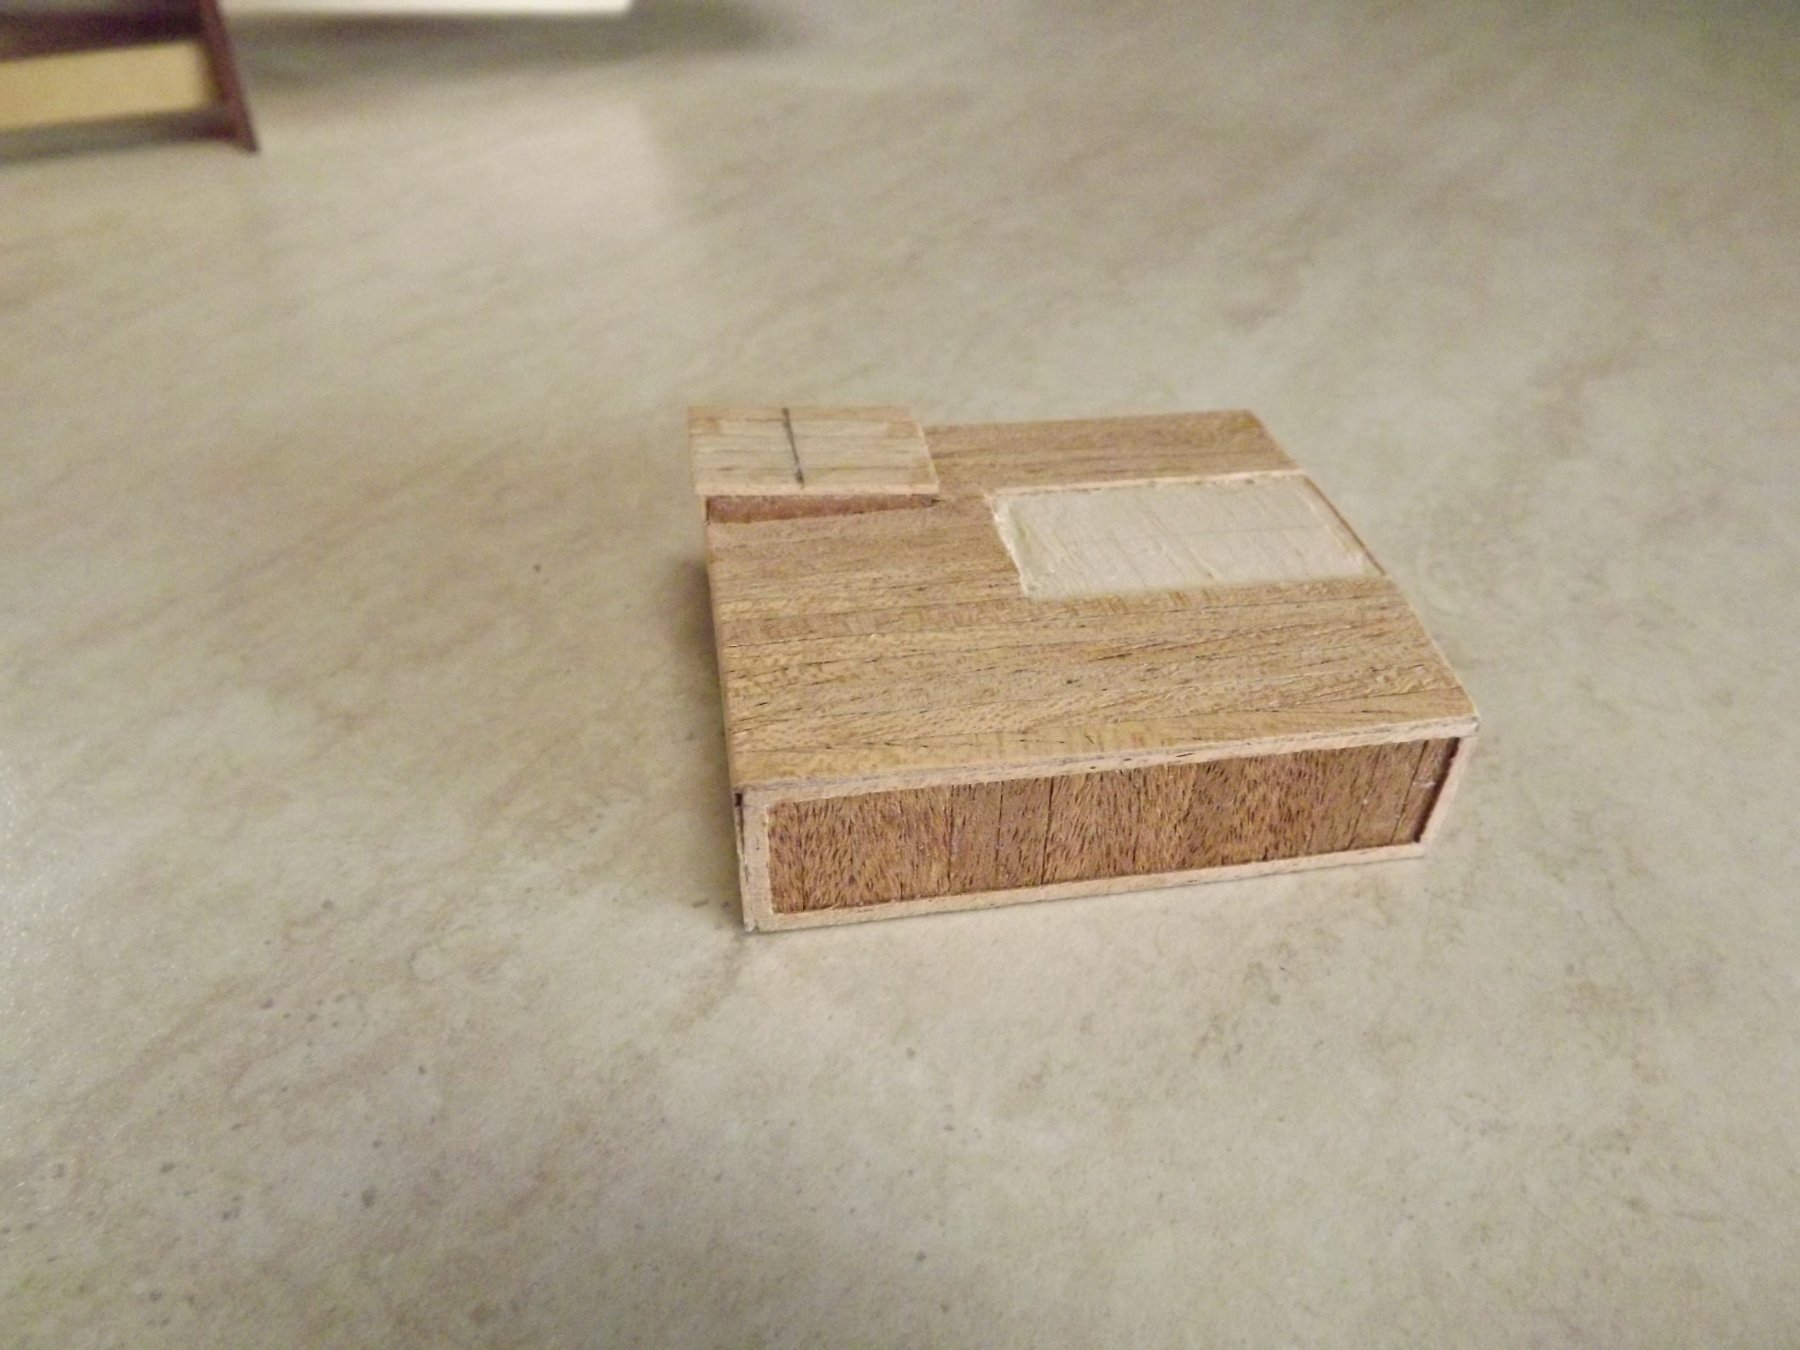
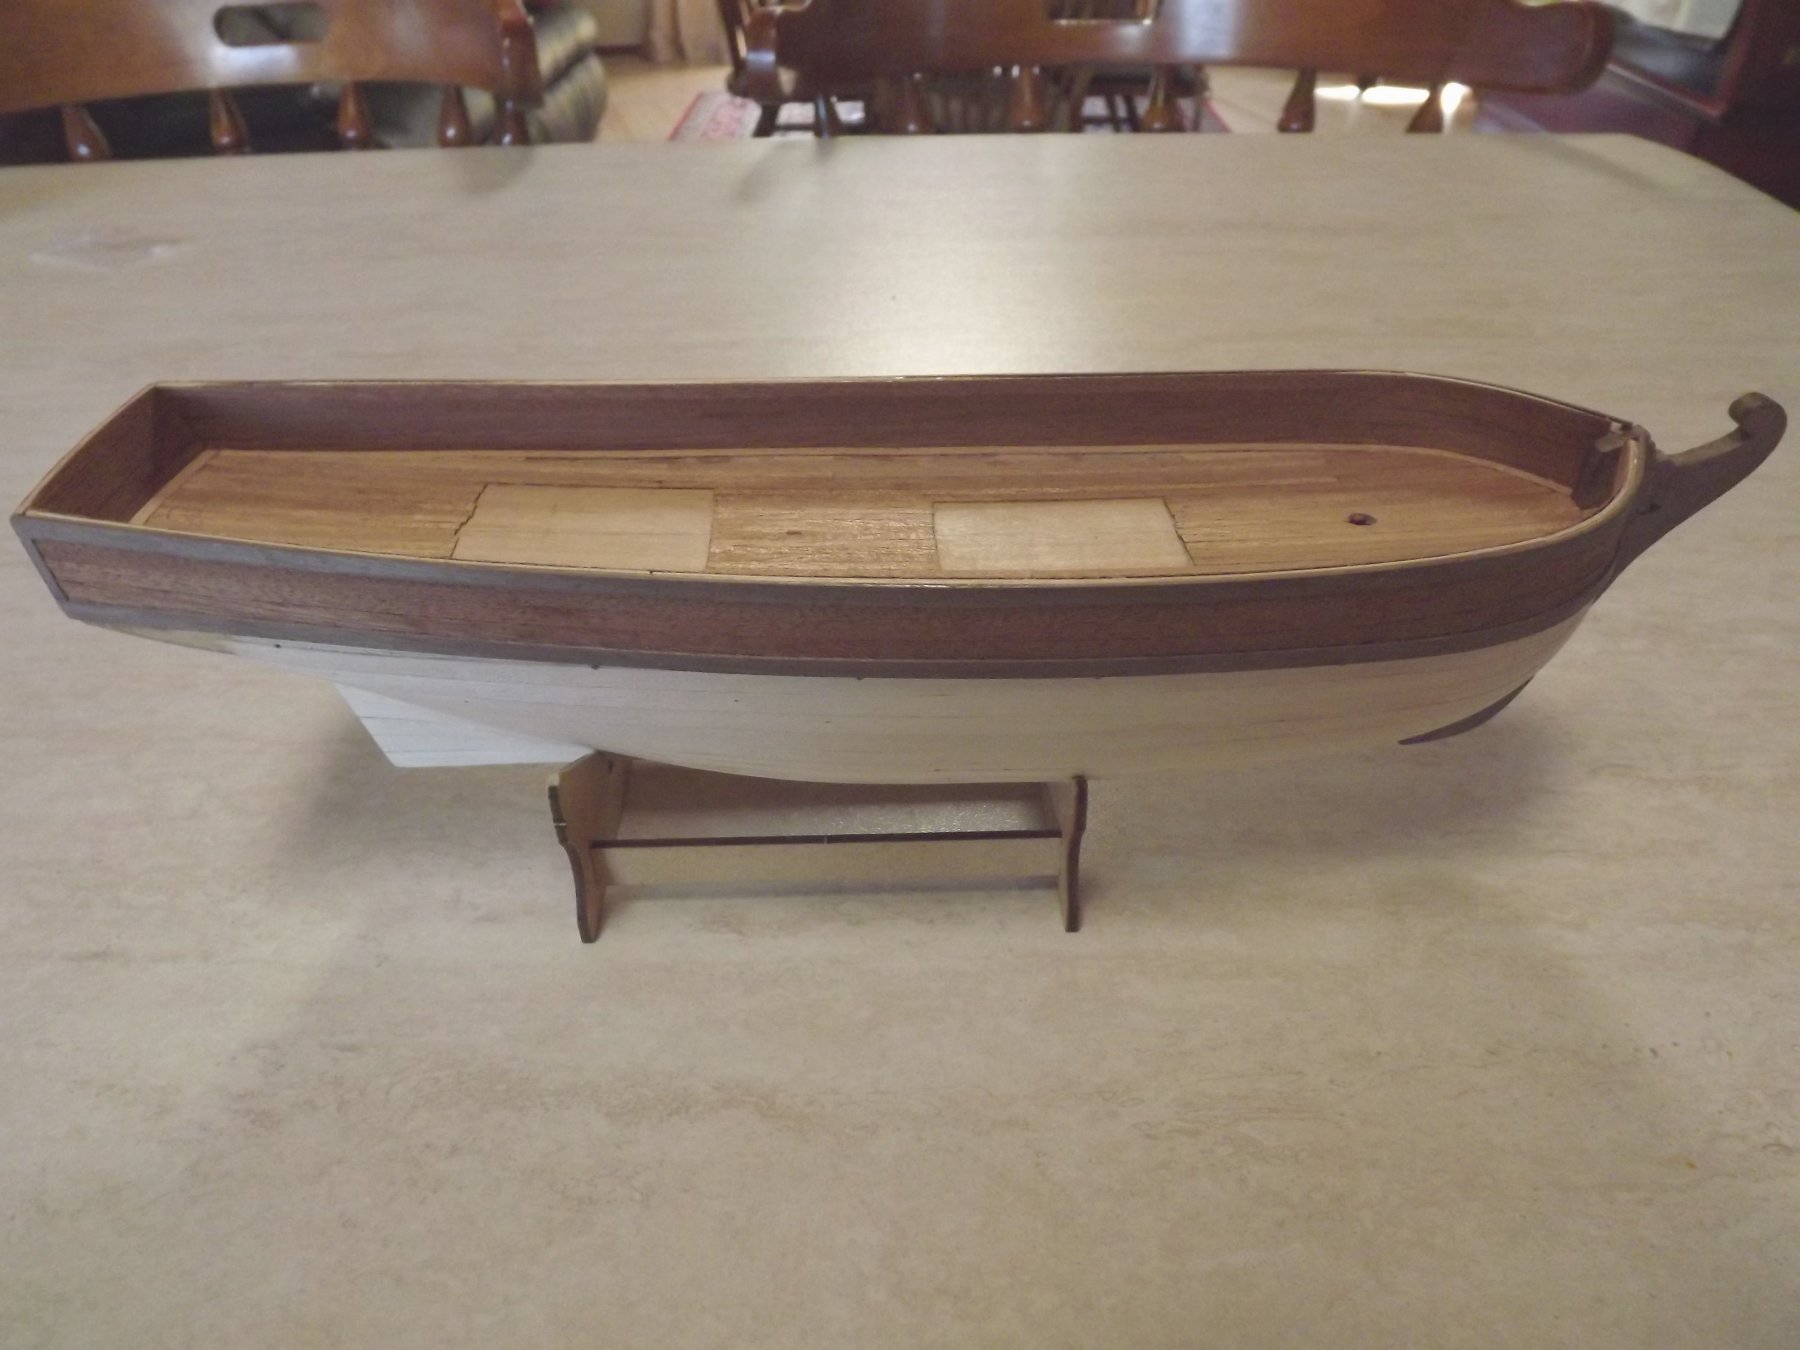
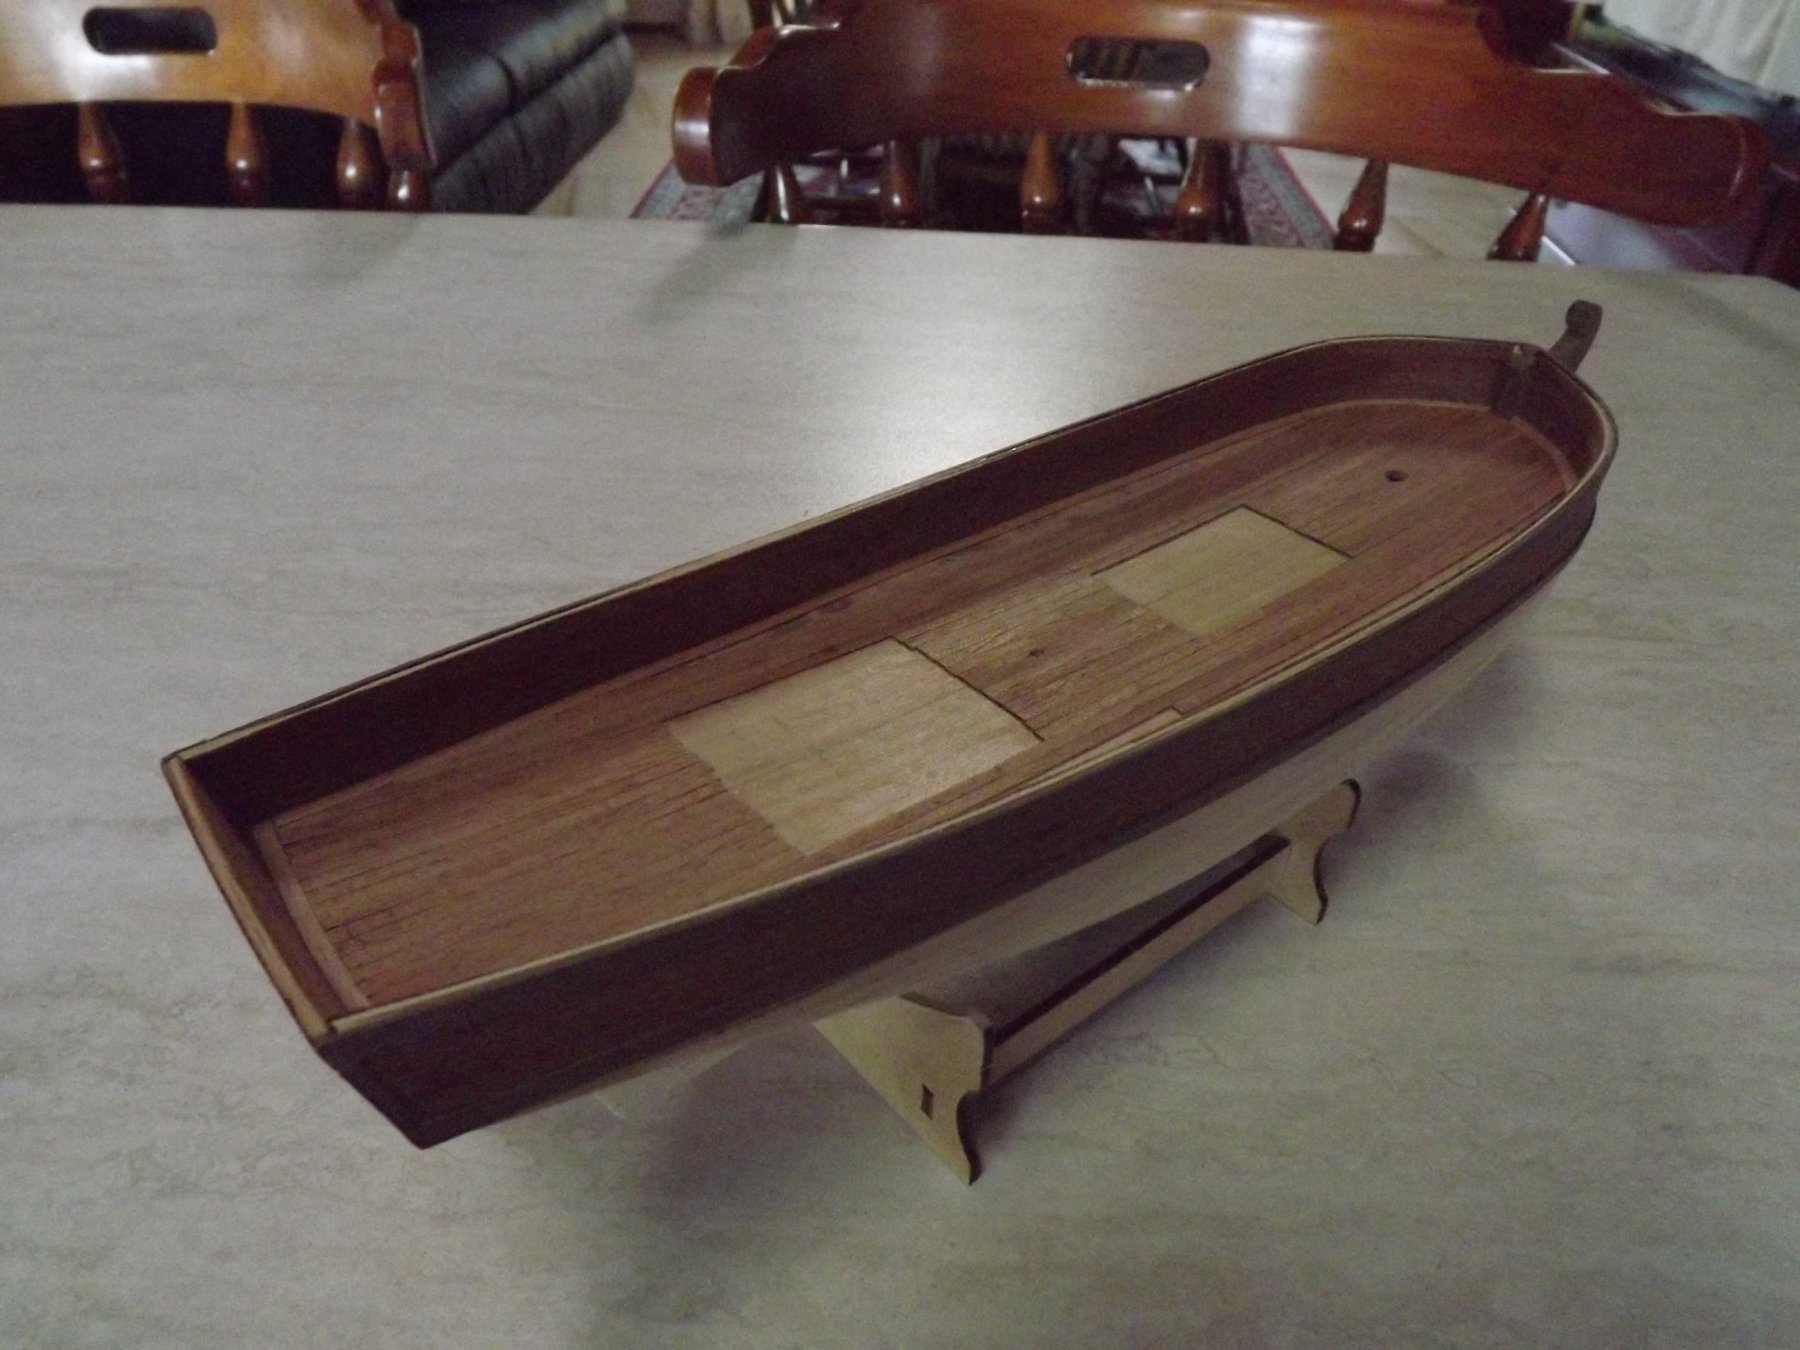
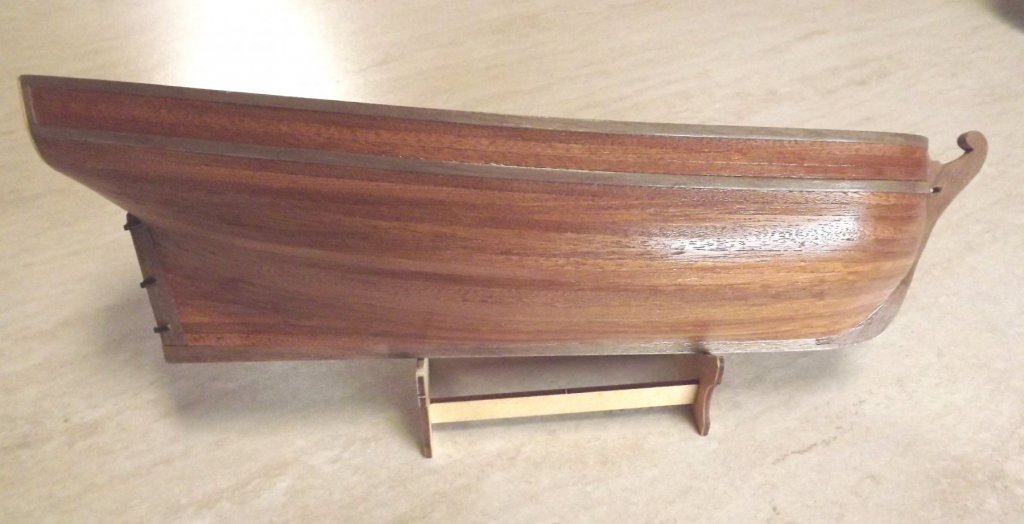
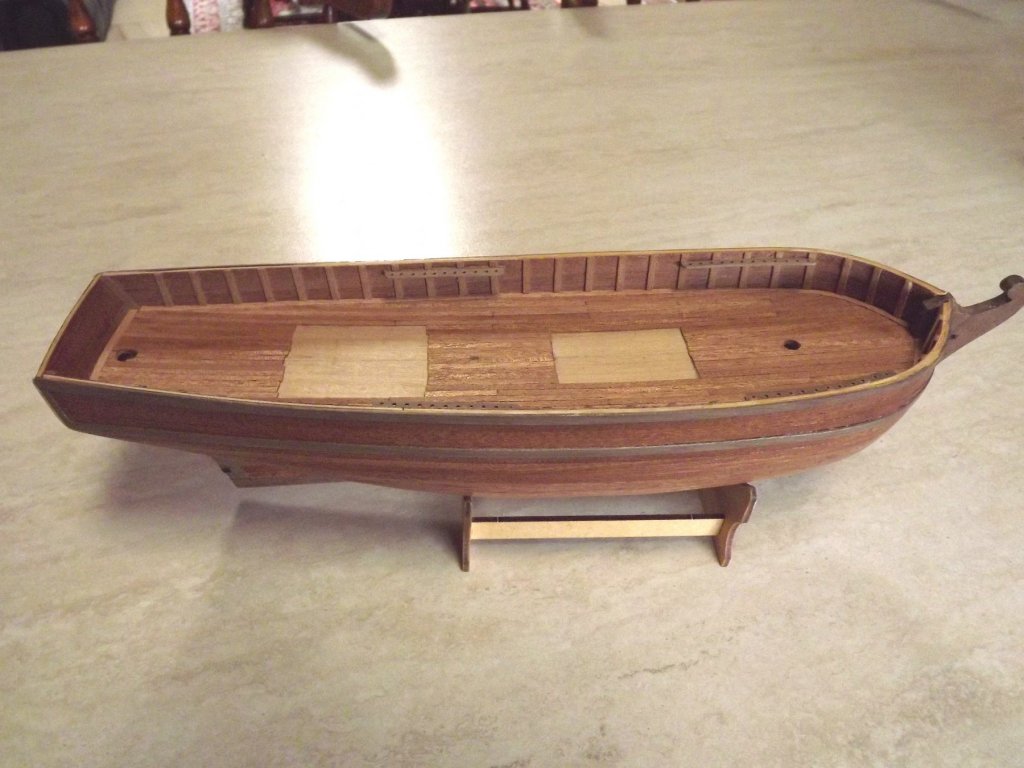
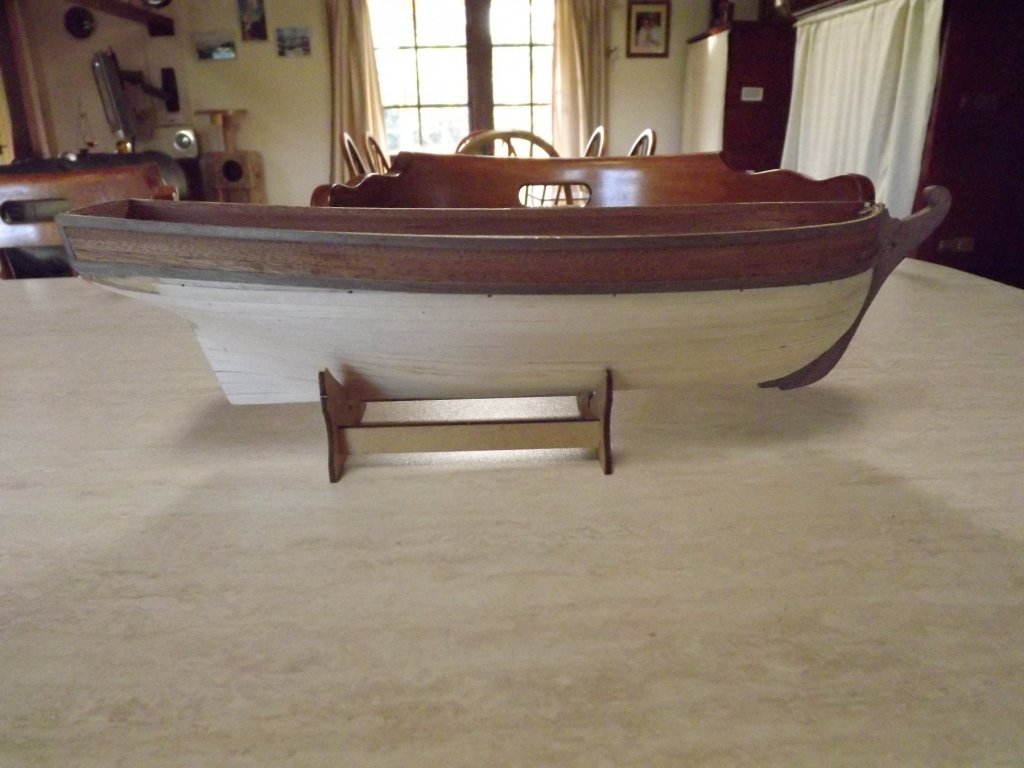
The exterior hull is now finished and it's time to start work on the deck fittings that need to be attached before I step the masts. I've finished the planking with a satin water based varnish to save it from grubby fingerprints as I do further work - it's not as glossy as the photos intimate - there was a lot of reflected light on it! Gunwales completed and pin rails drilled and attached. It only took five attempts to make these, rather a lot seemed to split after drilling half the holes no matter how carefully I worked. Got there in the end though. I've also completed the deck housing and just need to fit door hinges and a handle.


-
Before you get any further I think you need to take a short break and get this book "Rigging Period Ships" by Lennarth Petersson. I know it covers one specific three masted ship but it will give you a good working idea on how the rigging runs, attachments, what loops over what etc.If the only instructions you currently have are one or two rigging plans (illustrations) this will help you make sense of it all. If you're like me you want to get it all done "NOW" but it's well worth stopping for a short time and getting this book. Don't know where you're based but EBay is a pretty good place for this item. I know yours is from an earlier period but the basic mechanics would be similar enough that securing points etc. should be fairly obvious then.
-
Standing rigging first i.e. shrouds and stays then the running rigging and I find working from prow to stern is easiest order otherwise you tend to be trying to work within rigging you've already installed. Pre assemble as much of the mast and spars as possible off the hull then start by stepping the lower masts and standing rigging then the next level of masts etc. Hope this is what you're looking for.
-
You could always remodel it to look like it in its current state! http://www.cerberus.com.au/labeleddrawing2.html
- 193 replies
-
- 3
-

-
- cerberus
- paper shipwright
- (and 1 more)
-
24 solar panels on the house so the heater I run doesn't cause any cost problems.
-
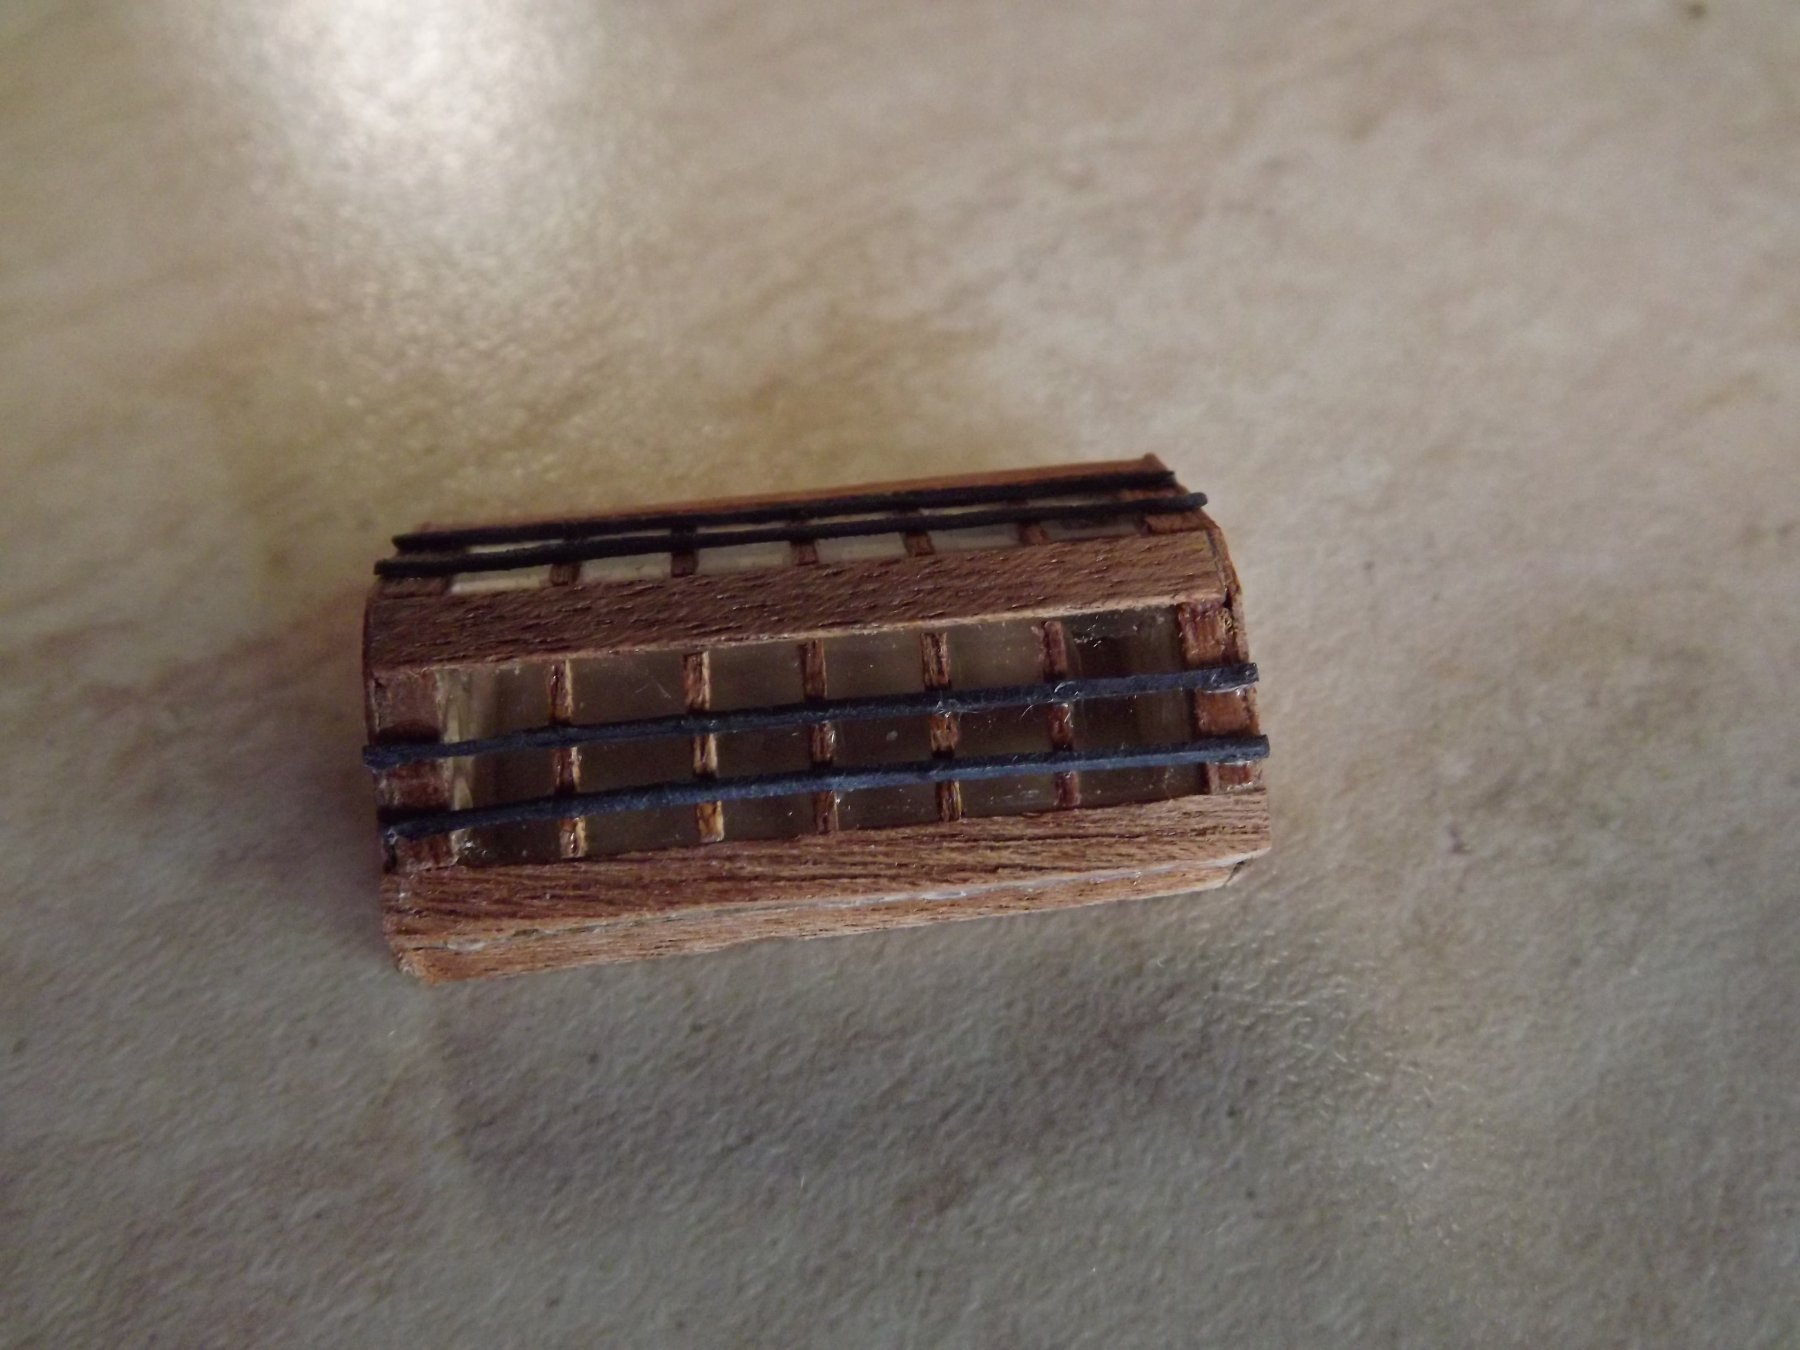
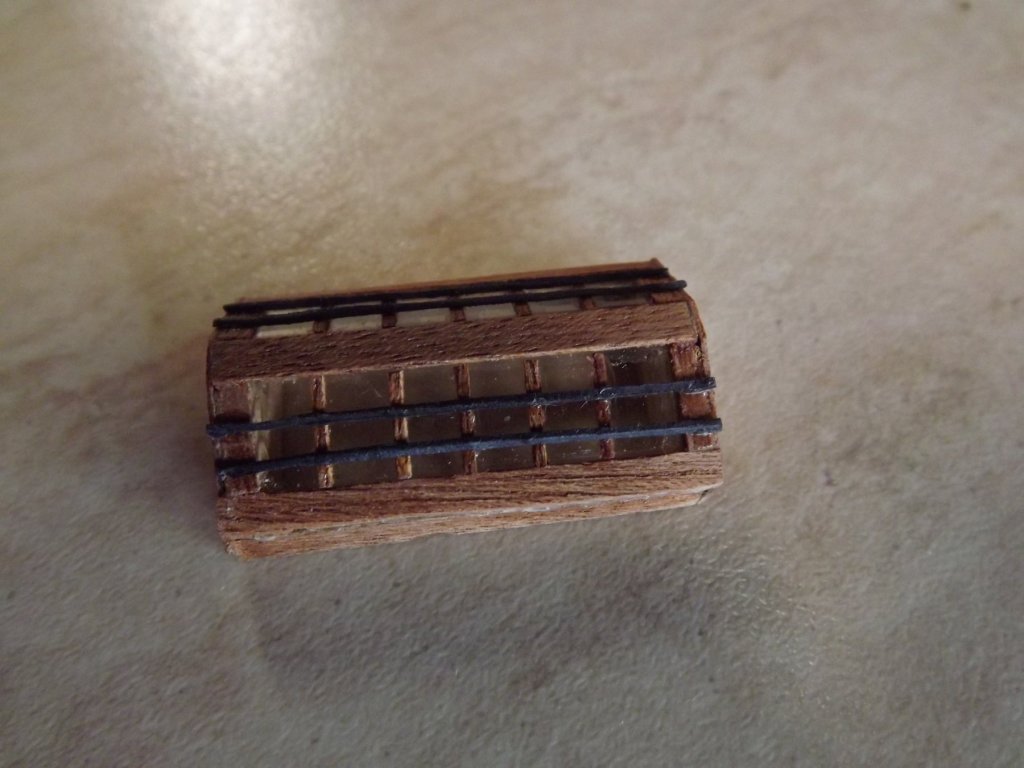
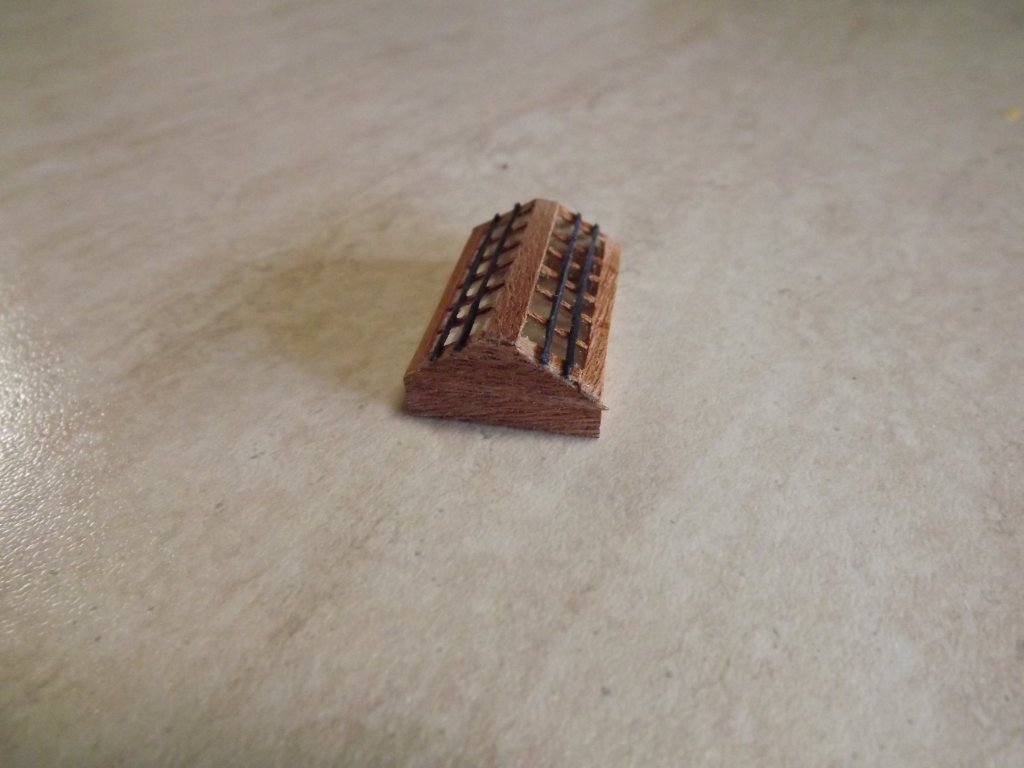
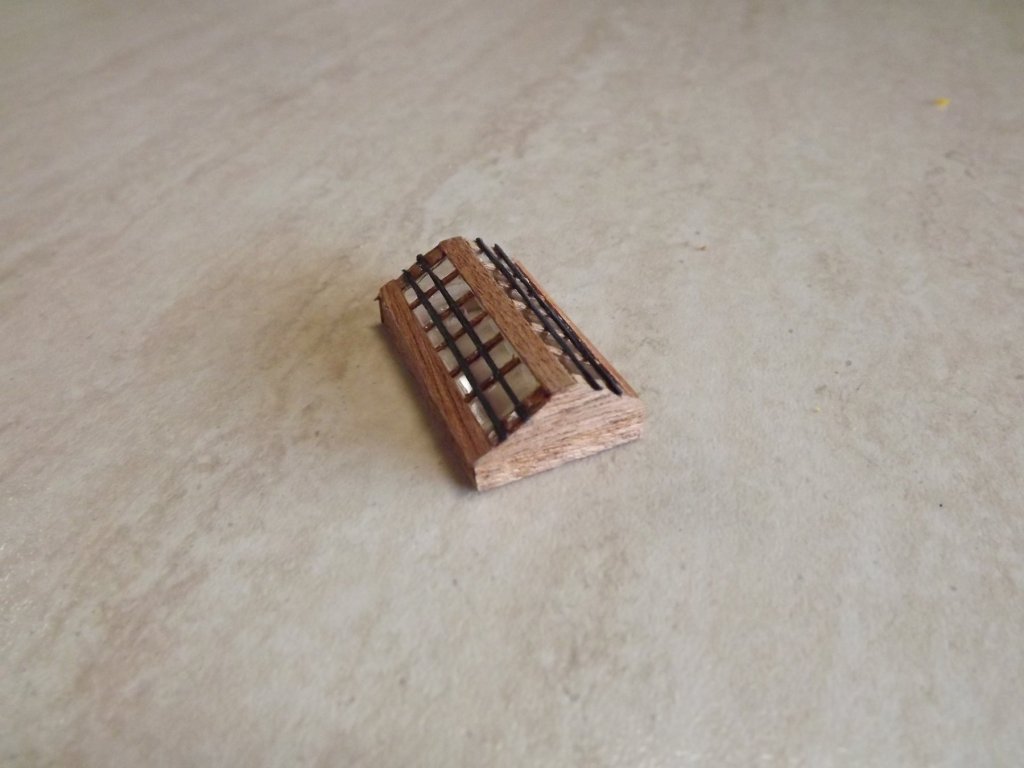
Little side trip whilst I have rest from planking (again). I've now finished the skylight- it just needs a very light sand and then a water based satin finish varnish. The glass is .18 mm micro slide cover which caused me a lot of trauma as it shattered every time I tried cutting it to size. Eventually (15 sheets later) I glued a full slide to the frame and once fully dry held a steel straight edge firmly on the glass and chipped it away, glued the trim one then very carefully filed the edges back. The bars are black cartridge paper sliced finely and glued to the frame. As is usual with close-up photos it all looks rougher than it really is.
-
I seal my hull/decking once I've finished that section, I find it easier to clean grubby marks due to handling after sealing than trying to work round deck fittings later. Only catch is that when fixing furnishings etc. you do have to scrape back any sealant for the glue to take but that's only a minor problem.
-
This is what she should look like once finished. Missed her last month as the weather was to rough , but she sailed in to Mornington this weekend. I've got some detail photos now to help once I'm past the hull stage. One big difference between this and the plans is the raised superstructure just behind the foremast not shown on the plans. I'm guessing this is because the replica takes passengers for overnight cruises and weekends whereas the original was a trading schooner with a larger hold and no specific passenger accommodation. Notice she's flying the skull and crossbones as it's a pirate weekend!

-
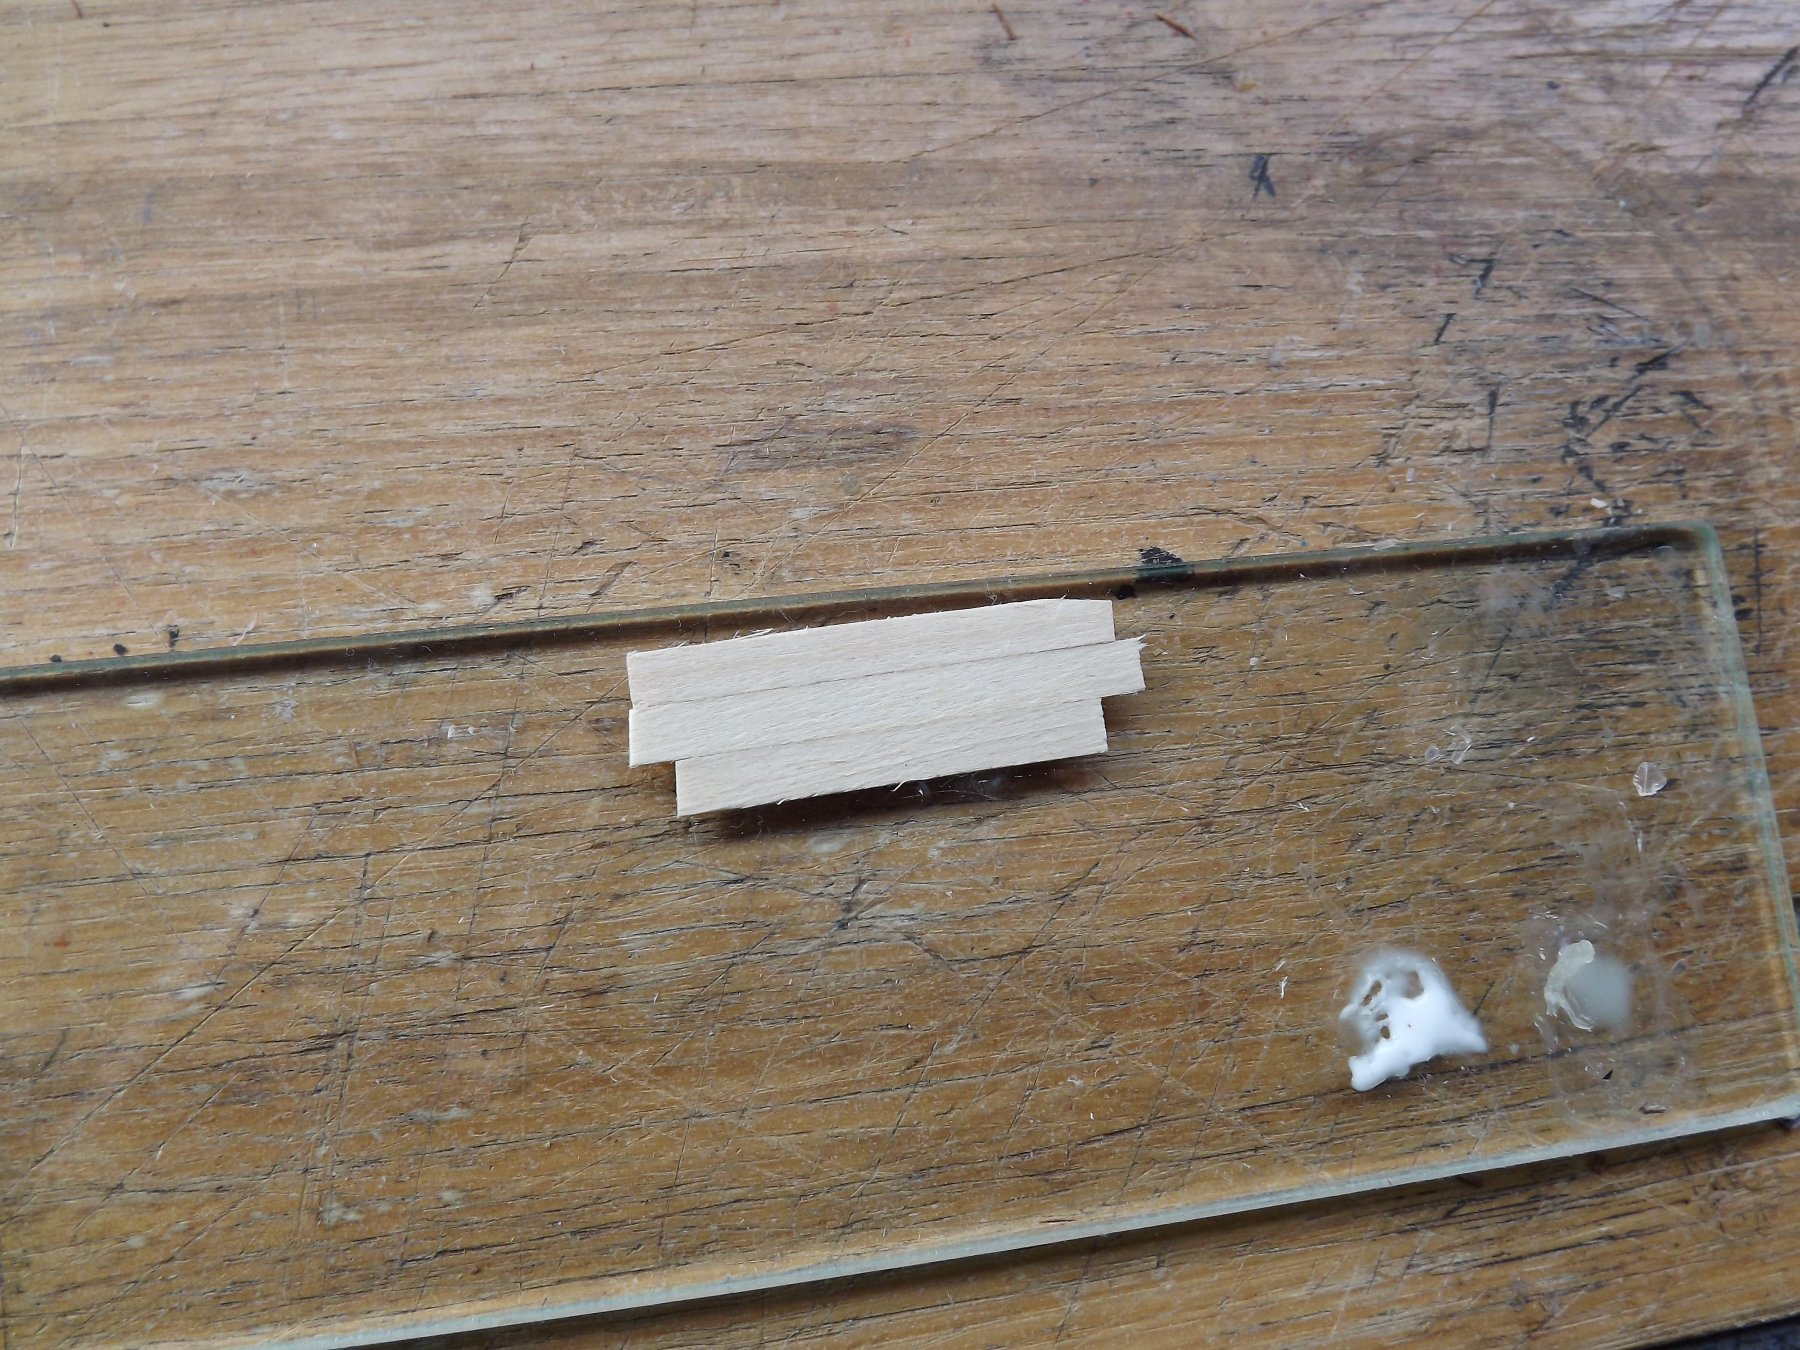
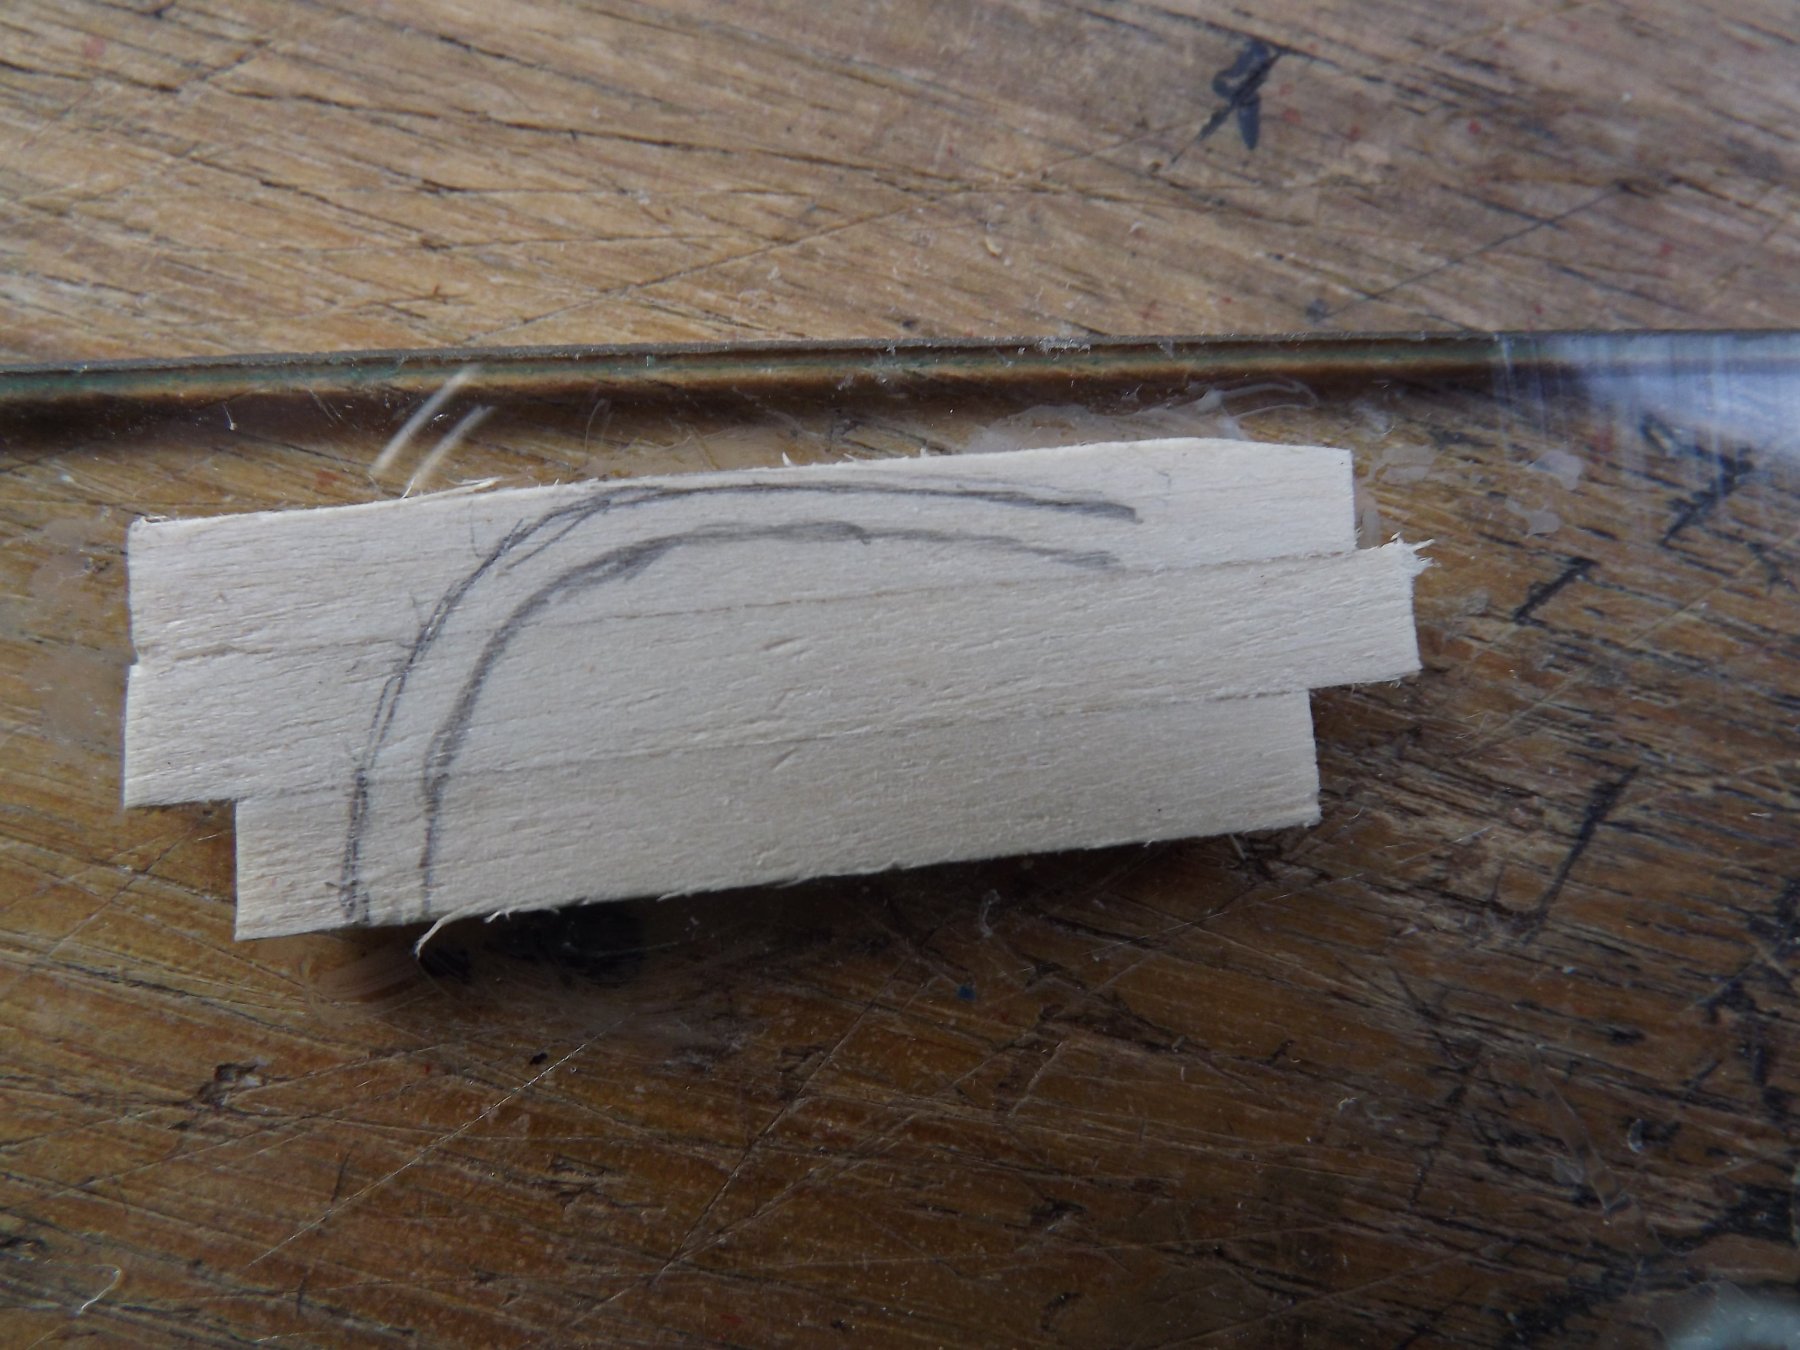
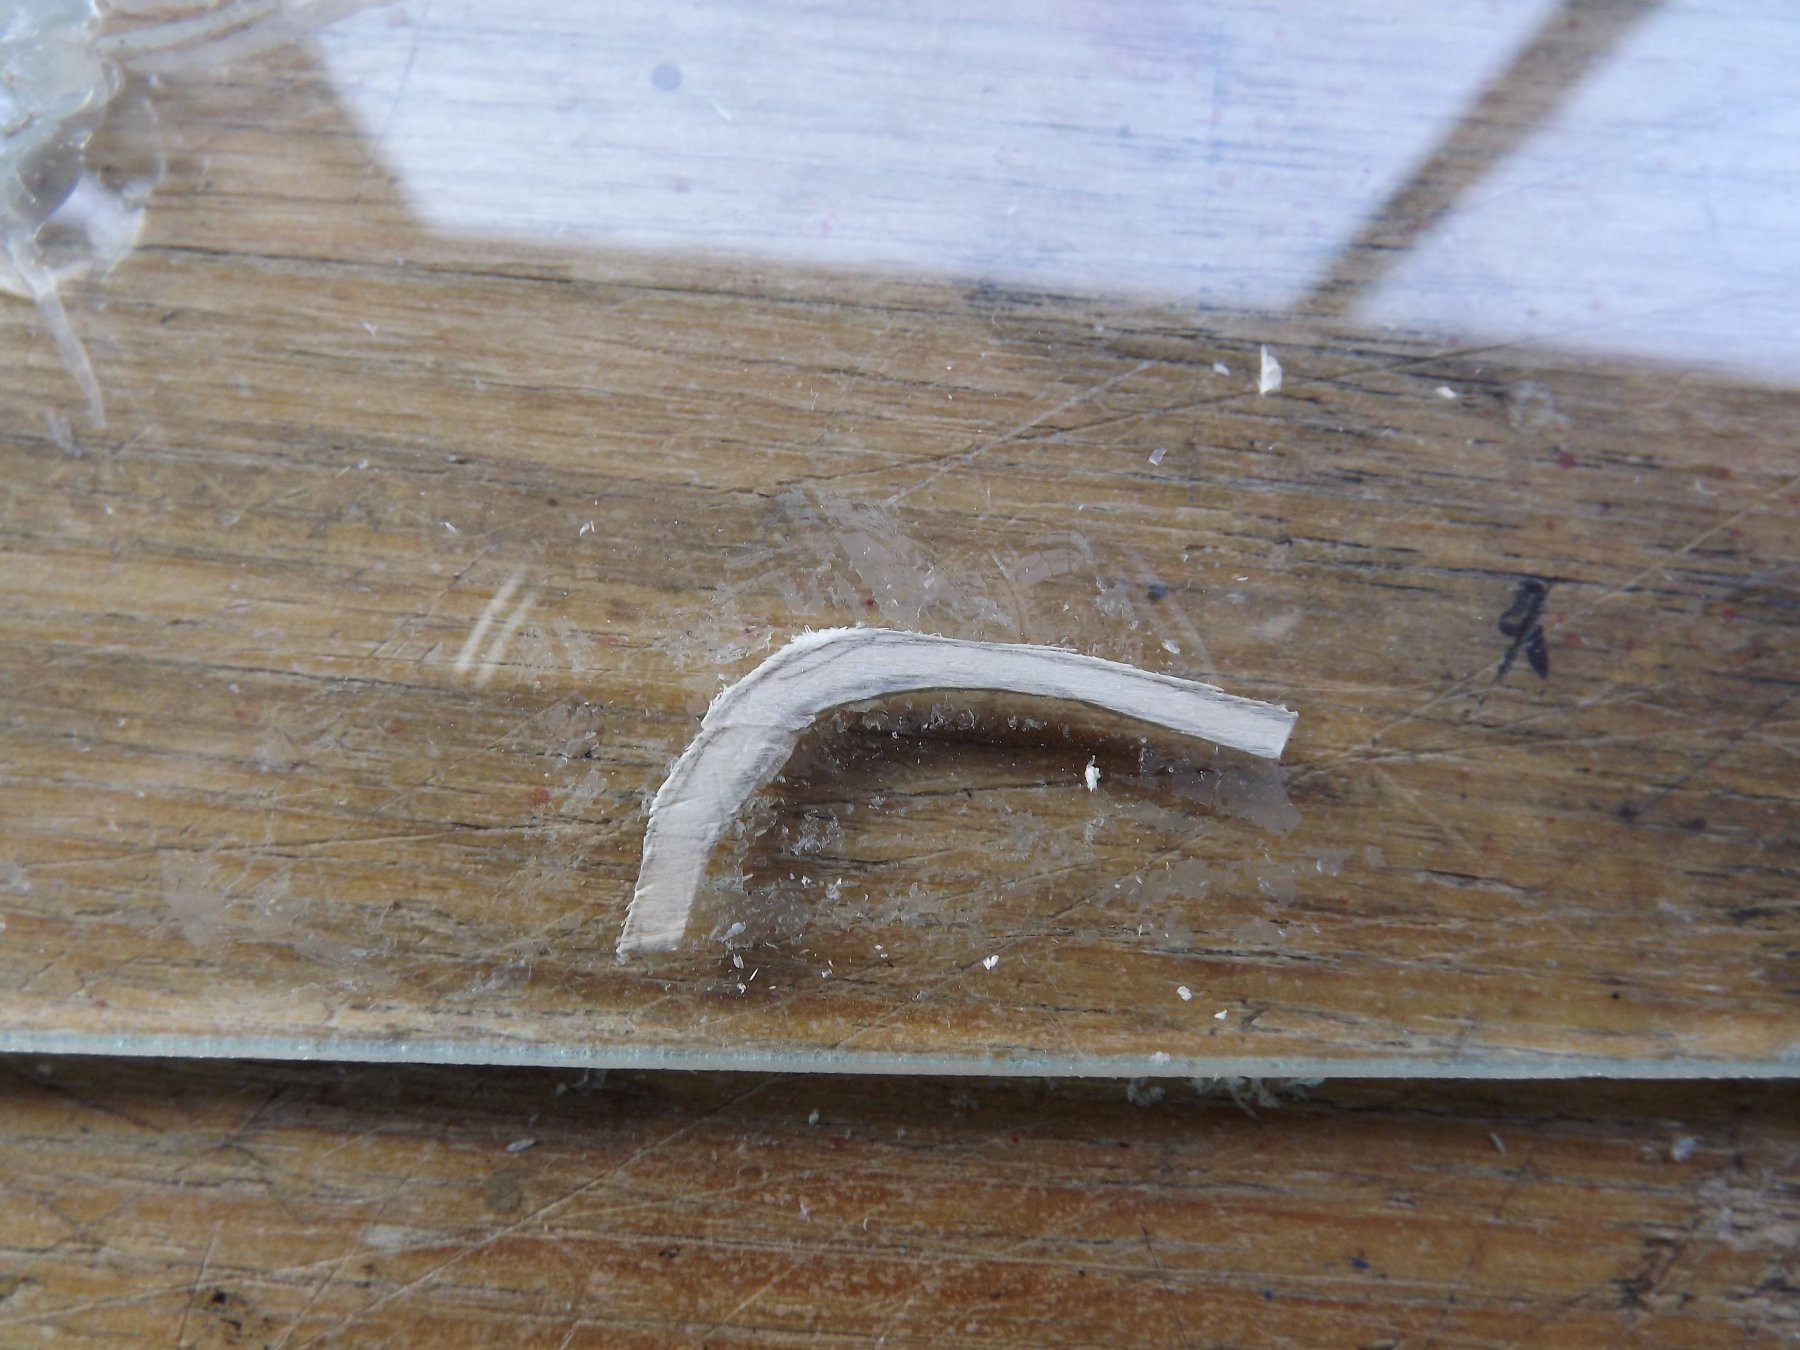
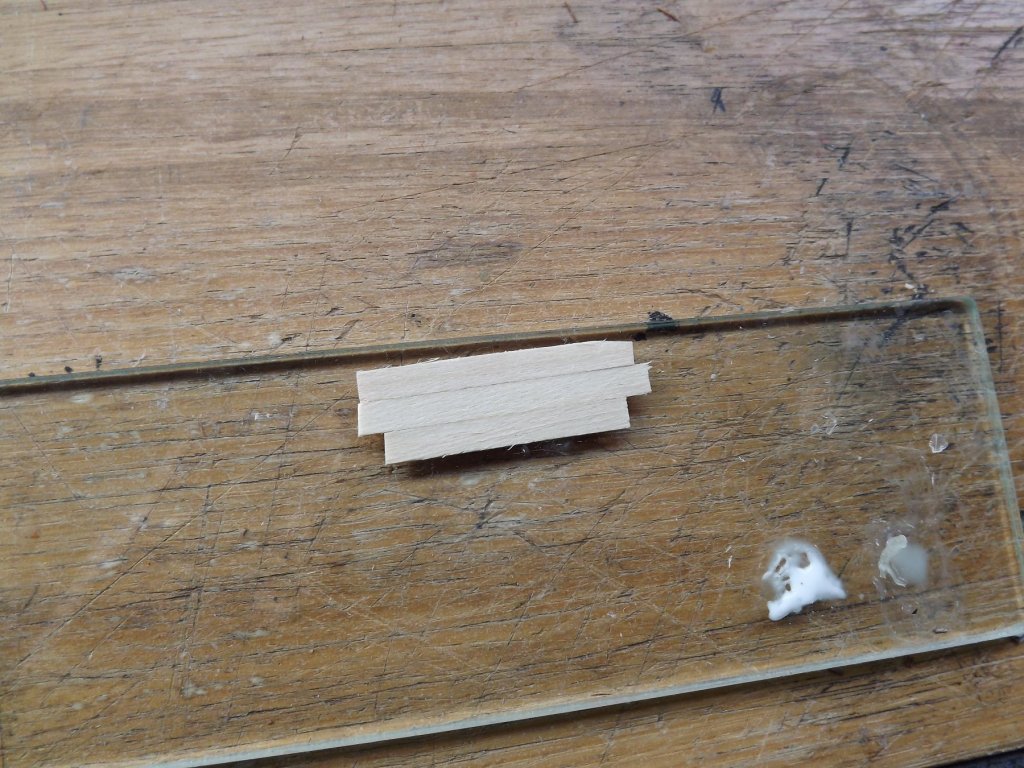
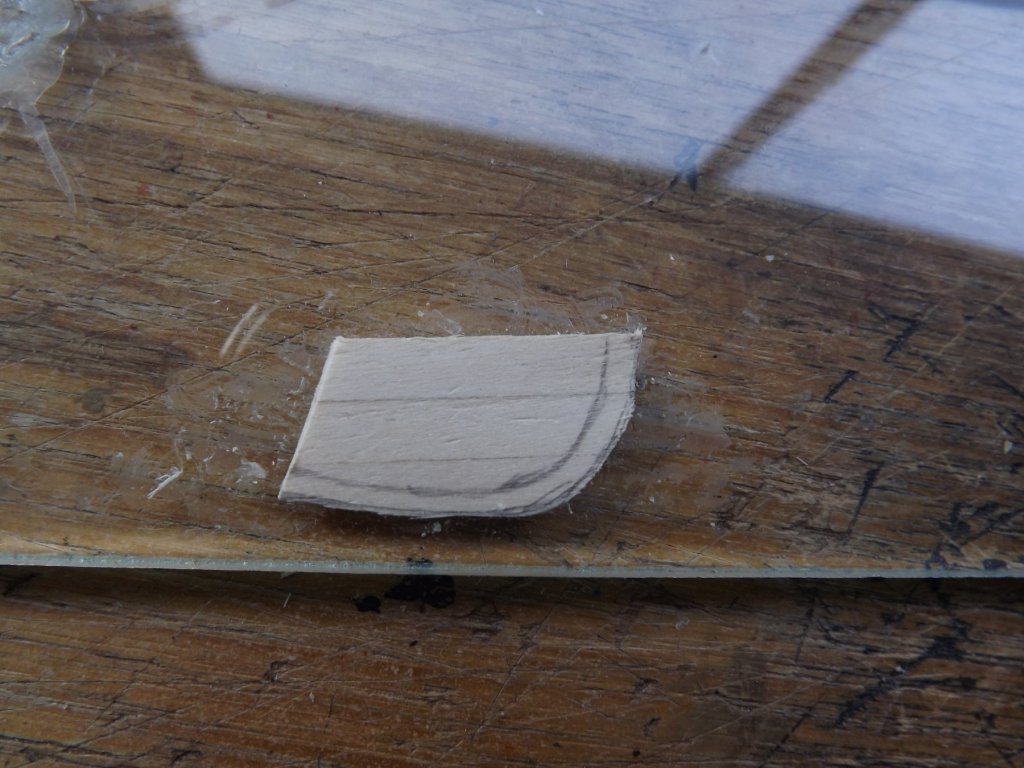
Still planking and still hate doing it. So just for a short break I've started on the trim surrounding the stern. Half a dozen attempts to get a really sharp bend on some wood later I decided it wasn't going to work as the wood splintered well before I could get the bend near correct, so on to plan B. Edge glued some scrap and when dry peeled off the glass and holding it against the stern traced the curve needed. Re glued to the glass and once set I slowly cut away the wood leaving a rough "hockey stick" which was then lifted again with a scalpel. This will then be cleaned up and fitted later in the build.


-
Here's a thought for anyone thinking of going this way - 12" feeler gauge at .018". They're available but tend to be in packs of 5+ so you may want to on sell some.
- 714 replies
-
- 1
-
-
- lady nelson
- victory models
- (and 1 more)
-
Like the spring steel idea - I've been using emery boards with various grades of paper stuck on with double sided tape. Must loo into the spring steel option though (eldest son builds rotary aircraft engines and probably has access to such stuff), I'm guessing this would also work well when trying to draw a straight line on a curved surface.
- 714 replies
-
- 3
-
-
- lady nelson
- victory models
- (and 1 more)
-
The only thing I can offer in the way of basic reasoning is that originally these were used by smugglers then excise guys as high speed rough water craft. Imagine one under way in a reasonable blow, all the canvas possible spread - the bow is going to be forced down some way and this should level the gunports fairly well ( my thoughts anyway). I really know nothing about sailing craft but I tend to apply common sense to a problem which usually gives some sort of reasonable solution. Of course the other point is that (as we've both felt) the kit supplied gunwales is slightly out of whack ! Another theory!! They put 6lb guns at the bow end and fire these first with the discharge forcing the bows down which then brings 3lb stern guns up to the same level allowing them to be discharged on the same plane?" Well it does sound good.
- 714 replies
-
- 3
-
-
- lady nelson
- victory models
- (and 1 more)
-
Check these plans http://collections.rmg.co.uk/collections.html#!csearch;authority=subject-90352;collectionReference=subject-90352;innerSearchTerm=armed_cutter I think you'll see that the bow actually does sit quite high ( as long as you can make out the very feint water line shown). I've just gone back and looked at your scheme and I feel that the waterline is pretty good, but do check these plans yourself.
- 714 replies
-
- 2
-
-
- lady nelson
- victory models
- (and 1 more)
-
We must have been thinking along similar tracks today - I put up my workbench/tools purely to show what you can get away with somewhere about the same time as you posted your collection. I just kept imagining a wave coming up hard and fast from astern and the fountain as it blew up through the hole for the rudder ( bit like a good blow hole).
- 714 replies
-
- 2
-
-
- lady nelson
- victory models
- (and 1 more)
-
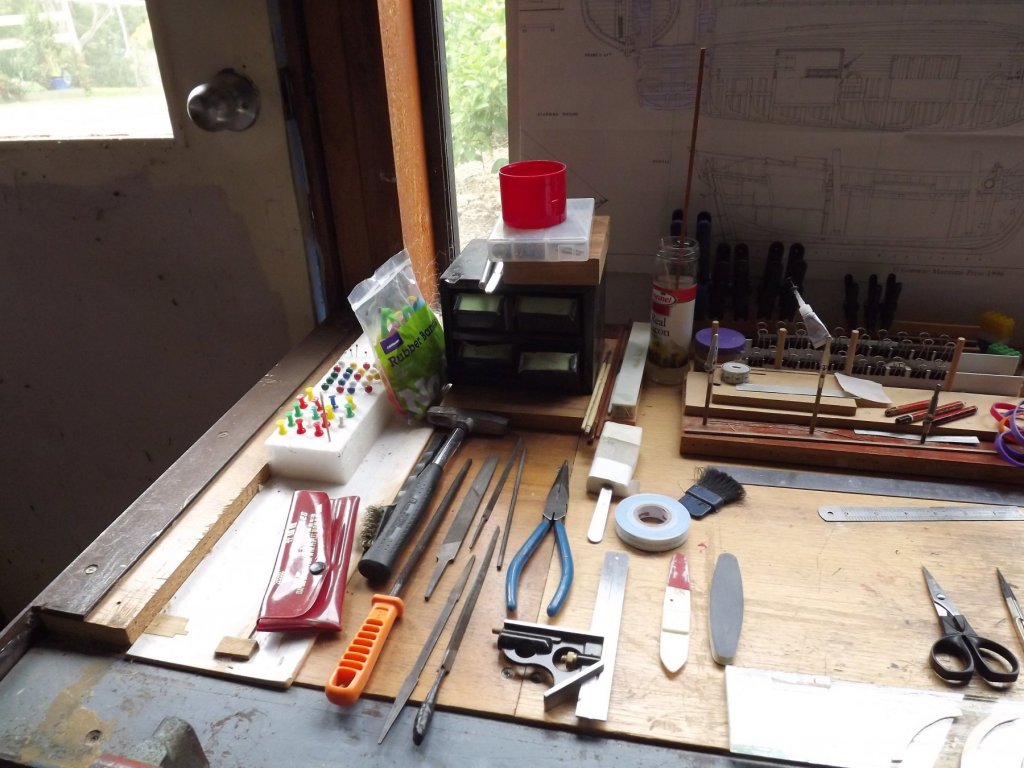
Just before you "first build" guys get scared off by this collection ( I'm green with envy). Have a look at my current work top and tools bottom of this post
- 714 replies
-
- 2
-
-
- lady nelson
- victory models
- (and 1 more)
-
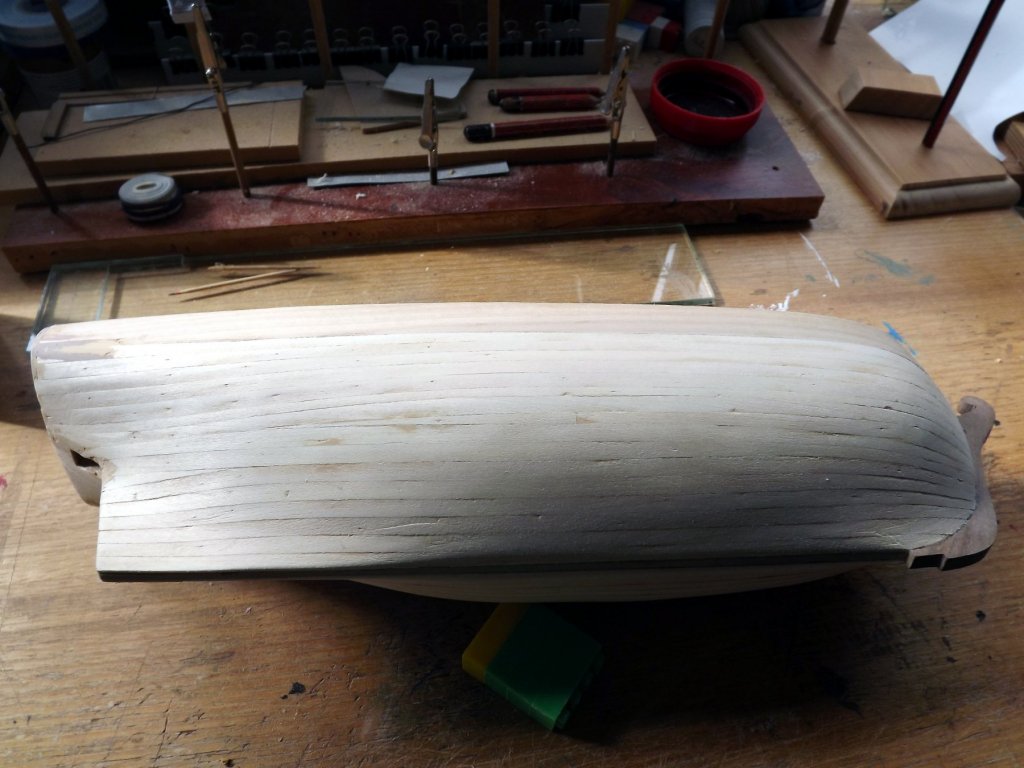
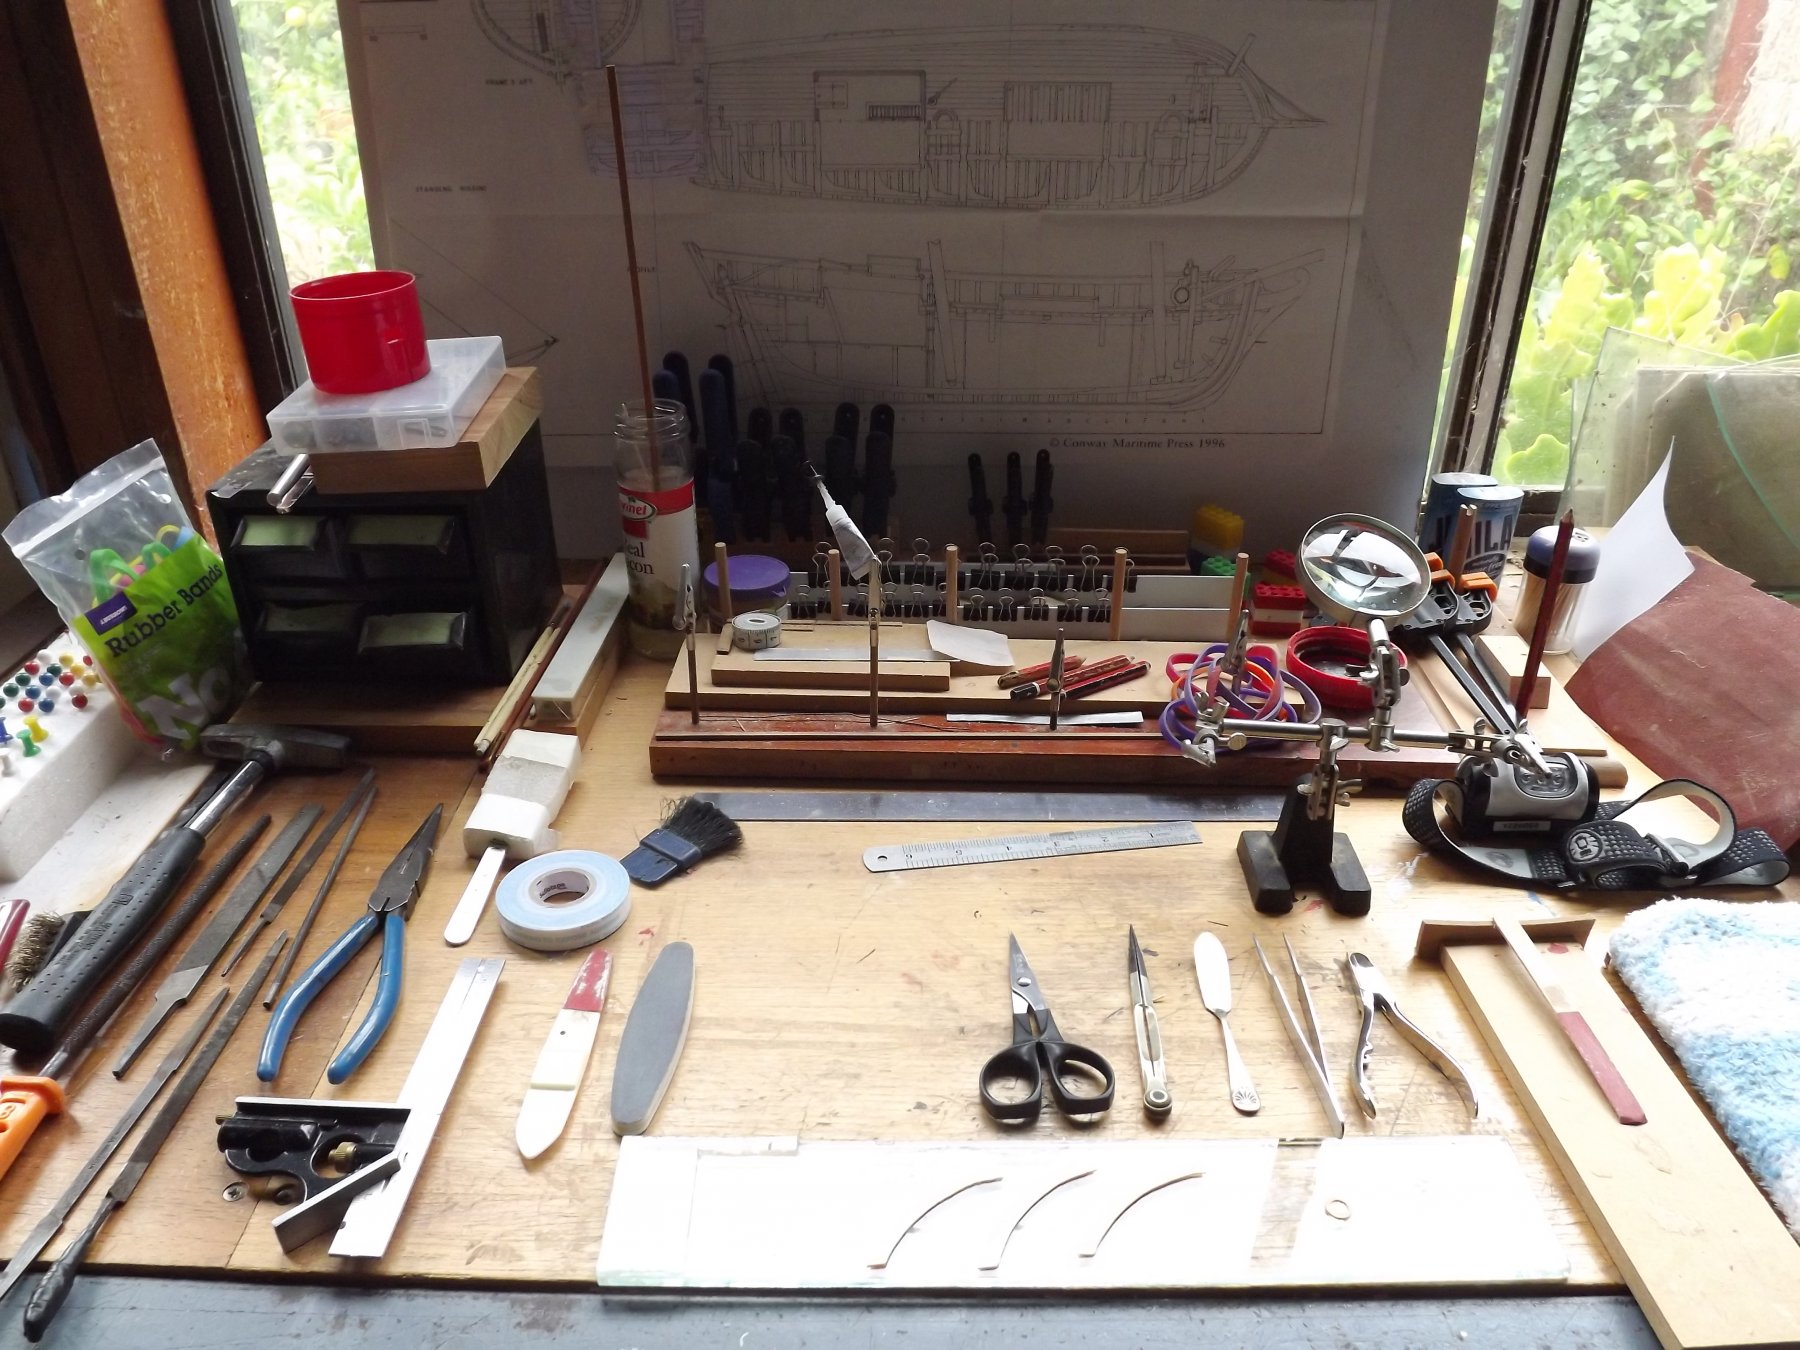
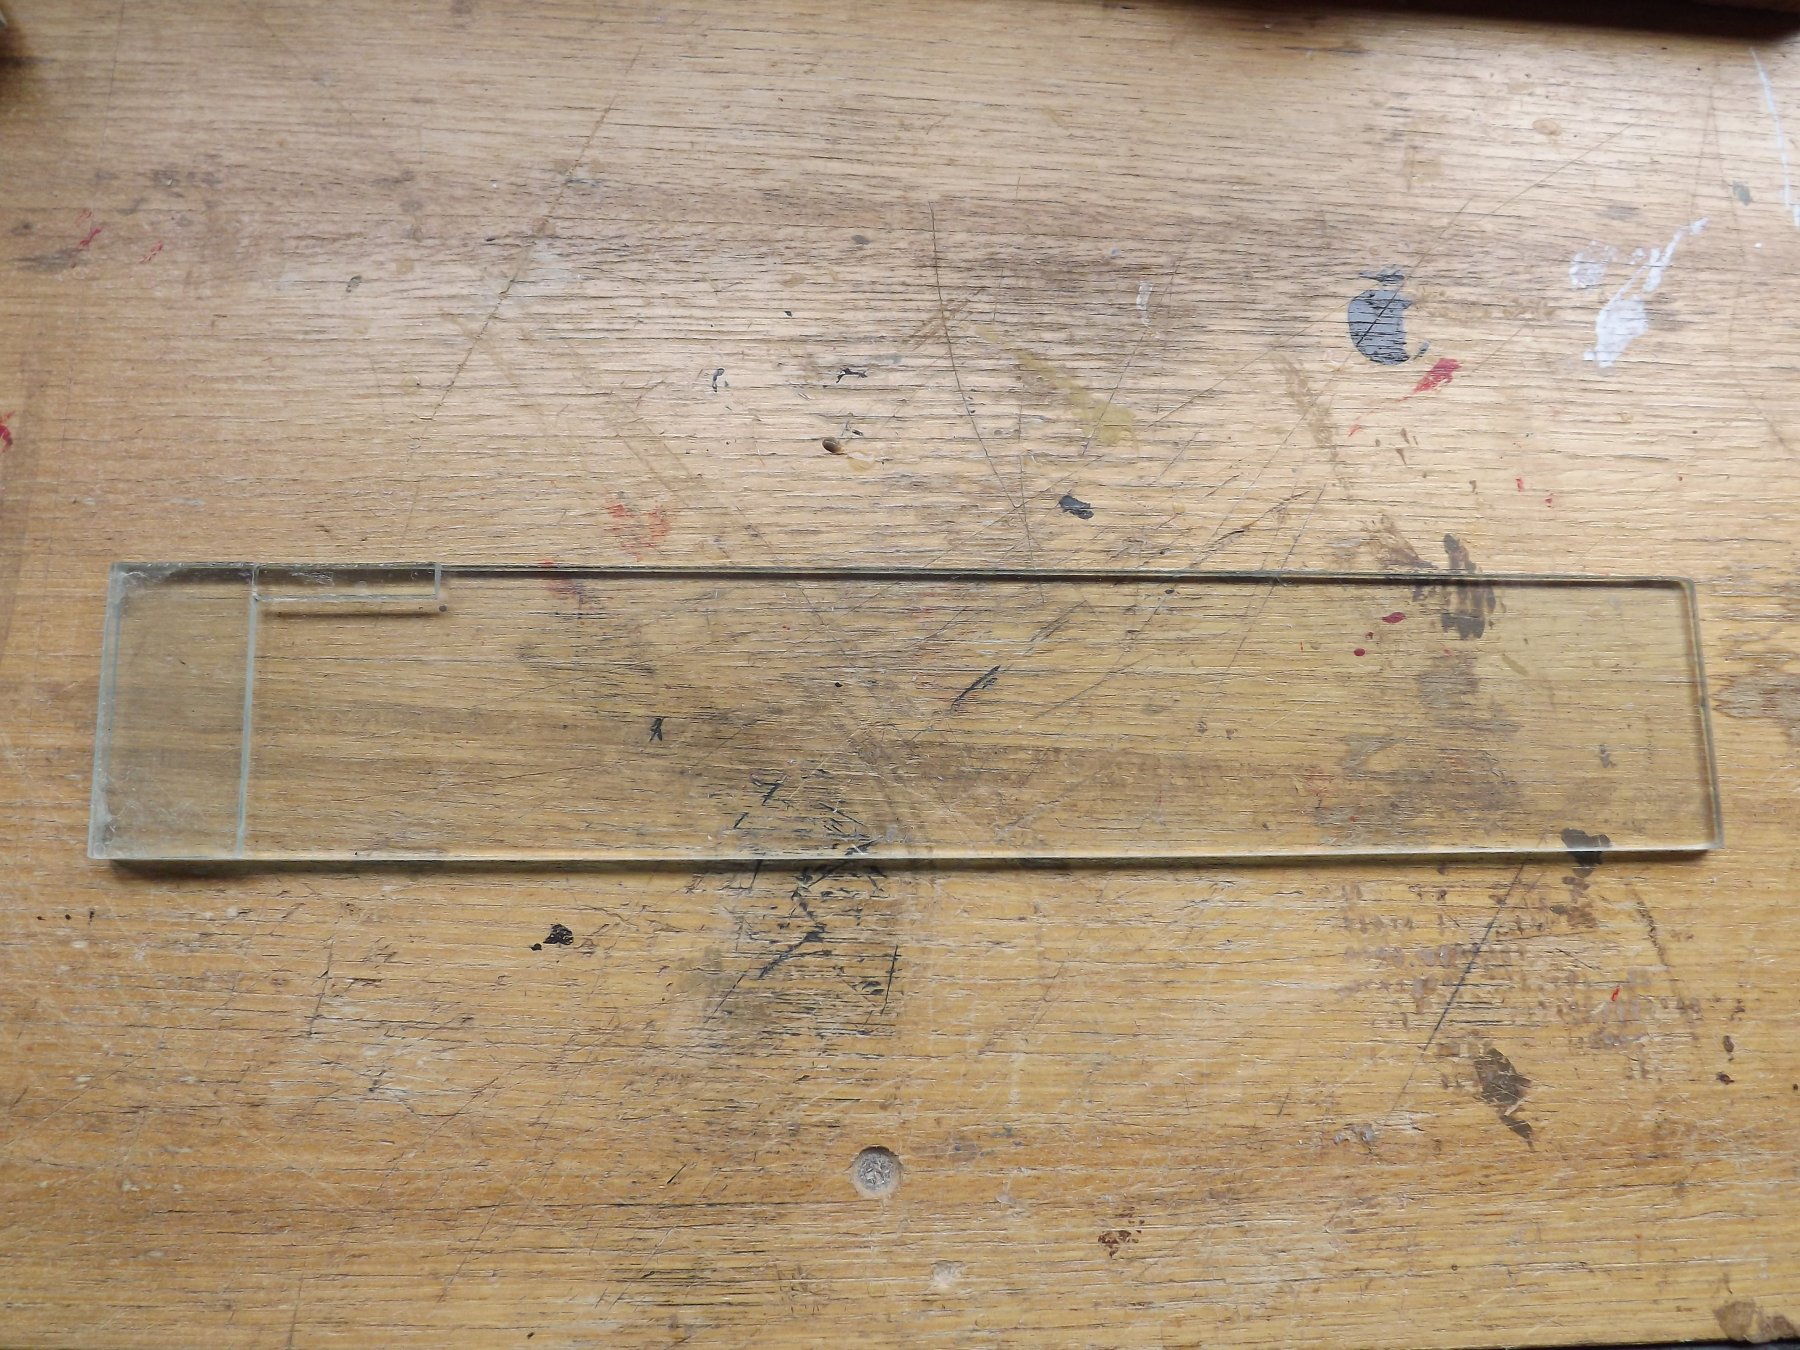
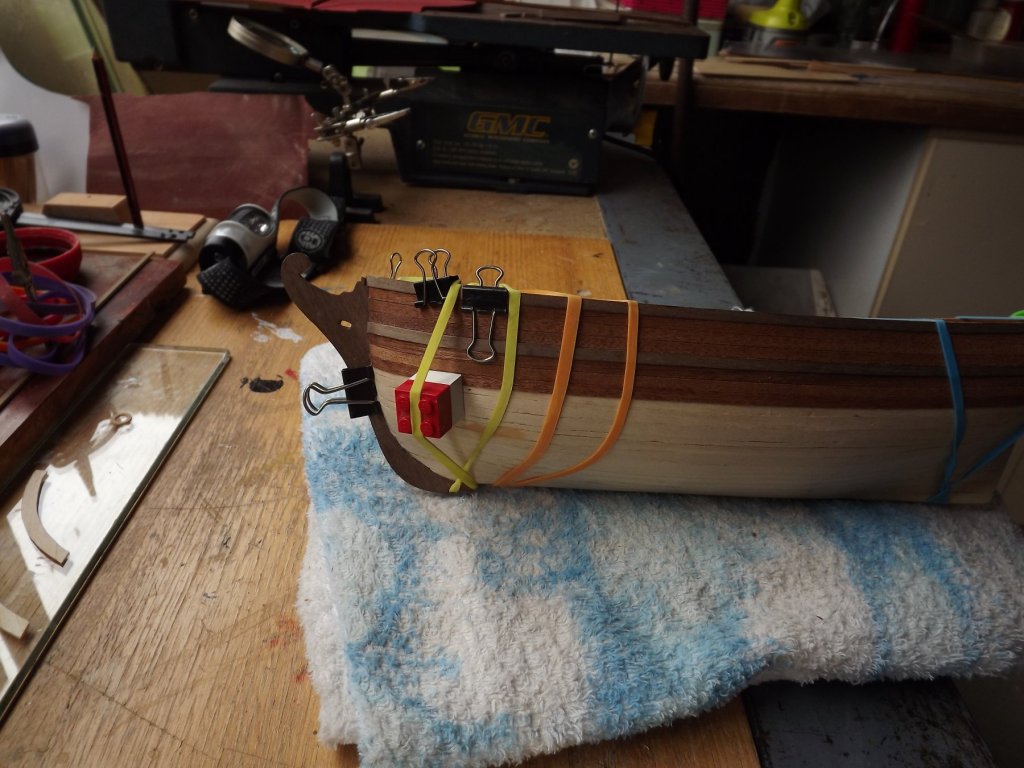
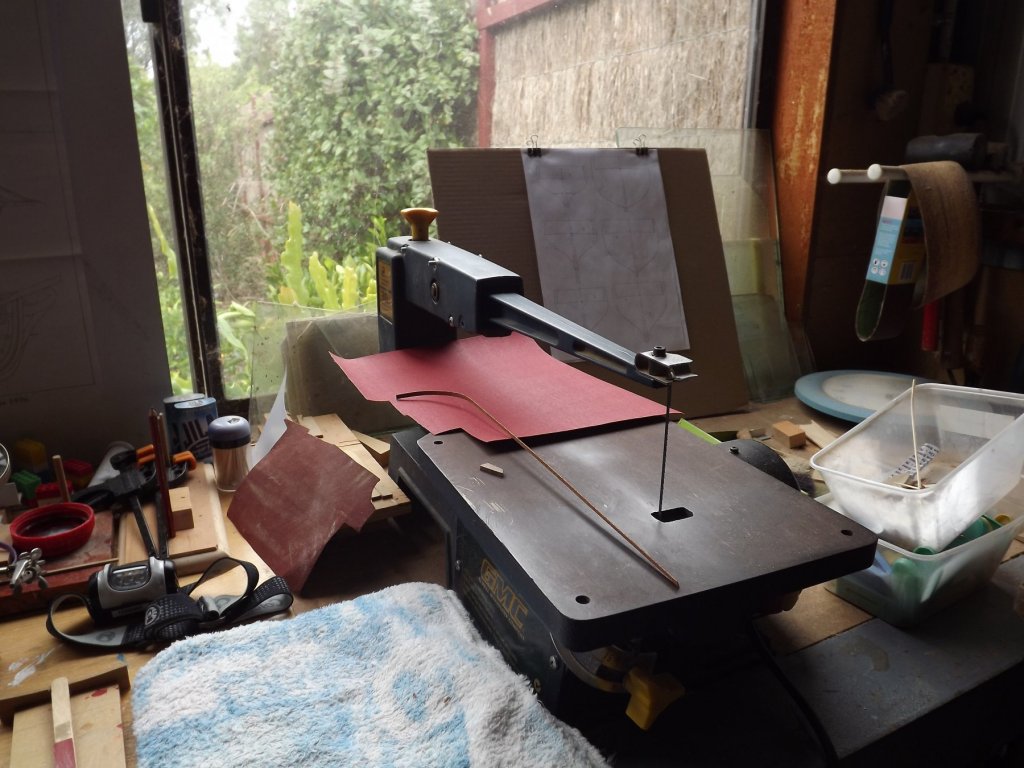
Well I've started the exterior planking and seem to be able to progress at about 4 planks a day. In between times I've grabbed a couple of shots of my work area/tools etc. for those beginners who may look in at the build. See it is possible to make a workman like model using basic items at little cost (nothing over $10.00 au). Plenty of elastic bands, a couple of bulldog clips and lego bricks and the planking stays in position. OK the saw cost more than $10.00 but it wasn't bought specifically for modelling work. Everything else has either been raided from first aid kits, make up bags or psaid for as a last resort. One of my home made useful items - it's a 35 x 6mm bit of plate glass with a couple of off cuts glued to one end at right angles. When I need to edge glue .6mm bits I don't have to worry about them sticking to other surfaces - glue the edge, slide together on the glass and carefully clamp if needed. Once the glue has set it's then just a matter of sliding a scalpel blade along the glass to lift the item. Cleaning the glass is very easy again just lift any glue with the blade and polish the glass with warm eater. Likewise with any right angle gluing needed - I'd have been in trouble without it when making the deck housing.


-
Jay - don't know how far down you want to go with detail but have a look at this It's something that has bugged me for a while - common sense says there had to be some sort of gasket but I could never find any illustrations/references to the fittings.
- 714 replies
-
- 2
-
-
- lady nelson
- victory models
- (and 1 more)
-
Thanks Blue Ensign exactly what I was hoping to see but just didn't look in the right places! :-(
-
Just a thought - with the smaller craft where the rudder extends up through the deck and is controlled by a tiller bar. Is there any type of seal to prevent/slow down water being forced up the hole that the rudder is mounted in. I realise that in many craft this is above the waterline but would expect that wave action would still cause water to flow through there at times.
-
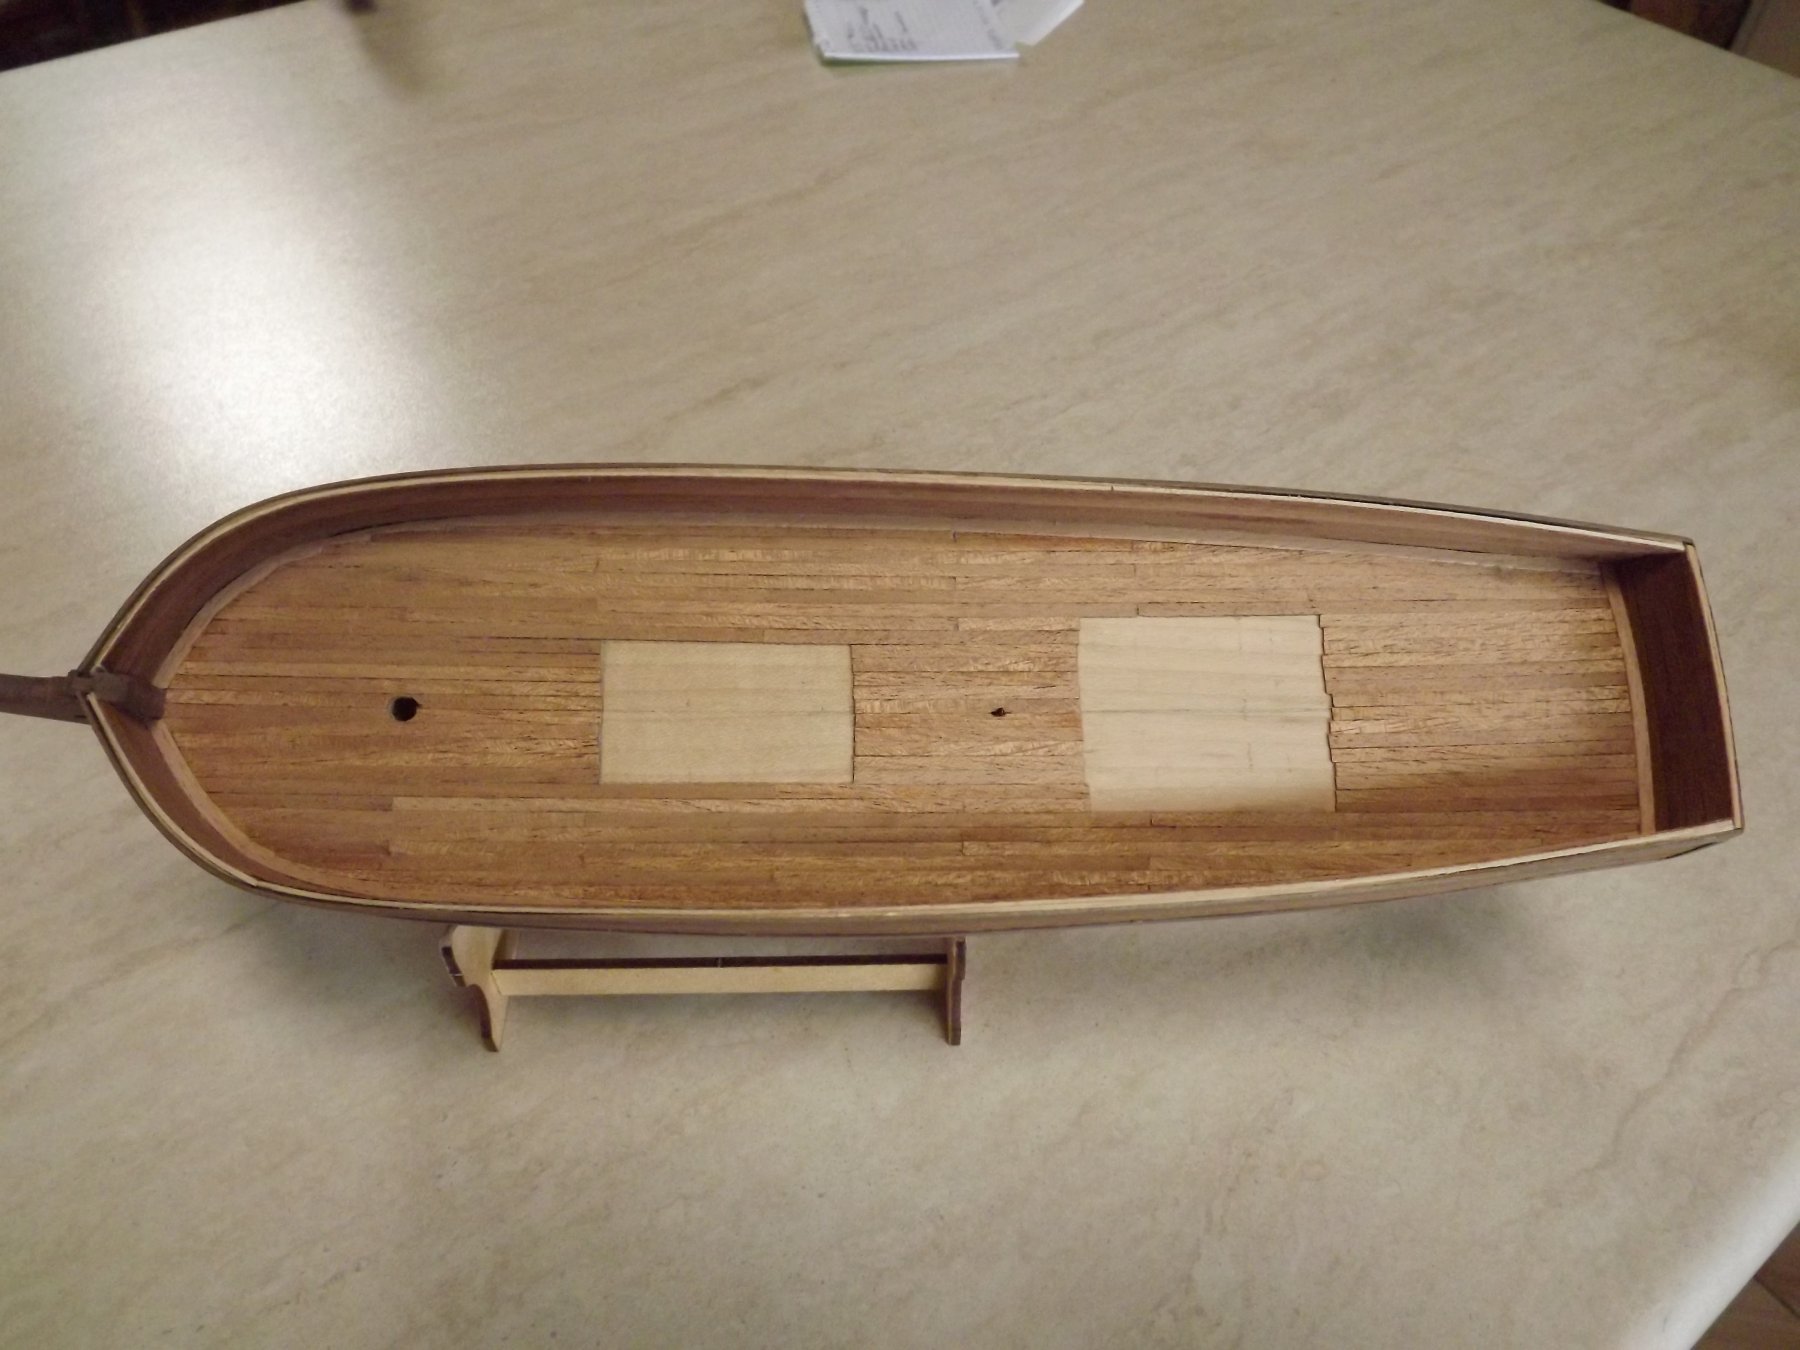
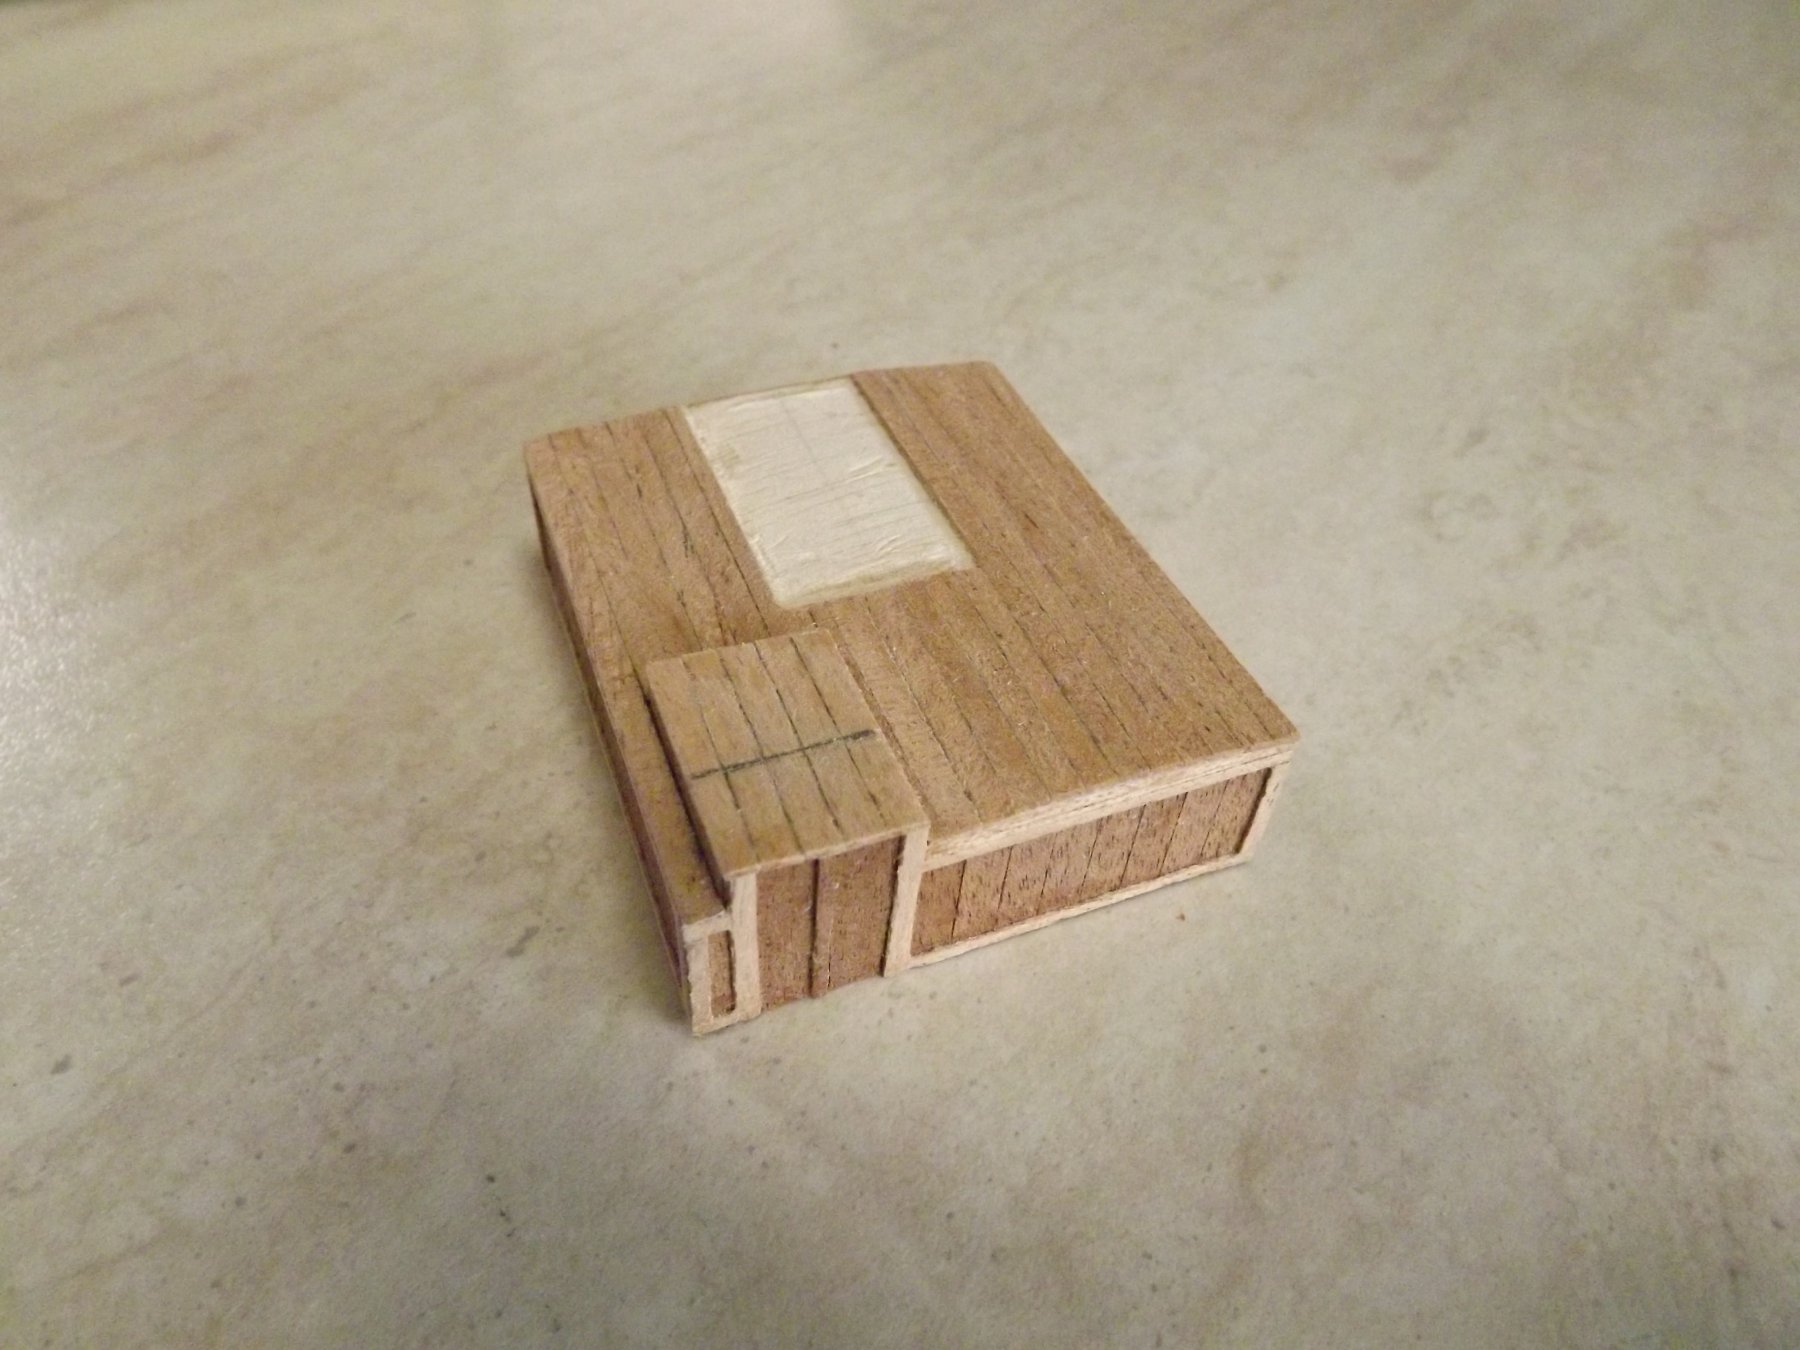
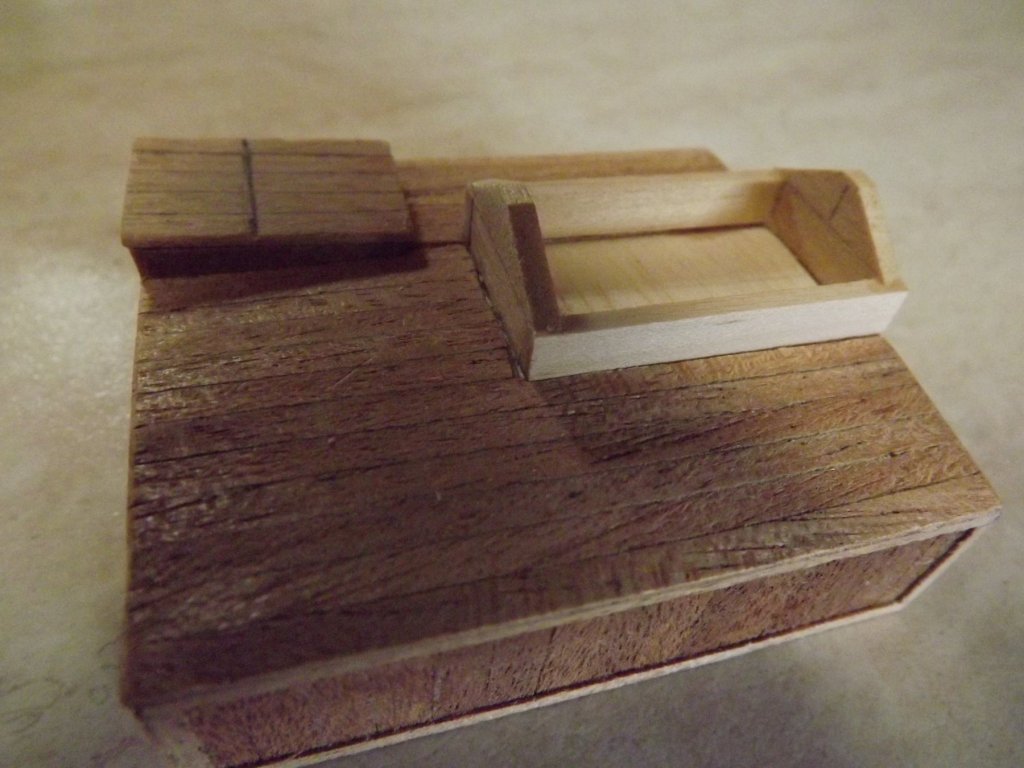
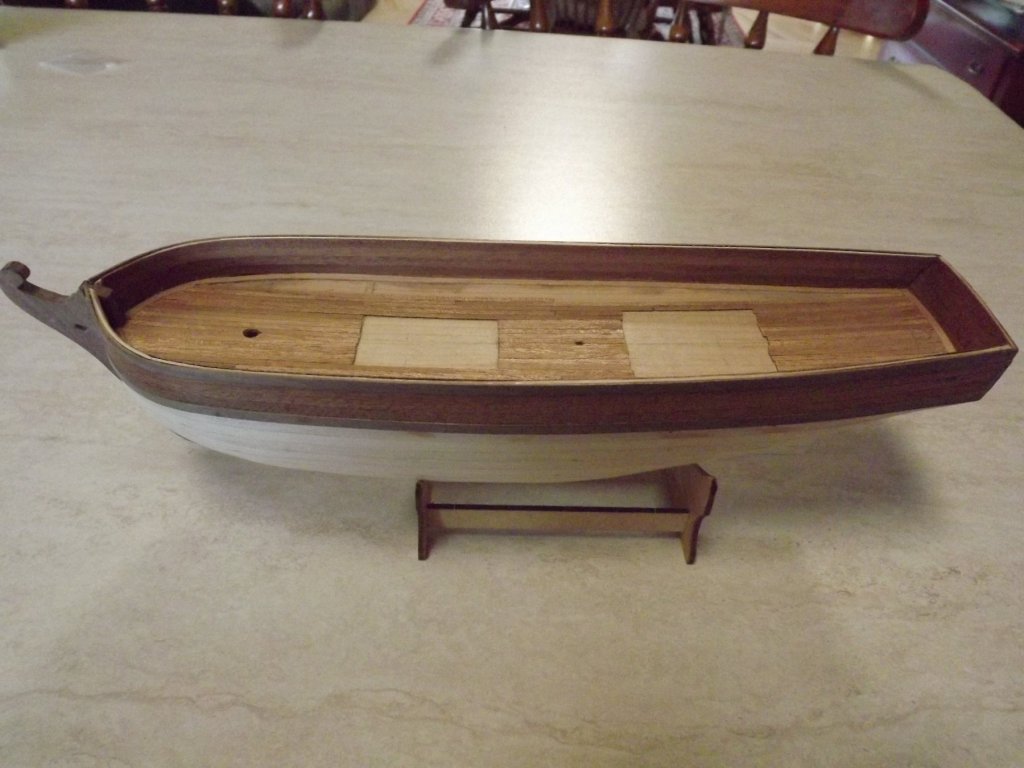
Deck planking finished and will be sanded properly later. I've also completed the deck housing/companionway and built the frame for the skylight. Can't do any more with this though until I've fitted the glass - I've ordered some microscope slides which will cut down fairly well and then will only need framing glued to the glass to provide the correct effect. The deck housing is mostly scraps left over from decking and bulwarks planking fixed to a box frame. I've avoided the final planking as long as I can but I'm afraid I'll now have to start the one part of the build that I really dislike!


-
Got the bulwarks lined and exterior planking fitted which has strengthened this area considerably. I've started on planking the deck but at the moment this is going slowly - got my centre line slightly off I think, which together with slight differences in decking widths shows up as I near the edges. Given that the original was a privately (non-gov't shipyard) built working schooner I'm happy to have a few "quirks" to the planking lines. Actually, unless you start counting and measuring the runs I don't think they'll ever be noticed.


-
I'll still be around to comment on deck furniture, masts and rigging . This seems to be where the kit has taken the easy way and oversimplified much of the detail, however as it's a kit of representative cutter it does allow us to reinterpret/refit this whole area.
- 714 replies
-
- 3
-
-
- lady nelson
- victory models
- (and 1 more)
-
First planking now complete, time to take a short break while I consider my next few moves. This working without an instruction sheet does make you think well ahead to ensure you don't do something that you have to undo later!! Looks pretty rough in the photos but actually it's a good surface for final planking. Next step ( I think) will be to take a break from working the exterior and knock off the gunwales supports, plank the inner gunwales and stern counter, mark out the deck for hatches etc. then plank the deck.