Rick01
-
Posts
652 -
Joined
-
Last visited
Content Type
Profiles
Forums
Gallery
Events
Everything posted by Rick01
-
In a word "no". As Pat explained the expansion/compression will cause problems, in addition if you use a water based glue it will come undone whilst soaking. It's not that hard to pre-bend and then fit the inner planks - just need a lot of clips to hold it firmly on the bulwarks as you glue it.
-
It's surprising how much that first one rises at the first attempt, once you've got it sitting right however the rest should follow quite nicely. By the way - with four garboard builds under my belt I still can't get them right so you look to be well ahead of me!
- 714 replies
-
- 4
-

-
- lady nelson
- victory models
- (and 1 more)
-
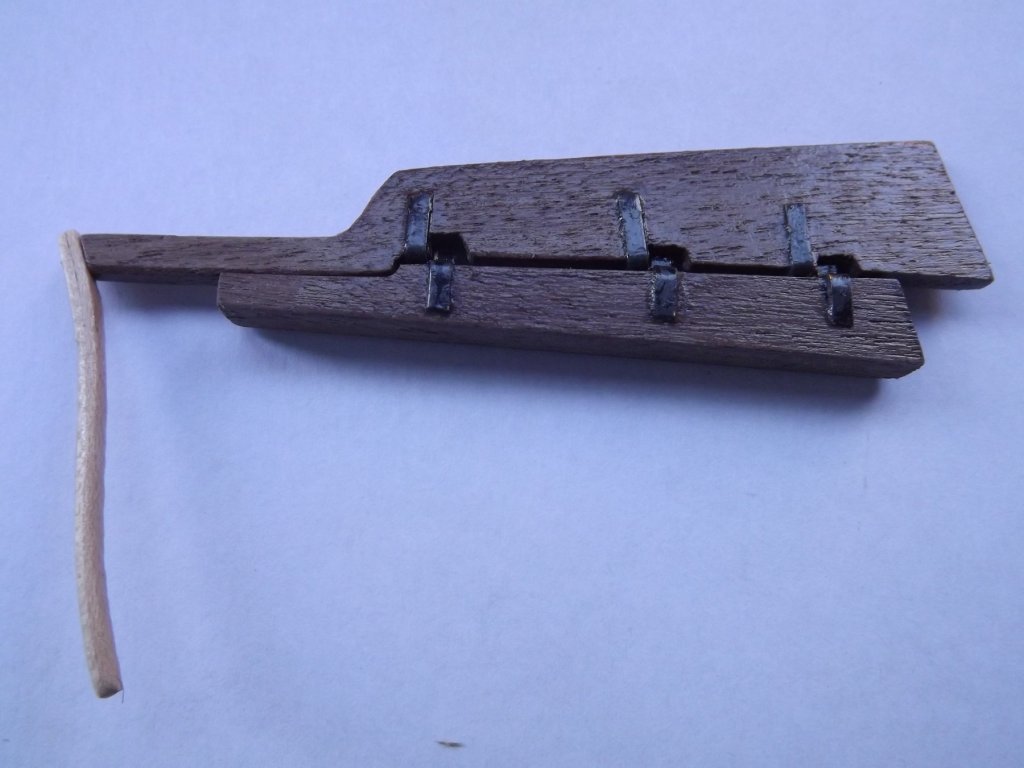
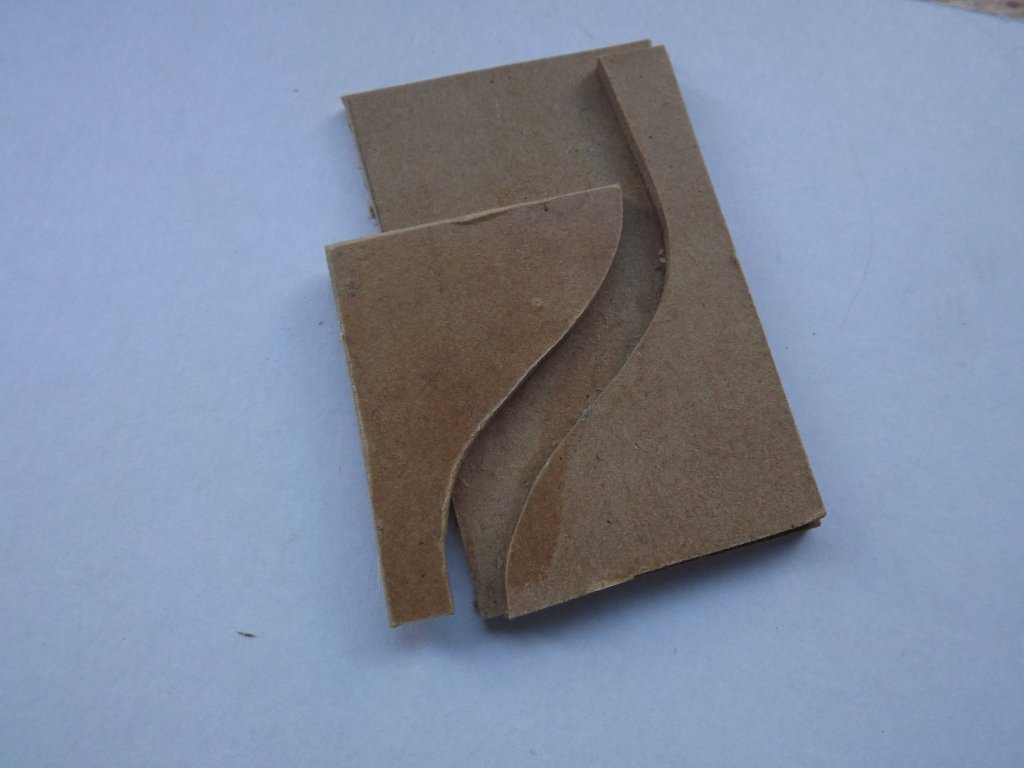
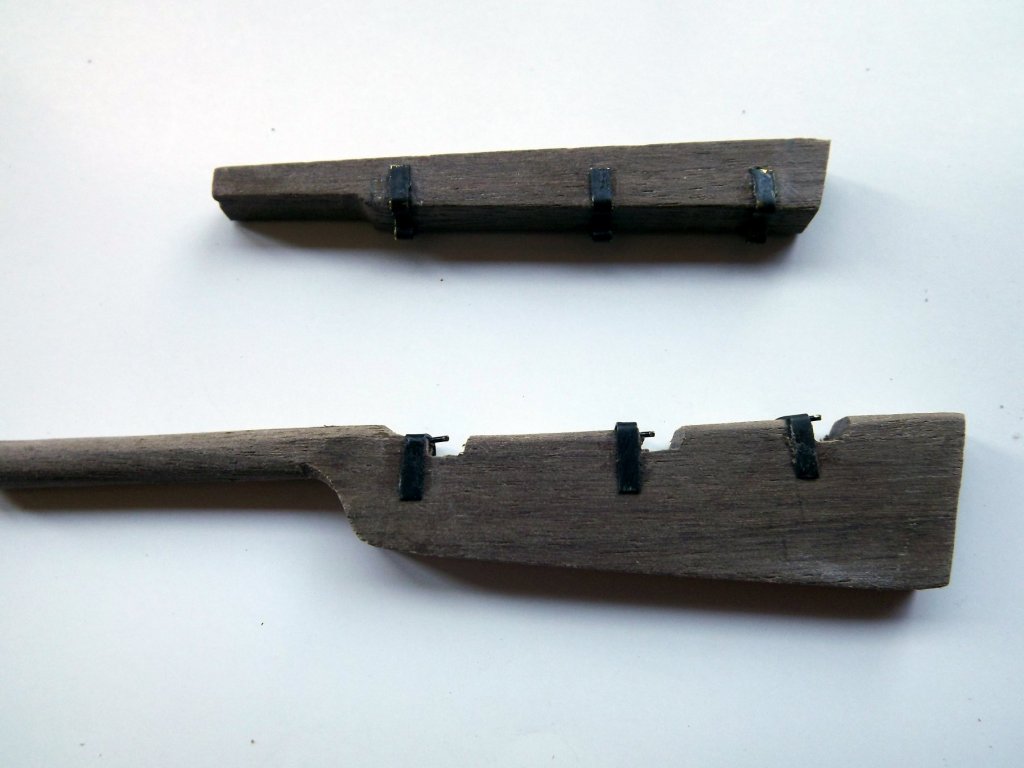
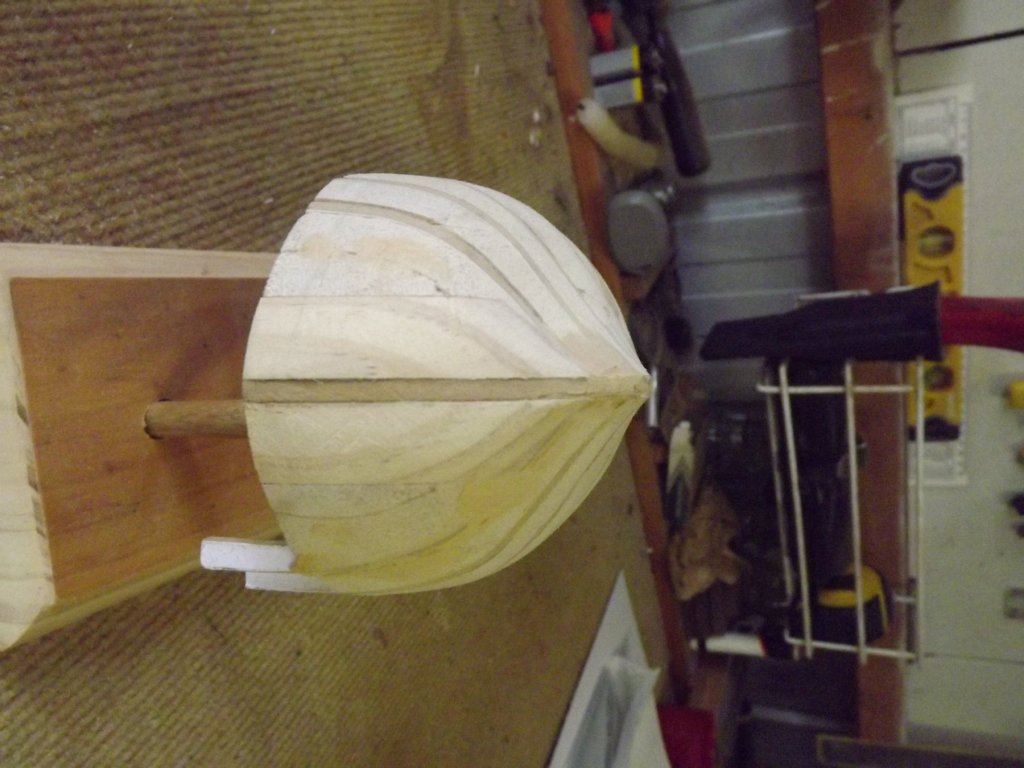
Still on the first planking, only three more each side and that's finished. Meanwhile I've completed the components of the rudder and test fitted them. The tiller was a bit of a problem and this is actually number four. Either they snapped during construction, straightened themselves once un-clamped or or split when drilling for a pin to secure them to the top of the rudder. Eventually I used a couple of small scrap bits of Maple (I think) soaked well then individually clamped. Once dry and released I then laminated them and reclamped for 12 hours - end result something I was happy with that held its shape and didn't split when drilled. To get the right shape I cobbled together a few bits of scrap MDF cut to the correct form, one side glued to a base and the other floating free so that it could be clamped tight against the Maple. Crude but effective and one of the reasons I never dump off-cuts until I've finished whatever project I'm working on. I may never need this specific curve again so I can happily dump it and not worry that I've wasted wood.
-
I think you'll find that even the experts cheat and use a simple overhand knot at times. In fact some correct knots actually become disproportionately large when used on some of the finer lines. Suggestion for you - instead of superglue use a PVA it does make removing the line easier if/when you find you hate the look of a particular line!
-
If you want to stick with an Australian theme then check out HM Cutter Mermaid. Not really a cheap kit and the accuracy is not hte greatest. However there are some sketches on-line done by the commander of her which allow for the kit to be amended quite easily. I didn't do a build log but there is a good one in the forum, plus I've got a number of posts in the rigging area which help. If you do go down that route I'm happy to talk you through the amendments I made.
- 20 replies
-
- 1
-
-
- longboat
- artesania latina
- (and 2 more)
-
With my build I think I actually just referred to the step numbers and suggested that they should be reversed rather than saying don't do this first do that! With the furry rigging a bit of dilute PVA glue rubbed on it "with" the thread direction neatens it up. I re-rigged mine after those photos as I wasn't happy with the way the stays were anchored, I looked at Chuck's build of a longboat and used a similar method with deadeyes and hooks.
- 20 replies
-
- 1
-
-
- longboat
- artesania latina
- (and 2 more)
-
Couple of points for you - did you read and of the previous builds here? I know I pointed out the problem with the gunwale covers when I did mine (chweck my signature for a link). The forward boom has a block and tackle that should be anchored down along the centre line of the boat - this fixes the "flopping around" problem. As to the hoisting of the gaff, I think that the model is missing a section of rigging - with cutters and larger ships there is a hoist which lifts from the yoke thus keeping everything neat. Solution is either scrap the sails and lower the gaffs, or install a hoist for each gaff. Got to agree about rigging plans - not the best for a beginner.
- 20 replies
-
- 1
-
-
- longboat
- artesania latina
- (and 2 more)
-
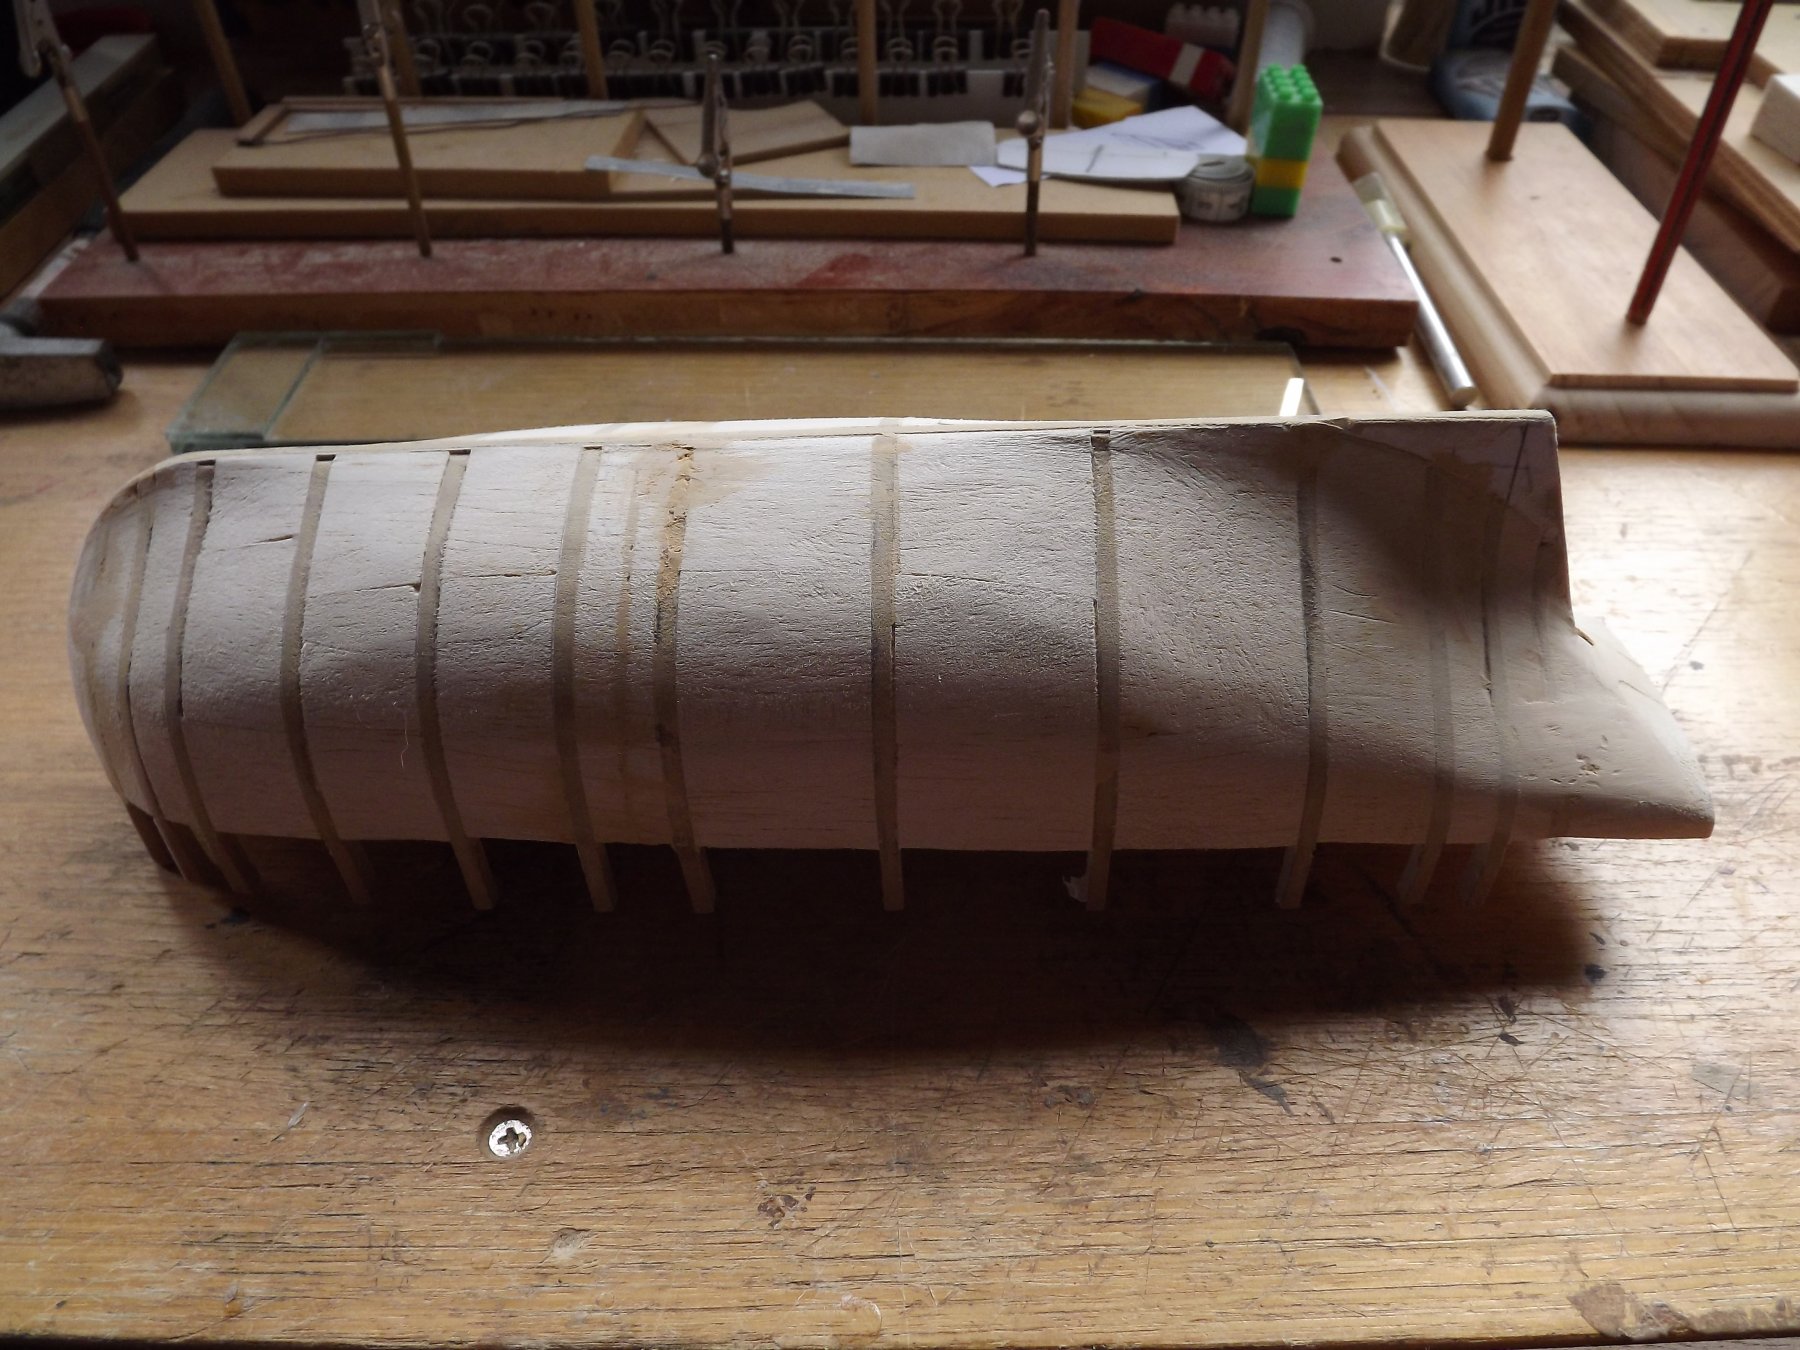
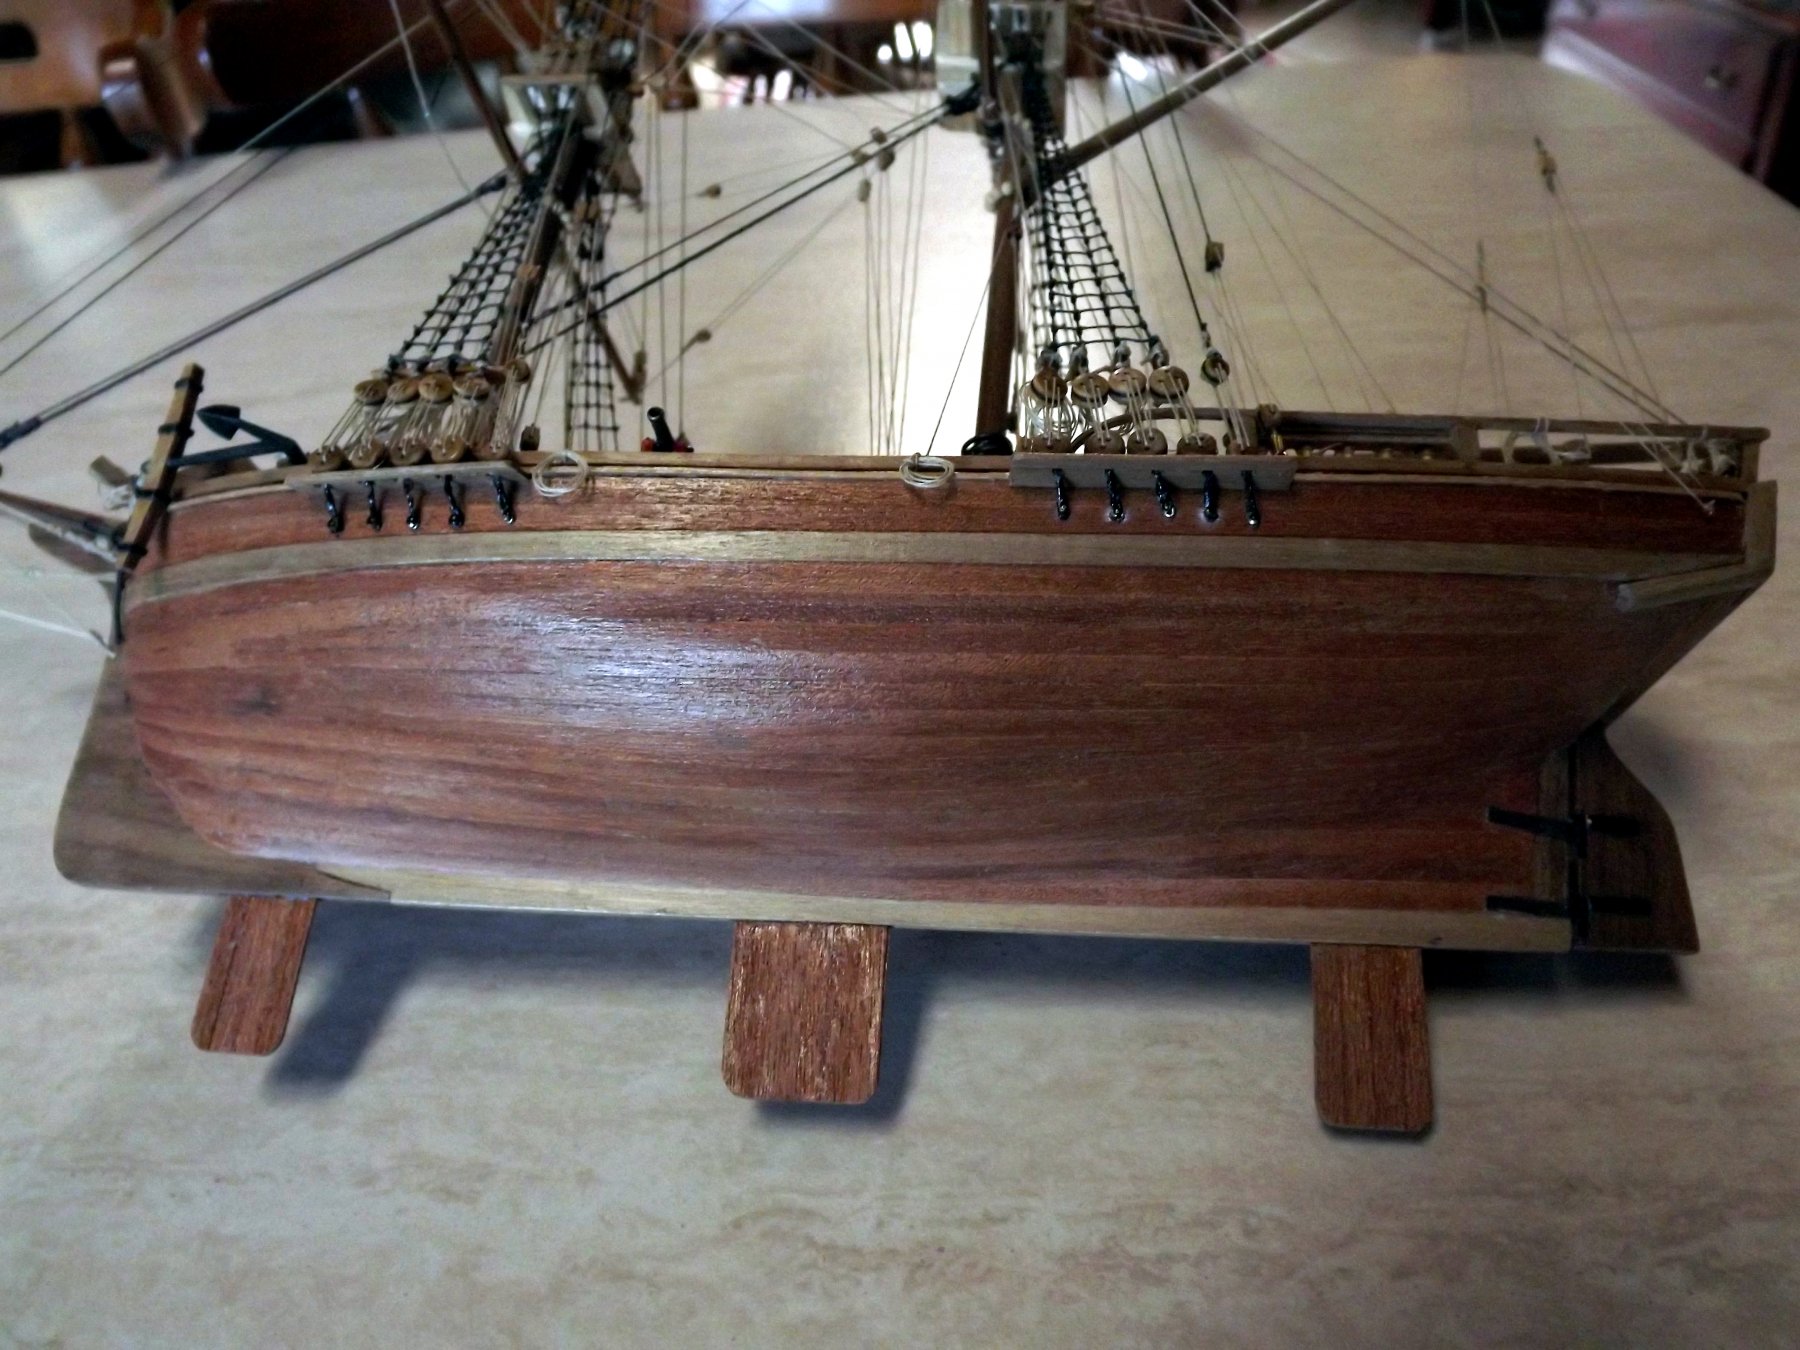
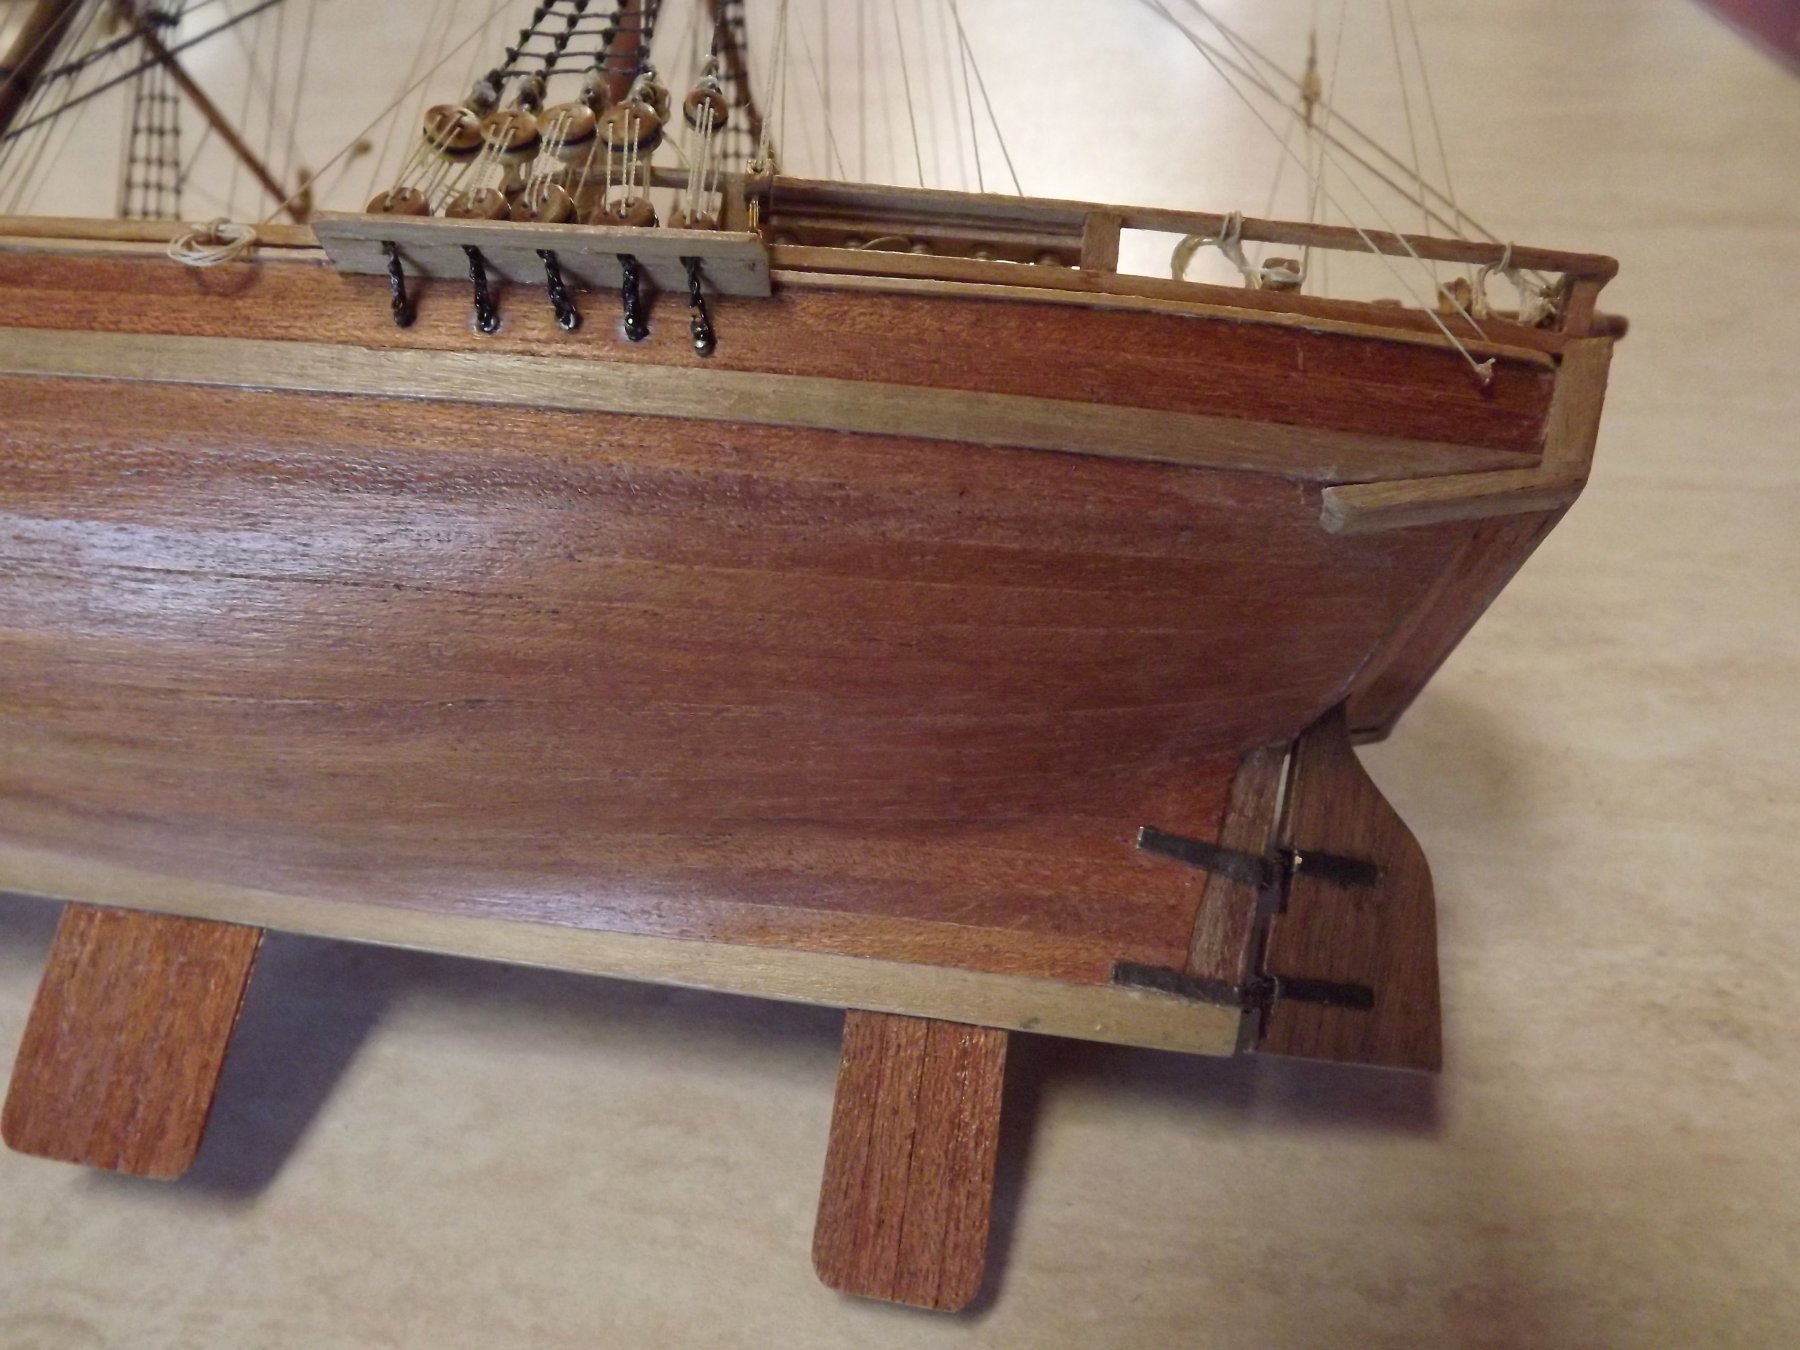
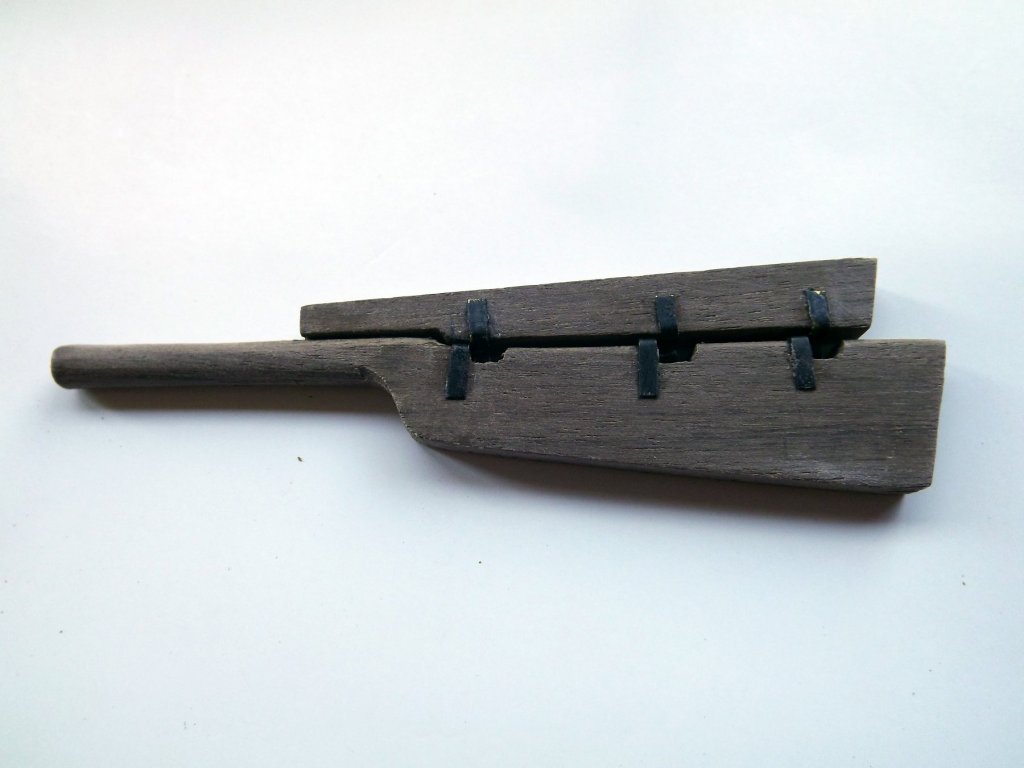
First planking is coming on slowly with my usual fight to get things to fit (I'm best left alone during this part of the build). In between swearing at planks and removing glue from my fingers I've also taken the odd moment out to make the rudder assembly and fit it all together. Component parts. Hardware fitted. All test fitted. Due to the kink in the rudder itself this will need to be slotted in to the ship as a single unit at a later date. Currently it just need s slight clean up and then a couple of coats of a water based satin finish varnish. Meanwhile I'll need all sorts of operations/chemicals to remove the superglue that I always seem to coat myself with when putting these items together!

-
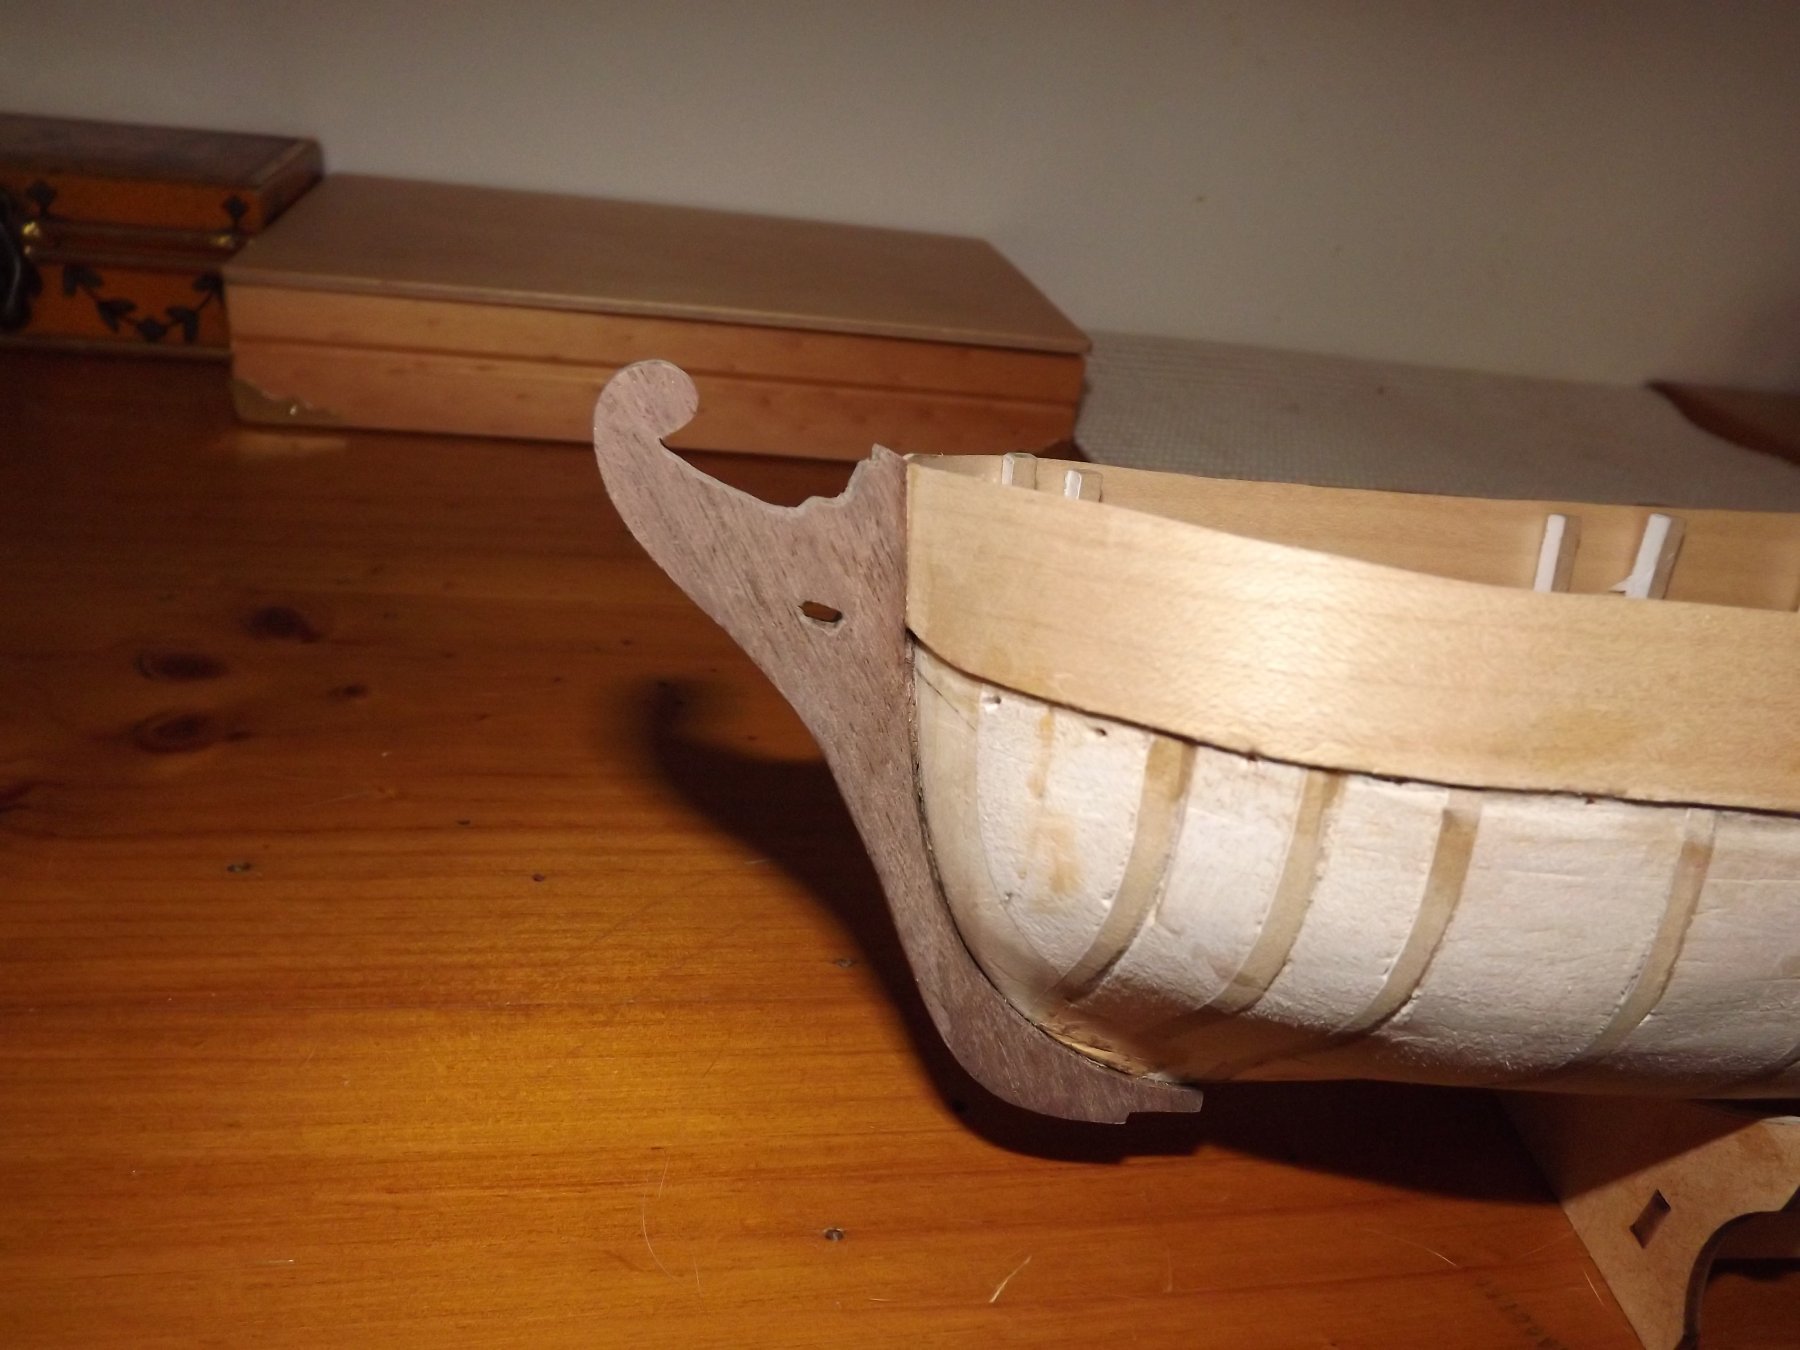
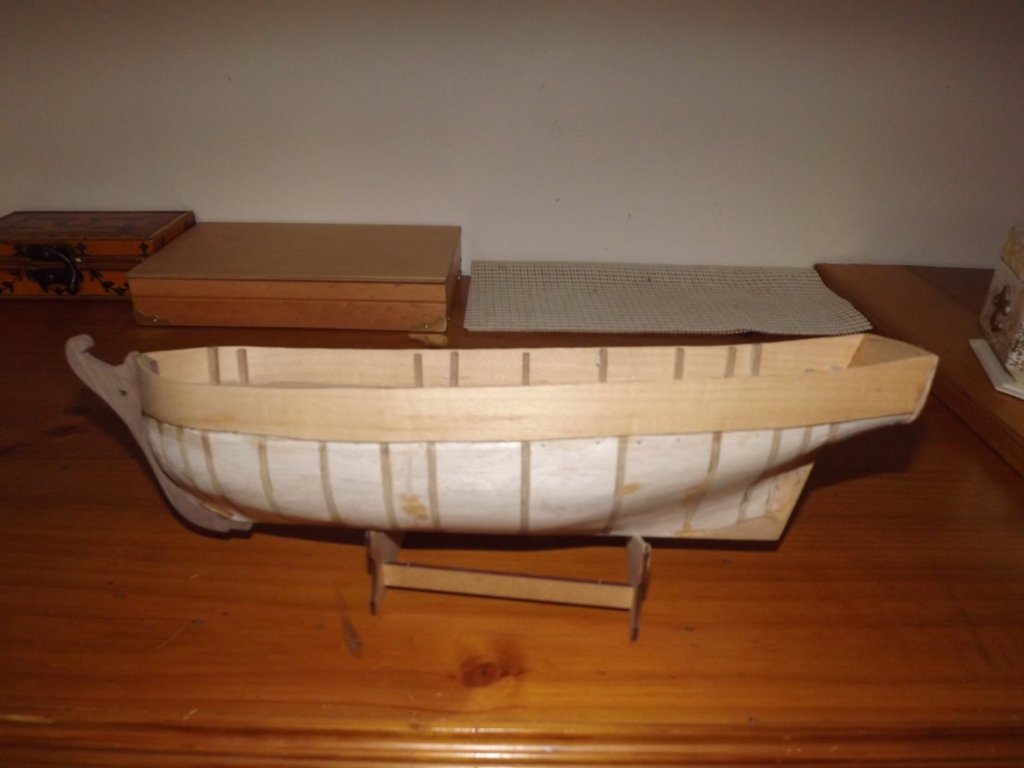
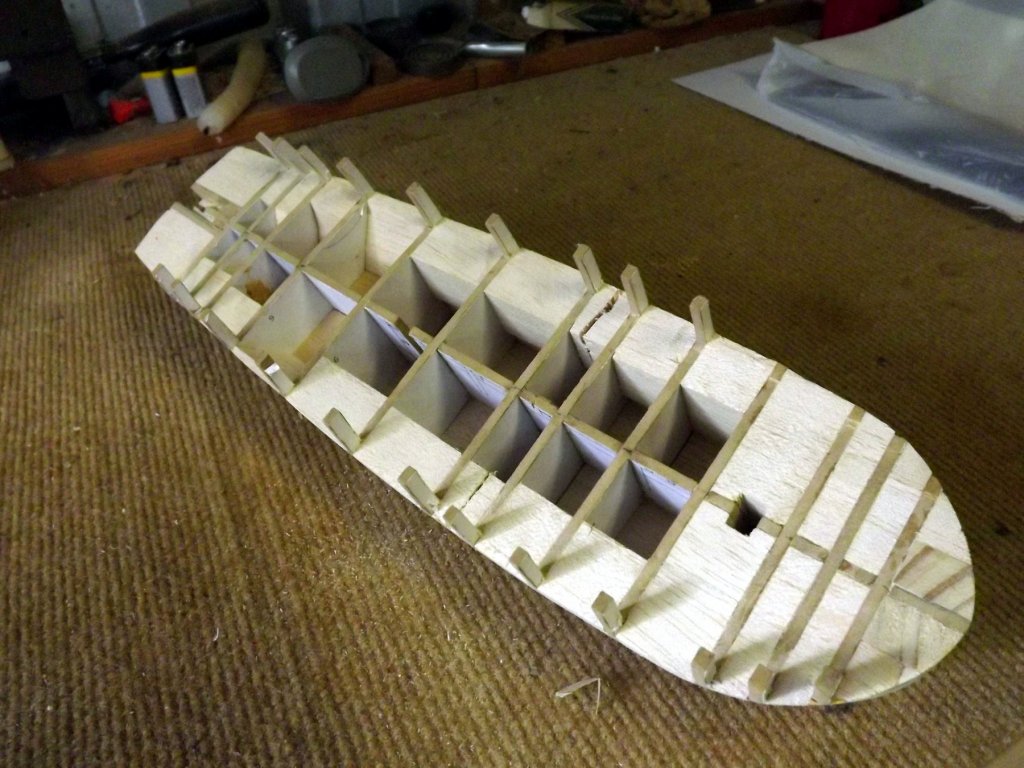
I've now got bulwarks fitted, plus the prow (?) which was needed to locate the bulwarks properly. A lot of stock card has been cut up bent, spindled and otherwise tortured to get a template something vaguely resembling the correct curve for the bulwarks. That way I didn't waste any timber when cutting the final bulwark, even now it's a bit wobbly however by the time it's all planked everything should square itself up and all the wavy lines will disappear (positive thinking here). Went down to Mornington today in the hopes of getting some photos but it seems the guys running her picked up their bat and ball Saturday morning and went home as it looked to be too rough for tourist trips. 1st planking next, then the balance of the false keel.

-
She's in Mornington this weekend - I'll be visiting and grabbing as many photos as I can for later reference.
-
Looks like you've got it this time! Those stealers seem to sit quite naturally now so don't try tweaking it any more or you'll never be happy with it. One of my worst habits is going back again and again "just to try a little improvement" and generally ending up with something a bigger mess than when I started. Can't you just leave your socks on the floor in the hopes that someone will take pity on you and do a quick tidy-up. Or have you tried that before and failed?
- 714 replies
-
- 4
-
-
- lady nelson
- victory models
- (and 1 more)
-
Infill completed and sanded back. Looks rough in the photos but is not that bad in reality. You'll notice a fine "bulkhead " just left of centre which is in fact a saw cut. I ended up with a slight bend in the keel (not noticed until after all the work had been done). To correct it I identified the section causing the problem then made a cut both sides centred on the kink, drove a small wedge into the body until the keel straightened then filled - problem fixed. You'll notice a couple of gunwale supports missing (broke during deck sanding) - I'll make a temporary block to keep the correct shape/lines when I start on the gunwales.Next step is a visit to "Float-a-boat" in Ringwood for all the timbers for decking planking etc. meanwhile the false keel will be cut to shape. I'll be more than happy if I get this bit right the first time! Someone wil spot that there are no rabets - the frame is 3 mm mdf and the plans indicate a 5 mm false keel giving me a 1 mm tolerance either side when fitted so by my calculations I won't need a rabet which makes my life a little easier. This scratch building is definitely scary but I'm happy with what I've got happening so far and I will not be giving up!


-
I fit mine in a similar way to Don but make a blunt arrow head shape on the narrow end rather than a square end. Fitting a couple with maybe two full planks between them make for a much neater look.
- 714 replies
-
- 4
-
-
- lady nelson
- victory models
- (and 1 more)
-
Popeye has got it - This is the point where I despair of getting it right but by planking this way the stealer positions itself pretty well and shouldn't be obvious. The only way to find our is to start planking.
- 714 replies
-
- 4
-
-
- lady nelson
- victory models
- (and 1 more)
-
I started off gluing mine in but thrn changed to allowing the rigging to hold it in place correctly. I actually found it easier to position the mast this way and fine adjustments were also easy just by tensioning or slackening the relevant shrouds.
-
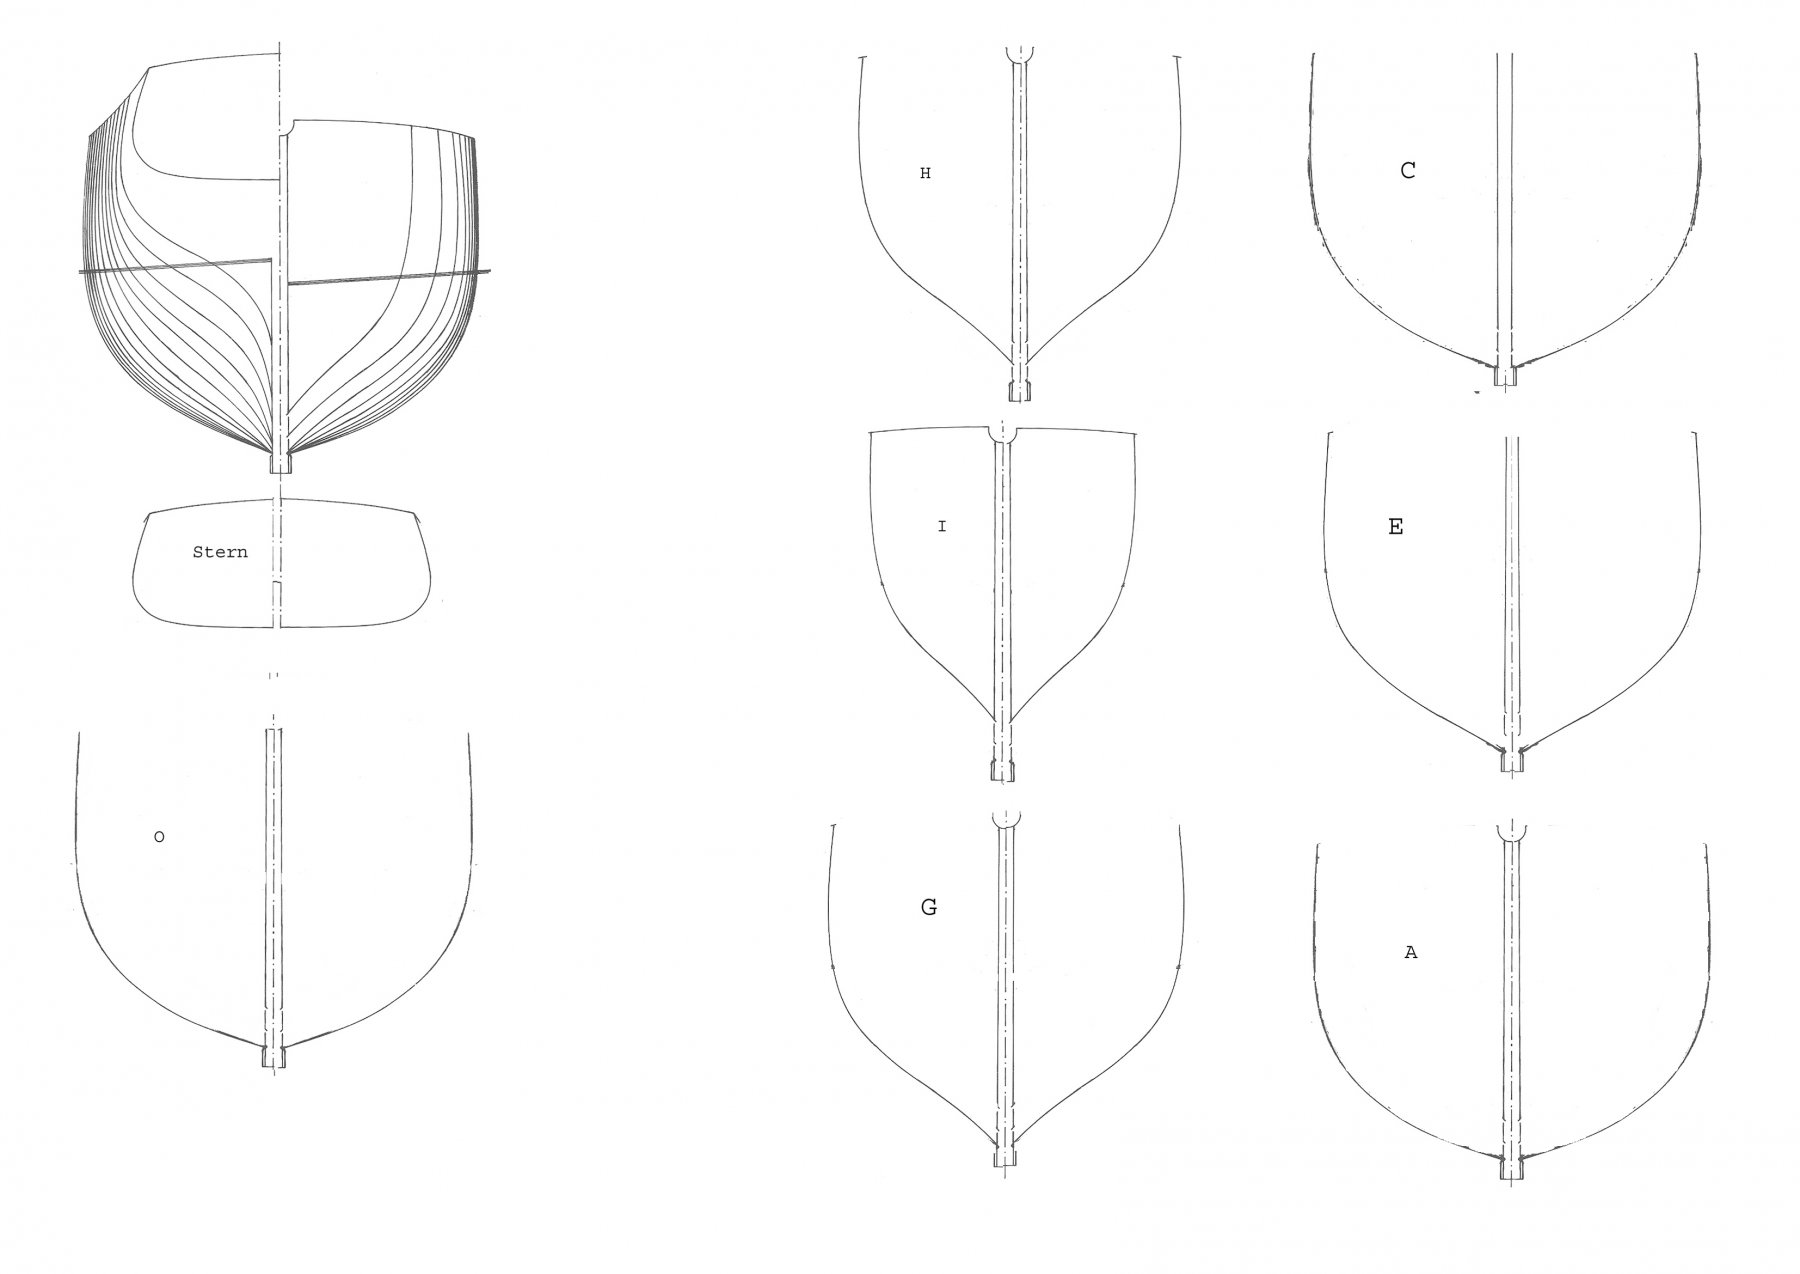
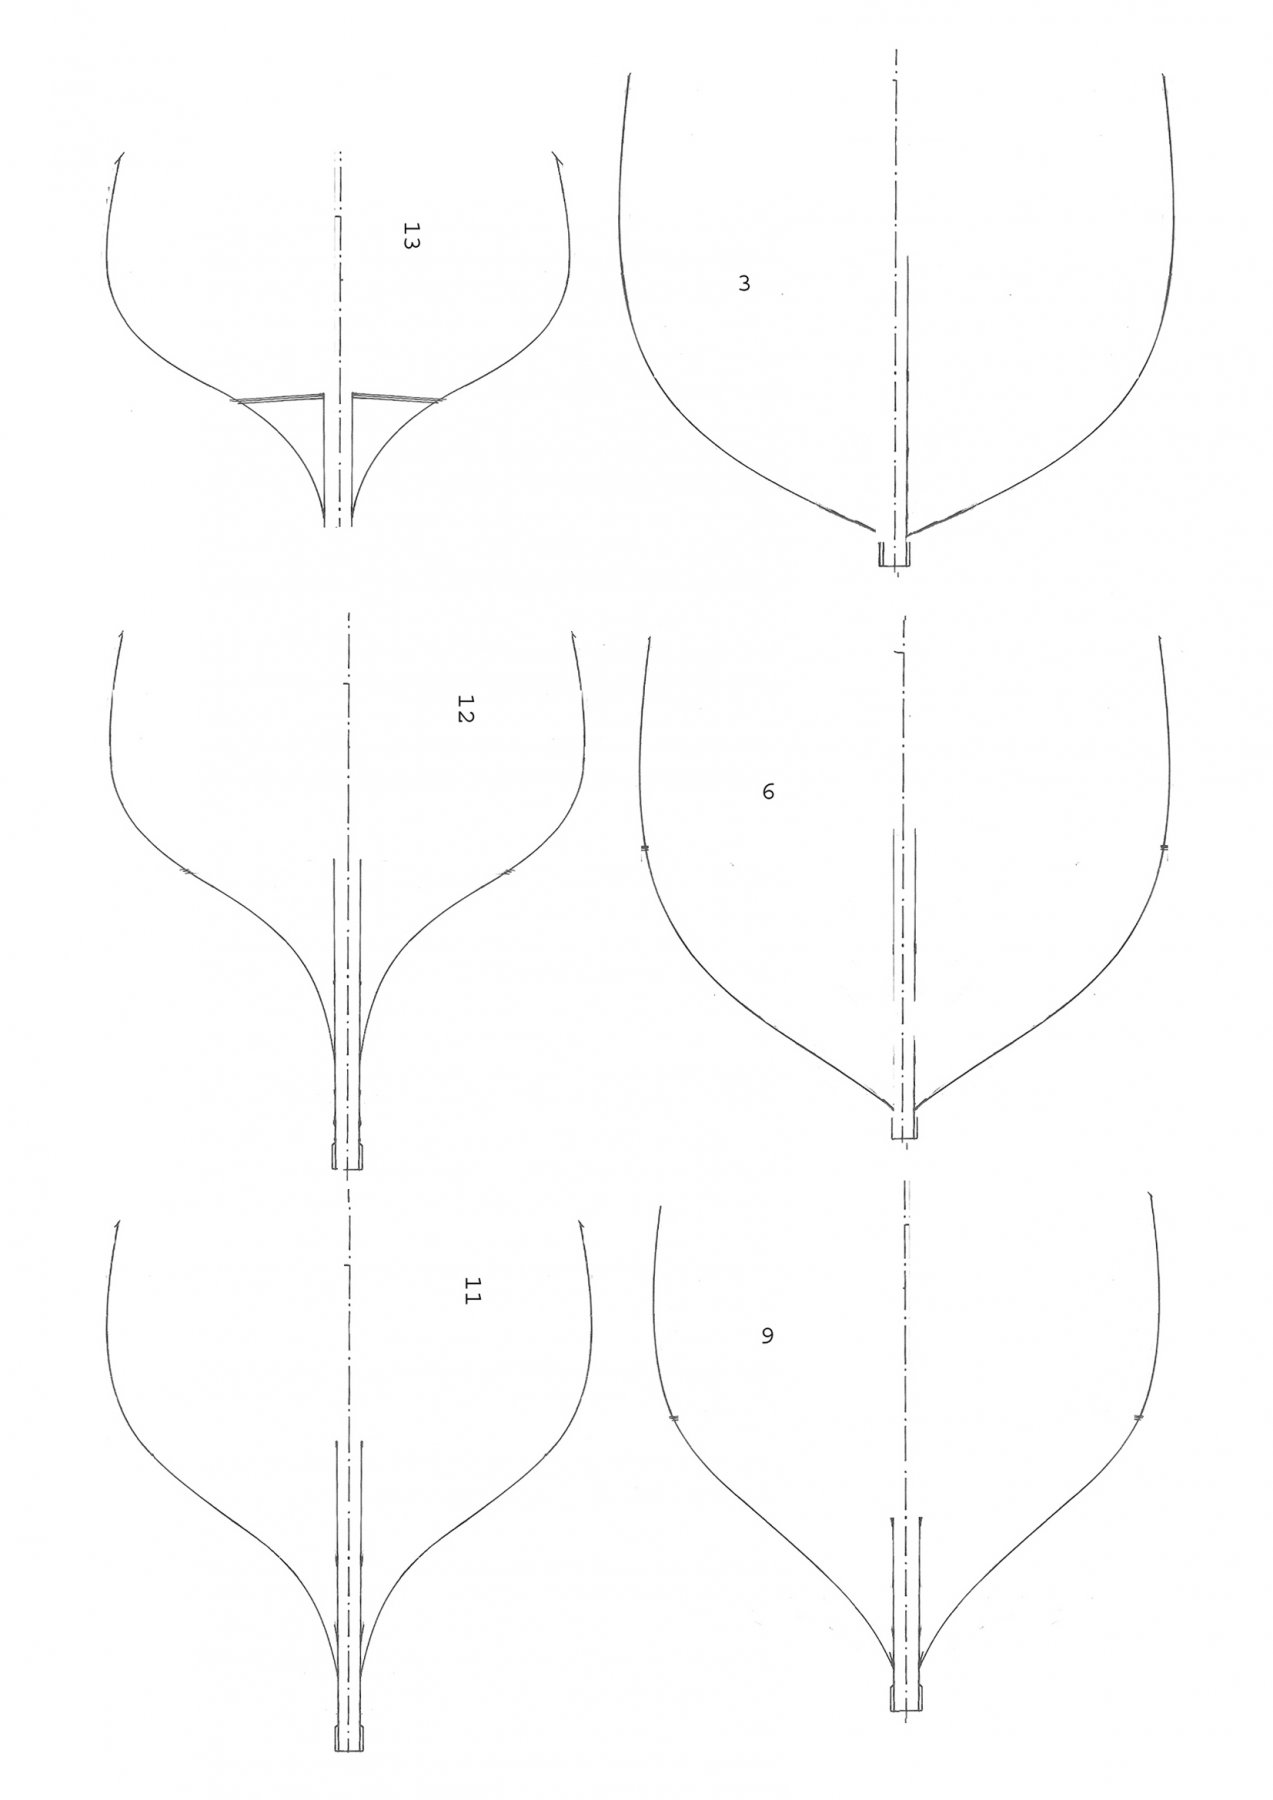
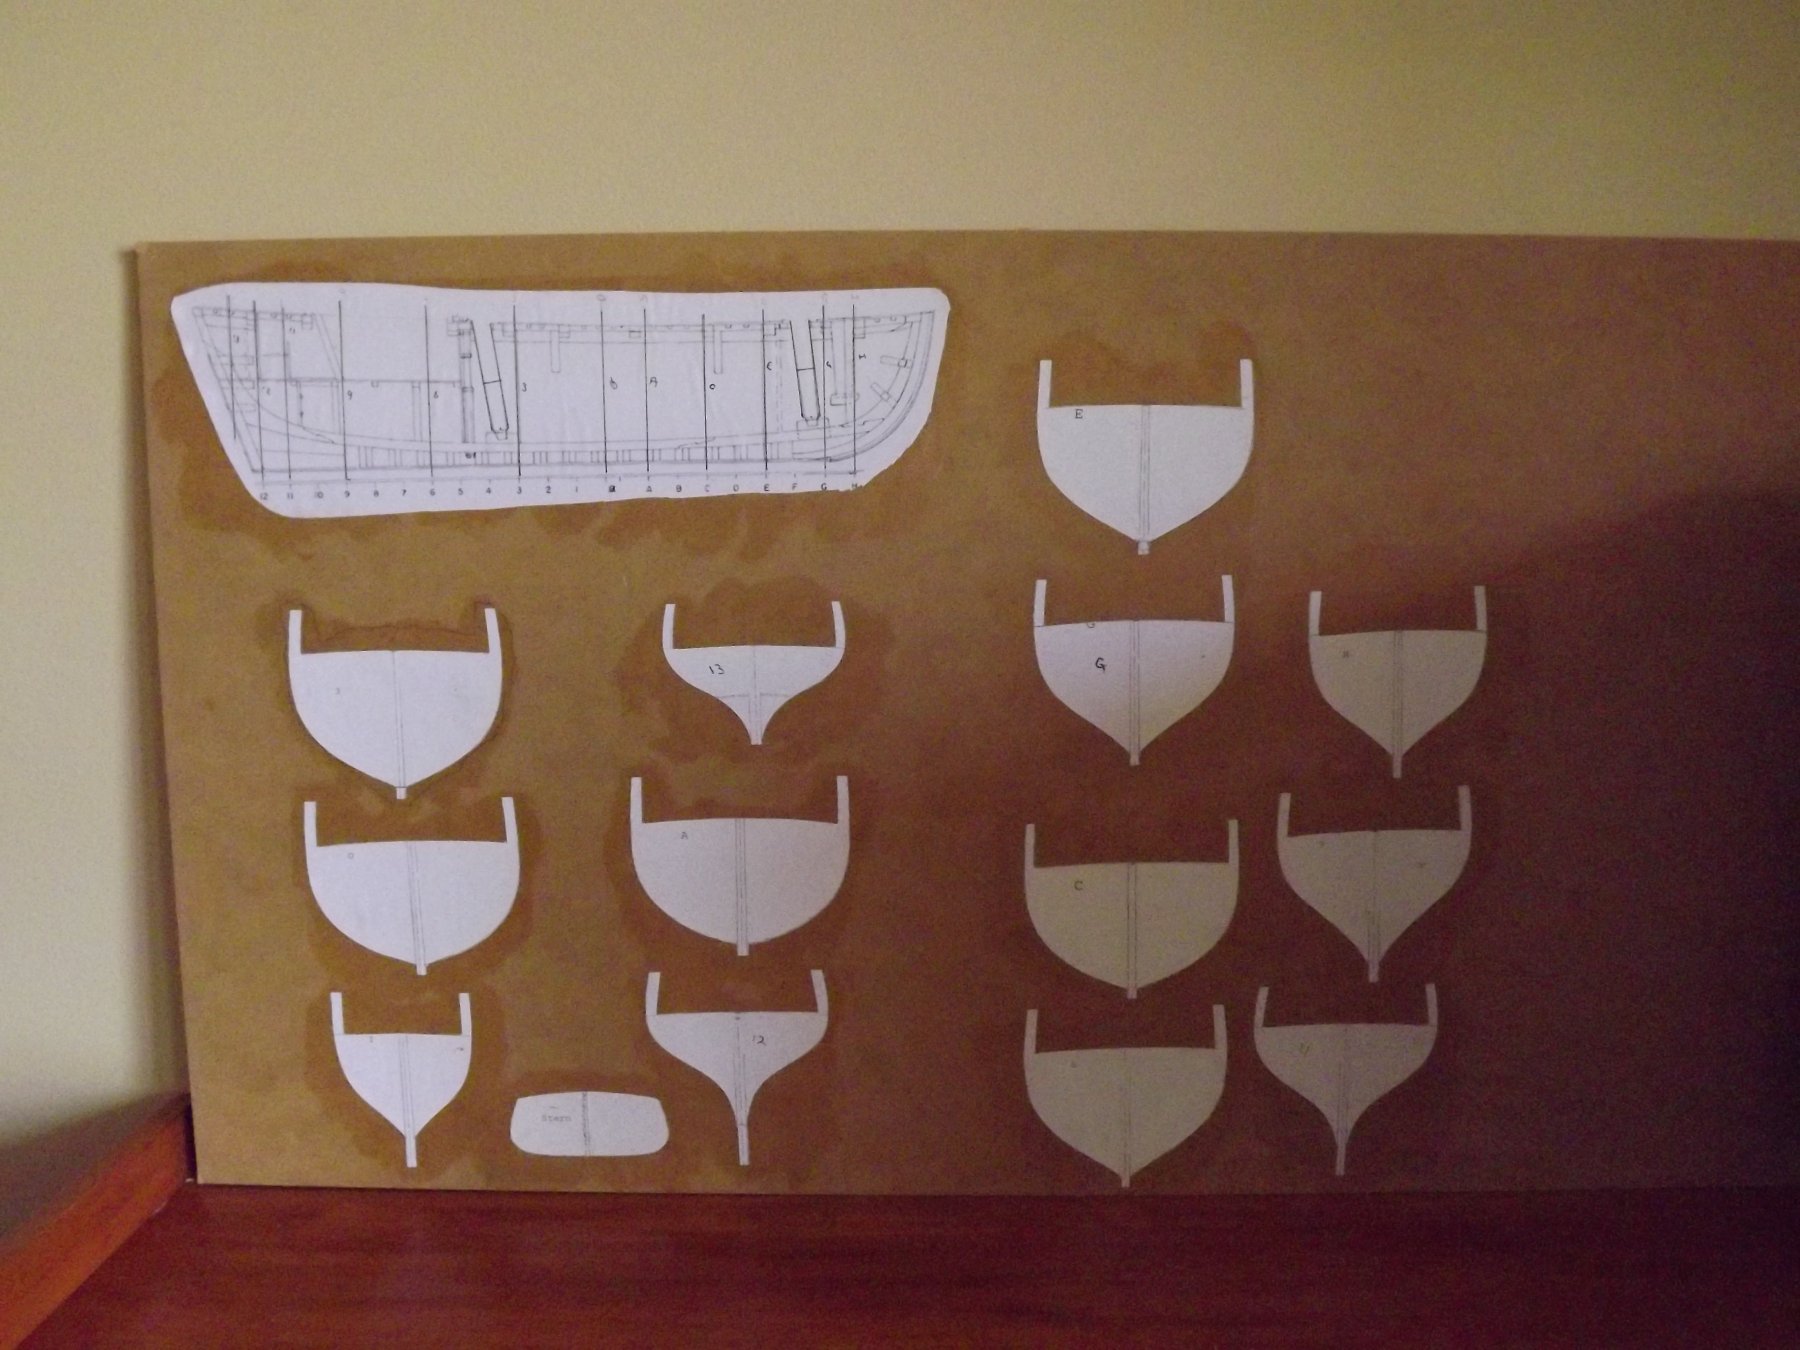
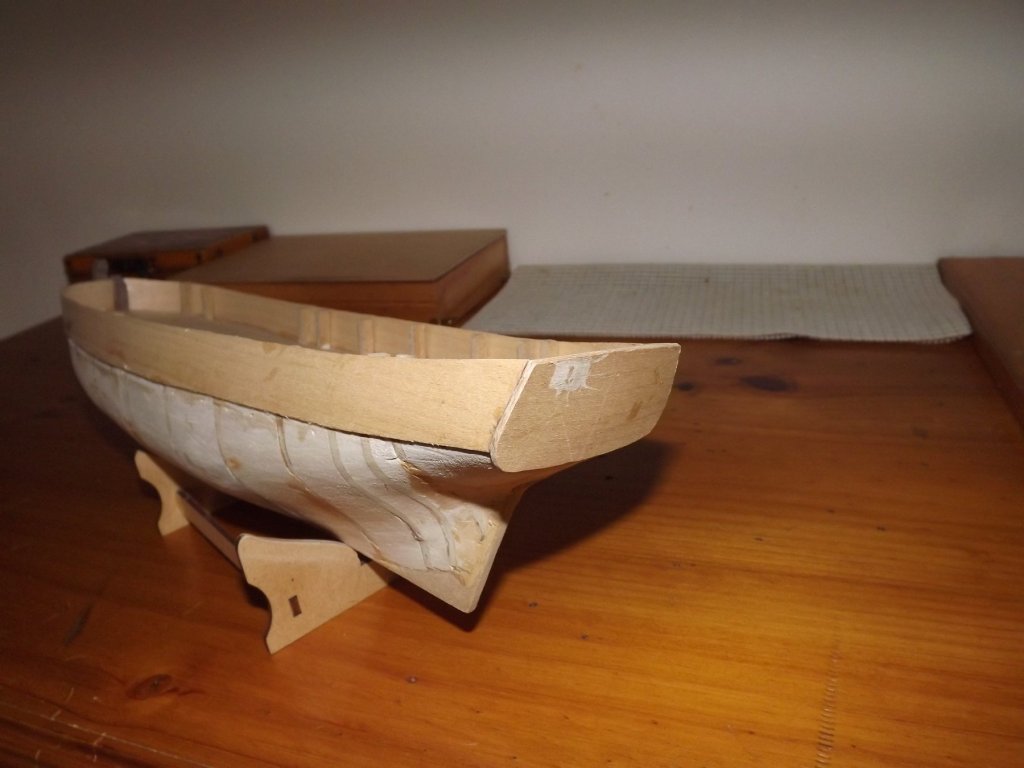
Not the best shots but you should be able to see the run of the planks from the garboard fairly well. The stealer was inserted 5th plank up.

- 714 replies
-
- 5
-
-
- lady nelson
- victory models
- (and 1 more)
-
Tomorrow I'll try and photograph the hull of another model I've bashed to show those first planks. The hull itself is actually the Lady Nelson hull with some major mods to the upper works so the planking is exactly the same (I hope).
- 714 replies
-
- 3
-
-
- lady nelson
- victory models
- (and 1 more)
-
I see what you mean about the garboard plank appearing to want to rise at the stern. I've just done a quick search of the NMM for planking expansions and none that I found show the garboard leaving the false keel. Your fore/aft shot looks good with a nice clean line following the keel, it's the deep belly that causes the apparent problem (as we both know). Hows it look if you lay out a couple more planks above it? I did notice a couple of expansions in the NMM where the garboard stopped short and the second plank had a hook end but that actually was effectively two planks into one which has the opposite effect. Both cutters that I've built have had the garboard run the full length of the keel and the stealer occurred naturally just before the 90 deg. twist up to the stern counter. Sorry I can't be more help here but I feel that the straight run is more correct.
- 714 replies
-
- 3
-
-
- lady nelson
- victory models
- (and 1 more)
-
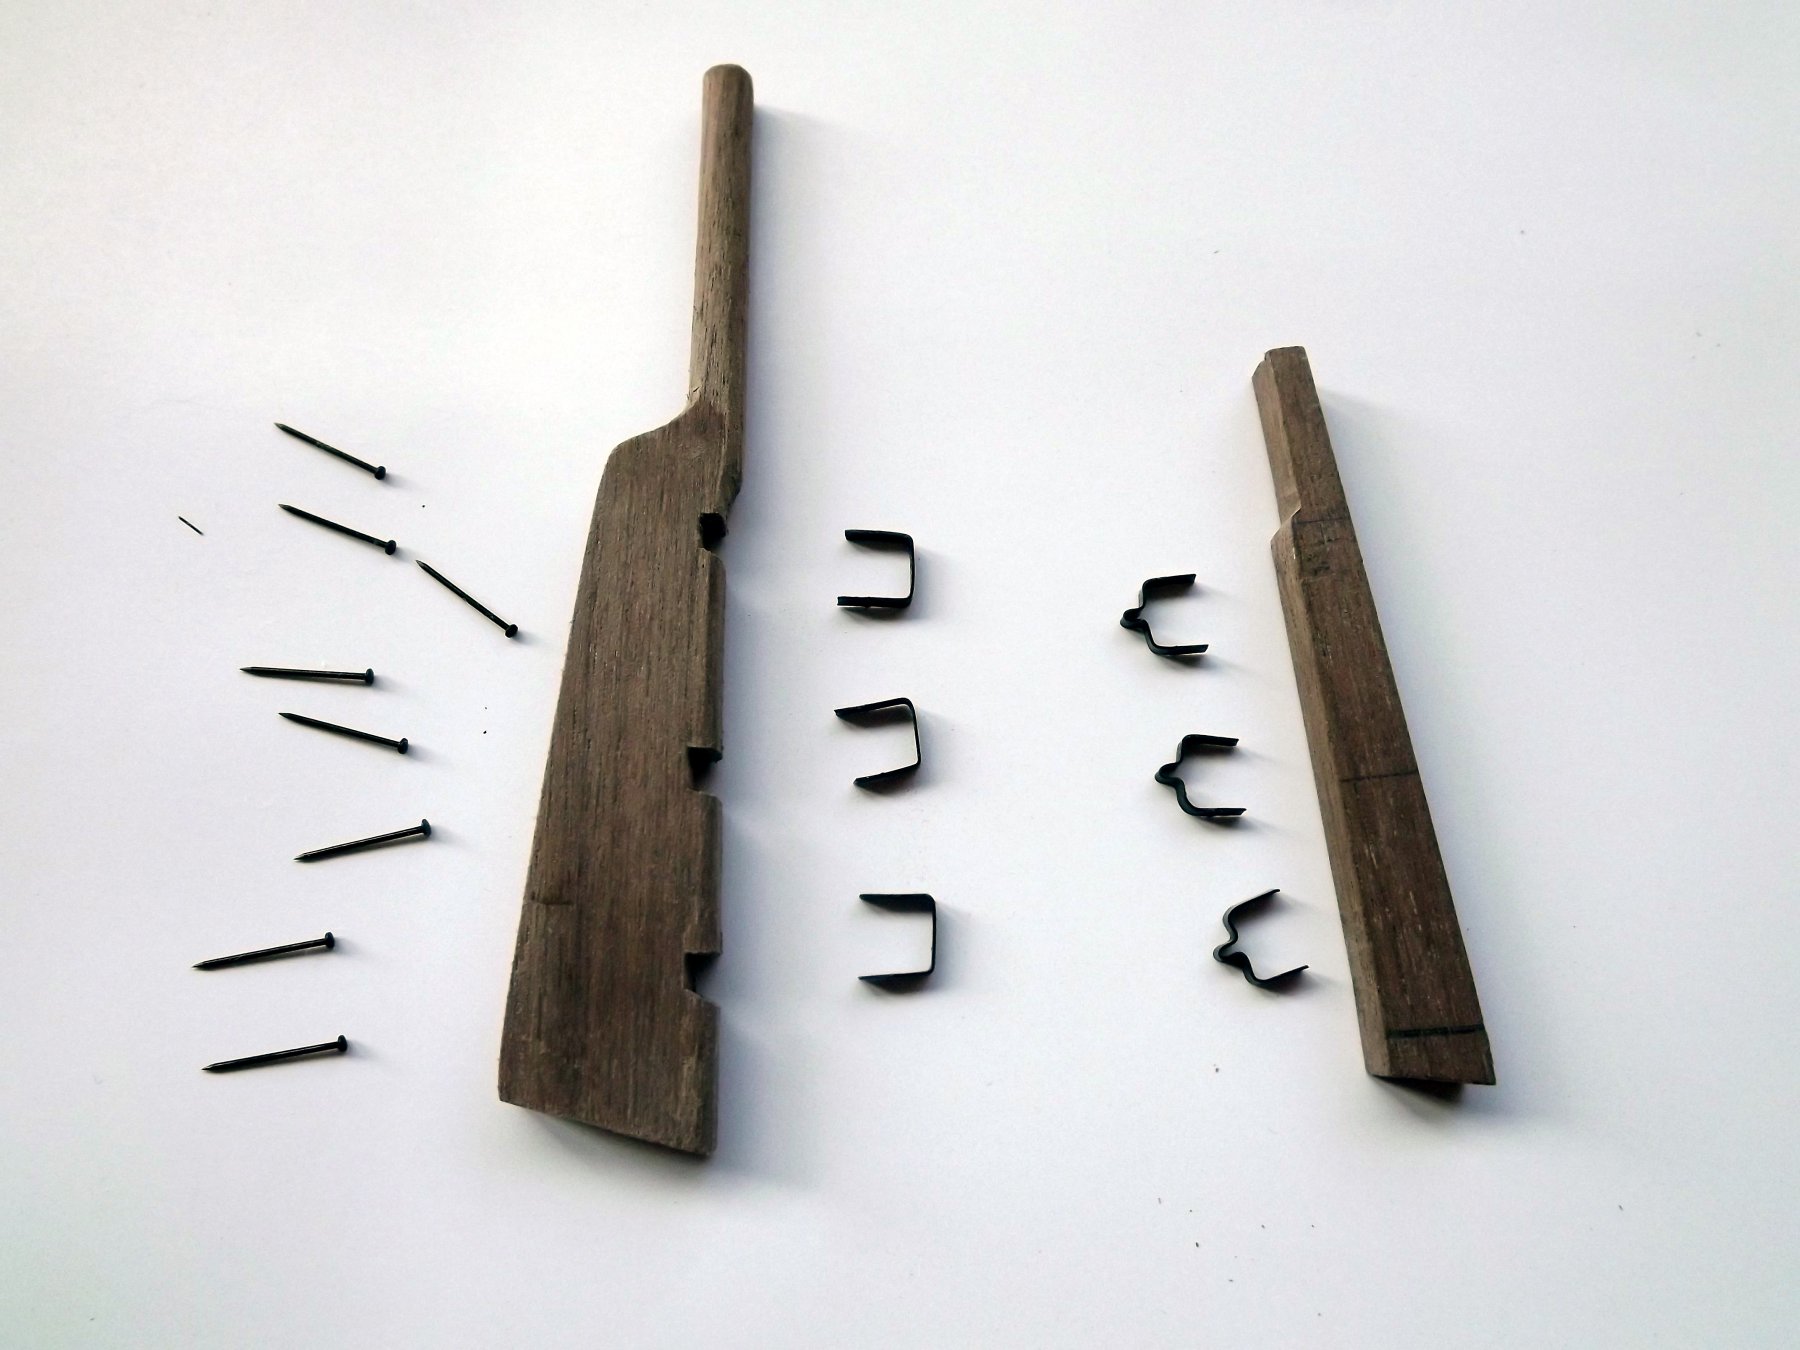
Belaying pins
Rick01 replied to bluenose2's topic in Discussion for a Ship's Deck Furniture, Guns, boats and other Fittings
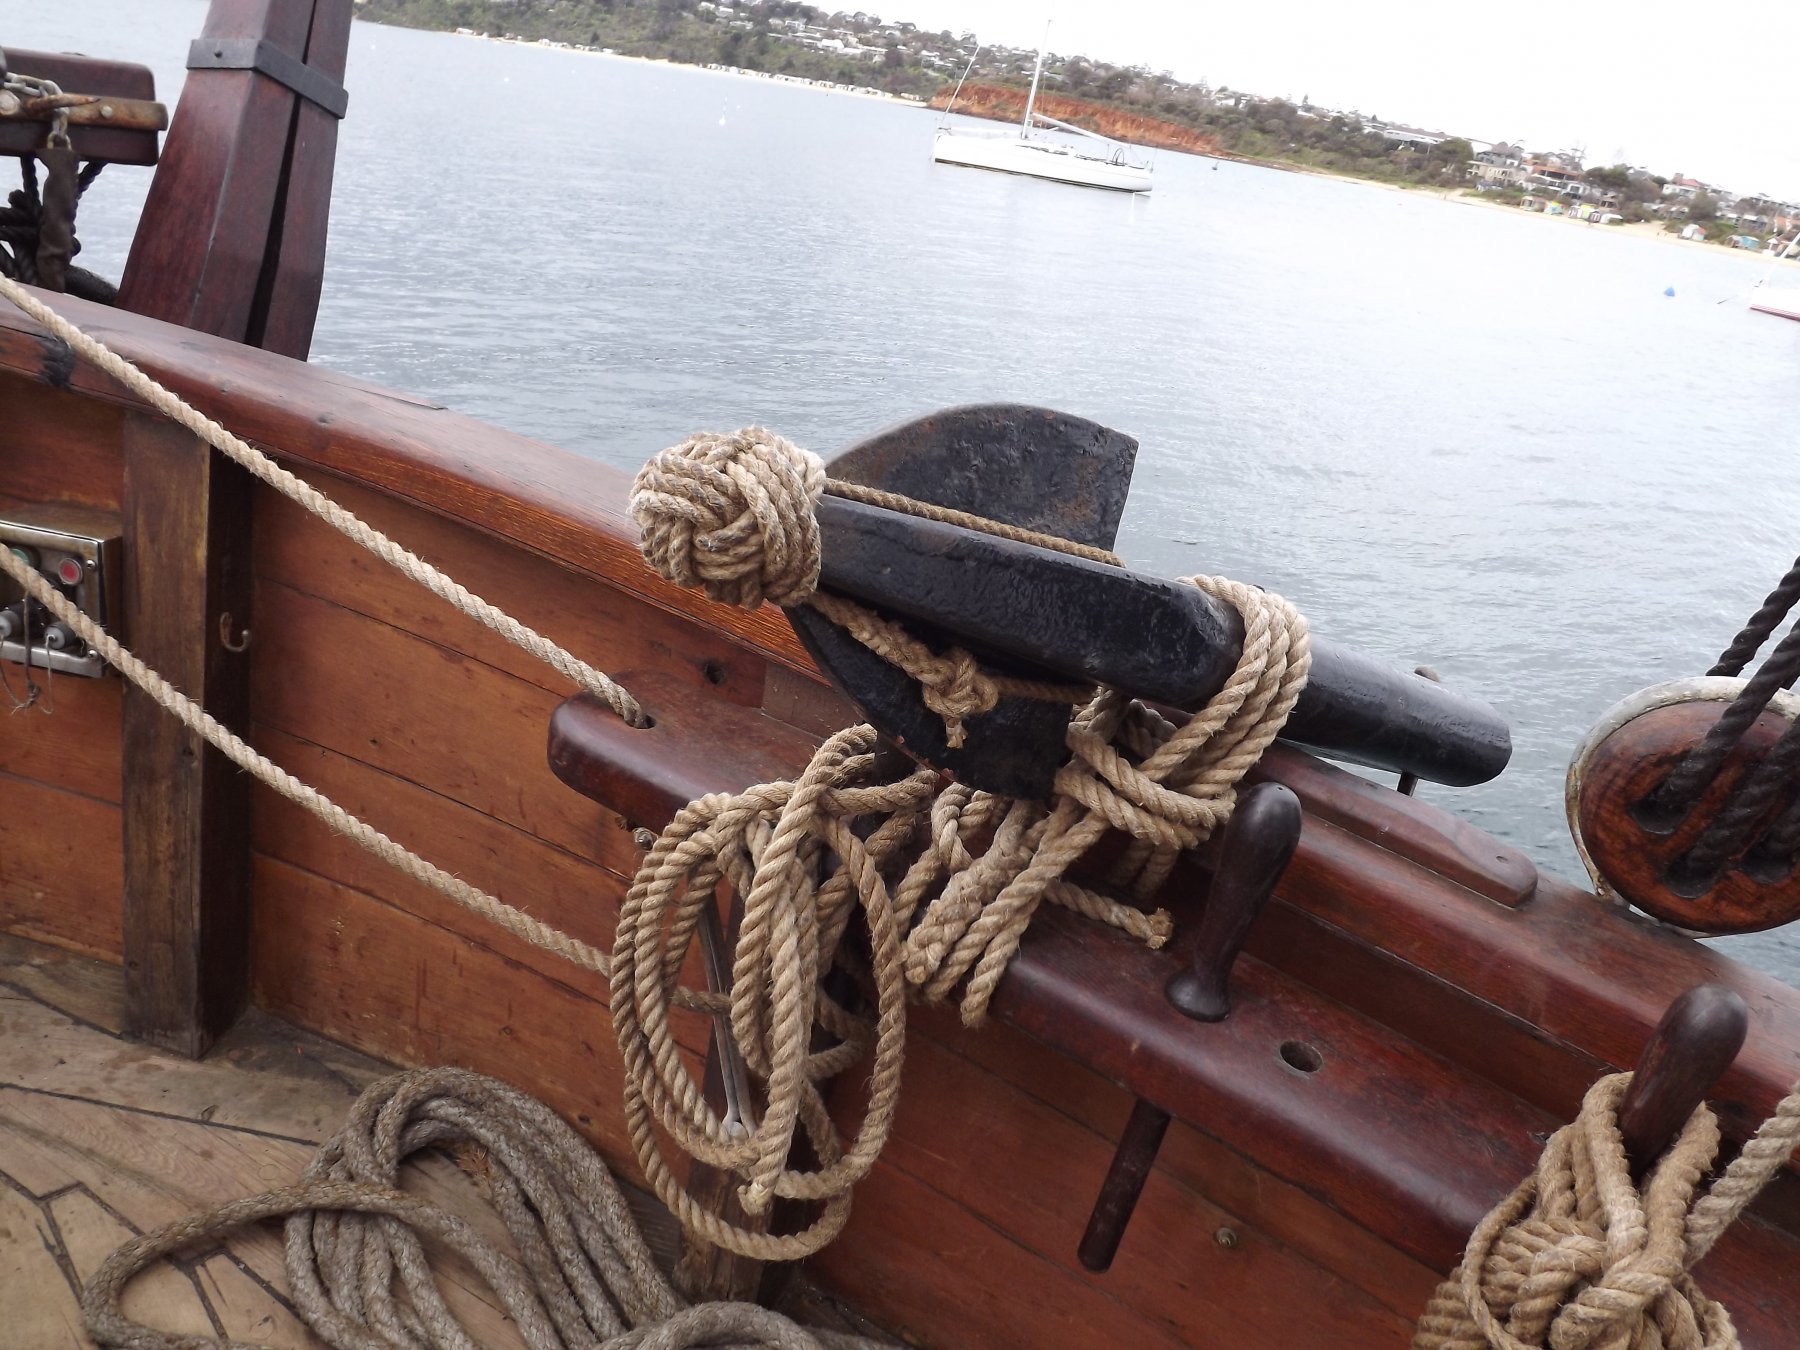
Part of the reason I took the photo. This little ship does hour long trips around Port Phillip bay and so any pointy bits need some sort of covering to stop land lubbers from injuring themselves on them. -
Belaying pins
Rick01 replied to bluenose2's topic in Discussion for a Ship's Deck Furniture, Guns, boats and other Fittings
This pin is on a replica of an 1830's topsail schooner. It's about 15" long - hope it helps.
-
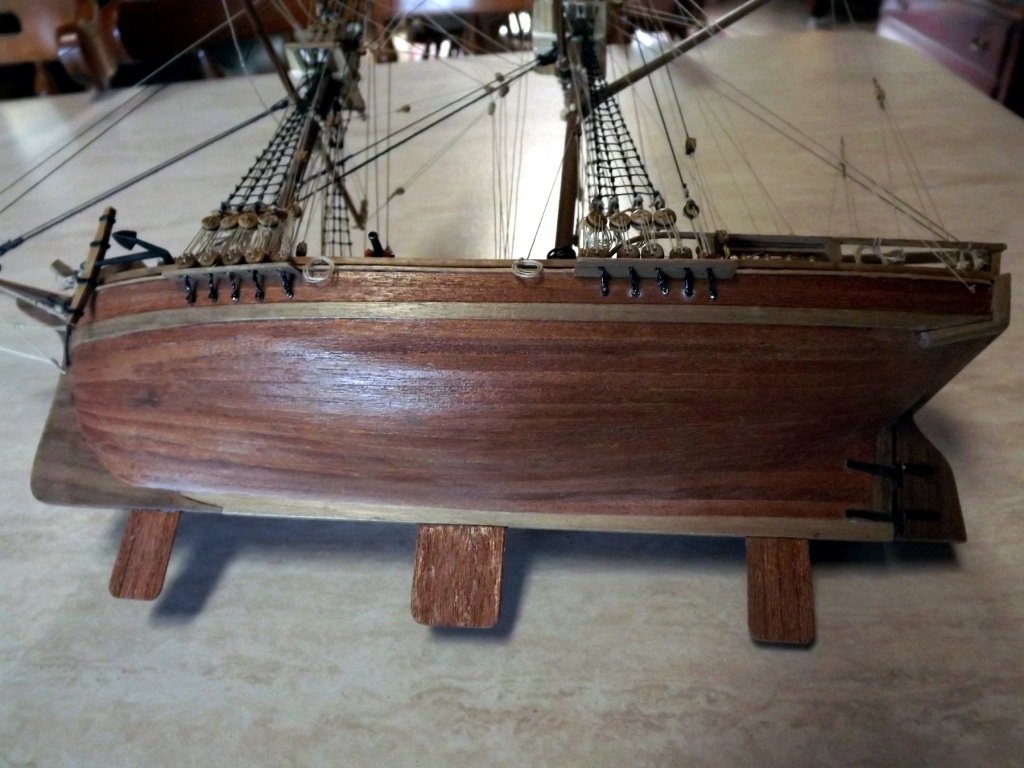
Two reasons:- 1/ I've got torn ligaments/inflamed bursar in my shoulder so I find it easier to work with. 2/ I've piles of the stuff laying around in the workshop. I will be filling between the bulkheads in due course so there will be a stable base for all the planking and subsequent attachments. The Enterprize replica will be in a local harbour next month so I'll be off then to grab as many photos as possible to help me in the build.
-
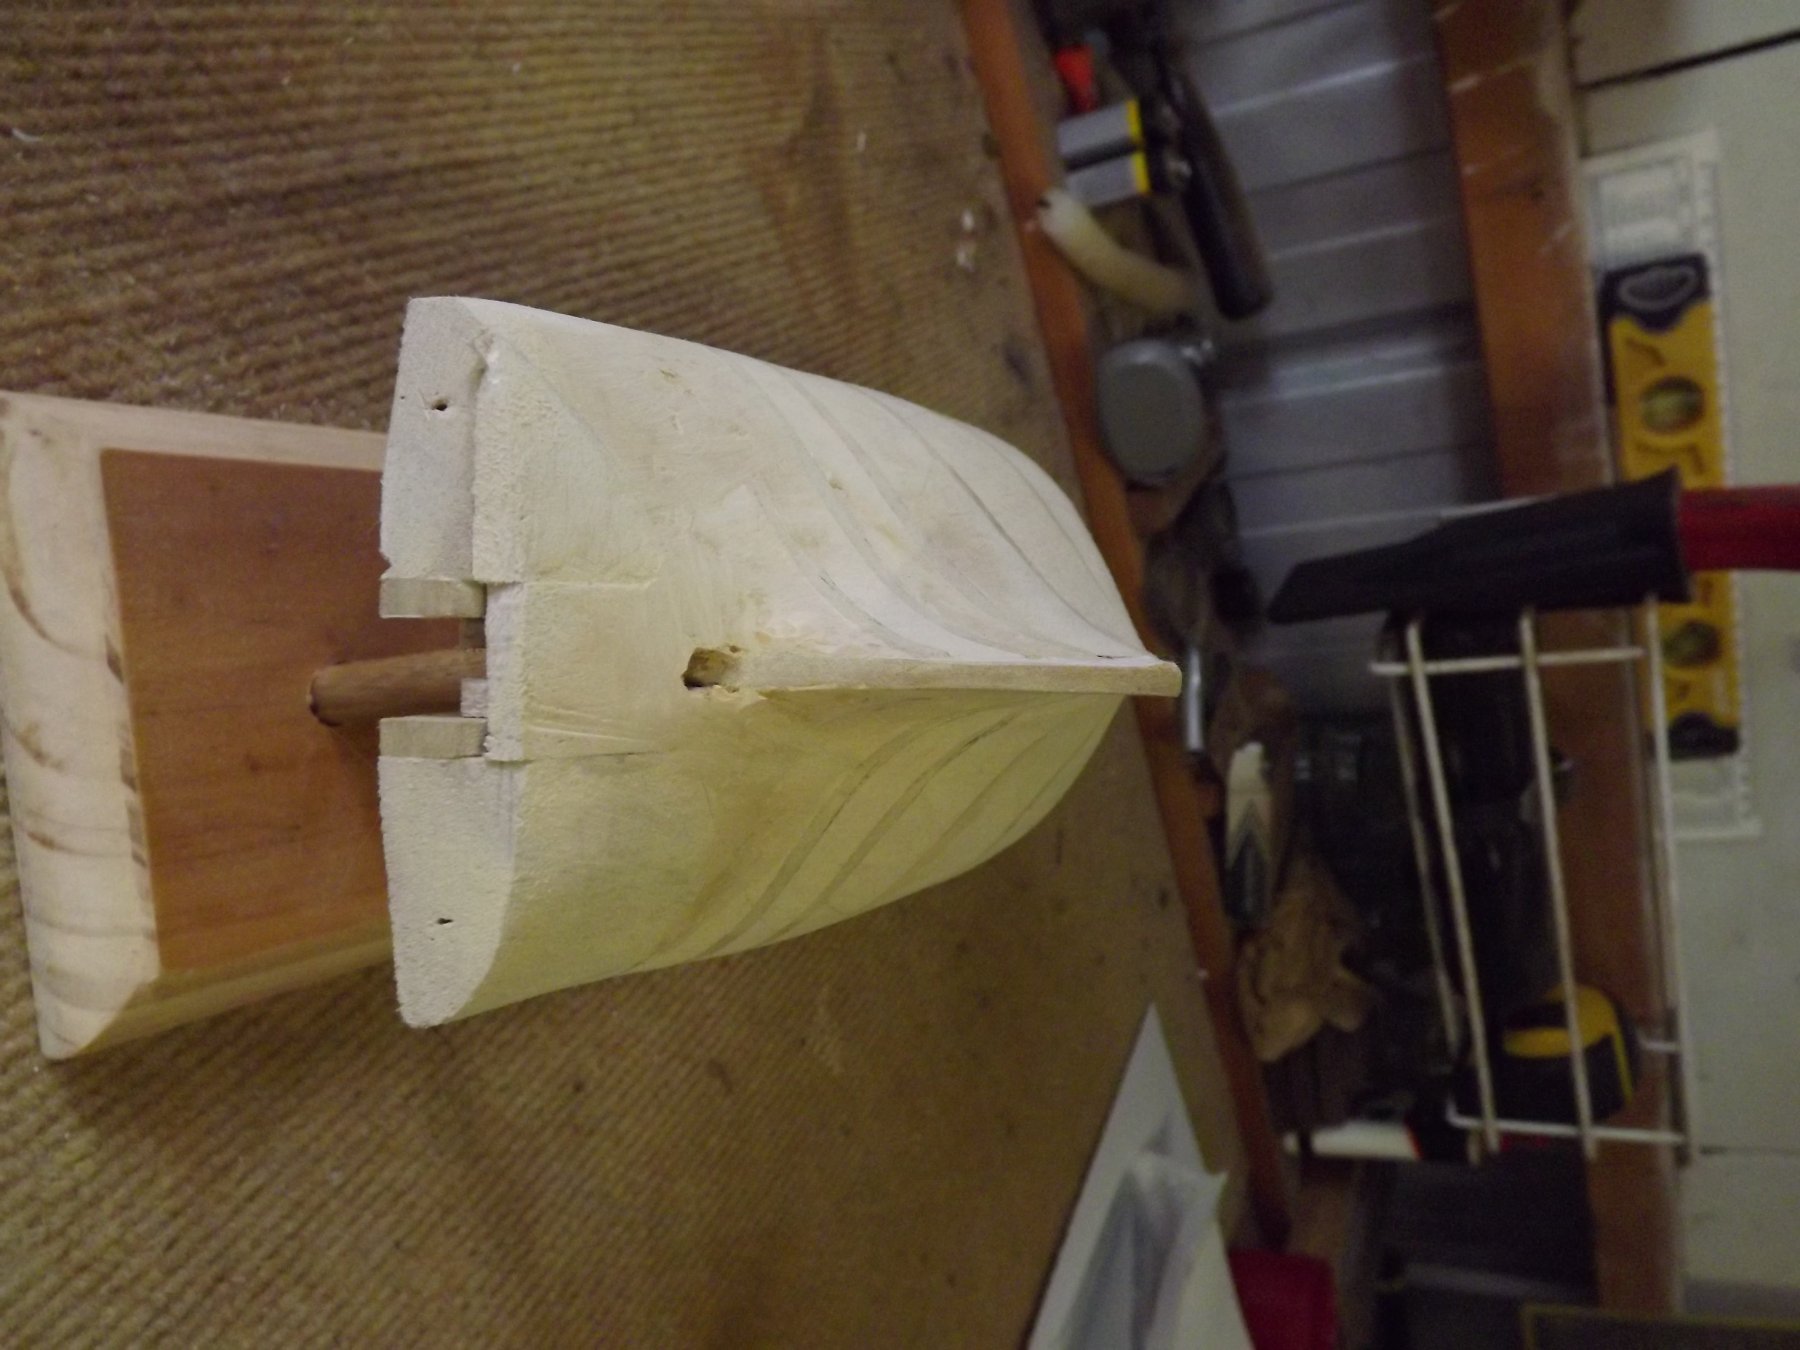
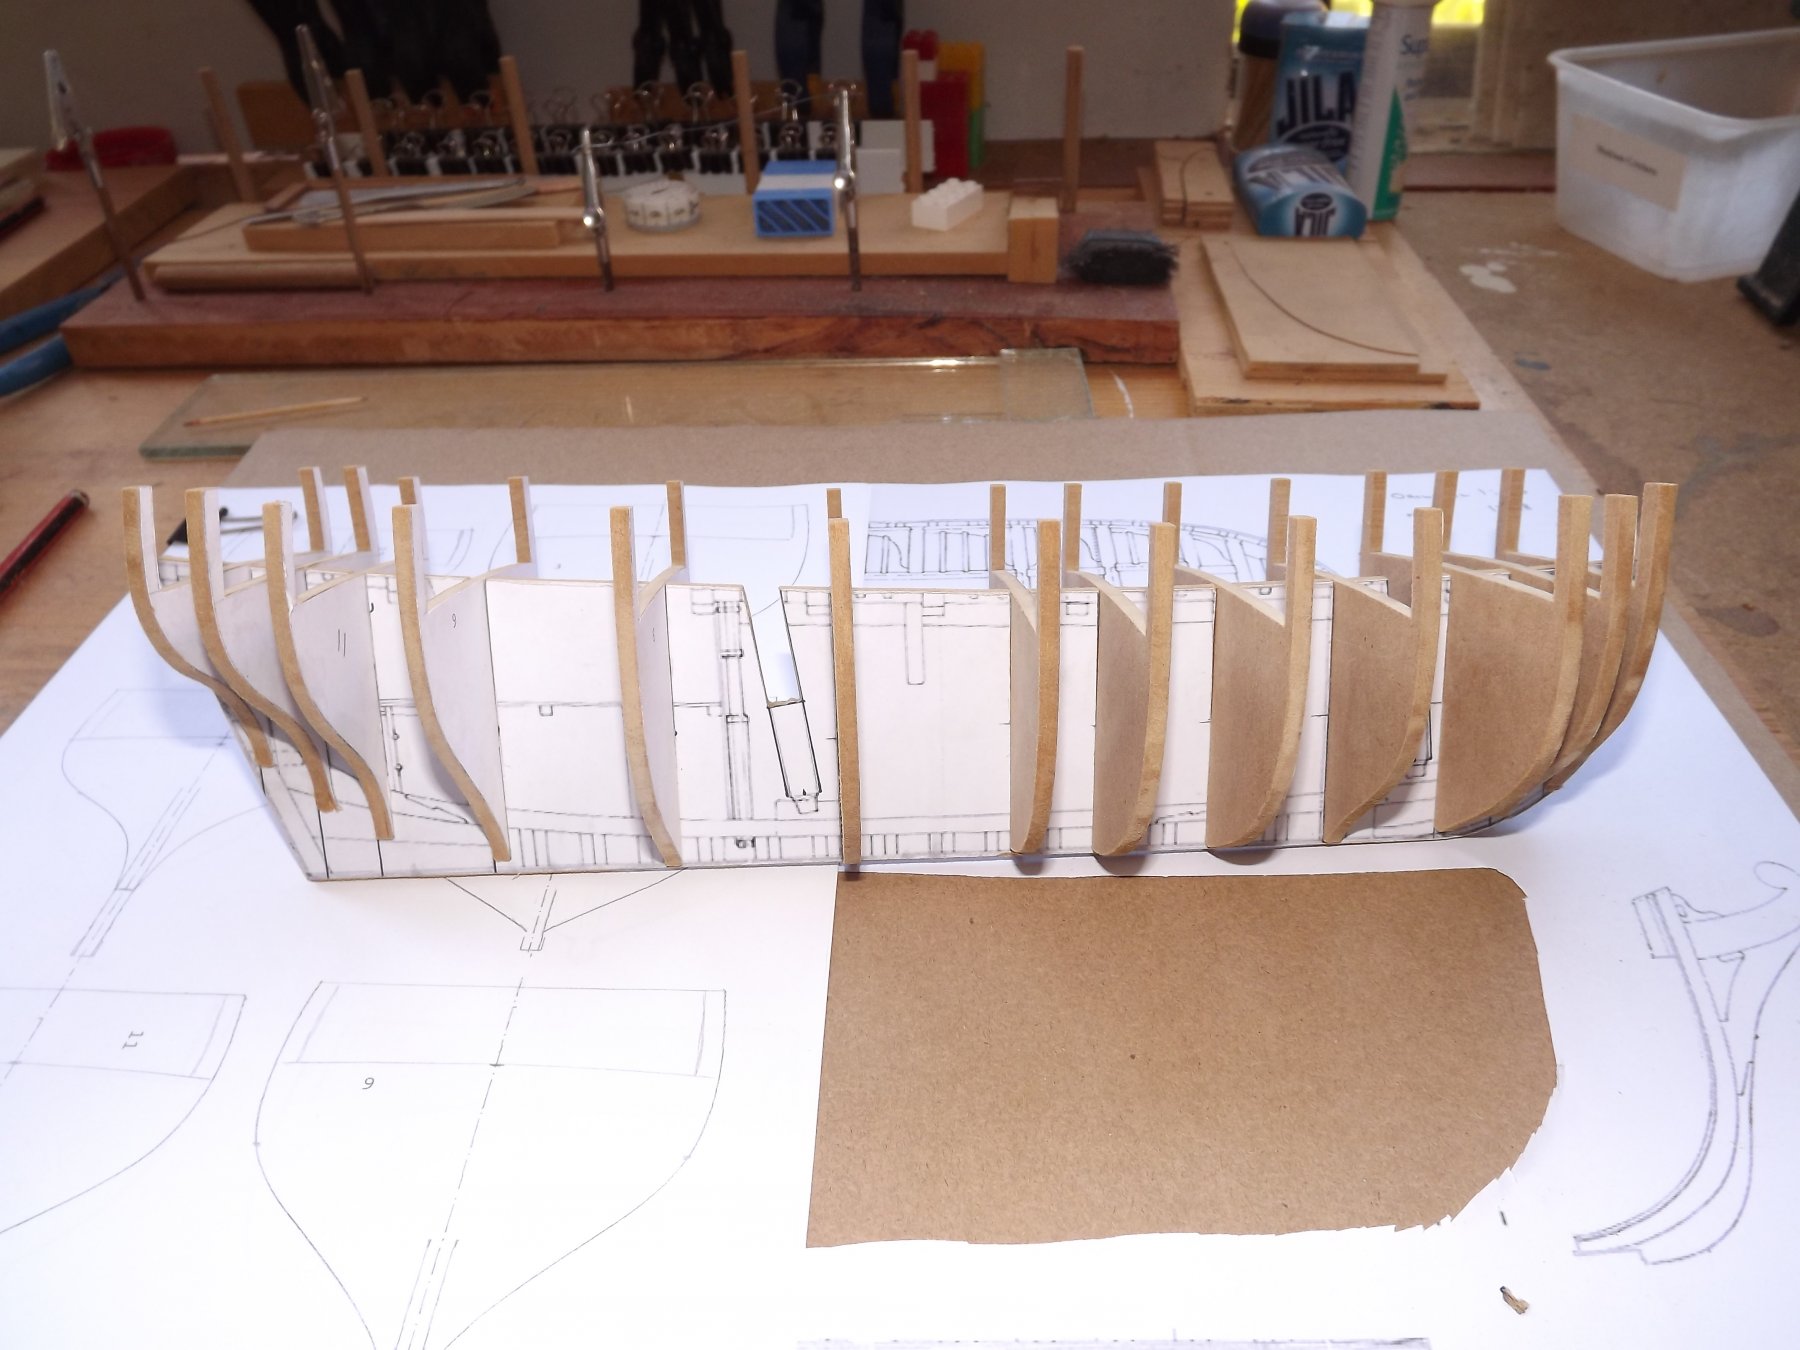
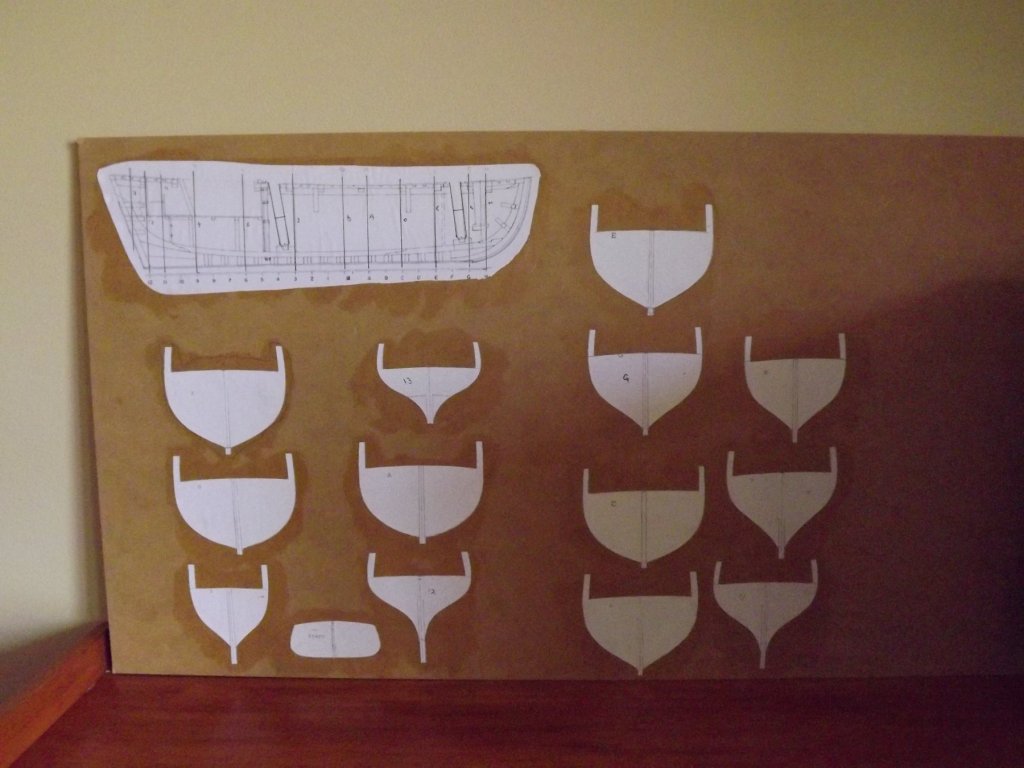
All the bulkheads have now been cut out, sanded to shape and dry fitted. I now need to ensure everything is square and the deck line is symetric. Given that I'm using an old GMC band saw and a tongue depressor with sandpaper held on with double sided sticky tape I'm happy with the results so far. Spot the error - counting from the prow third and fourth bulkheads need to be swapped!! At least they're only temporarily dropped in to place.

-
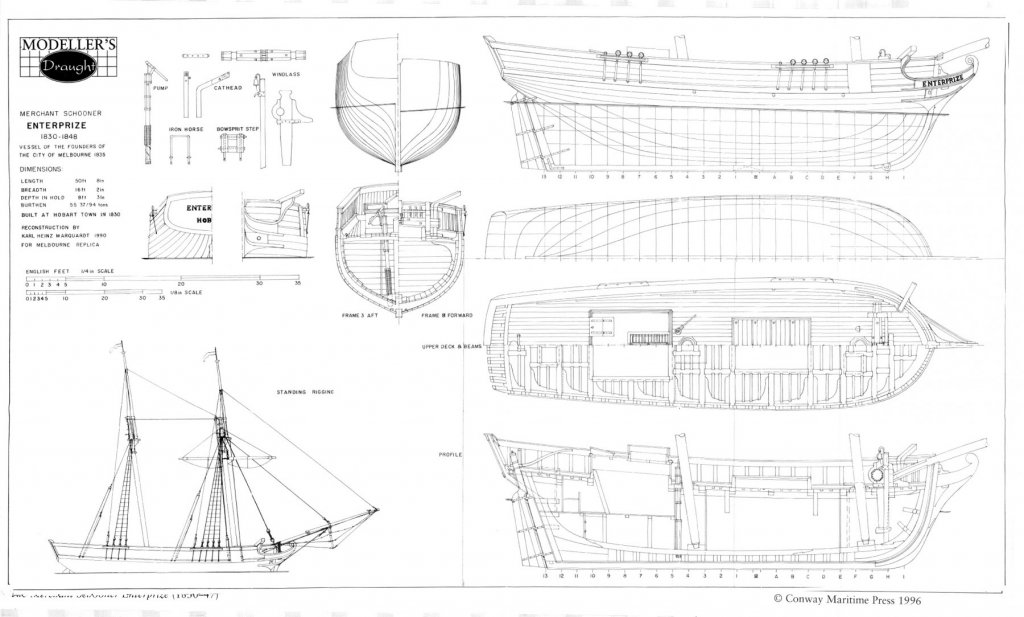
OK I'm now getting so far out of my comfort zone I'm almost coming back in the other side.One of our local historic ships was the topsail schooner Enterrize sailing from Hobart. Recently I bought a copy of the plans issued by Modeller's Draught as reconstructed by Karl Marquardt and am now attempting to build the model as a POB construct, I do have the luxury of having a full size replica visiting our local harbour frequently so am collecting piles of photos for additional reference. First step was to scan the A2 sheet and then reduce the scale to 1:48 and then break up the scan in order to print it as a series of A3 and A4 sheets that could then be cut and glued to 3mm MDF before taking to it with a band saw, files etc to make the basic frame.

-
Hey - at least you know what to plan for now!! Re ship names - I can't quote the discussion but I've a niggle in the back of my mind that a couple of the guys who really get into the research mentioned that it wasn't usual for the smaller ships such as cutters to carry a name on the stern. Maybe someone else can comment on this.
- 714 replies
-
- 4
-
-
- lady nelson
- victory models
- (and 1 more)
-
If you do have a leg fall off - make it the right one. I've a spare prosthesis you may borrow if need be. Rick
- 714 replies
-
- 3
-
-
- lady nelson
- victory models
- (and 1 more)