HOLIDAY DONATION DRIVE - SUPPORT MSW - DO YOUR PART TO KEEP THIS GREAT FORUM GOING! (Only 24 donations so far out of 49,000 members - C'mon guys!)
×


Rick01
-
Posts
652 -
Joined
-
Last visited
Content Type
Profiles
Forums
Gallery
Events
Everything posted by Rick01
-
I agree that the gunwales from the exterior look perfect on your kit - but as you say when looking at the interior view it seems there is a problem. Not sure if it's the photo but the first gun port seems completely square whereas I'd expect the top and bottom to be angled to match the deck. It's almost as if the deck itself doesn't follow the correct line even though it is pretty obviously correctly fitted. Got me puzzled at the moment as I can't find any faults in your construction. Perhaps looking up a recent build of this cutter and asking the builder if they'd be prepared to measure the various areas - gunwale height, gunports above deck etc. may throw some light on this. Like you I can't envisage gunport heights from deck varying and I'd be tempted to mock up a cannon to see how it sits in each of the ports. I'm off to look at my plans now and see if I can see how this may have happened as I'm totally puzzled at the moment! Rick
- 714 replies
-
- 3
-

-
- lady nelson
- victory models
- (and 1 more)
-
OK here's mine (excuse the photo quality - not something I'm good at). Height form deck to top of gunwales 12mm, height of planking above gun port 2mm. If the ports are that far out I'd plank the inside from the deck up to get the correct curvature then re-cut the ports as parallelograms measuring 7mm x 7mm approx. Really sounds as if the original laser cut went very wrong! Hope this makes sense. Rick


- 714 replies
-
- 7
-
-
- lady nelson
- victory models
- (and 1 more)
-
My gunwales height doesn't vary across the full length of the ship. Obviously the gunports remain at a constant height above the deck level and (as discussed elsewhere on another build) the ports themselves have the sides perpendicular to the waterline whilst top and bottom are parallel to the deck. I'll try and get a reasonable photo of mine for you and post here later. Rick
- 714 replies
-
- 3
-
-
- lady nelson
- victory models
- (and 1 more)
-
Hull plank length
Rick01 replied to Mau's topic in Planking Techniques's Click Here for Topics dedicated to planking!!!!
Mark - you were commenting on the importing of wood for decks, I'm wondering about minimum lengths of planking for hulls. With something like a 50ft cutter trying to get a good shift pattern on the hull would be quite hard without using lengths down to 10ft (5ft would be nice but I'd think not particularly effective). Rick -
Hull plank length
Rick01 replied to Mau's topic in Planking Techniques's Click Here for Topics dedicated to planking!!!!
In addition to maximum plank length, shift pattern and minimum plank length would need to be looked at I assume. Any basic rules to follow here? Rick -
I'm sure you originally wanted to explore building a kit ship and learn through first principles - me going on holiday for a few days is purely a chance to get back to self sufficiency in the build. Rick
- 714 replies
-
- 4
-
-
- lady nelson
- victory models
- (and 1 more)
-
I'll follow your 2nd planking with interest as I'm starting a scratch build of a local ship shortly ( topsail schooner Enterprize out of Hobart) and may just try shorter length planks. By the way we may have a little problem in a weeks time. I'm heading up country to Mildura and Lake Mungo so may not be as well off for internet connection - you may well be on your own for a few days but I do think we've covered most of the harder problems that may occur. Sorry can't change my plans as this was arranged before we started on this voyage but I'm sure you'll cope. Rick
- 714 replies
-
- 3
-
-
- lady nelson
- victory models
- (and 1 more)
-
That's a question that I've never really considered. What constitutes "proper length" with a cutter? I'd have thought that a 50 ft plank wouldn't have been out of the ordinary during the 18th century. This one is a question for someone like Chuck or someone with more historical knowledge than me. I'd suggest asking it in the Building Framing, Planking section. Don't know that it would be harder - manoeuvring shorter lengths would make life easier in some aspects. Rick
- 714 replies
-
- 3
-
-
- lady nelson
- victory models
- (and 1 more)
-
No I did check the plans for the reference first!! With the points that Tony's photos have brought up, it seems that cutters are a pretty individual ship with each shipyard/builder having his own idea as to where and what to place deck fixtures and fittings. Most have the top mast forward of the mainmast and the double bracing for the square sails also is common to the style of rigging. The hand cranks were only fitted where a "drop keel"was fitted see http://collections.rmg.co.uk/collections/objects/86094.html so you may ignore this completely. Personally I planked the gunwales continuously then cut the ports out as it did help maintain rigidity whilst working on the hull. Hope this all helps. Rick Ps One last suggestion - get the basic hull finished to the point that the painting and decking is done and stop. Then we look closely at the variations for deck furnishings, belaying points, rudder arm, etc. I didn't do this and now have a number of items that really could have been applied better. Pps Cleats - before painting the bulwarks you may want to fit the cleats shown on sheet 4 marked 3 (top left illustration), however I'd put them much nearer the left hand cannon either above or just to the left of the scupper. Fits better with the rigging per Peterssons book.
- 714 replies
-
- 3
-
-
- lady nelson
- victory models
- (and 1 more)
-
Don't forget to watch out for the problem with the "wobble" in one of the gunwales you found earlier on! Rick
- 714 replies
-
- 3
-
-
- lady nelson
- victory models
- (and 1 more)
-
I think it's all pretty well covered - the counter is a bit fiddly and needs playing with to fit tidily but once that's done final planking should go smoothly. You need to decide if you're going to plank over the cannon ports then reopen or cut sections to fit between. Capping rail - sheet 2 part 45 (bottom right hand corner of the plan). You also now need to contemplate removing the bulkhead tabs, then planking the interior of the gunwales before the decking is laid. If I think of anything else I'll pop it on later today but as of now I'd say you ready to do the final planking. Rick
- 714 replies
-
- 3
-
-
- lady nelson
- victory models
- (and 1 more)
-
I think I originally mentioned that if you weren't going to paint the fascia then you should plank it before mounting it, assuming that you'd also plank the exterior! I have planked mine as I don't see the ship builders getting a single slab that large in real life. My thoughts would be to use the black on the section that the rudder pierces if you go with the hull painted in white and the holly for the upper section. This latter has a surround which would look great then in black. However if you go with the natural wood hull then I'd switch the black and white timbers around. Please be aware that I'm not allowed to chose any sort of colour scheme at home and am required to carry a note from my wife if purchasing paint/stains! Just as a refresher - you're using a different thickness timber to for final planking and the capping rail assumes 1mm planking inside and outside the ply gunwales so you will probably need to make some sort of adjustment to the planking thickness on the inside of the gunwales when you get that far. Rick
- 714 replies
-
- 3
-
-
- lady nelson
- victory models
- (and 1 more)
-
It'll be like that until you tie the last knot in the last bit of rigging and then you have to decide how you're going to display her! Not withstanding the hiccups along the way I must admit the whole exercise is pretty satisfying. Rick
- 714 replies
-
- 2
-
-
- lady nelson
- victory models
- (and 1 more)
-
You've done it exactly as I do - building up and down with a final plank (hopefully only needing a slight trim) somewhere in the middle. Looks good so far - no problems with the twist into the stern? Rick
- 714 replies
-
- 3
-
-
- lady nelson
- victory models
- (and 1 more)
-
Common blocks & the like for 1:64 scale ships
Rick01 replied to FlounderFillet5's topic in Masting, rigging and sails
Try the spread sheet here - it should give you a general idea of sixes at least. http://modelshipworldforum.com/ship-model-rigging-and-sails.php Rick -
I didn't expect you'd be throwing in the towel - just popped the comment in for any beginners in the hopes that they will not give up but push on past this point. Rick :-)
- 714 replies
-
- 5
-
-
- lady nelson
- victory models
- (and 1 more)
-
You're right in taking your time and getting the first planking correct even if it won't be seen - you can't exactly experiment with the second planking when it's on show. I find that tapering starts one bulkhead past centre and should be a gentle taper on each plank with bevelling on the tapered (upper) edge only. The first couple of planks shouldn't need a taper as the prow and sides are pretty well vertical - as the hull starts to curve so the tapering is needed (hope that makes sense). I'm pretty sure this is the point where many beginners throw there hands in the air and the kit in the bin, but pushing past it is well worth the struggle. Rick
- 714 replies
-
- 3
-
-
- lady nelson
- victory models
- (and 1 more)
-
Hands up anyone who has never had to make this sort of adjustment in a build! I find Mk I eyeball really comes into play all the way through planking, doesn't matter how carefully you measure something creeps in when your back is turned. Rick
- 714 replies
-
- 3
-
-
- lady nelson
- victory models
- (and 1 more)
-
It's surprising what we define as a tool here - flexible emery boards and double sided sticky tape come to mind. Rick
- 714 replies
-
- 4
-
-
- lady nelson
- victory models
- (and 1 more)
-
I also use the broad rubber bands plus lego bricks for additional pressure where needed - the bricks are also useful when something needs squaring but you have little space to place any tools. Rick
- 714 replies
-
- 3
-
-
- lady nelson
- victory models
- (and 1 more)
-
Actually no - it's the one area I rather dislike and know that it has to be taken pretty slowly so I'm expecting you to be pretty quiet for a while once the first couple of planks have been fitted. Is the second planking going to be .6mm or a thicker variant - reason I ask is that the capping rail assumes that the bulwarks have been fitted with two layers of 1mm timber so bulking out the bulwarks would be needed if using .6 mm Rick Rick
- 714 replies
-
- 3
-
-
- lady nelson
- victory models
- (and 1 more)
-
Looking good Can't see any problems arising in the next steps given the way you're setting it all up. Rick
- 714 replies
-
- 3
-
-
- lady nelson
- victory models
- (and 1 more)
-
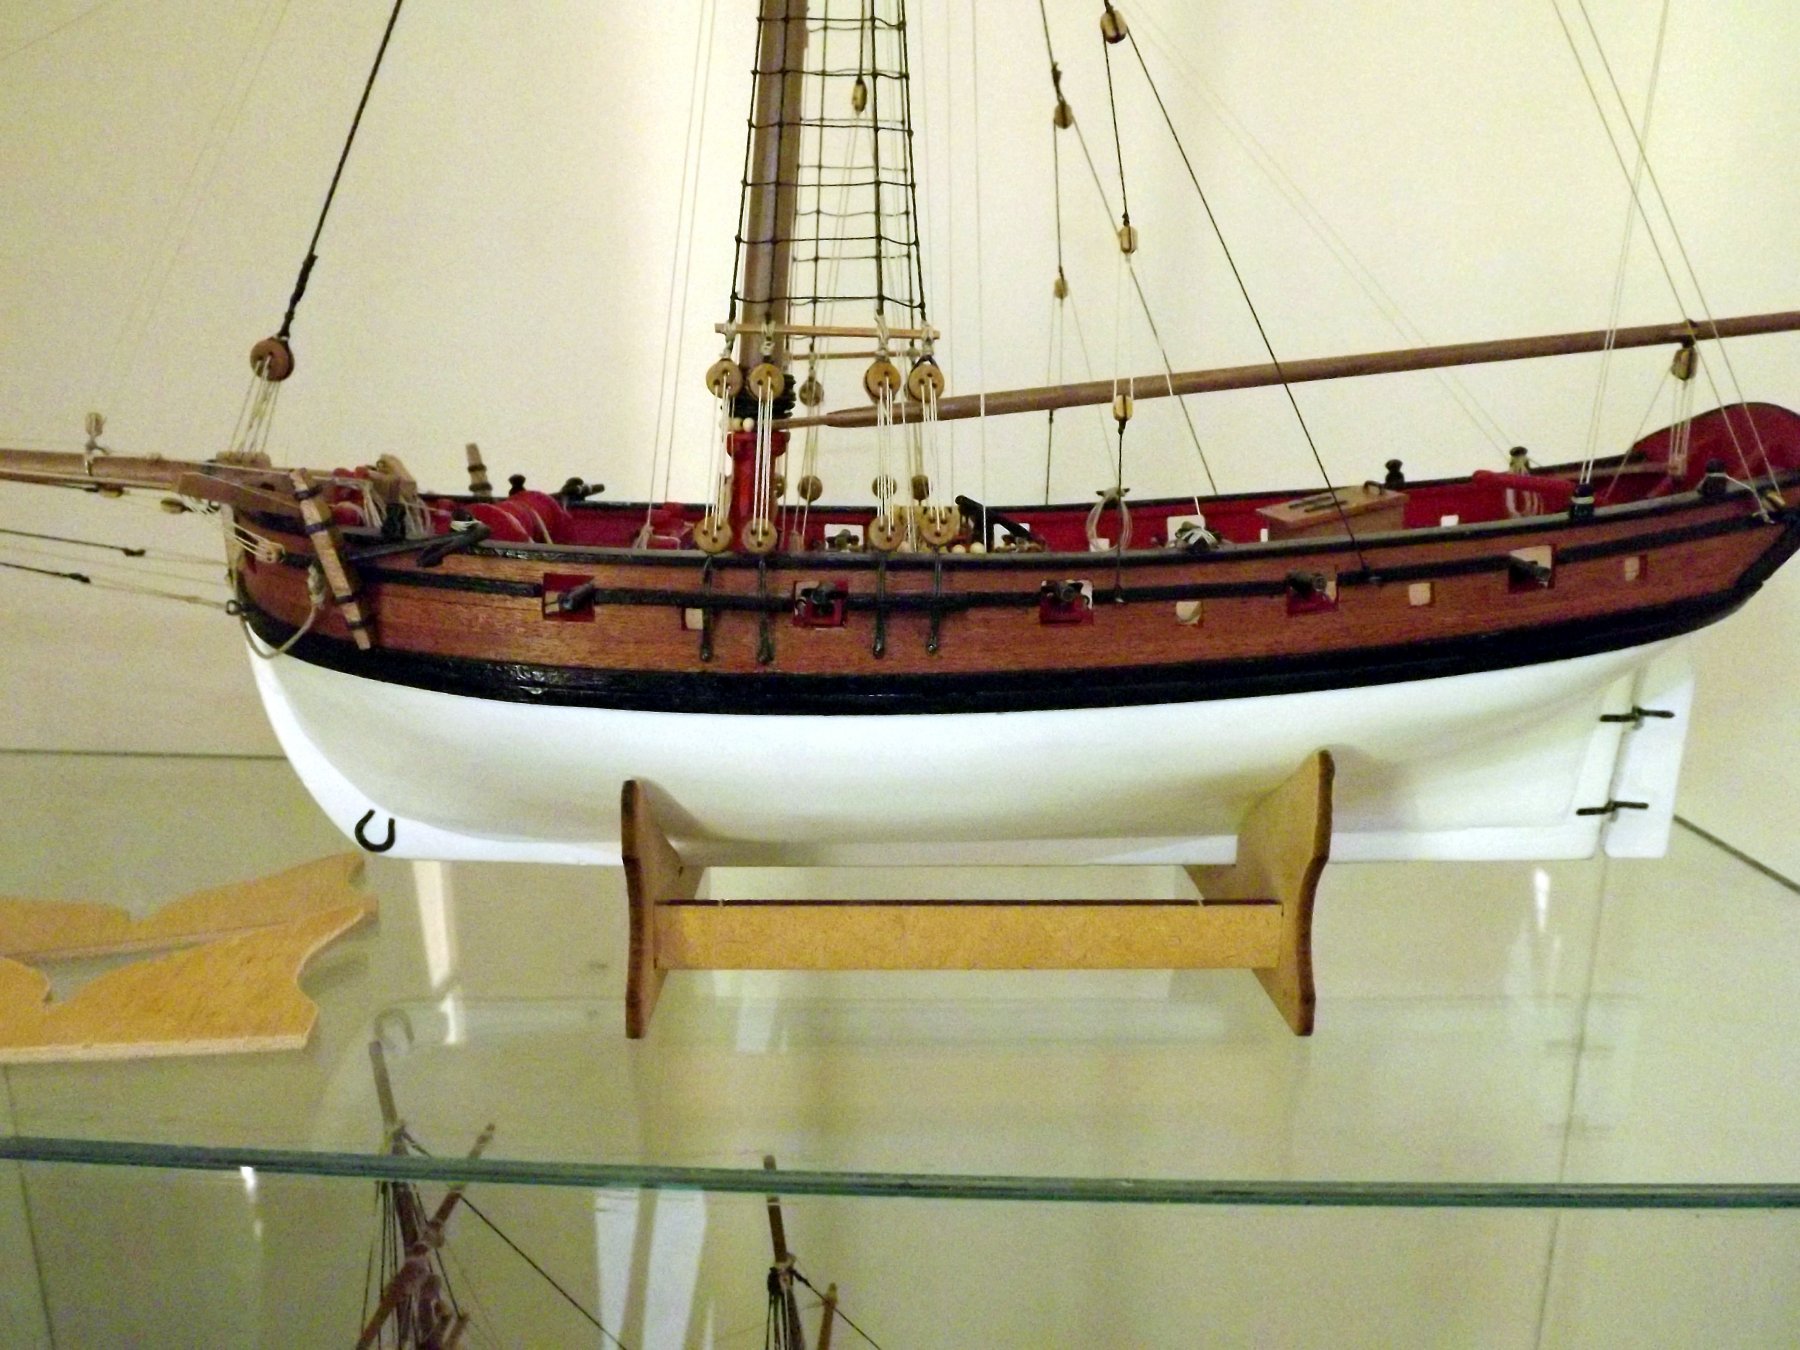
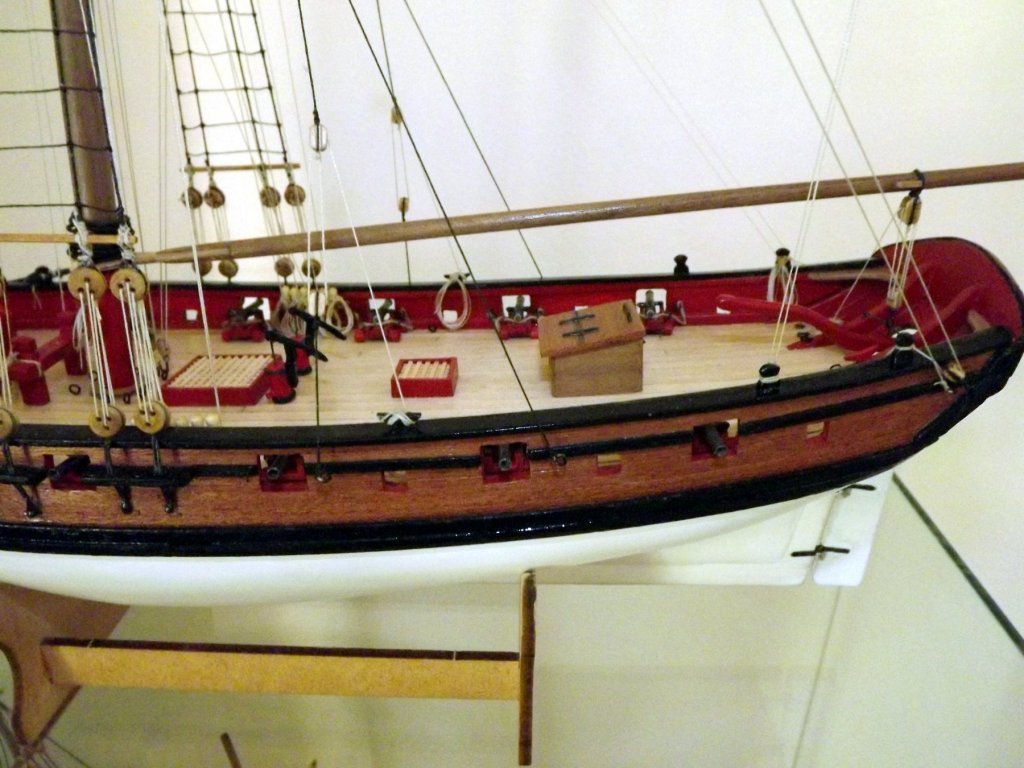
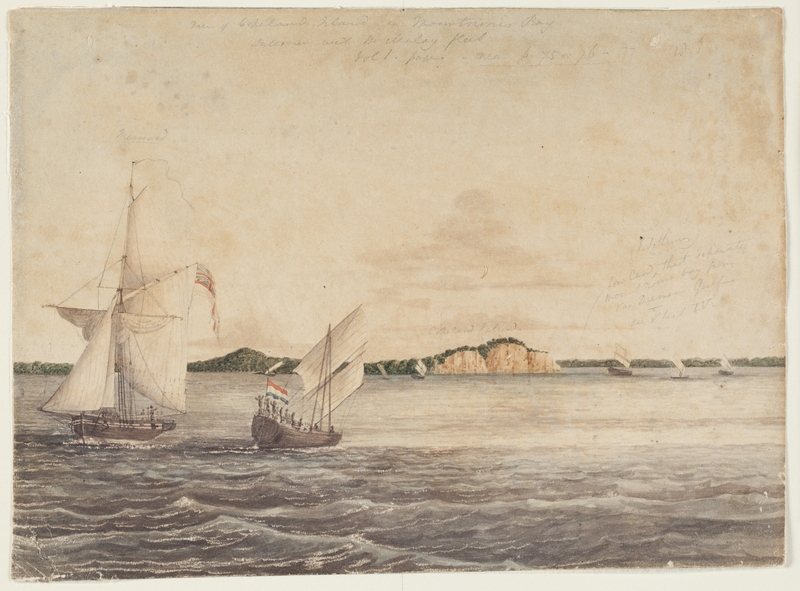
Don't know if this helps or hinders Frankie but this is a sKetch of a similar size/era cutter showing two sails running off the bowsprit - maybe pushing it out allowed for extra canvas to be flown. Rick
-
So "no" :-( I'll try not to do that to you any more, but I just couldn't live with the thought of you mounting the bowsprit and then finding a problem. Any chance of getting a dispensation and maybe having a single oxen sacrificed at the finish? We could all come over for a barbecue then. Rick
- 714 replies
-
- 3
-
-
- lady nelson
- victory models
- (and 1 more)
-
Just had a horrible thought - did you increase the height of the prow when you drilled it for the extra couple of holes? If not then another goat will be needed as the bowsprit sits fairly high along side it. If you didn't then you may want to drop the bowsprit and its supporting timbers a couple of mm. when you get that far. Rick
- 714 replies
-
- 2
-
-
- lady nelson
- victory models
- (and 1 more)