HOLIDAY DONATION DRIVE - SUPPORT MSW - DO YOUR PART TO KEEP THIS GREAT FORUM GOING! (Only 44 donations so far out of 49,000 members - C'mon guys!)
×


BobG
-
Posts
3,109 -
Joined
-
Last visited
Content Type
Profiles
Forums
Gallery
Events
Everything posted by BobG
-
Thank you Kurt. I haven't read that article yet. Perfect timing for me!
-
Thanks everyone for taking the time to share your expertise. I will heed your advice and put it into practice when I paint the hull. I really like to paint but have never used an airbrush so I will practice quite a bit before attempting to paint the hull. I am pretty critical of my own painting and I'm never 100% pleased with it. I will sometime point out some lap or brush marks or some unevenness of color and she just rolls her eyes and says, "No one would ever notice that but you." That may be the case but I still want my painting to get better and better.
-
Thanks BE. The mahogany king plank was dry and brittle too and it was prone to chipping and tearing. I would have liked a smoother grained wood like teak or something. The walnut that is used around the hatches has an even looser grain so I decided not to joggle the hatches. Thanks for stopping by. Cheers!
-
Thank you Eamonn. I'm very fascinated by these beautiful yachts. I'm amazed at how much canvass they can put up and still manage to fly along in a brisk blow without capsizing! It would be exciting to take a fast ride on one of these yachts. I've only sailed a little bit with my brother-in-law who has a 18 foot sailboat. We nearly tipped her over several times when we got a bit cocky and really leaned her over until water was spilling over gunwale on the low side of the deck. I love to hooking my feet under the hiking straps and lean out over the high side as far as possible. It's exciting...until the moment that you feel like you've pushed it a bit too far!
-
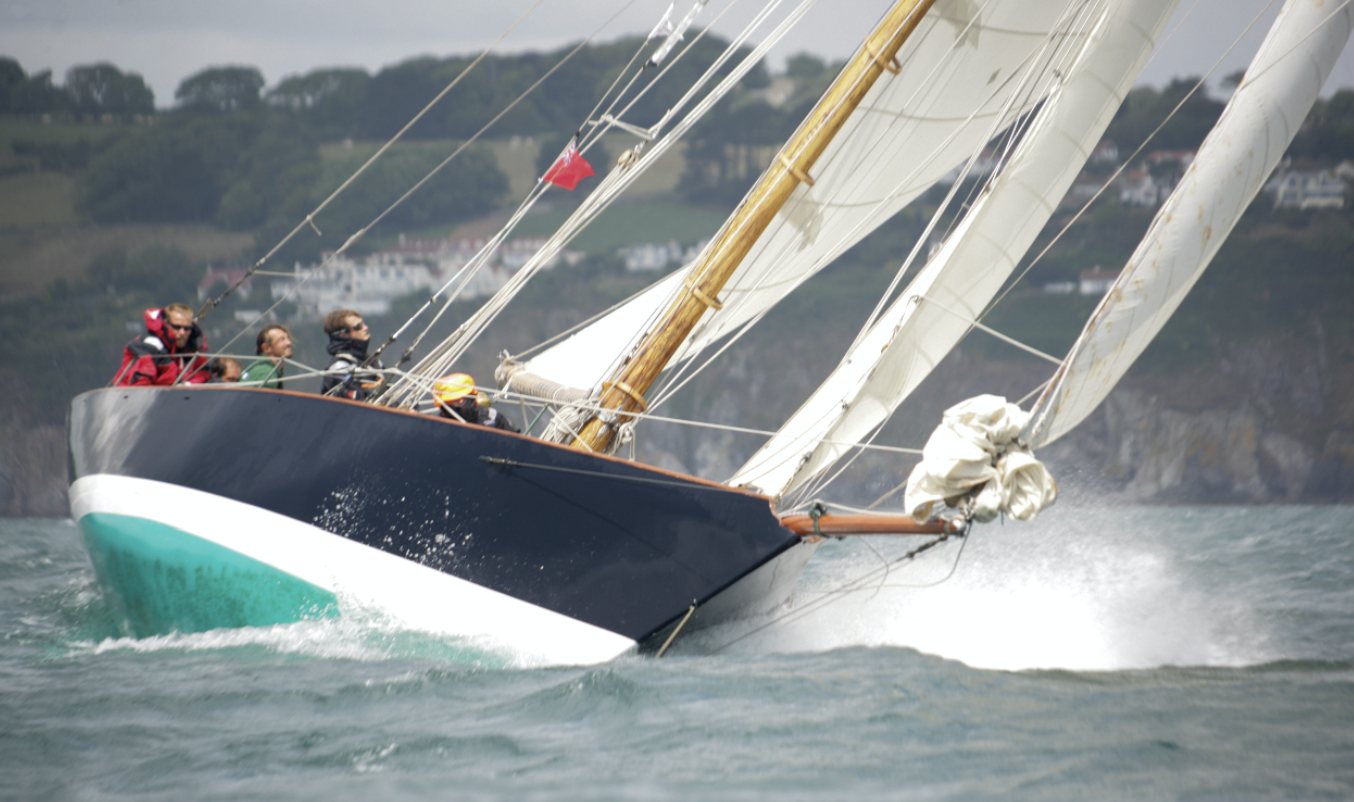
Here how I hope my hull looks after it is painted: https://www.classicboat.co.uk/events/pen-duick-and-pen-duick-ii-confirmed-for-classic-channel-regatta/

-
I will be painting the hull of my AL Pen Duick with an airbrush soon. The hull has 3 colors and I'm wondering what would be the best order in which to paint the 3 colors? The 3 colors are green, white and black. Should the painting sequence be from the lightest to the darkest (white first, then green and black)? I also would like to know how to best get sharp lines of separation between the colors so the lines where the colors meet don't have a noticeable "overlapping ridge." It seems to me that, if I spray one color and then mask and spray the next color, there will be a slightly higher line of paint left on top of the first color where they overlap. Maybe the paint is so thin that this would not be noticeable...?? To prevent a lap line it seems you would have to be able to cleanly mask off the edges of each color and that would be difficult to do and end up with clean, crisp, even lines without any tiny gaps or rough edges...? Here is a photo of the hull of the Pen Duick: https://www.classicboat.co.uk/events/pen-duick-and-pen-duick-ii-confirmed-for-classic-channel-regatta/ Thanks very much!
-
Thank you Kurt and Grant for the great information. I'm excited to start trying out my new airbrush!
-
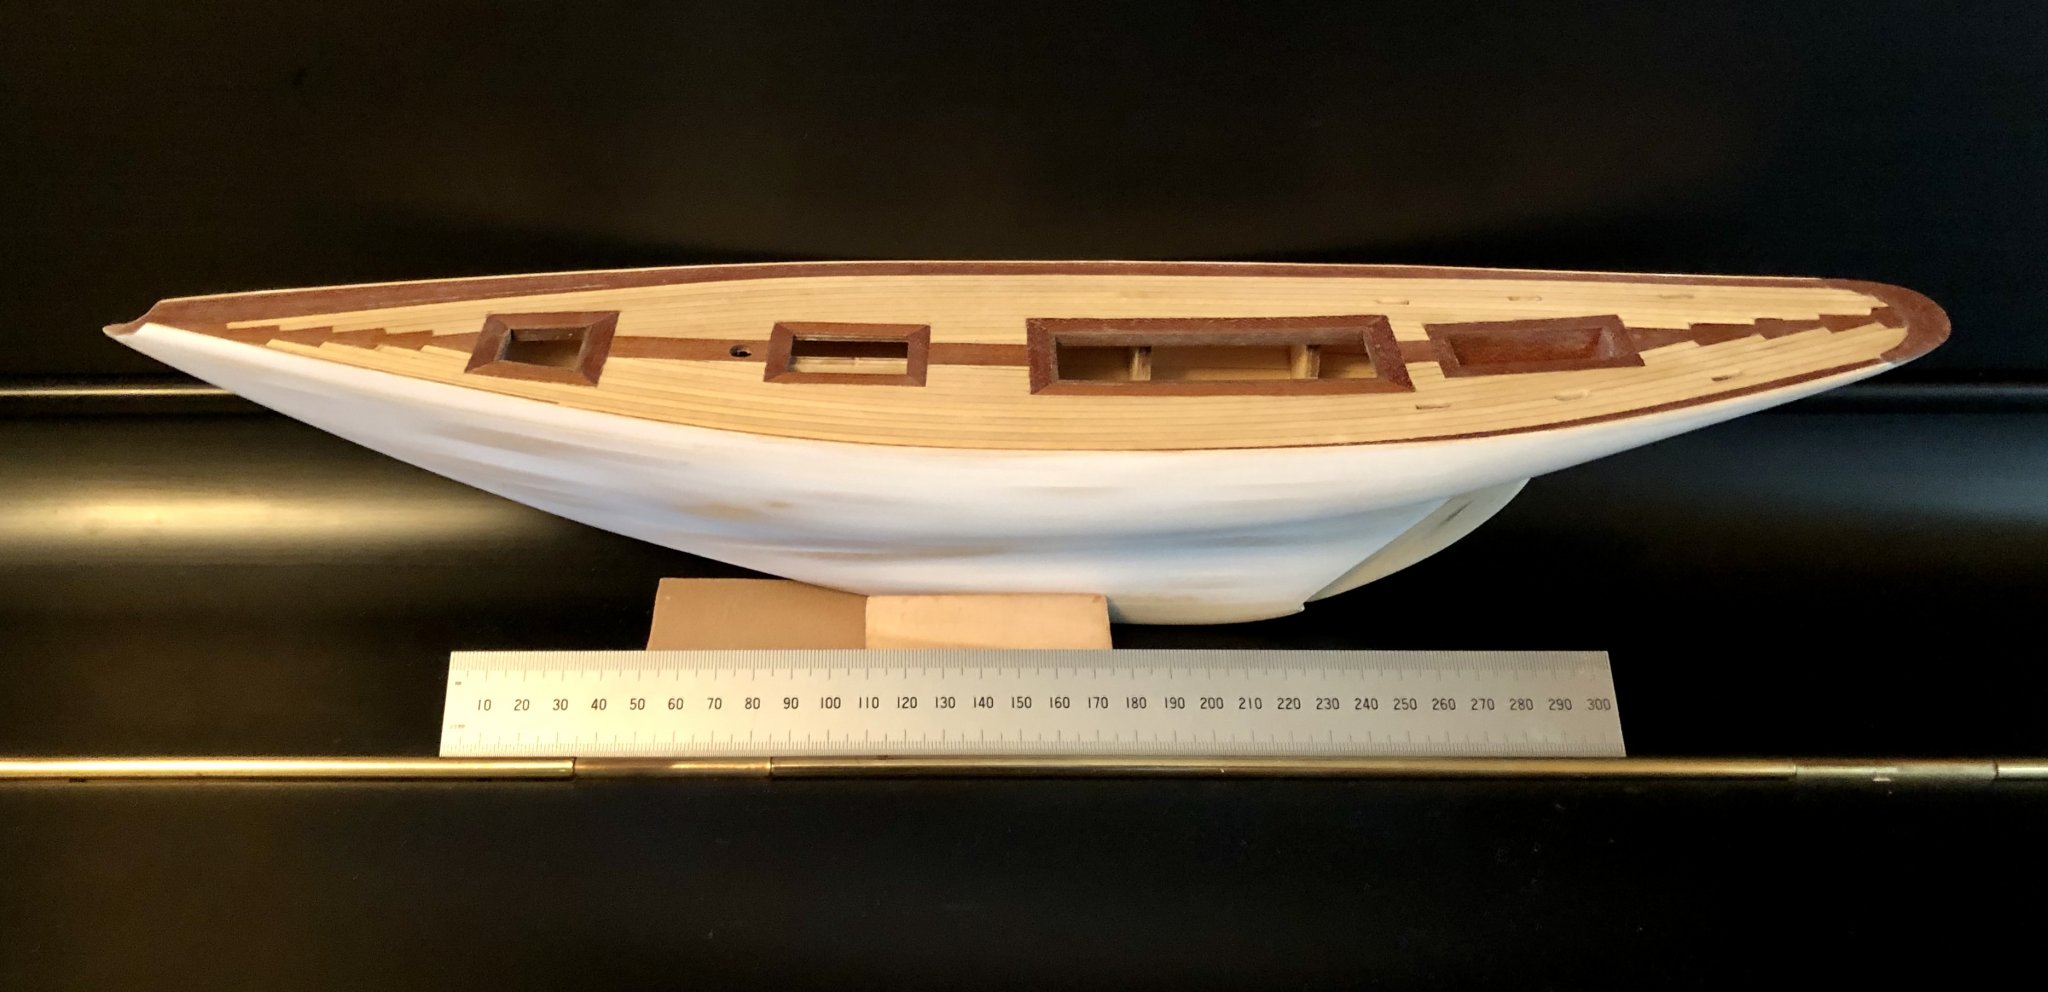
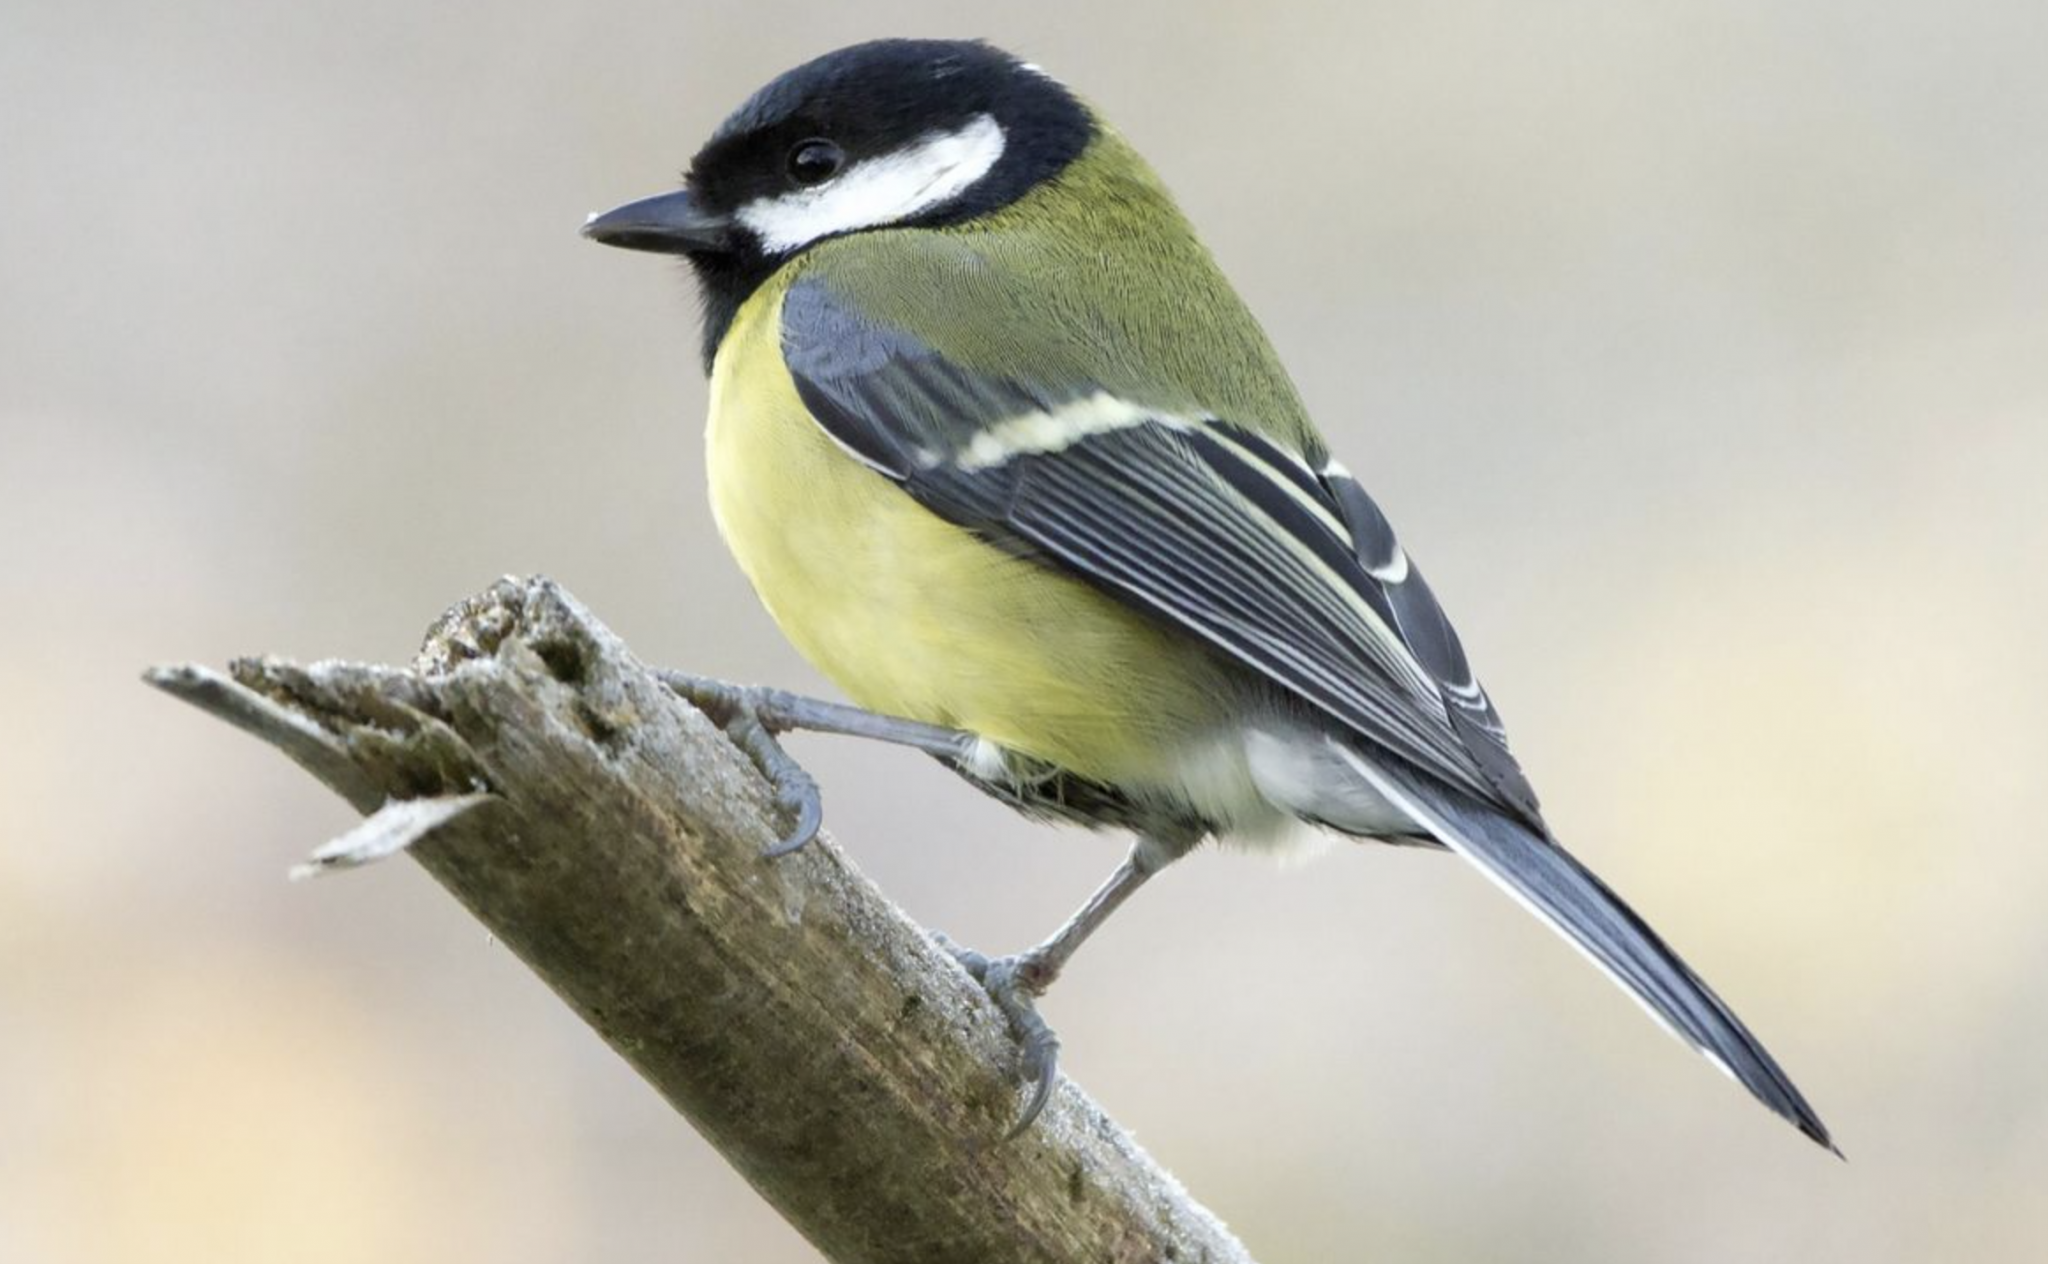
Thanks Eamonn! The Pen Duick, originally named Yum, was indeed built in Cork Harbor, Ireland, in 1898 and it was 10.97 meters (36 feet) in length. The Artesania Latina kit is 543 mm long, 727 mm tall and 93 mm wide at the beam. Here's a photo with a 305 mm ruler (12 inches) in the foreground: Here is some additional information about the original Pen Duick from Wikipedia: https://en.wikipedia.org/wiki/Pen_Duick It's interesting to note that the Pen Duick was named for a small bird common in the UK known as the Coal Tit. I've noticed that the main colors of the Coal Tit are black, white and green and are similar to the colors on the hull of the classic Pen Duick I. https://www.nationalgeographic.co.uk/animals/2018/04/bird-week-coal-tit Cheers!


-
Very nicely done, BE. I recently completed laying the deck on my Pen Duick build. I started started from the margin plank and worked towards the center and joggled the center king plank. Is there a rule of thumb about where to start laying the deck planks when joggling? Do you typically start working from the center outward when the joggles are in the margin planks and the opposite when the joggles are in the center king plank? Did you do any calculations in selecting the width of the planks you decided to use so that the joggles finish where you want them to end on the final planks? Also, what did you use to simulate the caulking?
-
I have a couple more questions that have come to mind: 1) Is it best to apply a good primer before painting with an airbrush? If so, are common rattle can primers acceptable or are specific model paint primers better? 2) Is it a wise to wear a mask for lung protection when using an airbrush?
-
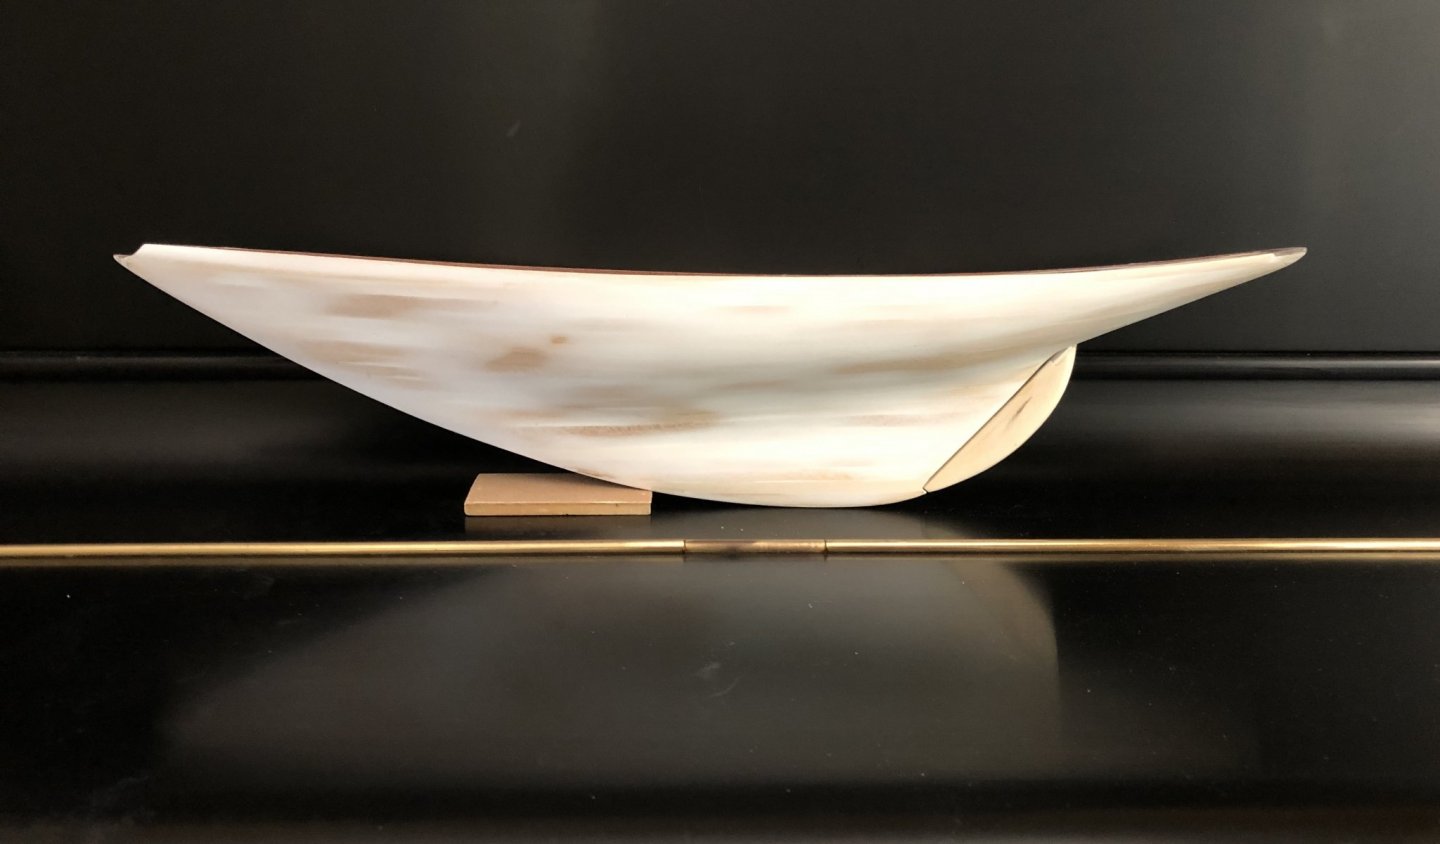
I spent time today adding tiny patches of wood around the rudder shaft hole and tweaking the hole so the the rudder dry fits very nicely now. Then I slathered the entire hull with Elmer's Color Changing Wood Filler. After I let it dry thoroughly, I sanded the hull first with 220 and then 320 adhesive sandpaper on a soft sander block and it's very smooth now. I plan to spray it with Rustoleum High Build Gray Primer and sand it more tomorrow. Then I'll play with my new airbrush before attempting to paint the hull.
-
Thank you, Justin. I love this boat and, if you haven't built one of these ocean racing yachts, I recommend doing at least one. The hulls are so sleek and have such beautiful form and lines. The AL Pen Duick is occasionally available on eBay and Ages of Sail had one the last time I looked. Amati also has several of the famous America's Cup racing yachts in there line up. Thanks for stopping by.
-
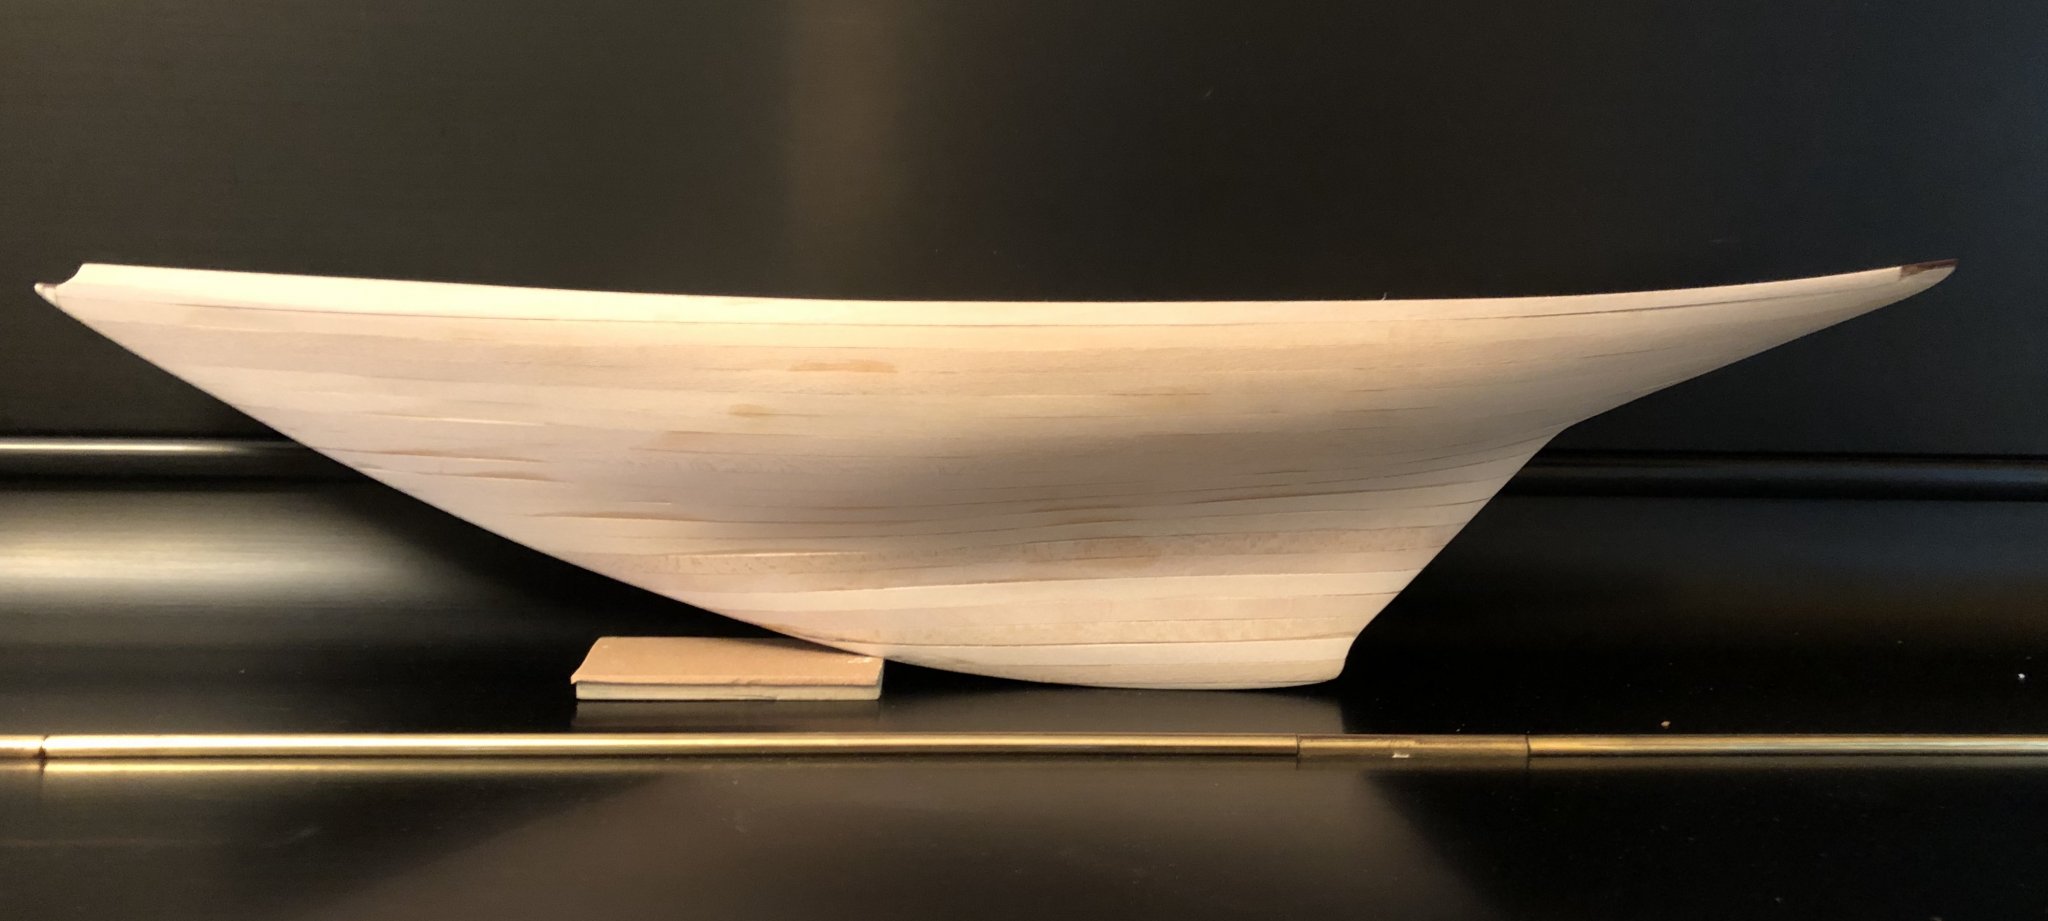
Thanks very much, vaddoc. I didn't edge bend any of the strips and all of them are full length. I did need to use a hair dryer to bend and twist some of the planks so they would lay flat as they curved and twisted at the stern. I chamfered the top edge of some of the planks in a few sports but, since I knew I would be using wood filler and painting the hull, I wasn't overly concerned with small gaps. It made a big difference using the thinner 1 mm limewood instead of the 2 mm ramin that was supplied in the kit. I use Elmer's Wood Filler also but I've never tried using carpet razor though. I'll have to give it a go. I was pleased with the limewood but I've heard very good things about maple also. I don't know where I could get strips of it though and I don't have a table saw yet so I can't mill my own. I agree. I think this is one of the most beautiful sailboats I've ever seen. I like it so much that I may consider some of the Amati America's Cup Yachts in the future and, if I ever learn to scratch build, a larger model of the Pen Duick with lots of authentic details would be wonderful. Thanks very much for coming along for the ride!
-
That's great to hear, Derek! I'll be trying out my new airbrush in the next couple of days and I'm excited.
-
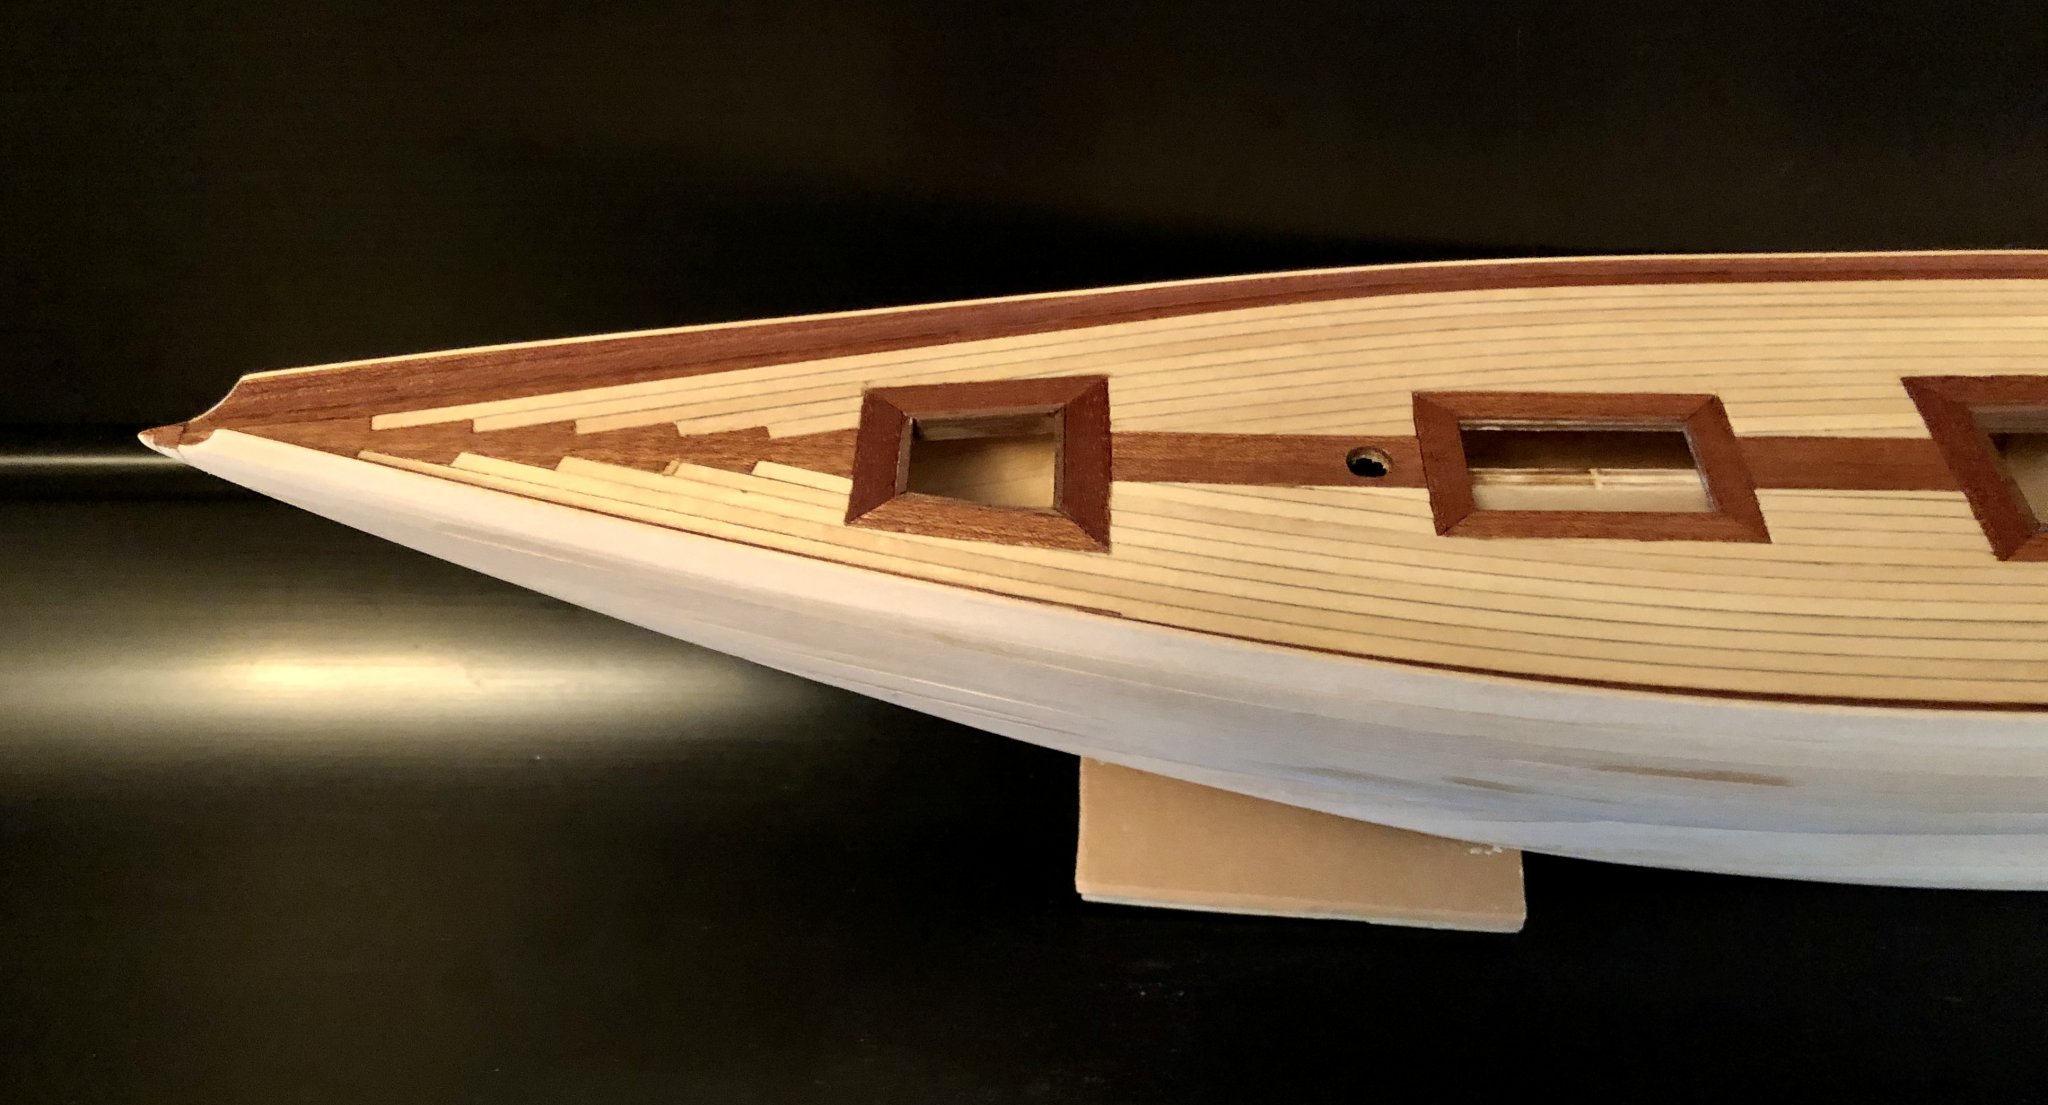
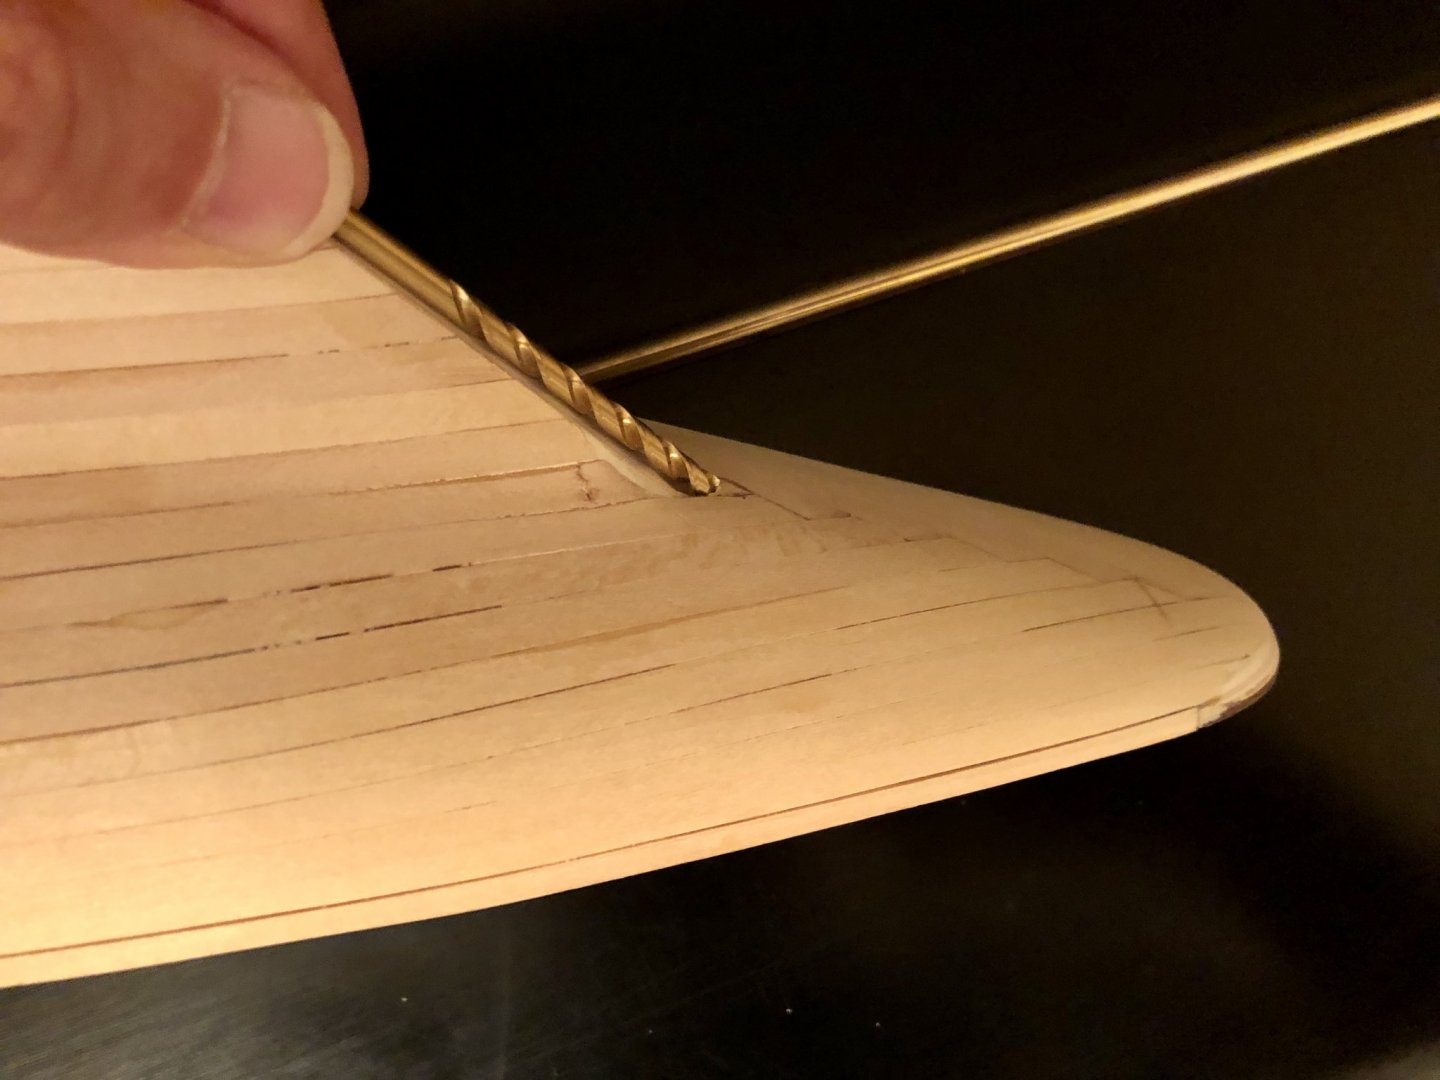
Thanks for the likes and for stopping by everyone. Much appreciated. I completed the rudder today and I'm happy with it after I dry fitted it to the hull. It always seems to take me longer to complete a step than I think it will. Of course, it could be that I'm just plain slow! The AL instructions tell you to drill a 4 mm hole through the deck and down through the keel. They say nothing about how to accomplish this. To be able to do that and have the drill bit stay centered and at the correct angle so that the rudder post and the rudder line up exactly seemed to me to have a high likelihood for a major error. It would not be good for the hole to end up misaligned. Harry (hof00) was able to do it on his Pen Duick by using his fingers to twist the drill bit and cut the hole up through the deck as it lay against the keel to and drilling upwards through the deck. So I thought I would give it a go and started using my fingers to rotate the drill bit as it lay agains the keel where the rudder will be attached but I quickly abandoned the idea. It was practically impossible to keep the drill bit centered since it was so awkward trying to twist the drill bit with my fingers and keep the alignment correct. I had visions of the hole cutting through the deck in the wrong place and so I said, "Forget it." I'm sure I would have ended up with blisters on my fingers as well! I really don't need a rudder that actually works since I'm building the model for display only so I went to Plan B. I made the rudder with a short shaft so that it could be inserted into the hull about 5 mm. Even so, I had to do quite a bit of sanding on the hull and the keel to get the rudder to fit nicely within the lines of the hull. The rudder will have a pin on the bottom that will be inserted into the little nub on the bottom of the keel. It could actually pivot but I'll just glue it and have a fixed rudder. I'll paint the hull and the rudder before gluing it on the boat. The first photo below shows how you would have to drill the rudder shaft hole up from the bottom using the keel to keep the angle correct. Of course, you would have to keep the drill accurately centered also. Notice how you would have to twist the drill with your fingers while barely being able to grasp the the drill bit. I suppose you could try and drill the hole blindly from the deck down but it would be a long shot for it to come out in the right place through the keel. All I can say to Harry is, "Congratulations man, you managed to do it!"

-
Great discussion everyone! Here's another question from this airbrush newcomer: Is there much difference between Vallejo Model Air Paints and the regular Model Paints? I assume that they may have difference viscosities and, if that's the case, it would stand to reason that the Vallejo Model Air Paints are thinner right out of the bottle and the regular Model Paints will need to be thinned before usage?
-
Thanks, Joe. I'm excited to learn to use my airbrush and the information I'm getting here from experienced modelers will be invaluable to me. This is outstanding information!
-
Thanks Kurt and Carl. It looks like I have quite a bit to learn before I actually commit to painting the hull. I really do not want to mess up the paint job on this hull.
-
Thanks very much, Joe. I've been happy with brushing Vallejo Acrylics so I just thought I'd continue with them since I am totally new to airbrushing. I take it that they don't make a semi-gloss varnish so I'll need to experiment as you have suggested. It gets very hot and dry here in Sacramento during the summer. I will be painting outside so it looks like I'll need to spray early in the mornings as well when applying a clear varnish to try prevent the varnish drying in the air. How long do these varnishes generally take to dry before applying additional coats? Are several coats preferred for getting a nice finish with these varnishes? A few more questions: Have you used the Vallejo Model Air Paints other than their varnishes? If so, did you need to thin them very much with water? Is it better to use distilled water than regular tap water? Would the Vallejo Thinner be better to use than water? Much appreciated.
-
I am currently building the Pen Duick by Artesania Latina and will be painting the hull soon with my new airbrush after practicing with it on some scraps. At this point, I plan to use Vallejo Model Air Acrylic Paints for the 3 different colors on the hull. I want to simulate the resin hull of the Pen Duick after it was restored by Eric Tabarly in the late 1950's. The photos I have seen of the yacht at this time show that the sleek hull was highly polished. I am assuming that a semi-gloss would be appropriate or maybe even a gloss finish similar to many of the America's Cup, J-Class racing sailboats. So I have a couple of questions regarding using an airbrush to obtain an appropriate finish like that on the hull. First of all, would a semi-gloss or gloss finish be more authentic and what would what the best way to apply a crystal clear, semi-gloss or gloss finish using my airbrush? Is clear coating with an airbrush any different than normal painting with an airbrush? Does anyone have experience obtaining this kind of clear, polished finish and, if so, what clear coat products did you use? Thanks very much.
-
How to seal acrylic paint?
BobG replied to Bill97's topic in Painting, finishing and weathering products and techniques
I think that's wise advice, Kurt. -
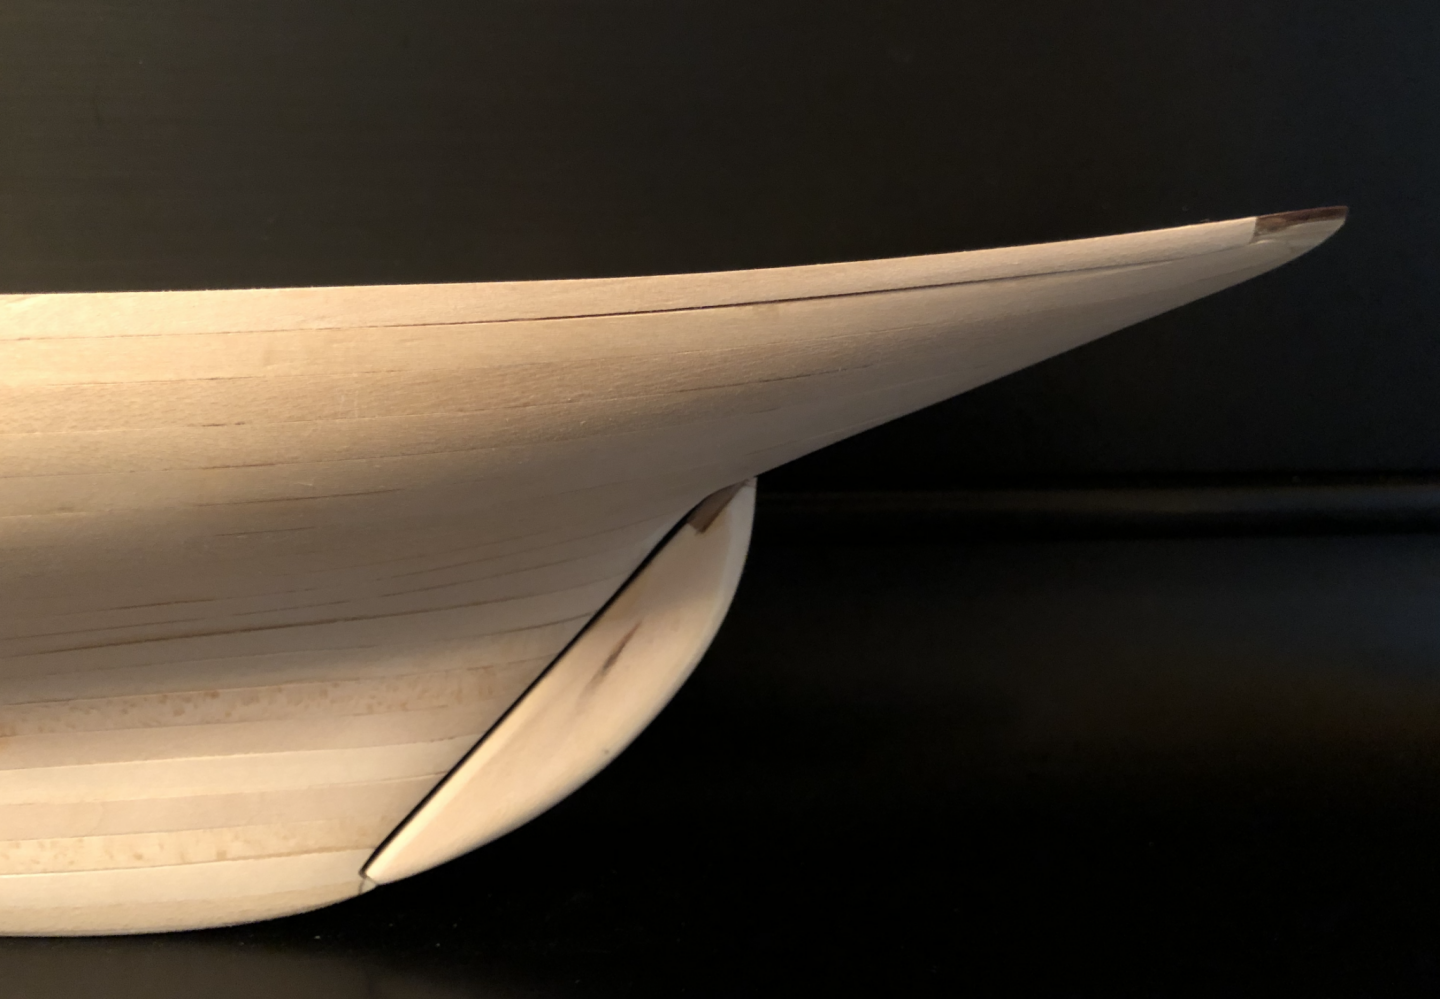
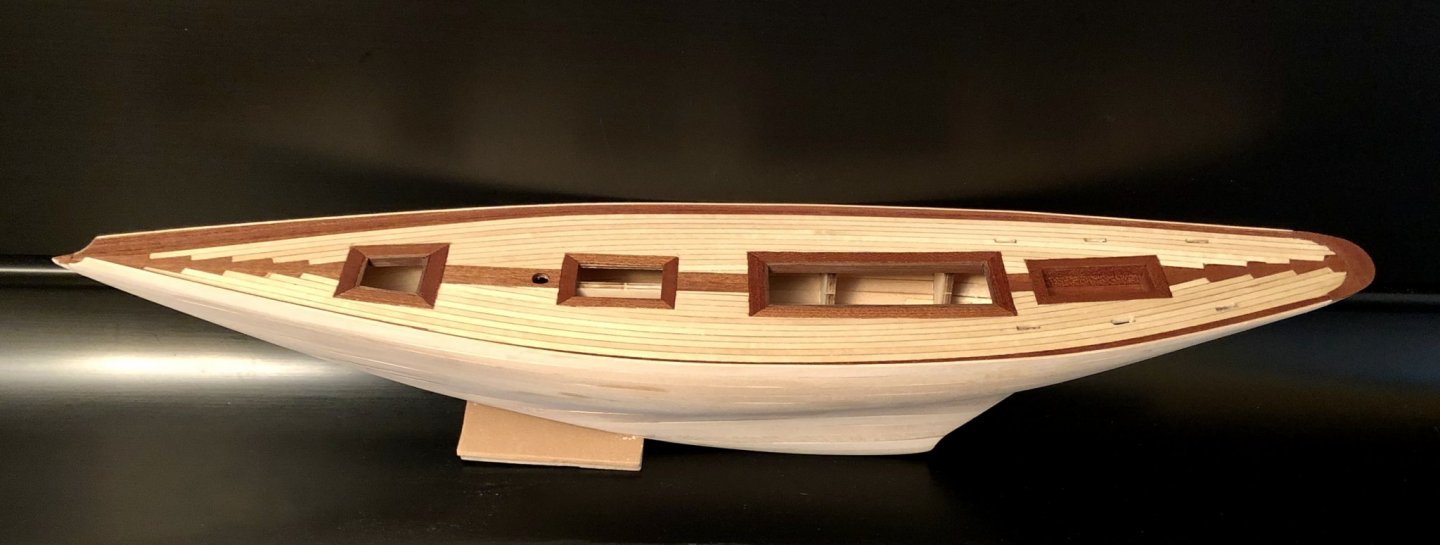
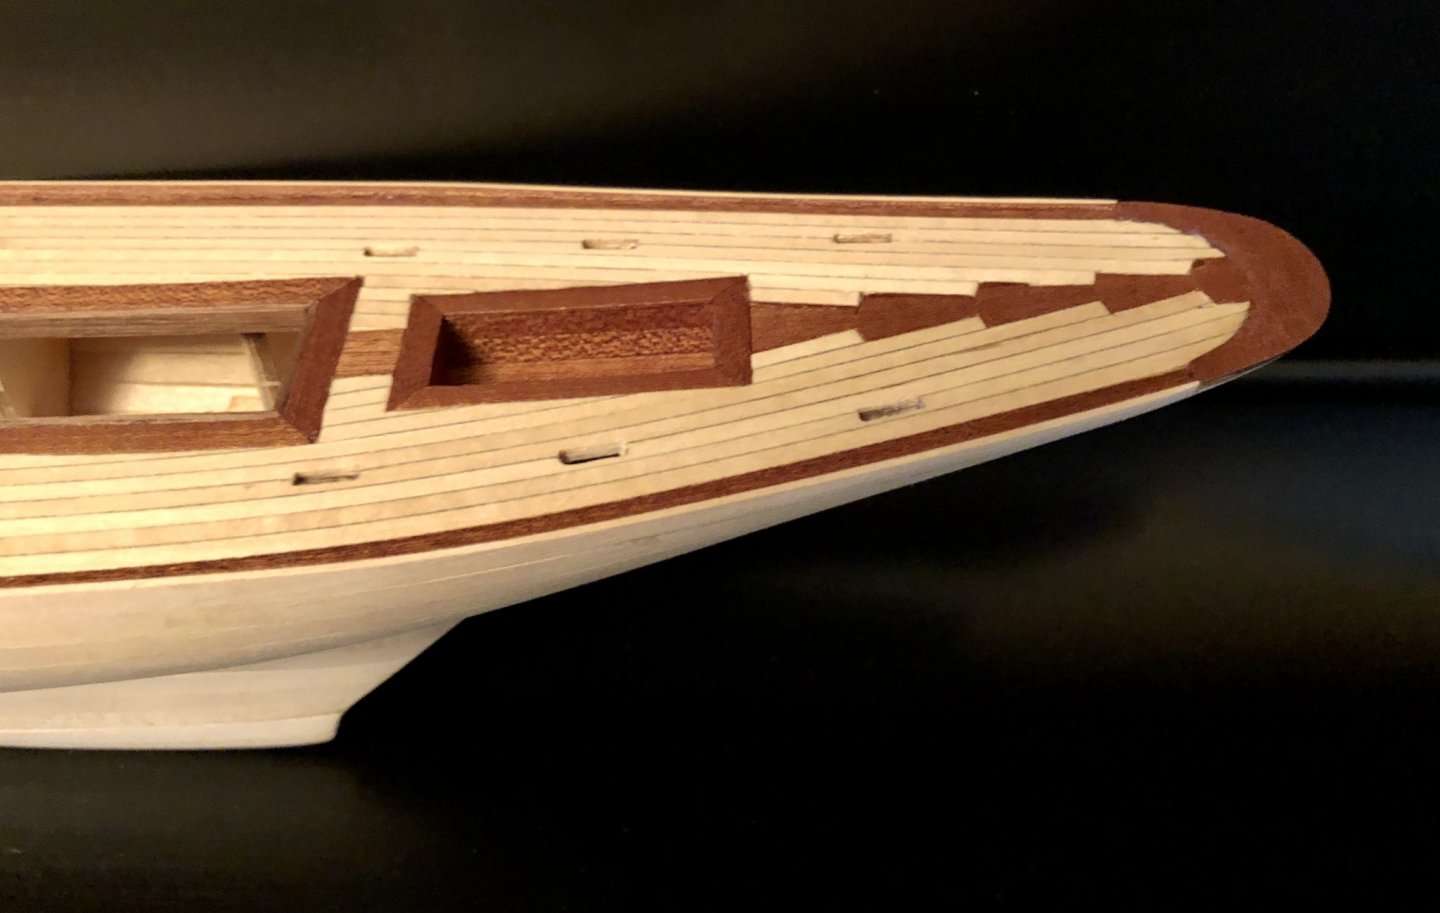
The AL instructions said to add the bulwarks before planking the hull but I decided to plank the hull first and then add the bulwarks. This allowed me to also have the upper edge of the first plank for supporting the alignment of the bulwarks and gluing them in place. I also used 1 x 8 mm limewood strips for the bulwarks instead of the kit supplied 2 x 8 mm ramin wood strips. The thinner limewood strips were much easier to bend around the hull and along the sheer of the deck. I used Titebond Quick & Thick PVA for this step since I knew I would need more time to make adjustments than I would have using CA. As expected, it was a bit tricky to get a nice tight fit but I took my time and they turned out well. The bulwarks were glued on with 5 mm extending above the deck. They have a curved cutout on each side at the bow. I used my Dremel and sandpaper to shape these cutouts. I also needed to make a tiny "nose piece" at the point of the bow so it wouldn't be blunt. The bowsprit will extend through the bulwarks at the very point of the bow and the "nose piece" will finish up the rise of the razor edge of the keel and support the bottom of the bowsprit. On the real Pen Duick the bulwarks are mahogany or teak and, since I used limewood for the bulwarks, I decided to line the insides of them with some 0.5 x 3 mm mahogany strips using PVA. So I will now have mahogany margin planks, bulwarks and cap rails which will be more authentic to the real Pen Duick. The next step was to taper the bulwarks from a full 5 mm at the bow to being level and flush with the curved, walnut piece that finishes the deck at the stern. In order to do this I used a soft sander block with adhesive sandpaper that spanned the width of the deck and carefully sanded the taper from the bow to the stern. Finally, I sanded the deck and the bulwarks lightly with 220 sandpaper and added a coat of Satin Wipe-on-Poly and I'm pleased with how everything looks.


-
Yes, the building board is included. I think you would love building this boat, Glenn, it's an outstanding kit.