HOLIDAY DONATION DRIVE - SUPPORT MSW - DO YOUR PART TO KEEP THIS GREAT FORUM GOING! (Only 44 donations so far out of 49,000 members - C'mon guys!)
×


BobG
-
Posts
3,109 -
Joined
-
Last visited
Content Type
Profiles
Forums
Gallery
Events
Everything posted by BobG
-
I finished airbrushing the general area of white waterline stripe. How long should I wait now until I can safely mask of the white stripe before painting the aqua-green below the waterline?
-
Porsche 934 by kpnuts - FINISHED - Tamiya - 1/12 - PLASTIC
BobG replied to kpnuts's topic in Non-ship/categorised builds
This is going to be one gorgeous car! I'm late to the party but I'm staying now unto the end... -
Just beautiful, Grant! The metal paint looks fantastic. What paint are you using to get this realistic looking metal? What kind of glue did you use for attaching the brass stiffeners to the soft rubber leaf springs?
-
That's good to hear, Kurt. I was worried that I was laying down too many coats in one paint session. I'm really loving this airbrush. Thanks for all the advice everyone!
-
I've done that more than I'd like to admit and I'm sure it will happen again. When that has happened to me I end up talking to myself wondering how in the world how I could have actually done that! For example, I had a tough time getting the deadeyes on the shrouds done properly on my Medway Longboat and when they were finally done I was really pleased. The next day I was admiring them and realized that I had them upside down on the port side! I'll bet we've got more company that we realize when it comes to these these kinds of errors...most folks just never show it in their build logs! I now consider it just part of the journey and try and just enjoy the ride...
- 436 replies
-
- 6
-

-
- vanguard models
- alert
- (and 1 more)
-
I have a general question about airbrushing technique. In my very limited experience so far using my airbrush, I have found that it puts down a very fine spray and it takes quite a lot of passes to get complete coverage on a large surface like the hull. Since the spray is so fine the paint goes on very transparent until I eventually get even coverage after many passes. My question is whether or not I should continue to spray until the coverage looks evenly complete and no longer transparent or is it better to put on some paint and then wait a while and come back and spray some more etc until it is finished? The acrylics seem to dry quickly on the surface of the hull so I have just continued spraying until the coverage looked good and didn't look transparent. Is that the way to do it? When I was spraying the primer I began to wonder if I was making too many passes trying to get the hull evenly coated?
-
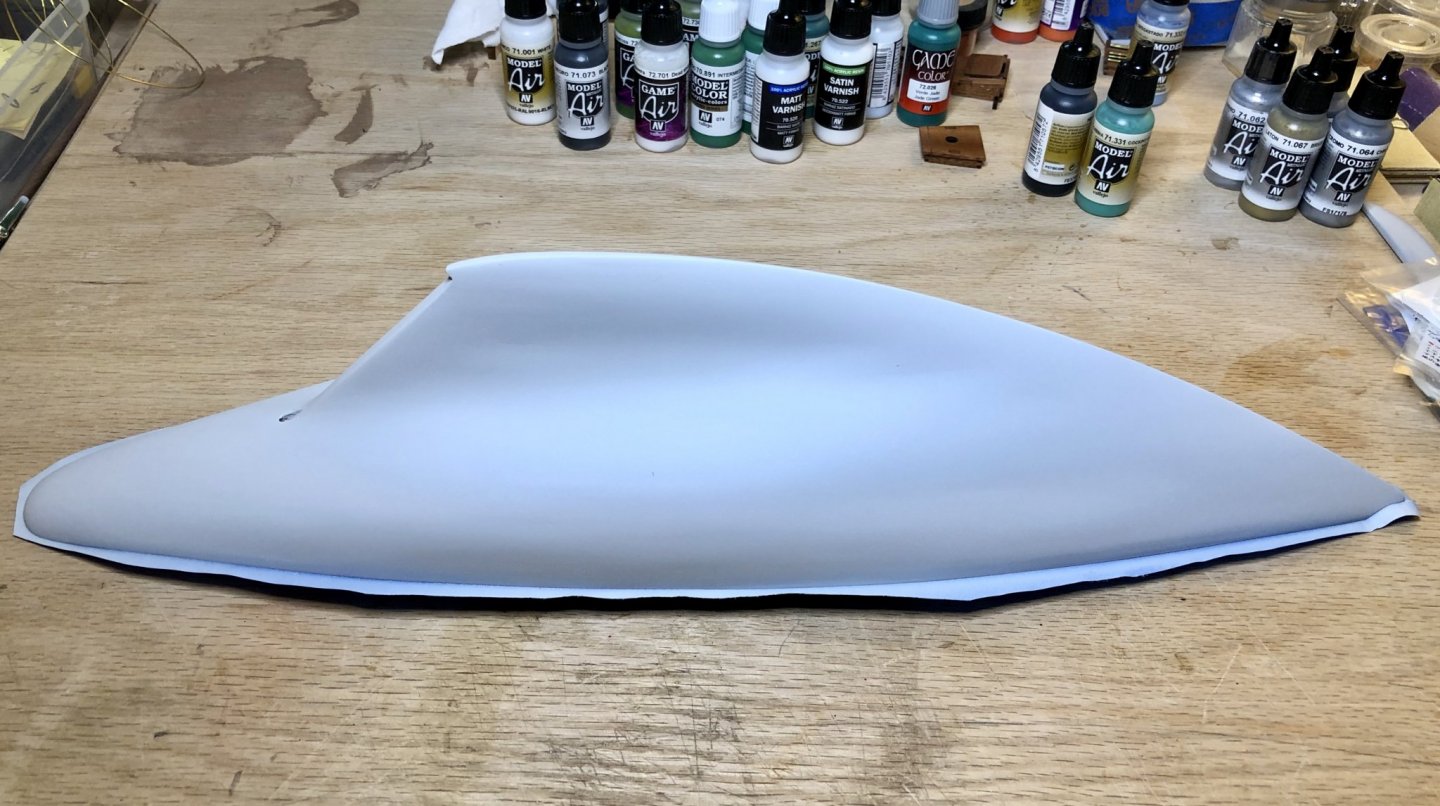
I filled the all the tiny imperfections I could find and sanded the hull lightly with 400. Then I sprayed it again with Vallejo Gray Primer using a .5 mm fan nozzle. I also added some Vallejo Flow Improver to the paint at the rate of 1 drop per 10 drops of paint. It turned out well and the imperfections are gone!


-
I filled the all the tiny imperfections I could find and sanded the hull lightly with 400. Then I sprayed it again with Vallejo Gray Primer using a .5 mm fan nozzle. I also added some Vallejo Flow Improver to the paint at the rate of 1 drop per 10 drops of paint. It turned out well and the imperfections are gone!

-
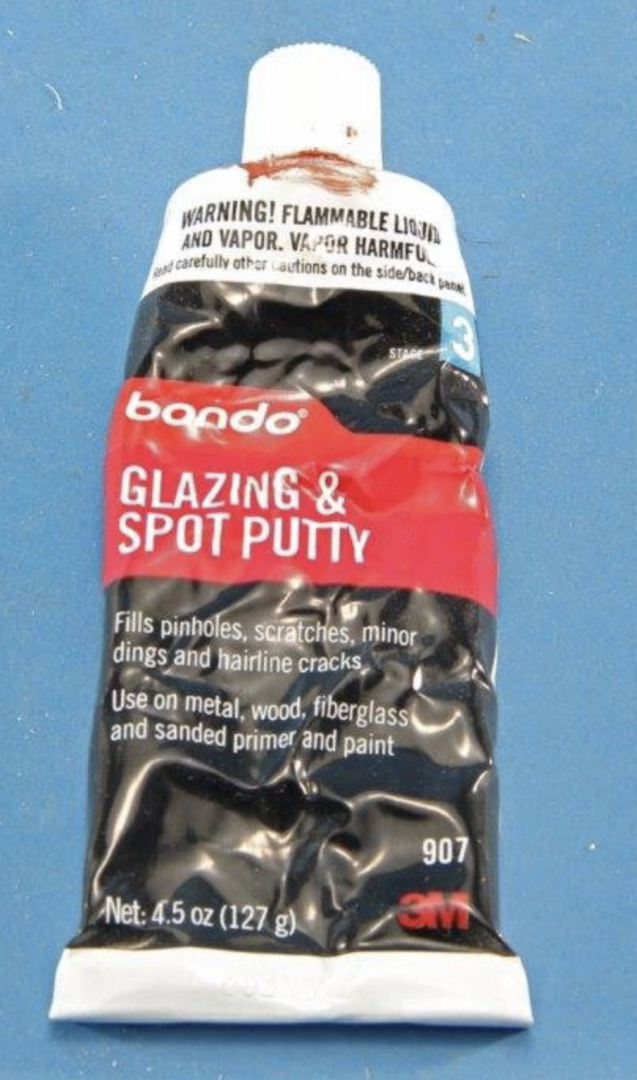
Thanks Vaddoc. I'm using the the Bondo Glazing and Spot Putty that Kurt for small imperfections. I like it so far. I'm just smoothing on a tiny dab with my finger and then letting it dry before sanding it. I has a rather toxic odor so I'm using it outside. I think I should probably spray the primer again after I've finished touching up the hull.
-
Thanks Kurt and Carl. It will bother me for sure and I've already started trying to fix them. I'm using the the Bondo Glazing and Spot Putty that Kurt recommended previously for small imperfections. I like it so far. I'm just smoothing on a tiny dab with my finger and then letting it dry before sanding it. I has a rather toxic odor so I'm using it outside. I think I should probably spray the primer again after I've finished touching up the hull.
-
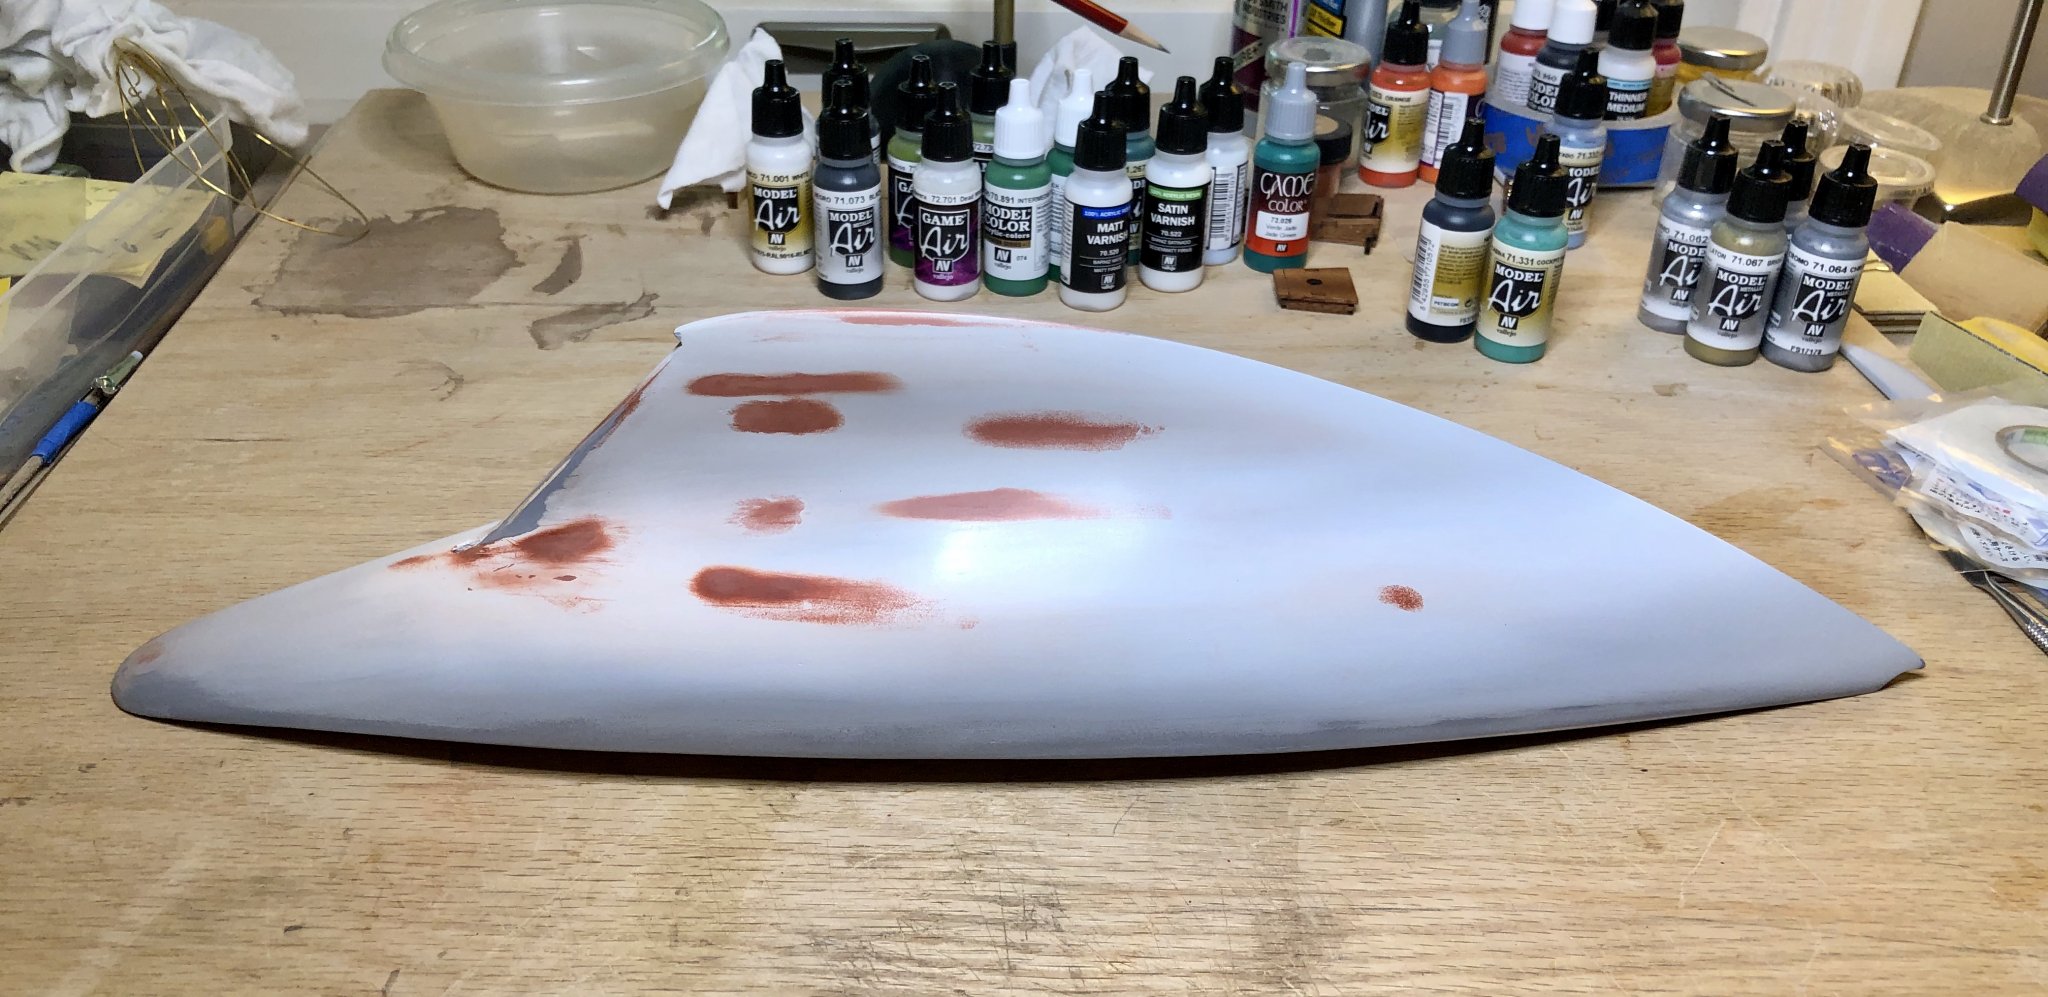
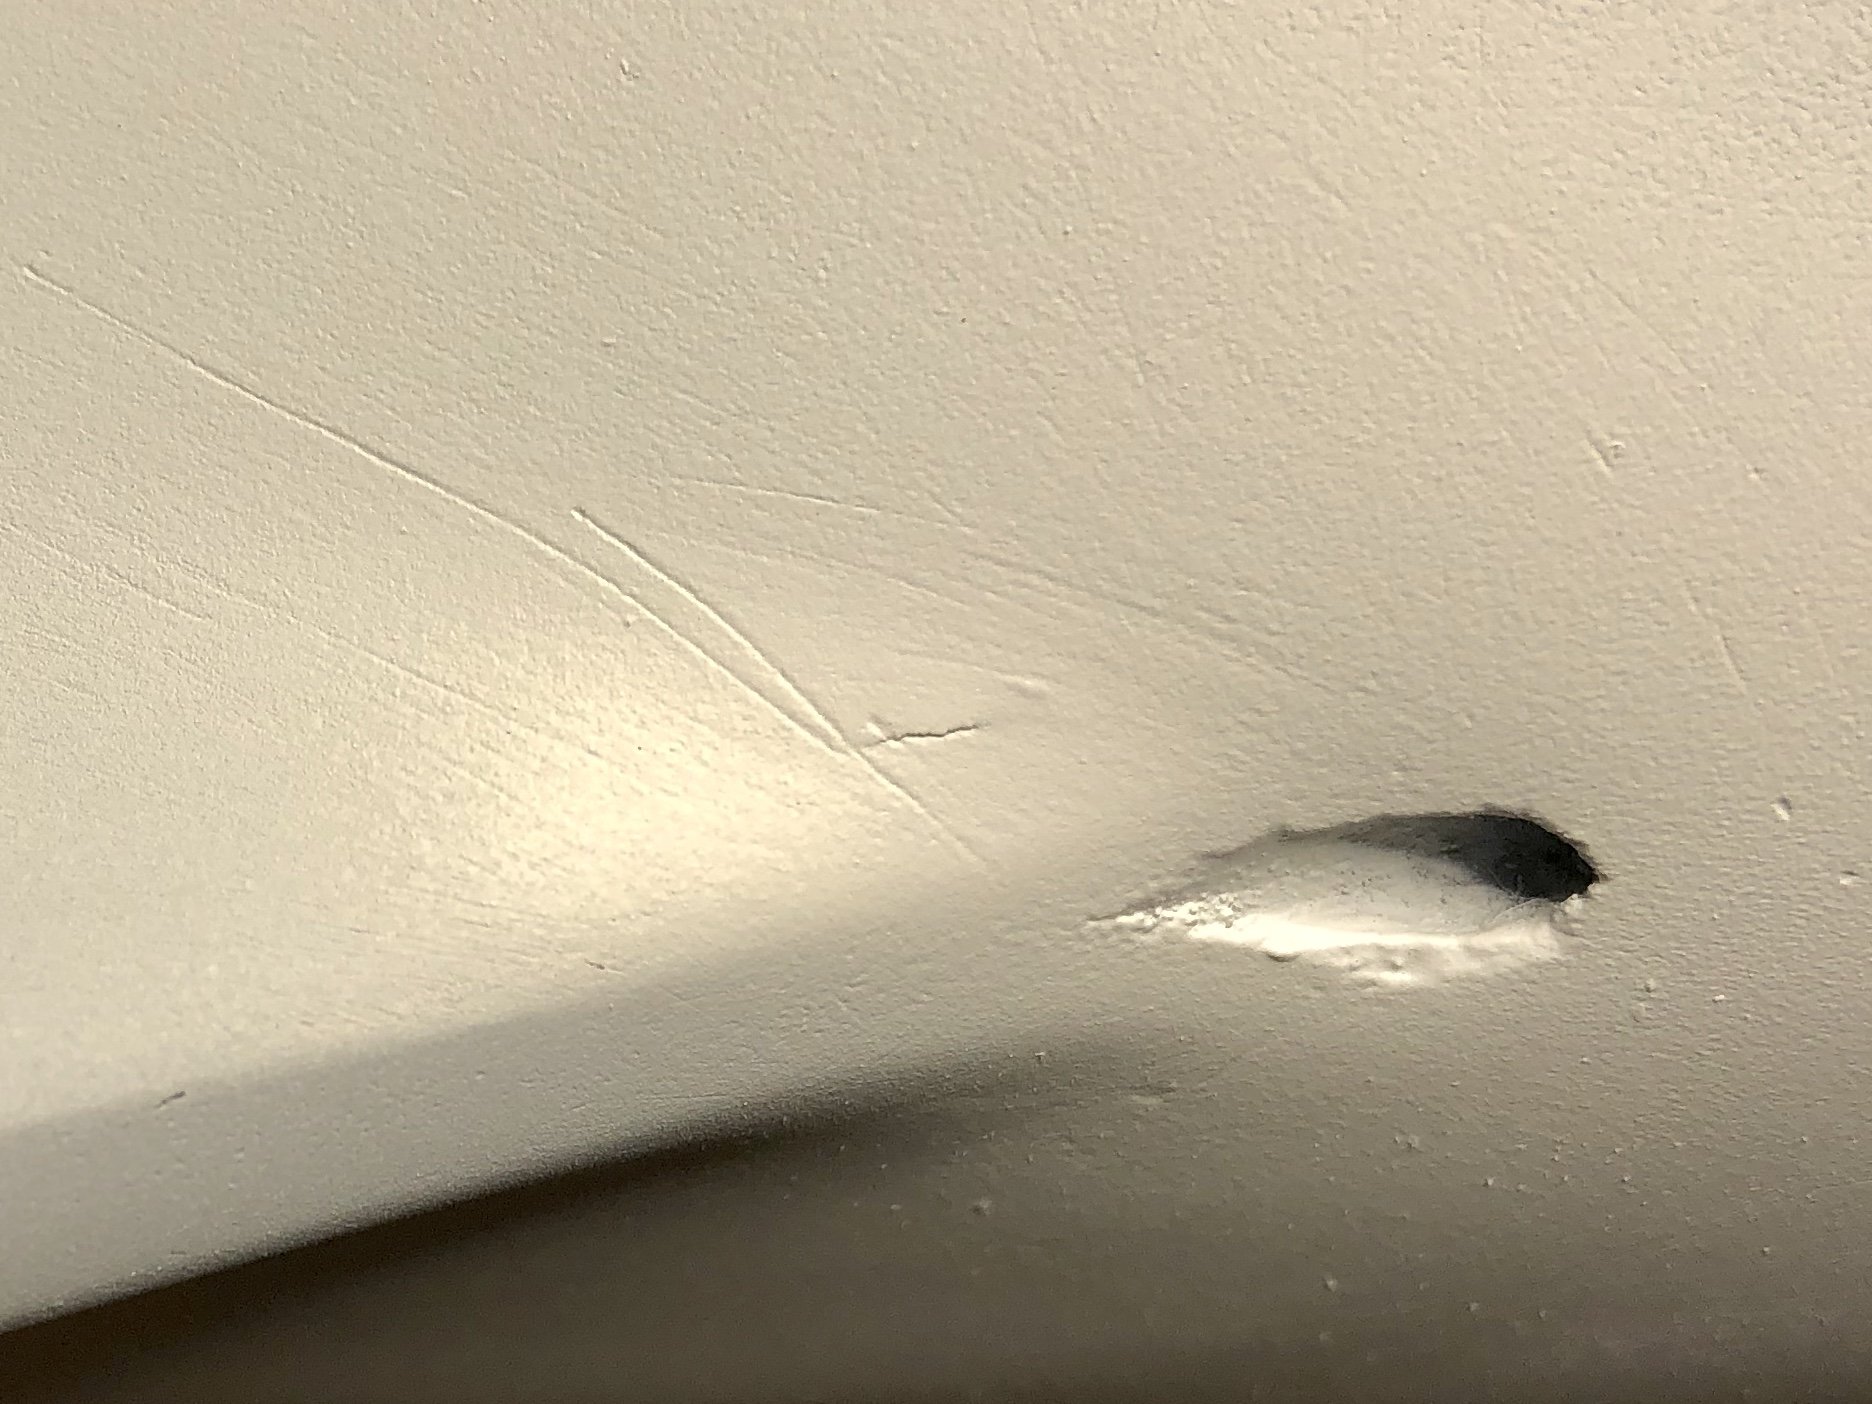
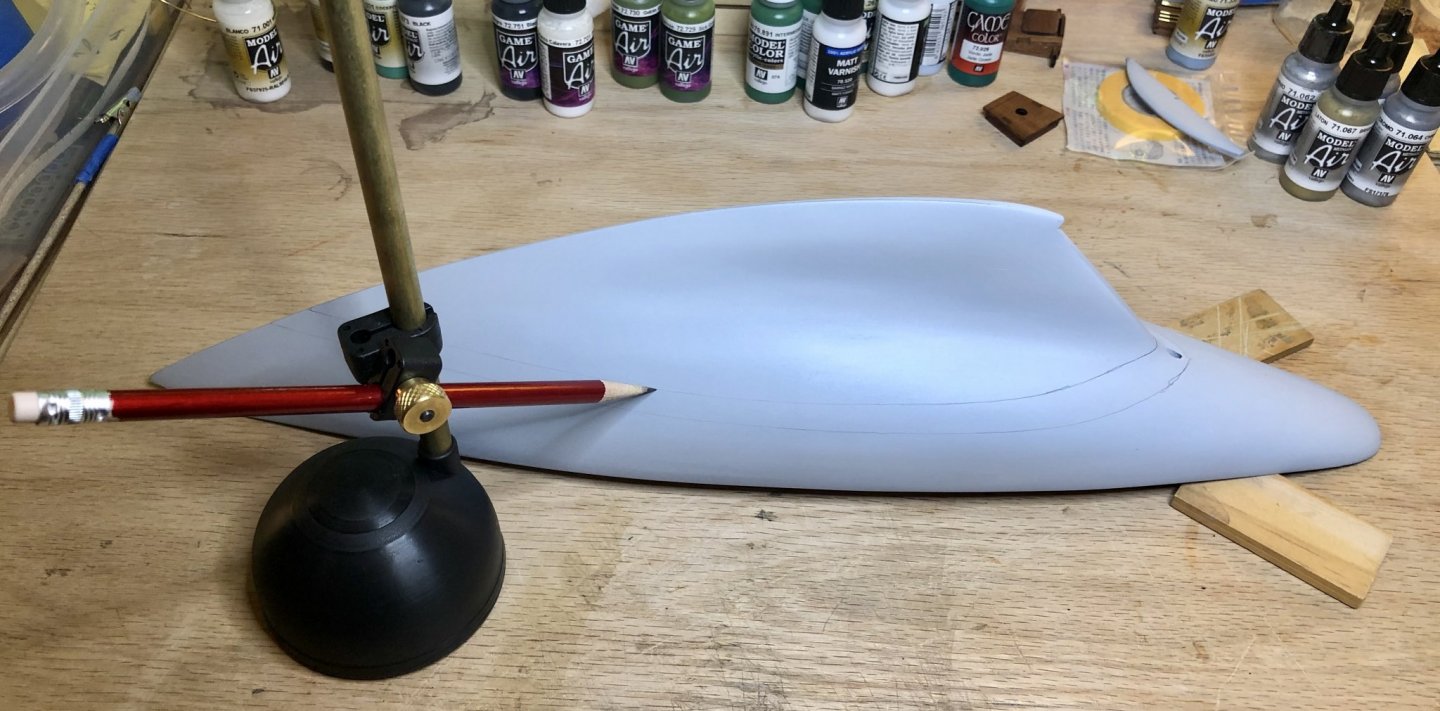
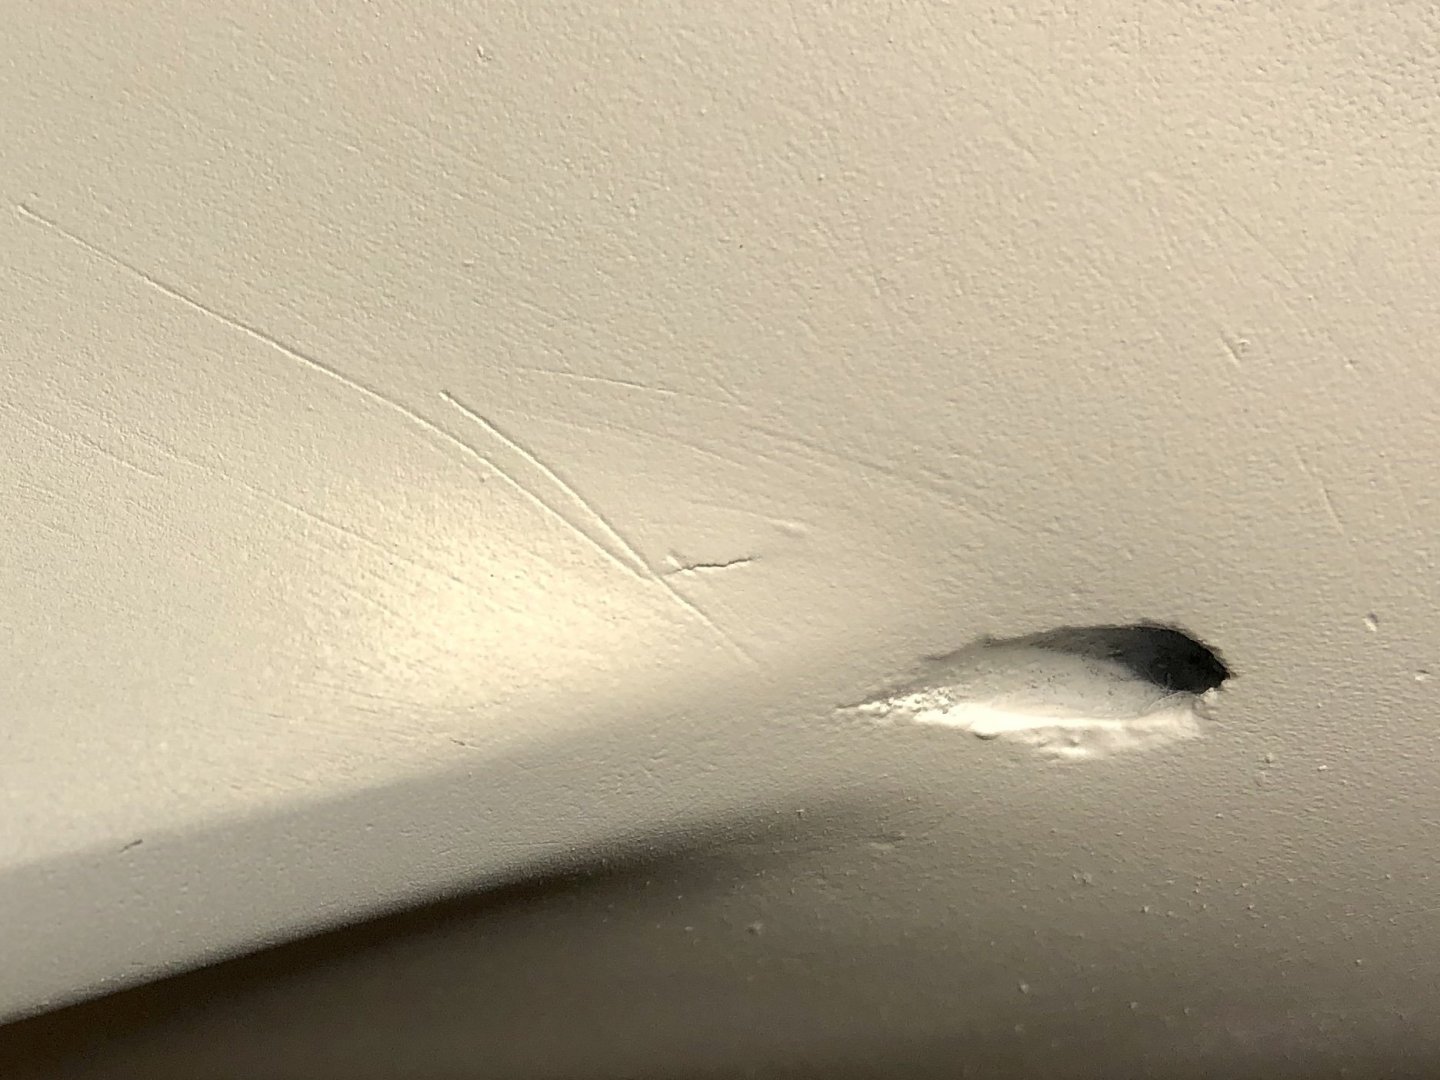
I marked off the the white waterline stripe using an Amati waterline marking jig to give me some lines to spay the general area that will be white. The white stripe will be marked again and then masked off before spraying the green and the black. I sprayed the white stripe using a .3 mm fan spray nozzle in order to give me a broader spray pattern but it still took a lot of passes to get good coverage. Upon closer inspection of the hull after it dried, I found some small imperfections that I didn't see before with the primer on the hull. I'm sure they will be magnified with a semi-gloss varnish as a finish coat so now I'm considering filling them and doing some more sanding which means probably priming the hull again. Maybe I can carefully sand them with 600 grit and see if I can carefully eliminate them. One step forward and two steps back.... These imperfections are very small and a couple of them are simply from the slight pressure from the pencil when I marked the white stripe. I'm on the fence as to whether I should try and get the hull even smoother and eliminate tiny imperfections like these, there are only a few but, knowing me, I'll probably take the long road and do try and make it better. Hopefully, I won't screw it up if I do. Getting this hull perfectly smooth so it will look good with a semi-gloss finish is not an easy task. It looks gorgeous with the primer on it but the finish paints are showing up the tiniest little imperfections and that bugs me! Should I or shouldn't I work on making it better...that is the question? I'll have to set it aside and think about it a bit...


-
🤣 I'm glad I wasn't on the road when you were watching the box dancing in the rear view mirror! I'm already in the front row, Mike!
- 3 replies
-
- 1
-
-
- Chris-Craft
- Chris-Craft 24 Runabout
- (and 1 more)
-
Manitowoc Crane - RESTORATION
BobG replied to mtdoramike's topic in - Build logs for subjects built 1901 - Present Day
Can't wait to see your build log on this one, Mike. You always build some of the most unique models we ever get the pleasure of seeing here on MSW. -
I marked off the the white waterline stripe using an Amati waterline marking jig to give me some lines to spay the general area that will be white. The white stripe will be marked again and then masked off before spraying the green and the black. I sprayed the white stripe using a .3 mm fan spray nozzle in order to give me a broader spray pattern but it still took a lot of passes to get good coverage. Upon closer inspection of the hull after it dried, I found some small imperfections that I didn't see before with the primer on the hull. I'm sure they will be magnified with a semi-gloss varnish as a finish coat so now I'm considering filling them and doing some more sanding which means probably priming the hull again. Maybe I can carefully sand them with 600 grit and see if I can carefully eliminate them. One step forward and two steps back.... These imperfections are very small and a couple of them are simply from the slight pressure from the pencil when I marked the white stripe. I'm on the fence as to whether I should try and get the hull even smoother and eliminate tiny imperfections like these, there are only a few but, knowing me, I'll probably take the long road and do try and make it better. Hopefully, I won't screw it up if I do. Getting this hull perfectly smooth so it will look good with a semi-gloss finish is not an easy task. It looks gorgeous with the primer on it but the finish paints are showing up the tiniest little imperfections and that bugs me! Should I or shouldn't I work on making it better...that is the question? I'll have to set it aside and think about it a bit...
-
I agree, the Emerald Green is a very nice color. I've seen models of the Pen Duick where the green is a very deep color and it looks good. However, I've scanned the internet looking at as many photos that I could find of the Pen Duick I, and the green section of the hull in those photos have a significant aqua blue tone to them so I went with the Emerald Green. Of course, a lot of things can affect the accuracy of the colors we see on our computers. I think it's a great color so I'll go with it. There were even small differences in the blacks and the whites. My wife and I compared them side by side outside in natural light in order to get a more accurate look at the colors. That's how we went about making the final choices. I'm not sure how that would look since I believe that these resin, racing hulls were quite polished overall in order to make them as fast as possible. I'll do several tests with the varnishes on scraps and see what looks the most authentic to me before I put spray the final finish on the hull.
-
Thanks Moab. To me the hull and the deck will be the main focal points of this yacht although the amount of sails she will have is impressive also. I will need to get these areas done well since they will stand out so much.
-
Holy smokes! 😲 I'd need to add a room to our house in order to display it! 🤑
-
Wow...what are the overall dimensions of this model?
-
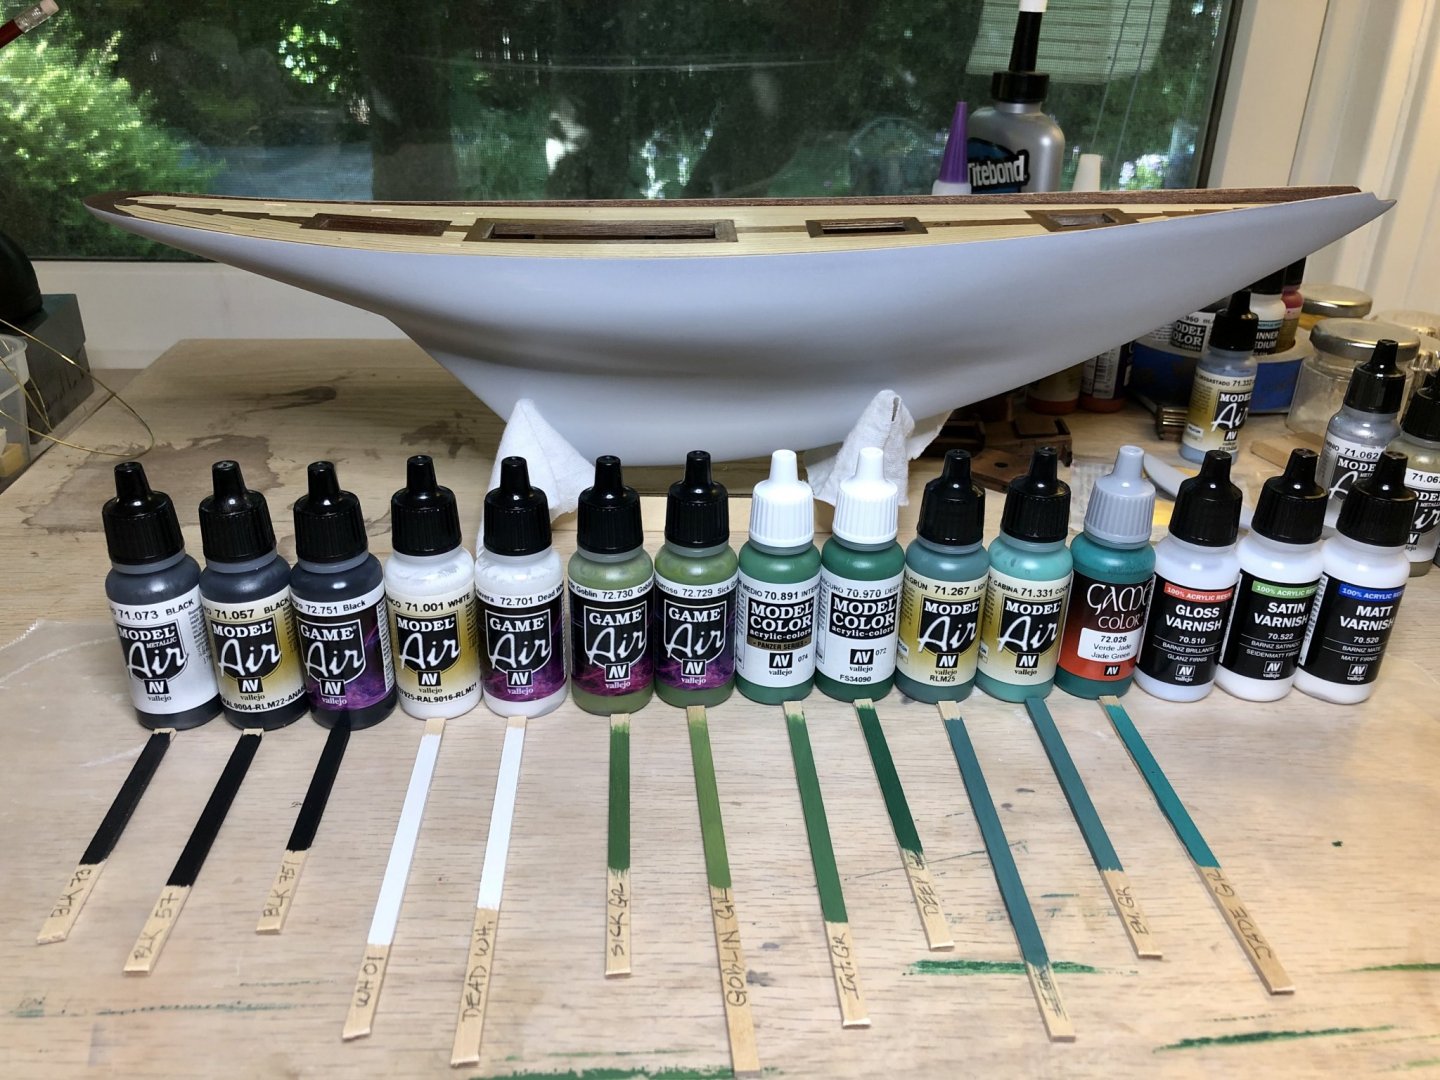
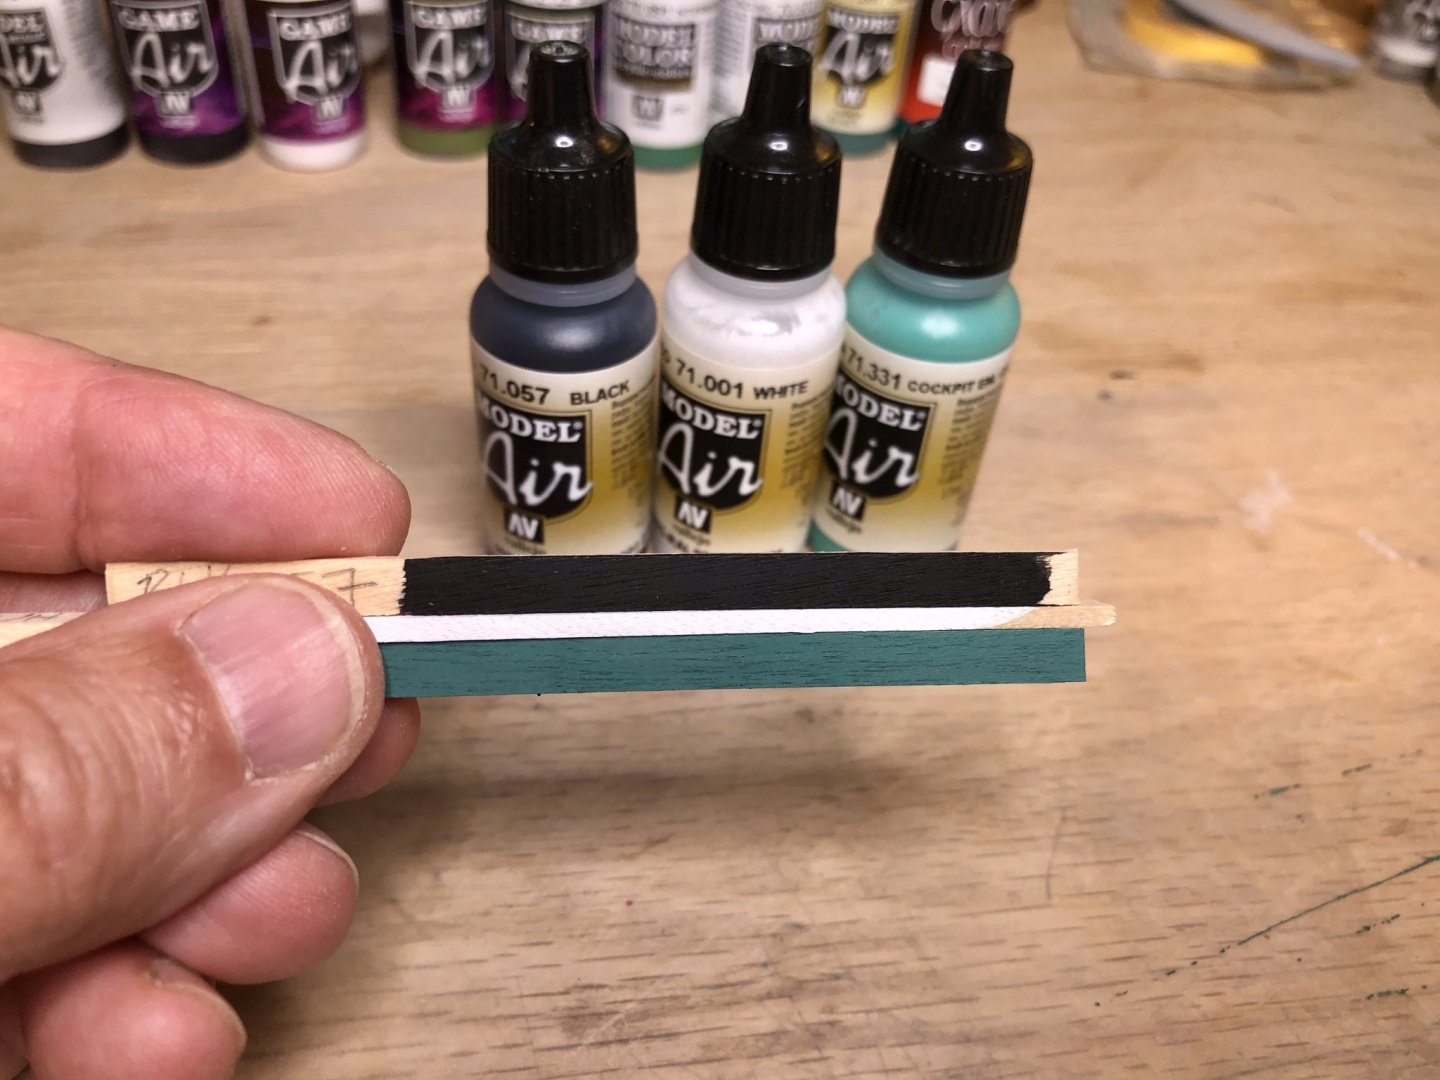
Not much progress to report in the past few days other than I have decided on the paint colors I will use. I've only used Vallejo Model Paints for brushing previously and I like them. So I decided to stay with what I am familiar with. I needed to order some paints for comparison and they finally arrived. I painted the colors on some strips of ramin wood and then compared them side by side. I sampled 7 different greens, 3 blacks and 2 whites. The hull of the Pen Duick is aqua-green below the waterline with a white stripe separating it from the black above the waterline. All of the 3 colors I ended up choosing to use are Vallejo Model Air Paints and I will be airbrushing the hull. The colors are Model Air 71.331 Cockpit Emerald Green "Faded," Model Air 71.001 White and Model Air 71.057 Black. After I get the hull painted I will be spraying it with Vallejo Varnish. I have all 3 of their varnishes: matte, satin and gloss. I'll test some painted strips with different combinations of the varnish in an effort to try and find a mixture that will give the hull a semi-gloss sheen. It's been scorching hot here in Sacramento the last few days with temperatures above 100 degrees F. So I will need to paint early in the mornings since I do my painting outside in the garage otherwise the fine spray could dry before it hits the hull. The second photo below shows the colors I will use.
-
Really nice, Mike. She's a beauty! What did you use for the lettering on the hull?
-
Wonderful detail, BE! It's these kind of small details that add so much interest to ship models. Did you prime the brass before painting it or did you paint directly onto the brass and what type of paint did you use?
-
Good to hear that it's going well, Don. That's a whole lot of hull to fair! How do you manage the dust? I have to go outside for any significant sanding. Even when I'm just sanding small pieces it seems to get all over everything in the room. Wish I had a dedicated workshop.
- 144 replies
-
- 2
-
-
- winchelsea
- Syren Ship Model Company
- (and 1 more)
-
The deck looks great! How in the world did you manage to remove the king plank without breaking it?