HOLIDAY DONATION DRIVE - SUPPORT MSW - DO YOUR PART TO KEEP THIS GREAT FORUM GOING! (Only 44 donations so far out of 49,000 members - C'mon guys!)
×


BobG
-
Posts
3,109 -
Joined
-
Last visited
Content Type
Profiles
Forums
Gallery
Events
Everything posted by BobG
-
The Vallejo Varnishes are water-based and, from everything that I have read, their Flow Improver, Retarder Medium and Airbrush Thinner are all compatible with their water-based products. I think the problem is mainly due to how I applied the varnish. I was trying to keep the application wet and I applied too thick of a coat. My air pressure may not have been ideal either and I may have gotten the airbrush too close to the hull at times as well. So I don't think compatibility was the main culprit. I think my technique was the problem with the varnish not leveling well. I was looking at the hull this morning and, quite honestly, you can not really see the orange peel effect from 2 feet away. You can see the orange peel effect if I hold the hull up close so the light hits it at an angle. My wife thinks it looks fine but I certainly wish it was better. I have some Micro Mesh Soft Sanding Pads on order and there will be 9 pads with grits from 1500 to 12000. I've been reading where modelers have been able to polish out the orange peel effect with these pads successfully so I will give them a try. Evidently, using them up to 6000 gives you a more satin sheen and from 6000 on up the sheen becomes more glossy.
-
kit review Kit Review - HMS ENTERPRIZE (1774) by CAF MODELS
BobG replied to kljang's topic in REVIEWS: Model kits
This looks like an outstanding kit. Thanks for the detailed review. -
Thanks very much for your reply, Bob. Much appreciated. I think you are spot on about what happened. I tried to keep the varnish fairly wet and ended up putting on too heavy a layer. When I painted the hull I used Vallejo Model Air paints and I added some Vallejo Flow Improver to the paint and I was really satisfied with the way the hull turned out. They were all matte colors and I needed to put on a clear coat to get the sheen I wanted. Today, however, I just thinned the Vallejo Varnish and didn't put the Flow Improver into the mix. I sprayed outside in my garage in the morning and it was cool so I didn't think I'd need the Flow Improver since the paint had been thinned. In hindsight, I probably should have added it. That said, I think that the main culprit was that I applied the varnish too thick. Of course, the other culprit, was me being entirely new to this. Oh well, they say we learn the best through our mistakes but, damn, I hate it when that happens...
-
I used Vallejo Model Varnish and it is water based. Would wet sanding be a problem on these water based varnishes?
-
Thanks, Moab and Vayageur. Good advice. My perfectionism can get in my way at times! I'm going to give it a rest as you suggested. BTW, I see that you live in Indianapolis. I grew up in in the small town of Elwood about 45 miles northeast of Indianapolis and my sister lives near Fishers. I have basketball in my veins and still follow Indiana and Butler.
-
Yes, it's here and there in all the colors but the white is the most difficult to see it. Did you use them on any clear coats? Were you able to get rid of this "orange peel" effect that I'm seeing in the clear coat? Thanks, Per. This is the first thing I've ever painted with my new airbrush. I'm pretty sure I must have had the pressure too high. I was going to lower it more but the nozzle clogged almost immediately and I had to empty the paint cup and clean the airbrush. At that point, I decided not to lower the pressure for fear that I might get another clog. I'm at that stage of "live and learn" when it come to airbrushing. My perfectionism can be a pain in the butt at times!
-
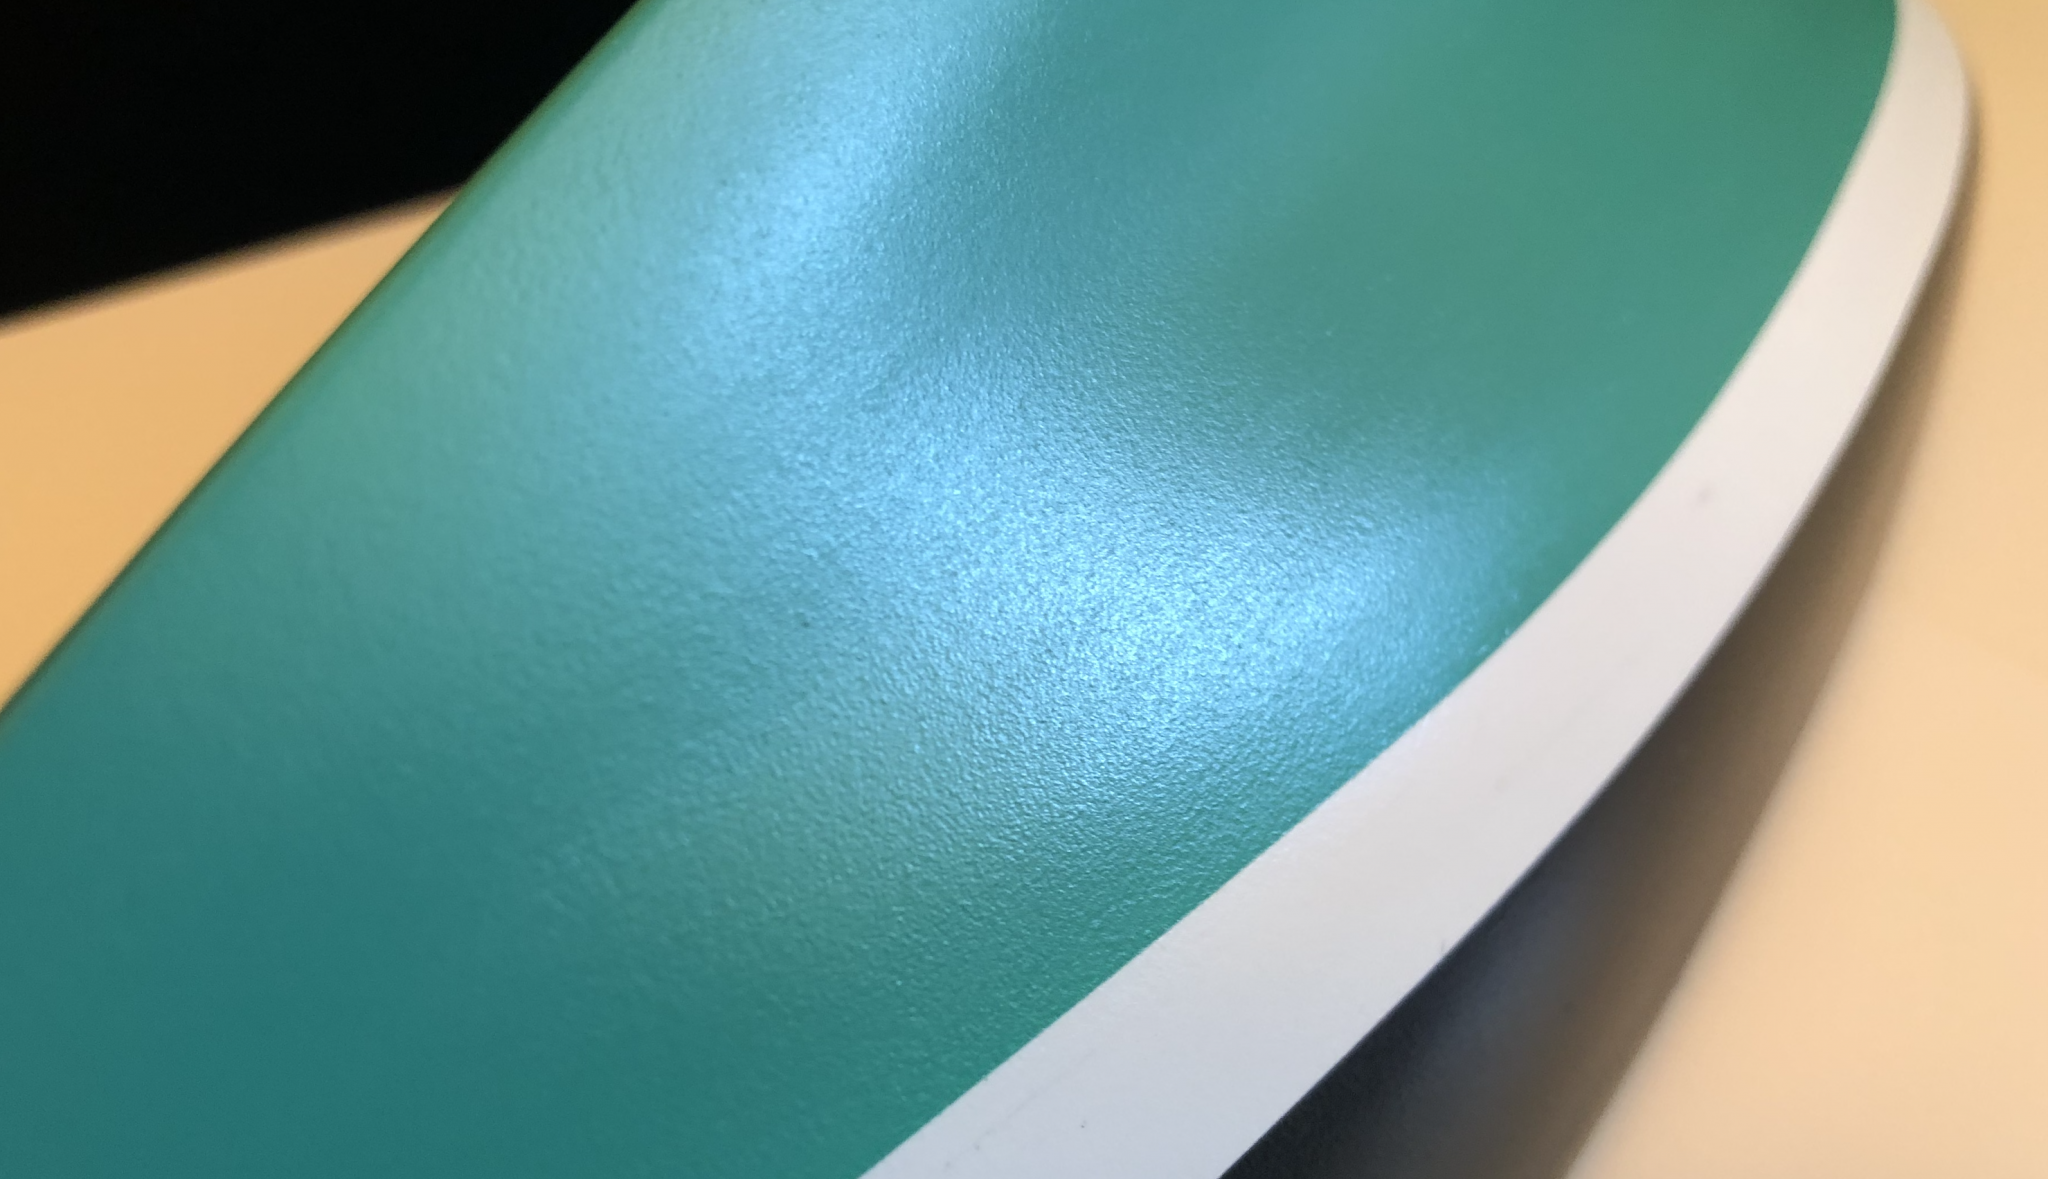
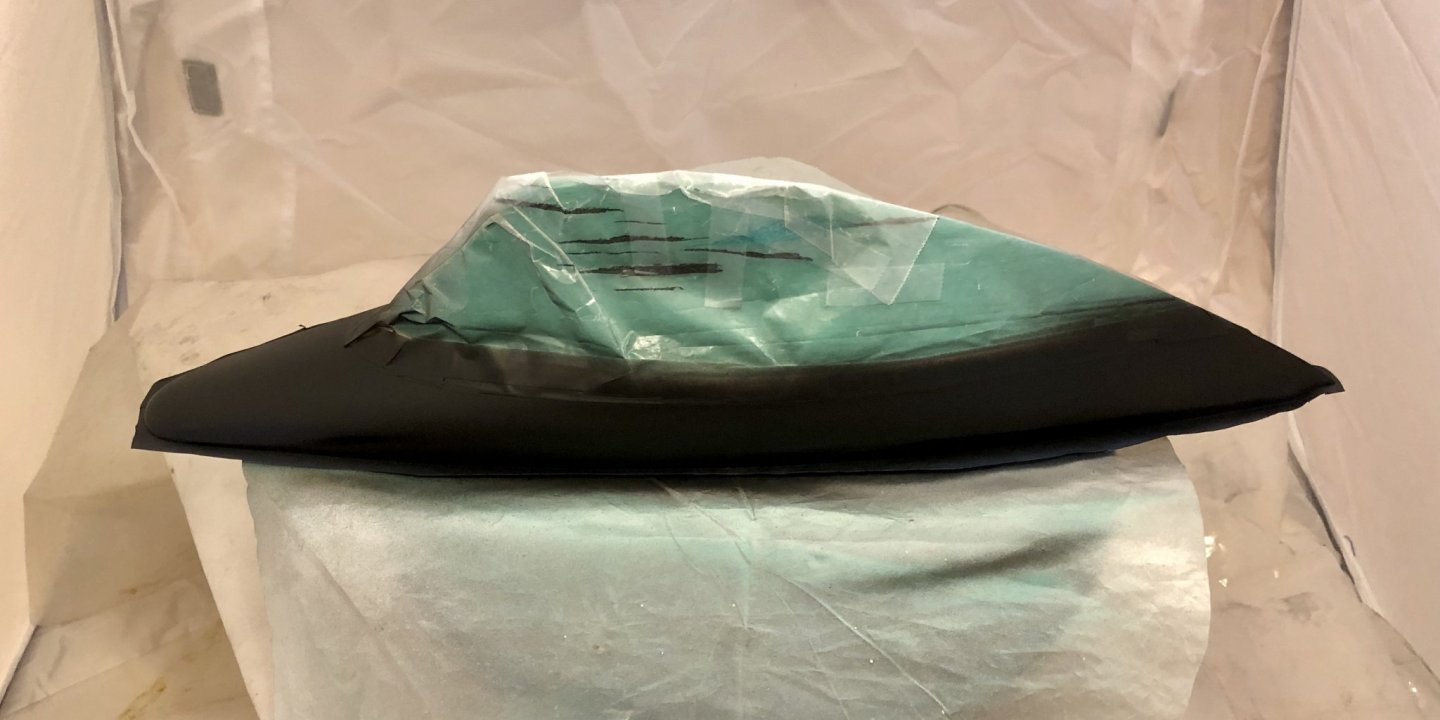
I've been worried about applying a clear coat to the hull but I finally pulled up some courage and did it this morning. I have 3 Vallejo Varnishes: matte, satin and gloss. I wanted to try and get a semi-gloss finish so I airbrushed some satin and some gloss on a piece of clean, clay pottery that had a similar matte finish on it as the paint I used to paint the hull. I thought the satin sheen was too low and the gloss was too high so I mixed them the two together in a 50/50 mixture and that looked good to me. I mixed the the satin and gloss varnishes in the cup of my airbrush along with 1 drop of Vallejo thiner to every 3 drops of varnish. I used a .5 mm fan spray nozzle and lowered the air pressure a bit per the advice I got from Joe Volz previously. It turned out ok but I think it could be better. The sheen is good: somewhere between satin and glossy...just what I was hoping for but, when I look closely at it, it looks a bit rough and I can feel some roughness in the texture. I think I had the air pressure a little too high. Overall, it's pretty good and I think a lot of people would be happy with it but I'm now wondering if I should try and get it smoother. It seems like there might be a couple of options. I ordered some Micro Mesh Polishing Pads that come with 9 flexible sanding pads that range from 1500 to 12000 grit and people seem to love them for polishing out hard surfaces from satin to high gloss. I thought this might be something to try. The second option would be to lightly sand the hull and spray it again and the third option would be to leave it alone since it looks pretty good as is. I suppose I could end up making it worse so it might be in my best interest to leave well enough alone! It's been several hours now since I sprayed it and it still has a very slight tackiness feel to it so I'm going to let it sit until I can't feel any tackiness at all before I try anything. I feel like I've got a lot to think about... I hope you can see the semi-gloss sheen in the photos below. The last photo is an extreme close-up that clearly shows the roughness in the texture. It looks awful in that photo but you really don't notice it unless you hold the hull up close and examine it. So what to do now? Is there a proper fix or should I just leave it alone...?


-
I've been worried about applying a clear coat to the hull but I finally pulled up some courage and did it this morning. I have 3 Vallejo Varnishes: matte, satin and gloss. I wanted to try and get a semi-gloss finish so I airbrushed some satin and some gloss on a piece of clean, clay pottery that had a similar matte finish on it as the paint I used to paint the hull. I thought the satin sheen was too low and the gloss was too high so I mixed them the two together in a 50/50 mixture and that looked good to me. I mixed the the satin and gloss varnishes in the cup of my airbrush along with 1 drop of Vallejo thiner to every 3 drops of varnish. I used a .5 mm fan spray nozzle and lowered the air pressure a bit per the advice I got from Joe Volz in this topic: https://modelshipworld.com/topic/24604-using-an-airbrush-for-semi-gloss-or-gloss-finish/#comments It turned out ok but I think it could be better. The sheen is good: somewhere between satin and glossy...just what I was hoping for but, when I look closely at it, it looks a bit rough and I can feel some roughness in the texture. I think I had the air pressure a little too high. Overall, it's pretty good and I think a lot of people would be happy with it but I'm now wondering if I should try and get it smoother. It seems like there might be a couple of options. I ordered some Micro Mesh Polishing Pads that come with 9 flexible sanding pads that range from 1500 to 12000 grit and people seem to love them for polishing out hard surfaces from satin to high gloss. I thought this might be something to try. The second option would be to lightly sand the hull and spray it again and the third option would be to leave it alone since it looks pretty good as is. I suppose I could end up making it worse so it might be in my best interest to leave well enough alone! It's been several hours now since I sprayed it and it still has a very slight tackiness feel to it so I'm going to let it sit until I can't feel any tackiness at all before I try anything. I feel like I've got a lot to think about... I hope you can see the semi-gloss sheen in the photos below. The last photo is an extreme close-up that clearly shows the roughness in the texture. It looks awful in that photo but you really don't notice it unless you hold the hull up close and examine it. So what to do now....??


-
I just caught up on your build log, Dave, and this hydroplane is a beauty. It's a great tribute to your father as well. It looks really big. What are the dimensions? I'll put in a vote for making it RC. I'd bet your father would have loved to see it skipping across the water at a blistering speed with a tall rooster tail following in the wake! Good luck on the rest of your build.
- 51 replies
-
- 6
-

-
- miss unlimited
- dumas
- (and 1 more)
-
Hi Dave, I just found your build log and really enjoyed reading it. I'm currently building the Pen Duick by Artesania Latina and I just completed painting the hull. It turned out very well and now I need to put a clear coat on it. I'm really nervous about applying the clear coat and am also unsure about how high the gloss should be on these racing sailboats. I was wondering what you used for your clear coat and how you applied it? I really love these wonderful J Class sailboats. Congratulations on a beautiful model!
-
Which is a testament to the high quality of your craftsmanship and build log!
- 195 replies
-
- 1
-
-
- lady eleanor
- vanguard models
- (and 1 more)
-
Great work as usual, BE. Did you solder the aluminum chimneys? The nets are awesome! How did you make them? I have the Lady Isabella and would like to find out more about these Zulu fishing vessels. Do you have any good resources that you could recommend? All the best,
-
I hope you will make a build log for your Amati Fifie build. I would enjoy following a build of that boat.
-
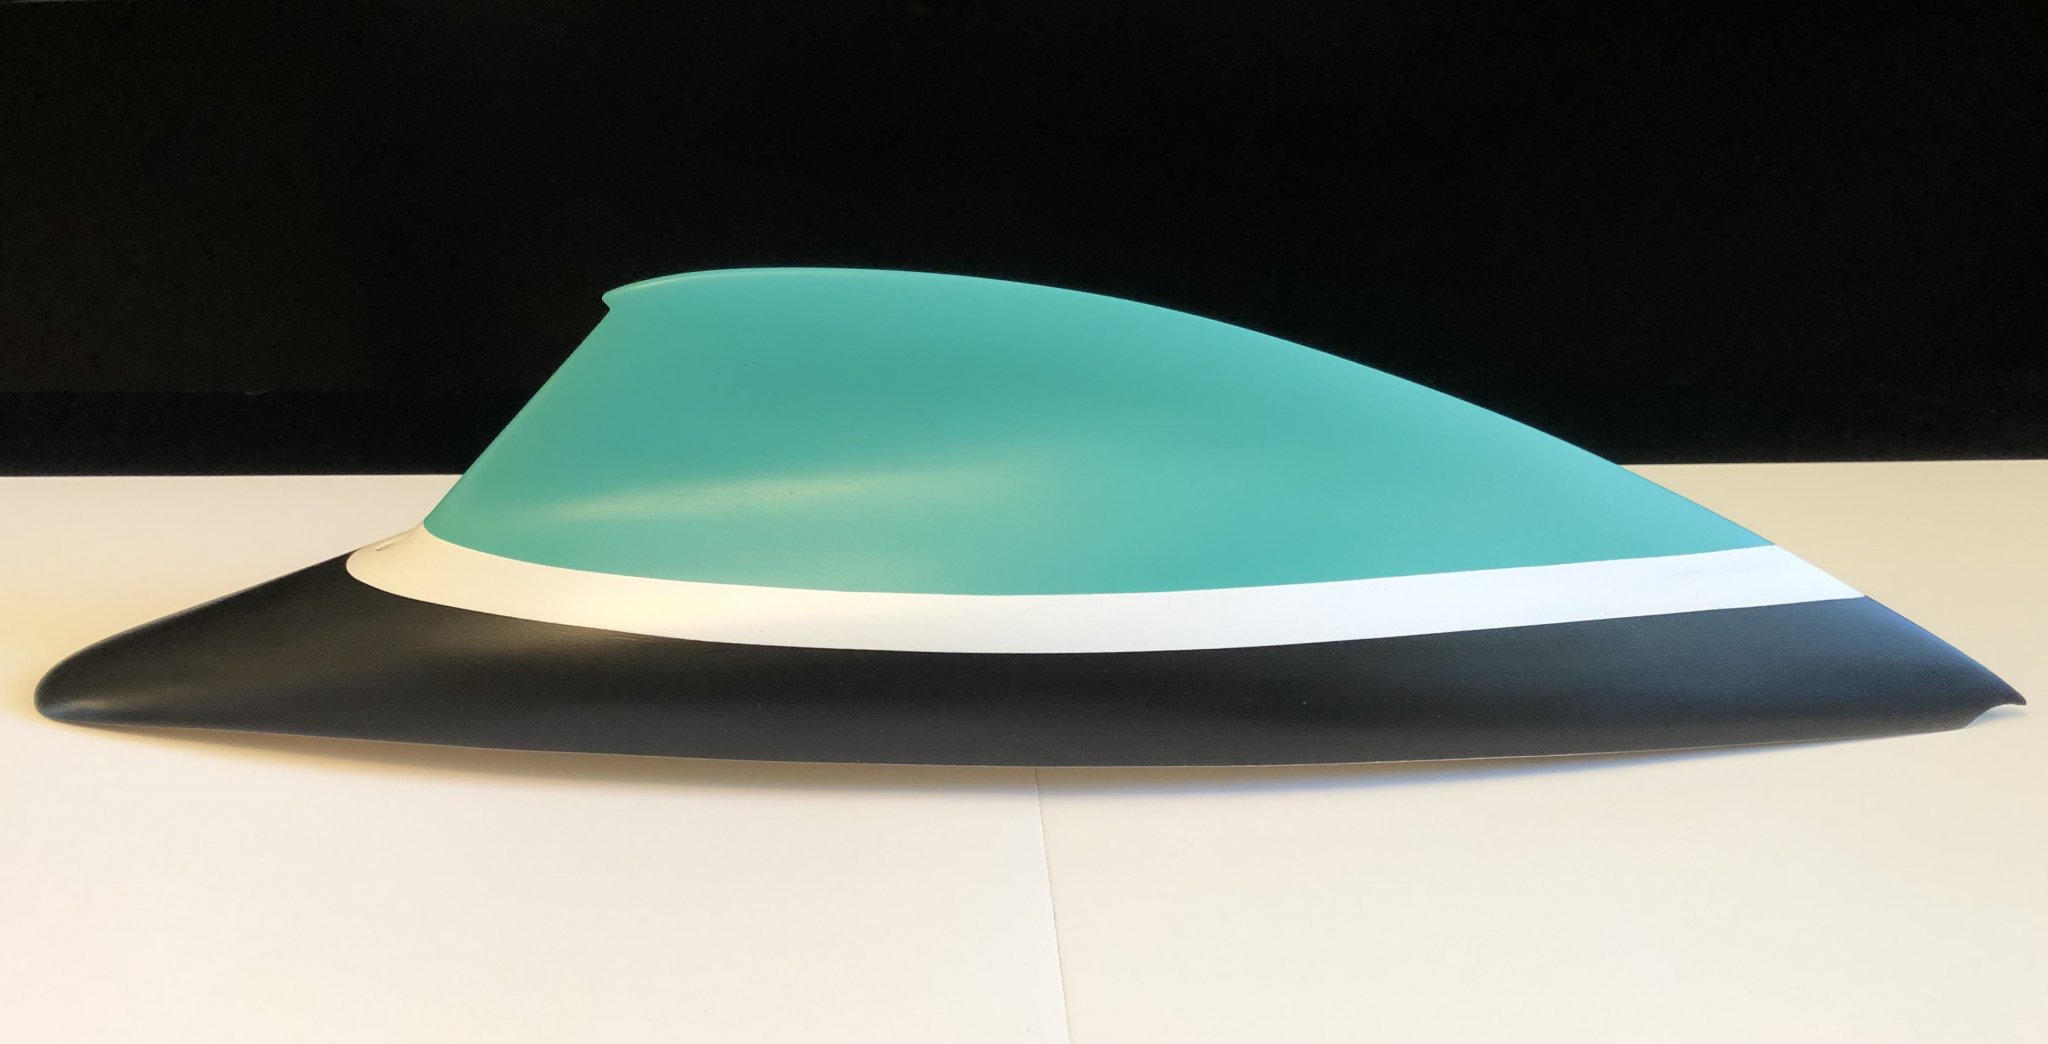
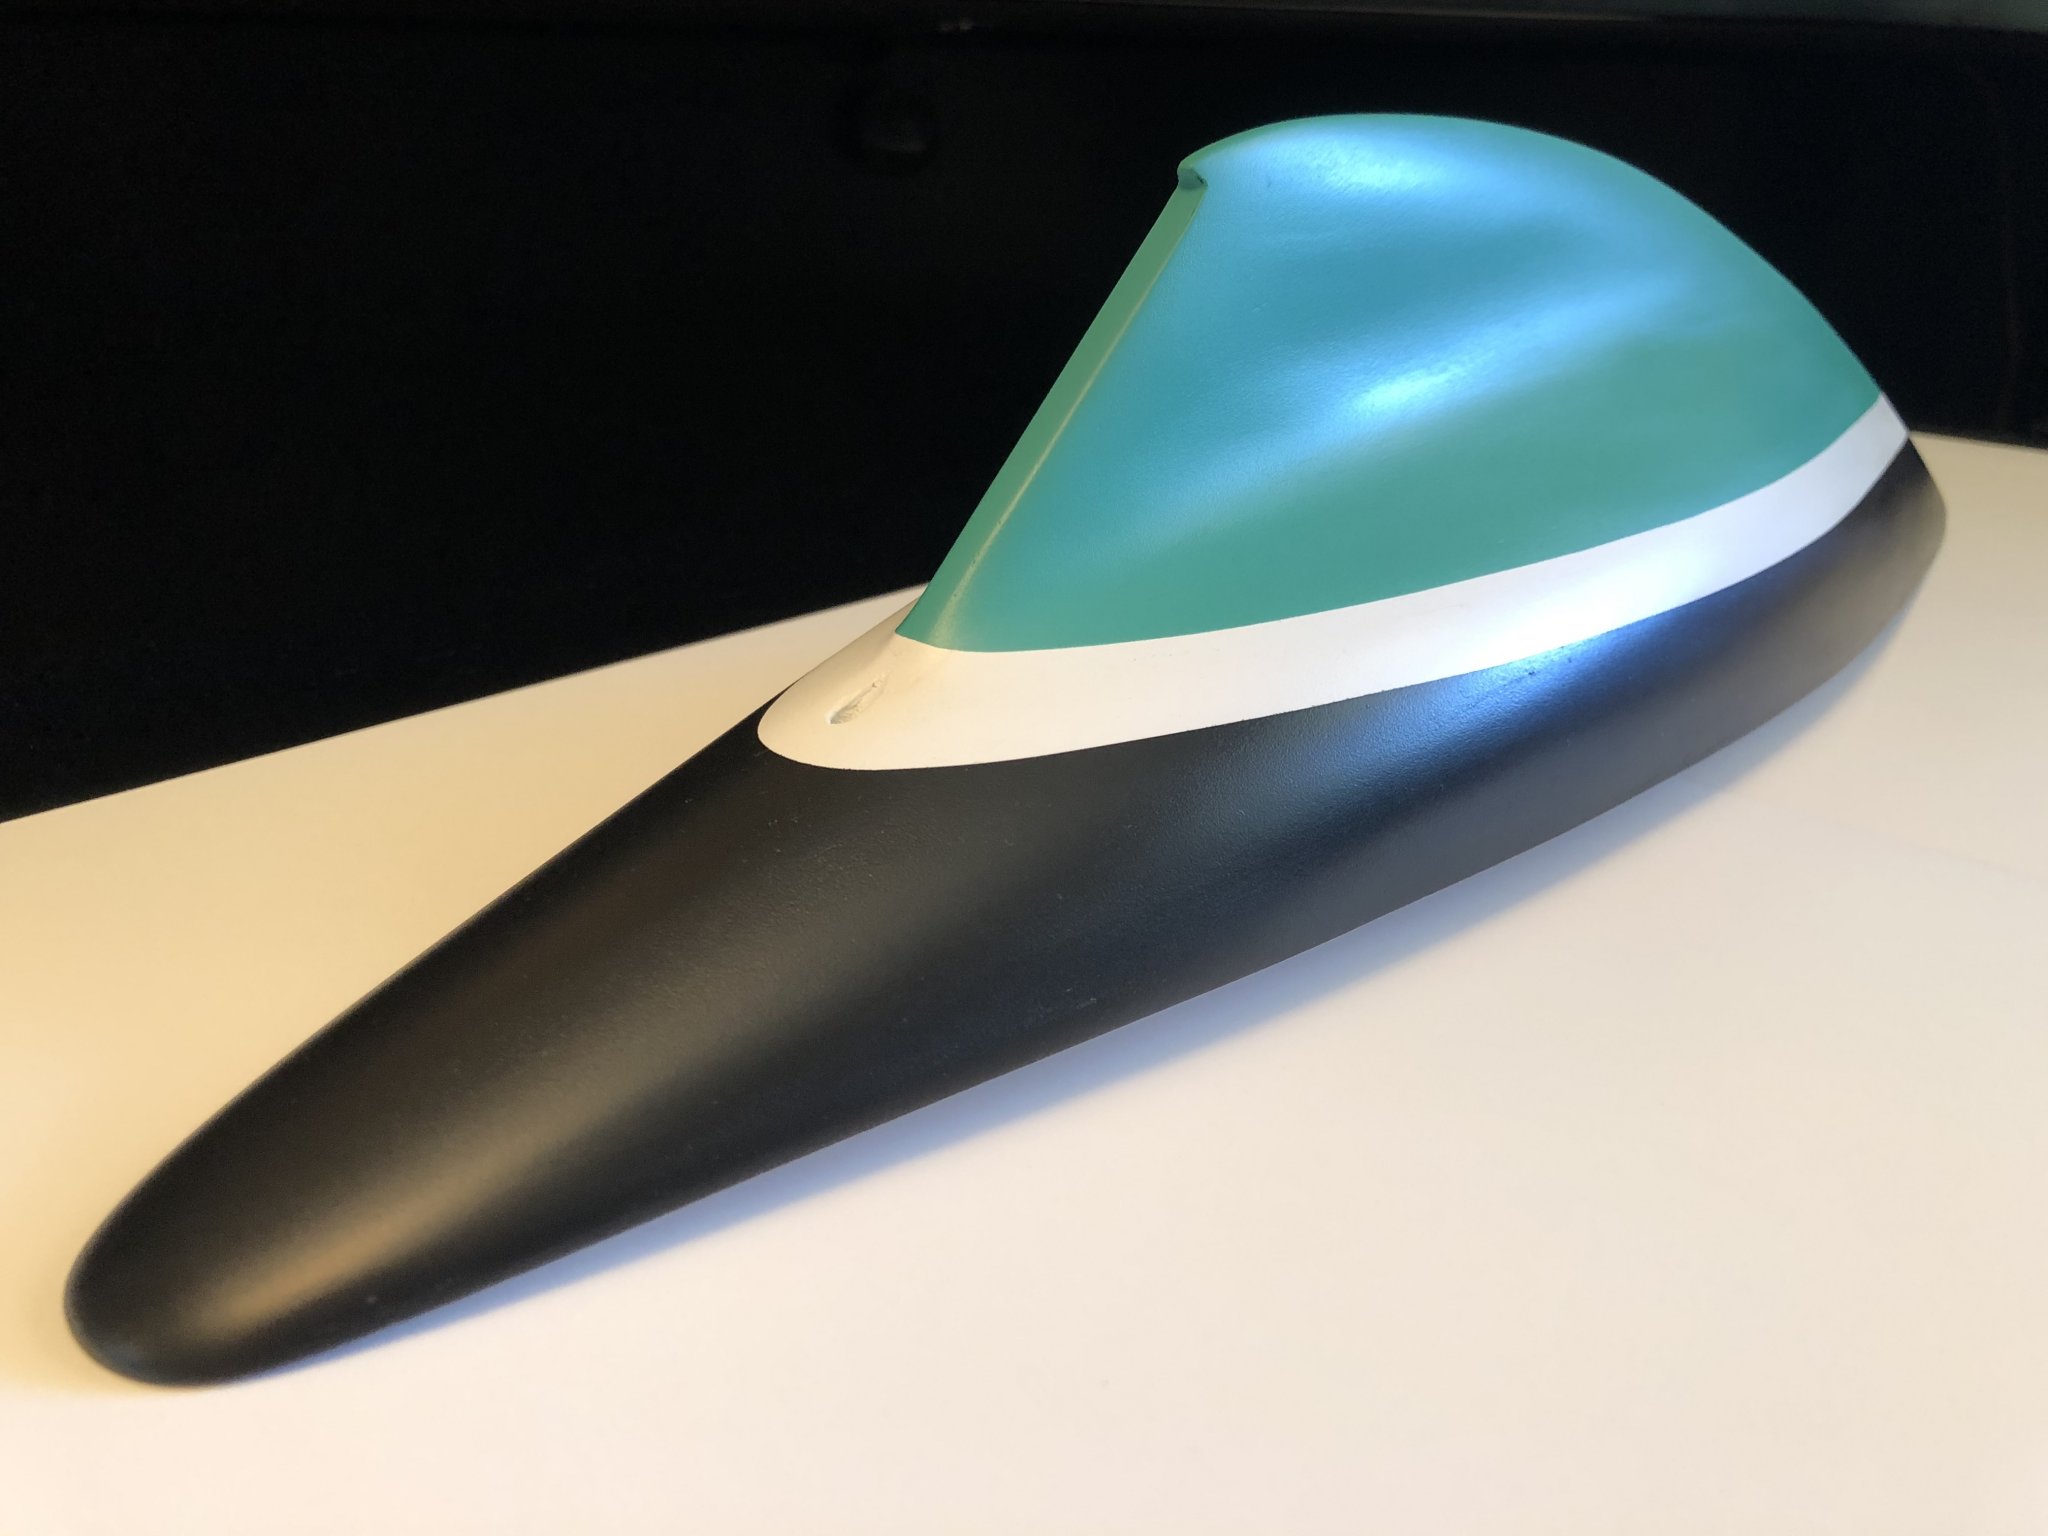
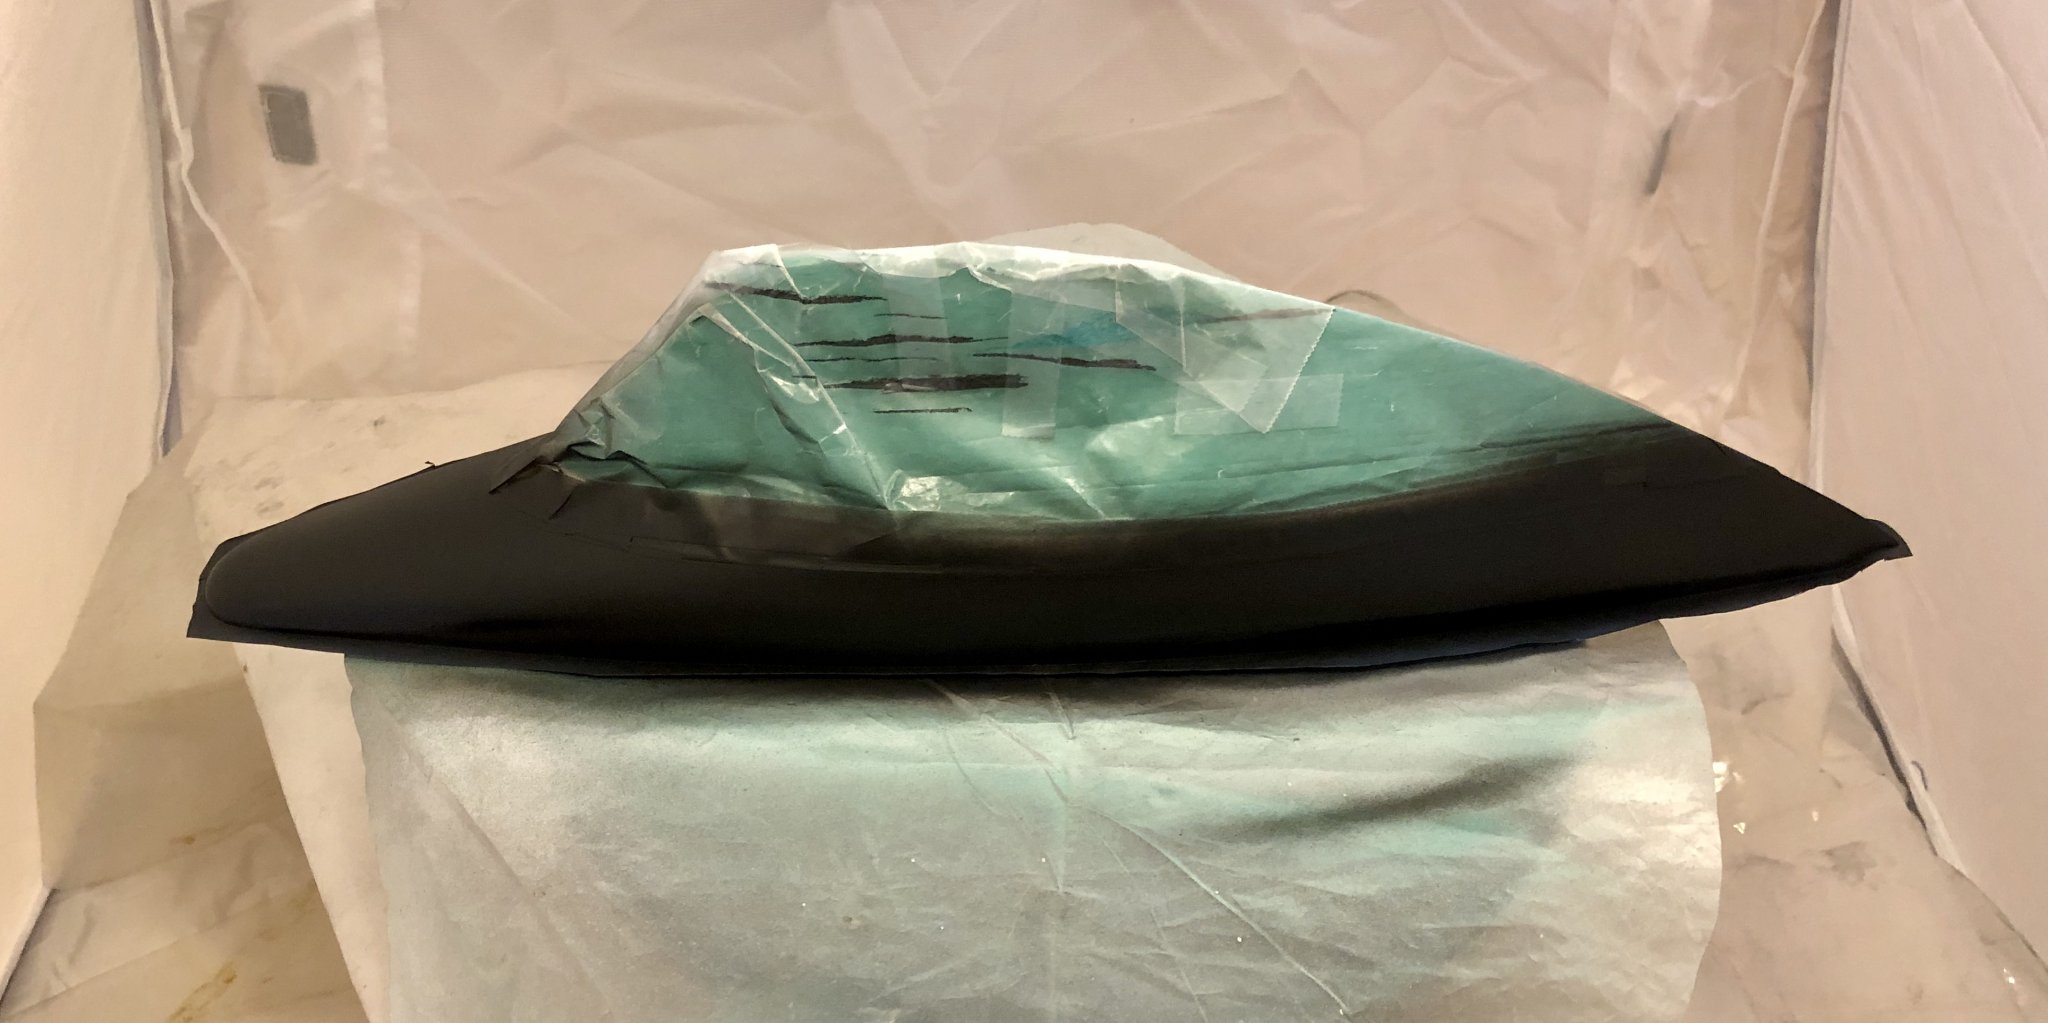
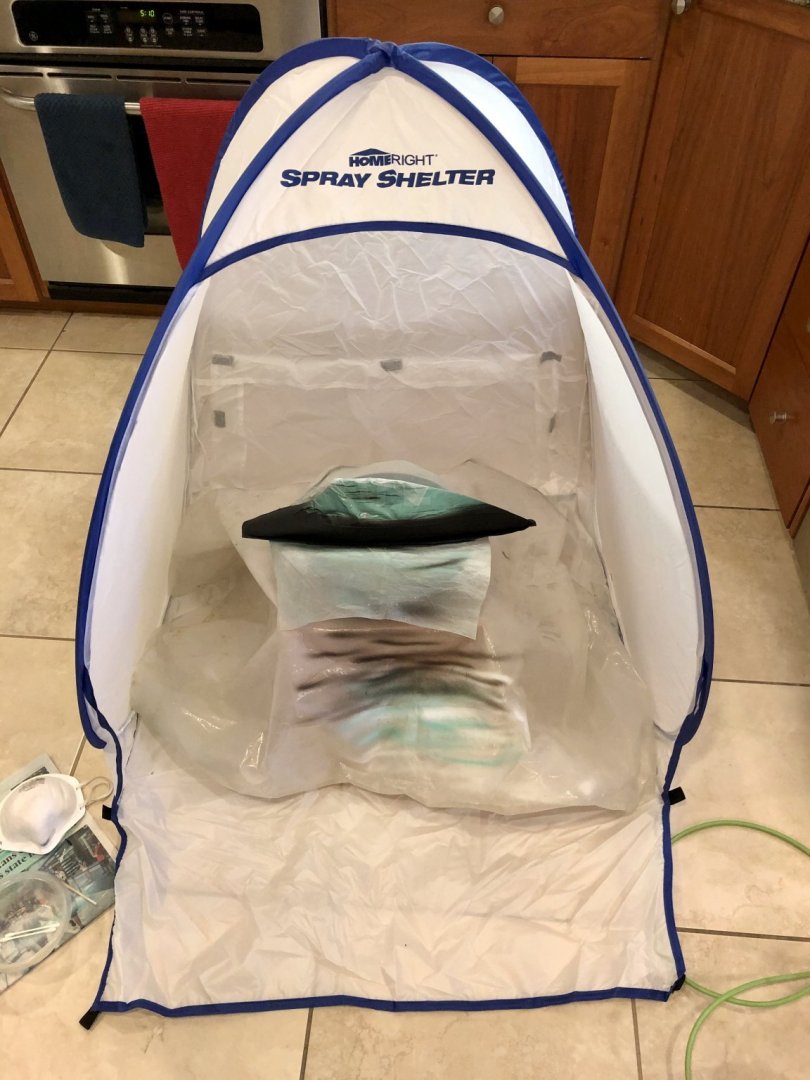
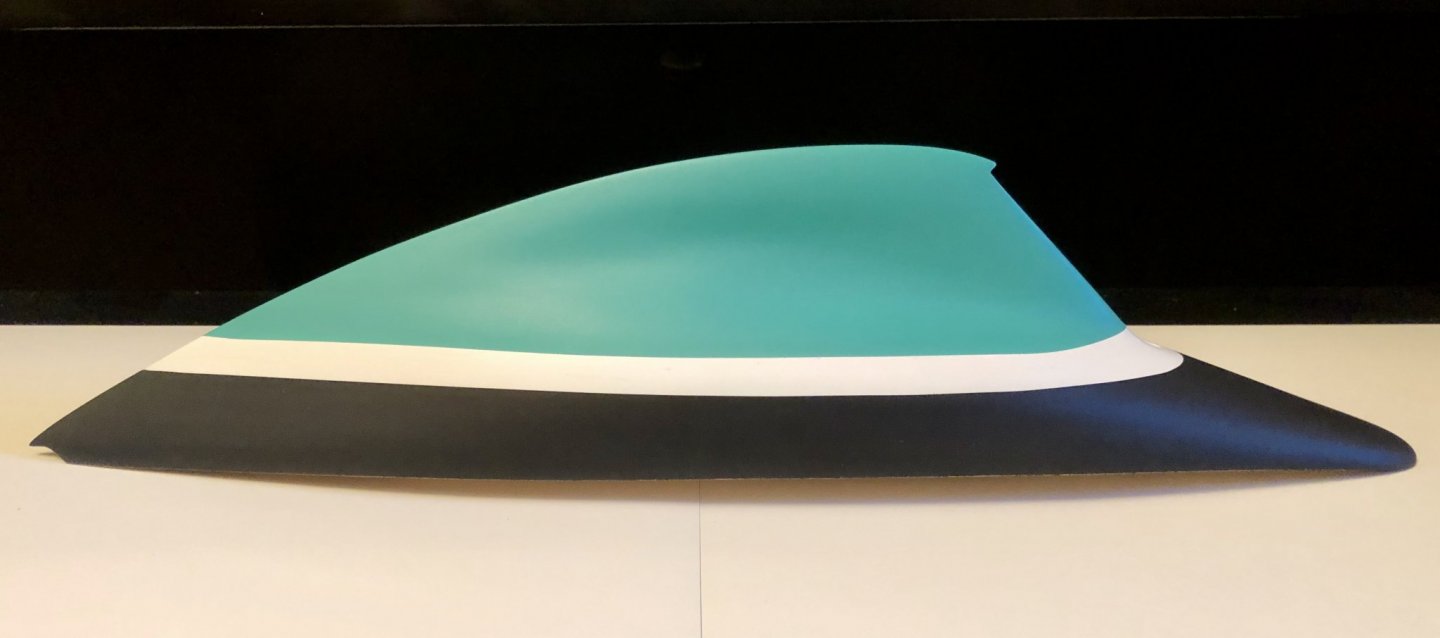
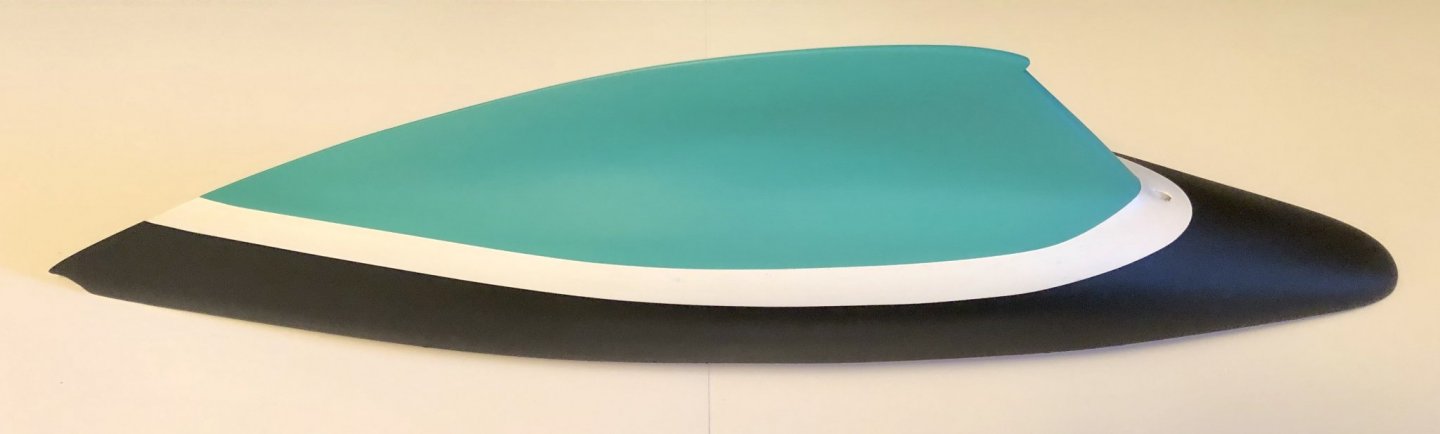
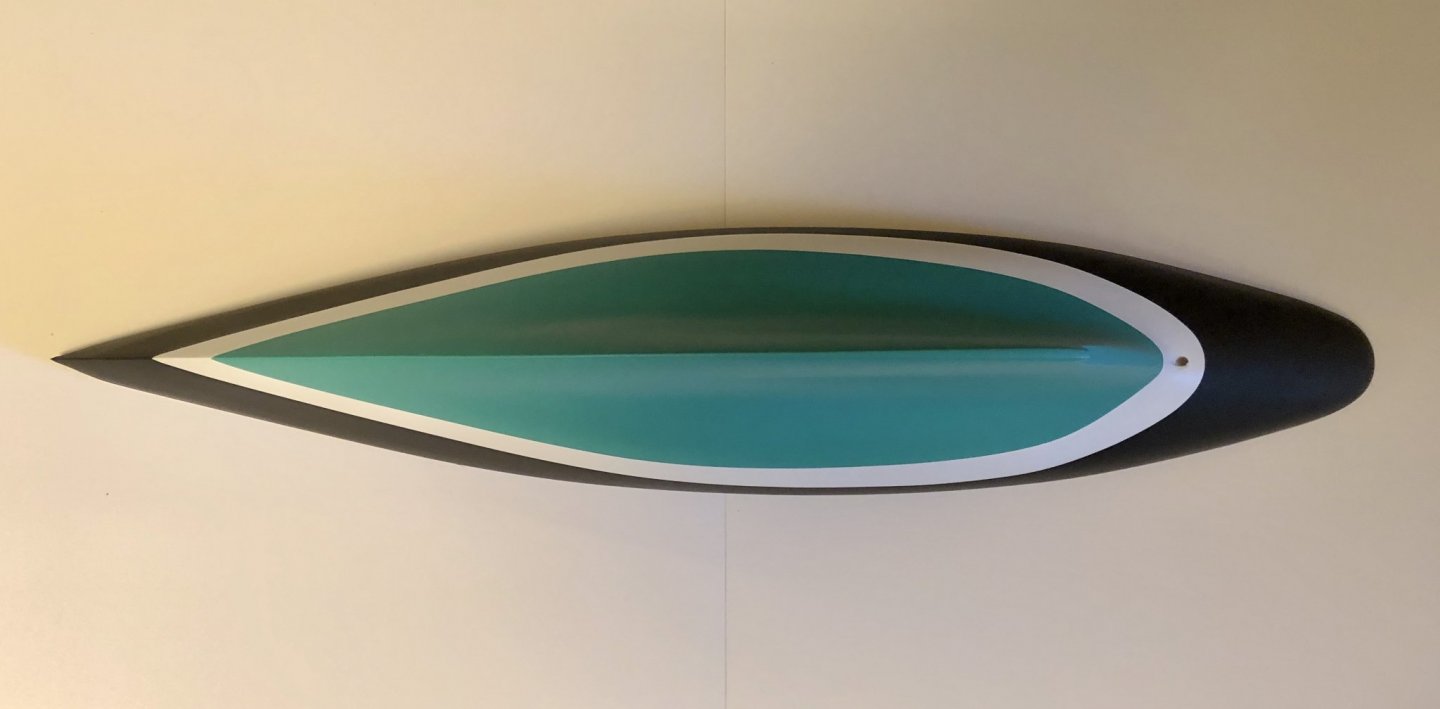
I finally got the hull painted and I'm really pleased with it but it did not come without it's difficulties. I would have never thought it would take me so long to mask of the waterline white stripe which is quite large on the Pen Duick. I started off by using an Amati waterline marker but, because of the shape and contours of the hull that goes from vertical on the sides to horizontal at the stern, it wasn't getting it done for me. The wide, white waterline stripe on the Pen Duick is not a complete straight line since it goes from the bow and then curves sharply around the rudder post hole. The first problem was that even the lightest pressure on the pencil would leave a noticeable scratch in the primer and, when I would only lightly touch the hull, the pencil would not leave a mark. It was also difficult for me to be able to see what I was doing where the waterline turned horizontal under the stern. So I went to plan B. I found that I was better off measuring down from the gunwales and placing a few very small pencil marks on the hull. Then I connected the dots while essentially just eyeballing it while holding the boat in my lap as I laid down the masking tape. I used 3 mm Tamiya Masking Tape for Curves since there is a very tight curve around the rudder post hole. I was able to see the where I was masking on both side of the hull this way and it was easier for me to get one side symmetrical to the other. Once I thought it looked good, I would turn the boat right side up and eyeball it again to see if the line looked straight from the bow to where it curves sharply around the rudder post hole. If it didn't look symmetrical I would pull the tape and redo it. I just kept eyeballing it and adjusting until it looked good and it took me several hours to get it right. I'm sure there must be better methods but, in the end, it worked for me even though it was a very slow process. I airbrushed the general area of the white stripe first and then taped off the lower line of the white stripe, masked off the rest of the hull and sprayed the Emerald Green. I was able to use my airbrush outside in the garage in the morning but, by afternoon, it was too hot so I set up my Homeright Spray Shelter in the kitchen and continued to spray the black above the white stripe. The light was not the best for me for spraying the black inside the shelter and it was hard for me to accurately gauge the coverage I was getting. When I finished I noticed that I had a 2 inch sagging line where I over sprayed an area. I let it dry and was able to sand it smooth very carefully with 400 grit and then I polished it ever so lightly with 2000. After that I went back and sprayed that area again and it turned out great. There's no sign of any run at all and the black coverage is completely even. I am super pleased with my paint job on the hull. I am a firm believer in airbrushing now and, even though I am a compete novice in using an airbrush, the hull turned out fantastic. Thanks to everyone to contributed to this topic. Your advice certainly helped me be successful and I learned a lot. I will now need to clear coat the hull. I'll need to experiment quite a bit with my airbrush and figure what I feel comfortable using to get a satin to semi-gloss sheen on the hull. This step has me worried that I could easily mess up this nice paint job by goofing up the clear coat. I'll have my fingers crossed.... Cheers!

-
Please do that in your build log, James. It would be outstanding to follow you as you added these wonderful details and lighting to the model.
-
Thanks to everyone for the likes and for stopping by to read my build log. I corrected a couple of the sentences is my previous two posts where I typed some words out of order and the sentences didn't make a lot of sense. Sometimes my mind gets ahead of my fingers and I end up typing words out of order especially late at night! Thanks for the heads up, vaddoc, I'll do some experimenting and will try a couple of options for clear coating. Let me know how your trials with Liquitex turn out, Grant. Any advice and recommendations are greatly appreciated since I'm anxious about spraying the clear coat. I've never clear coated anything in my life and I really don't want to mess up this hull! If you don't have an airbrush yet, Justin, I'd highly recommend getting one. I'm a complete beginner and the ability of my airbrush to spray what looks to me to be a near perfect paint job amazed me. I've got a lot to learn but, even as a rank airbrush novice, you can get some impressive results from the start.
-
Thanks, vaddoc! There is an extremely slight edge between the black and the white. You can not really see it but I can feel it with my finger. It's interesting that there is no edge between the white and the green though. The black paint was thicker than the green and I think I should have thinned it a bit more. The light was not real good for me when I painted the black also and I sprayed more than I needed too since I was having a hard time seeing the coverage very well. I need better lighting when I'm using my airbrush so I can judge the coverage better. This is my first time painting a finish coat with an airbrush. I think the key to not getting any edges between colors might be to spray very light coats with well thinned paint and to have good lighting so I can see better when I've done enough. I'm really worried about spraying the varnish. I've been reading where people say that you have to be careful not to get bubbles and runs in the clear coat. I need to practice a lot before I spray it. I have some Vallejo varnishes that I'll practice with. There are a lot of choices and I've never done any clear coating on anything. Some modelers even swear by using Future Floor Polish! I hope the black edge doesn't get magnified by clear coating on the hull.
-
I finally got the hull painted and I'm really pleased with it but it did not come without it's difficulties. I would have never thought it would take me so long to mask of the waterline white stripe which is quite large on the Pen Duick. I started off by using an Amati waterline marker but, because of the shape and contours of the hull that goes from vertical on the sides to horizontal at the stern, it wasn't getting it done for me. The wide, white waterline stripe on the Pen Duick is not a complete straight line since it goes from the bow and then curves sharply around the rudder post hole. The first problem was that even the lightest pressure on the pencil would leave a noticeable scratch in the primer and, when I would only lightly touch the hull, the pencil would not leave a mark. It was also difficult for me to be able to see what I was doing where the waterline turned horizontal under the stern. So I went to plan B. I found that I was better off measuring down from the gunwales and placing a few very small pencil marks on the hull. Then I connected the dots while essentially just eyeballing it while holding the boat in my lap as I laid down the masking tape. I used 3 mm Tamiya Masking Tape for Curves since there is a very tight curve around the rudder post hole. I was able to see the where I was masking on both side of the hull this way and it was easier for me to get one side symmetrical to the other. Once I thought it looked good, I would turn the boat right side up and eyeball it again to see if the line looked straight from the bow to where it curves sharply around the rudder post hole. If it didn't look symmetrical I would pull the tape and redo it. I just kept eyeballing it and adjusting until it looked good and it took me several hours to get it right. I'm sure there must be better methods but, in the end, it worked for me even though it was a very slow process. I airbrushed the general area of the white stripe first and then taped off the lower line of the white stripe, masked off the rest of the hull and sprayed the Emerald Green. I was able to use my airbrush outside in the garage in the morning but, by afternoon, it was too hot so I set up my Homeright Spray Shelter in the kitchen and continued to spray the black above the white stripe. The light was not the best for me for spraying the black inside the shelter and it was hard for me to accurately gauge the coverage I was getting. When I finished I noticed that I had a 2 inch sagging line where I over sprayed an area. I let it dry and was able to sand it smooth very carefully with 400 grit and then I polished it ever so lightly with 2000. After that I went back and sprayed that area again and it turned out great. There's no sign of any run at all and the black coverage is completely even. I am super pleased with my paint job on the hull. I am a firm believer in airbrushing now and, even though I am a compete novice in using an airbrush, the hull turned out fantastic. I will now need to clear coat the hull. I'll need to experiment quite a bit with my airbrush and figure what I feel comfortable using to get a satin to semi-gloss sheen on the hull. This step has me worried that I could easily mess up this nice paint job by goofing up the clear coat. I'll have my fingers crossed.... Cheers!


-
Byrnes machinery dust collection
BobG replied to Bill Hill's topic in Modeling tools and Workshop Equipment
I'm in the market for a new shop vac to replace the old Sears Craftsman vac I've had for years. I hope to get some Byrnes machines in the near future and I don't have any large woodworking machines. It seems like many of you are happy with the Fein vac. Is there a Fein model you would recommend? I see that they make several models but I'm not sure which model would be most appropriate for my current purposes. Is the hose on the Fein vac very flexible? I have always disliked the stiff hose on my Craftsman because it makes it hard to maneuver and manage. Are there any accessories to the Fein that would would recommend also? Thanks very much. -
Your research has added greatly to the fine details you are adding to this boat, BE.
- 195 replies
-
- 2
-
-
- lady eleanor
- vanguard models
- (and 1 more)
-
Thanks, Ryland. I'm doing much better at not pressing ahead until I'm happy each step I working on.
-
Thanks, Carl. I'm happy with the way the hull turned out and I appreciate the advice and encouragement.
-
Thanks, Grant. I didn't even know anything like that existed. I'll definitely check out those videos. I just looked at Paul Budzik's website and it's great. His Tools and Techniques page has links to his videos. https://paulbudzik.com/index.html
-
I haven't used the Gloss Primer yet only the standard Gray Primer but I will need to use it when I spray some of the Vallejo Metal Paints. I haven't had any problems with clogging yet with the Gray Primer. I added 1 drop of Flow Improver per 10 drops of primer and shot it using a Grex .5 mm fan nozzle. I wanted a wider spray pattern for the hull of the Pen Duick. It still took me a lot of passes to get a nice, even coat on it though. I finding out that there's a bit of a learning curve using an airbrush and I'm smack dab in the middle of it.
-
Are you also using the Vallejo Gloss Black Primer under the metal paints? I was watching a video on youtube made by Vallejo and the guy was using that primer under all of the metal colors.