HOLIDAY DONATION DRIVE - SUPPORT MSW - DO YOUR PART TO KEEP THIS GREAT FORUM GOING! (Only 44 donations so far out of 49,000 members - C'mon guys!)
×


BobG
-
Posts
3,109 -
Joined
-
Last visited
Content Type
Profiles
Forums
Gallery
Events
Everything posted by BobG
-
Thanks Cabbie. I'm my own worst critic so the compliments are much appreciated. I was working under my magnifier when cutting the joggles and for tapering the planks. I was trying to keep the planking symmetrical primarily by measuring. I was surprised when, after so much careful measurement, I would sometimes still end up with an error. I found that not only did I need to measure accurately but I also needed to simply eyeball the joggles before cutting them. As it turned out, eyeballing before cutting alerted me to an error that I wasn't seeing under the magnifier. Getting away from the magnifier and eyeballing things before cutting was important. I use CA a lot even though many modelers swear against it. I find, that if I work the piece so that it will fit almost perfectly in a dry test, I can then carefully use CA to quickly glue the piece in place. Like you, I use a quick drying PVA (Titebond Thick & Quick) when I feel like I may need a little more time for adjustment before the glue sets.
-
I finished the deck planking today and I'm satisfied with it. I used CA exclusively and that worked well for me. The brittleness of the mahogany king plank made cutting the joggles tenuous and, along with my efforts to keep one side symmetrical to the other, it was slow going but worth it. I'm happy with the deck pattern that I decided on too. My wife is an excellent pastel artist and she has a keen eye for patterns and shape. I discussed a couple of variations of deck patterns with her that I could do and she thought that keeping the pattern simple and clean would look the best. I agreed and decided to only joggle the first section of the king plank near the bow and the last section near the stern. It is simply an artistic choice and I'm happy with it. There were some inevitable flaws that occurred especially with tear out on the edges of the joggles when I was cutting them with a scalpel. It was hard to avoid no matter how carefully I was trying to be. I was able to make some adequate repairs by gluing slivers of mahogany into the gaps that occurred and patching some of the ramin deck planks with a slurry of ramin sawdust mixed with yellow glue. Finally I sanded the deck up to 220 and, once I had a very nice, smooth surface, I applied a coat of Satin Wipe-on-Poly. Overall, I'm pleased with the deck and now I will get ready to dive into planking the hull. I'm apprehensive about the hull planking since I'm not very experienced at doing it. However, it won't have to be perfect since the hull will be painted. In the close up photos below you can see how I made some repairs and they really stand out and look awful in the photos but, to the naked eye at a normal viewing distance, you don't really notice those them all that much unless you are using magnifying glass! Maybe I should stop posting the extreme close-ups!! Thanks to everyone for the likes and thanks also for stopping by. Cheers!

-
new modeler from Barcelona and some Albatros photos
BobG replied to Geowolf's topic in New member Introductions
Thank you, Geowolf. we would love to do that. We rented an apartment near the Sagrada Familia while we were in Barcelona and visited many of Barcelona's museums during our stay but, unfortunately, we didn't manage to visit the maritime museum. We will definitely do that on our next visit. Spain is such a magnificent country. We spent 10 days in Madrid and then visited Segovia and Toledo. Then we rented a car and drove to Albarracín, Cuenca and then up into the Pyrenees where we stayed for 9 days hiking many wonderful trails. From there we drove to Cadaqués and Barcelona. From Barcelona we took the train to Sevilla for 9 days and then to Granada for a week after which we rented a car and drove for 2 more weeks visiting many of the beautiful, small Pueblos Blancos de Andalucía. We ended our 10 week trip with 5 days in Córdoba. We hope to take another long, road trip in Spain again. This time we would like to drive through northern Spain and then down through Portugal and the back through souther Spain to Barcelona. We hope the world returns to normal soon so we can begin traveling again. Best regards, Bob -
I fully understand, Luekutus. I have a lot of other interests also including photography, guitar and cycling. I've been riding my bike a lot but modeling is getting most of the rest of my time lately so I've been neglecting my other hobbies. Nunnehi (Don) just completed a beautiful model of the Calypso. Have you seen it? I hope you will find time to continue building your model. She's a very special boat.
-
new modeler from Barcelona and some Albatros photos
BobG replied to Geowolf's topic in New member Introductions
Welcome to MSW, Geowolf. You did a really good job on the Albatross for your first wooden ship. You're off to a great start in this hobby. My wife and I spent 10 days in Barcelona a few years ago and loved the city. We traveled on our own for 10 weeks in Spain. It was an amazing trip. My wife had not been back to Spain since she spent her junior year in college studying in Madrid in 1968. We hope to return for long stay once the world returns to normal. I look forward to following your Terror build. -
Thanks Robert! It's not been easy but it's satisfying work. As usual, there are things about it that I wish I had done better but, generally speaking, I'm the only one that will notice those flaws the most!
-
Welcome to the MSW forum, goemon. You are doing beautiful work on this model. The clinker planking is fantastic!
- 23 replies
-
- 3
-

-
- vanguard models
- alert
- (and 1 more)
-
Fantastic boat and diorama! One of the best I've seen here on MSW. Congratulations Hellmuth!
-
Great color...she's a beauty, Mike!
-
Hi Mike, I wonder if you could move your build log over to the Ship Models from Kits forum. More forum members would see it there and it's a very interesting build.
-
I agree that the Bounty would be very difficult to do well as a beginner and it would take much more time than you would expect. Either of the two Vanguard models that Grant referred to in his post would be perfect choices for you to build. They have outstanding instructions and great materials so you would be able to successfully complete a beautiful model. Check out the Vanguard Lady Eleanor and the Lady Isabella build logs by James H here on MSW. They are beautiful models. Good luck!
- 14 replies
-
- 1
-
-
- hours
- build time
- (and 4 more)
-
Hello sticker, my wife always tells me that I'm the only one who will see the flaws that I see in my models too. Thanks for stopping by.
-
I already have about a 1 mm difference from one side to the other. That's a good idea about paired up the deck planks since they are uneven in places. I wish I had thought of that before but now I know. Thanks!
-
I continued with the deck planking today and was able to complete 5 planks on the opposite side of the deck. I've decided to continue joggling the planks the way I started doing it and am only going to cut the joggles in the king plank and not the hatches. I like the way that looks. I've been using a scalpel mostly instead of a #11 blade since it is cutting the hard, brittle, mahogany king plank more precisely. I have to do a bit of physical gymnastics in order to hand hold the boat in my lap so I can turn it and hold it at different angles while cutting the joggles. I'm working slowly so that the mahogany doesn't tear out along the cut line and to prevent slashing my fingers with the scalpel! The challenge today was trying to keep one side of the deck symmetrical with the other side. I measured and centered the king plank and the frames around the hatches before I started planking and everything was centered on the deck but I'm still getting some variation. I think that one of the reasons that I'm not getting perfect symmetry is that the ramin deck planks are not all uniformly 3 mm wide along their entire length. The ramin strips have not been milled precisely. Although the variances are quite small they add up as more planks are laid side by side and the differences between one side and the other gets magnified. It's not terribly noticeable but I'd rather not have it at all and I think it may become more noticeable as more planks are laid down. Oh well, I'll just do my best and see how it goes.

-
It's nice to see you back working on your longboat, Don, and it's looking great. I was really apprehensive about my first go at rigging but it turned out to be one of my favorite parts of the entire build. The finish line is in sight for you!
- 46 replies
-
- 2
-
-
- medway longboat
- Syren Ship Model Company
- (and 1 more)
-
Thanks so much, Justin. I'm kind of surprised the Pen Duick isn't built more often. It's such a historic sailboat and I think it is just gorgeous as well.
-
Thanks Don. I tried to make a template of the deck planking thinking that I could then transfer it to the false deck but it was much too complicated for me to try and draw precisely. I think someone could do it if they were skilled at CAD. So I just decided to start laying the planks down and cut the joggles where they planks overlaid the king plank. It's working out fairly well so far. Are you back working on your Medway Longboat now that you finished the Calypso?
-
Thanks VTHokiEE. I haven't tried a chisel. I'm having better luck making fine cuts with a scalpel rather than the #11 blade. It's still slow going since the mahogany king plank is glued down and it is also brittle and tough to cut through. The scalpel works slightly better for me. I'm hand holding and cradling the boat in my lap while I make the cuts so I have to be careful not to stab myself!
-
Thanks sticker. I've been doing some more deck planking today and I'm having fun doing it plus I like the way my joggles are looking as more of the deck is completed. Considering it, as you said, as "having my own personal touch" is a nice way of looking at it. I think most of us want our models to have a high degree of accuracy but, unless you are a master ship modeler who scratch builds everything down to the finest, historical accuracy, our models will not be 100% accurate and they can still be very fine models that we're proud of.
-
Thanks vaddoc. I agree, the Pen Duick is a gorgeous sailboat with very interesting sails. I'll have take a look at your Deben build. Thanks for stopping by.
-
Thanks for the encouragement, Emmonn. I think I will just continue with the joggles like I have been doing them. The kit doesn't call for them at all. I decided to do them after looking at a couple of models that have been posted here on MSW and from some photos I've seen on the internet. I think they look really good on the deck so I decided to try and do them. I was apprehensive about it because it requires some very precise work to get them to look good but I got really engrossed in doing them yesterday. I liked the way they looked as I was cutting them out, so much so, that I had a brain fart and completely forgot that joggles typically have the ends of the deck planks perpendicular to the center line of the boat. Oh well... I looked at it this morning and, you know what, I like them the way they are. So I'm going to keep them just as they are and I'm also only going to cut joggles in the king plank and not the edges of the hatches. I think it looks clean and sharp that way. It's certainly not historically correct but neither are other aspects of this kit. For example, the boat should also have a screw and there are quite a few more rows of deck planks on the real boat compared to the number that are provided in the kit. My build will certainly not be 100% historically accurate when it is finished but I think it can still be a very nice model when it's done and a pretty good representation of this beautiful yacht. Cheers!
-
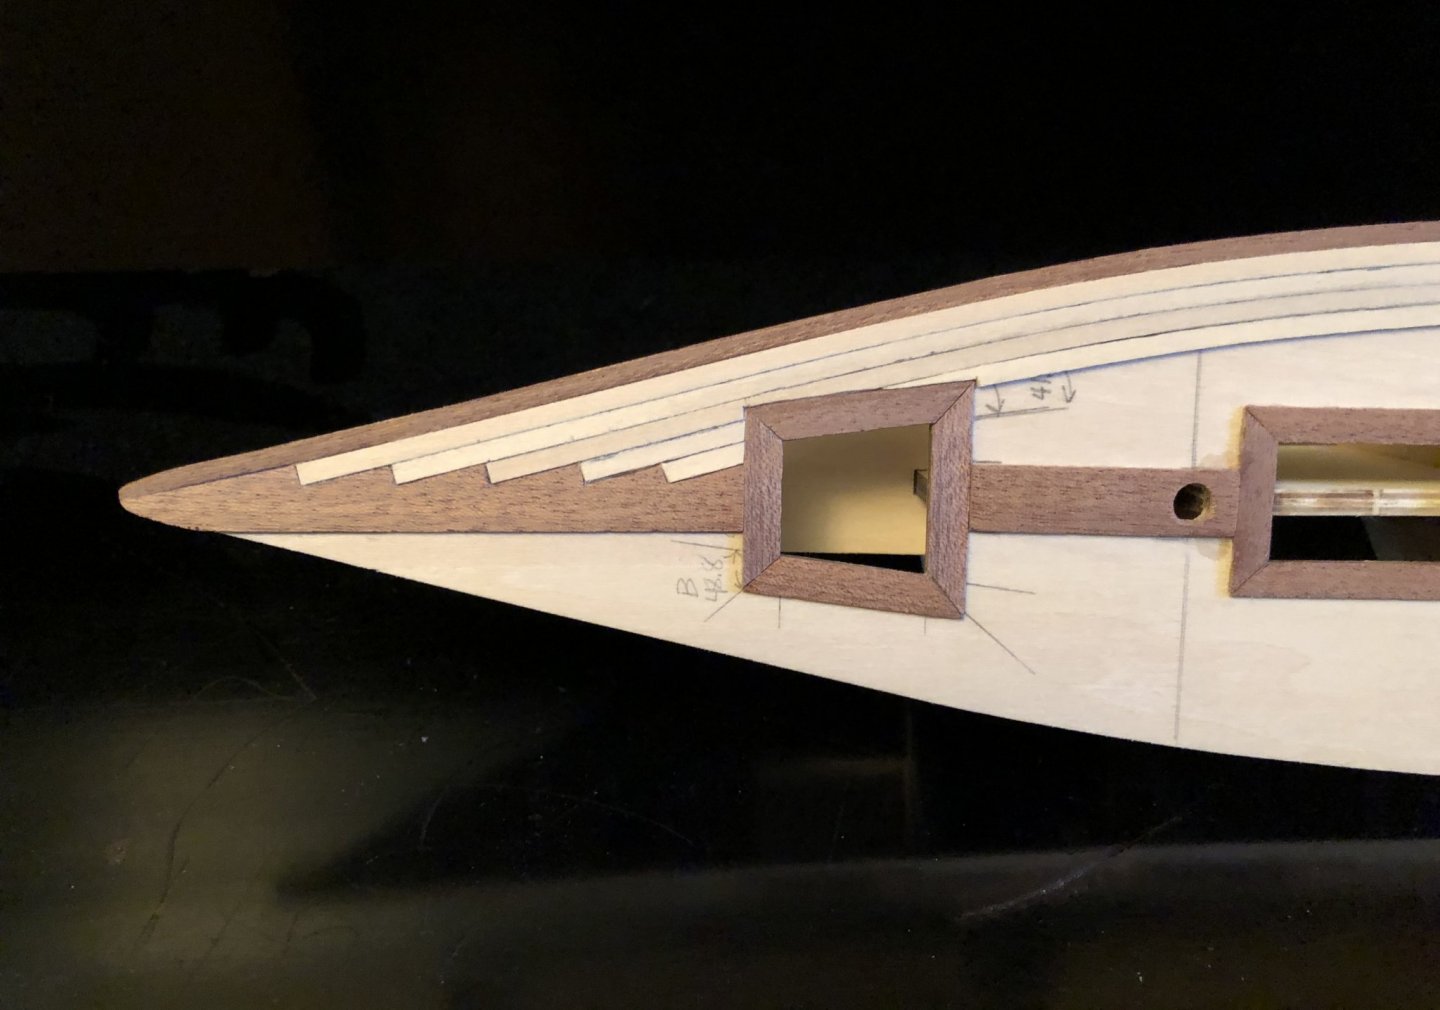
I just noticed that I made a big mistake in way that I cut the joggles in the king plank. The ends of the deck planks should be perpendicular to the edges of the king plank not at an angle as I have done them. I like how they look the way I cut them but it's not correct. Of course, the kit doesn't include any joggles at all so they are decorative addition by choice. So now I have to think about whether I should rip it all out and redo it or continue on the way I've been doing them. I actually think they look pretty good the way they are so maybe I'll just consider this my artistic choice...
-
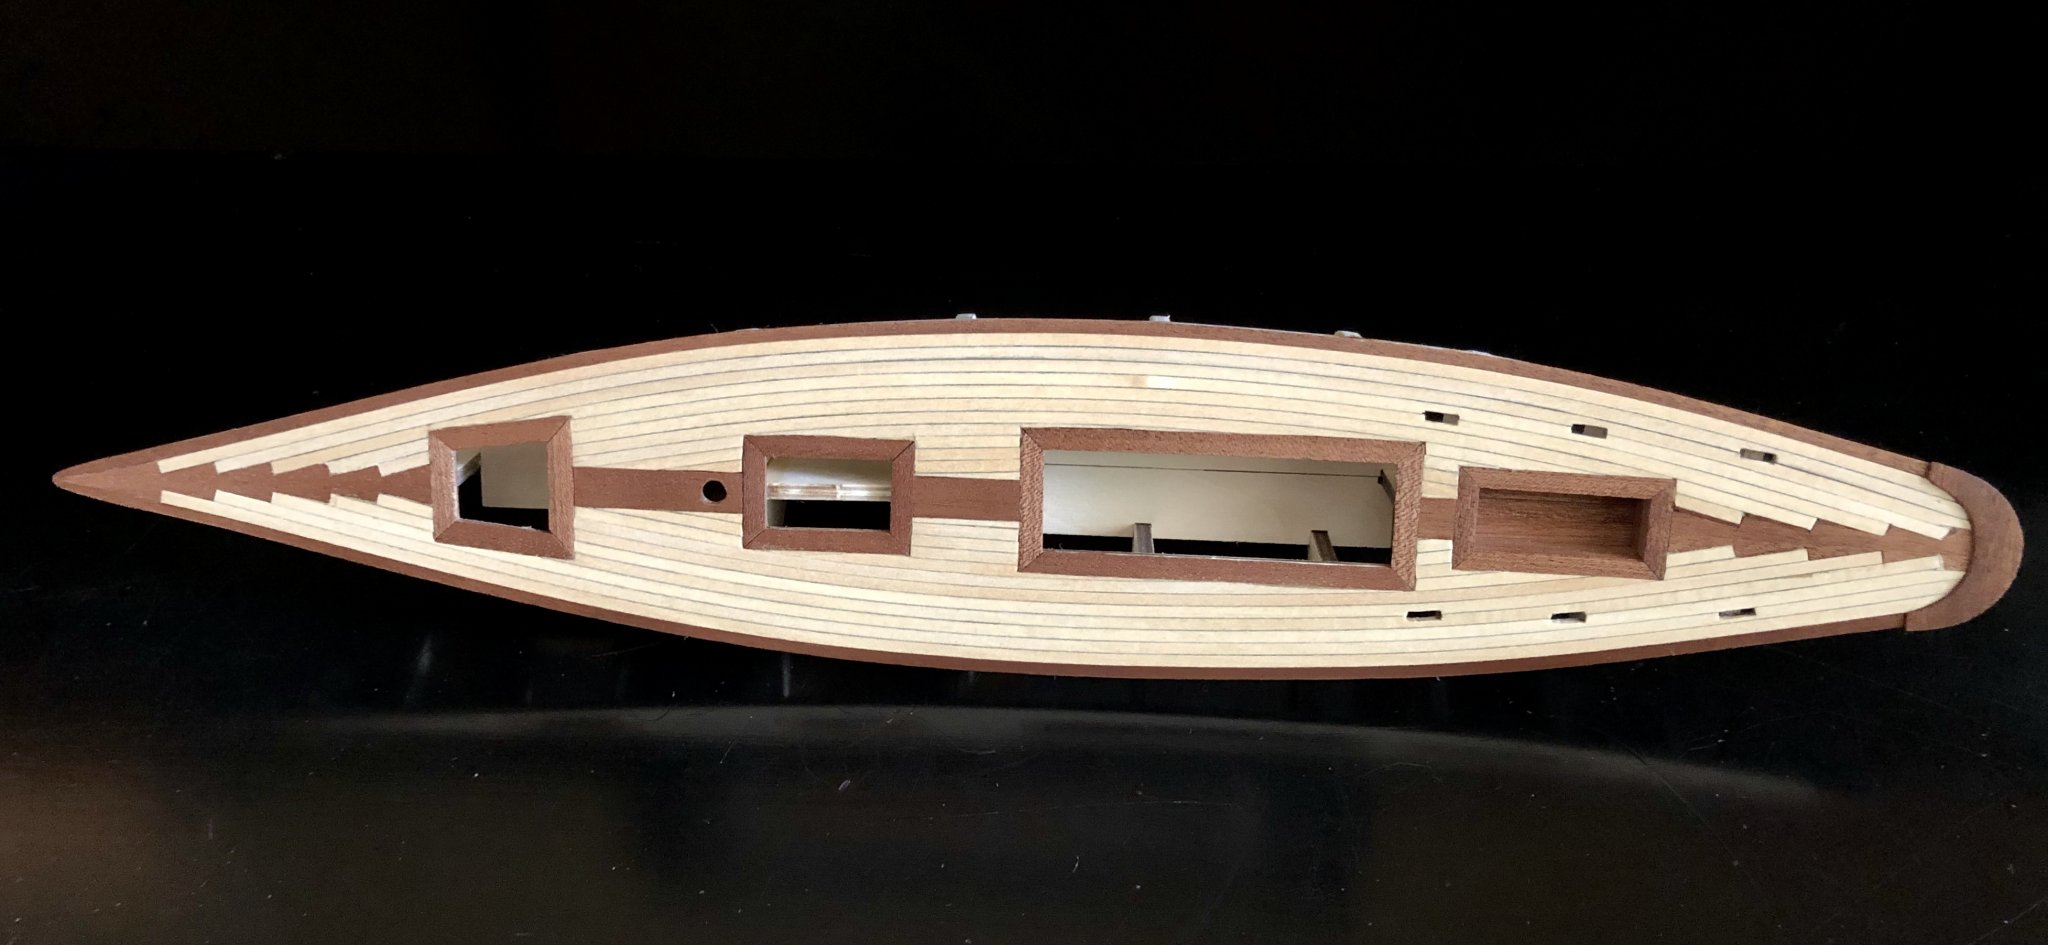
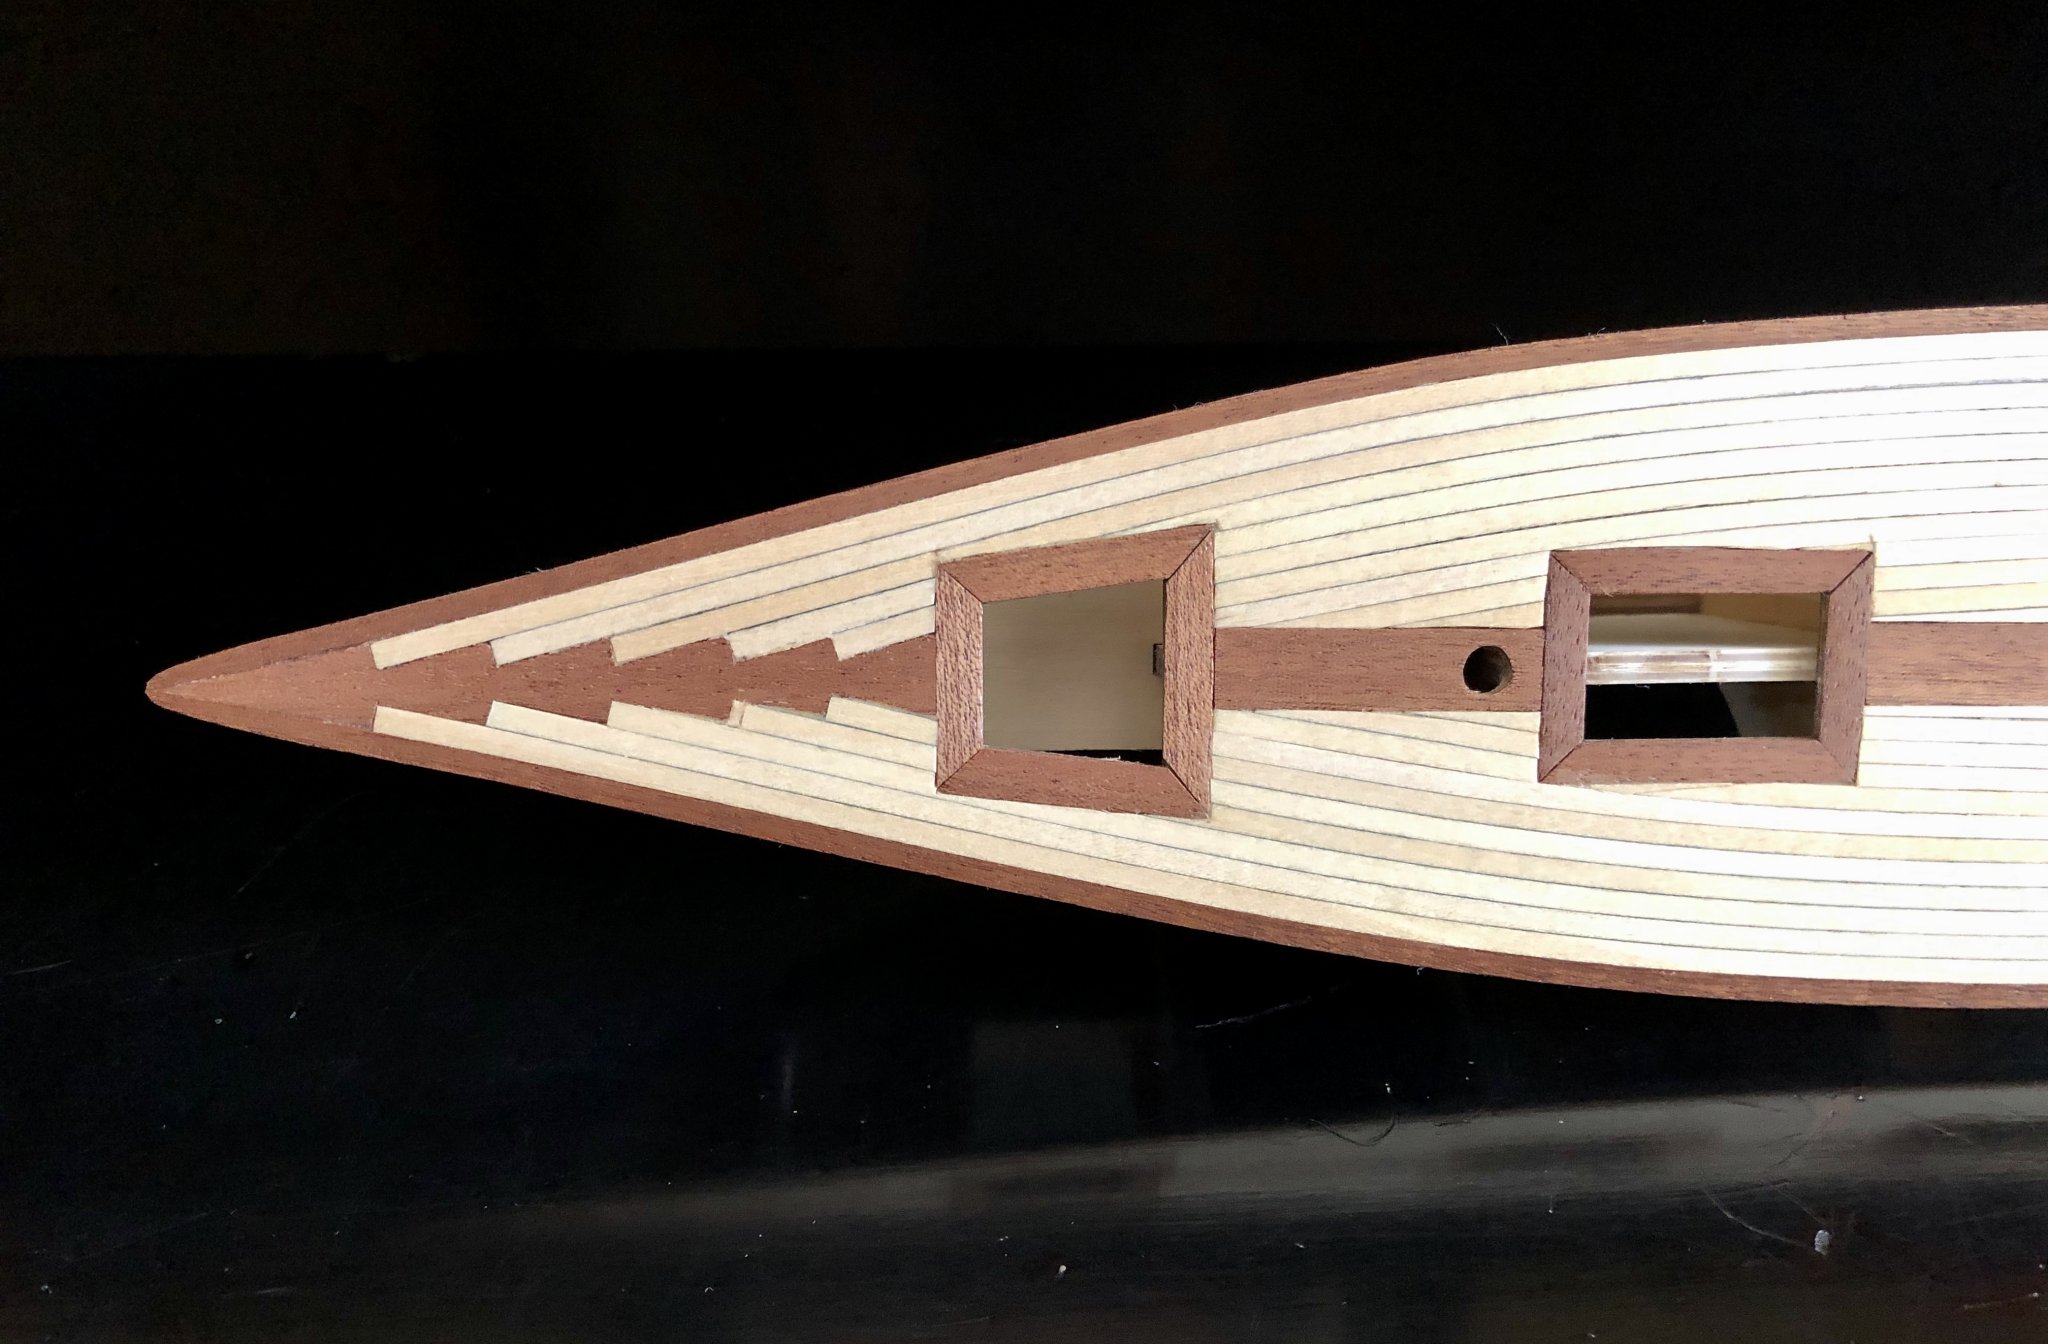
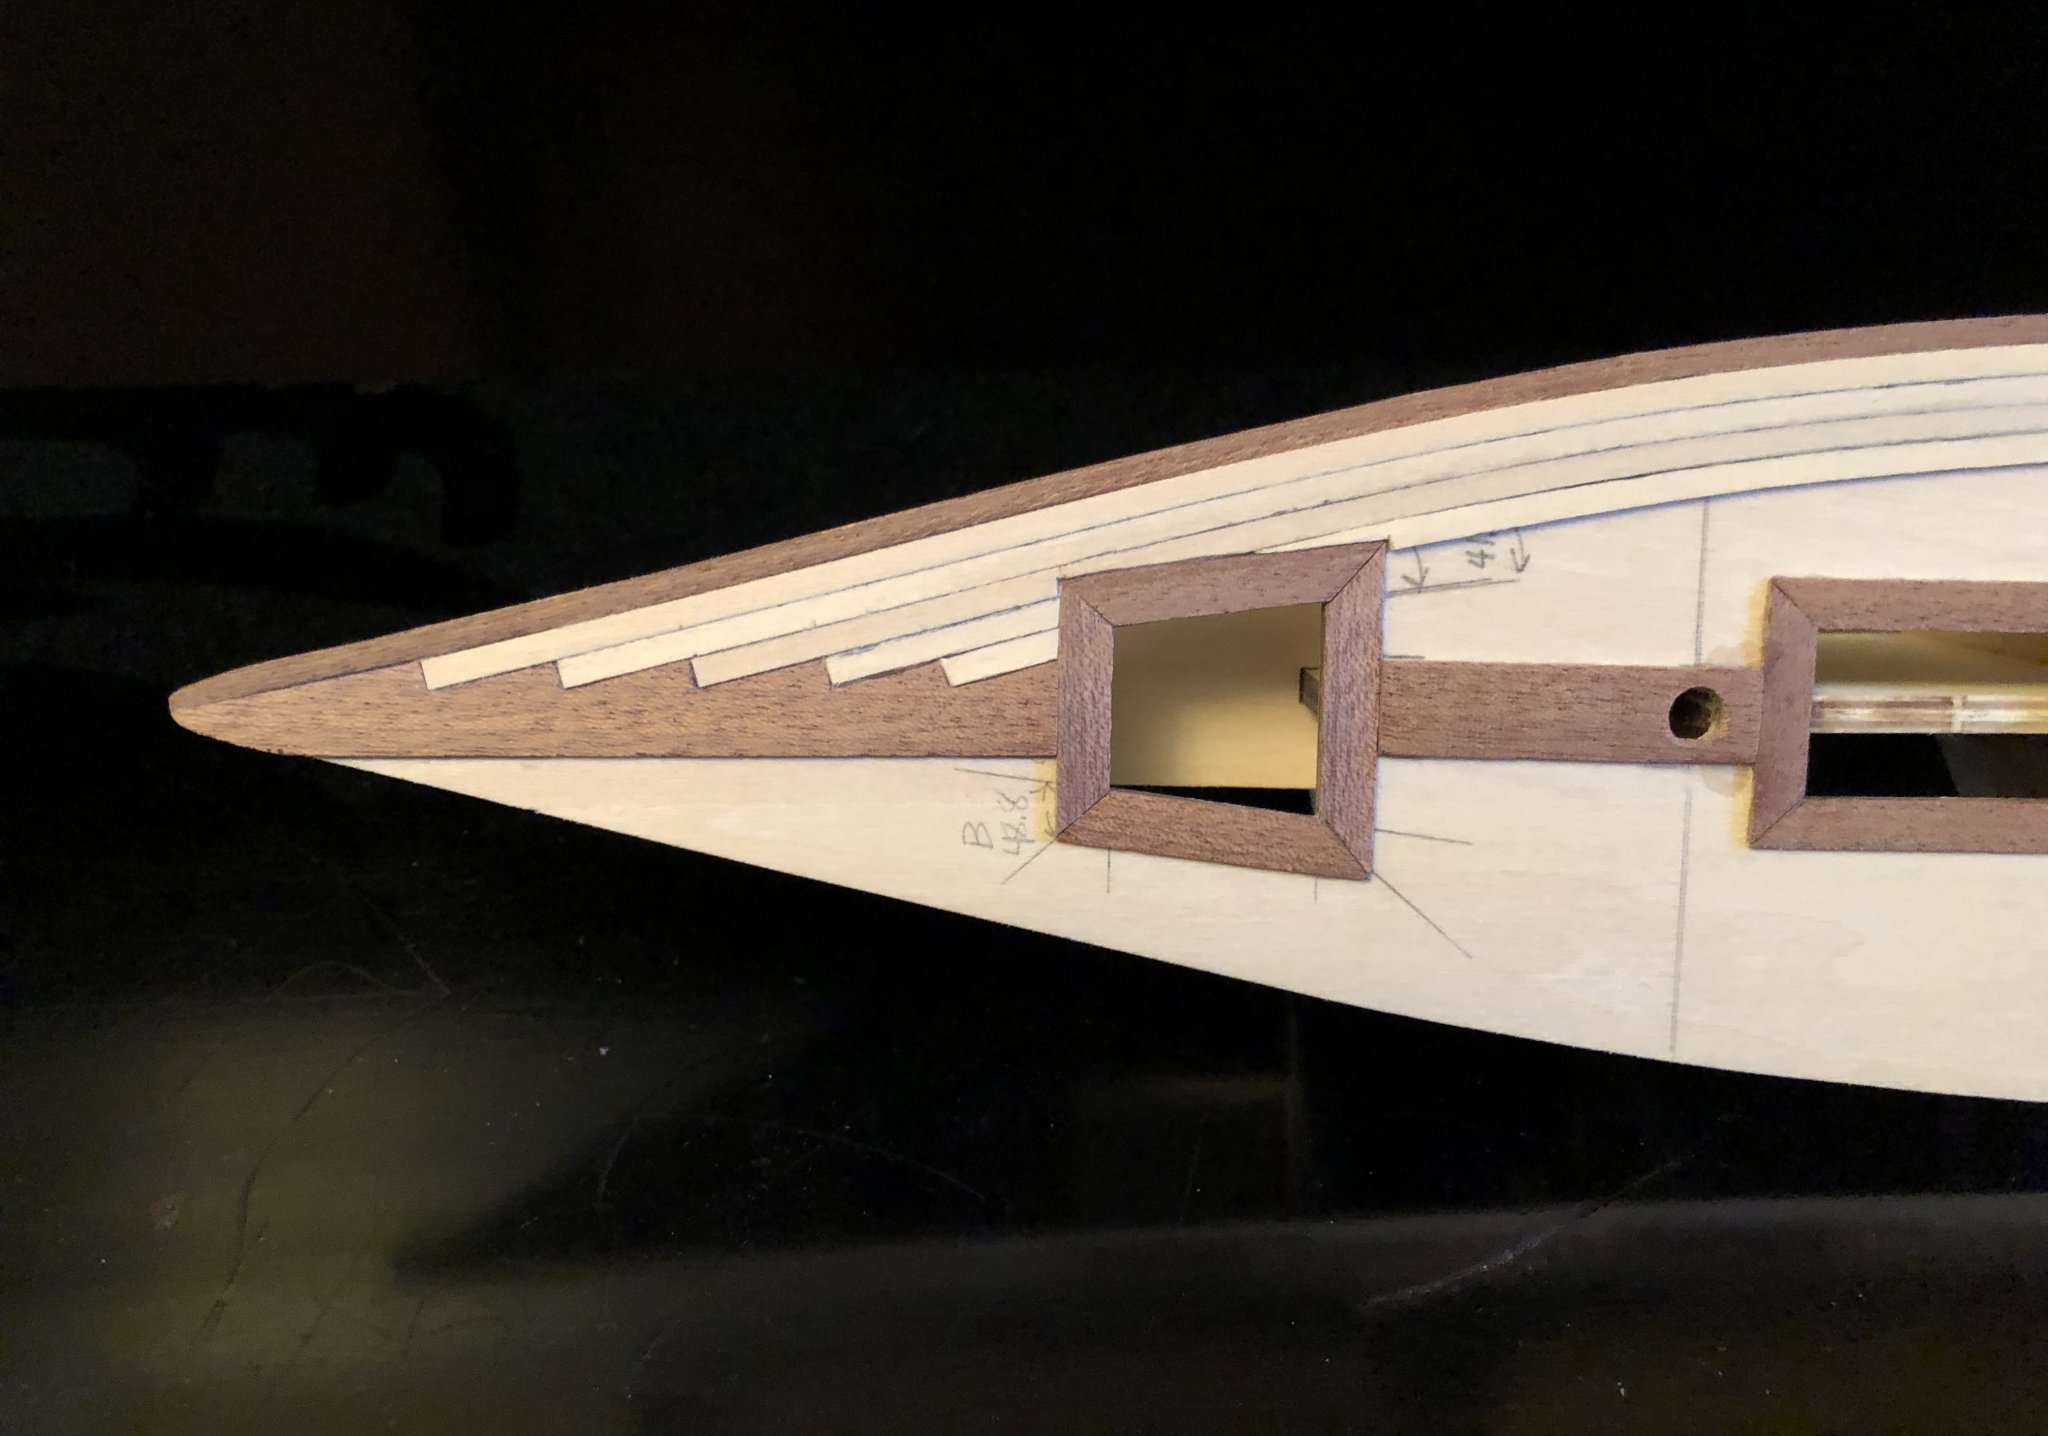
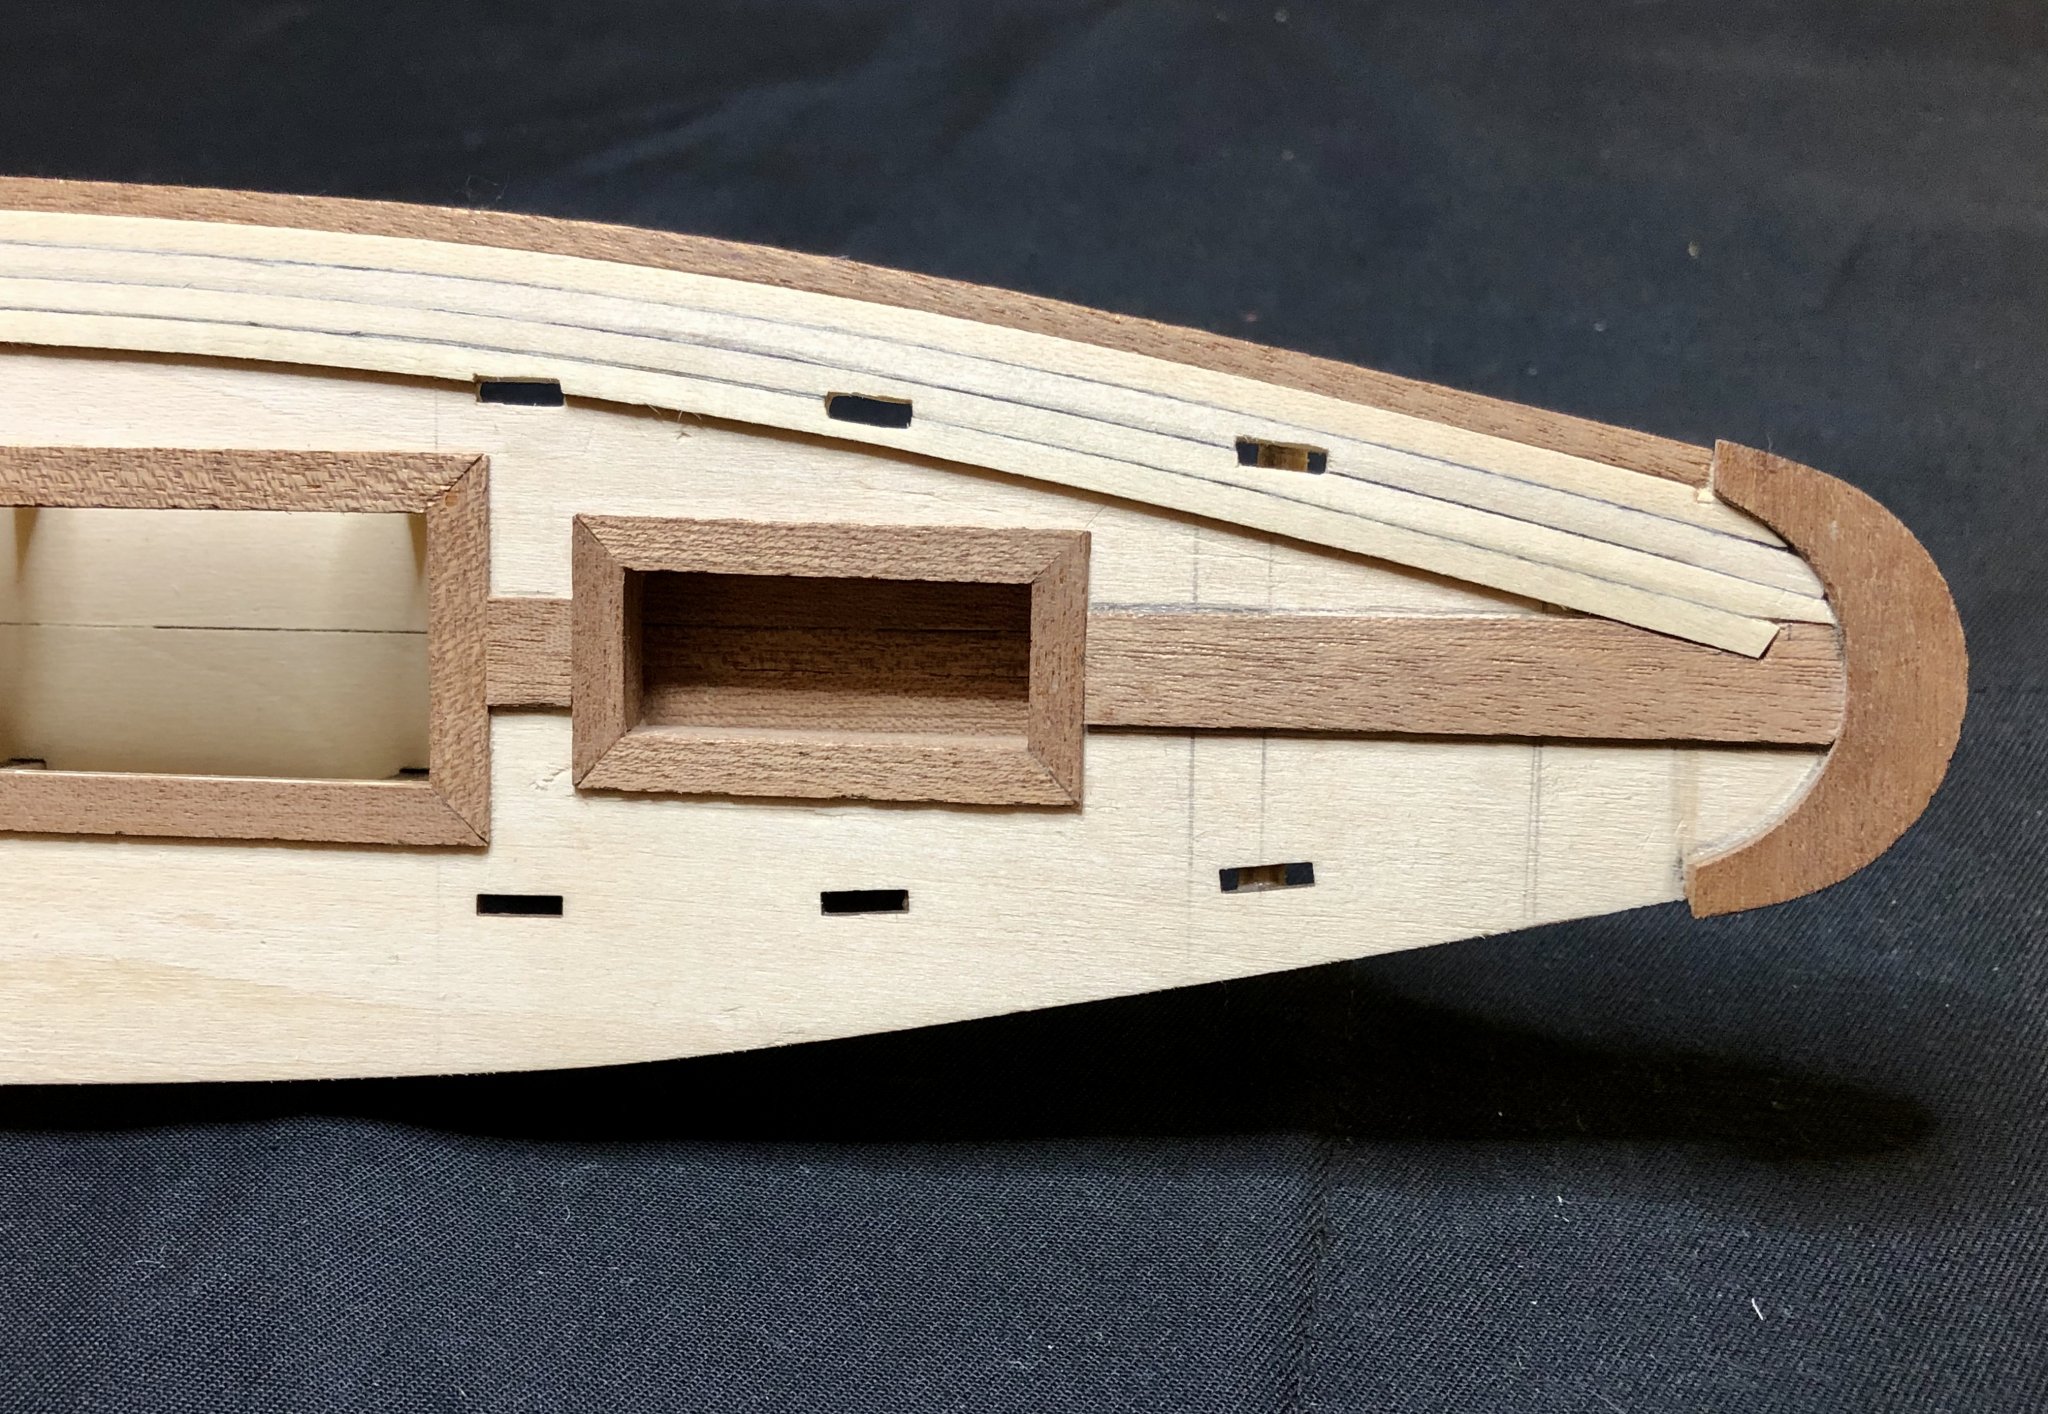
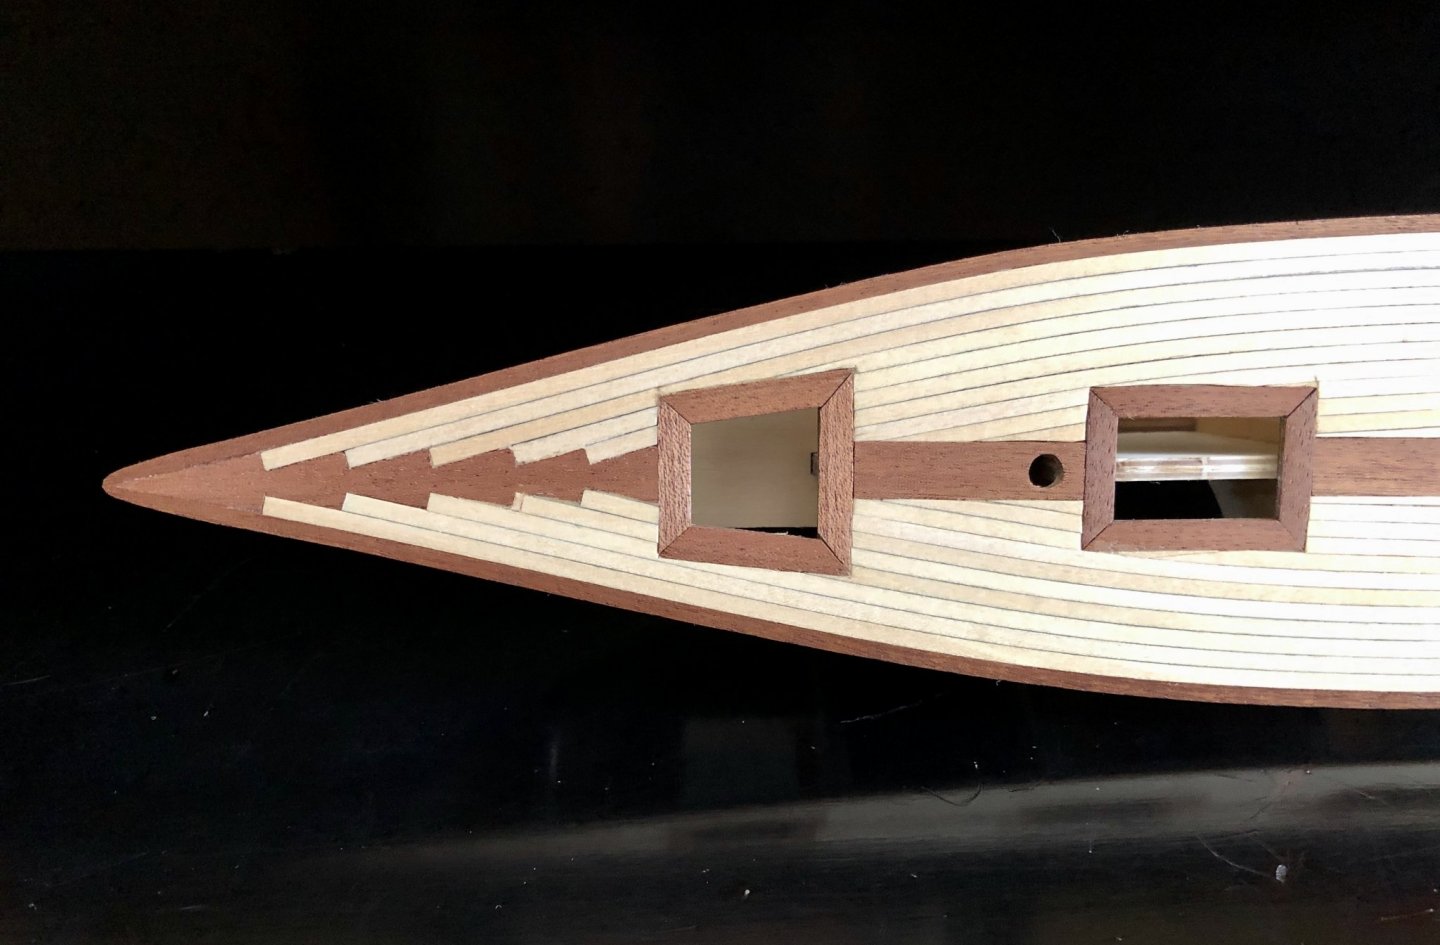
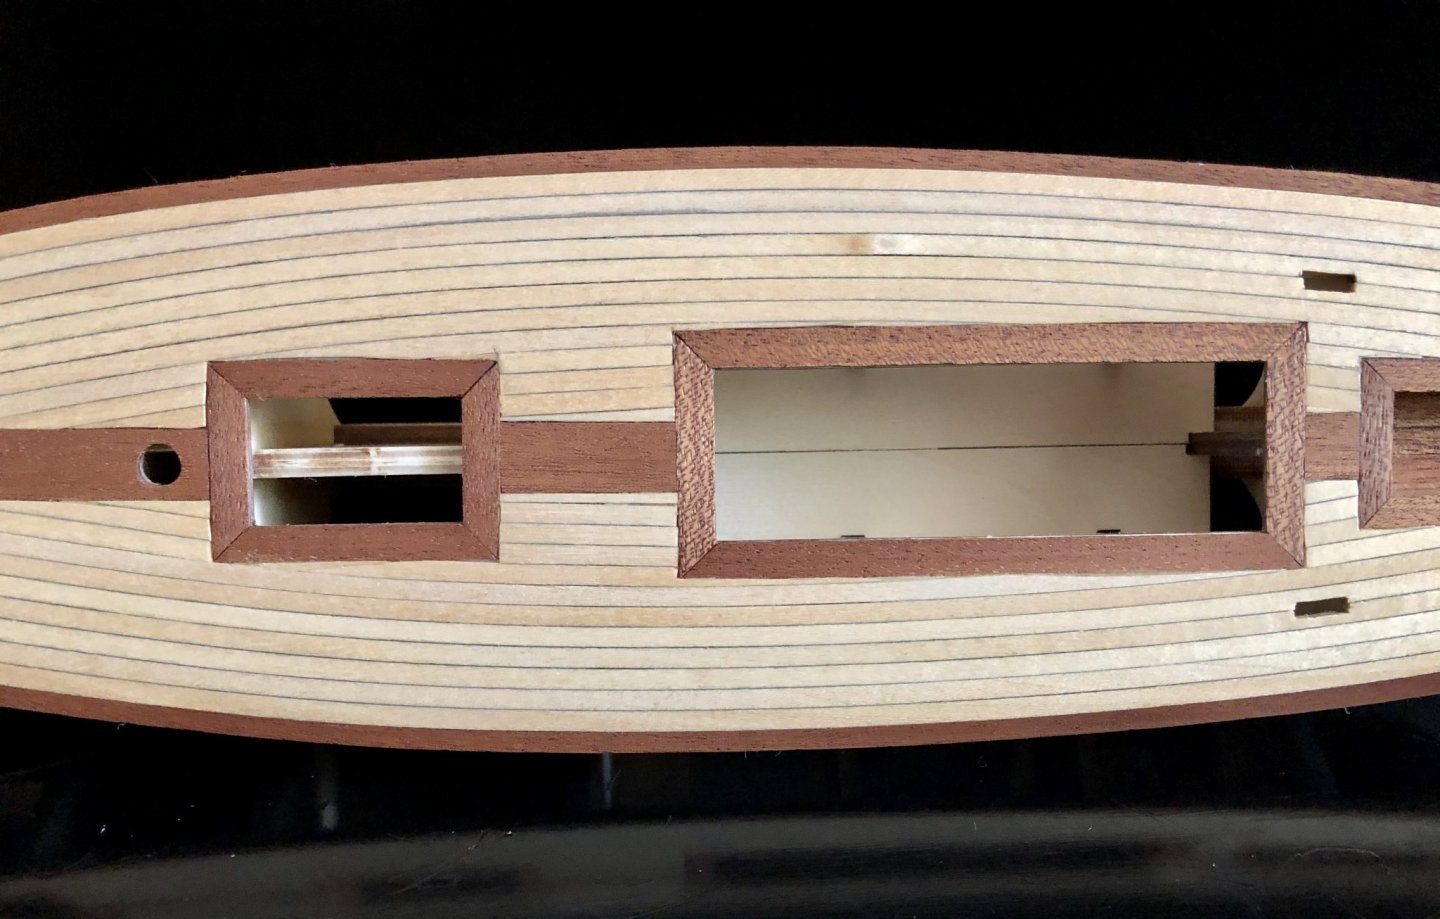
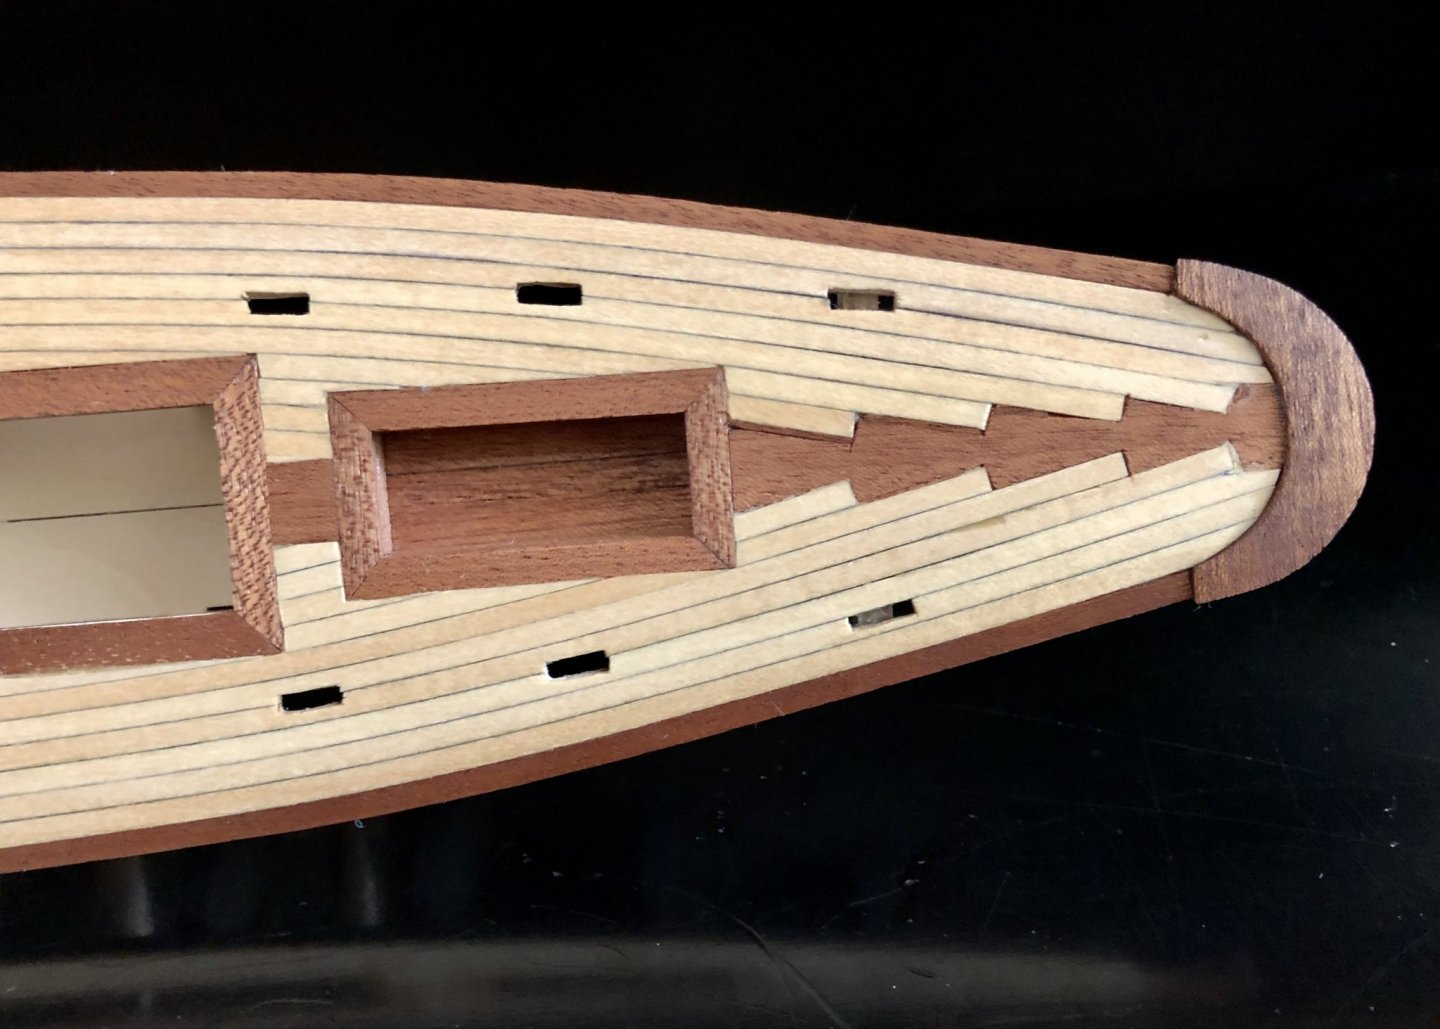
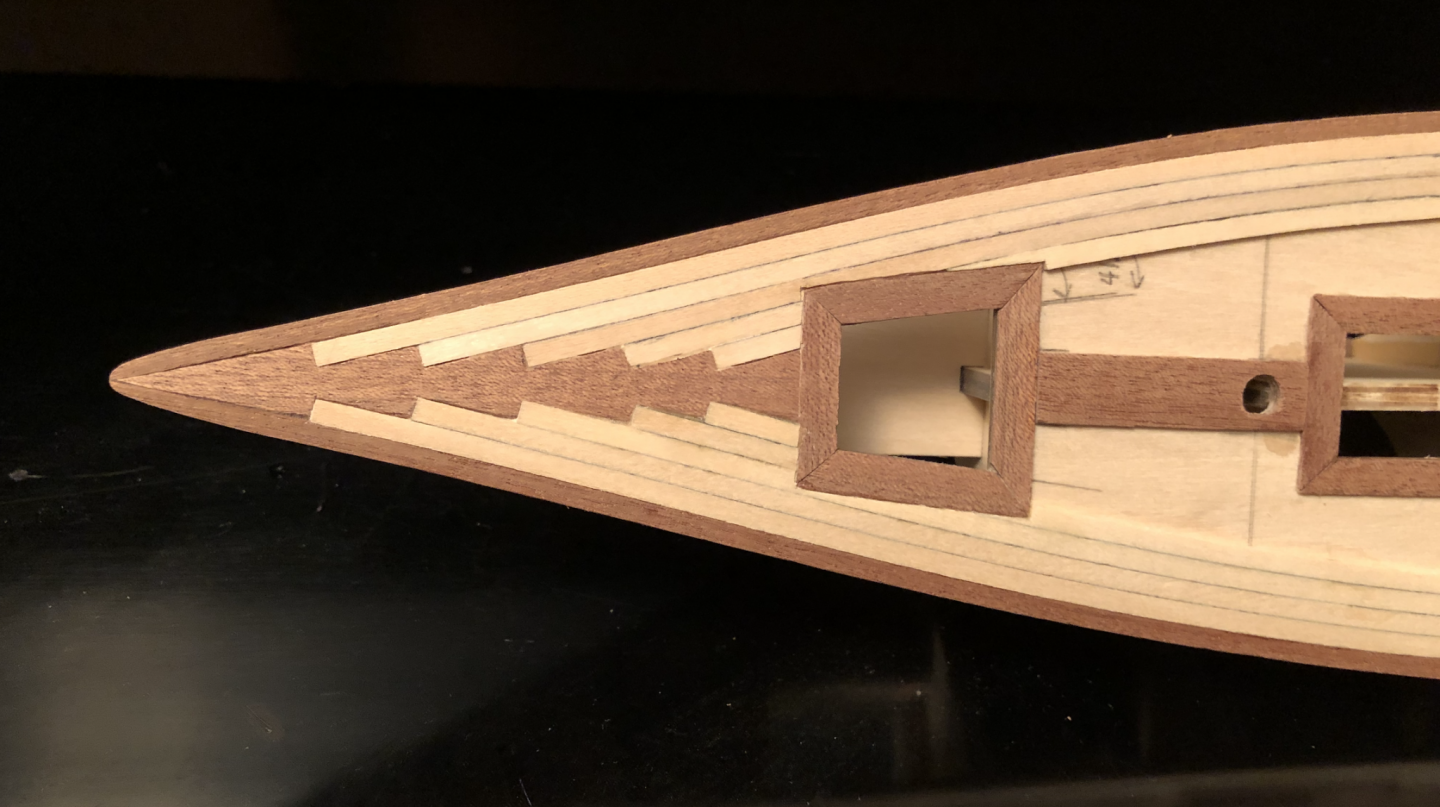
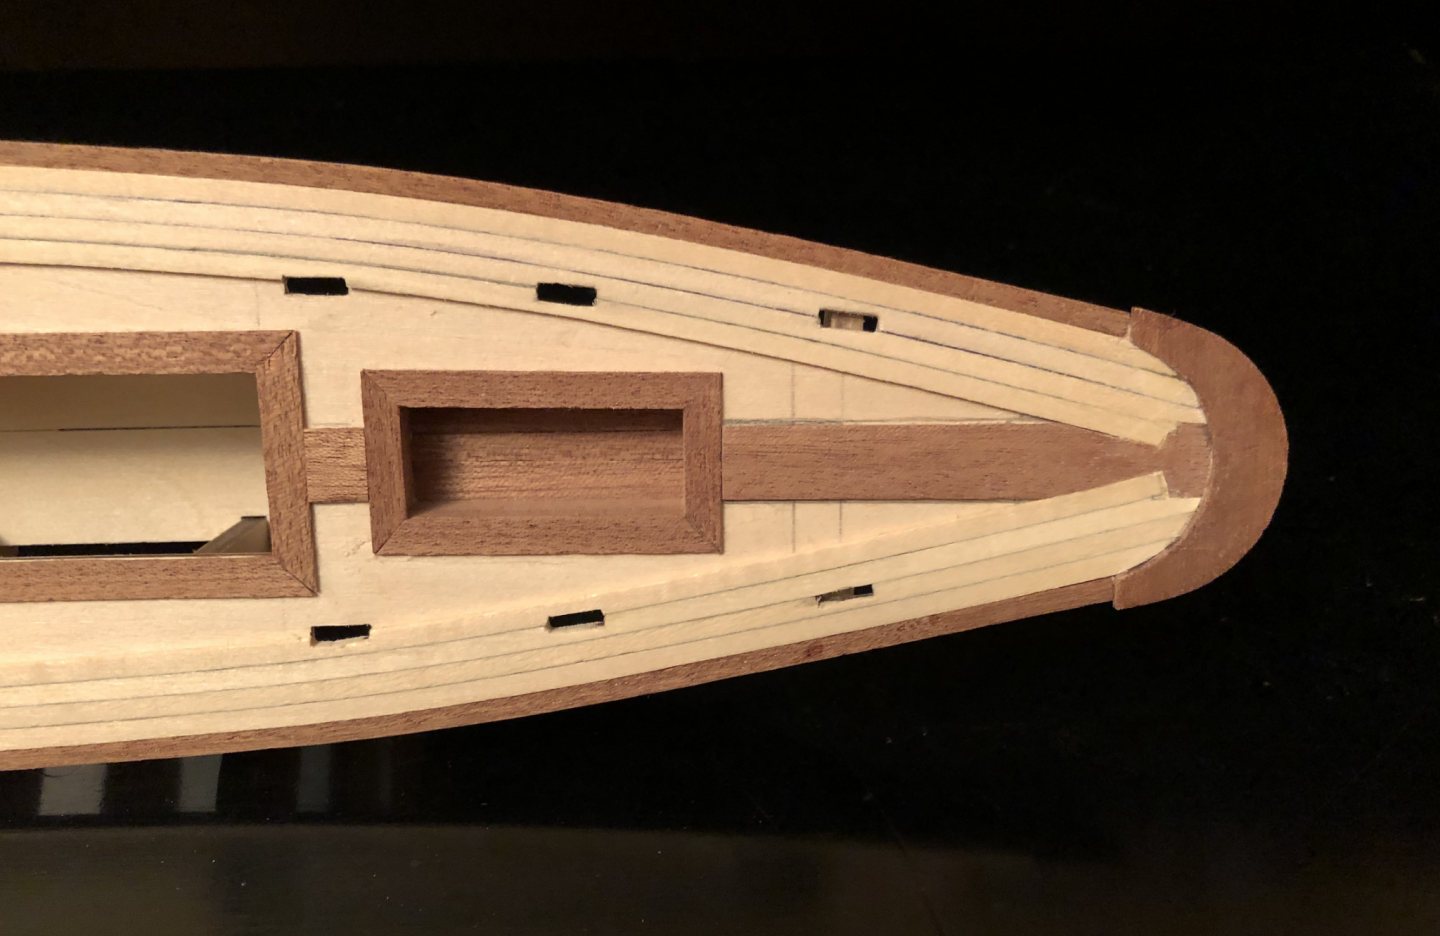
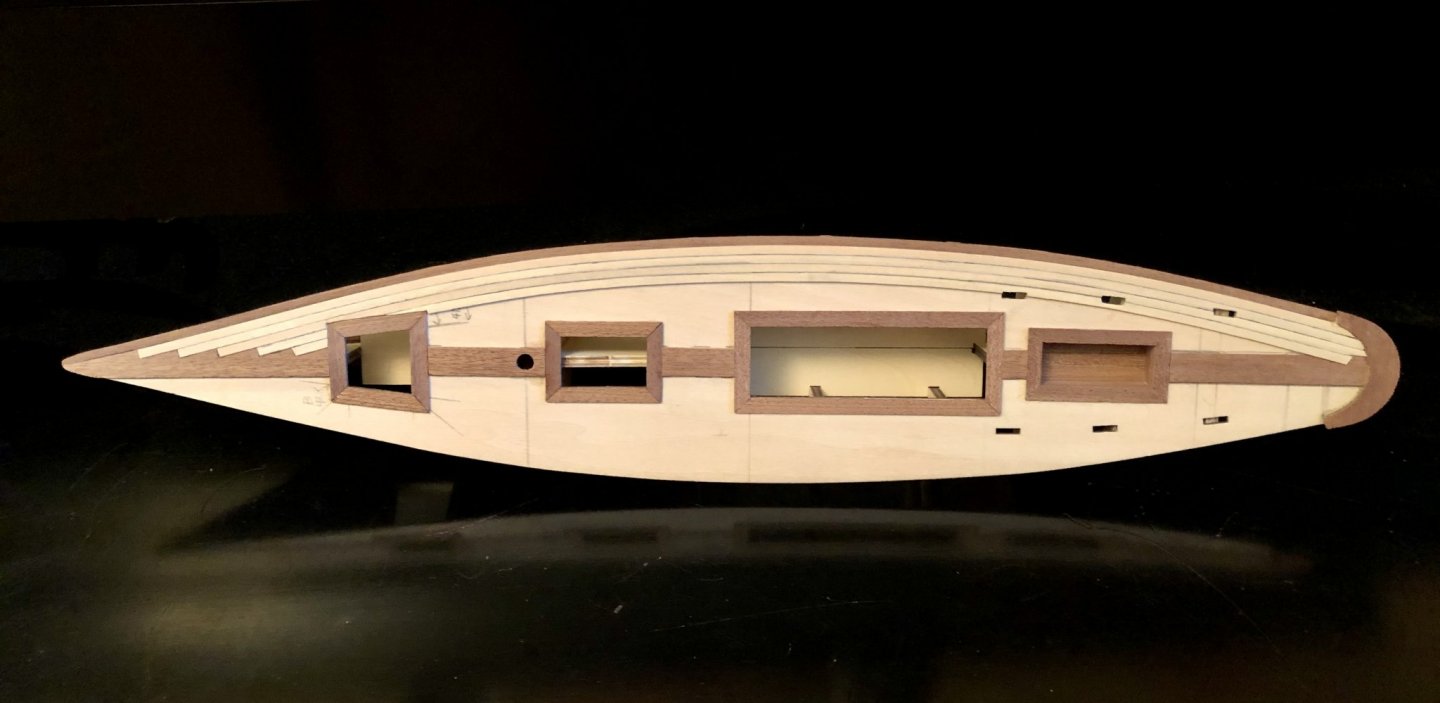
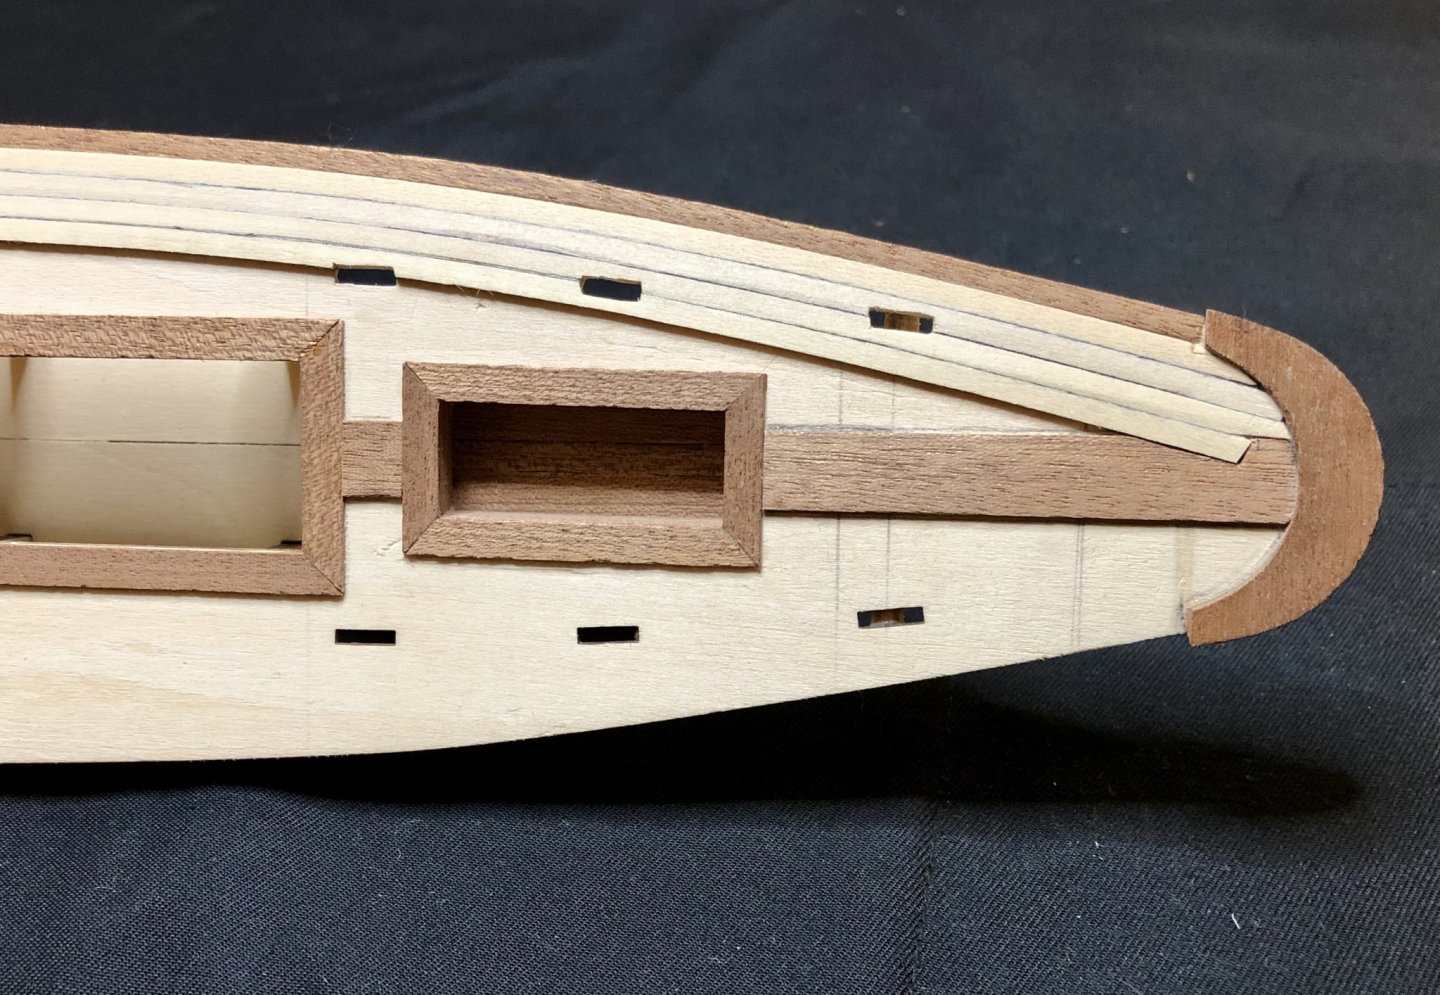
I began planking the deck today. Before I started the planking I decided to cut out a portion of king plank at the stern so that the curved mahogany piece that frames the stern would lay flat on the false deck instead of being on top of the deck planks. I did this because placing it on top of the deck planks would make the stern profile thicker. I've seen some photos recently that show that the deck and the hull at the stern form a rather sharp edge and not a thick lip. I'm thinking of fairing the hull more at the stern to achieve more of an edge there so I didn't want any more thickness in that area. I glued on the mahogany margin plank first and cut it the king plank parallel to it where they met near the bow. The regular deck planks are ramin wood. I took a ramin plank and laid it tight against the margin plank. Then I drew the outline of the joggle around the ramin plank where it overlaid the king plank. The first joggle began at the intersection of the margin plank and the king plank. After that plank was glued in place I would repeat the process and, eventually, began to cut joggles at the stern also as the planks wrapped around deck profile. This was very slow going for me but I'm enjoyed doing it. I don't have a table saw so I used a sharp #11 blade and a scalpel at times to carefully cut out the joggles. I had to go very slowly since the mahogany king plank is prone to tearing. That happened a couple of times but I was able to repair it. I used medium CA for gluing the planks. I would apply the CA to a portion of the plank and then lay it tightly in place. Then I would gently lift the plank and apply CA to another section of the plank and lay it down etc, etc. I began simulating the caulking by using a black sharpie on the edges of the planks but it was looking uneven to me so I ended up just using a #2 pencil to darken the edges of the planks. It isn't the neatest job but I'm ok with it so far. I decided not to cut joggles in the sides of the framing around the hatches but I'm now thinking that I may want to do that. That means I'll need to rip out the last plank I finished today. I'll sleep on it and see how I feel about it tomorrow.
-
Congratulations on completing this wonderful model, Robert! The weathering and detail you achieved on this boat is incredible and very different from what we usually see here on MSW. Super well done!