BobG
-
Posts
3,109 -
Joined
-
Last visited
Content Type
Profiles
Forums
Gallery
Events
Everything posted by BobG
-
Poly after gluing to deck...
BobG replied to mpk73's topic in Painting, finishing and weathering products and techniques
🤣 -
I use it quite a bit for rigging but I use only the tiniest dot of it carefully placed because it will darken lighter rope material. However, I'm aware that many modelers strongly recommend against it. I will use diluted, white PVA when I don't need a quick hold on a spot of line and on flat rope coils etc.
-
Poly after gluing to deck...
BobG replied to mpk73's topic in Painting, finishing and weathering products and techniques
Same with me. I find that the oil based, Satin WOP is easy to use, has low sheen and can be recoated, if you want, in 2 hours. I don't like using it indoors because of the vapors it emits. It's not terrible but it is significant. I either work with it outdoors, in the garage or, if I do apply it indoors during bad weather, I'll take it out and place it in a protected place like the front porch for several hours so it can off-gas before I bring the ship back indoors. I'm probably more sensitive to the fumes of oil based products than most though. -
You've set the standard pretty high, Harry. I hope my model doesn't turn out to be the ugly step-sister! 🥺
-
Poly after gluing to deck...
BobG replied to mpk73's topic in Painting, finishing and weathering products and techniques
Minwax Satin Wipe-on-Poly is what I use also. -
I use CA primarily as well even though it seems to get a bad rap from a lot of our forum members.
- 66 replies
-
- 1
-

-
- Finished
- Model Shipways
- (and 1 more)
-
Finely executed and truly exceptional work, Justin. These small boats are indeed wonderful to build. You'll absolutely love the Medway Longboat. What is the clamping device you have that has all the pegs in it? Also, what is the foredom that you refer to for making the belaying pins. I used my Dremel for making them on my Medway Longboat and it wasn't easy. What glue or glues have you been using? Cheers,
- 66 replies
-
- 1
-
-
- Finished
- Model Shipways
- (and 1 more)
-
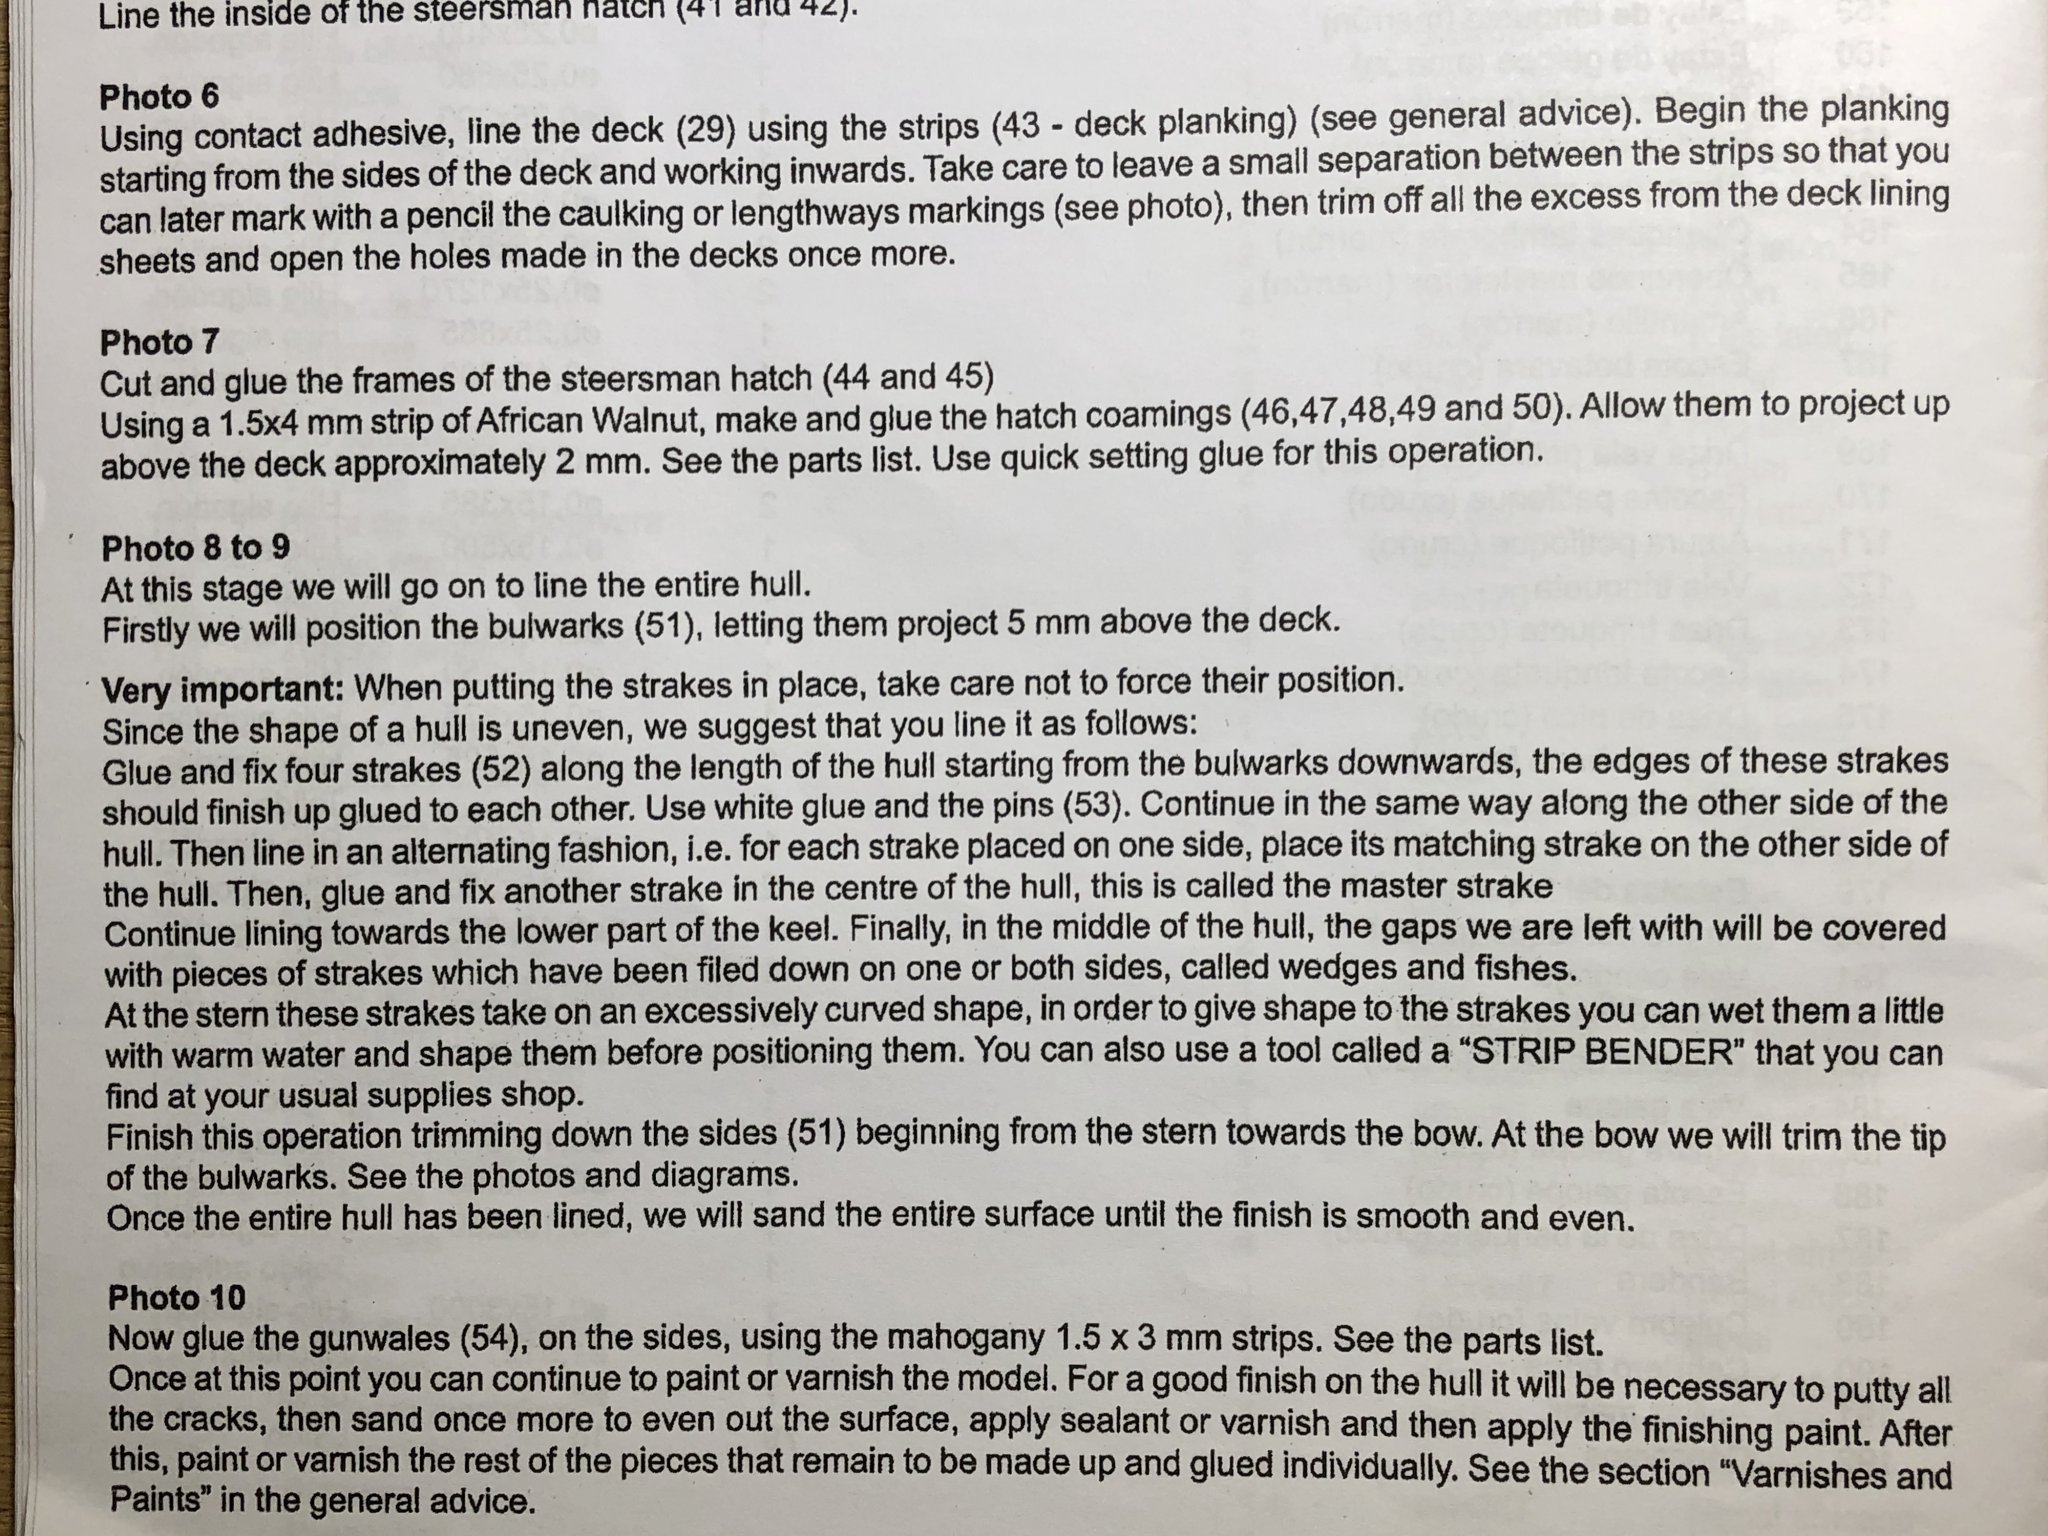
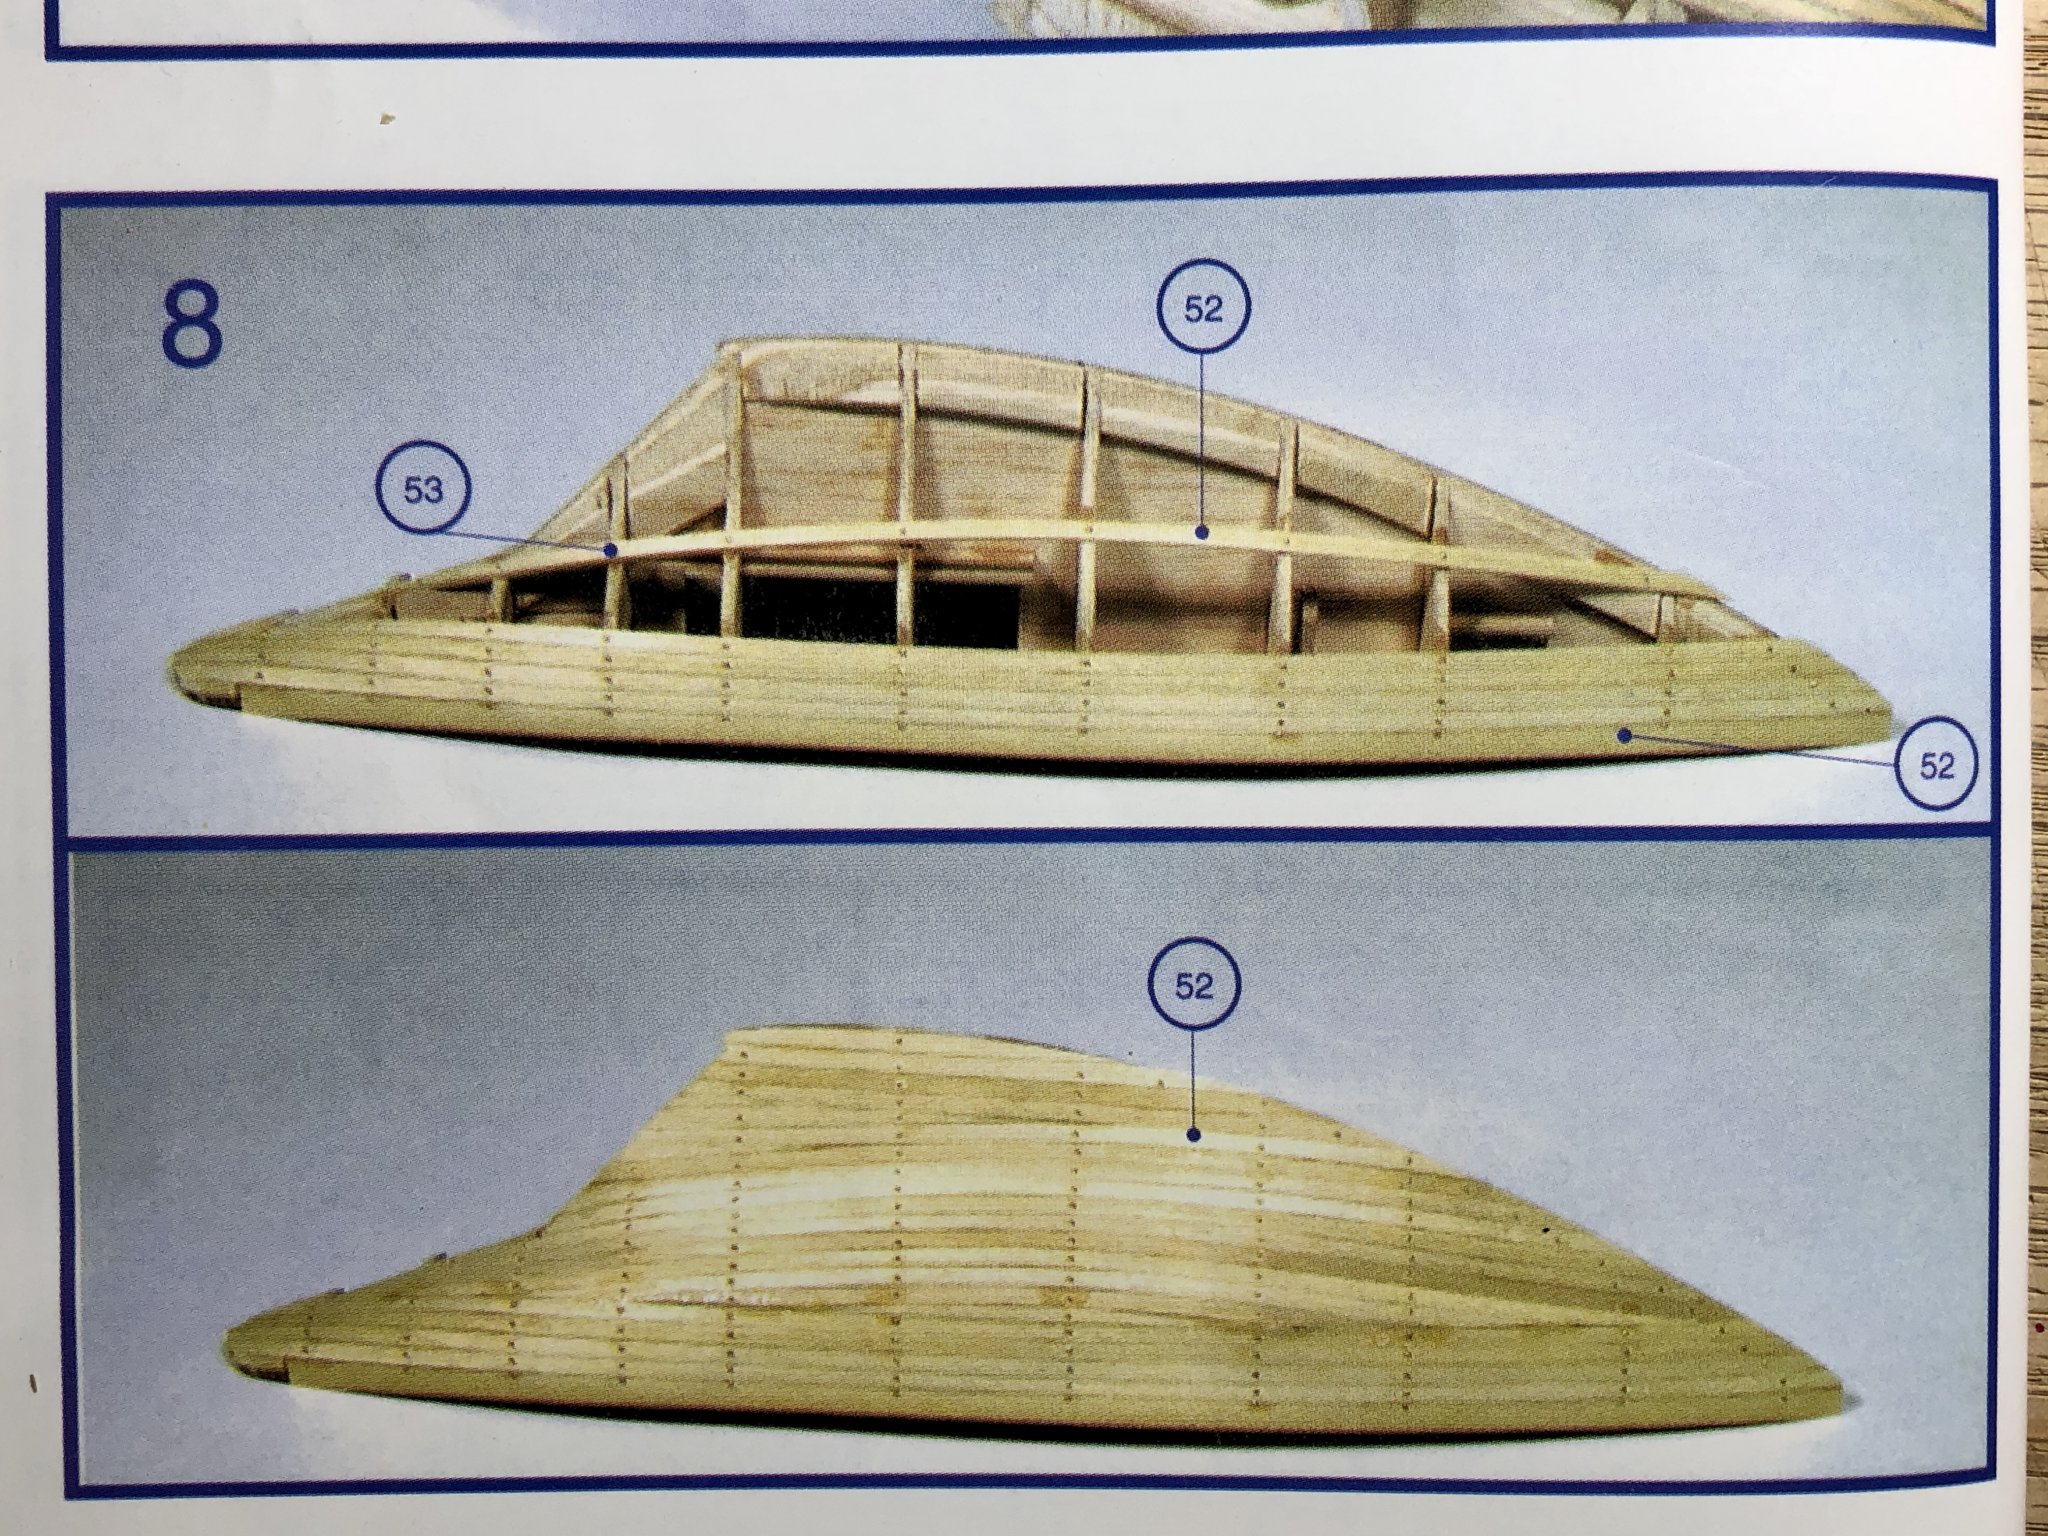
The bulwarks are 1.5 x 8 mm ramin strips and the hull planks are 2 x 5 mm ramin strips. These strips are, in my opinion, way too thick and they are difficult to bend and twist. I guess I've been spoiled by the 1/32" Alaskan Yellow Cedar planks that were used in the Medway Longboat by Syren. They were easy to work with and could be bent and twisted using dry heat only. I don't like the idea of having to wrestle with planking strips and having to resort to soaking or steaming them to get them to follow the shape of the hull nicely. I'd rather use dry heat and to do that I will need thinner strips to work with so I've ordered some 1 x 5 mm limewood strips for the hull planks and 1 x 8 mm limewood strips for the bulwarks. They will be much easier to work with and, if necessary, I could even double plank the hull although don't think I would need to do that. On the real Pen Duick the part of the bulwark that extends above the deck is teak or mahogany but the kit provides ramin wood for the bulwarks which is a blond color. Since I will now be using 1 x 8 mm limewood for the bulwarks, I plan to line the inside of them with 0.5 mm mahogany. That way the mahogany margin deck plank, bulwark and gunwales will all be mahogany which looks more authentic to the real boat. So I will have a brief respite until the new wood strips arrive.
-
I hope you had a nice nap, Eamonn! 💤
-
I just read through your build log and you're doing a very nice job. The planking is coming along very well too. It looks like you live in a very beautiful area. Where are those mountains that are in the background of your photos? Good luck on the rest of your build!
- 108 replies
-
- 2
-
-
- armed virginia sloop
- model shipways
- (and 1 more)
-
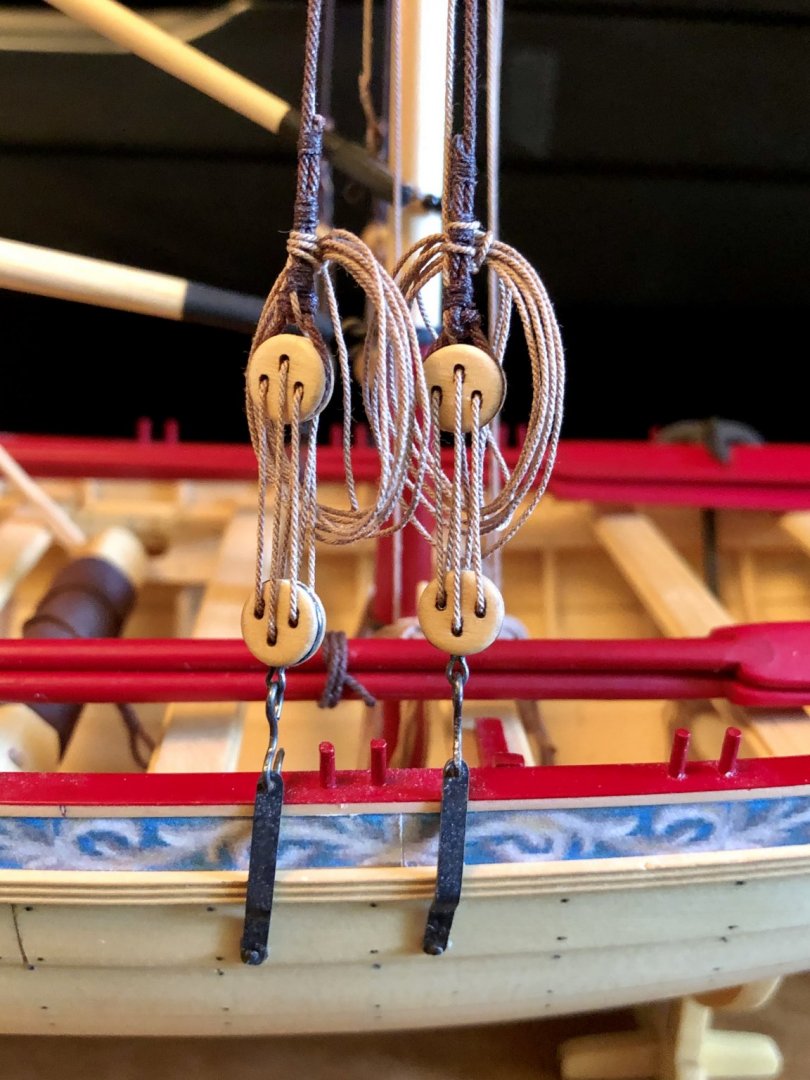
Justin, the flay halyards are belayed to the amidship shrouds on the Medway Longboat. They are tied off to the shrouds with coils of rope. I would assume that this model uses this method the same as on the Medway Longboat.
- 95 replies
-
- 2
-
-
- Model Shipways
- 18th Century Armed Longboat
- (and 1 more)
-
Poly after gluing to deck...
BobG replied to mpk73's topic in Painting, finishing and weathering products and techniques
Keith, I've never really thought of using Wipe-on-Poly on painted surfaces or metal. I thought it was a product to be used specifically on wood. I use acrylic paints and generally use a blackening agent on brass and do not topcoat them with anything. I'm not certain if poly would be compatible with acrylics or brass that been blackened either. So, for me, I just don't see a need to put WOP on anything except wood. -
Poly after gluing to deck...
BobG replied to mpk73's topic in Painting, finishing and weathering products and techniques
Ok, looking at your model I don't see any compelling reason why you would need to remove anything from your deck before applying the poly. If it was my boat I would just use Satin Wipe-on-Poly on everything that is accessible that you want it on. Your boat will be fine if there are areas under a deck structure where can't do that. Simply protect any surfaces by masking or careful application that you don't want to get any poly on. I don't put poly on any painted surfaces or metal surfaces. Poly will not penetrate glue smears so, if you have any, those spots would look different from the areas with poly on them, but it sounds like you did a nice job of being careful with your gluing. The best policy is to avoid glue smears in the first place by being careful and cleaning up excess glue immediately or, if it has already dried, carefully scrape and/or sand the glue spots before applying any finish. I hope this helps. It's not too late for you to start a build log for your model. There are a lot of very experienced modelers on this site that will be more than happy answer your questions and share their knowledge with you. Best of luck! -
Poly after gluing to deck...
BobG replied to mpk73's topic in Painting, finishing and weathering products and techniques
Sorry, mpk73, I don't think I'm understanding exactly what the problem is. The poly is protective and enhances the beauty of the wood as well. Wipe-on-Poly is very easy to use. I simply wipe in on with a clean cloth and I use a small paint brush to get it into areas that I can't wipe with the cloth. Just make sure you are not leaving pools of poly anywhere. Just wipe up anything that the wood doesn't absorb. I don't see why you would need to remove your deck structures to that. Now, if you mean that you put the poly on but prefer a different finish, then, of course, you'd need to somehow remove the poly before applying a different finish. -
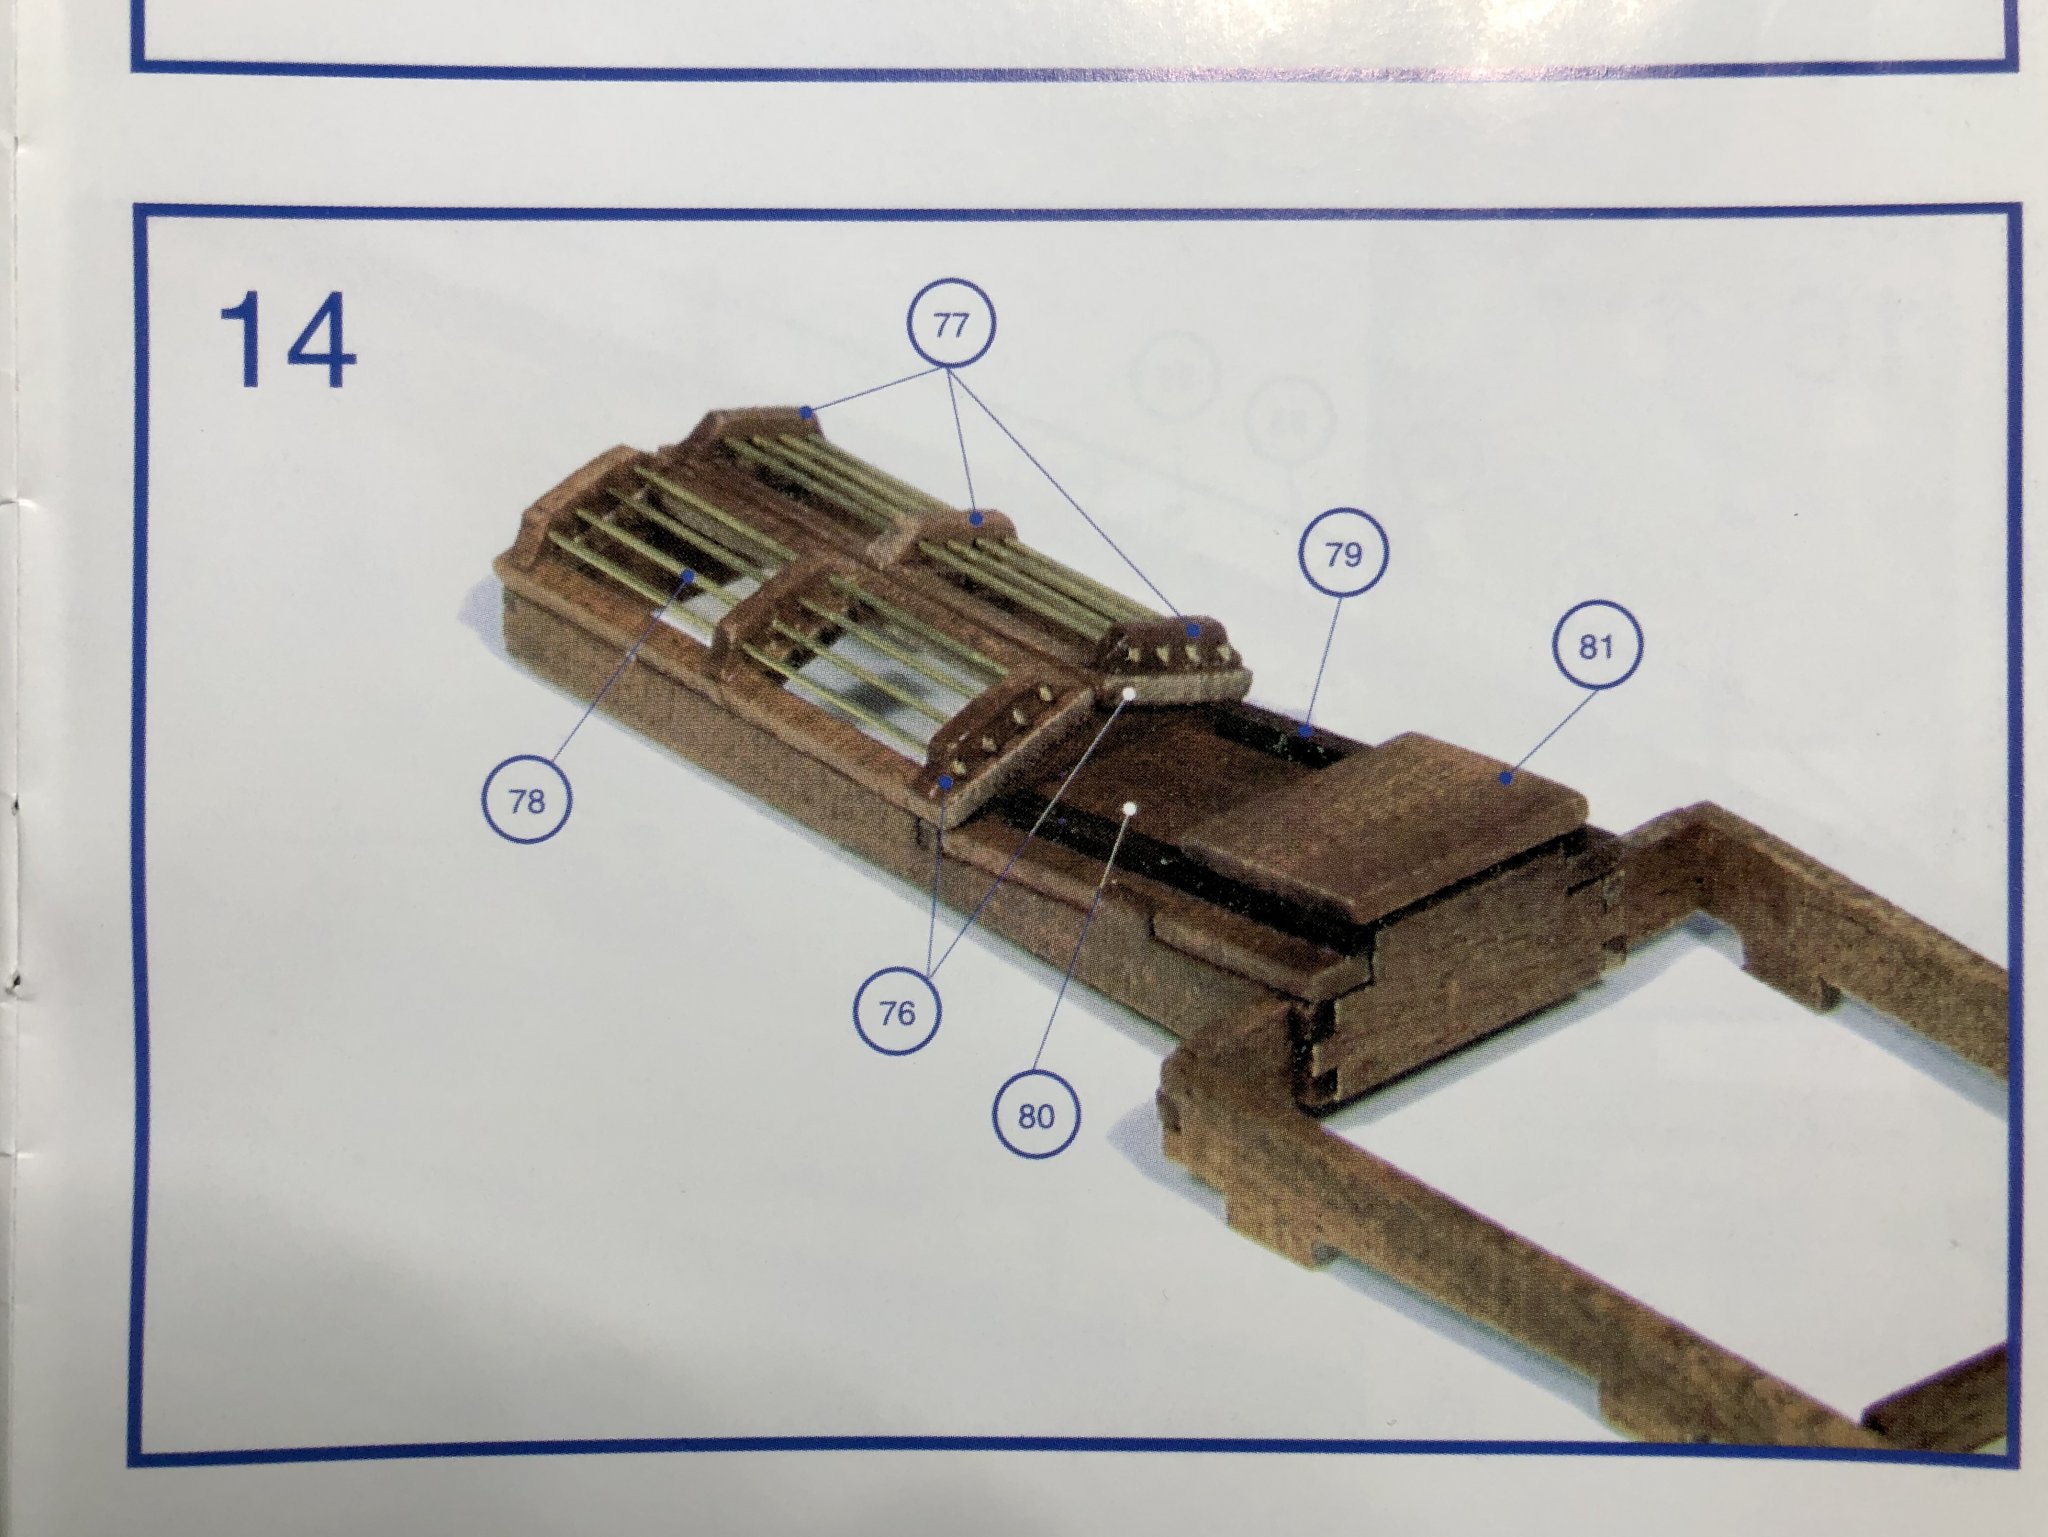
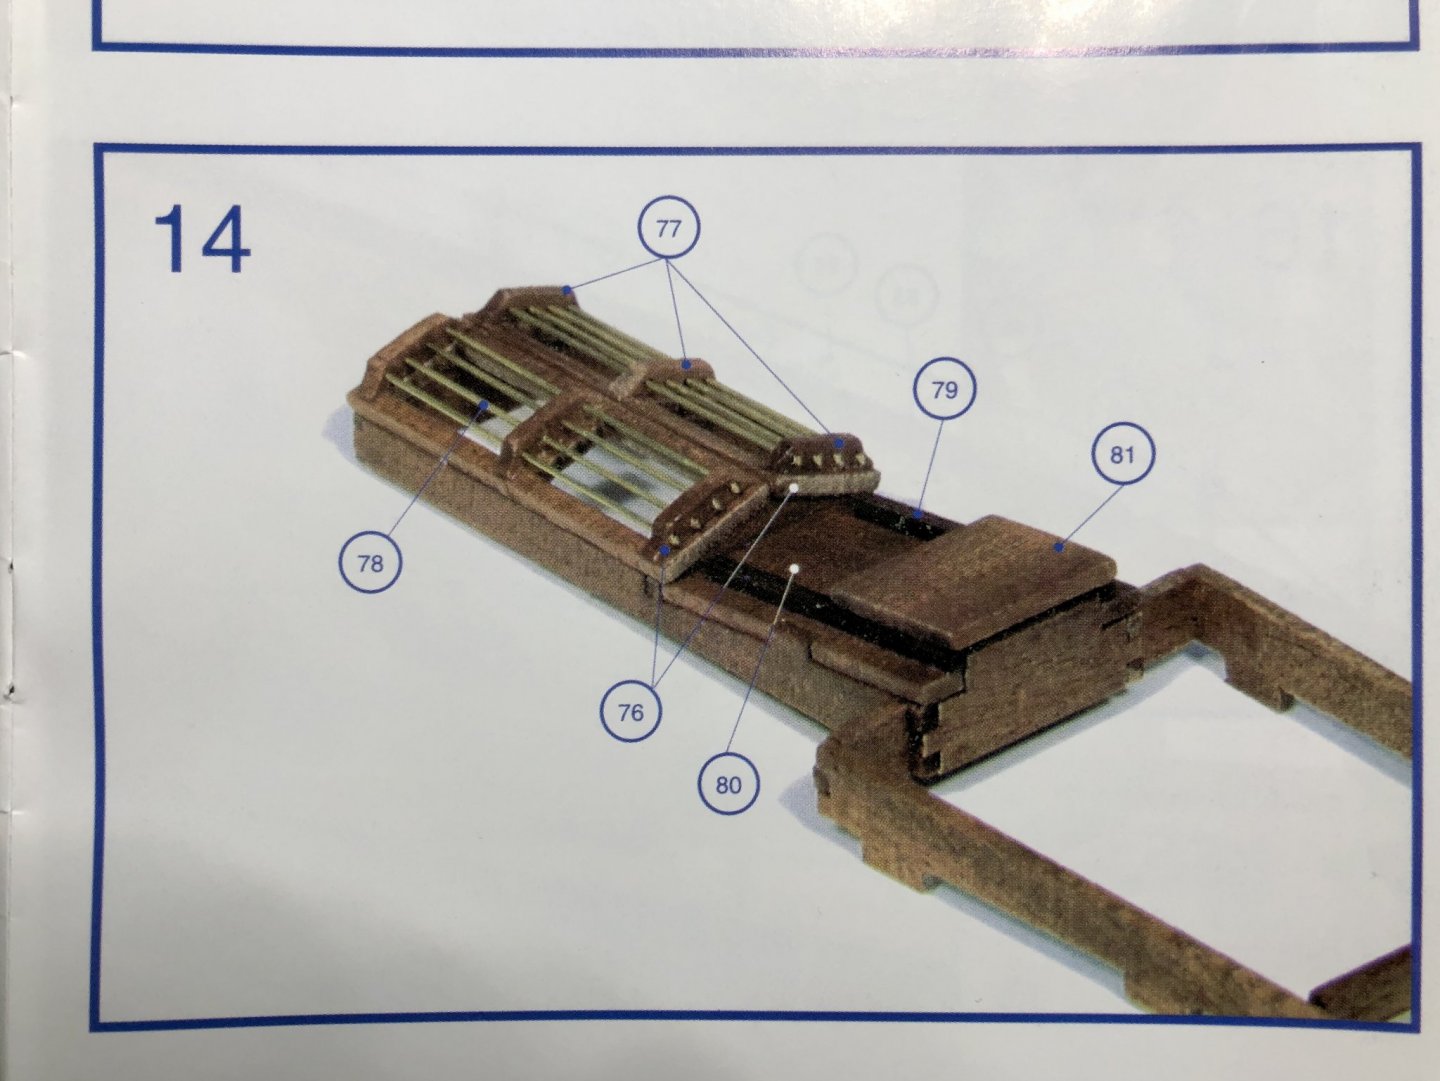
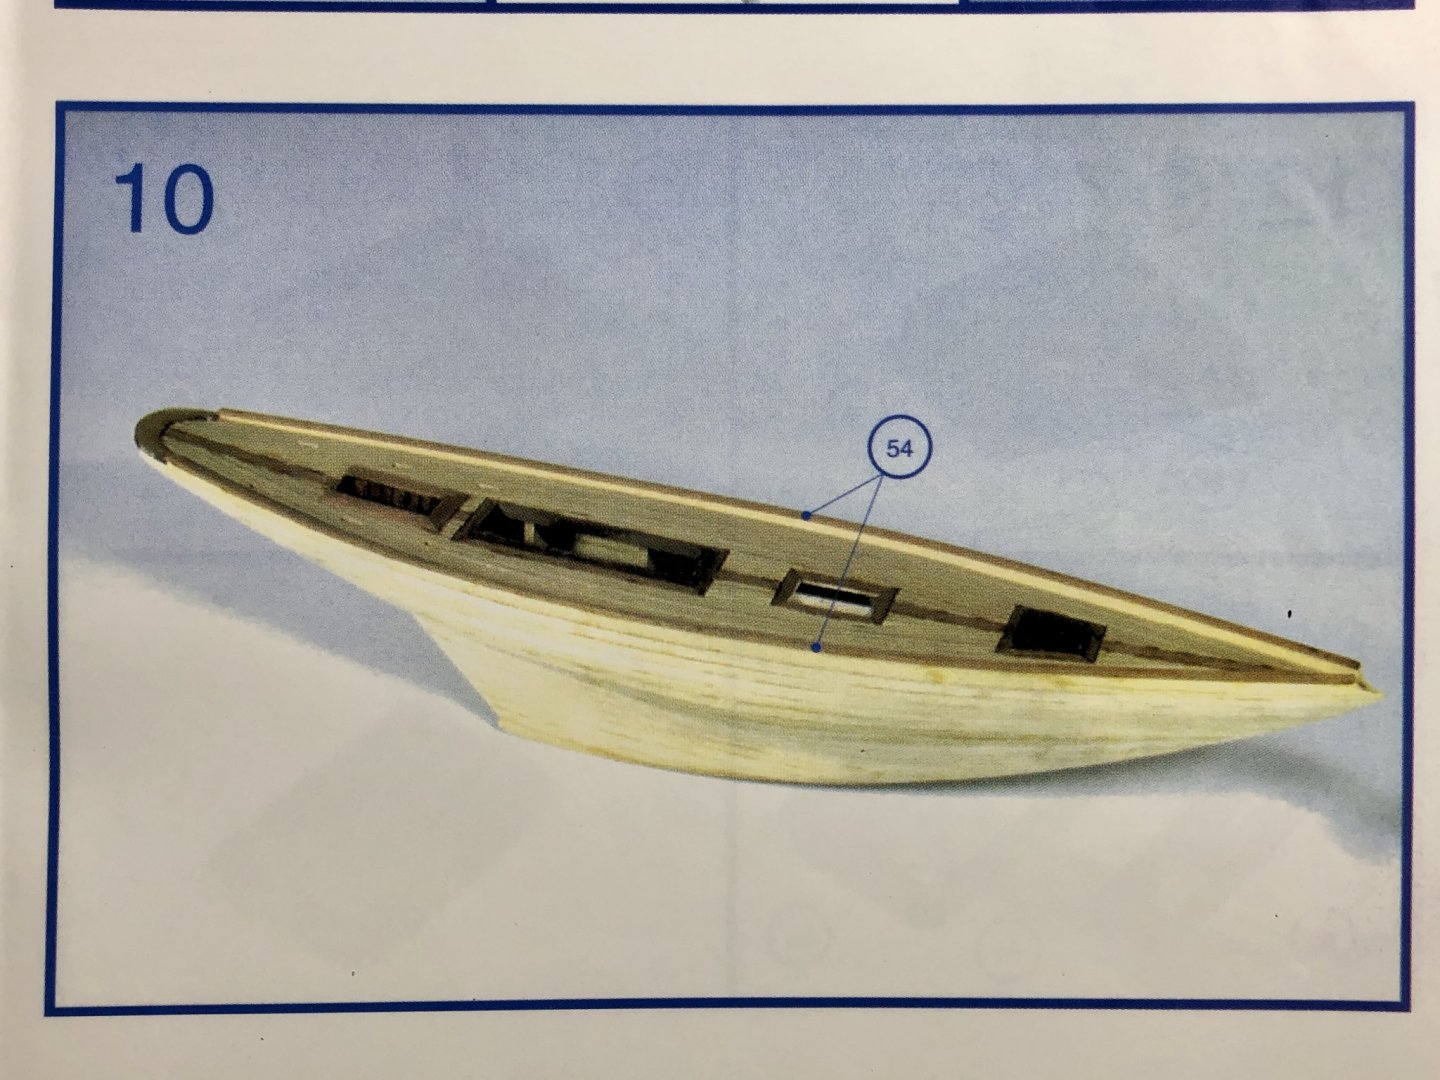
I spent some time researching how the hulls of older racing yachts were planked and came across a website for the United States Vintage Model Yacht Group. They have some publications that can be purchased for downloading in digital PDF files. I purchased and downloaded two of them: Building Planked Models by Charles Farley and Yankee III by Earl Boebert. They are both very interesting and informative. The Farley publications essentially shows a planking method for yachts like the Pen Duick that is very similar to what the AL instructions recommend. So I will essentially do the hull planking following the AL instructions as brief as they are. Farley mentions spiling for racing yachts but has this to say about it: "Planking is not so difficult as some textbooks imply. Spiling and other terrifying terms may be forgotten." The United States Vintage Model Yacht Group is a very interesting website with lots of information etc that I may be of interest to ship modelers in general and especially those modelers interesting in vintage yachts. Here is a link to their website: https://usvmyg.org The hull planks provided by the Al kit are 2 mm ramin strips. Unfortunately, they are much too thick and stiff and I'm sure that they will not be easy to bend and twist. In contrast, the hull planks provided in Syren's Medway Longboat were 1/32" thick Alaskan Yellow Cedar and they were very pliable and could be edge bent and twisted with dry heat alone. Planking the hull of the Pen Duick will certainly be a different kind of experience and I hope it doesn't get too frustrating! I made another small mistake when I added the 1.5 mm walnut coamings to a couple of the hatch openings. I failed to read the directions thoroughly and just assumed that they would be flush with the deck. They are not. However inadequate these instructions are, and they are very inadequate, they did say that the coamings should be 2 mm above the deck level. I've decided to just leave them flush with the deck since the hatches themselves will cover them completely. I think the only purpose for them in the model would be to help make aligning the placement of the hatch structures easier but that can easily be done with careful measurement as well. I do have a question about the hatch skylight covers. The kit has brass bars running parallel to each other fore and aft over the open skylight of the hatch covers. I would assume that on the real Pen Duick that there was clear plexiglass or glass that under the brass bars so that the hatches would be sealed from the elements. That's seems logical to me but I could be wrong...?? So, if there is clear plexiglass or glass in the skylight, how could that be simulated in the model? Is clear, thin acetate available to use for something like this? I'd like to usesome clear material there and not just have the hatch skylight covers open as the kit shows if that would be more authentic. You can see how the skylights are left open to the elements in the kit. Surely there would be some clear window material such as plexiglass or glass to seal the skylights on the real Pen Duick...?
-
Poly after gluing to deck...
BobG replied to mpk73's topic in Painting, finishing and weathering products and techniques
I don't understand why you have decided to remove everything you can from the deck when it seems like you are ok with the sheen of the satin WOP? Your boat looks wonderful as it is. -
Poly after gluing to deck...
BobG replied to mpk73's topic in Painting, finishing and weathering products and techniques
First of all, your model looks great especially considering that it's your first wooden ship and I don't thing you need to change anything. I have used Satin Wipe-on-Poly my models. It is very low sheen and brings out the natural color of the wood. I personally think it looks great. Many modelers use Satin WOP and are very happy with it. One of the moderator's here, Chuck Passaro, who also is model ship designer and the owner of the Syren Ship Model Company, uses Satin WOP on his models and they are museum quality. You'll find a lot of differing opinions about finishes here and you'll need to eventually try different ones and decide what you prefer but, for now, I think you are doing a great job. Congratulations. -
I believe the AL kit represents the Pen Duick I after it was restored by Eric Tabarly in the late 1950's. Since the original hull had rotted he replaced it with a resin hull. It would be interesting to know how the older entirely wood, racing sailboats were planked though.
-
Yes, this helps to think it through!
-
Maybe this will help, Harry:
-
Thanks Chris for your reply. I haven't worked much with white metal so I respect your choice for using wood. The grapnels on the Medway Longboat by Syren were also made from wood as were things like the the pintles and gudgeons. I was able to make them look more like metal by painting them with Vallejo black acrylic and then using some Doc O'Briens Rusty Brown Weathering Powder lightly on them. That burnished them to look quite like metal. So I think this would work well for the anchors on the Flirt too.
- 109 replies
-
- 2
-
-
- Vanguard Models
- Flirt
- (and 1 more)
-
This ship is definitely on my tick list! She looks great! The only thing so far that I do not like so much is the wood anchors. I like the wood stocks but I would have preferred the shank, arm and flukes to be made from metal for more realism. I think the wood on those parts shows too much rough grain. Otherwise, she's a beauty.
- 109 replies
-
- 2
-
-
- Vanguard Models
- Flirt
- (and 1 more)
-
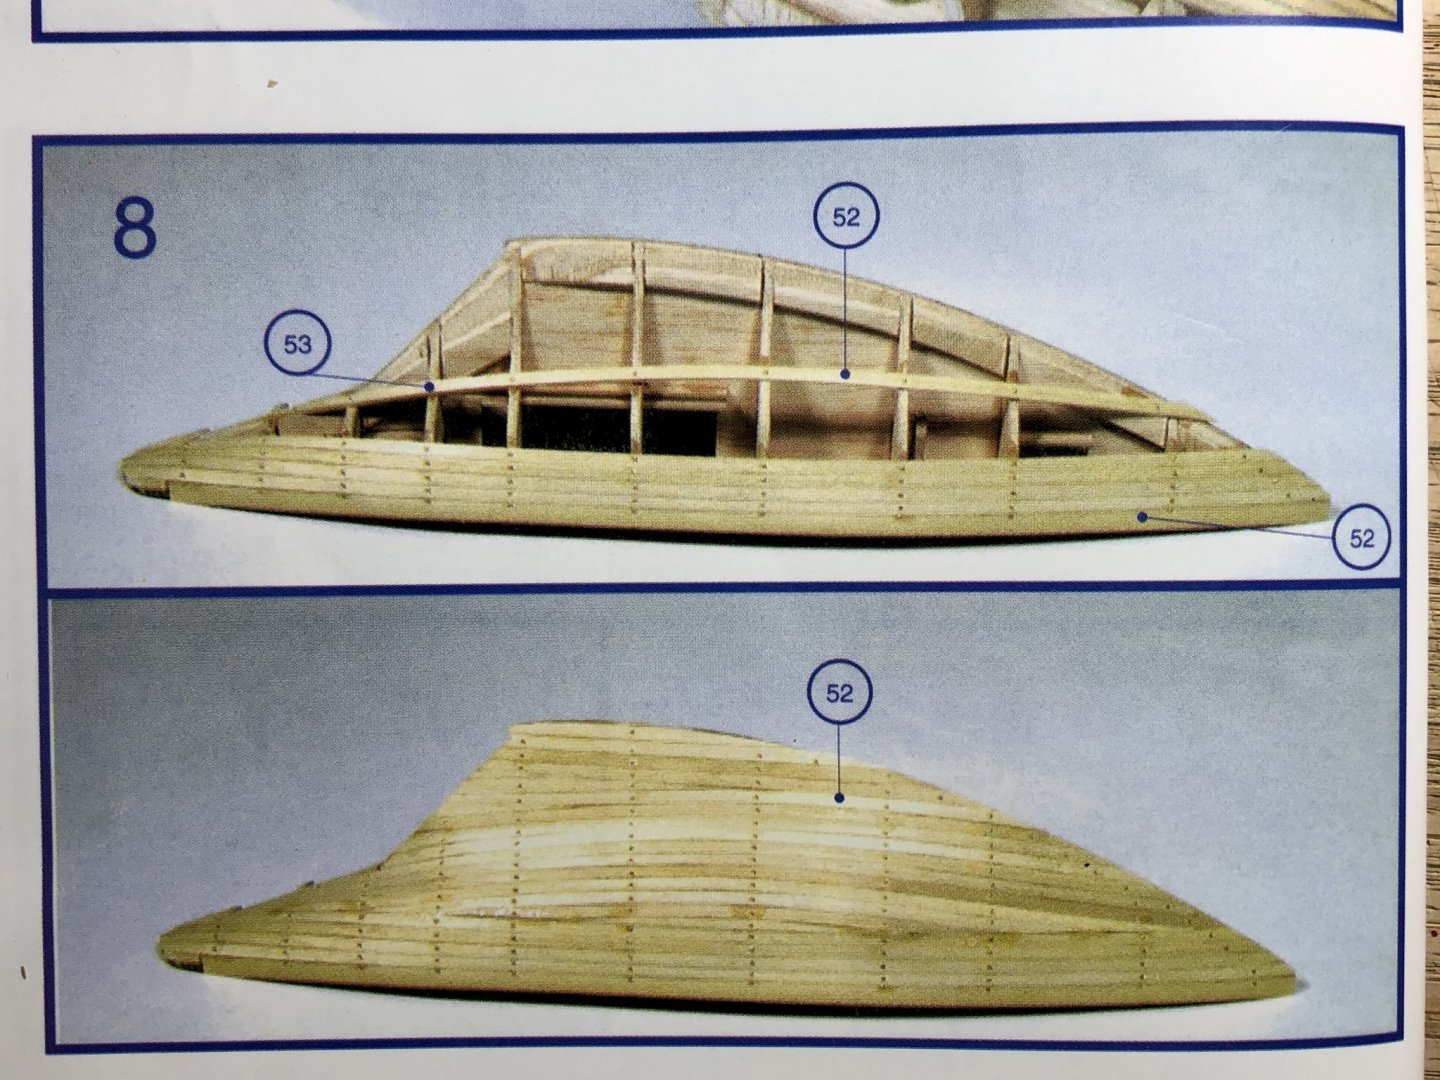
Thanks, Harry, that's very helpful. I was thinking about trying Chuck's method of planking by lining off the hull after determining the number of planks needed using tick marks, but I'm not sure how that would work on this hull shape since some of the planks run the full length of the hull and cover all of the bulkheads and some near the bottom do not. After you added the bulwarks and a few planks below them, did you then sand down the top of the bulwarks to achieve the taper from the stern to the bow? It seems like that would be hard to do. Can the bulwark taper be cut prior to gluing them on? I'm not quite sure how the bulwark taper is supposed to look when it's done so I'll study the plans more and see if I can figure it out. I wish the instructions were more clear. I'll take my time and try not to mess it up. Cheers!
-
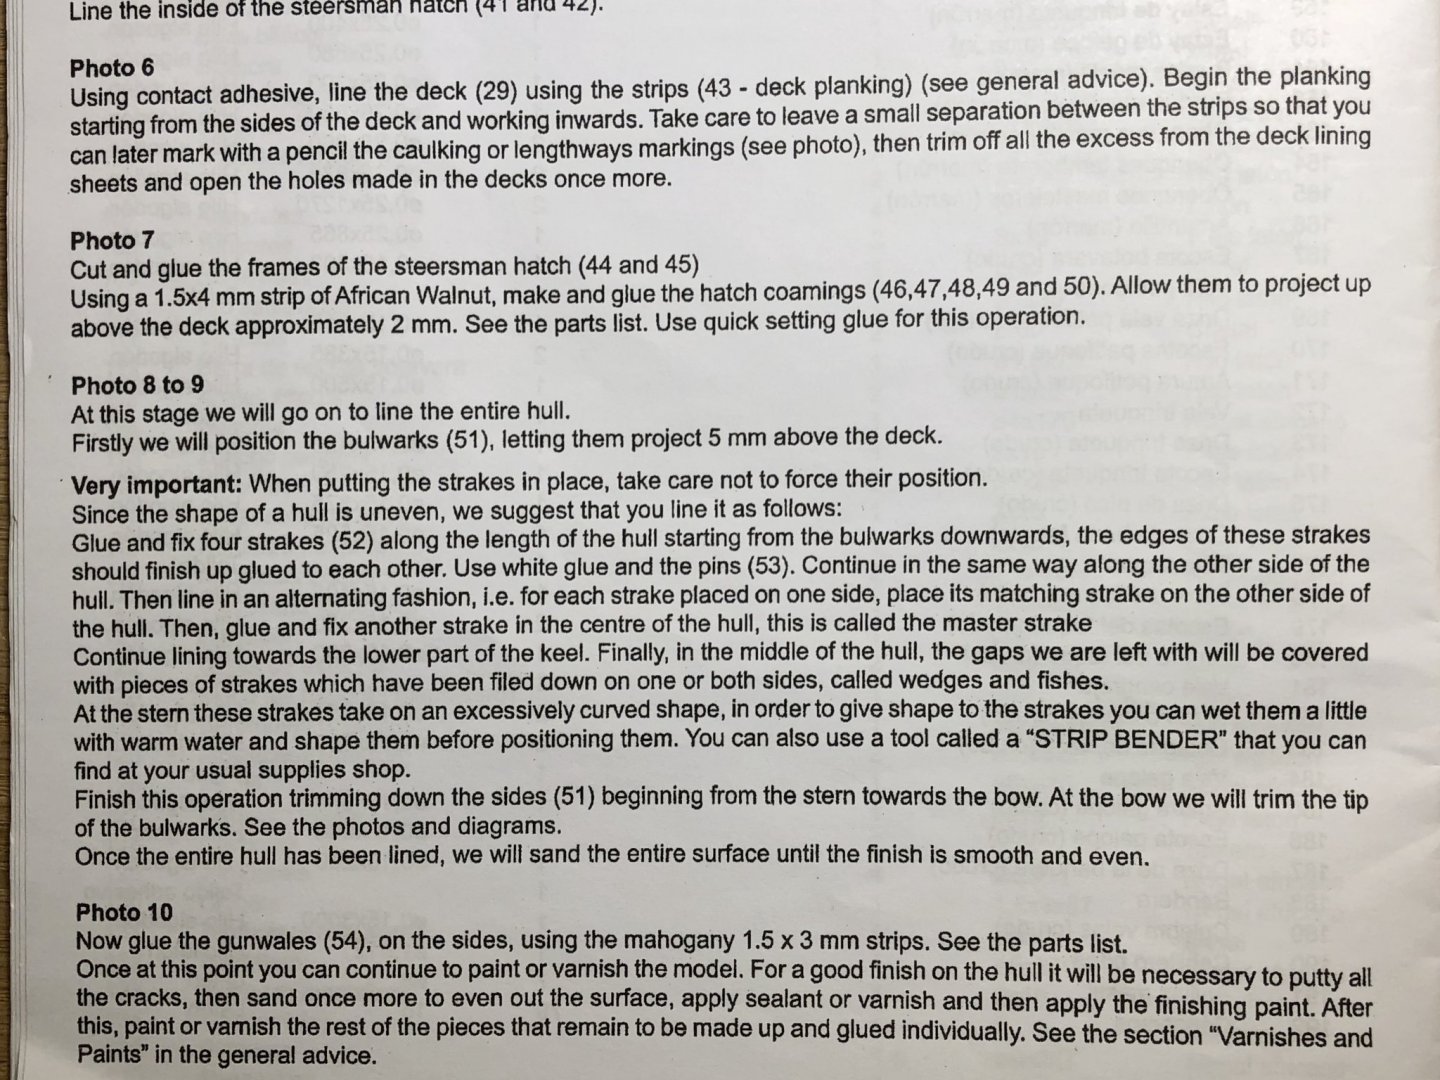
Thanks Harry. Did you follow the AL instructions for planking the hull? They recommend starting at the bulwarks and place 4 to 7 planks on each side down towards the center. Then place a plank in the center and plank down to the keel. Finally, close the gap at the center between the top and bottom planks. I hope I don't mess it up!
-
Thank you, Don!