HOLIDAY DONATION DRIVE - SUPPORT MSW - DO YOUR PART TO KEEP THIS GREAT FORUM GOING! (Only 44 donations so far out of 49,000 members - C'mon guys!)
×


BobG
-
Posts
3,109 -
Joined
-
Last visited
Content Type
Profiles
Forums
Gallery
Events
Everything posted by BobG
-
I'm probably not the best person to be giving you advice on this problem but, since no one else has responded yet, I'll give it a go. I had a similar looking spot on my longboat in about the same location. I don't think I did anything with it at first since it was not very prominent. Eventually, after completing the planking and while doing a final sanding, I glued a tiny piece of wood in the gap by the keel with white glue and sanded it so that it was flush with the keel and the planks. I may have added a tiny amount of either Elmer's Wood Filler or white glue mixed with Alaskan Yellow Cedar sawdust too. I can't remember exactly. It was practically unnoticeable after that. I'm not sure it's the best way to manage the problem but I was ok with it after I was done. It would probably be wise to at least to shape and dry fit the next plank or two to see if the frame is consistently too low or just in that one spot. If it is consistently too low, you might want lift the planks and shim the frame since it's probably going to create problems later as you go along. These kind of small errors tend to creep and become more prominent as you continue planking. Thinking about it now in hindsight, it may have been better if I had used some CA debonder on the frame or frames so you could lift the planks just enough to be able to glue a small shim on the frame and raise it up a little in the low spot and perhaps further down the frame as well if necessary. I think that would help prevent the error from magnifying itself as you continue the planking. I hope someone more experienced than me will and their advice since I am certainly no expert with these matters. Good luck and hang in there. My model isn't perfect but I I'm very pleased with how it turned out.
- 217 replies
-
- 3
-

-
- medway longboat
- Syren Ship Model Company
- (and 1 more)
-
Hi Chris, I have a couple of questions. I'm just now putting the final touches on the Syren Medway Longboat and am trying to decide what to build next. I have several models on the shelf and some others that I don't have yet which I am considering also. It took me 6 months to finish the Medway Longboat so I now know how much time and effort it can take me to build a model and do a nice job on it. So I'm taking my time deciding what to do next. 1. I have your first generation Alert kit. Can you tell me what the differences are between the first and second generation kits? Are any of the changes you made in the second generation kits available as an upgrade to the first generation kit? 2. Do you have a photo of any kind of the Flirt? I can't seem to find anything except the HMS Flirt destroyer of 1897 on the internet. 3. Do you have an approximate ETA for Lady Isabella and for the Flirt? Thanks very much!
-
Thanks, Jean-Paul. I'll be following your build which is on it's way to being a superb model. I noticed that your next model is going to be the Cheerful. It is high on my list as well. I've started reading through the instructions and there are some steps that look intimidating to me though. Fairing the hull is one of those steps and I didn't do it very well on this boat. I managed to correct my mistakes on the longboat but I wouldn't want to mess up the fairing on the Cheerful as well. I understand what needs to be done but I'm still not sure what is the best way to go about it and get it precisely right. I've never spiled my own planks either since the longboat already had that done for me so that would be entirely new also. I'd need to get a model table saw to mill the planks too. It would certainly teach me a lot that's for sure. A part of me wants to do it and a part of me says I don't have enough experience yet so there's a lot to think about.
-
Thanks, Bob. I really like working on the small details because they add so much interest to the model.
- 170 replies
-
- 2
-
-
- medway longboat
- Syren Ship Model Company
- (and 1 more)
-
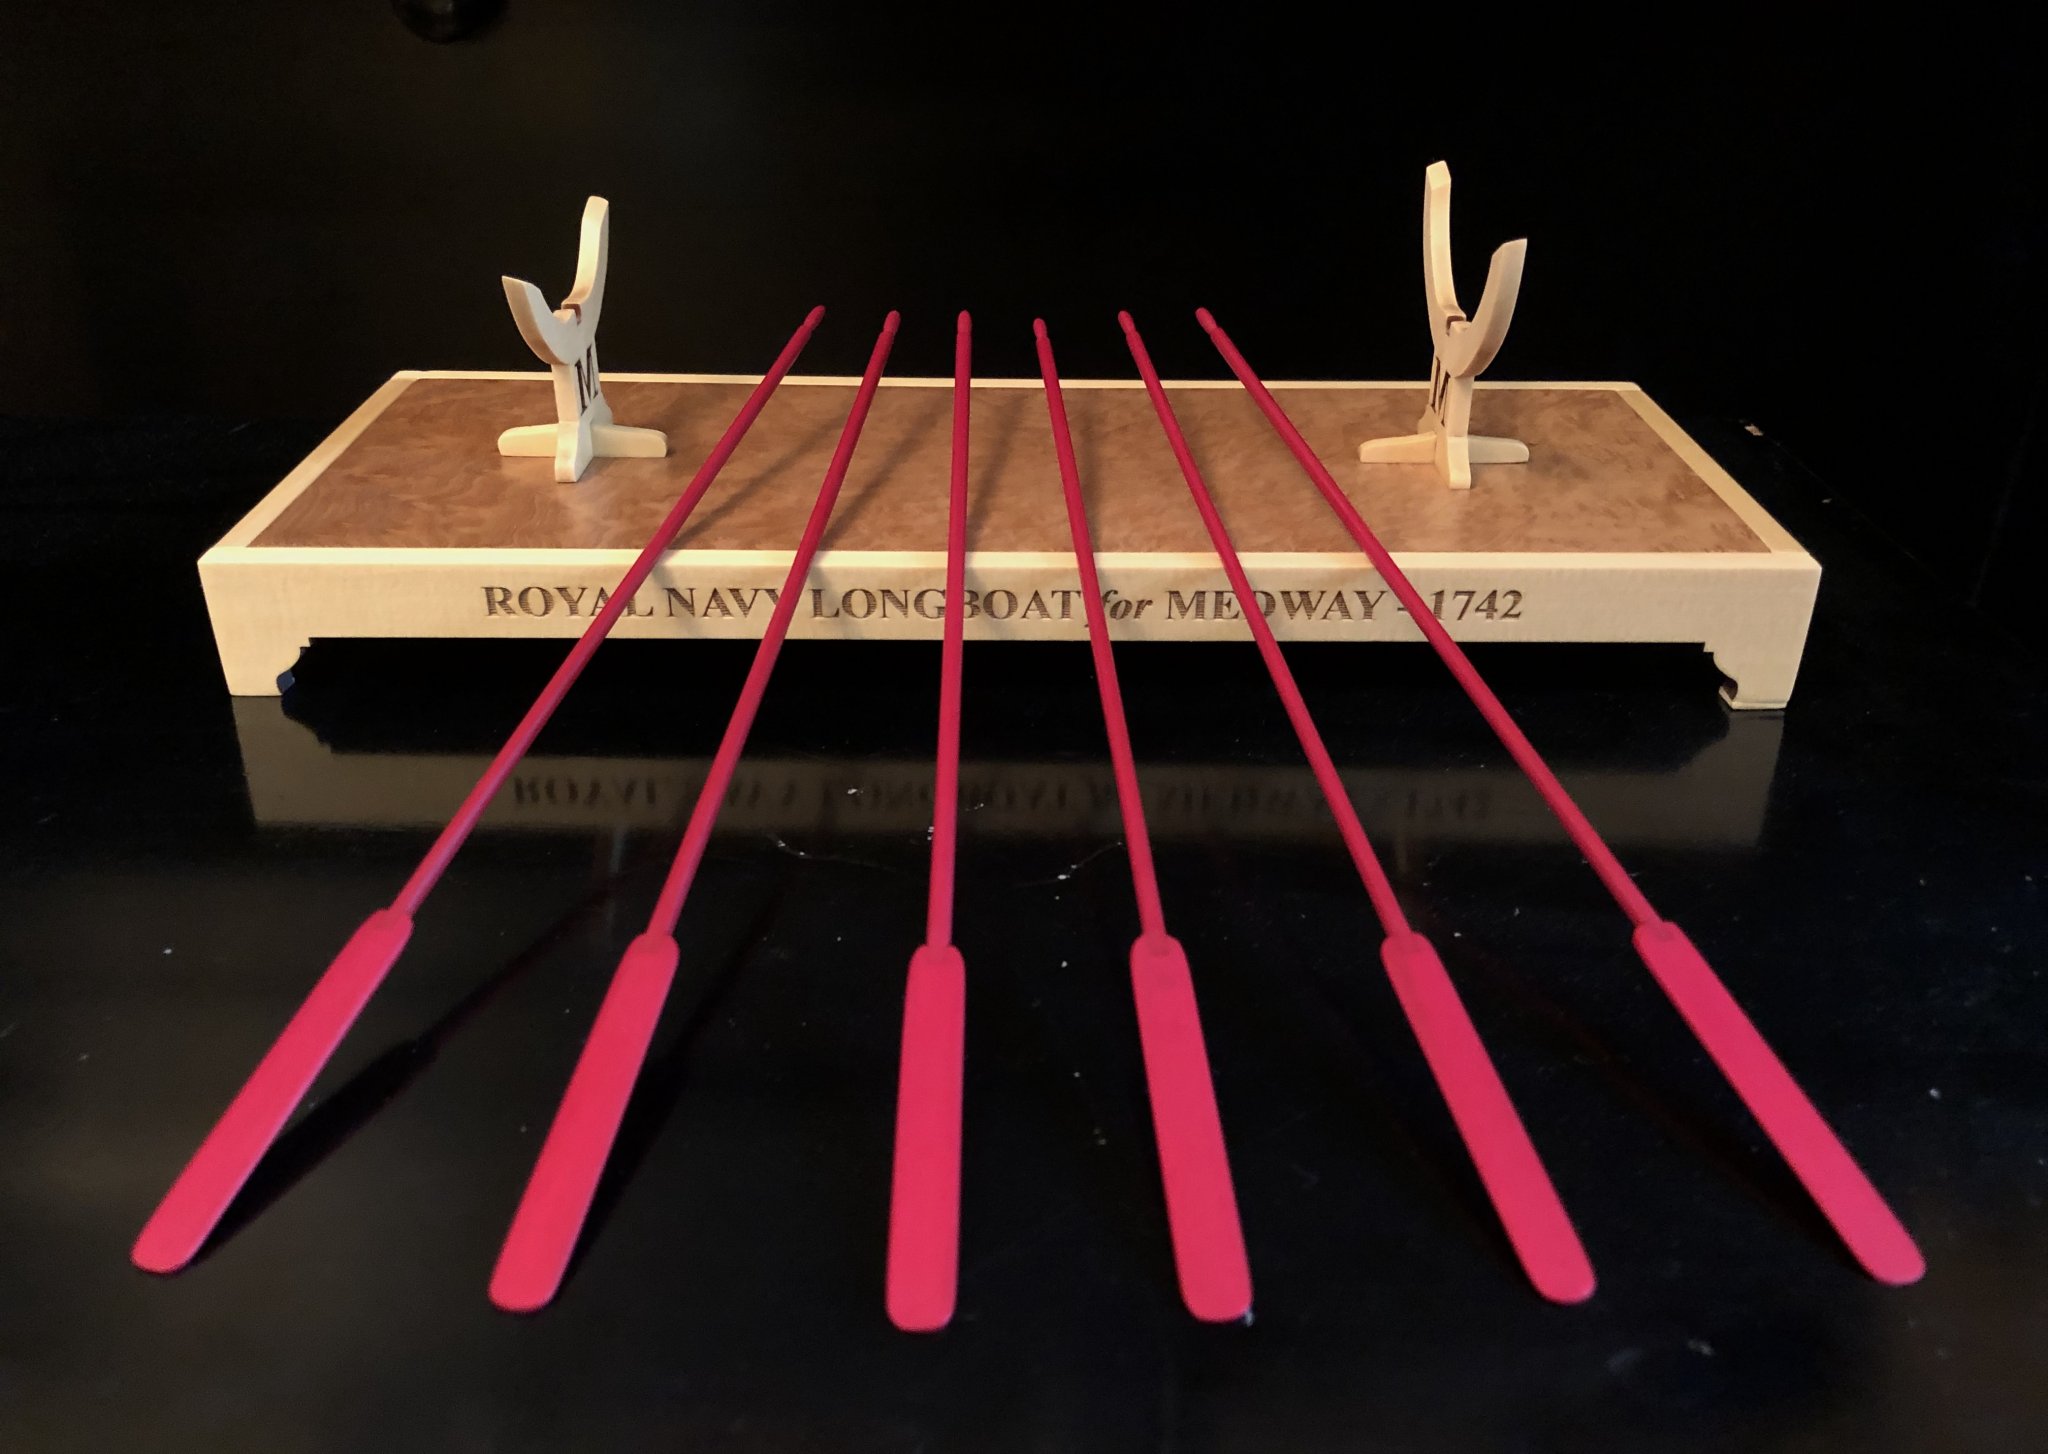
After 10 thin coats of Vallejo Model Air Red 71.102 the oars are finished. All that is left to do now is to bundle the oars and do a final inspection and, if necessary, any touch up, cleaning and dusting and arranging the rope coils to make her look her very best. Then I'll take some final photos to post here and in the MSW Gallery before finding her a nice place to sit in our small house.

- 170 replies
-
- 7
-
-
- medway longboat
- Syren Ship Model Company
- (and 1 more)
-
Welcome aboard, HakeZou. You made a good choice to build the Bon Retour. It's a lovely looking boat. My very first wood model was the AL Saint-Malo dory and it was not a very good kit in my opinion although it did get me hooked on model ship building. The materials and the instructions left a lot to be desired. I did enjoy making the hull and thwarts and painting them but I stopped without finishing the mast and sails since they just looked too historically incorrect. There are better dory boat models available than the Saint-Malo. I look forward to seeing your build log of the Bon Retour. Good luck!
-
Tony, when you get your new hull you should most definitely start a build log. It's easy to do and you will be able to ask questions and get advice from some very experienced modelers here who are very willing to help you out. It doesn't take that much time and it will help you be successful in building a very nice model. Good luck!
-
Your model just keeps getting better and better, Jean-Paul.
-
Hi Grant, The Vallejo Model Air Red paint color I used is Rojo 71.102 Red. I tried 3 different Vallejo red paints before settling on this one and, although it is formulated for airbrushing, I thinned it even more and brushed on many coats in order to get a nice, deep color since it is quite transparent to begin with.
- 170 replies
-
- 1
-
-
- medway longboat
- Syren Ship Model Company
- (and 1 more)
-
Sorry, Bob, I misunderstood your post about her "toughening out the Covid-19 by herself." She's been through a lot and I hope she is able to stay safe and well during this terrible pandemic.
- 87 replies
-
- 1
-
-
- medway longboat
- Syren Ship Model Company
- (and 1 more)
-
I'm so sorry to hear that your daughter contracted Covid-19 and I hope she will recover quickly. New Jersey and New York have been hit so hard. I hope you and your family and friends stay safe and well.
- 87 replies
-
- 1
-
-
- medway longboat
- Syren Ship Model Company
- (and 1 more)
-
OMG...no kidding! 😱
-
Thanks so much, Jason. I'm really happy with my build. It wasn't easy for me and I struggled at time but this kit has taught me so much. Thanks also for introducing me to the Quadhands tool. It's one of the handiest tools that I now have.
- 170 replies
-
- 1
-
-
- medway longboat
- Syren Ship Model Company
- (and 1 more)
-
The Quadhands is a fantastic tool and I'm discovering new ways to use it all the time. It really helped me with stropping blocks and making eyes in ropes. I highly recommend it.
- 170 replies
-
- 2
-
-
- medway longboat
- Syren Ship Model Company
- (and 1 more)
-
It would almost be worth it to see my wife's face if I told her that a torture chamber was going to be my next build!!
-
Fantastic diorama and I love the creativity of your "get out of jail" option!
-
🤣 ...speaking of torture racks, a few years ago my wife and I traveled on our own for 10 weeks in Spain. She had spent her junior year of college studying in Madrid and always wanted to go back and I'm half Spanish from my father's side of the family so it was a very special trip. We were walking around the cobblestone streets of the medieval city of Toledo one day and when I saw a sign for the Museum of Torture from the Dark Ages and, after much persuasion, she reluctantly decided to go in with me. Oh man, they had some gruesome torture devices back then! Anyone who was considered a heretic was condemned to one or more of these horrifying devices. I thought it was shockingly interesting but I'm not sure my wife has ever forgiven me for talking her into going in there with me!
- 170 replies
-
- 2
-
-
- medway longboat
- Syren Ship Model Company
- (and 1 more)
-
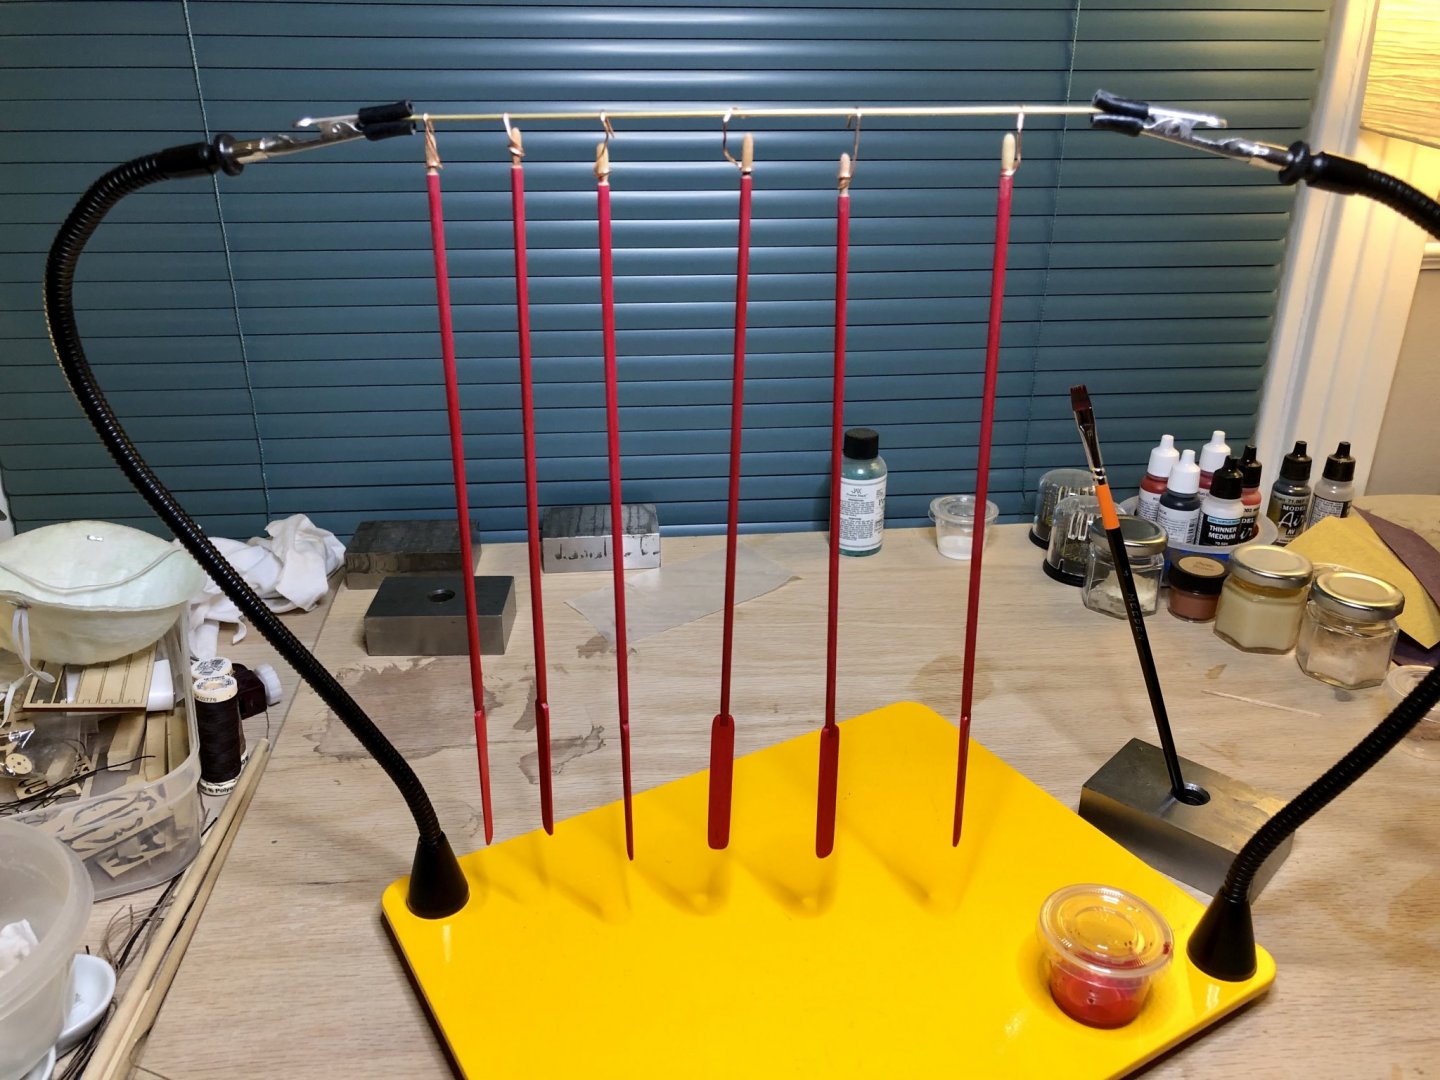
First of all, thanks for the likes everyone. They're much appreciatred. I began working on the oars today. I decided to make 6 of them. Once I got the handles shaped and the blades glued on and shaped, I wondered how would I be able to paint them on both side at once. So decided to wrap a small piece 20 gauge wire around the handle so I could hang them after painting all but the short handle. I began brush painting them with thinned, Vallejo Model Air Red Paint and used my Quadhands device with a piece of brass rod clamped between two arms to hang the oars on while they dried. The thinned, red paint is quite transparent so it will probably take 10-15 coats or more to get the finish I want and then all I will have to do is paint the small handles.
- 170 replies
-
- 6
-
-
- medway longboat
- Syren Ship Model Company
- (and 1 more)
-
I asked Chuck the very same question some time ago and he said that it is historically accurate and that seems to be confirmed from the diagram that BobW has in his post. I know that it doesn't seem logical but I guess that's the way it was. I'm not sure why they would have done it that way though...?? 🤔
- 87 replies
-
- 1
-
-
- medway longboat
- Syren Ship Model Company
- (and 1 more)
-
She looks fantastic with sails, Bob! Thanks also for the research you did to get the sails and rigging historically correct. I would have to change a lot of my rigging and move the backstays forward but you've given me something to think about. It still doesn't make sense to me that the main sheet can be located so far aft that it interferes with the tiller but Chuck assured me that that is historically accurate and your diagram shows that as well.
- 87 replies
-
- 1
-
-
- medway longboat
- Syren Ship Model Company
- (and 1 more)
-
I'll be following along on your build of this beautiful ship, David. It looks like it will be a fairly advanced model and I'll be able to learn a lot watching you build her. Good luck!
- 136 replies
-
- 2
-
-
- kolderstok
- batavia
- (and 1 more)
-
I'm don't think it would make a significant difference but it would probably be best to simply be consistent with your tic marks. Mine were fairly consistently in the center of the frames since a portion of the frame was covered with my paper tic strip and I would mark just to the right edge of the strip.
- 217 replies
-
- 1
-
-
- medway longboat
- Syren Ship Model Company
- (and 1 more)
-
If I am understanding your question, then yes, your tic marks should all be on the outer edge of the faired frames.
-
I really like the tissue flag that Chuck includes in the Medway Longboat kit. His method of using spray, matte, artist fixative to wet and shape the flag works very well and you can obtain any shape you would like to have. I think it looks fairly realistic once it's finished. Here's a photo of the flag that I ended up with on my Medway Longboat. It looks shinier in the photo than it really is due to the light hitting it strongly at a low angle.

-
Here is a few of the models that I have built over the years
BobG replied to mtdoramike's topic in Wood ship model kits
You have built a treasure trove of beautiful models, Mike! How would you compare the quality of Mamoli vs the Model Shipways Constitution kits since you have built both?