


Canute
-
Posts
5,835 -
Joined
-
Last visited
Content Type
Profiles
Forums
Gallery
Events
Posts posted by Canute
-
-
-
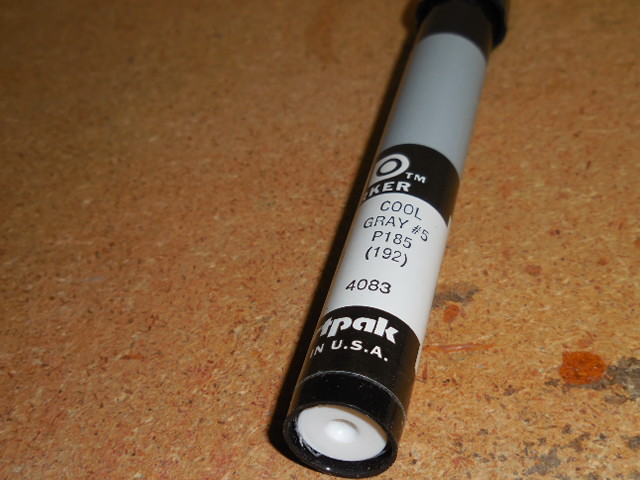
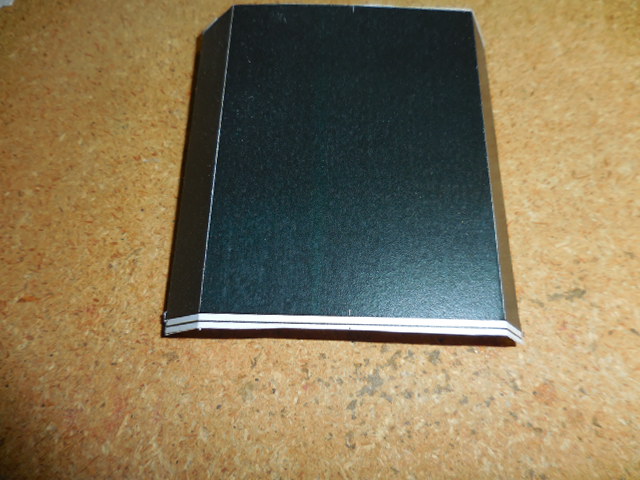
I colored the edges of the hull skins with a Cool Gray #5 I have.

There are 10 different cool grays (bluish tint) and 10 warm grays (brownish tint). They get darker with higher numbers. Looked OK when I first did it, but after it dried it looked too light.

 The edge stands out, though not as bad as a white edge.
Glued up the first 4 hull skins, on the bottom only. I'll glue up the sides when it's all one piece.
 You can see how the marker, which is alcohol based, bled into the paper.
On the printed side it's not obvious, but it is too light. I think I need a #10 cool gray or a black marker.

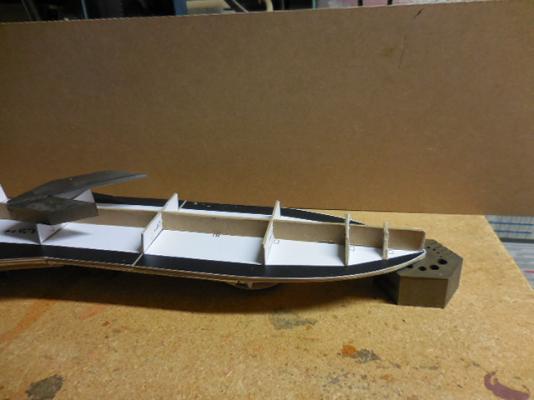
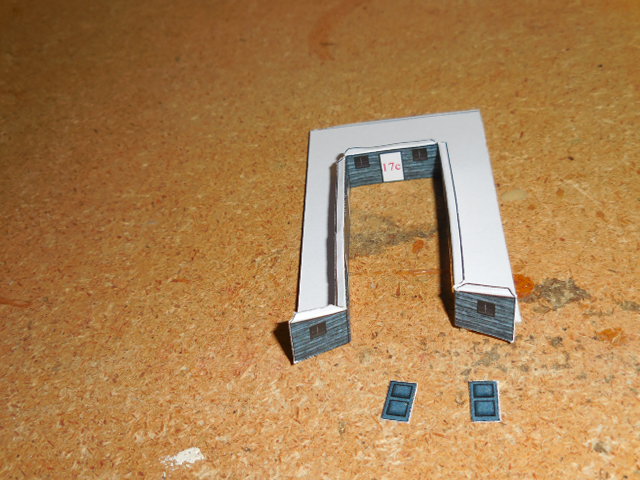
Also started gluing up the compartments that sit between the paddle wheels. They even have five separate doors.
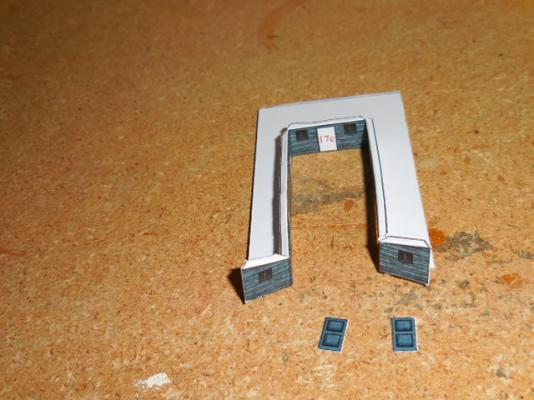 Only the far, inside, end is glued, so far (the visible 17c end).
Still studying the stern parts; not yet ready to apply any glue to those 2 parts.

-
-
-
Reflections, Jerry. Simple physics. Shiny stainless acts as a mirror. "Taint turning transparent. Capeesh?
-
Patrick, George and Carl, thanks for the support. The PDF will be handy, Carl.
I did reinforce the connection of the paddlewheel section to the deck, with some wood strips. Butt joints aren't very strong. The cabin area between the paddles will also get some bracing too. It helps to hold the paddlewheel housings square, so should get some strengthening.
I'll glue up the hull skins later and see if my process will work. I think I have a technique to bend, fold glue and attach those last two stern sections. Crossed fingers on this one.
-
I know how you feel, Jonny. My laptop (running Vista) is teetering on the brink. Fortunately, I have my desktop too, so I can pick out a new laptop after due deliberations with some computer tech buddies. One's an 80 yr old wizard, the other is a 19 yr old computer communications major. I may go for a Win 10 machine.
-
George, it's going to be "fun".
I'm cutting out some parts for the section between the paddlewheels and have to add separate doors into these compartments. I'll take some more pictures once I figure out how to manipulate the stern parts. The beta build doesn't delve too deeply in constructing this part of the ship.  Gotta put on my thinking cap here.
 -
Great job on your stern-wheeler. The paddle setup looks great. Enjoy your vacation in Yellowstone.
- mtaylor, CaptainSteve, Cathead and 2 others
-
 5
5
-
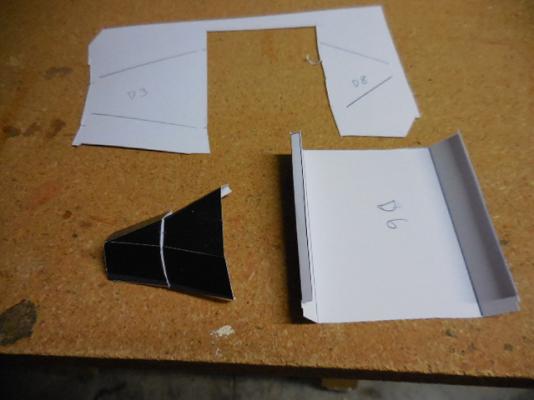
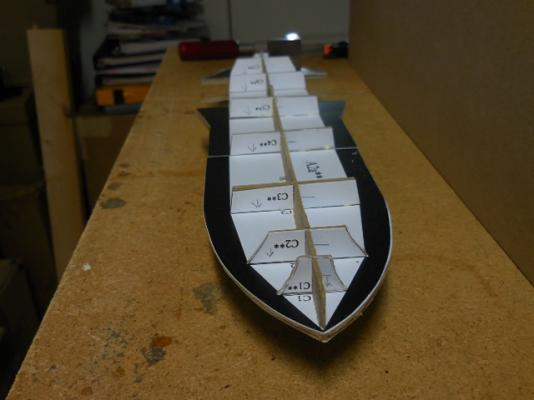
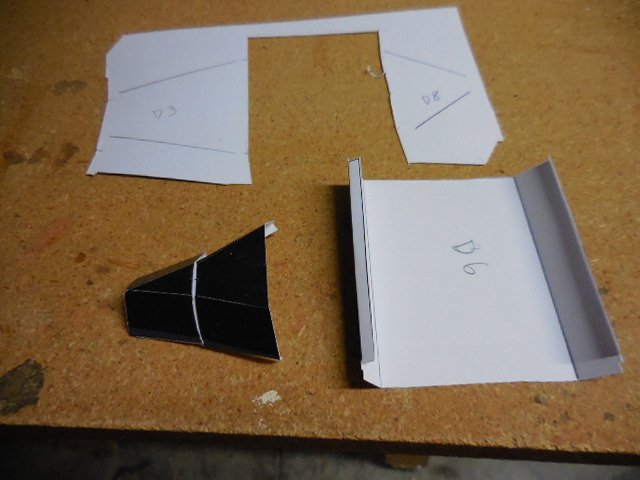
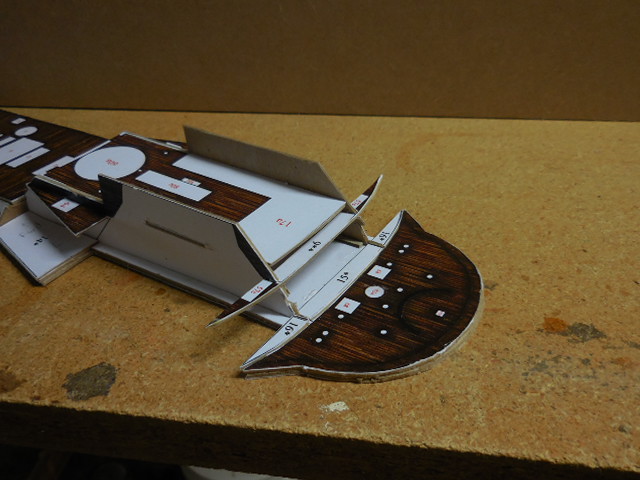
Finished slicing and dicing my hull components. Some of the cutoffs looked like the debris from punching holes in an old IBM card.
Upon further review of the beta build , I realized the hull sections were glued together and then attached to the bulkheads. Looks doable, except for the small stern segment.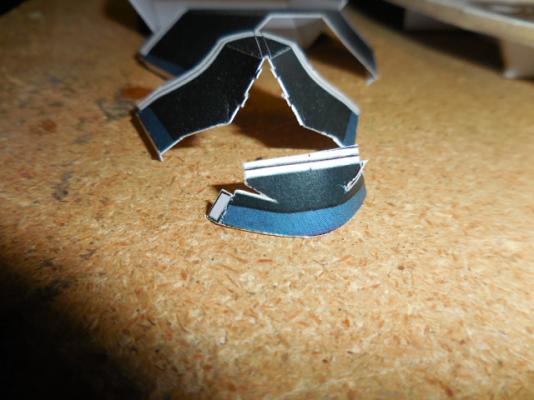
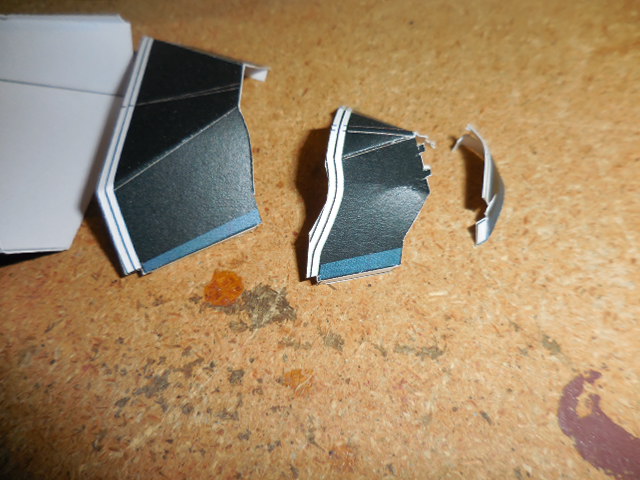
I have to figure out how to bend, curve, glue and fit into the hull section ahead of it.The little black projections on the section in front of the stern are the rudder attachments. That section will have some fun curves. The tab on the stern section somehow fits under the rudder attachments. The blue-gray segment on each section is the part of the hull closest to the deck.

These are the segments at the stern. I may have to trim some of the gluing tabs to get the hull skin to fit around the bulkheads.
I plan to touch up the cut edges with some cool gray Pantone markers I have. Cool grays are bluish, so it should work on the armored areas.They've worked real well for me in the past on wood as a stain. I'll test before I take a flyer with them, however.


-
Very nice joinery, Grant. Well done.
- GLakie, CaptainSteve, gjdale and 2 others
-
5
-
-
Chris, thanks for your comments. This is way back on the list of "want to dos". My skills need to get further along first. I've had to deal with some pretty spartan instructions as a kit building model railroader, so I've learned some skills at interpreting "instructions". Guess this little brig isn't very popular.
-
-
Could the gang comment on this kit? Is it an early Caldercraft or a later Jotika kit? How are the instructions? Is the wood in need of replacement? Haven't seen any builds of this ship.
May want to build this one down the road, since it ties into some of the nautical fiction I've been reading.
-
David, Jack, I'm sitting here reading your kind suggestions and thinking to myself "I've said the same things".
 I have to think this through, better.
I use an unfolded paperclip to apply glue to the parts. I'm used to putting the glue on the edge of a part, which has a thickness, say 1/32". The paper is hair thin, so I get drips and runs.
I have to use more backing on the joints. "This ain't no Ambroid boxcar, Spanky." And neatness does count. 
Like I said, it's my first pure card ship. Another learning opportunity.
Thank you both for sharpening my focus.
-
-
I just got one last week. I think it was the last one before the re-order.
-
David, thanks for reading this. And thanks for the likes, too. Half the fun is sitting at the the cutting board, deciding how best to cut a part out. There are a bunch of nooks and insets and some parts have to interlock.
I found the beta build on a papermodeler website, so I will study his pictures closely. The instructions are mostly pictures showing parts, but not too much in the way of closeups. The web pages will be a help. I'm not shooting for hyper accuracy, just trying to get my technique down. I have to work on my gluing, still using too much.
The full hull is a poser; should I glue it all into one piece and attach to the bulkheads or do it segment by segment. I'm leaning towards the segments. The original builder went from exposed bulkheads to covered without any explanations.
-
George, I could re-glue the thicker,laminated parts, which I did with one deck on the paddle wheel housing. If I flub with a piece printed on the heavy paper, I can reprint the sheet. Some archival tape may work, but I don't know where I'd get any, short of mail order. The cost of a sheet of 110 lb. paper and printer ink is low, so just reprint your part. The "kit" is a download on your computer, so once you have it; it's yours.
I like to think I'm fairly safe, although I did have a trip to a hospital ER after slicing open my had while cleaning up a pour stub on a boxcar kit Took 4 hours, four stitches and two tries at getting a Tetanus shot. My left hand bears a few scars from sharp objects over the years.
As for Choctaw, I'm not sure if I should glue up all the hull segments first and skin the hull or attach each segment individually, stern to bow.
-
Went to cut out the hull skins with my new scalpel with the curved blade, a #12 I believe. Worked really well cutting into the corners of these pieces. The skins appear to go on like shingles on a roof, since they have uncolored tabs along the axis of the hull. Looks like I skin this boat from stern to bow.
 Origami skills needed.
 Glue tab on the near side of the part.
I had laid the skin sheet on a light table so I could mark where the curves go in pencil, before I cut any of them out. You can see the lines in the top picture.

I did up four sections out of 10, so far. The stern piece will need some judicious molding to cover just above the rudder. each section's mounting tabs get folded inboard to glue the skin to the decking. I lightly scored the backside of each part so I could fold them. I used the backside of a #11 blade. Score it, don't cut it.
I got into one of the curvier parts and decided I could free hand the curve. Dug in too deep and pulled the blade back, mostly away from me. I did anoint the hull skin with some type O+, but no further bloodshed followed.
Nipped up to the bathroom, pulled out the ointment and a Band-Aid and I was good to go. Twas naught but a scratch, Ma!
Thanks for reading.
-
Well done, Matt. The masts look good.
-
-
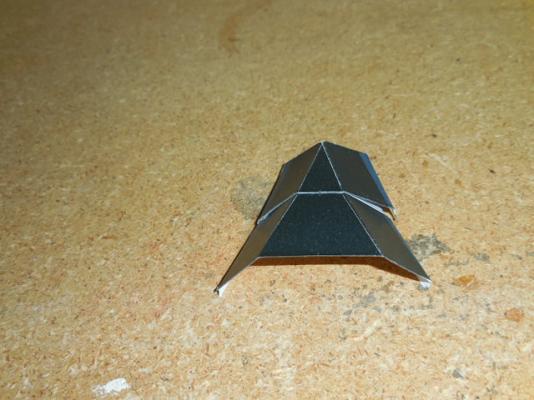
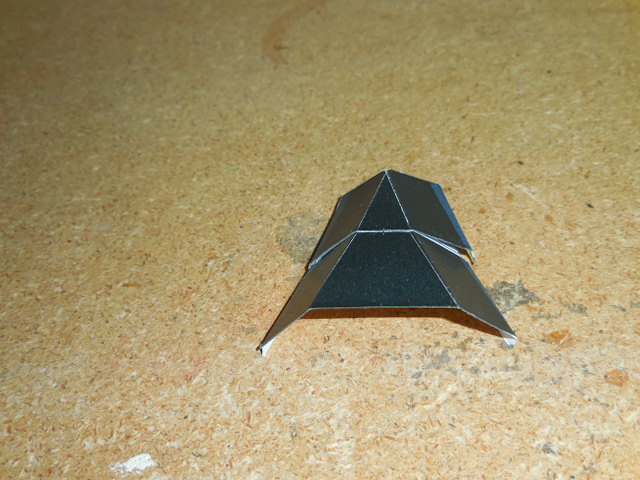
As promised, the overall superstructure base:
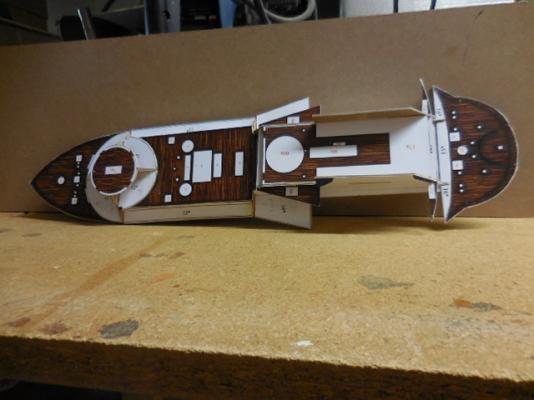
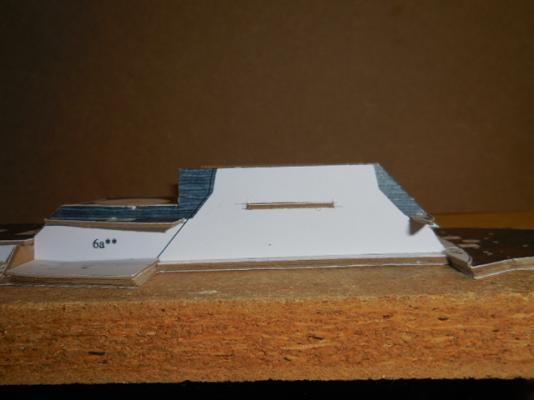
Here's the front casement:
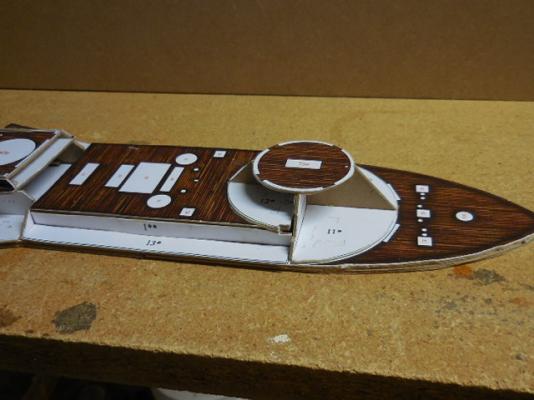
And the paddle wheel housing:
A little more detail on the aft end of the paddle house:
 Looks like one of those floating hotels.
 I glued the formers/bulkheads to the underside of the hull. Not very many.
And a closeup of the bow formers
This ship was built as a ram, although they couldn't get going fast enough to be effective. So, after I skin the hull, I have to make up the ram. Some of these parts are pretty curvy, so I'll be having fun keeping on top of the cut lines.
Thanks for following along.


USS Choctaw by Canute - Heinkel Models - 1/200 scale - CARD
in - Kit build logs for subjects built from 1851 - 1900
Posted
George, I think so. The edge coloring subject is one often discussed on paper-modeling forums, from what I've been reading. Probably will need more coats.
I'm applying color with an alcohol based marker, not paint. Not much pigment applied there. I've used these markers to color basswood structures, and end up doing several applications. But it does work. The coloring is more like a wash than a coat of pigment.